Shared posts

23 May 06:24

potato vareniki

by deb

[Welcome to the Sous-Chef Series, a new, sporadic feature on SK in which I invite cooks I admire over to my small kitchen to teach me — and thus, us — to make one of their specialties. Spoiler: I’m the sous!]

I first heard of the Russian restaurant Kachka when I was last in Portland, Oregon on book tour (hi, Powell’s!), when no fewer than a dozen people separately told me I had to go while I was there. A few said it wasn’t just their favorite restaurant in Portland, but their favorite restaurant, period. This made me all the more sad that I didn’t have time to make it happen. My regrets snowballed when I finally dug into the restaurant’s eponymous cookbook last summer. I was no further than the first page — where the confusion as to what is “Russian” food when “food from the former Soviet Union including Russia but also the countries surrounding it like Belarus, Latvia, Ukraine…” would be more accurate is humorously laid out — when I became deeply, emphatically obsessed with all that I’d missed.

Read more »

09 Feb 10:58

Integrating Microsoft Flow Mobile Integration with Microsoft Flow Automation in Office 365 Online Services

by Melick
How to integrate Microsoft Flow Automation in Office 365 Online Services
15 Sep 06:15

Clamshell Lighting: An Amazing Two-Light Setup, Explained

by John McIntire

The post Clamshell Lighting: An Amazing Two-Light Setup, Explained appeared first on Digital Photography School. It was authored by John McIntire.

clamshell lighting: a comprehensive guide

What is clamshell lighting? And how can you master clamshell lighting setups for stunning results?

In this article, I explain the ins and outs of this simple – yet incredibly powerful – two-light portrait setup. By the time you’re finished reading, you’ll know how to create clamshell-lit portraits like a pro (no matter your lighting gear).

So if you’re ready to become a clamshell portrait master, then let’s dive right in, starting with the basics:

What is clamshell lighting?

Clamshell lighting is a simple, two-light configuration: You place both lights facing your subject at a 45-degree angle, one angled up, one angled down. Note that your key light (i.e., your primary, brighter light) should point 45 degrees downward, while your fill light should point 45 degrees upward. Your camera should sit between the two lights, facing your subject.

When viewed from the side, the two lights resemble an open clamshell (imagination may be required!):

clamshell guide and tips lighting diagram

A clamshell setup provides beautiful, soft light with faint shadows and glorious catchlights. Clamshell lighting works well on pretty much everyone; I’d say that it’s flattering for men and women of all ages, so it’s a great setup to have in your back pocket.

Note that clamshell lighting is just like butterfly lighting, except that you add the fill light below the subject (which eliminates any heavy shadows caused by the key light). So if you’re already doing a butterfly setup, you can always add in a clamshell look at the end for some variation!

clamshell lighting guide and tips

How to create a clamshell lighting setup: step-by-step process

clamshell lighting guide and tips


Creating a clamshell lighting setup is simple, and as long as you have two working lights, you’re practically guaranteed to pull it off. Here’s what you do:

Step 1: Select your lights and modifiers

Clamshell lighting requires two light sources, and these can be strobes or continuous, modified or unmodified.

Personally, I’d recommend you use modifiers – these will help soften the light for a more flattering effect – and grabbing a pair of similarly sized softboxes is a great starting point. Then, once you’ve mastered clamshell lighting setups using the softboxes, you can start experimenting with other modifiers, such as beauty dishes and strip boxes.

That said, if you don’t have modifiers or you prefer a harder look, then work with an unmodified light! At the end of the day, it’s your photoshoot, after all.

Step 2: Position your key light

Grab your key light (i.e., your main light source). The goal is to place it in front of your subject and slightly above; angle it down so it points directly at the subject’s nose.

If you want a softer effect that features fast light falloff, bring the light in close to the subject’s face. If you want a harder effect that lights the subject more broadly, move the light farther away.

Next, meter for your desired aperture (we’ll use a hypothetical f/11) and take a test shot.

If everything is set up correctly, you should produce a decently lit image with deep shadows under your subject’s nose and chin. (If the image is too dim, feel free to brighten your light, and if the image is overexposed, do the reverse.)

clamshell lighting guide and tips

Step 3: Add your fill light

Now it’s time to add in the second light; take your fill light and place it directly underneath your key light, pointed upward toward your subject at 45 degrees.

clamshell lighting guide and tips behind the scenes

Adjust the light’s brightness until it sits two stops below the key light. (If you wanted to shoot at f/11, you could meter your fill light for an f/5.6 result.) Then take a second test shot.

If the effect is too strong and your fill light is obliterating the shadows, turn down the light power. If the light isn’t doing enough, turn it up. The main thing to look out for is the fill light overpowering the key light, as that would result in a very unflattering image that’s lit from below.

clamshell lighting guide and tips behind the scenes

Step 4: Capture your clamshell image!

At this point, you should have two lights sharing the same vertical space, and the light on top should be roughly two stops brighter than the light on the bottom.

Stand behind the lights and shoot through the gap. Note: If there isn’t much of a gap to work with, raise and/or lower both of your lights until you have enough room to shoot in the middle. To be safe, you may want to take another meter reading.

Of course, once you’ve grabbed a shot or two, check your camera’s LCD for exposure issues and other concerns. And if you have the capability, I recommend tethering your camera to your laptop; that way, you can review your images instantly on the big screen.

And that’s all there is to it! Clamshell lighting is really easy to do, and with a bit of practice, you’ll be able to get the two-light setup running in a couple of minutes.

clamshell lighting guide and tips behind the scenes
Check out this clamshell setup, viewed from the side. Note that there are three softboxes in the image, but only two – the ones in front of the model – are active.

Clamshell photography setup: a quick tip

Once you can create a basic clamshell setup without much difficulty, then don’t stop – instead, look to expand your lighting capabilities.

For instance, try moving your lights closer and farther from the model and see how that affects the results.

Then test out different modifiers (I encourage you to experiment liberally, here!). Have a pair of strip boxes you want to use? Go for it. Want to use a beauty dish as your key light and an umbrella as fill? Sure. How about a snoot and a small softbox? Absolutely. Use what you have at hand. Pretty soon, you’ll be able to improvise like a pro.

And you’re not limited to using just two lights, either. You should always keep the basic two-light clamshell setup, but feel free to add rim lights behind your subject to make them pop off the background. You can also try adding a hair light for additional depth, and you can certainly have fun adding background lights (and swapping out backgrounds).

Clamshell lighting examples

Now let’s take a look at some clamshell examples. You can use them as inspiration, though don’t limit yourself – these are just a handful of the many clamshell setups you can create!

First, we have a nice black and white portrait. Notice the soft shadows on my subject’s cheeks:

clamshell lighting guide and tips

Next, we have a brighter, more upbeat clamshell image with a well-lit background:

clamshell lighting guide and tips

Then another black and white with a slightly darker background:

clamshell lighting guide and tips

To pull this next shot off, I added a third light, pointed toward the background. Note that you can experiment with different head turns:

clamshell lighting guide and tips

Plus a few more clamshell lighting examples for variety’s sake:

clamshell lighting guide and tips

Clamshell lighting: final words

If you’ve made it this far, you should understand the power of a basic clamshell lighting setup.

Of course, you can always take your clamshell setups to the next level with additional lights and modifiers, but even the basics are guaranteed to get good results.

So head into your studio and try some clamshell lighting out for yourself!

Now over to you:

What subjects do you plan to shoot using a two-light clamshell setup? Share your thoughts in the comments below!

The post Clamshell Lighting: An Amazing Two-Light Setup, Explained appeared first on Digital Photography School. It was authored by John McIntire.

23 May 10:14

Build Process for Front End Applications

by KamalSaluja
Automating tasks for building a front end application
11 May 09:03

This Script Can Make GNOME Shell Look like Windows, Mac, or Unity

by Joey Sneddon

GNOME Shell Layout Manager ScriptGNOME Shell’s stock experience is fairly vanilla, but with the right ingredients you can give it an entirely different flavour.  GNOME Layout Manager is a new script in development that takes advantage of this malleability. Using it you can  quickly transform GNOME Shell to look like: Ubuntu Unity Windows macOS We’ve written articles before showing you can make Ubuntu look like […]

This post, This Script Can Make GNOME Shell Look like Windows, Mac, or Unity, was written by Joey Sneddon and first appeared on OMG! Ubuntu!.

20 Apr 05:17

perfect garlic bread

by deb

garlic bread

Does anyone really need a recipe for garlic bread? I mean, garlic + butter + bread = it’s impossible to imagine a bad outcome. And yet I do use one. I mean, prior to today it was in my head and did not include baguette weights because despite the impression this site might give you, I’m not that crazy upstairs. I use a recipe because like most people in the year 2016, I don’t take carb consumption lightly, and garlic bread is even more of a rare luxury. Because of this, if I’m going to make it I don’t want it to be almost right but could use a little more salt, or too much garlic and too little butter, and absolutely not pale and soggy or crouton-hard. I want each time I make it to be like the best time I ever had it, a beacon of bronzed edges, lightly drenched with garlic butter with a whiff of herbs and a kiss of salty heat.

... Read the rest of perfect garlic bread on smittenkitchen.com


© smitten kitchen 2006-2012. | permalink to perfect garlic bread | 104 comments to date | see more: Bread, Italian, Photo, Put An Egg On It, Quick, Vegetarian

09 Mar 10:18

10 Tips for Stunning Headshot Photography (in 2021)

by Sean Gannon

The post 10 Tips for Stunning Headshot Photography (in 2021) appeared first on Digital Photography School. It was authored by Sean Gannon.

tips for stunning headshot photography

Do you struggle to capture beautiful headshot photos? Are you looking to take your headshot photography to the next level?

You’ve come to the right place.

As an experienced headshot photographer, I’ve been exactly where you are. But after a lot of practice (and a fair bit of trial and error), I’ve figured out how to get headshots like this:

Headshot on Black Background

And in this article, I aim to show you how. I’ll give you plenty of tips, plenty of professional examples, and by the time you’re done, you’ll know how to shoot headshots like a pro.

Let’s get started.

1. Have a pre-session consultation

There are many different headshot styles – and different models/clients/subjects will need specific stylistic results, depending on the headshot purpose. For instance, an artistic, color-graded style might work great for a fashion model, but won’t be appreciated by a corporate client.

So before your session, have a sit-down with your subject. Make sure you know exactly how your headshot photography will be used. You might even ask, point-blank: “What kind of style would you like?” And be prepared to show plenty of examples that convey potential stylistic options.

This consultation can take place on the phone or face-to-face. I don’t recommend communicating in writing, though; talking to your subject will help them relax much more than an email, and you can use the consultation to help them prepare for the session, too (by explaining what to expect and by answering their questions).

Headshot on White Background

Pro tip: If the headshots will be used for corporate materials, use the consultation to find out your subject’s profession. A corporate lawyer may opt for a clean white background look (above), while a more relaxed professional (e.g., a yoga instructor) may prefer a colorful, environmental image (below).

Indoor Headshot

2. Help your subject choose the right clothes

Generally speaking, solid, neutral colors work best for headshots, as you want to avoid anything that distracts from people’s faces.

If you’re looking to achieve a formal style, make sure everyone remembers to bring their best work clothes. Men often forget their jackets, so for a consistent look, try to have a spare one on hand, even if you need to clip it at the back. And if possible, send out a reminder the day before your scheduled photo shoot. (Oh, and include an ironing reminder, too – there’s nothing more frustrating than a photo ruined by wrinkled clothes!)

Also, if you’ll have lots of time with a person, get them to bring a few items of clothing. You can do changes throughout the session and provide them with a variety of final images.

Here are some examples of good clothing choices:

women with good headshot clothing
man with good headshot clothing
man with good clothing for a headshot

3. Create separation from the background

Great headshot photography includes separation between the subject and the background. There should be a clear foreground subject (the head!) and a clear (ideally blurred) background.

The easiest way to achieve this effect is by positioning your subject a handful of feet in front of any background elements, be it trees, grass, a stairwell, a building, or a desk. For indoor portraits, don’t let your subject lean against the wall; instead, bring them out so the wall can blur.

Also, if you are using a studio background (or the wall in an office) and you let your subject get too close, you may see shadows on the wall, which makes the images look less professional. Bottom line: get your subject away from the background, no matter how interesting or nondescript it seems.

You can also enhance the subject-background separation by widening your aperture, which will decrease depth of field to create nice background bokeh. Typically, I aim for an aperture of f/4 for environmental and natural light sessions; the aperture is wide enough for background blur, but narrow enough to keep the subject’s head sharp.

(Note: If you’re doing a studio session, with lights and prepared backgrounds, you’ll have more leeway. For such portraits, I often just use an aperture of f/8.)

4. Give your subjects time to relax

Whether you are photographing headshots for a single person or a whole team, make sure you have a general chat with each person before firing the camera. In my experience, this is the best way to help your subject relax – and relaxation leads to the best images.

Your chat can be pretty quick, too. It can be a 10-second, confident handshake and a “How are you?” Though if you have time, I’d recommend going a little deeper; people generally feel very nervous about having their photograph taken, and talking about something within their comfort zone (where they live, if they have children or pets, etc.) will really help them become more comfortable.

5. Ask for silly faces

Here’s one of my favorite tips for taking headshots, and while it’s a little unorthodox, it gets the job done:

Once your subject sits down and you’re ready to take a test shot or two, ask them to pull a funny face. You can shoot it as a first frame. It’s a great way to break the ice, and very few people will refuse to do it.

Once your subject has pulled a silly face, everything else is easy! It’s what I used for this headshot photo:

person making a funny face

Which then led to this professional result:

Headshot Photography example

Of course, don’t go overboard, and if your subject feels uncomfortable with the idea, don’t push it. The idea is to make them more comfortable, not less!

6. Light like a pro

Lighting is an essential part of professional headshot photography, and you one-hundred percent cannot skimp on your lighting techniques. Lighting should be controlled and carefully positioned. Fortunately, once you know the basics, getting a good, consistent look is actually quite easy.

For business and actors’ headshots, I tend to light quite evenly. There are a few circumstances where the images are low key (i.e., moody with a black background), but for the most part, I like to go for a balanced, detailed effect. A classic beauty lighting setup works well, with one light above and a second light, or a reflector, supplying fill light from below. Though try positioning your key light slightly off center to add a bit of definition to your subject’s features.

Ensure the subject’s body is turned 45 degrees away from the camera, while their face remains pointed straight toward the camera. You may need to guide people to look straight down the lens. You’d be surprised to learn how many people look off-camera, at the flash, or somewhere random – and this won’t turn out so great!

As you can see from the behind-the-scenes shot below, I’ve asked my subject to turn her body 45 degrees from the camera. (She’s still looking straight into the lens, though!) I’ve added a large light in front (slightly to the left), and I’m using a reflector below her face to reduce harsh shadows. I’ve also included a small softbox behind my subject to separate her hair from the background.

Headshot setup

And here’s a headshot example that I captured using a similar setup:

Posing example

7. Sit people down

People often feel more comfortable sitting down, and at the end of the day, comfort is king.

Ask your subject to rest their hands on the tops of their thighs (it gives them something to do with their hands!). It also ensures that the subjects know where they need to be, and that they don’t move around too much.

And honestly, it’s pretty tough to tell whether a headshot is shot standing up or sitting down, so don’t stress too much about how either option looks.

8. Pay attention to the little things

What separates a great headshot from an average one are generally very small changes – little adjustments that can make all the difference.

So once you’ve got your lighting set up and your subject relaxed and ready to go, don’t rush. Instead, take the time to make changes: The slight tilt to the head, a subtle lean forward, a gentle but intriguing smile.

Don’t be afraid to ask someone to make very specific changes to their expression and position until you get the image you’re looking for. And once you do have the perfect shot, feel free to experiment a little with poses and even (if you’re not working with a series of clients) lighting. Who knows when you’ll come up with the next great look!

Below is a professional headshot example. Can you spot the little things that make it great?

Headshot Photography

9. Keep talking and be positive

When you’re taking photographs, talk to your subject. Reassure them that they’re doing it right and that you’re getting great images. It’s hard to do, yes – but it’s worth it, because your subject will remain comfortable and you’ll stay on track to get professional headshot results.

In fact, even if you’re not satisfied with the images you’re getting, continue to praise your subject. When your subject turns their head in a certain direction or when the light falls in a bad way, never express those feelings. Instead, tell them they’ve done a great job – then subtly prompt them to make adjustments to their pose.

Bottom line: Silence will kill the atmosphere, so no matter what is happening, just keep chatting. Stay positive!

10. Shoot tethered

This isn’t an essential headshot photography tip, but if you have all the necessary equipment, I highly recommend you shoot tethered. (And if you don’t have all the equipment, consider making the investment, because tethered shooting can be a game changer.)

For one, when your subject can see a couple of shots on the screen, they’ll quickly get an idea of what needs to be changed. And tethered shooting is great for you, the photographer; you can see whether your lighting looks good, whether your subject is in focus, whether they’re nicely posed, etc., much more easily than on your camera’s LCD preview.

Headshot photography tips: final words

I hope you find these tips for better headshot photos helpful. Commit them to memory, make my suggested changes, and pretty soon, you’ll be capturing pro-level images!

Now over to you:

Do you have any other tips we missed? Please share them – and your favorite headshot photos – in the comments below!

Table of contents

Portrait Photography

16 Feb 05:44

88 baby photography tips, tricks, techniques and time-savers

by Amy Davies

There’s some irony in the fact that probably one of the most photographed subjects in the world is also one of the most difficult. Baby photography can be a joy, but it can also be incredibly infuriating as it’s nigh on impossible to communicate that you want them to look this way, sit still, do this and do that.

In this round-up, we’ll be serving up 88 baby photography tips to hopefully take some of the stress away from you, whether it’s your own baby you’re photographing or somebody else’s. We’ve divided the tips into different categories, as some are more appropriate depending on the age of the baby, while some apply to preparation, and others to after you’ve taken the shot. Let us know how you get on!

88 baby photography tips, tricks, techniques and time-savers

How to prepare for a baby photography shoot

1. Pick the best time
Unless you’re photographing a baby that is just a couple of days old, it’s likely that the baby will have some kind of routine. The parents should know when they’re likely to be at their calmest – this is the time you should aim for (don’t be surprised if the baby spontaneously changes pattern though…).

2. Know the light
Once you know what time of day (roughly) you’re going to be shooting, pick the best place to photograph. For babies you’ll want to stick to natural lighting – near a window is ideal, but the light may change depending on what time of day it is.

3. Remove clothes ahead of time
If you’re going to photograph a baby without any clothes on (typically newborn shoots go this way), it’s a good idea to remove any ahead of time to reduce any marks or lines from the clothes on baby’s skin.

4. Colour palette
On the other hand, if you’re going with a clothed shot – think about how what baby is wearing co-ordinates or clashes with the background you’re going to shoot on.

SEE MORE: Color Theory: best color combinations for photography (and how to take it further)

5. Check your equipment ahead of time
If you’re lucky, you’ll get maybe 10 minutes of shooting time with a fidgety baby. Don’t waste that by cleaning lenses, checking your bag for the lens you need, etc. Have everything you need, cleaned and within easy reach before you start shooting.

SEE MORE: Free family portrait photography cheat sheet

How to prepare for a baby photography shoot

6. Allow enough time
Although you may only get a tiny amount of actual shooting time, you need to plan for a whole lot more. Minutes and hours can easily be swallowed up by a tantrum, a nappy change, an unexpected snooze… you get the picture. Allow at least a couple of hours,if you can.

7. Use your resources
Websites like Pinterest are positively brimming with posing tips and suggestions for babies. Have a browse and make a particular note of anything you want to try ahead of time.

8. Make a list
Your time with the baby, or when the baby is in a photographic mood, may be limited. Have a list of shots (that also includes the incidentals, close-ups and macro shots) you want to grab ready to tick off rather than trying to remember – and inevitably – forgetting something.

SEE MORE: 14 quick tips for candid family photos on location

9. Use a tripod
If you mount your camera on a tripod, it leaves your hands free to pose the baby (great for newborns) or create a fuss or distraction to get the expressions you want (for older babies). Just be careful that the baby doesn’t wander outside the edge of the frame. Set up the tripod in the room you’ll be photographing in ahead of time.

10. Baby photography apps
You can get great photos with your phone too! Download one of the many free apps for Android or iOS that will play a sound or funny noise from your phone to encourage babies to look directly at the camera lens.

SEE MORE: Family Portrait Ideas: how to photograph your loved ones at any age or occasion

How to prepare for a baby photography shoot

11. Online shopping trip
Website Etsy is a great place to find props for baby photography. From hats to baskets to cocoons for the baby to sit in, there’s plenty of sellers geared up exactly for this kind of photography. You could re-sell any items you buy on eBay once you’re done with them, too.

12. Keep an eye out for baskets
Baskets make for a classic place to pose a baby – especially a newborn or very small baby. If you can find a shallow basket – homeware stores such as Ikea are great – then it’s ideal, but otherwise, pad the bottom of a basket out with cushions, towels or blankets.

13. Always in raw format
Shooting in raw format is generally a good idea, but especially so with babies. If you manage to grab a shot, but the white balance or exposure is slightly off, you can alter that in Photoshop no problem.

SEE MORE: What is a raw file? We explain the pros and cons

14. Blank space
With baby shoots, you don’t want to have anything that can take your attention away from the baby doing something great. You can guarantee that the best moment will come just as your memory card fills up. Get in the habit of formatting your memory card before each shoot.

SEE MORE: Memory cards: how to choose and use the right storage device for your camera

General baby photography tips

General baby photography tips

15. Don’t try and be Anne Geddes for every shot
Baby photography hit the big time with the styled shots made famous by Anne Geddes. In reality, these shots take hours to set up, style and usually have a bunch of assistants to help. So don’t worry if your home-styled shots don’t quite have the same look – yours will be more natural.

16. Experiment with focus points
Although focusing on the eyes is the traditional “rule”, it doesn’t hurt to bend, or completely break those rules every now and then. Try focusing on the baby’s hand and blurring the rest of them, and then switching back to the face. The two photos will look completely different, and tend to work well as a pair.

SEE MORE: Master your camera’s autofocus: which AF points to use and when to use them

17. Keep calm
Babies may not be able to communicate in a traditional manner, but they are receptive to moods and feelings. If you’re stressed about the shoot, or frantically trying to get the shot you want and worrying about unexpected movements etc, it’s highly likely you could make it worse.

18. Keep quiet
If your camera has a quiet, or better yet, a silent shooting mode, activate it. Babies can easily be scared or distracted by beeps and the loudness of a shutter release. Alternatively, you could play some calming music to mask the sound of your shutter.

19. Pick the best aperture
A wide aperture works well for most portraits, including baby shots. Try something very wide, such as f/1.4 or f/1.8, but be aware that if the baby moves slightly, a very shallow depth of field created from a wide aperture can throw off focus. You may find you get better results shooting slightly narrower, such as f/2.8 – still enough to blur the background but a little more flexible for slight movements.

SEE MORE: What is the best aperture and focal length for portraits?

20. Keep on shooting
The moments you stop the “formal” shoot while normal baby stuff is happening, i.e. a feeding, is an opportune moment to grab some lifestyle and context shots that show the family interacting with this new life. Ask if moments like this can take place near a window for the best light, and therefore the best chance of a stunning shot.

SEE MORE: Best camera settings for window-lit portraits

General baby photography tips

21. Make a montage
The posed shots you take will likely to be beautiful, but the moments in between – a feeding, a nappy change and pictures of the baby’s things, such as clothes, toys and so on, are more realistic and give the complete picture of what it’s like when a baby arrives. Create a collage or a montage of all of the photos you take during a day’s shoot for a great overall effect.

SEE MORE: Stitch photos together: how to make a montage in 9 easy steps

22. Shoot in aperture priority
Chances are you’ll be working with wide apertures for baby portraits. Shooting in aperture priority allows you to work quickly without having to worry about setting the best shutter speed. Simply choose the aperture you want, adjusting depending on how much depth of field you want to show.

23. Shoot in burst mode
Shooting in burst/continuous mode means you’re more likely to capture the moments of rapidly moving infants. If you can activate a quiet or silent burst mode, even better as the rapid shutter speed sound can be a little overwhelming.

SEE MORE: How to use continuous mode to shoot static subjects

24. Bounce the flash
Generally speaking, using flash with very small babies, is a no no. For slightly older babies, it can still be very harsh. If you really need to use it, use an external flashgun indirectly by bouncing it off the ceiling or an opposite wall. It should result in a natural and less intrusive look.

SEE MORE: How to bounce flash indoors: try this simple technique for portraits at parties

25. Warm your hands!
Before you attempt to pose the baby or touch any bare skin, make sure your hands are nice and toasty. An ice cold touch can startle and wake up the baby and you might need to start all over again.

General baby photography tips

26. Same pose, different backgrounds
This works particularly well for newborns, but you can also try it with older babies. Use the same pose / angle, but switch the background each time to create a montage. If you have a background holder that’s ideal, but you could also just attach large pieces of card to a wall, or get a willing volunteer to hold different coloured sheets or material behind the baby.

27. Pick the best lens
Using a wide aperture to create a shallow depth of field effect is ideal for babies, giving that dreamy, innocent look that suits young faces so well. A 50mm f/1.8, which can be picked up pretty cheaply, is an ideal starting lens. Anything that opens up wide, such f/1.4 or f/1.8 works well.

SEE MORE: Best lens for portraits: 5 sensibly priced options tested and rated

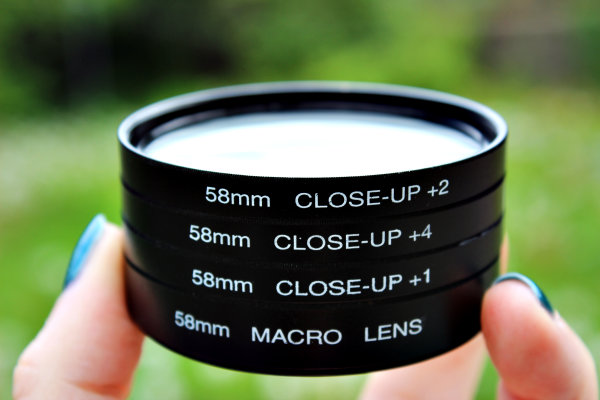
28. Try out a macro lens
A macro lens can be ideal for this type of work. It’s more versatile than you might think too. Not only can you use it to pick out small details, but they’re also great for portraits, offering a classic portrait length (such as 60mm or 100mm) and opening wide (usually f/2.8).

SEE MORE: What is a macro lens? Magnification and minimum focus distance explained

29. Don’t lose focus
Unlike older portrait sitters, you don’t always have much luck convincing a baby to sit perfectly still. Make sure you refocus in between taking each shot to account for any movements, or switch to continuous AF to keep up instead.

30. Bring a change of clothes
If you’re photographing a baby outside of its home, make sure there’s a spare set of clothes ready to go. Not only for the obvious reason that babies don’t always stay clean for long, but also to create a bit of variety.

SEE MORE: Baby footprints: how to photograph a memento of your newborn

General baby photography tips: use a reflector

31. Reflect the light
A simple reflector can make or break a portrait shot. The same is true for baby shots, where you’ll want to be avoiding artificial or flash light. Look for a reflector which has several sides for different ways to manipulate the light. A white side creates an even, neutral light, a gold side creates warmer tones, while the silver side creates colder, harsher light.

SEE MORE: When to use a reflector: the effects produced by different colour surfaces

32. DIY Reflector
If you don’t have your own reflector, you can make one quite easily. Simply find a large piece of white card (at least A3 sized, but ideally larger if possible), and cover one side with foil. Now you have a double sided reflector created in just a few seconds.

SEE MORE: 5 life-saving DIY hacks every photographer should know

33. Choose the best ISO
Even if you’re working in good window light, chances are it’ll be a little gloomy. Infants tend to move quite fast so you want a fast shutter speed, which means a mid-high ISO. Use ISO 400, but don’t be afraid to push to ISO 800 or ISO 1600 if you need it – a slightly noisy photo which is in focus is better than something out of focus. If your camera has automatic ISO with a top limit (such as ISO 1600), set to that for even less time adjusting settings.

SEE MORE: 6 things you don’t know about ISO, but probably should

34. Clean up operation
Always have baby wipes on standby for a quick clean up as and when necessary. We won’t say if, because it’s pretty much a cert. It’s better to be cleaning the baby quickly in person than painstakingly removing flecks later on in Photoshop.

35. Focal lengths
Even though you might want a close up of baby’s face, the last thing it wants is a huge lens stuck in its face, while using a wide angle can create a distorted look. Use longer focal lengths (50mm or above if possible) to grab close ups of the face. If you’re using a zoom lens (such as a 24-70mm), stick to the telephoto end of the lens.

SEE MORE: Best focal length for your type of photography

General baby photography tips: always be ready

36. Always be ready
Babies are spontaneous little creatures. You can almost guarantee the moment they’ll do something hilariously funny (or disgusting), your camera will be in a different room. Have your main camera in the room you spend the most time with the baby, while a second camera, such a simple point-and-shoot in another part of the house can be a great backup for those last minute shots.

37. Fast shutter speeds
For best results from wriggly infants, you’ll want to use shutter speeds of 1/100 or quicker. If you’re photographing newborns you can use slower shutter speeds if you need to as they don’t tend to move quite so much.

SEE MORE: Best shutter speeds for every situation

38. The eyes have it
As with other types of portrait photography, the eyes are usually the most important thing in a baby photo. Babies tend to have particularly expressive eyes, so it’s important to focus on them – set the focus point to the eye, and refocus if the baby moves in the frame.

SEE MORE: How to focus a portrait: get pin-sharp eyes in 3 easy steps

39. Rosy glow
The time immediately after baby’s bath can be a fantastic time to photograph. The baby’s cheeks should have a gorgeous rosy glow, while towel ruffled hair also adds to the cuteness. Use a towel or robe to frame the baby’s face.

40. Ring the changes
Photograph a baby in the same spot every week for a year (or every day if you get the inclination!). You’ll be amazed how much they change in a relatively short period of time. Compile all the images together in a moving image for a cute thing to share on social media.

General baby photography tips: get down low

41. Get down low
For an unusual angle, place the camera directly on the floor, pointing up at the baby – whether that’s their face or feet. If you have an articulating screen, this can be especially useful for framing the shot. Otherwise, just fire off a bunch of images and see what works!

SEE MORE: Camera Angles: 5 ways to add impact with unusual perspectives

42. Keep it simple
Keep the background of your baby portraits as clutter free as possible. We know that’s not always an easy task, but a gorgeous smile can be ruined by a foreign object appearing to stick out of baby’s head.

43. Know when to stop
As soon as the baby starts to get cranky and stressed, don’t try to push it further – it’s unlikely you’ll get any good shots when a baby is like this. Have a break, get mum or dad to comfort them, change them, feed them, whatever it is they want. Once they’ve calmed down again, you can always have another go.

44. Sentimentality
Ask mum or dad for any sentimental items that could be used as props for a baby shoot. Perhaps a treasured piece of jewellery, an old photo, a scarf, anything. It makes for a great tie-in between the older members of your family, and the new generation.

45. Soft textures
Babies love the feel of soft textures against their skin. Have a range of rugs, blankets, soft throws etc, available for the baby to lie on. A soft, fluffy background also looks great in the shot too.

SEE MORE: How to pose for pictures: find the most flattering angles for you and your subjects

General baby photography tips: catchlights

46. Catch the light
Position the baby in such a way so that light from the window acts as a catch light in baby’s eyes. Ideally, the light should be coming from above the baby, rather than underneath, as this will appear more natural.

SEE MORE: Catchlight photography tips: how to create custom-shaped highlights in subjects’ eyes

47. Toys as props (and distraction)
For babies older than about six months (those that can sit unaided), you can use toys both as props and something for them to interact with. Try a mixture of their favourite toys, and something new – the intrigue of which can create some great expressions.

48. Use the golden hour
If you’re going to be photographing babies and small children outside, look for the golden hours – the time just after sunrise, and the time just before sunset. This will throw the most natural and flattering golden light over your subject and you can utilise the low sun to create a halo effect around heads, or add flare for a dreamy look.

SEE MORE: Photography Lighting: how to take control of everything from natural light to flash

49. Get to know them
If it’s your own baby you’re photographing, then you won’t need to do this, but it can help to build up some trust with the baby first before you start pointing a big scary camera in their face. Spend some time holding or playing with the baby before you start the shoot so they can get to know you.

50. Different framing options
There’s tons of compositional “rules” you can follow for child portraiture, but breaking those rules often pays dividends. Try the rule of thirds for sure, but also experiment with placing the baby smack bang in the centre of the frame and see how that works.

SEE MORE: 10 rules of photo composition (and why they work)

Newborn photography tips

Newborn photography tips

51. The opportune time
While brand new parents may not feel like organising a photo shoot, the baby itself will be at its most posable and pliable during the first 10 days. If you can, work during this special first few days.

52. Tiny details
When the baby is being a little grizzly, turn your attention to all the little details – tiny fingers clutching mum or dad’s finger and tiny toes are good places to start.

53. Hat tip
Tiny babies, especially those that have experienced a forceps birth, can have a slightly conical head. A small beanie hat can take attention away from that, and look extra cute too.

54. Use what you have
A simple, yet effective, setup for a newborn baby to pose on, is the car seat which has been draped with a blanket or sheet. This gets the baby into a seated position and makes them feel secure. Crop in tight and the sheet will appear as a simple background colour.

SEE MORE: 10 quick portrait photography tips for working with what you’re given

55. Safety first
Although little tiny babies are relatively easy to pose (when they’re asleep), you always need to be conscious of safety. Ideally have somebody to help you make sure there’s always a secure hand nearby.

Newborn photography tips: use mum and dad

56. Use mum and dad
Posing a newborn is a little daunting if it’s not your own baby. Explain to mum or dad how you want the baby to be positioned and ask if it’s possible for them to mould them into the right shape.

57. Unclench those fists
You may find that a baby’s go-to hand pose is to clench its tiny fists as tight as possible. Gently unfurl baby’s fingers for a more relaxed look – it’s much easier to do this once the baby is asleep.

58. Up the heat
If you’re photographing the baby without any clothes, make sure that it’s lovely and toasty in your shooting location so the baby doesn’t get chilly. Keep a blanket to hand for the moments in between shots, or to incorporate into the shot itself.

59. Take your time
If you’re photographing newborns, they’re unlikely to be moving quickly just yet – take your time to perfectly frame your shot. There’s no rush to frame, but you may find they stir if they hear the sound of the shutter release so make sure it’s right before you push that button.

60. Add personality to your shots
It can be tricky to create baby shots with a difference since they’re often very similar to each other as newborns. An easy way to add a special quality to your group of shots is to capture things which are unique to them, such a personalised toy or blanket, or a favourite piece of furniture.

Newborn photography tips: perspective

61. All about perspective
Shooting from your own height while the baby lies on or near the floor can create perspective problems. Instead, lie on the floor with the baby and shoot from the same level for more natural looking shots.

SEE MORE: How to photograph from a low perspective

62. Tiny hands, big hands
One of the best ways to set the context of just how small a tiny baby is to photograph it clutching mum or dad’s finger. Isolate the subject by using a shallow depth of field for an image which can be used as part of a series or montage.

63. Overhead
A great shot can be the baby lying down flat, looking directly up at a camera above them. Place the baby on a bedsheet, and shoot directly from above. You can frame the face quite tightly to show the most expression.

64. All about context
You can use every day objects to show just how teeny a baby is – especially newborns. How about placing the baby on top of a stack of freshly folded towels? Make sure the baby is safe and secure at all times.

65. Show the whole family
Although a baby shoot will usually just centre around the baby, don’t forget about mum and dad too. But, give them warning they’re going to be photographed! Many new mums will understandably be wary about being photographed when the baby is very new, but they will cherish these photos in later years.

SEE MORE: Family photo ideas: make a striking family portrait from individual faces in profile

Newborn photography tips: be sensitive

66. Be sensitive
Although it’s very common for newborns to be photographed naked, bear in mind that not everybody will be comfortable with that. Discuss with parents beforehand which looks you want to achieve, and reassure them that any image won’t show anything it shouldn’t.

67. Lose the awkwardness
Because tiny babies have very little control over their arms and legs, they can end up looking a little awkward on camera if you don’t pose them. When they’ve newly born, their limbs are very flexible so you can move them without disturbing them too much – but if you’re nervous, ask mum or dad to help.

68. Tuck in legs
The extended legs of newborns tend to look a little gangly, get around this by tucking the legs underneath the body for some great lines and shapes.

69. Watch the face
Babies (as do most of us if we’re honest), tend to snuggle into a blanket or pillow if you place them onto it. You may need to delicately move their face so they’re facing out and into your lens.

70. Feed them up
To get those classic newborn photography shots, feed the baby just before you start the shoot so they’ll fall asleep full and contented. This should give you a bit of time to grab the shots you need before they wake up again.

SEE MORE: Family photo ideas: create a multi-frame photo grid for a fun portrait montage

Newborn photography tips: feeding

71. Rest on a beanbag
A beanbag is great for resting newborns and small babies on. The flexibility of the beans means that it should shape itself around the baby for maximum comfort. If you don’t have one, you can make do with a pile of soft cushions. Drape a blanket over either the bean bag or pile of cushions for a soft effect.

72. A classic pose
One pose you’ll probably want to check off your list fairly quickly is the head resting on hands pose. Place the baby on its tummy, and put its hands crossed over underneath its head. Also tuck the legs underneath them for a sweet, bundled up look.

SEE MORE: 13 tips for better pictures of babies, toddlers and teenagers

Toddler photography tips

Toddler photography tips

73. Peekaboo
For slightly older babies and toddlers, catching their attention can be tricky. Make them laugh with squeaky toys, ideally operated by mum or dad standing as close as possible to the camera. Or, you can have them standing to the side for a shot of the baby looking out of the frame.

74. Head outdoors
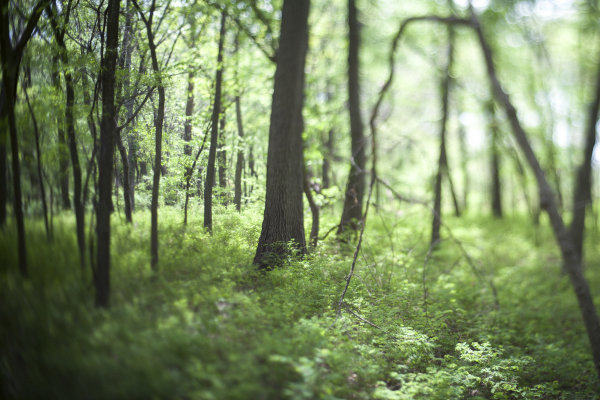
Although for tiny babies you’ll likely be photographing indoors, once they get a bit older, head outside for some great seasonal portraits. This works for babies who can sit up unsupported, as you can get some great outdoor contextual shots.

75. Co-ordinate with the seasons
When you’re photographing outdoors, dressing the baby in natural colours tends to work well. So browns, greens, and anything neutral looks great with grass, woodlands, beaches, etc.

Toddler photography tips: seasons

76. Beach baby
What’s cuter than a baby on the beach? Adjust your camera settings accordingly for bright light – low ISOs, slightly narrower apertures, and fast shutter speeds. If your camera has an inbuilt ND filter, this can be extremely useful at this time.

77. Make it into a game
If you’re trying to photograph two children at the same time (good luck), if one of them is older, try to make them a part of the shoot. Make it into a game, encouraging the older one to look into the camera and interact with their sibling to get a great shot.

78. Show them your shots
Toddlers can be quite engaged with the camera, and have a natural curiosity. Showing them their photo after you’ve taken it usually encourages them to pose for more. Try not to be too precious about your equipment – yes, it’s expensive, but letting them touch the camera often removes the intrigue and makes everything feel more natural.

79. Look for characters
If you’re tasked with photographing a group of infants, lucky you, try to find the one that is most confident in front of the camera and photograph them first. This should hopefully show the others that there’s nothing to fear.

80. Give them a task
For older babies and toddlers, giving them a task to complete can result in some wonderful candid shots. Something like a jigsaw puzzle focuses their attention – position yourself on the same level as them to get the best shots. If you’re feeling brave, you could also photograph a supervised cooking session.

SEE MORE: How to shoot a ‘cool’ wintry portrait

Toddler photography tips: wellies

81. Pack your wellies
Toddlers love jumping in puddles (adults do too, they’re just less honest about it). You can get some great shots by asking delighted infants to jump in puddles. Use a high shutter speed to freeze water droplets, and try framing just the feet for some shots too. Brightly coloured wellies and umbrellas are great props for this kind of shoot.

82. Find them somewhere to sit
Chasing after a toddler to try and take a photo is a thankless task which rarely leads to great photos. Instead, find them somewhere to sit – a step, a bench, a rug – it doesn’t matter what. You may find they run off pretty quickly, so have your camera set up and ready to go near to the seat and work quickly!

83. Follow the leader
Make a game out of posing by asking a toddler to copy what you do. You can try silly poses at first so it’s fun, the mix them up with more subtle or neutral ones. Challenge them to keep the pose for as long as possible as part of the game (while you fire off the shutter release).

SEE MORE: How to shoot portraits with continuous light sources

What to do after you’ve taken the shot

What to do after you’ve taken the shot

84. Convert to Mono
Give your baby photos a classic look by converting them to Mono. It’s a very quick process in Photoshop – you may want to up the contrast a little to converted shots for a more striking look.

85. Spot heal tool
You might squirm a little at the thought of airbrushing an infant. However, the fact is that under the close scrutiny of a high resolution image, any imperfections that may not be that noticeable in real life can be amplified. Use a light touch with the Spot Heal tool to remove any bumps, scratches or marks, without changing the look or shape of the baby’s face.

86. Go for a high key effect
Baby portraits look great with the so-called high key effect. Characterised by bright highlights and a minimalist look, the clean lines of a baby’s face work very well for this technique. Shoot with wide apertures, dial in some exposure compensation, and in Photoshop, using curves to bring up the highlights.

87. Be organised
When it’s your own baby, you’ll no doubt be snapping hundreds of photos, probably daily. Try your hardest to be organised with the photos, as it’ll reap rewards in the long run. You could organise on your computer by age, date, place or event – age is great for quickly jumping to photos of your child when they were a given age at a later date.

88. Print your best shots
Don’t let your precious shots of your baby sit gathering digital dust on your hard drive. Print out your best shots for framing, or consider putting them together in a photo book – a good milestone to create one of these is for the first birthday, filled with shots from the first year.

READ MORE

How to shoot baby portraits that look classic and timeless
Baby Photography Ideas: simple ways to capture striking pictures of your infant
14 portrait photography tips you’ll never want to forget
10 family portrait photography mistakes every photographer makes

The post 88 baby photography tips, tricks, techniques and time-savers appeared first on Digital Camera World.

12 Feb 08:44

10 Awesome AngularJS Tutorials to Kick-Start your Web Programming Projects

AngularJS (commonly referred to as “Angular” or “Angular.js”) is an open-source web application framework mainly maintained by Google and by a community of individual developers and corporations to address many of the challenges encountered in developing single-page applications.
08 Oct 03:30

Download 15 Free Programming Books for Coders of All Levels

by Melanie Pinola

You can never have too many free ebooks—especially ones that help you learn something new or improve your skills. So here you go: 15 programming books for beginners and current coders alike.

Read more...


19 Aug 01:51

How to pose headshots and hands: free portrait posing guide

by Jeff Meyer

Compared to other styles of portraiture, the traditional headshot might seem a little, well, dull. But there’s a fine art to posing a headshot and it’s an important part of any portrait photographer’s repertoire.

Likewise, knowing how to pose hands and direct your subject to place them in a way that feels natural and open will make your portraits much more engaging.

In our latest photography cheat sheet we’ve created a free posing guide for headshots and hands. Here you’ll find nine classic poses for beautiful head-and-shoulder portraits.

SEE MORE: How to shoot a headshot – tips for taking a professional portrait

How to pose headshots and hands: free portrait posing guide

Click on the infographic to see the larger version

Check out these great posing guides

How to pose full-length female portraits: free posing guide
10 classic posing mistakes photographers make (and how to avoid them)
How to pose for photos: find the most flattering angles for you and your subjects
54 portrait ideas: free downloadable posing guide
40 more portrait ideas: part 2 of our free downloadable posing guide
17 posing tips and in-camera slimming tricks for shooting curvy models
19 stellar posing tips and camera tricks for flattering pictures of older people
18 of the best ever posing tips for group photos
Posing couples: 6 ways to make heartwarming photos
Male poses – 17 tips to make him confident and comfortable for your camera

The post How to pose headshots and hands: free portrait posing guide appeared first on Digital Camera World.

15 Jul 02:20

How to pose full-length males: free posing guide

by Photo Plus

Full-length portraits of men are some of the more difficult images to pose. Many male subjects are often uneasy in front of the camera, and the key is getting them to relax.

Following on from our popular posing guide for full-length female portraits, our latest photography cheat sheet illustrates nine classic ways to pose full-length male portraits. We’ve also provided tips on how to capture each image.

To download the infographic either click on it to see the larger version, or drag and drop it to your desktop.

How to pose full-length males: free posing guide

10 more posing guides to improve your portrait photography

10 classic posing mistakes photographers make (and how to avoid them)
How to pose for photos: find the most flattering angles for you and your subjects
54 portrait ideas: free downloadable posing guide
40 more portrait ideas: part 2 of our free downloadable posing guide
17 posing tips and in-camera slimming tricks for shooting curvy models
19 stellar posing tips and camera tricks for flattering pictures of older people
18 of the best ever posing tips for group photos
17 romantic couple poses that will make you say, ‘I do’
Posing couples: 6 ways to make heartwarming photos
Male poses – 17 tips to make him confident and comfortable for your camera

The post How to pose full-length males: free posing guide appeared first on Digital Camera World.

20 Jan 02:38

vintorez: The artist’s name is Chiara Bautista! She’s awesome...

12 Jan 03:05

The God Login

by Jeff Atwood

I graduated with a Computer Science minor from the University of Virginia in 1992. The reason it's a minor and not a major is because to major in CS at UVa you had to go through the Engineering School, and I was absolutely not cut out for that kind of hardcore math and physics, to put it mildly. The beauty of a minor was that I could cherry pick all the cool CS classes and skip everything else.

One of my favorite classes, the one I remember the most, was Algorithms. I always told people my Algorithms class was the one part of my college education that influenced me most as a programmer. I wasn't sure exactly why, but a few years ago I had a hunch so I looked up a certain CV and realized that Randy Pausch – yes, the Last Lecture Randy Pausch – taught that class. The timing is perfect: University of Virginia, Fall 1991, CS461 Analysis of Algorithms, 50 students.

I was one of them.

No wonder I was so impressed. Pausch was an incredible, charismatic teacher, a testament to the old adage that your should choose your teacher first and the class material second, if you bother to at all. It's so true.

In this case, the combination of great teacher and great topic was extra potent, as algorithms are central to what programmers do. Not that we invent new algorithms, but we need to understand the code that's out there, grok why it tends to be fast or slow due to the tradeoffs chosen, and choose the correct algorithms for what we're doing. That's essential.

And one of the coolest things Mr. Pausch ever taught me was to ask this question:

What's the God algorithm for this?

Well, when sorting a list, obviously God wouldn't bother with a stupid Bubble Sort or Quick Sort or Shell Sort like us mere mortals, God would just immediately place the items in the correct order. Bam. One step. The ultimate lower bound on computation, O(1). Not just fixed time, either, but literally one instantaneous step, because you're freakin' God.

This kind of blew my mind at the time.

I always suspected that programmers became programmers because they got to play God with the little universe boxes on their desks. Randy Pausch took that conceit and turned it into a really useful way of setting boundaries and asking yourself hard questions about what you're doing and why.

So when we set out to build a login dialog for Discourse, I went back to what I learned in my Algorithms class and asked myself:

How would God build this login dialog?

And the answer is, of course, God wouldn't bother to build a login dialog at all. Every user would already be logged into GodApp the second they loaded the page because God knows who they are. Authoritatively, even.

This is obviously impossible for us, because God isn't one of our investors.

But.. how close can we get to the perfect godlike login experience in Discourse? That's a noble and worthy goal.

Wasn't it Bill Gates who once asked why the hell every programmer was writing the same File Open dialogs over and over? It sure feels that way for login dialogs. I've been saying for a long time that the best login is no login at all and I'm a staunch supporter of logging in with your Internet Driver's license whenever possible. So we absolutely support that, if you've configured it.

But today I want to focus on the core, basic login experience: user and password. That's the default until you configure up the other methods of login.

A login form with two fields, two buttons, and a link on it seems simple, right? Bog standard. It is, until you consider all the ways the simple act of logging in with those two fields can go wrong for the user. Let's think.

Let the user enter an email to log in

The critical fault of OpenID, as much as I liked it as an early login solution, was its assumption that users could accept an URL as their "identity". This is flat out crazy, and in the long run this central flawed assumption in OpenID broke it as a future standard.

User identity is always email, plain and simple. What happens when you forget your password? You get an email, right? Thus, email is your identity. Some people even propose using email as the only login method.

It's fine to have a username, of course, but always let users log in with either their username or their email address. Because I can tell you with 100% certainty that when those users forget their password, and they will, all the time, they'll need that email anyway to get a password reset. Email and password are strongly related concepts and they belong together. Always!

(And a fie upon services that don't allow me to use my email as a username or login. I'm looking at you, Comixology.)

Tell the user when their email doesn't exist

OK, so we know that email is de-facto identity for most people, and this is a logical and necessary state of affairs. But which of my 10 email addresses did I use to log into your site?

This was the source of a long discussion at Discourse about whether it made sense to reveal to the user, when they enter an email address in the "forgot password" form, whether we have that email address on file. On many websites, here's the sort of message you'll see after entering an email address in the forgot password form:

If an account matches name@example.com, you should receive an email with instructions on how to reset your password shortly.

Note the coy "if" there, which is a hedge against all the security implications of revealing whether a given email address exists on the site just by typing it into the forgot password form.

We're deadly serious about picking safe defaults for Discourse, so out of the box you won't get exploited or abused or overrun with spammers. But after experiencing the real world "which email did we use here again?" login state on dozens of Discourse instances ourselves, we realized that, in this specific case, being user friendly is way more important than being secure.

The new default is to let people know when they've entered an email we don't recognize in the forgot password form. This will save their sanity, and yours. You can turn on the extra security of being coy about this, if you need it, via a site setting.

Let the user switch between Log In and Sign Up any time

Many websites have started to show login and signup buttons side by side. This perplexed me; aren't the acts of logging in and signing up very different things?

Well, from the user's perspective, they don't appear to be. This Verge login dialog illustrates just how close the sign up and log in forms really are. Check out this animated GIF of it in action.

We've acknowledged that similarity by having either form accessible at any time from the two buttons at the bottom of the form, as a toggle:

And both can be kicked off directly from any page via the Sign Up and Log In buttons at the top right:

Pick common words

That's the problem with language, we have so many words for these concepts:

  • Sign In
  • Log In
  • Sign Up
  • Register
  • Join <site>
  • Create Account
  • Get Started
  • Subscribe

Which are the "right" ones? User research data isn't conclusive.

I tend to favor the shorter versions when possible, mostly because I'm a fan of the whole brevity thing, but there are valid cases to be made for each depending on the circumstances and user preferences.

Sign In may be slightly more common, though Log In has some nautical and historical computing basis that makes it worthy:

A couple of years ago I did a survey of top websites in the US and UK and whether they used “sign in”, “log in”, “login”, “log on”, or some other variant. The answer at the time seemed to be that if you combined “log in” and “login”, it exceeded “sign in”, but not by much. I’ve also noticed that the trend toward “sign in” is increasing, especially with the most popular services. Facebook seems to be a “log in” hold-out.

Work with browser password managers

Every login dialog you create should be tested to work with the default password managers in …

At an absolute minimum. Upon subsequent logins in that browser, you should see the username and password automatically autofilled.

Users rely on these default password managers built into the browsers they use, and any proper modern login form should respect that, and be designed sensibly, e.g. the password field should have type="password" in the HTML and a name that's readily identifable as a password entry field.

There's also LastPass and so forth, but I generally assume if the login dialog works with the built in browser password managers, it will work with third party utilities, too.

Handle common user mistakes

Oops, the user is typing their password with caps lock on? You should let them know about that.

Oops, the user entered their email as name@gmal.com instead of name@gmail.com? Or name@hotmail.cm instead of name@hotmail.com? You should either fix typos in common email domains for them, or let them know about that.

(I'm also a big fan of native browser "reveal password" support for the password field, so the user can verify that she typed in or autofilled the password she expects. Only Internet Explorer and I think Safari offer this, but all browsers should.)

Help users choose better passwords

There are many schools of thought on forcing helping users choose passwords that aren't unspeakably awful, e.g. password123 and iloveyou and so on.

There's the common password strength meter, which updates in real time as you type in the password field.

It's clever idea, but it gets awful preachy for my tastes on some sites. The implementation also leaves a lot to be desired, as it's left up to the whims of the site owner to decide what password strength means. One site's "good" is another site's "get outta here with that Fisher-Price toy password". It's frustrating.

So, with Discourse, rather than all that, I decided we'd default on a solid absolute minimum password length of 8 characters, and then verify the password to make sure it is not one of the 10,000 most common known passwords by checking its hash.

Don't forget the keyboard

I feel like keyboard users are a dying breed at this point, but for those of us that, when presented with a login dialog, like to rapidly type

name@example.com, tab, p4$$w0rd, enter

please verify that this works as it should. Tab order, enter to submit, etcetera.

Rate limit all the things

You should be rate limiting everything users can do, everywhere, and that's especially true of the login dialog.

If someone forgets their password and makes 3 attempts to log in, or issues 3 forgot password requests, that's probably OK. But if someone makes a thousand attempts to log in, or issues a thousand forgot password requests, that's a little weird. Why, I might even venture to guess they're possibly … not human.

You can do fancy stuff like temporarily disable accounts or start showing a CAPTCHA if there are too many failed login attempts, but this can easily become a griefing vector, so be careful.

I think a nice middle ground is to insert standard pauses of moderately increasing size after repeated sequential failures or repeated sequential forgot password requests from the same IP address. So that's what we do.

Stuff I forgot

I tried to remember everything we went through when we were building our ideal login dialog for Discourse, but I'm sure I forgot something, or could have been more thorough. Remember, Discourse is 100% open source and by definition a work in progress – so as my friend Miguel de Icaza likes to say, when it breaks, you get to keep both halves. Feel free to test out our implementation and give us your feedback in the comments, or point to other examples of great login experiences, or cite other helpful advice.

Logging in involves a simple form with two fields, a link, and two buttons. And yet, after reading all this, I'm sure you'll agree that it's deceptively complex. Your best course of action is not to build a login dialog at all, but instead rely on authentication from an outside source whenever you can.

Like, say, God.

[advertisement] How are you showing off your awesome? Create a Stack Overflow Careers profile and show off all of your hard work from Stack Overflow, Github, and virtually every other coding site. Who knows, you might even get recruited for a great new position!
18 Dec 03:26

15 Project Ideas to Spark Your Creativity

by Nancy Young

Photography has never been as popular as it is today. People of all ages learn photography in various schools and online universities, and lots of talented photographers have a wonderful opportunity to reveal themselves not only as artists, but also as teachers.

Alex Eylar

By Alex Eylar

Like all creatives, photographers can sometimes experience creative block or a lack of interesting ideas, no matter what side of the school desk they are sitting on. One way for photography mentors and teachers to fight this problem is through the use of creative assignments.

In this article I’ve put together 15 creative project ideas to use in your photography class (if you are a teacher) or for yourself. When completed properly, a student assignment is a great teaching tool. If it’s well-designed and structured, it enables students to develop their technical skills and artistic vision, as well as improve their general thinking abilities and subject knowledge. So whether you’re a photography teacher looking for effective assignment ideas or a self-taught photography student focused on training your eye and critical vision, this roundup will surely come in handy.

1. 365 Project

No matter what you call it, the 365 Project or Photo a Day project, the result is the same – a photo for every day of the year. These kinds of long-term projects give you an opportunity not only to explore and learn photography, but also develop creative seeing and improve your post-production skills. 365 Projects have changed the lives of a lot of photographers, and who knows, maybe you’re next?

Further Reading: 11 Tips for a Successful 365 Project

Olli Henze

By Olli Henze

Dennis Skley

By Dennis Skley

2. 100 Strangers

The 100 Strangers project enables you to interact with 100 strangers and take a photo of each of them. It can be quite scary to start shooting people in the street, or local cafe, if you’re an introvert. But being a photographer is not as easy as it may seem at first. Photography is all about overcoming your fears. This project will help you do that.

Louisa Billeter

By Louisa Billeter

3. 52 Weeks

The 52 Weeks project is similar to 365, but this time you’re supposed to come up with a new photo each week, not each day. The difference between these two projects is that you can choose a theme for every week. For instance, you may shoot particular subjects, places, or even do some photowalks. A photowalk is an awesome way to find inspiration, discover new locations, and come up with really valuable, interesting ideas in the end.

Shutterbugamar

By shutterbugamar

4. Social Awareness Project

Capturing dramatic moments that will influence the minds of their viewers is a mission that many iconic photographers are dedicated to. Spend a weekend shooting the faces on your local streets, or collaborating with a non-profit can help you develop your skills as a documentarist and photojournalist. Such photo projects are definitely not easy to work on, both emotionally and technically, but the reward of being an activist is obvious – every time you click the shutter button you create a photo that could change the world.

5. Self-Portrait

Of course, you may have taken a self-portrait many times with your smartphone. Instagram has turned self-portraits into something usual and mundane.

However, self-portraits can be quite helpful in opening up, and exploring parts of photography in which you don’t normally find yourself involved. Mix it up and stay creative with your surroundings and emotions. For example, look at the work of Kyle Thompson, who has really succeeded in self-photography.

Check out these Self Portrait Photography Tips for some hints on where to start.

Özgün ERDEM

By Özgün ERDEM

6. New Lens Type

You may pick one lens and use it exclusively during this project. A 50mm is a good starting point, as it forces you to move around and stay selective. A fisheye lens could also make an interesting theme.

Moreover, you may experiment with freelensing which is an inexpensive way to get a similar photo effect as from an expensive tilt-shift lens. The idea behind a tilt-shift lens is tilting the lens at an angle to the sensor to change the orientation of the plane of focus (PoF). The technique of freelensing, not only gives you the ability to change the PoF, but it also gives you some pretty cool light leaks from not having the lens actually attached to the camera.

Nuwandalice

By Nuwandalice

David Hepworth

By David Hepworth

7. Monochrome

Try to shoot all your photos in monochrome, or convert them to black and white in post-processing. The beauty of black and white photography is that it focuses more on visual elements such as tone, texture and shapes. By starting this project for yourself, you’ll see the objects in a different light, and rather than just color, your eyes will be better trained to recognize various forms and shapes.

Photograph A Fistful of Kits by Peter Greig on 500px

8. Panoramas

Panoramas are one more way to develop your creative vision. Panoramas usually give the viewer a much wider viewing angle than normal. You can create some small panoramas by merging three photos in one, or go full 360 and make tiny globes like the ones in the picture below. It’s all up to you!

Further Reading: 8 Guidelines To Taking Panoramic Photos With Any Camera

Johanna Herbst

By Johanna Herbst

9. Food

In today’s world of foodie-Instagram, everyone could be a food photographer. Especially if you’re fond of cooking, then food photography is right for you. It’s a myth that you need a super-wow camera to capture food. Food photography is all about styling and beautiful background. No matter what kind of photographer you call yourself, it’s advantageous to have some food photography skills under your belt.

Further Reading: How to Take Mouth watering photos of food

Christopher Chan

By Christopher Chan

10. Sunset and Sunrise

As dawn breaks and the sun comes up, you get to see the creeping rays of sunlight bathe everything in their shining glow. Such scenes are the perfect environment for memorable photos that you can’t pass up. Sunrises and sunsets happen every day. It may sound quite obvious and ordinary, but these times of the day are a golden opportunity to capture breathtaking images.

Read more about how to photograph sunsets and sunrises.

Mike Behnken

By Mike Behnken

Linda O'Dell

By Linda O’Dell

11. Single Theme

Pick an object and try to get a collection of snapshots representing it. For example, try to shoot only circular objects everywhere you go. Or pick a color, for instance blue, and try to go all day long photographing only blue things. The aim of this assignment is to learn to see the ordinary object in a different way.

12. Phone Camera

The main advantage of your phone camera is that it’s with you everywhere you go. Moreover, these days smartphones’ camera quality is much better than years ago and you may come up with images that look almost as good as if they were taken with an expensive DSLR. Using your phone allows you to put exposure on the back burner, and lets you focus more on composition instead. You may also use various photo-editing apps to add various photo effects.

Takeshi Garcia

By Takeshi Garcia

13. Urban Exploration

Urban exploration photography is the art of finding abandoned places, houses, locations; explore them and shoot in a unique way. It’s potentially dangerous, exciting, and a lot of fun. In order not to get scared, you should take your friends with you. Even if they’re not interested in photography, exploring abandoned places is really breathtaking.

Editor’s note: always follow the laws when doing urban exploration. Do not enter where prohibited and always stay safe. Abondoned buildings can be dangerous or illegal to enter. Be careful.

Read more about urban exploration photography.

Michal  Jan?ek

By Michal Jan?ek

14. Perspectives

Shoot a whole set of images from one perspective, such as from a child’s the point of view. Or try to capture all photos from up high. We are used to seeing the majority of shots at eye level, why not to try something different? It’s a great way to learn how to deviate from the normal.

Ken Owen

By Ken Owen

15. Film Photography

Film photography is something every photographer should practice for a few reasons.

First of all, unlike digital photography, you don’t get to see the image you took for a while. It may seem annoying, but you’ll get used to it.

Second of all, you will begin to think more carefully before pressing the shutter button. While shooting digital photography, you may take 10 photos of the same thing to choose the best shot in the end. But with film photography you will not have that chance.

Read this helpful post with suggestions on getting started with shooting with film.

Gioia De Antoniis

By Gioia De Antoniis

Bonus Assignment

Once you accomplish your creative assignment, create a dedicated photography portfolio (Defrozo and Koken provide website building tools for free) or write a guest post for some photography blog to describe your journey and share your experience with fellow enthusiasts. Developing your marketing and blogging skills increases the likelihood of building a prospering and successful photography business.

Resources for Inspiration

The web has so many opportunities to get fresh ideas for your next photography project. I’d like to share some resources you may get inspiration from.

TED talks

Ted is aimed to amplify the ideas of students and teachers from all over the globe. Their mission is to spread great ideas and inspire students of any specialization. You may browse 1800+ TED talks on photography available on their site to spark your curiosity.

OKDOTHIS App

This smartphone app was made by a celebrity photographer Jeremy Cowart. OKDOTHIS is a photography community that inspires people to do more. It’s based on DOs which are creative tasks made by other members of the community. You may upload a photo in someone’s DO or create your own one. The app has also a built-in photo editor.

Behance

Behance is a leading online platform to showcase and discover creative work. All the creatives starting from web designers to photographers share their best artwork here. You may browse the Behance gallery in Photography to find new projects from other photographers.

Weekly Assignments in the dPS Forum

Check out the weekly assignments in the dPS forum for more inspiration. DPS nominates a topic for each week. It could be a lot of fun and a great way to improve your photography skills in various areas.

Make it Happen

What homework do you prefer to give to your students? What assignments appeal to you most? What project interests you and gets you thinking creatively? Share your experience and suggestions in the comments.

The post 15 Project Ideas to Spark Your Creativity by Nancy Young appeared first on Digital Photography School.

19 Aug 13:55

Another 15 Cheat Sheets, Printables and Infographics for Photographers

by Julia May

Editor’s note: Last week we shared a list of some great resources for photographers. It was so popular we thought we’d bring you another set compiled for dPS by Julia May, enjoy.

More Photography Tech and Creative Process

The basics every photographer must know. Click the links to see the original article and source.

Continued from #15 from last weeks: 15 of the Best Cheat Sheets, Printables and Infographics for Photographers

#16 Digital Macro and Close-Up Photography for Dummies

(click the link to read the full summary and see the whole sheet)

18 macro dummies

#17 Quick Guide Natural Light Settings

(Click the image to get a larger view of this graphic)

18 natural light 600

#18 Exposure Guide: Road to Photography

19 digital photography exposure guide

#19 Photoshop CS6 Shortcut Cheatsheet

20 photoshop cs6 shortcuts

#20 How to Take Pictures Like a Pro

(Click the image to get a larger view of this graphic)

21 photography pro 600

#21 Is Photography Dead? Mobile Photography Explosion

(Click the image to see the full graphic)

22 mobile photography

#22 21 Simple Poses to Get You Started With Photographing Children - a dPS article!

(Click the link above for the full article and all images)

23 posing guide children

#23 Using Nikon Metering Modes

24 Nikon DSLRs metering modes full

#24 Portrait Posing Ideas (Printable)

(Click the image to see the full graphic)

25 Portrait Ideas

(Click the image to see the full graphic)

25 Portrait Ideas part2 cropped

Photography Business and Legal

Learn how to get started with your own photography business and check if your marketing strategy includes all the latest techniques.

#25 9 Ways to Grow Your Photography Business in 2014

(Click the image to see the full graphic)

26 photography business plan

#26 9 Free Photography Contracts

(Click the link above for the full article and get the contracts)

27 photo contracts

#27 Creating a Marketing Plan That Works (Printable Worksheet)

(Click the link above for the full article – click the image below for the full printable sheet)

28 marketing photo worksheet

#28 Know Your Rights As a Photographer

(Click the image to see the full graphic)

29 Photographers rights

#29 Photography Marketing Cheat Sheet (SEO, Social Media, Classic Marketing, Email Marketing)

(Click the image to see the full graphic)

30 defrozo photography marketing cheat sheet

#30 Top 15 Photographers Under 25 by Defrozo

(Click the image to see the full graphic)

30 photographersunder25 600

Any useful resource I missed? Share your suggestions in the comments below.

The post Another 15 Cheat Sheets, Printables and Infographics for Photographers by Julia May appeared first on Digital Photography School.

31 Aug 06:41

103 Things I’ve Learned About Street Photography

by Guest Contributor

By Street Photographer Eric Kim

Calcutta 2013 2

  1. A good photo asks more questions than provides answers
  2. 35mm as a focal length is generally ideal for most street photographers. 28mm is too wide (most people don’t get close enough) and 50mm is too tight.
  3. My keeper ratio : one decent shot a month, one shot I am proud of in a year.
  4. “When in doubt, click.” – Charlie Kirk
  5. When in doubt, take a step closer.
  6. You will become a better photographer by asking people what they don’t like about your shots (rather than what they like).
  7. A harsh and constructive critique is better than a pat on the back.
  8. A good photo critique needs (at least) 4 sentences online. Preferably 8 sentences or more.
  9. It isn’t the quantity of social media followers you have that matters, rather then quality of followed you have that matters.

Calcutta 2013 1

  1. Be consistent : stick with one camera, lens, film, or post processing approach to develop your style.
  2. Great photography projects generally take at least 5-10 years.
  3. Buy books, not gear.
  4. The only way money will make you happier in photography if you invest it into experiences (travel, workshops, teachers) rather than material things (cameras, lenses, gear).
  5. The best camera bag in street photography is no camera bag.
  6. “The decisive moment” is a myth. Even Henri Cartier-Bresson took at least 5 photos of scenes he found interesting and worked the scene to get the one memorable shot.
  7. Most famous photographers are only known for their 1-3 most popular images after they die. If you accomplish the same, you have done your job as a photographer.
  8. When shooting film, it is better to over expose than underexpose (film has more details in the highlights).
  9. When shooting digital, it is better to unexpose than overexpose (digital has more details in the shadows).
  10. Street photos of people just walking by billboards is boring.
  11. To become a great street photographer you must first understand what a great street photograph is. Study the masters.

Eric Kim Color 1

  1. When shooting street photography with a DSLR, micro 4/3rds, or a compact and you don’t want to worry about technical considerations, just use “P” mode at ISO 1600.
  2. Projects are more meaningful than single images.
  3. Creating a photo book is the ultimate expression of a photographer.
  4. Shoot as if each day were your last.
  5. One camera, one lens is bliss.
  6. Grain is beautiful, noise is ugly.
  7. My favorite films are Kodak Tri-X (for black and white) and Kodak Portra 400 (for color).
  8. Bokeh in street photography is overrated. Shoot at f8-16
  9. With film, your first 10,000 photos are your worst. With digital, it is more like your first 1,000,000 are your worst.
  10. The secret of a memorable street photograph : capturing emotion.
  11. A street photograph without emotion is dead.
  12. No amount of post processing will make a crappy photograph into a good photograph.
  13. Wait at least 6 months to a year before uploading your images to the Internet, to truly understand if is a good photograph or not.
  14. When it comes to editing, remember to “kill your babies.”
  15. Cheesy titles in street photographs don’t make them any better.

Calcutta 2013 11

  1. Watermarks in street photographs ruin the viewing experience for your audience.
  2. Buying a more expensive camera won’t make you a better street photographer.
  3. Shooting film will teach you more discipline in street photography (and may lead you to become a better photographer).
  4. Street photography is the most challenging genre of photography out there.
  5. A great street photograph needs strong content (what’s inside the frame) and form (composition).
  6. Shoot for yourself, not others.
  7. Spend less time on gear review sites and more time on Magnumphotos.com
  8. You can never spend too much money on photo books.
  9. You are your worst critic. Always get critique from others, they will help spot the holes in your photography.
  10. Sticking with one focal length for a long time will help you better pre visualize your shot and master framing.
  11. You are only as good as your worst (public) street photograph.
  12. Secret to good multi subject shots : don’t overlap your subjects and look for emotional gestures.
  13. How to improve your framing : don’t crop for a year.
  14. How to become a better editor : don’t upload photos to social media for a year.
  15. Try to shoot at eye level (or extremely above or below) your subjects. So crouch when taking photos of people sitting down, shorter than you, or kids. Or shoot from a very high vantage point.

Eric Kim Color 6

  1. 99% of street photographs are ruined by messy backgrounds.
  2. To get cleaner street photographs, first find a clean background and then wait for your subjects to enter the scene.
  3. If your mom likes your street photographs, your photos are probably generic and boring.
  4. Always carry a camera with you.
  5. Street photographs don’t have to have people in them (but generally are more interesting with them in it).
  6. You don’t need a Leica to shoot street photography. Be grateful for what you have and use what you got.
  7. Spend 99% of your time editing your photos (choosing your best images) and only 1% of your time post processing them.
  8. Style in street photography is a combination of having consistent equipment (camera and focal length) as well as “look” (film or post processing style) and content (the subjects you generally photograph).
  9. It is better to over shoot a scene then under shoot a scene.
  10. “Shoot from the gut, edit with the brain” – Anders Petersen
  11. It is always nice to have a shooting partner when out on the streets.
  12. “Shoot who you are.” – Bruce Gilden
  13. Taking a photo of an interesting character isn’t enough. Try to capture them in an interesting context or with a good gesture.
  14. Don’t take photos of homeless people and street performers. They rarely make good photos.
  15. Don’t worry if your photos qualify as “street photography” or not. Just aim to make meaningful and memorable images.

Eric Kim Color 2

  1. Telling the truth isn’t the job of a street photographer (it is for the photo journalist).
  2. Don’t be afraid to interact with your subjects when shooting on the streets. Not all of your photos have to be candid.
  3. You can make interesting posed street photographs. But don’t pretend to your audience that they are candid.
  4. There is no one “right” definition of street photography. Define it personally for yourself and just shoot.
  5. You often can’t control the scene when you are shooting in the streets, but you can control whether you share the image or not. Case in point : don’t make excuses for the small failures in your photos, just edit out those shots.
  6. Don’t respect the critique of other photographers unless you have seen their portfolio.
  7. Zoom lenses will prevent you from becoming a great street photographer (you will never master one focal length). Stick to primes (preferably a 35mm full frame equivalent). 28mm and 50mm are okay too (if you can use it well).
  8. A single photo can’t tell a story (it doesn’t have a beginning, middle, or an end). Only photo series or projects can do that.
  9. The photos you take are more of a reflection of yourself (than of the people you photograph).
  10. The importance of looking at great photos : you are what you eat. Fine french cuisine = great photos in books, galleries, or exhibitions. Junk food = most photos on Instagram, Flickr, Facebook (not always, but mostly).
  11. 99% of people on the Internet don’t know what a great street photograph is. Don’t always trust the comments, likes, and favorites you get from the Internet on social media sites. Rather, stick around in street photography critique groups (or private ones).
  12. You will find the best street photography opportunities in the least expected places.

Eric Kim Color 4

  1. When you see an interesting person or a scene, don’t just take one photo and move on. Aim to take at least 5 photos (or more if possible).
  2. Beware using telephoto lenses in street photography. Remember, “Creepiness is proportional to focal length.”
  3. Incorporate your own reflections and shadows in street photography. They often make interesting images (look up Lee Friedlander).
  4. Photos shot head on have more energy and drama than photos shot from the side.
  5. A brief list of great street photographers : Garry Winogrand, Lee Friedlander, Henri Cartier-Bresson, William Klein, Daido Moriyama, Diane Arbus, Weegee, Bruce Gilden, Alex Webb, Joel Meyerowitz, Martin Parr, Josef Koudelka,
  6. After taking a photo of a stranger, make it a rule to look at them, smile, and say thank you.
  7. I never regret taking photos. I always regret not taking photos.
  8. It is better to beg for forgiveness than ask for permission.
  9. Be confident while you are shooting and rarely will you have any issues. Be nervous while shooting and you will ruin into many problems.
  10. The only person you should try to impress with your photos is yourself.
  11. The benefit of getting eye contact in your photos : eyes are the windows to the soul.

Eric Kim Color 5

  1. Don’t make photos. Make connections.
  2. The best place to shoot street photography isn’t New York, Tokyo, or Paris. The best place to shoot is your backyard.
  3. See your scenes with your eyes and shoot with your heart.
  4. If you are working on a project and photographers discourage you by saying “it has been done before” ignore them. Nobody has done it like you before.
  5. Street photography is applied sociology with a camera.
  6. If you aim to get recognition for your photography you will never get it.
  7. If someone gets upset when you take their photograph, offer to email them a copy. Carrying around business cards always come in handy.
  8. Don’t just look at photos, read into them.
  9. To double your success rate in street photography, double your failure rate.
  10. The photos you decide not to show are more important than the photos you decide to show.
  11. Rather than creating photos to please your audience, find an audience that will be pleased by your photos.

Eric Kim Color 12

  1. Street photography isn’t a contest about how many followers, viewers, followers, exhibitions, books, cameras, lenses, and fame you have. There are no winners and losers. Collaborate with one another instead of competing with one another.
  2. Giving away my prints and cameras has brought me more joy than selling it for money.
  3. The friendships I have made through street photography is mode valuable than any of the photos I have ever taken.
  4. Luck is when preparation meets opportunity – Seneca. Make your own luck.

Check out more from Eric Kim at his Blog, Facebook, and Twitter.

Post originally from: Digital Photography Tips.

Check out our more Photography Tips at Photography Tips for Beginners, Portrait Photography Tips and Wedding Photography Tips.

103 Things I’ve Learned About Street Photography

11 Jul 03:16

PiPlanter: a plant growth monitor

by liz

We’ve see a lot of clever irrigation devices for gardeners being made with the Pi, but PiPlanter is the most complete (and the best documented) system we’ve seen so far. It does far more than simple irrigation. PiPlanter monitors temperature, ambient light, ambient humidity and soil humidity; it outputs that data to a MySQL database, controls a pump to water the plants depending on that data, and outputs the data as graphs and text. (It also tweets that text and uploads the graphs to Flickr hourly so that Devon, the PiPlanter’s owner, can keep an eye on things.)

Devon has documented the build minutely, with circuit diagrams, a ton of code, and several videos. Here, he explains more about the sensor array he built.

You can read much more at Devon’s blog, and replicate the project yourself. Thanks Devon: more power to your green thumb!

16 Apr 15:07

So You Want to be a Stock Photographer, Part I

by Dale Wilson
The photographer has spent a fair amount of time creating this image both in shooting the elements and model, and compositing in post production.  But as a stock image - what does it say?  How will the end user use the image for their messaging?  License cost was 3 credits or about $2.58; photographer will receive about 52 cents.

The photographer has spent a fair amount of time creating this image both in shooting the elements and model, and compositing in post production. But as a stock image – what does it say? How will the end user use the image for their messaging? License cost was 3 credits or about $2.58; photographer will receive about 52 cents. How much is the photographers time worth?

A few weeks back there was an opinion piece posted on dPs that raised the ire of many, and garnered supporters from others.  The fact remains that while it was an interesting read from a single individual, there were several inaccuracies in that piece.

First,  iStock was not the first microstock agency to enter the marketplace; the most widely known perhaps, but it definitely was not the first.  That claim to fame can be laid on another Canadian upstart – Corel.  While I can’t recall the exact dates, in was around 1993-94 time frame when Corel started to purchase images outright for inclusion in CD bundles and incorporation in Corel Draw and Word Perfect. In those days it was pretty much called clip art.  Now it can be argued that Corel wasn’t a microstock agency. I would suggest they were as they purchased images from amateurs and professionals alike. The only difference between them and an iStock, for example, was that Corel purchased the rights and owned the image whereas the microstock agencies today simply work on a royalty basis with the contributor.

The other inaccuracy in the article was the implication that agencies only provide 20% royalty to the photographer.  In some cases this may be true; however, there are also agencies that provide 50% royalty to the contributor, and any percentage combination below that which you can think of.  Usually, the extreme low percentages are in microstock and traditional agencies marketing RF images.  However, in order to compete traditional rights managed agencies are also making package and bundle deals that can see rights managed license fees dramatically reduced to levels even below royalty free image fees.

But let’s not get hung up on the 20% royalty. Yes, the contract most likely states that the photographer will receive 20% royalty from “monies received.” Let’s put that in context.  Somewhere else in that contract you are most likely giving the agency the exclusive right to redistribute the image through their other supply networks.  What this means is that you will not get 20% of the purchase price, but 20% of your contracted agencies receipts.

Put in context it translates to this:  Photographer A makes an image available to his contracted agency – let’s call them Agency X.  Agency X then places that image in the redistribution circuit with Agency Y.  (Photographer A usually does not know who Agency Y is or what the financial arrangement between Agency X and Agency Y might be.)  Agency Y licenses the Royalty Free image to a client for $10.00 USD.  Agency Y then remits $5.00 to Agency X (assuming their split if 50%), and agency X then redistributes its 20% obligation amounting to $1.00USD to Photographer A.

This is a really nicely executed stock image. Are the two ladies friends, or lovers? Is this image about fashion, seasons, or simply looking toward the future? The image provides options for the copy writer, and the more options provided typically the better sales. However, this image has only been licensed twice in more than one year. The license for appearance here cost one credit or about 60 cents; the photographer will receive, unfortunately,  about 12 cents.

This is a really nicely executed stock image. Are the two ladies friends, or lovers? Is this image about fashion, seasons, or simply looking toward the future? The image provides options for the copy writer, and the more options provided typically the better sales. However, this image has only been licensed twice in more than one year. The license for appearance here cost one credit or about 60 cents; the photographer will receive, unfortunately, about 12 cents… it is most definately worth more just in production value alone.

So as you can see, if you are signed with a small agency who more than likely is clamouring to get their material with the large image machines that have far reaching marketing clout, you are more than likely only going to receive 10%, or less, of the initial license price.

Let’s put this financial translation into further context.  I am going to assume you are a Canon user, and you need a new popular lens; let’s say the 70-200mm F4L which retails for about $700.  You offer that you can warrant purchasing the lens because of your stock sales and over time you will recover the purchase price.  But wait, when you receive the $1.00 from that sale, that is not a deposit in your bank account.  How much time did you take to edit and prep the image by sizing and ensuring the right colour space? How much time did you spend ensuring the correct metadata and keywords were applied. How much is your time worth?  Now that you have received your royalty I suspect you have the usual income tax deductions that can range anywhere from 15-40% depending upon where you live. And on it goes – the list of expenses is endless. However, a general rule of thumb is to endeavour that you would like to retain 30% of your gross income as profit … although many stock photographers today are suggesting they are in a negative profit position and are getting out of the business.

Therefore, and assuming we are going to keep good business practises and retain 30% of the gross sale, we would have 30 cents from each sale from which to purchase that lens. (I don’t want to get into the minutiae of whether or not your capital reserve is included in your business plan.)  Quick translation realizes that we would have to make 2,333 sales in order to purchase that lens!  I can tell you that in more than 20 years as a full time stock photographer I have not had one image be licensed for even half that many times.

So the point of this primer on the financial benefit of the microstock industry and part-time photographer is this: There probably isn’t any financial benefit and in all likelihood it will cost you money.

So yes, if you want to continue shooting for pizza and beer go for it; but at the same time you should calculate all your costs, including time, to see if you would be further ahead by spending that time and money with family.

In the next installment we’ll take a look at cost per image versus return per image.

Post originally from: Digital Photography Tips.

Check out our more Photography Tips at Photography Tips for Beginners, Portrait Photography Tips and Wedding Photography Tips.

So You Want to be a Stock Photographer, Part I