Shared posts

16 Oct 04:39

The Surprising Reason We Don’t Tip Flight Attendants

by Lisa Wade, PhD

When the airline industry first tried to go commercial after World War I, it needed to convince skeptical customers that air travel was safe.  One strategy was to make passengers feel that the entire crew was able and willing to see to their safety. This included the stewards, the all-male precursors to the stewardess. But which men to hire? The default employee should have been an African American.  Ocean liners and train cars, air travel’s main competitors and the model on which they built their business, largely employed Black porters and stewards.  But the airlines believed that the overwhelmingly White passengers would not have felt comfortable placing their lives in the hands of Black men.  So they hired White men instead.  Kathleen Barry, who discusses this in her book Femininity in Flight, explains:

Equanimity on aircraft circa 1930 was a tall order for anyone, but stereotypes dictated that it would most likely come from white male attendants. With uniforms that echoed the naval-style garb of pilots, stewards reassured passengers that the white men in the cabin as well as the cockpit were competent and in control.

Screenshot_1

If stewards were so capable and appreciated, why not offer one’s appreciation in cash?  The answer is, in short, because tips were for Black people.  Black porters on trains and boats were tipped as a matter of course but, according to Barry, tipping a White person would have been equivalent to an insult. A journalist, writing in 1902, captured the thinking of the time when he expressed shock and dismay that “any native-born American could consent” to accepting a tip.  ”Tips go with servility,” he said. Accepting one was equivalent to affirming “I am less than you.” This interpretation of the meaning of a gratuity, alongside airlines’ need to inspire confidence and simple racism, is why we don’t tip flight attendants today.

Lisa Wade is a professor of sociology at Occidental College. You can follow her on Twitter and Facebook.

(View original at http://thesocietypages.org/socimages)

27 Sep 18:04

Homemade Hairspray

by Stacy
homemade-hairspray

This is one of those things I had on my, “I’m gonna do one day” list. Do you have one of those? There are lots of things on there that are like Pie in The Sky to me. I add them to the list to make me feel better. So when another mom says, “Yeah, I make my own yadda yadda every week.” Instead of feeling downcast, I can pop right up and say, “YEAH! I’ve got that on my list too.” Makes me seem more important and stuff.

Life gets in the way – dogs poop in the basement – kids get sick – I spend all my time on Pinterest instead of making stuff from scratch…I pin it, but then I’m too busy pinning to GET BUSY. Does that happen to anyone else? *Cough*

But I finally got around to making my own hairspray. I never thought I would forsake John Freida – poor feller. He was my total fave….I still really like him, but now I’ve got a cheaper thing going on. Dear John – I’ll be using you less…you’re for super special occasions now. Sorry, but I’m sure you understand. I like my cash…and Mama says I’m tighter than Dick’s hatband.

Homemade Hairspray

I’d like to tell you where I found this recipe…but I can’t. It’s from a magazine and the page is ripped out. It was ripped so that there isn’t a page number or name of the magazine on the bottom either. Oops. So, this idea is originally from The Magazine. Proper credit given.

But, of course I had to Stacyify this one too…because well, I don’t have any white sugar in the house and that’s what this recipe calls for. Because sugar, once it’s wet and then dries makes things kinda hard and sticky…kinda like when someone spills a Dr. Pepper all over the floor and it doesn’t get wiped off – that’s worse than a pond of quick sand. “Help! I can’t get out!”

So, what’s sticky like white sugar? Well, I racked my brain for a bit…it’s not stevia like we’ve been using. And then I had a lightbulb moment – we still use maple syrup for the kids. And let me tell you something. IT’S STICKY. And Annie always gets it all over herself, the table, and the floor. So, I’m convinced it’s even stickier than white sugar. Bingo.

Homemade Hairspray

You can use whatever scent of oil you want to make this smell all pretty. I chose Sweet Orange because I like the smell of oranges. I like eucalyptus too, but I didn’t want it sprayed all over my head. But really, what does everyone want to smell like anyway? Yep, you got it. BACON. I don’t have any bacon essential oil though…and if my hair smelled like bacon, I’d probably attract every man and dog in a 5-10 mile radius every time I left the house. Ain’t nobody got time for that.

Yes, I used Aura Cacia. Along with Beeyoutiful oils, it’s my oil of choice. No, it’s not the most expensive. But after some testing done by a third party and my friend, Lea, I’m not convinced that it’s worth selling my birthright to get oils. But, I don’t want to go into that here…because some of y’all are pretty passionate about it.

Homemade Hairspray

All you do is mix all this stuff together with some boiling water and then let it cool down. That’s it. It seemed too easy…but at this point in life, I need “too easy.” Can I get a witness?! I have things to pin to add to The List, ya know.

Let me give you a little tip here. Don’t take a big sniff of this while it’s hot. Wanna know why? It might burn your nose hairs out and make your eyes water. Or so I’ve heard from OTHER PEOPLE. *Cough* This stuff is STRONG. But we need strong for our hair don’t we, ladies? Just don’t sniff it. This has been a Public Service Announcement.

Homemade Hairspray

I poured mine into an empty spray bottle…yes, I keep them. I have a thing for spray bottles, so empty ones always get kept. They’re excellent for occupying small children outside. “Here’s a spray bottle! Now go play outside…”

I was using this spray from Vitacost, but I didn’t really like it. The scent was weird. I used it on Annie when I made her pigtails…but she didn’t really like it either. She doesn’t complain about this one though…that’s a miracle.

The recipe says you might have to use a few applications to get it strong enough for your liking. I’ve found that two is good enough for me. Spray, let dry. Spray again.

I was skeptical, but it really works…and it’s cheap. And it works. The only thing that could make it better was if it was bacon scented – but really, we’ve already gone there. Dogs. Men, etc.

Embrace your frugalness and make this today.

    Print This!    

Homemade Hairspray

  • ½ cup water
  • 2 teaspoons maple syrup (not sugar-free…it won’t be sticky) or white sugar
  • 2 tablespoons rubbing alcohol
  • 8 drops essential oil of choice


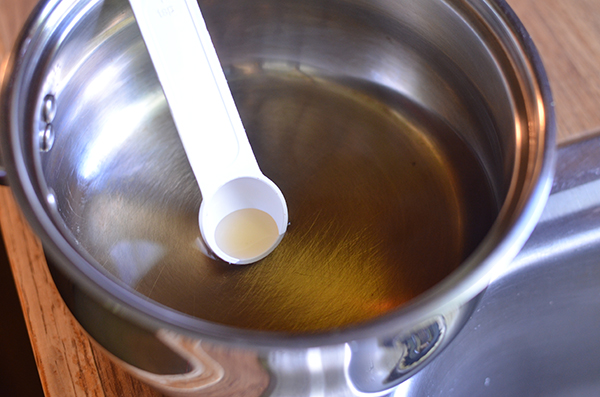
  1. Bring water to a boil and remove from heat.
  2. Add maple syrup and stir until it melts.
  3. Add alcohol and oil. Stir. Don’t sniff unless you need to get rid of some long nose hairs.
  4. Let cool completely.
  5. Pour into a spray bottle.

Yield: about 4 ounces of hairspray

27 Sep 04:27

Pumpkin Pie Potpourri

by Savvy Housekeeper

Here is a simple fall decorating idea: Pumpkin Pie Potpourri.

Carve the pumpkin, cut air vents in it, and rub the top with pumpkin pie spices or push cloves into the top. Put a tea light in the pumpkin and the heat from the candle with warm up the spices and release a nice scent into the air.

I think I’m going to try this.

25 Sep 02:37

7 Clever Kitchen Storage Ideas

by Savvy Housekeeper

I’m in the early phases of planning for the remodel of my kitchen, which is going to be the big house project for 2014. It’s the last room of my house that still looks like the 1960s!

There are so many cool storage solutions for kitchens these days. Here’s a few I’ve stumbled upon:

1. Swing-Down Spice Rack. The spice rack looks like a drawer, and swings down when you need it for easy access.

2. Store pot lids on the inside of the door. In this case, they are held on with towel racks. I saw someone else do it with a metal magazine rack.

3. Put a narrow cabinet in to store cleaning supplies. I almost have space for this, but not quite.

4. Store cutlery in a shallow drawer above the dishes. This would make setting the table much easier.

5. Built in paper towel holder. Enough said.

6. Use a metal peg board and a narrow drawer to store utensils. You can hang from the pegs and use magnets on the metal.

7. A cabinet that allows you to sweep dirt down under the house. Imagine that, no more dustpans.

25 Sep 01:56

September 24, 2013


HEY EUROPE! Come see me!
19 Sep 19:01

Recipe Collection: Fruit Leather

by Kate Tietje

finished edit

The summer’s bounty is overflowing right now.  This is the best time of year!  The summer goodies are still pouring out of gardens — peaches, tomatoes, cucumbers, squash, peppers, etc. — yet the fall goodies are beginning to come as well (pears, apples, grapes, potatoes, garlic).  It’s just a wonderful time of year for fresh foods.

It’s also a time for working hard — to preserve that harvest to enjoy all year long!  I’ve recently begun my massive tomato canning (200 lbs. down so far, which is about 58 jars of sauce), and I’ve also been doing fruit leather!  We love peaches, but mostly to eat fresh or toss into smoothies.  The canned peaches haven’t been that popular for us the last couple of years.  But the fruit leather…the kids love it!

A small strip of real fruit leather at a health food store will run $0.50 – $0.75!  That’s not cheap for that little snack.  I made 104 roughly 4×6 sheets of fruit leather for just $12.  That is really cheap and awesome!

Luckily fruit leather is also super simple.  You can really use any fruit you want, but if you choose a less-sweet variety (berries, peaches), pair it with a sweeter variety (apples, pears, bananas) in order to naturally increase the sweetness and improve the flavor.  I chose peaches and pears for mine, although I’ve also done peaches and apples.  I really choose whatever I can find at the farmer’s market that is “seconds” and cheap.

Also, a friend gave me a tip to coat apple peels in cinnamon and dehydrate those as well, like ‘apple chips.’  Thanks Michelle!  My kids loved those and something that would have been trash is now a snack.

Ingredients:

  • 4 lbs. peaches (or strawberries, blueberries, etc.)
  • 1 lb. pears (or apples)

OR

  • 5 lbs. of apples, pears, other sweeter fruit

Directions:

Slice your peaches (or other fruit).  Place fruit into a large pot.

sliced fruit

Add water to the bottom — just a small amount, 1/4 c. or so.  Then, put the pot on the stove and put a lid on it, and let it steam on low for 30 minutes or so.

cooked fruit

When the fruit is soft, scoop it out into a blender.

fruit in blender

You will have liquid left in the bottom.  I strained it and heated it up separately, mixed it with gelatin, and made jell-o out of it.  You can drink it, use it to sweeten smoothies or baked goods, or get rid of it.  Whatever you want.

Puree the fruit.

If it is pretty thick, like applesauce, you can pour it straight onto parchment paper on dehydrator trays or baking sheets (use the parchment paper!).  If it’s thinner, pour it back into the pot.

puree in pot

Simmer on low until it’s thick enough.  I’ve done it with and without this step and it always worked.  You don’t want it too thin though.

Pour onto dehydrator sheets, about 1.5 – 2 c. per large tray.  You want a nice layer, but not too thick.

puree on tray

Put into the dehydrator on 120, or into an oven on low (170).  It takes a good 12 – 15 hours in a dehydrator; an oven would only take 2 – 3, so watch carefully.

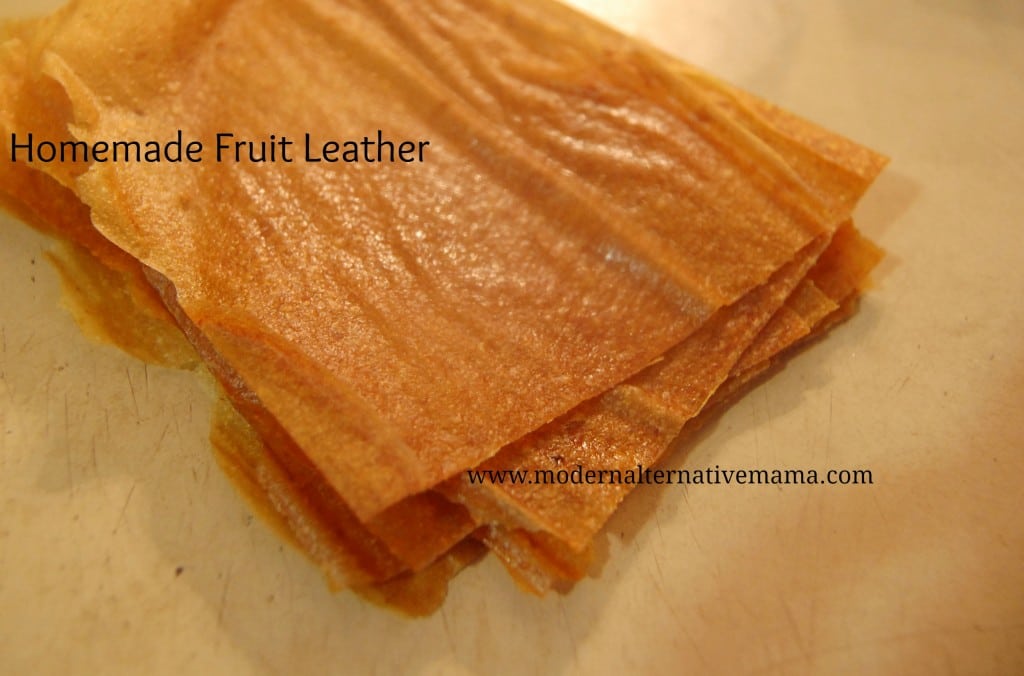
Pull it out and you’re done!  Fruit leather.  I cut mine into about 9 – 10 pieces per large sheet and stored them in a bag.

What’s your favorite way to preserve fruit?

16 Sep 19:53

September 16, 2013


Hey geeks! If you want a nice poster of the comic about raising a geek, it's only available for 2 more days. I will probably not keep this in store, so this is the only way to get it for relatively cheap.
10 Sep 16:29

How did King Arthur Flour get its name?

by PJ Hamel

How did an American company founded in 1790, just a few short years after the Revolution, end up being named after an English king?

The answer is quite “dramatic.”

longwharf

British troops landing on Boston’s Long Wharf in 1768, from an engraving by Paul Revere.

In 1790, Boston businessman Henry Wood began importing flour from England, headquartering his new firm at the city’s Long Wharf.

The United States, with nearly 4 million inhabitants, couldn’t produce enough flour of its own to satisfy the bread-baking wives of the new nation’s 16 states; Wood saw a sales opportunity and took it.

Excalibur

The business flourished over the next 106 years, eventually coming to be known as Sands, Taylor & Wood.

And then, one hot September day in 1896, a star was born.

photo 1[1]

Messrs. Taylor, Sands, and Wood (l to r), at the Boston Food Fair in 1896.

“In 1896, Mark Taylor, Orin Sands, and George Wood, of the Sands, Taylor & Wood Company, introduced their new and exceptional product: King Arthur Flour. This new flour was milled from a unique blend of 100 percent hard wheat with no additives needed to enhance its baking qualities or appearance.


“Wood received inspiration for the name while in the audience of a Boston musical based on King Arthur and the Knights of the Round Table. He witnessed the same values in Arthurian legend he saw in his new exceptional flour: purity, loyalty, honesty, superior strength, and a dedication to a higher purpose.

“King Arthur Flour was introduced at the Boston Food Fair on September 10, 1896, and it became an immediate success.” – from  Images of America: King Arthur Flour Company.

This all-American flour company, whimsically named after one of England’s finest kings, has been building on that success ever since.

Interested in more King Arthur Flour history? Check out our history page, including video.


04 Sep 01:30

Inside-Out Pumpkin Muffins: it’s what’s inside that counts

by PJ Hamel

InsideOutPumpkinMuffinsC13F

Is this a gorgeous picture, or what?

Golden-orange pumpkin muffins, complete with a sweet baked-in filling of cider and cinnamon-scented cream cheese.

They’re every bit as good as they look; and not at all fussy to make.

Because, trust me, if these muffins involved a piping bag – in my personal parlance, “the dreaded piping bag” – they wouldn’t be on my “must-do” list, no matter how tasty.

Call me unreasonable, but I have a thing against piping bags. Let’s take 5, shall we? Five reasons I don’t happily pipe:

1. You have to figure out a) what tip to use, and b) how to attach it. I know, I know, one piece goes INSIDE, one piece goes OUTSIDE…
2. There are many small pieces involved. And I inevitably lose the one key piece (coupler?) needed to make the whole thing work.
3. They’re a pain to fill; never mind the tall glass, piping bags are always a pain to fill.
4. Everything I pipe, from writing atop a cake to a simple éclair, looks like a mess.
5. When you’re done, you’re faced with the cleanup: a bag that’s greasy both inside and out. And not only that, greasy in little hard-to-reach places…

No thanks.

So, I absolutely LOVE a “fancy” recipe for a filled treat that doesn’t get me anywhere near a piping set.

Like this one, perfect for fall (yes, it’s on the doorstep): Inside-Out Pumpkin Muffins.

Shall we begin?

IMG_1712

While the recipe on our site calls for a relatively plain sweetened cream cheese filling, I think our recipe for Cider-Cinnamon Spread is a wonderful fit, as well. You’ll use only about half of this spread for the muffins; but I advise making the entire recipe, as it’s delicious on toast and bagels.

Combine the following, stirring until smooth:

1 1/2 cups (12 ounces) cream cheese; low-fat is fine
1/4 cup sugar
1 1/2 teaspoons ground cinnamon
1/8 teaspoon salt
2 tablespoons boiled cider

Preheat the oven to 400°F. Line a standard 12-cup muffin pan with muffin papers, and grease the papers. Or lightly grease a maple leaf pan.

pump1

Put the following in a bowl:

1 cup pumpkin purée (about half a standard 15-ounce can)
2 large eggs
1/2 cup brown sugar
3 tablespoons vegetable oil
1/4 cup boiled cider* (for best flavor), or dark corn syrup
1/2 teaspoon salt
1 1/2 teaspoons pumpkin pie spice; or 1 teaspoon ground cinnamon + 1/4 teaspoon ground cloves + 1/4 teaspoon ground ginger
1 teaspoon baking powder
1/2 teaspoon baking soda
1/3 cup milk

*Boiled cider isn’t something you can easily make yourself, simply by boiling cider. But it’s so wonderful, in so many different fruit desserts (especially autumn-type treats, like these muffins), it’s worth it to keep a bottle on hand. It’ll last for months in the fridge.

Beat everything together. Scrape down the sides and bottom of the bowl.

Add 1 1/2 cups (6 1/4 ounces) King Arthur Unbleached All-Purpose Flour or King Arthur White Whole Wheat Flour (6 ounces). Stir just to combine. Don’t beat; beating will toughen the muffins.

pump2

Drop about 2 tablespoons of the batter (a tablespoon cookie scoop works well here) into each muffin cup, spreading it to cover the bottom. Dollop on a heaping tablespoon of filling (a slightly heaped teaspoon cookie scoop); remember, if you’ve made a whole recipe of cinnamon-cider spread, you’ll only use half. Cover the filling with another 2 tablespoons of batter.

If you’re using maple leaf molds, drop about 1 1/2 tablespoons of batter into each of the 6 molds. Add a scant tablespoon of filling, and spread about 1 1/2 tablespoons batter on top. The recipe will make 16 maple leaves, so you’ll need to bake in batches.

Sprinkle coarse white sparkling sugar on top, if desired.

pump3

Bake the standard muffins for 18 to 20 minutes, until a cake tester inserted in the center comes out crumb-free.

Bake the leaf muffins for 16 to 18 minutes, testing them the same way.

pump4

Remove the muffins from the oven. After 5 minutes, transfer them to a rack to cool.

If you’ve baked leaf muffins, after 5 minutes gently loosen their edges, and turn the pan over onto a cooling rack; the muffins should drop out.

And there you have it: moist, tender pumpkin muffins with a creamy center – no piping bag involved!

Read, bake, and review (please) our recipe for Inside-Out Pumpkin Muffins.

Print just the recipe.

Want to try a similar treat with classic carrot cake flavor? Try our Cream Cheese Carrot Cake Muffins.

24 Aug 21:30

Crypto implementation in Whistle.im ...

image

by loxiran

23 Aug 14:48

A tale of two tests: the quest for Baking Sheet recipes

by Susan Reid

beautyshot

When someone writes you a letter that starts “Oh, Obiwan Kenobi of all things, baked, please help me!” there’s really no way you can ignore them.

jane'sletter

Thus began a fascinating letter from Jane A. Thomas, who signed herself “A wishful thinker and Baking Sheet reader.”

Here’s the letter she wrote:

“Attached is the recipe for Doris Knutson’s Top Secret Filled Coffee Cake. As a child growing up in Burlington, Wisconsin, my family had been the lucky recipients of these incredible coffee cakes that Doris made and gave as gifts. Much to my chagrin, from the age of 10, I could never get Doris to give me the recipe and neither could anyone else. Over the decades, I have never forgotten about Doris’ coffee cake and have often tried to discover a recipe that matched it but never have. Amazingly enough, when she passed away in March 2013, her family gave it out at the funeral.

Here’s what was written in her funeral program: ‘Doris was an avid baker, and her cream-filled coffee cake was a regional favorite. The recipe was a closely-held secret, and many, many attempts were made to crack the code – by several professional kitchens and chemists. They all failed.’

My one attempt to make it did not taste like I had remembered, which was a very fluffy filling and an airy cake with a slight crunch to the exterior. There are no quantities given for the flour and no baking time specified. It makes three cakes but it would be great to make just one at a time. Finally, after 44 years I am hoping to recreate what I and so many others in my home town cherished.”

Here’s the recipe Jane sent me:

originalrecipepart1


recipe instructions

Now, with a story like that, you know the hunt was on. The same day, I was testing a recipe I found in an old cookbook called “The Best From Midwest Kitchens,” originally published in 1946. Unfortunately for our ever-patient kitchen steward, Julie, the first attempt at both recipes yielded similar results.

First, I converted the coffeecake’s amounts to what I thought was a reasonable starting point (roughly x 1/3). Since I had no idea how much flour it would take, I went through the steps and kept the finished dough on the sticky side. It still took almost 5 1/2 cups of flour, and despite putting it in a 10″ layer cake pan, you can see I was not exactly in the ballpark.

Doris Knutson quest1

The 1946 recipe for “Spiced Nougat Cake” said “bake in one loaf for 1 1/2 hours at 300°F.”  Adding the ingredient volumes at a quick glance came out to around 6 cups, which is the amount for a 9 x 5″ loaf pan, or one of our tea loaf pans, which I thought might look elegant. Yeah.

Spicedcakelavaflow

Not so much.

Back to the drawing board, calculator in hand. The nougat cake got an overhaul for amounts, including cutting the leavening in half. Into the oven it went, and this time things looked much more encouraging.

nougatcake2

This shot is taken at the same time in the bake as the first one. Note the sheet pan underneath, just in case…

As for the coffeecake, I cut down the amounts again, and this time decided a springform pan was the better part of valor. Things looked pretty reasonable as I mixed and plopped the dough into said springform for its last rise. Note the greasy stack of recipes on the bench, complete with markups. The white stuff in the saucepan is the flour/milk mixture for the coffeecake’s filling, and as you can see, the nougat cake behaved itself.

workdayinprogress

The Baking Sheet runs a regular feature called Recipe Makeover, and it’s one of our most popular. Everyone has a story like Jane’s, or a baking wish that they’re not sure how to realize. That’s where PJ and I come in. We’re part mad scientist, part translator, part foot soldier, making the messes and screwing things up so you won’t have to; she for the blog and I in the pages (and in the app) of the Baking Sheet.

“Results!” you say. What happened next?

Let’s just day that Doris’ famous coffeecake is one… exuberant recipe. It’s pretty heavily yeasted, even when converted, and the only springform I could put my hands on was a 9″ diameter. So… here’s what happened to take 2 in the oven:

Doriscake2baked

A lofty, light-textured cake, that resembles… a mushroom. But I figured I was further down the road, so it was time to finish the filling, split and fill the cake, and put it into the employee kitchen. That done, I went to check my email, and came back in 10 minutes. This is what was left.

tastingDoris2

As you can see from the cross section, the cake itself is very light. One of my co-workers described it as being almost like an angel food cake.

And the taste? The filling is amazing. I’ve never had anything like it. I’d seen cooked roux frostings, but nothing like this filling’s technique. The cooked milk/flour mixture gives it a flavor that reminds you of homemade pudding, but much lighter. It’s a little tricky to make without lumps, but after tasting this cake I began to understand that Doris Knutson’s legendary status as a baker was well deserved.

Time for take 3.

All amounts a bit smaller, a better understanding of how to make the filling, and still… it’s clear to me that this recipe just plain HAS to be in a 10″ pan. And a springform one, at that.

round3

So I dug out my 10″ springform from home, and went toe to toe one last time.

Before I show you what happened, I should report that the nougat cake, while vastly improved, was a little dry for mouthfeel after its last go-round. The first one was downright greasy, so I’d cut the butter quite a bit. The recipe also calls for sour cream, which I’d brought down in proportion, but I think it’s worth bumping that up just a bit and taking the recipe around the block just once more.

spicecakeround2

After putting the coffeecake in the 10″ springform pan, here’s what came out of the oven.

lastpass10inchpan

No mushroom, still tall and light. In the 10″ pan you need to wait until the dough has been in there rising for about 20 to 25 minutes before putting the crumbs on top.  I think you could make two 8″ cakes from this recipe, but you’d want to multiply the filling and topping amounts by 1.5 to have all the proportions line up. I can report that I froze one of the cakes over the weekend, and it disappeared just as quickly as its brothers after being thawed.

I think Doris’ coffeecake (for the revised recipe, click here) is truly a masterpiece. Recreating it was a journey into all the unspoken areas where experienced bakers make instinctive adjustments that they may or may not ever put down on paper for others to read. I believe the difference between the formula I arrived at and Doris’ working guideline are the tweaks and measuring and spelling out of at least some of the graceful moves Doris made when she was baking for other people.

I’m hoping that Jane will be as excited about having a working formula for it as we are. And I’m sincerely hoping that our efforts will create those taste memories for her and everyone who cherished Doris’ wonderful baking expertise.

There’s more to say about the nougat cake’s adventures, (including its really, really yummy chocolate cream cheese frosting) but you’ll have to sign up if you really, really want to know. :-)

Both of these recipes are going to be appearing in the Winter (coffeecake) and Early Spring (Spiced Nougat Cake) issues of The Baking Sheet. If you’re interested in having a regular source of exclusive, original, seasonal, tested recipes, and the stories that go with them, I hope you’ll consider subscribing, to our print, or digital versions (or both).

Subscribers to our app have access to every recipe ever published in The Baking Sheet since its beginnings in 1990. That’s more than 3,500 of them. The first back issue on the app is a comprehensive, searchable index of all of them.

One of our Baking Circle Community members sums it up nicely, when sharing one of her own baking experiments. Mrs. Cindy says:

“I think I know why we all love this site so much. From the beginning KAF has supported our love of tinkering and tweaking recipes. Indeed, look at the Baking Sheet. Every issue begins with Susan telling about finding a recipe, or someone sending her a recipe, or an associate/friend asking for help with a recipe. No recipe is safe from Susan’s tweaking. She encourages us to do the same. We are safe in these environs!”

A lovely thought, and we’d be more than happy to welcome you to our Baking Sheet group of friends.

19 Aug 20:19

Blueberry Cream Cheese Rolls: there’s no blue Monday here

by MaryJane Robbins


blueberry-cream-cheese-roll_900w

Beneath your bowler brim the world’s a simple song,

A lovely lilt that makes you tilt your nose,

Get out your slickers, your flannel knickers,

Your red suspenders and hose,

For there’s no blue Monday in your Sunday clothes!

Yes indeed, Dolly Levi, when you’re dressed like a dream your spirits seem to turn about. It’s just as true in the kitchen as it is in Yonkers, NY. When you take a baked treat that you love and dress it up just a bit it can really lift you up and change how you’re feeling about life and livin’.

When my daughter graduated from high school this spring and performed in her last play, it didn’t occur to me at the time that Hello, Dolly was in fact a wonderful way to transition to a whole new world.

Many of the kids in the class had been together since they were in my pre-school class at age 3. While we could have lost ourselves in the blues of leaving each other, instead the kids were singing about getting out into the world, and reawakening, and new beginnings. Looking back, it was an amazing message to have in their lives during a tough transition period.

I can honestly say the energy and sheer joy of the students made this the best performance we’ve ever seen on that school stage, and we’ve seen some spectacular shows over the years.

So do away with any blues we may be feeling today and make some blues we can use. Blueberry Cream Cheese Rolls are ready for their starring roles. (Did you see what I did there? Rolls, roles. I’m a wit, I am.)

Let’s make a batch before the parade passes us by and bring happiness and joy to our kitchens.

blueberry cream cheese buns

remember, you can click anywhere on the picture to enlarge it

Making these rolls doesn’t have to become a Broadway production; there are quite a few steps but they’re all easy. Check out the steps here, starting with the top left.  Make a batch of dough. Make the filling*, spread it on the dough, cut up the rolls, make the cheese topping, pipe it and smooth it. Make the streusel, sprinkle, bake, and enjoy.

If that was enough to get you started, you can skip to the recipe. If you want to see a bit more up close and personal, come along as we make Blueberry Cream Cheese Rolls.

DSCN0799

Start with your favorite sweet bread dough, rolled out to approximately 16″ x 20″.  You’ll need approximately 2 cups of blueberry filling or jam. I used the jam setting on my bread machine to make mine, like in our blog.

Taking a hint from sushi masters, place some of the filling in each of the 4 corners. You then spread out each section to the sides and center and before you know it, the whole surface is covered without any tugging or pulling of the dough.

Roll the dough up cinnamon bun-style, working from the long side and rolling towards yourself.

DSCN0801

Using a sharp knife, dental floss, or quilting thread, divide the rolled log into 12 equal pieces. Place the pieces slightly touching  in a well-greased 9″x 13″ x 2″ pan.

Cover with plastic wrap and set aside to rise for 40 minutes.

By the way, I hope no men are trying to make this recipe because you know…

O yes it takes a woman,
A fragile woman,
To bring you the sweet things in life!

OK, OK stop protesting – I was just kidding!

DSCN0803

While the dough is rising prepare the cream cheese topping. Mix together 12 ounces soft cream cheese, 1 cup confectioners’ sugar, 2 tablespoons flour and 1 teaspoon vanilla. Stir until smooth.

DSCN0808

Using a piping bag or zip-top bag with the corner cut off, pipe large, marshmallow-sized daubs of cream cheese topping onto each roll. Using a knife to cut each portion off is helpful.

DSCN0814

Wet your fingers with cold water and gently smooth out the filling so that the top of the bun is fully covered.

So, why not put the topping on the rolls at the beginning of the rise?

Sweet doughs have a harder time rising than plain dough, and adding a heavy layer on top would really slow them down even further. Give them a chance to get started, then add the topping shortly before baking.

DSCN0802

Just before sending the rolls to the oven, make the streusel topping. White streusel topping is really easy to make. It’s equal parts of flour, white sugar, and butter. Here I’ve used 1/2 cup of each and whirled it all together in my trusty food processor.

DSCN0818

Sprinkle the crumb topping evenly over the whole pan full of rolls. Don’t worry if some falls between; it will all bake together beautifully.

DSCN0820

Bake the rolls in  a preheated 350°F oven for 45 to 55 minutes. The cheese filling will puff up, the streusel will turn golden brown, and what little of the rolls you can see will be deep brown in color.

Set the pan to cool slightly on a rack before serving. I like to serve these just barely warm or at room temperature. They’re definitely a KFJ (knife and fork job) dish, with a tall glass of milk on the side.

So, say so long, dearie, to feeling dreary, and go out there to conquer the world.

And… jazz hands!

I hope you’ve enjoy my tribute to Dolly. I’d love it if you took a moment to add a comment about your favorite musicals or plays. What show tunes lift your spirits when you’re feeling down and out? Bonus points if you’ve been in the show!

Please read, bake, and review our recipe for Blueberry Cream Cheese Rolls.

Print just the recipe.


10 Aug 21:36

When is the Best Time to Buy Everything?

by Savvy Housekeeper

Mint.com has an interesting infographic showing When is the Best Time to Buy Everything?

Click to see the whole thing:

09 Aug 21:13

August 07, 2013

02 Aug 00:00

July 30, 2013


True story.
26 Jul 21:36

Travel Hoodie Pillow

by Savvy Housekeeper

I like this Travel Hoodie Pillow. It’s an inflatible pillow attached to a hoodie. Looks convenient for travel. $20.

18 Jul 16:59

July 18, 2013


Oh god. Flying out to SDCC this morning. See you all soon at the Overdue Media booth. God help me.

Also, just for SDCC, an SMBC Theater Superhero compilation!

17 Jul 04:11

July 16, 2013


OH GOD IT'S ALMOST SDCC TIME. We're boothing with Overdue media at 2300 and I'll be there Fri and Sat!
11 Jul 18:28

July 09, 2013


Hey poli sci geeks - my brother, Greg Weiner (yes there are more Weiners), is writing some articles here. Fair warning: They involve nuance and politics, so you will probably be angry at some of them. Enjoy!
10 Jul 17:24

Why I Don’t Want My Kids “Socialized” in Public School

by Kate Tietje

Probably the first and most popular “complaint” that homeschooling parents hear is “What about socialization?”

Now that my oldest is 5 and would be going into kindergarten this fall, people I meet have started to ask: “Is she going to school?  Where is she going?”  And then I answer, “We’re homeschooling…I’m not sure what school she would have gone to.”  (In my city there are many districts and many schools within each.  I really have no clue.)  Then I feel like that parent.  Oh, those weird homeschoolers who think they are better than others.

Totally not true.  Everyone chooses the type of schooling that works for their family.  This post isn’t about why homeschooling is a better choice (except, for us.  It’s totally better for us).  This post is why the socialization myth is one I absolutely have to bust.  It’s totally wrong that my homeschooled kids don’t socialize; there are lots of ways to accomplish that.  And I don’t want my kids to be socialized in a public school anyway.

I Went to Public School

I went to public school myself, K-12.  I know what it is like there.  I know that the kids can be curious about other ways.  I know for the first 3 – 4 years they overlook familial differences and don’t form any sort of “social classes” and they’re generally pretty inclusive.

But then, it changes.  Somewhere around the 4th grade, they start to figure it out.  Some people are “better” than others.  Some people are “weird.”  And weird is bad.  You can’t stand out.  Differences are not appreciated, especially if they are of the slow, nerdy, ‘strange’ (think, dresses in all black/enjoys reading encyclopedias for fun/would rather hang out with the lunch lady than the other kids) variety.

There is no way to avoid this.  Kids are naturally curious about what makes them different from others.  They are beginning to pick up on the attitudes of the adults around them, including their parents.  I don’t know a single adult who, in private, is 100% non-judgmental and inclusive.  And even if they are, there’s that little thing called peer pressure.

So many people grow up to hate those who tormented them in school.  Some never outgrow wanting to “show the bully” how successful they are, how they rose above the poor treatment they received.  There are entire books, movies, and TV shows dedicated to these issues.

Look at the wildly popular show, The Big Bang Theory.  How often do the characters on that show discuss how they wish their bullies could see them today, how nerds “really” run the world, and how the character Penny (who is of average intelligence and is considered beautiful, and was very popular in high school) used to be a bully and the fully grown Bernadette and Amy characters, both of whom have Ph.D.s and successful adult lives are “lucky” just to be her friend?

It’s not just fodder for TV.  It’s a reflection of the real world, in this case.  Schools are cracking down on bullying, working under a so-called “zero tolerance” policy (that is an issue for another day…).  Young boys and girls are committing suicide over teasing and torturing they receive in school because they are too stupid, too smart, too fat, too poor, too rich, too…something.

Having been on the receiving end of it the majority of my school years, I know what it’s like.  I know the feeling of being on the “outside” and wishing to fit, wondering why I didn’t, wondering how I should or could change.  I wish now I could go back 15 years and tell myself it doesn’t matter, that they don’t set the standard for what is good or right, and that there are many ways to be that are perfectly good and fine, even if they’re not common.  But this isn’t about me.

Setting Standards By Peer Demands

I do not want my children to pick up on “the way the world works” when they are still young and fragile.  I do not want them to think there is something wrong with them because we make different choices in religion, food, medicine, and so on.  They are fully well aware that we do make different choices — I am very honest with them that most other families vaccinate because they believe it is best for them, that they eat processed food because they don’t know it is not healthy, that their babies are born in hospitals, and so on.  They know that what we do is not that common outside our circle of friends (where most are a lot like us).

It’s not about hiding the world from them.  It’s not about pretending “all that other stuff” doesn’t exist.  That’s foolish, because someday they will realize and they will wonder, unless you tell them.

What it is about is letting us set the standards for them.  Letting us teach them what is right and what is wrong.  Letting us allow them to be who they are and grow confident in it.  It’s about keeping them away from this ridiculous peer pressure and impossible peer standards at a time when their identities are still forming.

It does not bother me now if someone thinks I am weird for canning food or not vaccinating.  I feel confident I’ve made the right choice for my family and I know that I don’t have to live to others’ standards.  Because I am an adult.  Kids just don’t have those solid convictions yet.  They can’t until they reach a certain age and learn to think abstractly and form their own sense of identity.  I want to help them realize whoever they are is okay, and help them figure out what that is, without the input of their peers.  They don’t need that sort of nonsense.

Maybe part of this is in reaction to what I experienced as a kid, but as I’ve noted, it’s only too real today — bullying is a huge topic in society.  The problem hasn’t gone away.  If I can save my kids from that, I will.

Living in the “Real World”

My kids still live in the real world, and so do I.

I let them know that others will disagree with us.  I let them know that others have different ways of thinking.  purposely tell them about ways people are different.  ”Did you know some Mommies work during the day and someone else cares for their kids?  Did you know sometimes Daddies do all the grocery shopping and cooking?  Did you know some Mommies have their babies cut out of their tummies?  Did you know some babies are fed with bottles?  Did you know most kids go to school in a building with other kids?”

They know these things.  And people talk to them about these things.  These things are depicted in books we read and shows we watch.

The difference is, they think of these things as abstract.  Stuff other people do.  Like we do things our way.  They don’t think of it as a judgment on what we do, and they don’t think of what we do as a judgment on others’ choices.  We co-exist peacefully.

And yeah, they’re socialized.  They’re not shy at all (I tend to be) and they love to run up to people they meet and introduce themselves and start a conversation.  It does not matter to them if the person they meet is old, young, fat, thin, black, white, etc.  They are equally interested in all people.  They don’t care about differences.  They’re not going to be taught that one person is better or worse than another, because I’m not going to teach them that, and they’re not going to be in school to learn it the hard way.

The other day we went to the playground.  A woman stopped walking and turned off her music device to talk to all of us.  The kids introduced themselves and Nathan and talked to her for awhile, then she left.  Another woman and her two kids came along awhile later.  They introduced themselves to her, and started talking to the kids.  When the little boy (2) ran his tricycle into the playground and got it stuck on the ledge, my kids rushed to help him.

When the mail man drives by our house, my daughter begs to go outside and talk to him.

When we go to a playground or to the zoo or any other larger gathering of people, my daughter will pick up the baby and go introduce him and herself to a random stranger, then ask the stranger to hold Nathan for awhile, because she is so proud he is her brother and wants to share him.

When we visited my husband’s office, my oldest son offered to shake hands with every adult he met as he introduced himself (we didn’t teach him to do that, either — he’s picked up on it from observation).

My 22-month-old waves to people as we take walks.  If someone he doesn’t know should pick him up, he just smiles.

The kids run across people of all ages, races, religions, genders, and more every single day.  We also get together with friends fairly often and they have plenty of semi-supervised peer-to-peer time.  (What I mean by “semi-supervised” is like us moms sit on benches at the edge of the playground and chat.  We can see them, but we’re not micromanaging their interactions.)

They’ll grow up just fine, with a pretty good idea about what you might find in the world.  What they won’t grow up with is doubting if they are good enough.  Wondering if their peers are right, after all, and they’re too weird.  Wondering if making choices outside the mainstream really is “wrong.”  That’s the way I want it.  When they come across that first “bully” who would tell them they are too weird to fit in, I want them to laugh and say “There’s nothing wrong with me.  We’re just different people.  How do you know you’re just not cool enough to hang out with me?”

How do you feel about this sort of “socialization?”  If you are sending your kids to public school, how are you combating the bullying issue?

06 Jul 01:41

38 Anthropologie Hacks

by Savvy Housekeeper

Anthropologie is such an overpriced store, but often has great design for those high prices. Here are 38 Anthropologie Hacks that shows you how to make your own Anthropologie-inspired project yourself.

29 Jun 23:31

Is Buying “Cheap” Always Bad?

by Kate Tietje

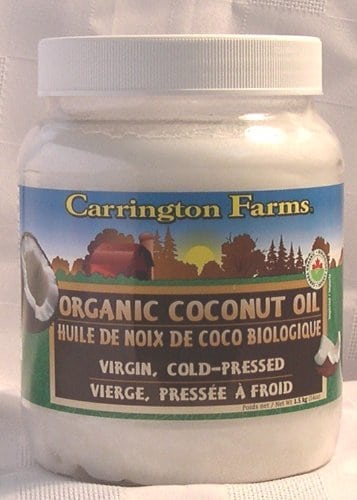
Last week, I read a post by The Healthy Home Economist about why buying coconut oil at Costco is bad.  It seems that someone had emailed her to ask if her coconut oil, which had an “off” smell, was truly bad and if so, why.  It just so happened that the woman had purchased Carrington Farms brand at Costco, which sells for around $15 per 54-oz. jar.  This is far cheaper than most other places, so based on the woman’s experience and the price alone, Sarah (the blogger behind The Healthy Home Economist) concluded that buying “cheap” was the problem.

Concerned, I immediately looked up the brand in question.  I haven’t bought it yet, but my coconut oil is almost gone and I had been thinking about doing so.  I wanted to know what I was getting into.

What I found was not what that post led me to believe….

Do Your Research

I found that, unfortunately, the original post had been rather poorly researched.  It appeared that when the email came in, it corroborated something the author already believed, so she simply wrote the post to warn everyone else, without looking into the matter further.

It is so important to do your research on anything and everything.  Even if you only spend 5 minutes searching google to see what others are saying (that’s really sufficient in a case like this, where we’re talking about a simple food item).  I did exactly that.

The company in question, Carrington Farms, produces virgin, cold-pressed coconut oil.  It is organic, unrefined, and free of BPA and hexane (a solvent used to extract oils sometimes).

One criticism levied against the company was that they labeled the product “extra virgin,” a term which doesn’t apply to coconut oil.  However, many of their packages (like the ones on Amazon) do not say this.  They simply say “virgin” (which does apply).  Many other companies also use the term “extra virgin” to refer to coconut oil, including Nutiva, Nature’s Way, Barlean’s, Jarrow Formula, Vitacost, Artisana, and more.  In fact, almost all the brands listed on Amazon — including ones that are known to be reputable — use this term.

The reasoning behind the use of “extra virgin” is that people are familiar with it from olive oil, and associate it with “top quality” oil.

Another criticism was that the company must use an inferior process or cut the oil with other vegetable oils.  There is no evidence for this.  The company states that it is 100% unrefined virgin (or extra virgin) coconut oil.  There is no reason to believe it is anything else.  I checked several blogs and websites for reviews of the product and the only “negatives” I could find related to cost of the product in one place vs. another, and none had anything negative to say about the quality of the oil.  Not a single review mentioned any “off smells” or tastes in the oil.

It would be hard to add another oil to it because coconut oil is pretty unique.  It’s clear when liquid (most oils are yellowish), it’s white when solid, and it solidifies until it reaches 76, while other oils are liquid even while refrigerated.  The oil, if blended, would behave drastically differently.  If little shreds of coconut were left in the oil, this would be evident at the bottom of the jar — and I have seen no one mention this.

It is probably likely that this particular oil went “off” from having been in a very hot garage for several months, or perhaps it was an odd bad jar.  Regardless, it seems to be an isolated incident and certainly not worthy of warning people off the brand entirely!

Is “Cheap” An Indicator of Quality?

While price is generally correlated with quality, it is certainly not always the case!

Costco is known for being able to offer high-quality items for lower prices.  They can do this because they sell such a high volume.  I personally shop there every couple of weeks, and can find excellent deals on fairly high-quality items.

In addition to the coconut oil (some Costcos sell Carrington Farms; some sell Nutiva; both appear to be good brands), they also carry Tillamook cheddar, which I recently learned is mostly grass-fed and raw (as raw as you’re going to get outside of small artisan cheesemakers, anyway), for only $3.35 – $5/lb. depending on style.  They have an imported raw Romano cheese as well, and Kerrygold butter.  These are just a few of my favorite items!

It’s true that Costco carries Kerrygold, for example, for around $4.50/lb., which is about what I pay for regular old organic butter (not grass-fed).  Any other store carries Kerrygold for $7 – $8/lb.  That doesn’t make Costco’s Kerrygold inferior; it means because of the volume they sell, I get a really good deal.

If you see an unusually cheap price on an item, go home and look it up.  See if it’s cheap because it’s lower quality or because it’s an awesome deal.  I haven’t yet found an item at Costco that I would otherwise consider that was low-quality.  (Now, they also sell plenty of items that are not “real food” that I wouldn’t consider, but we’re going to ignore those.)

Guilt Over Food Budgets

You know what?  We all have food budgets and we all have to be realistic.  Sometimes, we’re not going to be able to afford the absolute top quality.  Sometimes we need to go with “good enough.”

If Carrington Farms coconut oil is nothing but coconut oil, then perhaps the rest doesn’t matter.  I could pay $45 for a gallon, or $15 for just under 1/2 gal.  Guess what I’m going to do?  It’s still real coconut oil.  I don’t know the the quality isn’t the same.  And even if it’s not, my food dollars stretch further when I get food that’s “good enough” even if it’s not “perfect.”

We have enough guilt over what we feed our families and what we do with our dollars without needing to worry that what we can afford to buy from stores like Costco “isn’t good enough.”  I’m happy that I’m feeding my family coconut oil and Kerrygold butter instead of margarine and soybean oil!

Don’t feel guilty.  Don’t look at the price tag and think “this can’t possibly be good enough, I have to spend an arm and a leg to feed my family.”  Don’t get caught up in that silly nonsense about “pay the farmer now or pay the doctor later.”  While there’s some truth to it, we can’t feel guilty over what we can’t afford!  We live in the real world here, and any “real foods” are better than none, even if not perfectly sourced.

No guilt here, and go ahead — buy your coconut oil at Costco!  :)

**EDIT: Some people are saying you should not buy Carrington farms because it is owned by one of the major food corporations that donated to stop GMO labeling in California last fall (prop 37).  I did some digging around to figure out what the truth is there, too.  Carrington Farms isbased in New Jersey and is a privately owned company. Here is a list of all the companies and their subsidiaries and brand names that donated to the anti-GMO labeling laws, and Carrington Farms isn’t on it.  This one is false — Carrington Farms is not owned by a major company trying to stop GMO labeling.

What do you think — is cheap always bad?

23 Jun 01:19

Lacto-Fermented Kosher Dill Pickles

by Shannon

http://www.dreamstime.com/royalty-free-stock-image-preparing-sour-cucumbers-image10025556

I grew up eating spicy, garlic-studded “kosher” dill pickles. These pickles are crisp, crunchy, sour, and delicious – everything a pickled cucumber should be. I love them.

The so-called “kosher” pickle is not necessarily kosher in the sense that it complies with Jewish food laws. It is called kosher because of its flavor profile made popular by New York’s Jewish pickle makers, who made the pickles using the same kind of salt used to prepare meat in the kosher style.

These pickle-makers were known for their natural salt-brined pickles heavily seasoned with dill and garlic. So any pickle that is seasoned in the same fashion is referred to as a Kosher Dill.

You may notice an unusual ingredient in the recipe below: grape, oak, or horseradish leaves. These leaves are not for eating, though you probably could. The leaves are added to the brine because the tannins in them help the pickles stay crunchy, a vital characteristic of every good pickle.

http://www.dreamstime.com/stock-photos-pickled-cucumbers-image14088513

Ingredients

  • 5 tablespoons sea salt
  • 2 quarts of chlorine-free water
  • 4 to 6 grape, oak, or horseradish leaves
  • 6 to 9 cloves of peeled garlic
  • 2 large heads of dill
  • Spices to taste: black peppercorns, red pepper flakes, mustard seeds, etc. (Secret ingredient: for an extra bite, add a few strips of fresh horseradish to the spice mix!)
  • Enough pickling cucumbers to fill a half-gallon jar

Directions

  1. Make a brine with 2 quarts of chlorine-free water and 5 tablespoons sea salt. Mix well, cover, and allow to cool to room temperature. This brine can be kept for days before using.
  2. In a 1/2-gallon jar add a couple of the tannin-containing leaves, a few cloves of garlic, the heads of dill, and 1/3 of the spices you plan to use.
  3. Pack half of your cucumbers tightly on top of these spices. (The longest ones work best at the bottom.) Repeat a layer of leaves, garlic, and spices. Add another tightly packed layer of cucumbers and top them off with more garlic and spices.
  4. Pour the brine over the pickles, leaving 1 to 2 inches of headspace. Place another tannin-containing leaf on top of the pickles as a cover between the pickles and the surface of the brine.
  5. Tightly cap the jar and place in a safe spot at room temperature for 3 to 10 days. Alternatively, place in a root cellar or cool basement for up to a month.
  6. You will know your pickles have fermented when the brine is cloudy, the brine has stopped bubbling, and the pickles have a bubbly sourness to them. The warmer the fermenting temperature, the shorter the fermentation time, though a cooler fermentation temperature is desirable (less than 80°F).
  7. Eat right away, or move to cold storage to store for months and enjoy them all winter long.

Makes one 1/2-gallon jar of pickles.

23 Jun 01:18

The One Ingredient You’ll Need for Crunchy Lacto-Fermented Pickles

by Shannon

http://www.dreamstime.com/stock-images-leaf-grape-plant-image1270644

After I shared our favorite dill pickle recipe yesterday, I ended up with a few questions. Specifically, why would you be adding tree leaves to your pickles? Oh, and where do we find them?

Well, I’ve given it away already, haven’t I? The one ingredient I’ve used over and over again for crunchy pickles of a variety of vegetables is leaves.

But they can’t be just any leaves. They have to contain a very specific compound or they’re not going to work.

That compound is tannins. Some say that this compound inhibits an enzyme that can make the vegetable go soft. I don’t know about all of that, but I know it helps us get delicious, crunchy pickles almost every time.

There are some temperature factors in how well your pickles crisp up. Most of these are fairly extreme, so for the purpose of our topic I think we’ll stick to the leaf discussion.

http://www.dreamstime.com/stock-image-oak-leaf-image5736311

You can find tannins in a few leaves:

  • Oak
  • Grape
  • Horseradish
  • Black Tea
  • Mesquite Leaves (now that we’re in Central Texas)

Wild grapes were common in the Mid-West where we used to live, so I would often tiptoe barefoot out to the vines and grab a few leaves. Horseradish is also commonly found in the wild. Now we have a plethora of mesquite trees to grab a handful of leaves from.

http://www.dreamstime.com/stock-images-plant-horse-radish-image18213144

Some of these seem inaccessible, but black tea leaves are quite common in many households. In her book, The Complete Idiot’s Guide to Fermenting Foods, Wardeh Harmon recommends using a pinch of black tea leaves, which also contain tannins.

Tannins can produce an unpleasant flavor, so don’t go overboard. It is thought that oak leaves contain the most tannins, so use fewer of those than you would the other varieties.

In a half gallon of pickles, I have found three grape leaves to be sufficient. A couple of tablespoons of mesquite leaves do the trick in a quart jar. A pinch of black tea should also be sufficient for a quart of pickles.

Always rinse the leaves, as you might the produce going into your ferment. The larger grape and oak leaves also make a great top to a jar of vegetables, assisting in the weighting down of those pickles that like to bob up.

Have you tried this age-old crunchy pickle trick?

21 Jun 16:50

Crock Pot Sugar-Free Strawberry Chia Jam

by Stacy

I love jam…namely my Mama’s Strawberry Freezer Jam. I could literally suck that stuff up with a straw. But man alive – as good as it is, it’s chock full of sugar. Most jams are. When we started eating the Trim Healthy Mama way, I had to start learning how to convert my favorite recipes to be made without sugar. And boy, I hit this one out of the park. BOOYA!

Most jams are made with a bunch of sugar, some pectin, and a little bit of fruit. I wanted my jam to be made of mostly fruit, sweetened with stevia, and thickened with something good for me.

I had read that you could thicken jam using an apple…but I didn’t want to go that route. I saw somewhere on Pinterest that you could make RAW jam with strawberries using chia seeds – and I know chia is great for thickening smoothies and oatmeal. So, I thought I would give it a shot: freezer jam, made without sugar, thickened with chia and in the, wait for it…CROCK POT. Booya again.

Strawberry Chia Seed Jam

This turned out well so well…well beyond my imagination. I’m SO EXCITED to share this with you today! :-) Especially during berry season. I’ve only made this with strawberries and blueberries so far, but I imagine it would work with any berry: blackberry, raspberry, etc.

Why in the crock? Well, I’ll be honest here…I burn stuff a lot. A LOT. Cooking things in my crock helps me be more successful…it’s harder to burn stuff in there. Possible, yes. Harder, yes…and no one wants burned jelly – that’s sacrilegious.

Strawberry Chia Seed Jam

First mash

This recipe is really very easy. You simply wash your berries and chop them. I quartered my berries unless they were HUGE – then I cut them into smaller pieces. Add some lemon juice and stevia. Bingo. That’s it until you add the chia seeds later.

Why lemon juice? To help keep the beautiful red color…we don’t need no stinkin’ red food coloring around this joint. Booya – have I said that already?

Strawberry Chia Seed Jam

Second mash

I used stevia to taste – NuNaturals Pure White Stevia Extract that I purchased from Vitacost. You could also use sugar if you like – but you’ll need about 4 cups of it.

I used a little over 2 teaspoons of stevia for my batch, but you’ll need to use it to taste – it will depend on the sweetness of your berries. Add just a little and taste as you go to get it right. 

After you put the berries in the crock with the lemon juice and stevia, you’ll cook them on high one hour – then you’ll mash them with a potato masher. You’ll cook another hour and mash again. After that you’ll cook a final two hours.

Strawberry Chia Seed Jam

During the final two hours, you’ll want to put a spoon under the lid to prop it open a bit. That’s to help let the moisture escape so the jam can start to thicken. Make sure to tell your 3 year old why it’s there so she does not remove it and use it to torture her brother and the dog.

You’ll want to cook until it starts to thicken just a bit. This will vary based on your crock pot. Some crocks cook REALLY hot…if yours does, then keep a watch on this during the final two hours. You might only need three total hours.

When it is slightly thickened, stir in your chia seeds.  I also purchase my chia seeds from Vitacost. They are such a great thing to have around for thickening stuff. Since they’re black and strawberries already have seeds, you can’t even tell that they’re in the jam. Nice!

Strawberry Chia Seed Jam

Ladle your jam into jars and let it cool slightly. Refrigerate or freeze for longer periods. I imagine it would keep several weeks in the fridge – but I don’t know because mine didn’t last that long. I froze part of it…and I need to make MORE. We need jam to last us through the winter! What’s Christmas without a big ole delicious jelly biscuit?!

This mixture gets thicker as it sets up in the fridge – let the chia seeds work their magic. Booya.

**I store mine in the freezer in sterilized mason jars.**

Strawberry Chia Seed Jam

    Print This!    

Crock Pot Sugar-Free Strawberry Chia Jam

  • 3 pounds strawberries or blueberries, quartered
  • ¼ cup lemon juice
  • 2-3 teaspoons stevia extract (I use NuNautrals) OR 4 cups sugar (start with the small amount and taste as you go to get the sweetness right. It will depend on the sweetness of your berries.)
  • 2 tablespoons chia seeds
  1. Lightly grease a 5 quart crock.
  2. In crock, combine lemon juice, berries, and stevia. Stir to coat.
  3. Cover and cook on HIGH for 1 hour.
  4. Uncover and mash berries using a potato masher.
  5. Cover and cook another hour.
  6. Mash berries again.
  7. Cover and cook for 2 final hours with a spoon propped under the lid to let moisture escape. You might need only 3 hours, but I needed 4 hours for mine to start to thicken.
  8. Stir in chia seeds.
  9. Ladle mixture into jars and let cool slightly.
  10. Refrigerate or freeze for longer periods. This mixture will get thicker in the fridge as it cools and the chia seeds work their magic.

NOTE: When making Blueberry Jam, I find that I need to cook the mixture 5 hours to thicken instead of 4.

**I store mine in the freezer in sterilized mason jars.**

Yield: 4-5 cups jam

THM Compliant: This is a FP jelly with a serving size of 2 tablespoons for strawberry jam and 1 tablespoon for blueberry.

21 Jun 13:57

thickening fruit pies: no runs, no drips – no errors!

by PJ Hamel

StrawberryRhubarbPie2-C2f

Does your strawberry pie look like this…

IMG_9436

…or like this?

How the heck do you ENSURE your fruit pie filling will be perfectly thickened every time – no lava flow, no slumping…

IMG_9561

…no puddle in the bottom of the pie pan?

The answer is…

IMG_3909

You don’t. There’s no surefire, works-every-time thickener for every fruit pie out there.

Sigh. Death and taxes are still life’s only certainties.

After lots of experimenting with different fruits and thickeners, I’ve concluded there are just too many variables to guarantee perfectly thickened fruit pies EVERY time out.

That said – there are certain things you can do to increase your chances of success considerably. You can come very, very close to guaranteeing good results – even if you can’t QUITE get there.

Let’s start with the thickeners themselves.


IMG_1434

Pictured above are the six ingredients we use here in the King Arthur test kitchen to thicken fruit pies.

Which is best? Let’s put ’em to the test.

Fresh and frozen blueberries; apples; strawberries; six thickeners. What’s the most efficient, most accurate way to gather data for analysis?

Theoretically, the best way would be to bake a pie using each combination. By my calculations, that would be 24 pies.

I’m a member of the King Arthur test kitchen staff, but I bake at home, using my own kitchen and single (sometimes balky) oven.

You ask, why don’t I take advantage of King Arthur’s wonderful kitchen facility, with its multiple ovens, “instant” dishwashers, and every ingredient and tool one could possibly want?

Because I want to replicate, as closely as possible, the experience YOU have at home: limited counter space; juggling batches of cooling cookies on and off a single cooling rack; laboriously scraping burned pie filling off a baking sheet (a wonderful reason to use parchment, folks).

So, bake two dozen full-size pies? There has to be a more efficient way. What would be quicker and easier, yet still yield valid results?

IMG_1458

How about a muffin tin?

IMG_1460

Light dawns on Marblehead! Forty-five minutes in a 350°F oven yields a good approximation of baked fruit pie filling: tender, bubbly fruit. Just two tins’ worth provides all the data I need.

IMG_1474

I add a few more tests along the way, and chuck a few obvious failures. And at the end of the day, I’m able to examine over 2 dozen small mounds of thickened fruit, comparing and contrasting them for thickening ability, clarity, and flavor.

IMG_9587

And here are the initial results. In my second round of tests, I use the information above to increase or reduce the amount of each thickener, in an attempt to produce a similar consistency in all the fillings.

thick1

One thing I notice right off is the clarity of the filling juice. The top row of photos shows blueberry and apple fillings thickened with flour. The bottom row, those same fillings thickened with Pie Filling Enhancer (a.k.a. PFE).

See how my lit flashlight is able to shine through the PFE fillings, while the cloudiness of the flour fillings dims the light?

Strike one against flour. While it’s probably the most ubiquitous ingredient in your kitchen, it doesn’t produce the prettiest fruit filling.

Now, I can hear some of you saying, “But I always use flour to thicken my fruit pies. It’s what my mom and grandma used.”

Great! If flour works for you, keep using it.

In fact, as you read through this post, you may find you disagree with some of my assessments. In fact, you may be a pie aficionado who, over the years, has worked out the perfect solution to all of your fruit filling challenges.

Again – keep doing what you’re doing! What works for you is absolutely what you “should” be doing.

And that’s the only time I like to use that loaded word, “should.” There are no Baking Police here; no absolute moral high ground, when it comes to baking.

Some bakers — and you may be one of them — take an opposing view, arguing that there’s a right and a wrong way to do things in the kitchen. But aside from basic food safety rules, I believe that there are many paths to any destination – find the one you like best, and follow it.

OK, back to the test results. Here are some general conclusions I was able to draw:

•Apples need less thickener than berries; in very general terms, about half as much.
•Fresh fruit needs just slightly less thickener than frozen.
•Flour is the only thickener that produces significant cloudiness, though cornstarch-thickened filling is somewhat more opaque than fillings thickened with other starches.
•Taste-wise, the best thickener is PFE. Its hint of ascorbic acid “brightens” fruit flavor; the other thickeners yield either neutral or flat flavor.
•Tapioca makes a filling that’s unpleasantly gluey (to my taste), even at low levels; the others make a filling with pleasing consistency.
•The thickness of some fillings (namely, those thickened with flour or cornstarch) changes a lot as they cool, while others (especially Signature Secrets) come out of the oven fairly close to what their final thickness will be.

IMG_1482

And now, the $64,000 question: how much of each thickener do you use to get that perfectly thickened filling?

Not so thick it’s rubbery and tough…

IMG_9441

…nor so thin it “bleeds” out of the crust.

Truthfully? The most I can say is, it varies. Fruit to fruit, pie style to pie style.

Pie style? Yes. Interestingly, I found that a double-crust pie needs more thickener than an open-faced pie, or one with a lattice crust, or pastry cutouts on top.

Makes sense, when you think about it. Even with vents in the top crust, that layer of pastry is preventing steam from escaping as the pie bakes. The liquid that would evaporate from an open-faced pie is trapped in a double-crust pie. Thus more thickener is needed to thicken the extra liquid.

My conclusion, after all these tests, is this:

Follow a recipe when making fruit pie.

Sounds like common sense, doesn’t it? But how many times have you made a fruit pie, and substituted raspberries for some of the peaches, or cherries for a portion of the blueberries? Or used flour as the thickener because you’d run out of cornstarch?

Good recipes are thoroughly tested, using the ingredients as written. If you want to make that perfect apple pie you see pictured in your cookbook, use the ingredients as written – no substitutions!

Another path you can take: combine just the fruit and sugar (no thickener), stir, and let rest for 30 to 60 minutes. Stir again, pressing down on the fruit so it releases as much juice as possible. Pour the accumulated juice from the bowl into a saucepan, and simmer until thick and syrupy. Pour over the fruit, and continue with the recipe as written.

One more thing you can do: record your results. Jot down the following on each fruit pie (or crisp) recipe you make:

•Season of the year;
•What variety of fruit you used (especially apples; e.g., Northern Spy, Granny Smith), and whether it was grown locally;
•Whether the fruit was fresh or frozen;
•Type of crust (single, double, lattice, etc.);
•Pan used;
•Baking temperature;
•Baking time;
•How long the pie cooled before you cut it (strong suggestion: overnight);
•Initial outcome: perfect, lava flow, too stiff, etc.;
•Outcome 24 hours after cutting (still perfect, puddled juice in pan, etc.).

If you take the time to record your results, you’ll be able to make adjustments to your recipe until eventually, you find that sweet spot: the ingredients, style, pan, and baking/cooling process that create the “perfect” fruit pie.

So, after several rounds of testing over a few days (which did, eventually, include some complete-with-crust, full-size pies), I’ve chosen my two favorite fruit pie filling thickeners:

Pie Filling Enhancer for apple pies; and Instant ClearJel for berry pies.

And the reasoning behind that decision?

PFE’s ascorbic acid adds a touch of welcome tang to apples; especially store-bought apples, which can taste bland.

And ClearJel, with its extra thickening power (ounce for ounce), is a good match for the large amounts of juice most berries exude as they bake.

Both have a benefit none of the other thickeners have: they work well with pies that will be frozen after baking, then thawed, as neither breaks down when frozen/thawed, like other starches do.

Oh, one more tip: Signature Secrets is perfect for no-bake fruit pies. It thickens instantly – no baking needed. Simply slice fruit/crush berries, mix with sugar, and wait until juices collect. Stir in Signature Secrets, continuing to add until the filling is as thick as you like; then spoon filling into a baked pastry or graham cracker crust.

And finally – DO NOT cut into a fruit pie while it’s hot! The vast majority of warm fruit pie fillings will collapse into the breach you’ve created by lifting out the first slice. Just to be safe, I like to let a pie rest overnight before cutting.

If you just can’t wait, and want to cut your pie while it’s just slightly warm (not hot), it’s good to have a pie dam on hand to stanch the filling flow.

IMG_9560

So, now that you’ve read all you ever wanted to know about fruit filling thickeners, you should be able to turn this…

CranapplePie C0F

…into this.

You may find success right away; or it might take you a few tries. But if you follow the recipe; record your results, then use those results to fine-tune your next pie, you’ll soon be right up there with the best fruit pie bakers you know.

Promise!

Ready to bake? Here are some recipes you might enjoy –

•Blue Ribbon Pie
•Bumbleberry Pie
•Paper Bag Apple Pie
•Presidential Cherry Pie
•Rustic Raspberry-Peach Pie
•Strawberry-Rhubarb Pie

And remember, if you ever need a hand – the friendly bakers manning our hotline are ready to help.


20 Jun 17:22

How To Make Wrapped Hair Combs by Kristina

by Kristina Clemens
READ MORE »
      
20 Jun 03:16

How We Stay Hydrated

by Shannon

I’ve been getting quite a few questions lately about how we manage the heat off-grid, with no air conditioning. Um, is not very well and day-by-day a good enough answer?

I guess that’s the honest answer, but I’ll try to share more about that another day. I can share a slightly more elaborate answer to one of the keys to this not-so-little predicament – staying hydrated.

Of course, starting with good water is important, but I find that drinking too much water can be counter-productive to staying hydrated.

A lot of sweating goes on around here. Working in the garden, standing in our windowless kitchen, sitting down doing absolutely nothing… lots of sweating.

In order to avoid an electrolyte imbalance, induced by a lot of sweating coupled with flushing our bodies of minerals with too much plain water, we’re using a number of methods to stay hydrated.

IMGP4934

Salt

I personally have had a consistent problem keeping up with my sodium intake. I know that sounds crazy, but salt is necessary for our bodies functioning, and I personally tend to benefit from the intake of extra salt.

During the summer I often just take a dip out of the salt jar. When I feel a bit shaky, dizzy, or as though a headache is coming on it quite often balances me out.

We generally use this brand of salt. And wow, is it just me or is everything getting more expensive by the day?

Electrolyte Drink

One tasty option I’ve been making lately is this Naturally-Sweetened Electrolyte Drink. It combines the electrolyte power of citrus with a hefty pinch of salt and the fortifying power of a natural sugar.

Electrolyte Packets

 One of the quick-fixes we have used, when we don’t have a batch of the homemade electrolyte drink made up, are these Electrolyte Packets. They are from a company I trust, they don’t contain near the amount of sugar as the usual sports drink, and are handy to have around when we need them.

Lacto-Fermented Beverages

Finally, one my favorite solutions to the hydration dilemma – lacto-fermented beverages. In this article, Lacto-Fermented Beverages as Electrolyte Drinks, I discuss how these drinks are full of hydrating qualities, how to make them, and what you may already be drinking that could do the trick.

So, that is how we are staying hydrated in the heat. How do you do it?

20 Jun 03:02

Into the Gray

by Emily

Joie Top, Free People Sunglasses, Rag & Bone Jeans, Manolo Blahnik Heels, Essie “Cute as a Button” Nail Polish, Cupcakes and Cashmere for Coach Bag I’m usually not one to buy the same thing in two different colors (the only recent exception was with these Zara sandals) since I worry my closet would become full [...]


Related Stories

 
20 Jun 03:00

Ruthie: Baguette Thief

by I'm Helga's daughter, Gesine
Photo by Raymond Prado


There are days when Ruthie gets away with baguette theft without repercussion.  


Photo by Raymond Prado

I think the photo op outweighs the work that went into making it.

Photo by Raymond Prado

And it's not often that my work as a baker results in such unabashed and bouncy joy.

Photo by Raymond Prado