Shared posts

28 Nov 07:06

Broccoli Wild Rice Casserole

by Ree

Broccoli Wild Rice Casserole
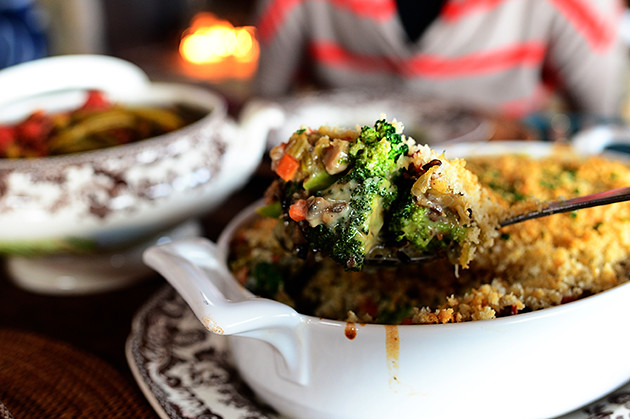
This is one of my very favorite Thanksgiving recipes from my new cookbook, and if I could eat it for breakfast right now, I could. It’s meant to be a play on the familiar, blessed broccoli rice casserole, which uses the bright orange cheese and cream of mushroom soup…but this one’s a little more rustic, contains wild rice instead of white, has no cheese, and is made entirely from scratch.

But other than that, it’s exactly the same!

Ha.

You will love this casserole, my friends. It’s beautiful, it’s tasty…and it really is a cinch to make.


Broccoli Wild Rice Casserole
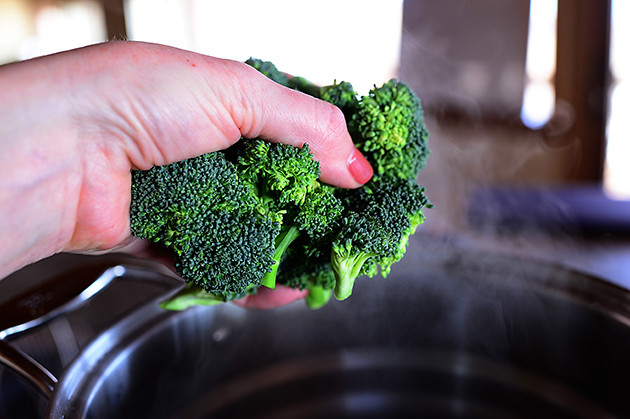
First, take your very disturbing looking hand and throw a bunch of broccoli into a pot of boiling water.


Broccoli Wild Rice Casserole
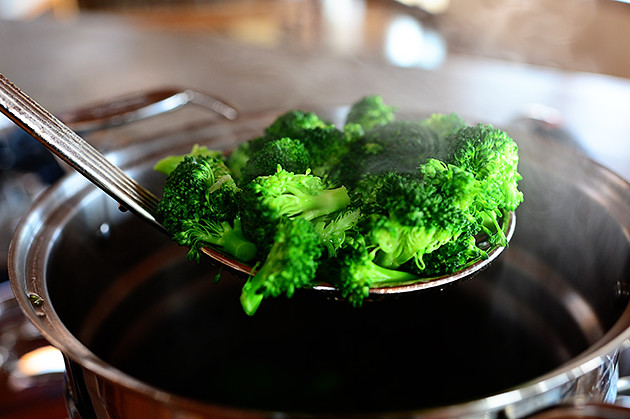
Bawl it—I mean boil it—for about a minute or so, then remove it with a slotted spoon…


Broccoli Wild Rice CasseroleAnd plunge it into ice water to stop the cooking process. This is known as blanching, which reminds me of “A Streetcar Named Desire,” which reminds me of Vivien Leigh, which reminds me that Gone with the Wind will be on TV all day next Wednesday, which means I have something hugely exciting to look forward to while I prepare the ingredients for this Broccoli Wild Rice Casserole.

And with that, everything just came full circle.

I love it when that happens!


Broccoli Wild Rice Casserole
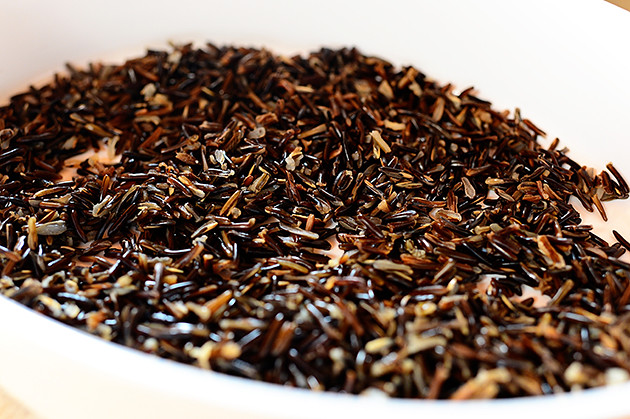
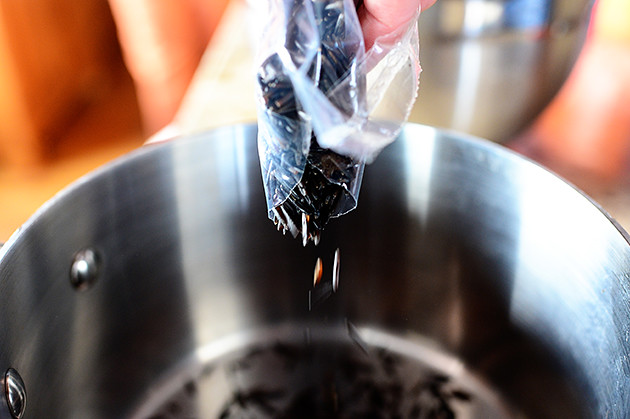
You also need to cook some wild rice, and I mean the real stuff! I wanted to use wild rice for this casserole because it’s hearty and slightly chewy and holds up really well…and because I love the color of wild rice. It’s just so…so…

Brown. Actually, a nice dark taupe.


Broccoli Wild Rice Casserole
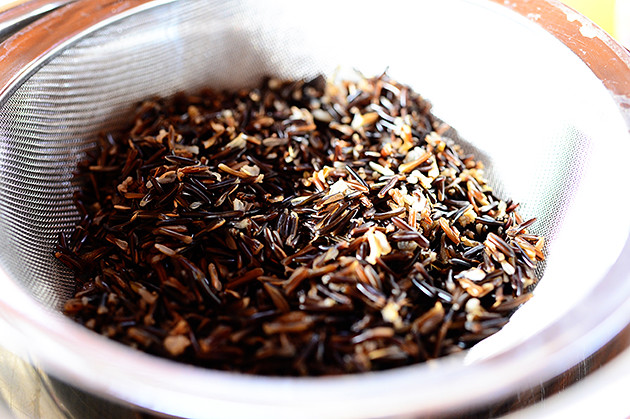
Wild rice takes awhile to cook, so just be sure to read the package directions! This was about 35-40 minutes in, and the rice had just started bursting open. You can let it go longer, but since it’s going to continue cooking in the oven, I wanted to give it a little breathing room.


Broccoli Wild Rice Casserole
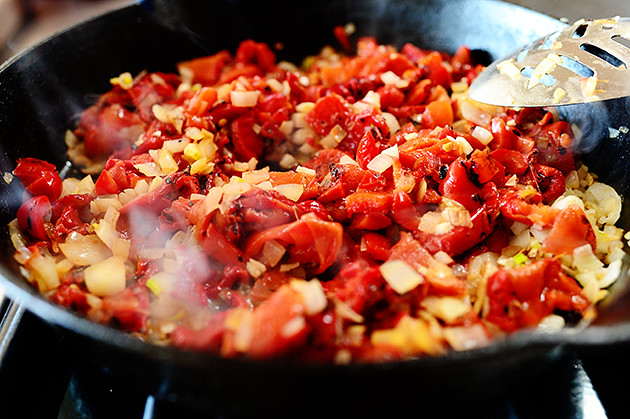
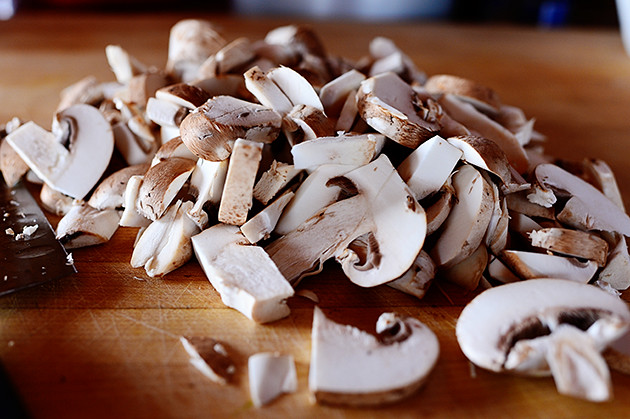
Next, start on the luscious liquid mixture, which is sort of a play on cream of mushroom soup, which is used in all manner of broccoli rice casseroles. Cut up some mushrooms…


Broccoli Wild Rice Casserole
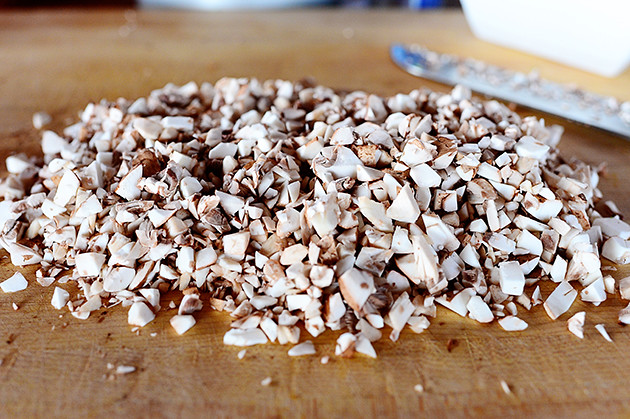
And keep going until they’re pretty finely chopped.


Broccoli Wild Rice Casserole
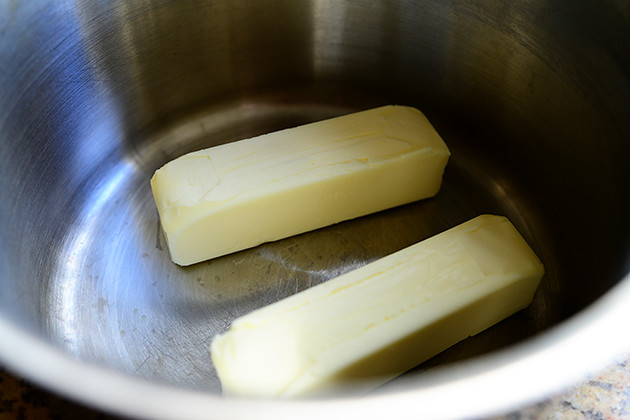
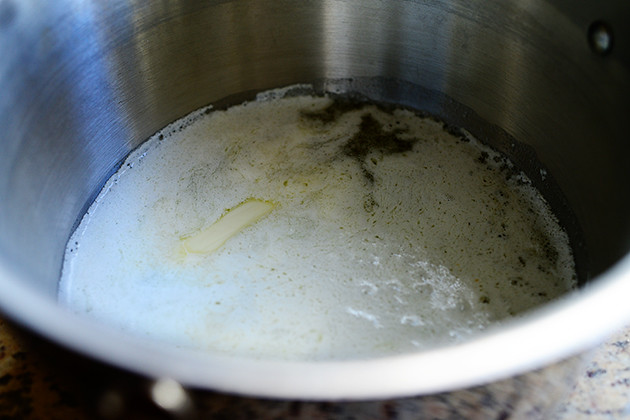
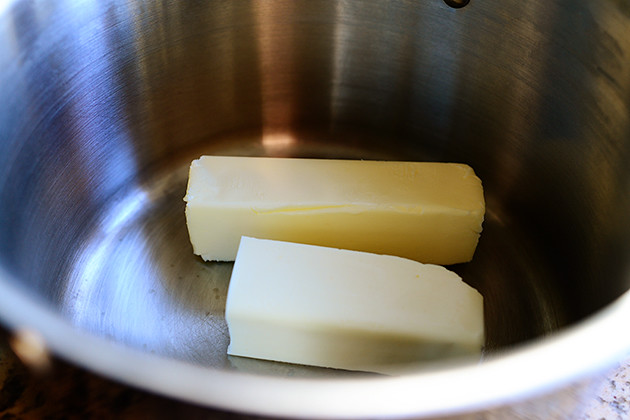
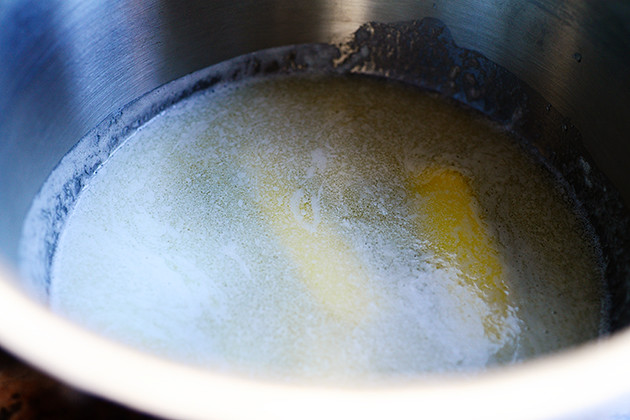
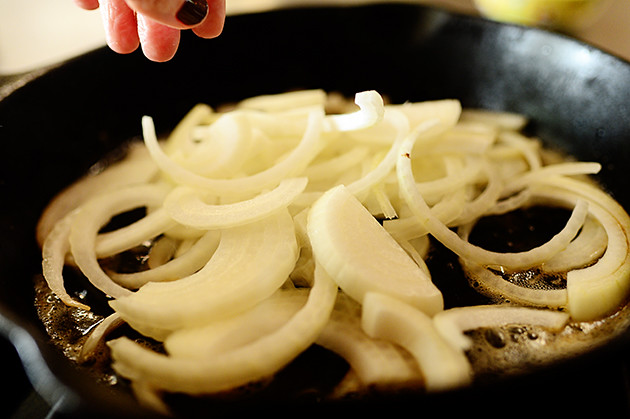
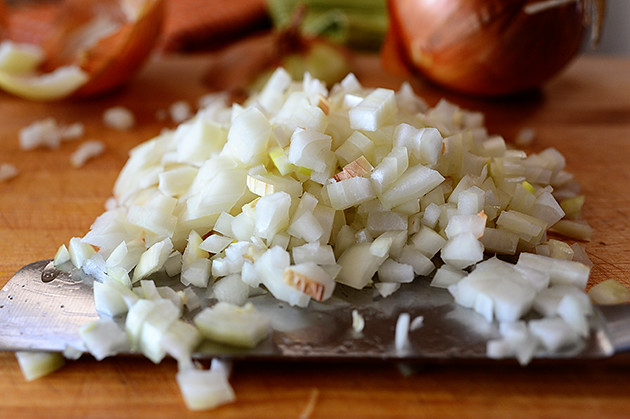
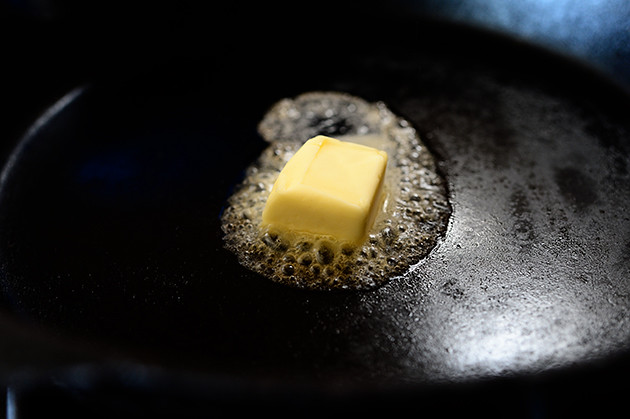
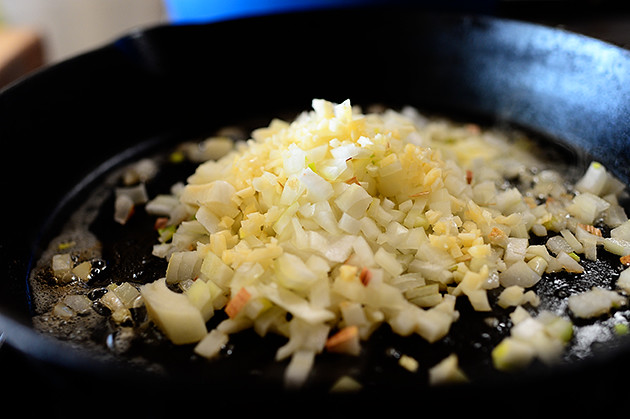
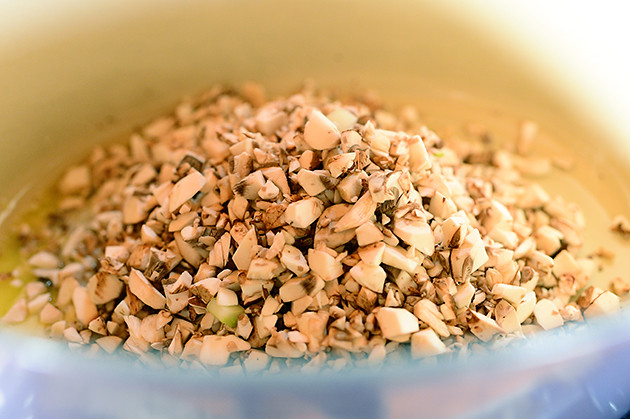
Heat a large pot over medium-high heat, then melt 6 tablespoons of the butter. Add the mushrooms along with some chopped onions…


Broccoli Wild Rice Casserole
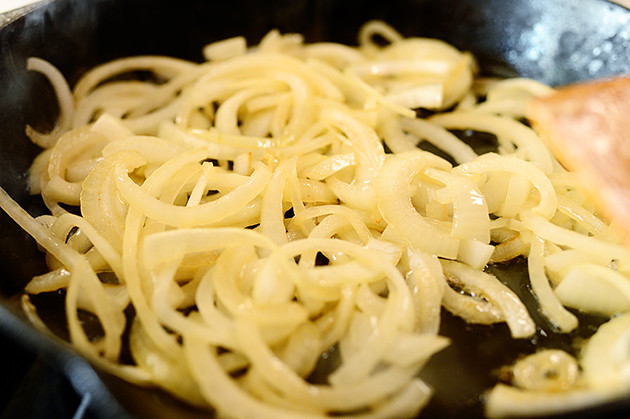
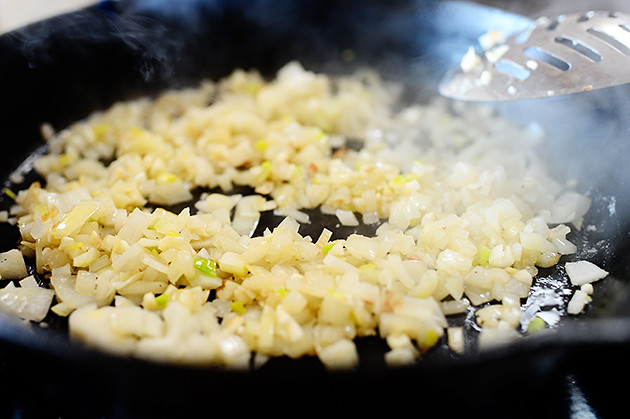
And cook the mushrooms, stirring them occasionally, for 3 to 4 minutes, until a lot of the liquid is reduced.


Broccoli Wild Rice Casserole
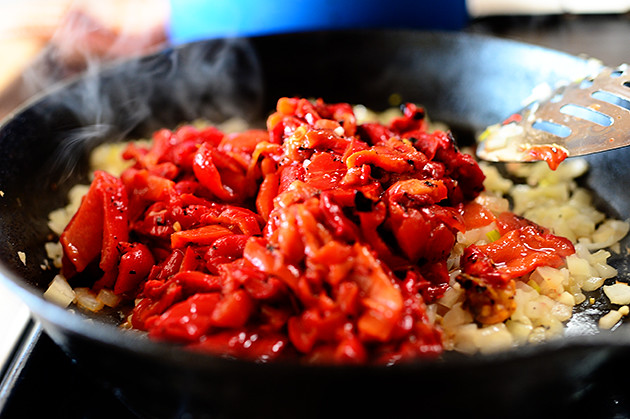
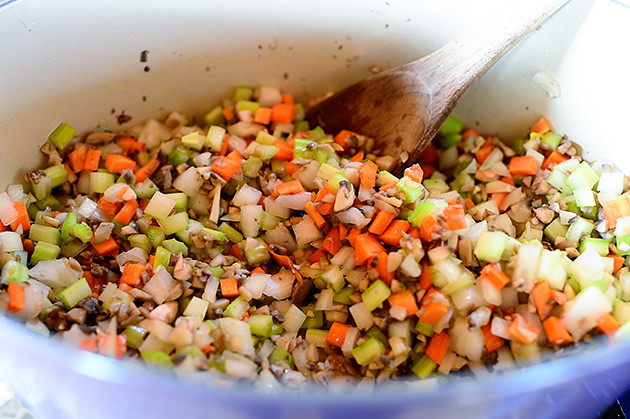
Then add finely diced carrots and celery…


Broccoli Wild Rice Casserole
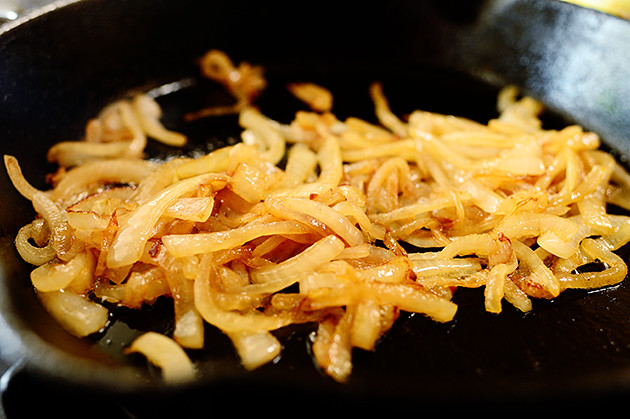
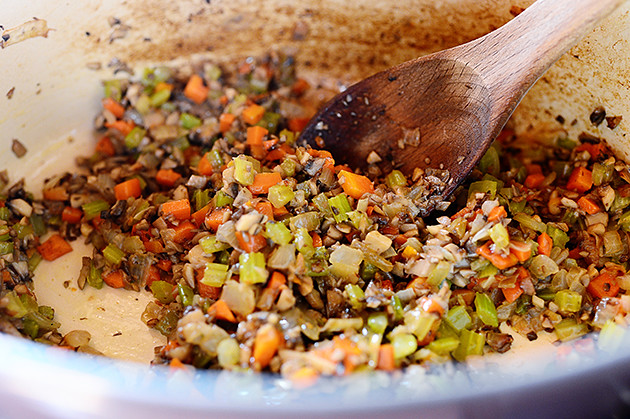
And cook for 3 to 4 minutes, until the vegetables are soft and the mixture begins to turn darker in color.


Broccoli Wild Rice Casserole
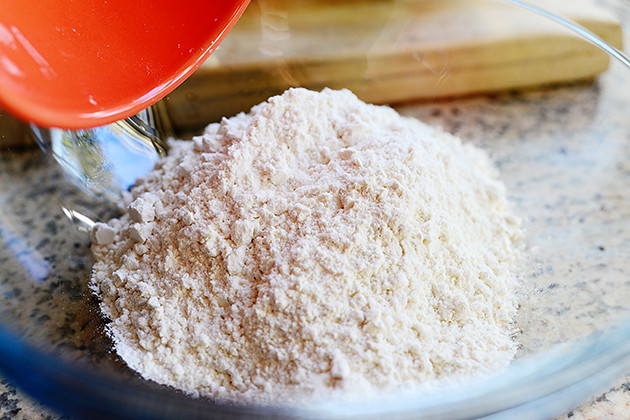
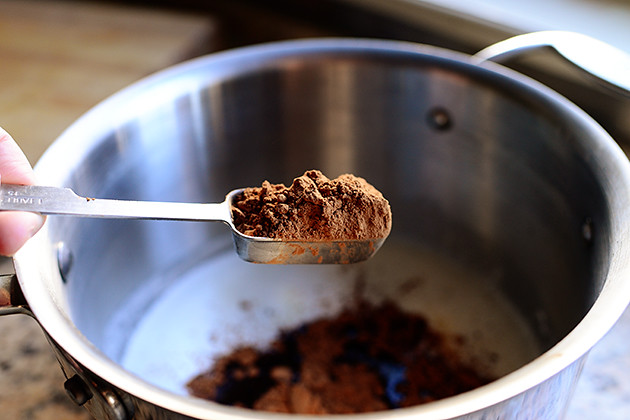
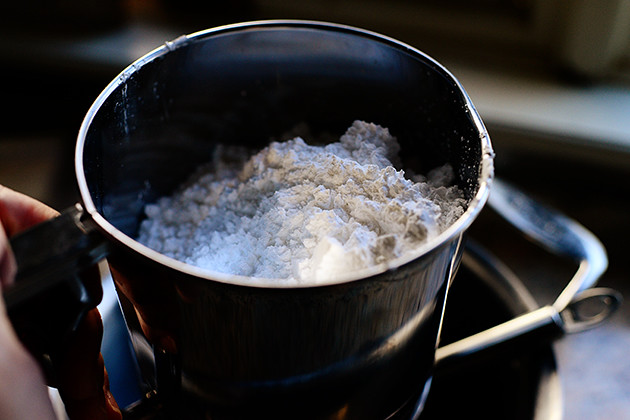
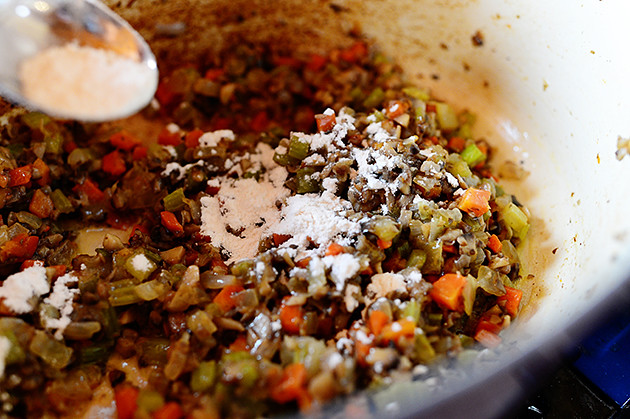
Sprinkle the flour on the vegetables and stir it until it’s all mixed together…


Broccoli Wild Rice Casserole
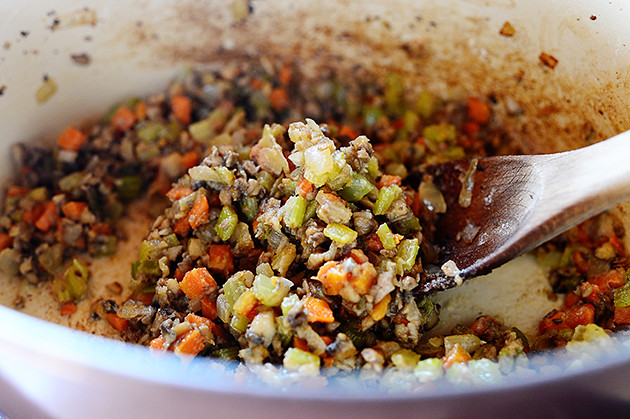
And cook it for another minute or so.


Broccoli Wild Rice Casserole
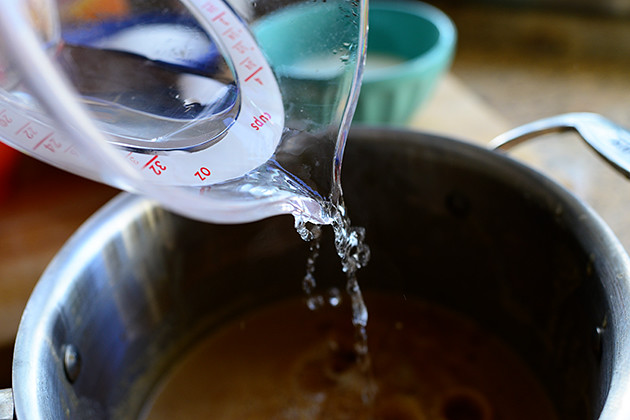
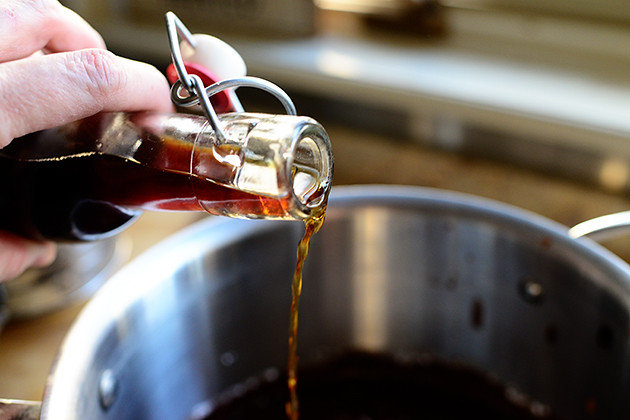
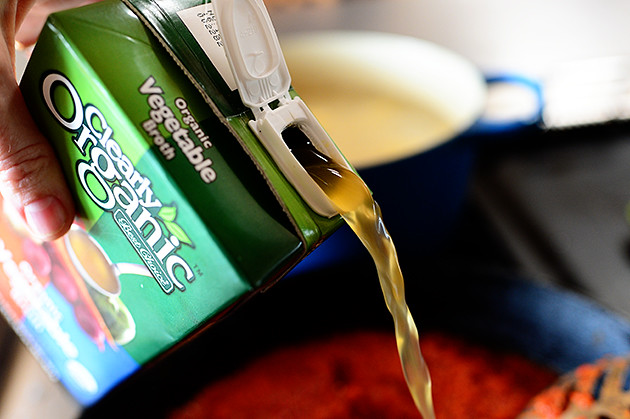
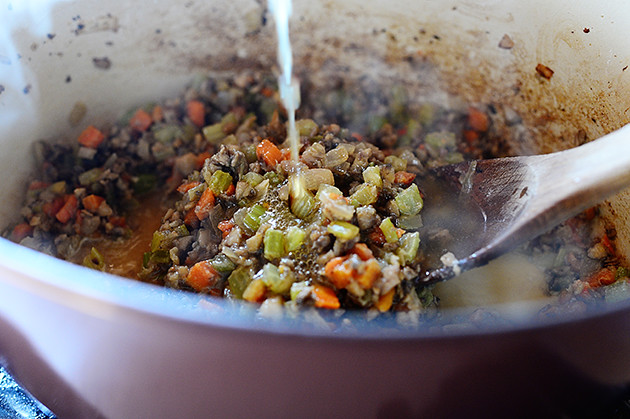
Then pour in zee broth…


Broccoli Wild Rice Casserole
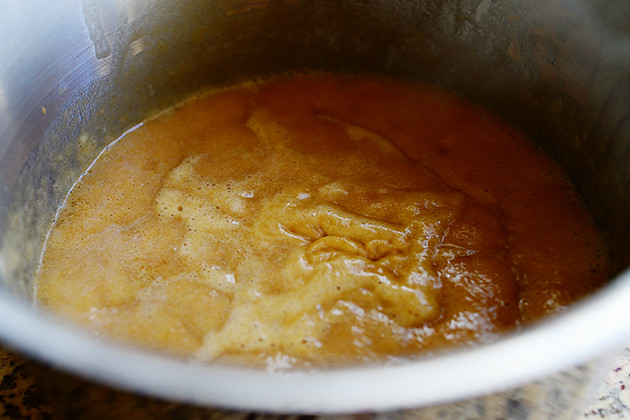
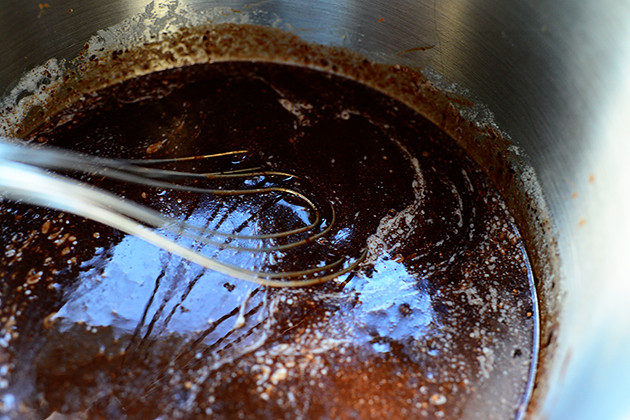
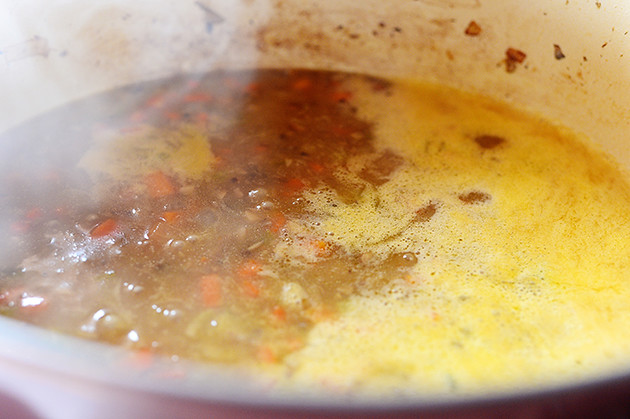
And stir it to combine. Bring the mixture to a gentle boil and allow it to thicken, about 3 minutes.


Broccoli Wild Rice Casserole
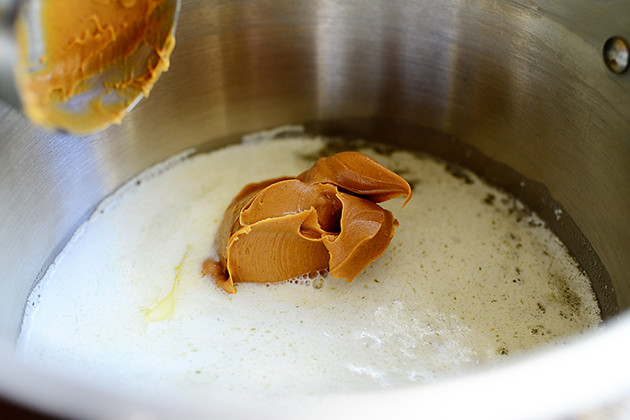
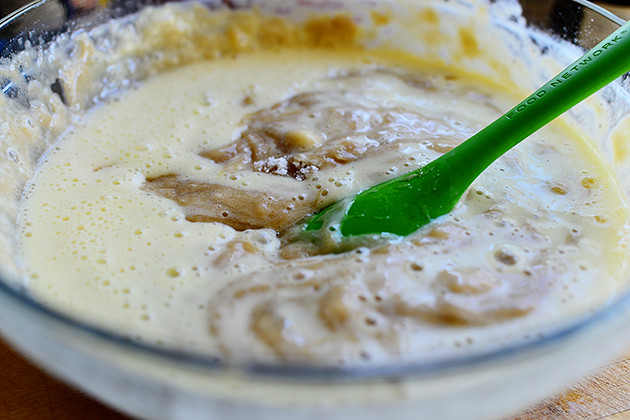
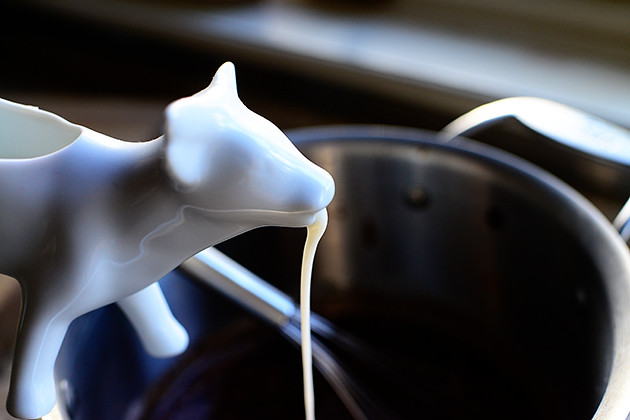
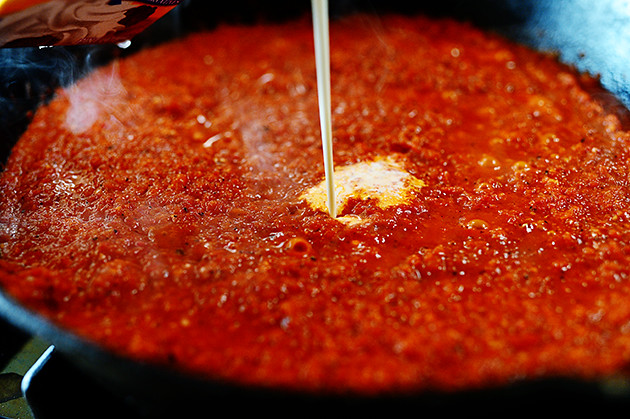
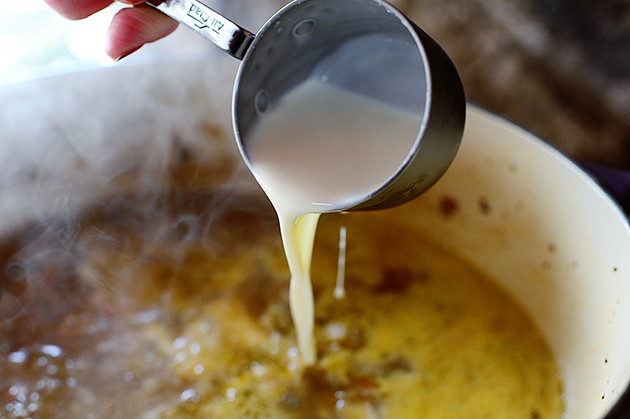
After that time, pour in a little heavy cream, stirring to combine.


Broccoli Wild Rice Casserole
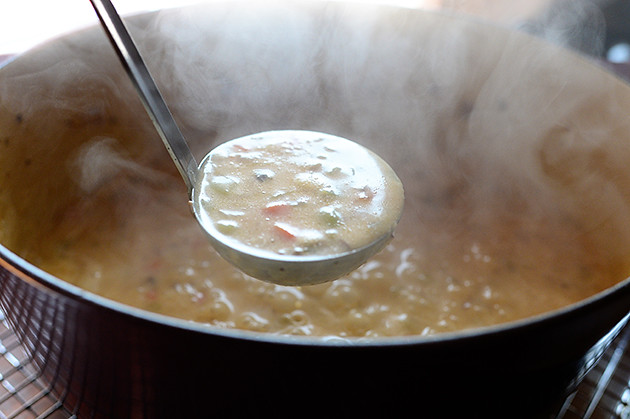
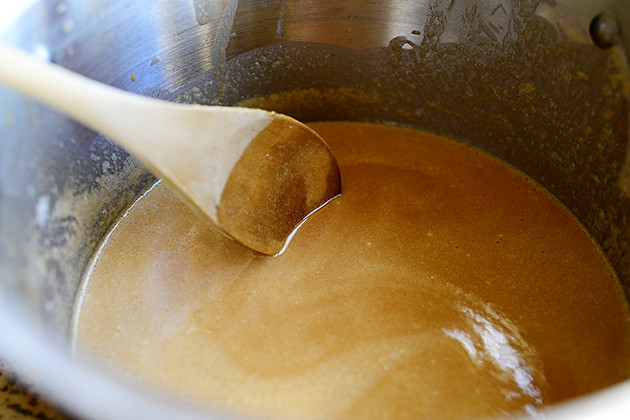
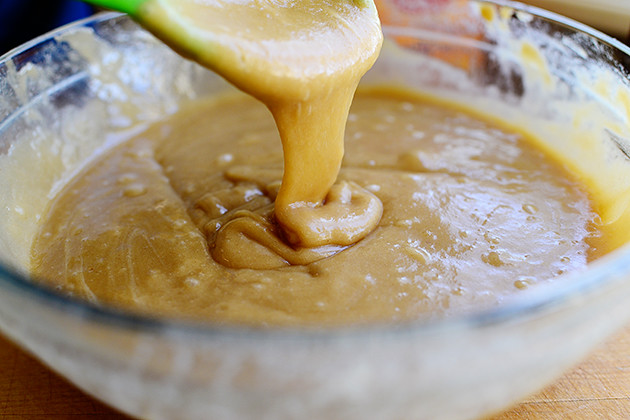
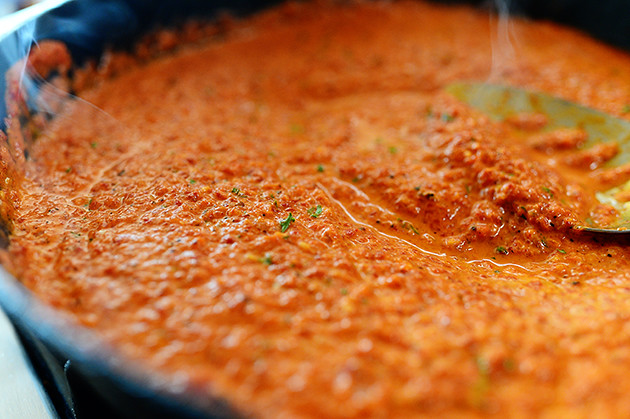
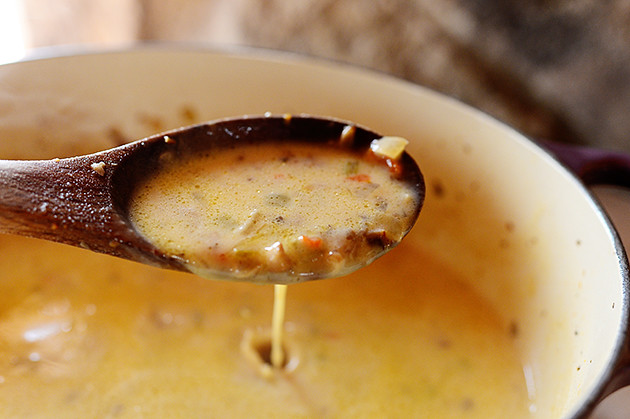
Then just let it cook until it’s a nice thick soup consistency! You don’t want it to be overly thick like a gravy…just slightly thick but still nice and liquidy.


Broccoli Wild Rice Casserole
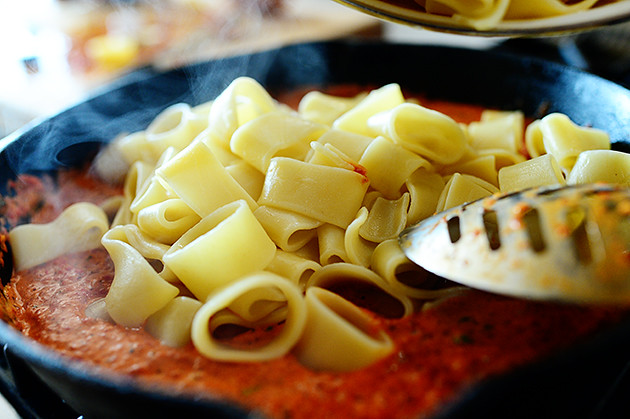
Now, you could just mix the rice, broccoli, and sauce all together and put it in a casserole, but I wanted to keep the elements somewhat separate so every bite was different. So layer half the rice in the bottom of a buttered pan…


Broccoli Wild Rice Casserole
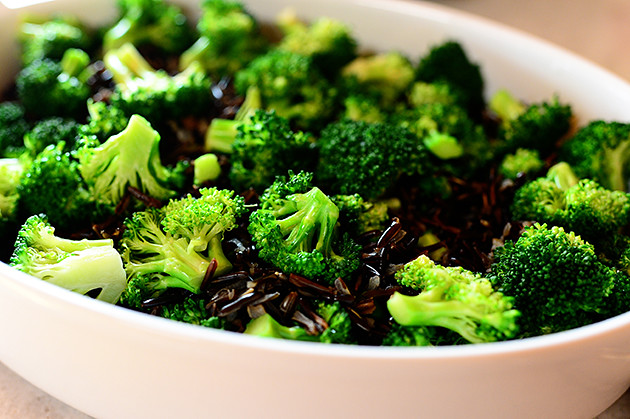
Then layer on half the broccoli…then do another layer of both.


Broccoli Wild Rice Casserole
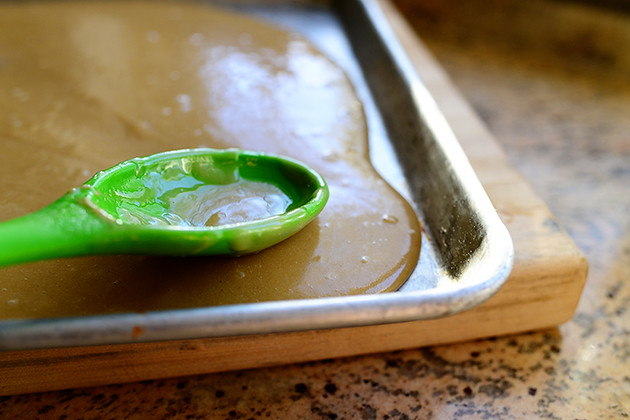
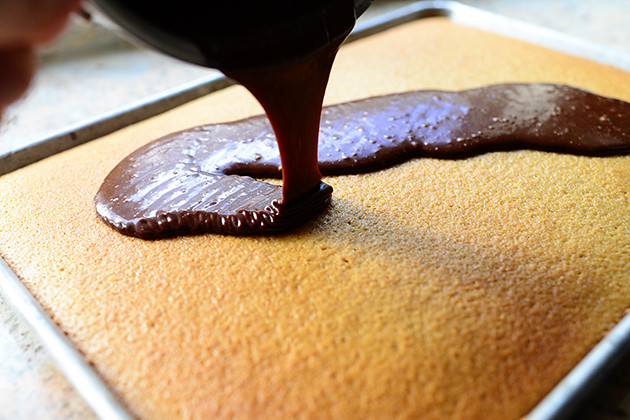
Then, using a ladle…


Broccoli Wild Rice Casserole
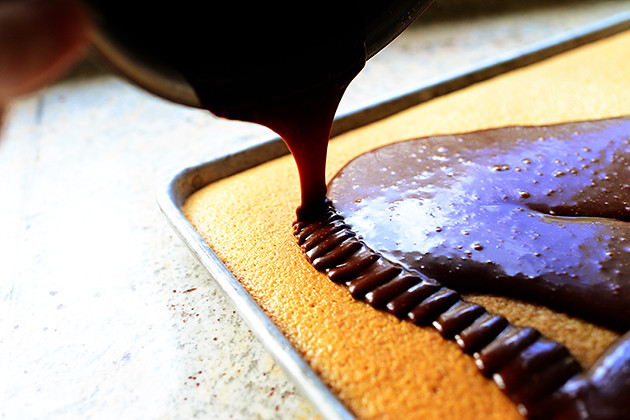
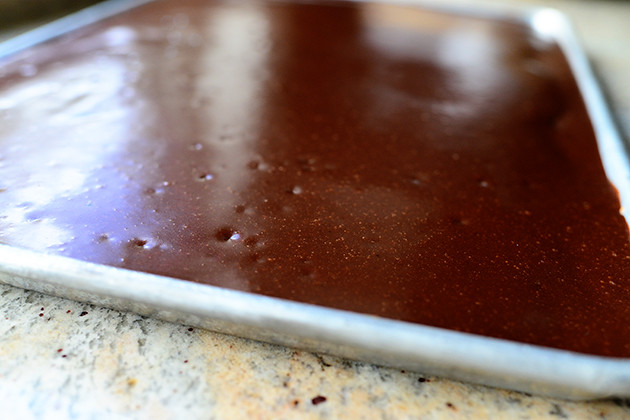
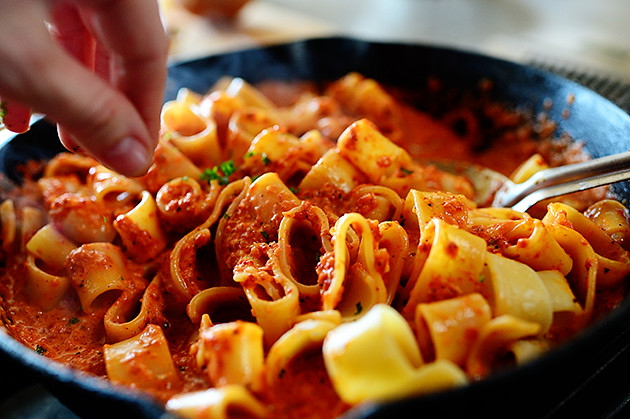
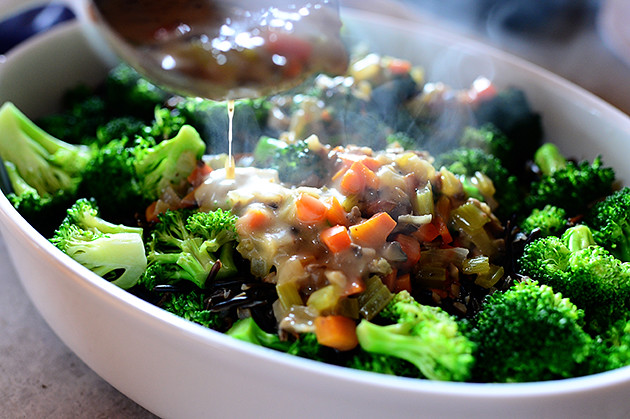
Pour that beautiful sauce all over the top.


Broccoli Wild Rice Casserole
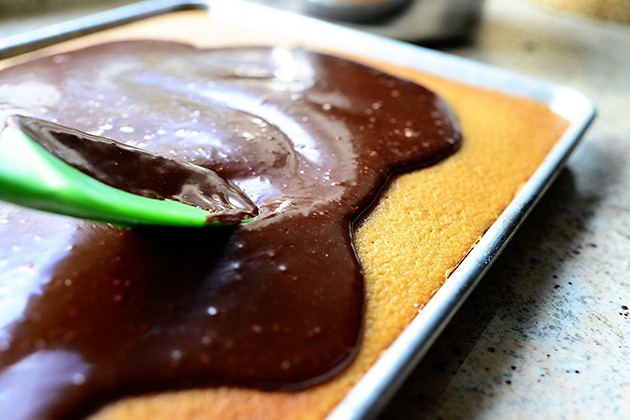
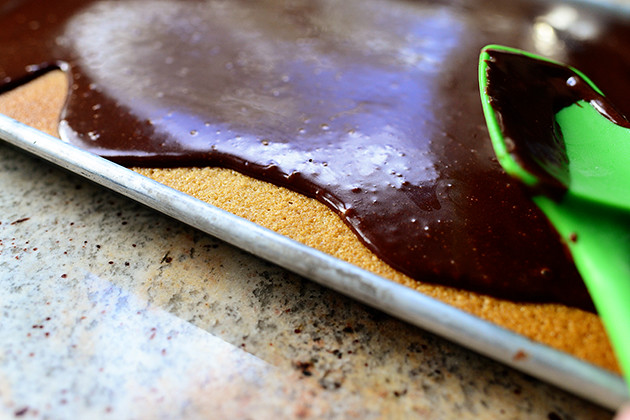
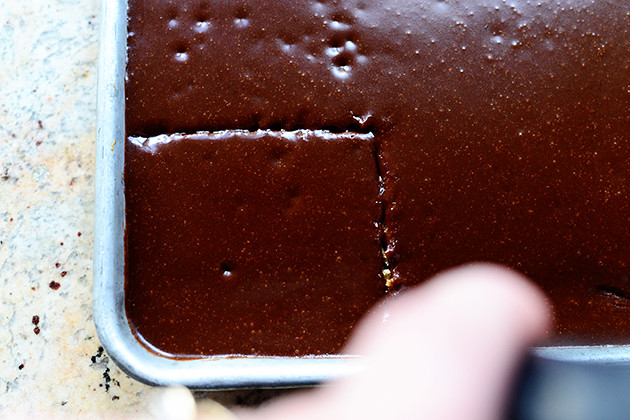
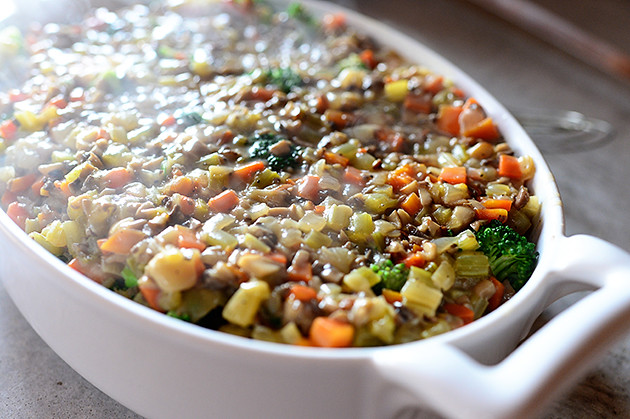
Keep going until all the sauce is in there!


Broccoli Wild Rice Casserole
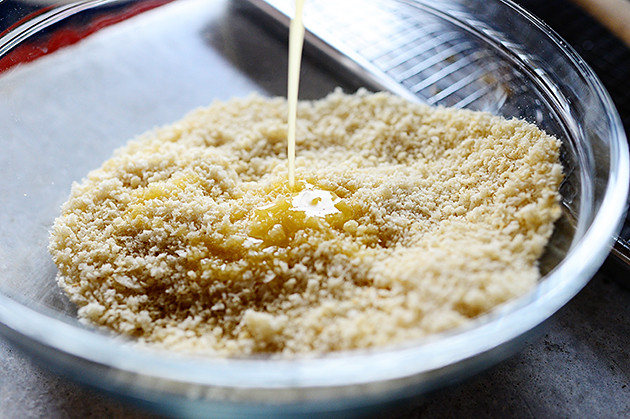
Next, mix some panko breadcrumbs with a little melted butter in a bowl…


Broccoli Wild Rice Casserole
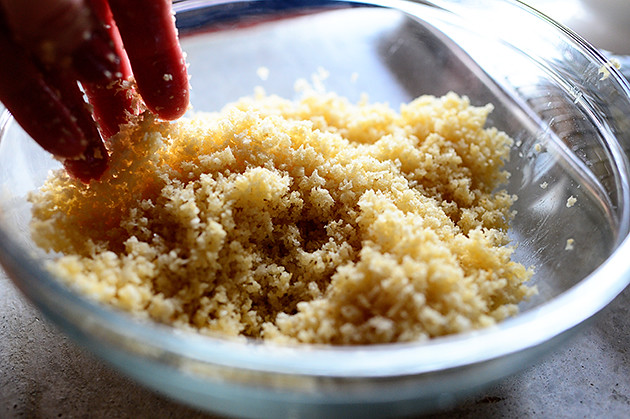
Toss them till they’re coated…


Broccoli Wild Rice Casserole
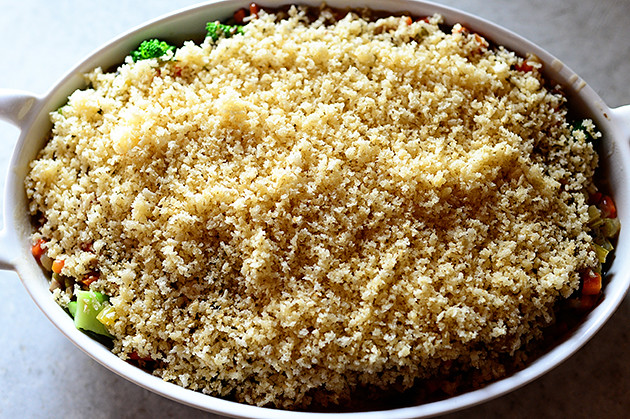
And sprinkle them all over the top of the casserole.


Broccoli Wild Rice CasseroleCover the casserole with foil and pop it in the oven and bake it at 375 for about 20 minutes…


Broccoli Wild Rice Casserole
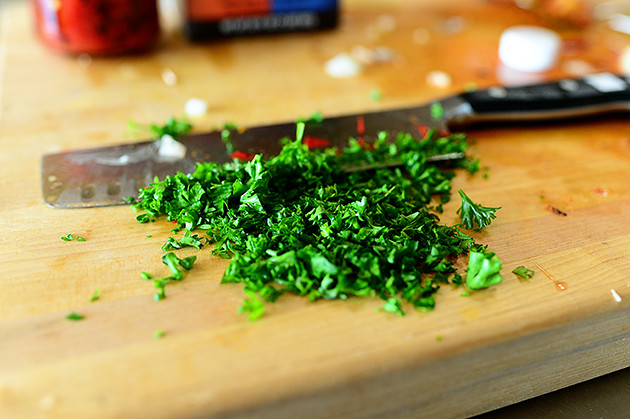
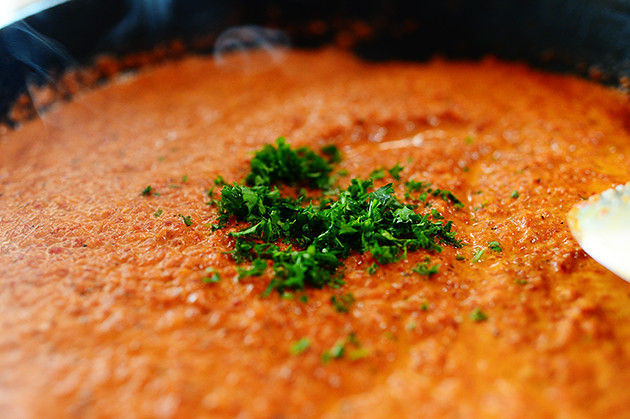
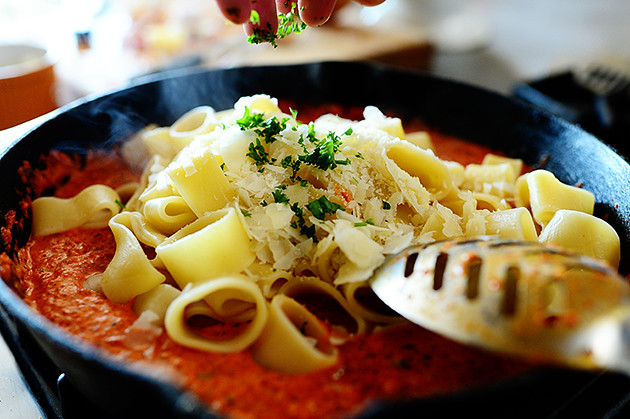
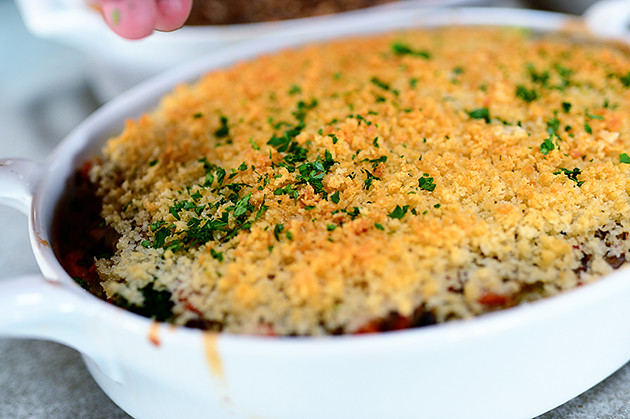
Then remove the foil and bake it for another 15 minutes until the top is nice and golden. Then sprinkle on some minced parsley…


Broccoli Wild Rice Casserole
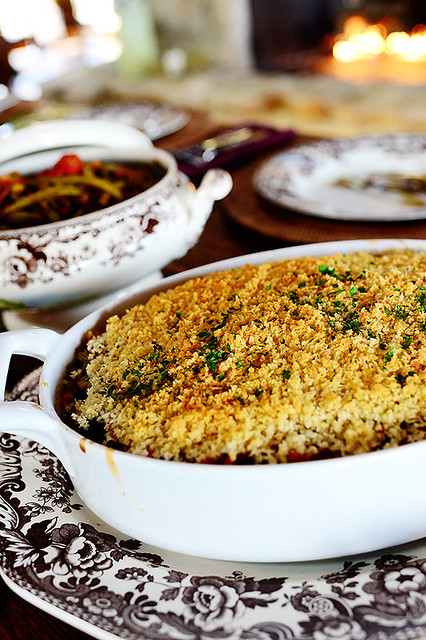
And plop it on your Thanksgiving table with all the other delights you’ve prepared while watching Gone with the Wind and The Godfather!


Broccoli Wild Rice Casserole
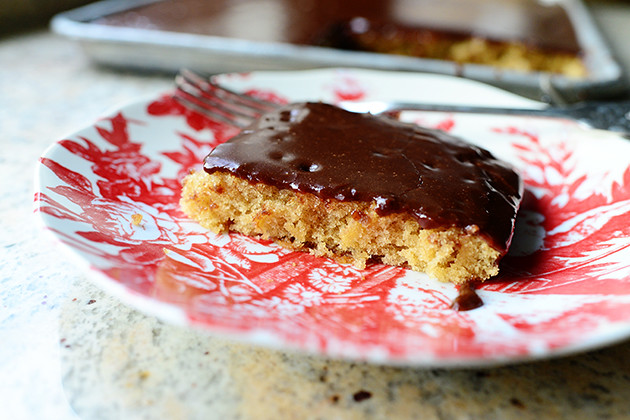
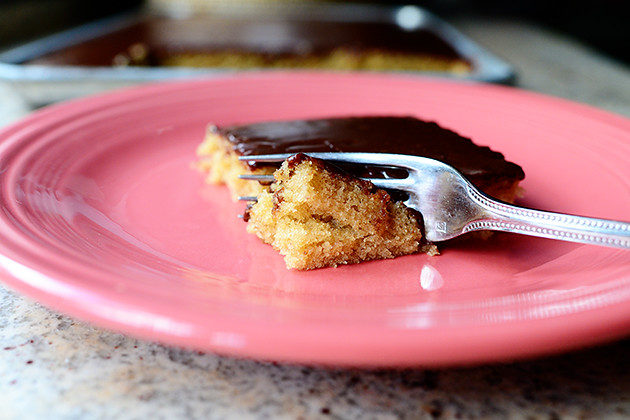
This…is…tremendously delicious. Lots of texture, lots of color, lots of goodness. Hope you love it!

Here’s the handy dandy printable.

(P.S. Thanksgiving is next week! Raise your hand if you’re excited.)

Recipe

Broccoli Wild Rice Casserole

Prep Time:
Cook Time:
Difficulty:
Easy
Servings:
12

Ingredients

  • 2 cups Uncooked Wild Rice
  • 8 cups Low-sodium Chicken Broth, More If Needed For Thinning
  • 3 heads Broccoli, Cut Into Small Florets
  • 1 pound White Button Or Crimini Mushrooms, Finely Chopped
  • 1/2 cup (1 Stick) Butter
  • 1 whole Medium Onion, Finely Diced
  • 2 whole Carrots, Peeled And Finely Diced
  • 2 stalks Celery, Finely Diced
  • 4 Tablespoons All-purpose Flour
  • 1/2 cup Heavy Cream
  • 1 teaspoon Salt, More To Taste
  • 1 teaspoon Black Pepper
  • 1 cup Panko Breadcrumbs

Preparation Instructions

Add the wild rice into a medium saucepan with 5 cups of the chicken broth. Bring it to a boil over medium high heat, then reduce the heat to low and cover the pan. Cook the rice until it has just started to break open and is slightly tender, about 35 to 40 minutes Set it aside.

Meanwhile, blanch the broccoli by throwing the florets into boiling water for 1½ to 2 minutes, until bright green and still slightly crisp. Immediately drain the broccoli and plunge it into a bowl of ice water to stop the cooking process. Remove it from the ice water and set it aside.

Heat a large pot over medium-high heat, then melt 6 tablespoons of the butter. Add the onions and the mushrooms and cook, stirring them occasionally, for 3 to 4 minutes, or until the liquid begins to evaporate. Add the carrots and celery and cook for 3 to 4 minutes, until the vegetables are soft and the mixture begins to turn darker in color.

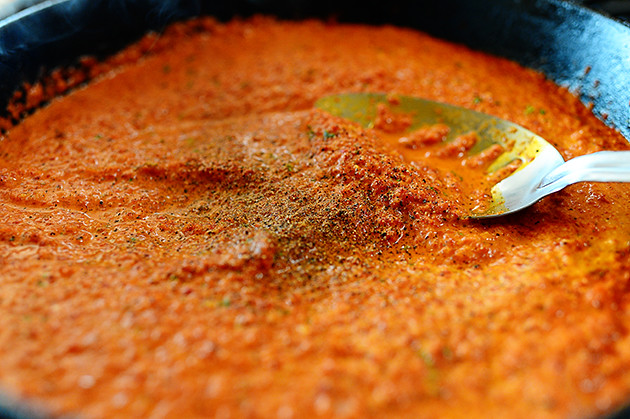
Sprinkle the flour on the vegetables and stir to incorporate it, then cook for about a minute. Pour in the remaining 3 cups of broth and stir to combine. Bring the mixture to a gentle boil and allow it to thicken, about 3 minutes. Pour in the heavy cream, stirring to combine. Let the mixture cook until it thickens. Season with the salt and pepper, then taste and adjust the seasonings as needed.

Add half the cooked rice to the bottom of a 2-quart baking dish, then lay on half the broccoli. (You can do one layer of each or two layers of each. Using a ladle, scoop out the vegetable/broth mixture and spoon it evenly all over the top. Continue with the rest of the sauce, totally covering the surface with vegetables.

Melt the remaining 2 tablespoons of butter, then pour it into a separate bowl with the panko breadcrumbs. Toss the mixture together to coat the breadcrumbs in butter, then sprinkle the breadcrumbs all over the top.

Cover with foil and bake the casserole for 20 minutes, then remove the foil and continue baking for 15 minutes or until golden brown on top. Sprinkle on the parsley after you remove it from the oven.

Posted by Ree on November 20 2013

27 Nov 21:58

Call Pie-One-One for TDay Help!

by Art of the Pie

Just in time for your Thanksgiving Pies it’s Pie-One-One Time again.

Pumpkin Pie made with Coconut Milk (Photo Credit: Stephen Gross)

Pumpkin Pie made with Coconut Milk (Photo Credit: Stephen Gross)

Here are a few links to my recipes, videos, tips, tricks, and technique.

Flour, Salt, Fat and Water (a pie-dough tutorial on the original Art of the Pie Dough)

About Bowls, Pans, Pins, Cups, Aprons, Fruit, Filling, Dough, Vents and Baking. 

Art of the Pie Dough Recipe

Gluten-Free Flour Mix & Pie Dough #1

Gluten Free Flour Mix #2

Gluten-Free/Vegan Pie Dough

Leaf Lard (what it is and how to render it)

Making a Lattice Crust (scroll down in the entry for the link to a quick video that lots of folks have viewed and had success with!

Rolling Pins (a variety of options)

A Pin That Rolls Merrily Along

Tips & Tricks for Making Pie in Hot Weather

What’s your favorite Thanksgiving Day Pie? Does it have a family history? Pass on those stories. We’d all love to hear them!

And, I’ll be talking pie on Twitter tomorrow morning 11/22/13 at 7AM EST/10AM PST with pie greats Nancie McDermott, Emily Hilliard, Julia Collin Davison, Paula Haney, Jan Moon, and Tiffany MacIsaac sponsored by American Food Roots. Use the hashtag #TGpiechat. We’ll share our tips and answer your questions in time for the Thanksgiving pie-athon!

17 Nov 03:59

Peanut Butter Cake with Chocolate Icing

by Ree

Peanut Butter Cake with Chocolate IcingI’ve been wanting to take the chocolate sheet cake recipe I’ve made for my entire married life—the same sheet cake recipe my mother-in-law handed me when I became engaged to her son, the same sheet cake that has gotten me through some wild ups and downs in life, the same sheet cake recipe that should be canonized it’s so delicious and perfect, if a recipe could even be canonized, which it couldn’t, but that’s how good it is—and turn it into a peanut butter version, but for some unknown reason, I never have done it.

Until yesterday.

And I’ll just say it: Yesterday was my very favorite day ever.

Come along! I’ll show you why!

 
Peanut Butter Cake with Chocolate IcingHere’s what you need for the cake: Flour, sugar, salt, butter, peanut butter, baking soda, buttermilk, eggs, and vanilla.

Amen.


Peanut Butter Cake with Chocolate IcingStart with just under 2 sticks of butter. I actually tried it with 2 full sticks, but wound up deciding it needed a little less because I wanted to add more peanut butter and I didn’t want the cake to be too oily.

Boy, that was a long explanation.


Peanut Butter Cake with Chocolate IcingWhen the butter melts…


Peanut Butter Cake with Chocolate IcingGrab some peanut butter…


Peanut Butter Cake with Chocolate IcingAnd measure half a cup.

(Note: I used a 1/3 cup measure here, heaped it in there, then wound up wanting more peanut butter flavor in the case. Hence the half cup measure.)

(Boy, that was a long explanation.)


Peanut Butter Cake with Chocolate IcingPlop the peanut butter into the pan with the butter…


Peanut Butter Cake with Chocolate IcingAnd stir it till it’s smooth.

And this right here is pretty much the only difference between the chocolate sheet cake and this peanut butter version: Instead of adding cocoa at this stage, I added peanut butter. A simple change that completely alters the entire cake.

Just like that bottle of Sun-In completely altered my entire head of hair in the summer of 1985.

But that’s another story for another time.


Peanut Butter Cake with Chocolate IcingPour in the boiling water…


Peanut Butter Cake with Chocolate IcingThen let the mixture bubble up for about 10 seconds or so before turning off the heat and setting it aside.


Peanut Butter Cake with Chocolate IcingNow make the buttermilk mixture! Add 2 eggs to the buttermilk…


Peanut Butter Cake with Chocolate IcingAlong with baking soda…


Peanut Butter Cake with Chocolate IcingAnd vanilla.


Peanut Butter Cake with Chocolate IcingWhisk it around and set it aside.


Peanut Butter Cake with Chocolate IcingFor the dry ingredients, mix 2 cups flour…


Peanut Butter Cake with Chocolate IcingWith 2 cups sugar…


Peanut Butter Cake with Chocolate IcingAnd 1/4 teaspoon of salt.


Peanut Butter Cake with Chocolate IcingStir it around…


Peanut Butter Cake with Chocolate IcingThen pour in the peanut butter mixture…


Peanut Butter Cake with Chocolate IcingAnd stir it until it’s halfway combined.


Peanut Butter Cake with Chocolate IcingNext, pour the buttermilk mixture into the peanut butter…


Peanut Butter Cake with Chocolate IcingAnd gently fold it together…


Peanut Butter Cake with Chocolate IcingUntil it’s all combined.


Peanut Butter Cake with Chocolate IcingNow, pour the luscious batter into a half-sheet pan, also known as a sheet cake pan, also known as a sheet pan, also known as an 18 x 12-inch pan you can get at restaurant supply stores or kitchen stores, also known as I have an addiction to these and use them for everything.


Peanut Butter Cake with Chocolate IcingAnd speaking of everything…this batter is everything.


Peanut Butter Cake with Chocolate IcingSmooth it all out so the surface is even, then violently place it into a 350 degree oven for 20 minutes.


Peanut Butter Cake with Chocolate IcingWhile the cake was baking, I made the icing so that I could get it on the warm cake right out of the oven. But rather than make a matching peanut butter frosting, which I was afraid would be too overwhelming, I stuck with the regular chocolate icing that goes with the chocolate sheet cake.

You know why?

Because…”Two great tastes that taste great together!”

If you can name the product that goes with that jingle, you watched way too much TV in the early eighties.

Like me.


Peanut Butter Cake with Chocolate IcingPlace just under 2 sticks of butter in the same saucepan, which you just washed because you didn’t want to dirty another pan because your sink’s already full of enough dirty dishes.

Boy, that was a long explanation.


Peanut Butter Cake with Chocolate IcingMelt the butter…


Peanut Butter Cake with Chocolate IcingThen add 4 heaping tablespoons of cocoa.


Peanut Butter Cake with Chocolate IcingWhisk it together…


Peanut Butter Cake with Chocolate IcingThen add 6 tablespoons of milk. I put my milk in this little cow creamer, because it absolutely cracks me up to watch milk pour out of the cow’s mouth.

I’m easily entertained.

And here’s where my being married to a cattle rancher messes with me. I think to myself, milk would never come out of a cow’s mouth. Cows don’t drink milk. Cows eat grass. Now, calves drink milk. Calves drink milk a lot, as long as they’re still nursing. So really, these should be CALF creamers, not COW creamers. But even then, milk would be going INTO a calf’s mouth, not out. If milk were coming out of a calf’s mouth, the calf would probably be sick. Which makes me want to stop talking about it and get out there and doctor the sick calf.

Even though the sick calf only exists in my mind.

Goodbye.


Peanut Butter Cake with Chocolate IcingSift in the powdered sugar…


Peanut Butter Cake with Chocolate IcingAdd the vanilla…


Peanut Butter Cake with Chocolate IcingAnd whisk it all together.


Peanut Butter Cake with Chocolate IcingMeanwhile…the cake is ready!


Peanut Butter Cake with Chocolate IcingMmmm. You can’t imagine how delicious this smells. It filled my house with peanut buttery goodness heaven bliss wonderment.


Peanut Butter Cake with Chocolate IcingRight when the cake comes out of the oven, drizzle the warm icing on top.


Peanut Butter Cake with Chocolate IcingLuscious, luscious, luscious!


Peanut Butter Cake with Chocolate IcingLuscious!

Oh, and don’t worry if you see little powdered sugar lumps. The world is an imperfect place. Be part of that beautiful imperfection!


Peanut Butter Cake with Chocolate IcingSmear the icing all over the surface…


Peanut Butter Cake with Chocolate IcingAnd here’s where you can start to get excited.

And I mean excited.


Peanut Butter Cake with Chocolate IcingHello, love-muffin!


Peanut Butter Cake with Chocolate IcingIt’s best if you eat this warm.


Peanut Butter Cake with Chocolate IcingHere’s where you can start to get excited. Again.

Wow.


Peanut Butter Cake with Chocolate IcingLook how pretty and moist!


Peanut Butter Cake with Chocolate IcingSo basically…we inhaled this. All six of us.

Nine of us, if you count seconds.


Peanut Butter Cake with Chocolate IcingThis is delightful! Make it the next time you need a comforting cake to go with your big glass of cold milk.

In other words: Make it today.

Here’s the handy dandy printable, both for the peanut butter cake and for the original chocolate sheet cake.

Be good! (Ha.)

Recipe

Peanut Butter Cake with Chocolate Icing

Prep Time:
Cook Time:
Difficulty:
Easy
Servings:
16

Ingredients

  • Cake
  • 2 cups All-purpose Flour
  • 2 cups Sugar
  • 1/4 teaspoon Salt
  • 1/2 cup Buttermilk
  • 2 whole Eggs
  • 1 teaspoon Baking Soda
  • 1 teaspoon Vanilla
  • 1-3/4 stick Butter
  • 1/2 cup Peanut Butter
  • 1 cup Boiling Water
  • Icing
  • 1-3/4 stick Butter
  • 4 Tablespoons (heaping) Cocoa Powder
  • 6 Tablespoons Milk
  • 1 pound Powdered Sugar, Sifted
  • 1 teaspoon Vanilla

Preparation Instructions

Preheat oven to 350 degrees.

In a large bowl, stir together flour, sugar, and salt. Set aside.

In a small bowl, whisk together buttermilk, eggs, baking soda, and vanilla. Set aside.

In a medium saucepan, melt 1 3/4 sticks butter. Stir in peanut butter until smooth. Add boiling water, let the mixture bubble up for about 10 seconds, then remove from heat.

Pour the peanut butter mixture over the flour/sugar mixture and stir until halfway combined. Pour in the buttermilk mixture and stir gently until the batter is smooth. Pour the batter into a sheet pan or jelly roll pan and smooth the surface. Bake for 20 minutes, then remove it from the oven.

While the cake is baking, make the icing: Melt 1 3/4 sticks butter. Stir in the cocoa powder, then the milk. Remove from heat and add vanilla and powdered sugar and stir until smooth. Add more powdered sugar if you want it a little thicker.

Pour the icing over the warm cake right out of the oven and smooth the surface. Allow to sit for 10 minutes before cutting into squares and serving warm.

Posted by Ree on November 4 2013


Recipe

The Best Chocolate Sheet Cake. Ever.

Prep Time:
Cook Time:
Difficulty:
Easy
Servings:
24

Ingredients

  • FOR THE CAKE:
  • 2 cups Flour
  • 2 cups Sugar
  • 1/4 teaspoon Salt
  • 4 Tablespoons (heaping) Cocoa
  • 2 sticks Butter
  • 1 cup Boiling Water
  • 1/2 cup Buttermilk
  • 2 whole Beaten Eggs
  • 1 teaspoon Baking Soda
  • 1 teaspoon Vanilla
  • _____
  • FOR FROSTING:
  • 1/2 cup Finely Chopped Pecans
  • 1-3/4 stick Butter
  • 4 Tablespoons (heaping) Cocoa
  • 6 Tablespoons Milk
  • 1 teaspoon Vanilla
  • 1 pound (minus 1/2 Cup) Powdered Sugar

Preparation Instructions

Note: I use an 18x13 sheet cake pan.

In a mixing bowl, combine flour, sugar, and salt.

In a saucepan, melt butter. Add cocoa. Stir together.
Add boiling water, allow mixture to boil for 30 seconds, then turn off heat. Pour over flour mixture, and stir lightly to cool.

In a measuring cup, pour the buttermilk and add beaten eggs, baking soda, and vanilla. Stir buttermilk mixture into butter/chocolate mixture. Pour into sheet cake pan and bake at 350-degrees for 20 minutes.

While cake is baking, make the icing. Chop pecans finely. Melt butter in a saucepan. Add cocoa, stir to combine, then turn off heat. Add the milk, vanilla, and powdered sugar. Stir together. Add the pecans, stir together, and pour over warm cake.

Cut into squares, eat, and totally wig out over the fact that you’ve just made the best chocolate sheet cake. Ever.

Posted by Ree on November 4 2013

17 Nov 03:36

Life/Work Balance Divides Us

by Thorn
  • What are you leaving out? 
  • What feels separate, set aside? 
  • What do you “have to make time for”? 
  • What “should” you be doing? 
  • How do you live in the “real world”?

The corporate world – when it bothers to pay attention – speaks of “life/work balance.” As if life and work were two separate and opposing forces. They are not. Just the phrase is a problem. We do it with many things: “sacred and mundane”. “Magical life and real life.” We speak in these binaries as though magical life cannot be real, or as though work is not a healthy part of life.

We are tearing ourselves apart for no reason.

What sort of life would you like to lead?

What sort of life would remind you that every part of life is important, magical, and sacred?

What things can you let go?

For me, my life includes rest, reading, exercise, clients, writing, students, activism, good food, work, music, sitting under trees, bicycling, sex, friends, spiritual practice…Every day includes a healthy measure of most, and every week includes the remainder. All the parts of my self need to be fed. All the parts of myself need reminders that they are important facets of the whole. Exercise is just as important as spiritual practice is just as important as meeting with spiritual direction clients. I spend different amounts of time on each of these, but they all weave into the whole.

It took me a long time and some reframing to get here. I still work a lot, but there is a more useful sense of flow among all the aspects of my life, less of a sense of separation.

What feels important to you? What would feel healthy and nourishing to include? What would it feel liberating to let go of? 

What sort of life do you lead and what life are you hoping to craft?


Stop thinking of life balance and start pondering life integration.

Manifestation will follow.


——————————

If you can use a sounding board or some guidance around navigating your own integration, I have just adjusted my spiritual direction rates to open up more spaces for those struggling in our current economic times.

Addendum: I also write about manifesting desire in Make Magic of Your Life. Some people are finding it helpful.

16 Nov 21:21

What's Twenty Minutes?

by Cat C-B
So I get to thinking, "I should go to a nice retreat at Woolman Hill," and I notice one coming up on deepening worship.

"Great!" I think to myself.  "I should try that!"

And so I read the brochure.  And it reads in part, "What do you do to nurture your spirit? How regular are you in this practice?  If you are attending the retreat, please practice a spiritually nurturing activity for 20 minutes or more each day. If you do not find the time to do so, without judging yourself, notice what was a greater priority."

And so now I'm grumpy.  Because that so-reasonable sounding commitment, of building in a 20 minute daily spiritual practice, is just laughably out of reach for me at the moment.  I would LOVE to have a whole uninterrrupted 20 minutes a day for spiritual practice. But I am coming to understand that there are times I am not going to get it.

There are two kinds of professions in the world, as far as I can make out: those where you can pee anytime you feel like it, and those where you can't.  Teaching is one of the ones where you can't--you have to wait until your prep block rolls around, however long that takes. 

Peeing is pretty basic.  When you have to plan ahead for your next potty break, and it is enough hours that you don't get to drink a full cup of morning coffee, you have a time-management fiasco of a working life.

Which is to say that I can get a little sensitive to issues of scheduling.

Now, I get that this says "without judging yourself," to notice what gets in the way of setting aside twenty minutes a day for spiritual practice.  But it sure feels like there's a judgy thing going on with the whole "notice what was a greater priority" instruction.  I mean, I obviously do have more than twenty minutes a day when I'm not teaching (or peeing).

What is a "higher priority" in my life than a daily spiritual practice?  What are the daily activities that take up more of my time than I have free for practice?  Well, aside from things like working, sleeping, showering, and cooking--necessities--there's just a few: Facebook, television, and reading pulp novels.

When I list them that way, it really does sound like I ought to simply limit those activities, and then I'd be free to build in a more robust personal spiritual practice, right?  And isn't the implication that whatever activities crowd out that twenty minute time slot need to be weighed against the importance of a spiritual life, and if they are not equally profound, I should cut them?

But I don't buy it.  Setting aside the fact that some of that time is already pretty limited (like TV watching, which is limited to a single episode of a DVD, watched over dinner) it is also true that my time wasters are, on some level, actually vitally important to me.

The more I think about it, the more I'm clear that any attempt to cut out the "junk food" in order to build in more time for a nourishing spiritual practice would backfire utterly.  Because before I can soar, I need to stand still.  Before I open myself to Spirit, I have to have time being me, ordinary, in my own body and in my own life.

You see, I can't do that while I'm teaching. Teaching--at least for me--requires being fully and wholly present, other-focused and other-centered, for about as long at a stretch as is even possible.  Not only does peeing have to wait when I'm managing a classroom of two or ten or twenty teenagers, so does ordinary reflectiveness on my life outside the classroom. 

Now, that's not a complaint (well, except for the part about not getting to pee when I need to) but it is the truth.  Teaching uses me up, takes me from myself until I am too empty of energy and too full of detail (lesson planning, student needs, changing schedules and demands and reactions) to be able to hear anything from Spirit but my own wishful thinking projected out into the void.  When I'm done with a day of teaching... I'm done.

I cannot go straight from the classroom to the cathedral and to a different kind of self-forgetfulness.  I need to go first to being... self-centered, at least a little.  An ordinary, slightly self-absorbed, pop-culture-consuming, You-Tube-viewing, blogroll-skimming, middle-aged woman with a weight problem and a headache.

I used to tell my Wiccan students, "To transcend the self, first you have to have a self."  It turns out that this is as true in terms of daily life as in terms of developmental stages.  Each day, after being other-centered long enough, I need to rest for a time in the "merely creaturely," as early Quakers might have said.

They'd have disapproved of setting aside time to be merely creaturely, though. 

Be that as it may, I've come to understand I need it.  I get kind of nuts without it.  So I eat pizza, go on Facebook, read sci fi and fantasy novels... and, when I have a little bit of myself back again, I slip in tiny little scraps of spiritual practice around the edges.

Tiny scraps...  There are very few twenty minute blocks of time in my life for spiritual practice.  But, if I set aside my frantic feeling that there ought to be more time than there is, I can begin to see I do have some regular patterns.  For instance:

On my morning commute, I often listen to the news.  I listen to the news in the morning to wake me up, and in the afternoon to entertain me.  But on either drive, there is a stretch of road--roughly half the length of the commute--that I consider too beautiful to allow to roll past me while I am distracted by the radio.  When I get to that stretch of road, the radio goes off.

Sometimes I think about people I'm worried about... sometimes about things I'd like to write about. Sometimes I pray.  But I always try to be awake for it, even if it is only ten minutes at a time.

Then too, on Facebook (that ultimate time-waster) when people share news of trouble or sadness in their lives, I frequently stop right then and there and hold them in silent prayer.  That practice might last for no more than a minute at a time... but it happens a lot, when I think about it.

When I am able to sit down quietly over a cup of coffee on a Saturday morning, or when I see a deer, or a flock of wild turkeys, or a heron along my commute, I reach out in my mind and heart for the sense, the texture, of the sacred in a busy world--like reaching out for my husband's hand in the dark, before we slip into sleep on a day that has been too busy to spend time gazing into one another's eyes.

Some wise person once advised us to "Pray without ceasing."  I do not think it reflects a deficiency in how I order my life--a life which is actually filled with Spirit, brimming with it and guided by it, to the best of my ability to accept guidance at least.  But in my case, if I did not in some sense pray without ceasing--weaving Spirit into a thousand tiny crevices in my life--I would never find the time to pray at all.

Twenty minute practice?  I really don't have time for that.  Maybe I'll just have to settle for every-minute practice.

Maybe that isn't such a hardship after all.
19 Aug 15:49

Further Reflections on Altars

by Broomstick Chronicles
Altar at Lucky Mojo Curio Co.
This post I hope to be another of a series of writings about magical objects, tangible items that have meaning to and are used by Pagans of various stripes.  I’ll work from the more immediate (altars, clothing, incenses, masks, etc.) to the broader (temples, nemetons, sacred spaces).

To continue, what’s the purpose of having an altar?  Is it a surface to holding the tools with which we work?  Certainly in most Witchen[1]situations that’s how an altar is used.  But besides holding working tools and such (bowl of water, dish of salt, cup, athame, etc.), a Witchen altar holds candles and more often than not images of a deity or deities.[2]

For an altar that holds working tools, one may also consider a kitchen counter arrayed with bowls, ingredients, spoons, measuring cups, cutting boards, strainers, colanders, and the like, ready to bake a cake or baste a roast.  After all, the kitchen is where the magic of transforming the nourishing fruits and flesh given us by Nature into sublimely tasty comestibles takes place.  Our ovens are our athanors, the chambers that with heat and time transform what we put into them.

Another altar holding working tools is the surgical tray.  I have little conscious experience of operating rooms where surgery is performed, but I’ve seen enough dramatic reenactment to know that there is a cadre of persons who assist the lead surgeon.

Perhaps you have a carpentry workroom in your garage or a sewing room in your home.  When you prepare to work, do you lay out an array of tools you expect to employ?  Beyond that, do you perform a brief ritual as you prepare?  I know that some cooks do so, and I would guess that some surgeons or surgery teams may also call upon some kind of divine guidance of the hand wielding the scalpel – at least I hope their work is not compromised by hubris.

Altars can also serve as the foundation upon which sits an idol or idols.  Deity altars usually hold candles, incense, flowers, fruits, and other offerings.

Older books on Wicca and other magical systems, as most readers know, contain detailed charts showing where each specified item should be placed.  Those altars contained cup or chalice, blade, wand, pentacle, dish of salt, water, at least two candles, and often representations of goddess and sometimes god.  In other words, basic tools.  In addition, they may contain flowers or seasonal vegetation, and other tools that may be required for that particular working.

One friend who began her practice on the East Coast had learned to use two candles on her altar, one for the goddess and one for the god.  That's not a custom I had encountered when I was learning.

When I began my practice, my altars were fairly simple, although I never felt that I needed to place items in any other configuration than that which pleased my personal aesthetic and I always felt I could add other pretties as I was inspired to do so.  Over the years my attitude towards altars evolved, more about which follows shortly.


[1]             I prefer using the term “Witchen” when referencing the most common manifestation of Pagan religion in our contemporary world.  To my knowledge, this word was coined by Deborah Bender back in the 1970s to encompass both older British lineaged Craft traditions and newer bootstrap traditions. So in this context, Wiccans are formal descendants of British Traditional Wicca – I leave the discussion of who is who in the context of BTWs to those who hold to it – while Witches include both Wiccans and other practitioners of what is generally known as Witchcraft or the Craft.
[2]             I intend another post exploring idols and idolatry.
14 Aug 17:22

Reflecting on Altars

by Broomstick Chronicles
Coven Trismegiston Lammas Altar 2013

At a recent seminary graduation ceremony I attended I noticed the altar.  It wasn’t an altar like the altars I’m more used to seeing. 

The setting was a church sanctuary, 1950s post-WW-II modern, set upon a hill with expanses of window giving view to the surrounding town and countryside.  The glass was clear but for a band of Frank Lloyd Wright-inspired stained glass around the top.  Chairs placed in rows rather than pews faced the far end of the hexagonal-shaped room, with a choir section off to the right.  Although singers wore street clothes, most of them had some sort of rainbow chevron on their clothing.

The dais at the front of the room contained the altar, some chairs for dignitaries, and a lectern, probably the modern version of a pulpit.  The altar itself, set back against the wall at the far side of the dais, was a sturdy dark wood table holding a large spray of seasonal flowers.  That’s it.  No religious symbols.  No statuary.  No candles. No tools of any kind.

This got me to thinking about all the many kinds of altars people have created and the many ways they’re used.  The first thought that came to me, as I pondered the source of altars, was of a slab of rock upon which Abraham had laid Isaac for sacrifice before his hand was stayed.  I thought of it as a workspace.  I don’t know why my thoughts should take me in this direction.  Perhaps because of my Christian upbringing.

But of course the altars of my childhood weren’t used for sacrifice.  The altars atop Aztec pyramids were, though.  They were similar to Abraham’s slab of rock in that they were a hard flat surface for cutting and bloodletting, albeit sacred bloodletting.

Altars in the Methodist church were fairly simple affairs, a long, narrow wooden table draped with white linen, holding a few candlesticks and vases of flowers, with an empty cross hanging on the wall above.

The Roman Catholic altars of my father’s church outdid the Methodist ones in splendor.  I don’t know if they were larger or not, but they seemed so; they held many objects.  No plain linen altar cloths for Catholics.  Oh, no.  Theirs were embroidered with elaborate designs using gilt thread.  The altars held bejeweled chalices, censers, and monstrances, bells and Bibles, and who knows what all.  And they were used.  The priest and his assistants touched and moved and changed things – no doubt in the process of transmuting the bread and wine into the body and blood of their god.

Nor do Catholic altars stand alone.  There are other surfaces holding other things, plus elaborate gilded candle stands, banks of votive candles, chairs, both lectern and pulpit, surmounted and surrounded by statuary, images, hangings, stained glass windows, and all manner of marble and fine carved wood opulence.

When I first got into the Craft, we set up altars with the tools, paraphernalia and images we were learning to use, arranging them as artfully as we wished, although there were a few texts in those days that featured diagrams of exactly what each object should be and where it should be placed.  Esbat altars were fairly standardized and sabbat altars more elaborate and containing seasonal colors, images, and flora. Candles mandatory, altar cloths optional.

At that time we placed the one working altar in the North quadrant of our circle.  We placed point candles in the other three quarters, sometimes with a symbol of Element associated with that quarter, say a feather or bell in the East, a seashell or cup in the West.

When we began to offer public sabbat rituals, we sought to dress up and “sanctify” rented meeting spaces by erecting substantial altars in each of the four quarters.  They grew larger and more elaborate, bringing out the artist in the altar-builders.  We also had four long banners, about 3’ by 8’ hanging above each altar.

My late friend Judy Foster brought a whole new dimension to altar-building, about which I'll elaborate in a future post.  They deserve a post of their own. 

14 Aug 13:53

Simple Things

by Kristin Shepherd
yjapples.jpg

Funny, the more yoga I do, the less I have to say about it. More accurately, what comes out of my mouth and my head/heart gets simpler as my practice matures.

I am less concerned than ever about where I place my mat in class, what I'm wearing, whether or not I'll ever do a handstand without a wall (OK, I still dream about this one), and whether home practice is better than class. I have cared deeply about every one of these, but they're receding in the rear view mirror, if you know what I mean.

What I do contemplate now, on and off the mat, are things like this:

Open is better than closed. Open body, open mind, open heart. Not always easier, but always preferable.

Discomfort goes away when I don't meet it with resistance. (Tight hips are one thing. "Oh my god, these hips are killing me, why won't they let go, I'll never be able to do a stinking King Pigeon" is resistance.)

My body knows what it wants. This is more important than any outside advice.

Pushing doesn't work. Google Sisyphus.

Accepting what is grants me immediate freedom. All of a sudden my head is 90 percent quieter.

Judging me or anyone else is a colossal misuse of energy and erodes everything I love about myself and my life.

Courage and trust are the best companions ever. Feed them well.

Joy makes me healthy.

And as always, love wins.


Is it getting simpler for you? Or more complex? I'd love to hear.

Thanks to yoga for keeping it simple. Thanks very much to you for the conversation,

kristin

Dr. Kristin Shepherd is a chiropractor, actor, and speaker (About All Things Wonderful) in North Bay, Ontario.  Join her on the web, on Facebook, on Twitter, and on iTunes.


14 Aug 13:04

Art of the Pie in New York Times!

by Art of the Pie
This is me...a happy pie maker!

This is me…a happy pie maker! (Photo Credit: Kelly Cline)

This may totally be my 15 minutes of fame and I’m still kind of in shock, but today I was in the New York Times!

I mean, I’m a self-taught baker and a self-taught pie-maker. For that matter, pretty much everything that I’ve done in my life has been self-taught. My mom did always tell me that the only way I learned ANYTHING was to do it myself…and many times that turned out to be the hard way. Is that true for you, too?

So, I was interviewed by NYT’s travel writer, Elaine Glusac, recently and the thing that I like the most today is my quote that she chose for the article:

“The key is to keep all your ingredients chilled…Actually, I always say keep everything chilled, especially yourself.”

And that’s the truth!

The biggest challenges that folks who come to make pie with me have are:

  • fear of dough and rolling (think about something else like a beautiful flower when making or rolling dough and just keep going.)
  • the weather is hot and the fat melts while making dough (bake early in the morning, pop the dough in the fridge to chill it back up, double bowl it with some ice below the top bowl, turn the air-conditioning on.)
  • hot hands that melt the fat (hold onto ice-cubes for instant pastry maker hands.)

I’ve written about these things over the years in my blog and talk about them ALL the time at my workshops and camps.

Fear is really what keeps us from doing and succeeding. What’s the worse thing that can happen?

  • Will life as we know it end if the pie dough is not rolled out in a perfectly round circle?
  • Will cracks in the middle or the sides cause an earthquake?
  • If it falls a part when it goes into the pan, or burns in the oven will the sky fall down?

Absolutely NOT!

And, if you stop and think about it, maybe that’s how grunts, buckles, crisps and slumps were invented!

Ok, so I’ll chill now because that’s not really what I meant to write about.

May I share with you the link? Oh please say, yes, because here it is…

Extra! Extra! Read All About It! 
Art of the Pie in the New York Times!

P.S. I’ve added some new workshop dates at Pie Cottage. I hope you’ll come to make pie with me. We chill a lot. ;-)

04 Aug 23:49

Cherry Cheesecake Shooters

by Ree

shooters2I made these incredibly easy and exceedingly cute desserts on my Food Network show on Saturday. They’re little cherry cheesecake shooters—mini desserts that use a quick cream cheese filling and (wait for it) canned pie filling.

They seriously take 15 minutes to make.

Maybe 16.


cherryshootersNow, I made the same dessert for my new cookbook coming out this fall—only instead of pie filling, I used a cooked cherry and whiskey topping.

Both options are delicious, and I have the two printable recipes below.

Here’s how I make the second version. The first version is identical—just use pie filling instead!

(Note: The recipe below makes a bunch of shooters—you can easily halve it.)

 
Cherry Cheesecake ShootersTo make the topping, I combined frozen cherries and honey in a saucepan…


Cherry Cheesecake ShootersStir it around and cook it over medium heat for a few minutes, until it’s hot and bubbly.


Cherry Cheesecake ShootersThis is totally optional: Grab the whiskey from your bedside table and splash in a little! If you’re using an open flame, be careful (you can temporarily turn it off while you pour it in.)

You can totally leave out the whiskey if you’re not feeling it.

*Hiccup!*


Cherry Cheesecake ShootersLet it cook for another couple of minutes…


Cherry Cheesecake ShootersAdd some butter to the pan and let it melt…

(Note: I adjusted the recipe to call for half this amount of butter. I got a little overzealous!)


Cherry Cheesecake ShootersThen whisk together some cornstarch and lemon juice…


Cherry Cheesecake ShootersAnd pour it in.


Cherry Cheesecake ShootersCook it for another couple of minutes, until it thickens up…


Cherry Cheesecake ShootersThen add a little bit of almond extract.


Cherry Cheesecake ShootersNext, pour it into a bowl, let it cool to room temp, cover it and refrigerate it for a few hours, until it’s nice and thick and luscious.


Cherry Cheesecake ShootersNow, when you want to assemble the little babies, make the creamy cheesecake filling! For these, I used two packages of cream cheese…


Cherry Cheesecake ShootersAnd a can of sweetened condensed milk. For the show, I used one and one, which makes the filling more of a pudding-like texture.


Cherry Cheesecake ShootersThis is a thicker texture.

Either is delicious!


Cherry Cheesecake ShootersNext, crush up some graham crackers in a Ziploc: Just pound away until they’re all broken up!


Cherry Cheesecake ShootersTo assemble them, spoon some crumbs into the bottom of a glass. I used mini wine glasses (you can get them at lots of department stores or kitchen supply stores; cute!) but you can also use demitasse cups, small mason jars…any small glass will do.

Here’s a link to the ones I have. They’re $20 for 12 glasses, and you can use them for so many cool things.

Cute Little Wine Glasses

Amen.


Cherry Cheesecake ShootersPut the filling into a pastry bag or Ziploc, then snip off the end and squeeze in some of the filling. (This is much, much easier than trying to spoon it!)


Cherry Cheesecake ShootersNext comes the cherry topping (or pie filling)…


Cherry Cheesecake ShootersAnd a sprinkling of sliced almonds.


Cherry Cheesecake ShootersDarling!


Cherry Cheesecake ShootersAnd…wow.

These are super fun, super adorable, super easy…and (most important) super good.

Great for parties or fun get-togethers!

Recipe

Cherry Cheesecake Shooters

Prep Time:
Cook Time:
Difficulty:
Easy
Servings:
12

Ingredients

  • 12 whole Graham Crackers (the 4-section Rectangles)
  • 2 packages 8 Ounce Cream Cheese
  • 1 can Sweetened, Condensed Milk
  • 1 can Cherry Pie Filling
  • 1/4 cup Slivered Almonds

Preparation Instructions


Put the graham crackers into a ziplock bag and smash them with a rolling pin until they're fine crumbs.

Spoon graham cracker crumbs into the bottom of mini wine glasses.

Add cream cheese and sweetened condensed milk to bowl of an electric mixer fitted with the whisk attachment and whip them together until fluffy.

Fill a pastry bag or zipper bag with the filing. Snip off the end and pipe a big helping over the crumbs in each of the glasses.


Top with a big spoonful of cherry pie filling.


Top with chopped almond flakes.

(Note: Mix 2 tablespoons melted butter into the crumbs if you'd like them to be a little more moist.)

(Use whatever kind of pie filling you'd like!)

(Note: 1 package of cream cheese makes for a more pudding-like texture; 2 packages makes for a thicker texture.)

Posted by Ree on July 8 2013

Recipe

Cherry Cheesecake Shooters (Version 2!)

Prep Time:
Cook Time:
Difficulty:
Easy
Servings:
18

Ingredients

  • 2 bags (12 Ounce) Frozen Sweet Cherries
  • 1/4 cup Honey
  • 1/4 cup Whiskey (optional)
  • 2 Tablespoons Butter
  • Juice Of Half A Lemon
  • 1 teaspoon Cornstarch
  • 1/4 teaspoon Almond Extract
  • 2 packages 8 Ounce Cream Cheese
  • 1 can (14 Ounce) Sweetened Condensed Milk
  • 12 whole Graham Crackers (the 4-section Rectangles)
  • 1/4 cup Sliced Almonds

Preparation Instructions

Combine the cherries and honey in a medium saucepan and cook it over medium heat until hot and bubbly. Pour in the whiskey and stir to combine, then let it cook for 2 minutes. Stir in the butter until it melts.

Mix together the lemon juice with the cornstarch, then pour it in. Continue cooking for 2-3 minute until thicker. Add the almond extract.

Pour into a bowl and allow to cool to room temperature. Cover with plastic wrap and refrigerate for a few hours, or until chilled.

Crush the graham crackers and spoon into the bottom of mini wine glasses.

Add cream cheese and sweetened condensed milk to bowl of an electric mixer fitted with the whisk attachment and whip them together until fluffy.

Fill a pastry bag or zipper bag with the filing. Snip off the end and pipe a big helping over the crumbs in each of the glasses.


Top with a big spoonful of the cherry topping.


Top with sliced almonds.

(Note: Mix 2 tablespoons melted butter into the crumbs if you’d like them to be a little more moist.)

(Note: 1 package of cream cheese makes for a more pudding-like texture; 2 packages makes for a thicker texture.)

Posted by Ree on July 8 2013

04 Aug 23:35

Simply the Best, Food Edition

by Ree

On tomorrow’s Food Network show, I list a bunch of “Bests” in my world: Everything from the Best Grilled Cheese to the Best Scrambled Eggs…and a few non-food bests, too (Best Horse, anyone?) I think you’ll love the show, as I picked my favorite recipes in a handful of categories. (Best Grilled Cheese makes an appearance!)

As I did last week before the Freezer Cooking show aired, I’m going to share a whole bunch of “Bests” here, too. These are my tried-and-true favorites…I hope you find some new favorites, too!

(Click on the photos or links to see the step-by-step for each recipe below.)

Best Main Dish Salad

chipotleChipotle Steak Salad. I could eat this morning, noon, and night. Medium rare steak sliced and draped over greens with a smoky, spicy, creamy dressing. Simply too good for words.


Best 16-Minute Meal

TPW_8020Of all my 16-Minute Meals, this Beef with Snow Peas is absolutely, positively my favorite. The flavor is just incredible and it couldn’t be easier. My girls inhale this!


Best Pancakes

sourcreamEdna Mae’s Sour Cream Pancakes. So light, so sweet and delicious. These are the pancakes I make when I want my kids to love me.


Best Pasta

TPW_3646Okay, so it’s basic. But that’s what makes this so delicious! Pasta with Tomato Cream Sauce is my favorite category of pasta, and you can add grilled chicken, shrimp, wine, herbs—anything to dress it up however you’d like. It’s to die for.


Best Cake

tresIt’s unconventional. It’s weird. And it’s the most delicious cake you’ll ever eat in your life. It’s Tres Leches Cake, and I insist that you try it! You’ll absolutely die from bliss.


Best Soup

potatosoupI have a lot of soups on this website o’ mine. So I hope it makes an impression on you to read that this Potato Soup is absolutely my favorite soup around. It makes my skirt fly up. Like, way over my head. I’m sorry if that disturbs you.


Best Circular Bread Item

cinrollsIf there were such a category, these Cinnamon Rolls, which I’ve eaten since I was in my mother’s womb, would definitely take the prize. Start gearing up for the holidays! Deliver these to everyone you love.


Best Quesadilla

quesadillasI’ve more than established that I am a quesadilla lover beyond any quesadilla lover in North America. I crave them when I’m pregnant. I mean…I craved them when I WAS pregnant. I mean…never mind. Just be sure you make these Grilled Chicken & Pineapple Quesadillas sometime before you leave this earth.


Best Adult Beverage

mango2Mango Margaritas. They are out of this world delicious, and you really have to sip slowly or…well, things happen. You start telling people you love them whether you know them or not.


Best Sandwich

sandwichI want to marry this Barbecue Chicken Sandwich. Between the soft, slow-cooked garlic cloves, the tender chicken, and the crunchy cilantro slaw…it’s pretty much got everything in life that I look for.


Best Chocolate Dessert

cakeChoosing my favorite chocolate dessert is like choosing my favorite child…but I am love this Chocolate Strawberry Nutella Cake right now. What I love is how versatile it is: you can make one layer or four, depending on how outrageous you want to be. And it’s just so good.


Best Appetizer

bruschettaThere’s not much I love more than Bruschetta. It’s so fresh, so herby, so divine. I want some right now! Will you make me some right now?


Best Pie

pieOkay, so it’s not made with Key limes. But this Key Lime Pie is still divine. So easy…so luscious.


Best Pizza

bbqI never met a pizza I didn’t like. And I’ve always loved this BBQ Chicken Pizza, inspired by my old 80′s experiences at California Pizza Kitchen. The chicken is yummy, the red onions give it color and flavor, and the cilantro at the end totally makes it.


Best Use of Canned Biscuits

orangevanillaHave you made this Orange Vanilla Monkey Bread yet? If not, you haven’t lived. I’m not kidding. You have not been alive! Okay, thanks.


Best Cookies

citrusI came very close to choosing these cookies instead, but I wound up going with these Citrus Butter Cookies just because they’re irresistible and pretty.


Best Comfort Food

chickennoodlesNothing says “comfort food” to me like these Chicken and Noodles. My mom made it. My grandmother made it. I make it. Everyone loves it.


Best Noodles

noodlesSesame Noodles. Eat them alone or with cold steak sliced over the top. Just eat them. One bite and you’ll see what I mean.


Best Vegetable

kaleI’m on a kale kick these days and this panfried version makes my heart go pitter-pat. I love it!

Okay, that’s all the “Bests” for now!

Hope you enjoy the show this weekend, guys. It was a fun one to make.

Love,
P-Widdle Diddle

04 Aug 23:33

French Bread Pizzas

by Ree

French Bread PizzasThese are the facts of the case and they are undisputed: Sometimes we humans can’t spend four hours making dinner. In fact, sometimes we humans can’t spend two hours making dinner. Along those lines, sometimes we humans can’t spend one hour making dinner.

Especially if we humans have a houseful of kids and dogs, soccer practice (yes, it has already begun), football meetings (yes, they have already begun), and a million and four things going on.

Last night was one of those nights. So I made French Bread Pizzas!

And all the problems of the world were solved.

 
French Bread PizzasThe thing about these French Bread Pizzas is…I didn’t even use French bread! I used these good ol’ deli rolls, because that’s what I have available in my smalltown grocery store, Maynard. If you can find small baguettes or crusty sandwich rolls, those would be good.


French Bread PizzasBut these work just fine, too!

And I’m sorry I called you Maynard.


French Bread PizzasThen I just grabbed a whole bunch of stuff from my fridge and pantry! Some I wound up not using, other things (not pictured) I brought in at the last minute. Variety is the spice of life with these babies.


French Bread PizzasThe first thing I got started were some caramelized onions: I violently threw some butter in a skillet over medium heat…


French Bread PizzasThen I angrily sliced up an onion and threw it in…


French Bread PizzasAnd cooked ‘em…


French Bread PizzasUntil they were nice and golden brown.

Caramelized onions are my love language.


French Bread PizzasI also done fried up some of that there sausage stuff.

You can use Italian sausage if you want to be cool.

But you can use this breakfast sausage stuff if you want to be like me.

Go ahead and brown the stuff, but if you really, really want to be like me, don’t take a photo of the browned sausage in the pan, okay? Because that would be way too linear and logical and my brain doesn’t work that way.


French Bread PizzasI also was moved deep in my spirit to cut up a pineapple.


French Bread PizzasSo that’s what I did!


French Bread PizzasThin slices. Eat one. Then eat another one. Then save the rest for the pizza.


French Bread PizzasOnce you’ve got all your toppings together, grate up a whole bunch of mozzarella cheese. You can use the good, fresh stuff if you have it…or just the stuff in the supermarket.


French Bread PizzasSplit the rolls in half and lay them all on a baking sheet…then grab the pizza sauce, which is nothing more than jarred marinara, man.


French Bread PizzasSpread it over half of the roll halves….


French Bread PizzasThen pile on the cheese…


French Bread PizzasAnd whatever toppings you’d like! There’s pepperoni for the dudes in my house…


French Bread PizzasCooked sausage, too!


French Bread PizzasIf you haven’t eaten them all yet, do a caramelized onion version.

Divine!


French Bread PizzasAnd guess what? You can use jarred pesto as the pizza “sauce.”

It’s a world gone mad.


French Bread PizzasAll it needs is cheese and tomatoes!


French Bread PizzasRaise your hand if you like Canadian bacon and pineapple!


French Bread Pizzas*Raising hand*


French Bread PizzasIf I’d had green bell peppers, I would’ve sliced ‘em thin and threw a couple of rings on here.


French Bread PizzasHere, I did a four-cheese version. Only I didn’t use four cheeses. I used two. Which I guess makes it a two-cheese version. But I’ve never heard of a two-cheese pizza. So I guess what I made here was a cheese pizza. But I’m still going to call it a four-cheese pizza. Cool with you?

Thank you for indulging me.


French Bread PizzasSo that’s basically the story: I just built and built. Caramelized onions…


French Bread PizzasSausage…


French Bread PizzasPepperoni…


French Bread PizzasCanadian Bacon/Pineapple…


French Bread PizzasBlack Olive…


French Bread PizzasFour Cheese, which is actually Two Cheese, which is actually Cheese, which I’m actually going to call Four Cheese anyway. And here, because I had no parsley in my garden (it’s really inconvenient) I chopped up some basil and threw it on, which is going to turn black as soon as it hits the oven, but I tried…


French Bread PizzasTomato Basil…


French Bread PizzasOh! And strips of Roasted Red Pepper on a pesto base.


French Bread PizzasSausage, Olive, and Caramelized Onion on the same pizza. Scandal!


French Bread PizzasAnd there you go! A nice colorful assortment. Now just throw ‘em in the oven! I put them on the lowest rack in a 375 degree oven at first, because I wanted to give the bread a chance to get a little crisp without cooking the toppings too much. After about 8-10 minutes, I cranked up the heat and moved them to the top rack for a couple of minutes.


French Bread PizzasAnd here they are! A little something for everyone.

(I threw some basil leaves over the Four Cheese Two Cheese Cheese Four Cheese version after it came out of the oven to cover up the black flecks. Always have whole basil leaves around; they cover a multitude of sins.)


French Bread PizzasI probably could have gone a little longer to get the cheese a little more brown…but I was hungry, man.


French Bread PizzasCan’t beat good ol’ pepperoni. This is where Marlboro Man lives.


French Bread PizzasI live anywhere caramelized onions reside. They are not only my love language, they’re also my life, my purpose, and my heart.


French Bread PizzasBut sausage pizza? Mmmmm. There’s something about it.


French Bread PizzasEnjoy these, guys! Nothing simpler in the world, and they’re perfect for a slumber party, football gathering, or just any weeknight when you don’t have a ton of time.

Here’s the handy dandy printable.

Recipe

French Bread Pizzas

Prep Time:
Cook Time:
Difficulty:
Easy
Servings:
12

Ingredients

  • 6 whole Deli Rolls Or Crusty Italian Rolls
  • Jarred Marinara Sauce Or Pizza Sauce
  • Jarred Or Refrigerated Pesto
  • 2 pounds Mozzarella Cheese, Grated
  • Grated Parmesan Cheese To Taste
  • 2 Tablespoons Butter
  • 1 whole Onion, Sliced
  • 1/2 pound Sausage (regular Breakfast Sausage Or Italian Sausage)
  • Pepperoni Slices
  • Canadian Bacon Slices
  • Pineapple Chunks, Fresh Or Canned
  • Roma Tomatoes, Sliced
  • Sliced Black Olives
  • Optional Ingredients: Goat Cheese, Sliced Bell Peppers, Various Cheeses, Pepperoncinis, Jalapeno Slices, Diced Red Onion, Any Other Pizza Topping You'd Like!

Preparation Instructions

Preheat the oven to 375 degrees.

Slice rolls in half and lay them, cut side up, on a large baking sheet.

Top each half with a generous portion of either marinara or pesto. Next, top with a generous amount of grated mozzarella and Parmesan, if you'd like.

Add whatever toppings you'd like on top of the cheese!

Once all assembled, put the pan in the oven on the lowest rack for 8 to 10 minutes. Crank up the heat to 425 and put it on the highest rack until the cheese starts to bubble a bit and turn golden.

Remove and serve immediately! You can cut the pizzas in half right across the middle so there are mini-French Bread Pizzas for everyone.

Posted by Ree on July 31 2013

27 Jul 23:25

How to Poach an Egg (especially if it scares you)

by Tea

Lately I’ve been thinking about what single thing I’ve learned in the past few years has had the most impact on my cooking and eating life. I didn’t have to think long—hands down, it’s the ability to poach an egg.

Baking sourdough bread is a close second, but let’s face it—the process takes two to three days and not everyone is going to sign up for that. Even I don’t do it that often.

Poaching eggs is something I do at least weekly. And just five years ago I was scared of it. I remember when I moved to Seattle and had Molly and Brandon over for lunch the first time, I made Brandon poach the eggs for us. I was too scared to do it myself.

One of you recently mentioned a fear of egg poaching and I realized I should share the method I figured out to get me over my own fear. Clearly it worked because I am a poaching convert. Now, a waffle or a bowl of thick soup or a toasted piece of bread topped by an egg where the whites are set and the yolk oozes out all golden and glorious is one of my favorite things. Especially when you’re cooking quick (or vegetarian) and you want to add some easy protein to a meal, a poached egg cannot be beat.

I am sure fear of poaching comes in different categories, but for me I was scared of getting my hands close to a vat of simmering, steaming water. And you have to get close to crack an egg into it. Some people will tell you to crack you egg into a tea cup and use that to slip it into the water, but for me it was still getting my hands too close to the hot pot—because to slip something as fragile a raw egg in without breaking the yolk, you need to get pretty intimate with near-boiling water. I didn’t want to go there.

So I devised a solution. If I didn’t want to use a tea cup, what could I try that would keep my hands protected and still do the job? Voila: a ladle. I could crack the egg into the bowl and use the long handle to stay safely away from the steam and potential splatter. I felt like a genius.

The trick is getting the egg into the ladle, and here I found a two-cup Pyrex measuring cup does the job—the handle of the ladle fits into the spout of the cup and keeps it steady.

Once you have the egg in the bowl of the ladle you can use the long handle and slip the egg into the steaming water.

But here is an important point: you must make sure to do it quickly with a speedy twist of the wrist. If you slowly lower the ladle (or tea cup, if you want to try that) into the hot water, the metal (or porcelain) heats up and will begin to cook the egg and it won’t slip out easily. It may take a time or two (or three) to get the hang of the quick release, but I am sure you’ll be on your way soon.

The other thing we need to talk about is water. If you’ve ever tried to poach and egg and had the white go wispy on you and end up all over the pot, then you know the particular heartbreak that we are trying to avoid. To do this many people use vinegar. It’s a little unclear to me why acid helps the egg whites hold together (cursory research turns up several theories), but at this point I’m okay with knowing just that it does.

I use vinegar: one tablespoon to about two cups of water (I don’t bother to measure any longer but that is the ratio). I recommend an inexpensive distilled white vinegar, though in a pinch I have used both red wine and rice vinegar (the red wine can tinge things a bit pink); please do not use Balsamic or any flavored vinegars. Pour it in and bring the water to a simmer.

Now comes the next important key: how hot should your water be?

Here’s where we get to dissect the nature of the simmer. I usually poach my eggs in a small pot but I’m using a wok here with a silver-colored lining so we can take a close look at what is going on. You want bubbles on the bottom, you want the water to be on the verge of dancing, but nothing yet to break the surface. It’s all potential energy at this point, about to break loose but not quite there.

To be honest, I usually just bring the water to a boil and then turn it down, which is easier than watching the pot as it slowly increases in temperature. Whatever works for you. Once you get the water where you want it—hot, about to simmer—quickly slip the egg in (remember to add the vinegar first, of course) and you’re off to the races.

Of course, this is egg poaching—things could still go wrong. If egg poaching were a smooth sail we wouldn’t have an array of devices trying to assure us flawlessly poached eggs (Poaching Pods, anyone?).

Your whites could go slightly wispy, though the vinegar does a good job of keeping them together. Mostly the risk at this point is that your egg might stick to the bottom of the pot (a higher risk if you are poaching in not enough water). If this happens, let the egg firm at least two minutes, then take a spoon or rubber spatula and gently slide it under and in one smooth motion nudge the egg from the pot (scrape might be the better word). You may pierce the yolk while you are doing this, you may end up with an uglier egg, but the path of life does not always run smooth. About one out of every ten eggs I poach sticks to the bottom, it’s not the end of the world.

Next let’s talk about what you use to turn and remove your egg from the simmering water. I use the skimmer you see above—which I bought at an Asian kitchen supply store in San Francisco for less than two dollars and think everyone should have (great for skimming jam and chicken stock). Most people use a slotted spoon, which does a perfect job (maybe better, even) and just recently I was reading Elissa Altman’s new book, Poor Man’s Feast, in which she mentioned her wife uses a wooden spoon. So basically, you don’t need special equipment here.

You will, however, need to turn your egg. This can get a little scary too at first.

I poach my eggs about four minutes, and I turn them after two and a half, maybe three minutes. This allows the white to firm enough so the egg stays together and you just basically roll it, gently and with one smooth motion. It feels intimidating at first, but you’ll soon get the hang of it and not think twice.

I cook it another minute to a minute and a half on the other side. Sometimes I lift it up in the skimmer and see how it jiggles or poke the yoke a bit to make sure it’s set the way I like it, but I’ve pretty much got the routine down (poaching weekly will do that for you). When I have it where I want it, I lift out and voila: a poached egg. See, that wasn’t too hard, was it?

At this point I hear some people like to gently rinse off the water so any lingering vinegar tang is removed, but I never bother (perhaps for company I would). I also hear that you can poach your eggs ahead of time and keep them in room-temp water until you’re ready to serve the meal and just reheat by re-immersing in simmering water, but I’ve never done that either.

One thing I will mention, is that it always seems like the second egg I poach in the same water is never quite as good. Oh it’s fine, but poaching eggs seems to run the opposite of pancake-making. There the first pancake is always the worst. With egg poaching it seems the first is always the best and they go downhill from there. Which all goes to say that if you are poaching a number of eggs you might want to change the water and start over.

Can you poach more than one egg in a pot? Yes, but use a large pot and make sure you’ve perfected your technique first.

Also, there are other methods out there! Deb swirls her water and doesn’t turn them (this may result in a more attractive-looking egg, but perhaps a little scary at first). Amanda strains the egg and gets rid of the looser part of the white (I feel like this might be a restaurant/chef trick), resulting in a very attractive egg, but a bit of loss on the food front. I haven’t tried either of these methods, but I might experiment, especially if I want to make poached eggs for company.

My eggs run the gamut: sometimes they are pretty, sometimes—like here—they are just okay. But I wanted to show you an average egg, not a cover girl version, because this is more likely what yours will look like, at least in the beginning. Okay in the looks department, but tasting delicious.

And you’ll get better the more you make them. These days I no longer use the ladle—I actually crack the eggs straight into the water with my hands (how bold, how brave!). It took me about a year to get there, but now I am an avid and fearless egg-poacher.

So, if you want to learn how to poach eggs, grab a ladle (a large metal spoon might work as well, though harder to crack the eggs into). I think the ladle and measuring cup are an awfully good set of training wheels to help you get there.

And if you try this method I’d love to hear how it works for you (you could even post a photo to the Facebook page, link in the comments here, or email it to me directly; that would make my day).

How do you feel about poached eggs? Do you like them? Do you make them? Do you fear them? I’d love to hear.

—Tara

26 Jul 21:06

Easy Chicken and Bean Bake

by KathEats

This might be one of my favorite recipes I’ve ever made! I can’t take all the credit – one of my friends shared the technique on our mom’s group Facebook page. I knew upon her description that I had to take my own stab at it!

Foodblog-6854_thumb_thumb_thumb_thumb_thumb.jpg

The best part about this “casserole” layered with beans, veggies and chicken is its versatility. You can put any vegetable or bean under the chicken and it will turn out delicious every time. As the chicken cooks it drips flavor and seasons everything down under. Moreover, you can assemble this in the morning and bake it off when the baby is crawling underfoot and you just want dinner to be ready already!

Foodblog-6856_thumb_thumb_thumb_thumb.jpg

Start by choosing the beans you’d like to use. I used navy and garbanzo, but you could try black beans, great northerns, pintos, giant beans, lima beans – anything. You can use canned or about 3 cups of freshly cooked too.

Foodblog-6826_thumb_thumb_thumb_thumb_thumb.jpg

Foodblog-6830_thumb_thumb_thumb_thumb.jpg

Herb options are also completely up to you. I chose oregano and basil from our garden, but rosemary would have been nice too!

Foodblog-6825_thumb_thumb_thumb_thumb_thumb.jpg

Mix beans, herbs and spices together in the casserole dish

Foodblog-6835_thumb_thumb_thumb_thumb.jpg

Plus green beans. I had frozen on hand, but you can also use fresh – or any other veggies you like.

Foodblog-6836_thumb_thumb_thumb_thumb.jpg

Add your chicken on top. We had boneless/skinless, but bone-in and skin-on will work – as will breasts. (Check doneness with a meat thermometer if you use thicker pieces like bone-in breasts)

Foodblog-6840_thumb_thumb_thumb_thumb.jpg

Season with more salt and pepper

Foodblog-6843_thumb_thumb_thumb_thumb.jpg

And rub with olive oil. I added some optional Garlic Gold nuggets on top too.

Foodblog-6845_thumb_thumb_thumb_thumb.jpg

Ready to go in!

Foodblog-6849_thumb_thumb_thumb_thumb.jpgFoodblog-6848_thumb_thumb_thumb_thumb.jpg

45 minutes later Matt and I couldn’t wait to dig in

Foodblog-6852_thumb_thumb_thumb_thumb.jpg

We served this with Spinach Feta rolls on the side.

Foodblog-6862_thumb_thumb_thumb_thumb.jpg

Easy Chicken and Bean Bake

by Kath Younger

Keywords: bake entree beans chicken

Ingredients (4-6)

  • 2 cans of beans of your choice, like navy beans and garbanzo beans, or use 3 cups of cooked beans
  • 1 cup green beans, frozen or fresh
  • 2 tsp chopped fresh herbs, like oregano and basil
  • 1/2 tsp each of kosher salt and black pepper
  • 1 tsp fresh garlic, minced
  • Red pepper flakes to taste
  • 1-2 tbsp olive oil
  • 6 chicken thighs, bone in or bone out, skinless or skin on

Instructions

Start by prepping ingredients – drain and rinse beans, chop herbs, mince garlic

Mix beans, herbs, garlic, red pepper flakes, salt and pepper on the bottom of a casserole dish

Add thighs on top

Drizzle thighs with olive oil and season with additional salt and pepper

Bake in 425* oven for 45 minutes for skinless/boneless and 1 hour for bone-in/skin on chicken.

Powered by Recipage


I can’t wait to make another twist on this soon: Sun-dried tomatoes? Olives? Peas? Kale? Dill and lemon? Endless options for customization!

Foodblog-6859_thumb_thumb_thumb_thum2.jpg

26 Jul 20:31

Kate’s Kookies

by KathEats

cookie

My neighbor Kate is the coolest mom. Her kids are in elementary school and are shining stars – so friendly and full of life. Among other more serious qualities, Kate is a cool mom because she has a cookie jar in her kitchen. Matt and I were over visiting one day and she offered me a cookie – straight from the jar. The cookie I savored was one of the best I’ve had – chewy, buttery, seedy. And it was one of those cookies that tasted deliciously healthy.

Foodblog-7500

Kate shared the recipe with me, and while these cookies do contain their share of sugar and butter, they are packed with good-for-you ingredients as well: whole wheat flour, ground flax, coconut oil, chia seeds, pecans, oats and dark chocolate.

Foodblog-7491

I gathered my ingredients on the porch one rainy day during naptime and set to work.

Foodblog-7458

I halved Kate’s original recipe and used whole wheat pastry flour instead of spelt flour. My cookies turned out a bit thinner than hers, but they have the same wonderful chew and flavor.

Foodblog-7457

Foodblog-7476

‘Nothin’ like the smell of vanilla!

Foodblog-7459Foodblog-7460Foodblog-7463Foodblog-7462

Foodblog-7469

The recipe is super simple once you have all of the ingredients set up – just sift your dry, mix your wet, dump dry into wet and stir by hand. Add your mixins and form into cookies. Bake.

Foodblog-

Foodblog-7475

The chia seeds really are the stars here – itsy bitsy crunch!

Foodblog-7479

But then again…the chocolate…

Foodblog-7480

Because this is a beast of a recipe, Kate often makes her dough in bulk and then freezes it to bake off for her hungry kiddos as needed.

Foodblog-7484

I formed mine into balls and gave them a slight smash

Foodblog-7485Foodblog-7486

Outta the oven 12 minutes later!

Foodblog-7490

These are the type of cookies you have to let cool or they’ll crumble into your hands. It was a long wait!

Foodblog-7492

Kate’s Kookies

by Kath Younger

Keywords: bake dessert snack cookie

Ingredients (24 cookies give or take a few)

    Dry

    • 2 cups whole wheat pastry flour (or spelt flour)
    • 1 tsp baking powder
    • 1tsp ground cinnamon
    • 1/2 tsp baking soda
    • 1/2 tsp salt

    Wet

    • 1.5 sticks softened butter (6 ounces)
    • 1/4 cup coconut oil
    • 1 cup white sugar
    • 1 cup brown sugar
    • 1/4 cup honey
    • 2 large eggs
    • 1/2 tbsp vanilla extract

    Mix Ins

    • 1 cup oats
    • 1 cup chia seeds
    • 1 cup ground flax seeds
    • 1 cup chocolate chips
    • 1/2 cup raisins
    • 1/2 cup chopped pecans

    Instructions

    Preheat oven to 350*.

    Sift dry ingredients together.

    In a large bowl, combine wet ingredients.

    Add dry ingredients to wet and stir until smooth.

    Stir in mix ins.

    Bake until they are just cooked – about 12 minutes.

    Powered by Recipage

    Mazen was very excited about the cookie jar when naptime ended even though he’s not quite old enough for cookie eatin’

    Foodblog-7501

    I thought having a cookie jar would be super fun and I was right – it IS super fun! Meaning I’ve eaten way too many of these delicious cookies this week. Alas, I don’t think I’m going to make this a regular thing – until I have troops of kids coming through my house looking for an after school snack to eat them before I can!

    Foodblog-7502 Foodblog-7498

    26 Jul 20:25

    Good Morning Greens

    by joythebaker

     good morning greens

    Friday is a dangerous day.

    Friday afternoon, after a long week of words and dishes and more dishes and words… I feel very deserving.

    I feel like I deserve a double cheeseburger with short ribs.  I feel like I deserve a negroni or several.  I feel like I should see how many Oreo cookies I can fit in my mouth… just so I know… in case anyone ever asks.

    Maybe I am deserving of such indulgence.  Maybe though… maybe I’m just eating my feelings a little bit.  Real life.  I’m just being honest.

    Here we are staring Monday in the face.  I’m ready for something green… and something a little less short rib-y.

    good morning greens

    A few months ago we talked about juicing.  It’s totally a thing.

    Takes some fruits and vegetables, mash them through a grind-y thing, drink the juice and hope it tastes good.

    Today’s Apple Cucumber Celery Kale Ginger Juice definitely tasted great!  Not like short ribs… but that’s good, right?

    Let’s talk green, and you don’t even need a juicer to do it!

    good morning greens

    Spinach Kiwi and Chia Seed Smoothie.  Spinach is totally drinkable, even without a juicer.  Spinach grinds into a smoothie like a dream.  Hidden greens.  Not so hidden.

    good morning greens

    Kale Spinach and Pear Smoothie.  Doubling the greens means super-hero status.  

    good morning greens

    Super Spinach Smoothie  is packed with greens and Amazing Grass Green Powder.  Powerhouse!

    good morning greens

    Apple Cucumber Celery Kale Ginger Juice

    Print this Recipe!

    1 cucumber, sliced

    1 apple, cored and sliced

    2 heaping cups kale leaves, stems removed

    3 stalks celery, greens and all, cut into chunks

    juice of 1 lemon

    1 inch fresh ginger, unpeeled is fine

    Press all of the produce through a juicer.  Enjoy immediately.  It’s green!  


    26 Jul 20:25

    Solo Bike Adventure

    by joythebaker

    solo bike adventure

    A few weeks ago, a friend asked me what I thought was a totally ridiculous question.  She said, ‘How do you feed yourself?’.

    Um… With a fork.  Sometimes chopsticks.  Occasionally my hands.  Usually a shovel.

    What she meant was… how do you feed your creativity?  My initial answer was bewilderment.  What?  Don’t people just work and work until they can’t work anymore and then collapse on the couch and watch reruns of The Voice?   Not everyone does that?  Oh…

    solo bike adventure

    My friend was right.  Creativity is such a bountiful blessing but it does take some tending to.  Creativity can be exhausted.  I reach that point in my brain often and it leaves me wondering exactly what else I can smash butter and bacon into (I’m sorry/not sorry that I do that).

    Work is awesome and I’m a total fiend for it, but it’s not a creativity feeder.  Couch-time is just like turning my brain to stand-by mode… welcome but not a creativity feeder.  Pasta is a belly and creativity feeder.  Ok!  We’ve got one on the list so far.

    Bike rides are also a creativity feeder.  Seeing how the sun makes shapes in the world, watching people live this life, and daydreaming about the lives of my neighbors… these things totally get my brain working. Yes!  Two things on our list!  Now we’re cookin’.

    IMG_1927

    Let’s go on a creativity-feeding, pasta-heavy adventure.  I hope this inspires you get out and see your neighborhood in a new light.  You don’t necessarily need a fancy bike or mason, a pair of loafers and a granola bar will do for a nice stroll.  Get out there and find what feeds you (I hope there’s pasta involved).

    IMG_1856

    Before we head out the door, we must assemble our snack!

    Orecchiette is my favorite cold pasta shape.  The little ear shape holds all sorts of pesto and pistachio goodness.

    IMG_1912

    I tossed warm pasta with a pre-made basil pesto.  If you’d like to make your own pesto… it’s super easy!  I love this Spinach Cashew Pesto.

    Cherry tomatoes and fresh mozzarella chunks stud this pasta.  I also added salty green olives and lots of chopped pistachios.  Green-themed.

    Tomato Basil Orecchietti with Pistachios

    serves 1 (with leftovers)

    Print this Recipe!

    2 cups dried orecchietti pasta

    about 1 cup basil pesto

    1 handful cherry tomatoes, sliced in halves and quarters

    1 handful fresh small mozzarella balls, sliced in halves and quarters

    1 small handful shelled salted pistachios, coarsely chopped

    salt and pepper to taste

    Bring a large pot of water to a boil.  Add a good sprinkling of salt and pasta.  Cook until pasta is tender through, about 9 minutes.  Drain well and promptly return to the pot.  Top hot pasta with pesto, tomatoes, mozzarella, and pistachios.  Taste and season as necessary!  It’s totally easy… it’s supposed to be.

    solo bike adventure

    Pasta is jarred and ready for our adventure.

    IMG_1946

    We’ll need a beverage treat as well!

    Strawberry, lime, and basil seem like wonderful things to smash together.

    IMG_1955

    solo bike adventure

    Our drink is slightly sweet (from the strawberries), has fragrant herby notes, and a little punch from lime.  It’s super refreshing.

    If it is your inclination to add gin… I totally feel ya… but there’s no drinking and biking.  Not so safe.

    Strawberry Basil Lime Smash

    serves 1

    Print this Recipe!

    3 fresh strawberries

    1 tablespoon chopped fresh basil

    juice of 1 lime

    Smash strawberries and chopped basil in a small bowl.  Add the strawberries and basil to a glass filled with ice.  Top with lime juice and cold water.  Serve.  Yea… it’s totally that easy!  

    solo bike adventure

    solo bike adventure

    Adventure supplies include:

    - an old painting tarp for use as a solo picnic blanket.

    - an old map ripped from the Thomas Guide I used to look through in the back seat of my parents’ Jeep Cherokee.

    - a canvas napkin and silver fork… because I’m worth the real-deal.

    - sunglasses:  designer or otherwise. (Mine are totally from Target.)

    - bike gear including flashing lights and a helmet (to keep your hard head hard)

    - reading inspiration.  I chose the deconstructed food magazine Middlewest.

    a notebook and pencil for random bursts of creativity.

    - adventure lunch and strawberry-smash drink!

    - (not pictured) my Canon Rebel T5i camera… because i’m using it to shoot (duh!)

    bike adventure

    With my bag packed and my bike tires pumped, it’s time to take off!

    IMG_1597

    IMG_2058

    This might sound strange.  A majority of the things I say here sound strange… but, I love front doors.

    I love how differently people choose to display the door that welcomes people into their space.  It’s sort of like looking at everyone’s shoes.

    IMG_1656

    solo bike adventure

    I can be guilty of not stopping to smell the roses, or appreciate the bouganvilla, or take in the craaazy looking ivy.

    Taking these little pieces of nature in makes me think I should take out my watercolor paints, right!?

    IMG_2021

    IMG_2016

    I love how late afternoon light creates these bold shadows.

    I played with my Canon Rebel T5i‘s Sport Mode while watching these kids at the skate park.  Even just playing with a new camera mode can help me kick the walls out of the box I’m in.

    IMG_2034

    I love when shadows help create new shapes in a photograph.  I’m usually at home shooting food on a tiny butcher block, trying to avoid direct light and too many bright brights or dark shadows.  When I’m out in the world, I want the let the brights and shadows play.

    Also… just so we’re clear.  The kid with the blue ball is trying to hit the other two kids in the head.  Totally normal.

    image

    IMG_2045

    Also… Let’s be models.

    I love Venice Beach.

    IMG_2066

    Bright skies and rippled house shadows.

    IMG_2065

    In the Venice Canals, Los Angeles.

    IMG_2038

    Every day-explorer need a little rest and snack time.

    IMG_2055

    IMG_1622

    Every day-explorer also needs a giant cone of ice cream.

    IMG_1728

    Los Angeles adopts a dusty pink haze as the sun starts to set.

    I love the energy around sunset at the beach.  It feels like everyone slows to appreciate the sincerity of the moment.

    IMG_1705

    Ugh… why don’t I just take my dang shoes off?

    solo bike adventure

    IMG_1715

    As the sun goes down, I like to shoot into the light, letting the sun create gorgeous silhouettes of the shapes in front of me.

    Palm trees, a shuttered life guard stand, the Santa Monica Pier.  It all just feels so pink and dusty and full of anticipation.  Is it the kind of thing that makes you want to marry the night… or is that just me?

    I hope you’re inspired to take some time, strap on your bike helmet, grab your camera, pack up your pasta, and go for a little day adventure of your own.  It really doesn’t take much.  Just some eyes wide open to what the world wants to show you.  That sounds so hippie-dippy, but it’s totally just true.  Feed yo’self!

    Screen shot 2013-05-13 at 11.29.25 AM

    Sponsored by Canon

    All images captured on the Canon RebelT5i.


    26 Jul 20:23

    Thirty Two

    by joythebaker

    doughnut

    You know what’s weird?  Getting older.  I think it must be weird for everyone.

    I’m celebrating a birthday this weekend.  The big 32.  That just sounds strange.  I was just getting used to 30, but I feel like I’m 26.  Somewhere.  Somehow.  The numbers feel off.

    I’m not the kind of person who has life goals set for each year of life.  I don’t feel behind in the marriage game.  I can barely handle babysitting.  I’m not trying to reach the top of the baking ladder… that just sounds sticky.  I subscribe to the idea that working really hard and loving people better every day will get me where I want to be each day, week, month and year.  Too loose a plan?  I dunno.  It feels right.  It requires a lot of ever-changing lists…but it feels right.

    Oh, also!

    I don’t make myself a birthday cake and blog about it.  Birthday cake doesn’t taste as good if you make it for yourself.  It’s a thing.  This year I’m going to eat as many doughnuts as my heart desires.  This will probably fall in the 2 to 8.5 range… I’ll let you know where I land.  Ps.  My dream birthday cake is this Angel Food Cake with Vanilla Strawberries.  Hint (Dad, do you still read my blog?) Hint.

    Every year I make a list of things I’ve gained perspective on, and a list of things that I’m still stubbornly trying to figure out.  The list is as shallow as selfies and as deep as God… because that’s exactly how life is.  On the real.  On the reg.

    photo3
    This Is That:  a list

    (by ‘you’ I mean ‘me’, always.)

    ONE: Have honest friendships.  You really can’t afford to be friends with someone who will let you have spinach in your teeth all night.  You’re not that graceful.

    TWO: Take as many selfies as it takes for everyone to look good in the picture.  Come on… common courtesy.

    THREE:  You only need one good purse… and it doesn’t have to be this season’s super expensive impossible bag.  Come on… a vintage Coach bag that you’ve brought back to life with leather polish is totally IT!

    FOUR:  Upon entering ‘the club’ where people are drinking and dancing and acting a fool (and it’s so much fun), be aware of the fact that you look like you’re in your 30′s… because you are. You’re not fooling anyone. The 25 year old guy that yells in your ear that you look 28… he’s being nice and he’s a liar.  You look 32. It’s ok. Dazzle him with your awkward dance moves. He’s 25… who cares (not you!).

    FIVE:  You glorify being busy …but you don’t know how to stop.  Maybe admitting it helps?  Realtalk:  You know what you should be glorifying.  It has nothing to do with you and everything to do with God.

    SIX:  Any tiny annoyance you have before two martinis will be a big yell-y ISSUE after two martinis.  Think/Re-think those martinis.

    SEVEN:  CAPS LOCK LIVING!  Think about it.

    EIGHT:  You’re actually really cool. Not because anyone else thinks you are, but because you think you are.  The secret to being cool:  just think it true.  Others will follow suit.

    photo2

    NINE:  Rappers rap about some stooooopid stuff that you, as a classy lady, do not need to be/concern yourself with.  Pfffft.  In their dreams.  Can ladies start rapping about men with passion, integrity, a job, and nice shoes?  Yea…. it’s like that.

    TEN:  Ask yourself ‘just who the heck do you think you are?’ in a very non-rhetorical way every once in a while.  The answer is important.

    ELEVEN:  It doesn’t matter what size the clothing label says, it only matters that it feels good and falls well on your body.  AKA… you’re not that size anymore, kick it up a notch, it’s cool, love your thighs. GEEZ!

    TWELVE:  When in doubt (which is often):  confetti and champagne.

    THIRTEEN:  Go on a roller coaster at least once a year because they make you laugh-scream like nothing else on the planet.

    FOURTEEN:  Tell your parents that you’re glad they’re your parents.  They’ll be like ‘Whaaaat!?  That’s a crazy thing to say!’, but they’ll feel it in their hearts and probably buy you lunch.  Do it because you mean it… not for the free lunch.

    FIFTEEN:  Chill out. Halle Barry is pregnant.

    SIXTEEN:  It’s ok to say things like ‘I don’t know.’.  It’s waaaay better than arguing a point when you’re not on solid ground.

    SEVENTEEN:  What does it look like to dig deep every day?  It looks exhausting, and kinda terrifying, and kinda like the best days that ever happened day after day after day.

    EIGHTEEN:  Get good at a thing and never apologize for being good at that thing.  It’s all yours.

    NINETEEN:  Never trust someone who refers to themselves a ‘tastemaker’.  Don’t be fooled.  You won’t be bossed.

    TWENTY:  Give more, even when you think you have nothing to give… you do!  Sidenote: I bought myself a Giving Key and I’m sponsoring another child with Compassion for my birthday.  Yes… selfie birthday presents.

     photo1

    TWENTY ONE:  You have a story to tell.  Everyone does!  Tell it proud!

    Happy Birthday to Us!  We all have one, and I’m glad that we do!

    Other times I wrote words:

    On Turning TwentyOne   + What It’s Really Like  + I Accidentally Saw a Picture of You + Thirty Years of Learning 


    sprinkle image credit Paola Parsons 

    diva joy next to a bike image credit Whitney Adams


    26 Jul 20:21

    The Ultimate Club Sandwich

    by joythebaker

    IMG_9405

    Let’s just get this humble-brag out of the way now:  I’m REALLY good at making sandwiches.  It’s mostly just about piling delicious things onto fresh bread.  It’s not really rocket surgery.

    Making a sandwich for someone is dang important.  A good sandwich can’t be faked. Avocado must be ripe.  Bacon must be crisp.  Produce must be fresh and cheese must be perfectly melty.

    It’s a science… but it’s not a science at all.  It’s just a sandwich, but it’s important.

    Can we just talk about sandwiches?  K. Thanks.

    IMG_9316

    I call this sandwich The Ultimate Club because it’s totally top-shelf.

    We’ve got crisp Black Forest Bacon, whole grain mustard, ripe tomatoes, baby spinach, roasted turkey, and ripe avocado.  Wait.. did I mention melty Brie Cheese!?  Yea… it’s serious.

    IMG_9339

    Mustard is smeared.  Brie and turkey are piled generously.

    IMG_9370

    Flavor layering, featuring BACON!

    Bacon should probably be on every sandwich ever, including this Peanut Butter Pickle Sandwich.  Yea… I went there.

    IMG_9376

    Only two things could make this sandwich better:  avocado and grilling.  We’re going to make both happen.  Duh!

    IMG_9425

    By now you may know that I have a serious obsession with outrageous sandwiches.  I’ve made Spinach and Artichoke Grilled Cheese, French Onion Soup Sandwiches, and Pepper Jack Spicy Grilled Cheese.   Seriously delicious.  like whoa.

    This Ultimate Club is easily one of my new favorites.  It has everything a good lunch sandwich should have and it feels like a total treat!  Served with fresh cherries, potato chips, and a Dr. Pepper… come on.  Get in my life, for real.

    The Ultimate Club Sandwich

    makes 1 sandwich

    Print this Recipe!

    2 slices good bread

    whole grain mustard

    Brie cheese, rind and all

    thinly sliced roasted turkey

    2 slices crisp cooked bacon

    sliced tomato

    baby spinach leaves

    ripe avocado, sliced

    butter for grilling

    You know how to make a killer sandwich.  You don’t need any help from me.  But… while we’re here, let’s just spell this out.

    Spread two slices of bread with whole grain mustard.  Top one of the bread slices with a bit of Brie cheese (rind and all).  Top the Brie bread with a bit of fresh baby spinach leaves and a few tomato slices.  On the other slice of mustard covered bread, add roasted turkey slices.  Top with cooked bacon and sliced avocados.

    Smash the two slices of bread together.

    In a medium saute pan, melt a bit of butter over medium heat.  Grill sandwich until golden on each side.  Serve warm.  It’s yummy.  

    26 Jul 20:20

    Brown Butter Chocolate Chip Cookies

    by joythebaker

    IMG_9698

    I haven’t been feeling at home lately.  I don’t think it’s an issue of physical location… I spend a hearty amount of time sitting at my desk.  I think this might be more of a brain-space problem… my brain is everywhere but in my head doing its job.

    I’m not certain how to coax my brain back into the world of now.  I’ve been busying my poor brain with future work, future deadlines, and future anxieties.  The now is certainly suffering in a way that feels annoyingly paralyzing.

    Making these cookies came to mind more as a meditation than a treat.  The act of melting butter down into a fragrant amber-colored fat, and creaming it with brown sugar feels like it could lead me home.  Toasted pecans and dark chocolate chunks stud the path.  The smell that fills the kitchen?… Yep, I think it’s working.  I’m finding my way home.

    Thank you for being here with me.  Here is home, right?

    Editor’s Note (it’s just me, Joy):

    -  There’s no way I could mention chocolate chip cookies without mentioning the dad who taught me how to make cookies:  Dad the Baker.  Father’s Day is right around the corner, which makes this week a wonderful time the reminisce about Dad Lessons.  Oh how I need these every single day.

    -  If you follow me on Instagram (and I’m super glad that you do!) you may be have seen that this weekend I’m part of a Pop-Up Bake Sale and Shop in Los Angeles.  Just sayin’.  Stay in the know!  

    IMG_9633

    Here is a collection of ingredients I feel at home in.  Butter is browned and nutty.  Brown sugar is sticky and moist.  Chocolate is dark.  Pecans are chopped.  I live in this space.  Home, Sweet (literally) Home.

    IMG_9639

    This cookie dough is creative with butter.  We use softened unsalted butter like traditional cookie dough… but we also use melted and browned butter.  Yea… brown butter is the magic ingredient to everything delicious.  That’s not an exaggeration.

    Proof:  Brown Butter Strawberry Banana Bread

    IMG_9642

    Now would be a good time to grab a spoon.

    IMG_9647

    I’m at home, but sometimes it takes the smell of baking cooking to actually make me feel at home with everything around me.

    IMG_9657

    Cookie dough is patient and kind.

    IMG_9660

    Cookie dough burrito.

    (I’m a poet.)

    IMG_9664

    Cookie dough is scooped and, because I have a salt-tooth, I like to top these cookies with a pinch of smoked sea salt.

    I mean…

    Yea!

    IMG_9684

    You can taste the butter from here, can’t you?

    IMG_9694

    Brown butter + chocolate + pecans.

    Chewy, crisp, and buttery.  There’s not much more to say.  We’re all  the way home.

    Brown Butter Chocolate Chip Cookies with Pecans

    from the Joy the Baker Cookbook

    makes 24 cookies

    Print this Recipe!

    2 1/4 cups all-purpose flour

    1 teaspoon salt

    1 teaspoon baking soda

    1 cup (2 sticks) unsalted butter, softened to room temperature

    1 cup packed light brown sugar

    2 teaspoons pure vanilla extract

    1 teaspoon molasses

    1/2 cup granulated sugar

    1 large egg

    1 large egg yolk

    1/2 cup coarsely chopped pecans

    1 cup bittersweet chocolate chips

    coarse sea salt for sprinkling

    In a medium bowl, whisk together flour, salt and baking soda.  Set aside.

    Start by browning 1/2 cup (1 stick) butter.  In a medium skillet, melt butter over medium heat.  Once the butter has melted completely, it will begin to foam and froth as it cooks.  The butter will also crackle and pop.  That’s the water cooking out of the butter.  Swirl the pan occasionally, and keep an eye on the melted butter.  The butter will become very fragrant and brown bits will begin to form at the bottom of the pan.  Once the bits are an amber brown, immediately remove pan from the heat and pour browned butter (bits and all) into a small bowl.  Leaving the butter in the pan will burn it.  Allow butter to cool for 20 minutes.

    In the bowl of a stand mixer fitted with a paddle attachment, cream remaining 1/2 cup of butter with brown sugar.  Cream on medium speed until light and fluffy, about 3 to 5 minutes.  Add the vanilla extract and molasses and beat until incorporated.

    Once the brown butter has cooled slightly, pour the butter (brown bits and all) into the creamed butter and sugar mixture.  Add the granulated sugar and cream for 2 minutes, until well incorporated.  Add the egg and egg yolk and beat for 1 minute more.

    Stop the mixer and scrape the bottom of the bowl to ensure that everything is evenly mixed.  Add the flour mixture, all at once to the butter mixture and beat on low speed until the flour is just incorporated.  Remove the bowl from the stand mixer and use a spatula to fold in pecans and chocolate chips.

    Spoon batter onto a piece or parchment paper or plastic wrap and wrap into a disk or cylinder and seal at both ends.  Allow to rest in the fridge for at least 30 minutes.

    Place racks in the center and upper third of the oven and preheat oven to 350 degrees f.  Line two baking sheets with parchment paper.  Scoop dough by the two tablespoonful onto prepared sheets.  Be sure to leave about 2-inches of space between each cookie.

    Bake for 12 to 14 minutes of until cookies are golden brown.  Remove from the oven and allow to rest on the baking sheet for 5 minutes.  Serve warm or allow to cool completely.  Cookies are best enjoyed within a few days.  Duh.  


    26 Jul 19:58

    Strawberry Raspberry Crisp

    by joythebaker

    IMG_0925

    My summer love language is pink and fruity.  All I want to do this weekend is put Van Morrison in my headphones, tool down the bike path at the beach, people-watch, seagull-watch, and express my affections in strawberries and raspberries.

     Good, right?  What more do we really need?  (If your answer to that rhetorical question was: CRISP OAT TOPPING!!!… then you’ve totally come to the right place.)

    IMG_0882

    We don’t even need a bowl for our mellow summer baking.  This crisp topping can come together on a clean counter or a plain ol’ baking sheet.

    Pile together flour, oats, sugar, and spice and work in cold butter and walnuts.

    This is totally relaxed summer baking.  Embrace it!

    IMG_0885

    Flour, sugar, oats and spice.  Gather it all with your fingers.  It’s totally cool.

    IMG_0889

    Quickly break cold butter into the dry ingredients.  It’s like we’re making pie crust but much more mellow and spiced.

    IMG_0893

    Gather in the walnuts and we’re all the way in the game!

    IMG_0905

    Combine fresh raspberries and big strawberry bites.  Add a big dose of crumble.  We’re going to stir it together.

    IMG_0910

    We’re adding flavor and coating the fruit in a bit of flour and oats.  The fruit juices will bake and thicken beautifully.

    IMG_0913

    The rest of the crisp topping is piled atop the fruit.

    It’s a lot of topping.  It’s serious.

    IMG_0919

    Baked and golden.  The more golden the crust, the more crisp the bites.  Yes!

    IMG_0922

    This crisp is elegant in its comfort and simplicity.  The raspberries bake down into a jammy consistency and the strawberries become slight and tender, but still hold their shape.  The amount of oat topping rivals the amount of fruit, making this crisp extra toothsome, extra crunchy, extra delicious.

    Breakfast?  Yes.  Afternoon snack?  Sure?  Dinner?  You know I’ve done it.

    This is an anytime, summertime crisp.  Do it up!

    Strawberry Raspberry Crumble

    makes 1 8×8-inch pan

    Print this Recipe!

    1 pound fresh strawberries, hulled and quartered

    2 cups fresh raspberries (if using frozen, just thaw and drain)

    1 cup all-purpose flour

    1 cup packed brown sugar

    3/4 cup old fashioned oats

    1 teaspoon ground cinnamon

    1/2 teaspoon freshly grated nutmeg

    1/4 teaspoon ground ginger

    Pinch of salt

    1/2 cup (1 stick) unsalted butter, chilled and cut into small cubes

    1/2 cup coarsely chopped walnuts (optional)

    Place a rack in the center of the oven and preheat to 350 degrees F.  Place sliced strawberries and raspberries in a square 8×8-inch baking dish and set aside.

    In a medium bowl, whisk together flour, sugar, oats, spices, and salt.  Add the butter and toss the mixture together with your hands.  Break the butter up into the flour mixture until the butter is the size of small pebbles and oat flakes.  This took me about 4 minutes.  Toss in the walnuts (if using).

    Toss a generous handful (about 1 cup) of crumble topping into the strawberry and raspberry mixture.  Toss loosely with your hands.  Spread fruit evenly in the pan and top with the remaining crumble mixture.  Bake until fruit is juicy and bubbling, and the top of the crumble is slightly browned and crisp, about 30 minutes.

    Remove from the oven, let cool slightly, and serve with vanilla ice cream.  Crumble is delicious served warm and can be stored, covered, in the fridge and reheated in the oven or microwave for serving.

    26 Jul 19:56

    Picking Basil, Planting Peppers, Loving Lettuce and More: Garden Update 5/21/12

    by Farmgirl Susan
    Lots of beautiful basil from just two plants (I love these $10 take apart shears).

    Want to see more of my garden? The new weekly Friday Farm Fix series on Farmgirl Fare usually includes lots of kitchen garden photos.

    Realization of the Day:
    Eating from the garden makes everything taste better, even if your harvest is just a sprinkling of chives or a handful of parsley.

    There isn't a whole lot of bounty in the garden yet, but during the past week we enjoyed plenty of beautiful (and big!) salads, as well as chopped green onions on just about everything. If all goes well, it won't be long before I'm digging up the first new potatoes, harvesting the garlic, and picking my favorite Dragon Langerie (also called Dragon Tongue) beans. And the arugula and Parris Island cos lettuce are almost ready to start thinning and tossing into salads.

    The weather has been crazy hot and way too dry (thanks to my super lightweight Water Right garden hoses I no longer dread watering the garden!), but we did finally get a little rain yesterday. Just about 4/10ths of an inch, but I'll take it. At least it settled all the dust.

    Like what you see growing in my garden? The links included below can help you grow the same things in yours.

    Into the kitchen during the past week:
    Chives (Learn how to grow chives here, plus my easy herbed yogurt cheese recipe.)
    Green onions and spring onions (read about why I now grow onions from purchased plants here)
    Italian flat leaf parsley (here's the best way to store fresh parsley)
    Lettuce (I picked the entire 4'x8' bed of my favorite Rocky Top Lettuce Mix from Baker Creek before it all went bitter from the heat; learn how to grow your own gourmet lettuce from seed here).
    Red Russian kale (from a couple of last spring's plants; photo below)
    Swiss chard (amazingly heat and cold tolerant; learn how to grow Swiss chard from seed here)
    Tuscan kale (also called Lacinato kale, dinosaur kale, and Nero di Toscana cabbage; one enormous plant direct seeded last fall)

    And into the garden:
    Four Golden California Wonder sweet pepper plants (purchased; tips for planting and growing peppers here)
    Five Roma tomato plants (four purchased, one volunteer from last year I'd dug up and put into a small container)
    Eight eggplant plants (purchased; the tag just says 'classic' which cracks me up)

    I have several more varieties of tomato plants that still need to go into the ground (both purchased and started from seed), another four Golden California Wonder pepper plants (purchased), and a bunch of leggy little purple basil seedlings I grew from seed that desperately need to be transplanted into individual plugs (I think they're still too small to go straight into the garden, especially with this heat).

    I'm also hoping to plant some more green bean seeds and am wondering if I should try direct seeding some cucumber seeds this time, since the soil is plenty warm and my first two attempts at starting them in flats (including 4 different varieties of all brand new seeds) yielded nothing for some reason. I don't think I've ever had trouble sprouting cucumber seeds before. The basil, calendula, and zinnia seeds didn't do squat either.

    Twelve more garden photos below. . .
    Click here for the rest of this post »
    26 Jul 19:55

    Growing (and Using!) Your Own Fresh Herbs: My Six Favorite Varieties

    by Farmgirl Susan
    Greek oregano growing in the unheated greenhouse on 11-13-12
    Taken today: a happy pot of Greek oregano is surrounded by volunteer, easy to grow Swiss chard in the unheated, homemade greenhouse.

    Chives, basil, Greek oregano, lemon thyme, Italian parsley, and lemon balm. It's the middle of November in zone five Missouri, and five of my six favorite herbs are still thriving in the kitchen garden, despite weeks of heavy frosts and several nights in the 20s. Even some of the heat-loving basil lasted until a week ago, thanks to some old bed sheets and a plastic tarp.

    When my publishing network, BlogHer, asked if I was interested in writing an article for their Go Green to Save Money series, I immediately thought of homegrown herbs. They're easy to grow, cheap to keep, don't require lots of space or attention, and aren't usually bothered by diseases and pests. They're pretty to look at, bursting with flavor, and far fresher than those pricey little packets at the store.


    Do you grow any herbs in your garden? Any favorite varieties, stories, growing tips, or recipes to share?

    © FarmgirlFare.com, full of freshly picked flavor.
    26 Jul 19:55

    How To Grow Your Own Garlic (and How To Not Get Any Planted): Garden Journal 1/1/13

    by Farmgirl Susan
    How to grow garlic (1) - save your biggest cloves for planting next year's crop - FarmgirlFare.com
    Save your biggest cloves for planting next year's garlic crop.

    Realization of the Day:
    December is a bad time for me to plan on planting my garlic.

    Of course I knew this already. The best time to plant garlic is a month or two before the ground freezes. Here in Missouri that means October. In warmer regions, you can plant after the first frost date through early winter. Ideally you want to get good root growth but no top growth before winter, although I've had sprouts shoot up before it got really cold, and they survived just fine.

    If you're gardening by the moon, you want to put your garlic in the ground on a fertile day during the third or fourth quarter. (If you're interested in learning more about minding the moonsigns, Astrological Gardening: The Ancient Wisdom of Successful Planting & Harvesting by the Stars by Louise Riotte is a great book.)

    the snowy kitchen garden on 12-29-12 - FarmgirlFare.com
    The kitchen garden on Saturday, December 29th.

    Miraculously, I did actually manage to get my garlic in the ground in October in both 2011 and 2010, but this year my planting plans were waylaid. Then I missed November. And on Saturday, which was my scheduled December planting day, the ground was frozen and there were three inches of snow on it. Yesterday and today are good planting days as well, except for the old snow and the new sleet. But that's okay.

    Lots more below. . .
    Click here for the rest of this post »
    26 Jul 18:02

    Lemon Blueberry Muffin Bread

    by jenna

    Good morning.

    This is for those in need of a last minute Mother’s Day brunch recipe! This breakfast bread that tastes exactly like a giant blueberry muffin. And who doesn’t like a giant muffin?! No one. It’s so good slathered with salted butter that I can’t even stand it.

    Happy early Mother’s Day to all the mamas out there! This has been the longest I’ve ever gone in my life without seeing my mom and I’m so excited to see her soon at the wedding!!

    You can get this recipe over at PBS Food. Enjoy!

    Pin It
    26 Jul 18:02

    Double Chocolate Fudge Cookies

    by jenna

    Well, you guys. It’s finally time. I can finally say that I’m getting married next week. That’s NUTS.

    That being said, you can probably imagine what this week is like for me. I’m scrambling. I’m packing for our wedding + honeymoon {we won’t be back until mid-June}, finishing up all the wedding details and all my work so I can take a real vacation for a few weeks. I’m also doing all that bridal prep stuff like getting my hair highlighted and getting my nails done because once our plane touches down in Austin, it’s go time. First with my bachelorette party, then rehearsal dinner, then wedding! Like I said…nuts. I’m so excited! If you’re wondering what will happen to this blog while I’m on my honeymoon, the answer is nothing. I’m going to be quiet for a few weeks and just soak it all in. I vowed not to be attached to my laptop while I’m on my honeymoon and I think it’s going to be really good for me! There will probably be a travel update here and there {keep up with us on Instagram!}, but no real posts until I return in June.

    However, today calls for cookies!! And not just any cookies — double chocolate fudge cookies made with Fair Trade ingredients!

    I told you guys a few weeks ago that I was doing some work with my friends over at Fair Trade and this is one of the recipes I came up with using the fun ingredients they sent me! I’m in love with this alter eco organic mascobado cane sugar! It has a pretty strong vanilla and caramel taste to it, which I can’t get enough of. If you’re lucky enough to get your paws on some of this sugar, it’s a real treat.

    This cookies are for the serious chocolate lover…aka yours truly! Especially during stressful wedding planning moments. I like to say my pre-wedding diet has consisted of chocolate and avocados. I should really market that idea, huh?

    They are chocolatey, ooey and gooey. Let’s just say you’ll need a glass of milk to wash these bad boys down.

    If you’re passionate about Fair Trade like me, you maaaaaaaaay want to check back here tomorrow. There might be a little surprise. Just sayin’!

    Double Chocolate Fudge Cookies

    Print this Recipe!

    yields 2 dozen cookies

    Ingredients:

    2 sticks unsalted butter, room temperature

    1 1/3 cup Fair Trade organic cane sugar

    2 eggs

    ½ tsp salt

    1 tsp baking powder

    1/3 cup cocoa powder

    2 ¼ cups all purpose flour

    1 12-oz bag Fair Trade semisweet chocolate chips

    Directions:

    Preheat oven to 350 degrees and line a sheet pan with parchment paper.

    Cream together the butter and sugar until light and fluffy. Add the eggs one by one, beating after each addition.

    In another bowl, sift together the flour, cocoa powder, baking powder and salt. Add to the butter mixture and mix until combined. Add the chocolate chips and mix until just combined.

    Drop dough by the spoonful onto prepared sheet tray. Press down gently to slightly flatten each cookie dough mound then bake for 12-13 minutes.

    Let cookies cool on a wire rack then enjoy!

    Time:

    30 minutes

    Pin It
    26 Jul 17:57

    Fresh Cherry Limeade Cupcakes

    by jenna

    limeade cupcakes-4784

    I am in love with these cupcakes.

    You see, the other day I was having a major moment of Sonic nostalgia. Memories of going through the drive-through with my girlfriends and slurping on a deliciously fizzy cherry limeade with the crunchy ice. Remember the crunchy ice?! You know what I’m talking about. Well, out here in San Francisco there are unfortunately no Sonics to be found. It’s a sad fact but true. There’s also no Cracker Barrels here. Don’t even get me started on that one. I don’t even know how to take a proper road trip without Cracker Barrel brunch and cherry limeade from Sonic. Ahhhh the memories of my youth.

    So what’s a girl to do when a cherry limeade craving strikes? Bake up a batch of these zesty lime cupcakes topped with fluffy fresh cherry frosting! You’re going to love them — I promise!

    limeade cupcakes-4754

    When I was working on this recipe, it was important to me to make them “all natural”. This means I used real butter, sugar, limes and fresh cherries instead of maraschino. No artificial colors or flavors. I wanted the natural flavors of the fruit to really pop so I used really fresh ingredients! Just look how gorgeous this fluffy pink cherry frosting is! It has big chunks of sweet cherries in it.

    I love baking by myself at home because no one {but Dexter} can see just how much frosting I “sample”. You know, for recipe development purposed…of course.

    limeade cupcakes-4760

    Mmmmmm just seeing these photos makes me want to bake another batch. I took these to our community group last Thursday night and everyone went crazy over them. I might need to bake another batch to take with us to Tahoe later this week. They go fast, people, watch out!

    limeade cupcakes-4765

    My favorite part is the cherry on top. It reminds me of an old fashioned ice cream sundae.

    Hope you guys love these as much as we did! They definitely quelled my Sonic craving for at least another few weeks. Happy Monday, friends!

    limeade cupcakes-4786

    Fresh Cherry Limeade Cupcakes

    makes 1 dozen cupcakes

    Print this Recipe!

    Ingredients:

    for the cupcakes -

    1 stick unsalted butter, at room temperature

    3/4 cup sugar

    2 eggs

    1 1/2 cups all purpose flour

    3/4 tsp baking powder

    1/4 tsp salt

    zest of 1 lime

    juice of 1.5 limes {about 2 tbsp juice}

    1/2 cup buttermilk

    for the frosting -

    2 sticks unsalted butter, room temperature

    1/2 cup pitted sweet cherries

    1 lb powdered sugar

    additional cherries for garnish

    Directions:

    Preheat oven to 350 degrees. Line a cupcake tin with paper liners and lightly spray the liners with nonstick cooking spray.

    Cream together the butter and sugar until light and fluffy. Add the eggs and continue beating until well combined. Add the lime juice and mix well.

    In a large bowl, whisk together the flour, baking powder, salt and lime zest. Add the butter and sugar, then drizzle in the buttermilk. Keep beating until batter is smooth.

    Scoop out batter into prepared cupcake tins. Fill each tin 3/4″ of the way full then bake for 30 minutes until cupcakes are golden. Remove cupcakes from the oven and let cool completely before frosting.

    To make the frosting, beat the butter in a stand mixer until it softens. Add the pitted cherries (these can be roughly chopped or just halved) and the powdered sugar and keep beating for another 6-8 minutes until very fluffy. The cherries will naturally break up during this process.

    Frost cupcakes and top each with a whole cherry.

    Time:

    total time: 2 hours

    active time: 30 minutes

    *cupcakes can be made a day ahead of time and stored, covered, at room temperature


    Pin It
    26 Jul 02:11

    Carrot Cake Oatmeal

    by Annie

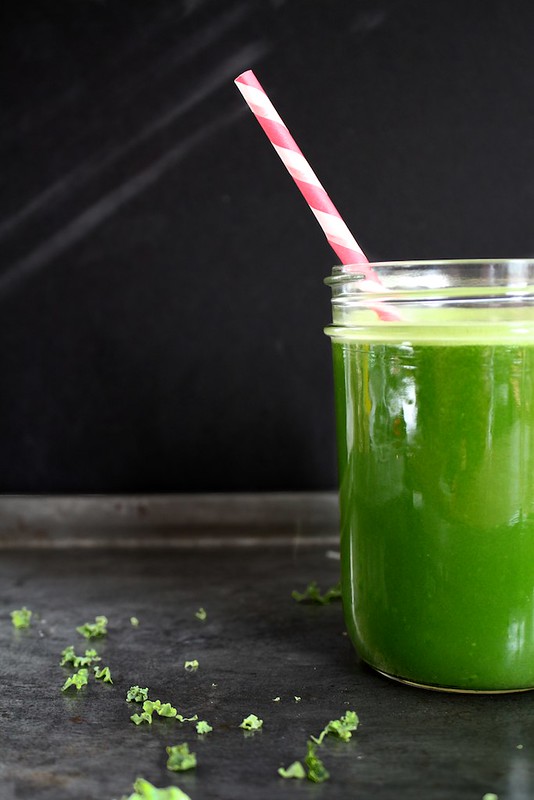
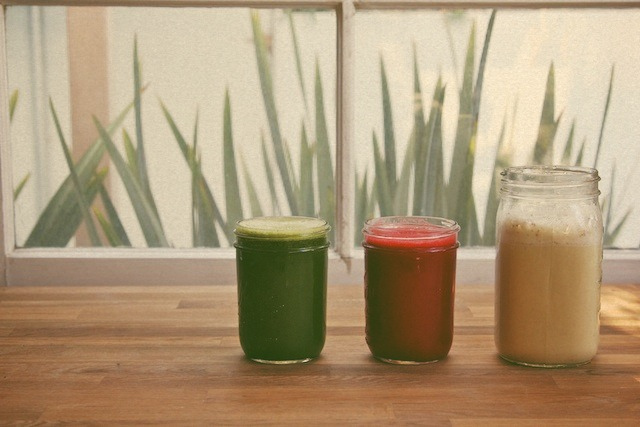
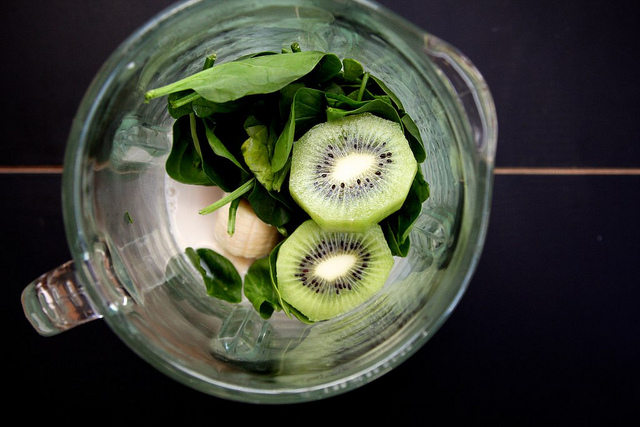
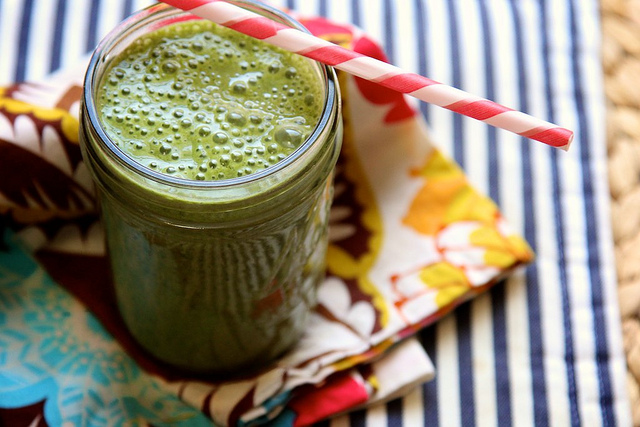
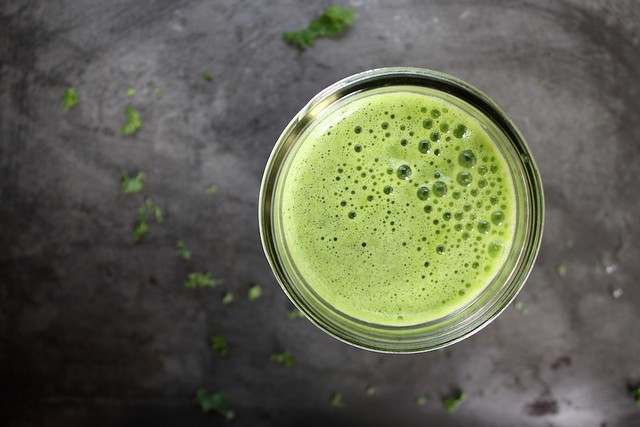
    Despite my best efforts, I fell into some sort of weird breakfast rut the past month or so.  Nothing has sounded particularly good to me…I think in part due to the change in the weather.  So many of the dishes I loved through winter are less appealing now.  That coupled with having about two minutes available for eating breakfast each morning has led to an awful lot of smoothies and sad banana toasts.  Oatmeal has become a favorite of mine in the past few years but I wanted a new spin on it.  This carrot cake oatmeal was the answer.

    Okay, obviously it isn’t exactly carrot cake.  I mean, it’s still oatmeal.  But it’s darn good oatmeal.  The carrot, coconut and raisins pack a nice dose of natural sweetness so very little additional sugar is needed.  This recipe will definitely come in handy for all those times that I have random bags of carrots sitting neglected in the veggie drawers.  Enjoy!
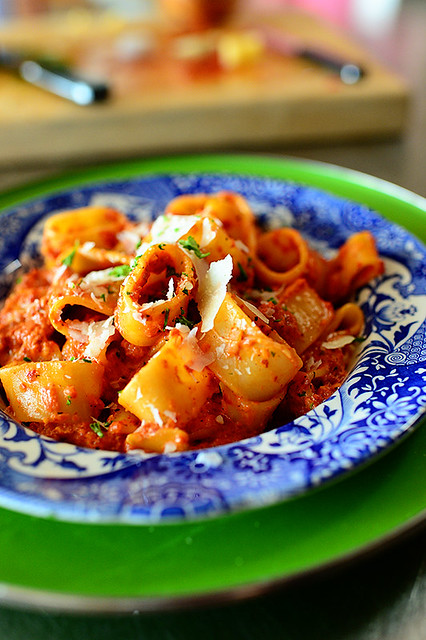


    Recipe: Carrot Cake Oatmeal

    Yield: about 6 servings


    Ingredients:

    3 cups water
    1 cup low-fat milk*
    1 tbsp. unsalted butter*
    1 cup steel-cut oats
    ¼ tsp. salt
    3 tbsp. brown sugar
    3 carrots, peeled and shredded
    ½ cup shredded coconut
    1/3 cup raisins
    ½ tsp. ground cinnamon
    ¼ tsp. ground ginger
    ¼ tsp. grated nutmeg


    Directions:

    Combine the water and milk in a medium saucepan.  Bring to a simmer.  Meanwhile, melt the butter in a 10- or 12-inch skillet over medium heat.  Add the oats and toast, stirring occasionally, until golden and fragrant, about 2 minutes.

    Stir the toasted oats into the simmering liquid.  Reduce the heat to medium-low and simmer gently until the mixture is very thick, about 20 minutes.

    Stir in the salt, brown sugar, carrot, coconut, raisins, cinnamon, ginger, and nutmeg.  Continue to simmer, stirring occasionally, until all of the liquid has been absorbed and the oatmeal is creamy, about 10 minutes more.  Remove from the heat and let stand 5 minutes before serving.

    *To make this vegan/dairy free, use coconut milk and coconut oil in place of the milk and butter.

    ** This recipe can be made in advance and reheated before serving.  When reheating, stir in an additional splash of milk to help loosen the cooled oats.


    Source

    01 May 12:44

    Quick and Easy Roasted Red Pepper Pasta

    by Ree

    Roasted Red Pepper PastaI made this for a quick dinner last night, so I thought I’d share it with you this morning. It’s almost identical to a recipe I posted here back in ancient times, also known as 2009, but it’s much quicker, easier, and will leave more time for you and your husband to catch up on old Season 3 episodes of 24, which have recently been playing on some cable channel without commercial interruptions.

    Along those lines, I would like to say that I don’t think my central nervous system will make it to Season 4. I just don’t.

    Anyway, in the old, ancient version of this pasta, I took the time to roast the red peppers myself over the stovetop burner, and I added toasted pine nuts, which added a nutty flavor and a little crunch. But last night, I had no time for roasting. I had no time for nutty crunch. I just had time to whip up a quick, easy pasta. And I just had time for Jack Bauer.

     
    Roasted Red Pepper PastaI love, love, love these things. You can find lots of different brands, lots of different sizes of jars. But jarred roasted red peppers are absolutely, positively something you should stock in your pantry or fridge if you don’t already. They’re just smashing in sauces like this one, but they’re also perfect cut into strips on a sandwich, chopped and spooned over a block of cream cheese with crackers, or just eaten on a plate for lunch with a pile of cottage cheese.


    Roasted Red Pepper PastaStart by grabbing any pasta you want. I got this in the big city, and it’s part of my Different Pasta Shapes collection, which I would someday bequeath to a museum if I didn’t have big ol’ plans to eat it all.

    Pasta. It is everything.


    Roasted Red Pepper PastaThrow it into salted boiling water and cook it till it’s al dente.


    Roasted Red Pepper PastaThen chop up an onion…


    Roasted Red Pepper PastaAnd mince up some garlic.


    Roasted Red Pepper PastaThen pile some roasted red peppers onto the cutting board…


    Roasted Red Pepper PastaAnd give ‘em a rough chop.


    Roasted Red Pepper PastaNext, grab a couple of tablespoons of glorious, flavorful butter…


    Roasted Red Pepper PastaThen throw in the onions and garlic.


    Roasted Red Pepper PastaSaute them until they’re soft, about 3 to 4 minutes or so.


    Roasted Red Pepper PastaNext, throw in the chopped red peppers…


    Roasted Red Pepper PastaAnd cook them around for a couple of minutes, just until they’re heated through.


    Roasted Red Pepper PastaTransfer the mixture…


    Roasted Red Pepper PastaTo a food processor or blender…


    Roasted Red Pepper PastaThen puree it until it’s all…well, pureed!


    Roasted Red Pepper PastaMmmm. This is divine right here. And even though it’s totally pureed, it’ll still have a great texture to it. Yum!


    Roasted Red Pepper PastaNow, back to the skillet: Heat another couple tablespoons of butter…


    Roasted Red Pepper PastaThen pour the pureed pepper right in.


    Roasted Red Pepper PastaTurn on the heat and start to heat up the puree…


    Roasted Red Pepper PastaThen pour in some vegetable or chicken broth to thin it a bit.


    Roasted Red Pepper PastaThen stir it all around.


    Roasted Red Pepper PastaAdd some salt and pepper…


    Roasted Red Pepper PastaThen, my favorite part: Add in some heavy cream.


    Roasted Red Pepper PastaStir it around and see what it looks like, then you can always splash in a little more cream if you want it even richer.


    Roasted Red Pepper PastaNext, mince up some herbs. I only had parsley, but if I’d had basil I would have gone crazy with it.


    Roasted Red Pepper PastaThrow it right into the sauce…


    Roasted Red Pepper PastaAnd stir it around.


    Roasted Red Pepper PastaThen taste the sauce and add more salt and pepper if it needs it.


    Roasted Red Pepper PastaDrain the pasta and throw it into the sauce…


    Roasted Red Pepper PastaThen in goes the Parmesan…


    Roasted Red Pepper PastaA little more parsley…


    Roasted Red Pepper PastaThen toss it all together, sprinkling in more Parmesan and/or parsley as you go!


    Roasted Red Pepper PastaHoly…help me Rhonda.


    yumOne of my favorite things on earth. And takes no time at all! And you can serve it with a grilled chicken breast or slice the chicken and mix it in with the sauce.


    Roasted Red Pepper PastaPositively scrumptious!

    Here’s the handy dandy printable.

    Recipe

    Quick and Easy Roasted Red Pepper Pasta

    Prep Time:
    Cook Time:
    Difficulty:
    Easy
    Servings:
    8

    Ingredients

    • 12 ounces, weight Pasta Of Your Choice (I Prefer Short Ones Like Rigatoni, Penne, Etc.)
    • 4 Tablespoons Butter
    • 1/2 whole Large Onion, Finely Diced
    • 3 cloves Garlic, Minced
    • 1 jar (15.5 Ounces) Roasted Red Peppers, Drained And Roughly Chopped
    • 1 cup Vegetable Or Chicken Broth
    • 1/2 teaspoon Salt, More To Taste
    • Freshly Ground Black Pepper
    • 1/2 cup Heavy Cream (more To Taste)
    • 1/2 cup Parmesan Shavings (more For Serving)
    • Finely Minced Parsley
    • Chopped Fresh Basil (if You Have It!)

    Preparation Instructions

    Cook pasta in salted water according to package directions.

    Melt 2 tablespoons butter in a large skillet over medium-high heat. Add the onions and garlic and saute for 2 to 3 minutes or until starting to soften. Add the chopped red peppers and cook for 2 to 3 minutes, until hot.

    Remove the skillet from the heat. Carefully transfer the contents of the skillet to a food processor or blender. Place on the lid and puree the pepper mixture until totally blended (there will still be some texture to the peppers.)

    Heat the other 2 tablespoon butter back to the skillet over medium heat. Pour the pepper puree back into the skillet. Add the broth, salt, and pepper, and stir until heated. Splash in the cream and stir to combine. Taste and adjust seasonings if you need to.

    Drain the pasta and add it to the skillet. Add Parmesan and parsley/basil, then stir it together to coat the pasta.

    Serve in bowls with extra Parmesan and a sprinkling of parsley on top.

    Posted by Ree on May 1 2013