Shared posts

20 May 20:07

Virtually Free Rapsberry Pis

by Al Williams

One of the nice things about the Raspberry Pi is that it runs Linux and you can do a lot of development right on the board. The converse of that is you can do a lot of development on a Linux desktop and then move things over to the Pi once you get the biggest bugs out. However, sometimes you really need to run code on the actual platform.

There is, however, an in-between solution that has the added benefit of upping your skills: emulate a Pi on your desktop. If you use Linux or Windows on your desktop, you can use QEMU to execute Raspberry Pi software virtually. This might be useful if you don’t have a Pi (or, at least, don’t have it with you). Or you just want to leverage your large computer to simplify development. Of course we would be delighted to see you build the Pi equivalent of the Tamagotchi Singularity but that’s a bit beyond the scope of this article.

Since I use Linux, I’m going to focus on that. If you insist on using Windows, you can find a ready-to-go project on Sourceforge. For the most part, you should find the process similar. The method I’ll talk about works on Kubuntu, but should also work on most other Debian-based systems, including Ubuntu.

Step 1. Tools

Your PC probably has some sort of Intel processor in it. The Pi has an ARM chip. QEMU is the emulator that lets you run–among other things–ARM executables on the PC. You need a static copy and the binfmt-support package. This combination will let Linux recognize alien executables and run them transparently. Here’s how you install what you need:

apt-get install qemu qemu-user-static binfmt-support

Step 2. Raspberry Pi Image

Make a working directory and download a Pi image in zip format. You can then unzip it, to create an IMG file. Here are the steps:

wget https://downloads.raspberrypi.org/raspbian/images/raspbian-2015-11-24/2015-11-21-raspbian-jessie.zip

unzip 2015-11-21-raspbian-jessie.zip

Step 3. Get Data

We need a few numbers from the img file and yours may be different than mine, depending on what you downloaded. The command you want to run is:

fdisk -lu 2015-11-21-raspbian-jessie.img

Here’s the output, with the important parts in bold:

Disk 2015-11-21-raspbian-jessie.img: 3.7 GiB, 3934257152 bytes, 7684096 sectors 
Units: sectors of 1 * 512 = 512 bytes 
Sector size (logical/physical): 512 bytes / 512 bytes 
I/O size (minimum/optimal): 512 bytes / 512 bytes 
Disklabel type: dos 
Disk identifier: 0xea0e7380 
 
Device                          Boot  Start     End Sectors  Size Id Type 
2015-11-21-raspbian-jessie.img1        8192  131071  122880   60M  c W95 FAT32 (LBA) 
2015-11-21-raspbian-jessie.img2      131072 7684095 7553024  3.6G 83 Linux

The first partition is the boot partition and the second is the filesystem.

Step 4: Increase Hard Drive Size

The base filesystem isn’t very large, so let’s make it bigger:

dd if=/dev/zero bs=1M count=2048 >>2015-11-21-raspbian-jessie.img

This will add 2 GB to the image. However, the filesystem won’t know about it yet. First, we need to mount the image as though it were a set of disks:

losetup -f --show 2015-11-21-raspbian-jessie.img

losetup -f --show -o $((131072*512)) 2015-11-21-raspbian-jessie.img

The numbers (131072 and 512) must match the ones highlighted in step 3. The 512 probably won’t change, but the start of the filesystem can and does change.

Unless you already had loopback devices, this should give you a /dev/loop0 that corresponds to the whole “disk” and /dev/loop1 that is the filesystem (the part we want to expand). Recreate the partition table to know about the extra space (the mkpart command will need some numbers you can read from the output and those numbers are marked in bold):

$ sudo parted /dev/loop0
GNU Parted 3.2 
Using /dev/loop0
Welcome to GNU Parted! Type 'help' to view a list of commands. 
(parted) print                                                             
Model: Loopback device (loopback) 
Disk /dev/loop0: 6082MB 
Sector size (logical/physical): 512B/512B 
Partition Table: msdos 
Disk Flags:  
 
Number  Start   End     Size    Type     File system  Flags 
 1      4194kB  67.1MB  62.9MB  primary  fat16        lba 
 2      67.1MB  3934MB  3867MB  primary  ext4
 
(parted) print

(parted) rm 2

(parted) mkpart primary 67.1 6082

(parted) quit

$ e2fsk -f /dev/loop1
$ resize2fs /deve/loop1
$ losetup -d /dev/loop[01]

Step 5: Mount Filesystem

Make a directory to use as a mount point. I usually just make a directory called mnt in the current directory. You’ll need to be root to mount and use the offsets found in step 3 (8192 and 131072, in this case):

mkdir mnt
sudo mount 2015-11-21-raspian-jessie.img -o loop,offset=$((131072*512)),rw mnt
sudo mount 2015-11-21-raspbian-jessie.img -o loop,offset=$((8192*512)),rw mnt/boot
sudo mount --bind /dev mnt/dev
sudo mount --bind /sys mnt/sys
sudo mount --bind /proc mnt/proc
sudo mount --bind /dev/pts mnt/dev/pts

Step 6: Modify ld.so.preload and Copy Executable

As root, you need to edit mnt/etc/ld.so.preload with your favorite editor (which is, of course, emacs). You could, if you wanted to, use vi or some other editor of your choice. Just make sure you are root. Just put a hash mark (#) in front of the line you’ll find there. Failure to do this will cause illegal instruction errors to pop up later.

In addition, you need the qemu-arm-static executable available to the new fake Raspberry Pi:

sudo cp /usr/bin/qemu-arm-static mnt/usr/bin

Step 7: Chroot!

The chroot command will cause the Pi’s filesystem to look like the root directory (in one shell window). Then you can change user to pi (or any other user you want to configure):

cd mnt
sudo chroot . bin/bash
su pi

Using It

How do you know it is working? Try a uname -a command. You should see an armv7l processor type. You can run executables just like on the Pi. If you want to use X, set DISPLAY=:0 to use your main screen. For example:

DISPLAY=:0 dillo

Or you can set the display for all programs:

export DISPLAY=:0

Optional: Flash It

Now you are ready to go. After some development, you might want to save your work. All you need to do is to exit the chroot (type exit) and change /etc/ld.so/preload back (remove the # character you added). Then you should unmount everything that you mounted. The image file will remain and will contain all your changes. You can flash it, and you can reload it by repeating the chroot and mount instructions.

In Summary

There are lots of ways to do cross development on the PC for the Raspberry Pi. This is one of them. However, it also points out the power of using QEMU to run alien executables. That’s a trick you could use for lots of different development boards and platforms. There are QEMU emulators for several CPU types ranging from Microblaze to other ARM variants to PowerPC, to an S390. A quick glance at the /usr/bin directory for qemu-*-static will give you a list.

Sure, it is easy enough to get a Pi and use that. But this is yet another tool to do cross development when you need it.


Filed under: Hackaday Columns, Raspberry Pi, Skills
03 May 15:56

Does Money Truly Bring Independence and Security?

by Trent Hamm

It’s been no secret that over the past few years Sarah and I have adopted a goal of financial independence. Our goal is to reach a point where we can live off of the income from our investments as early as we possibly can. It’s a straightforward goal, really, and it’s one that we work towards by finding additional ways to earn income as well as keeping our spending low.

There are two big reasons why we’re chasing this goal: freedom and security.

First of all, we really want to be free of the workweek grind. As most working Americans know, the grind of a typical workweek, repeated over and over, can really wear a person down. You’re often left feeling exhausted and you definitely feel as though there’s never enough time to try all of the things you want to do. We want this goal so that we can have more time to explore other endeavors.

Second, we want the security of having plenty of money in the bank even if things go wrong. Even if we find that we can’t sustain living in a financially independent state, we can still return to the workforce with the knowledge that we have a lot of resources to fall back on.

It makes sense from a financial standpoint, after all. Having plenty of money in the bank unquestionably does improve your personal freedom and your security.

But is that enough? How much security and independence does that really bring all on its own?

Potential Risks

Even with lots of money in the bank, there are still plenty of risks we face when it comes to our future.

The collapse of the dollar is a potential risk. If the political wheels turn the wrong way – and some might argue that this is already happening – the dollar could be rapidly devalued. We’re not financially independent any more if the dollar suddenly goes into rapid inflation. You can have a million dollars in the bank, but it’s not going to be that useful if a gallon of milk costs $500.

Large-scale societal problems also present a challenge. Even if the dollar isn’t devalued, other things such as a major plague or some kind of serious technological revolution can really change the rules of the game in a way that we didn’t expect. A situation where the normal supply lines for goods or services breaks down can cause a lot of difficulty in the lives of those who are not prepared for it.

Fraud and criminal acts are things that we need to be on guard for all of the time. While many such criminal acts that could target our wealth are ones for which we might have a legal response, some would be difficult to handle. Sometimes, life is going to punch you in the gut when you least expect it. Are you ready to handle picking up the pieces from this kind of disaster?

Familial and health issues could definitely drain our resources very quickly. Even with great health insurance, a major illness can burn through your resources very quickly. Family and legal issues can similarly damage one’s financial state, even with protections such as umbrella insurance.

Personal changes include any situation where your own personal beliefs, goals, and desires change over time. You might find that you’re not happy with parts of your life, and the truth is that money can’t solve everything. Financial freedom can hold open the doors to a lot of life changes, but many changes require other things in life like strong relationships and personal health.

These are just a few of the more obvious challenges that might occur that could damage one’s sense of financial independence, but they’re far from the only ones.

It’s obvious, then, that financial independence only gets you part of the way to your destination of maximum personal freedom. It’s definitely a key component, but if your goal is to build a life with as much freedom as possible balanced with some personal security against the unknown, you’re going to have to go beyond mere dollars and cents.

It is worth noting, before we get started, that money can actually help build many of the things below, but they also require a great deal of personal time and effort.

Additional Tools for Greater Freedom and Security

So, beyond mere dollars and cents, what kinds of things can you do to prepare your life for the maximum amount of personal freedom as well as protection against unforeseen events? Interestingly enough, many of these areas can also alleviate some of the reliance you may have on your personal wealth, too. You won’t need as much money if you pull off these things.

Here are some areas you can work on to build that kind of freedom.

Knowledge and Skills

What do you do if your toilet breaks? What if the light fixture in your family room stops working? What if your furnace stops working?

Do you call a repairman? If that’s your primary hope for fixing such things, you may find yourself in trouble in a difficult situation.

The reality is that the more you need to rely on the skills of others to go about your daily life, the less freedom you have. If you can’t fix your toilet when it breaks, then you’re relying on a plumber to maintain your indoor plumbing. If you can’t replace a light fixture in your family room, you need an electrician (or at least a handyman) to maintain indoor lighting. If you can’t make at least a reasonable shot at fixing an appliance, you’re relying on appliance repairpeople.

What exactly do you do if those people aren’t available? Does everything just descend into chaos quite rapidly?

The truth is that these kinds of skills are valuable for everyone to have, for a lot of reasons, but here are two big ones. First of all, the more skills you have, the easier it becomes to maintain things yourself and fix minor problems yourself with no help. If you know how to work on a car, you can fix minor car issues with no help, for example.

Second, if you have skills, you can trade those skills with others to gain other things. If you can fix your neighbor’s lawnmower, your neighbor might be able to help you fix something or give you something in return.

This extends to skills far beyond basic home and auto repair things. Any skill that you have that someone else might value in a crisis situation is worth having. Things like first aid, computer repair, bicycle repair, and so on are all well worth knowing how to do.

Here’s the solution: if you find yourself needing to pay someone else to do something for you, try to learn how to do it yourself first. You might find that you can’t actually do it for some reason, but it’s much more likely that you’ll find, if you spend some time learning, that the task really isn’t that hard to begin with, and if you do it a few times, it’s really not hard at all. That way, when you actually need that skill in the future or want to help a friend or a neighbor with that skill, you can easily call upon it.

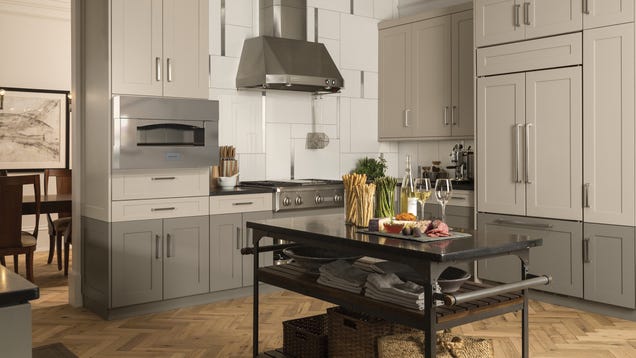
Self-Sufficiency / Homesteading

Another key tool for maximizing personal freedom and minimizing your reliance on the services of others is through homesteading and self-sufficiency. When your home produces the resources you need to survive, then you’re not reliant on others providing those services.

For example, most people are reliant on the electrical grid to provide home energy for themselves, but people who have installed solar panels or a wind turbine are free from those needs and have all of the home energy they need.

If you buy all of your food from the grocery store, you’re reliant on the food supply chain. On the other hand, if you raise a lot of your food and store the extras, you’re not reliant on that food chain as much or at all.

Consider investing in things like renewable energy at home through solar panels or a wind turbine. Also, consider starting a garden, even if it is not big enough to sustain all of your food needs. The knowledge you accumulate from doing this will be enough.

You may even want to consider installing water capture tools, such as rain barrels at the bottom of your downspouts, or even installing a well or a sandpoint for water. While you probably wouldn’t normally want to use that water for everyday purposes, it’s perfectly good for things like watering your garden or lawn.

Another part of this whole equation is knowing – and actually practicing – the preservation of some of the food that you grow. Do you know how to dry beans? Do you know how to can excess vegetables? In periods of disaster or societal unrest, knowing how to do such things can be very valuable.

Strong Relationships

Do you have a strong circle of friends in your immediate area that you can rely on when things are difficult? For instance, if you found yourself needing help, do you have people you could call on and reliably expect for them to be there?

I’m not talking about acquaintances or professional relationships or other such connections that are much more tenuous. I’m talking about people that will have your back through thick and thin, no matter what happens.

While it’s powerful to have such friends when things are good, having such relationships is absolutely vital if you’re making changes to your life. They’re also absolutely vital in situations where things become challenging. Having such relationships means that you have people you can rely on no matter what life happens to bring your way.

How can you cultivate such relationships? Be giving with yourself and the resources you can share. Give people time and effort and energy. Listen – and by listen I don’t mean futz with your cell phone while they’re talking or stand there trying to think of the next thing you want to say while ignoring what they’re saying. Those things are the bedrock upon which strong and lasting relationships are built, and it’s the ability to call upon those people when you really need them that can make life better – and make a disastrous situation a whole lot better.

Community Ties

While there are some similarities between community ties and strong relationships with people nearby, there are some distinct differences, too.

Community ties are lighter versions of those strong relationships. Community ties are the kind that will result in people giving you a helping hand when you need it, but not necessarily the kind that would be at your door any time of the day or night. Community ties are the kind where lots of people know your name and will say good things about you and give you a solid reputation, but won’t have your back in any situation.

What value do community ties have? Community ties make it easy to find work if you ever need it. Community ties make it easy to quickly find specific types of help if you ever need that. Community ties can form a great network of people who keep an eye on each other’s homes. Community ties are the invisible strings that make things better in countless little ways that you often don’t directly see, but you’re sometimes blown away when you do see them.

How can you build community ties? Get involved in local events in your town. Join a community organization. Help out with local charities. Learn the names of your neighbors and perhaps invite them over for dinner. Have a smile on your face when you go out in public and take the time to greet others and have brief conversations with them.

Those little steps seem small, but over time they add up to a great deal, and it’s that fabric of community that will help support you in countless ways if you put in the time and effort to do so.

Stewardship

Stewardship simply means taking care of the things that you own and are responsible for. It’s an easy concept, but it’s not one that we often put into practice. However, if you want maximum freedom in life, knowing how to care for the key things in your life is absolutely vital.

You practice stewardship with your possessions by taking care of them, cleaning them, and storing them properly. You practice stewardship with your home by keeping it clean and repairing it and doing maintenance. The same is true with your car.

Stewardship extends beyond those physical things, however. You practice stewardship with your relationships by putting in the effort to keep that contact going, by listening and helping when possible. You practice stewardship with your skills by putting them to the test on occasion.

When you practice stewardship, you end up with things that you can rely on, things that won’t fail when you need them. Sometimes things aren’t going to go perfectly, and when that happens, the person that has practiced smart stewardship and maintenance of the things in their life is going to reap the rewards, because those possessions and relationships will be there for them when they’re needed.

Take care of the things that you have. Know how to repair the things that you own. When they need replaced, buy things that will last for a long time. You’ll continually be glad that you did so.

lacing up sneakers

All the wealth in the world won’t bring you freedom if you don’t stay healthy enough to enjoy it. Photo: JJ Chang

Physical Health

You can have all of the assets in the world, but if you don’t have the physical health to enjoy them, not only are you going to miss out on their benefits, you’re also going to see many of your financial resources devoured in an effort to secure your remaining health.

The best solution, then, is to take proactive steps to help with your physical health.

It’s not exactly rocket science, people. Move around more. Eat a plant-based diet. Maintain some degree of portion control. Eat fewer sweets. If you do those things, you’re probably going to be in pretty good shape.

The challenge here is consistency. Eating one healthy meal won’t make you healthy. Having one busy day won’t do it, either. If your life routine involves unhealthy foods, you need to alter that routine. If your life routine involves not moving around very much, you need to alter that routine.

While you’re at it, it’s a good idea to get regular checkups with your doctor to keep tabs on your overall health. Medical screenings can identify problems when they’re still small, before they become big problems. When they’re small, they’re easier to fix and they’re far less expensive, too.

Mental Health

Hand in hand with your physical health is your mental health. Again, you can have all of the assets in the world, but without your mental health, it’s difficult to enjoy what those assets can bring into your life.

So, as with physical health, it’s absolutely vital to stay on top of things. This list of steps to maintain and improve mental health is very good:

1. Value yourself
2. Take care of your body
3. Surround yourself with good people
4. Give of yourself
5. Learn how to deal with stress
6. Quiet your mind
7. Set realistic goals
8. Break up the monotony
9. Avoid alcohol and other drugs
10. Get help when you need it

You might just notice that many of those steps are well in line with the other strategies from this article, such as building strong relationships and maintaining your physical health.

Final Thoughts

Here’s the truth: You can have all of the wealth in the world, but if you don’t have the things listed above – knowledge, skills, relationships, stewardship, health – your wealth won’t bring you freedom.

The truth is that financial independence is only one part of true independence. True independence, or as close to it as we can come in our world, comes from having the ability to solve most of life’s problems on your own or with the help of close relationships. The less we have to truly rely on others, the more independent we are.

If financial independence is a major goal for you, you should take steps to build other elements of true freedom while on your journey to financial independence. After all, the goal, in the end, is to maximize your personal freedom, and there’s no better way to do that than to make the basic elements of your life – your health, your relationships, your home – as free as possible.

Good luck.

The post Does Money Truly Bring Independence and Security? appeared first on The Simple Dollar.

21 Apr 14:16

Hacking When it Counts: POW Canteen Radios

by Dan Maloney

Of all the horrors visited upon a warrior, being captured by the enemy might count as the worst. With death in combat, the suffering is over, but with internment in a POW camp, untold agonies may await. Tales of torture, starvation, enslavement and indoctrination attend the history of every nation’s prison camps to some degree, even in the recent past with the supposedly civilizing influence of the Hague and Geneva Conventions.

But even the most humanely treated POWs universally suffer from one thing: lack of information. To not know how the war is progressing in your absence is a form of torture in itself, and POWs do whatever they can to get information. Starting in World War II, imprisoned soldiers and sailors familiar with the new field of electronics began using whatever materials they could scrounge and the abundance of time available to them to hack together solutions to the fundamental question, “How goes the war?” This is the story of the life-saving radios some POWs managed to hack together under seemingly impossible conditions.

No Atheists in a Foxhole

Many POW radios are extensions of foxhole radios, a common pastime of soldiers in WWII. A resourceful soldier living in the field could likely have scrounged or looted a complete radio, or at least could have rounded up the parts to make a decent regenerative receiver for news and entertainment in the field. But the local oscillator of even such a modest receiver could be detected by the enemy, so crystal radios were preferred. With nothing but a tuned circuit and rectifier cobbled from a safety-pin and a razor blade, crystal foxhole radios were undetectable and could be used to tune in commercial broadcasts and military transmissions.

A replica foxhole crystal set. Photo: Bill Jackson
A replica foxhole crystal set. Photo credit: J.G. Jackson

Foxhole radios would be easy to replicate in the POW camps, and to some degree might operate better than they would in the field. POWs often used the long runs of barbed wire in the camp fences as antennas, and the waste produced by the camp led to ample opportunity to scrounge parts.

With that in mind, many of the POW hackers looked for ways to improve their foxhole radios. The most obvious improvement was adding a capacitor to the coil to create a proper LC circuit, rather than depending on the stray capacitance of the antenna. Scoring a variable capacitor to tune the radio was an even bigger coup.

Life or Death Hacking

A step up from the foxhole-style crystal set was a simple regenerative receiver. The richer scrounging and greater likelihood of finding mains or battery power in the POW camp led to these receivers, grouped under the general heading of canteen radios from one common way of concealing them.

One especially well-documented build was that of an American amateur radio operator named Captain Russell Hutchison. He built a fairly complex single tube regenerative receiver into a standard GI canteen while interned by the Japanese in the Cabanutuan concentration camp in the Philippines.

N6CC's working replica of Hutchison's canteen radio. Source. CanteenSWRadio

Hutchison had the relative good fortune to be tapped as the fix-it guy for the camp; even the Japanese relied on him to repair their gear. Radios looted by Japanese soldiers made it to Hutchison for repair, and pilfered parts began to accumulate. Eventually Capt. Hutchison had enough parts to build his radio, which was sensitive enough to copy shortwave transmissions from as far away as San Francisco using a covert antenna of fine wire woven into a clothesline.

Hutchison’s radio was a matter of life and death in more than one way. The most pressing concern was being discovered with the set, which would result in summary execution. To avoid that fate, Hutchison took elaborate measures beyond the canteen subterfuge to ensure that as few men in the camp as possible knew about his hack.

Despite several near-misses, the radio was never discovered and Hutchison eventually made it out of the camp alive. But the radio served another life and death role. Far from being just an amusement to pass idle hours, the radio was used to monitor the progress of the expected invasion of Japan. The POWs realistically feared their captors would execute them and destroy the evidence of their atrocities as soon as Allied boots hit the Japanese Home Islands; the radio kept the POWs one step ahead so that they could try to escape before the bullets started flying.

Something from Nothing

As impressive as Hutchison’s hack was, at least he had manufactured components to work with. There were other POW hackers that weren’t so fortunate, but still needed the connection to the outside world that radio provided. With the same mortal stakes at play, these hackers built radios from almost nothing. Take the case of one Lt. Colonel R.G. Wells, a British officer interned in a Japanese concentration camp in Borneo. In 1942, he created almost every component of a superheterodyne receiver from found objects. Capacitors were made from the foil lining of a tea chest and the few precious scraps of newspaper that weren’t horded for alternate duty in the latrines. Resistors were pieces of string impregnated with burnt cinnamon bark. Bare wire was insulated by rubbing flour nicked from the mess into palm oil and caking it onto the wire. A chromic acid wet cell was concocted of potassium dichromate “donated” by the camp pharmacy and zinc trouser fly buttons. When that proved insufficient to power the radio, Wells built a chemical cell that both rectified the camp’s AC supply and dropped the voltage to a usable level.

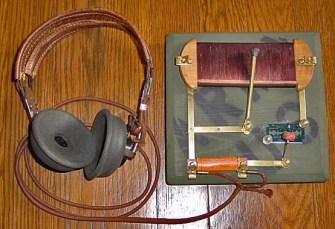
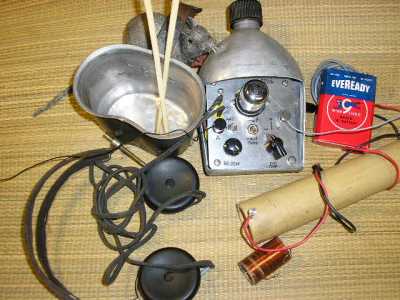
The only components Wells couldn’t conjure out of thin air were the vacuum tube and the headset. Wells’ detailed oral history of the radio doesn’t say much about where the tube came from, but it does record that the headset was smuggled into the camp. Given enough time, the resourceful Col. Wells no doubt could have manufactured a headset; indeed, a Vietnam POW named Richard Lucas built the headset for his foxhole radio using a core of nails wrapped with wax-insulated wire in a bamboo resonator with a tin can lid for a diaphragm. He reported that it worked well enough to hear several stations, but that the headset would have worked better with a magnet to bias the coil.

As impressive as these hacks are, more amazing still is the fact that all of it was done from memory. These POWs came into camp with nothing but their dog tags and the clothes on their backs, and sometimes not even the latter. There were no reference books or cheat sheets. The circuits these men built under impossible conditions, often with only the rawest materials, were committed to memory, probably from days and nights of experiments in the pre-war years. Their hobby paid off in a big way and allowed them to hack their way through a more difficult time than any of us can likely imagine.


Filed under: classic hacks, Featured, radio hacks
11 Apr 18:52

Decades later, a new Mike Tyson’s Punch-Out!! Easter Egg has been found

by Kyle Orland

You might think that gamers have combed through every secret and available strategy in Mike Tyson's Punch-Out!! (aka simply Punch-Out!!) since its original release on the NES in 1987. You'd be wrong, though. Just this weekend, word first started to spread of a previously unnoticed background Easter Egg that can help players with the split-second timing needed for some crucial knockout punches.

The three-minute video explanation from YouTuber midwesternhousewives lays out the specifics, but in short, the newly discovered secret hinges on a bearded man on the bottom row of the on-screen audience, near the left side of the screen. If you watch his face closely during the first fight with Piston Honda and the second fight with Bald Bull, this one audience member will duck slightly at the precise moment you can throw an instant, body blow knockout punch.

While the general timing for those one-hit knockouts have been well-known for decades, this is the first time anyone has publicized the existence of this specific timing clue. The animation timing could theoretically be a coincidence, but since the man doesn't seem to react at any other point in the game—and ducks consistently whenever the knockout opportunity presents itself—it seem highly unlikely.

Read 2 remaining paragraphs | Comments

29 Mar 17:59

Learn How to Memorize Information With This Video From a World Memory Champion

by Melanie Pinola

Can you memorize 20 random words in a couple of minutes? Yes, you can, after watching World Memory Championship winner Alex Mullen take you through a sample memory palace.

Read more...

29 Mar 14:56

Amazon Echo – the homebrew version

by Liz Upton

Amazon’s Echo isn’t available here in the UK yet. This is very aggravating for those of us who pride ourselves on early adoption. For the uninitiated, Echo’s an all-in-one speaker and voice-command device that works with Amazon’s Alexa voice service. Using an Echo, Alexa can answer verbal questions and integrate with a bunch of the connected objects you might have in your house, like lights, music, thermostats and all that good smart-home stuff. It can also provide you with weather forecasts, interact with your calendar and plumb the cold, cold depths of Wikipedia.

51XeN2UYoyL._SL1000_

Amazon’s official Echo device

_88948671_b49cb625-c213-43c3-88ac-a58bd9200900

The Raspberry Pi version (our tip – hide the Pi in a box!)

Happily for those of us outside the US wanting to sink our teeth into the bold new world of virtual assistants, Amazon’s made a guide to setting up Alexa on your Raspberry Pi which will work wherever you are. You’ll need a Pi 2 or a Pi 3. The Raspberry Pi version differs in one important way from the Echo: the Echo is always on, and always listening for a vocal cue (usually “Alexa”, although users can change that – useful if your name is Alexa), which raises privacy concerns for some. The Raspberry Pi version is not an always-on listening device; instead, you have to press a button on your system to activate it. More work for your index finger, more privacy for your living-room conversations.

Want to build your own? Here’s a video guide to setting the beast up from Novaspirit Tech. You can also find everything you need on Amazon’s GitHub.

Installing Alexa Voice Service to Raspberry Pi

This is a quick tutorial on install Alexa Voice Service to your Raspberry Pi creating your very own Amazon ECHO!! Thanks for the view! **You can also download the Amazon Alexa App for your phone to configure / interface with your raspberry echo!. it will be listed as a new device!!

Let us know if you end up building your own Echo; it’s much less expensive than the official version, and 100% more available outside the USA as well.


The post Amazon Echo – the homebrew version appeared first on Raspberry Pi.

28 Mar 20:04

100+ Books to Read Before They're Films

by Shannon Vestal Robson

There are always going to be books that are being made into movies, and we love to read them before they get the big-screen treatment as much as you do. If you like being able to say the book was better (isn't it always?), then we have over 100 novels to dive into. Click through and see which books you need to add to your shelf - before they get to the theater.

10 Mar 13:37

Clinton Throws Flash Grenade To Divert Attention From Question About Senate Voting Record

MIAMI—Surreptitiously grabbing the explosive device stashed inside her lectern and pulling its pin as soon as she heard moderator Jorge Ramos mention her support for the Iraq War and the Wall Street bailout, presidential candidate Hillary Clinton reportedly threw a flash grenade onto the stage during Wednesday night’s Democratic debate to divert attention away from a question about her Senate voting record. “That’s an important question, Jorge, and one I’m happy to answer,” said the former secretary of state just as the military-grade M84 stun grenade exploded, emitting a deafening blast and blinding flash of white light that prevented anything on stage from being seen or heard for the duration of Clinton’s answer. After cowering with their hands over their ringing ears for approximately 70 seconds, rattled audience members, the debate’s moderators, and fellow candidate Bernie Sanders were said to have regained their vision ...


02 Mar 18:08

How to Start Your Retirement Like a Boss

25 Feb 21:24

News in Brief: Report: Getting Out Of Bed In Morning Sharply Increases Risk Of Things Getting Even Worse

WASHINGTON—According to a report published Thursday in the Journal Of Applied Psychology, the act of getting out of bed in the morning dramatically increases the risk of things becoming even worse. “No matter how bad things were upon waking up, the very moment our trial subjects pulled off the covers and stepped out of bed, things spiraled even further downward for them in roughly 92 percent of all cases,” said lead researcher Alison Chaudhary, who added that her research team observed no instances in which rising from one’s bed and beginning to go about one’s day improved things for any of the test participants. “In addition, we discovered that the chances of everything going completely and irreversibly downhill rose even higher should one subsequently get dressed and head toward the front door. After that point, once one has left their home, the likelihood of avoiding being weighed ...


22 Feb 13:41

The Legend Of Zelda Was Born 30 Years Ago Today On An Ugly Little Floppy Disk

by Mike Fahey on Kotaku, shared by Andrew Liptak to io9

On February 21, 1986, Japan got its first taste of the magical land of Hyrule, though not on the famous gold cartridge Western gamers are familiar with.

Read more...


04 Feb 15:53

Ubuntu's first tablet doubles as a desktop, goes on sale in Q2

by Chris Velazco
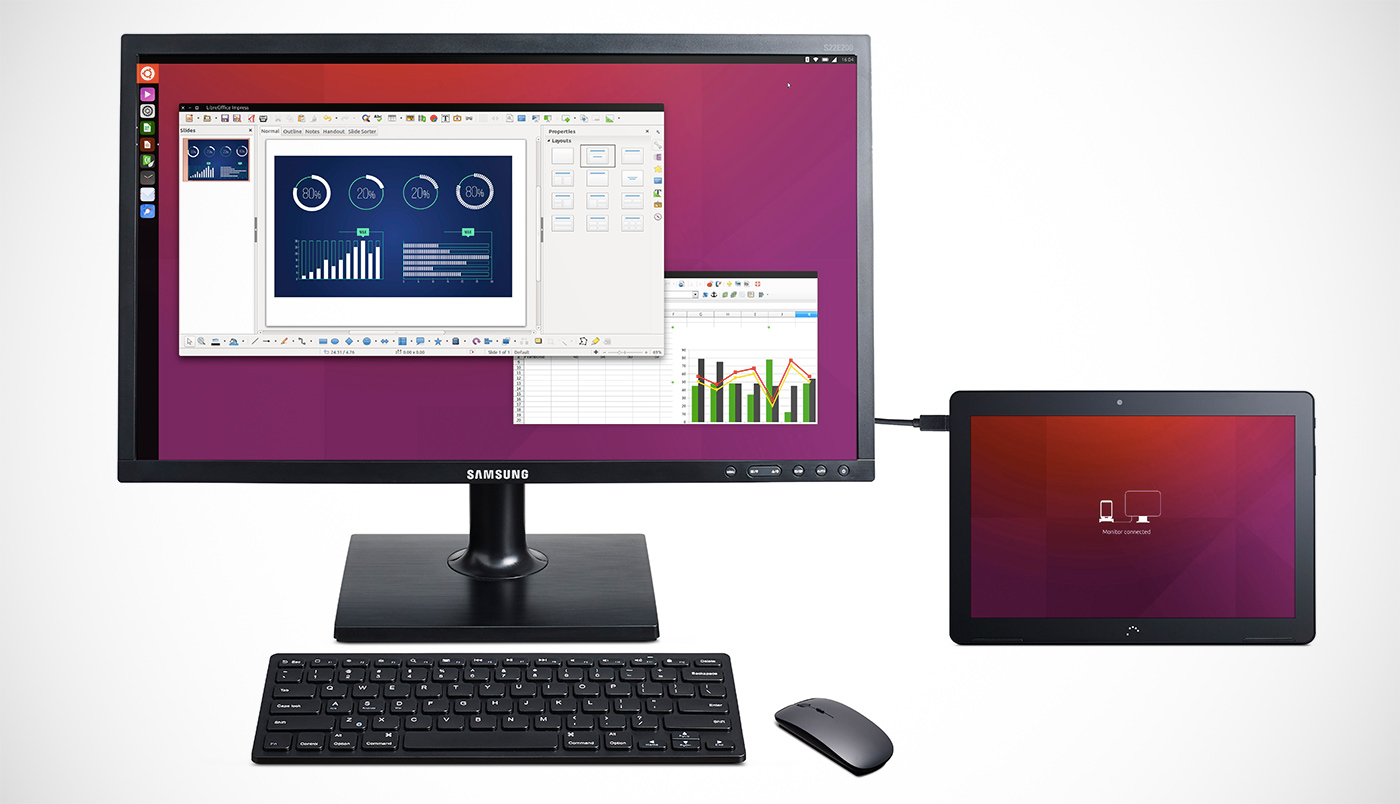
Remember that time Spanish device maker BQ started promoting a new, Ubuntu-powered tablet before Canonical was ready to start talking about it? Well, the Ubuntu developer finally decided to get chatty. As expected, the device is a Ubuntu-fied version...
03 Feb 15:42

HOW TO STORE BITCOINS IN YOUR BRAIN (MAC/LINUX)

Since Bitcoin is fundamentally an abstraction of information, you have the option to store your wealth inside your brain. As long as you have a strong enough password that you can remember, and have a means to restore your funds, you could literally walk around with 1 dollar or 100 million dollars in your head and no-one would know.


This guide will show you how to create your own brain wallet. You’ll need a mac or linux system and access to a terminal app. The rest we’ll go through in the guide. Think of this more analogous to a long term savings account than a regularly used checking account.


Johnny Mnemonic may have had 80 gigs capacity, but he didn’t have bitcoin.


HOW-TO GUIDE


Step 1. Go to electrum.org and download the latest version of their Bitcoin wallet app.


It’s worth noting that obviously you should be doing this on a secure system, preferably a freshly wiped drive or brand new computer.


TAILS OS also comes with electrum pre-installed which is handy, or you could use a cheap raspberry pi.


- https://electrum.org
- https://tails.boum.org


Step 2. Install Electrum and make sure it works. If everything’s good, we don’t need to use the internet anymore, so as another safety precaution, go ahead and disconnect.


Step 3. OK, so what we’re going to do is use a strong password and convert it into a 256bit hash that handily doubles as a bitcoin private key. This can then be imported into Electrum and used as a spendable Bitcoin wallet.


Open up a terminal app and type the following in. We’ll go through what each part means.


echo -n “very strong password here” | shasum -a 256


echo -n  – outputs data to the terminal. We add the -n option because some systems will automatically add a new line character to the output, which is not what we want.


“very strong password here” – Obviously here’s where you put your password. I can’t stress how important it is to use something very strong, since there are many computers out there automatically scanning for weak passwords 24/7 and stealing bitcoins. That means having a password that’s like 100+ characters long, with punctuation, other symbols, numbers and non-dictionary words. The very hard thing is to have one that’s strong enough that you can actually remember.


shasum -a 256 – Finally, this part converts the password into a SHA256 hash.


Step 4. Now press enter and you’ll see a bunch of numbers and letters pop up. This is the 256bit hash of your password, and will always be the same as long as you use the same input.


Step 5. Copy the hash and open up Electrum. There should be an option to create/restore a new wallet, click that.


Name your wallet, then choose the “Restore a wallet or import key” option, then press Next. Now paste the hash into the input box, and press Next again.


Step 6. It’ll now ask you to choose a new password. This is different from your actual private key which you set earlier. This one will just protect the wallet while it’s on your system, and since we’re going to be deleting it in a few steps, you can use whatever you like. Press OK, and Electrum will generate your bitcoin wallet


Step 7. The new window that popped up is your bitcoin wallet. Navigate over to the Receive tab. Next to the Receiving Address section is your public bitcoin address for this wallet.


You can copy this or generate a QR code, then you or anyone else who knows it can add funds into the account. Importantly, only you and no-one else will actually be able to spend those funds.


Step 8. That’s it! What we need to do now is clean up. You might not know, but you’ve left footprints behind that a malicious attacker could use to trace and steal your coins. This includes the clipboard, bash_history file, the electrum wallet file and probably more. You could securely wipe the drive, or if you’re extremely security conscious, you can physically destroy it.


You now have a Bitcoin wallet that exists entirely in your memory. If you want to restore and spend your funds, you just follow from Step 3, inputting the same strong password you used earlier. Pretty cool eh? Obviously this does have its drawbacks, say if you die or forget the password, then those coins will be lost forever, but I think it’s an interesting option to have, and something not possible before bitcoin existed. It’s also worth noting that this method should work with other bitcoin wallet software too, though I haven’t tested them all.


––
BY CHRIS ROBINSON

27 Jan 20:22

Body cam captures man’s final words—begging the cops to get off of him

by David Kravets

(credit: Kevin Lim)

"They're killing me right now... I can't breathe."

Those are among the final words of an Oakland man shouting to his sister as Oakland Police Department officers pinned him to the ground—a knee on his back—moments before he died. Hernan Jaramillo screamed those words over and again, according to grainy body cam footage from the 2013 incident that sparked a civil rights lawsuit (PDF) the city is now settling (PDF) for $450,000.

"Sir, we're not killing you," one of the handful of officers on the scene is overheard saying calmly. Minutes later, the 51-year-old man is dead. The footage has been sealed under a protective order, but the Contra Costa Times managed to get ahold of it and published it Tuesday.

Read 8 remaining paragraphs | Comments

24 Jan 15:42

Build a Super-Powered Mobile Gaming Device with a Raspberry Pi 2

by Thorin Klosowski

The original Raspberry Pi-powered PiGrrl put together by Adafruit is a wonderful way to take your retro gaming on the go, but the two-button setup was a bit limiting. Now, Adafruit’s back with a new version.

Read more...

21 Jan 19:23

GE’s New $10,000 App-Powered Pizza Oven Is My American Dream

by Adam Clark Estes

Imagine a world where pizza didn’t come from the pizza store. Imagine if you could pop down into your spacious kitchen, toss some toppings on dough, and throw it all into your very own internet-connected pizza oven. This future is finally possible—but it’s expensive.

Read more...


21 Jan 15:57

All Five Naked-Eye Planets Are Up at Dawn to Greet You

by Mika McKinnon

Are you awake before dawn? Good. Go outside. Look east. Bask in the astronomical wonder of seeing all the brightest planets out at the same time, pinpricks of worlds drifting up from the horizon. Missed it? Try again any morning for the next month.

Read more...


20 Jan 17:50

HOW TO ENCRYPT AND DECRYPT FILES ON MAC AND LINUX

Here is a quick, simple way to encrypt and decrypt files on any Mac or Linux system using OpenSSL. You only need access to a terminal app and don’t need to install anything extra.


ENCRYPTING FILES


Step 1. In this example, both the unencrypted and encrypted files will be in your home folder. If you want to encrypt multiple files, it’s easier if you compress everything  into a single .zip file first. We’ll be using a picture of a kitten.


Step 2. Open the terminal, type the following, then press enter. We’ll go over what each section means:


openssl aes-256-cbc -in ~/File.jpg -out ~/Encrypted.file


- “openssl”. This tells the terminal to start the openssl utility.
- “aes-256-cbc”. This is the encryption cipher we’ll be using for this example.
- “-in ~/File.jpg”. This tells openssl that the input file (the one you want to encrypt) is File.jpg. If you don’t want to type out the full path for the file, you could just type “-in ” (with a space it) and drag the file into the terminal.
- “-out ~/Encrypted.file”. This is the output file you will get. You can name it pretty much anything you like, although it’s worth noting that you may run into problems if you name the output file the same as the input.


Step 3. You’ll now be asked to choose an encryption password, and after you press enter, you’ll be asked to verify.


Step 4. Now if you check your home folder, you should have a new “Encrypted.file” file sitting there. This is an encrypted version of your original File.jpg. You can now delete the original file if you want.


DECRYPTING FILES


Step 1. In a terminal window, type the following and press enter:


openssl aes-256-cbc -d -in ~/Encrypted.file -out ~/File.jpg


You’ll notice that this is almost identical to the command for encrypting, except for a few things:


- “-d” is included which tells openssl you want to decrypt the file
- The “-in” file is now the Encrypted.File and the “-out” is the original File.jpg.


Step 2. Now enter your decryption password. Press enter and your original file will reappear in your home folder.


FINISHED


These encrypted files are perfect for emailing and uploading to services like dropbox, since they’re cocooned and impenetrable to passive snooping.


––
BY CHRIS ROBINSON

12 Jan 18:27

Hackers and Heroes: Rise of the CCC and Hackerspaces

by Elliot Williams

From its roots in phone phreaking to the crackdowns and legal precedents that drove hacking mostly underground (or into business), hacker culture in the United States has seen a lot over the last three decades. Perhaps the biggest standout is the L0pht, a visible 1990s US hackerspace that engaged in open disclosure and was, arguably, the last of the publicly influential US hacker groups.

The details of the American hacker scene were well covered in my article yesterday. It ended on a bit of a down note. The L0pht is long gone, and no other groups that I know of have matched their mix of social responsibility and public visibility. This is a shame because a lot of hacker-relevant issues are getting decided in the USA right now, and largely without our input.

Chaos Computer Club

But let’s turn away from the USA and catch up with Germany. In the early 1980s, in Germany as in America, there were many local computer clubs that were not much more than a monthly evening in a cafeteria or a science museum or (as was the case with the CCC) a newspaper office. Early computer enthusiasts traded know-how, and software, for free. At least in America, nothing was more formally arranged than was necessary to secure a meeting space: we all knew when to show up, so what more needed to be done?

Things are a little different in the German soul. Peer inside and you’ll find the “Vereinsmentalität” — a “club-mentality”. Most any hobby or sport that you can do in Germany has an associated club that you can join. Winter biathlon, bee-keeping, watercolor painting, or hacking: when Germans do fun stuff, they like to get organized and do fun stuff together.

Logo_CCC
Kabelsalat ist gesund! This CCC logo reminds you that it’s healthy to have a tangle of cables under your desk.

So the CCC began as an informal local hacker meetup in 1981, and then went on to having regular meetings in Hamburg. In 1984, they held the first Chaos Communication Congress, an annual meeting held just after Christmas that’s now in its 32nd year. A few years later, the CCC formally incorporated as a registered association, but there was a little more at work than simply “Vereinsmentalität”.

Translated from the CCC’s website: “In order to rule out legal misunderstandings, the CCC was registered as an e.V. to further information freedom, and the human right of at least worldwide unhindered communication.” I want to draw your attention to the cute phrase: “to rule out legal misunderstandings.” You see, even though the CCC had only been in informal existence for about five years, they’d already pulled off some stellar hacks that could potentially land people in difficult legal situations — and would have without question just a few years later in America. Ironically, by publicly incorporating and becoming pre-emptively open, rather than trying to hide, the CCC was buying itself some cover.

If you notice the parallel between the reason that the CCC became a registered association and the reasons that Mudge brought the L0pht into the government’s eye, you’ve got this article’s thesis in a nutshell. Publicly-visible and responsible hacking groups take an end-run around the potential charge that they’re a “gang” or that they’re doing something shady. How many gangs have 501c3 status? At the same time, they make it easy for newspapers and congressmen alike to find them if they have questions. The hackers become members of society.

The CCC has done the par-excellence, to the point that occasionally the club’s publications have had to remind folks to remember the actual binding force that holds geeks together: “Spaß am Gerät”, fun with the machines, or happy hacking.

The BTX Hack

While the CCC may have started out like other clubs, a few early high-profile hacks helped set the direction of the club, as well as contribute to their public image as being on the side of the common man. Which is not to say that everyone’s motivations are pure, or that everything was above-board. But, like L0pht would later become in the USA, the CCC became a source of public information about the security failures in the new online world. The CCC was committed to disclosing these failures regardless of the possible damage to reputation that doing so might cause. And it didn’t hurt if the reputation damaged was that of the hackers’ arch-enemy, the Bundespost.

posthorn_montage
Left: German Post logo. Right: CCC pirate flag. Get it?

The “Bundespest” was a favorite target of German hackers. The government telecom and post monopoly was, like AT&T in the USA, very probably overcharging for services because it could. As mentioned last time the Post forbade the import of foreign modems, requiring Germans to purchase the more expensive “official” models. Phone calls, which also meant data at the time, were expensive, and even normal people wanted alternatives to the Post. Idealist hackers like CCC founder Wau Holland wanted free alternatives.

btx1The target in 1984 was Bildschirmtext. Bildshirmtext, or BTX, was an advanced-for-its-time dial-up service that was most similar to Compuserve‘s early service in the USA. Only BTX was run by the government phone monopoly, and relatively costly.

The story goes that a buffer overflow was discovered by CCC founders Wau Holland and Steffen Wernéry that would spit out unencoded data, among them passwords in cleartext. After going to the Bundespost, and being ignored, they cooked up a spectacular hack and went to ZDF — the second national television network — and got on the nightly news. Holland and Wernéry managed to get the password from a Hamburg bank and opened up a paid BTX site that the CCC owned, repeatedly, from the bank’s account. After racking up 136,000 Deutschmarks overnight, they went to the press. (They gave the money back, naturally.)

ccc_holland-shot0002
Wernéry and Holland and a whole bunch of monitors, prime-time on Channel One.

But having a high-profile hack (Google translate link) of an important system shown on the national nightly news is a game-changer. The Hamburg bank thanked them for making them aware of the potential problem. The Bundespost had to respond a few days later, saying that they’d fixed the flaw. But the cat was out of the bag, and more to the point the public was giving their data security a second thought. And the CCC came off as dial-up Robin Hoods.

By going straight to the press, the CCC managed to stay on the right side of the law and public opinion, most of the time. When asked if the police knew what they were up to, for instance, Holland responded in an interview that he personally sent a copy of the CCC’s newsletter, die datenschleuder: the “data-flinger”, to the head of the Bavarian police computer crime unit. The media presented the CCC, and hackers in general, as the necessary civil-society counterpoint to the assertions of big business that their data would be kept secure.

Through high-profile hacks that had public impact, as well furthering happy hacking, the CCC grew its membership and spun off satellite clubs outside of Hamburg. Today there are 25 local CCC branches in Germany, and with over 5,500 members, the CCC is certainly the largest computer club in Germany and probably the world. And because they’ve publicly probed into technology that affects everyone, from BTX to computer voting systems, the press and society, and even sometimes the government, listens.

Hackerspaces, Bringing a Slice of Germany to the USA (and the World)

All this talk about the CCC brings us, oddly enough, back to the USA. Whether you realize it or not, the CCC’s 25 locals (and the independent but friendly c-base in Berlin and Metalab in Vienna) were the prototype for what I’d call new-wave hackerspaces in the USA.

hackersonaplane2A group of American hackers, among them Bre Pettis, Nick Farr, and Mitch Altman, went on a European vacation to the Chaos Communications Camp in the summer of 2007, and then on to a tour of German and Austrian hackerspaces to see what made them tick, with the thought of bringing the idea back home to the US. At the 24th Chaos Communications Congress in December 2007, Jens Ohlig and Lars Weiler, founders of the CCC branches in Cologne and Dusseldorf gave a talk about everything they new about running a hackerspace to help out their American friends: Building a Hackerspace.

The slides from this talk, the Hackerspace Design Patterns would become the jumping-off point for founding three of the first new-wave American hackerspaces. In February 2008, the for-profit NYC Resistor opened its doors. By March, HacDC was incorporated as a non-profit and was open for non-business. And although they’d been meeting here and there for a while, Noisebridge rented its first space in October of 2008, and incorporated as a non-profit six months thereafter.

Within a couple years, there were a hundred hackerspaces in the USA. Today, there are 406 registered active hackerspaces on hackerspaces.org in the US, and 1,200+ worldwide. Not bad for eight years’ work! If you haven’t been to your local hackerspace yet, you owe it to yourself.

800px-HackerspacesTeeDesignDue to the tastes of individual members, every hackerspace is slightly different. I don’t know how exactly to draw the distinction between a hackerspace and a “makerspace” but it seems that there are groups that focus more on hardware projects, and those that focus more on computers and information freedom. But my own experience is that there are no hard boundaries, either, and the strong-suits of a space tend to shift over time.

And that’s a good thing, because when people are having fun hacking they produce their best work, and providing constant opportunities for cross-pollination helps keep things fresh. In the early years of HacDC, we had a great time with high-altitude ballooning, for instance, because it got to connect up our hardware folks with the ham radio people and even the web-development types who cobbled together a nice real-time mapping solution. But at the same time, HacDC also put out Project Byzantium, an easy-to-configure ad-hoc wireless mesh networking solution.

So as much as I love the way that the US hackerspaces have sprouted up out of over the last decade, and as much as each individual space that I’ve visited has been neat and interesting in its own right, I have to say that there’s something missing in the USA, and that’s a larger organization and purpose. It’s hard to overestimate how much cool stuff could get done if some of the ambition of the USA’s 400+ hackerspaces were pooled together.

USA-CON!

So what’s the next step, Team USA? It’s going to be incredibly hard to get any consensus across 400+ hackerspaces, but imagine the amount of good it would do if you could all occasionally speak with one voice? But where to start? How would one even try to organize this chaos?

You want to know how I think the Germans would do it? An annual conference first, and then incorporate an organization to handle the coordination: you’ll be surprised how much focus and teamwork pulling off a large annual conference will build. An annual event gives groups a deadline to work toward, and I don’t need to tell you how important that is. And an annual conference gets people physically together and having fun, and that absolutely shouldn’t be underrated.

Don’t know what common ground you all have? You could do worse than start with the the Hacker ethic, which non-coincidentally came up out of the early days of MIT’s shared computer resources, but is the unifying basis in the German CCC:

  • Access to computers—and anything which might teach you something about the way the world works—should be unlimited and total. Always yield to the Hands-On Imperative!
  • All information should be free
  • Mistrust authority—promote decentralization
  • Hackers should be judged by their hacking, not criteria such as degrees, age, race, sex, or position
  • You can create art and beauty on a computer
  • Computers can change your life for the better

And at least consider the CCC’s two additions:

  • Don’t meddle in the data of others
  • Use open data, protect private data

(Elliot was a founding member of HacDC and is at least paying dues at the Munich CCC, though he hasn’t been over in a shamefully long time.)


Filed under: Featured, Hackerspaces, slider
06 Jan 21:01

The birth of Debian, in the words of Ian Murdock himself

by Glyn Moody

As we reported a few days ago, Ian Murdock, the creator of the Debian GNU/Linux distribution project, died in rather unclear circumstances last week. Until more details emerge, it seems wise to refrain from speculation about what really happened. Far better to celebrate what is not in doubt: his important contribution to free software at a critical period in its growth.

In November 1999, I spoke to Murdock at length, during one of the 50 interviews that form the backbone of my book Rebel Code: Linux and the Open Source Revolution. Inevitably, I was only able to use a few quotations from Murdock in the book's text, and now seems an appropriate moment to give a more complete version of how Murdock came to create Debian, told in his own words.

Murdock first came across GNU/Linux in 1993, when he was a 20-year-old student at Purdue University, studying accountancy: "This was around the time that PCs were just starting to get fast enough to actually run things like Unix. I'd been using Unix and I saw Linux as a way to have more convenient access to it." He said that the software at that time was "pretty rough around the edges," but that helping to fix that was part of the fun: "one of the great things about Linux is it was one of the first operating systems that you could actually not only see what it was doing but you could get in there and tinker around with it."

Read 16 remaining paragraphs | Comments

30 Dec 22:40

This season, a notorious pirate gives the music industry an expensive gift

by Annalee Newitz

Peter Sunde, co-founder of the Pirate Bay and digital artist.

Peter Sunde, co-founder of the Pirate Bay, is out of jail and back with a new project whose entire goal is to screw the music industry. It's called the Kopimashin, and it lives to make copies of the Gnarls Barkely song "Crazy."

All it took was a Raspberry Pi and some Python code, and now the Kopimashin is making 100 copies of "Crazy" every second. Sunde posted about the device on Konsthack, a site devoted to art and hacking. He writes, "The Kopimashins lcd display consists of three rows of information, the serial number of the mashin, amount of copies created and the dollar value it represents in losses for the record labels (Downtown Records / Warner Music), currently represented by USD 1,25 per copied piece." Each copy is "stored" in /dev/null, which is to say, it is not stored at all (/dev/null is a nonexistent "null device"). The point, Sunde says, is "to make the audio track the most copied in the world and while doing so bankrupting the record industry."

Sunde hasn't made the source code available yet. As he told Ars via -mail: "It’s really simple, it’s ugly code and I have no energy to clean it up for the 'helpful' community to make the code 1% faster — and it’s about making a point, not the code itself. If you want to build your own, just start a terminal, find a song to copy and do: while true; do cat file.mp3 >/dev/null; done."

Read 3 remaining paragraphs | Comments

14 Dec 16:42

Bust Out Your Nostalgia and Watch as Melissa Joan Hart Explains The '90s

Submitted by: (via Bustle)

06 Dec 15:39

How to Save Money with a Home Brewing Hobby

by Trent Hamm

About a week ago, I posted an article on how to save money with a board and card gaming hobby. That article came pretty directly from the heart, as board and card games are one of my primary hobbies (along with reading and… well, home brewing).

Naturally, several people wrote to me asking about my other interests. How do you cut back on the costs of a home brewing hobby? How do you make a reading hobby cheap? This week, I’ll address that first question (and tackle the second one later this month).

So, let’s dig in, right from the beginning.

What Exactly Is Home Brewing?

Home brewing is simply brewing beer at home. You start with basic ingredients – water, yeast, and some sort of grain – and allow the yeast to feast on the grain, producing a small amount of alcohol right in the water. That’s what beer is, at the core. All of the different varieties – and there are tons of them, all of which are simply variations on that core recipe – boil down to that core mechanism. Just put some grains in water, add yeast to the mix, and wait for a while and you’ll have some kind of beer.

Of course, you’re going to want to make something that’s palatable, and that means using particular grains and particular types of yeasts and particular additional ingredients to make something tasty. You’re also going to need containers for the stuff to ferment in (it produces gas while fermenting and you also don’t really want to leave the surface exposed to air, either) and containers to store the beer when it’s finished. Depending on what you’re making, other equipment is needed as well.

The truth is that home brewing is definitely one of those hobbies that can be as expensive as you want it to be. I can make decent beer in a plastic bucket. On the other hand, I have friends that have their entire garages devoted to elaborate home brewing setups with thousands of dollars worth of equipment, kegging systems, and other things that push them right up to the edge of being a microbrewery business. (You can make 200 gallons of beer per year for personal use in a household with two adults, which adds up to an astounding 2,133 bottles of beer.)

For me, it’s firmly a hobby for personal enjoyment. I enjoy the process of making small batches (around five gallons) of beer once in a while, mostly to be shared with family and friends. I definitely do things on the cheap side, but it could get really expensive really quick if I allowed it to.

So, how do I keep it relatively inexpensive? Here are some strategies that I use.

Start With Very Simple Gear and Upgrade Only When You Have a Reason (or Need a Gift Idea)

My first several batches of homemade beer were made in a five gallon plastic Culligan water jug that someone gave to me. I attached a one inch piece of clear rubber hose to the top to serve as a blowoff hose. I bottled the beer in bottles I saved over a long period of time and capped them using the cheapest caps and cheapest bottle capping tool I could find from the home brewing supply store.

All told, my initial gear added up to about $10 for the cheap capper and the little bit of rubber hose. It was far from perfect, but it did the job just fine.

Over time, I slowly upgraded that equipment. I moved to a glass carboy from the plastic Culligan jug. I started using an airlock instead of the blowoff hose. I got a better capper eventually (after breaking the first one) and added a few additional pieces of equipment here and there.

The key thing to keep in mind is that all of these upgrades weren’t strictly necessary. As I became familiar with the process, I began to see how certain upgrades were useful and I eventually made those upgrades. However, many of my gear upgrades came as a result of my wife searching for Christmas gifts for me, to tell the truth. Home brewing has provided many, many gift ideas over the years.

Use a Lot of Kitchen Gear You Already Have

Many useful items for home brewing are things you already have in your kitchen. As long as you thoroughly clean them both before and after using them for brewing, there’s no need to buy separate equipment.

For example, I often use a stock pot for cooking my grains (for those unfamiliar, heating grains up causes them to brew like tea, emitting much of their sugar and other compounds into the water, some of which the yeast later transforms into alcohol). It’s just an ordinary kitchen stock pot that you can get at pretty much any store, and we use it for other things, too.

You don’t need to duplicate anything that you already have in your kitchen. When you’re learning how to home brew, look for things you already have and use those. Just make sure to keep everything very well cleaned.

home brewing

If you already have a stockpot at home, there’s no need to buy a separate one for home brewing. Photo: Colby

Make Your Own Equipment

Some home brewing equipment for specialized beers can be quite expensive. Trust me – you can spend a lot of money on equipment for various purposes. However, most of that equipment is actually really simple stuff and you can make it yourself for much less money without a whole lot of effort.

I’ll use a mash tun for an example here. A mash tun is simply a container used in one type of brewing to extract sugars from the grains. You use it when you want to maintain a certain temperature for a long while. It basically needs to be a large insulated container with a false bottom and a spigot at the bottom to let the sugary liquid out at the end of the process.

You can buy these from home brewing supply stores, of course, but it’s not hard to make one. Just find a used five or ten gallon insulated water/beverage cooler. Just replace the spigot with a better one – you don’t want to have a typical water cooler spigot emitting near-boiling water – and simply put a piece of steel mesh from the hardware store on the inside of the spigot to filter out the grains. A beverage cooler with maybe $10 worth of modifications is the same as a $200 home brewing mash tun.

There are lots of pieces of equipment you can make on your own in this way. The easiest way to learn about them… well, here you go!

Join a Local Home Brewing Club

Almost every city of reasonable size has a home brewing club of some kind. Home brewing clubs are amazing resources for learning how to home brew, try the things others make (usually by just swapping, but home brewers are usually very generous), and learn about techniques for saving money like building some of your own equipment. I’ve participated in two groups over the years and still would be if it were not for scheduling conflicts (my kids win out, believe it or not).

Most home brewing clubs are completely free to join. Some have small membership fees that usually go to pay for events or some shared resources.

If you’re interested in finding one, there are several places to look. The two most likely places for finding such a club are meetup.com or this directory on the American Homebrewers Association website. Both tools will help you find clubs near you.

Get Involved in Group Buys of Supplies

One of the big advantages of being in a home brewing club is that people will often get together for group buys on specific materials for home brewing. They might collect enough money to make a wholesale purchase of barley or hops, for example, and then get together to split up the goods after it comes in.

These things are usually pretty ad hoc and they also tend to somewhat restrict what your next few batches of home brewed beer will be like, but the cost of the ingredients ends up being very low when this type of bulk buying happens. You can get pounds and pounds of grains or hops for less than what a single pound might cost you from a store or an online seller.

It’s the bulk buying principle at work. If everyone gets together so that they can purchase something at a wholesale price, whether it’s a specific kind of hops or a specific barley, everyone involved saves money. Sure, it might restrict your home brewing a little bit, but that’s just a convenient excuse to experiment.

Use Yeast Across Multiple Batches

Yeast is a key ingredient in making beer. It performs the magic of turning some of the sugars into alcohol, turning grain-flavored water into a delicious drink.

However, buying yeast over and over again can get expensive. If you want to save money on yeast, one method is to simply stretch one yeast purchase over a bunch of batches of beer.

This process is called washing yeast, and it’s described in this great article from BeerSmith. Basically, all you do is take some of the sediment from your current batch, add some water to it, slosh it around, and then just keep the water, leaving the sediment behind. After a week or two in the fridge, a sediment of yeast will form in the bottom of the jar, which is exactly what you want. Just add some sugar to the jar the day before you brew and the yeast will be ready to go to town. This procedure can stretch one packet of yeast across five (or so) batches of beer, saving you some dollars.

Freeze Extra Yeast, Too

When you follow the above procedure, you’ll often find yourself with more yeast than you intend to use. I often wind up with huge amounts of yeast, far more than I need for a batch.

The thing is, you don’t have to dump the excess. You can just freeze it in a small freezer bag and it works like a champ. All you have to do is save some of that precipitated yeast from the above procedure in a pint-sized freezer container. When you want to use it, let it thaw slowly in the refrigerator for a few days, then slowly bring it to room temperature by leaving it out on the table. Add it to some warm water in a sanitized container and give it some sugar to eat and you’ll find yourself with tons of yeast for your next home brewing experiment.

You really can stretch a single yeast packet over years if you’re careful. (Of course, you’re also the strange guy with containers of yeast in their freezer, but that just means you have something in common with avid home bakers, too.)

Re-Use Sanitizer a Few Times

I use Starsan when I sanitize my equipment. Starsan is a very common sanitizing agent for getting rid of the things that can contaminate your beer.

The thing is, Starsan is actually reusable, so when I use a little to sanitize an item, I’ll pour it back into a small bottle and use it again. I usually get two or three uses out of Starsan.

One friend I know has a “second use” and a “third use” bottle of Starsan (each of which are original bottles that Starsan came in). If he uses Starsan fresh from the original bottle, he’ll dump the used Starsan back into the “second use” bottle; if it came from the “second use” bottle, he’ll dump the used Starsan into the “third use” bottle; if it came from the “third use” bottle, he disposes of it properly according to the instructions. He keeps them separated with a little piece of masking tape on the “second use” and “third use” bottles.

Starsan can actually be used over and over again until the pH gets too high, but to be on the safe side, I only use it three times at most.

Brew ‘All Grain’ Style

Many people get started in home brewing by using kits that come with all of the ingredients you need to make a particular style of beer. Most of the time, these kits come with malt extract, which is very convenient but also fairly expensive. Malt extract is essentially what you get from boiling grains in water, straining out the grains, and then boiling the sugary water down to a syrup.

Once you move on to trying your own recipes, there’s really no need to keep buying expensive malt extract. Instead, just buy the grains – they’re way cheaper – and simply boil the grains yourself at home.

The easiest way to get started with this is to try the “brew in a bag” method, something I hinted at above. With this, you essentially make a “tea bag” out of your grains using a small mesh bag and simply boil that bag in a few gallons of water. It’s harder to perfectly control the temperature when doing this, but it gets the job done.

When you’re wanting to move on to beers that require more specific temperature control, you’ll move from “brew in a bag” to using a mash tun, which is a piece of equipment you can make yourself, as described above.

Shop Around for Grains

I’m often surprised at the kinds of places where I can find great prices on grains for home brewing. I’ll find bins of barley and other such items often where I least expect them.

For example, my local food co-op often has the best prices locally on several different kinds of barley, so I’ll usually go there for many barley types and only visit the local home brewing supply store for specialty grains.

Take a look at the grains available in the bulk section at the grocery stores you shop at. They often sell barley and sometimes sell several varieties of it. With barley being such an essential ingredient in making beer, if you can find a cheap source for the type of barley you need, you’re going to be money ahead every time.

Use Your Own Grain Mill

If you do choose to go the “all grain” route, one challenge you’re going to face is the need to grind your own grains. Barley needs to be ground down so that the insides are exposed in order to brew effectively, and the only real way to do that is with a small grain mill.

Of course, many home brewing supply stores have a grain mill available for customers to use, but the problem there is that it restricts you from buying from any store that doesn’t offer a mill. You can’t buy whole grains from online stores, for example, and they will make you pay more if they have to grind it for you. Over a large number of brews, that can end up costing you quite a bit.

A simple mill is very inexpensive. You can get a manual grain mill like this one for less than $20. Of course, the amount you can spend on such a device is practically endless, with all manner of electronic devices that grind your grains for you, but a basic mill like this is all you really need.

Grow Some of Your Own Ingredients

If you’re a gardener, you can actually grow some of the ingredients needed for home brewing in your own garden.

Growing barley, for example, is actually fairly easy – and growing them yourself lets you experiment with heirloom barley and specific varieties. Here is a great article from Mother Earth News on growing barley for home brewing. Hops can be grown as well, but they require more work.

You can also grow other ingredients you might use in specific beers. Elderberry, nasturtiums, hibiscus, and many other flowers and herbs (and even some vegetables) can be grown in your garden and used for making beer.

Buy Less Craft Beer

Home brewing produces a product that’s a good replacement for craft beer that you might already purchase, so rather than increasing your beer consumption, just decrease the amount of beer that you buy.

I was never a heavy beer buyer or drinker, as I’m the type of person who might enjoy one or two flavorful beers on some evenings, but making my own beer means that rather than increasing my total consumption, I’m simply decreasing how much I buy.

These days, my craft beer purchases are often in the form of single bottles or mixed six packs so that I can try a bunch of different things, figure out what I like and don’t like, and use that as input for my future home recipes.

That means that most of the money spent on funding my home brewing is actually money that I might have otherwise spent on craft beers.

Final Thoughts

Home brewing is a wonderful hobby, one that has left me with a lot of great memories and enabled me to enjoy some amazing creations produced in my own kitchen and garage.

However, there’s no denying that it can be an expensive hobby. You can certainly dump a lot of money into home brewing if you’re not careful.

My best suggestion? Start off cheap and brew until you understand why you would want to upgrade your equipment or materials. Everyone has a somewhat different setup and somewhat different needs and skills, so take things at your own pace. Only upgrade if there is a real, tangible reason to do so.

Good luck, and enjoy!

Related Articles:

The post How to Save Money with a Home Brewing Hobby appeared first on The Simple Dollar.

03 Dec 21:11

Why Time Feels Like It’s Flying By (and How To Slow It Down)

by Kristin Wong

Our parents warned us about it, but it’s hard to understand until you experience it first hand: as you get older, time seems to fly. It catches you off guard, probably because it’s such a powerful and bizarre concept. You can’t add more time to the clock, but by understanding how this phenomenon works, you can at least try to make life seem like it’s passing by a little slower.

Read more...

03 Dec 19:41

Gamer Uses Raspberry Pi Zero to Cram Entire Game Console into Old Xbox Controller

by Cabe Atwell
James Cochran

This is pretty cool. I wonder how ps1 emulation is on the zero...

The Raspberry Pi Zero is small enough to fit inside of the original Xbox controller and is connected via a modified USB OTG cable.This gamer decided to take the super cheap Raspberry Pi Zero and fit it into his Xbox controller for a custom game emulator.

Read more on MAKE

The post Gamer Uses Raspberry Pi Zero to Cram Entire Game Console into Old Xbox Controller appeared first on Make: DIY Projects, How-Tos, Electronics, Crafts and Ideas for Makers.

17 Nov 20:46

This Box Makes It Easier To Fall Asleep By Slowly Removing Blue Light From Your TV Screen

by Andrew Liszewski

Researchers have confirmed that the blue light emitted by all of our electronic devices at night messes with our melatonin production–which in turn hinders a good night’s sleep. But with this black box connected to your TV, you can fall asleep to Netflix and still have a good night’s slumber.

Read more...


17 Nov 19:37

Repair a Messed Up Relationship Over the Holidays with This Six Part Plan

by Thorin Klosowski

Mending relationships is tough work, but it’s not an impossible task. To help you figure out where to start, The Wall Street Journal’s put together a six step outline.

Read more...

16 Nov 15:54

Yep, You Can Play Dungeons & Dragons in VR Now

by Darren Orf

AltspaceVR is a small virtual reality company that wants you to communicate with friends and family as a virtual avatar, kind of like a 3D version of Skype. But around this time last year, the company decided to take that idea a step further—it wanted to bring Dungeons & Dragons to virtual reality.

Read more...


13 Nov 13:39

Beats Music Will Die a Sad, Lonely Death Later This Month

by Chris Mills

Beats Music Will Die a Sad, Lonely Death Later This Month

The writing has been on the wall for Beats Music ever since Apple bought the company and launched its own streaming service, Apple Music. The end is now coming: on November 25th, the not-quite-two-year-old service will end.

Read more...


28 Oct 02:00

Back In Stock: TiVo's Roamio OTA DVR With Lifetime Service For $300

by Shep McAllister, Commerce Team on Deals, shared by Shep McAllister, Commerce Team to Lifehacker

In case you missed it earlier in the month, the best DVR for cord cutters is back in stock, complete with discounted lifetime service.

Read more...