Shared posts

20 Jun 20:19

GB at 10: Walking the Streets

by ah

John Greenfield took a walk up Elston Avenue for NewCity. John walked several venerable streets for GB over the years, too.

Halsted Street
Archer Avenue
Grand Avenue
63rd Street
Kedzie Avenue
Belmont Avenue
79th Street
Martin Luther King, Jr. Drive.

12 Jun 18:06

We did it! We finally got married!

by wizbiz
Mdoherty83

I'm the groom!


We did it! We finally got married!

01 Jun 17:39

Best Homework Ever

by Robyn Nisi
Superdawg - front.JPGFound on Facebook: Second grader Thomas Sorokti wrote a very informative report on Norwood Park's Superdawg, complete with a fun model of the restaurant made with their meal boxes. A++++!
01 Jun 15:23

A Linguistic Dissection of 7 Annoying Teenage Sounds

by Miss Cellania

This is what you get when a linguist's children reach middle school. Linguist James Harbeck gives us the phonetic analysis of the things teenagers say WAY too much, mainly to annoy parents, teachers, and even their best friends. A sample:

1. Breathy-voiced long low back unrounded vowel with advanced tongue root
This is usually spelled something like auuggghhh. It's the classic teenage sound of utter exasperation. The eyes are usually angled upwards, sometimes in contrast with a downward movement of the shoulders. "Breathy-voice" means that the vocal folds are wide apart, giving a very "chesty" sound. "Advanced tongue root" means that the back of the tongue is moved forward to make a larger resonating cavity behind it. "Low back" means the tongue doesn't rise anywhere in the mouth (compare this with "eee," which is high front). "Unrounded" means the lips aren't rounded.

If that makes no sense to you, it will when you hear him reproduce this and all the analyzed sounds in the accompanying video at The Week. Link -via Metafilter

01 Jun 15:19

These Sculptures Are Made Entirely of Wood

by John Farrier

1

2

3

4

5

These sculptures are amazing! Tom Eckert, a professor of art at Arizona State University, carved these incredibly realistic sculptures of everyday objects. At the link, you can view more photos of his work as well as watch an interview of him.

Link | Artist's Website

31 May 16:42

How to Host A Beer and Cheese Tasting Party

by Mike Reis
Mdoherty83

This is a MUST do for me a guy who LOVES craft beer and Loves fancy Cheese even more!

20130530beercheese.jpg

[Photo: Stephanie Stiavetti]

Wine and cheese pairing has been the bright shining light that has guided many a semi-classy house party here in our fine country over the last several decades. But it is time for that sun to set, I say. Beer and cheese pairing is primed for its own period of luminescence—with craft beer's boom in popularity, good beer is more and more widely available. And interest in what well-made beer can do has never been higher.

You may not be ready to host a full-on multicourse beer-focused pairing dinner, but with the tips I have for you today, you'll be primed to host the most awesome beer and cheese tasting party ever...and you and your guests might even learn something along the way. Shall we get started?

Setting the Table

In order to avoid getting frazzled (no one likes a frazzled host!) it's best to do as much as you can in advance. Set your table with a single large plate for each guest and, if possible, two glasses for tasting.

We're going to be dealing with small pours (I like to serve about three ounces of each beer), so you'll want to pick a glass that will capture the aromas of such a small pour—and also showcase the beer's color and clarity. Don't worry; you probably already have the right glass on hand: standard white wine glasses are perfect for this task. Giving each guest two glasses will help take off the pressure to chug or dump the remainder of one beer as you move to the next one. Still, be sure to have a bucket available for dumping excess.

Silverware should be mostly unnecessary for your beer and cheese extravaganza. Let your guests use their hands for all but the runniest of cheeses, and provide a butter knife for each cheese that requires one.

Be prepared to serve lots of water and palate-resetting neutral foods as well. Bread and crackers can help prevent palate fatigue.

When you serve, place the cheeses around the edge of the plate, starting at the top, and moving clockwise with your desired progression. Make every plate the same so that all your guests can follow along as you go. The complex flavors of cheese will come out at the cheese nears room temperature, so feel free to serve the cheeses 30 minutes before guests arrive, so that they'll be at ideal temperature when everyone's settled and ready to get started.

Alright, your table is looking nice and fancy, but we haven't told you what to put on it!

A Group Effort

Hosting a tasting like this can be nerve-wracking...What if my guests don't like my pairings? What if the store doesn't have the exact beer I'm looking for? How much is this all going to cost? I've found that the best way to avoid a lot of this anxiety is to encourage a little audience participation.

Tell your guests that you will provide the cheese, and ask each of them to bring a beer that falls within a certain range of styles or flavors. The goal is to explore the fullest range of beer flavors possible. Try to get eight pairings set up. This will allow you to really showcase a range of beers, cheeses, and the flavors that can occur when you match them up. If you stick to three ounces of beer with a half to three-quarters ounces of cheese for each pairing, we're looking at four to six ounces of cheese and 24 of beer. Not a totally crazy amount to consume over the course of a couple hours.

Gathering the Beer

20110409-146480belgiantripelbeercheese.jpg

Assign each guest one of the following beer categories. Ask them to choose one beer to bring, and make sure they provide enough of that beer for each guest to have three ounces—this might mean purchasing a few bottles of the same brew, depending on bottle size.

Light Lager: Pilsner, helles, Kölsch (not really a lager)
Wheat Beer: witbier, hefeweizen, dunkelweizen, Gose
Amber/Brown: amber ale, brown ale, doppelbock
Stout/Porter: the roastier the better. An aggressive black lager will work here too.
Farmhouse Ale: saison and biere de garde
Abbey Ale: dubbel, tripel and Belgian strong Dark Ale/quadrupel
IPA/Double IPA: anything with a dominant hop character
Sour Ales: the more sour examples are likely to leave the biggest impression

If everybody takes one category, you'll get to experience a huge range of beer flavor, and everyone will feel involved in the experiment.

Getting Cheesy

It's time to make friends with your local cheese monger. Ask them for tips choosing cheeses in each of the following categories, and then serve the pairings in the order below.

For the light lager: fresh, ash-ripened cheese or mild cheddar.
Mill Valley Beerworks' Sweetwater Kölsch recently wowed me with Capriole's Wabash Cannonball—the beer's soft malt sweetness provided a satisfying counterpoint to the salty twang of the cheese, while the earthy hops in the beer matched the earthiness of the cheese's ashy rind. With a cheddar, you're likely to find a fantastic interaction between grassy flavors in your cheese with similar flavors coming from the European hops most commonly used in Pilsner, helles, or Kölsch.

For the wheat beer: fresh mozzarella, burrata or chevre
The bright, fruity, spicy, and tangy flavors you'll find in these beers make an excellent match for the similarly fresh and lively flavors of the cheeses mentioned above. The fruity and spicy yeast character in these beers will provide complexity to your pairing and really wow your guests. Note: the wetness of fresh mozzarella and burrata may make for a more difficult presentation on what will become a crowded cheese plate. Put this cheese in an accompanying small bowl, or stick to the more manageable chevre.

For the amber/brown beer: aged gouda
Heavily-aged gouda is loaded with nutty and caramelly flavors. This makes it a spectacular partner for amber and brown beers that typically have similar character from the roasted and caramelized malts used in their production.

For the stout/porter: Parmigiano-Reggiano
Real Parmigiano-Reggiano is one of the most umami-dense foods in the world, and that makes it especially great with stout, especially when the beer is on the drier end of the spectrum. Roasty bitterness balances all of that meaty mouth-filling flavor, and calls to mind the charred consequences of a steak thrown on the grill.

For the farmhouse ale: something big, creamy and funky
The wide range of earthy, grassy, herbal, spicy, peppery and funky flavors in these beers pretty much qualifies them as the ultimate cheese beers in my mind. Their high carbonation thoroughly scrubs the palate of the mouthcoating richness that can come with many cheeses. Throw a big, funky cheese at this beer. I recently enjoyed Jasper Hill's Harbison with Brasserie St. Sylvestre's Gavroche and the same brewery's Trois Monts with Sequatchie Cove's Dancing Fern. In both cases, the beer's sweet malt character tamed the funk, while offering a spicy yeast character to complement the funky, woodsy flavors of the cheeses. Drier saisons may be more appropriate for firmer, grassier and more herbal cheeses, but you won't really know what you're getting until your guest arrives!

For the abbey ale: washed rind cheeses
Ultra-pungent washed rind cheeses are great with big abbey ales. Again, we're working with a beer that is extremely carbonated here, which will help keep your palate refreshed after being coated with a thick paste of dairy-laden funk. Many of the dark fruit and caramel flavors associated with abbey dubbels and Belgian strong dark ales offer a nice contrast to the bracing funk of these stinky cheeses. Maybe push your guests toward buying a bottle of Chimay Grande Reserve, as Michael Agnew suggests, to pair with the monastery's own cheese, Chimay à la Bière.

For the IPA: blue cheese
The sharp kick of blue mold integrates neatly with the pointed bitterness of an IPA. I tend to prefer maltier beers to help temper and integrate all that intensity, but these categories tend to produce some surprising pairings, so go into it with an open mind.

Sour ale: dessert course
After seven beer and cheese pairings, it may be difficult to leave a lasting impression with an eighth. Mix it up a little bit and prepare a light, cheese-based dessert like this ricotta cheesecake pie to pair with a sour ale. The beer's acidity will liven up the bright strawberry-rhubarb flavor in the compote and cut through any fattiness from the cheese or crust. Fruit sours will amplify this affect.

Have At It!

If all goes as planned, your beer and cheese tasting will be filled with lively discussion about which pairings work, which don't, and why. Not every pairing is going to be a total winner, and that is completely okay. It is at least as interesting to discuss why something doesn't work as why it does, and the casual pot-luck format dilutes the pressure for the host to create perfect pairings.

Have you ever hosted a beer and cheese tasting party? Got any more tips to add? Please share in the comments!

About the author: Mike Reis is a Certified Cicerone and Co-Director of Beer at the Monk's Kettle and Abbot's Cellar restaurants in San Francisco. Follow him on Twitter @beerspeaks or find him behind a pint near you.

More from Mike Reis

How to Identify Bad Flavors in Your Beer
How to Identify Yeast Flavors in Beer: Esters, Phenols, and Alcohols
How to Identify Oats, Rye, Wheat, Corn, and Rice in Your Beer
How to Identify Hops in Your Beer: The Three C's
Have Beer Weeks Grown Too Big?
The Best Places to Drink Beer Outside in San Francisco and the East Bay
Aging Beer: 6 Tips to Get You Started
Hops From a Land Down Under

29 May 21:07

Contraption Maker, spiritual successor to The Incredible Machine, due this year

by David Hinkle
1992s Rube Goldberg-em-up The Incredible Machine is getting a spiritual successor this year, produced by the creators of the original. Contraption Maker will makes its debut on Windows PC and Mac, helped along by The Incredible Machine coder Kevin Ryan, producer Jeff Tunnell, and original pixel artist Brian Hahn.

Expect improved physics, art and animations in Contraption Maker, developer Timothy Aste told Indie Games. "The higher fidelity graphics really shine on making the puzzles more fun an exciting (especially for those who enjoy flipping cats). In addition, we have some really cool things in development that are new to the series such as a super beefed up the sandbox mode and allow players to build much more elaborate puzzles and machines that can interconnect and be easily share-able over the internet." Aste added Contraption Maker will be mod-friendly. "We have even discussed some really 'out there' stuff such possibly support for Arduino to control real life puzzle elements, but we'll have to wait and see if we can get that far.

The Incredible Machine tasks players with constructing a series of complex Rube Goldberg devices around fixed devices to complete an objective. The series was published by Sierra Entertainment. In 2009, Tunnell acquired the rights through his studio, PushButton Labs.

JoystiqContraption Maker, spiritual successor to The Incredible Machine, due this year originally appeared on Joystiq on Thu, 16 May 2013 01:00:00 EST. Please see our terms for use of feeds.

Permalink | Email this | Comments
23 May 18:46

How to Install Linux on a Chromebook and Unlock Its Full Potential

by Whitson Gordon

There are some Chromebooks with awesome hardware out there, like the beautiful Chromebook Pixel, but they don't quite hit their full potential with Chrome OS. Here's how to install Ubuntu and get more out of your Chromebook.

Chrome OS isn't bad, and you can actually do a lot of work with the great Chrome apps out there. But sometimes, you just need a full desktop to get things done. Enter Ubuntu: with just a few minutes of work, you can get a full-fledged Linux desktop up and running on some solid Chromebook hardware, making for a pretty great laptop.

We're going to use a tool called Crouton to install Ubuntu (hat tip to our friends at the How-To Geek), which uses the chroot command to run Ubuntu on top of Chrome OS, which is already based on Linux. Unlike dual-booting, that means you can switch between Chrome OS and Ubuntu with a quick keyboard shortcut, no reboots necessary, which is awesome. It's speedy, powerful, and there only when you need it. If you prefer a more traditional dual-boot environment, check out ChrUbuntu instead, but we'll be using Crouton today. We tested this on a Chromebook Pixel, but it should work on any Chromebook.

Step One: Enable Developer Mode

This will wipe your local data, so make sure to back anything up that you don't have stored in the cloud. To put your Chromebook in Developer Mode:

  1. Press and hold the Esc and Refresh keys together, then press the Power button (while still holding the other two keys). This will reboot your Chromebook into Recovery Mode.
  2. As soon as you see Recovery Mode pop up—the screen with the yellow exclamation point—press Ctrl+D. This will bring up a prompt asking if you want to turn on Developer Mode.
  3. Press Enter to continue, then give it some time. It'll pop up with a new screen for a few moments, then reboot and go through the process of enabling Developer Mode. This may take a little while (about 15 minutes or so), and will wipe your local information.
  4. When it's done, it will return to the screen with the red exclamation point. Leave it alone until it reboots into Chrome OS.

Note that some older Chromebooks have a physical switch that you'll have to flip in order to turn on Developer Mode. If you aren't sure, look up instructions for your specific device on enabling Developer Mode.

Step Two: Install Crouton

Next, we're going to install Crouton and get Ubuntu up and running. To do so, follow these instructions:

          1. Download Crouton from the top of this page (or by clicking here) and save it in your Downloads folder.
          2. Press Ctrl+Alt+T to bring up a terminal on your Chromebook.
          3. At the Terminal, run the following command to enter a Ubuntu shell:
            shell
          4. Next, run the following command to install Crouton:
            sudo sh -e ~/Downloads/crouton -t xfce
            If you're doing this on a Chromebook Pixel, change it to:
            sudo sh -e ~/Downloads/crouton -t touch,xfce
            to get touch screen support. Optional: You can also encrypt your new desktop with a password for extra security using the -e flag (since Developer Mode inherently decreases the security of your machine). You can read more about that here.
          5. Let your computer install Crouton. This might be a good time to grab a cup of tea. When it's done it'll ask you for a username and password for your new Ubuntu installation, so enter them when prompted.
          6. After it's finished installing, run the following command to start your new desktop environment:
            sudo startxfce4
          If you want Ubuntu's Unity interface instead of the XFCE desktop environment, you'd change instances of "xfce" to "unity" (no quotes) in the above commands, including the last command (which would become "startunity"). You can also install LXDE or KDE if you prefer. See the Crouton GitHub page for more info on what you can do, and our guide to desktop environments for the difference between each one.

          Step Three: Optimize Your Linux Desktop for Your Chromebook

          Now, you can switch back and forth between Chrome OS and Ubuntu using Ctrl+Alt+Shift+Back and Ctrl+Alt+Shift+Forward (if you're on an ARM-based Chromebook) or Ctrl+Alt+Back and Ctrl+Alt+Forward (If you're on an Intel-based Chromebook). In the latter case, you will also need to press Ctrl+Alt+Refresh after pressing Ctrl+Alt+Forward to bring up the desktop. To exit the Linux desktop, just log out of it like you would on a normal PC—you'll close it completely and go back to Chrome OS (after which you can run sudo startxfce4 again to go back).

          Now that you're on the Desktop, here are some things you may want to know to optimize your experience:

                  • Your desktop won't come with very many programs installed. You'll find that even a lot of default Ubuntu tools are left out, so you'll have to install them yourself using apt-get. If you're on an ARM-based Chromebook, not all apps will be compatible. Intel users will be much better off.
                  • If you're using XFCE, you should disable the screensaver, which can cause graphics issues in Chrome OS.
                  • The Downloads folder in Chrome OS is the same as the Downloads folder on the Linux desktop, so if you download or create a file in one environment, you can put it in the Downloads folder to make it available in the other as well.
                  • If you're on a high resolution display like the Chromebook Pixel, your icons will be very, very tiny. The Crouton wiki has a few options for fixing this, though none are quite perfect. You either deal with a few tinier buttons or you go to a more standard resolution.
                  • Since your Chromebook is in Developer Mode, it will take an extra 30 seconds to boot up, since it shows you the Developer Mode message. You can skip this by pressing Ctrl+D.
                  • Lastly, if you want to remove your Linux desktop and go back to regular ol' Chrome OS, you can just reboot your Chromebook and press spacebar when it prompts you to re-enable OS verification. This will remove Crouton and restore Chrome OS in its original state.

                  That's it! Now you have a fully working Linux desktop on top of Chrome OS, and you can switch between them whenever you want with a quick keystroke. This makes those great but seemingly dumbed-down Chromebooks a lot more useful (not to mention tempting).

                  17 May 15:25

                  San Francisco: Snapshots from Choke, a Cynar and Artichoke Pop-Up Dinner

                  by Lauren Sloss
                  Mdoherty83

                  I need to do Malort shots at my upcoming bachelor party

                  Slideshow

                  VIEW SLIDESHOW: San Francisco: Snapshots from Choke, a Cynar and Artichoke Pop-Up Dinner

                  [Photographs: Wes Rowe]

                  For Morgan Schick and Eric Quilty, creating food-and-cocktail pairings was always part of the game plan. Schick (of the Mission's Trick Dog) and Quilty (of East Bay Spice Company) banded together in 2010 to form Jupiter Olympus, a cocktail consulting group. "It's been our goal for the whole time to do something with food," Schick said behind the bar at Kronnerburger on Monday evening.

                  That concept was realized with Choke, an artichoke-themed dinner hosted by Cynar and featuring food from Chris Kronner of Kronnerburger and Kevin Cimino of St. Vincent. The four-course dinner was $30 per person, and all proceeds went to the People's Grocery in Berkeley. Quilty and Schick worked closely together to develop 5 cocktails to pair with the food that they felt showcased the bittersweet complexity of the artichoke-flavored amaro.

                  Quilty and Schick, hard at work.

                  Quilty and Schick hard at work

                  "Cynar really lends itself to food pairings," Schick mentioned. "You don't want to pair food with very high-proof cocktails; it destroys your palate. But Cynar has that depth without too much alcohol."

                  The artichoke side of Cynar provided inspiration in the kitchen, too—all of the evening's dishes included the California favorite, including dessert.

                  From a salad 'dressing' cocktail laced with Champagne vinegar and fennel to a dessert digestif 'tea' made in a French press, there was no shortage of creativity in the cocktails from Jupiter Olympus. "Morgan and I will go out for lunch and it'll usually take, oh, half a beer, before we start coming up with ideas," Quilty said of their partnership. "The great thing about us is, we never say no to each other."

                  Take a peek at the slideshow to see all of the evening's artichoke-inspired pairings »


                  About the author: Lauren Sloss is a bicoastal food-lover who is based in San Francisco. Some of her favorite things include The Black Keys, goat gouda, and guacamole. You can follow her on Twitter @laurensloss.

                  16 May 20:28

                  Chicagoland: World's Best Burgers at Fred's in Burlington, WI

                  by Jennifer Olvera

                  From Chicago

                  051513-252433-Serious-Eats-Chicagoland-FredsA.jpg

                  Fred's cheese-sauced burger is worth driving for. [Photographs: Jennifer Olvera]

                  Have you ever taken a day trip for a burger? If not, Fred's in Burlington, Wisconsin, makes the case to start. Giving itself the tagline "World's Best Burgers," it's got some hype to live up to. I don't know about the "world" part, but "best" is pretty tough to argue with.

                  051513-252433-Serious-Eats-Chicagoland-Freds.jpg

                  It's a typical wood-paneled place, and a crowded one at that. Going into the experience, the uninitiated should know you seat yourself. It's a self-order situation, too.

                  051513-252433-Serious-Eats-Chicagoland-Freds2.jpg

                  Grab a menu from the wall, along with an order card. Then, write down what you want, including any special requests, and bring it to the far end of the bar—this is where you place your order and pay.

                  As far as pubs go, the menu is pretty large, housing atypical appetizers—fried green beans ($3.99), broccoli and cheese poppers ($5.59), and jalapeno-cheese-filled tots, ($4.59), for example, plus a other miscellany. Honestly, everything I've tried, including the peppery popcorn chicken ($4.99), is good.

                  Still it's the bragged-about burgers everyone comes for. One bite, and you'll know why. Choosing one is hard, as there are versions both straightforward and fancified. Stick with what Fred's is known for: the sloppy melted cheddar cheese sauce cheeseburger ($4.29 for a 1/4 pound, $5.49 for a 1/2 pound). It arrives perfectly pink with or without crispy, fresh toppings like lettuce, tomatoes, and pickles, plus grilled onions if you wish.

                  051513-252433-Serious-Eats-Chicagoland-Freds3.jpg

                  Skip the fries in favor of house-made, Parmesan-showered potato chips ($2.49), and leave a happy man, woman or child.

                  Great taps house icy-cold Sprecher root beer and locally loved Spotted Cow from New Glarus Brewing. Watch, too, for limited release and lesser-known brews from the brewery as well, such as crisp, balanced Two Women lager, named for Viking gals who brewed in Norse society.

                  Fred's

                  596 N. Pine St., Burlington, Wisconsin, (map)
                  262-763-8370
                  frp.tripod.com

                  About the author: Jennifer Olvera is a veteran food and travel writer and author of "Food Lovers' Guide to Chicago." Follow her on Twitter @olverajennifer.

                  16 May 16:15

                  Free stream: The Source Family soundtrack of 1970s cult psychedelia

                  by David Pescovitz
                  NewImageThe Source Family was a radical, utopian social experiment that emerged from the Los Angeles freak scene in the 1970s. Operating out of a hip health food restaurant owned by judo master/bank robber/accused murderer Jim Baker, aka Father Yod, The Source Family was everything you could want in a post-hippie, West Coast outsider spiritual trip. And they had a rock band too! Thanks to our pal Jodi Wille and Maria Demopoulos's absolutely fantastic new documentary now in theaters about Father Yod and his "children," interest in The Source Family and their band, Ya Ho Wa 13, has never been greater. The film, titled The Source Family: A Documentary, was inspired by The Source: The Story of Father Yod, Ya Ho Wa 13 and the Source Family, written by family members Isis Aquarian and Electricity Aquarian, edited by Jodi, and published by our pals Process Media. To complete the full transmedia Source Family experience, Drag City is releasing The Source Family soundtrack, a collection of choice tunes from the nine albums that The Source Family recorded between 1973 and 1974. Boing Boing is pleased to premier this free stream of the entire album, The Source Family soundtrack, available next week on CD and, of course, vinyl. Far fucking out.


                  15 May 16:39

                  BRASSFT PUNK: Brass band covers of Daft Punk classics

                  by Dean Putney

                  If you're still thinking about Daft Punk after yesterday's excitement around Random Access Memories, you might appreciate this masterful New Orleans brass band cover EP of a few of their classics. Their Kickstarter to cover Get Lucky is also fully funded with four hours left!

                  BRASSFT PUNK Thanks, SQ!


                  15 May 16:27

                  Bamboo wok brush: easy, no-soap wok and pan cleaning tool

                  by Cool Tools
                  Mdoherty83

                  Need one of these for my cast Iron skillet esp. since Ive been trying to use it more and would like more cast iron in the future

                  I use well-seasoned cast iron and carbon steel pans for the better part of my cooking. To clean them, I’ve used the same bamboo wok brush than I bought at a corner market in Sacramento in 1990. I’ve been thinking of buying a new one, just so I can phase it in over a few years while I slowly retire the original. It only takes a few swishes around the inside of the pan with hot water (no soap!) and a rinse to clean a pan. In the time I’ve been using it on my iron and steel pans, including the wok I use occasionally, I’ve gone through countless sponges, scotch-brite pads, and those looped-plastic scrubbies that I use on stock pots etc., all of which get pretty hinky once put into use and have to be run through the dishwasher to get free of food particles. It also looks dignified and fine sitting on the countertop by the sink, has just gotten more seasoned, and never needs more than a rinse to get clean. The edges of the cane bristles are pretty blunted by now and a new one might work better for attacking the occasional nuclear cooking mess. On the other hand, it’s gentle enough on the built-up seasoning in my pans that they keep getting non-stickier and shed scorched cheese like schmutz on teflon.

                  The brush I bought way back when has flat bristles, about 11 inches long by 3/16 wide, and stouter than most of the wok brushes I’ve seen recently in Asian groceries. I can’t imagine that there’s been much innovation in wok brush technology in the last 3000 years, but quality is probably inconsistent on an item like this, even from the same seller. Unless you have access to Asian markets and can shop around while you’re out making your weekly durian run, Amazon has a variety to choose from, all about $7.50 with shipping. The Wok Shop seems to be reputable, but it might be prudent to order a few just in case yours only lasts as long as a good hamster. -- Brian Garber-Yonts

                  Bamboo Wok Brush $7


                  15 May 16:13

                  May 15, 2013

                  Mdoherty83

                  This may be his opus indeed......


                  This may be my opus.
                  13 May 17:50

                  Make bread by mixing ice cream with flour and baking

                  by Cory Doctorow


                  It appears that you can make delicious (and fantastically high-carb) bread by mixing melted ice-cream with self-rising flour and baking it. I'm willing to believe that this is totally yummy but I'm not going to try it:

                  1 Preheat oven to 350 F
                  2 Let ice cream soften at room temperature for 10-15 minutes.
                  4 Evenly distribute sprinkles in the bottom of a greased Bundt pan and scoop batter evenly on top.
                  5 Bake for 35 minutes until a toothpick inserted comes out clean.
                  6 Invert and allow to cool completely.

                  Cake Batter Ice Cream Bread (via Neatorama)


                  13 May 17:37

                  Robert Crumb interviewed at Last Gasp Warehouse in San Francisco

                  by Mark Frauenfelder

                  John Longhi interviewed Robert Crumb at the Last Gasp warehouse in San Francisco. He talks about the time he took a dose of bad LSD that negatively affected his brain for months (maybe for life, he thinks). Even though it was a bad experience, his creativity went into overdrive.

                  Crumb also recommends the book, The Cotton Kingdom : a traveller's observations on cotton and slavery in the American slave states, by Frederick Law Olmsted. It's available as an ebook at Archive.org.


                  13 May 17:14

                  Scratch 2.0: programming for kids, now in the browser

                  by Cory Doctorow
                  Mdoherty83

                  This could be great for tech initiatives and education in libraries.

                  The MIT Media Lab's Lifelong Kindergarten Group has shipped version 2.0 of Scratch, the justly famed and much-loved programming language for kids. Scratch makes it easy to create powerful simulations and games, even for small kids (basically, if you can read, you're ready for Scratch). The new version of Scratch runs right in a browser (no downloads or installs required), and is remarkable in its polish and power to excite. The programming environment is embedded in a sharing and shareable community, with millions of Scratch projects ready to be downloaded and remixed. It's just amazing.

                  With Scratch, you can program your own interactive stories, games, and animations — and share your creations with others in the online community.

                  Scratch helps young people learn to think creatively, reason systematically, and work collaboratively — essential skills for life in the 21st century.

                  Share with others around the world (via O'Reilly Radar)


                  13 May 17:05

                  Pray at the altar of NES chiptune metal with Diad

                  by Tony Ponce

                  Chiptunes are cool and all, but you know me -- I gotta have that little extra edge. When chip music emulates face-melting metal, it's one of the nine most beautiful things in the world (maybe some day I'll tell you what the other eight are).

                  Diad is a power union of Canadian and American talent between chip artists Heosphoros and Tadpole. Their self-titled album recalls hard rockin' soundtracks of the NES era, such as Sunsoft's Batman and Journey to Silius, or even the more recent Retro City Rampage. And if to draw even more attention to their metalhead sensibilities, the track "Dimension-Reversing Dualities" was given a live guitar arrangement by the always fantastic VikingGuitar.

                  The seven-track album is free (of course!), available in proper audio formats as well as original NSF sound files that can be played on native NES hardware. Go do dat thang!

                  Diad [Ubiktune]

                  Pray at the altar of NES chiptune metal with Diad screenshot

                  Read more...
                  13 May 16:49

                  Exploring the connected city of Chicago in Watch Dogs

                  by Hamza CTZ Aziz
                  Mdoherty83

                  I didn't realize this game was set in a future version of Chicago, now I want to play it really really bad!

                  Watch Dogs has been on everyone's radar ever since its surprise debut at E3 last year. It's an open world game, but what makes this one so unique is that you play as Aiden Pearce, an expert hacker who can control the connected city of Chicago right in the palm of his hands.

                  Anything that's electronic or connected online can be controlled with ease, and with this power Aiden will use whatever means necessary to get revenge on those that have wronged him. At the same time, Aiden becomes sort of a vigilante for the city of Chicago, and your actions will have an impact upon the game's world.

                  Those of you worried about story spoilers need not fear, as Ubisoft ran us through a live demo that merely consisted of exploring the open world environment to show us just how much future Chicago can offer players.

                  Exploring the connected city of Chicago in Watch Dogs screenshot

                  Read more...
                  13 May 16:32

                  Five Best Coffee Makers

                  by Alan Henry

                  Whether you do drip, French press, AeroPress, pour-over, percolator, or use a pod brewer, there are seriously more ways to make a good cup of coffee than we could ever highlight. Still, some methods are better than others, and you didn't hesitate to let us know. Here are the top five coffee makers, based on your nominations.

                  Earlier in the week, we asked you which coffee makers you thought were the best. We didn't expect the tidal wave of nominations you gave us, but we were happy to see them. Our only regret is that we can only feature the top five, and we don't have room for a lot of the very specific models and other less well-known products you shared with us. Even so, we know you'll sound off again in the discussions. In the meantime, here are your five favorites:

                  French Press (Bodum/Grosche/Espro/IKEA Upphetta/etc)

                  Ah, the venerable French press. Also known as a coffee plunger or a cafetière, the French press is a tried and true method of making a delicious cup of coffee that extracts an exceptional amount of flavor from coffee beans in a short brewing time. It's not the fastest or the slowest method in the roundup, and it's not the most hands-off, but it's hardly difficult, and for most people who want a pot of coffee big enough for a few cups (but who are also ready to upgrade from drip), it's a great option.

                  A relatively fresh coarse grind, good, cold water, and the time to both heat and brew, and that's all you need for a great cup. The french press method eschews disposable filters and gives the drinker complete control over the brew time and the end-strength of their coffee. Various models and types exist, from the ever-popular Bodum models to the affordable IKEA Upphetta and the dual-filtered Espro, so prices vary depending on the size and brand you go in for. Even so, those of you who nominated your French presses spoke highly of the control it gave you and the delicious coffee as a result.


                  Aerobie AeroPress

                  The history of the AeroPress is almost as fun to read as the AeroPress itself is to use, especially considering the AeroPress is the only non-sport/toy product Aerobe makes. We love the portable, single-cup maker, and even walked you through getting the best cup with one, and many of you nominated the Aeropress because it's fast, cleanup is a snap, and you get a quick, well-extracted, delicious cup in a matter of minutes (seen in the video above, although clearly it's a bit of an exaggeration).

                  The shorter brewing time and disposable paper filters may be a cause for concern to some, but filters are widely available in several-hundred packs, and the fact that the AeroPress uses air pressure to extract more flavor from the (relatively) finely ground coffee in the chamber makes for a more well-bodied cup. Best of all, the AeroPress will only set you back about $25 regardless of where you buy one. The AeroPress' shape and size make it absolutely ideal for taking a great cup of coffee with you anywhere you go, which is essential if you don't want to give up a good cup just because you're visiting friends or traveling for work.


                  Pour-Over Brewing (Chemex/Hario V60/Melitta/Clever Coffee Dripper)

                  Pour-Over filtration brewing isn't exactly new, but it has surged in popularity recently, partially due to a whole new group of people discovering the method who had previously known nothing more than push-pot office brew and Mr. Coffee drip pots. Pour-over brewing is fairly simple: a glass or plastic cone is mounted on top of a carafe, and a paper or cloth filter is used to store the coffee in the filter. You then boil good, cold water to the proper temperature, and slowly pour the water over the freshly ground coffee you put in the filter. You have control over the amount of coffee that goes into the filter, and the temperature of the water, but not so much the level of extraction (beyond through the amount of coffee used, of course).

                  The end result is a stronger extraction than you might expect because of how long the water stays in contact with the coffee as it passes down through the grinds and through the filter into the carafe below. You also get a more well-balanced cup but one that's still smooth, blending the characteristics of drip and pressed coffee. Depending on the model you purchase, you can spend as little as $25 (for the Clever Coffee Dripper, for example) or as much as $40 for a Chemex, not including filters and accessories. Detachable filter models are surprisingly portable, too, and can be used with thermoses, any available carafe, or even right into your coffee cup.


                  Technivorm Moccamaster

                  The Technivorm Moccamaster thermal drip coffee maker picked up enough nominations of any individual brewing method that we had to feature it (that, and its competitor and natural alternative, the Bonavita BV1800). The Moccamaster is a handmade thermal pot that represents a significant upgrade to traditional drip models. The Moccamaster (and the Bonavita) both strive to bring the temperature of the water up to the proper level in an independent heating area, away from the coffee and the carafe, and only then introduce the water to the coffee stored in the filter bed above the carafe. The Moccamaster and the Bonavita both have models with thermal carafes on top of their heating elements (if you don't like the idea of a glass carafe on top of the element), and they're built to only allow the water to extract for the proper length of time before exiting the filter bed—all design elements that many more affordable drip makers completely neglect, in favor of features like timers and attached grinders.

                  The Moccamaster even earned a nod from Cooks Illustrated Magazine, a significant feat for a drip maker. When people talk about dropping the drip, they usually haven't tried one of these models. Cost of entry can be significant though, the Moccamaster starts around $300 (and the Bonavita, by contrast, is $130 for the glass carafe and closer to $150 for the thermal model). If you do enjoy a Moccamaster or a Bonavita, don't forget our tips to getting the best coffee from a drip maker. They'll help you make the most of it.


                  Bialetti Moka Pot

                  The Moka Pot, also known as the Moka Espresso or the Moka Elite, were invented in the early 1930s and have been making killer coffee ever since. It's incredibly popular in Europe and Central and South America, and while it's not as popular in the United States, a few of us here at Lifehacker love them, even if they're not the easiest coffee makers to find in your local department store (although they are $25 at Amazon, so there's that). I've seen them in thrift stores, old and well-loved models available for a few bucks, with people passing by not knowing what they're seeing.

                  When brewing with the Moka pot, water in the bottom chamber of the pot is heated and steam pressure pushes it up through a central basket that contains the ground coffee, and then finally into the top chamber where the coffee eventually rests, ready to pour. Since steam pressure is important and the water is in the bottom chamber, the pots are usually made of aluminum or stainless steel, and go right on top of the heating element when brewing. Just open the top, clean it out, pour water into the bottom, add coffee to the center basket, and pop it on the stove. The Moka pot's classic gurgle signals that the pot is finished brewing and ready to serve. They're super-easy to use (although they get seriously hot), and while you don't get much control over the nuances of the brew, the final product has an extraction ratio more like espresso than drip, and has a flavor and balance to match.


                  There you have it, the top five, based on your nominations earlier in the week. Now it's time to vote for the winner:

                  Honorable mentions this week go out to Keurig Single-Cup Brewers, which came surprisingly close to making the top five (They only missed by one or two nominations). Regardless of your opinion of pod-coffee makers, many of you appreciate the convenience and ease-of-use that Keurig's brewers bring to the mix. Similarly, Nespresso's pod-based brewers came pretty close to the top as well.

                  Another honorable mention goes out to vacuum pot coffee makers, like the Yama and the Cona, which use a tiny amount of ground coffee to yield a delicious, strong cup of coffee. We also want to highlight the only cold brew method that made the upper echelons of the nominees, the Toddy Cold Brew System, which makes a flavorful, strong cup for hot or iced coffee in no time.

                  Of course, we would be remiss if we didn't point out that regardless of the coffee maker you use, if you put terrible coffee into it, you're going to get an awful brew out of it. Many of you pointed out starting with quality beans and a good even grinder shouldn't be overlooked in the rush to find a great gadget to make your morning cup. In short, even the best brewing techniques can't turn lead into gold.

                  Have something to say about one of the contenders? Want to make the case for your personal favorite, even if it wasn't included in the list? Remember, the top five are based on your most popular nominations from the call for contenders thread from earlier in the week. Don't just complain about the top five, let us know what your preferred alternative is—and make your case for it—in the discussions below.

                  The Hive Five is based on reader nominations. As with most Hive Five posts, if your favorite was left out, it's not because we hate it—it's because it didn't get the nominations required in the call for contenders post to make the top five. We understand it's a bit of a popularity contest, but if you have a favorite, we want to hear about it. Have a suggestion for the Hive Five? Send us an email at tips+hivefive@lifehacker.com!

                  Photos by Mat Honan, Don LaVange, Ty Nigh, Lauri Rantala, and Bill Rice.

                  11 May 18:21

                  Pretzel Making at Home by Andrea Slonecker — New Cookbook

                  by Emma Christensen

                  I love me some pretzels something fierce. Partly, it's the memory of eating them at baseball games and trips to New York. Partly, it's that moment of tearing through the chewy crust and biting into the soft, piping-hot middle. Partly, yes, it's the enormous grains of crunchy salt scattered over the top. This means that this new book by Andrea Slonecker, Making Pretzels at Home, speaks to me in a very clear and insistent voice. It's saying, "Get thee to the kitchen! Make some pretzels!"

                  More


                  11 May 16:57

                  Food Storage 101: Where and How Long to Keep Your Favorite Foods

                  by Tessa Miller

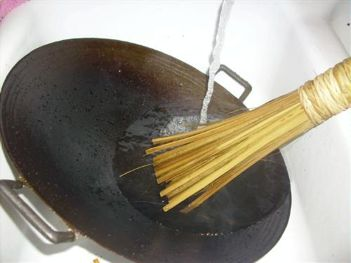
                  We've talked about food storage and safety quite a bit here at Lifehacker—from what you do and don't need to refrigerate, to the best ways to stop spoiling (and wasting) food. But if you're still not sure where to store your favorite snacks, and for how long, our friends at Food52 have you covered with this complete guide.

                  Part of treating ingredients correctly is knowing the best places to store them, and for how long. Let's tackle several storage myths and general confusions, starting with the counter and the pantry.

                  The Counter

                  Garlic, onions, and shallots: These alliums can be stored in a cool, dry place for up to two weeks. In the fridge, they will turn mealy and lose much of their flavor.

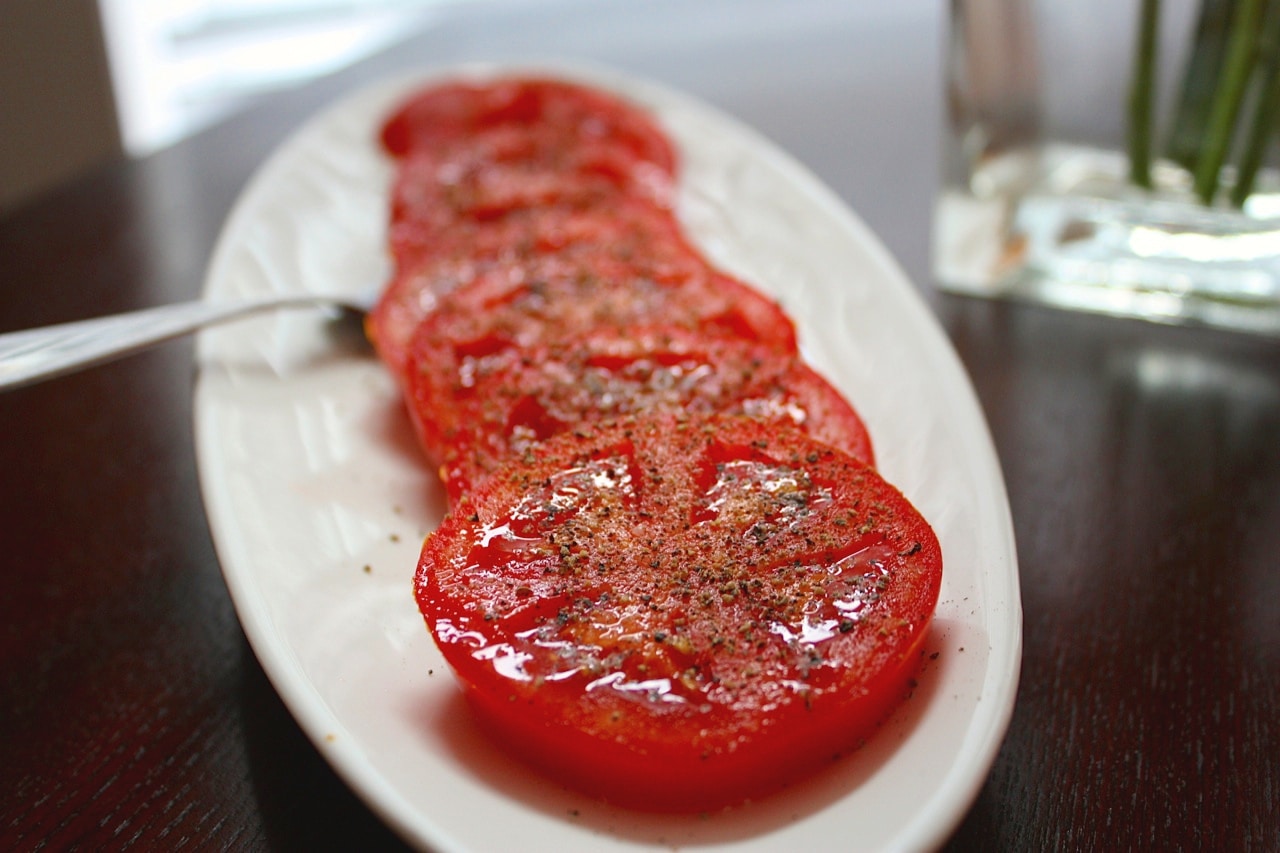
                  Tomatoes, potatoes, and winter squash: Although it may seem blasphemous to keep vegetables out of the refrigerator, trust us (and the USDA): these should be kept in a cool, dry place instead. (Plus, they make beautiful decorations.)

                  Bananas, citrus, and melons: Like the vegetables listed above, these fruits are best left on the counter. Once cut, they should be relegated to the refrigerator; otherwise, they will begin to dry out.

                  Bread: To slow down retrogradation—the process in which the starch molecules in bread crystallize—Cook's Illustrated says to store bread at room temperature for up to two days, either tightly-wrapped in foil or in a Ziploc bag to minimize moisture loss. After two days, wrap the bread in foil, place in a freezer bag, and store it in the freezer. And to revive crusty bread that's been stored for more than a day, just pop it into the oven for a few minutes.

                  Cakes and pies: According to pastry chef Stella Parks, both frosted and un-frosted whole cakes will last for about a week when tightly wrapped in plastic. Cut cakes have a shorter shelf life, around three to four days. Fruit pies can be kept on the countertop for up to two days; after this, move them to the refrigerator.

                  The Pantry

                  Dry goods: Generally, dry goods can be stored for up to six months (longer if you take good care of them), according to scientists at Colorado State University. Once a package is open, it’s best to move it to an air-tight container. This will ensure freshness and keep your pantry cleaner to boot.

                  Nuts: Store your nuts in air-tight containers if possible—these allow them to maintain the right level of moisture. For ultimate freshness, consider storing them with their shells on.

                  Spices: As the LA Times tells us, heat, light, air, and humidity are all spices’ enemies; your spices should live in your pantry. Whole spices last much longer than crushed or ground—these can be kept for up to two years, while ground spices should be refreshed every six months. Airtight tins or small spice jars are the best mode of storage.

                  Now, we're taking you to the refrigerator and freezer. Because not all parts are created equal, we'll show you where—and for how long—your goods will last.

                  The Refrigerator

                  Dairy products: According to Cooks Illustrated, milk, cream, yogurt, and other dairy products are best stored on the upper shelves of your refrigerator. The temperature there is the most constant, so they'll keep longer.

                  Eggs: Some refrigerators urge you to put your eggs on the inside of their door. Don’t give in— the door is the warmest part of the refrigerator. Eggs are happiest in their cartons on a shelf. Don't try to be European and store your eggs outside the refrigerator either: eggs in the United States, unlike in Europe, are washed before sale so they lose their protective outer layer.

                  Mushrooms: According to our friends at the Kitchn, commercial mushrooms (the ones you buy at the grocery store) are best left in their original packaging. Once you open it, wrap the whole package in plastic wrap. Wild mushrooms are best kept in a paper bag in your refrigerator’s crisper drawer.

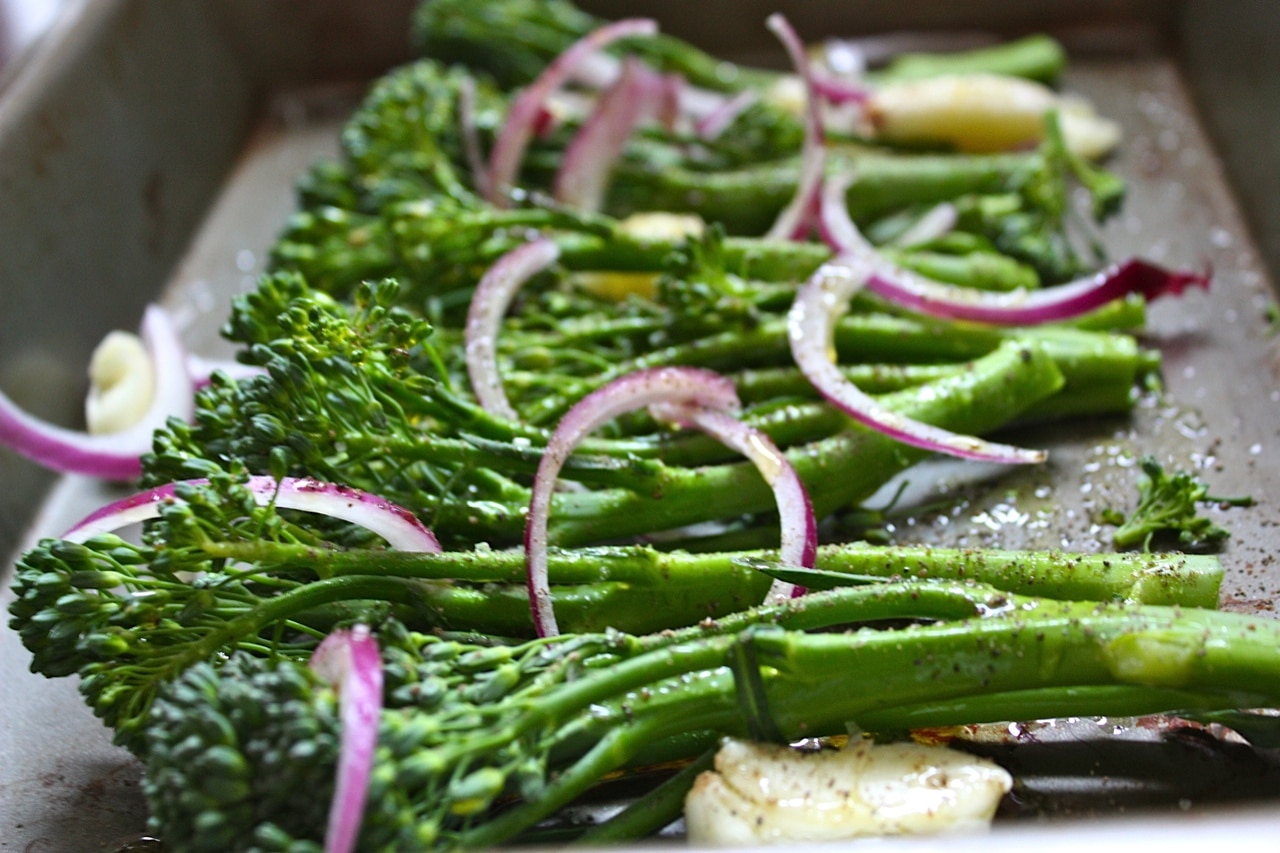
                  Vegetables: All vegetables, minus the ones relegated to the countertop, are best stored in perforated plastic bags in your refrigerator’s crisper drawer. To make sure they don't decompose prematurely, keep them away from ethylene-producing fruits: apples, stone fruits, mangoes, passion fruit, pears, and kiwis.

                  Fruit: Fruit, with the exception of melons, citrus, and bananas, should be stored in the refrigerator in a separate drawer from the vegetables. Do not wash your fruit until you are ready to eat it; the excess water quickens decomposition. Although whole lemons are best left out on the counter, lemons that have been zested—but not juiced—can be wrapped in plastic wrap and stored in the refrigerator.

                  Cheese: According to Formaticum's blog, cheese should be wrapped in porous material for storage; cheese paper is the best, but waxed paper or parchment paper will also do the trick. Before storing, do a “face clean” of each cheese: scrape the surface with a non-serrated knife to remove any excess oil that may have “sweat out” at room temperature.

                  Each cheese should be wrapped separately and marked with the name and date of purchase. Avoid plastic wrap at all costs—as scientiest Harold McGee says in his book On Food and Cooking, the cheese can absorb the flavors and chemicals from the plastic. There’s nothing worse than an expensive piece of cheese that reeks of plastic or has gone bad, so storing it correctly is worth that extra effort. For a handy how-to, check out this article from Serious Eats.

                  Meat: Meat is best stored in the coldest section of the refrigerator: the bottom. Removing the retail packaging and rewrapping the meat in foil can extend its shelf life, but you should try to consume refrigerated meat within 4 days of purchase.

                  Fish: Before refrigerating a piece of fish, dry it completely and wrap it in waxed paper. It will usually keep in the coldest part of your fridge for up to two days, but make sure to check the smell before you cook it. If it smells too fishy or has an off color, throw it out. For bonus points: store wrapped fish on a bed of ice (heaped in a bowl or shallow dish) in the fridge, and change as needed, à la Cooks Illustrated

                  Pies: According to Betty Crocker, pies containing eggs (custard or cream-based pies) should be stored loosely covered in the refrigerator.

                  Yeast: While yeast can last in the pantry, it's best stored in the refrigerator (or freezer, for long-term). Once exposed to heat and light, it's easily killed.

                  Herbs: According to FOOD52-er RobertaJ on this Hotline thread, basil, parsley, cilantro, and other leafy, water-based herbs should be treated like flowers: take off any twisty ties, trim a small amount off the stem ends, and plop the bunch into a tall glass of water. Cover the herbs loosely with a plastic bag, and they’ll stay fresh for at least a week. Hardier, oil-based herbs like thyme and rosemary can be wrapped in a damp paper towel and layered into plastic bags. Hotline MVP anitalectric has a special tip for basil: wash, dry, and stem the basil when you get home from the market, and keep the leaves in a rolled-down plastic bag. They’ll stay fresh for five days.

                  The Freezer

                  Meat: Freezing uncooked meat in its original packaging is the best way to keep it for long periods of time. According to the USDA, the maximum recommended freezer storage time for beef and lamb is six months; for veal, pork, and poultry, four months; and for seasoned sausage, two months.

                  Fish: Fish can last in the freezer, according to the Perdue University Center for Animal Sciences, for up to 6 months. Fattier fish, however, should not be frozen for over three months. For the best results, use the ice-glaze method provided by the National Center for Home Food Preservation: place the unwrapped fish in the freezer until completely frozen, dip the fish in near-freezing ice water, and place it back in the freezer to harden. Continue with this process until a uniform cover of ice is formed, then place the fish in a freezer bag for storage. As an alternative, according to the FDA you can simply wrap your fish tightly in plastic, foil, or moisture-proof paper before freezing.

                  Pies and pie crusts: You can freeze crusts and whole pies, baked or unbaked. According to Betty Crocker, an unbaked crust will keep for two months; an unbaked pie for three months; and a baked crust or pie for four months.

                  Cake: Un-cut, un-frosted cakes can be wrapped first in plastic wrap, then tin foil, and stored in the freezer for several months. To thaw, let the rounds spend a night in the refrigerator; cake needs to thaw slowly so that it can reabsorb its moisture.

                  Stock: Freeze stock in ice cube trays or muffin tins, then store the cubes/chunks in a freezer bag. That way, you can access a small amount of stock whenever a recipe calls for it. To save even more space, reduce the stock by 50 percent before you freeze it, then add water when you defrost it. According to Martha Stewart Living, frozen stock will last up to two months. You can also store leftover wine in the same manner and use as needed.

                  Coffee: Cook's Illustrated says the freezer is the best place to store ground coffee beans; they keep longer, and will retain their well-rounded, roasted flavor.

                  Citrus Zest: Here's a tip from the smart folks at The Kitchn: any time you use a lemon, lime, grapefruit, or orange, take a few minutes to zest it. You can store the zest in the freezer in plastic bags for each fruit—or if you’re feeling fancy, in individual, plastic-wrapped portions.

                  Smart Storage, Part 1; Smart Storage, Part 2 | Food52


                  Brette Warshaw is the editorial assistant at Food52. She's a reader, eater, culinary thrill-seeker and food nerd.

                  Image via Africa Studio, Venus Angel, and Mile Atanasov (Shutterstock).

                  Want to see your work on Lifehacker? Email Tessa.

                  09 May 16:59

                  Book Talkin’

                  by Miss Julie

                  (You need to sing the title of this post to the tune of “Jive Talkin’”)

                  via the new york city public library's flickr page

                  via the new york city public library’s flickr page

                  As the school year draws rapidly to a close (seriously, where did it go?) I’ve been reflecting on my first year as a school outreach librarian. I can’t tell you how invigorating it has been to use different skills and get to try new things with a wide variety of audiences. One of my favorite programs this year was all of the booktalks I did for middle schoolers (6th-8th grade) and teachers. In my previous six years as a librarian, I had done very few book talks. It was something I really wanted to do, but it just never happened in previous positions.

                  I was extremely lucky that I started out this school year being invited to book talk first to two groups of teachers, one elementary and one middle school. After getting to see me and my colleague book talk, teachers had a sense of who I was, how I behaved, and liked me enough to want to have me get up in front of their students. This was a great break for me, and once one class had me and my coworker in, all of the rest of them wanted us, too.

                  This year I averaged about two book talks a month, usually spending an entire school day (8 a.m.-2 p.m.) talking to multiple classes. Often I was solo, but several times I was lucky enough to be joined by members of our teen staff. While I can do these book talks alone, six hours of booktalking is a long time, and even with a partner I’m exhausted by the end of the day. I vastly prefer booktalking as a team for two major reasons (other than the fact that it helps to save your voice):

                  1) Variety. With two readers sharing books, the kids will get a wider variety than from one person alone. While I am very careful to select a variety of books, there are certain genres and topics I just can’t muster much enthusiasm for. I can fake it, sure, but why do that when a coworker is just nuts about the books I’m lukewarm about? While I’m pretty good at selling any book, kids can tell the difference between my genuine enthusiasm and the enthusiasm I put on for their sake.

                  2) Attachment Librarianing. This is something I carried over from my preschool teaching days, and I think it really applies to librarianship. Kids and teens are all unique, and not every personality is going to have a great fit with every kid or teen out there. For example, I quickly bond with shy, nerdy, awkward kids and teens (I try to find the Whovians in every middle school class as fast as I can). Other kids like me just fine, and I can and love to help everyone, but the geeky kids are more likely to seek me out and will get better recommendations from me, just because we’re so simpatico. With more staff available, more kids are likely to find the librarian whose style and personality speaks to them, which equals better service.

                  For me, booktalks are a lot like storytimes for older kids. While I don’t reveal endings or major plot points when I book talk, I do tell a story to get kids invested and interested. A lot of times I will use the theme of a novel or a hook from a nonfiction title to riff for a while. Just call me the wholesome Richard Pryor of librarianship. For example, when I booktalk Fourmile by Watt Key, I spend a lot of time talking with kids about PTSD, the stigma of mental illness in our culture, how we treat our soldiers, and why so many books for kids feature dead dogs (seriously!). When I talk about Almost Astronauts, I tell them the anecdote about Jerrie Cobb shattering all isolation booth records (NINE HOURS AND FORTY MINUTES Y’ALL), yet never getting the chance to be an astronaut. From there, I talk a bit about how women are seen in our culture and how we are treated.

                  My style is a little unconventional, I suppose, but it works for me, and it works for many of the kids I booktalk to. And that’s the important thing, I think–is to find your own personal style, your voice. That’s what will make your book talks exciting and get the kids interested in reading the books you’re pushing.

                  And what books do I push? It depends. If a teacher is working on a genre study, I’ll bring titles in that genre. Often I like to do a mixture of fiction and nonfiction, new books and backlist. I try to have books at a wide variety of reading levels with a variety of appeal factors. Most of all, I strive to bring books that I’ve read completely and have a component that I am super, super excited about. Even if I didn’t personally love the book, if there’s a crazy character or fascinating setting that I can see kids being interested in, I’ll definitely book talk that sucker.

                  So that’s just a little bit about my new favorite professional responsibility. What about you–do you book talk? What’s your style? Any favorite titles?


                  09 May 16:26

                  Skip the Take-Out: Quick Southern Comfort Recipes

                  by Matt Moore

                  These days, it seems that my life never gets any less busy. Just when I think I’m on top of things, another project or opportunity comes along that puts me right back behind the eight ball. I imagine most of you can relate. Between work, relationships, significant others, kids, (insert your own craziness) – life never seems to slow down.

                  It’s no wonder why so many of us choose to “outsource” our meals to the local restaurant or drive-through. After all, it’s much faster and easier to pick up dinner than spend your valuable time working away in the kitchen, right?

                  Not always.

                  Of course, I’m a bit biased, but I believe making food at home doesn’t have to be such an involved process. Besides, you are likely to save money, calories, and potentially even relationships by sharing and preparing meals around the family table.

                  I’ve put together some of my favorite Southern-inspired comfort food recipes that can all be prepared rather quickly – perfect for a weeknight meal when life gets too busy. Rest assured, just because we’re saving some time doesn’t mean we are sacrificing any flavor! So the next time you are dialing for delivery or hopping in the car for take-out, give these recipes a try. I guarantee you’ll find a favorite amongst the bunch.

                  Cheers,

                  MM

                  Sliced Vine Ripe Tomatoes

                  tomato
                  Yes, it’s just that simple. Pick up tomatoes from your famers market whenever possible. Not only do they taste better, but they are typically much cheaper than those found in the supermarket. This makes for a great side dish or as a simple alternative to preparing a salad. (Prep: 1 minute, serves 4)

                  4 vine ripe tomatoes
                  Kosher salt
                  Fresh cracked pepper

                  Slice tomatoes and season with salt and pepper. Serve.

                  Quick Cook Grits

                  grits
                  Nothing is more Southern and comforting than a bowl of creamy grits. To save calories, you can substitute olive oil for butter and omit the cream. (Prep: 1 minute, cook 10 minutes, serves 4)

                  1 Tablespoon unsalted butter
                  1 cup quick cook grits
                  3 cups water
                  1 teaspoon kosher salt
                  ½ teaspoon fresh cracked pepper
                  ¼ cup heavy cream

                  Combine the first 5 ingredients into a stock pot and bring to a slow boil over medium-high heat – stirring to ensure no lumps are formed. When mixture reaches a boil, cover and reduce heat to low; simmer for 7-8 minutes. Finish by adding cream, stir, and serve.

                  Roasted Broccolini

                  broccolini
                  No Southern meal is complete without some greens. Instead of the traditional greens (collards, mustard, or turnips), I’ve chosen broccolini to help speed up the process and get dinner on the table. Substitute broccoli spears if you cannot find broccolini. (Prep: 1 minute, cook 15 minutes, serves 4)

                  1 bunch broccolini
                  ¼ small red onion, sliced thin
                  2 cloves garlic, smashed
                  2 Tablespoons extra virgin olive oil
                  Kosher salt
                  Fresh cracked pepper

                  Preheat oven to 425 degrees F. On a baking sheet, arrange broccolini and onion slices into a single layer. Drizzle with extra virgin olive oil and season to taste with salt and pepper. Roast, uncovered, for 12-15 minutes. Discard garlic prior to serving. Serve.

                  Grilled Pork Chops

                  pork chops

                  Thinly sliced, bone-in pork chops cook up quickly while still maintaining great flavor. Paired up with your favorite BBQ sauce – I recommend Slap Sauce – and this dish is sure to be a favorite. (Prep: 5 minutes, cook 10 minutes, serves 4)

                  4 thinly sliced bone-in pork chops
                  Extra virgin olive oil
                  Kosher salt
                  Fresh cracked pepper
                  BBQ sauce

                  Preheat a grill or grill pan over medium high heat. Drizzle chops with olive oil and season both sides liberally with salt and pepper. Grill over direct heat for 3-4 minutes per side. Remove from grill and rest for 3-5 minutes prior to serving. Serve alongside your favorite BBQ sauce for dipping.

                  Traditional Southern Pound Cake

                  pound cake
                  A relatively simple and delicious cake that keeps well all week long for dessert. Since this recipe takes longer to bake, I prefer to prep this before dinner and get it into the oven. You can make all of the other dishes, enjoy your meal, and pull this out just in time to enjoy a great dessert. Better yet, this cake serves as double duty in the meal department – making a great accompaniment to your morning cup of coffee. If you don’t have time to bake your own (you do!), order your favorite cake online from Atlanta, GA’s St Rita’s Cake Company. (Prep 10 minutes, bake 60 minutes, serves 4-6)

                  3 cups of all-purpose flour
                  1 teaspoon baking powder
                  1/4 teaspoon kosher salt
                  1 cup (2 sticks) of unsalted butter, at room temperature
                  2-1/2 cups granulated sugar
                  5 extra-large eggs, at room temperature
                  3/4 cup half and half
                  1 Tablespoon pure vanilla extract

                  Preheat oven to 325 degrees F. Prepare a Bundt pan or loaf pan using shortening and dust lightly with flour. Put the flour, baking powder, and salt into a strainer and sift into a bowl; set aside.

                  Beat the room temperature butter on medium speed until creamy. Add the sugar into the butter 1/2 cup at a time and continue beating on medium until mixture becomes fluffy (about three minutes). Add eggs, one a time, to the butter and sugar mixture, blending each egg in before adding the next.

                  Reduce speed to low and begin to alternately add the flour mixture and the half and half into the creamed butter, starting and ending with the flour, until all is fully incorporated. Add the vanilla and blend it in. Pour the batter into the prepared pan and spread out the top evenly. Bake at 325 degrees F for about 1 hour or until a toothpick inserted into the center comes out clean.

                  Place the pan onto a cooling rack and cool the cake in the pan for 10 minutes. Turn cake out onto the rack and allow to cool completely.

                  Related posts:

                  1. Fire Up the Grill: 5 Mouthwatering Recipes for Your Memorial Day Weekend
                  2. 5 Ways to Use Your Turkey Leftovers
                  3. 5 Delicious Ways to Use a Store-Bought Rotisserie Chicken
                  4. Skirt Steak: 5 Different Ways
                  5. Cowboys Recipes That’ll Put Hair on Your Chest


                  08 May 19:59

                  'CardSplice' Cleverly Catalogs Your 'Magic: The Gathering' Cards Using the iPhone Camera

                  by Eli Hodapp
                  Mdoherty83

                  I'm probably going to see if I can adapt this when and if the library gets an ipad

                  mzl.ehgqieyz.320x480-75It seems like the longer you play Magic: The Gathering, the more massive your collection of cards inevitably grows, and the greater the urge is to somehow digitize it all becomes. Whether it's because you've got tens of thousands of dollars of cards you want record of for insurance purposes, a neurotic need to catalog everything, or maybe just to quickly view your mana curve in a deck, that itch is definitely there. The problem is, every other app I've tried that serves this purpose has involved loads of typing. It's just the nature of any data collection app, as the first step of analyzing any data is actual often irritating data entry.

                  CardSplice [Free] aims to change all that. Using technical wizardry that straddles the line between optical character recognition and feeling like straight up black majiks when it's working properly, all you need to do is wave your cards in front of your iPhone camera to enter them in to the app. Admittedly, it's far from perfect, and there's a bit of a learning curve in regards to how you need to hold your phone in relation to the card, how ambient light needs to be hitting the card, and other finicky things that makes the card recognition stop working.

                  The good news is, the developer is totally on top of this with two options for making papercraft stands for both your iPhone and the cards themselves. Whether you fashion this apparatus via elaborately folding paper or the (seemingly much more simple) cutting a few junk Magic cards up, removing all the variation of holding the phone, holding the card, and making sure the image isn't blurry seemed to make things go substantially better.

                  CardSplice is free to try, and a single $2.99 in-app purchase unlocks the recently released "Dragon's Maze" card set as well as every other card set to be released in the future. Better yet, your data isn't trapped in your phone either, which often is another negative of these style of databasing apps. It's all uploaded to the CardSplice site where there's a variety of options for sharing, searching, and exporting.

                  Really, the only serious down-side of CardSplice is that the oldest set of cards supported by the app is "Magic 2011," making the app perfect for Standard players, but not so great for fellow obsessive M:TG nerds whose weeks are defined by which nights you're playing Standard, Modern, and Legacy. But, hey, this is a great start and from where I'm sitting, a necessary utility for any iPhone-owning Magic player.

                  UPDATE: If you're into nitty gritty rules discussion, there's a pretty interesting thread forming on Reddit with various Magic judges (including a level 5 judge) on whether or not using this in a sanctioned environment is legal.

                  App Store Link: CardSplice, Free