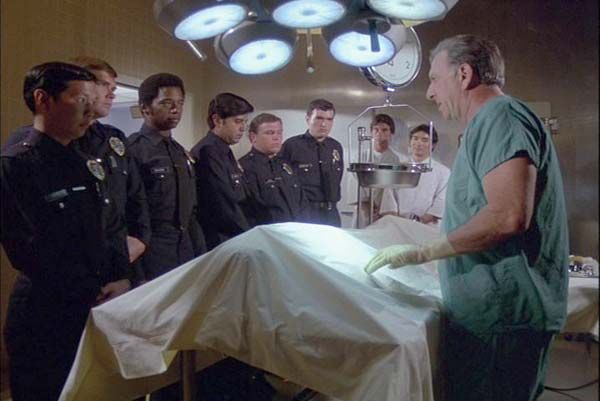
A recent post at AskReddit said, "Autopsy Doctors of Reddit, what was strangest discovery you’ve made while preforming an autopsy?" (sic) Responses came in from medical examiners, autopsy techs, EMTs, pathologists, embalmers, med students, and plenty of other folks who have seen. Some. Stuff. Here is one example.
6. "When I was in my intro to EMS class, my teacher brought in a death investigator and former autopsy examiner to speak to our class. She told us while she worked as an autopsy examiner, she got this woman who, at the time, mysteriously suffocated after a car accident. Apparently, while she was driving, she grabbed her lighter from her purse and was holding it in her mouth while she fumbled through her bag for her cigarettes. While doing this, she got T-boned."
"The airbag went off and on the way to the hospital, they kept trying to put tubes down her throat to open her airway cause she was having trouble breathing. But no luck. She said when they cut open her throat during the autopsy they found her lighter jammed down there. Apparently, when the airbag went off, it got jammed down her throat and no one knew."
When the red delicious apple was developed a hundred years ago, it was supposedly the best-tasting apple around. But the variety became a victim of its own popularity, as the apple was altered to suit the industry. By the time you and I came along, we were unimpressed and made jokes about the use of the word "delicious." Oh yeah, the red declicious apple stayed popular for a long time after it lost its taste, mainly because it was all you could find at the grocery store. Then just in the last few decades, better apples were developed to replace it.
What we have in this video is really a history of apples that leads up to the rise and fall of the red delicious. A neat story altogether, but it bothers me that the host cites Charles Darwin to explain crossbreeding of plants to develop new varieties when it should have been Gregor Mendel. -via reddit
One college student recently wrote in a campus newspaper, "I stay up into the early hours of the morning, Googling some variation of 'Is there hope for climate change,” and “Biden climate change plan good?' (...) The anxiety is crippling"
Kit Knightly Republished as part of our ‘Best Of’ series, revisiting some of OffG’s Pre-Covid editorials – either because they help remind us of important realities easily overlooked nowadays, or because they take on added significance in a ‘post-covid’ world. The assassination of JFK has been a deeply personal issue for me since I was …
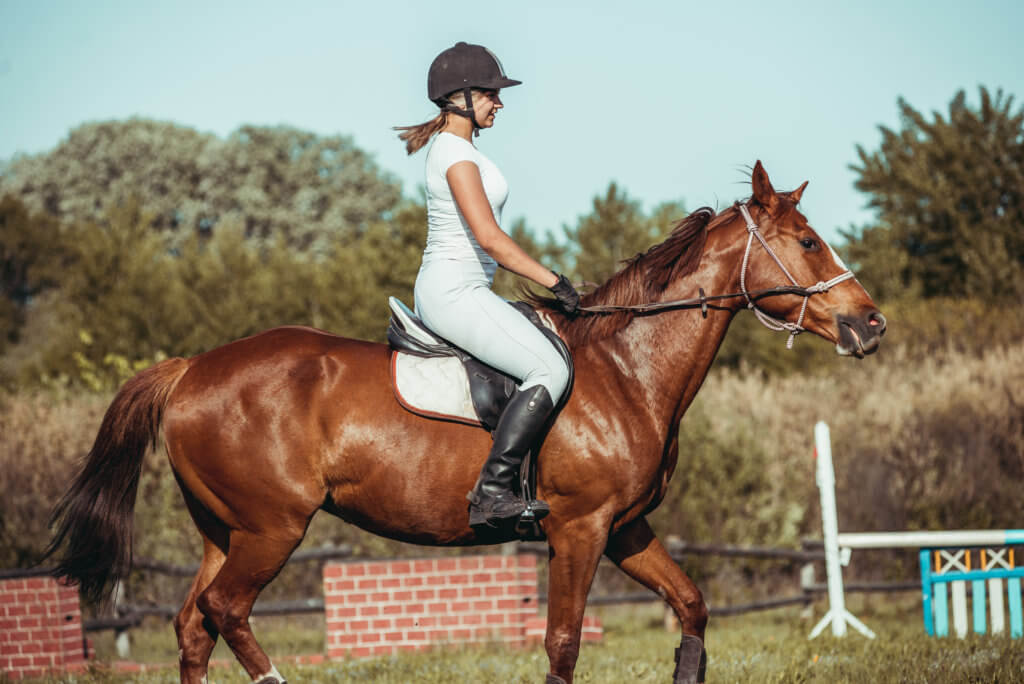
EDINBURG, Texas — Horseback riding is more dangerous than other sports including football, motorcycling, and even skiing, a new study warns. Perhaps surprisingly to many, there are more hospital admissions due to horse riding injuries than other challenging sports. Millions of Americans enjoy horseback riding, but it can be a risky sport, even for experienced…
The perfect steak is one of the “high holies” of the grill. So let’s dispel some common myths to help you nail the perfect steak every time.
MYTH #1: A steak is a steak is a steak.
FACT: Not all steaks are created equal and each requires its own special way of grilling. Thin ones, like skirt and flank steaks, should be grilled quickly over a hot fire. Thick steaks, like a porterhouse or T-bone, require a two-zone fire—the hot zone for searing, the medium hot zone for cooking the meat through. Tough, fibrous steaks, like flank steaks, should be scored on the top and bottom to tenderize them and thinly sliced across the grain when served. Lean steaks, like filet mignon, require added fat, either in the form of an oil-based marinade or a wrapping of pancetta or bacon.
MYTH #2: You should bring a steak to room temperature before grilling.
FACT: Leaving meat out at room temperature is a formula for disaster and there isn’t a respectable steak house in the world that does it. Steaks (indeed, any meat) should be kept ice-cold—and bacteria free—until the moment they go on the grill. (When you’re working over a 600° to 800°F fire, it takes mere seconds to take the chill off the meat.)
Cherry-Smoked Strip Steak with Cutting Board Sauce – Click picture for recipe
MYTH #3: Salt toughens steak. Don’t apply it before grilling.
FACT: A generous sprinkling of salt (kosher or coarse sea salt) and cracked black peppercorns applied just prior to grilling gives you the savory crust and robust flavor characteristic of the best steak house steaks. Grill masters from Florence to FlorianÓpolis back me up on this. Season steaks right before they go on the grill. Just don’t season them hours ahead or the salt will draw out the meat juices and make the steaks soggy.
Hanger Steak with Mustard and Caramelized Onions – Click picture for recipe
MYTH #4: A barbecue fork is the proper tool for turning a steak.
FACT: Stabbing a steak with a fork serves only to puncture the meat and drain out the juices. Turn your steaks with tongs.
MYTH #5: Turn the steaks often while grilling.
FACT: If you watch really top steak masters from around the world, you’ll notice they turn a steak only once. Why? This produces a better crust.
MYTH #6: The best way to check a steak for doneness is to cut into it with a knife.
FACT: Again, cutting the meat releases the juices. The best way to check for doneness is to poke a steak with your finger. A rare steak is soft and squishy; a medium rare steak is yielding; medium is gently yielding; medium-well is firm; and well done is hard and springy.
Reverse-Seared Porterhouse Steaks with Poblano Crema – Click picture for recipe
MYTH #7: Steak tastes best sizzling hot off the grill.
FACT: Like most grilled meats, a steak hot off the grill will taste leathery and dry. You need to let it rest for a few minutes on a warm plate before serving. This allows the meat to “relax,” making for a juicier, more tender steak.
Finally, for flavor, sheen, and succulence, don’t forget to drizzle a little extra-virgin olive oil, melted butter, or beef fat over your perfectly grilled steak before serving. Think of it as the varnish on your masterpiece.
The US is importing more fruits and vegetables than ever, as a shortage of farm and agricultural workers persists, according to a report from the New American Economy (NAE).
While the market for fresh fruits and vegetables has increased over the past 30 years, it seems American consumers are increasingly seeing produce from outside of the country on shelves. In 2019, the US imported more than 40 percent of its fresh fruit—a huge jump from 2001, when the country brought in only 20 percent of all fruit. The report found that, in addition to bananas, which have historically always come from outside of the country, fruits such as raspberries, avocados and pineapples are now mainly imported from other countries. Fresh veggies don’t fare any better, with the US importing 16 billion pounds of vegetables in 2019, including 99 percent of all asparagus you see in produce departments.
This increased reliance on imported fruits and vegetables impacts growers, workers and farmland. In the past two decades, land dedicated to growing produce has decreased by more than six percent, with the largest drop coming from groves of citrus fruit.
Why is the US continuing to bring in more produce rather than grow production in our own backyard? The report posits a few theories.
First, there are fewer self-employed and family farmers working today than there were in the mid-20th century. The rate of hired agricultural workers and farm hands has also dropped, and workers are, on average, getting older. In 2019, less than 20 percent of farm workers were under 25, and nearly half of workers were 45 years old or older. This suggests that as farm hands and agricultural workers age out of the industry, they aren’t being replaced by younger workers. Fewer workers means less picking and harvesting, with less produce making it to the shelves.
The NAE also notes that labor costs on fruit and vegetable farms are higher than the average farm, which only contributes to the staffing shortages. Labor makes up about a third of the cost on fruit farms and nearly a quarter of costs on vegetable farms. With the labor force aging and fewer young people joining the workforce, economists at the NAE expect labor costs to continue to rise to attract new people.
Year after year, the demand for labor continues to grow. Since 2010, the number of H2-A visas that the US has issued has nearly tripled, to more than 280,000 visas in 2020. Those visas allow temporary foreign workers to come to America for up to 10 months and work for an agricultural employer. Farms rely on seasonal labor to help during planting and harvesting, and year after year, that demand has grown. The NAE found that the majority of H2-A visa applications specified that workers would handle apples, blueberries and strawberries—all fruits that require a specific skill set and gentle handling during harvesting. Increasing the number of temporary visas and focusing on creating a consistent workforce would pay dividends for these farmers.
While imported fruits and vegetables offer benefits for consumers—such as increased variety of produce available all year round and competition keeping prices stable—it can be difficult for smaller farms to compete with the amount of produce brought into the country every year. The NAE report doesn’t suggest what consumers or producers should do about that, but it seems clear that the next decade will be a tipping point for the sector. Will Americans refocus on local produce and eating seasonally or will global availability and resources win out?
Often overlooked in the rush of fall hunting seasons is how hunting and fishing licenses help fund wildlife work. In Georgia, each license sold – even a one-day $5 combo – returns to the state that license fee plus as much as $45 in federal excise taxes paid by hunters and anglers on gear, ammo…
Dr. Juliette Engel is a survivor of MK Ultra CIA mind-control, was indoctrinated into a program called Sex Magick as child in the 1950s. She says there are many others who were similarly abused are now in power as leaders in government, corporations and heads of universities.
In this article, you’ll discover the best landscape photography settings to take your photos to the next level.
Landscape photography is one of the most popular photographic genres, and it’s why many of us pick up a camera in the first place. However, determining the perfect settings for great results can be a struggle, which is where this article comes in handy.
Below, I share plenty of settings advice. I explain how to select the perfect camera mode, shutter speed, aperture, and white balance, plus plenty more – so if you’re ready to improve your landscape photography, then read on.
Your camera has several modes, ranging from Automatic through to Manual. These are the common modes available to you:
Automatic: With Auto mode, your camera chooses the aperture, ISO, and shutter speed. All you need to do is compose and take the photo.
Landscape: This is also a type of automatic mode, but is a step up from the standard Auto mode mentioned above. In Landscape mode, your camera knows you’re photographing a landscape, so it will choose a more standard “landscape” aperture.
Aperture Priority: Aperture Priority mode allows you to set your aperture and (if you wish) the ISO, while your camera selects the shutter speed. You can adjust the exposure value – to darken or lighten the photo – with your camera’s Exposure Compensation feature.
Shutter priority: Shutter Priority mode lets you choose a specific shutter speed while your camera picks the aperture. This can be useful for long exposure landscape images.
Manual: Manual mode lets you control all your settings – the aperture, shutter speed, and ISO – to get the correct exposure. This will take longer, but in landscape photography, you have the time.
As a beginner, you maybe tempted to use the camera’s automatic features, but I highly recommend you learn your camera setting and use Manual. Your results will pretty much always be better!
Canon 5D Mark III | Canon 17-40mm f/4L | f/8 | 1/400s | ISO 100
The best aperture, shutter speed, and ISO for landscape photography
The three key settings for any photographer, no matter the type of photo, are aperture, shutter speed and ISO. Together, these settings determine the final exposure of your image, which is why they’re often referred to as the exposure triangle.
In landscape photography, you’ll want to adjust these settings very carefully. Let’s take a closer look, starting with:
Aperture
Aperture is arguably the most important setting in landscape photography. It controls sharpness, depth of field, and at smaller apertures can create a starburst effect.
Sharpness: Landscape photos are best when they’re both focused and sharp. Using the wrong aperture for your landscape can result in a softer image. You’ll want to select an ultra-sharp aperture somewhere between f/8 and f/11, but the specifics depend on the lens you have. Generally, your lens’s sharpest aperture is three stops down from its widest aperture, so feel free to use this as a guideline (though you can always do a few tests!).
Depth of field: When you have foreground elements close to the camera, depth of field is especially important. You’ll need a deeper depth of field to maintain sharpness across the frame, which is achieved in one of two ways: with a narrow aperture (around f/8 and beyond), or with focus stacking, where several photos are taken then merged in post-processing to produce focus throughout the photo.
Starburst effect: A small aperture can produce a pleasing starburst effect when you shoot toward points of light like street lights or a partially covered sun.
Canon 5D Mark III | Canon 17-40mm f/4L | f/8 | 1/100s | ISO 500
Shutter speed
Another very important landscape photography setting is the shutter speed. In fact, it can dramatically change the type of landscape photo you capture. Based on your shutter speed, you can create a crisp photo (fast shutter speed) or a softer, long exposure (slow shutter speed). Note that any shutter speed over half a second is considered long exposure, and you’ll need a tripod for the best results.
The long exposure effect
Long exposure has a transformative effect on photos when applied in the right place and at the right time. You can easily carry out long exposures at night, thanks to the lack of light; during the day, you’ll need a strong neutral density filter to achieve a long shutter speed without overexposing the image. You might choose to use a long shutter speed in any of the following scenarios:
Coastlines: Use at least ten second exposures to flatten the water.
Moving water: Use exposures of one second or higher around white water for the “silk effect”
Traffic light trails: Use exposures long enough to capture car light trails along the length of the road you’re photographing. Aim to keep the shutter speed over 15 seconds or so.
Windy days: You can capture cloud movement across the sky with exposures of 30 seconds or longer.
Intentional camera movement: Try moving your camera body or adjusting the focal length during a long exposure. These type of photos can last anywhere between five to thirty seconds in length.
Canon 5D Mark III | Canon 17-40mm f/4L | f/8 | 20s | ISO 1000 | Hoya infrared filter
ISO
Your ISO setting will brighten your photo, but the higher the ISO, the worse the image quality.
As a landscape photographer, you should shoot with a tripod for the best results, so in most conditions you’ll be able to use an ISO of 100 (or your camera’s base ISO setting).
That said, there are times – especially at night – when you might want to use a higher ISO. For example, if you’re using an aperture of f/11 and you’re not getting enough light for a correct exposure even at 30 seconds, you may want to boost your ISO to get a reasonable shutter speed.
Also, if you do astrophotography, you’ll definitely need a high ISO, assuming you want to freeze the stars (which are always moving across the sky, or at least appear to be!). Consider shooting at ISO 12600 or even more, if your camera can handle it. In fact, standard Milky Way settings are an aperture of f/2.8, an exposure of 25 or 30 seconds, plus an ISO as high as you can reasonably go.
Canon 5D Mark III | Canon 17-40mm f/4L | f/16 | 1/200s | ISO 640
The best focusing settings for landscape photography
When it comes to landscape photography, you have two choices for the proper focusing mode:
Autofocus or manual focus.
In my opinion, the best results come from manual focus, though it is somewhat dependent on the equipment and the scenario. Let’s take a closer look at these two options:
Autofocus
With autofocus, your camera where automatically focus, though you do get the option to specify where you want your camera to focus.
So set your camera to its single-point focus mode (where it uses a single AF point to determine the proper focus). Then compose your shot, select an object in the middle ground, and position your single focus point over that object.
Press your shutter halfway to achieve focus, then take the shot.
Canon 5D Mark III | Canon 17-40mm f/4L | f/11 | 13s | ISO 250 | ND1000 filter
Manual focus
Manual focus will often given you sharper images, though it’s a little trickier. You’ll need a tripod, or at least a steady location where the camera remains still. Here’s what you do:
Place your camera on a tripod and compose your shot.
If your lens has image stabilization, be sure to switch it off.
Set your lens to manual focus; that way, you’ll be focusing the lens with your lens focus ring.
Turn on your camera’s Live View function. If you’re using a DSLR, the mirror will lock up.
Use your Live View’s zoom function to zoom in on an area of your composition. Note: Don’t zoom with your lens, only with the Live View zoom.
Once you have zoomed in, use the lens focus ring and focus sharply on your desired object.
Zoom back out, check your composition, and take your photo.
Canon 5D Mark III | Canon 17-40mm f/4L | f/8 | 1/125s | ISO 100
The best white balance for landscape photography
White balance is an important setting for any photographic situation, and landscape photography is no different. You have a few choices, including a manual and an automatic option. But depending on your image file format, you can make further adjustments in post processing.
Why does white balance need adjusting?
When photographing during the day, you’ll likely get good results from the automatic settings on your camera. However, photographing at night with cold or warm street lights can cause the automatic option to fail, in which case you may prefer to use a semi-automatic or manual white balance option.
Automatic white balance
The Auto White Balance setting, or AWB for short, tells your camera to make the white balance decisions for you. It’s certainly usable during the day, and today’s cameras will give good AWB results.
White balance presets
Your camera will also have a number of preset white balances. These include settings like Tungsten and Fluorescent, which counteract he warm or cold light produced by the corresponding light sources. White balance presets are useful for nighttime cityscape photography, when you want to cool your image and remove the orange glow a city produces.
Manual white balance
The white balance can be quantified using Kelvin, a measure of temperature. Cameras generally offer a white balance Kelvin scale ranging from around 2500K to 15000K, where the lower the Kelvin number in your camera, the cooler the resulting image, and vice versa.
To set the white balance on your camera, you can use the camera’s custom white balance setting. Aim your camera at a gray or white card, then take a photo. Then use this photo to set your camera’s custom white balance. Alternatively, use the camera’s Kelvin adjustment buttons to choose the correct setting.
There are two main file types to choose from when taking photos (TIFF is another popular option but is more relevant to post processing). These are RAW and JPEG:
JPEG
This file type is designed to be a finished product. If you’re not interested in a lot of editing work, a JPEG might suit you. The size of file is also a lot smaller than its RAW counterpart, which can be helpful in certain situations.
When capturing JPEGs, it’s best to get the image right in camera, because you have much less flexibility in post-processing. If you’re happy to work this way, then JPEGs are a good path.
RAW
The vast majority of landscape photographers photograph in RAW, also referred to as the digital negative. RAW file sizes are larger, but the ability to enhance your image in post processing is so much greater.
Adjusting settings after the fact, like temperature, sharpness, and exposure levels, give much better results when the file was shot in RAW. You’ll also find that adjusting (and recovering) shadows and highlights will be improved.
Canon 5D Mark III | Canon 50mm f/1.2L | f/8 | 10s | ISO 100
Additional landscape photography settings to know
There are a handful of other landscape photography settings that can improve your results, including:
Mirror lock-up
Mirror lock-up only applies to cameras with mirrors (e.g., DSLRs). It can improve the sharpness of your photo if you’re using slow shutter speeds, because it prevents the camera mirror from causing vibrations when you hit the shutter button.
Image stabilization
If you’re taking a photo handheld and your lens or camera has image stabilization, it’s a good idea to turn it on. Stabilization technology counteracts camera shake, and will therefore allow you to photograph at a slower shutter speed.
However, when your camera is on a tripod and you’re shooting at slow shutter speeds, make sure to turn off all image stabilization technology; in such cases, the image stabilizer will actually cause image blur.
Bracketing
If you wish to do any HDR or digital blending in post-processing, then bracketing is an important setting to get right. When your camera is set up for bracketing, it will take three photos of the same scene (you should use a tripod for this) with different exposure values, typically +1, 0 and -1. Though you can vary the exposure values, the idea is to create a dark, normal, and light image, which you can later blend together for improved dynamic range.
Canon 5D Mark III | Canon 17-40mm f/4L | f/8 | 1/3s | ISO 400
Landscape photography settings: final words
Landscape photography is an exciting genre, and it’s great to get out and capture those epic scenes! Now that you’ve finished this article, you should be a landscape settings expert – so get out to some great places near you and apply your new knowledge.
Over to you:
What settings have you been using for your landscape photos? How will your workflow change in response to this article? Share your thoughts in the comments below!
You can say what you want to about your favorite defensive school or those advanced-fighting techniques you learned, but the greatest defensive skill that a person can develop is simply awareness. I will freely admit that developing effective awareness is anything but simple, but being able to spot trouble before it is close enough to get in your face will certainly save you from a lot of trouble and possibly even some pain and grief.
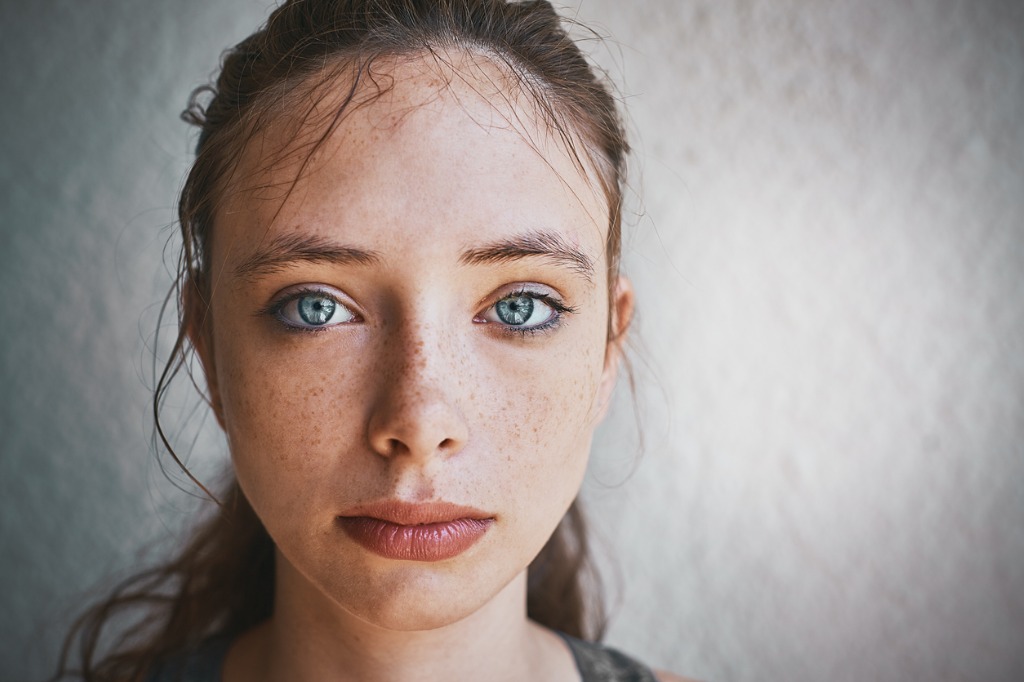
If you’re learning how to take better portraits, then you’re probably looking for some portrait photography hacks. Unfortunately, figuring out how to take better portraits is harder than it looks because the way your portraits turn out completely relies on where you’re shooting, who you’re shooting with, and how you’re shooting.
What I’m saying is that there are a lot of variables.
Miguel Quiles, one of the YouTube photographers that I really enjoy, has a great video filled with portrait photography tips to help you get started.
I obviously recommend that you watch the entire video, but if you don’t have time to, I’ll give you a short breakdown of all of his recommendations. If you implement some of these tips, you will take better portraits almost immediately.
I see a lot of photographers take documentary-style images where they leave a ton of headroom above their model’s face in their photos.
This does a few things, which can be negative when not taking a documentary portrait.
First, it makes the model look small. You obviously don’t want your model to look small, you want them to look bigger than life and powerful. Second, it indicates to the viewer that you, as the photographer, don’t really know where you want them to look. You are essentially taking your subject and obscuring it.
If you want to take better portraits, you should use your entire frame. Make sure that your subject is the only thing your viewer sees when they first look at your image.
Another way to take better portraits is to use catch lights as often as possible.
Catch lights are when you use a light source to create a highlight in your model’s eye. This light source could be natural, like the sun, or it could be artificial, like from a studio light or a portable reflector.
Catch lights help to keep your viewer’s attention for just a little bit longer. With catch lights and a filled frame, your model will look powerful and interesting.
I love this tip especially because of how easy it is. If you forgot to bring a light source or a reflector, then you can simply move your model around until you find a light source to use. Plus, whenever you get to your location, it only takes a minute to check your model’s eyes to see if you have a catch light that will hold your viewer’s attention.
I know that I just talked about this with catch lights, but your model’s eyes are so important that I need to talk a little bit more about them quickly.
You not only need to ensure that your model’s eyes have some catch lights in them, but you also need to ensure that you aren’t seeing too much of the whites of their eyes.
If you are shooting with someone who is uncomfortable in front of the camera, then they may naturally want to look away from it. Since their eyes are the most interesting part of their face, this will mean their images will turn out disappointing.
In order to get around this problem to take better portraits, you can either have your model look directly at the camera, or you can have them keep their eyes straight above their nose.
One thing that I love about portrait photography is that you can cheat. If you genuinely don’t know what you’re doing in terms of lighting, then it’s always a safe bet to take your model out during golden hour in the morning or in the evening. This is because you’ll always have warm, beautiful lighting during this period.
Otherwise, you can learn a little bit more about lighting and start playing around with bringing your own light sources.
While you definitely need to be thinking about all of the technical aspects of your photo when you are taking portraits, you also need to be in the moment with your model. This is because when you get too caught up with your camera and your composition, you could be getting technically good images with ugly facial expressions.
You need to find the emotions in your model. It’s why you’ll hear about couples photographers who suggest that one individual whisper their dinner order in the other individual’s ear in their sexiest voice. It gets everyone laughing and ensures that they can calm down enough to genuinely be themselves.
You can also help your models to be more comfortable by reassuring them that you’re a professional and it’s your entire job to get a shot that they’re going to love.
Nothing kills the Christmas spirit quicker than a conifer quarrel: the inevitable spat between two people trying to stabilize a newly acquired tree in a finicky, fussy stand.
If you’ve opted for a real tree instead of an artificial one, and you want to avoid that seasonal struggle, the Krinner Tree Genie XXL is the best stand available. It has been our pick since 2012, after we considered more than 45 stands and tested five, and it’s held up for a number of our staffers over years of use. We also recommend a good pair of Christmas lights to go with your tree.


 Developed in Bermuda post WWI, this rum-based drink recreates the contrast between ocean and storm.
