
Srjuliana
Shared posts
Ex-aluno de Ciências Sociais da Ufes é aprovado para mestrado em Oxford

Bolsistas do Ciência sem Fronteiras constroem parque criativo para crianças britânicas
Rheinfall, as cataratas do rio Reno
São 23 metros de altura e 150 metros de largura de pura água corrente. As cataratas ficam entre as cidades de Neuhausen am Rheinfall e Laufen-Uhwiesen, no cantão de Schaffhausen, próximo a Zurique. De Zurique para Schaffhausen de trem dá uns 40 minutos. Só que de Schaffhausen ou voce anda até as Cataratas ou pega um trem menor até Neuhausen am Rheinfall que já é mais perto.
Aqui quando tem previsão de sol, já estou com o costume suíço de me programar o quanto antes para fazer alguma coisa outdoor e aproveitar o verão, já que passa tão rápido. Então num belo domingo quando tava previsto fazer bastante sol, programamos uma ida as cataratas. Po as cataratas do rio Reno tão pertinho de casa, estava louca pra conhecer! Só que pra ficar mais emocionante e pra aproveitar ainda mais o dia, resolvemos ir andando de Schaffhausen até lá.
Em Alemão chama-se wandern, em Inglês to hike. É fazer trilha, andar na natureza. É o esporte mais popular na Suíça. Então com a nova aquisição aqui nas ferramentas do Edi que foi a mochila de andar com ele nas costas que é bem confortável e distribui melhor o peso, ideal para crianças maiores que já estão muito pesadas para andar com o ErgoBaby ou o BabyBjorn, botamos Edi nas costas e fomos lá pra nossa trilha.
Chegamos em Schaffhausen de trem, e a a previsão era pouco mais de 1 hora andando até chegar às cataratas. Fomos preparados para levar mais que isso, pois estávamos sem stress com hora, fomos devagar, parando pra tirar foto, Eric quis mergulhar no rio numa hora lá, Edi ficou com fome, reversamos a mochila nas costas de um e de outro, enfim. Levamos umas 2 horas até chegarmos às cataratas.
Cansa, claro. Mas vale cada segundo. Primeiro que as paisagens na Suíça são de tirar o fôlego. E quando estavamos nos aproximando, começamos a ouvir o barulho de longe da água caindo, e a cada passo o barulho ficava mais forte. Quando chegamos à ponte que leva ao castelo que tem lá próximo, aí sim, tínhamos chegado. Atravessar a ponte sobre aquele monte de água passando em baixo de você é bem intenso.
Há passeios de barcos ali pra chegar próximo à queda de água (claro voce fica todo ensopado) e é a maior atração turística do lugar! A gente não foi porque tava com Edi, mas ficamos assistindo lá o pessoal nos passeios e era cada grito de emoção que deve ser realmente libertador. A gente só ficou por ali mesmo no mirante que tem próximo à queda de água e já tava bom demais. Dali dá pra ter a melhor visão de quanto é enorme e realmente intenso o fenômeno da natureza. E claro, muito muito lindo.
Geologicamente falando, as cataratas foram formadas desde a era do gelo, há quase 20 mil anos atrás, quando pedras resistiram à erosão e o rio teve que contornar seu fluxo. Pode-se dizer que a pequena cidade de Neuhausen am Rheinfall sobreviver do turismo. Vem gente do mundo inteiro ver esse espetáculo da natureza de perto e olha, é mesmo impressionante. Há também um castelo, o Schloss Laufen que aliás é patrimônio nacional suíço, que pode ser visitado por dentro e pertencia à famílias antigas de barões da cidade... me perdoem mas não sei direito a história dele e nem entramos lá porque o dia tava muito quente para "desperdiça-lo" indoors. No entanto as fotos ficam bonitas e é também a base de apoio do lugar com restaurante, banheiro, hotel, etc.
Bom, a gente gastou um tempão lá admirando a paisagem, literalmente. Na volta, pretendíamos pegar o tremzinho local que parte de Schloss Laufen mas o horário é bem restrito e o último partia às 19h ou algo do tipo. Só que 19h no verão parece 15h então o que aconteceu? Perdemos a hora. Andamos uma meia hora até Neuhausen, pegamos um ônibus até Schaffhausen e de Schaffausen o trem de volta para Zurique. Demorou pra caramba e chegamos em casa já de noite. Mas assim que é bom! O domingo foi memorável. Sem dúvida é um passeio que deve ser feito no verão.
Para mais informações sobre as cataratas e os arredores visite o site http://www.rheinfall.ch.
sobre galinha e outras drogas
O que me incomodava era justamente o fato de que esta galinha fazia meu bebê - super energético - ficar ali paradinho. Mas olhei pelo lado bom: pelo menos eu poderia ir no banheiro pelo tempo que ir no banheiro leva. Me julguem!
Em pouquíssimo tempo, antes mesmo da minha conclusão sobre o custo x benefício, a galinha começou a fazer merchan de sabonete. Aí é demais! Parei com tudo: se antes eu tinha uma desconfiança, naquele momento tudo passou a ser real, era uma penosa mercenária.
Quando meu bebê esqueceu a galinácea, ela começou a licenciar deus e o diabo: quebra-cabeça, boias de braço, bonecos, etc. A regra é clara: licenciou, perdeu (meu respeito, meu dinheiro, minha audiência).
Foi neste ponto que a informação veio chegando, fomos nos observando, ficamos atentos às crianças e suas reações, fomos percebendo o tanto de equívocos, fomos cortando a tevê, as telas em geral, reduzindo, reduzindo, devagar e sempre, como todas as mudanças que se pretendem duradouras.
Preferia que meu bebê não ficasse diante de uma tela, mas se precisasse que pelo menos ficasse diante de algo menos (bem menos!) mercenário, que ficasse diante de algo menos entorpecente. Finalizei a galinha na minha casa. Como já havia finalizado uma série de turminhas, duplinhas, bandinhas...
***
Sei que muitas amigas super queridas usam o recurso das telas (com galinha ou outras drogas) para as mais diversas necessidades. Não as julgo, porque eu mesmo usei. Não as julgo, porque sei que cada mãe tem seu limite e sua possibilidade. Não as julgo, porque sei que acham que é tudo muito inofensivo.
Sei que acham que a galinha apresenta o cancioneiro popular para as crianças. Que a galinha traz consigo aquelas lembranças das cantigas de roda e muitas até acham que estar diante desta tela animada é como ouvir a mãe cantando cantigas ou rodar numa roda de mãos dadas como um dia rodaram na frente da casa da avó. A galinha fala ao coração dos com mais de 30.
Juro que compreendo muito bem como é alentador ter como aliada e cúmplice uma personagem tão encantadora para as horas de desespero :
- Só um pouquinho não faz!
E quando se vê, estão sem saber o que fazer quando bateria ou o 3G terminam. E quando se vê, o quartinho mais parece um parque temático. E quando se vê, a galinácea (ou outra droga) está em todas as fotos da criança.
Peço que observem o quanto é antinatural uma criança ficar uma hora parada diante de uma tela ou de abrir a boca para comer quando a vontade é de correr. Será que não há alternativa fora das telas? Será que não existem outros aliados, outros cúmplices?
Peço que avaliem também a história da personagem e dos seus criadores: de um projeto rejeitado para o um bilhão de acessos. Avaliem a maneira como eles tratam a infância. Este é um print do Canal do YouTube em comemoração ao primeiro bilhão de acesso (veja bem: BI-LHÃO!),
Isso é jeito de se referir à crianças: eles só querem que fiquem quietas, se eles pudessem mandavam um rivo**il on line.
Eu sei que há quem faça um uso regulado, com boas doses de bom senso para permitir a galinha e a infância, mas pouco importa se uma, duas ou meia dúzias de mães façam um uso regulado e pouco prejudicial desta série de animações, a galinha continua sendo um produto marketado para manter as crianças quietas e deixar os pais em paz sem sentimento de culpa (porque elas parecem estar bem e o conteúdo parece inofensivo), além de, a reboque, vender produtos e mais produtos licenciados. É um produto marketado para os pais: ponto!
Existem pessoas que fazem uso regulado e pouco prejudicial de álcool, mas ele continua sendo uma droga marketada para o consumo abusivo. Sim, quanto mais se toma, mais se lucra: aquele "beba com moderação" eles só colocam porque são obrigados.
O que importa - na minha leitura de mundo - é como os criadores da galinha pintadinhas estão marketando o seu produto. O que eles estão dizendo por meio desta singela frase é que eles criam o vídeo para paralisar as crianças e é exatamente isso o que a maioria das mães quer que o vídeo faça.
"Parabéns, Galinha Pintadinha por:
- animar as crianças que cantam e dançam ao som das nossas músicas
- divertir as crianças
- ensinar às crianças o cancioneiro popular
- manter as crianças expatriadas em contato com a língua portuguesa
- mil outras opções menos explícitas que celebrasse algum benefício para criança: ficar quietinha pe benefício para o adulto."
O que eu estou fazendo aqui não é analisando a qualidade técnica e pedagógica da produção, mas constando como certos produtos são marketados:
- a galinha pintadinha é marketada para atender uma DEMANDA DOS PAIS: um produto que remete à nossa própria infância e paralisa as crianças diante de uma tela.
Agora, se seu filho está fazendo um uso regulado desta droga (ou de qualquer outra que vem em tela), vá em frente, só não esqueça que É droga: ele pode até dançar e cantar, ele pode até não ficar paralisado, ele pode até só aguentar 30 minutos, ele pode até não estar viciado, ele pode até (comer)(andar de carro) (viajar de avião) (deixar vc ir no banheiro em paz)(aguardar o pediatra) (deixar vc temperar o frango) sem a galinha, mas ainda assim é uma droga!
(*) texto editado a partir de comentários na página do MILC
(**) este texto contém ironia e sarcasmo
Dicas essenciais de El Calafate
Para facilitar a vida dos leitores, resumimos nossa viagem em um post com informações sobre El Calafate, El Chaltén, Perito Moreno e uma parada estratégica em Buenos Aires. Primeiro passo: não interessa se a sua companhia escolhida disse que é possível despachar a sua bagagem direto para El Calafate. Ao chegar em Buenos Aires, a […]
The post Dicas essenciais de El Calafate appeared first on Janela ou Corredor?.
Life Without a TV
Note: This article was originally published in 2012, yet has changed to many lives that we felt the need to repost it. We hope you enjoy!
Life without a TV : Our Story
Written by Jen Hansard, co-founder of Family Sponge and Simple Green Smoothies
It was autumn of 2004 and I had just married my high school sweetheart. Ryan and I were finishing our undergraduate work at CSU Long Beach and working insane jobs to keep the student loans at bay. We had very little time to actually spend together as newlyweds and the time we did have, we spent watching TV because we were exhausted from the long days. After a few months of this numbing routine, we sat down and had the big conversation about what we wanted for our lives and if it revolved around a TV. Well, we quickly decided to get rid of our TV—that was seven years ago.
It wasn’t a radical decision at the time. We just knew that something had to give. So out went the television and in came books (lots of books), cooking, lengthy discussions, hiking, marathon training, Yatzee tournaments, bowling dates, and much needed sleep. Ryan even learned to juggle five balls and ride a unicycle. Life as we knew it slowed down and we finally caught our breath.
In 2007, our son was born and most of our time was spent infatuated with his bowel movements and babbles. When Jackson turned 18 months old and I was 8 months pregnant, I cracked and bought a Netflix subscription for our computer. Sesame Street moved into the house and one month later, my daughter was born. We now use Netflix daily and let the kids each pick out a show to watch. This gives them commercial-free shows like Caillou, Dora and Sesame Street. And it gives us a much needed break.
Sometimes Ryan and I catch an episode of Grey’s Anatomy before bed or watch a movie. It’s something we look forward to and do on rare occasions. It’s like a date night— yet we can do it in our home without paying for a sitter.
To stay up to date on world events, we use cnn.com and npr.org . If there is a big disaster, our parents and friends call to let us know. If there is a big sports game that Ryan wants to watch, he heads to a friend’s house and they watch it together. Or sometimes we even head to the stadium to catch the real thing as a family.
We are definitely out of the loop with the latest TV episodes and new fancy products. Sometimes we are buzz kill on the conversations that go “Did you see… last night”, but that is perfectly okay with us. The unexpected joys from life without a TV trumps any setback by a long shot.
Perks that have come from not having a TV in our home
1. No cable bill. We have saved over $5500 these past seven years by not having a cable bill (and that is a very conservative estimate). Not to mention what it would cost to buy a TV, speakers, dvd player, dvr, etc.
2. We don’t see commercials. This makes passing by the toy section in Target a walk in the park for our kids. And also hides a lot of the consumerism brainwashing from Ryan and me.
3. We don’t have to arrange our furniture with a TV in mind. It’s nice to choose what is the focus of the room— right now it is our hodge-podge wall of family pictures that dominate the living room. You can actually see our home right here.
4. We have become more creative. We listen to lots of music, do puzzles, board games, art projects, nature walks, cook together, ride bikes, read books and write books. We make elaborate snowmen when it snows, jump in puddles when it rains, and collect hundreds of leaves in the fall.
5. Oh, the places you go! With the money we have saved and our appetite for adventure, we have made traveling a part of our family mission statement. In the seven years, we have backpacked through Europe, took a month-long road trip from Los Angeles to Glacier National Park in Canada, three trips to Amsterdam for art shows and architecture admiration, spent a week driving to Denver, Taos and the Grand Canyon, and did many red-eye flights to NYC for art shows. We even drove across country from LA to Tampa, FL along Route 66 with the kids for 10 days. With that kind of traveling, people think we have tons of money. But we honestly don’t. We just don’t have a TV.
Interested in going TV free? Here are tips Ryan & I came up with to help the transition:
1. Be intentional. Have specific things to replace your time like reading some classic books (we have enjoyed Robinson Crusoe, The World According to Garp, East of Eden.) Ryan made a list of things he wanted to accomplish and when he was bored he would pull out the list and do one of them.
2. Do it together. For us, it was a team decision and I think that is why it was such an easy change. We both felt the same way and wanted to give it a try and it has definitely helped us grow closer together. (We honestly had no idea that it would be a 7-year TV strike going into it.) Replacing electronic screens with loving relationships has been the greatest benefit of going TV free.
3. Set guidelines. If you are going to use Netflix like we do, it helps to have a plan. For us, each child picks out a show to watch in the afternoon (after naps and quiet time). If they are sick or it’s been a crazy day, we bend the rules for sanity’s sake. But we are very intentional about how much time is spent in front of the computer screen each day.
4. Have a time frame in mind. Getting rid of TV forever is a hard pill to swallow (I am not there yet!). Why not set a goal of 3 months without it? Cancel your cable service, store the TV in the garage, rearrange your furniture so nothing feels missing and see how it goes. Take the money you save on your cable bill and buy some books, board games and juggling balls to fill the time.
In present-day America, such self-denial is apt to require heroism. In practice it may mean giving up many or most of the luxuries which I have come to regard as necessities, at least until I have acquired sufficient self-control to use these things without being enslaved by them. — Thomas Merton
Want to continue the TV or No TV conversation? Spread the word by sharing this post on Facebook with your friends.
Would you like to share this with other readers?
Click to StumbleUpon, Reddit and Digg Us!
Subscribe to our weekly newsletter for updates and free giveaways.
Life without TV: Speak your mind!
How do you feel about going TV free? Have you done it before? Share some tips or thoughts with other Family Sponge readers in the comments below.
The post Life Without a TV appeared first on Family Sponge.
Relógio de Roda de Bicicleta - Faça você mesmo
Pra fazer é bem tranquilo e fica muito barato também! Você vai precisar de :
- Uma roda de bicicleta (no tamanho que você quiser)
- Um cassete de marchas ou engrenagens
- Uma máquina pra relógio (custa 2,50)
- Um espaçador de vidro (encontra fácil em qualquer vidraçaria)
- Massa plástica
- Dois discos de metal (serve fundo de latinha ou um disco de papel mais grosso)
Na outra extremidade encha de massa plástica também. É esse lado que irá na parede e garantirá que o relógio não caia e de quebra dá um acabamento bacana como a gente gosta. Aí coloque a parte maior do espaçador, afunde ela até ficar só a ponta pra fora.
Pra prender a roda na parede, parafuse a porca que vem no espaçador. Depois é só enroscar a roda (como se fosse um volante). Quando estiver bem firme, venha com o relógio e cole bem no centro.
>> Pintei os ponteiros de vermelho usando tinta acrílica;
>> As engrenagens saíram de graça (você encontra fácil em qualquer oficina de bicicleta);
>> Se for usar papelão, pinte com spray prata (olha o acabamento!);
>> A máquina pro relógio dá pra comprar até pela net (dá uma olhada no google);
>> O pino da máquina deve ser o maior (21mm);
>> Tive que comprar os ponteiros separados porque os que veem no kit são pequenos;
>> Não faça com roda de moto, vai ficar grosseiro. Muito menos com roda de cadeira de rodas de alguma velhinha (Deus tá vendo);
Patinete em Londres – Borogodó para andar por aí!
Banheiros públicos: quanto eles refletem nossos preconceitos de gênero?
O futuro é agora
Um grande passo foi dado e não podemos parar por aqui! A redução do valor das passagens foi conquistado por muitas cidades, mas esse é o primeiro de muitos outros problemas que vamos lutar para que sejam resolvidos, nas ruas, de mãos dadas e sem violência. A nossa voz é a nossa arma e é com ela que vamos mudar os rumos desse país que a gente tanto ama!
E por quê que eu tô aqui com esse discurso engajado pra você? Porque eu acho que, nesse momento, cada um ajuda como pode. E eu tô aqui pra contribuir com uma das coisas que esse blog faz de melhor: dividir lindos pôsteres com você. Rá. :)
Vamos pra rua, sem violência, sem vandalismo, com uma baderna controlada e cheia de esperança. Precisamos ser firmes, focados, e mostrar quem está no comando: o povo unido e organizado.
No lugar da raiva, o bom humor. No lugar da violência, a delicadeza. No lugar da quebradeira, o colorido. No lugar da revolta, o otimismo. No lugar da brutalidade, a sutileza. No lugar da ignorância, o esclarecimento.
"Os poderosos podem matar uma, duas ou até três rosas, mas jamais poderão deter a primavera. "
Che Guevara
Para baixar esses e muitos outros cartazes que têm muito o que dizer, acesse o site Benguelê Tarja Preta, clique na imagem, escolha a sua mensagem e imprima no tamanho que desejar!
Sabe que dia é hoje? Hoje é dia de mudar o país. E amanhã, e depois, e depois, e depois.... ♥♥
Autoria dos cartazes: Benguele Tarja Preta
Oscillating Bird Science Toy For Kids
I recently made a new oscillating bird design for a magazine, so I thought I’d share it here too. After finding this toy idea on the brilliant Science Toy Maker site a couple of years ago, I made this woodpecker.
It’s based off of an old folk toy, and is a great way to teach kids about the science of potential energy.
It’s easy to make, and very fun to play with. I’ll insert the original instructions below, as well as a video so you can see it in action!
Click on the template below, then print.
Coloring Sheet Version Below.
Kutná Hora e a Capela de Ossos
O papel do pai
Vem chegando o neném. Ou os nenéns. A mãe gesta, dá à luz, nutre. E o pai?
Durante a gravidez as modificações ocorrem no corpo da mãe mas emocionalmente ambos podem se preparar. Quando a sintonia do casal está afinada a gestação, o parto e a amamentação, assim como os cuidados, passam a der dos dois.
Ambos podem frequentar juntos grupos de informação e apoio sobre maternidade/ paternidade.
O pai pode participar do parto dando apoio físico e emocional para a mãe, fotografando, incentivando.
O pai pode cuidar da mãe que amamenta observando o ambiente: mãe confortável, alimentada, hidratada.
O pai pode cuidar do bebê para a mãe tomar um banho ou fazer as unhas, uma mãe feliz materna melhor!
O pai pode assumir os cuidados (especialmente noturnos) após a amamentação como ninar, ajudar a arrotar.
O pai pode trocar fraldas, lavar roupinhas, lembrar a mãe de tomar sol nos seios doloridos.
O pai pode massagear e ordenhar o leite empedrado.
O pai pode compreender, massagear, incentivar, esperar, estar ao lado. Talvez não seja possível fazer alguns programas como antes da chegada dos filhos então aproveite para conhecê-la, para lerem juntos, assistirem filmes, escrever um livro para o filho, fazer planos para o futuro. Quando os filhos crescerem o vínculo estará muito forte, tanto como pai quanto como marido, e vocês terão ótimos momentos juntos.
Leia também o material da La Leache League: http://www.llli.org/lang/espanol/faqbfa.html
Imagem do livro http://www.holistika.com/cuentos-infantiles/tu–yo-y-la-teta.asp
Procura-se sogra. Paga-se bem.
Um elogio vale mais do que mil palmadas!
Como reformar um livreiro - Faça você mesmo!

Isso mesmo, 1 rolo gigante pra encapar tudo que você quiser (e que não seja vivo, claro). A melhor resposta (segundo o dono do blog) leva! E nem vem reclamar que não tem criatividade e bla bla blá, tudo tem um preço na vida uai! Expreme aí que sai.
Regulamento:
- Promoção válida apenas para leitores que morem no Brasil
- Válido somente para os comentários feitos aqui no blog.
- Vale somente uma resposta por pessoa.
- Resultado no dia 21/06, sexta feira.
- O resultado será divulgado aqui no blog e na página do Homens da Casa no Facebook
Boa sorte e boa semana pra todo mundo!
Muita gente participou e as respostas foram incríveis. Mas a que chamou a atenção pela praticidade (marca registrada do HC) e criatividade foi essa:
Eu chamava ele de lagartixa, jogava na parede e fazia um painel pra minha TV!
Parabéns Eliane Zimmerman, o rolo de contact é seu!
A todo mundo que participou, obrigado demais!
Finlãndia: um exemplo!
Neste 4 de junho, a BBC News Magazine publicou um artigo contando que, na Finlândia, há 75 anos, o Estado presenteia as famílias que terão bebês com uma caixa de papelão recheada de presentes. A caixa vem com um colchãozinho ao fundo e poderá servir de berço para as crianças (muitas famílias não têm condições financeiras para compra-lo) nos primeiros tempos.
E ela vem recheada com o enxoval da criança. Acreditem e vejam:
Há de tudo, inclusive um super-macacão bem quentinho, já que o país é muito frio.
Encantador, maravilhoso, sensacional ... e muito mais do que isso, pois esta tradição finlandesa responde às mudanças de paradigma, orientando carinhosamente a população a acatar tanto as descobertas da ciência e da medicina e também da indústria, quanto a renegar as inovações propostas por esta última a cada vez que isso se mostrar necessário.
Desde 1949, as caixas são enviadas apenas às mães que realizam o exame pré-natal. Como todas devem querer recebe-la, resolve-se assim a questão do acompanhamento de sua gestação;
Desde 1957, ao invés de enviar tecidos e linhas para a confecção do enxoval, a caixa vem com roupas prontas;
Em 1969, as fraldas descartáveis foram introduzidas mas ...
Desde 2006 (antes tarde do que nunca), essas fraldas foram retiradas para a reintrodução das fraldas de pano, já que elas não são respeitosas ao meio ambiente;
E desde 2006, também, mamadeiras e chupetas foram retiradas do pacote com a finalidade de incentivar o aleitamento materno.
:o)
Isso é de uma inteligência, de uma perspicácia, de um carinho e cuidado impressionantes....
Uma caixa que evolui em termos científicos, comportamentais e estéticos. Isso é um programa político. É essa a política que sempre me interessou e na qual sempre acreditei. Que alegria constatar respeito, delicadeza e compromisso em uma ação estatal, convertida em um presente, um auxílio às famílias.
Quando vejo coisas assim, penso: é possível.
Me revolto com a realidade que conhecemos, tão sem esperança, mas sou incentivada a seguir.
Sempre.
Muito obrigada, Gabriela Romero, por me enviar o artigo. Estamos em rede.
Os humanos também têm direito
Lindo filme realizado pela Unicef chinesa!
Parede Chevron - Faça você mesmo!
O primeiro passo é pintar a parede com a cor de fundo, a mais clara no caso. Para que a tinta não escorra pra outras paredes, é importante que você passe uma fita em todas as extremidades, criando uma espécie de moldura. Eu usei a fita crepe azul da 3M, a mesma que a gente vê nos tutoriais gringos. Ela é mais fina e tem menos adesivo, o que gera menos desespero na hora de tirar e ver o resultado. Assim que aplicá-la, passe o dedo por cima pra garantir uma boa aderência. Comece pintando as extremidades da parede com um rolinho ou pincel pequeno, depois use um rolo maior para pintar o resto.
>> Comprei a fita azul no Leroy, mas dá pra achar na internet também;
>> Não esqueça de deixar reservado um pouco de tinta pra fazer o acabamento depois;
>> Gastei umas 8 horas pra fazer tudo e mais umas 2 pra tirar a tinta desse corpo sedutivo, rs.
Essa parede fica de frente para a parede de madeira e a bancada de adesivos pra azulejo. No começo fiquei com medo de ficar poluído demais, mas o resultado ficou muito legal. Ainda vou fazer uma mesa quadrada pra colocar no lugar dessa redonda e colocar um aparador perto da janela, mas tudo isso é assunto pra outros posts.
Não sei porque, mas depois desse projeto não tiro da cabeça aquele desenho que uma gata preta tomava umas pinceladas de tinta branca e aí um gambá Don Juan não desgrudava do pé dela. ;)
Home Improvement: Laying Tile (on a fireplace, walls, or backsplash)
We recently moved into a new home and have been busy re-vamping, tearing down, and re-constructing this/that in our new home. It’s been fun……but a complete learning process. If you’d like to see other Home Improvement Projects that we’ve been figuring out (from the help of friends, family, and the ol’ internet), be sure to check them out.
***
I’m being really flippy-floppy with my posts lately because, well, I’ve been flippy-floppy lately. I’ll share more of the Teaching Kids to Sew Series next week. But my house hollered at me this week and asked me to hurry and pretty up a few of her walls. And I couldn’t resist.
So, while we had one of my brothers (thanks Greg!) and Steve’s brother (thanks Joe!) here at different times, we pulled some tiling tips from them……and went crazy tiling a few places in our home.
And, let me tell you……if you’ve never tiled anything before, you’re probably a little nervous like I was. I had only done a few simple tiling projects in the past but I really wanted these to look nice. So, I was anxious about them. But holy smokes……..I’m TRIPLE THRILLED with how they turned out!
So, let me share what I’ve learned.
Maybe you have an area that needs a little love…….like our Powder Room Bathroom did.
I used to hate using it because it was just icky, un-loved, and the paint was so sad in there. Now, I just sit (ahem, excuse me) and enjoy the beautiful colors in there! Ahhhhhh! (Yeah, I need to share more pictures of the finished space….but I haven’t hung a mirror yet. Or replaced the light fixture. Or finished the baseboards. Or hung anything on the walls. So one day soon…)
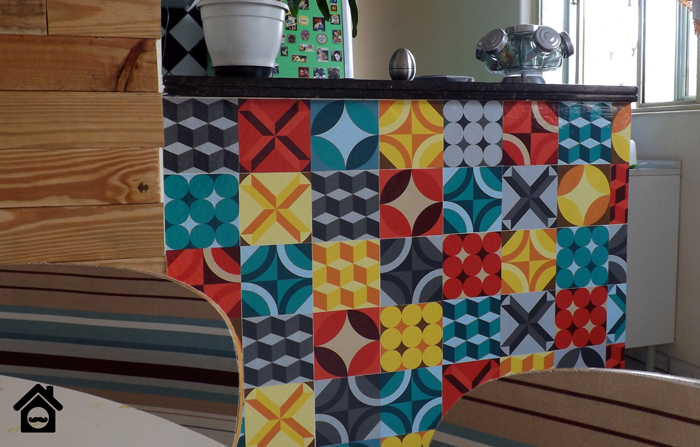
And the other tiling project that makes my heart smile……is the fireplace. The finished mantel (which I’ll also share another day, including a tutorial) turned out so stinkin’ beautiful……but the tile definitely finished it off perfectly. Eeeeeeeh, I couldn’t be one ounce happier with how it all turned out. Really.
And it’s kinda hard to tell, but that glass tile really has some sparkle and texture to it. The light dances across it once the sun pours through the neighboring window. And I’m pretty sure that the fact that I laid that tile with my own hands……makes the tile extra gorgeous in my happy little eyes. :)
Ahhh, Elli. She kept twirling in front of my camera while I was trying to take photos of the tile. That girl. I need to find her a dance teacher in this area.
This tile is one of the first tile samples I brought home and Steve didn’t care for it. He called it “Paris Hilton” tile. See the random crushed glass tiles in there?? He thought they were too “glittery”. I laughed and we took it back (because we both need to love something so permanent, right?).
So, about 13 sample designs later (that we were SURE we’d love) and about 200 pounds of different tiles that we bought and then lugged back to the store after hating it with the paint/lighting/mantel/etc in the room……….we somehow went back to the “Paris Hilton” tile, after many weeks of searching. Which is so funny because Steve was so sure he’d hate it, remember? We looked at it with fresh eyes, imagined it grouted, and now…..neither one of us can keep our hands or eyes off of it. The tile has the right texture, isn’t too loud or obtrusive, it lets the the new fireplace and mantel have more of the attention, and it adds a little sparkle to the space when the light plays off it. Okay, I’ll stop. I’m just way too excited about it all. :) (You’ll see more of what I mean when you see the finished mantel, the hardwood floors, the wall paint, etc.)
But let me tell you, tiling has made a huge different to these 2 rooms. And once we finish some things in the kitchen, we’ll be adding some back splash tiles in there. Can’t wait!
How about you?
Do you have a tiling project in mind?
Are you ready to give it a try? You should…
Let me share what I’ve learned about tiling…
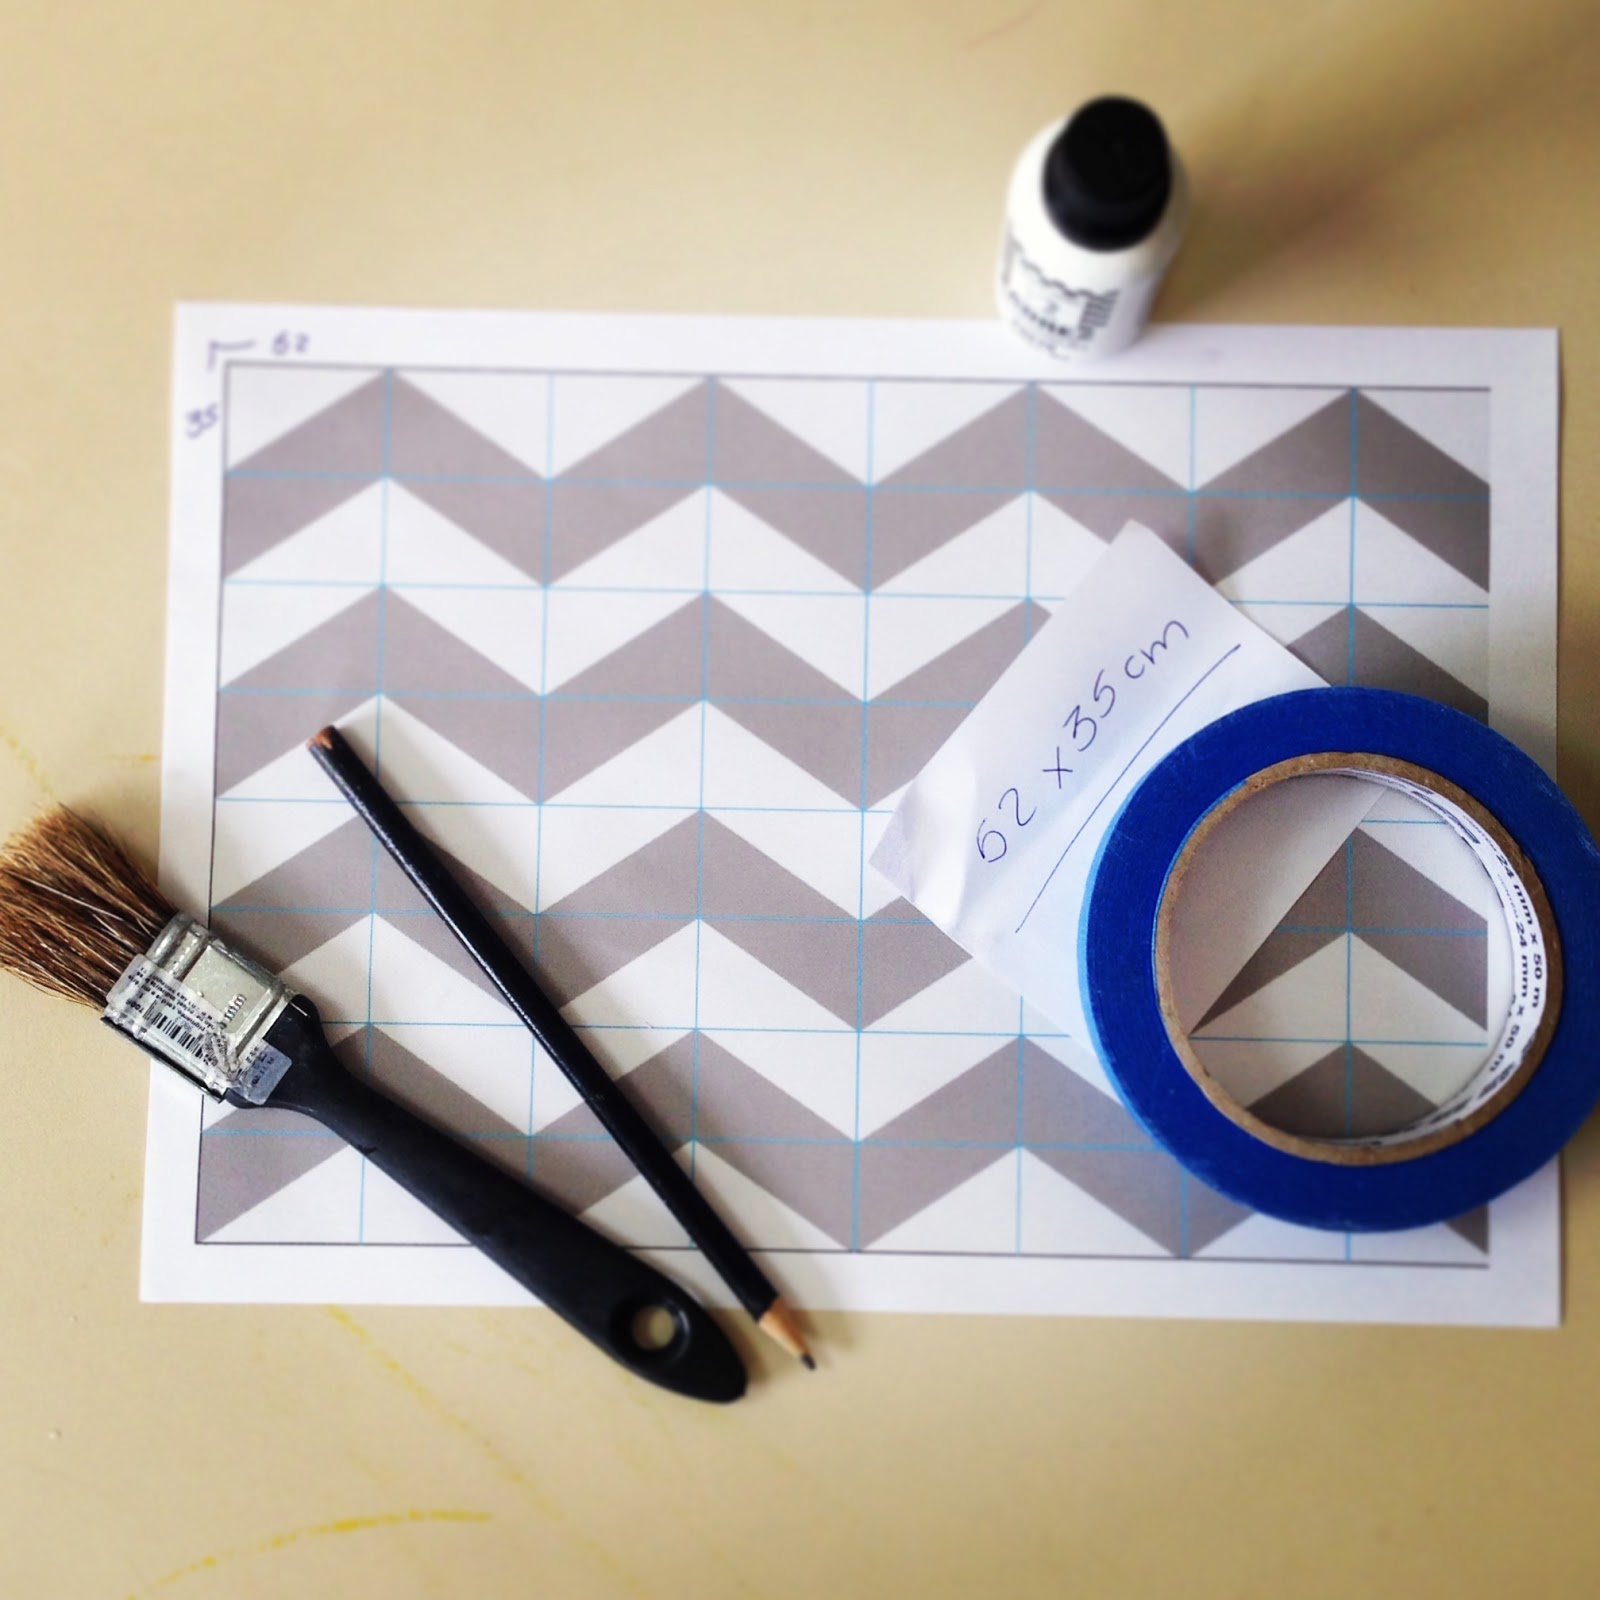
Okay…..let’s get started. Gather your supplies.
**I also forgot to picture the plastic tile spacers…..but that’s because I didn’t need them. But you may.
BUT WAIT!!! Unless your tiling over a concrete floor, STOP!!! You need to lay down Cement Board on your sub-floor or screw it into the wall or counter top that you’re tiling. What’s Cement Board? It’s a sturdy board that is made of yep, cement, and other fibers. It is used behind tiling to offer stability, eliminates sagging, and gives an even surface to work on. The “pros” I’ve talked to say they wouldn’t ever tile without having it. So I just do what I’m told! ;)
Now, you’ll need to place the Cement Board beneath all your tiling but sometimes there are curves or corners or obstacles to work around. You could cut smaller puzzle pieces of Cement Board and then fit them all together to cover your surface but whenever possible, consider measuring and sketching the place you need to cut out so that you can have one continuous piece of board.
Now, my brother taught us this trick to get pieces out of the center of Cement Board. (Thanks Greg!)
Drill a hole at each corner of the portion you need to remove.
Then, drop your jigsaw blade down into the hole and cut out your marked portion to remove.
Repeat with any other section that needs to be removed. Works great!
**Cement Board is pretty rough on your saw blades. So be prepared to burn through an extra blade or two while cutting through this stuff. The good thing, is that blades are only a $1 or so a piece.
If you don’t have a jigsaw: you can use a utility knife and cut a line in your board and then place it on the edge of a hard surface and push down on free edge to break it. This works but can be a little trickier.
Then place your Cement Board in place, to see if it fits. Make adjustments if necessary.
Then screw the board in place. Having 2 people holding this stuff in place is helpful while getting your first screws in place.
The Cement Board that we used on the fireplace had little spots to add screws. The stuff we used in the bathroom didn’t (we bought it at different stores). Just keep in mind, you’ll need plenty of screws so that the board lays really flat and doesn’t warp. Oh, and the screws are special Cement Board screws. I think they’re made of special Cement Board magic. Maybe? :)
Keep adding your pieces of Cement Board, until your entire surface is covered.
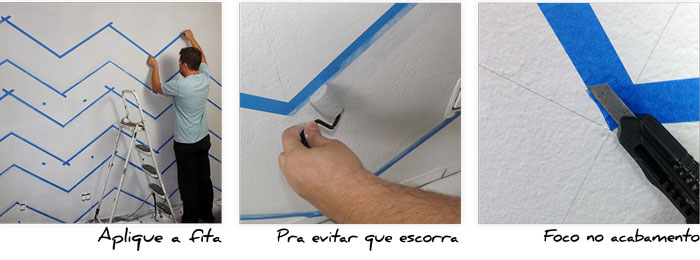
Now, it’s time for tiling. Taping is optional but helps keep excess gunk off your nice surfaces. I especially liked having that thick paper taped down below, because I knew globs would be falling soon.
Okay, back to the tiling supplies. If you’re laying large tile pieces, you can use a square notched trowel…..but the little triangle notches work better for smaller tile like mine.
**I also forgot to picture my plastic tile spacers…..but that’s because I didn’t need them. But you may.
Also, I’m not sure how strong your muscles are but mine begged me to buy a drill bit mixer. This saved me a lot of time and energy…….and worked like kitchen beaters to mix up my grout. Very cool!
Then, I noticed you can buy pre-mixed tile adhesive (but not grout), so I jumped all over that too. It really didn’t cost much more and came in a nice tub that would help save the extra for future tiling projects. If you’re mixing your own adhesive, it should be the consistency of peanut butter……so keep that in mind as you’re mixing.
Okay, so let’s get started with laying that tile. Depending on what type of tile you use, our methods will vary a bit…..but the whole process is the same.
(Steve’s brother taught me how to do everything from here on out. He supervised while I tiled. It was a good match! ;) Thanks again Joe!! )
First, grab one of your buckets and fill it half full with water and toss in your sponge. You will NEED this water…..so grab it first! And be prepared to dump it and replace it with fresh water many times throughout this process.
Now, you need to decide where you want to start laying your tile. Take notice of where you’d like a nice clean line of tiles to start……and begin there. Generally, you’ll start where your eye will be drawn to first…..or perhaps the area that is most noticeable. I started at the bottom because the top edge was kinda hidden. And then from there, you’ll work in rows…..finishing a row and then beginning another row above (or beneath) it.
Use your trowel and slap some adhesive up there on the Cement Board. Then, just like frosting a cake, try to keep things neat and clean and even, moving your trowel back and forth, and up and down.
Apply enough adhesive for a tile sheet or two (if yours are 12 x 12 inches like mine) or more if you’re laying single tiles. If you apply too much adhesive at once, it will start to dry before you get your tile up there. So, just do a little at a time.
Be sure that there aren’t huge globs of adhesive anywhere…..especially those sneaky edges. If there’s too much adhesive, once you set your tile and push it on, the adhesive will ooze out and will clog all the space in between the tiles for grouting later on.
Eventually you should have a nice layer of adhesive. I always applied enough for about 1 and half tile sheets.
Now, put your tiles right in place…..adjusting and spacing it just how you need it.
Now, use your Grout Float to apply even pressure to your tiles. Press pretty firmly but not too much or you’ll squeeze all the adhesive out.
While you’re working on one row, scrape away any excess adhesive. Since I was working my way to the left, I would leave extra adhesive to the left because I was working in that direction. But all the stuff up above would dry before I moved up to that row, so scraping it off kept the Cement Board surface even.
After finishing a tile sheet (or a few single tiles), wet your sponge and wipe off any excess adhesive from your tile surface. Rinse out your sponge and repeat if necessary. It’s important to keep your tile surfaces clean.
**And once your water becomes really mucky, dump it and replace with fresh water. You’ll have to do this many times to keep things clean.
Now, if your tiles are heavy and are sliding out of place, add some plastic spacers between your tiles to keep them in place while the adhesive dries. These spacers come in all sizes……so get what you need, depending on your tiles spaces. However, I didn’t even use one of these. I just wanted to show when and where you’d use them. My tile stayed in place and even Whew……lucky! But part of that is that my tiles were pretty forgiving and weren’t super precise with sharp corners or anything. Yours may be different though.
At some point, you’ll probably need to cut your tile to fit around different obstacles. Place some painters tape on your tile along the edge that you need to cut. Place the tape on the section you want to keep…..and then cut away what you don’t need. This will keep your measurements accurate.
Now, place your tile in the area you need it and check for accuracy before laying down more adhesive.
Then go ahead and add your layer of adhesive and place your tile where it needs to go. Repeat the above process of scraping away excess adhesive from, wiping with a sponge, etc.
And again, if you need to add spacers between each sheet of tiles, go ahead and do so before everything dries.
And then let everything dry in place for 24-48 hours…..or whatever your product says on the label.
Now, it’s time to grout.
***EDITED TO ADD: Instead of mixing my grout powder with water, I mixed it with a grout sealer, which was liquid like water. That way I didn’t have to seal my grout after it dried in between the tiles. It saved us a step and any future steps of sealing the grout in the years to come. Definitely recommend it. (I just can’t remember the name but just ask for something similar at the tile store.)
Again, you need to fill up your bucket with clean water and keep it handy. You’ll dump it and replace it many times throughout this process as well.
Mix up your grout, per your product’s instructions. You don’t want it too stiff and I actually preferred it to be slightly thinner than the adhesive. I mentioned above that the adhesive should be like the consistency of peanut butter……I liked the grout a little thinner than that. (Just because it seemed easier to get into all the cracks a little thinner.) Then grab a blob of grout with your Grout Float and start from the bottom and push it into all the cracks as you slide it upwards.
Then use your float and slide it across the surface pushing from the left, then the right, then down from the top. This will just help work it into all the cracks. If you have blobs fall down below, just scoop the back up, return them to the bucket, and continue on. It’s a little messy but you’ll get better and better as you go.
Once you finish grouting like a 2 x 4 square foot area, wet your sponge and wipe away any excess grout from the tiles and the surfaces around your tile. Rinse your sponge and repeat a few times. And replace your water with fresh water once your bucket gets too clouded and mucky.
Then repeat, repeat, and repeat some more…..until all of your tiles are grouted.
Then get new water in your bucket and make one final wipe over the tiles. Wipe a few feet of tile, rinse your sponge, repeat, and repeat again. This final wipe will help assure you get all the final grit off the surface of your tile.
Then, allow your grout to dry for a couple hours and then wipe your tile surface with a dry cloth or paper towels to help shine them up.
Let your grout completely dry (check the label of your grout brand to see how long this takes) and then caulk all of the edges. Your grout brand probably offers a matching caulk color, so that you can help blend the caulk into your tile cracks. However, mine didn’t. Luckily, my grout was a light grey and the fireplace was white…..so I just used white and tried to wipe out the excess from the tile cracks. When caulking, use your finger (or a caulking tool) to press your caulk into the cracks and to remove the excess. Have lots of wet paper towels (or a smaller sponge) ready to wipe the other surfaces around the tile, including the tile. Do this right away because caulk dries pretty quickly.
Caulking will help hide uneven edges and will also help your tile job to last longer……so don’t skip it. Just be patient with it and wet your finger or your caulk tool) with water as your pushing it into cracks. Water glides right over it while it’s wet…..so you’ll notice a huge difference if you keep things wet.
Also, be sure you’re using PAINTABLE caulk so that you can touch up any surfaces that butts up against your tile/caulking project.
And at last……YOU’RE DONE!!!!! So worth it, right??
Let me know what tiling projects you’re thinking of doing.
And good luck!
-Ashley
. . . . . . . . . . . . . .
Featured Sponsor
Paper City Circus!
A couple of weeks ago I finished some circus paintings for a pediatric dentist’s office here in Portland. After they were done, I thought the designs would translate well to a circus themed Paper City. So here it is – Paper City Circus!
My kids liked the idea too. Especially our almost two year old who loves roaring like a lion. Nice!
All of the printable templates are below. And I’d love to see your colored in versions if you’d like to post a photo on the Made by Joel Facebook Page.
Hope you enjoy the big top show!
Click on the images below, then print.
If you’d like to take a look at the original paintings, you can click on the image below.
Adesivos para Azulejo
Razões para você adotar adesivo na sua decoração:
- Mais barato;
- Personalizável de acordo com seu gosto;
- Fácil aplicação;
- Não tem gasto com mão de obra
- Cansou? Só tirar e colocar outro.

Ah, agora o blog tem Instagram. Todo mundo seguindo @homensdacasa lá. ;)
Teaching Kids to Sew: Intro to Hand Sewing
Ooooooh, time to share my newest sponsor Seamingly Smitten, which is a shop full of Sewing Patterns for girls, boys, and all ages! All patterns are available as an INSTANT download and are great for beginner sewing projects. Each pattern has step-by-step photos and are completely stylish and current! And we all know……it’s so rewarding to create your own items for yourself or as gifts. So hurry on over…….and snatch up a few patterns!
. . . . .
Oh gee, where did that holiday weekend go? Did everyone (here in the U.S.) enjoy their Memorial Day yesterday? (A big thank you to past/present service men/woman who fight for and honor our country!) Holidays that fall on Mondays, confuse me. Because it makes me think it’s a Saturday. So, naturally, today should be Sunday. And I should have one more restful day with my husband and little ones. Instead, Steve left for work. And the laundry piles are laughing at me. ;) Anyone else here in the U.S. feel confused today?
Anyway, onto something a little fun for today.
Do you remember back when we voted on the Next Project Idea?? Well, the Fabric Dolls won the vote and good grief, those turned out so fun to make. (So, thanks again for the excuse to make those! ;) ) But one of the other projects on the ballot was something I’ve been trying to put together for a long time. In fact, I finally started putting this together right before we moved…..but then it took a back seat while I started working on Home Improvement projects. Darn house……it has made a fickle person out of me on more than one occasion. Ha!
However, it’s time to start sharing.
And what better timing than now…..because summer vacation is here. So, kids are home and are needing extra little things to do.
I have several posts that I’m putting together, to help “beginning sewists” (not just kids!) gain a little confidence with fabric and needles and constructing sewing projects.
And my guinea pig for this series……..my little Elli (who is 6 1/2.). And let me tell you, she was HAPPY to volunteer! I can’t tell you how many times she has asked to start learning on my sewing machine. (I know, this is long overdue!) But, I’m going to show you a few things that she has been working on and mastering……before she graduated to the sewing machine.
And yes, it’s just as important……..and that’s Hand Sewing.
Even if you prefer the sewing machine, there are still times when you HAVE to hand stitch something in place or closed. So my advice, is to get comfortable with that first.
And for little kids, it helps to let their hands manipulate the needle and thread and gain an understanding of the thread going up and down and securing itself to the fabric (or in this case, a plate). It helps to demonstrate in a very basic way, how the sewing machine works. So……letting those fingers explore is a great way to begin the sewing adventure.
And hey, even Connor enjoyed this and was able to complete master it!
So all you need…….is some fun and colorful embroidery thread. And some styrofoam plates (which are easy to poke through and stay nice and stiff while your beginner learns to make stitches).
As for needles, I like Tapestry needles best. They generally have a really big eye for the thread to slip through (making it easier for kids to thread themselves) and a dull point.
And Elli and Connor didn’t want to stop at just one project. They kept going and going and going…….
Truly, a fun thing to see……..my sweet little ones, experiencing a small taste of something that I truly love. I sure hope by teaching them young, that they’ll always appreciate the art of sewing. And hey, maybe one of them will take things much further than I ever will and we’ll see their designs in stores one day! :)
Want a few more tips and ideas?
First of all, I’m not sure there’s a magic age to begin teaching someone to sew. Connor is almost 5 and Elli is 6 1/2. They both enjoyed this project and there was very little frustration. In fact, they have asked several more times to use the needles and thread and a few plates to create some of their own creations. But, I’m thinking a good guide would be, if your child can use a pencil and draw letters and shapes, then they probably have enough hand control to at least try hand sewing. And if it fails miserably, tuck it all away and try again in a few months. No need to push this.
Anyway, to begin, allow your little one (or your student) a little exploratory freedom. Let them get used to the needle and thread and just go up and down with these new items.
To let them do so, thread your needle and then tape the end of the thread to the back of your styrofoam plate. If you tie a knot, it will most likely just pull through the stryrofoam. The tape holds it in place very nicely.
Then explain the idea of the needle going up and down through the plate. And be sure to demonstrate a few times, so that they understand that whatever side of the plate that the thread came out of last, is the side that you poke the needle back into. Then let them do their own thing……..and become more comfortable with it.
And if the thread comes out, show them how to re-thread the needle themselves.
And when you can see that they understand how that works, it’s time to move on.
Here’s Elli’s practice plate:
I was a little surprised at how well Connor did with this. He clearly understood how it all worked and was able to carefully pull the thread through the plate from both sides.
His little mind was so curious how it all worked. And he was so proud of himself with every stitch.
And here’s Connor’s practice plate:
Now, it’s time to follow some lines and gain some control. So, I quickly drew some shapes on the plates and let them practice.
Tape the thread to the back of the plate, just like you did above but be sure it’s out of the way of the drawing…..or they’ll have a hard time poking their needle through it. And then guide them to a good starting point.
And then let them practice going up and down, right along the existing line.
At the end, add a piece of tape to the other end of the thread so that it doesn’t come loose.
If they want to change colors, let them!! Just use tape at each end. Learning knots is for another day. ;)
And then one more idea……and something really rewarding for little ones, is to let them draw their own image.
And then let them stitch along their own creation……and feel extra proud of their hand-sewing skills! :)
And that’s it for today.
If your child (or you, if you’re the student) feels comfortable with this, it’s time for the next step.
Which is coming soon……so stay tuned!
-Ashley
. . . . . . . . . . . . . . . .
Como mudar a cara do seu banheiro com pouco dinheiro
Hoje a nossa seção "Eu que fiz" tem gostinho especial, pois é em dose dupla! Já tem um (bom) tempo que eu recebi esses dois projetos de lavabos lindos por e-mail. Aliás, já faz tanto tempo, que é bem capaz que os donos tenham até esquecido que dividiram comigo esses projetos! Mas eu não esqueço. Tava aqui, guardado com carinho, esperando o dia de dividí-los com vocês. Então, com vocês, dois lavabos lindos e com dois estilos bem diferentes. O primeiro recebeu guardanapos. O segundo, adesivos de azulejo. O que os dois têm em comum? Dois casais cheios de força de vontade, criatividade de sobra e, é claro, muito orgulho da cria depois de pronta! Carlos, conta pra gente como essa lindeza foi feita?
"Aqui vai o passo-a-passo detalhado:
- Guardanapos: pacote com 20 unidades = R$ 10,00 (só na parede usamos 26 guardanapos e nas caixas mais alguns, então foi necessário 2 pacotes) - total R$ 20,00. Obs1: Esses guardanapos são de folha dupla, sendo somente a de cima colorida e a outra branca. Portanto a folha branca é descartada. Obs2: A aplicação do guardanapo é bastante difícil, já que, uma vez aplicado não pode ser removido, pois senão desmancha e estraga. Ou você remove tudo imediatamente e refaz o serviço ou deixa como está. Se você observar atentamente a minha parede, verá que bem no centro tem um que dobrou feio. Estou procurando uma alternativa para disfarçá-lo (pendurar um enfeite, sei lá...), mas minha esposa diz que decoupage é assim mesmo e dá até "um charme", mas não me convenceu.
Mari, queremos saber: foi fácil fazer essa belezura?
"Quando vi esse projeto dos azulejos no seu blog, fiquei apaixonada! Chamei o Fabricio para ver, depois mostrei para a minha sogra, minha mãe... resumo da ópera: a gente nem tinha apê ainda, mas já sabia que ele teria azulejos coloridos!!! rs... Aí então achamos o apê e ele tinha (tem) um lavabo pequenininho que era (é) ideal para o projeto! Velhinho, precisando de uma "alegria"... Enquanto rolava a papelada e a mini mini mini reforminha que fizemos (a grana não dava para grandes mudanças, então foi só o indispensável mesmo), eu passava noites e finais de semana (ok, só os nublados) baixando as imagens na internet e editando para ficar no exótico tamanho 15 x 20 dos nossos azulejos. Detalhe: NO PAINT!!! Não sei usar Photoshop nem nenhuma dessas outras ferramentas de imagens, mas meu amigo Paintbrush nunca me deixa na mão. Ao todo, baixei e editei 105 imagens diferentes, colei uma do lado da outra e criei um arquivão que, de tão pesado, às vezes travava o meu computador, rs...
Mandei pra gráfica e pedi para imprimirem 2 cópias (210 adesivos) e já cortarem direitinho para mim, dica sua. :)
Eu e Fabricio passamos uma noite e a tarde seguinte colando os adesivos, super empolgados! Depois esperamos a vidraçaria instalar o espelhão que mandamos fazer e... voilá... ! Veja as fotinhos do resultado! Hoje o nosso lavabo é o cantinho preferido da casa, o que mostramos com mais orgulho pros amigos e família que vem conhecer nosso apê."
Adorei, Mari, adorei!!!! Mas me conta, porque já sei que os leitores vão perguntar: onde você imprimiu os azulejos? Quanto custou?
- Gráfica: Alphagraphics da Barra (a de Botafogo não faz em adesivo vinil colorido, mas enviei o arquivo por e-mail para a da Barra e eles entregaram em casa, então não teve problema nenhum).
- Valor: R$ 378,00 (lembrando que o arquivo era enorme, ao todo ficou com 1,05m x 3,0m, e eu pedi 2 cópias, já com o corte e a entrega. Então, se for uma parede só ou uma parede menor, ficaria bem mais barato - pelo menos metade do preço)
Como reformar uma cômoda - Faça você mesmo!
A primeira coisa pra se fazer na hora de reformar um móvel é identificar os defeitos. Pra quem não se lembra, o problema todo da cômoda estava na minha pressa em terminar e no descuido em alguns detalhes que nunca devem passar batido:


Pra usar, é muito fácil, recorte o tecido em tiras de forma que sobre uns 5 centímetros pra cada lado da gaveta. Depois alinhe o tecido e vá prendendo essa sobra na parte de dentro da gaveta. É importante manter o grampeador bem reto pro grampo fixar bem, mas caso algum cisme de não entrar direito, ponha ele no seu devido lugar usando um martelo. Para os cantos, dobre o tecido (que nem a gente faz quando vai embalar um presente) e grampeie.
Agora é só pegar suas gavetas estilosas e colocar na cômoda! ;)
Dá muito trabalho? Dá. Mas a lição que fica disso tudo é:
Uffa, que post gigante, credo! Mas espero que tenha gostado. E lembre-se sempre, foque na diversão que tudo fica mais fácil de fazer. Cobre-se menos, você não é profissional, mas não esqueça que nem a Eliana faz mais projeto com acabamento de trabalhinho escolar.
Dúvida, já sabe né?
Abraço! ;)
Gardening with Kids
SrjulianaAllan Patrick, dá uma olhada.

Written by Britney Manuel from BtanJerine and A Simply Raw Life
When it comes to gardening I have the proverbial “black thumb of death”, a gardening mass murderer if you will. I think that plants come to my house specifically to live out their last days! That being said, I knew that I bit off more than I could chew when I decided to start a full fledged garden with my daughter. But this is a success story, and if I can do it, you surely can!
I thought that this project of growing our own fruits and veggies would be a great way to get my little one more interested in eating all the good things. I thought it would be a great experience for her to care for something, and see how something she planted could grow into something she would eventually eat. So I chose to make this an all edible garden.
3 Things You Need to Start Gardening with kids
We planted things with only 3 requirements: it needs to be hard to kill, edible, and grows fast. Included in our garden are sunflowers, strawberries, tomatoes, lettuces, peppers, and a host of herbs. Most of which I was able to pick up at our local farmers market. Another great resource for organic seeds is Seeds of Change. I involved Z in picking out the plants, she helped to plant them, and it is one of her responsibilities to water the plants.
I used my Pinterest board for some design inspiration, and came up with these wonderful wine cork garden markers found here. It was simple and just required skewers + wine corks + and a sharpie. I suggest an adult writing on the corks and putting the skewers in the cork. The kids can have the honor of placing the markers in the garden.

For some of the plants that we raised from seeds, we transplanted them into the peel of an orange (I know brilliant idea huh?), another wonderful idea I found on Pinterest here.
We just juiced the orange and used the peel for a new home for the seedling. Poked a whole in the bottom of the peel, and voila, a perfect home for the seedling that can then just be put into the ground (I would suggest planting seeds in a green house type container and then transfer the sprout to the orange peel since the peel will break down far before you are able to get a sprout if you do it from a seed).
The seedling gets the nutrients from the peel, and then disintegrates into the ground. A circle of life moment, and such a great way to recycle, and teach that when we use the earths resources, it usually can have more than one purpose.

So it has been about two months since we have started our garden and guess what? We have only had 1 casualty (and I don’t even think it was my fault to tell you the truth, it was the basil and I think the weather dipped too low a couple of days and that did it in). This project has been a total score! Z tells me how much she loves gardening, and she is excited to eat the fruits of our labor. I can’t wait to add to our garden, cucumbers from a recent seedling swap, beans, and blackberries are on our list to plant in the coming weeks. Yea I’m getting braver, I likened gardening to children. I try to be attentive to their needs, give them water and sun, and apparently that’s all they need!

Join the conversation!
If you start a garden, let me know how it’s going, and if you have any gardening tips I would love to hear them!
Guest Post: O mito do parto hospitalar mais seguro para gestações de baixo risco
http://articles.mercola.com/sites/articles/archive/2012/07/26/hospital-birth-vs-home-birth.aspx
Resumo dos fatos
- Dezessete estudos conduzidos nos últimos 15 anos demonstram que partos domiciliares assistidos são mais seguros para mulheres de baixo risco do que partos hospitalares.
- As taxas de mortalidade perinatal foram ou mais baixas ou similares para partos domiciliares, enquanto as taxas de morbidade materna foram significativamente mais baixas, comparadas com partos hospitalares.
- Para mulheres de baixo rsico, um parto hospitalar aumenta grandemente o risco de intervenções médicas desnecessárias que podem por sua vez aumentar o risco de infecções sérias, prolapso de cordão, cesariana e outras.
Parto hospitalar planejado indica o receio materno de um mau desfecho, o que pode ser uma profecia autocumprida
| O medo aumentado leva à liberação de adrenalina e outros neurotransmissores adrenérgicos que podem desacelerar ou até para o processo de nascimento
| Ambiente não familiar, estranhos, pessoas de uniforme e cheiros não familiares durante o trabalho de parto contrariam o instinto mamífero
| Equipe hospitalar reservatório de bactérias para as quais mãe e bebê não têm imunidade
| Menor acesso a comida e bebida podem causar hipoglicemia e desidratação
|
Acidentes de carro no caminho para o hospital
| Medo e ambiente não familiar aumentam o nível de dor, o que envia sinais de estresse para o feto, provocando influência negativa na frequência cardíaca fetal
| O conluio entre os trabalhadores do hospital têm precedência sobre o compromisso com a cliente e os protocolos seguros
| Falta de prestação de contas da equipe para as pacientes contribui para os maus desfechos
| Ficar deitada de costas comprime a aorta e a veia cava reduzindo o aporte de oxigênio para o feto
|
Monitorização fetal continua aumenta a dor, reduz a oxigenação fetal, reduz a mobilidade e aumenta a ansiedade
| Exames vaginais de hora em hora empurram as bactérias para dentro do útero, causando aumento da taxa de infecção depois de 3 exames
| O uso excessive de antibióticos mata a flora saudável, reduzindo a capacidade do sistema imunológico
| A rupture artificial das membranas pode causar prolapso de cordão, aumento de infecção e dor
| Indução pode causar prolapso de cordão, ruptura uterina, embolia por líquido amniótico e aumento de hemorragia pós-parto
|
Analgesia peridural causa febre em 15% das mulheres, o que aumenta as convulsões neonatais, que podem causar dano cerebral
| Episiotomia pode causar hemorragia, lacerações de terceiro e quarto grau e invalidez permanente
| Vácuo aumenta a taxa de lacerações de terceiro e quarto grau, causando incontinência urinária e fecal em longo prazo, disfunção sexual e aumento de hemorragia. Para o bebê, aumenta o risco de hemorragia intracraniana, fraturas de crânio e, raramente, lesão cerebral e morte fetal
| Distocia de ombros em função de o parto acontecer na cama do hospital em vez de na posição de 4 apoios
| Cesariana pode causar morte maternal e perinatal, além de aumento da morbidade materna e fetal, dor persistente na cicatriz, infertilidade, aderências, redução do sucesso da amamentação, aumento de natimortos e acretismo placentário em gestações subsequentes.
|


