Shared posts

09 Nov 13:05

Bring Home ‘Super Mario Odyssey’ (and Chain Chompikins) for the Holidays

by Kelly Knox

If you still haven’t picked up the Nintendo Switch for the family, there’s no better time than the holidays. The system is incredibly versatile and appropriate for just about all ages, and the latest big release couldn’t be more fun. Bring home Mario this holiday season with Nintendo Switch–and then put him on the Christmas tree with this DIY ornament inspired by the game.

Super Mario Odyssey

Super Mario Odyssey, like Legend of Zelda: Breath of the Wild, is a must-have game for your budding Nintendo Switch game library. It’s bright, sunny, funny, and just plain fun to play. You’ll take Mario to places that feel both new and familiar at the same time, and even with new gameplay elements that require shaking the Joy-Cons, the controls still feel intuitive for anyone who’s played a Mario game before.

In short, Super Mario Odyssey is one of the best games not just for the Switch, but of the year. Take a look at GeekDad’s detailed review for more information if you’re still on the fence.

Capture Your Own Chain Chompikins

One of the first bosses you’ll encounter is Madame Brood and her Chain Chompikins. Don’t let the cutesy name make you think this is a little, normal Chain Chomp. Chompikins is big, gold, and hungry! During the battle, Mario and Cappy will capture Chompikins in a fast-paced boss battle.

Capture your own Chain Chompikins with this easy DIY Super Mario Odyssey ornament, and hang him on the tree (or your game room doorknob) year after year.

What You Need

  • Round papier-mache ornament
  • Toilet paper roll
  • Gold, silver, red, white, and black acrylic paint
  • Blue enamel dot stickers
  • Red, silver, and brown craft foam
  • Hot glue gun
  • Scissors
  • Paint brushes

Get Started!

Begin by painting the eyes and mouth shapes with the white acrylic paint. (If you have a hard time making circles, dip the end of a foam paint brush in the paint and use it as a stamp to make the circle.) Let dry.

Paint the rest of the ornament with the gold acrylic paint, and let dry.

Next, use the black acrylic paint to draw the lines to make Chompikins’ teeth, and then paint two small black circles on the blue enamel dot stickers. Let dry.

Paint small white dots on the black painted dots you just made to complete the eyes, and let dry.

Draw a Mario mustache shape on the brown craft foam and cut it out. Check the size against the ornament; you may need to trim it to get it to fit correctly.

Hot glue the mustache on to the ornament, and stick the painted enamel dot stickers on the white circles for the eyes.

Next, draw a cap brim shape on the red craft foam, and cut it out. Glue it to the top of the ornament near the hanger.

Very carefully, begin squeezing hot glue on the very top of the ornament until the glue reaches the cap brim. Make as round of a shape as possible, without letting the glue drip down the sides. Let cool completely.

(If the shape isn’t round and even, you can add a little more glue around it to finish it.)

While the glue is cooling, paint the toilet paper roll with silver acrylic paint and let dry.

Paint the cooled glue with the red acrylic paint and let dry; more than one layer of paint may be needed for coverage.

Paint a small white circle on the red cap, and after it dries, paint the “M” for Mario with red paint. Let all paint dry.

Next, cut the silver toilet paper roll lengthwise. Cut strips from the roll across the width, and hot glue them together in circle shapes to create a chain.

Cut a circle from the silver craft foam, and stick it on the back side of the ornament. Glue the silver chain you made to the silver foam.

Your Chain Chompkins ornament is complete!

GeekMom received a promotional copy of the game for review purposes.

All Super Mario Odyssey Images © Nintendo

All Photos: Kelly Knox

Click through to read all of "Bring Home ‘Super Mario Odyssey’ (and Chain Chompikins) for the Holidays" at GeekDad.

If you value content from GeekDad, please support us via Patreon or use this link to shop at Amazon. Thanks!

15 Apr 14:37

Baked Asparagus Fries with Creamy Lemon Sauce

by A Beautiful Mess
Danielle.decesaro

They're fries... maybe I'll eat them!

Baked Asparagus Fries (via Abeautifulmess.com)   Confession: when I travel and have a long layover during an appropriate mealtime, I always rejoice when I see a TGI Fridays. Why? Green bean fries, man. I love them!

Do you like how I keep my green bean fry obsession only during "appropriate mealtimes?" If it's before 10am, then I go for the Auntie Anne's pretzel. Breakfast of champions.

Baked Asparagus Fries (via Abeautifulmess.com)           OK. So, I may have some questionable travel habits. I'll admit it. But there is nothing questionable about these baked asparagus fries. So good and (I'm sure) so much better for you than those deep fried things I'm obsessed with. I was actually going to make green bean fries, but I found I had some ripe asparagus readily available in the refrigerator. So I decided to try using that instead, and I'm so glad I did! I'm pretty sure this is my new favorite way to eat asparagus.

How to Make Baked Asparagus Fries (via Abeautifulmess.com)Baked Asparagus Fries, serves 4-5 as an appetizer.

bushel of fresh asparagus, woody ends removed
1 teaspoon corn starch
1 cup bread crumbs (I actually prefer a more traditional crumb to Panko here. Just FYI.)
1/2 cup Parmesan cheese (go for the powdery kind)
2 eggs

Toss the asparagus in the corn starch. You can do this in a large bowl or in a sealed gallon size ziplock bag.

In a large, shallow bowl or plate with a lip, whisk one egg. In another large, shallow bowl or plate with a lip, combine 1/2 cup bread crumbs with 1/4 cup Parmesan. Dip the asparagus in the egg, then into the bread crumbs. Set on a plate until you've dipped all of them. About half way through I like to refresh my egg and bread crumb plates because clumps will begin to form. You want a thin, non-clumpy coat of each of these elements on the asparagus before they go in the oven. So don't be afraid to clean off those bowls or plates and refresh if you need.

Coat a baking sheet in 2-3 teaspoons olive oil. Use your (clean) hands to spread the oil so the whole sheet is covered. This will help the asparagus to not stick while they bake.

Bake at 400°F for 20-25 minutes. After the first 8-10 minutes, remove from the oven and flip the asparagus over before continuing to bake.

Creamy lemon sauceWhile those bake, it's time to make our creamy lemon sauce. Guess what? There's only two ingredients plus seasoning needed. Whisk together 1/2 cup mayo with the juice from one lemon. Taste and add salt and pepper to your liking. Easy right?!

Baked Asparagus Fries (via Abeautifulmess.com) Serve these warm with the dipping sauce. Enjoy and happy snacking! xo. Emma

Credits // Author and Photography: Emma Chapman. Photos edited with A Beautiful Mess actions.

13 Apr 10:55

Alyssa Milano versus Heathrow Airport

by Sarah Pinault
Milano

Screenshot: @Alyssa Milano


This week, Alyssa Milano took to Twitter to lambast Heathrow Airport for confiscating her expressed breast milk. Meanwhile, in small town Maine, I jumped for joy at finally having these policies and their ramifications brought to light by someone with a big enough voice to make a difference. Having traveled between Logan Airport and Heathrow Airport extensively with my children, I know from personal experience how Heathrow treats pregnant or nursing mothers.

When traveling through Boston’s Logan airport, I could not have asked for more courteous staff. I flew to London while in my second trimester, and was encouraged to use the fast lanes so that I wouldn’t be on my feet so long, I was even brought to the front for boarding, though I didn’t have children with me yet and had no first class ticket. Simple gestures that made a 17 hour journey so much more comfortable. When traveling through Logan with infants or toddlers, even when witnessing families traveling with older children, I saw the same impeccable service. Families are directed by members of staff to shorter lines, sometimes even skipped ahead if a child is in distress. Before we get into the idea of this being a privilege, and parents shouldn’t expect such behavior, let me ask you this: People traveling without children, would you rather be stuck in line with kids screaming, or would you rather kids get pushed through lines and settle down quietly to wait for their plane? I remember pre-child travel, I know how I would answer this question. Boston is a pregnant or nursing mother’s dream. Staff are helpful, sensitive and there are even rocking chairs.

Traveling through Heathrow as a pregnant or nursing mother, is like moving through one of the inner circles of Hell. Now it’s a big airport, so I don’t begrudge the distances you have to walk to reach your gate, or the small amount of time they give you before announcing the gate number, and expecting you to be there. I get it, Heathrow is enormous, those things cannot be changed. But laws and regulations can, and the regulations currently in place for nursing mothers traveling through Heathrow are appalling.

Alyssa Milano was traveling without her baby, and so using a breast pump to pump milk. For the uninitiated, you can’t just let that stuff sit in you for the length of a trans-atlantic flight, the body doesn’t work like that. While going through security, her expressed milk was confiscated. Her shampoo was not. They said that if the child had been with her she would have been able to keep the milk, she countered that if the child were with her, she wouldn’t have to use the breast pump.

Milano 2

Screenshot: @Alyssa Milano

Well, I’m here to tell you Alyssa, even if your child had been with you, Heathrow regulations still don’t look on nursing mothers with fondness. I traveled with my first son when he was nine months old. For reasons beyond our control, I wasn’t able to nurse so I had committed to exclusively pumping for the first year of his life. I carried my Medela around with me like most people carry a cell phone. Every three hours for twenty minutes I hooked myself up and thereby was able to sustain my son.

Medela

Image: Medela

It’s a three hour journey from my parents house to Heathrow airport, we stopped on the way for a bite to eat, and so that I could pump. I was a bit of a milking machine, and Toby was a bottle fed breast feeder so we arrived at the airport well stocked with my milk. In a cool bag, with ice packs. Ice packs that had been purchased in America and had already made the trans-Atlantic flight over and landed in Heathrow. And here my adventure begins.

We get to security, where my biggest concern is if they will let the pump through, even though I had checked and knew it was acceptable. Their first concern was the sealed jar of baby food. They made me break the seal and taste it. Quite frankly, I’m glad they did, we had never used store bought baby food before, but thought it best for the 17 hour journey ahead of us to use something a little more preserved. So I tried it, it was vile and we bought bananas from a cafe once past security. Their second concern was my breast milk. 4 ounces in each bottle, they wouldn’t let it past without me drinking some in front of them. Now I may have been using breast milk and making my own baby food, but drinking my own breast milk was not a frontier I felt the need to cross. But I did, slightly perturbed, and then came the biggest challenge: The ice packs.

These ice packs, as I have said, had already been through this airport once before. Logan airport security was fine with them coming through, and Heathrow had no need to check till my return journey. They insisted they would have to confiscate them. I insisted on talking to many people, and spending much time at security before I would un-willingly leave them behind.

Three hours to get to the airport. Three hours at the airport. Seven-and-a-half hours in the air. One hour through US customs in Boston. Two-and-a-half hours back to Maine. Seventeen hours of travel time—what did they expect me to do with breast milk that needs refrigerating? Three officers told me I could buy frozen ice packs once through security. This turned out to be completely un-true, Heathrow has a large shopping mall, but no-one sells ice packs, let alone ice packs that are already frozen. Back to security we went, they would still not return the ice packs but suggested we get ice from a coffee shop instead. Ice to fill our cool bag with water within the hour. We were told, by security, that once on board the plane we would be able to use inflight refrigeration. Good old US hospitality to the rescue, Starbucks graciously gave me some crushed ice to keep breast milk at a safe temperature.

Logan

Image: Sarah Pinault. Waiting at Logan Airport.

Once aboard the plane, we discovered that airport security had once again misled us. By this point, it felt like they were doing this deliberately to get us to move on. We were informed that it was illegal to store passenger property in on-board refrigeration. Luckily, Virgin Atlantic has the nicest and most helpful staff of any airline I have ever flown with. By this time I was pretty distraught and rapidly making calculations in my head as to how much milk would need to be thrown away, and if I would be able to pump enough fresh to keep my son calm on the plane. The flight attendants immediately came up with a solution and they filled our cool bag with dry ice from their meal compartments, which would stay plenty cool through our remaining trip back to Maine.

I don’t think people traveling with children should get special treatment, though I think it’s in everyone’s best interests when screaming children aren’t kept in line. I don’t think moms with small children should be exempt from the rules. I think the staff at Heathrow follow the rules they are given. I do however think that in this case, the rules are wrong. Regulations on flying with expressed breast milk need to be changed, and I for one, am glad that Alyssa Milano is expressing herself so vocally.

The post Alyssa Milano versus Heathrow Airport appeared first on GeekMom.

09 Apr 11:16

One Pot Creamy Broccoli Pasta

by A Beautiful Mess
Danielle.decesaro

I really want to eat this...

One pot creamy broccoli pasta (via abeautifulmess.com)  It's official. I'm addicted to one pot pastas. It's easy. It's pasta. Dinner's ready so quick. It's pasta. Easy to clean up after. It's pasta.

Did I mention it's pasta? Guys, I LOVE PASTA!

One pot creamy broccoli pasta (via abeautifulmess.com)   If you haven't heard, one pot pasta is a THING. Type that into Pinterest and you'll get about 1.5 million results (OK maybe not quite that many, but a lot). I first got hooked a few years ago when I tried out this one. And I've been into it ever since. In fact, if you like red wine (who doesn't?!), you should check this one out too while you're at it. 

One pot creamy broccoli pasta (via abeautifulmess.com)    One Pot Creamy Broccoli Pasta, serves 2-3.

9 oz. fettuccine (I used Bertolli—the fresh kind found in the refrigerated section)
3 cloves garlic, minced
1 tablespoon butter
2 teaspoons olive oil
2 cups seafood stock
1 1/4 cups whole milk
1/2 cup grated Parmesan cheese
1 cup chopped broccoli florets
salt + pepper to taste
chopped parsley for garnish

First, sauté the garlic in the butter and olive oil over medium heat for 1-2 minutes. Then add the noodles, stock, milk and broccoli. Bring to boil, cover, and reduce heat to a simmer for 8-9 minutes. Remove the lid and allow to cook for another 8-9 minutes until the liquid has mostly evaporated/absorbed into the noodles and broccoli. Toss in the cheese during this last 8-9 minutes of cooking.

One pot creamy broccoli pasta (via abeautifulmess.com)        As you could probably tell from the photo before the pasta is cooked, I used a fresh (store bought) pasta. You could easily use a dry pasta instead, but you may need to cook the dish covered for an additional 2-3 minutes as fresh pasta cooks a little faster than dry.

One pot creamy broccoli pasta (via abeautifulmess.com)Taste and then season with salt and pepper. Garnish with a little chopped parsley and some more grated cheese and enjoy! xo. Emma

Credits // Author and Photography: Emma Chapman. Photos edited with A Beautiful Mess actions.

06 Apr 12:44

Love ‘Minecraft’ (or Know Someone Who Does)? Let Gameband Take You There

by Ken Denmead
GAMEBAND

Courtesy of Gameband.

Gameband + Minecraft is something special for fans of Minecraft. It’s a wearable (yeah, I know we’re hearing a LOT about those these days), but it’s a wearable with a big difference. Gameband is a portable game of Minecraft you take with you on your wrist. It’s YOUR personal, portable game of Minecraft, because when you plug it into a computer (any computer) and play, you save your own personal creations back on the device.

[This post was sponsored by Gameband]

The basic idea is that users can play Minecraft from the Gameband on most any computer (Windows, Mac, and even Linux), as the game is pre-installed on Gameband (but the user needs to have purchased the game license separately). On top of that, Gameband comes with a bunch of pre-loaded contents, including awesome maps created by community-favorites SethBling, Dragnoz, and Hypixel. What’s really special is that whatever you do in a given session using the Gameband is automatically backed up to the Gameband, and if you have internet connectivity, it’ll be backed up to the cloud as well (via Gameband’s servers). You’ll never lose your world again, and you can take it anywhere you want to go!

Computer 14-02 v1e

Courtesy of Gameband.


You may have also noticed it’s a watch, and it has the software built in so that the user can tweak the LED-array display in any way they please. Because hackability is key!

The Gameband comes pre-loaded with the Pixel Furnace app that lets you design what the Gameband displays. You can develop any animations you want to run on your Gameband, save them, and even share them on the Pixel Furnace community, where you can find animations from other Gameband owners as well.

As for the hardware: Gameband + Minecraft has a high-end watch strap made from durable thermoplastic polyurethane, a stainless-steel clasp (with Redstone design elements), USB 3.0 MLC drive technology (offering high-speed data transfer for gamers and a 10x life-cycle compared to normal UBS drives), and a 140 LED-array display. And it’s splash-proof to IPX-4—which means it can handle being worn if you get caught out in the rain (but we advise you take it off before playing with Super-Soakers).

Backpack

Courtesy of Gameband.


The point is: It’s durable, and meant to be used and used! It’s the perfect wearable for the “kid” who loves Minecraft.

Price: $79.99. Available at Gameband.com or at Target, GameSpot, EBGames, and NewEgg. They also just launched at Microsoft stores (look at these images from the launch party in Boston last week), and will be in Best Buys all over by the end of March.

Click to view slideshow.

[GeekMom Sponsored Content Notice: This post was sponsored by the creator of the product. It is GeekMom’s ethical and legal duty to notify our readers when we run sponsored content, but while we are either getting paid for a post (it’s one of the few ways we have to generate revenue to keep the site running) or have received review samples of the products we write about, we work very hard to only bring you sponsors and products that we ourselves would be interested in.]

The post Love ‘Minecraft’ (or Know Someone Who Does)? Let Gameband Take You There appeared first on GeekMom.

06 Apr 12:42

Ways to Self-Promote without Being (Too) Annoying

by A Beautiful Mess

Tips for self promotingFirst off, if you are a creative entrepreneur of any kind (blogger, artist, photographer, musician, etc.), you've probably already realized that promoting yourself and your projects/business is absolutely vital to your success. And for many of you that probably makes you feel SUPER UNCOMFORTABLE. I think many of us (myself included) grew up hearing that we shouldn't talk about ourselves too much as it might come off as bragging or like we are full of ourselves or something. But, if you're about to launch your latest line of handmade necklaces and you don't tell people... well, chances are no one is going to buy one (because they've never heard of it!).

Self-promotion is key to a creative entrepreneur's success. It is absolutely vital and there's really no way around it. If you're still in the boat of I-don't-feel-comfortable-promoting-myself, let me gently encourage you to step out of your comfort zone. You can do this. You really can! And there are lots of ways to self-promote without being (too) annoying. But the bottom line is you have to give yourself permission to talk about the things you work hard on. Here are five ideas to get you going:

1. Start a newsletter/email list

Ground breaking, I know. But here's some real truth, we didn't start a mailing list for the first six years we had a blog. We already had multiple books and an app out before we ever started one. So silly! I think for a long time we thought no one would want to sign up for an ABM newsletter, but we were wrong. The great thing about an email list (or newsletter, I'm using the words to mean the same thing here) is users have given you permission to contact them by joining the list. They WANT to know if you have a new product out or are offering a sale.

You can find about one million articles online about starting and maintaining a newsletter. One resource I really like is the Smart Passive Income Blog, so check out Pat's site if you haven't already. There are also lots of different sites that can host your email list. (I recommend using a reputable one as there are legal considerations when you start a newsletter—mainly that users are able to opt out anytime they choose. So pick a site that can facilitate this.) We have used and liked MailChimp, but it can become costly the more your list grows, so do your research and find a source that works for you.

Once you have a newsletter, just remember these three things: make it easy for users to find it and sign up (don't bury it in your website design or no one will sign up since they can't find it!), occasionally reward users for subscribing by offering a special discount or a free download of some kind (depending on what type of products or services you offer), and don't be afraid to use your newsletter often. We used to be very afraid that if we sent out too many newsletters everyone would unsubscribe because it might feel too spammy. If people want to unsubscribe, they will. Don't worry about it. Just make sure you are offering real content with each newsletter and see how your users respond, then adjust accordingly.

2. Host a giveaway

Everyone loves getting something for free, right? I know I do. Hosting a giveaway is a great way to remind people about your projects but also offer them a chance to win something. Let's say you just launched your first e-course. Hooray! You post about it online and wait for the students to start rolling in. After a few days or a week your post is buried and forgotten. So how can you remind people without being a broken record? One option is to give away a few "copies" of your course. This will generate interest, and it's a way to get your course in front of eyes again without having to say the exact same message you posted before.

One word of caution on giveaways is you have to be strategic and also cost effective. If you're promoting a digital product, like my example with the e-course, then you can afford to giveaway as many copies as you like since there are no printing or shipping costs involved. But what if you make custom wedding dresses for a living? How can you possibly host a giveaway? If it's not cost effective to giveaway a custom wedding dress, what else could you offer that relates to your product/service? Could you create a downloadable mini wedding planner you could giveaway? Do you have the skills to create a necklace or other accessory that might not need to be sized and can more easily be made and shipped without costing you an arm and a leg? Sometimes you have to get creative to get your idea out there. 

3. Offer a discount or sale (for a set amount of time)

This is a similar tactic to hosting a giveaway. Basically when you host a sale you get to talk about your project again but without being a broken record (because you're informing everyone about the sale). If your discount or sale is only for a set amount of time, even better! This gives people a more immediate call to action letting them know they only have so long to take advantage of the sale, and it gives you the ability to talk about your sale at least twice: once to announce the sale, and once toward the end of the set time to remind everyone the sale is about to end. Setting how much you can discount your project for is up to you and your margins. 

4. Publish related (free) content

This is most effective on a blog or website, but it can also work on many social channels as well. Let's say you are publishing a cookbook. The day comes and you blog your heart out about your new cookbook! OK, great, now what? It's two weeks later and you want to remind everyone about your cookbook again, but how can you do this without being totally annoying (and you already hosted a giveaway too :)). Why not post an original recipe (not found in your new book, or one that is), and at the end of the post say something like, "If you enjoyed this, then you'll love my new cookbook where you get over 100 original recipes. Click here to learn more!" Yes, it's got a touch of sales-y in there for sure, but what you really just did was give people something for free and then offer them more if they want it. That's not annoying, that's actually a lot of work and really nice. And it's a great way to remind people of projects!

5. Incentivize others to promote too

If you don't want to do all the talking yourself, or if you want to reach people that you don't currently have a connection to, then I highly recommend you look for ways to incentivize others to promote your project. The ultimate example of this is to set up an affiliate program. If you're not familiar with affiliate programs, google it. But basically it's a way to partner with others so when they promote your project and sales are made, they receive some set amount of payment or a percentage of the sales. 

Other ways to get others to help promote is to offer them your project early or at a discounted rate. For example, when we released both of our apps, we sent goodie bags with iTunes gift cards to friends and other influencers a week before the launch. They were able to learn about our app, download it for free, and get a few goodies while we hoped they might like our new app and post about it on their channels. If you go this route, know that not everyone you send a goodie bag to is going to necessarily post about your venture. But if they like it, they might. And if they don't, just chalk it up to the cost of doing business. 

I could probably write another 1000 words on each of these five ideas, but I think I'll leave you with these thoughts for now. If you have questions regarding any of these, or if you have other small business questions, feel free to leave them in the comments. Thanks for letting me share and to all you creative entrepreneurs reading—GO YOU! We're totally rooting for you here at ABM. xo. Emma

Credits // Author: Emma Chapman. Photo by: Sarah Rhodes.

20 Mar 11:09

Harry Potter Prints Are Giving Us All the Feels

by Jackie Reeve

Oh, Spoonflower. Your designers just own our hearts. Where else could we go to find the coolest fabric designs for our crafty machinations?

Spoonflower is such a game changer if you love fabric—especially geeky fabric. Anyone can upload their own design and sell it straight to consumers on a variety of fabric options. You can even just have your own stuff custom-printed for a project. And—ahem—the prints are also available as wallpaper and wrapping paper. Squee!!

I miss Harry Potter. All the time. I may just have to save my pennies and support these independent designers. My sewing machine is crying out for these. Click on the images below to buy from the site.

The Sweater That Lived

Image courtesy of Spoonflower, used with permission.

The Sweater That Lived by Designs by Mandrie
It’s a Harry Potter print inspired by ugly Christmas sweaters. What about this is not completely amazing?!

Harry Potter Kids

Image courtesy of Spoonflower, used with permission.

Harry Potter Kids by id_insomniacdesigns
Adorable little cartoonish Harries and Rons and Hermiones. I big glittery heart this.

Under Your Spell (Gryffindor dark)

Image courtesy of Spoonflower, used with permission.

Under Your Spell (Gryffindor Dark) by Implexity Designs
This print is available in a bunch of colorways. It would look amazing in a quilt.

Ravenclaw Argyle

Image courtesy of Spoonflower, used with permission.

Ravenclaw Argyle by id_insomniacdesigns
There are argyles for every house available, so pledge your allegiance.

slytherin baby

Image courtesy of Spoonflower, used with permission.

Slytherin Baby by Small Pirates
Darling little evil ties.

Harry Potter

Image courtesy of Spoonflower, used with permission.

Harry Potter by 3 Peas Fleece
The layout of this print just makes me want to sway and solemnly swear that I am up to no good.

Harry Potter-ch

Image courtesy of Spoonflower, used with permission.

Harry Potter-ch by closet_crafter
I kind of really want to upholster a chair in this print.

Dark Mark

Image courtesy of Spoonflower, used with permission.

Dark Mark by Studio Fibonacci
I find this just darling, and I do not know how to feel about that.

The post Harry Potter Prints Are Giving Us All the Feels appeared first on GeekMom.

06 Mar 12:27

How to: Make This Crossbow Out of Office Supplies

Look, sometimes Bill from work gets outta hand and you need to up your game. If the whole Office Space smashing the printer thing, isn't exactly an option, why not opt for the more practical pen-firing crossbow made from simple office supplies? Everyone will know you mean business.   

Continue reading on ManMadeDIY.com
11 Feb 14:17

My Favorite Picture Books… Right Now

by Ariane Coffin
Julia's House for Lost Creatures. Image credit: First Second

Julia’s House for Lost Creatures. Image credit: First Second.

In the past, we used to pick our picture books willy-nilly at the library with the two kids in tow. Recently, I found out my library offers an online book-requesting service at no cost, so I can reserve titles and have them all bundled up and ready for me to pick up on my way home from work. Since my kids tend to pick books with little thought or care—though they love bedtime stories, they don’t seem to understand that time invested in a careful selection means better stories later on—pre-selecting the book myself has helped us hit a lot more “winners.” So, without further ado, here’s a list of my family’s favorite picture books right now.

Julia’s House for Lost Creatures by author-illustrator Ben Hatke (pictured above)

We were already fans of Hatke after reading the graphic novel series Zita the Spacegirl, and this picture book did not disappoint. Julia is new in town, but she doesn’t remain bored for long when she adds a sign to her house: “Julia’s House for Lost Creatures.” Soon, all kinds of mythical creatures show up seeking shelter and chaos ensues. Good thing Julia’s got a few tricks up her sleeve.

The Adventures of Beekle: The Unimaginary Friend. Image credit: Hachette Book Group

The Adventures of Beekle: The Unimaginary Friend. Image credit: Hachette Book Group.

The Adventures of Beekle: The Unimaginary Friend by author-illustrator Dan Santat

Santat’s latest book made a big splash last week, after it was announced as a Caldecott Medalist. Beekle is the story of an imaginary friend who’s tired of waiting for his friend to imagine him, so he takes an adventure into the real world to find his friend all on his own. I just can’t decide which aspect of this book I like the best: the art or the story? The whole thing is adorable, right down to the close-up shot of Beekle’s square little bottom sitting in a tree.

Unicorn Thinks He's Pretty Great. Image credit: Disney-Hyperion

Unicorn Thinks He’s Pretty Great. Image credit: Disney-Hyperion.

Unicorn Thinks He’s Pretty Great by author-illustrator Bob Shea

The title alone was enough to sell me on this book, plus there’s a unicorn, tons of cupcakes, and sparkles all over the book cover. That’s so much win just on the cover. The story is equally fun and silly. Goat is pretty jealous of Unicorn, the new kid in town. Now all of Goat’s tricks are nothing compared to what that stupid Unicorn can do. But fear not, Unicorn is one friendly dude who keeps it real, and he thinks Goat is pretty cool himself. What could these enemies accomplish if they become friends?

What Do You Do With An Idea? Image credit: Compendium Kids

What Do You Do With An Idea? Image credit: Compendium Kids.

What Do You Do With An Idea? written Kobi Yamada and illustrated by Mae Besom

I love this book. I mean, I love this book. The art is fantastic, which is obviously a running thread along my favorite books. In this story, a child gets an idea, represented as an egg. The boy doesn’t know what to do with his idea: He tries to ignore it, people make fun of him for it, etc. As the story goes, the egg gets bigger and bigger and starts to color the sepia-toned world around it. It’s just beautiful. It’s a simple and admittedly abstract concept, and my 4-year-old finished the book in disbelief. “An idea can’t do that,” she said, sounding almost insulted. It opened up the floor to a great conversation about how even a small idea can have a big impact on the world. Slow clap, drops mic.

The post My Favorite Picture Books… Right Now appeared first on GeekMom.

11 Feb 11:30

Boost Your Kid’s Programming Skills With Adventures in Minecraft

by Maryann Goldman
Danielle.decesaro

I might even be able to learn programming with this!

 Adventures in Minecraft

Adventures in Minecraft Cover. Photo: Wiley

I have a passion to share my love of coding with kids whether it be through Lego Mindstorms robotics, The Hour of Code, or Minecraft. “Wait, did you say Minecraft?”  Yep, you read that right. Minecraft! I stumbled upon the Adventures in Minecraft book and and was very excited when I realized that I could insert teachable moments into my boys’ Minecraft gaming experience.

Before I proceed with my review, I have a tiny, little confession to make. I had never played Minecraft before. Sure, I saw the Minecraft screen on my boys’ computers. I knew some of the Minecraft lingo like “spawning” and “Creeper,” but I had never actually logged into Minecraft and tried to play the game in Creative, let alone Survival, mode. So, I ordered the book and bought myself a copy of Minecraft. The things we GeekMoms do for our kids!

Adventures in Minecraft is designed for kids 11-15. Programming is done in Python using the IDLE editor. Students create a local Minecraft programming environment using a Bukkit server to test their programs on. The book walks the student through all the necessary set-up on either the PC, Mac, or Raspberry Pi and starts with programming basics so that even kids without prior programming experience can follow along with the exercises. It is helpful if the student is familiar with Minecraft, but I am proof that you can be successful with this book even if you are new to Minecraft. There are some great beginner tutorial videos out there if you need them. The book also brings some real world results into the exercises through the use of LEDs, push buttons, and a 7-segment LED display. Your program will interact with an electronic circuit! There is also a website that supplements the materials in the book. For example, if you get stuck with a syntax error that you can’t figure out, you can consult the official program listing online.

I decided to work through the chapters in the book slightly ahead of my boys so that I would be available to help them work through any issues they ran into. We started meeting once a week, on weekends, to have a family coding session. The chapters in the book have lots of subsections, and it is easy to find a good place in the book to conclude each session.  We code for about 90 minutes each time we get together. I’m honestly not sure who is enjoying these sessions more, me or my boys.

Family Programming Time

Family programming time. Photo: Maryann Goldman

Hello World

As with most programming languages, one of the first things you do is write a “hello world” program. We all had a great sense of accomplishment seeing the first results of our set-up and programming come alive on the screen. One of us apparently had Star Trek and Lost in Space on the brain too. Why code “hello world” when you can be much more creative!

Writing to the Minecraft chat. Photo: Joey Goldman

Writing to the Minecraft chat. Photo: Joey Goldman

Player Position

In Chapter 2, a lot of time is spent figuring out your player’s position in the game. That is, where is the player on the x, y, and z coordinate system? It might be useful to refresh your memory on Cartesian coordinates before proceeding.

Minecraft Wooden Fence

Minecraft wooden fence. Photo: Maryann Goldman

And, do make sure to graph out the coordinates of your fence to make sure you understand what coordinates to plug into your program. If your x or z coordinate happens to be a negative number, it will simplify the exercise if you move to a position where all the coordinates are positive, and redo your fence.

Minecraft fence coordinate map

Johnny’s fence coordinate map. Photo: Maryann Goldman

Challenge Sections

I just love the challenge sections in the book too. In Chapter 3, after we learned how to set blocks, it was suggested that we try setting some blocks to SAND or WATER, so I went up in the sky and set one of the AIR blocks to WATER and proceeded to flood my world. I had to call in reinforcements to use buckets to stop it!

Minecraft Water Block

Water, water, everywhere. Photo: Maryann Goldman

Then there was the dice face challenge. I had the hardest time trying to figure out how to add my blocks to the correct position. I just refused to quit, both wanting to set a good example to the boys and also just wanting very much to succeed. I finally did it…in the rain. I know, I  know, it’s a rectangle and not a cube, but I still felt pretty good about it!

Minecraft Dice Structure

Minecraft dice structure. Photo: Maryann Goldman

Minecraft dice program

Dice Python program snippet. Photo: Maryann Goldman

Useful Commands

I found that my Minecraft world was always getting dark or raining, and it impeded my ability to test my code, so I consulted my boys on how to get around that. The command:

/time set day

works great to get back to daytime, and the command:

/weather clear

works great to get rain to stop. You’ll want to keep these in your arsenal of commands as you work through the book.

Houses and More Houses

My boys were sold very quickly on the merits of learning to program in their Minecraft world. When they saw that they could built a huge house in the blink of an eye through a simple program, they were blown away and highly motivated to learn more.

Minecraft Houses

Street of houses in Minecraft. Photo: Maryann Goldman

Electronic Interaction

One of the concepts that really differentiates this book from other kids’ programming books is that it includes some electronic interaction with the programming starting in Chapter 5. I ran into a little trouble with the set-up, but it was my own fault for ordering the wrong part. If you are working on the PC or Mac, make sure to order your Arduino Pro Micro board from the correct place.

Soon, I was able to write programs so that when my player landed on a certain type of block in the Minecraft world, various color LEDs on my bread board would light up. How cool is that?!? You do need to consider the additional investment required for the electronic parts which is about $50 depending on whether or not you have some of the parts already on hand, but I think it’s totally worth it!

Minecraft electronic interaction

Electronic interaction. Photo: Maryann Goldman


Continuing Adventures

I’m halfway through Chapter 5, and my boys are halfway through Chapter 3. We are excited to have our next family programming session and to see what is in store for us next. There are nine adventures in the book plus a bonus adventure on the website. If you get stuck, have a cool tip to share, or want to check out the latest changes, like how the new Raspberry Pi 2 will work with Minecraft, you can also go to the Stuff About Code forum.

Interview With Author David Whale

I had a chance to interview one of the authors of Adventures in Minecraft, David Whale. He was kind enough to assist me through a set-up issue I had with my Arduino Pro Micro and then engage me in some additional conversation. I asked him if he had any quotes that he would like to share about why he feels teaching programming to kids is so important and why Minecraft is a great choice to accelerate their learning. He had several which I’ll share with you:

• Programming is important, because it allows you to influence and enhance what the computer does for you, and to break outside the bounds of what the designers of the programs expect you to do. Instead of being a consumer, you can be a creator, and make the computer do what you want it to do, not what the manufacturers decided to let you do with it.
• Even if you don’t want to be a computer programmer, the thought processes that you go through when coding really do exercise your brain and your logical thinking ability, and these are skills that can be used in any walk of life. When faced with any problem, using the skills you pick up from programming a computer, you can learn how to think a bit more abstractly about a problem, how to break it down into logical parts, how to split a big (complex) problem into many smaller (simpler) problems, and even how to split tasks up to run them in parallel effectively (e.g., delegating parts of a big task to a team of people).
• Minecraft is such a great way to learn programming—not only can you extend and enhance your favorite game and make it do things that you want it to do, you have a great excuse to play your favorite game while learning a new skill. Things that take a long time manually (e.g., building a 100x100x100 cube) take a fraction of a second with a small program, and you can be more expressive and creative as a result. Your Minecraft world will be different from any other world, and you can even program your own intelligence into it and write your own mini-games. It’s much more exciting than printing names and ages on a boring text screen (as many courses in programming will have you do).
• You will learn programming quicker using Minecraft, because you have a real purpose, a goal that you want to achieve, rather than working on some task that is only designed to test your understanding of a particular concept. When learning is fun, you want to do it, and you remember it much more if you are learning to build a huge ice cube that melts into an underwater pipe system, compared to printing names and addresses on the screen in alphabetical order.
• I’ve been writing computer software for over 30 years now, and I *still* get excited the first time I flash an LED on a new bit of hardware—it feels like I have “breathed life” into this lifeless object, and given it a piece of my soul that will live on forever.
Conclusion
I can’t say enough positive things about this book. I think it can add an additional level of learning to the time your child normally spends playing Minecraft. The book is written in such a way that it inspires the coder to push their limits and innovate beyond the suggested basic program. The electronic interaction adds an extra level of excitement to the learning process. Who wouldn’t be excited to see actions in Minecraft lighting LEDs!

Adventures in Minecraft currently retails on Amazon for $19.07 for the printed book or $13.99 for the Kindle version.

The post Boost Your Kid’s Programming Skills With Adventures in Minecraft appeared first on GeekMom.

09 Jan 20:46

Leather + Copper Cup Organizer DIY

by A Beautiful Mess
Danielle.decesaro

Could actually do this!

Leather + Copper Cup Organizer DIY (click through for tutorial)            As much as I love making items that are pretty or cute just for the sake of aesthetics (which is a totally valid reason to make something), there's always a special satisfaction I get when I work on something that's functional as well as easy on the eye. I wanted some sort of hanging organizer for my bathroom where I could store makeup brushes and other everyday makeup items, but the whole "hanging mason jar with leather straps" look has been done exactly one million and eleven times already. Been there, seen that. Obviously the concept of storing items in cups or jars isn't new, but I wanted something a little more modern looking than mason jars that would still get the job done. I wondered if my copper Moscow mule cups would make a good organizer, but I didn't know if I wanted to use a mug with a handle as my holder. Thankfully, it didn't take much searching to find copper cups sans handles, and I was well on my way to the cute wall organizer of my dreams.

Leather + Copper Cup Organizer DIY (click through for tutorial)Supplies:
-wood board about 18"x 8" and 3/4" thick (You can make yours longer if you want more than 3 cups attached. Your local home improvement store should be able to cut you a similar size if you can't find a board already sized to your liking.)
-copper tumblers
-colored leather lace
-white semi-gloss paint
-drill
-sawtooth picture hangers
-staple gun (optional)

Leather + Copper Cup Organizer DIY (click through for tutorial)First, paint your board with a few coats of white paint. Place your cups on your board and stagger them as far apart as you like. I left more room at the top of the cups than the bottom so that they will look more evenly placed when there are items in the cups. Place a pen mark near the top of each cup on both sides so you'll know where to drill your holes. 

Leather + Copper Cup Organizer DIY (click through for tutorial)Drill each hole with a bit that's just big enough for your leather lace to go through. Make a knot at one end of your lace, and thread the lace through the hole from the back. Wrap the leather around the top of your cup as many times as you'd like, thread it through the hole on the other side of the cup, and make another knot on the back side of the board to finish. If you wrap the lace around several times, make any crisscrosses on the back side of the cup so they are out of sight (this will make your front side appear neater). 

Leather + Copper Cup Organizer DIY (click through for tutorial)Leather + Copper Cup Organizer DIY (click through for tutorial)If you have one, you can also use a staple gun to secure the beginning and end of each lace so your organizer will lay a little flatter on the wall when hung. Once all your cups are attached, you can install a few sawtooth picture hangers on the back, and your organizer will be ready to hang!

Leather + Copper Cup Organizer DIY (click through for tutorial)Leather + Copper Cup Organizer DIY (click through for tutorial)          Leather + Copper Cup Organizer DIY (click through for tutorial)            I had some items that were a little shorter than the makeup brushes (like the lip glosses), so I put a few inches of uncooked rice at the bottom of those cups to make the cup more shallow. Of course you can customize your organizer with whatever paint and cord color you like, but I think the teal is really pretty against the warm copper tones. I love that I can get a few things off my counter, free up some makeup drawer space, and add a cute detail to the wall (and it was pretty easy to make). I guess sometimes you can have it all! xo. Laura

Credits // Author and Photography: Laura Gummerman. Photos edited with A Beautiful Mess actions.

24 Dec 15:44

Give the Gift of YES!

by Dak

Coupon Book Cover

With my son’s room overflowing with toys and gadgets he’s accumulated over his short lifetime, we decided this year would be a “no toys” Christmas. Instead of toys, we wanted our friends and family to give him theme park tickets, cash, gift cards to his favorite restaurants, or subscriptions to comic books he enjoys. However, this put us in a bind for figuring out what to put under the tree for him.

One day while brainstorming how we could give him gifts without contributing to the mess that is his room, I remembered the coupon books I gave my parents as a kid. We made them in school and they were for things like vacuuming the living room, putting up the dishes, doing the laundry, and other household chores. My mom would then “redeem” her coupons for us to take over chores for the day.

Then I had a brilliant upon brilliant idea: What could be a better gift for a child than saying “yes” to something they want to do?

After completing my happy dance and patting myself on the back for my genius idea, I sat down to figure out what kinds of things my son would love to hear me say “yes” to.

A few ideas I came up with were:

  • 1 additional hour on Minecraft.
  • Get out of cleaning your room.
  • Pizza and a movie night.
  • Bedtime extension (valid for 1 hour on a weekend or 30 minutes on school night).
  • New game on the iPad (value not to exceed $______).
  • One additional hour on a game of your choice.
  • Family game night (you pick the game).
  • One family video game competition.
  • A trip to the comic book store for a book of your choice.
  • An extra dessert with dinner.
  • Dessert first at dinner.
  • Grocery store snack and drink of your choice.
  • Lunch with Mommy/Daddy at school.
  • Trip to restaurant of your choice.

Once I had my list, I remembered that my son has a very scheming mind (I wonder where he got that from…<looks away>) and realized that a set of rules would also be a good idea.

I looked back over my list and came up with a disclaimer for any of them that I thought he might try to be evil with. For instance, “pizza and movie night” has a disclaimer that it’s only valid on weekends (no staying up late on a school night in this house). I also threw in a stipulation that if a coupon required us to spend money, we have the right to refuse it on grounds of financial stability (but we also have to give him a new date that will fit our budget better). Another stipulation I threw in there was that he can’t use the coupon book when grounded. This prevents him from getting out of his punishment with a coupon.

While this list will make my son very happy, my fellow GeekMoms came up with a few additions that suit their own families.

Lisa gave a couple of suggestions based on what her girls enjoy:

  • New book…for no reason at all.
  • One day of getting to choose the station/CD we play in the car or at home.

Sarah’s suggestions suited her family and what they like:

  • Hot cocoa and extra stories in mom’s bed at bedtime. Toby loves when we do that—so much so that he asks to go to bed half an hour early so we can get more stories in.
  • A trip to the mall without siblings.
  • Pancakes without siblings (we usually do IHOP).
  • 10 extra minutes of video games.
  • An impromptu trip to the library.

Kay has some teenagers in her household and came up with a few things they would find worthy of excitement:

  • Choosing the audio book on a long car ride.
  • Getting the choice of being first for anything in a sibling situation.
  • Choosing desserts.
  • Extra time in the shower or bathroom, especially for a teen.
  • Extra time to sleep in, for a teen.
  • Chore trading or chore randomizing.
  • Picking the bedtime story.
  • DQ. DQ. DQ. (It’s an obsession at our house.)

Thanks to Rebecca Moore, we have some template coupons for you to use for your own kids’ coupon book. Just click on the image you want to use, save it to your computer, and add some text to it by hand or with your preferred program. Remember to come up with a set of rules that suit your family so that this is fun and not frustrating. I laminated my coupons and used a couple of binder rings to hold it together and keep them neat.

But wait! There’s more. Once they give you a coupon, keep it. The next time your child does something worthy of a treat, give them a coupon back to reuse. See? It goes from a Christmas gift to a reward system instantly. Cool huh?

coupon_template_kids coupon_template_time
coupon_template_toys coupon_template_food
coupon_template_minecraft coupon_template_vgame

The post Give the Gift of YES! appeared first on GeekMom.

10 Mar 12:06

Pretending to Sell SIDS Prevention

by lskenazy
Danielle.decesaro

I love the last line: And so begins the great parent freak-out, brought to us by the endlessly inventive and seemingly recession-proof Child Safety-Industrial Complex.

Readers – This is a wonderful and well-researched piece on Slate by Linda Rodriguez McRobbie, who seems to have written articles on everything that interests and outrages me, including Satanic panic  (a FANTASTIC and oh-so-disturbing story), and how junk science can put innocent people behind bars for a very long time. But this time she’s writing about high-tech baby monitors like the Mimo and Owlet, sold to parents as essential for peace of mind:

If only mom had an iron lung to attach me to, then she could be SURE I'm breathing!

If only mom had an iron lung to attach me to, then she could be SURE I’m breathing!

Linda writes:

[The American Academy of Pediatricians advises] “Avoid commercial devices marketed to reduce the risk of SIDS. … There is no evidence that these devices reduce the risk of SIDS or suffocation or that they are safe.” And: “Do not use home cardiorespiratory monitors as a strategy to reduce the risk of SIDS. … They might be of value for selected infants but should not be used routinely.” (In fact, there’s some evidence that they might not be safe: In November, monitor behemoth Angelcare voluntarily recalled 600,000 under-mattress sensor pads after two infants died of strangulation when the cord attached to the pad wrapped around their necks.)

The point is clear: Infant monitors, even the newest generation of smartphone-friendly wearable tech, do not reduce the risk of SIDS. And while the creators of devices like Mimo agree, Dr. Claire McCarthy, a pediatrician at Boston Children’s Hospital and a professor of pediatrics at Harvard Medical School, calls Mimo’s claim that it is not presenting its device as SIDS protection “disingenuous”…

Lenore here: Disingenuous is a nice word for “Hucksterism.” Not only can’t these devices prevent SIDS, they actually spread EXCESS worry by making it seem like a sleeping baby is in danger every single second. No wonder parents are so crazed with fear. NOTHING — not even a baby in a crib — is safe enough for us to let our guard down a sec.

And so begins the great parent freak-out, brought to us  by the endlessly inventive and seemingly recession-proof Child Safety-Industrial Complex.

07 Mar 16:11

Frozen Directors on How “Let It Go” Changed the Film and More

by Cindy White
"FROZEN" (Pictured) ELSA. ©2013 Disney. All Rights Reserved.

Image courtesy of Disney.

Back in September of last year, I attended an early press day at Disney Studios for its upcoming animated feature, Frozen. When I spoke with the directors, I hadn’t yet seen the film in its entirety. Although I had a sense it would be a success, no one could have predicted just how big it would be.

Frozen has now won two Academy Awards—for best animated feature and best original song—and crossed the billion-dollar mark at the box office, making it the top-grossing original animated film of all time (only the sequel Toy Story 3 has earned more). Stores can’t keep the merchandise on shelves, the soundtrack album was the first to hit number one on the Billboard 200 chart since Titanic, YouTube is filled with cover versions of “Let It Go,” and thanks to John Travolta’s now infamous mangling of her name on the Oscars telecast, Adele Dazeem, er, Idina Menzel, ironically has more name recognition than ever. It seems that the early feminist criticism I argued against in November didn’t have much of an effect after all.

With the home-video release approaching, I had another chance to speak to directors Chris Buck and Jennifer Lee (who also served as co-writer and is the first woman to have a directing credit on a Disney animated feature) during a two-day blogger event organized by the studio to promote the DVD and Blu-ray. Having seen the film this time, I had all sorts of burning new questions for them, so I jumped right in and asked about that remarkable ending. I should warn you now that from this point on there will be spoilers, so if you haven’t seen Frozen and don’t want to know any details of the plot, including the ending, you might want to come back and read the rest of this later.

Frozen Filmmakers

Directors Jennifer Lee and Chris Buck. Image courtesy of Disney.

I wondered if Buck and Lee had taken into account Disney’s rich animation legacy and the modern criticisms of it when they were developing Frozen. I asked them how that played into the story, especially Anna’s climactic act of true love for her sister, something the studio has never done before in an animated film.

“We started realizing in developing it why you had never seen it before,” Lee said. “Because it was a really hard thing to earn, and I mean that emotionally. So that when you get to that moment, it’s surprising, inevitable, and satisfying, and you’re emotionally there. It was amazing in the story process how much if you just lean too heavily one way or the other on the romantic story or the sister story it would fall apart. So I think so much of our development—for a year at least, 14 months straight—was the constant reworking and rebuilding and stripping away and starting anew, just to get to that moment. So I think that that’s why we talk about it a lot, as that was True North the whole time.”

“The idea was, how can we sort of redefine true love?” Buck explained. “What does true love mean? What have we done in the past here at the studio and how can we do something a little bit different? So everybody was on board with that idea—and it just kind of built from there.”

In the finished film, the ending works because of the depth of the love between Anna and Elsa, but that wasn’t always the case. In early versions of the story, the characters weren’t even sisters and until very late in the development process, Elsa was the villain of the piece. In the original source material, Hans Christian Andersen’s folk tale The Snow Queen, the title character is indeed a much darker figure. Lee said they hung on to that concept for so long because they loved the idea of creating an iconic Disney villain. It wasn’t until they heard a demo version of a little song called “Let It Go,” by husband and wife songwriting team Bobby Lopez and Kristen Anderson-Lopez, that the Elsa we now know and love started coming into focus.

Frozen Elsa

Image courtesy of Disney.

“We were struggling with how villainous should she be,” Buck said. “And Bobby and Kristen, they were on the journey with us, so we were all struggling together. And they came up with this song. We talked a lot about it and loved the demo. When we first heard the demo we went, ‘Wow.’ And it was Kristen Lopez singing it. She’s got a great voice. So she gave a lot of power to it, a lot of emotion. And then Jen got to rewrite.”

“The whole movie!” Lee finished with a laugh. “It was an important moment because we could feel the tug of war. What I love about animation is it’s very collaborative. But the challenge is, it’s very collaborative. There were a lot of ideas about the [character of the] snow queen for a year or two of development, and she was the villain. And then there was a new idea of moving away from that. And so you had a tug of war. It’s very important in all storytelling or in any film, you have to be able to prove your point. If you want her to not be villainous, you have to show us why we should want that if we always thought we were going in a different direction. And ‘Let It Go’ was that. It was the day when we showed everyone ‘Let It Go’ we were able to say, ‘This is the potential.’”

The songwriters contributed to the story in other ways, too. Lee recalled that Bobby Lopez was the first one to see the potential when she first suggested that Olaf the snowman could dream about seeing summer.

“I love when a character wants the opposite of what is right for them,” she said. “It’s just a fun thing. And it was just a funny idea to me. I was like, ‘What if he wants summer?’ And a lot of people were like, ‘Oh my god, that’s suicidal! No!’ And then Bobby Lopez went, ‘I think I can get behind that.’ So they wrote [the song 'In Summer']. And I think why it works for us is because it’s the only song where we stop and have fun. But if you look at it, it really says everything about innocence. It’s the impossible dream. And there’s something about it, that’s what childhood is. And every now and then, that dream comes true. So I think that’s why it ended up really working and not coming off so mean and sick.”

Frozen Anna, Olaf, and Kristoff

Image courtesy of Disney.

We got a bit of background on Olaf’s origins as well. Initially, he was part of a whole army of snowmen built by Elsa, only one of which remains in the finished film. Buck described him as “the first pancake,” as in the one you throw away. But when they hit upon the idea that young Anna and Elsa first built him when playing together as children, he became something much more.

“In ‘Let It Go,’ the first thing she does is the last thing they did, in terms of the last time she was happy,” Lee said. “Like, they built this snowman, not magical, but together—and that was her happiest moment with Anna. And then everything went bad. So when she starts ‘Let It Go,’ she goes right back to the last moment she was happy. And it was Olaf. So to us, he’s imbued with the magic of innocent love, of love that’s pure, that’s undamaged and unhurt by life.”

The subject of love came up in our conversation a lot, but it’s only half of the film’s overarching theme. When the filmmakers finally hit on the idea that Anna would represent love and all the good and bad that goes along with it, and that Elsa would represent fear, everything really fell into place.

“Fear becomes the enemy of the film,” Lee said. “That’s when we all just, I think we just knew. We felt it. We’re like, ‘Now we have what we’ve been looking for.’”

Look for Frozen now on digital download and on DVD and Blu-ray beginning March 15.

The post Frozen Directors on How “Let It Go” Changed the Film and More appeared first on GeekMom.

07 Jan 14:55

4 Ideas for Overnight Oatmeal

by A Beautiful Mess

How to make overnight oats For me, oatmeal is one of those foods that I just plain forget about. I've pretty much always loved oatmeal. It's warm, easy to customize cereal. Who doesn't love cereal? And once I learned that oatmeal can actually be quite good for you, I was even more sold on it as a breakfast option.How to make overnight oatsThe one draw back is prep time. You can easily make oatmeal on the stove top or in the oven (yay for baked oatmeal!). Neither option takes much time. But when you're the kind of person who waits until the last possible moment before leaving your house to think about breakfast, well, your options get pretty limited fast. That's why I was so excited to try out overnight oatmealHow to make overnight oats   I am happy to report overnight oats are awesome! You can quickly put this together the night before and you have a ready to go breakfast in the morning. You could easily pop this in the microwave too, if the weather is bananas cold where you live right now (we just got more snow yesterday!). Here are a few of my favorite combinations so far. Berry overnight oatmealVery Berry Oats, serves one.

2/3 cup oats
2/3 cup coconut milk (or almond milk)
1 tablespoon blueberry jam
fresh or frozen berries for the top

The night before combine the first three ingredients in a small jar. Give it a good shake with the lid on. Place in the refrigerator. This variation isn't very sweet, the only sugar being whatever is in your particular blueberry jam (you could use any fruit jam you prefer).Banana nut overnight oatsBanana Nut Oats, serves one.

2/3 cup oats
2/3 cup whole milk (skim or 2% is fine too)
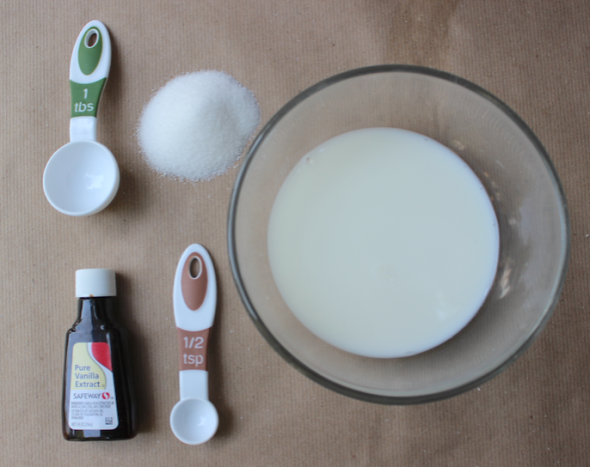
1/8 teaspoon vanilla extract
1 tablespoon pure maple syrup
banana slices and chopped pecans

The night before combine the first four ingredients in a small jar. Give it a good shake with the lid on. Place in the refrigerator. Top with bananas and pecans the next morning just before eating.Pumpkin spice overnight oatsPumpkin Spice Oats, serves one.

2/3 cup oats
2/3 cup whole milk (skim or 2% is fine too)
2 tablespoons pumpkin puree
1/8 teaspoon vanilla extract
a big pinch of cinnamon
a small pinch of nutmeg
1 tablespoon pure maple syrup
granola for the top

The night before combine the first seven ingredients in a small jar. Give it a good shake with the lid on. Place in the refrigerator. In the morning top with crunchy granola. Oats on oats. Then, go ahead, it's good I tell you. :)Overnight oats with coconut milkTropical Oats, serves one. (Exotic sounding, no?)

2/3 cups oats
2/3 cup coconut milk (or almond milk)
1 tablespoon brown sugar
sliced mango
chopped almonds

The night before combine the first three ingredients in a small jar. Give it a good shake with the lid on. Place in the refrigerator. In the morning top with sliced mango and chopped almonds. I also think a little toasted coconut would be wonderful in this one. The morning I made this I found I did not have any coconut left though. Oops. How to make overnight oats  Before adding the toppings in the morning be sure to give the oats a taste and add a little more sweetener or even a pinch of sea salt to boost the flavor. Try it! You're gonna love it. xo. Emma

Credits // Author and Photography: Emma Chapman

24 Oct 19:06

Mario Wedding Ideas

by Starrley

About to get married, and looking for some Mario inspiration?

via[weddingomania]

02 Oct 12:29

Hacker Scouts: Encouraging Kids to Hack!

by Cristen Pantano
Danielle.decesaro

This is great!

Hacker Scout Badge Circuit encourages kids to seek out projects based on their own interests.

Samantha Cook* is an artist, an educator, a hacker, a Maker, a mother, and the Founder of Hacker Scouts. Hacker Scouts began a year ago in Oakland, CA, and is now a national non-profit that encourages children to build, hack, and create on their own terms. The program’s main goal is to give children the necessary skill set to be able to follow through on projects of their own interest and design.

I learned about Hacker Scouts a few weeks ago after the launch of its current KickStarter, which is to raise money to develop a national hacker scouts headquarter in Oakland, California. The kickstarter has 12 days to go, with having earned, as of this writing, $19, 921 of their $35,000 goal.

The thing about Hacker Scouts that stands out, and resonates with children, is that while there are many STEM kits, online classes, and school programs for children, most focus on a particular finished product. Many kits and classes have children follow a set of directions to complete a particular project, not allowing for innovation or freedom. Hacker Scouts focuses on giving children a set of skills in the STEAM areas, and then letting the children decide what they want to do with that skill set.

While that may sound like complete mayhem, there is a successful method to this Making madness. Children are first guided through the building of an Arduino circuit. This gives the kids a base set of skills including soldering, coding, and even sewing. Once this skill set is achieved, kids are free to move on. They can come to Open Lab, where mentors and experts are ready to help them with any project that they bring in. They can also chose from available kits or organized projects. The outcome of the kits and projects is up to the child. No finished product is “wrong.” The emphasis is skill and confidence building.

Young Hacker Scouts working on their Arduino circuits. Used with permission from Hacker Scouts.

I wanted to learn more about the program, and its evolution, so I talked with Founder Samantha Cook this past weekend. Here are some highlights from our chat.

GeekMom: Could you describe HackerScouts for those unfamiliar with Hacker Spaces, the Hacker Movement, and your organization?

Samantha Cook: Hacker Scouts is a nonprofit organization focused on STEAM education and skill building for kids and families. Hacking is a form of modification—it is taking something and changing it to fit your needs. My husband and I are part of the Maker community in Oakland, and I have a background in education. We saw a need for a new approach to introduce, and support, making and hacking, especially with children. We believe that the next generation needs to go beyond making, and hack their own education. They need to be able to adapt to new technology, think in creative and innovative ways, and value collaboration and sustainability.

We accomplish this through programs that are designed to support intellectual and social development, while allowing kids to build confidence and control their education. Currently we have three programs: Open Lab (all ages, open to the public), Guild (weekly group, ages 8-teen), and Sparks (weekly group, ages 4-7). We are also starting to add modifications to our programs, new programs, and workshops that will support teachers in integrating STEAM and making into the classroom. In a year, we have gone from one location (Oakland) to over 30 nationally and we are growing! We also publish all of our programs open source online.

“We believe that the next generation needs to go beyond making, and hack their own education.”
Image used with permission from Hacker Scouts.

GM: Your formal educational background is in Art History. Tell me a bit about your journey to becoming a Hacker.

SC: I studied Humanities, Art History, and Archaeology as an undergraduate, and then went on to get a Masters in Museum Education. I started teaching when I was 16 and I have always been interested in how people learn. Museums ended up being a wonderful vehicle through which I could really explore informal learning. I was not really interested in technology before I met my husband, but, I married a geek and it was inevitable. I am now learning new skills and concepts. It is empowering and exciting. I think that is how many of the families who come to us feel when they learn something new. So I understand, and it is my pleasure to be a catalyst to that experience for them.

GM: What prompted you to start Hacker Scouts?

SC: After my second son was born, I decided to work freelance for a while in Washington, DC, with a variety of museums until we moved back to California. While freelancing, I taught in schools. I saw how the children loved the hands on learning that I brought into the schools, and I saw that schools were not encouraging enough self-directed learning for kids. I now have three kids and we have been involved in a variety of programs and classes that touched on STEM concepts and skills. However, they never gave a thorough education, they never built community, and they never focused on what each of my kids wanted out of the experience. So, I decided it was time there was a program available to all kids that did.

GM: What do you think it is about HackerScouts that has gotten kids so excited?

SC: It is not hard to get kids excited about making. What is different about us is our emphasis on mentoring (both adult to kid mentorship and peer to peer mentorship) and the ability to individualize our program to each kid’s personal goals. We provide a clear structure with activities meant to teach real, relevant skills that kids can use for their own ideas, their own dream projects. We don’t ever ask if it’s possible, we figure out how to get them there and support them, empower them. We don’t want them to simply follow directions or to only understand a concept or skill in a specific context, so we built an approach that would allow them to control their learning and make each decision connected to their personal vision. That is not an experience most kids get on a regular basis.

GM: Tell us a bit about the current Kickstarter.

SC: Our Kickstarter is so important. We have been partnered with a space in Oakland for a year but we have outgrown it, it is not ideal for kids and families, and our access to it is extremely limited. This Kickstarter will not only help us to be able to expand our programs locally, but it will give us the equipment and materials to build more programs, activities, and badges that we then release open source to everyone else. So, while it is located in Oakland, it benefits anyone who is a part of our program anywhere, or who uses any of our online resources. We offer everything we do for free or low cost. In order to keep doing that, we now need the support of our community, or anyone who thinks this kind of education is relevant and important. We are also documenting the process of building a hackerspace for kids and families, which is a unique kind of space, so that we can help others who want to do the same.

At the end of our conversation, I asked Samantha how she balances homeschooling her three young children and working full time for Hacker Scouts. She told me that mornings are family time. No phone calls, no email. She focuses completely on her kids as they learn together. The afternoons are open for work. If her kids are playing and occupied, she will open her laptop. She will also tell her children when she needs time to work from home. There are two other factors that really helped her success: her community, and the fact that she has created a family-friendly work space. Her friends will drive her kids to afternoon classes, park meet-ups, or field trips if she needs a few hours of uninterrupted work time. Additionally, her children come with her to work and are very involved in Hacker Scouts. Her eldest is a mentor, her middle child helps the youngest Hacker Scouts build paper rockets, and her four-year-old has even found ways to help out. The kids can also hack or create art while she is working and they get to test out project prototypes.

If you are interested in the program, check out their website to see if one of the now 30 branches is local to you. If you yourself are inspired, you can contact Samantha and her colleagues to find out how to start a local chapter yourself.

*Note: Samantha Cook is an Occasional Contributor to GeekMom.

The post Hacker Scouts: Encouraging Kids to Hack! appeared first on GeekMom.

13 Sep 18:13

On Breaking, or Not Breaking, the Harry Potter Spell

by Cristen Pantano
Danielle.decesaro

I feel like maybe this fuels my own obsession with rereading them.

One of the many dog eared copies of Harry Potter strewn about our home. Photo: Cristen Pantano

“Oh Potter, you rotter, what have you done?”

Last November my husband began reading Harry Potter and the Sorcerer’s Stone to our son. After a few chapters, they were both hooked.  Within a few weeks, they were on to book two.

One weekend our son told us that he had been thinking about some things from the first book and wanted to know if he could reread it to himself. This is where it all began.

He reread the first two books, and was then frustrated with the pace at which my husband was reading book three aloud to him. We told him that he could go on and read it to himself.  He was enchanted by Harry and Hogwarts, and there was no stopping him.

When it was time for book seven he dove right in, but,  he put the book down after about three chapters. He has been elusive in his reasons for not finishing, so we haven’t pressed. I’m thinking he was scared; others have suggested that he probably doesn’t want it to end.

When he put book seven down, we thought that after almost eight months of nonstop Harry Potter, he would read something else. We couldn’t have been more wrong.

Each day he picked one of the Harry Potter books and carried it around all day long. He would read various chapters and passages at random, then decided to start at book one again. The books have become an additional appendage on his body. They are dog-eared, stained, tattered, and strewn about the house.

At first I thought this was great, he was reading and loving what he was reading. But then, as the calendar moved toward September it hit me that he hasn’t read much other than Harry Potter for almost a year. I asked friends for suggestions: What did their kids read after Harry Potter?

Percy Jackson was a fail, but children’s Greek mythology books were a hit. The Wonderful Wizard of Oz, score! Meanwhile, Encyclopedia Brown and The Hardy Boys are collecting dust as Harry Potter continues to log many miles.

I decided to ask my fellow GeekMoms if their children had done this with Harry Potter, and whether I should just let it go, or encourage other books. Many responded that their kids had a similar experience with Harry Potter. Some let it go, and some encouraged one other book in between each Harry Potter book. Many also shared with me their own book obsessions. There were also a few responses that stopped me in my tracks.

GeekMom Samantha had this to say, “…there is clearly something he is working out, something he is grappling with that the books are providing for him. Something that only reading them over and over will give him. Eventually, he will move on when he comes to his moment of clarity or closure.”

GeekMom Ariane posed this succinct question, “What’s your concern with this behavior?”

What was my concern?  Honestly, I still can’t  completely answer that question. I guess I would prefer that he read a variety of books.  Maybe I feel that that is what he is “supposed” to do? Maybe I fear an unhealthy obsession? I seriously don’t know. I don’t even know if I am that concerned, or if it’s just that I think that maybe I should be. Ariane stumped me.

With all of the GeekMom responses in mind, and my inability to pinpoint what my concerns were, we decided to let it go but keep other new books available to him.

Last weekend we visited our favorite local bookstore. The owners chatted with our son and helped him pick out some great new books for us to read to him, and for him to read on his own. He has read one and the others are sitting on the coffee table, waiting…

I have asked him many times why he keeps reading the books. He usually just shrugs and keeps on reading. Today I told him that I was going to write about his love for Harry Potter. This time he looked up and said, “I just don’t want it to end.”  With GeekMom Sam’s words in my head, I told him that as long as he keeps reading them, the adventure will continue.

The post On Breaking, or Not Breaking, the Harry Potter Spell appeared first on GeekMom.

09 Sep 16:56

From a distance…

by Jenny the bloggess

Conversation Victor and I had while passing by a frozen yogurt shop which specializes in having new weird flavors every week:

me:  Holy shit.  Does that say “Fucked Up Green Apple?”  Is that their new flavor?

Victor:  Of course not.  It’s…wait…does it say Fucked Up Green Apple?

me: Because that would be kind of fucked up, right?  And aptly named, I guess.

And of course then we had to actually go in to take a picture of the Fucked Up Green Apple.

Ah. Never mind then.

I’d like to think that everyone passing by had the same reaction as us, but I suspect this was some sort of yogurt-based Rorschach test we both failed.  But we failed it together, so it’s nice to do something as a couple.  I say that’s a win.  Victor says it’s a sign that I’m contagious.  It’s possible we’re both right.

*************

And in other news, it’s Sunday, which means its time for python fights!*

What you missed in my shop (tentatively called “Eight pounds of uncut cocaine” so that your credit card bill will be more interesting.):

What you missed on the internets:

This week on shit-I-didn’t-come-up-with-but-wish-I-did-because-it’s-kind-of-awesome:

This weeks wrap-up sponsored by the fabulous women behind “Female Moments” a series of short, funny videos reflecting the everyday moments in the average woman’s life. It’s focused on women’s “issues,” but the series is relatable to both men and women as often times men are a witness to (or an active participant in) a woman’s “moments”…whether they like it or not.  You can check it out here.

*I apologize for the lack of python fights.  I just wanted to see if you were paying attention.

26 Aug 12:54

I blame Steve Jobs for this.

by Jenny the bloggess

A series of texts I sent to my friend Maile after the rotten wood on our deck was replaced:

To her credit, Maile was unflappable and assumed that my deck, dock and cock were all equally well-crafted.

PS.  After you fuck up two texts your phone should just automatically shut off to save you from yourself.  Just a suggestion, Apple.

 *******************

And in less slightly-confusing news, it’s time for this week’s wrap-up:

What you missed in my shop (tentatively called “Eight pounds of uncut cocaine” so that your credit card bill will be more interesting.):

This week’s wrap-up is sponsored by my friend Marie, creator of Misanthropista.  She’s sort of a bad-ass and most of her emails end with “Oh, bite me” or “What the fuck are you looking at?” but deep down she has a heart of gold and will teach you all about sexting.  You should check her out. Bring donuts.

26 Aug 12:53

3D Mario Pirhana Plant Painting

by Lord Libidan

Via [Deviantart]

21 Aug 12:33

The DIY Tailor: How to Hem Jeans Like a Pro

Danielle.decesaro

Hemming jeans.

created at: 08/19/2013

There are two basic principles to the ManMade approach to style and dress: fit is everything, and buy high-quality, universal items that will last. In order to help you hold on to those investment items, and make sure they suit you as best they can, ManMade is happy to present our latest series: The DIY Tailor. This summer and fall, professional tailor and alteration specialist Danni Trester will teach us some basic sewing principles and easy DIY repairs that every guy should … read more

12 Aug 23:11

Mushrooms & Red Wine Pasta

by elsiecake

Easy homemade dinners via A Beautiful Mess  I'd like to say that every dinner I make is a perfectly thought out and crafted meal. But if I'm being honest (and why not?) I'd have to admit that I love meals that can be made with items I usually have on hand. Going to the grocery store after a long day can feel like such a chore. And some nights, just for fun (and because I'm cheap) I don't want to buy lots of additional ingredients. It's like a game.Easy homemade dinners via A Beautiful MessAnd besides, sometimes a simple meal is best. As long as you have great flavors, good company and and only one or two dishes to clean afterward (I hate doing dishes!), I'd say that's an awesome dinner. And that's what this is a simple but delicious dinner.MushroomsMushrooms & Red Wine Pasta, serves 2-3.

1/2 lb. uncooked pasta (any kind you have/prefer)
16 oz. mushrooms
1 tablespoon olive oil
1 tablespoon butter
2 cloves minced garlic
1/3 cup red wine
1/3 cup vegetable stock
2 tablespoons balsamic vinegar
salt + pepper to taste
goat cheese (or feta) & chopped parsley to garnish 

Begin cooking the pasta in boiling, salted water until al dente. In the meantime scrub the mushrooms. Slice thin and set aside.Simple homemade dinner ideasIn a large pan or skillet heat the oil and butter together. Saute the minced garlic for 1 minute until very fragrant. Add in the mushrooms, wine and stock. Cook until the liquid has reduced and the mushrooms are cooked through (6-8 minutes). Add in the cooked (and drained) pasta. Stir in the balsamic vinegar and continue cooking so everything gets coated in the wine juice. Forgive me for saying wine juice, that sounds kind of weird. Taste and add salt + pepper if needed.Easy homemade dinners via A Beautiful Mess Serve hot topped with goat cheese and fresh parsley. Think of this as a generous garnish, so add as much cheese as you like. :) Enjoy! xo. Emma 

26 Jul 13:57

Bioshock Book

by Lord Libidan

This is quite frankly one of the best book conversions I’ve ever seen.

Based on Bioshock the artist has built a new front and back cover, and filled ALL the pages with Bioshock goodness. You seriously have to check out the link to see how she created this master peice, and see the pages inside.

Via [Flickr]

26 Jul 13:54

I know you need caffeine sometimes but don’t even fucking think...


I know you need caffeine sometimes but don’t even fucking think about reaching for a RedBull or 5-Hour Energy. I will slap that shit out of your hand so quick you won’t know whatthefuck happened. Energy drinks are toxic and fucking expensive. Money doesn’t grow on trees; coffee does. Don’t waste your time in a fucking line and spend your hard earned cash on something you can make while you’re sleeping. Cold brewed coffee is also way less acidic, making this easier on your stomach. SO GRAB A CUP OF THIS SIMPLE SHIT AND SEIZE THE GODDAMN DAY.

COLD BREWED COFFEE

¾ cup ground coffee (whatever you got is fine)

3 ½ cups cold water

Put the coffee grounds in the bottom of a large container. If you like coffee with some fucking bite, add another ¼ cup of grounds. Slowly pour the water over the grounds and stir. Make sure all the grounds get wet because sometimes there are weird dry pockets and then you’re just wasting fucking coffee. Let this sit in the fridge (or on your counter if its not too fucking hot in your place) overnight or for at least 10 hours. In the morning, strain that shit using a mesh strainer. You know, the ones that look like a screen door. If you have the time, strain one more time through a paper coffee filter to get out the last of the grounds (or don’t and just deal with a couple rogue grounds in your drink). Serve over ice and with some almond milk if that’s your thing.

Makes about 3 ½ cups of coffee (triple this recipe and keep the extra in the fridge all week)

11 Jul 12:29

Men's Style: How Clothes Should Fit

created at: 07/10/2013

I just stumbled across this cool new site called HowClothesShouldFit.com, a guy's guide to using clothing fit to look your best. What's interesting here, at least to me, is … read more

08 Jul 12:53

DIY HOME: BEDSIDE TABLES

by Geneva Vanderzeil

Recently an Australian magazine got in touch wanting to know what my bedroom looked like and if I was interested in being part of an article about the bedrooms of Australia creatives. My room is in many ways quite minimalist and nice, but full disclosure, it’s barely bigger than the bed that sits in the middle of it. Let’s remember I live in Hong Kong – the most expen$ive rent in the world! Luckily, having your room photographed is a great incentive to investing energy in creating a more inviting space (complete with vignette style nooks – more on that later), and learning to get around the small size was a big part of this. Scouring the internet for boudoir inspiration, I was instantly taken with various DIYed bedside tables, much more exciting than the stool that was doing that job up until recently. Personally, I’m loving the idea of a ladder as a bedside table, a bit of a balancing act required but oh so space efficient (yay!).

diy bedside table a pair and a spare 2 diy bedside table a pair and a spare 3 diy bedside table a pair and a spare

Images: here, here, here, here, here, here, here

04 Jul 00:33

Ten Geeked Up KitchenAid Mixers

by Ruth Suehle

A kitchen geek is lost without her KitchenAid. Sometimes I wish I had two or three of them, but I settle for having two bowls and multiple attachments for everything from casing sausage to extruding pasta. What I don’t have is an awesome design on it. I should work on that. Meanwhile, I’ll gaze at these:

If I could have made my Mass Effect costume out of batter instead of foam, this would have come in handy:

KitchenAid Brasil produced this special design:

Image: KitchenAid Brasil

Image: KitchenAid Brasil

Alas, most of us don’t live in Brazil. But you can buy decals for your KitchenAid designed for mixers that are blue. white, or red.

    Image: Alan Chris Ltd.

Image: Alan Chris Ltd.

You can always go hand-painted if you’re a committed DIY geek, but the easiest route is vinyl decals, and Etsy is a treasure trove of them. Click the names in the captions to go to their stores.

The KitchenAid’s shape practically screams Bullet Bill from Mario, doesn’t it? Mustard Seed Dream on Etsy makes a white vinyl sheet that when applied to your black KitchenAid looks like this:

I think if you put these TARDIS decals on your mixer, you’re obligated to make Ood rolls with it.

Or there’s the Batman option:

For cupcake pirates, wandering the seven kitchens looking for tiny dessert booty:

And finally, though not strictly geeky in the way the rest of these are, I couldn’t resist adding this:

The post Ten Geeked Up KitchenAid Mixers appeared first on GeekMom.

04 Jul 00:31

DIY Delicious: Homemade Vanilla Ice Cream

by Kristen

DIY Homemade ice cream Glitter N GlueI’m a Texas girl… born and raised in Houston. About an hour outside of Houston in a small town called Brenham is the Blue Bell Ice Cream Creamery. This creamery produces the BEST ice cream IN THE WORLD! Yes, I said it… BLUE BELL ICE CREAM IS THE BEST ICE CREAM IN THE WORLD! (lol… I know all my East Coast/ Turkey Hill Creamery lovers will disagree )
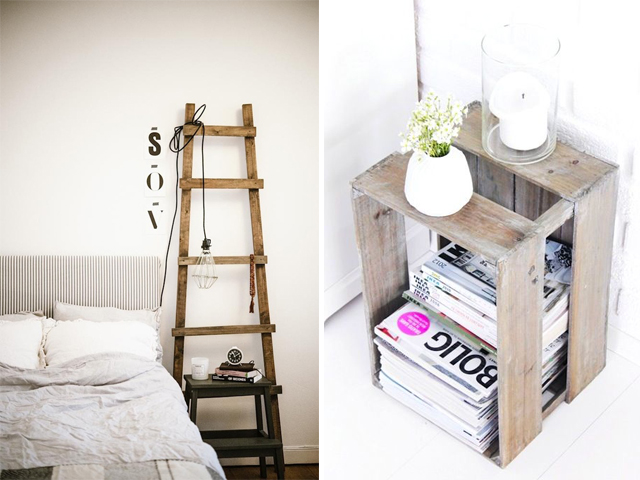
Growing up we’d make an annual field trip to visit the creamery.  They would give us a tour of the grounds and show us how they made all their yummy flavors. They’d also show us how we could make our own ice cream at home. Recently with all the extreme LA heat, I’ve been craving some homemade ice cream. Below is a yummy ice cream recipe that’s sure to be a delicious DIY treat at your next Summer gathering and you likely already have most of the ingredients in your pantry.

Shopping List: Gallon size resealable plastic bags, quart size resealable plastic bags, whole milk, sugar, vanilla extract, sea salt, ice

DIY Homemade ice cream Glitter N Glue Add 2 tablespoons of sugar, 1/2 a cup of whole milk and 1/2 a teaspoon of vanilla extract to a quart size resealable plastic bag

DIY Glitter N Glue Homemade Ice CreamAdd 6 tablespoons of sea salt and 3 large scoops of ice to a gallon size plastic bag. Insert your sealed quart size bag into your gallon ice bag, seal it and shake for about 7 to 10 minutes.

Note: The bag of ice is very cold, obviously! Wear a pair of winter gloves to protect your hands while shaking up your ice cream.

DIY Glitter N Glue Homemade Ice CreamA homemade ice cream DIY station adds an interactive touch to your 4th of July party! Add a some red and blue toppings to your station and allow everyone to personalize their ice cream. Fresh strawberries and blueberries are healthy topping alternative, but sprinkles and chocolate syrup are always a treat!

DIY Glitter N Glue Homemade Ice CreamClick here for a fun video tutorial from Howcast.


20 Jun 17:39

In my defense, since I wrote about it it’s technically considered “work”.

by Jenny the bloggess
Danielle.decesaro

This is why my cat doesn't like me too.

A series of emails between me and my husband:

me:  Hey.  Wanna see what I’m gonna look like when I’m old?

Victor: Is that a hat? DO NOT BUY ANOTHER HAT. We live in Texas, for God’s sake.

me:  It’s not a “hat”, Victor.  You’re insulting all three of us here.

Victor:  …Three?

me: 

Victor: This is why she doesn’t come to you when you call her.

me: She doesn’t come because she’s a cat.  She fucking loves this.  She feels useful. For once.

Victor:  Did you actually need something or…?

me:  I did have one serious question.  Does this cat make me look fat?

Victor: Stop emailing me cat pictures.

me: “Said no one ever.” Hey, I need something.

Victor: STOP EMAILING ME. I’M WORKING.

me: AND I NEED SOME BANDAIDS. Like, a lot of bandaids. And some iodine.

Victor: I’m blocking this email address.