It’s one of the first challenges with any modular – you get a wild banging groove, but then… you’re stuck with it. One new video tutorial suggests a way to arrange your modular with Ableton Live and free VCV Rack software.
Live’s real-time arrangement and triggering features have always been part of its appeal – something exploited by everyone from live electronic musicians to those triggering sounds for radio and theater. Here, it’s a great way to take your cabled modular concoctions and actually turn them into a song structure or live performance. But it may not be immediately obvious to beginners how to go about it.
The inspiring VCV Rack ideas comes to the rescue here. It’s been updated for the just-release VCV Rack 1.0.
Now the audio advice here is actually soon to become outdated – Bridge will go away later this year, and you’ll be able to run Rack as a plug-in. But you can actually skip that part if you want to go another route, and just let Rack control your audio interface and send MIDI from Ableton Live.
(You could also apply this on Linux easily, with Bitwig Studio in place of Live – think I’ll try that myself, in fact.)
But the basic idea here is, run MIDI from Live to Rack, and use clips and scenes to trigger changes. There are some clever ideas about how to map control via CV and MIDI, and then the really important step is adding a physical controller, so you can get your hands on the live performance and improvise.
Note that while this example uses VCV Rack, you could apply the same ideas to any modular with MIDI input – or even mix in a partial or complete hardware set with the same rig. And watching this I also imagine some other ideas for where to go; this is by definition an open-ended process. Have a look:
Have you got another way of working? We’d love to hear about it in comments.
By the way, if you’re at SONAR this week, I’ll be giving a workshop with VCV Rack on Friday. (You need a delegate pass / pre-registration. But of course I’ll share some of how it goes here on CDM soon.)
In this tutorial I'll show you how to create a complex symmetrical pattern using Adobe Illustrator together with the additional tools of MirrorMe, allowing you to create instant symmetry, the Smart Remove Brush, enabling you to remove excess points with one stroke, and ColliderScribe, giving you precision and speed when placing objects adjacently. So, let's start getting more familiar with some of the high-tech aspects in vector graphics!
Sponsored Content
This content was commissioned by Astute Graphics and was written and/or edited by the Tuts+ team. Our aim with sponsored content is to publish relevant and objective tutorials, case studies, and inspirational interviews that offer genuine educational value to our readers and enable us to fund the creation of more useful content.
1. Install Required Plug-ins and Create a New Document
In this tutorial we'll be using plug-ins from Astute Graphics which will really help to speed up and simplify our workflow. Download a 14 day free trial for MirrorMe, ColliderScribe, and VectorScribe plug-ins. These brief videos cover the installation, licensing, and activation process. As we go through the tutorial we'll be learning how various tools within these plug-ins can help us in our design process.
Run Adobe Illustrator, then hit Control-N to create a new document. In the opened dialog box, set the parameters of the artboard and choose the color mode depending on how you are going to use your artwork. If you're planning to print your pattern choose the CMYK color mode, but if you want to publish your artwork solely on the web then choose the RGB color mode.
2. Working with MirrorMe
Step 1
The MirrorMe plug-in is designed to literally mirror your vector artwork instantly. You can mirror your artwork on either just one axis or multiple (up to 72) axes. Once you've installed the plug-in, you will see the tool icon appear in the Tools panel. To open the plug-in's panel, go to Window > MirrorMe > MirrorMe panel.
Take the MirrorMe Tool and click on the artboard where the axis of symmetry will be. This will produce the annotation system. Now you can move the axes of symmetry and change their angle by moving the center of symmetry and rotating the axes using MirrorMe.
In the MirrorMe panel you can set the exact coordinates of the center of symmetry together with the angle and number of axes. Set the angle at 90 degrees with 4 axes of symmetry.
Step 2
Click on Apply to Layer in the annotation system or in the MirrorMe panel.
By doing this all the objects you created in the active sector will now instantly appear in the other sectors. The active sector is the area where we'll be drawing and is marked with two triangles on the axes. Objects created in other sectors will be ignored by the plug-in.
3. Create the Basis of the Pattern Using the Extend Path Tool
Step 1
Using the Ellipse Tool (L) create a circle in the active sector. This circle should not intersect the axis of symmetry. Take the Scissors Tool (C) and cut it at the points A and B.
Then delete this segment of the circle.
Step 2
Continue the path from point A. As you will be aware, it's quite tricky to avoid breaking the curvature of an adjacent segment when you're using the Pen Tool (P). This is where the Extend Path Tool, one of the tools in the VectorScribe2 plug-in, really helps out as it allows you to trim or extend the path along a certain trajectory. After installing the plug-in the tools appear on the Tools panel. Click on the PathScribe Tool icon and select the Extend Path Tool in the opened sub-tools panel.
When clicking on point A you can see the annotation showing the trajectory you can extend the path at.
Step 3
There are four extension modes: the Single Bezier, Constant Radius, Straight, and Spiral. You can switch between these modes by pressing the E shortcut while holding the mouse button. You can also choose the extension mode in the Extend Path Preferences dialog window; to open it, click on the Return/Enter button or double-click on the Extend Path Tool icon in the Tools panel. Choose Constant Radius and Use Fixed Radius in this window.
Now the annotation shows us the path in the shape of a circular arc.
To reduce the radius use the Left Arrow key, and to increase it use the Right Arrow key.
Increase the radius and continue the path by moving the pointer of the tool along the annotation and crossing the axis of symmetry.
When the path crosses the axis of symmetry, it connects with its reflection.
Step 4
Create a curved segment using the Pen Tool (P).
This time I'm going to extend it along a spiral. Choose the Spiral extension mode and click on the endpoint.
As with the Constant Radius mode we can change the radius of the spiral using the Left and Right Arrow keys. In addition we can change the Winding Constant of the spiral using the Up Arrow key to increase and the Down Arrow key to decrease this parameter.
When the shape is how you want it, you then extend the path.
Step 5
Continue filling the active sector with the pattern's elements by creating the beginnings of the paths with the Pen Tool (P) and extending them using the Extend Path Tool.
Thanks to the Extend Path Tool it's easy to create a spiral continuation of the path and to fill the spaces between other paths exactly how you want to. It helps you avoid unplanned intersections and also saves tedious editing. I don't think it would be easy doing this with the standard Spiral Tool as it doesn't allow you to smoothly continue a path adding a spiral at the end. MirrorMe gives you an instant reflection of the paths you've created so that you have visual control over the entire pattern as you're actually creating it.
4. Convert Uniform Paths into Variable Width Paths
Step 1
Change the width of the paths so that it gradually increases from the start-point to the endpoint. Select one of the paths and then apply to it the triangular profile in the Stroke panel. Here you can also control its width.
Step 2
Use the Width Tool (Shift-W) to control the width of the path locally. Bring the pointer of the tool closer to the desired point. Click-drag will change its width.
Double-clicking in the selected location will open a dialog box where you can set the exact values of the width.
Now change the width of all the available paths.
5. Delete Excess Points Using the Smart Remove Brush Tool
Step 1
Select all the paths, then go to Object > Path > Outline Stroke. As you can see, the resulting objects have a large amount of excess points. In fact my pattern contains a massive 2263 points!
The good news is that we can quickly remove most of them by using the Smart Remove Brush Tool which is from the VectorScribe2 plug-in. Click on the PathScribe Tool icon and in the opened sub-tools panel select the Smart Remove Brush Tool.
Open the Smart Remove Brush Tool Preferences window by pressing the Return/Enter key. Set the brush size, tick Only Remove Points if Path Changes Within Tolerance and set the tolerance value to 15.
Now sweep the brush by clicking the mouse button where the excess points are. The red line of the annotation shows us what shape the path will be after deleting the points. Notice how many points we removed with just one sweep of the brush without significantly changing the shape of the path! These changes happened within the tolerance that we set.
Step 2
You can continue deleting points on the selected segment by disabling the option Only Remove Points if Path Changes Within Tolerance. In this case, all the points that you've swept over with the brush will be removed. This means that you can have complete control over which points to delete and keep to keep the path shape exactly as you want it. I think both of these methods should be applied so that you first use the tolerance measure to remove the majority of points on all the paths which we could call "roughing". Then disable the tolerance measure and work on each path individually with the brush.
The Smart Remove Brush Tool has quickly cleaned up my pattern. Instead of having 2263 points I now only have 207 points, which is 11 times less than before the editing! Even more impressive is that this only took me three minutes!
6. Precise Positioning of Pattern Elements with the ColliderScribe plug-in
Step 1
ColliderScribe is a simple toolset for Adobe Illustrator that enables you to position shapes accurately by placing any object precisely next to another when it touches. After installing the plug-in, you can find new tools in the Selection Tool (V) group in the Tools panel. These are the Snap To Collisions Tool and the Rotate At Collisions Tool.
Create a circle using the Ellipse Tool (L).
To demonstrate the tool's performance take the Snap To Collisions Tool and click anywhere on the circle and drag it to the adjacent object. When the objects touch there will be a snapping action, as if real physical bodies are colliding. A red collision marker will appear at the tangent point.
You can move objects one around another without breaking their contact if maintained within the Snap Tolerance range.
The Snap Tolerance value is set in the Snap To Collisions Preferences dialog window. To open it, click on the Return/Enter key or double-click the tool’s icon.
Step 2
The Rotate At Collisions Tool allows you not only to collide shapes, but also to rotate the selected object around the path of another one. When using the Rotate At Collisions Tool you must capture the object at the edge of the path.
Using these two tools, I've been able to accurately position existing and new elements in the pattern. For example, at the end of the spiral elements I've placed a circle using the Rotate At Collisions Tool.
Now you can remove unwanted parts of the pattern using the Shape Builder Tool (Shift-M).
After doing this the pattern elements appear as shown in the image below.
Step 3
Let's make a few simple elements using the Pen Tool (P). These objects will fill empty spaces we have.
Select all the created objects, and then click on Unite in the Pathfinder panel.
7. Color and Refine the Pattern
Step 1
Select all the objects and fill them with a light brown color R=213 G=159 B=76.
In the bottom part of the pattern elements create curved paths using the Pen Tool (P) without a fill and with the brown color stroke R=180 G=97 B=42. Choose Width Profile 1 in the Stroke panel for these paths. In this panel you can also adjust the width of the stroke.
We've now created shadows on the pattern giving more depth.
Step 2
The shape of some shadows may be more complex. For these, create an object with a brown color fill and no stroke as shown below.
Remove the part of the shadow that goes beyond the pattern's border. Select the shadow and the pattern, take the Shape Builder Tool (Shift-M), then holding the Option/Alt, click on the part of the shadow that we are going to remove.
Using these steps, continue creating shadows on all the elements of the pattern within the active sector of MirrorMe.
Step 3
The technique we're going to use to create highlights is the same as when we created shadows. But this time, we're going to use the color yellow R=246 G=234 B=109 for the fill and stroke. Place highlights at the top of the pattern elements.
Now that all the elements of the pattern are ready, click on the Remove Axes button in the MirrorMe panel. This will exit the symmetry mode.
Step 4
Take the Rectangle Tool (M) and create a rectangle filled with the color brown R=77 G=37 B=28. The size of the rectangle should correspond to the size of your artboard.
Lock this object in the Layers panel.
Step 5
Group up all the objects of the pattern (Control-G). Move the pattern in the upper left corner of the artboard, holding Option/Alt and Shift. Doing this will double up the pattern.
Lock the group with a pattern in the center of artboard in the Layers panel.
Step 6
Select the upper pattern, then take the MirrorMe Tool and set the center of symmetry in the center of the artboard. Choose two axes of symmetry in the MirrorMe panel, then click on the Apply to Selection in the annotation system.
Step 7
Using the Rectangle Tool (M), create a rectangle with the vertices coinciding with the centers of the patterns on the edges of the artboard.
Select these patterns and the rectangle, then go to Object > Clipping Mask > Make.
Congratulations! You're Done.
Now you can use this pattern in your future projects.
Phenakistoscopes, praxinoscopes, and zoetropes, oh my! Richard Balzer, a 69-year-old New York native, has cultivated a remarkable online museum of early animations and optical toys of the 18th and 19th centuries.
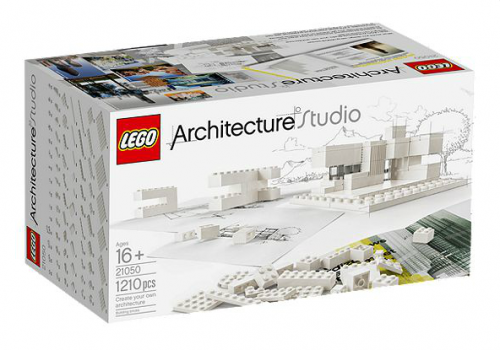
С 1 августа стартовала продажа LEGO Architecture Studio. Набор включает в себя 1210 белых и прозрачных блоков в 73 разновидностях и мотивирует людей, интересующихся архитектурой создавать свои собственные шедевры. Помимо прочего в комплект входит 272 страничная книга с информацией об архитектурных концепциях и о том, что такое масштаб, симметрия, плотность, пространство и прочее.
Комплект LEGO Architecture Studio можно купить за $150....
1 июля Илья Красильщик уходит с поста главного редактора журнала «Афиша», который он занимал ровно пять лет. Редакцию возглавит его заместитель Александр Горбачев.
Thomas Mangold is an award-winning digital artist who often combines 3D models and photography to create stunning compositions. In this article, we will take a look at some of our favorite works from his portfolio.
Когда вы начинаете думать о том, что вы едите, то окажется, что 90% вашей корзинки в супермаркете нужно вывалить на пол и раздавить ногами. Сосиски, вареные колбасы, плавленные сырки, непонятные крашенные йогурты и «активии» с супер-пупер-бактериями (кто в это еще верит-то?), сухой корм на утро для детей с перепастеризированным молоком, сладости с эмульгаторами и непонятными веществами, пластиковые яблоки и клубника без вкуса и запаха натертые парафином и многое другое — это не то, что принесет вам здоровье и не то, что вам нужно. Аналогом этим товарам и полуфабрикатам, которые просто удобны для продажи супермаркетам, могут стать фермерские рынки. Но проблема состоит в том, что вы не всегда можете знать об их существовании. В наших краях фермерские рынки справедливее назвать «место, где бабушки продают свои продукты». Там вы можете купить овощи и фрукты, черемшу, чеснок и лук, грибы и ягоды, когда придет их сезон.
Мы предлагаем вам попробовать iOS-приложение, которое помогает находить и добавлять такие места продажи настоящих продуктов.
Если вы сами знаете такой рынок или хотите его найти, то обязательно установите приложение Farmstand, которое ставит амбициозную цель собрать любителей настоящей еды и помочь им находить места ее продажи в любом месте — дома, в отпуске, в командировке.
Аудитория, тесно знакомая с "творчеством" Трея Паркера (Trey Parker) и Мэтта Стоуна (Matt Stone), лишь взглянув на название спектакля сразу может предположить о чем будет идти речь. "Книга мормона" (The Book of Mormon) это непревзойденный сатирический мюзикл с "песнями и плясками" о паре мормонов-миссионеров, отправленных из Солт-Лейк-Сити в столицу Уганды, город Кампала.
Metro is one of my all time favorite songs. Check out Berlin’s lead singer Terri Nunn on Terri on VH1′s Where Are They Now? She talks about what pushed her to make the vocals and she says what I always say: The best music comes from frustration. Synths and sex forever people.
“Berlin is an American synthpop band. The group was formed in Los Angeles in 1978 by John Crawford (bass guitar). Bandmembers included Crawford, Terri Nunn (vocals), David Diamond (keyboards), Ric Olsen (guitar), Matt Reid (keyboards) and Rod Learned (drums). Learned left during the first EU tour and was replaced by Rob Brill (drums). The band gained mainstream-commercial success in the early 1980s with singles including “The Metro”, “Sex (I’m A…)”, “No More Words” and then in the mid 80s with chart-topping single “Take My Breath Away” from the 1986 film Top Gun.” – Wikipedia
What would happen if Traktor DJ and a KAOSS Pad had a love child, who went to school at Ableton and came home full of automation envelopes and triggers? Well, maybe something like this. Certainly, the results would be a DJ tool the likes of which only FL “Fruity Loops” Studio maker Image Line would dream up, in a demo video only they would make.
It’s beta 2 of Deckadance, the underdog Mac/Windows DJ app that’s surprisingly full of functionality. And while this isn’t the first DJ software to do sampling and effects, those features are now tied to some powerful automation and envelope features we haven’t seen in a conventional multi-deck DJ tool. They also accompany a KAOSS-style, X/Y multi-effects VST plug-in that users of other hosts might want separately.
Oh, yeah – VST. It does VST. Got your attention, Traktor users? Read on.
In the latest software cure for KAOSS envy, Effector is a powerful tool for multi-effects with rich controller mapping features. In fact, it looks so nice, it may appeal even if you have no interest in Deckadance. We’ll be eyeing a VST release here. Check out the help file.
Features – just quoting here, as they’re nicely described:
Decks – 2 or 4 decks.
Smartknobs – Link a knob to multiple FX & Mixer interface targets. User-programmable envelopes.
GrossBeat – 8 user defined FX per deck with integrated editor. Program glitch, stutter & scratch FX.
Isolator Effects – Up to 3 insert effects per track (from 10) applied independently to High/Mid or Low band.
Sampler – 1/32 to 16 step beat-matched easy sampling. One shot, trigger, retrigger and loop modes.
Smart Panels – User configurable Loop, Cue, Grid, DVS, Key, Smart Knob and Tempo panels.
As far as how this stacks up against the competition, my feeling is that, even though you tried to help her, your love was useless and she carried on. And as we wait for the beta, she couldn’t tell you the burden was heavy enough alon–*
Sorry, dozed off for a second. I may have watched that video too many times. Hmmm…
Even though you wanted plug-ins, your love was useless and Traktor said no. And Ableton said seeing side-by-side waveforms couldn’t work; the UI burden was heavy enough with one.
Man, I’d better not go out in Berlin tonight…
Yes, this beta looks worth checking out. Let us know what you think.


 Фирменное блюдо помогло вычислить злоумышленников


 Аудитория, тесно знакомая с "творчеством" Трея Паркера (Trey Parker) и Мэтта Стоуна (Matt Stone), лишь взглянув на название спектакля сразу может предположить о чем будет идти речь. "Книга мормона" (The Book of Mormon) это непревзойденный сатирический мюзикл с "песнями и плясками" о паре мормонов-миссионеров, отправленных из Солт-Лейк-Сити в столицу Уганды, город Кампала.
