Shared posts

23 Mar 21:16

A "magia" do efeito giroscópico

by Carlos Martins

A maioria das pessoas conhece implicitamente os efeitos das forças centrífugas e centrípetas, e também do efeito giroscópico que nos permite andar de bicicleta sem cairmos constantemente para o lado. Mas o que poderão não conhecer são alguns casos em que estas forças parecem quebrar as leis da física e permitir coisas "impossíveis".

A maioria das pessoas poderá ter alguma dificuldade em pegar num peso de 20Kg - mas se o mesmo estiver na ponta de uma barra será fisicamente impossível mantê-la na horizontal pegando apenas na ponta oposta. No entanto, com uma ajudinha do efeito giroscópico, torna-se possível. Será magia ou um truque de ilusionismo?

Não, tudo pode ser explicado pelas nossas conhecidas leis da física... mas mesmo ficando-se a saber porque é que isso acontece, não faz com que seja menos impressionante de observar... uma e outra vez. :)


23 Mar 21:12

WPA2 já pode ser crackado com facilidade

by Carlos Martins

Quem usa redes WiFi e se preocupam minimamente com a sua segurança saberá que usar o modo de segurança WEP é praticamente equivalente a não usar nada, uma vez que contém vulnerabilidades que permitem a um atacante rapidamente descobrir a sua password. A solução passava pela utilização de modo mais recente e seguro conhecido por WPA2... mas que agora se vem a descobrir que também pode ser crackado com relativa facilidade por um atacante empenhado.


Investigadores de várias universidades estiveram a analisar minuciosamente o sistema e descobriram várias vulnerabilidades que podem colocar em risco uma rede WPA2 e facilitar o acesso aos hackers. A principal falha não está na encriptação usada, mas sim num pequeno passo que pode ser explorado. Numa rede WPA2, os dispositivos têm que re-autenticar a sua ligação de tempos a tempos, trocando a sua chave de acesso. É precisamente na forma como os equipamentos se "desligam" antes de reactivarem a nova ligação que o sistema pode expor dados que ajudam os hackers - embora para isso necessitem de ter um scanner WiFi com capacidade para apanhar estes pacotes de dados no momento exacto.


Não me parece que seja um problema de fácil resolução, pois possivelmente obrigaria a mudar o protocolo e lançar actualizações para milhões de routers no mercado (pois... estão ver as probabilidades disso vir a acontecer, certo?) Quanto muito, alguns poderão dizer que este estudo vem mesmo a calhar para servir de incentivo a que se vendam novos routers, que ofereçam um novo sistema de protecção de dados que garanta a segurança dos mesmos... durante mais algum tempo.

Mas até lá... por muito prático que possa ser querer substituir os cabos de rede por uma rede exclusivamente wireless, fica demonstrado que talvez não seja a melhor ideia - a não ser que queiram facilitar a vida a potenciais hackers.
21 Mar 20:19

PNotify – JavaScript Notifications for Bootstrap or jQuery UI

by Ray Cheung

Advertise here via BSA

PNotify is a JavaScript notification plugin, developed by SciActive. Formerly known as Pines Notify. It is designed to provide an unparalleled level of flexibility, while still being very easy to implement and use. It can provide non-blocking notices. This allows the user to click elements behind the notice without even having to dismiss it.

PNotify uses either Bootstrap or jQuery UI for styling, which means it is fully and easily themeable. Try out some of the readymade themes using the selector in the top right corner of this page. It works in all major browsers and provides a consistent interface. It is tested thoroughly for consistency.

p-notify

Requirements: JavaScript Framework
Demo: http://sciactive.com/pnotify/
License: GPL, LGPL, and MPL License

Sponsors

Professional Web Icons for Your Websites and Applications

21 Mar 20:08

Gmail passa a encriptar todos os emails para evitar espionagem da NSA

by Carlos Martins

O Google não gostou de descobrir que a NSA interceptava o seu tráfego interno para poder espiar os emails dos utilizadores do Gmail, e não demorou muito a implementar um sistema que evita que isso se repita.


A partir de agora o Gmail passa a usar sempre uma ligação HTTPS para segurança acrescida, algo que sempre esteve disponível mas que era de uso opcional (embora desde 2010 que tenha passado a ser a forma usada normalmente pelo Gmail). Agora, passa a ser a única forma de aceder ao Gmail, e garante que ninguém se possa intrometer nos vossos emails, mesmo que estejam a usar uma rede WiFi pública.

Mas para que a situação da NSA não se repita, agora o Google passa a encriptar todos os emails internamente, mantendo-as codificadas enquanto passam de servidor em servidor, e só sendo descodificadas quando são enviadas para o cliente final (que estará a usar HTTPS obrigatoriamente, evitando que possa ser espiado nessa altura - pelo menos a nível de intercepção do tráfego de internet entre as máquinas.)

O Google refere ainda que o seu serviço Gmail esteve disponível 99.978% do tempo durante o ano de 2013, sendo o equivalente a uma falha de apenas 2h para cada utilizador durante todo o ano (mas já sabemos como é a Lei de Murphy, que garante que essas 2h acontecerão no pior momento possível, em que o acesso ao email nos seria essencial.)
18 Mar 20:18

How to Setup GitLab: A Self Hosted GitHub

by Nicholas Cerminara
gitlab

Introduction

Okay — GitLab isn’t really your own self-hosted GitHub. I don’t believe GitLab or GitHub share any relationship besides both being Git Management Software, but it’s the best way I find to describe in laymen terms what GitLab is. GitLab is awesome. It’s featured packed, and it does nearly everything that Github does. Best of all, you get unlimited private repos with it (or techincally as many as your server can handle).

I have some pretty good DevOps skills, but I’m not really a server guy. Until recently, I’ve never previously wanted to deal with the hassle of setting up my own Git server, and GitHub’s managed solution is really quite appealing. With GitHub, you have a reliable and easy solution that you never really have to worry about. It’s also very nicely integrated with a huge array of social features like forking and organizations amongst other collaboration tools. The only thing is it can get expensive real fast if you need more than a handful of private repositories.

Digital Ocean has recently made it very simple and straight forward to setup Gitlab with minimal effort and fully supporting one-click restorable backups. They also even provide great resources and tutorials on it:

This post will be very similar to those articles, but I’ll be going through step-by-step in more detail as well as some improvements and notes of my own. Feel free to read below or go straight to the Digital Ocean docs themselves.

Sign up with Digital Ocean

The first thing you’ll need to do is signup with Digital Ocean.

Screen Shot 2014-03-17 at 9.30.45 PM

Setup Public SSH Keys

Digital Ocean automatically will provision your server with the public keys you upload to your account. This step isn’t really required, but it makes it easier and faster to access your new server environment.

Screen Shot 2014-03-17 at 9.41.35 PM

Create Your Droplet

If you don’t know much about servers – don’t worry. Digital Ocean will make this very easy for us, and they’ll actually “automatically” do most of the work for us.

Select your Hostname

For this, use the domain (or subdomain) that you would like to use. For example, you could do gitlab.scotch.io.

Select the server size

The official recommendation for GitLab can be found here. In summary, your server should have:

  • 2 cores of CPU power
  • 2 GB RAM

However, I’ve found that GitLab still works well even if you don’t meet these requirements. If you select the smallest Droplet, GitLab will occasionally freeze or hang. This is usually fixed with a quick reboot of the server. I recommend the smallest Droplet you select is their $10/month plan. I have found no problems yet running this with a small team for both work and play.

Select a region

Select the region that you would like your server to be in. You should select a region that is closest to you to reduce latency.

Select an image

The next step is to select the GitLab application image provided by Digital Ocean. Selecting this basically means that GitLab will automatically be installed when the server is provisioned.

Select the SSH Key

Select the Public SSH Key you added from earlier. This will allow you to SSH into the server without needing a password. Selecting this also means that Digital Ocean won’t send you a root password when the Droplet is created.

Enable Backups

The last step is to enable backups. Even though Git is a distributed version control system, I still would enable this so that you can easily recover your Git repos if anything unexpected happens.

Note: The screenshot below uses git.scotch.io as the hostname, but I ended up switching it to gitlab.scotch.io.

long

Configure the Server

Access the Droplet

Now that we have created our Droplet and before we do anything, lets SSH in and make some minor setting changes. To get the IP address of your Droplet, just navigate to your Droplets in the Digital Ocean backend. After you find it, open the terminal and connect with it via SSH (no password will be required since we are using public and private keys):


ssh root@107.170.99.221

Note: You can visit the IP address in your browser now to see GitLab is working. Don’t worry about that just yet, we’ll get to that soon enough.

Screen Shot 2014-03-17 at 10.29.18 PM

Update the Hosts File

This helps remove warnings when rebooting GitLab. We’re going to add the hostname of your Droplet to the hosts file. To do this, open /etc/hosts with your favorite editor:


vim /etc/hosts

Then, add your IP address, a tab, and the hostname on line 2 of that file:


107.170.99.221 gitlab.scotch.io

Screen Shot 2014-03-18 at 12.44.12 AM

Setup URLs and Emails

We’ll need to set some default settings and globals for GitLab. These are things like the base URL and default support email. Open the /home/git/gitlab-shell/config.yml and update the variable gitlab_url:


vim /home/git/gitlab-shell/config.yml

Screen Shot 2014-03-17 at 11.32.54 PM

After that, we’ll need to update one last file. Open up /home/git/gitlab/config/gitlab.yml in your editor:


vim /home/git/gitlab/config/gitlab.yml

You can go through this file and make adjustments to customize your installation. Most of these are just default settings. For the most part you should leave it as is, but you’ll need to change host under GitLab settings to your domain name.


host: gitlab.scotch.io

Then, you need to set the default From and Admin emails:


email_from: yo-its-me-gitlab@gitlab.scotch.io
support_email: nick@scotch.io

Screen Shot 2014-03-17 at 11.45.38 PM

Reboot GitLab

To finalize everything, reboot GitLab with the following command:


service gitlab restart

Screen Shot 2014-03-17 at 11.49.45 PM

Setup DNS

Point the A Record

The final step is to now point the A record of either the domain or subdomain to your Digital Ocean IP address. I use CloudFlare to manage my domains, but your setup should look very similar to the below screenshot:

Screen Shot 2014-03-18 at 12.48.04 AM

Access Your New Git Server!

If everything worked out correctly and DNS propagated, you can now visit the URL in your browser to access your new git server!

Screen Shot 2014-03-17 at 10.55.13 PM

You also can now SSH into your Droplet with the following command:


ssh root@gitlab.scotch.io

Default Login

Now that you have successfully navigated to your URL, you’ll need to login. The default login for this image is:


admin@local.host
5iveL!fe

You probably noticed this already when you were SSHing into the server. This appears in the welcome message.

After you login, you’ll be prompt to change the password, then you’ll need to login again with the same email and the new password. Once you have logged in successfully, you’ll need to change the default Admin email to your email address. To do this, navigate to the Admin Panel located here:

/admin/users/root/edit

Next, we’ll need to update the default username (which is currently root). To do this, navigate to:

/profile/account

After you make that change, you are all set on configuring the server!

Next Steps

GitLab has a whole bunch of cool features. I won't go over everything in detail because a lot of it is self-explanatory, but some of the things you should consider playing around with once logged in are:

  • Adding Public Keys
  • Creating Groups and Teams
  • Customizing Themes
  • Your own GitLab API
  • Webhooks

Debugging, Troubleshooting, and Backups

If GitLab ever hangs or freezes on you, you can try rebooting it with:


service gitlab restart

If that doesn't work, you can reboot your entire Droplet through the command line with:


shutdown -h now

or


sudo reboot

When you do a power cycle from the command line like this, Digital Ocean will take a snapshot of your Server in case you need to safely restore. If that doesn't work, you can just login to your Digital Ocean account and reboot the Droplet through their backend.

If you ever need to restore from a backup, all you have to do is log into the backend of Digital Ocean, select your Droplet, and click Restore from Backup.

Screen Shot 2014-03-18 at 12.24.14 AM

Conclusion

That's all there is to getting your own little private Git server. GitLab is an amazing tool, and the awesome guys over at Digital Ocean have made it really straight forward to set one up with backups, hardened security, "unlimied" privated repos, and more.

I'm a huge fan of Digital Ocean and their services, and I highly recommend that you use them. GitHub is really worth every penny, but if you're in need of a ton of private repos on a tight budget, GitLab might be the best solution for you. Some other ways you could inexpensively manage your Git repos online are:

18 Mar 20:06

Win A 5-Year, $900 Worth Time Tracking Pro Plan at Timeneye

by Kevin Liew

Time tracking is an important practice in most companies. It keeps track of time and resources. However we all have to agree that doing the routine time tracking is a chores! But it doesn't have to! Thanks to Timeneye Time Tracking App.

As its name implied, Timeneye is a time tracking web app designed to be fast and easy to use. Built with users in mind, Timeneye focuses on user-friendliness and usability so you get to finish what you have to do immediately.

Timeneye is a web app, which means, you can access it anywhere as long as there's Internet. And the best part - there are time tracking app - natively developed Timeneye app for the iPhone, Android smartphones and Windows Phones, so that you can track your time whenever you are. Same concept with the web app, all these mobile apps are designed for simplicity, making the time tracking almost effortless.

Timeneye is giving away 5 year, $900 worth Pro Plan to 5 lucky winners. This giveaway will run for a month, and in the end of the day, we will be randomly choose 5 lucky winners.

To participate, use the widget below and follow all the instructions.

Giveawayly

18 Mar 18:40

Realtime Chat with Node.js

by Nick Anastasov
nodejs-realtime-chat

In this tutorial, we are going to build a realtime chat system with Node.js and the socket.io library. The chat permits users to create private chat rooms that they can share with a friend. For avatars, we will use gravatar. You can run the chat locally with node, or push it to heroku or a different cloud service provider.

The code

You can grab the source code from the download button above. It has plenty of comments and is easy to follow. Start with the app.js file and read from there. Here are a few things to look for:

  • All dependencies are declared in the package.json file. They are not included in the zip and you will have to run npm install to get them.
  • We are using separate JavaScript files for the configuration and routes, to make the code more manageable.
  • In the routes file, socket.io stores the username, avatar and room of the person as properties of the socket object itself. This saves us a lot of code and makes managing rooms easy.
  • We use socket.io‘s rooms feature to isolate one chat from another, which is exactly what that feature was developed for.
Enter your name to chat

Enter your name to chat

The design

The PSD for this tutorial is available for free in our members area, along with other goodies that you will love. Become a member here!

Running the chat

To run the chat, you need to have node.js installed, so that the node and npm commands can be called from your terminal. Download the code and unzip the archive to a folder called nodejs-private-webchat. After this, navigate to the folder you’ve created from your terminal:

cd nodejs-private-webchat/

Running the ls (or dir if you are on windows) command should show app.js, package.json and the other files from the archive. Then, run this command to download all the libraries that the chat system uses:

npm install

This will install all the dependencies that are described in package.json. This may take one or two minutes. When it’s done, run the following command to start your very own local chat, which you can see on http://localhost:8080

node app.js

Hit ctrl+c to stop it. The bad news is that you can’t invite your friends to your chat, since it is running on your own computer. To fix this, you need to run it on a web server. Setting up a web server by yourself to run node is not a very straightforward process and involves a good deal of server administration skills. Luckily, it is very easy to get started with cloud platforms like Heroku, which is what I will show you next.

Node.js Realtime Chat

Node.js Realtime Chat

Hosting the chat on Heroku

Heroku is a cloud hosting platform that automates the deployment and scaling of web apps. It offers a free plan, which is sufficient for less busy apps like our chat. Here is what you need to do:

  1. Create an account, if you don’t have one already.
  2. Install the heroku toolbelt for your operating system. It will give you access to the heroku command from a terminal window.
  3. Initialize an empty git repository (explained below)
  4. Push your code to heroku. This will deploy it and give you a URL which you can share with your friends.

You can also read this getting started guide, followed by this guide about running node.js applications.

Creating a git repo

The heroku toolbelt installs the heroku command and the git version control system. You need to create a git repo in order to be able to deploy your app to heroku (there is no ftp here). To do this, run this command:

git init

Then, we need to tell git not to include the node_modules folder to your repo. This folder can grow quite large and it simply does not belong in git. To ignore the folder, create a new empty text file named .gitignore with the following content:

node_modules/

Now you can commit your code to your fresh new repo! Write these commands:

git add .
git commit -m 'Initial commit'

There is one last thing that we have to do. Heroku requires that your application has a text file named Procfile, which contains the command used to start your node.js app. Create it, and add the following content:

web: node app.js

Then commit the changes with these commands:

git add Procfile
git commit -m 'Added a procfile'

We are now ready to push the application to heroku!

Pushing to Heroku

The following two commands are only done the first time you start using the heroku utility. First you need to login to heroku from the command line tool:

heroku login

Then, you need to add your ssh key, so you can push code without entering a password:

heroku keys:add

Next, you need to create a new heroku application from the code in this folder:

heroku create

And finally, we are ready to push code! Type this command:

git push heroku master

This line will send your application code to heroku, where their servers will process your package.json file and install all libraries that your app needs. Do this every time you need to upload a new version of the code (you must have made a commit beforehand). All that is left, is to enable websockets so that our real-time chat can work (read more here):

heroku labs:enable websockets

To open your very own web chat in your browser run this command:

heroku open

This will open it in a tab in your default browser.

Hope you like our little chat!

But there is much more that can be improved on it. You may implement alerts of new messages with HTML5 audio, make it possible for more than two people to join the same room, to require passwords before joining and more. If you make something cool, be sure to share it in the comments for everybody to see :)

15 Mar 09:47

Taking A Second Look At Free Fonts

by Jeremiah Shoaf


Once thought of as amateurish by professional designers, free and open-source fonts have gone through something of a renaissance in just the last few years. The quality of available free fonts has increased dramatically. To be frank, free fonts don’t have a good reputation, and often they are knock-offs of thoroughly crafted, already established typefaces. So is it time for professional designers to take a second look?

First, A Story

Early in my design career, around 2003, I wanted to purchase the font DIN for a project at work. My manager promptly dismissed the idea of paying for a font and instead handed me a CD that had “5,000 free fonts” on it, saying “This CD has every font a designer could possibly need. No need to waste money buying fonts!”

I popped the CD in my computer and found a collection of the most horrendous fonts you could imagine. Novelty and “retro” fonts. Spooky Halloween fonts. “Techno” fonts. Fonts with letterforms made up of cats posing in crazy positions. Fonts with terrible kerning, missing glyphs and wonky rendering. Fonts available only in single weights with no italics.

Nowhere to be found was DIN or, for that matter, any font that a professional designer would actually use. Feeling dejected, I ended up just using Helvetica because we actually owned that one.

Fast-forward to 2014. When I hear the words “free fonts,” I still can’t help but picture that horrible CD. But things have completely changed since then, and I find myself actually using free fonts quite often in my projects.

Where Do Free Fonts Come From?

In the past, free fonts typically came from one of two places: amateur designers who created fonts for fun or as a learning experience, and professional type designers who released a single variant of a font family for free as a form of marketing, the idea being that people would come back to purchase the full family once they realized the limited usefulness of a font without multiple weights and italics.

Why Is Having Multiple Weights With Italics So Important?

To set body copy properly, a font family requires four variants: normal, italic, bold and bold italic. A font used on the Web that doesn’t include these four basic variants will inevitably get the dreaded faux bold and faux italic treatment generated by the browser, which should be avoided at all costs — in fact, there are ways to avoid them for good. Other weights, such as light and extra bold, are helpful for creating typographic contrast between elements.

Free Fonts Are Not What They Used To Be

Recently, large companies such as Adobe and Google have been commissioning fonts for open-source projects and releasing them for free on the Web. Professional typeface designers have been getting involved in open source as well, sharing complete font families on Google Fonts.

Thanks to the open-source community, there are now free fonts available that even typography snobs would be happy to use. The following fonts all have multiple weights with matching italics. They are suitable for headlines as well as body copy, and they render well on screen and at small sizes.

Alegreya

Alegreya is an award-winning serif typeface, chosen by ATypI as one of 53 “Fonts of the Decade” in its Letter.2 competition. It is available for free on Google Fonts, but, sadly, most designers don’t seem to know about it. I hardly see Alegreya used anywhere online, which is a shame because this is a truly great font. Alegreya was designed with printed text in mind, but it is excellent to read on screen as well.

The designer, Juan Pablo del Peral, claims that just as much care and attention to detail was spent on designing the italic as the roman and it definitely shows — the italic style is especially beautiful. I hope more designers become aware of this excellent typeface and that we’ll see it used more widely on the Web in 2014.

Alegreya font sample
Beef uses Alegreya for the body copy on their website, giving it a stately appearance, which contrasts nicely with the use of Avenir for headings.

Alegreya font sample
The beautiful bold italic style of Alegreya is used for a heading on Beef’s job section.

Source Sans Pro

Released by Adobe in August 2012, Source Sans Pro is Adobe’s first open-source font. Its designer, Paul D. Hunt, was inspired by early-20th-century gothics such as Franklin Gothic and News Gothic. To my eyes, Source Sans Pro feels much more modern, a little reminiscent of FF Meta. Its intended use is for user interfaces so it renders very well at small sizes. The font is available in an impressive 6 weights, making it extremely versatile.

Source Sans Pro font sample
CAST83 uses Source Sans Pro throughout its website, showing off the diversity of the family; large headlines are set in the lighter weights, while the heavier weights are used at smaller sizes and set in uppercase, creating excellent typographic contrast.

Source Sans Pro font sample
Plentific uses the extra-light and normal weights of Source Sans Pro to create contrast between different levels of headings.

Open Sans

Designed by well-known type designer Steve Matteson and commissioned by Google, Open Sans is one of the most widely used open-source fonts on the Web. It is the default font for Zurb’s new Foundation 5 framework and is used on many of Google’s redesigned pages. I’ve even heard Open Sans described as the “flat design” font. The five weights with matching italics make this humanist sans-serif useful for a wide variety of situations

Open Sans font sample
Vitor Andrade’s website uses Open Sans in a very understated way; the minimal, type-driven design doesn’t draw attention to itself, appearing very neutral and lending focus to the excellent work being featured on the website.

Open Sans font sample
The light weight of Open Sans is used for the article titles on The Industry’s website.

Anonymous Pro

Anonymous Pro is a monospaced font that I’m surprised so few designers know about, considering it was designed by Mark Simonson, the type designer behind Proxima Nova. Monospaced fonts seem to be popular with designers at the moment, and Anonymous Pro is an excellent option.

Inconsolata is a much more widely used monospaced font, also available on Google Fonts, but doesn’t include italics, as Anonymous Pro does. Setting body copy in a monospaced font isn’t always a good idea, but in the right context it can give a design a very clean and refreshingly sparse feel.

Anonymous Pro font sample
Per Sandström uses Anonymous Pro at a large size for the body copy on his website, where it works surprisingly well paired with Futura for headings.

Anonymous Pro font sample
The bold weight of Anonymous Pro is used for the buttons on Per’s website.

Playfair Display

Playfair Display is a high-contrast serif designed by Claus Eggers Sørensen. Reminiscent of Baskerville, it takes its cues from the typeface designs of the late-18th century. Although designed primarily for titles and headings, the three weights with matching italics make it suitable for short stretches of body copy as well. For longer stretches of body copy, Playfair Display pairs very well with Georgia.

Playfair Display font sample
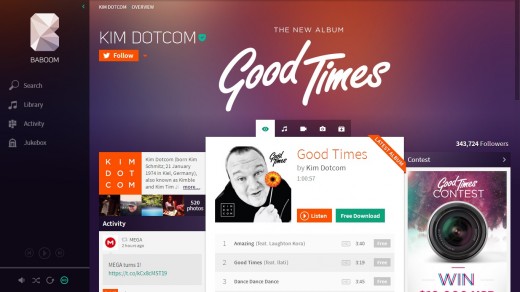
Playfair Display features a beautiful italic variant, seen in the headings on Boompa Records’ website.

Playfair Display font sample
The bold weight of Playfair Display is used on the headings of Digital Abstracts’ website.

Roboto

Roboto has been accused of being a “Frankenfont” — a mashup of Helvetica, DIN and Myriad. I understand where the criticisms come from, but I quite like Roboto. Updates and improvements have been made to Roboto since that “Frankenfont” article, and I think the font works great on screen at different sizes and device resolutions, which is its purpose.

The font feels familiar, yet still possesses unique character the more you look at it. The Roboto family also includes a very nice slab version as well as a condensed version.

Roboto font sample
I use Roboto on my Type & Grids side project, and the font renders beautifully on high-density displays at small sizes.

Roboto font sample
Paone Creative uses the light weight of Roboto on their blog section.

Lato

Lato is Polish for “summer,” and the name perfectly fits this warm-feeling sans-serif. The designer, Łukasz Dziedzic, originally designed Lato as a corporate font for a large client. After the client decided to go in a different design direction, Łukasz released the font for public use. Lato feels very modest and unassuming when set at small sizes in body copy, but the italic variant is distinctive and easily recognizable. Lato is used in WordPress’ latest default theme, Twenty Fourteen, so its popularity on the Web is sure to increase.

Lato font sample
Frank Chimero makes elegant use of the hairline weight in his article “What Screens Want,” setting it in uppercase at a large size, which is needed for such a thin, delicate weight.

Lato font sample
On AIGA’s “100 Years of Design” website, a customized “dotless i” version of Lato is used.

Merriweather

Designed by Eben Sorkin, Merriweather is a serif font created for on-screen reading. Its tall x-height and hefty serifs give it excellent legibility. Merriweather is under active development, and improvements are constantly being made. There is also a sans-serif version of Merriweather available that makes an excellent companion.

Merriweather font sample
Dickson Fong uses the light weight of Merriweather, which gives his design an elegant look.

Merriweather font sample
Vtcreative show off the light italic style of Merriweather in their footer.

Karla

Karla is a grotesque sans-serif designed by Jonathan Pinhorn that is full of character and quirks. Something about it reminds me of the trendy Apercu font. The tracking might be set a little wide for body copy, and some of the kerning can be a little wonky, but something about this font makes me overlook those downsides. This is a perfect font to add a touch of personality to your design.

Karla font sample
Borsch, Vodka & Tears use Karla for the short bursts of body copy on its website, and it works really well.

Karla font sample 2
Kalyn Nakano shows off the normal and bold weights of Karla on her portfolio site.

Clear Sans

Clear Sans is Intel’s recent contribution to the open-source font community. Designed with on-screen legibility in mind, Clear Sans prides itself on its unambiguous character design. For example, the uppercase “I” has serifs added to distinguish itself from the lowercase “l”. This makes it an excellent choice for UI design work where clarity is key. Clear Sans is currently not available through Google Fonts, so designers looking to use this font will need to host it themselves.

Clear Sans Font Sample
The delicate, light weight of Clear Sans is used for the body copy on the Clear Sans website.

Fira Sans

Designed for the Firefox Operating System, Fira Sans was recently released as a free font available for public use. The font shares many similarities to FF Meta, which makes sense as Erik Spiekermann is the designer of both. It’s rare to find a free font created by such a renowned typeface designer. Fira Sans also includes a monospaced version called Fira Mono. Interestingly, the web font used on the official Fira Sans page is Open Sans, not Fira Sans. You’d think Mozilla would want to show off their new font on their site.

Fira Sans Screenshot

Other Free Fonts Worth Checking Out

Don’t Rely On Free Fonts For Every Project

As nice as the fonts above are, designers shouldn’t rely entirely on free fonts. Free fonts will never match the quality of the fonts offered by top type design foundries. Budget for professional fonts in every project when possible. Type foundries need the support of the design community to continue innovating and producing excellent fonts.

That being said, if a project requires free fonts, whether due to budget constraints or other reasons, then rest easy knowing that an ever-growing selection of professional-quality fonts are available at your disposal. I continually update a curated list of open-source Web fonts in my side project, Typewolf. You can also follow me @typewolf and check out my other side project, Type & Grids, which uses many of the fonts featured in this article.

Designing a typeface requires a lot of time, patience and very hard work, and type designers should be rewarded for their work. So if you decide to use a free font, please always make sure to support type designers by purchasing the other fonts that they created or donating to support their efforts.

(al, vf, il)

Front page image credits: Vitor Andrade.


© Jeremiah Shoaf for Smashing Magazine, 2014.

12 Mar 21:02

Hosting a Website on Amazon S3

by Cory LaViska

Everyone knows that Amazon S3 is great for storing files. It’s fast, inexpensive, and easy to setup. What you may not realize is that you can also host static websites on this robust platform.

What is a static website? In short, it’s a website comprised of only HTML, CSS, and/or JavaScript. That means server-side scripts aren’t supported, so if you want to host a Rails or PHP app, you’ll need to look elsewhere. For simpler purposes, welcome to the wonderful world of hosting websites on S3!

Creating a Bucket

If you don’t already have one, the first thing you’ll need to do is sign up for an Amazon Web Services (AWS) account. It doesn’t cost anything to sign up, but keep in mind you will need to pay for storage and transfer fees once you start putting objects on S3. (Don’t worry, it’s cheap!)

Once you create an account, you’ll have access to the AWS Management Console.

The AWS Management Console

This is where you’ll go to create your first bucket. A bucket is similar to a folder on your hard drive, except it’s in the cloud and it has virtually unlimited storage. There are a few things you need to know about buckets before creating one:

  • Bucket names need to be unique across the entire S3 platform
  • You can create a bucket in one of many supported regions around the world
  • If you want to use a custom domain, your bucket name will need to be the same as your domain name

To create a bucket, navigate to S3 in the AWS Management Console and hit Create Bucket. You’ll be prompted to enter a name and a region.

Creating a bucket in the AWS console

If you plan on using your own domain/subdomain, use that for your bucket name. For the region, pick the one closest to you and hit Create. With any luck, you’ll see your new bucket appear in the console.

Viewing your bucket in the AWS console

The only thing left to do is enable Static Website Hosting. Just select it from the panel on the right.

Static Website Hosting settings in the AWS console

Make sure you set the Index Document to index.html. You can also set an error page if you want. When you’re done, hit Save.

Well, that was easy. Now let’s upload the homepage!

Uploading Your First Page

One nice thing about the AWS Management Console is that you can upload files to your bucket right from your browser. Let’s start by creating one called index.html. This will be the contents of the homepage:

<!doctype html>
<html>
<head>
    <title>Hello, S3!</title>
    <meta name="description" content="My first S3 website">
    <meta charset="utf-8">
</head>
<body>

    <h1>My first S3 website</h1>
    <p>I can't believe it was that easy!</p>

</body>
</html>

To upload it, select your new bucket and hit Upload.

Uploading a file in the AWS console

Once you’ve uploaded index.html, it will appear in your bucket. However, you won’t be able to see it in your browser yet because everything in S3 is private by default.

To make it public, right-click on index.html and select Make Public. (Remember to do this for any other files you upload to your website!)

Now that your homepage is visible to the world, it’s time to test everything out! Select index.html in the console and go to the Properties tab.

Getting the link to your file in the AWS console

Clicking the link will take you to your new homepage.

Homepage Preview

You’ll notice that the address bar shows s3.amazon.com. This is the default URL for objects stored on Amazon S3. Let’s setup a custom domain and really turn this into a website.

Using Your Own Domain

If your bucket name is the same as your domain/subdomain name, you can point it to your new website by creating a CNAME record in your domain’s DNS settings. It should look something like this:

Domain: example.com
Type: CNAME
Target: s3.amazonaws.com.

Remember to replace example.com with your own domain. After the DNS propagates (which could take up to 24 hours), you should be able to see your website by visiting the domain in a browser. If it doesn’t show up, make sure your bucket name is exactly the same as your domain/subdomain and double check your DNS settings.

How to Edit Your S3 Website

Now that your website is up and running, you’ll probably want to make changes to it. Alas, you can’t install something like WordPress on Amazon S3. So how do you manage content?

Shameless plug: I recommend Surreal CMS. It links up to just about any site using FTP, SFTP, or Amazon S3 and it’s dead simple to integrate. Take that homepage, for example. Let’s make the entire thing editable:

<!doctype html>
<html>
<head>
    <title>Hello, S3!</title>
    <meta name="description" content="My first S3 website">
    <meta charset="utf-8">
</head>
<body>

    <div id="content" class="editable">
        <h1>My first S3 website</h1>
        <p>I can't believe it was that easy!</p>
    </div>

</body>
</html>

Notice how I’ve wrapped the content in a <div> and given it a class called editable? That pretty much sums up the integration process. You can make just about any HTML element editable this way.

Setting Up Surreal

Adding Your Site

Start by creating an account. The first thing you’ll see once you’re in Surreal CMS is the sites page.

Surreal CMS sites page

Select Add a New Site and you’ll be taken to a form that asks for some information.

Adding a site in Surreal CMS

Enter your website’s URL. Make sure you change the protocol to Amazon S3 and pick the correct region, otherwise Surreal won’t be able to connect. You’ll also need to enter your access key and secret key. If you don’t have these handy, you can get them from the Security Credentials page in the AWS Management console. For added security, consider creating a separate access key just for this purpose.

Once you’re finished, hit Submit and your site will appear in Surreal.

Enabling Pages

The next step is to enable your homepage for editing. Select your site and hit the Enable Pages button. A dialog will appear showing you the contents of your S3 bucket. Select index.html and then hit Done.

Congrats, you’re ready to start editing!

Editing Pages

Remember how you added that editable class to the homepage earlier? Well, you’re about to see why. The glorious thing about Surreal is that you’ll be editing your page inline, just like it appears in the wild. Select it from the list and you’ll be taken straight to the Live Editor.

The Live Editor in Surreal CMS

Of course, you can make any changes you want in the editor—all the usual options are available. When you’re done, go to Save > Publish and Surreal will save it to Amazon S3 for you!

Extras

Surreal also has a bunch of other great features that you’ll find useful. To name a few:

  • Inline editing
  • Responsive UI
  • Photo gallery editor
  • Google Analytics dashboard
  • Scheduled publishing
  • Change notifications
  • White-label support

While it isn’t free, you can signup for a free trial and get a full month to play around with it. I may be biased, but it’s definitely worth checking out ;)

And there you have it. Now you know how to setup a website on Amazon S3 and edit it with minimal effort. If you have questions, leave them in the comments. If you enjoyed this tutorial, let me know!

Read the full article at: Hosting a Website on Amazon S3

Treehouse

11 Mar 20:04

Free Download: Smarter Wireframe and UI Kit

by Ray Cheung

Advertise here via BSA

Normal wireframes provides limited insight or vision, and clients didn’t understand them. As a result, ideas were lost, and a gap was forming in the earliest stages of the project. What C.Rowe thought were clear wireframes, were just boxes. He’s realizing that some clients need visual cues to help them interpret this bare bones approach to organizing content. Here we got C.Rowe Wireframe and UI Kit.

Using C.Rowe Wireframe and UI Kit has not only bridged some gaps for the client, but it has allowed us to start testing interfaces earlier and at a faster rate. So if you’re digging this kit and want to start using it, then download and get going.

wireframes-ui-kit

Requirements: -
Demo: http://theycallmecrowe.com/advice/crowe-wireframekit.html
License: License Free

Sponsors

Professional Web Icons for Your Websites and Applications

11 Mar 20:03

TLDRLegal: Software licenses in plain English

by Cameron

TLDRLegal is a reference for software licenses translated out of legalese and into plain English. Just search for the license you want and get an easy-to-read and understandable summary.

tldrlegal

11 Mar 20:01

Uma em cada dez pessoas pensa que HTML é uma doença

by ProgramadorREAL
11 Mar 19:54

Popcorn Time - Todos os filmes a um clique de distância

by Carlos Martins

Alguns de vocês terão amigos que recorrem a sistemas que lhes permitem ver todo o tipo de filmes e séries sacadas da internet. Provavelmente, também gostariam de ter algo assim mas não têm muita vontade de se aventurarem em processos de instalação e configuração de diferentes programas e plugins. Agora com este Popcorn Time podem fazê-lo sem chatices nem complicações.

Este Porcorn Time faz aquilo que os estúdios e distribuidores há muito deveriam ter disponibilizado aos utilizadores, uma forma simples e prática de ver filmes - e que neste caso recorre ao streaming via BitTorrent de filmes colocados na internet. Uma opção de legalidade sempre duvidosa, uma vez que a maioria destes conteúdos estará na internet de forma ilegal, mas a que os criadores deste projecto se tentam esquivar relembrando que o Porcorn Time apenas dá uso a coisas que estão disponíveis na Internet e não aloja ou disponibiliza conteúdos directamente (e que também não ganha dinheiro com o serviço, que é gratuito e nem sequer apresenta publicidade).

Basicamente, trata-se de um Netflix pirata, onde os utilizadores não têm que se preocupar com nada, nem com downloads de pesados ficheiros, nem tão pouco com a chatice de procurar capas ou legendas para determinado filme - tudo é feito de forma automática e transparente, de forma a que todo e qualquer utilizador o consiga fazer, independentemente do seu grau de conhecimento.

O projecto é open-source e está disponível no GitHub para todos os que o queiram espreitar ou modificar.
11 Mar 19:52

Novo cabo da Intel combina 64 fibras para atingir os 800Gbps

by Carlos Martins

Um dos maiores problemas dos computadores actuais é arranjar forma de transmitir (e receber) as enormes quantidades de dados que necessitam ser processados ou que resultam do seu processamento. Por isso se vai assistindo à evolução das velocidades no USB, o surgimento de sistemas como o Thunderbolt, e agora... este novo cabo da Intel que permite transferir até 800Gbps de dados usando fibra óptica.

Na verdade o cabo não utiliza apenas uma fibra mas sim 64 fibras, colocadas numa única ficha de tamanho compacto, e onde 32 estão encarregues de transmitir dados num sentido e as restantes de os receber (e onde cada uma é capaz de transferir 25Gbps num total de 800+800Gbps... ou 1.6Tbps como a Intel anuncia). É uma evolução que será do agrado de todos os que actualmente "desesperam" com as ligações de 10Gbps disponíveis neste momento, e que permitirá uma nova era da comunicação nos data centers e super-computadores - o mercado a que este sistema se destina, pelo menos nesta primeira fase onde os seus custos deverão ser demasiado elevados para "o público".


Outra vantagem é a de se poderem ligar equipamentos a distâncias de até 300 metros (mantendo os 800Gbps nos dois sentidos), e no futuro a Intel prevê duplicar a velocidade de cada fibra dos actuais 25Gbps para 50Gbps, o que permitiria transferir um total de 3.2Tbps sem necessidade de se modificar a ficha ou o número de fibras.

A Intel diz que esta ficha e cabos estarão disponíveis para os clientes interessados já no terceiro trimestre deste ano.
11 Mar 19:52

iFarmácias - um portal e app para encontrares medicamentos ao melhor preço

by Carlos Martins

Se alguma vez já foram a correr a uma farmácia para descobrirem que o medicamente que precisavam afinal não estava disponível, vão gostar de ficar a conhecer este iFarmacias - um portal web e app para Android que permitirá não só saber se cada farmácia tem o medicamento que procuram, como também o seu preço.


O iFarmacias será útil para evitar viagens desnecessárias e também confirmar se o medicamente que precisam está mais caro ou mais barato em diferentes farmácias; mas oferece também um conjunto mais alargado de funcionalidades. Os utilizadores poderão usar o serviço para controlar os medicamentos de outros membros da família (facilitando a gestão dos medicamentos de pessoas com doenças crónicas), e também registar a evolução do peso, tensão, colestrol, etc. - dados que poderão até ser partilhados com os médicos caso dêem permissão para isso. Aliás, também os médicos poderão ser notificados de que os medicamentos receitados a um paciente estão prestes a terminar, para que eles possam dar continuidade ao tratamento caso seja necessário.

Infelizmente, por agora o número de farmácias integradas neste iFarmacias é bastante reduzido, limitando-se a uma meia-dúzia de farmácias na zona centro do país (a maioria em Lisboa). Mas se/quando este iFarmacias começar a apresentar uma maior quantidade de farmácias... não deixará de ser uma opção bem interessante para ajudar todos os que necessitem de medicamentos.
08 Mar 19:20

Um Smartwatch de estilo clássico

by Carlos Martins

Quando se fala de smartwatches, a maioria das pessoas imediatamente pensa em modelos futuristas com ecrãs curvos e um conjunto de sensores retirados dos filmes de ficção científica. Mas há quem pense que um smartwatch poderá ser algo de estilo mais clássico... e se esta proposta de smartwatch se tornasse real não penso que tivesse dificuldade em encontrar compradores.


A proposta chega-nos de Gábor Balogh, um designer húngaro, que opta por um estilo tradicional que poderia passar por um relógio clássico. A grande vantagem é que ao simplificar o design, este smartwatch dominado pelo seu ecrã circular que ocupa toda a sua face frontal ganha capacidades camaleónicas. Num momento poderá estar a mostrar ponteiros de um relógio clássico, como a seguir transformar-se num ecrã de navegação com um mapa, ou um indicador com opções para atender ou rejeitar uma chamada.


Mesmo não sendo grande fã de "relógios", confesso que a ideia me agrada bastante - e ainda por cima, nada impedia que cada utilizador pudesse escolher entre diferentes variedades e temas para que o seu relógio se adaptasse às suas preferências de cada dia. Mudar entre um mostrador de estilo clássico com ponteiros, ou outro que simulasse um relógio mecânico com os mecanismos à vista, ou outro com mostrador digital estilizado, seria algo que poderia ser feito com apenas alguns toques no ecrã.

E se tudo isto viesse acompanhado por uma autonomia suficiente para alguns dias de utilização e um preço imbatível à "Google Nexus"... então seria garantia de sucesso imediato.
07 Mar 20:57

Cabovisão oferece serviço sem fidelização

by Carlos Martins

Raramente as coisas são "a preto e branco", e o mundo real é dominado por uma quantidade infindável de cinzentos - mas ainda assim há que realçar as mudanças positivas que algumas empresas têm a coragem de oferecer, relembrando que as coisas não tem que permanecer "como é costume" só porque sim. Depois de ainda ontem termos falado de mais um caso de cláusulas abusivas de um operador nacional, hoje temos uma boa notícia: a Cabovisão torna-se no primeiro operador a oferecer pacotes sem fidelização em Portugal.

É uma opção que será apreciada por muitos clientes, e que assume ainda maior importância nesta fase complicada que se atravessa e onde assumir um compromisso a 12 ou 24 meses se torna numa proposta bastante arriscada (em caso de desemprego, por exemplo - com alguns operadores a insistirem, ilegalmente ao que parece, que não há forma de escapar ao contrato a não ser pagando todas mensalidades em falta).

Nem que seja pela simples atitude mais "humana" e respeito pelos clientes, penso que há que dar todo o mérito à Cabovisão por avançar com esta iniciativa que, esperemos, venha a contagiar os restantes operadores. Muitas vezes tudo o que é necessário para se mudar "a norma" do mercado é que apenas um dos operadores tenha a coragem de o fazer... acabando por forçar os demais a que sigam as suas pisadas (mas não sem que fiquem marcados como apenas o tendo feito por terem sido "obrigados" e não por sua própria iniciativa).

Esta oferta sem fidelização vem também demonstrar que as desculpas que têm sido usadas pelos operadores para a necessidade da mesma (como forma de permitir a manutenção dos "preços baixos" e amortizar o "investimento" feito com um novo cliente) não passa disso mesmo: de desculpas, sem cabimento. Se se está a fornecer um serviço, aquilo que têm que se focar é no fornecimento continuado de um serviço que o cliente deseje ter, e não da fidelização invertida a que se assiste, em que tudo serve para prender o cliente ao serviço mesmo que dele queira escapar.

Nos próximos tempos começaremos a ver nas ruas esta nova campanha, com o nome "Torna-te Livre - Sem fidelização só na Cabovisão". E agora... vamos ver de que forma reagem os restantes operadores.
07 Mar 05:37

Revista PROGRAMAR - Revista PROGRAMAR Edição 44 - Fevereiro de 2014

Revista PROGRAMAR
Edição 44 - Fevereiro de 2014


Imagem Colocada

(clica para download)


Nesta edição trazemos até si como tema de capa o artigo Criar extensões para Google Chrome. Adicionalmente, poderá ainda encontrar nesta edição os seguintes artigos:
  • JSF - Parte 2 - Como Criar um Projeto JSF
  • Aplicação de Licenças de Utilizador no SharePoint 2013
  • Funções Anónimas
  • Pascal - Operator Overloading
  • Quero fazer uma aplicação simples! E agora? Por onde começo?
  • Desbravando o goto!
  • Arduino: const vs define
  • C# - Resolução de Sobrecarga de Método
  • Integrar o Facebook numa aplicação Windows Phone
  • O Impacto das Novas Tecnologias nas Crianças com Necessidades Educativas Especiais

Continuamos também a premiar os autores dos três melhores artigos, dado o sucesso nas edições anteriores. E os leitores devem dar a sua opinião para que possamos premiar correctamente. Para isso vote em http://tinyurl.com/ProgramarED44-V.
07 Mar 05:06

Zizabi - Descobre o preço justo de imóveis em todo o país

by Carlos Martins

Para quem estiver a pensar mudar de casa, a pesquisa por um novo local para morar começa invariavelmente pela Internet, e nesse sentido este Zizabi será um excelente lugar para começarem.

Em vez de se limitar a dar uma listagem dos preços dos imóveis disponíveis ou apresentá-los num mapa, o Zizabi tem a particularidade de usar um conjunto de dados que poderá ser do interesse dos futuros compradores, como o número de escolas nas proximidades, esquadras de polícia, parques, bares, locais culturais, farmácias, etc.


Mas não se pense que as coisas ficam por aqui, pois o Zizabi (que é um projecto de uma start-up do Porto) vai ainda mais longe para criar o mapa das avaliações para os imóveis em cada zona. Para além de todos os diferentes pontos de interesse nas proximidades, o Zizabi tem também em consideração dados do Instituto Nacional de Estatística para nos apresentar ainda mais informação.


Para além da idade e finalidade dos edifício, o Zizabi aprofunda ainda mais a informação disponível permitindo saber a idade e dimensão média dos agregados familiares de cada zona, da distribuição de homens/mulheres, as suas profissões e até a sua formação.

Claro que têm que ter em conta que estes dados poderão ter meses/anos de desfasamento, mas sempre servirão para dar uma melhor ideia sobre o vosso potencial futuro local de residência - e que todo o tipo de informação será certamente bem vinda.
07 Mar 05:01

Uma página com mais de 1000 livros gratuitos sobre programação

by Denise Helena

libros

Em github.com há uma página mantida por mais de 200 pessoas que contribuem frequentemente adicionando novos livros gratuitos relacionados com o mundo da programação.

Desde manuais até guias específicos de alguma linguagem, podemos encontrar já mais de 1000 títulos classificados, com links que apontam tanto a documentos em PDF como a páginas web nas quais o conteúdo se encontra em HTML.

Este tesouro começou a ser criado em maio de 2013 em stackoverflow.com, criando uma lista cuja fama começou a crescer na rede para gerar outras variações, como a de resrc.io, por exemplo.

Em outubro do mesmo ano a lista mudou para github, ganhando muito mais conteúdo graças à colaboração de centenas de usuários que alimentam o projeto.

A última atualização da lista foi feita a apenas 3 dias, sinal de que se trata de um diretório de links constantemente vivo. Infelizmente os títulos estão em inglês, embora isso seja algo já assumido por quem está aprendendo a programar.


Artigo escrito no br.wwwhatsnew.com
Acompanhe também as notícias pelo twitter: twitter.com/pooldigital ou pelo RSS


01 Mar 16:07

Responsive Social Sharing Buttons Built with SASS

by Ray Cheung

Advertise here via BSA

Ridiculously Responsive Social Sharing Buttons(RRSSB) is built with SASS, so you can easily customize it by tweaking a few variables. SVGs allow for tiny file size and retina support. Add or remove icons as you see fit — the rest will fill in automatically in the container. Adding a class of popup to the anchor tag for each share button will make the share dialog open in a popup, rather than a new window.

responsive-social-buttons

Requirements: SASS
Demo: http://kurtnoble.com/labs/rrssb/
License: See License

Sponsors

Professional Web Icons for Your Websites and Applications

01 Mar 15:54

Koding dá-te até 20GB de espaço gratuito para programação online

by Carlos Martins

Penso que todos concordarão que o passo mais difícil para quem gostaria de aprender programação é... decidir-se a dar o primeiro passo. Existe um enorme conjunto de dúvidas e receios, e tudo serve como desculpa para ir adiando a coisa. O Koding é uma plataforma gratuita de programação online que simplifica o processo, e que de momento está a disponibilizar espaço extra (até um máximo de 20GB) para projectos mais.... espaçosos.

Basicamente, o Koding liberta-nos da necessidade de ter uma máquina configurada para a actividade da programação, disponibilizando uma máquina virtual gratuita (que está a correr Ubuntu, e com acesso a um terminal "real") com acesso via browser, e que qualquer pessoa poderá utilizar para trabalhar nos seus programas, quer sejam em C/C++, PHP, Python, etc. Facilita também o processo de programação colaborativa e partilhada, o que o torna ideal para pequenas equipas - ou até para que se torne na forma ideal para um grupo na escola completar o projecto que tem que apresentar.


Acima de tudo, acaba por remover um potencial entrave a quem se quer aventurar nas lides da programação, ao disponibilizar uma máquina virtual dedicada a isso e que está acessível a partir do vosso browser e sem que tenham que fazer qualquer modificação ou instalação de conteúdos adicionais no vosso computador.

Portanto, se estiverem interessados, comecem já com 4GB no Koding em vez dos habituais 3GB (válido apenas para quem se juntar ao serviço, durante esta semana) e poderão ganhar 1GB extra por cada amigo que convidarem para o serviço.


01 Mar 15:54

Authy sincroniza o 2-step authentication em múltiplos dispositivos

by Carlos Martins

Encontrar o equilíbrio perfeito entre a segurança e a comodidade não é tarefa fácil. Mas por vezes tudo se resume a usar a ferramenta certa para a tarefa pretendida. O sistema de autenticação 2-step é fundamental para quem quer manter o acesso a diferentes serviços em segurança, adicionando um código único sempre diferente à password que habitualmente se utiliza. Mas, a maioria das apps que geram este tipo de códigos tem um grande inconveniente: foram feitas para serem usadas apenas num único equipamento. O Authy resolve isso.

Se já se converteram ao 2-step authentication no Google, Facebook, Dropbox e outros serviços e usam a app Google Authenticator para gerar os códigos saberão que no caso de trocarem de smartphone - ou tão simplesmente se comprarem um outro dispositivo (um tablet, por exemplo), onde queiram ter também a possibilidade de gerar os vossos códigos... não podem. São obrigados a repetir o processo de configuração inicial para gerar um novo código de sincronização (e nessa altura, aproveitar para colocar o código nos múltiplos equipamentos que tiverem). Claro que se passado alguns meses trocarem ou comparem um novo... voltam a ter que fazer o mesmo processo.

Este Authy é uma app que tem a possibilidade de manter uma cópia das vossas contas na cloud (encriptadas, obviamente), de forma a que quando a reinstalam num novo equiapamento, poderão ter acesso imediato a tudo o que tinham sem necessidade de recriar o processo para todos os vossos serviços.

Claro que se coloca a eterna questão: será que se pode confiar neste serviço para manter os vossos códigos 2-step em segurança? Fará sentido adicionar um sistema 2-step para aumentar a segurança no acesso a um serviço e depois facilitar o seu acesso em múltiplos equipamentos e ficando dependente de uma empresa de terceiros? Isso são perguntas a que cada um terá que responder por si - mas se são daquelas pessoas que troca de equipamento com alguma frequência e já está farto de recriar continuamente os seus tokens 2-step, valerá a pena espreitar este Authy.


25 Feb 11:40

Microweber CMS - A Flexible, Easy-To-Use & Open Source CMS

by Kevin Liew

The idea of Microweber was born almost two years ago as founders Boris (designer), Peter (developer) and Alexander (front-end developer) thought the world of CMS needed something fresh. Most systems were too complex for the end-user lacking technical background.

Designers and developers were concerned too as they would only benefit from another platform for their concepts and ideas. There was a dire need of something that is both free and open source. Microweber just recently came out of its beta and is a product close to its complete finish. A flexible, easy-to-use, free, open source CMS, it lets the user choose between three things: to create a website, an online shop or a blog. Any of these can be either hosted on the Microweber server or the user can download the CMS and host it on his own server.

Microweber Dashboard

It’s true that the CMS niche is a bit overpopulated and you need to present a serious innovation for the users to choose you. Microweber has some features that make it stand out.

Drag & Drop

Microweber operates on the Drag & Drop. This means that the user can move text, upload images, embed videos, arrange modules or plug-ins with just a click of the mouse, dragging and dropping what is needed to its designed place. Drag & Drop has no boundaries so every element no matter if you’re running a blog or an online shop, can be moved via the technology.

Real time text writing & editing

Microweber Real time text writing & editing

The quickness and comfortable use of Drag & Drop are enhanced by the highlight feature of Microweber CMS. The Real time text writing & editing function gives the user an opportunity to go “Live edit”. “Live edit” lets users manage content directly on the site interface itself. Think of it as an alternative to organizing your website in the Admin panel. Microweber lets you choose between Admin and Live Edit. You will surely prefer the latter, especially if you have a terrific template that makes working on the interface an amazing experience. Either way, switching between those views is one button away for the user’s convenience.

To-be rich on customization

Speaking of templates, the Microweber team is working on designing a heap of interesting templates to add to the existing default site template. The concept goes way beyond that, though, and continues with the idea of a Microweber Marketplace. This Marketplace will be a platform for all developers and designers to showcase their talent, create templates, plug-ins or modules and either offer them freely or sell them to end-users.

The layouts are another strong feature of this CMS. A few examples that are executed only with a click of the mouse and a drag across the screen are: a predefined layout for a Corporative team member page, a widescreen image followed by a single column of text below for a Breaking news story, or arrangement of images in two or more columns for those who wish to create their photo gallery in mere seconds. There are currently more than 15 layouts so the user can choose how to customize his content.

E-commerce

Microweber E-commerce

As mentioned before Microweber can also be used as an e-commerce platform. In fact, that’s a core feature of the CMS. Users can upload their products, add pictures and videos, set different pricing & shipping costs. The product customization is diverse and includes a lot of custom fields like sizes, colors, dimensions and many others. An option for tracking orders and defining different payment methods is also available.

Blogging

Microweber Blogging

Microweber is blog-friendly too. The Drag&Drop makes writing articles, adding multimedia and organizing widgets a lot easier. There is of course a comments section open to connect the blogger with others and spark discussions.

Mobile

We know that the future is inevitably mobile. Every up-to-date CMS has to think about this and so has Microweber. Websites created using the CMS are 100% mobile compatible in order to secure maximum compatibility and accessibility.

For the devs

Microweber has a module-based structure with rich PHP and JavaScript/AJAX APIs. The API can be used for creading Modules or Templates – this is where the aforementioned Marketplace kicks in too. Using Microweber is pretty easy if you are familiar with other template-based CMS like Wordpress for example. The new thing here is that the developer can define his own draggable or droppable areas.

Features:

  • PHP API
  • JavaScript/AJAX API

The sole requirements of Microweber CMS are PHP and MySQL. More information about creating Modules and Templates can be obtained in http://microweber.com/docs

Keep in mind that this CMS is still in development and there are many things that will be added, upgraded and developed to ensure users experience the best they can.

Microweber Admin

Video Demo

25 Feb 11:34

Gitter: Chat for Github

by Cameron

Gitter, currently in beta, offers up free chat rooms for all of your public repositories. You can see who’s read your messages, it offers full emoji support, and stores infinite chat history in the cloud so you can always access it.

gitter

13 Feb 09:20

3 coisas que nem imagina que podem ser feitas com Google

by Denise Helena

Faz mais de um ano publicamos aqui uma lista com 10 coisas que talvez não saiba que podem ser feitas com Google, hoje ampliaremos essa lista com mais três detalhes bem pouco conhecidos entre o público em geral.

1 – Se usar o Google translate para traduzir esto “pv zk bschk pv zk pv bschk zk pv zk bschk pv zk pv bschk zk bschk pv bschk bschk kkkkkkkkkk” e clicar no alto falante para escutar o resultado. Escute aqui.

2 – Se usar asteriscos ao buscar em Google, o sistema vai devolver o estatisticamente mais provável. Se buscarmos “A coca-cola foi inventada *”, por exemplo, Google mostrará frases nas quais o asterisco se completa em diversos resultados. Podemos usar quantos asteriscos quisermos.

3 – Podemos encontrar câmaras de segurança de lugares em todo o mundo buscando inurl:view/view.shtml, já que é a url que muitas câmeras IP utilizam para mostrar a imagem. Pode experimentar aqui.

Em hacksandstuff.com comentam algumas curiosidades.

Se souber alguma curiosidade e quiser compartilhar, sinta-se à vontade para deixar nos comentários,ok?


Artigo escrito no br.wwwhatsnew.com
Acompanhe também as notícias pelo twitter: twitter.com/pooldigital ou pelo RSS


06 Feb 17:32

Preocupação com a velocidade da Internet é a principal razão para uso do Net.mede

by NovidadesTV

Só 18% dos consumidores que usaram a ferramenta disponibilizada pela ANACOM estavam preocupados com o traffic shaping. A maioria opta por verificar a velocidade do serviço.

Dados partilhados pelo regulador das comunicações indicam que nos últimos dois meses o Net.mede recebeu 204 mil visitas de utilizadores que visualizaram 561 mil páginas.


O serviço foi disponibilizado em dezembro com o objetivo de aumentar a transparência no mercado e ajudar os consumidores a fazerem melhores escolhas no serviço de acesso à Internet, permitindo medir a velocidade de upload e download, mas também o traffic shaping, através de um teste que permite verificar se os operadores estão a utilizar mecanismos de gestão de tráfego de internet.

Através do serviço os utilizadores podem comparar os resultados dos testes com a velocidade do serviço que têm contratado, aferindo a qualidade da sua ligação.

Fonte: NovidadesTV.com / Sapo.TeK
Agradecimento ao “Lázaro” pela informação

22 Jan 23:06

Baboom - serviço de música de Kim Dotcom (feito em Portugal) já mexe

by Carlos Martins

Kim Dotcom está prestes a revelar o seu novo serviço de música online, que visa ser uma alternativa a serviços como o Spotify e o iTunes - e que pretende atrair os artistas para que possam ganhar dinheiro com as suas músicas.


Tal como no seu novo Mega, também este Baboom tem a particularidade de ser um serviço desenvolvido em Portugal (mais propriamente na avenida da Boavista no Porto, oh oh) e o primeiro artista a surgir no serviço é... o próprio Kim Dotcom. Segundo o próprio, a ideia subjacente ao futuro da música é a de os artistas disponibilizarem as suas obras gratuitamente, mas facilitando também o acesso às versões pagas para os fãs que desejarem pagar por elas (ou usarem um plugin no seu browser que apresenta publicidade). Ainda assim, cada artistas terá a liberdade de especificar quais as músicas que deseja disponibilizar gratuitamente e quais estarão disponíveis apenas a pagar.

Uma novidade que poderá ser interessante (caso seja para manter) é a de existirem prémios monetários para os fãs que criarem os melhores remixes e videoclips das músicas: e estamos a falar de prémios de $5000 e $10000 dólares - bastante atractivos, portanto. Isto aplica-se às músicas de Kim Dotcom, mas caso seja uma iniciativa que vá ser alargada no futuro a mais artistas, poderia ser uma excelente forma de dinamizar este serviço e atrair mais interessados.

Por agora, experimentem a versão "demo" onde a selecção artística é bastante limitada... e lá mais para o final do ano veremos se este Baboom tem pernas para andar - que é como quem diz, competir com os gigantes já implantados no panorama da distribuição musical na internet.
22 Jan 22:51

Um caixa eletrônico para Bitcoins

by Denise Helena

Em São Paulo, durante a Campus Party, que acontecerá de 27 de janeiro a 2 de fevereiro, vamos poder ver o primeiro Caixa Eletrônico de Bitcoins de toda América Latina, que custou 10.000 dólares, fabricado em Portugal e importado pela empresa Mercado Bitcoin.

Seu funcionamento é simples: pagamos com dinheiro normal e compramos Bitcoins graças ao código QR correspondente a nossa conta. Mercado Bitcoin cobrará 2,5% pela transação, e só aceitará pagamento em real.

Depois do evento será instalado o Caixa Eletrônico em um centro comercial, tendo previsão de que até o final do ano tenha se conseguido amortizar a quantia investida no equipamento. A empresa responsável pelo Caixa é Lamassu, cujo site (lamassu.is) já está divulgando as funcionalidades do dispositivo.

cajero bitcoins

Comentam em estadao.com.br que o governo brasileiro ainda não está dando muita importância a esta moeda. O Banco Central comentou “analisamos o emprego do bitcoins e, no momento, não é relevante para o sistema financeiro brasileiro”.

Pode até não ser, porém, se está começando a aparecer Caixas deste tipo pelas cidades, é porque algo deve estar acontecendo…


12 Jan 21:44

O Som dos Algoritmos de Ordenação

by Carlos Martins

Quando alguém se aventura nas artes de dominar a linguagem de programação de computadores, mais cedo ou mais tarde vai deparar-se com os algoritmos de ordenação. Embora muitas linguagens hoje ofereçam funções "já feitas" que tratam disso, não deixa de ser um exercício mental engraçado que irá fazer aquecer os neurónios... e neste caso, os ouvidos.

Existem inúmeros algoritmos diferentes de ordenação - e o mais engraçado é que se pensavam que por esta altura já estaria tudo inventado, continuam a surgir variantes que conseguem superar o desempenho de algoritmos anteriores (embora, cada vez mais, apenas em casos específicos).

Não é preciso saber programação para pensar nisso: se vos dessem 50 páginas de um livro, numeradas, mas fora de ordem, e vos pedissem para as ordenar, como fariam?

Quase seguramente que diferentes pessoas utilizariam diferentes métodos... Uns poderiam ir percorrendo o monte de folhas procurando pela primeira página e colocando-a numa pilha ao lado, depois procurando a segunda, e assim sucessivamente; outros poderiam ir desde logo trocando a ordem das páginas "mais à frente" com as que ficam "mais atrás"; etc. etc. E na verdade muitos dos algoritmos existentes replicam estes processos que seria feitos manualmente.


Existem inúmeros sites, programas e vídeos que demonstram o processo de cada método de ordenação usando diferentes modos de visualização, mas o que vos trago hoje é um que nos permite ouvir o som dos métodos de ordenação.

Se quiserem saber um pouco mais sobre eles, o site sorting algorithms mostra-nos alguns deles e como se comportam com diferentes conjuntos de dados (aleatórios, quase ordenados, pela ordem inversa, e com poucos valores diferentes). Como se poderá ver, não existem um único algoritmo "perfeito" para todas as situações. Há uns que são manifestamente mais rápidos de uma forma geral (quase sempre com complexidade acrescida face aos métodos "fáceis de entender"), mas há alguns que são particularmente eficientes para os diferentes casos dos dados a ordenar. Por isso, a escolha do método a usar irá depender do tipo de dados mais prováveis de encontrarem para cada caso.


Mas se preferirem outro tipo de sonoridade e visualização... também há quem se tenha dado ao trabalho de demonstrar estes algoritmos de ordenação usando danças populares! :)