Com a Tesla a tardar em cumprir a promessa de fazer uma viagem autónoma a atravessar os EUA, o engenheiro especializado em sistemas de condução autónomos que esteve no centro da discussão entre Google e Uber, troca as palavras pelos actos, fazendo essa viagem com o sistema que criou na sua nova empresa Pronto.ai.
Anthony Levandowski foi um dos elementos chaves no projecto de automóveis autónomos da Google durante quase uma década, que depois deu origem à Waymo; e que depois se aventurou na criação da sua própria empresa - a Otto - de sistemas autónomos para camiões, que acabou por ser comprada pela Uber. O problema é que no meio de todo este processo, Levandowski terá levado informação secreta que a Uber estaria a utilizar, e que resultou na sua saída da empresa. Pois bem, uma pessoa como esta não fica parada por muito tempo, e o seu mais recente projecto é a Pronto.ai.
A Pronto.ai continua a dedicar-se à sua área de especialidade - a condução autónoma - mas que não ambiciona fazer tudo aquilo que a Waymo está a tentar fazer. Em vez de criar um sistema capaz de substituir completamente um condutor (os chamados nível 4 ou nível 5), Levandowski diz que é bem mais realista focar-se na criação de um sistema que assumidamente seja apenas de "assistência à condução" (nível 2), mas que poderá já resultar em vantagens práticas para o dia a dia dos condutores, e orientado especialmente para as pessoas que passam o dia na estrada: os camionistas.
Do que é que o sistema é capaz? Bem... Em Outubro, Levandowski fez uma viagem de costa a costa nos EUA num Toyota Prius equipado com o seu "Copilot", sem tocar no volante ou nos pedais, apenas com as paragens para abastecimento e dormir. Foram 4987 km percorridos ao longo de mais de 50 horas, sem que tenha acontecido uma única desactivação do sistema. É impressionante - ainda mais quando se tem em conta que o sistema não estava a seguir uma rota pré-calculada ou com mapas especiais, usando apenas câmaras - e, que vem "puxar o tapete" à Tesla, que há tanto tempo vinha a prometer fazer algo assim.
Provavelmente, várias vezes já deve ter precisado compartilhar a tela de seu computador pela internet, uma tarefa que pode ser bem complicada se não contarmos com as ferramentas adequadas. Recentemente, descobrimos Recordit, um simples programa para Mac e Windows que nos permite gravar screencasts de forma gratuita.
Quanto à algumas características pelas quais Recordit se destaca, uma delas chama a atenção por sua incrível simplicidade. De fato, é só baixar e abrir o aplicativo e selecionar a região da tela que quer gravar. É importante levar em conta que na gravação só aparecerá o que podemos ver na área selecionada, embora seja possível incluir toda a tela se quisermos. Depois, é só clicar no botão “Record” para que o screencast comece a ser gravado.
Ao terminar a gravação é só clicar em “Stop“, para que comece o download dos dados e possa compartilhá-los com outros usuários. Recordit oferecerá um link único com o qual podemos acessar à gravação de qualquer dispositivo. E mais, a ferramenta também conta com suporte para Twitter e gifs animados. Por último, aproveitamos para mencionar a possibilidade de apagar um screencast enviado à Internet a qualquer momento.
A while back I wrote about using Cloudinary to Optimize Images, a technique you can use to crunch image size, serve images from the cloud, and modify images on the fly. As someone who isn’t great with Photoshop, and never really has the time to play around with the amazing app, I appreciate that Cloudinary can do the hard work of cropping, optimizing, and doing a variety of transformations on images by simply changing a URL or adding a few parameters.
One of the Cloudinary add-ons I recently found blew my mind: removing photo backgrounds! Essentially Cloudinary’s service can accept your image upload and then remove the background elements so that only the foreground, focus image remains!
The JavaScript
Cloudinary provides an API in just about every language you can think of (JavaScript, Python, PHP, etc) but you probably know I’ll always opt for the JavaScript API! The following JavaScript code is all you need to upload an image and remove its background:
// npm install cloudinary
var cloudinary = require('cloudinary');

// Set your API information
cloudinary.config({
	cloud_name: 'david-walsh-blog',
	api_key: '############',
	api_secret: '############'
});

// Upload an image,
cloudinary.uploader.upload('sample-photos/my-photo.jpg', function(result) {
    // Log out the result to get the URL of the image
    console.log(result);

    // Image url is: result.url / result.secure_url
}, {
    public_id: "my-photo",
    background_removal: "remove_the_background"
});

/*
    Result:

    { public_id: 'my-photo',
      version: 1467832498,
      signature: 'd64413aaad8aefa3d0b6d521eab802e9bea5158d',
      width: 581,
      height: 583,
      format: 'jpg',
      resource_type: 'image',
      created_at: '2016-07-06T19:14:58Z',
      tags: [],
      bytes: 21368,
      type: 'upload',
      etag: 'e8584286fd457e9893b0dd69fd8c47c1',
      url: 'http://res.cloudinary.com/david-wash-blog/image/upload/v1467832498/my-photo.jpg',
      secure_url: 'https://res.cloudinary.com/david-wash-blog/image/upload/v1467832498/my-photo.jpg',
      info: { background_removal: { remove_the_background: [Object] } },
      overwritten: true,
      original_filename: 'my-photo' }
*/
That’s quite a small snippet for triggering such an amazing automated image modification! The photo uploads instantly and is added to your media library but the background removal does take a few moments to process. Cloudinary does let you configure your account to send alerts when the process is complete.
Example Output
Cloudinary’s background removal add-on is quality — no pixelated outlines or broken images. Here are a few before and after photos to prove it:
Cloudinary Rocks!
Cloudinary’s API is easy to use and their number of features and add-ons is amazing! Crunching images helps SEO and load time, serving them from cloud helps with performance, the ability to serve a different variation of image is a time-saver, and their add-ons like background removal make Cloudinary an incredibly powerful beast.
Cloudinary offers a free tier and so give them a try. There are loads of features and add-ons: they may save you time, effort, and worry about how your images are affecting your web load times!
I met Guillermo Rauch several years ago in the #mootools-dev room on IRC. He jumped into the MooTools project and made great things happen; he also coded MooTools’ plugins forge. Since then he’s gone on to create amazing things, most recently releasing HyperTerm, an excellent terminal app for Mac. I was recently browsing his GitHub repo list and found a goldmine of work but one quickly stuck out: wifi-password.
Have you ever been at a coworking location, a bar or restaurant, or your friend’s house and someone asks you for the wifi password? You don’t remember, of course, and the signs posting it are no longer up. What do you do? You grab wifi-password!
Once you’ve cloned wifi-password, you run the utility while you’re connected to the network:
./wifi-password
Wait a moment and the wifi password is output to your command line:
I can think of dozens of instances when this would’ve done me well. Being able to retrieve passwords from any app or network is incredibly useful when on the go!
Portugal já tem uma boa tradição quanto à criação de sistemas para domótica, e agora surge um que se quer destacar pela facilidade de utilização e um preço acessível: o DONA.
À primeira vista o DONA não parece ter nada de especial. Trata-se de "mais um" sistema de domótica que aposta nos seus módulos proprietários de controlo (para iluminação, estores, rega, tomada, e aquecimento) e de um mini servidor de tamanho compacto que trata de toda a inteligência e permite o controlo remoto a partir das apps.
Mas, o DONA aposta num aspecto que por vezes é esquecido, o da facilidade de configuração com um sistema visual que está ao alcance de qualquer entusiasta; e também o de ter preços competitivos que poderão dar-lhe alguma vantagem sobre sistemas alternativos.
É um sistema que vale a pena espreitar, mas que também aconselha a que se tenha alguma cautela. É que o maior problema nestas coisas não é apenas escolher um sistema "bom e barato", mas ter também alguma confiança de que o mesmo ainda estará funcional daqui por 5 ou mais anos. Nesse aspecto, e tendo em conta a "juventude" do DONA, haverá certamente quem prefira optar por soluções que fiquem menos dependentes de uma única empresa ou de módulos proprietários.
Mas, vamos acreditar que o DONA seja um sistema para durar, e que daqui por uma década ainda por cá esteja a mostrar que em Portugal também se fazem coisas boas. :)
Bem a propósito das preocupações ambientais com as cápsulas de café, a Xavax apresenta-nos a Coffeeduck Espresso Capsule, uma cápsula reutilizável compatível com a maioria das máquinas Nespresso.
Quer seja por uma preocupação de custos ou de consciência ambiental, há um número crescente de pessoas que tentam reutilizar as cápsulas existentes, com resultados nem sempre positivos. A Coffeeduck Espresso Capsule da Xavax é uma cápsula que foi concebida de raiz precisamente para esse fim, com um sistema de abertura fácil, simplificando o processo de colocação do café moído (lotes adequados para máquinas expresso) e que assim podem ser limpas e reutilizadas "infinitamente" - incluindo a capacidade para serem lavadas na máquina de lavar loiça.
Para além das vantagens já referidas (sem desperdício e redução de custos), esta cápsula permite também que cada utilizador possa criar as suas próprias combinações e obter o café precisamente ao seu gosto, em vez de ficar limitado às opções comercialmente disponíveis.
Cada pacote Xavax "Coffeeduck" Espresso Capsule inclui três cápsulas reutilizáveis e já está disponível em Portugal através da Hama por um preço sugerido de 13,99 euros.
Poder contar com um sistema de envio de newsletter super eficaz não é assim tão simples. Permitir criar modelos, oferecer estatísticas de envio, ter recursos que ajudem na gestão de listas, cuidar da reputação a todo momento para evitar spam… são muitas as variáveis que devem ser controladas a todo momento para poder garantir o sucesso do envio de nossos emails aos assinantes, e uma delas está relacionada, especificamente, com a tecnologia do envio do email.
No que diz respeito a este último ponto, vale a pena conhecer Mailtrain, uma plataforma de código aberto, que podemos usar para criar nosso próprio sistema de envio de newsletter, permitindo a importação de contatos e a gestão de listas, embora não disponha de sistema de criação de modelos nem estatísticas.
Com código disponível em github, permite o envio através de vários provedores, como Amazon SES, SparkPost, SendGrid o Mailgun, e os contatos importados podem guardar vários dados: email, nome, apelido… campos que poderão ser obtidos de fontes externas.
Mailtrain ainda tem muito caminho a percorrer para poder ser comparado com plataformas profissionais como as existentes hoje em dia no mercado, porém, oferece um bom exercício para que possamos entender melhor seu funcionamento dentro de um sistema de envio de newsletter, já que o código aberto permite a análise de todas e cada uma das suas linhas.
Facebook messenger já permite a criação de bots, sistemas que respondem de forma automática aos usuários e que aprendem com o uso, que podem ser configurados, monitorados, rastreados… Dizem que os bots são os programas do futuro, onde não serão necessárias apps para pedir uma pizza, já que com um simples chat será possível realizar esse tipo de ação, e hoje vemos como isso realmente é possível.
Em api.ai oferecem agora compatibilidade com Facebook Messenger. Se trata de uma plataforma que permite criar bots para vários sistemas, inclusive Slack, e ao adicionar Facebook messenger, suas possibilidades se multiplicam.
Desde api.ai podemos construir um bot sem necessidade de programar nada, só é necessário definir ações, ter presentes as palavras que podemos receber e as palavras adequadas que serão usadas como respostas. É possível estabelecer variáveis e criar simulações de conversas, e ao finalizar, integrar facilmente com o usuário desejado da plataforma, do Facebook messenger.
O idioma do bot pode ser também definido, e embora prometem ter um bot funcionando em poucos minutos, para que seja realmente atraente, é preciso um pouco mais de tempo, já que é importante ver os vídeos de demonstração da plataforma para aproveitar todas as funcionalidades oferecidas.
Ad blocking is one of the hot topics in website design and development right now. Adblock Identifier is a sweet little tool that detects ad blocking software and creates an alert for users that functionality will be disabled if the ad block is left running.
Installation is key with this tool and you should follow the instructions carefully. Customization options include the title, description and theme for how the message looks. It comes with light and dark options with a light default. You have a few customization options to think about, including the text in the alert message. The tool allows you to keep users from specific content if they are using ad block software or just warn them for next time.
This Light Bootstrap Dashboard from Creative Tim gives you a simple, beautiful, responsive dashboard for your Bootstrap 3 applications. It contains multiple hand-picked, optimized plugins, and six color filters.
The huge number of blogs out there speaks of the fact that people like to keep blogs and make their thoughts and ideas open to the World. Over the last several years the number of blogs increased dramatically targeting different goals and group of readers or audience. The purpose of having a blog differs from person to person. Some bloggers run a blog just to share some thoughts and interests, others run it for commercial purposes, for broadening the cycle of their network and overcoming boredom. A lot of people keep blogs as kind of a hobby and way of relaxation.
Whatever the goal of keeping a blog we wish it to be successful and involving. Those, who are serious about having a successful blog are more than welcomed to read about the best WordPress plugins which would be very useful to consider about.
Plugins are an important part of every blog. There are tons of them available at WordPress directory but not all of them will work for everyone. The plugins that I’m going to write about would pretty much fit to any web blog and will be the milestone of your online success.
Slider WD
Let me introduce Slider WD, a feature-rich WordPress slider plugin that has everything to make your blog stand out. It has all the necessary features that you could ask from a slider plugin. Create sliders to show your content in the best way and attract readers. You can upload unlimited images and videos to your slides, add almost any type of layer and even multi-layer slides, add parallax and carousel effects to the slides and choose from other offered features available. All the features are customizable to every need.
Simple Social Buttons Adder
Social media plays a crucial role in spreading information to almost every corner of the World. Get your content shared and spread your message across with the help of Simple Social Buttons Adder plugin. It helps you integrate social sharing buttons to all of your posts and pages. You can add custom images to the buttons to go with your WordPress theme.
Event Calendar WD
Event Calendar WD is a perfect choice for the bloggers who like to create different events for their readers and showcase them in a professional and organized way. This WordPress calendar plugin truly responsive and looks good on just any device. It has a variety of event display modes and theme skins which can be customized based on your needs. Additionally you can create categories for events and venue lists, add social sharing buttons, integrate Google Maps and many more features. The PRO version comes with a lot of add-ons and integrations which will equip your calendar with additional functionalities.
Form Maker
If you want to add different kinds of highly responsive and user-friendly forms to your blog in just a few minutes then you are strongly advised to get WordPress Form Maker plugin. You can generate various kinds of forms and customize almost every feature. It is extremely easy to use and you don’t need any programming skills to make it work. Its FREE version allows you to create up to 7 field forms which can include simple text, password, address, name, email, numerical fields for numbers. You also have the possibility to change the form layout, customize the button styles,review it before adding to your blog and many other features. The PRO version enables you to add unlimited number of fields to your forms with the possibility to add PayPal and Upload fields,Google Maps API integration.
Related posts
Related posts plugin is a good fit for just any kind of blog. Providing your readers with links to the related content is sure to significantly improve your pageviews. It helps you provide related post links to your readers so that they can discover related content they might be interested. In-text links are great for SEO perspectives as well. You can also help your readers find other great blogs with related articles.
To round up, these are my personal recommendations for plugins that, in my opinion, would fit any web blog and be beneficial for every blogger regardless of the targeted group of readers and the goal of the web blog.
Author : Gayane Mar
Bio: Gayane is a passionate web-blogger who started her blogging activity a few years ago. My posts are all about web design and web development. She writes all these posts for good people who need some guidance or advice with web development. The driving force behind her writings is the great hope that her blog posts would be helpful for each and every one reading them.
Browser desktop notification system, using this you can push notifications for event reminders, message information like whatsapp to desktop users in realtime from your web project. Very few line of JavaScript code, that can help you to interact with browser notification system. I have implemented this for 9lessons.info, you will find a most popular article notification for every 3 minutes. Take a quick look a the live demo.
Start Browser Notification This code will initialize the browser notification system, read more about Vanilla JS(Plain JavaScript)
document.addEventListener('DOMContentLoaded', function ()
{
if (Notification.permission !== "granted") { Notification.requestPermission(); }
});
Push Notification
This function will help you to push notification data, here you have to modify icon URL. You can pass title, description and URL values.
function notifyBrowser(title,desc,url)
{
if (Notification.permission !== "granted") { Notification.requestPermission(); } else { var notification = new Notification(title, { icon:'http://YourWebsite.com/logo.png', body: desc, });
/* Remove the notification from Notification Center when clicked.*/ notification.onclick = function () { window.open(url); };
/* Callback function when the notification is closed. */ notification.onclose = function () { console.log('Notification closed'); };
Demo Array The array contain most popular articles on 9lessons.info
var articles = [
[
"Vanilla JS Browser Default Java Script.",
"http://www.9lessons.info/2015/09/vanilla-js-browser-default-java-script.html"
],
[
"Facebook Style Background Image Upload and Position Adjustment.",
"http://www.9lessons.info/2015/02/facebook-style-background-image-upload.html"
],
[
"Create a RESTful services using Slim PHP Framework",
"http://www.9lessons.info/2014/12/create-restful-services-using-slim-php.html"
],
[ "Pagination with Jquery, PHP, Ajax and MySQL.", "http://www.9lessons.info/2010/10/pagination-with-jquery-php-ajax-and.html" ], [ "Ajax Select and Upload Multiple Images with Jquery", "http://www.9lessons.info/2013/09/multiple-ajax-image-upload-jquery.html" ], ...... ...... ...... ];
Jquery
Contains javascipt code. $("#notificationButton").click(function(){}- notificationButton is the ID name of input button.
<script src="https://ajax.googleapis.com/ajax/libs/jquery/2.1.3/jquery.min.js"></script> <script> $(document).ready(function() { $("#notificationButton").click(function() { var x = Math.floor((Math.random() * 10) + 1); /* Random number between 1 to 10 */ vartitle =articles[x][0]; vardesc ='Most popular article.'; varurl =articles[x][1]; notifyBrowser(title,desc,url); return false; }); }); </script> //HTML Code <input type="button" id="notificationButton" />
Vanilla JS
Plain JavaScript
<script> document.addEventListener('DOMContentLoaded', function() { document.querySelector("#notificationButton").addEventListener("click", function(e) { var x = Math.floor((Math.random() * 10) + 1); /* Random number between 1 to 10 */ vartitle =articles[x][0]; vardesc ='Most popular article.'; varurl =articles[x][1]; notifyBrowser(title,desc,url); e.preventDefault(); }); }); </script> //HTML Code <input type="button" id="notificationButton" />
SettimeOut
Contains simple JavaScript code, calls after 2 minutes. Here you can modify milliseconds values.
<script> setTimeout(function(){ var x = Math.floor((Math.random() * 10) + 1); /* Random number between 1 to 10 */ vartitle =articles[x][0]; vardesc ='Most popular article.'; varurl =articles[x][1]; notifyBrowser(title,desc,url); }, 120000); //calls every 2 minutes </script>
Rigorous attention to detail is what converts a simple design into a real masterpiece. Although it seems that regular users will not notice the difference, however, as practice shows they not just feel but also see it. It is like Flemish art, which excels in thoroughness and particularization that instantly strikes the eye and naturally stands out from others. Thoroughness rules and when it comes to UI and UX elements, icons are those integral particles that are able to ruin or perfect the whole design.
Restaurant-related projects, as befits every elaborate theme with matching pack of glyphs, need special icons that finish off the composition, increase the sense of harmony and make navigation through the project pleasant and enjoyable.
Here, you will find 15 carefully crafted icons packs that enrich any interface with fitting and relevant graphics.
Free Bar Icons by spovv
Specially crafted for restaurant-themed websites, this set comprises 32 subtle contour bar icons that can complement any modern interface and revamp nav bars. It covers vector representation of avatars, bottles, cutlery and other stuff.
Icons by Hour – 2pm (Sweet Treats) by Joe Harrison
The designer has created an interesting project, where each hour is described through a series of icons. Thus, 2 pm is reserved for sweets. The range includes pancakes, lollipops, doughnuts, macaroons, popcorn, chocolate bar and much more. Your delicious interface will certainly benefit from these yummy glyphs.
Food icons
Chosen in favor of nifty flat style and calm yet beautiful color scheme, the designer reproduced a dozen tasty, visually appealing food icons that illustrate not only kitchen utensils but also food items such as cake, watermelon, egg or chicken leg.
30 Foods Icons-Free Icon Set by zeuero
The PSD file embraces 30 sleek outline retina-ready icons that add a touch of elegance to any interface. They look especially good at flat and minimal UI designs, where legibility and clarity are top priorities.
Foodikons by Abdus
Foodikons have a lovely touch of smooth and delicate curves that give each item a playful and joyful appearance. Thanks to subtle line style, icons become ideal options for trendy material-inspired or iOS-powered interfaces, especially those that feature heavily blurred backdrops.
Free BBQ Icons by Cort McGinty
Stylish, flat, clean, solid and outline – that is how the set can be briefly characterized. It includes essential stuff inherent to BBQ party that is flawlessly executed. You can easily use each item individually for improving UI or use it as a bundle in order to create tasty-looking backdrops.
50 Free Autumn Inspired Icons by Nick Botner
The set is aimed to portray autumn, where each icon inherently relates to this time of the year; however, the artist has kindly included seasonal fruits and vegetables in order to complete the work. So that nifty vector representation of apple, peach, pumpkin, corn, carrot, grape, pepper and zucchini is already in your pocket.
Food Icons by Harshil Acharya
This small bunch of clean and minimalist icons comprises only some popular dishes that illustrate first/second courses and desserts. Nevertheless, it can easily beautify menu sections and enhance the look of widgets and modules.
Free Food Icon Set by Matúš Peciar
Tailored for improving small app interfaces related to the food industry and used as a kind of map pins, this set of gorgeous and sleek icons will certainly find its place in the upcoming project. It can instantly identify cocktail bars, brasseries, lunch bars, tea houses or cafes.
40 Food Icons ( PSD ) by Graphics Bay Team
Available in both PSD and AI formats, the pack may come in handy for fans of different Adobe platforms. Outlined with a fancy appearance, they give a cutting edge to any interface, injecting into it a bit of cheerfulness and artistry.
50 Flat Food and Drink Icons
50 Flat Food and Drink Icons naturally grab the attention with its bright and joyful outward. Smooth lines, long shadow, profiled shapes, to say nothing about an eye-catching color palette, your design will certainly win from a splash of such bright and stimulating visuals.
Free Flat Shadows Icons by Sumaira
The series is marked by a harmonious and appealing tandem of flat and line styles that produce a fantastic effect. Vibrant and energizing it is able to diversify any design. Whether you are up to creating an app or just a basic landing page for a small local restaurant, it certainly meets your needs.
Free Icons Pack – Fruits&Vegs by Lukasz KuIakowski
It’s the unique package that strikes you with a complex appearance. The artist goes for a more sophisticated and visually interesting look, recreating a bulk of mind-blowing low poly icons with a distinctive and strong three-dimensional appeal. It works well with the flat design with a vibrant color scheme.
Food and Cocking Icons
As the nameplate suggests, the package is aimed explicitly to represent products and kitchen utensils that can be found in restaurant-themed UIs. Here regular shapes and line style naturally recreate the whole beauty, making each item look weighty and at the same time nifty and exquisite.
Conclusion
Vector line-styled icons greatly dominate over others. Although vibrant solid flat icons grab plenty of attention as well, designers often prefer subtle and delicate contour graphics that are capable of unobtrusively enriching UI and making the navigation look absolutely refined.
WordPress is a powerful tool for building everything from a simple blog to a full-blown ecommerce website. There is a huge community of developers which is constantly creating new themes and plugins and writing articles about it. Here are some of the best resources that we’ve come across this summer.
A trendy theme rocking a clean, responsive flat design. It works equally well both for landing pages and for full featured blogs. Ambition offers many customization options such as different page and post templates, widget areas and sidebars that will help you create the perfect layout for your needs.
A business theme targeted towards companies and freelancers. It comes with two page templates, one for a front page and another for a full width layout. The theme gives users the option to present professional information via custom, built-in widgets for employees, services, skills, and more.
A Bootstrap powered theme for interior and furniture design. It’s packed with awesome features including a slider, a parallax scrolling effect, and cool JavaScript animations. A page created with Stone, looks astonishing and can be easily differentiated from the average WordPress website.
A heavily customizable theme with an advanced options panel and 12 unique presets, all interchangeable with the click of a button. The theme is fully responsive, retina ready and optimized for faster page load times.
A theme designed and built with magazines in mind. It it focused on presenting content the best possible way using single post templates and a nicely integrated related posts archive section, that will keep your visitors reading. Rowling also supports custom logos, accent colors and widgets.
A beautiful theme packed with superb animations and fancy effects. The design of all page layouts is very modern, making it suitable for websites about trendy topics such as design, fashion, and technology. Other unique bonuses of Abito are the page transition preloader and an infinite scroll to show all your posts in one page.
A theme with a minimalist look that focuses on your content and makes it look more professional. It is fully responsive and should load quickly on both mobile and desktop devices.
Quidus is a free blog theme with a sharp, smart look. It is highly customizable from the colors to the layout. Although this theme isn’t premium and won’t cost you anything, it’s creators offer great support and will answer your questions if you have any difficulties.
A supreme Bootstrap based landing page theme. It comes with a drag and drop builder and other custom options and widgets for quick development. It’s creators have also provided a YouTube video, to help you get the theme up and running.
A very stylish, mostly black and white theme with smooth animations and fonts for grown-ups. It’s developers offer additional free plugins that you can use to further expand the theme’s capabilities.
Author is a theme mainly for blogs. The page layout consists of a sidebar with various widgets on the left and a wide space reserved for your content on the right.
A lightweight WordPress theme that allows you too quickly setup a great looking website with minimal effort. Just like the previous theme on our list, this one places all sorts of information in a sidebar with widgets, while leaving the content more space on the right.
A free, powerful business theme that provides lots of functionality we would normally find in premium versions. Sydney brings of customization possibilities like access to all Google Fonts, full color and layout control. It also features a full screen image slider and a background parallax.
As the name suggests, Gridsby presents content in the form of a Pinterest-like image grid. It also includes a bunch of shortcodes with useful functionality such as sliders and lightboxes. The perfect theme for photography bloggers.
ColorMag is a responsive theme suitable for news, newspapers and magazines. It looks really professional and you wouldn’t be able to tell the demo isn’t an actual news website if you didn’t know. A cool feature here is the support it’s creators offer, even though it is a free theme.
Unlimited is a theme designed to improve the performance of your website. It doesn’t offer too many features, but in exchange for that it’s fast and simple to build with, while still looking great.
GridBlog is a modern grid-based theme with a ton of free features. It is fully responsive, SEO optimized and offers a plethora of widgets for added functionality. The theme is also completely customizable, allowing you to choose the colors and background to suite your style.
Discovery is a business oriented theme built with a focus on simple customization. It allows you to add your own logo, header, featured areas, social media links and much more without any coding.
BLDR is a great WordPress theme that gives your pages that premium full width look. It is bundled up with plugins such as a drag and drop page builder, which will make developing websites easier and quicker.
A well written article, presenting different ways of overcoming the exceeds the maximum upload size for this siteerror. Solving this problem requires modifying server settings via PHP or the .htaccess file to increase the maximum memory limit.
A tutorial on how to use the WordPress Filesystem API for accessing local file systems in a secure way, with proper file permissions. To give you an applicable example, this lesson goes through each step of building a simple plugin, that saves the content of a textarea to a file.
In this minute long video you can see the simplified process of creating a basic WordPress theme by using HTML/CSS templates and a bit of PHP. If watching the video gives you enough courage, you can read this follow-up series of lessons and start developing your first WP theme.
This comprehensive tutorial will show you how to transform a blank WordPress website into a full featured membership site. Creating custom user roles, managing locked content, handling registration and logins – everything you need to know is explained in great detail with easy to follow screenshots.
Over 70 highly useful shortcodes that you can copy and paste right into your WordPress project. Includes awesome snippets for adding functionality, such as Custom Content to Search Engine Visitors, Display Posts for a Specified Time Period and Highlight Author Comments.
Bookmark this article if you often find yourself wondering “What is page.php for?”, or “How do i add a footer?”. This cheatsheat allows you to quickly look up basic WordPress commands and concepts. It covers the purpose of each file in a WP theme, how to create a post loop and how to use bloginfo and include tags.
Reducing the file size of the images on your WordPress site is the easiest way to improve load times and performance. Here are a handful of different techniques to decrease the footprint of images without compromising too much on the quality.
This is a lesson on how to transform the Tag system of your WordPress site to a parent/child hierarchy for easier organizing of topics. Even if you are not interested in this experiment, the article offers a lot of great insight on categories, tags and categorizing data.
A number of good practices and principles to have in mind when constructing a WordPress website for somebody else. The tips offered here will add more safety and stability to your project, making it harder for clients to mess about and break the website’s features.
Have you ever found a great looking theme (like the ones above) and wanted to implement it on your website, replacing the old style entirely? This article will help you keep track of the things that might get lost when swapping themes.
With this plugin you can browse a library of 50+ shortcodes and use them to easily create buttons, sliders, responsive videos and many more. A lot of the elements in Shorctodes Ultimate provide features that are hard to emulate if they’re not included with the theme you’re using.
Insert customizable share buttons to your pages. Choose from a huge collection of social media, bookmarking and email services such as Twitter, Facebook, Pinterest and 100+ more. You can also bundle up a bunch of buttons and add them to a universal share button, which on click will pop up a menu with the chosen platforms.
Page Builder makes it possible to create responsive column based layouts, which you can then easily fill with content and standard WordPress widgets. It works with all themes, doesn’t require any coding skill and turns WP page development into child’s play.
With WP Retina 2x you can generate Retina (High DPI) versions of the images on your website, that will look amazing on any display. The plugin will also automatically detect what device it’s running on and supply the appropriate image file.
Although vanilla WordPress itself is very search engine friendly there is always place for optimization. When editing pages and posts, Yoast SEO will add a new panel below the editor. This panel will give you the ability to add a title, keywords and a meta description, while showing you a preview of how the page will look in Google.
Adding an instance of Google Maps to your posts and pages is as easy as copy-and-pasting the provided shortcode. After that, the widget allows you to control the zoom and size of the map, add markers, directions, and everything you would normally expect out of Google Maps.
Adds a Visual Editor widget that allows you to insert rich text and media objects. After installing the plugin, you will have the option to add the default WP visual editor as a widget. This is really useful when you want to add content to a sidebar, where normally only the WordPress Text Editor is available.
A spam filter that checks your comments against the Akismet Web service to see if they look like spam or not. If can work as a firewall outright blocking the incoming spam, or it can find suspicious comments after they are published and send them to the trash.
An easy to use image slider. Simply select images from your WordPress Media Library, drag and drop them into place, set slide captions and you’re ready to go. There are 4 different slideshows available, each of them can be embedded using the according shortcode.
This plugin can drastically reduce your pages’ load times by applying compression to your images. It runs automatically, optimizing every image file you upload to the Media Library. EWWW can also reduce the size of the images you’ve already uploaded and convert between file formats.
EWWW Image Optimizer
Hope you like our collection! Did we miss something? Tell us in the comments.
Spot.IM is the creator of the first “everywhere” social network, empowering website owners and publishers to turn their websites into a social network driven by their own content. Spot.IM’s technology enables publishers to take back ownership of the conversation going on around their content, freeing them from having to rely on larger, external social networks to provide the social space for community content engagement.
Typing users and submitted comments are seen in real-time. Hot content and trending conversations are presented in a cross-site Newsfeed. Readers are instantly notified about new comments and hot conversations. Site visitors can talk privately and share common passions and interests.
Agora mostraremos aqui mais opções dentro da categoria Bancos de imagens gratuitos, com uma lista de nada menos que 15 sites onde é possível encontrar centenas de imagens de alta qualidade, que podemos usar en nossos projetos (tanto pessoais como comerciais) e de forma completamente gratuita.
– Boss Fight: Imagens capturadas e divulgadas por @bossfightco, classificadas por comida, tecnologia, objetos, gente, animais e edifícios, com possibilidade de realizar busacas entre uma coleção de fotos que cresce a um ritmo de 10 a 20 novas imagens diárias.
– Realistic Shots: O fotógrafo Henry Reyes oferece uma extensa coleção com até 7 novas imagens por semana, todas elas com licença livre (CC0)
– Camarama: Diretamente da Alemanha chega esse projeto que conta com algumas dezenas de fotos (número ampliado semanalmente) completamente gratuitas, embora não tenha um buscador.
– MMT: Enormes e fantásticas fotos de Jeffrey Betts que são oferecidas com CC0, completamente gratuitas para uso pessoal e comercial.
– Unsplash: São imagens de vários fotógrafos que colaboram com o site para oferecer 10 novas imagens a cada 10 dias.
– Gratisography: Fotos e montagens criadas por RYAN MCGUIRE, que cede os direitos ao mundo deixando obras muito interessantes.
– Startup Stock Photos: Sem menus, sem campo de busca, sem explicações… simplesmente uma lista de fotos de computadores e escritórios que podemos usar para artigos, sites entre outras opções.
– SplitShire: Fotos realizadas por Daniel Nanescu, que criou o site, com imagens classificadas, para oferecer o resultado de seus anos trabalhando como fotógrafo. O site tem muita publicidade, porém, as imagens são excelentes.
– Free Nature Stock: Um site de fotos gratuitas sobre natureza, mantida por Adrian Pelletier
– Jay Mantri: Fotógrafo especializado em fotos em preto e branco. Publica 7 novas fotos a cada quinta-feira, sendo possível baixa-las em boa resolução.
– New Old Stock: Fotos antigas recopiladas de arquivos públicos, embora, claro, no caso de encontrar alguma imagem protegida será preciso avisar para que a eliminem.
– Moveast: Site do fotógrafo João Pacheco, que viaja pelo mundo oferecendo o trabalho fotográfico de forma gratuita.
– Life of Pix: Fotos de diferentes fotógrafos que enviam seus trabalhos para que estejam disponíveis em um só site.
– Skitterphoto: Uma excelente coleção de fotografias gratuitas classificadas. Há verdadeiras maravilhas na cateogoria de natureza.
– FancyCrave: Lista de fotos, em estilo blog, que é atualizada com bastante frequência.
E se quiser ter um aplicativo que navegue entre todos estes sites (sem buscador), vale a pena dar uma olhadinha em zoommyapp.com (no momento só para Mac).
Face++ is a new vision platform built by Megvii Inc. aiming at providing compact, powerful, and cross-platform vision service. Face++ uses the cutting-edge technology of computer vision and data mining to provide 3 core vision services (Detection, Recognition, and Analysis).
With the service and huge database of celebrity from Face++, the developers can apply the face technology into their own websites, mobile Apps, and smart TVs, increasing incredible user experience. There is no limit on the times of API requests. However, there is a limit on the number of concurrent API requests.
ECharts is a comprehensive charting library that supports line, column, scatter, radar, candlestick, chord, gauge, funnel, map, and force-directed chart types. It works even if you have tons of data, and can chart 200,000 data points on a Cartesian chart almost instantly.
You run into a problem and decide to use a regular expression. Now you have two problems. Or at least this is how the saying goes. Regular expressions are a powerful tool that skillful coders leave as a last resort, but when they do use it, they strike terror in the hearts of their enemies (and colleagues).
Regular expressions (or regex-es, as is the correct term for what we use in programming languages today) are specialized languages for defining pattern matching rules for text. They have their own grammar and syntax rules, which every beginner gets wrong. But you don’t have to! Here is what you need to know:
1. Matching a single character
Every programming language has a way of defining and using regular expressions. They have some differences, but the basics which are covered in this article should work anywhere. The examples here are written in JavaScript, so that you can try them out in your browser.
The most basic regexes are those that match a single character. Here are the rules:
The dot (.) matches any character. If you want to match the dot as a character, escape it like this: \.
A question mark (?) means that the preceding character is optional. If you want to match an actual question mark, escape it: \?
You can play with our editor below. Clicking the Run button will execute your code.
Building up from the previous example, we can write regexes that match only certain character by using sets:
A set is one or more characters enclosed in brackets [abc]. It matches only one of those characters – in this example only a, b or c. You can negate a set with ^. [^abc] will match any character that is not a, b or c. You can also specify a range [0-9], [a-z], which will match everything in the range.
There are built-in sets that make writing regexes easier (they are called shorthand). Instead of [0-9] you can write \d and for [^0-9] you can write \D. There are also sets for word characters (a through z with digits and underscore) – \w and \W, and spaces (including tabs and new lines) - \s and \S.
Most of the time, you will want to match entire words, instead of single characters. This is done by using modifiers which repeat a character or a character set. These are:
+, which repeats the preceding character or set one or more times
*, which repeats the preceding character or set zero or more times
{x} for an exact number of repetitions, {x,y} for varying number of repetitions (where x and y are numbers)
Also, there is the special \b pattern which matches the boundaries at the ends of words (not a real symbol).
In JavaScript, this is the type of patterns you would use to validate user input from text fields. It is just a ordinary regex, but anchored to the start and end of the text using ^ (start of line), $ (end of line) expressions. This will make sure that the pattern that you write spans the entire length of the text, and doesn’t only match a part of it.
Also, in this case we use the test() method of the regex object, which returns either true or false if the regex matches the string.
Another common task that often calls for the use of regular expressions is searching and replacing text. There are two basic ideas here:
A group is a set of patterns enclosed in braces (). Each group collects the text that was matched by the patterns inside it. The text matched by each group can be addressed later with indexes prefixed with dollar signs (starting from $1 for the first group).
Each group is available in the pattern itself as a back reference – backward slash followed by the group index, starting from \1 (see the example below). This is only rarely used, so you can blissfully forget about this feature.
And this concludes our quick overview! If you learn what was presented in this article, you will be well prepared to solve 80% of the problems that involve regexes. For the other 20%, try these tools and resources:
If you are into designing for multiple resolutions, SVG is the best option to turn to as far as the use of graphics is concerned. These small vector files can be scaled up and down as you like it without sacrificing quality. SVG Loaders is a collection of simple SVG loaders and spinners created and released by Sam. No images used, pure svg/css and scaleable.
This home automation project will teach you how to control an electrical device & display weather measurements over the Cloud using Spark Cores. Spark Core is a little Wi-Fi development board which you can use to connect your hardware to the Internet.
For this project, we will use two cores from Spark Core: one for the relay control module and one for the weather sensors. You will be assembling the hardware, test it via terminal commands and then build a graphical interface based on Node.js. Let’s dive in!
Hardware & Software Requirements
First, we’ll be needing two Spark Cores. Don’t worry, the OS of Spark Core is open-source, and the Spark Cloud service is free to use. It is USB-powered and works with wireless programming. If you’re familiar with Arduino, you’ll be able to take on Spark Core easily. It uses the same programming language — Wiring.
Another major component is the PowerSwitch Tail Kit. You’ll use this to power up the relay module. To measure the temperature, humidity and light level, you’ll need the DHT11 sensor and a photocell.
You will also need a 4.7k Ohm resistor, 10K Ohm resistor, 2 breadboards and a set of jumper wires.
Below is the list of the components you will need for this project:
Let’s work on the relay module first. Get one Spark Core. Connect the input of the power tail switch to digital pin 3 of the core. Connect the power ground to the core’s ground. On the following picture you can see the result:
Put that aside if you’re done. We’ll do the sensors module next.
Connect the photocell in series with the resistor. The free leg of the resistor should be connected to the ground, while the free leg of the photocell should be connected to 3.3V. Connect the node where the photocell and resistor meet to the analog pin A0.
As for the DHT11 sensor, here are the connections: pin 1 to 3.3V, pin 2 to D3 and pin 3 to ground. Place a 4.7K resistor in between pin 1 and pin 2. On the following picture you can see the result:
Testing Your Spark Cores
Now that we have finished configuring the relay and sensor modules, we can test if they are functioning properly. To do that, you will need the following sets of codes.
First up is the code for the relay module.
1
2
3
4
5
6
7
8
9
10
11
12
13
14
15
16
17
18
19
20
21
22
23
24
25
26
27
28
29
30
31
// Define the pin
int relay_pin = D3;
// This routine runs only once upon reset
void setup()
{
//Register our Spark function here
Spark.function("relay", relayControl);
// Set relay pin to OUTPUT
pinMode(relay_pin,OUTPUT);
}
// This routine loops forever
void loop()
{
// Nothing to do here
}
// Relay control
int relayControl(String command)
{
// Get state
int state = command.toInt();
// Apply command
digitalWrite(relay_pin,state);
return 1;
}
What this code does is set up the relay pin as output and declare it as a function that can be accessed remotely. Make sure you upload the code to your core via the Spark interface. Now, we can test it by typing the following codes in the terminal:
What this code does is declare the weather measurements variables in the Spark Cloud API. It enables the measurements captured by the sensors to be exposed to the cloud.
You can find all the code on the GitHub repository of the article:
Again, make sure that you have uploaded the code to your core via the Spark interface. To check the sensor’s functionality, type the code below in the terminal:
If it doesn’t work, you can check a couple of things. Make sure that you are using the right commands. The device IDs that you have specified should be the correct ones. Also, check if the access token for your Spark cores is the right one too. Now, we can move to the interface building.
Building a Web Interface
To interpret the data that our sensors have measured, we need to display it on a web browser. This will enable you to track the weather measurement levels at your home remotely. To do this, we need to work on three files: (1) Node.js server file, (2) HTML code which will contain the interface and (3) Javascript to link the two.
Let’s look at the Node.js server file first. This programs our required modules:
// Modules
var express = require('express');
var path = require('path');
var request = require('request');
// Create app
var app = express();
var port = 3000;
Next is the code for naming your relay core, sensor core and access token. You can modify the names of each of these components so you can easily identify them:
You should download the code place it in a folder on your computer. It’s now time to give our Spark Cores a test run. Type in the code below in the terminal:
sudo npm install express request
Then, type:
node app.js
After that, you should be able to view the dashboard with the measurement results. A snapshot of the dashboard can be found below:
Congratulations for building your home automation in the Cloud using Spark Cores! You should be able to see a ‘Core Online’ indication in green. You should also be able to see the temperature, humidity and light level readings displayed.
How to Go Further
We built a Node.js-based project to monitor your Spark Cores remotely for home automation purposes over the Cloud. We were able to display the readings on a web interface.
You can do more with this project by connecting more sensors like an air pressure sensor. You can also add more cores to the project. Another thing that you can do is deploy a web server online so that you can access measurements from anywhere, anytime.
Have you built projects using the Spark Core? If you have done a similar project, please share your experience in the comments!
Depois de anos de desenvolvimento, chega-nos finalmente a primeira versão estável do Android Studio, a plataforma de desenvolvimento para Android que poderá facilitar a vida a todos os que desejarem criar apps para esta plataforma.
Se é certo que nada detém alguém empenhado em criar um programa seja para que plataforma for, é também inegável que uma boa plataforma de desenvolvimento é capaz de atrair muitas mais pessoas. É esse um dos motivos porque muitas pessoas olham para o Visual Studio da Microsoft como referência; e agora com este Android Studio, o Google tenta aproximar-se um pouco desse conceito.
O Android Studio 1.0 está disponível para Windows, OS X e Linux, e disponibiliza um IDE (Integrated Development Environment) que pretende facilitar o processo de criação de apps para Android - aliás, este Android Studio passa a substituir o Eclipse como ferramenta oficial para desenvolvimento no Android.
O que podemos encontrar neste IDE: editor inteligente, com code completion, refactoring e análise; integração com GitHub; criação de apps para smartphones, tablets, smartwatches, TVs, Android Auto, e Google Glass; simulação de dispositivos de todos os tamanhos e resoluções; monitorização de recursos utilizados pelas apps; etc.
Estranhamente, não existe nenhuma versão "cloud based" que pudesse funcionar no Chrome OS; o que me parece uma grande falha, mas que esperamos ver corrigida no futuro - assim como talvez a aposta numa linguagem de programação mais moderna, ao estilo do que a Apple fez com o Swift (embora nesse aspecto o iOS precise mais disso devido ao seu arcaico Objective C, que o Android com o seu mais facilmente digerível Java.)
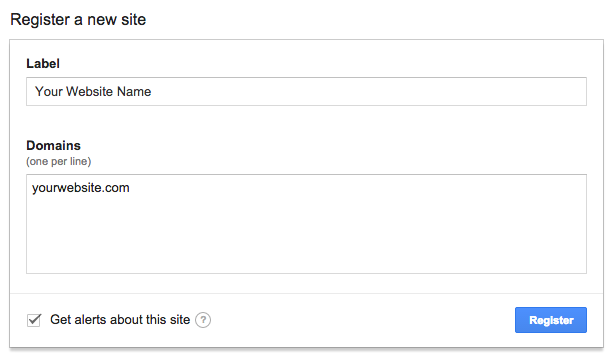
Today Google has been introduced new reCaptcha API called Are you a robot? “No Captcha reCaptcha” a complete new design captcha system. This protects your website for spammers and robots, in this post I had implemented new reCaptch API system with HTML login form using PHP. I like the new design it is clean and impressive, hope you will like it. Please take a look quick look at the demo.
This is a little known secret of Sublime Text – the ability to have multiple items in your clipboard history and access them with the keyboard.
To access the clipboard history, simply hit ⌘ + K, ⌘ + V – so just add the ⌘ + K infront of your regular paste shortcut. Windows users swap out ⌘ with Ctrl.
Watch the video for a quick tutorial on how to use it with your workflow:
Like this tip? Check out my book + video series for tons more!
In March 2014, the Baymard Institute, a web research company based in the UK, reported that 67.91%1 of online shopping carts are abandoned. An abandonment means that a customer has visited a website, browsed around, added one or more products to their cart and then left without completing their purchase. A month later in April 2014, Econsultancy stated2 that global retailers are losing $3 trillion (USD) in sales every year from abandoned carts.
Clearly, reducing the number of abandoned carts would lead to higher store revenue — the goal of every online retailer. The question then becomes how can we, as designers and developers, help convert these “warm leads” into paying customers for our clients?
Before Cart Abandonment
Let’s begin by looking at recognized improvements we can make to an online store to reduce the number of “before cart” abandonments. These improvements focus on changes that aid the customer’s experience prior to reaching the cart and checkout process, and they include the following:
Show images of products.
This reinforces what the customer is buying, especially on the cart page.
Display security logos and compliance information.
This can allay fears related to credit-card and payment security.
Display contact details.
Showing offline contact details (including a phone number and mailing address) in addition to an email address adds credibility to the website.
Make editing the cart easier.
Make it as simple as possible for customers to change their order prior to checking out.
Offer alternative payment methods.
Let people check out with their preferred method of payment (such as PayPal and American Express, in addition to Visa and MasterCard).
Offer support.
Providing a telephone number and/or online chat functionality on the website and, in particular, on the checkout page will give shoppers confidence and ease any concerns they might have.
Don’t require registration.
This one resonates with me personally. I often click away from websites that require lengthy registration forms to be filled out. By allowing customers to “just” check out, friction is reduced.
Offer free shipping.
While merchants might include shipping costs in the price, “free shipping” is nevertheless an added enticement to buy.
Be transparent about shipping costs and time.
Larger than expected shipping costs and unpublished lead times will add unexpected costs and frustration.
Show testimonials.
Showcasing reviews from happy customers will alleviate concerns any people might have about your service.
Offer price guarantees and refunds.
Offering a price guarantee gives shoppers the confidence that they have found the best deal. Additionally, a clear refund policy will add peace of mind.
Optimize for mobile.
Econsultancy reports that sales from mobile devices increased by 63% in 2013. This represents a real business case to move to a “responsive” approach.
Display product information.
Customers shouldn’t have to dig around a website to get the information they need. Complex navigation and/or a lack of product information make for a frustrating experience.
Unfortunately, even if you follow all of these recommendations, the reality is that customers will still abandon their carts — whether through frustration, bad design or any other reason they see fit.
After Cart Abandonment
The second approach is to look at things we can do once a cart has been abandoned. One tactic is to email the customer with a personalized message and a link to a prepopulated cart containing the items they had selected. This is known as an “abandoned cart email.”
The concept is pretty simple. At the right time, a customizable email is sent, complete with a personalized message and a link to the customer’s abandoned cart. Of course, this approach assumes that the customer has submitted their email address — effectively, they’ve done everything but paid. Abandoned cart emails represent one last attempt by the merchant to convince the buyer to check out.
In September 2013, Econsultancy outlined3 how an online cookie retailer recaptured 29% of its abandoned shopping carts via email. This is a huge figure and one we might naturally be skeptical of.
To get a more realistic perspective, I asked my colleagues at Shopify4 to share some of their data on this, and they kindly agreed. Shopify introduced “abandoned cart recovery” (ACR) in mid-September 2013 (just over a year ago at the time of writing). Here’s a summary of its effectiveness:
In the 12 months since launching automatic ACR, $12.9 million have been recovered through ACR emails in Shopify.
4,085,592 emails were sent during this period, of which 147,021 carts were completed as a result. This represents a 3.6% recovery rate.
Shop owners may choose to send an email 6 or 24 hours after abandonment. Between the two, 6-hour emails convert much better: a 4.1% recovery rate for 6 hours versus 3% for 24 hours.
It’s worth noting that the 3.6% recovery rate is from Shopify’s ACR emails. Many merchants use third-party apps5 instead of Shopify’s native feature. Given that Shopify is unable to collect data on these services, the number of emails sent and the percentage of recovered carts may well be higher.
Given the statistics, abandoned cart emails are clearly an important part of an online retailer’s marketing strategy. Luckily, most leading e-commerce platforms enable merchants to send custom emails, either in plain text or HTML. Knowing how to implement these notifications is a useful skill if you are designing for e-commerce, and they represent added value to your services.
Creating An HTML Abandoned Cart Email
The implementation of abandoned cart emails varies from platform to platform. Some platforms require third-party plugins, whereas others have the functionality built in. For example, both plain-text and HTML versions are available on Shopify. While the boilerplates are very usable, you might want to create a custom HTML version to complement the branding of your store. We’ll look at options and some quick wins shortly.
In recent years, HTML email newsletters have really flourished. You only have to look at the many galleries6 to see how far this form of marketing has progressed. Sending an HTML version, while not essential, certainly allows for more flexibility and visual design (although always sending a plain-text version, too, is recommended). However, it’s not without its pain points.
If you’ve been developing and designing for the web since the 1990s, then you will remember, fondly or otherwise, the “fun” of beating browsers into shape. Designing HTML newsletters is in many ways a throwback to this era. Table-based layouts are the norm, and we also have to contend with email clients that render HTML inconsistently.
Luckily for us, the teams at both Campaign Monitor7 and MailChimp8 have written extensively on this subject and provide many solutions to common problems. For example, Campaign Monitor maintains a matrix and provides a downloadable poster9 outlining the CSS support of each major desktop and mobile email client. MailChimp, for its part, provides numerous resources on CSS10 and email template design11. Familiarizing yourself with the basics before tackling your first HTML email is worthwhile — even if you ultimately use a template.
Open-Source Responsive Email Templates
While many of you might wish to “roll your own” template, I often find it easier to build on the great work of others. For example, a number of great open-source projects focus on HTML email templates, including Email Blueprints12 by MailChimp.
Another example comes from Lee Munroe. His “transactional HTML email templates13” differ in that they are not intended for use as newsletters, but rather as “transactional” templates. To clarify the difference, Lee breaks down transactional email into three categories:
action emails
“Activate your account,” “Reset your password”
email alerts
“You’ve reached a limit,” “A problem has occurred”
billing emails
monthly receipts and invoices
The templates are purposefully simple yet elegant. They also have the added benefit of having been throughly tested in all major email clients. Finally, because they are responsive, they cater to the 50+%14 of emails opened via mobile devices.
The Challenge
Lee’s templates are a good option for creating a simple HTML email for abandoned carts. Therefore, let’s move on from the theory and look at how to create an HTML template for the Shopify platform.
Let’s begin by setting some constraints on the challenge:
make the fewest number of markup changes to Lee’s template;
make use of the boilerplate text that is set as the default in the abandoned cart HTML template in Shopify;
inline all CSS (a best practice for HTML email);
send a test email with dummy data, and review the results in Airmail, Gmail and Apple Mail (on iOS).
1. Create a Local Copy of the Action Email Template
Having looked at the three templates, the “action” version appears to offer the best starting point. You can download the HTML for this template directly from GitHub15 if you wish to follow along.
The first step is to take the contents of Lee’s template and save it locally as abandoned-cart.html. A quick sanity check in a browser shows that the style sheet isn’t being picked up.
Inlining all CSS is recommended (we’ll look at this in a later step), so add the styles to the <head> section of abandoned-cart.html. You can copy the CSS in its entirety from GitHub18 and then paste it in a <style> element. Another check in the browser shows that the styles are being applied.
CSS applied.
2. Add the Content
Now that the template is working as a standalone document, it’s time to look at integrating Liquid19’s boilerplate code from Shopify’s default template. This can be found in the Shopify admin section under “Settings” → “Notifications” → “Abandoned cart.” If you wish to follow along with these code examples, you can set up a free fully featured development store20 by signing up to Shopify’s Partner Program21.
Hey{% if billing_address.name %} {{ billing_address.name }}{% endif %},
Your shopping cart at {{ shop_name }} has been reserved and is waiting for your return!
In your cart, you left:
{% for line in line_items %}{{ line.quantity }}x {{ line.title }}{% endfor %}
But it’s not too late! To complete your purchase, click this link:
{{ url }}
Thanks for shopping!
{{ shop_name }}
All notification emails in Shopify make use of Liquid, the templating language developed by Shopify and now available as an open-source project and found in tools such as Mixture22 and software such as Jekyll23 and SiteLeaf24. Liquid makes it possible to pull data from the store — in this case, all of the details related to the abandoned cart and the user it belonged to.
Having studied the markup, I’ve decided to place the boilerplate content in a single table cell, starting on line 2725 of Lee’s original document.
After pasting in the boilerplate code, let’s double-check that the template renders as expected in the browser. At this stage, Liquid’s code is appearing “as is.” Only once the template is applied to Shopify’s template will this be replaced with data from the store.
Boilerplate text added.
3. Modify the Boilerplate Code
The next stage involves tidying up some of the boilerplate code, including wrapping the boilerplate text in <p> tags. Then, it’s time to work out how best to display the cart’s contents in markup. For speed, I’ve chosen an unordered list. Liquid’s refactored for loop26 is pretty straightforward:
<ul>
{% for line in line_items %}
<li>{{ line.quantity }} x {{ line.title }}</li>
{% endfor %}
</ul>
After another sanity check, things are looking much more promising. However, we need to make a few final tweaks to make it work:
remove unwanted table rows,
add the correct link to the blue call-to-action button,
change the contents of the footer.
Tidying up.
4. Make Final Adjustments
Lee’s template includes markup to create a big blue “Click me” button. You can see this on line 3827:
<a href="http://www.mailgun.com" class="btn-primary">Upgrade my account</a>
Let’s turn this into a relevant link by changing the markup to this:
<p><a href="{{ url }}" class="btn-primary">Check out now</a></p>
Adding the call-to-action URL.
In this case, {{ url }} represents the link to the abandoned (and saved) cart. I’ve enclosed the anchor in a paragraph to ensure consistent spacing when the email is rendered, and I’ve moved it up into the main section.
Finally, we’ve changed the unsubscribe link in the footer to a link to the shop:
After a few minutes of editing, the template looks more than respectable. However, we’ve neglected one section, the text in the yellow highlighted “alert” section. I’ve changed this, along with the title element in the HTML, to this:
Changing the header text and footer link.
Your cart at {{ shop_name }} has been reserved and is waiting for your return!
Email notifications in Shopify have access to a number of variables that can be accessed via Liquid. A full list is available in Shopify’s documentation28.
5. Inline the CSS
To recap, we’ve changed the template’s markup very little, and the CSS is identical to Lee’s original (albeit in the template, rather than in an external file). Shopify’s boilerplate text is also intact, albeit with a very small change to Liquid’s for loop.
The next step is to inline the CSS in the HTML file. Because some email clients remove <head> and <style> tags from email, moving the CSS inline means that our email should render as intended. Chris Coyier penned “Using CSS in HTML Emails: The Real Story29” back in November 2007 — the landscape hasn’t changed much since.
Thankfully, taking your CSS inline isn’t a long or difficult process. In fact, it’s surprisingly easy. A number of free services30 enable you to paste markup and will effectively add your styles inline.
I’ve chosen Premailer31 principally because it has a few extra features, including the ability to remove native CSS from the <head> section of the HTML document, which saves a few kilobytes from the file’s size. After pasting in the markup and pressing “Submit,” Premailer generates a new HTML version that you can copy and paste back into your document. It also creates a plain-text version of the email, should you need it.
32Premailer has the ability to remove native CSS which saves a few kilobytes. (View large version33)
Another great feature of Premailer is that you can view the new markup in the browser. You’ll find a link above the text box containing the new markup, titled “Click to View the HTML Results.” Clicking the link opens a hosted version of the new markup, which you can use to check your sanity or share with colleagues and clients.
If you are keen to automate the creation of e-commerce notification emails, then Premailer also offers an API34. A number of libraries that support it are also available on GitHub, including PHP-Premailer35.
The final task is to copy the new HTML code and paste it in the “HTML” tab of our abandoned cart notification in Shopify’s admin area. Once it’s applied, you can preview the email in the browser, as well as send a dummy copy to an email address.
The process of turning Lee’s template into a usable email took around 30 minutes, and I am pretty pleased with the result from such little input.
Of course, this process screams out for automation. For those who are interested, Lee has also posted about his workflow for creating HTML email templates46 and the toolkit he uses (Sketch, Sublime, Grunt, SCSS, Handlebars, GitHub, Mailgun, Litmus).
Taking It Further
The template produced above is admittedly quite basic and only scratches the surface of what is possible. We could do plenty more to customize our email for abandoned carts, such as:
consider tone of voice,
show product images to jog the customer’s memory,
add a discount code to encourage the user to return and buy,
add upsells,
list complementary products.
Dodo Case
Tone of voice is a key consideration and goes a long way to engaging the customer. Dodo Case4947 has a great example:
As always, context is very important when it comes to tone of voice. What’s right for Dodo Case might not be right for a company specializing in healthcare equipment.
Let’s review a few examples (taken from Shopify’s blog51) to get a taste of what other companies are doing.
The language and tone used in Chubbies’ email really stands out and is in line with the brand: fun-loving people. There’s also no shortage of links back to the cart, including the title, the main image and the call to action towards the bottom of the email.
Black Milk Clothing62 includes a dog photo and employs playful language, such as “Your shopping cart at Black Milk Clothing has let us know it’s been waiting a while for you to come back.”
Finally, Holstee6664 asks if there’s a problem they can help with. It even goes so far as to include a direct phone number to its “Community Love Director.” Having worked with Holstee, I can confirm that this is a real position within the company!
Conclusion
While there are many tactics to persuade customers to buy, inevitably some people will get to the payment screen and decide not to continue. Any tactic that helps to seal the deal is certainly worth considering, and given the small amount of work involved in implementing an email to recover abandoned carts, it’s a great place to start. Designers and developers are in a powerful position to help their clients increase their revenue, and being armed with tactics such as the ones outlined in this article will hopefully enable them to offer a wider range of services.
Quem quiser dormir em segurança já sabe que não pode pesquisar por vídeos de lockpicking que mostram a "facilidade" com que os mestres dessas técnicas conseguem abrir todo o tipo de fechaduras. Mas há uma fechadura que parece ser capaz de impossibilitar todas as tentativas de lockpicking... graças a uma chave flexível.
Ao usar uma chave flexível, esta fechadura consegue ter um trajecto "serpenteante" no seu interior que impossibilita o uso de todas as habituais ferramentas de abertura de fechaduras. Como se isso não bastasse, tem também percursos falsos concebidos para encravar qualquer lâmina flexível que se tente lá enfiar, complicando ainda mais a vida aos atacantes.
O resultado é uma fechadura que conseguiu resistir às tentativas de um dos mais populares lockpickers da internet e que poderá servir de "garantia" para quem procurar uma fechadura capaz de resistir a este tipo de ataques.
Like most of the services from Google, Google News is a great tool to work with while searching for news, which offers unique opportunities. Google developed a unique algorithm, which allows reading the news on the same topic from different sources. They have just redesigned Google News from the ground up. Take a look at the design process.


 Download Script
 Live Demo