Shared posts

08 Jul 00:58

The Complete Guide to Weeping Tile Systems: Interior vs. Exterior

by Sharon Dewaard

A damp, musty basement is more than just an annoyance; it’s a sign of a serious problem that can lead to structural damage, mould growth, and a significant loss of usable living space. At the heart of most effective basement waterproofing solutions is a crucial component: the weeping tile system. This often-overlooked network of pipes is your home's first line of defense against the relentless force of hydrostatic pressure and groundwater.
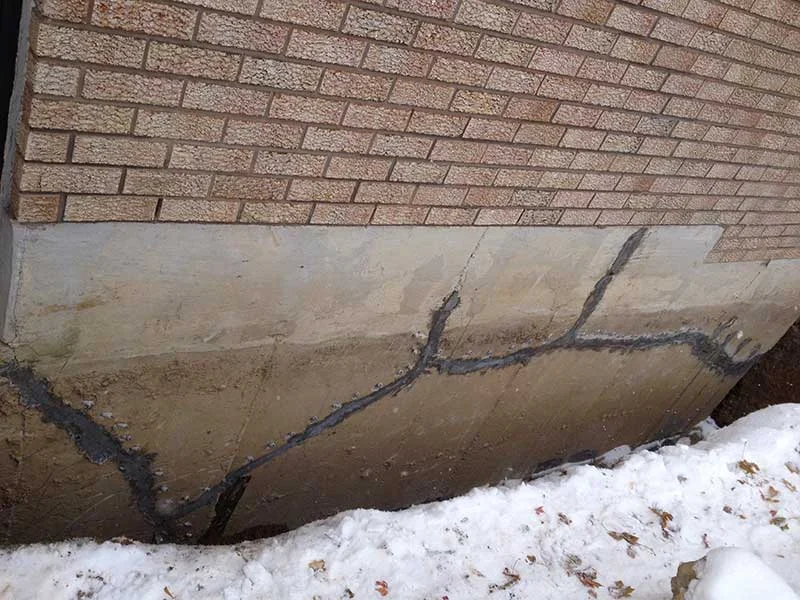
However, when it comes to addressing a water problem, homeowners are often faced with a critical decision: should they opt for an interior or exterior weeping tile system? Both methods are designed to manage water, but they differ significantly in their approach, cost, and effectiveness for different situations. In this comprehensive guide, we'll break down the pros, cons, and key differences between these two primary foundation drainage solutions to help you make the best decision for your home.

What is a Weeping Tile System and How Does it Work? (A Quick Refresher)

Before diving into the two types, let's quickly define what a weeping tile is. A weeping tile, also known as a french drain or perimeter drain, is a perforated pipe that runs along the perimeter of your home's foundation. Its purpose is to collect groundwater that accumulates around the foundation and direct it away to a safe discharge point, typically a sump pump or a municipal storm drain. By alleviating the buildup of hydrostatic pressure, it prevents water from being forced through cracks and porous concrete into your basement.

The Exterior Weeping Tile System: The Traditional Approach

The exterior weeping tile system is the most traditional and comprehensive method for managing water. It involves addressing the problem from the outside, at the source of the water infiltration.

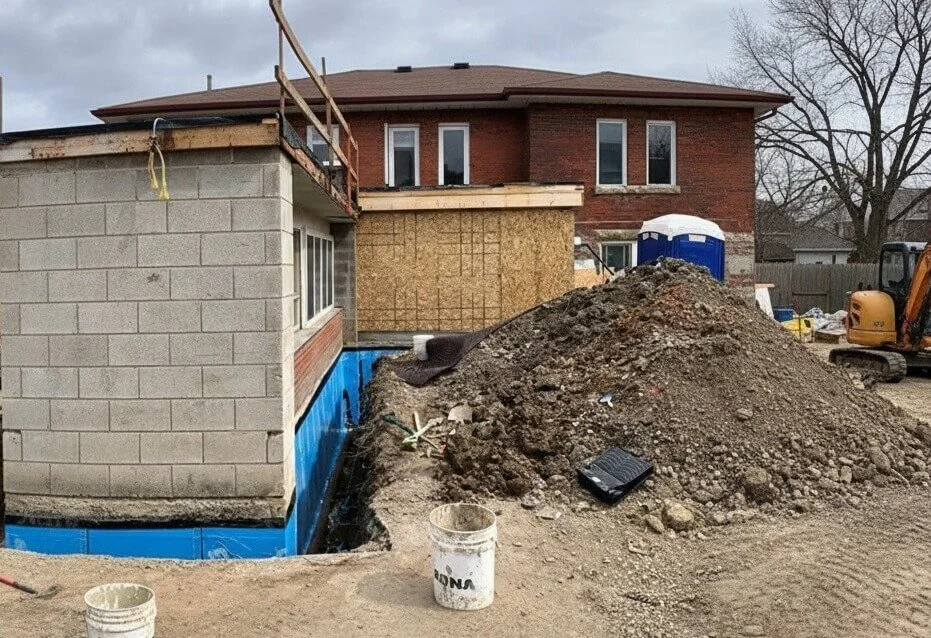
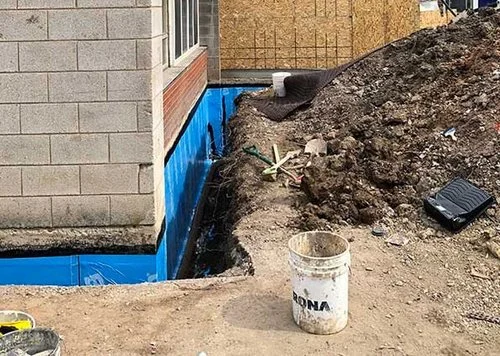
The Installation Process (Excavation, Membrane, Tile, Gravel)

An exterior waterproofing and weeping tile installation is a significant undertaking. The process involves several key steps:

1.  Excavation: The entire perimeter of the foundation is carefully excavated down to the footing. This requires heavy machinery and is a major construction project.

2.  Cleaning and Preparation: The exposed foundation walls are thoroughly cleaned and repaired. Any existing cracks are sealed with hydraulic cement or polyurethane injections.

3.  Waterproofing Membrane: A liquid or sheet-based waterproofing membrane is applied to the exterior of the foundation walls. This creates a continuous barrier that prevents water from seeping through the concrete.

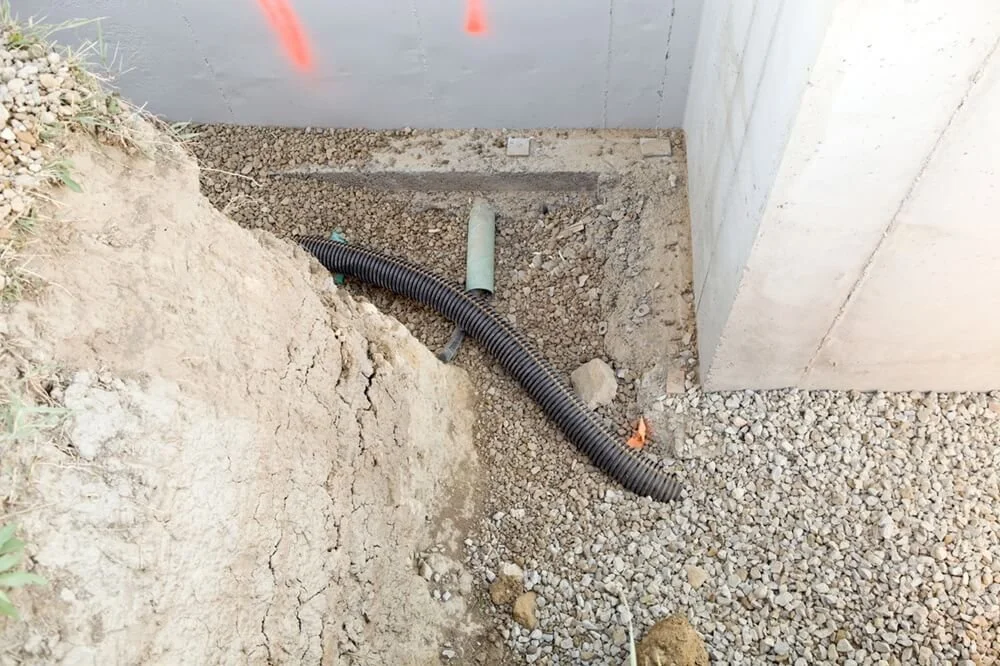
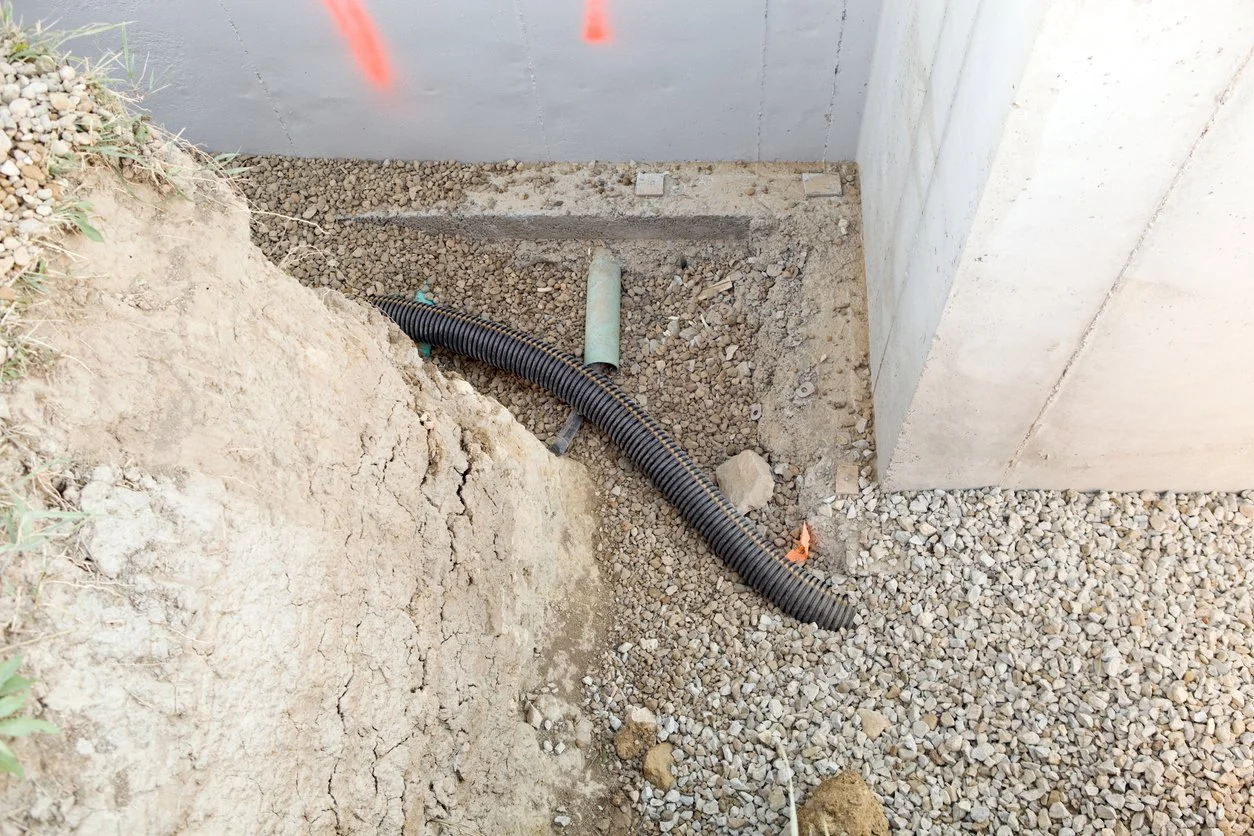
4.  Weeping Tile Installation: New perforated weeping tiles are laid around the perimeter of the footing. The pipes are covered with a filter cloth to prevent them from becoming clogged with silt.

5.  Gravel and Backfill: A layer of clean, coarse gravel is placed over the weeping tile to provide a porous medium for water to drain into the pipes. The trench is then backfilled with the excavated soil.

Pros of an Exterior System (Stops water before entry)

Most Comprehensive Solution: This method addresses the problem at its source, preventing water from ever reaching the foundation walls.

Ideal for New Construction: It's the standard for new builds, as it's easiest to install before backfilling.

Increased Home Value: A properly executed exterior waterproofing project is a major upgrade that can significantly increase a home's value and marketability.

Protection for Foundation: It prevents water from constantly pressing against the foundation, reducing the long-term risk of structural damage.

Cons of an Exterior System (Cost, landscape disruption)

Higher Cost: The extensive excavation and labour involved make this a more expensive option.

Major Landscape Disruption: Your deck, patio, driveway, and all landscaping around the perimeter of your home will be affected and potentially destroyed.

Weather-Dependent: The work can only be done in favourable weather conditions, which can delay the project.
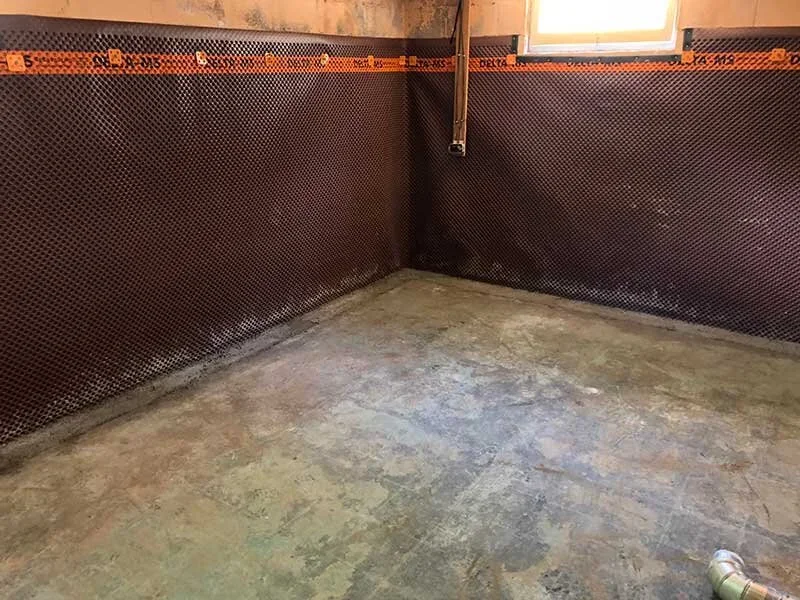
The Interior Weeping Tile System: The Modern Solution

The interior drainage system is an increasingly popular and effective solution for existing homes. Instead of stopping the water on the outside, it manages the water after it has entered the foundation.

The Installation Process

An interior weeping tile installation is a much less invasive process:

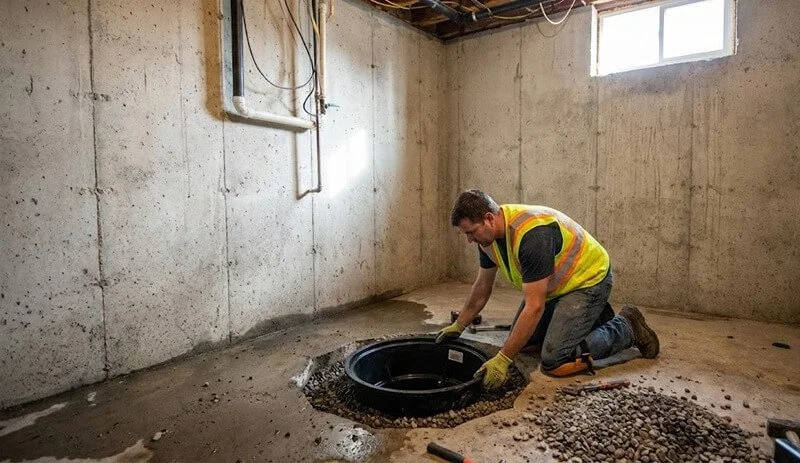
1.  Trenching: A trench is dug around the inside perimeter of the basement, exposing the footing where the wall meets the floor.

2.  Drainage and Tile: The concrete is removed, a layer of gravel is laid down, and a perforated drainage pipe is installed.

3.  Connection to a Sump Pump: The new drainage system is connected to a sump pump, which collects the water and pumps it safely out of the basement and away from the foundation.

4.  Finishing: The trench is then filled with new concrete, restoring the basement floor.

Pros of an Interior System

Less Invasive: There is no exterior digging, so your yard, landscaping, deck, and patio are left completely undisturbed.

Cost-Effective: The labour and machinery costs are significantly lower, making this a much more affordable solution.

Year-Round Installation: The work is done inside your home, so it can be performed in any season, regardless of the weather.

Addresses Hydrostatic Pressure: It is particularly effective at managing hydrostatic pressure, which is a common cause of water seepage through the wall-to-floor joint.

Cons of an Interior System

Doesn't Stop Water at the Source: This system allows water to enter the basement first before it's collected and drained. This is a point of concern for some homeowners, as the walls can still get damp.

Can Cause Interior Mess: While less invasive to your yard, the work inside the basement can be messy, creating concrete dust and requiring the temporary relocation of furniture and belongings.

Only Manages Water Under the Floor: It doesn't directly address water seeping through cracks higher up on the foundation wall, though it can be combined with other interior crack repair methods.

Cost Comparison: Interior vs. Exterior Weeping Tile

When it comes to cost, there's a clear distinction. An exterior weeping tile system is almost always the more expensive option due to the extensive excavation and labour involved. The price can be influenced by the size of your home, the depth of your foundation, and the complexity of the landscape. An interior system, being less labour-intensive and requiring no exterior work, is a significantly more budget-friendly solution for basement waterproofing.

Which System is Better for Your Situation?

The right choice for your home depends on a variety of factors. Here's a simple guide to help you decide:

Choose Exterior if...

  • You are building a new home. This is the standard for new construction for a reason; it's the perfect time to install a comprehensive system.

  • You are planning a major landscaping project or an addition to your home that will require excavation anyway.

  • Your home has a combination of serious issues, including an old, failed weeping tile system, multiple wall cracks, and a porous foundation.

  • Your budget allows for the more expensive, comprehensive solution.

 Choose Interior if...

  • Your home is already built and you want to avoid damaging your landscaping, patio, or driveway.

  • Your primary water problem is caused by hydrostatic pressure forcing water in through the wall-to-floor joint.

  • You are working with a more limited cost budget.

  • You need a solution that can be installed quickly and at any time of the year.

  • You have a finished basement and are looking to install the system with minimal disruption to your home's exterior.

Can Interior and Exterior Systems Work Together?

Yes, they can. In some cases, a combination of an interior and exterior system can provide the ultimate protection. For example, if your exterior weeping tile system is partially working, but you're still getting water coming through the floor joint due to high hydrostatic pressure, installing an interior system can supplement the exterior system and provide comprehensive coverage.

Contact Foundation Fix Today

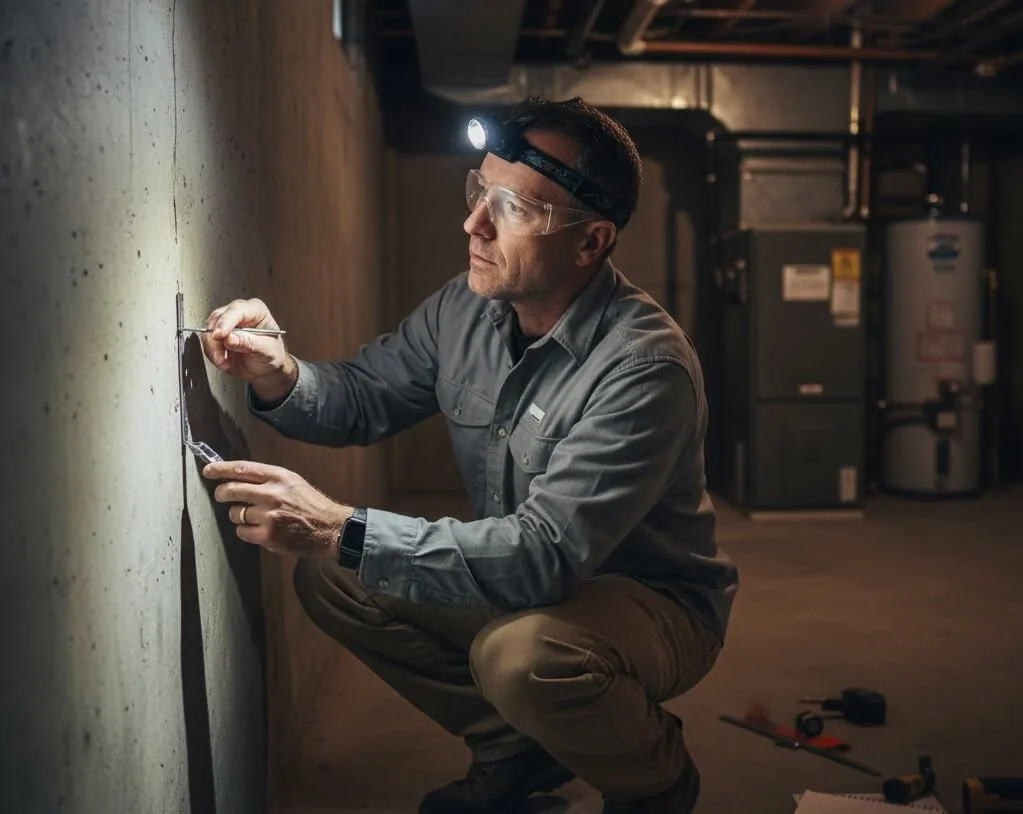
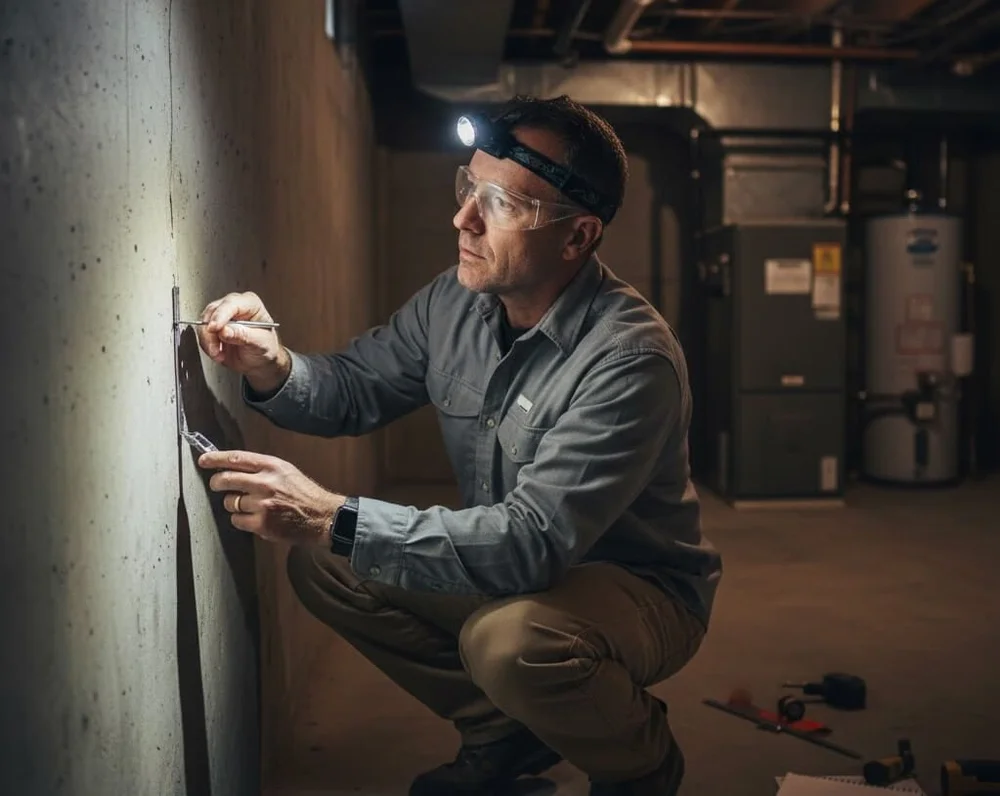
Ultimately, the best way to determine the right solution for your home is to get a professional assessment. A qualified waterproofing expert will be able to inspect your foundation, diagnose the source of the problem, and recommend the most effective and efficient weeping tile installation method to keep your basement dry for good.

Contact Foundation Fix today to discuss the best solutions for maintaining your home’s structural integrity.
08 Jul 00:58

The Ultimate Guide to Foundation Repair Costs in Southern Ontario

by Sharon Dewaard


A strong foundation is the bedrock of your home, providing stability, safety, and long-term value. However, even the most robust foundations can experience issues over time, particularly in a region like Southern Ontario, which is subject to varying soil conditions, freeze-thaw cycles, and shifting ground. When foundation problems arise, understanding the potential costs involved is crucial for homeowners.

This guide will delve into the various factors influencing foundation repair costs in Southern Ontario, breaking down common repair methods, their associated expenses, and practical advice for navigating the repair process. We'll explore key terms like basement waterproofing cost, foundation crack repair cost, average cost of foundation repair, structural engineer cost, underpinning cost, and helical piers cost, providing you with the knowledge to make informed decisions.

Why Foundation Repair is Critical

Ignoring foundation problems is a risky gamble. What might seem like a minor crack today can escalate into significant structural damage, leading to:

  • Decreased Property Value: A compromised foundation can significantly reduce your home's market value.

  • Safety Hazards: Severe foundation issues can threaten the structural integrity of your home, posing safety risks to occupants.

  • Water Damage: Cracks and shifts in the foundation can allow water to penetrate your basement, leading to mold, mildew, and extensive water damage, increasing your basement waterproofing cost.

  • Pest Infestations: Gaps and cracks in the foundation can become entry points for pests.

  • Cosmetic Damage: Misaligned doors and windows, cracked drywall, and uneven floors are common signs of foundation distress.

Addressing foundation problems promptly can save you considerable expense and stress in the long run.

Understanding the Factors Influencing Foundation Repair Costs

Several variables contribute to the overall cost of foundation repair in Southern Ontario. These include:

1. The Extent and Severity of Damage

This is arguably the most significant factor. Minor hairline cracks are far less expensive to repair than severe structural damage requiring extensive underpinning. The deeper and more widespread the problem, the higher the repair cost.

2. Type of Foundation

Different foundation types (poured concrete, concrete block, stone, slab-on-grade) may require specific repair techniques, influencing the cost.

3. Accessibility

If the repair area is difficult to access, requiring extensive excavation or working in confined spaces, labour costs will increase. This is especially true for interior foundation work.

4. Soil Conditions

Southern Ontario's diverse soil types – from clay to sand and bedrock – impact both the cause of the foundation issue and the complexity of the repair. Unstable or expansive soils can necessitate more robust and expensive solutions.

5. Repair Method Chosen

As we'll explore below, various repair techniques exist, each with its own cost structure. The chosen method will directly correlate with the final price.

6. Geographic Location within Southern Ontario

While this guide focuses on Southern Ontario, minor cost variations can occur between urban centres like Toronto and smaller rural communities due to differing labour rates and material transportation costs.

Common Foundation Repair Methods and Their Costs

Let's break down the typical costs associated with various foundation repair methods you might encounter.

Foundation Crack Repair Cost

Hairline cracks are common and often non-structural. However, larger, actively leaking, or widening cracks require attention.

  • Epoxy or Polyurethane Injection: This is a common and effective method for sealing non-structural cracks and preventing water penetration.

    • Cost: Typically ranges from $500 to $2,000 per crack, depending on the crack's length, depth, and the number of cracks.

    • Best for: Leaking cracks, horizontal or vertical non-structural cracks.

  • Carbon Fibre Straps: For more significant cracks or bowing walls, carbon fibre straps can be used to reinforce the foundation wall and prevent further movement.

    • Cost: Generally ranges from $2,000 to $5,000 per wall or $500 - $1,000 per strap, depending on the size of the wall and the number of straps required.

    • Best for: Bowing basement walls, large vertical cracks.


Basement Waterproofing Cost

Often intertwined with foundation repair, basement waterproofing addresses water intrusion issues. This can involve interior or exterior methods.

  • Interior Weeping Tile System (French Drain): Involves installing a drainage system along the interior perimeter of the basement to collect water and direct it to a sump pump.

    • Cost: Typically ranges from $5,000 to $15,000, depending on the size of the basement and the complexity of the installation.

    • Best for: Persistent basement leaks, high water tables.

  • Exterior Waterproofing: This involves excavating around the exterior of the foundation, repairing cracks, applying a waterproof membrane, and installing an exterior weeping tile system.

    • Cost: Considerably more expensive, ranging from $15,000 to $40,000+ due to extensive excavation and landscaping restoration.

    • Best for: Comprehensive water management, severe water ingress, foundation wall repairs.

Underpinning Cost / Helical Piers Cost

These methods are used for more severe structural issues where the foundation needs to be stabilized or raised.

  • Underpinning: This traditional method involves extending the foundation deeper into more stable soil or rock. It's often used for foundations that have settled significantly.

    • Cost: Highly variable, ranging from $5,000 to $30,000 per footing or more, depending on the depth required, soil conditions, and accessibility. A whole house underpinning project can easily exceed $50,000 to $100,000+.

    • Best for: Severely settled foundations, increasing load-bearing capacity, adding basement depth.

  • Helical Piers / Piles: These are steel shafts with helical plates that are screwed into the ground until they reach stable soil or bedrock. The weight of the structure is then transferred to these piers.

    • Cost: Typically ranges from $2,000 to $5,000 per pier, with most projects requiring multiple piers. A full project could be anywhere from $10,000 to $50,000+.

    • Best for: Settling foundations, inadequate soil bearing capacity, unstable soil conditions. Offers a less invasive alternative to traditional underpinning in many cases.

Structural Engineer Cost

Before any significant foundation repair, it is highly recommended, and often required by building codes, to consult with a licensed structural engineer.

  • Cost: A structural engineer's assessment and report typically range from $800 to $2,500, depending on the complexity of the inspection and the extent of the report required.

  • Why it's crucial: An engineer will accurately diagnose the problem, recommend the most appropriate repair method, and provide stamped drawings necessary for permits and contractor work. This upfront cost can save you from misdiagnosing the issue and incurring much larger expenses on incorrect repairs.

Average Cost of Foundation Repair in Southern Ontario

Given the wide range of factors and repair methods, providing a single "average cost" for foundation repair is challenging. However, we can offer a general range:

  • Minor Repairs (e.g., small crack injections): $500 - $2,500

  • Moderate Repairs (e.g., carbon fibre straps, interior weeping tile for a small area): $5,000 - $15,000

  • Major Structural Repairs (e.g., multiple helical piers, extensive underpinning, exterior waterproofing): $15,000 - $100,000+

These are broad estimates. Your actual cost will depend on the specific circumstances of your home and the chosen contractor.

The Importance of Professional Quotes and Estimates

Never proceed with foundation repair based on a single estimate. Always obtain multiple quotes from reputable, experienced foundation repair companies in Southern Ontario.

What to look for in a quote:

  • Detailed Breakdown: The quote should clearly outline all work to be performed, materials used, timelines, and labour costs.

  • Permits: Confirm who is responsible for obtaining necessary building permits. This is crucial for structural work.

  • Warranty: Inquire about warranties on both materials and workmanship.

  • References: Ask for local references and check online reviews.

  • Proof of Insurance and Licensing: Ensure the company is properly insured and licensed to operate in Ontario.

Be wary of exceptionally low estimates, as they may indicate cutting corners or hidden costs down the line.

Financing Foundation Repair

Foundation repair can be a significant unexpected expense. Fortunately, several financing options are available to Southern Ontario homeowners:

  • Home Equity Line of Credit (HELOC): Offers flexible borrowing against your home's equity, typically with lower interest rates.

  • Home Renovation Loans: Many banks and credit unions offer specific loans for home improvements.

  • Personal Loans: A less ideal option due to higher interest rates, but can be used for smaller repairs.

  • Contractor Financing: Some foundation repair companies partner with third-party lenders to offer financing options directly to clients.

  • Government Programs: While less common for general foundation repair, some energy efficiency or accessibility grants might indirectly assist with related costs.

When to Call a Professional

If you notice any of the following signs, it's time to contact a foundation repair specialist or a structural engineer:

  • Cracks in the foundation walls (horizontal, vertical, diagonal, or stair-step)

  • Bowing or bulging basement walls

  • Doors and windows that stick or are difficult to open/close

  • Uneven or sloping floors

  • Cracks in interior drywall or plaster, especially around door and window frames

  • Gaps between walls and ceilings or floors

  • Water in your basement or crawl space

  • A musty odour in the basement (indicating moisture)

Early detection and intervention are key to minimizing damage and repair costs.

Contact Foundation Fix Today

Foundation repair is a critical investment in the longevity and safety of your Southern Ontario home. While the costs can vary significantly, understanding the factors involved, the different repair methods, and the importance of professional assessments and multiple quotes will empower you to navigate the process effectively.

Don't compromise on the integrity of your home's foundation; address issues promptly by contacting Foundation Fix today.


 Sources for cost quotes:


08 Jul 00:58

Understanding Foundation Settlement in Niagara: Causes, Signs, and Solutions

by Sharon Dewaard

The foundation is the most critical component of any structure, literally supporting the entire weight of your investment. For homeowners, property managers, and investors in the Niagara region, understanding the challenges posed by foundation settlement is not just prudent, it's essential for long-term property maintenance and safety. This guide delves into what causes a settling foundation in this unique geographical area, the tell-tale signs to watch for, and the professional foundation repair solutions necessary to mitigate severe structural damage.

What is Foundation Settlement?

Foundation settlement refers to the downward movement of a structure's foundation relative to the original position upon which it was built. This natural process occurs when the soil supporting the structure compacts, shifts, or changes volume. The key distinction in diagnosing the severity of the issue lies in whether the settlement is uniform or differential.

Uniform settlement happens when the entire foundation sinks relatively evenly. While this can still cause some issues, the home often settles as a single unit, and the visible signs of structural damage are minimal.

Differential settlement, however, is the primary source of problems. This occurs when one section of the foundation sinks much more than an adjacent section, often due to variations in the underlying soil composition, moisture content, or loading. This uneven movement introduces significant stress and shear forces into the rigid structure above, leading directly to the classic, visible signs of a severely settling foundation and necessitating immediate foundation repair. The goal of any successful repair is to halt this differential movement and, where possible, restore the structure back to its original grade.

Causes of Foundation Settlement in Niagara

The Niagara Peninsula, shaped by glacial activity and bordering two Great Lakes, possesses a dynamic and often challenging geological profile. The causes of a settling foundation here are often rooted in these specific local conditions.

Soil Conditions

The foundation of a home is only as stable as the soil beneath it. In Niagara, several soil types present distinct risks:

Expansive Clay Soils: Certain areas of Niagara contain pockets of highly expansive clay. This type of soil possesses a high plasticity index, meaning it absorbs vast amounts of water, swelling significantly when wet (the "heave" effect) and shrinking dramatically when moisture is removed (the "shrink" effect). This constant, cyclical movement puts immense pressure on foundation walls and footings. Over time, this stress leads to fatigue and the eventual failure of the foundation, causing significant foundation settlement. Managing soil moisture is critical in homes built in these conditions.

Poorly Compacted Fill: Often, during new construction, the area around the foundation (the backfill) is excavated and then replaced. If this soil is not properly compacted in lifts—layers—before the structure is built, the weight of the house will naturally compact it over the following years. While this often manifests as uniform settlement initially, any unevenness in compaction can trigger differential foundation settlement, particularly under the corners or heavier load-bearing walls. This is a prevalent issue in rapidly developing subdivisions.

Organic Material and Voids: In older areas, foundations may rest partly on decomposing organic matter (e.g., old tree roots, buried debris) which break down over decades, creating voids and eliminating structural support. Similarly, subsurface erosion from prolonged water flow can wash away fine sand and silt particles, leaving unsupported sections of the footing, accelerating the downward movement of the settling foundation.

Drainage Issues

Water management is the single most critical factor in controlling foundation settlement. The stability of the soil directly correlates with its moisture content.

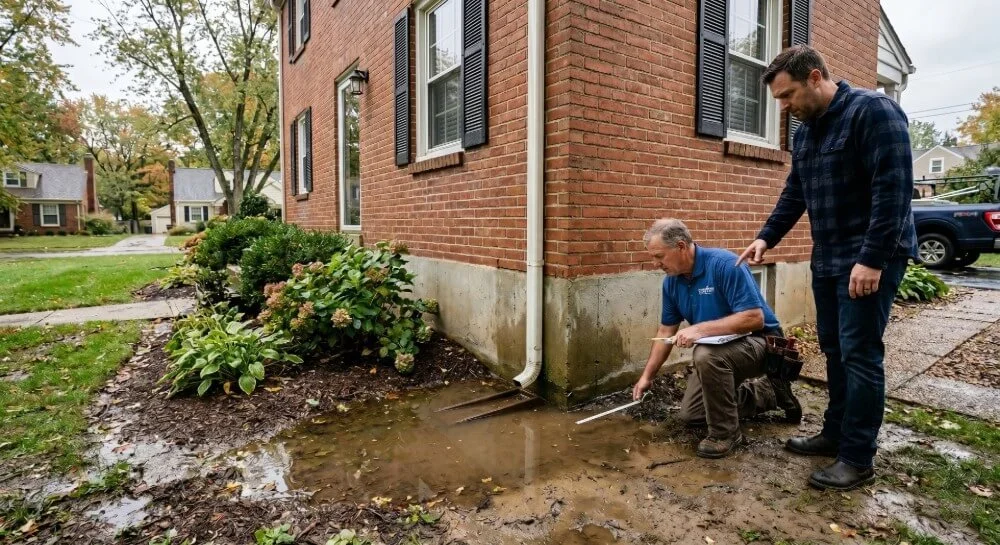
Surface Grading and Runoff: The fundamental rule of home maintenance is ensuring that the ground surface slopes away from the foundation by a minimum of 6 inches over the first 10 feet. If the grading is reversed or too flat, rainwater and snowmelt will pool directly against the foundation walls, saturating the supporting soil. Saturated soil loses its load-bearing capacity (shear strength), becoming soft and compressible, thereby allowing the structure to sink.

Defective or Missing Eaves-troughs and Downspouts: A standard roof can shed thousands of gallons of water during a heavy storm. If the gutter system is clogged, leaking, or if the downspouts terminate directly beside the foundation, this deluge of water is concentrated into a small area. This localized saturation can quickly soften the soil and initiate severe, localized foundation settlement at the discharge point, often leading to corner movement and stair-step cracking.

Subsurface Plumbing Leaks: Less visible but potentially more destructive are slow, consistent leaks from underground utility lines (water, sewer, storm drains). A persistent leak can silently wash away soil and create large subsurface voids beneath the footings. This localized washout is an extremely common cause of rapid, severe structural damage and requires urgent attention to both the plumbing and the subsequent foundation repair.

Construction Problems

Though less common than soil and water issues, problems that originate during the home's original construction can lead to significant foundation settlement years later.

Inadequate Footing Depth or Size: Building codes dictate that footings must be placed below the frost line (typically 4 feet in Niagara) to prevent movement from freezing and thawing cycles. If the footings were placed too shallowly or were undersized for the weight of the house, the foundation will inevitably experience instability, heave, or settlement.

Excavation and Adjacent Work: When adjacent lots undergo deep excavation or if heavy machinery is used nearby, the vibrations and changes in soil pressure can disturb the supporting soil beneath an existing foundation. This can cause the soil to liquefy momentarily or shift, resulting in a sudden, sharp instance of foundation settlement on the older structure.

Signs of Foundation Settlement

Early detection of a settling foundation is paramount. Homeowners should regularly inspect their property for the following critical indicators, as they signal the need for professional evaluation and potential foundation repair.

Cracks in Walls and Foundation

Cracks are the physical manifestation of the home’s stress points attempting to cope with uneven forces.

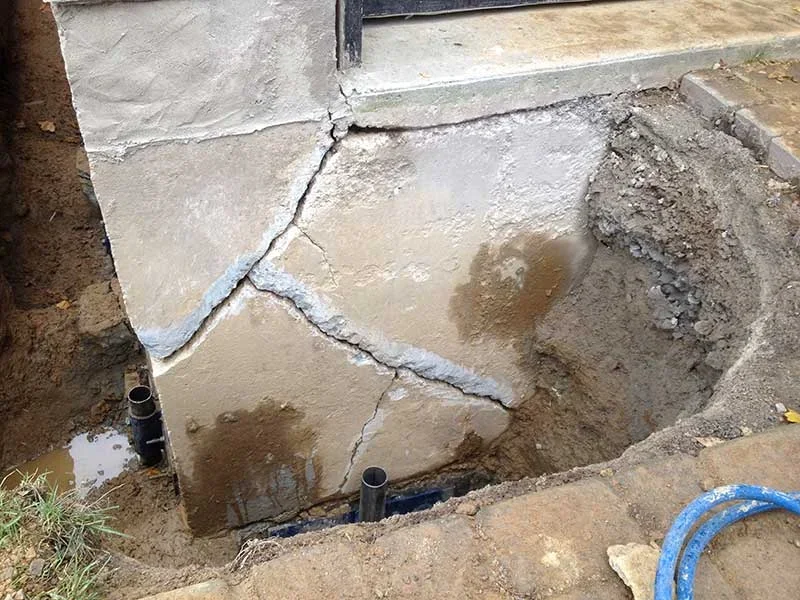
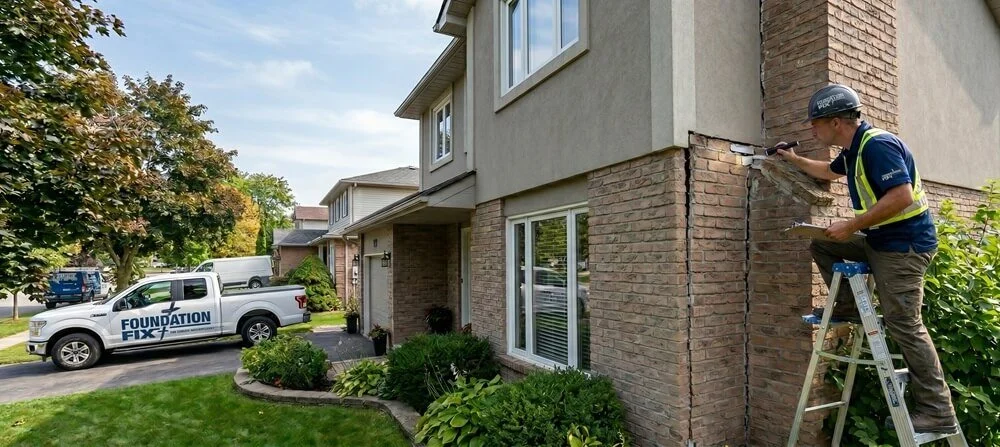
Foundation Wall Cracks: The most worrying cracks are those in the main concrete or block foundation. Diagonal cracks, running at a 30-45 degree angle, or stair-step cracks in concrete block or brick veneer, are hallmarks of differential foundation settlement. They usually start at a corner or below a window and widen as they move upward. Cracks wider than ¼ inch or those that show one side of the foundation wall pushing in or out are red flags indicating severe movement.

Interior and Exterior Finishes: On the interior, look for hairline cracks radiating from the corners of window and door frames, or cracks in the drywall or plaster where the ceiling meets the walls. On brick veneer exteriors, the stair-step cracks in the mortar joints are a definitive sign that the corner of the home is dropping relative to the rest of the structure.

Uneven Floors

When a section of the foundation drops, the floor structure above it is pulled down as well.

Sloping: Floors that have a noticeable pitch or slope towards the center of the house or a specific wall indicate that the foundation or the interior supports (like posts and beams) have settled.

Bouncing or Sponginess: While potentially related to structural wood issues, a sudden, new "bounciness" in a floor, accompanied by other signs, suggests that a support beam has lost contact with its footing due to foundation settlement.

Sticking Doors and Windows

Door and window frames rely on a perfectly square opening to operate smoothly. When the foundation moves, the house shifts, pulling the structure out of square.

Binding: Doors that stick, scrape the floor, or don't latch properly indicate the top corner of the frame has shifted down relative to the latch side.

Gaps: Conversely, if the gap around the door or window frame is significantly wider at the top than at the bottom, it confirms the frame is distorted due to movement in the load-bearing wall, a direct consequence of a settling foundation.

Is Foundation Settlement a Serious Problem?

Foundation settlement is not a cosmetic issue; it is a serious structural defect that can compromise the safety, value, and stability of a home. Ignoring a settling foundation will only ensure the problem becomes exponentially worse and more expensive to resolve.

The consequences of inaction include:

  • Catastrophic Structural Damage: Ongoing movement can eventually lead to the failure of load-bearing walls, compromise the roof structure, and make sections of the home uninhabitable.

  • Plumbing and Utility Disruption: Shifting foundations can shear or crack underground utility lines, leading to sewage backups, water leaks (which accelerate the settlement), and electrical conduit damage.

  • Decreased Resale Value: A foundation issue flagged on a home inspection report is a major impediment to a sale and almost always requires significant price concessions or mandatory foundation repair before a mortgage lender will approve financing.

  • Pest and Water Intrusion: Cracks caused by the settling foundation become direct conduits for moisture, leading to basement flooding, mold growth, and access points for rodents and insects.

Solutions for Foundation Settlement

When a professional structural engineer confirms differential foundation settlement, the solution is typically underpinning, a process that stabilizes the home by bypassing the unstable soil and transferring the structure's weight to a deeper, more reliable stratum.

Piering (Underpinning)

Piering is the definitive, long-term solution for severe structural damage caused by a settling foundation. It involves installing deep foundations beneath the existing footing.

Helical Piers: These steel piers resemble large screws. They are mechanically screwed into the ground deep below the unstable soil until they reach a predetermined torque or stable layer (e.g., bedrock or very dense till). A bracket is then secured to the existing footing, and the weight of the structure is transferred to the pier, stabilizing the home. Helical piers are ideal for lighter loads and locations where rock is very deep.

Push Piers: These steel pipe segments are hydraulically driven, or "pushed," deep into the ground using the weight of the house as a reaction force. They are driven to refusal, meaning they stop when they hit unyielding support. A heavy-duty steel bracket then connects the pier to the footing. Push piers are excellent for heavy structures and deep foundational support.

Both pier systems allow the foundation to be lifted back toward its original position and permanently supported, halting all further vertical foundation settlement.

Mudjacking / Polyurethane Injection (Slab-Lifting)

While not a solution for stabilizing a main, load-bearing settling foundation wall, these techniques are highly effective for leveling settled concrete slabs, such as basement floors, garage floors, patios, or walkways.

How it Works: Small holes are drilled through the settled slab. A material,either a cement/sand slurry (mudjacking) or an expanding geotechnical polyurethane foam (polyurethane injection), is pumped underneath the slab under pressure. This material fills the void beneath the concrete and, as pressure increases, gently lifts the slab back to level.

Advantages: Polyurethane injection is particularly favoured today due to its light weight (which doesn't stress the underlying soil further), speed of cure (minutes versus days), and minimal invasiveness. It is a repair solution that effectively addresses cosmetic settlement in concrete surfaces without requiring the excavation and replacement of large slabs.

Contact Foundation Fix

In the Niagara region, a proactive stance toward drainage and an immediate professional assessment upon seeing the first signs of cracking or sticking doors are the homeowner’s best defence against catastrophic foundation settlement and expensive structural damage. Investing in proper foundation repair ensures the longevity and safety of your home.

Don't compromise on the integrity of your home's foundation; address issues promptly by contacting Foundation Fix today.

Permalink

08 Jul 00:58

How to Choose a Basement Waterproofing Method in Niagara-on-the-Lake: A Comprehensive Guide

by Rocket Marketing

Owning a home in Niagara-on-the-Lake is a privilege that comes with a deep sense of history and aesthetic beauty. From the Victorian architecture of Old Town to the modern custom builds nestled among the vineyards of Virgil and St. Davids, the real estate here is some of the most sought-after in Canada. However, the very geography that makes our region a lush agricultural paradise, with the proximity to Lake Ontario and the unique composition of the Niagara Escarpment, creates a persistent threat to residential foundations: water.

For many Niagara-on-the-Lake residents, a dry basement is not a guarantee; it is something that must be engineered. In this guide, we will explore the complexities of basement waterproofing in our specific climate and soil conditions, helping you make an informed decision to protect your home’s structural integrity and market value.

Understanding Basement Waterproofing

To choose the right method, one must first understand the enemy. In Niagara-on-the-Lake, we deal with a phenomenon known as hydrostatic pressure.

The Niagara Soil Profile

Our region is characterized by heavy, silty clay. Unlike sandy soils that allow water to drain away quickly, clay holds onto moisture. During the spring thaw or the heavy autumn rains typical of Southern Ontario, the soil surrounding your foundation becomes saturated. Because this water has nowhere to go, it exerts massive pressure against your basement walls. This pressure can force water through microscopic pores in concrete, widen existing hairline cracks, and even cause walls to bow inward over time.

The Objective of Waterproofing

Waterproofing is not merely about stopping a leak you can see; it is about managing the water you cannot see. A professional system aims to do three things:

  1. Redirect surface water away from the structure.

  2. Relieve the pressure of groundwater against the walls.

  3. Provide a fail-safe interior management system for moisture that manages to bypass the exterior.

Exterior Waterproofing Methods

Exterior waterproofing is the most proactive and comprehensive approach. It is often referred to as "positive side" waterproofing because it stops water on the side of the wall where the pressure is being applied.

Excavation and Membrane Application

This is a labour-intensive process that involves excavating the soil around the entire perimeter of the home down to the footings. Once the foundation wall is exposed, it is cleaned and inspected.

The core of this method is the waterproof membrane. In our region, professionals typically use a multi-layer approach:

  • Bituminous Primers and Sprays: A liquid-applied coating that fills small cracks and pores.

  • Rubberized Membranes: A flexible, "self-healing" sheet that can stretch if the house settles, ensuring the seal remains intact.

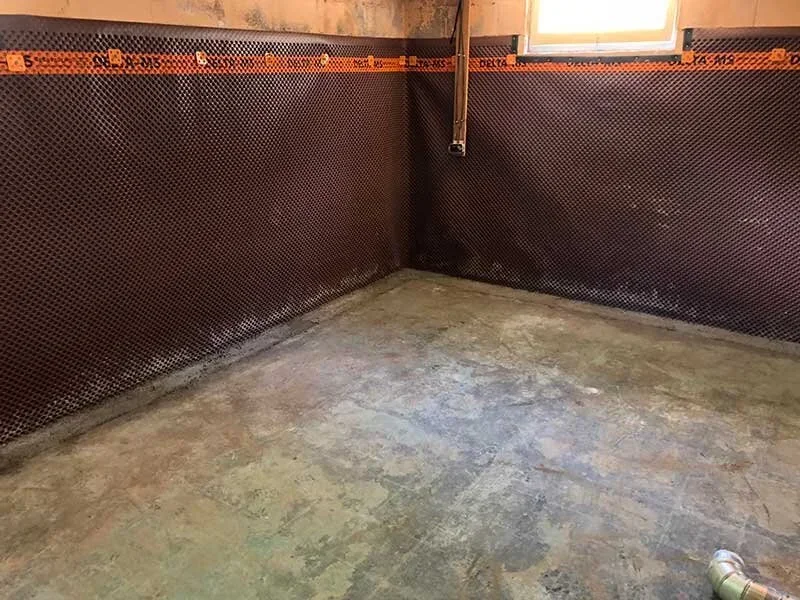
  • Dimpled Drainage Boards: These high-density polyethylene sheets (like Delta-MS) feature a dimpled pattern. The dimples face the wall, creating a small air gap. If any moisture does get behind the board, it gravity-feeds down to the drainage system rather than sitting against the concrete.

Weeping Tile Installation

The "weeping tile" is actually a perforated pipe that sits at the base of your foundation. In many older Niagara homes, these were made of clay or concrete and have long since collapsed or become clogged with silt and tree roots.

Modern exterior waterproofing replaces these with perforated PVC pipes wrapped in a "filter sock" to prevent silt from entering. The pipe is then buried under a deep layer of 3/4-inch washed crushed stone. This stone acts as a massive filtration bed, allowing water to flow freely into the pipe and away from your home, either to a storm sewer or a sump pit.

Interior Waterproofing Methods

Interior waterproofing is often the preferred choice for homes in densely populated parts of Niagara-on-the-Lake where houses are built close together, or where expensive landscaping, porches, and additions make exterior excavation impossible.

Interior Sealants and Coatings

While often marketed as a DIY fix, professional-grade interior sealants involve high-pressure epoxy or polyurethane injections.

  • Epoxy Injections: Ideal for structural cracks. The epoxy hardens to a strength greater than the concrete itself, effectively "welding" the crack shut.

  • Polyurethane Injections: These are best for leaking cracks. The material expands when it hits moisture, filling the entire void of the crack through to the outside soil.

Sump Pump Installation and Internal Drainage

The most effective interior method is the installation of an Internal Perimeter Drain (often called an interior French drain).

  1. Floor Breaking: A channel is jackhammered into the concrete floor around the perimeter.

  2. Drain Tile Placement: A perforated pipe is laid in the channel and surrounded by gravel.

  3. Wall Flashing: A plastic "dimple board" is tucked into the channel and extended up the wall. This ensures that if any water seeps through the wall, it is caught and directed into the under-floor drain.

  4. The Sump Pit: The drain tile leads to a sump pit. A high-capacity pump then ejects the water out of the house to a safe discharge point.

Comparing Waterproofing Methods

Cost Analysis

  • Interior Systems: Generally cost between $60 and $150 per linear foot. For a standard basement, this might range from $4,000 to $10,000.

  • Exterior Systems: These are significantly more expensive due to the heavy machinery and labour required. Costs typically range from $200 to $500 per linear foot, with total project costs often exceeding $20,000–$30,000 for a full perimeter.

Effectiveness and Longevity

Exterior waterproofing is superior for the "health" of the foundation. By keeping the concrete dry, you prevent the rebar inside the concrete from rusting and prevent the concrete from undergoing the freeze-thaw damage common in Ontario winters. Interior systems, while excellent at keeping the basement floor dry, do nothing to protect the exterior of the wall from the elements.

Disruption and Logistics

Interior work is messy inside the house. You must remove drywall, flooring, and furniture. Exterior work is messy outside the house. You may lose your deck, your prize-winning rose bushes, or your interlock walkway during the process.

Factors to Consider When Choosing a Method

 When deciding which path to take for your Niagara-on-the-Lake property, consider these four variables:

  1. Foundation Type: Stone and mortar foundations (common in homes built before 1920) react differently to moisture than modern poured concrete. Stone foundations often need to breathe, making certain exterior membranes or interior drainage systems more appropriate than rigid sealants.

  2. Water Table Height: If your home is near the lake or the Niagara River, you likely have a high water table. In these cases, a sump pump with a battery backup is non-negotiable, regardless of whether you waterproof from the inside or outside.

  3. The "Clay Bowl" Effect: When a house is built, the "backfill" soil (the dirt put back around the foundation) is looser than the virgin soil around it. This creates a "bowl" that collects water. In Niagara's clay, this bowl becomes a pond. Exterior waterproofing is the only way to effectively break this cycle.

  4. Permits and Zoning: Niagara-on-the-Lake has strict heritage and building codes. Always ensure your chosen method complies with local municipal bylaws.

Signs You Need Waterproofing

Early detection can save you tens of thousands of dollars in mould remediation and structural repairs.

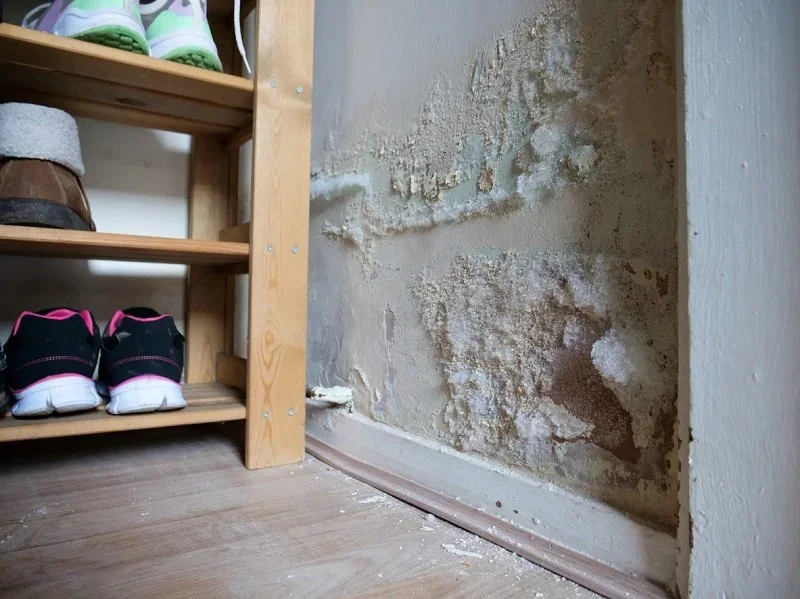
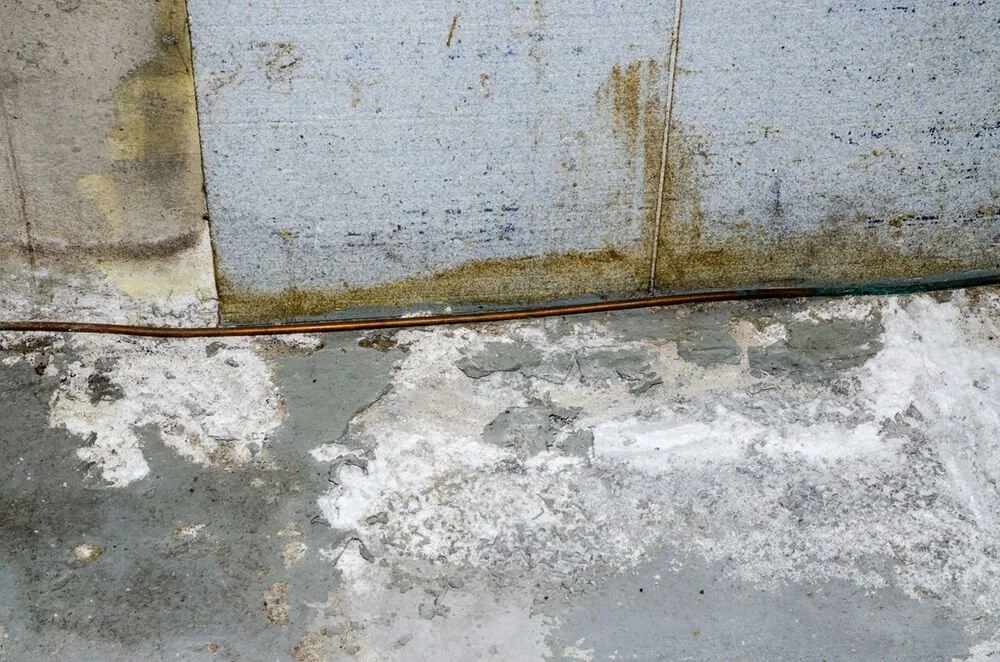
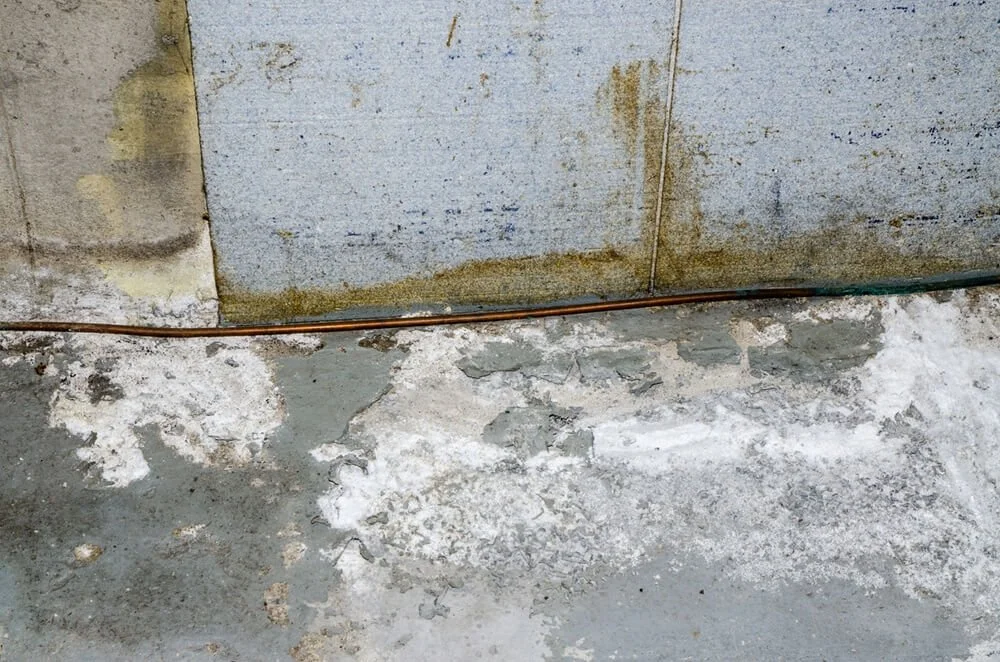
  • Efflorescence: If you see white, sparkling crystals on your basement walls, that is salt. It’s left behind when water evaporates through the concrete. It’s a "smoking gun" for moisture penetration.

  • Spalling: This is when the surface of the concrete starts to flake or peel off. It’s caused by moisture within the wall freezing and expanding.

  • Basement Humidity: If your dehumidifier is running 24/7 and still can't keep the air below 50% humidity, you have a moisture ingress problem.

  • Insects: Centipedes and sowbugs love damp environments. An uptick in "basement bugs" often points to damp foundation walls.

Choosing a Waterproofing Contractor in Niagara-on-the-Lake

Because of the high costs and technical requirements, you must vet your contractor thoroughly.

  • Look for Local References: Ask for homes they have worked on specifically in Niagara-on-the-Lake or St. Catharines.

  • Transferable Warranties: A 25-year or lifetime warranty that transfers to the next owner adds massive "peace of mind" value to your home.

  • Equipment Ownership: Does the contractor own their excavators and shoring equipment, or do they rent? Companies that own their gear are often more established and stable.

  • Consultative Approach: A good contractor won't just try to sell you the most expensive package. They will explain the science behind why they recommend interior vs. exterior for your specific lot.

Contact Foundation Fix Today

In Niagara-on-the-Lake, your home’s foundation is the only thing standing between you and the persistent moisture of the Golden Horseshoe. While the choice between interior and exterior waterproofing involves a complex balance of budget, disruption, and structural goals, the most important decision is simply to take action.

Ignoring a damp basement in a clay-heavy region like ours is a recipe for structural failure and diminished property value. By investing in professional waterproofing, you aren't just fixing a leak; you are preserving a piece of Niagara’s history and ensuring your home remains a safe, dry sanctuary for decades to come. Contact Foundation Fix today to ensure you are making the best decision for your home’s waterproofing.


Source: https://niagarafalls.ca/living/environment/wrap.aspx 

08 Jul 00:58

The “Clay Bowl Effect” In Niagara Homes

by Rocket Marketing

For homeowners in Niagara, the "dream home" often comes with a hidden geological challenge. While we enjoy the lush vineyards and fertile land of the peninsula, the very earth beneath our feet is a primary suspect in basement flooding.

If you’ve ever wondered why your basement feels damp or why you’re seeing a wet basement after rain, the answer likely lies in a phenomenon known as the "Clay Bowl Effect."

Why Niagara's Geology is Hard on Foundations

The Niagara Region is famous for its "heavy clay soil." Specifically, the Haldimand Clay Plain covers much of St. Catharines and surrounding areas. While clay is excellent for holding nutrients for grapes, it is a nightmare for residential engineering.

Clay is composed of fine particles that pack tightly together. Unlike sandy soils, which allow water to percolate through quickly, clay is remarkably non-porous. When it gets wet, it expands; when it dries, it shrinks and cracks. This constant movement creates a hostile environment for concrete foundations, leading to settlement cracks and, eventually, water ingress.You can read more about the expansive nature of clay here.

What is the "Clay Bowl Effect"?

 To understand the Clay Bowl Effect, you have to look at how your home was built.

The Construction Process: Virgin Soil vs. Backfill

When a builder prepares to pour a foundation, they excavate a hole significantly larger than the footprint of the house. This creates a "gap" between the exterior foundation wall and the undisturbed, "virgin" soil. Once the concrete walls are poured and cured, the contractor fills that gap back in with loose soil, known as backfill.

The problem is that this backfill soil is never as compacted or dense as the original, undisturbed clay. This creates a pocket of loose, porous earth immediately surrounding your home, encased by the dense, "waterproof" walls of the original clay excavation.

How the "Bowl" Fills Up During Rainstorms

Think of the undisturbed clay around your home as a giant ceramic bowl. Your house is sitting inside that bowl, surrounded by loose backfill dirt. During a typical Niagara thunderstorm, the rain hits the ground and tries to soak in.

Because the surrounding virgin clay is so dense, the water takes the path of least resistance: the loose backfill. The water rushes into the loose soil around your foundation, filling the "bowl" to the brim. Since the clay prevents the water from draining away horizontally into the yard, the water trapped against the foundation has nowhere to go but down.

The Consequence: Hydrostatic Pressure & Leaks

As the "bowl" fills, gravity pulls the water toward the bottom of your foundation. This leads to a build-up of hydrostatic pressure. Hydrostatic pressure is the pressure exerted by a fluid at equilibrium at a given point within the fluid, due to the force of gravity.

In layman's terms: the water sitting in the backfill is heavy. A cubic foot of water weighs about 62.4 pounds. When thousands of gallons of water are trapped against your basement walls, the pressure becomes immense. This pressure forces water through even the tiniest hairline cracks in your concrete, through the joint where the wall meets the floor (the cove joint), or even through the porous concrete itself. This is why many Niagara homeowners experience a wet basement after rain even if their foundation appears solid.

The Solution: Breaking the Bowl

You cannot change the geology of the Niagara region, but you can change how your home interacts with it. To prevent the Clay Bowl Effect from destroying your basement, you must manage both the water's entry and its exit.

Importance of Exterior Waterproofing Membranes

The first line of defense is a high-quality foundation waterproofing membrane. Modern membranes are not just "damp-proofing" (which is essentially just a thin layer of spray-on tar). A true waterproofing system involves a thick, rubberized coating and a dimpled drainage board.

The dimpled board serves two purposes:

  1. It acts as a physical barrier.

  2. It creates an air gap that allows water to fall straight down to the weeping tile, preventing hydrostatic pressure from building up against the wall.

Proper Grading & Swales

The second step is grading for clay soil. Because Niagara's clay is so stubborn, you cannot rely on the soil to absorb water. You must use physics to move it away.

The ground should slope away from your home at a rate of at least one inch per foot for the first six feet. In many Niagara subdivisions where houses are close together, "swales" (shallow, grass-lined channels) are used to collect this runoff and direct it toward the municipal storm drains or the street. If your grading has settled over the years, a common occurrence in heavy clay, you are essentially inviting the "bowl" to fill faster.

Why "Just Filling the Dirt" Doesn't Work

Many homeowners try to fix a sinking area near their foundation by simply dumping more soil or mulch into the depression. This is a temporary cosmetic fix that often worsens the problem.

Adding more loose soil doesn't stop the backfill drainage issues; it just provides more material for the water to saturate. If that soil isn't properly sloped and compacted, or if it’s a high-organic "garden soil," it acts like a sponge, holding moisture against the foundation longer.

To truly fix the Clay Bowl Effect, the solution usually requires a combination of:

  • Mechanical Drainage: Ensuring your weeping tiles are clear and connected to a functional sump pump.

  • Surface Diversion: Extending downspouts at least six feet away from the foundation.

  • Subsurface Barriers: Using bentonite or professional-grade membranes to ensure water never touches the concrete.

Contact Foundation Fix Today

Living in the Niagara Region means accepting that our soil is constantly working against our basements. However, by understanding the mechanics of the Clay Bowl Effect, you can move from reactive repairs to proactive protection. If you notice cracks in your cold cellar or water seeping in after a spring thaw, remember: it’s not just "bad luck," it’s physics. Contact Foundation Fix today to discuss proactive measures you can take to preserve your foundation.

08 Jul 00:57

Efflorescence vs. Mould: Identifying the "White Powder"

by Rocket Marketing

As a homeowner, few things induce a sudden drop in your stomach quite like heading down to the basement or out to the garage and discovering a mysterious, creeping patch of white powder on your walls. Instantly, your mind races to the worst-case scenario: a toxic fungal invasion that is going to cost thousands of dollars to remediate and put your family’s respiratory health at risk.

However, before you panic and start throwing away stored belongings, take a deep breath. While that strange white substance clinging to your foundation could indeed be a biological growth, there is a very high probability that it is something entirely different—and entirely harmless.

When dealing with masonry and below-grade walls, homeowners frequently encounter two distinct phenomena that look strikingly similar to the untrained eye: efflorescence and white mould. Understanding the critical differences between these two is the first step toward reclaiming your space. Let’s dive into how you can successfully distinguish between the two, what they mean for your home’s structural health, and how you can banish them for good.

The "White Stuff" Panic: What Are You Looking At?

The confusion between these two substances is incredibly common, and for good reason. Both of them thrive in damp, dark, and poorly ventilated environments. Both of them manifest as white, powdery, or patchy discolorations. Both of them serve as giant, flashing warning signs that your home is suffering from a moisture control problem.

But that is where the similarities end. One is a simple, inert chemical reaction that requires little more than a stiff brush to clean away. The other is a living, breathing fungus that will actively devour organic materials and compromise your indoor air quality. Misidentifying basement mould can lead to unnecessary panic and exorbitant cleaning bills, while ignoring it can lead to severe structural and health consequences. To solve the problem, you must first know exactly what you are fighting.

Contender 1: Efflorescence

If you have a concrete, brick, stone, or stucco surface in a damp environment, you are highly likely to encounter efflorescence. Unlike mould, efflorescence is not a living organism. It is a strictly inorganic mineral deposit. It cannot spread through the air via spores, it cannot cause respiratory illness, and it will not rot the wood framing of your home.

The "Salty" Science: How Water Pushes Minerals Through Concrete

To understand efflorescence causes, we have to look at the microscopic structure of your foundation. Concrete and brick may feel rock-solid, but they are actually highly porous materials, full of tiny capillaries.

When groundwater or soil moisture presses against the exterior of your foundation, it slowly forces its way through these pores. As this water travels through the masonry, it dissolves natural, water-soluble minerals hidden within the cement, such as calcium hydroxide and various hygroscopic salts.

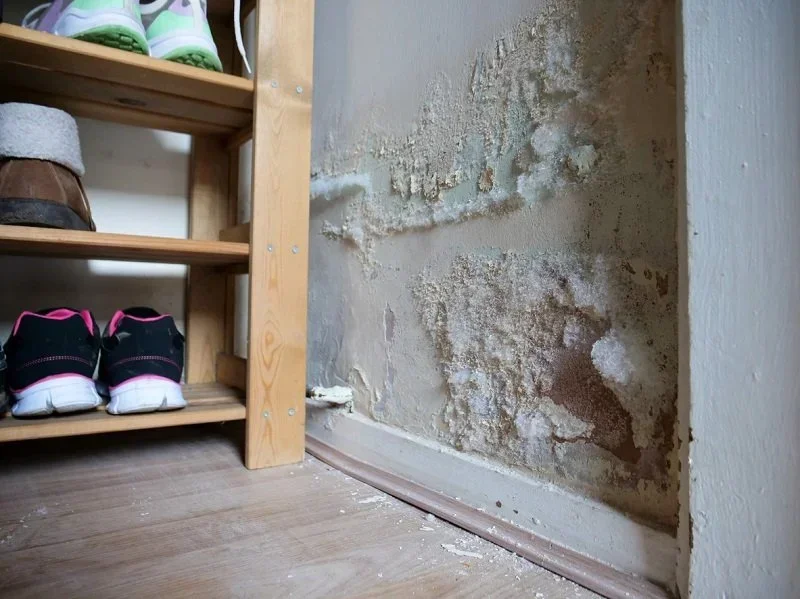
When that mineral-rich water finally reaches the interior surface of your basement wall, the water evaporates into the indoor air. However, the heavy minerals cannot evaporate. They are left behind on the surface, crystallizing into a chalky, white powder. This process is sometimes referred to as calcification on concrete. Because hygroscopic salts actively attract and hold water from the surrounding environment, these mineral deposits can sometimes look slightly damp or frosty, further adding to the visual confusion.

How to Test: The Water Spray Trick

Because efflorescence is essentially just crystallized salt, it behaves exactly like salt when exposed to moisture. This gives homeowners an incredibly easy, foolproof way to test the substance without needing a laboratory.

Take a standard spray bottle filled with clean water and aggressively spritz a small patch of the white powder. Because efflorescence is composed of water-soluble minerals, the powder will immediately dissolve and disappear into the wet concrete. (It will likely reappear once the wall dries again, but the instant vanishing act proves its mineral nature). If you want to be extra thorough, spray the area with a mild acid like household white vinegar; efflorescence will often produce a faint fizzing or bubbling reaction as the acid breaks down the alkaline salts.

Contender 2: White mould (The Fungus)

While efflorescence is a harmless mineral, white mould is a living fungal colony. Mould spores are microscopic and omnipresent in the air around us, but they remain dormant until they find the perfect trifecta of conditions: optimal temperatures, a food source, and, most importantly, liquid water or high humidity. You can read more about mould removal here.


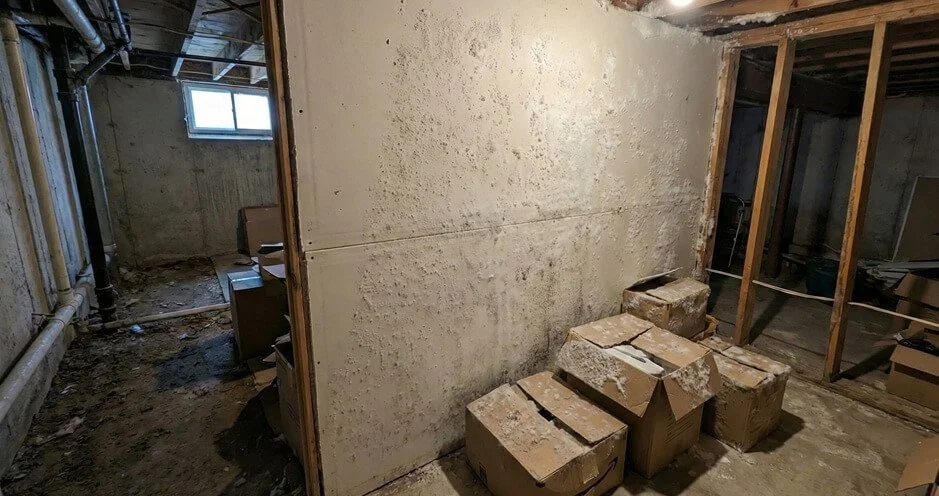
Unlike efflorescence, which only forms on masonry, fuzzy white mould feeds exclusively on organic materials. It actively digests cellulose to survive. Therefore, if you see white powder growing on your wooden floor joists, drywall paper backing, cardboard storage boxes, or old furniture, you can be nearly certain it is mould, as efflorescence cannot form on these materials.

The Smell Test (Musty vs. Odourless)

One of the most reliable ways to distinguish between these two substances doesn't involve your eyes at all; it involves your nose.

Because efflorescence is simply an accumulation of inert calcium and salt, it is completely odourless. If you are standing in a basement covered in efflorescence, the air will just smell like a normal basement.

Mould, on the other hand, releases microbial volatile organic compounds (MVOCs) as it metabolizes and digests its food source. These invisible gases are what produce that classic, pungent, musty, "wet earth" smell associated with damp basements and old cabins. If you are looking at a white patch and your nose is hit with a heavy, damp, rotting odor, you are dealing with a biological growth.

Texture: Fuzzy vs. Chalky

If you put on a pair of rubber gloves and a protective mask, you can also perform a tactile and visual inspection.

Efflorescence is flat, brittle, and powdery. If you rub it between your gloved fingers, it will feel gritty, exactly like table salt or chalk dust. It crushes easily and will quickly brush off the wall.

White mould has a distinct, three-dimensional structure. It often appears fibrous, web-like, or cottony. It does not brush away easily; instead, it tends to smear or mat down when you touch it, clinging stubbornly to the surface of the wood or drywall it is consuming. Furthermore, if you perform the "Water Spray Trick" mentioned earlier, mould will not dissolve. It will simply get wet and stay exactly where it is.

Why Both Signal a "Water Problem" (Even if One is Harmless)

Here is the most critical takeaway for any homeowner: whether your water spray test reveals harmless efflorescence or requires you to call a mould remediation specialist, the root cause is identical. Both of these issues are giant red flags indicating active moisture migration.

Water is penetrating your home's envelope. If you only clean the efflorescence off the wall or bleach the mould off the wood, you are only treating the symptom. The moisture is still moving through your concrete, and the white powder (whether mineral or fungal) will inevitably return.

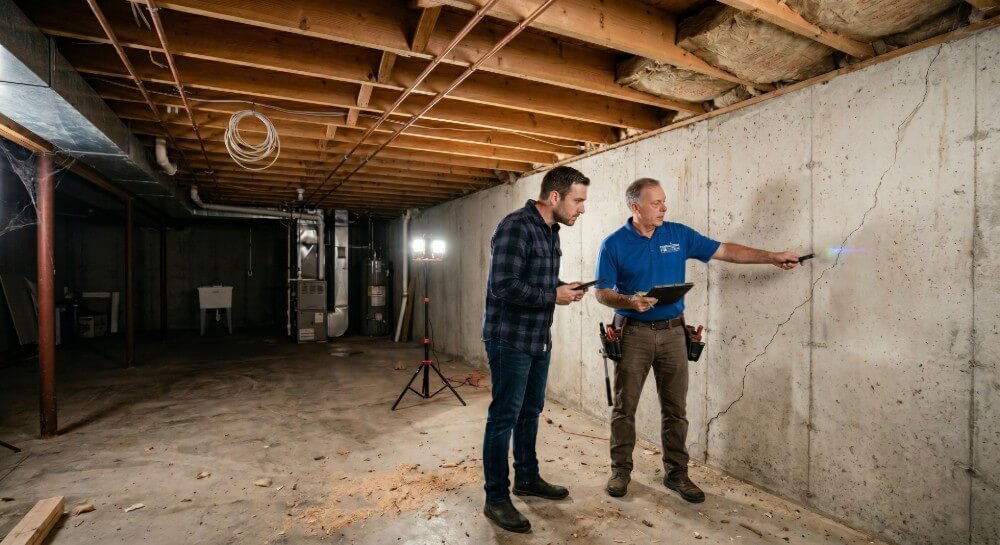
Furthermore, while efflorescence won't hurt your lungs, the constant movement of water and the crystallization of salts inside the pores of your concrete can eventually cause "spalling"—a condition where the surface of the concrete begins to flake, crumble, and deteriorate, threatening your foundation's structural integrity.
How to Stop Moisture Migration Permanently

To protect your home, you must cut off the water supply at its source. This requires a comprehensive approach to moisture control.

First, look outside. Ensure that your gutters are clear and that your downspouts are discharging water at least six feet away from your foundation. Check the grading of your landscaping; the soil should slope away from your home, preventing rainwater from pooling against the exterior walls.

If exterior drainage correction isn't enough, you will need to look at professional interior solutions. For residents in Southern Ontario dealing with high water tables and heavy spring thaws, investing in professional basement waterproofing St. Catharines experts can provide is often the only permanent fix. This may involve installing an interior weeping tile system and a sump pump to actively manage hydrostatic pressure beneath the slab.

Once the active water intrusion is stopped and the concrete is given ample time to dry, you can apply a high-quality, penetrating masonry sealer to your interior basement walls. A silane-siloxane masonry sealer works by soaking deep into the pores of the concrete and creating a hydrophobic barrier. This allows the concrete to "breathe" vapor out, but prevents liquid water and dissolved salts from passing through to the surface, effectively ending your efflorescence and mould anxieties for good.

Contact Foundation Fix Today

Uncertainty surrounding the foundation of your home can be scary. Contact Foundation Fix today to discuss best practices for identifying issues with your foundation.

08 Jul 00:57

Sump Pump Discharge Rules in Niagara: A Guide to Avoiding Fines

by Rocket Marketing

For homeowners in St. Catharines and the broader Niagara Region, the spring thaw and heavy autumn rains bring a familiar sound: the hum of the sump pump. This mechanical hero is your basement’s first line of defence against flooding, but how and where that water leaves your house is governed by strict municipal rules.


The "Sidewalk Ice" Problem: Why Bylaws Exist

You might wonder why the city cares if your sump pump is draining to the street. The primary reason is public safety. When a discharge line points directly toward a sidewalk or roadway, that water has nowhere to go but across the pavement.

In the Niagara climate, temperatures can fluctuate wildly. Water that is pumped out during a sunny afternoon can flash-freeze by nightfall, creating an "invisible" ice patch. This creates a severe slipping hazard for pedestrians and a liability nightmare for the homeowner. Beyond the ice, constant water flow on streets can accelerate the deterioration of asphalt and cause "icing" in gutters that prevents storm drains from working correctly during the next melt.

St. Catharines & Niagara Region Discharge Rules

The St. Catharines water bylaw (and similar regulations in Niagara Falls and Welland) is designed to keep "clean" foundation water out of the "dirty" sewage system.

Distance from Property Lines

In St. Catharines, the general rule of thumb is that your sump pump discharge must stay on your own property. Specifically, guidelines suggest that water should be discharged at least 2 meters (approximately 6.5 feet) away from your foundation wall to prevent the water from simply cycling back down into your weeping tiles.

Furthermore, you are legally responsible for ensuring your water does not negatively impact adjacent properties. Discharging water directly onto a neighbour’s lawn or within a few feet of the property line is a quick way to trigger a neighbour water runoff dispute.

Connecting to the Sanitary Sewer

The most significant violation a homeowner can commit is connecting their sump pump to the sanitary sewer (the pipe that handles toilets and sinks).

  • The Reason: Sanitary sewers lead to treatment plants. During a heavy storm, thousands of sump pumps discharging clean groundwater can overwhelm the plant, leading to raw sewage backups into people’s basements.

  • The Fine: Municipalities regularly conduct inspections and "smoke testing" to find these illegal connections. Fines can be substantial, and you will be required to disconnect the system immediately at your own expense.

Best Practices for Discharge Lines

To keep your basement dry and your neighbours happy, follow these professional standards for setting up your discharge system.

Burying the Line (Aesthetics & Freeze Protection)

Many homeowners dislike the look of a long PVC pipe snaking across their lawn. Burying the sump pump line is a popular solution. By trenching the line into the yard and finishing it with a pop-up emitter, you keep the water moving away from the house without the eyesore.

However, a buried line must be sloped correctly to ensure gravity carries the water away. If the line is flat, water will sit in the pipe and freeze during a Niagara winter, leading to a frozen discharge line and a burnt-out pump motor.

The "Air Gap" (Preventing Freeze-Ups)

The "Air Gap" is your best friend in the winter. This is a break in the pipe just outside where it exits your house. If the main line in the yard freezes solid, the water can overflow out of the air gap onto the ground near the house. While not ideal, it is infinitely better than having the water back up into your basement because the pump has nowhere to send it.

Dry Wells and Pop-Up Emitters

If your lot doesn't have a natural slope, a "Dry Well" is an excellent alternative. This is a large, perforated barrel buried underground and surrounded by gravel. The sump pump discharges into the well, and the water slowly leaches into the surrounding soil. A pop-up emitter at the end of the line acts as a safety valve, opening only when the water pressure from the pump is active.

Solving "Water Wars" with Neighbours

A neighbour water runoff dispute can escalate quickly. If your pump is cycling every five minutes and dumping water onto the property next door, you may be liable for any damage caused to their landscaping or foundation.

If you find yourself in this situation:

  1. Redirect the flow: Use flexible piping to move the discharge point to a different area of your yard (like the backyard or a rain garden).

  2. Install a French Drain: This can help disperse the water over a larger area underground.

  3. Check for a Storm Sewer Connection: In some parts of Niagara, you can apply for a permit to have a direct storm sewer connection. This allows your pump to discharge directly into the municipal storm system underground, bypassing the surface altogether.

Contact Foundation Fix Today

Navigating bylaws and drainage physics can be overwhelming. At Conterra Foundation, we specialize in ensuring your home’s drainage system is both effective and compliant with local Niagara regulations. From installing high-capacity pumps to designing sophisticated discharge systems that prevent freezing, we help you avoid the stress of "Water Wars" and municipal fines. Contact Foundation Fix today to ensure your property doesn’t result in fines.


08 Jul 00:57

Finishing Your Basement? The “Foundation First” Checklist

by Rocket Marketing

A finished basement can transform your home, adding valuable living space, increasing property value, and giving you flexibility for everything from rental income to family recreation. But before you start picking paint colours or flooring, there’s a critical step that too many Niagara homeowners overlook: ensuring the foundation is ready for finishing.

Skipping this step can turn your dream renovation into a costly disaster. That’s why any successful project should begin with a thorough basement renovation checklist focused on structural integrity and moisture control.

The Nightmare Scenario: Ruining a $50k Renovation

Imagine investing $50,000 into a beautifully finished basement, complete with drywall, flooring, a bathroom, and maybe even a guest bedroom. Everything looks perfect for a few months… until it doesn’t.

A musty smell creeps in. Then you notice bubbling paint. Soon after, warped baseboards and damp carpeting. When you finally open up a wall, you discover mould spreading behind the drywall and moisture seeping through the foundation.

This scenario is more common than most homeowners realize. The root cause? Skipping a proper pre-finishing foundation inspection and failing to address moisture issues before closing everything in.

Once the basement is finished, access to the foundation becomes limited and expensive. Fixing issues afterward often means tearing out walls, flooring, and insulation—essentially undoing your entire investment.

The takeaway is simple: your basement is only as good as the foundation behind it.

The “Foundation First” Inspection Checklist

Before you begin framing or installing finishes, you need a detailed inspection process tailored to Canadian homes and climate conditions. This checklist is designed to help homeowners and contractors identify potential problems early, when they’re still manageable and affordable.

1. The “15-Minute Rain Check”

Start outside. Water management begins at the exterior, and poor drainage is one of the leading causes of basement moisture issues.

During or shortly after a rainfall, take 15 minutes to walk around your home and observe how water behaves.

Look for:

  • Pooling water near the foundation

  • Downspouts discharging too close to the house

  • Improper grading (ground sloping toward the foundation instead of away)

  • Overflowing or clogged gutters

Water should always be directed away from your home. Downspouts should extend at least 6–10 feet from the foundation. If they don’t, you’re increasing the risk of water infiltration.

Fixing drainage issues is often simple and inexpensive compared to interior repairs. Regrading soil or extending downspouts can prevent thousands of dollars in damage later.

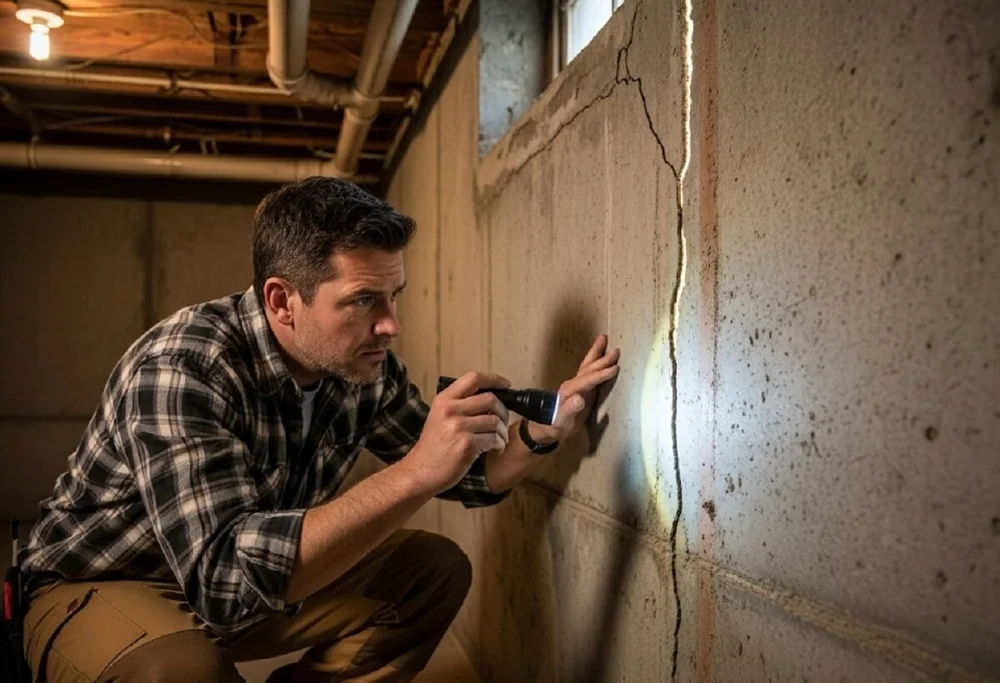
2. Inspecting for Hairline Cracks

Once exterior drainage is addressed, move inside and carefully inspect your foundation walls.

Hairline cracks may seem harmless, but they can allow moisture to seep in over time. Before you install framing, insulation, or drywall, you need full visibility of these surfaces.

Pay attention to:

  • Vertical cracks (often caused by settling)

  • Horizontal cracks (more serious can indicate structural pressure)

  • Diagonal cracks near corners or windows

Mark any cracks you find and monitor them. If they widen or show signs of water intrusion, they need to be repaired before proceeding.

Sealing cracks with appropriate materials is part of a proper pre-finishing foundation inspection, and it’s essential for long-term durability.

Remember: once you begin framing basement wall moisture barrier systems, these cracks will be hidden and much harder to address.

3. The Floor Check: Heaving or Dampness?

Your basement floor is just as important as your walls. Before installing flooring, conduct a thorough inspection of the concrete slab.

Check for:

  • Uneven surfaces or heaving

  • Visible cracks

  • Damp spots or discoloration

  • Efflorescence (white powdery residue indicating moisture movement)

A simple test for moisture is taping a square of plastic to the floor and leaving it for 24–48 hours. If condensation forms underneath, you likely have moisture vapour rising through the slab.

In this case, sealing basement floor surfaces becomes critical. Applying a proper vapour barrier or sealant helps prevent moisture from damaging flooring materials like laminate, vinyl, or carpet.

Ignoring floor moisture can lead to warped flooring, mould growth, and unpleasant odours.

4. Egress Windows: Are They Code Compliant for a Bedroom?

If your basement renovation includes a bedroom, you must ensure your egress windows meet building code requirements.

An egress window serves as an emergency exit and must meet minimum size and accessibility standards. These regulations are strictly enforced in Canada for safety reasons.

Key considerations include:

  • Minimum opening size

  • Maximum sill height from the floor

  • Ease of opening without tools

  • Clear access to the outside (no obstructions)

If your current windows don’t meet code, you’ll need to upgrade them before finishing. This is also the time to confirm requirements for a St. Catharines building permit or similar municipal approvals, depending on your location.

Failing to meet code can result in fines, failed inspections, or even the inability to legally classify the space as a bedroom.

Why You Need a Sump Pump (Even if You’ve Never Flooded)

Many homeowners assume that if their basement has never flooded, they don’t need a sump pump. Unfortunately, that assumption can be risky.

Weather patterns are becoming less predictable, and heavy rainfall events are increasing in many parts of Canada. A sump pump acts as a safety net, removing water that accumulates around your foundation before it can enter your basement.

Even if your home has historically been dry, finishing your basement changes the equation. You’re adding materials like wood framing, insulation, and drywall, all of which are vulnerable to water damage.

Installing a sump pump:

  • Provides peace of mind during heavy storms

  • Helps manage groundwater pressure

  • Reduces the risk of sudden flooding

  • Protects your renovation investment

Modern sump systems can also include battery backups, ensuring they function even during power outages, when they’re often needed most.

Think of it as insurance for your finished space.

Waterproofing from the Inside: The Renovator’s Insurance Policy

Exterior waterproofing is ideal, but it’s not always feasible, especially for existing homes. That’s where interior waterproofing solutions come into play.

Interior waterproofing focuses on managing water that enters the basement and directing it safely away before it causes damage.

Key strategies include:

Interior Drainage Systems

These systems collect water along the perimeter of the basement and channel it to a sump pump. They’re highly effective at preventing water buildup behind walls.

Vapour Barriers and Moisture Control

When framing basement walls moisture barrier systems, it’s essential to include proper vapor barriers. These prevent moisture from migrating into insulation and drywall.

This step is crucial for avoiding mold behind drywall, which can develop silently and pose health risks.

Wall Sealants

Applying waterproof coatings to foundation walls adds an extra layer of protection against moisture intrusion.

Smart Material Choices

Use moisture-resistant materials wherever possible:

  • Rigid foam insulation instead of fiberglass

  • Mould-resistant drywall

  • Vinyl or tile flooring instead of carpet in high-risk areas

Interior waterproofing doesn’t just protect your basement; it extends the lifespan of your entire renovation.

Bringing It All Together

Finishing a basement is one of the most rewarding upgrades you can make to your home—but only if it’s done right from the start.

A solid basement renovation checklist begins with what you don’t see: the foundation, drainage, and moisture control systems that keep your space dry and safe.

By prioritizing a thorough pre-finishing foundation inspection, addressing cracks and dampness, ensuring proper drainage, and investing in waterproofing measures, you set your project up for long-term success.

Don’t forget essential steps like:

  • Sealing basement floor surfaces

  • Installing proper moisture barriers when framing

  • Planning for rough-in plumbing if adding a bathroom

  • Verifying code compliance for windows and permits

  • Taking proactive steps toward avoiding mould behind drywall

Contact Foundation Fix Today

Cutting corners at this stage can cost you exponentially more down the line. But doing it right? That’s how you turn your basement into a space that’s not only beautiful, but built to last.

If you’re planning a renovation in the Niagara region or St. Catharines, start with the foundation. Everything else depends on it. Contact Foundation Fix today to discuss foundation solutions for your home.

08 Jul 00:57

Fixing a Separating Porch or Chimney with Helical Piers

by Rocket Marketing

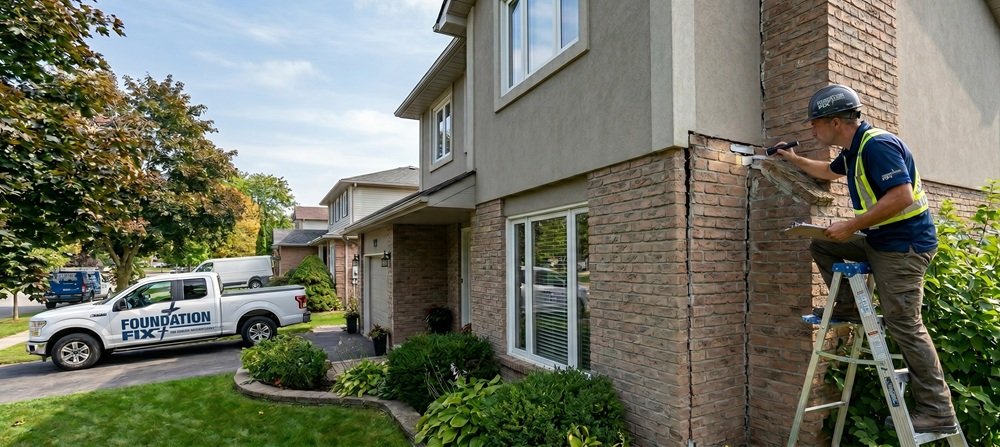
A visible gap forming between your porch and your home, or a chimney that appears to be pulling away from the structure, is more than a cosmetic issue. In many Canadian homes, especially in regions like Niagara with variable soil conditions and seasonal freeze-thaw cycles, these are clear signs of foundation movement.

Whether you are dealing with a sinking concrete porch, a chimney leaning away from your home, or a growing gap between the porch and the house, the underlying issue is almost always related to soil instability. Understanding the cause and choosing the right repair method is critical for long-term structural safety.

Mind the Gap: Why is Your Porch or Chimney Moving?

When you see separation between structures, it usually means that one part of your home is settling at a different rate than another. Porches and chimneys are particularly vulnerable because they are often built on separate footings from the main foundation.

This differential movement leads to visible warning signs:

  • A widening gap between porch and house

  • Steps pulling away from the structure

  • A chimney leaning or tilting

  • Cracks in masonry or concrete

  • Doors or windows near the area sticking

In Niagara and similar regions of Canada, these problems are often accelerated by climate conditions. Freeze-thaw cycles cause soil to expand and contract, while heavy rainfall can wash away supporting material beneath foundations.

Ignoring these signs can lead to more serious structural issues over time, making early foundation settlement repair essential.

The Causes: Poor Soil Compaction and Water Erosion

At the core of most porch and chimney movement is unstable soil. Two primary factors contribute to this problem.

  1. Poor Soil Compaction - During construction, the soil beneath a porch or chimney footing must be properly compacted. If it is not, the soil can compress over time under the weight of the structure. This leads to gradual settling, which is why a sinking concrete porch often develops years after a home is built.

  2. Water Erosion and Drainage Issues - Water is one of the biggest threats to foundation stability. In areas like Niagara, where seasonal precipitation and snowmelt are significant, water can erode soil or cause it to shift.

Common contributors include:

  • Poor grading around the home

  • Downspouts discharging too close to the foundation

  • Saturated soil losing its load-bearing capacity

As the soil weakens or washes away, the unsupported structure begins to sink or tilt. This is especially dangerous for chimneys, which are tall, heavy, and often unsupported beyond their base footing.

The "Band-Aid" Fix: Mudjacking

When homeowners first notice settlement, they often look for a quick and cost-effective solution. One of the most common options is mudjacking, also known as slab jacking or concrete lifting.

This process involves pumping a slurry beneath the concrete to raise it back into position. While it can temporarily correct the appearance of a sinking concrete porch, it does not address the underlying soil problem.

Why Mudjacking Falls Short

  • Temporary solution: The injected material sits on the same unstable soil that caused the problem in the first place.

  • Adds weight: The slurry can actually increase pressure on weak soil, accelerating future settlement.

  • Not suitable for structural elements: Mudjacking is not ideal for stabilizing heavy structures like a chimney leaning away from the home.

  • Limited lifespan: Many homeowners find that the issue returns within a few years.

This is why the debate of concrete lifting vs piering is so important. While lifting may improve the look temporarily, it rarely provides a lasting fix for structural movement.

The Permanent Fix: Helical Piers

For a true long-term solution, helical piers are widely recognized across Canada as one of the most effective methods for foundation settlement repair.

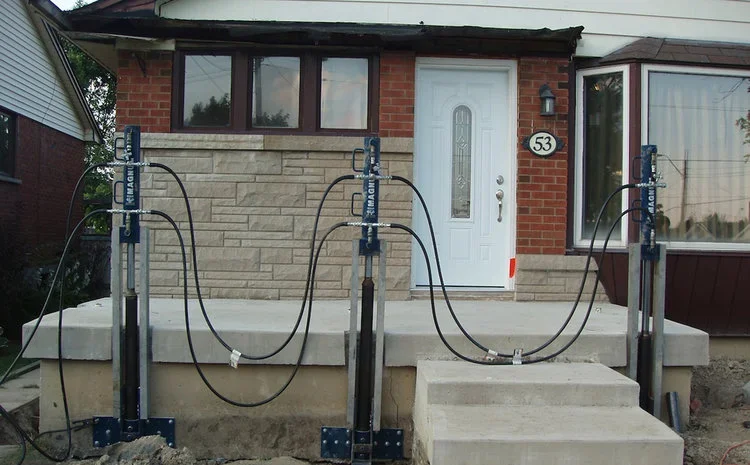
Helical piers are steel shafts with helical plates that are mechanically screwed into the ground beneath the affected structure. They transfer the weight of the structure from unstable surface soil to deeper, load-bearing soil layers.

This makes them ideal for stabilizing both porches and chimneys, especially in regions like Niagara where soil conditions can vary significantly.

Using helical piers for porch repair or chimney stabilization provides reliable structural support Niagara homeowners can depend on for decades.

How Piers Reach Stable Soil

The effectiveness of helical piers lies in their installation method. Unlike surface-level fixes, piers are driven deep into the ground until they reach stable soil or bedrock.

Key advantages include:

  • Depth control: Installers continue advancing the pier until it reaches soil with sufficient load-bearing capacity.

  • Minimal disruption: Installation is relatively non-invasive compared to full excavation.

  • Immediate stability: Once installed, the pier provides instant support.

This approach bypasses the unstable upper soil layers entirely. Instead of trying to improve weak soil, the system transfers the load to ground that will not shift or compress.

The Lifting Process

Once the helical piers are securely in place, the next step is to lift and stabilize the structure.

Hydraulic jacks are used to carefully raise the porch or chimney back toward its original position. This process must be done gradually to avoid damaging the structure.

During lifting:

  • The gap between the porch and the house can often be reduced or eliminated

  • A chimney leaning can be corrected and secured

  • Cracks may close or become less severe

After lifting, the structure is permanently supported by the piers, preventing future settlement.

This is the key advantage in the concrete lifting vs piering comparison. Piering not only restores position but also solves the root cause of the problem.

Is it Safe to Wait?

Delaying repairs to a settling porch or chimney is risky. What may start as a small cosmetic issue can quickly escalate into a serious structural hazard.

Potential Risks Include:

  • Structural failure: A severely leaning chimney structure can collapse, posing safety risks to occupants.

  • Water infiltration: Gaps allow water to enter, leading to further erosion and potential basement issues.

  • Increased repair costs: The longer the problem persists, the more extensive and expensive the repair becomes.

  • Reduced property value: Visible structural issues can significantly impact resale value.

In Canadian climates, freeze-thaw cycles can accelerate damage once movement begins. Water entering cracks expands when frozen, widening gaps and worsening instability.

Addressing the issue early with proper foundation settlement repair is always more cost-effective than waiting for the damage to progress.

Contact Foundation Fix Today

A separating porch or leaning chimney is not something to ignore. These are clear indicators of underlying soil and foundation problems that require professional attention.

While temporary solutions like mudjacking may seem appealing, they do not provide lasting stability. For homeowners in Niagara and across Canada, helical piers offer a proven, permanent solution.

If you notice a sinking concrete porch, a gap between the porch and the house, or signs of a chimney leaning, contact Foundation Fix to discuss solutions for your foundation problems.

08 Jul 00:57

Foundation Underpinning vs. Helical Piers: Restoring Sinking Foundations in Southern Ontario

by Rocket Marketing

For residential and commercial property owners near Niagara and St. Catharines, structural stability is an ongoing battle against the region’s unique subsurface geology. From the heavy glaciated lacustrine clay deposits of the Niagara Peninsula to the dense, variable tills of the Greater Toronto Area (GTA), the ground beneath our feet is continuously shifting. When a foundation begins to fail, the consequences are both visually alarming and structurally catastrophic.

Cracked drywall, jammed doors, unlevel flooring, and stepped masonry fracturing are classic indicators that a building’s structural footprint is no longer resting safely on competent soil.

Restoring structural integrity to a failing foundation requires looking beyond superficial structural cosmetics and addressing deep subgrade mechanical failures. In modern structural engineering, two primary intervention methods exist to halt foundational descent and safely transfer structural loads deeper into the earth:

  •  Traditional mass pour concrete foundation underpinning

  • Engineered helical piering systems

Both technologies aim to establish a permanent solution to foundation settlement. Yet, their methodologies, geological parameters, installation footprints, and cost dynamics vary significantly. Choosing the correct intervention requires an analytical understanding of regional geotechnical conditions, building loads, and structural mechanics.

 Decoding Differential Settlement: Why Niagara Foundations Sink Unevenly

To understand the mechanics of structural remediation, one must first explore the foundational enemy known as differential settlement. Unlike uniform settlement, where an entire building sinks evenly into the ground with minimal structural distortion, this phenomenon occurs when one portion of a structural concrete footprint settles at an accelerated rate compared to adjacent sections. This uneven rate of movement introduces immense internal stress, shear forces, and rotational moments into structural grade beams, concrete block foundation walls, and framing systems, rapidly leading to severe structural failure. We also see the impacts of the clay bowl effect, which you can read more about here.

In regions such as the Niagara Peninsula, Hamilton, and Haldimand County, this issue is profoundly exacerbated by the presence of highly reactive, over-consolidated shifting clay soils. These fine-grained glaciated clay matrixes possess high shrink-swell potentials that respond drastically to changes in moisture content.

  •  Wet Southern Ontario Springs and Autumns: The clay absorbs moisture, swelling and exerting upward hydrostatic and lateral pressures on foundation walls.

  • Hot, Dry Summer Spells: These clay layers undergo severe desiccation, shrinking and leaving massive subsurface voids directly beneath structural footings.

This perpetual cycle of volumetric expansion and contraction systematically undermines shallow foundation systems. Furthermore, several human and environmental variables create localized moisture imbalances:

  •  Mature tree root systems drawing moisture away from the perimeter

  • Poorly configured downspouts

  • Improper grading

The final result is a highly localized loss of subgrade support. This causes portions of the home to drop into the voids while other sections remain stable, fracturing the home’s primary structural skeleton.

 The Traditional Approach: Mass Pour Concrete Foundation Underpinning

When engineering intervention is deemed necessary to arrest this uneven structural movement, traditional mass pour concrete underpinning is often the first method scrutinized. This structural methodology relies on extending the existing foundation depth vertically downward until it reaches a stable, deeper soil layer capable of safely supporting the load.

The primary engineering goals of this method include:

  • Increasing the footprint and structural depth of the building's base by anchoring onto shallow stable soils.

  • Distributing the building weight across a larger surface area using traditional hand excavation tools, concrete mixers, and pump trucks.

  • Anchoring the structure onto more stable material below the active frost and moisture zones, typically four to eight feet below grade.

Traditional underpinning remains a reliable structural choice for projects with shallow stable strata. It is also highly effective where basement heights must be simultaneously augmented through deep interior underpinning. However, it is an incredibly invasive, labour-intensive discipline that fundamentally alters the immediate soil-structure interface around a building’s perimeter, making actual structural lifting exceptionally difficult and risky to execute safely.

Deep Hand Excavation and Sequential Concrete Footing Extension

Executing traditional foundation underpinning requires a highly calculated, sequential construction methodology. This strict staging is vital to prevent inducing catastrophic structural collapse during excavation. Because the earth supporting the home is being systematically removed, technicians cannot excavate the entire perimeter at once.

Instead, the workflow follows a precise pattern:

  • The foundation perimeter is divided into distinct, numbered segments called "pins", which are typically three to four feet in width.

  • These pins are arranged and excavated in a non-consecutive, alternating sequence, such as digging pins 1, 5, and 9 in the first phase.

  • Labourers initiate deep hand excavation beneath the designated pins.

  • They carefully remove the shifting clay soils and dig beneath the existing footing to the engineered depth specified by a structural engineer.

  • Once a pin cavity is dug out down to a dense, non-active stratum, heavy wood or steel forming is installed within the cavity.

  • Steel reinforcing bars (rebar) are placed into the void, extending horizontally past the form borders to ensure structural continuity with adjacent pins when poured in later sequences.

High-strength concrete is then pumped or poured directly into the deep void, forming new structural concrete footings beneath the original, failing foundation wall. Because concrete undergoes slight shrinkage during its curing phase, a physical gap of approximately two to three inches is left between the top of the newly poured concrete pin and the underside of the original footing. Once the structural concrete achieves its required compressive strength, this remaining gap is tightly packed with non-shrink dry-pack grout. This establishes complete structural continuity and completes the vertical extension of the foundation.


Geotechnical Engineering Note on Southern Ontario Tills

 In locations across Mississauga, Oakville, and Toronto, underpinning must often penetrate past highly weathered surface clays to reach dense Halton or Newmarket Till. If these stable strata are buried too deeply, traditional hand excavation becomes prohibitively dangerous and cost-ineffective, forcing a shift to deep piering alternatives.

The Modern Engineering Approach: Helical Piering Solutions

As structural engineering evolved, the physical limitations and intense labour demands of deep hand-excavated concrete underpinnings led to the development of deep mechanical foundation systems. Foremost among these modern engineering methods is the installation of helical piering solutions. Rather than attempting to expand the existing concrete footprint via mass concrete pours, helical piering functions by completely bypassing unstable, low-bearing surface soils altogether and transferring the building's entire weight down to deep, reliable strata.

A helical pier consists of:

  • A central high-strength structural steel shaft

  • One or more helix-shaped steel plates welded to its lower sections

 These piers function essentially as deep-foundation anchors that are mechanically driven deep into the earth. The installation process is highly controllable, utilizing real-time hydraulic data to guarantee that each pier satisfies specific load capacities before being structurally integrated into the building.

 Screwing Steel Piles into Dense Structural Load-Bearing Strata

The mechanical installation of helical piers follows a highly structured, lower-impact methodology:

  • Technicians use low-impact, high-torque hydraulic drive heads mounted to compact construction equipment, such as mini-excavators or skid steers.

  • This compact configuration allows technicians to work efficiently within tight residential setbacks, minimizing overall property disruption and keeping the installation footprint confined to minimal, localized access pits at each pier point.

  • The hydraulic drive head applies continuous downward force and rotational torque, screwing the steel pile cleanly into the ground, much like a self-tapping screw penetrating hardwood.

  • As the initial lead section of the pier descends, additional steel shaft extensions are securely bolted or welded onto the preceding section, allowing the pier assembly to reach profound depths.

  • The installation continues until the helix plates advance through the problematic shifting clay soils and securely bite into dense, unyielding load-bearing strata.

Depending on the precise geological characteristics of the Southern Ontario landscape, this stable zone may consist of dense glacial till, cemented sand and gravel formations, or solid rock. In many cases along the Niagara Escarpment, the piers are driven continuously until they achieve direct refusal upon reaching competent bedrock depth.

Once the pier achieves its targeted mechanical torque rating, which correlates mathematically to its ultimate load-bearing capacity, the installation is complete. The top of the steel shaft is cut to the exact engineered elevation, and a heavy-duty industrial steel load transfer bracket is mounted to the pier head. This structural bracket is positioned directly underneath the existing concrete foundation footing, creating a rigid mechanical connection capable of receiving and supporting the structural load.

Engineering Face-Off: Geotechnical Soil Density and Structural Weight Limits

When selecting between mass pour concrete underpinning and helical piering for a Southern Ontario property, a structural engineer must execute a comprehensive evaluation matching the structural engineering realities to the site-specific geotechnical profile. The choice is never arbitrary; it depends heavily on structural loads, soil density profiles, and the depth of competent strata.

Geotechnical soil profile variation across Southern Ontario dictates which technology can physically achieve success. Traditional concrete underpinning is limited by human excavation bounds and the safety realities of open-trench digging. If a property in the GTA sits on a deep layer of soft, unconsolidated organic silt or highly active clay that stretches twelve feet down before encountering dense till, hand-underpinning becomes unsafe and economically unfeasible. Pouring mass concrete into deep trenches under these conditions would require a massive volume of concrete, drastically increasing the building’s dead weight and accelerating the failure of the underlying weak soils.

Helical piers excel in this exact geotechnical scenario. Because the slender steel shafts add negligible mass to the foundation while utilizing deep end-bearing mechanics, they effortlessly pierce through twenty, forty, or even sixty feet of poor soil to reach the required bedrock depth. Rather than expanding the footing locally, they use deep end-bearing and skin friction to bypass weak layers.

However, helical piers can encounter limitations in soils filled with large glacial erratics, dense boulder fields, or heavy shale fragments common to parts of the Niagara Escarpment

Operational Realities: Speed, Vibration Risks, and Long-Term Structural Warranties

Beyond structural load equations and soil mechanics, property owners and project managers must carefully evaluate the operational impacts of each foundation restoration method. The chosen system directly influences project timelines, landscape disruption, neighbourhood relations, and future structural liability.

Project Speed

Project speed is an area where helical piering holds a distinct operational advantage. A standard residential foundation stabilization project utilizing helical piers can typically be completed in three to five business days. Because the process avoids bulk earth excavation and eliminates concrete curing lag times, the hydraulic lifting systems can be hooked up and engaged immediately following pier placement.

Traditional mass pour underpinning, by contrast, is a multi-week operational undertaking. The meticulous process of digging out alternating pins, building structural forms, pouring concrete, waiting for the material to cure to target compressive strength, and dry-packing the gaps must be repeated across multiple cycles, extending project schedules and prolonging site disruption.

Vibration Risks

Vibration risk is another critical parameter, particularly in historic urban cores like downtown Hamilton, Toronto's Cabbagetown, or older areas of St. Catharines. In these neighbourhoods, aging brick-and-mortar homes sit very close to property lines, sharing delicate party walls or structural boundaries.

  • Impact of High-Impact Equipment: Utilizing heavy impact equipment or high-impact driven piles to stabilize a foundation can send seismic shockwaves through the ground, inadvertently fracturing fragile historic masonry on neighbouring properties.

  • Impact of Traditional Underpinning: This method minimizes vibration risk by utilizing manual hand tools for excavation, but it carries a higher risk of localized soil relaxation, where neighbouring soil can slough into the open trench.

  • Impact of Helical Piers: Helical pier installation represents the safest alternative, as the smooth, rotational screwing action generates virtually zero vibrational signature, protecting delicate historic structures.

Long-Term Structural Warranties

Finally, long-term structural warranties and structural peace of mind must be factored into the project equation. Because traditional concrete underpinning relies heavily on the quality of on-site manual labour, manual concrete mixing, and the variable conditions of an open excavation trench, warranties are usually tied directly to the structural contractor's operating bond.

Conversely, helical piering systems utilize factory-certified, engineered steel components that are heavily galvanized to resist underground corrosion for generations. Furthermore, because each pier's load-bearing capacity is validated by digital hydraulic torque readouts during installation, structural engineers can definitively sign off on performance metrics. This allows manufacturers and specialized contractors to issue comprehensive, long-term transferable structural warranties, often extending from 25 years to a lifetime, adding measurable resale value and peace of mind to the Southern Ontario property investment.

Contact Foundation Fix Today

Ultimately, restoring a sinking foundation requires a careful balance of geotechnical realities, engineering metrics, and operational goals. For shallow foundational failures in boulder-heavy soils, traditional mass concrete underpinning remains a time-tested option. However, for deep structural settlement within Southern Ontario's active clay matrices, modern helical piering offers speed, precision, and reliable lifting performance, stabilizing properties and ensuring they remain level for decades to come.

If you notice your foundation is sinking, contact Foundation Fix today to discuss the best solutions for your property.