Shared posts

28 Jul 12:07

The Oldest Unopened Bottle of Wine in the World (Circa 350 AD)

by Josh Jones

Image by Immanuel Giel, via Wikimedia Commons

It’s an old TV and movie trope: the man of wealth and taste, often but not always a supervillain, offers his distinguished guest a bottle of wine, his finest, an ancient vintage from one of the most venerable vineyards. We might follow the motif back at least to Edgar Allan Poe, whose “Cask of Amontillado” puts an especially devious spin on the treasured bottle’s sinister connotations.

If our suave and possibly deadly host were to offer us the bottle you see here, we might hardly believe it, and would hardly be keen to drink it, though not for fear of being murdered afterward. The Römerwein, or Speyer wine bottle—so called after the German region where it was discovered in the excavation of a 4th century AD Roman nobleman’s tomb—dates “back to between 325 and 359 AD,” writes Abandoned Spaces, and has the distinction of being “the oldest known wine bottle which remains unopened.”

A 1.5 liter “glass vessel with amphora-like sturdy shoulders” in the shape of dolphins, the bottle is of no use to its owner, but no one is certain what would happen to the liquid if it were exposed to air, so it stays sealed, its thick stopper of wax and olive oil maintaining an impressively hermetic environment. Scientists can only speculate that the liquid inside has probably lost most of its ethanol content. But the bottle still contains a good amount of wine, “diluted with a mix of various herbs.”

The Römerwein resides at the Historical Museum of the Palatinate in Speyer, which seems like an incredibly fascinating place if you happen to be passing through. You won’t get to taste ancient Roman wine there, but you may, perhaps, if you travel to the University of Catania in Sicily where in 2013, scientists recreated ancient wine-making techniques, set up a vineyard, and followed the old ways to the letter, using wooden tools and strips of cane to tie their vines.

They proceeded, writes Tom Kingston at The Guardian, “without mechanization, pesticides or fertilizers.” Only the organic stuff for Roman vintners.

The team has faithfully followed tips on wine growing given by Virgil in the Georgics, his poem about agriculture, as well as by Columella, a first century AD grower, whose detailed guide to winemaking was relied on until the 17th century.

Those ancient winemakers added honey and water to their wine, as well as herbs, to sweeten and spice things up. And unlike most Italians today who “drink moderately with meals,” ancient Romans “were more given to drunken carousing.” Maybe that’s what the gentleman in the Speyer tomb hoped to be doing in his Roman afterlife.

Related Content:

How to Bake Ancient Roman Bread Dating Back to 79 AD: A Video Primer

How Did the Romans Make Concrete That Lasts Longer Than Modern Concrete? The Mystery Finally Solved

Rome Reborn: Take a Virtual Tour of Ancient Rome, Circa 320 C.E.

Josh Jones is a writer and musician based in Durham, NC. Follow him at @jdmagness

The Oldest Unopened Bottle of Wine in the World (Circa 350 AD) is a post from: Open Culture. Follow us on Facebook, Twitter, and Google Plus, or get our Daily Email. And don't miss our big collections of Free Online Courses, Free Online Movies, Free eBooksFree Audio Books, Free Foreign Language Lessons, and MOOCs.

28 Jul 01:03

Remembering Caspar Milquetoast, the Original Snowflake

by Eric Grundhauser
article-image

At one time, the term “milquetoast” was the go-to slam for bullies looking to belittle the meek. And while it sounds like some sort of French bread dish (and that’s no coincidence), the term originated with an early 20th-century comic strip star named Caspar Milquetoast, who through the subtle brutalities of everyday life became a sort of hero for the timid soul.

The original milquetoast was the creation of the illustrator H.T. Webster. Known as “Webby” to his friends, Webster grew up in rural Wisconsin and started his cartooning career in the first decade of the 20th century, with little formal education. He drew sports cartoons for some newspapers out of Denver, Colorado, before moving back to Chicago, Illinois, where he'd briefly attended art school.

During his years in Chicago, Webster produced satirical political cartoons for papers such as the Chicago Inter Ocean, which proved incredibly popular. According to the introduction to 1953’s The Best of H.T. Webster (published a year after his death), Webster's political cartoons were front-page attractions and even inspired an unsuccessful bill brought before the Illinois legislature to outlaw cartoonists’ unflattering portrayals of state senators and representatives.

article-image

His star rising, Webster took a job at the Cincinnati Post around 1908, where he continued his mostly single-frame strips for three more years, after which he headed off to travel the world. His travel journal comics didn’t prove popular enough to finance his globe-trotting adventures, so soon enough Webster found himself back in the States. He went to work in New York, where he began creating illustrations for the Associated Newspapers cartoon syndicate, and later the New York World and the New York Tribune. During this period, Webster moved away from political cartooning, focusing instead on the comedic strips for which he'd eventually come to be known. In a 1949 New Yorker profile, Webster said, “I didn’t like being in hot water, so every now and then, I’d do a little human-interest picture. [...] I found that drawing human-interest pictures is what I wanted to do more than anything else.”

Webster’s comics often involved a bucolic, nostalgic moment from childhood or a funny, meaningful, usually banal interaction with the modern world. The term “common foibles” comes to mind. He came to grouping them under titles such as The Thrill That Comes Once in a Lifetime, about life’s little victories; Boyhood Ambitions, which highlighted the lofty dreams of children; and Life's Darkest Moment, which were about the small indignities we all weather. Webster’s life was often front and center in his work, with many of his childhood strips recalling his Wisconsin upbringing. His Poker Portraits series was based on jokes around the card game that he enjoyed so much, and love of dogs came out in his collection of canine-based gag strips.

As popular as these comics were, it wasn’t until the introduction of Caspar Milquetoast that Webster became a legend.

article-image

Milquetoast first appeared around 1926, while Webster was working at the World. The character evolved out of an everyman figure that Webster began incorporating into his strips, although he told the New Yorker that even he was a bit unclear about Milquetoast's exact origin. As he solidified, the character of Milquetoast was drawn as a tall, skinny, older man dressed in a scholarly suit and delicate glasses. His most defining features were his bushy white mustache and little derby hat. Milquetoast was literally a caricature of a wimp.

As the character continued to pop up in Webster’s strips, they were eventually grouped together under the title The Timid Soul. Most of the Timid Soul comics involved Milquetoast becoming scared or offended by some seemingly innocuous circumstance, such as finding a blobby piece of art too suggestive, or being too scared to make small talk with a gruff-looking stranger. In a fitting reversal of rough-riding Teddy Roosevelt’s famous quote, Caspar Milquetoast came to be described as someone who “speaks softly and gets hit with a big stick.” The Timid Soul ran a couple of days a week, mixed in with some of Webster’s other strips, and soon gained a popular following.

Webster often modeled Milquetoast’s experiences on his own. Those who knew Webster described him as having a “hypersensitive consideration” of others' feelings, and an almost pathological respect for authority—so did Milquetoast. When Webster got into golf, or had car troubles, Milquetoast could be expected to go through the same.

article-image

In 1931, Webster’s Caspar Milquetoast comics were collected into a book, also titled The Timid Soul. In the New York Times review of the book, the reviewer describes what made the character so popular. “In his black and white delineation of the life and times of Caspar Milquetoast, [Webster] catches virtually all of humanity at one time or another in its most spineless moments.” Caspar Milquetoast, for all of his sniveling wussiness, embraced a sensitivity and universal weakness that was unlike the macho norms of the early 20th century. “The discovery that there are others just as craven is a sure cure for sensations of inferiority.”

Milquetoast went on to inspire a radio show, and even a television show that ran on the doomed DuMont Network. An article in Time from 1945 began, “Millions of Americans know Caspar Milquetoast as well as they know Tom Sawyer and Andrew Jackson.”

But the most telling sign of the character’s popularity was the adoption of his last name as a generic term for “wuss.” By at least the late 1930s (Merriam-Webster’s marks its first recorded usage in 1935), the term “milquetoast” was being widely used as a general term, outside of its comic strip origins. As Webster’s friend later noted, “Webby lived to see the word 'milquetoast' listed and defined in a standard dictionary.” The illustrator continued to produce comics until his death in 1952, but he would never create anything as iconic as Caspar Milquetoast.

article-image

The term enjoyed widespread popular usage during the 1930s, '40s, and '50s. But judging solely by the number of times it pops up in the New York Times' archives, “milquetoast” experienced a steep decline in the late 20th century. Today, it sounds almost hilariously anachronistic, especially in the face of more abrasive, but similar, put-downs like "cuck" or "snowflake."

Despite his mid-century popularity, the character of Caspar Milquetoast has also largely fallen out of the public consciousness. In an age when the basic concepts of sensitivity and thoughtfulness are under scrutiny or attack from seemingly every side, we could use more characters like Milquetoast (albeit updated with evolved views on gender and diversity), who aren’t afraid to own their weakness. As a friend of Webster’s said in the closing bits of the illustrator’s New Yorker profile, “Take a good look at Mr. Milquetoast and you’ll find that the big reason he has such a hard time in this world is that he’s a gentleman. A gentleman with the accent on ‘gentle.’”

28 Jul 00:59

Eclipseville, U.S.A.

by Dacey Orr

On August 21, 1955 on a farm outside the otherwise unassuming town of Hopkinsville, Kentucky, a family purportedly encountered about fifteen “little green men” that had just emerged from a UFO. The story quickly became legend, even inspiring early concepts for Steven Spielberg’s classic film E.T. Sixty-two years later to the day, Hopkinsville will once again be at the center of a major celestial event.

courtesy m.b. roland distillery

On Monday, August 21, during what has been dubbed the Great American Solar Eclipse, Hopkinsville will be the point of greatest eclipse, where the moon’s axis passes closest to earth when the eclipse reaches totality at 1:24 p.m. CT. In other words, Hopkinsville and the surrounding area is one of the best places in the nation to view the total eclipse—and the town aims to take full advantage.

“It’s the biggest event this community has ever had,” says Brooke Jung, Hopkinsville’s Solar Eclipse Marketing & Events Consultant. Yes, that’s her job title—the city hired Jung last September specifically to coordinate events around the eclipse, part of a plan begun more than two years ago. For the occasion, the community has nicknamed itself “Eclipseville” and is hosting more than twenty events and festivals all weekend leading up to Monday’s main attraction.

photo: Jim Creighton

A mural by local artist Amy Peters illustrates the town’s new nickname.

Visitors and locals alike can reserve eclipse-viewing spots at parks, fairgrounds, farms, golf courses, and other private venues throughout the area. At MB Roland Distillery, representatives from fifteen Kentucky distilleries will set up booths for tastings against a backdrop of food, live music, a cigar social, and a VIP distiller’s dinner. About three hours southwest of Louisville and Lexington and just a few miles north of the Tennessee state line, Hopkinsville is outside the Kentucky Bourbon Trail orbit. “Most people come [to Kentucky] and think bourbon,” says Paul Tomaszewski, founder and co-owner of the distillery. “I’m glad we can provide that.” Other weekend events like a downtown music festival, a celebration at the birthplace of Jefferson Davis, and the opportunity to scuba dive in a rock quarry during the two minutes and forty seconds of total darkness all seek to give visitors a taste of Kentucky culture. For folks who prefer a different kind of culture, the seventh annual Little Green Men Days Festival lifts off Friday at 5:00 p.m.

photo: Courtesy of MB Roland Distillery

MB Roland Distillery, one of many local spots hosting viewing parties for the eclipse.

And if you can’t make it to Kentucky for this one, start planning ahead to April 8, 2024, when the next total eclipse visible in North America will cut a swath across Arkansas and Texas.

For more information, visit eclipseville.com.

The post Eclipseville, U.S.A. appeared first on Garden & Gun.

28 Jul 00:59

Mountain Time

by Dacey Orr

As hard as it is for me to believe, it’s been thirty summers
now since I first drove up Sewanee Mountain—also called Monteagle Mountain, in southeastern Tennessee—to matriculate as an undergraduate at the University of the South. That’s the same gulf in time that separated my arrival at Sewanee from the launch of Sputnik, and the same gulf that separated the launch of Sputnik from the Coolidge administration. So it’s a fair chunk of what Robert Penn Warren tended to call “Time,” with a capital T.

And this summer is like all the others: My family and I will migrate to Sewanee for as long as we can. Our children—now ranging in age from nine to fifteen—have never known a world without a season of bicycles, hikes on the Perimeter Trail that rings what’s called the Domain, and, truth be told, domestically bitter Scrabble wars on the porch of our house. (My wife and I are not particularly congenial competitors—much to the amusement of our progeny.) In the age of Taylor Swift, it’s a summer experience that evokes the fiction of Peter Taylor. Which can’t be a bad thing.

The name of the town the Episcopal institution inhabits and a synonym for the university, Sewanee is geographically found on thirteen thousand acres of the Cumberland Plateau. Yet as generations of alumni, professors, trustees, regents, and bishops will tell you—eagerly, for passion for the place is a characteristic of the tribe—Sewanee is also an imaginative reality of winter fog and Gothic chapels, of undergraduates and faculty in tattered gowns, of great books, enduring symphonies, and endless forests. “It’s a long way away, even from Chattanooga, in the middle of woods, on top of a bastion of mountains crenellated with blue coves,” wrote the poet-planter William Alexander Percy. “It is so beautiful that people who have once been there always, one way or another, come back. For such as can detect apple green in an evening sky, it is Arcadia—not the one that never used to be, but the one that many people always live in; only this one can be shared.”

I loved the place from the first, and love her still. I met my wife here twenty-nine years ago; my mother-in-law was the homecoming queen in 1967. Our children, born in New York City, think of Sewanee as home, which soothes my soul: At least we got that much right. For them the Fourth of July is bundled up with memories of an early morning flag-raising in Abbo’s Alley (a splendid ravine garden in the middle of campus), of a wonderful small-town parade, of fireworks by Lake Cheston. Not a bad way to think of America at her best—in fact, it may be the best way to think of America.

Aside from delicious hours of reading on a screened porch during a Tennessee thunderstorm or swimming in the reservoir behind St. Andrews-Sewanee School, an-
other quality sets these summers apart. Like you, I suspect, I spend more time than I’d care to admit consumed by the hurly-burly of political life. I’ve tried to go on the wagon for moment-to-moment news but keep falling off. Immediately.

The tradition of a Sewanee summer is the one exception. There is something about the ethos of the place—not just its aesthetics, but its values—that makes the Twitter-fueled partisan arena seem more sideshow than center stage. There’s a core Anglican sensibility to Sewanee that allows for a milieu in which one can hold divergent views and yet not become disagreeable. It was Elizabeth I who reputedly said she did not wish to make windows into men’s souls. Too many people, however, are like the pastor in the old story in which he met a friend who happened to belong to a different denomination. The pastor and his friend discussed the differences between their creeds. It was a wonderful lesson in tolerance, and, as they parted, the minister neatly summed up, remarking: “Yes, we both worship the same God, you in your way and I in His.” Well. Reason and reasonableness—Sewanee hallmarks—are the best antidote to the self-satisfaction of that apocryphal cleric.

Derived from a Shawnee word meaning “south” or “southern,” Sewanee, at its founding in 1857, represented the culmination of a nearly three-decade-old vision of James Hervey Otey, an educator and Episcopal priest, to build a church-owned university to serve the Southern states. In the context of antebellum politics and culture, the school was neither wholly nationalist nor wholly sectionalist. Otey saw the university as an undertaking in keeping with the Union; another important founder, the Louisiana bishop Leonidas Polk, would die under arms as a Confederate general.

When the war came, everything was lost. Sewanee lay in ruins. The subsequent resurrection of the university owed much not to any single Southerner but to a Connecticut native: Charles Todd Quintard, who succeeded Otey as bishop of Tennessee. Quin-tard toured England for funds—there were few resources in the post-Appomattox South—and the university opened in 1868.

Long known for a fine tradition of letters (embodied in the Sewanee Review, the nation’s oldest continuously published literary quarterly) and for its ecclesiastical connection, Sewanee has been a stronghold for the liberal arts through turmoil and tumult. The university is devoted to introducing students to what Matthew Arnold described as the best that has been thought and said in the world, in intimate classes taught only by professors.

Life in the tiny environs of Sewanee is itself an element of one’s education. As Mark Twain once wrote, if you want to know a man truly, get to know him in a village, not a city, and Sewanee is a crucible for enduring friendships not only among students but across generations. Some of our happiest experiences are spent with alumni who graduated in different decades but who seem like contemporaries. I can’t count the number of enchanting hours we’ve spent at Vaughan and Nora Frances McRae’s idyllic redoubt on the bluff. Nora Frances, who went to the college, and I never overlapped as undergraduates (we met as members of the board), but that detail has long been irrelevant. Years ago the McRaes bought an old convent house alongside the grounds of St. Mary’s,
an Episcopal nunnery, where the family’s sprawling porch is a center of summer life. That devout Methodists took over an Anglican property would have created an ecclesiastical crisis in another age. Now it just leads to cocktails. Who said progress is dead?

Such close-knit networks of kith and kin could risk breeding provincialism, but Sewanee has long transcended the geographic confines of its official name, the University of the South, to include not only the particular but the universal. You can see more from a mountain, and Sewanee’s global focus, ranging from questions of the soul to our stewardship of the physical environment, belies its relative isolation.

No matter the season, there is something irresistible about the place and its people—for, as Mr. Percy noted, we always, one way or another, come back. And some of us never really leave. Or want to.

The post Mountain Time appeared first on Garden & Gun.

28 Jul 00:56

Podcast #325: Leading Quietly

by Brett

When we think of being a good leader, we often think we need to be a bold, visionary, risk-taking type like Winston Churchill, Theodore Roosevelt, or Steve Jobs.

But my guest today argues that most of the day-to-day work that makes the world function is done by individuals who stand outside the limelight and lead with calm confidence. His name is Joseph Badaracco and he’s the author of the book Leading Quietly: An Unorthodox Guide to Doing the Right Thing. Today on the show, Joe and I discuss the heroic archetype of leadership, why most leadership development books and courses focus on it, and why heroic leadership can actually get in the way of an organization’s success. He then shares the qualities of a quiet leader and why they’re often more effective than heroic leaders at getting things done in an organization. We end our conversation by exploring the Aristotelian approach to leadership that most quiet leaders utilize and how you can start using those same principles today in your work, community, and family. 

Show Highlights

  • Why do we see leaders as heroic, on-the-front-lines types of people?
  • How can heroic leadership get in the way of progress?
  • How quiet leaders are different from heroic leaders
  • The scenarios in which quiet leadership is the better model, and vice versa
  • The importance of pragmatic realism in leadership, and how to build that skill
  • How to remain realistic without falling into cynicism
  • The myth of the angelic motives of quiet leaders and why it’s okay to be selfish with your career
  • Why honing your managerial — that is, quiet — skills is important
  • Lincoln’s creative political maneuver that displayed quiet leadership
  • Why everyone should know the value of compromise, and how to do it
  • The role of rule-bending and flexibility in leadership
  • The 3 quiet virtues of leadership

Resources/People/Articles Mentioned in Podcast

Leading Quietly is one of the most practical and nuanced on books on leadership I’ve read. I’ve applied several of the principles in the book to my own life and have seen immediate results.

Listen to the Podcast! (And don’t forget to leave us a review!)

available-on-itunes

available-on-stitcher

soundcloud-logo

pocketcasts

google-play-podcast

Listen to the episode on a separate page.

Download this episode.

Subscribe to the podcast in the media player of your choice.

Podcast Sponsors

The Art of Manliness Store. Check out our new products, like the Stay Manly mug, and take 10% off your first order by using “AOMPODCAST” at checkout.

Proper Cloth. Stop wearing shirts that don’t fit. Start looking your best with a custom fitted shirt. Go to propercloth.com/MANLINESS and enter gift code MANLINESS to save $20 on your first shirt.

SimpliSafe. The smarter way to protect your home. No long-term contracts, wireless and portable, and just $15/month. Get $100 off the special Safeguard package when you go to SimpliSafe.com/listen.

Read the Transcript

Coming soon!

The post Podcast #325: Leading Quietly appeared first on The Art of Manliness.

28 Jul 00:54

Navajo Riders: 1904

by Dave
        "May your trails be crooked, winding, lonesome, dangerous, leading to the most amazing view."
-- Edward Abbey, Desert Solitaire 1904. "Navajo riders in Canyon de Chelly, Arizona." Gelatin silver print by the ethnologist Edward Sheriff Curtis (1868-1952). View full size.
28 Jul 00:51

Louie Mattar’s Fabulous Car in San Diego, California

Louie Mattar’s Fabulous Car

Within the first four years of owning his 1947 Cadillac, Louie Mattar had installed a shower (with the water piped around the exhaust manifold to heat it), a bar with spigots for whiskey, water, and soda, a washing machine, a stove, a kitchen sink, a hookah, and a driver-seat microphone connected to a speaker under the hood, for offering suggestions to other drivers on the road. But he wasn’t finished.

This car, along with a trailer, which Mattar also custom made, is now in the San Diego Automotive Museum. The car and trailer were loaded with amenities for a 7-day, 6,320-mile trip from San Diego to New York and back. He and two other drivers took shifts and didn’t stop the car a single time during the record-breaking trip at the end of September, 1952.

He rigged an apparatus that allowed tires to be changed while the car was moving. They refueled three times alongside moving gas trucks at airfields in Kansas City, Camden, and Omaha. The car was designed to automatically refill the radiator and change the oil from reserves in the trailer.

The drivers made an even longer nonstop run from Anchorage, Alaska to Mexico City (7,482 miles) in August 1954. The inspections for customs at border crossings were all done on the move.

The car weighs 8,500 pounds and holds 50 gallons of water, with an additional 30 gallons in the trailer. There are special axles drilled to allow the tires to inflate, if low on air, while they’re turning. The trailer holds 230 gallons of gas for automatic refueling, too, which is how they got by with so few airfield detours.

It took Mattar about seven years and $75,000 to complete the dream car.

28 Jul 00:49

Salsten House

Set along the coast in Härnösand, Sweden, the Salsten House pays homage to its previous life while welcoming a modern extension. From the front, the old beach villa appears to...

Visit Uncrate for the full post.
28 Jul 00:49

The Farm Where Cows Munch on Potato Chips

by Erik Shilling
article-image

In 1983, Jim Herr, the owner of Herr Food Inc., most famous for its eponymous line of potato chips, had a problem to solve. The state of Pennsylvania was beginning to tighten enforcement of waste-disposal regulations, and Herr found himself with no way to dispose of thousands of pounds of potato chips, pretzels, and cheese curls, among other products that, for whatever reason, weren't good enough to sell.

So Herr bought a farm, and 300 cows, and let them snack away—though he did work with a nutritionist to determine the best mix of chips, grass, and other feed. Thirty-four years later, the meat from the farm's cows is now being sold directly to restaurants and consumers. According to chefs and others who spoke with The Philadelphia Inquirer, the chips, pretzels, and cheese-dusted snacks are helping the flavor of the beef.

"The party-mix finishing feed lends the more subtle things," one local chef, Charles Parker, told The Inquirer. "For example, it has an unusual toasted cheddar note, and it’s a little sweet.”

Until last year, the beef was sold lumped together with meat from industrial-scale farms, until a neighboring farmer convinced Herr Food Inc. to sell it on its own merits—riding the wave of the farm-to-table craze.

Now it's served in two Philadelphia restaurants and sold at a farmer's market, with the best cuts fetching up to $30 a pound, and ground beef going for $6 a pound. That means that snack-fed beef can cost more than a lot of grass-fed beef.

28 Jul 00:47

11 Expert Tips for Beautiful Interior Architectural Photography

by Jeb Buchman

The post 11 Expert Tips for Beautiful Interior Architectural Photography appeared first on Digital Photography School. It was authored by Jeb Buchman.

Tips for interior architectural photos

This article was updated in February 2024 with contributions from Jeb Buchman, Natalia Robert, and Lily Sawyer.

Interior architectural photography is a sought-after skill; you can use it to create eye-catching real-estate shots, images of businesses, breathtaking shots of cathedrals, and even historical documentary photos. But shooting interiors isn’t exactly a walk in the park. It comes with plenty of challenges, including cramped spaces, low light, and difficult camera techniques.

Fortunately, I’ve spent years honing my interior architectural shooting skills, and in this article, I share my top tips to ensure success. I discuss:

  • The best focal lengths for interior architecture
  • The equipment item that you absolutely must own
  • Easy ways to improve your compositions
  • Simple editing steps for refined results
  • Much more!

So if you’re ready to level up your interior shots, then let’s dive right in.

1. If possible, prepare the space

If you’re photographing the interior of a house or a business, I highly recommend you set the stage by taking the time to de-clutter and open up the space. Clear all flat surfaces and floor areas. Open all blinds and curtains. Clean any dirty dishes in the sink and put them away. Be sure to clean the space much more so than you would for yourself. We get used to clutter and become blind to it, but a bit of clutter in a photo will be instantly obvious.

Once you’re done, the space should feel inviting, like the kind of place you can imagine yourself living or working. But if you’ve finished cleaning and you’re still not impressed, you can create those feelings in your photos by adding personal touches.

Interiors2
Image by Natalia Robert

If there’s a dinner table, set it for two and place a vase of fresh flowers in the center. Transform an empty breakfast nook into a great spot to lounge by adding a newspaper, coffee cup, and a plate or bowl of light (and pretty) snacks. Hang a fluffy bathrobe on a hook next to the bathtub.

If there’s a desk, consider adding a work laptop and a book (or three). When it comes to decorations or color palettes, you want to either fill the space with personality to play up its uniqueness or keep everything neutral with pops of bright color.

2. Always use a tripod

Interior architectural photography tips

Whenever you shoot architectural interiors, you absolutely must use a tripod. This is for a few main reasons:

First, a tripod will stabilize your camera/lens setup, which dramatically reduces the possibility of camera shake. Since interior shots tend to be taken at narrow apertures and slow shutter speeds, keeping your camera on rock-solid support is essential.

Second, if you use a tripod, it’s much easier to make sure your camera is level. (While I discuss the importance of a level camera later on in this article, it’s a fundamental part of pretty much all architectural photography.)

Interior architectural photography tips

Additionally, there’s no good reason not to use a tripod when photographing interiors. Sure, if you were tracking subjects or needing to constantly change your position on the fly, a tripod would be a hindrance. But architectural photography is slow and deliberate; since your subject matter is buildings, you can always count on it to sit nice and still while you set up your camera, dial in various settings, and fine-tune your composition.

Note that interior photoshoots tend to involve very little wind, rushing water, or rain, so you can often get away with using a cheaper tripod (though there are also reasons to invest in a good sturdy model, including gear safety, so make sure you choose your model very carefully!).

3. Start with natural light

One of the advantages of architectural photography, especially interior architectural photography, is that nothing moves. You can leverage this by playing with your settings, especially the shutter speed.

With the camera rested on a tripod, you can dial in very slow shutter speeds to capture all the ambient light, even in very dark corners. If some lamps and lights add to the overall ambiance of the room, include them and take advantage of slow shutter speeds and long exposures.

It is important to remember that for interiors, you should aim for balanced lighting; in other words, there should be no overly dark shadows or overly bright highlights. You want to see the detail in dark areas but not blow out the light areas altogether. And think about which times of the day best feature the interior space. Early morning and late afternoon light are very soft, though overcast days also produce soft light.

On the other hand, bright super sunny days produce harsher light, especially around midday. Therefore you may want to take into consideration shadows produced in the interior from harsh outside light. If you’re creating fine-art images, you can use these shadows as artistic elements, but if you’re doing commercial photography, this may not be appropriate.

4. Whenever possible, use a flash

In the previous tip, I emphasized the value of natural light. But while you should aim to get as much natural lighting is possible, if you shoot a room without a flash, you’ll typically get shadows scattered around the room (caused by artificial lighting positioned along walls and at various places across the ceiling). This often doesn’t look great and can be difficult to handle from an exposure perspective, so I encourage you to use a bit of flash. You only need one or two speedlights or strobes, and they’ll help balance the exposure across the entire frame.

Here’s what I recommend:

Make sure your flashes are mounted on separate tripods or stands (they shouldn’t be on your camera!), and place them a few feet off to the side and a foot or so behind your camera. (If you’re using two flashes, make sure they’re on opposite sides.) Aim the flashes so they point toward the ceiling and slightly away from the room you’re shooting.

Set the flashes manually at half power (a stop below full power) and fire away. Given the angle, the light from the flashes will illuminate the room indirectly (i.e., bouncing off the ceilings and walls), and you’ll get a soft, even fill light for the room you’re shooting.

Interior architectural photography tips
This was a tricky shot because my flash was reflecting off the windows no matter where I positioned it. In the end, I took two shots (one with flash and one without), then masked them together in Photoshop. The windows you see in this image are from the file without a flash, but the rest of the room is from the file with the flash.

I always encourage you to review the resulting image on your camera’s LCD and make changes accordingly. Watch for strange shadows, too-bright walls, dark corners, and reflections from the flash in windows and other glass objects.

5. When shooting whole rooms, don’t go too wide

When I first started taking architectural interior shots, I used the widest-angle lens I could get my hands on. I thought that with an ultra-wide lens, I could get more of the room in the frame – but while I was technically correct, more isn’t always better. I soon noticed a high level of distortion toward the edges of the frame, especially in smaller rooms, and I determined that ultra-wide focal lengths (i.e., 14mm) make the sides of the frame look oddly stretched and off the horizontal plane, even when corrected in post-production.

Interior architectural photography tips

So I experimented with different focal lengths and found that an effective focal length between 21mm and 28mm gives you a very nice balance; at 25mm, you get limited distortion and a wide-enough frame to capture the character and presence of the scene.

One option is to grab a 24mm prime, which can be very cost-effective when you’re just starting out (most manufacturers offer a high-quality 24mm lens for cheap). Alternatively, you might invest in a 24-70mm zoom – yes, it will cost a lot more, but it’ll offer extra flexibility and even allow you to capture some nice detail shots in the 50-70mm range. If you do prefer a wider perspective, you could look into a 16-35mm zoom instead.

By the way, if you’re in a situation where 21mm won’t capture enough of the scene, a panorama is always an option. Speaking of which:

6. Try panoramas for ultra-wide shots

Panoramas are a great way to capture an entire room, especially if you’re using a longer lens or you’re dealing with a cramped interior. But how can you create one?

Start by setting up your camera vertically on the tripod. Many photographers think it’s best to do panoramas horizontally, but the vertical orientation will give you a taller image.

Then do your best to pivot your camera while taking a series of images. Determine your start and end point in advance, and make sure that you have plenty of overlap between compositions. Using a tripod is essential, and it’s important that you rotate your camera on a perfectly level horizontal plane – with the pivot point being roughly where the lens meets the camera). Note that, if the pivot point is too far forward (i.e., somewhere on the lens) or too far backward (i.e., on the body of the camera), the panorama will appear distorted.

For the picture below, the pivot point was on the body of the camera, which is behind the ideal spot. As a result, the shot has a weird sort of convex distortion:

Interior architectural photography tips
This is a seven-image panorama. See how artificially “rounded” the walls are? This will happen if your camera and lens are not properly situated on the tripod.

7. Whenever possible, try to shoot only one or two walls

Beginner interior architectural photographers sometimes try to squeeze too much into the frame by including three or even four walls – but when you use this approach, the shot will often appear rather awkward-looking (if you aren’t extremely careful with the composition, that is).

Instead, go for a one- or two-wall shot, which will give the viewer the most geometrically pleasant image to view:

Interior architectural photography tips

The shot displayed above is a generic two-wall scene with the walls meeting at a standard 90-degree angle. Looks nice, right? Well, I also took a second shot, where I backed up several feet to deliberately include the third wall on the left edge of the frame:

Interior architectural photography tips
The third wall on the left side of this shot creates an unnatural and visually displeasing scene.

I don’t know about you, but to me, the third wall makes the photo look compositionally awkward and disorienting. I much prefer the two-wall version, and I recommend you pay careful attention to the number of walls you incorporate into your photos.

That said, including three walls in a shot is sometimes okay, provided that everything is geometrically aligned:

Interior architectural photography tips

8. Strike a balance

When composing your shot, focus the viewer’s attention on where you want it to go. If you can, consider using staged items to add depth and interest in the foreground. Avoid flat-looking photos by contrasting different elements in the foreground, midground, and background. Remember to aim for balance, not distraction.

Using the background to show a connecting room is also a great way to give the viewer a sense of space. This will add interest and make the viewer feel like they can visualize walking through the building.

Interiors3
Image by Natalia Roberts

9. Make sure your camera is perfectly level

When shooting any form of architecture, and especially interiors, this is a big deal:

You should work as hard as possible to ensure your camera isn’t tilted up, down, left, or right when shooting. Even the slightest tilt will require post-production cleanup, and you’ll lose pixels in the process.

Here’s an example of what I’m talking about:

Interior architectural photography tips

See how slanted the windows are? They lean outward, which is a sign of perspective distortion. Clearly, this is not an accurate depiction of the room; instead, it’s the result of the camera being tilted ever-so-slightly downward.

But once we get the camera nice and level, here’s the result:

Interior architectural photography tips

As you can see, keeping your camera level makes a huge difference. Happily, there are a couple of ways to help you get your camera perfectly straight when you compose your photos. Most cameras have a built-in level (with the built-in level activated, when you look into the viewfinder, you’ll see lines across the focusing screen that tilt when the camera tilts). If you’re not sure whether your camera has this option, take a peek at the manual or do a bit of Googling.

You can also use a bubble level that slides onto the camera’s hot shoe. (When the little bubble is centered, it means your camera is level.) You can buy one of these levels at just about any photography store for just a few bucks, and it’s my preferred solution because it tends to be more accurate than built-in camera levels).

Interior architectural photography tips

10. Get the white balance right

This is tricky and the nemesis of many photographers. Most non-photographers are oblivious to white balance. (This is especially obvious in wedding photos where the bride’s dress looks blue and people’s faces register as magenta, yet hardly anyone notices!)

When I sold my house a few years back, the real estate agents who boasted of great property photography sent a photographer to my house to take some professional pictures. She arrived with a camera on the tripod and a flash head pointed slightly upward. The lens used was very wide – I’d guess around 10mm or 14mm. When the photos were uploaded, I was dismayed to find that the images were all very blue. My home felt so cold, and one of the reasons for that was the incorrect white balance.

Personally, I prefer to add a warm feel to all my photos, so I tend to add that during editing. You can go for a neutral look – and it can help to use a gray card when on site – or you can emphasize warmth, but if you try the latter approach, do be careful that the whites still look white and not yellow or cream.

Bottom line: Always remember that what often draws people to an image is a feeling or emotion. Your image becomes all the more powerful if it reminds the viewer of a sentiment, experience, or something that resonates with them. White balance is key in helping achieve this kind of engagement with your viewer.

11. Carefully edit your interior images

Without editing your architectural photos, the results will be lackluster. Therefore, I encourage you to edit each and every image that you plan to share!

Start by importing your photos to your favorite editing program and follow these basic editing steps to create more refined results. (Note that I reference Lightroom Classic, but you can achieve the same effects in pretty much any editor.)

Straighten out the lines

Doing this will instantly polish up your photos. If you shot at a height of roughly five feet from the floor and kept the camera level, the amount of straightening you have to correct should be minimal. In Lightroom, you can find straightening options in the Lens Corrections panel.

Fill in and even out the light

Before making any adjustments to the brightness or exposure, be sure to correct any lens vignetting. (This is when the corners of the image are a bit darker and is especially common with wide-angle lenses.) Lightroom offers lens profiles that will automatically take into account your lens’s optics and make automatic corrections; just make sure that Enable Profile Corrections is checked in the Lens Corrections panel.

And if you don’t like Lightroom’s automatic adjustments, you can always head into the Manual tab and use the sliders to achieve the effect you envisioned.

Once your corners are corrected, use a Brush to correct the exposure in bright or dark areas. This is your time to dodge and burn. I find that erring on the side of overexposure lends a more natural feel to the space. I recommend pushing the overall exposure up slowly, and when it feels too bright, start pulling back.

You can also lighten dark areas slightly with the Shadows slider in the Basic panel. However, be careful not to lighten the shadows so much that you bring out grain (noise) or that the image looks fake.

Perform color corrections

Adjust the overall color temperature as needed. If you like a warmer effect, as I do, aim for warmth, not obvious yellow.

Also, bump up the Vibrance slider a bit instead of messing with the Saturation slider. Added Saturation can quickly make a photo look too fake, while Vibrance is a more subtle tool that helps give the color a little extra kick. Again, play with the sliders on these settings; seeing what your eye is comfortable with will go a long way toward honing your color-correcting skills.

Interiors4
Image by Natalia Roberts

Adjust the clarity and sharpness

Boost the Clarity slider, but do it slowly. Clarity is a great way to polish up a photo without going overboard on contrast, plus it gives the photo an overall crisp look. Depending on the image, you may want to simultaneously play with decreasing the Blacks slider a bit, too.

You may also want to add a bit of sharpening (in the Details panel). Be careful not to push the Amount slider too far, however; you want an image that looks detailed, not an image that’s full of unpleasant haloing.

Clean up the scene with cloning and healing

Use your editing program’s healing tools to remove any dust spots or other anomalies that may have gotten onto the photo.

Lightroom offers a few options: Clone, Heal, and Content-Aware REmove. Healing is a great option when correcting small spots, as it will have a softer blend to it, but I like to use the Clone tool to remove any glares or reflections. You can also use it to remove address numbers if needed.

By the way, while I typically use Lightroom for editing photos, my personal preference for cloning is Photoshop’s Stamp tool. It seems to allow for more control over the brush itself, therefore making it easier to clone in a way that looks natural.

Interior architectural photography tips: final words

Shooting interiors often comes with difficulties, and getting good at interior photography isn’t always easy.

However, with the tips I shared above plus some practice, you’ll be capturing stunning photos in no time at all! Just remember that you should never rush your images. One of the great things about architectural photography is that your subject will never move, so you have time to really slow down and deliberately refine each shot.

Now over to you:

Which tips do you plan to use first? Do you have any additional advice for capturing stunning interior images? Share your thoughts in the comments below!

Table of contents

Architectural Photography

The post 11 Expert Tips for Beautiful Interior Architectural Photography appeared first on Digital Photography School. It was authored by Jeb Buchman.

27 Jul 23:58

Bollinger Motors unveils B1 electric sport utility truck

by John Beltz Snyder
27 Jul 23:58

See London’s Underground ‘Mail Rail,’ Then and Now

by Anika Burgess

There’s a whole world hidden beneath modern London: Churchill’s war bunker, a Victorian street, and the 2,000-year old remains of a Roman amphitheater. There’s also 240 miles of underground track, a tunnel beneath the Thames for pedestrians, and a vast sewage system network that dates from the late 19th century. And then there’s the Mail Rail, 6.5 miles of disused railway that, for more than 75 years, shuttled letters and parcels between sorting stations across the capital—some 70 feet underground.

But before the Mail Rail, there was that popular Victorian device, a pneumatic tube. The London Pneumatic Dispatch Company opened a postal railway under Euston Station in 1863 that could carry 35 bags of mail one-third of a mile in a minute. According to a comparison in the East Kent Times in 1864, the tunnel “represents the pea-shooter, and the train the pea, which is driven along in one direction by a strong blast of air, and drawn back again in the opposite direction by the exhaustion of the air in front of it.” It was deemed to do the job “exceeding well," according to an 1865 edition of the Illustrated Times, but it proved expensive. The line closed in 1874, after a little over ten years of operation.

article-image

As the city developed, so too did its traffic problems. The congested roads created significant postal delays, so in 1909 discussions began for an underground railway. Construction started in 1914, but the timing was poor: With the outbreak of World War I, the operating equipment could not be ordered. The tunnels were finished, but with no method of transportation, the project was halted until 1923. The tunnels did serve a secondary use during the war: They stored works of art from the National Portrait Gallery and the Tate Museum. The Mail Rail eventually opened on December 5, 1927, just in time for the year's Christmas rush.

article-image

The system ran from Paddington in West London to Liverpool Street Station and the Eastern District Office. A diagram from 1926 shows how it worked. Mailbags from trucks were transported down to platforms via chutes and elevators. Once loaded onto the trains, the mailbags went along a single tunnel, nine feet in diameter, which split upon arriving at stations. The trains were electric and driverless, and resembled carnival rides. (Appropriately, staff held Christmas parties in the stations, and Santa arrived by train.) At its peak, the Mail Rail ran for 22 hours and carried four million letters each day.

article-image

Over the years, postal use declined and running costs escalated. After over 75 years of use, the Mail Rail closed in May 2003. The abandoned tunnels were rediscovered by urban explorers, but there’s now a legitimate way to view a part of London's hidden underground world: the new Postal Museum. Opening on July 28, 2017, the Museum’s attractions include a ride on one of the mail trains under the Mount Pleasant sorting office. If you can’t get there—or can’t wait until the ride opens on September 4—Atlas Obscura has a selection photographs, of both the abandoned tunnels and the heyday of the Mail Rail.

article-image
article-image
article-image
article-image
article-image
article-image
article-image
article-image

27 Jul 23:56

Pac-12 Media Days: Mike Leach weighs in on the 'is a hot dog a sandwich?' debate

by Yahoo Sports Staff
Washington State’s Mike Leach wax poetic about a number of subjects on Thursday. (AP Photo/Mark J. Terrill)

By Nick Bromberg and Sam Cooper

To read about Day 1 of Pac-12 Media Days, click here.

Mike Leach usually isn’t one to just fall in line when it comes NCAA rules adjustments. The Washington State coach was asked a few times Thursday about the new early signing period. In general, he’s against it, but he said he’s willing to watch things shake out to see if there are any potential benefits for signing in December.

“I’m guardedly curious about December. Anything earlier than that I think is a bad idea,” Leach said. “I’m not sure December is a great idea, but we’ll find out. (The recruit) is 18 and making a very important decision, and between him and his family needs more time to make that decision. In addition, as a school, you try to evaluate character and things like that. The more opportunity you have to get to know them, the better your chances of making accurate judgments on that. I think the additional time is helpful.”

One rule change Leach is OK with is the removal of two-a-day practices. He does, however, have a suggestion.

“We haven’t had many two-a-days for quite some time. I just felt like if you get too ground down,” Leach said.

“I think they ought to have four-a-days so hopefully some of these teams will pound their teams into submission and make our work a little easier for us. But it doesn’t sound like they’re going to let them do that. So we’ll just go about our business as usual.”

Oh, and if you were wondering, Leach does not think a hot dog is a sandwich. In fact, he doesn’t like hot dogs at all. He thinks it’s because he ate too many bologna sandwiches as a child. Really.

“I never liked hot dogs when I was a kid, and I think that some of that started with when I was a real young kid. I’d have bologna sandwich after bologna sandwich. So anything that even remotely resembled bologna, I hated. Everybody says go to the ballgame and eat a hotdog. Not me,” Leach said.

“No, it’s not a sandwich. I’m not into hot dogs, with all due respect to those that are, but they can have mine, so there will be more for them.”

Thank you, Mike.

Helton looking for new faces to step up at receiver

USC coach Clay Helton is still anxious to see how his new receivers mesh with quarterback Sam Darnold.

Darnold enters the season as the Heisman favorite and the presumptive No. 1 pick in the NFL draft — if the 2018 draft was held today, anyway. After emerging as the starter following USC’s rough start to the season, Darnold threw for nearly 3,100 yards and completed over two-thirds of his passes.

Many of those passes went to receivers who are no longer on the USC roster. The team’s two leading receivers, JuJu Smith-Schuster and Darreus Rogers, are off to the NFL. They combined for 126 catches and over 1,600 receiving yards in 2016.

Deontay Burnett, Daniel Imatorbhebhe and Steven Mitchell will take on bigger roles in the fall. When Helton was asked about his major concerns heading into fall camp, he immediately referenced his pass game.

“Probably the biggest one is the chemistry between Sam and our new receivers,” Helton said. “I think they’re beyond talented, the kids that we red-shirted, but they haven’t been in real live games yet. And to be able to see those bullets fly and see how they react will be really important to us.”

The redshirt freshmen that Helton speaks of are Velus Jones, Trevon Sidney and Josh Imatorbhebhe. USC needs at least one of the three to become a key playmaker for the offense.

Helton was also asked about the Los Angeles competition between Darnold and UCLA QB Josh Rosen for the title of best in the city — and maybe even the conference. Helton didn’t want to have much to do with picking a favorite.

“You all have to do that opinion. My job is to coach [Darnold],” Helton said. “I will say this, he’s an extremely talented individual that is not a finished product, and we’re continuing to get better every day. We’re very fortunate in this city. To have him and Josh right now, how cool is that? I think it’s great for college football … With those two quarterbacks, man, that makes for a heck of a story.”

Taggart wants Oregon defenders to “react and not think”

There’s no sugarcoating it; Oregon’s defense was terrible in 2016. The unit, coordinated by former Michigan coach Brady Hoke, gave up over 41 points per game and over 500 yards per game. Opposing offenses averaged 6.4 yards per play.

It was the fourth-straight season that opposing offenses had averaged more yards per play than the previous season against Oregon’s defense. After the Ducks fired coach Mark Helfrich, Hoke was out the door too.

Enter new Oregon coach Willie Taggart, who hired former Colorado defensive coordinator Jim Leavitt to run his defense. Leavitt has a four-year contract and Taggart said Thursday it’ll be important to have a defense with some stability.

Oregon coach Willie Taggart had his first Pac-12 Media Days experience. (AP Photo/Mark J. Terrill)

“But I think it all goes back to teaching and being simple enough so these guys can understand and play at a high level and fast, where they’re not running out and thinking too much,” Taggart said. “I think playing on that side of the ball, our guys got to react and not think, and that’s going to be important when it comes to teaching our guys and implementing our system.”

Oregon returns nine starters on that side of the ball. Perhaps a new system will be a kickstart.

“Again, our guys, we play a lot of young guys, you know,” Taggart said. “They took their lumps. Probably, again, they’re playing in another defense, so that part they’re going to learn. But I think going back to the 3-4 is going to help a lot of these guys because a lot of them were recruited to play in a 3-4 system, so hopefully that helps. Hopefully with Coach Leavitt and our defensive staff, they’ll do the things we know they’re capable of doing and get our guys to play at a high level.

Shaw: Playing in Pac-12 North is “insanity”

Stanford hit double-digit wins once again in 2016, finishing 10-3 with a six-game winning streak to finish off the year. But to coach David Shaw, it felt a little bit like a disappointment. The Cardinal finished third in the Pac-12 North thanks to back-to-back blowout losses to Washington and Washington State in Weeks 5 and 6.

On Thursday, Shaw was quick to compliment the depth of the Pac-12 North, especially with Oregon’s expected turnaround.

“It’s insanity. It’s crazy. But it’s great. You know there are no bye weeks, there are no off weeks,” Shaw said. “No one talks about the Washington State program that they put together up there. It’s not just the passing game with Coach Leach. They ran the ball well last year. They were physical up front last year. They played great defense last year both secondary-wise and up front. So you’re going to have a tough game in the entire conference.”

David Shaw really wants to see some kangaroos. (AP Photo/Mark J. Terrill)

Before the Cardinal can focus on its Pac-12 slate, it has the unique opportunity to travel to Australia for its opener against Rice. Shaw has leaned on former Cal coach Sonny Dykes, whose team made the trip last year, for advice.

“I’ve had multiple conversations with Sonny. I talked with Sonny when they first got back. I talked with him midway through the year as we were planning this. I talked to him after the season briefly about the things he would have done differently, what did he do, what would he choose not to do,” Shaw said.

“So we put together a pretty good plan, I believe. The big difference for us, our guys are not going to be in school. So they’ll be able to come back and truly rest and recuperate before we start that preparation for USC.”

What is Shaw looking forward to most about the trip?

“I want to see a kangaroo. Dead serious. I want to see a kangaroo.”

Troy Taylor spicing up “pedestrian” Utah offense

Kyle Whittingham said Utah was “pretty pedestrian” on offense in 2016. To spice things up a bit, he brought in Troy Taylor, the quarterbacks coach and play-caller at Eastern Washington, to run the Utes’ offense.

Whittingham spoke glowingly of what he’s seen from Taylor, who coached at the high school level for many years before one season at EWU, so far.

“I’ve been watching Troy a lot of years. My nephew played for him at Folsom High School. My brother said, ‘You’ve got to look at this guy. This guy is phenomenal as a coach. The schemes, the way he handles the players, his approach to the game is unbelievable.’ So I started watching him, was very impressed,” Whittingham said. “Still it was high school, so I was a little bit skeptical there. When Troy went on to Eastern Washington and had the same success there that he had in high school, I was sold at that point, and that’s when we pulled the trigger and brought him on board.”

Taylor brings a more pass-oriented offense to the Utes compared to recent years, which was music to the ears of quarterback Troy Williams and his group of receivers.

“(Williams was) very excited, as were the receivers, as was really the whole offense. (Taylor) was very well received. Spring ball was very positive, very productive, and the players are excited about the direction we’re going with the offense and the attitude,” Whittingham said.

Williams started all of 2016, but he doesn’t have the starting role locked up just yet.

“(Williams) had an outstanding spring, as did the other two behind him — Tyler Huntley and Cooper Bateman. They came out of spring one, two, three, in that order,” Whittingham said. “Tight enough race that those three guys will continue to get reps at least for the first week or two in fall camp, and then we have to make a decision to get things pared down to the two guys who are going to be getting all the reps and the one guy who is going to be the guy.”

Arizona State QB Brady White not in the starting picture because of foot injury

Arizona State played three quarterbacks in 2016 and all three quarterbacks return for 2017. So ASU coach Todd Graham has a decision to make about his starting quarterback.

But Brady White won’t be part of that decision-making process, at least at the beginning of the season. Graham said White is still recovering from the Lisfranc injury he suffered last season and may not be ready until November.

“So it’s basically a 12-month recovery, so I think it happened at the end of October, first of November. So has not been released medically, and I don’t look for that to happen at least for a while,” Graham said.

“So hopefully we’ll get him back this year, but right now I think that’s just a day-to-day deal … But want to be smart about his recovery, because it’s very, very important that he’s full speed before he gets going.”

Graham also said it would be “smart” to redshirt quarterback Dillon Sterling-Cole, who threw 55 passes in 2016. With White’s absence and Sterling-Cole’s redshirt, that leaves Manny Wilkins as the presumed starter, right? He was 197-311 passing for 2,329 yards, 12 touchdowns and nine interceptions in 2016.

Not so fast. Alabama transfer Blake Barnett is now a member of the Sun Devils and eligible immediately. And Arizona State’s new offensive coordinator is Billy Napier, an assistant at Alabama last season. Our guess is Barnett has the starting job in 2017 with Wilkins as his backup.

27 Jul 19:37

How to Update Your iPhone: iOS, Apps, and Data Backups

by Michael McConnell

If you need to update your iPhone, you’ve come to the right place.

Like everything on iOS, keeping your iPhone up to date is pretty simple. You have a few ways to back up your phone and apps, depending on how you prefer to work with your iPhone. We’ll show you what you need, especially when it’s time to update iOS.

Before You Begin: Clean Up and Back Up

Now is a good time to clean old files off your iPhone. This will help your backup and update installation complete more quickly.

You can find low-hanging fruit by visiting Settings > General > iPhone Storage. Here, your phone will recommend a few actions to clear a large amount of space in a short time. Check out our guide to managing your iPhone’s storage for more details on how to clear up photo, app, and other clutter.

Before you make any changes, you need a backup. There are two ways to back up your iPhone: using iCloud or iTunes. Neither is perfect, but they are easy to perform.

1. Backing Up via iCloud

Unless you’ve paid for more iCloud storage, backing up your phone to iCloud is not a viable option for most people. Apple only provides 5GB of free iCloud space, which is likely far less than what’s on your phone.

Check out the iCloud pricing page for a breakdown. You can get 50GB for $1/month, 200GB for $3/month, or 2TB for $10/month. You can also share the larger two plans with family members, which is one of the best uses for extra iCloud storage.

To turn on iCloud backup, open Settings on your iPhone. Tap on your name at the top to open your account management, then select iCloud. At the bottom of the Apps Using iCloud section, tap iCloud Backup.

Toggle the slider to enable it; a popup will warn you that your phone will no longer automatically sync with iTunes. After that, tap Back Up Now. A progress bar shows, telling you how long you have to wait.

Once that completes, you can move onto the next steps. If you’ve already turned on iCloud backups in the past, you can tap Back Up Now to make sure iCloud has the latest copy of your data before moving on.

2. Backing Up to iTunes

Backing up to iTunes does not require much setup. Plug your phone into your computer, and launch iTunes if it doesn’t appear automatically. If this is your first time connecting this device to iTunes, you’ll need to accept a prompt on your phone to trust the computer and enter your passcode.

Wait for the device button to show up in the toolbar (in the top-left next to the Music dropdown). Select that button to go to the main device page in iTunes (you may need to click your phone’s name at the top too).

The second table on the device page is Backups. On the left are the two options for automatic backup: iCloud and This computer. Select This computer to ensure that your iPhone backs up every time you plug it in.

iTunes-Back-Up-iPhone

If you check the option Sync with this iPhone over Wi-Fi in the Options table below, your phone will back up whenever it’s plugged in. If you want your backup to include all your passwords and accounts, you need to select Encrypt iPhone backup and set a password for it. This an extra step, but saves you time if you ever need to restore your phone.

Click Sync at the bottom of the window if you need to transfer data to or from your phone; otherwise just click Back Up Now. (If you’ve made any changes to the settings on your iPhone, you need to click Sync to update them.)

Over-the-Air vs. Wired Updates

Deciding whether to apply an update on your iPhone, or to use iTunes, depends on a few factors. The first and most vexing is having enough free space on your phone to update. While you can free up space on your iPhone to make room, it’s often a lot easier to use iTunes instead.

There are some other catches. Your phone won’t even start downloading the update unless you connect to Wi-Fi. Plus, your battery level must be over 50 percent, or iOS asks you connect to power before updating.

Updating over-the-air (OTA) with your iPhone is convenient, but is still an “in-place” upgrade. If you’ve had any weird performance issues, you should probably install the full OS via iTunes. An OTA update installs only the changes.

In general: iTunes updates are more work, but have the least amount of restrictions. Updating iOS from your iPhone is easier, but has stricter requirements.

Updating on Your iPhone

Installing an update within iOS is a simple process. Open the Settings app and select General > Software Update. You’ll see the details of the update on the next screen.

If your phone has not automatically downloaded the update, tap Download and Install. This shows Install Now instead if it’s already downloaded. A dialog will appear asking you to confirm by tapping Install once more.

Should you keep getting errors about verifying the update, you may need to re-download it. You can remove the update data by going back to General in the Settings app. Tap iPhone Storage, then find the iOS update in the list. Select it and choose Delete Update, then you can try to re-download it.

Updating via iTunes

Even if your phone is set to sync via Wi-Fi, you need plug it in using a Lightning cable before you can update with iTunes. Once you connect your phone to your computer open iTunes and the device indicator will pop up again. Click on it and select your phone.

On the device page, click Check For Updates (or Update if it’s already found one). A popup will notify you of the new version; click Download and Install. If you use a passcode, you need to enter it before applying the update.

iTunes-Update-iPhone

Restarting and Fixing Update Issues

Regardless of the method you used, your phone has to restart to apply the update. This screen shows an Apple logo with a progress bar. Once that finishes, your phone goes to the Hello screen like a new setup. From there, you may need to tap through some menus to agree to any changes and re-enter iCloud info.

If your phone hangs at the Apple logo, you may need to restore. Try pressing a button on your phone; you’ll see a message if the update is still working. If it’s unresponsive for some time (more than 30 minutes or so), try force-restarting it.

After that, reboot your phone. If you get a screen with the iTunes logo and a USB cable, you’ll need to restore it. Connect it to iTunes again and click Restore iPhone on the same screen where you update your phone. Sometimes the update will continue from where you left off and complete as normal after a forced restart.

How to Update iPhone Apps

If you just need to update the apps, you can do this on your iPhone. Apple removed the ability to manage iOS apps through iTunes in a recent update.

Open the App Store on your iPhone. Tap Updates in the bottom navigation bar, then on the next screen tap Update All.

Your iPhone Is Now Up-to-Date

Apple lets you update iOS however you like. In most cases, updating right from your phone is the most convenient. You should only need to update via iTunes if you’ve had an issues with your iPhone.

Now that you’re all up-to-date, why not check out what’s new in iOS 12?

Image Credit: PIMPAN/Shutterstock

Read the full article: How to Update Your iPhone: iOS, Apps, and Data Backups

27 Jul 16:25

Chef Seni Alabi-Isama raised the culinary bar in Statesboro. Now, he’s bringing sous-vide barbecue.

by Charles Bethea
SmoQue PitSeni Alabi-Isama scopes out the barbecue competition at Vandy’s in Statesboro.Photographs by Gregory Miller In the fall of 2013, a few months after opening his acclaimed restaurant Gunshow, chef Kevin Gillespie was on his way back to Atlanta from a food and music festival in Bluffton, South Carolina. As he and his wife, Valerie, drove along a desolate stretch of I-16, hunger struck. “Val, didn’t you hear about a restaurant there?” Gillespie asked as he eyed a sign for Statesboro. She had. The restaurant was called South & Vine, and it was a culinary oasis, a friend of hers had said, in a town otherwise known for serving Bud Light and burgers to Georgia Southern University students. The Gillespies were suspect—but still hungry. Twenty minutes…View Original Post
26 Jul 17:41

“Magical Bird”

by swissmiss

26 Jul 17:36

Judaculla Rock, Cullowhee, NC

Feature: Cryptic carvings and symbols on a soapstone boulder. ...
26 Jul 14:53

G&G Playlist: Southerners Under Cover

by Dacey Orr

Good music is hard to keep to yourself, whether you’re crafting a perfect playlist for a party or just humming along to a catchy melody. But musicians have a special way of sharing their favorite tunes: the cover song. Think Aretha’s take on Otis’ “RESPECT” or Willie Nelson’s “Always On My Mind,” which had already climbed the charts for Elvis in 1972. Renditions of old songs can even eclipse the originals—Hoagy Carmichael’s “Georgia On My Mind” became an instant classic once Ray Charles got ahold of it. There are plenty other worthy covers that never quite reached that pinnacle of fame, though. From Percy Sledge’s take on Merle Haggard to Kacey Musgraves playing Waylon Jennings, here are twenty new or little-known Southern cover songs that we feel ought to get a little more love.

Click to open this playlist on Spotify


“Angel from Montgomery”

Original: John Prine (1971)
Covered by: The Lone Bellow, Buddy Miller and Brandi Carlile, Cayamo Sessions At Sea (2016)


“You’re the Reason Our Kids Are Ugly”
Original: Loretta Lynn & Conway Twitty (1978)
Covered by: J.P. Harris and Nikki Lane, Why Don’t We Duet in the Road (2017)


“Still Crazy After All These Years”
Original: Paul Simon (1975)
Covered by: Robert Ellis, The Lights from the Chemical Plant (2014)


“The Wurlitzer Prize”
Original: Waylon Jennings (1977)
Covered by: Kacey Musgraves, Outlaw: Celebrating the Music of Waylon Jennings (2017)


“I’m So Lonesome I Could Cry”
Original: Hank Williams (1949)
Covered by: Hurray for the Riff Raff, My Dearest Darkest Neighbor (2013)


“The Ballad of Curtis Loew”
Original: Lynyrd Skynyrd (1974)
Covered by: Eric Church, Sweet Home Alabama: The Country Music Tribute to Lynyrd Skynyrd (2010)


“Please Call Home”
Original: The Allman Brothers Band (1970)
Covered by: Sam Moore of Sam & Dave, All My Friends: Celebrating the Songs & Voice of Gregg Allman (2014)


“You Are My Sunshine”
Original: Jimmie Davis and Charles Mitchell (1939/40)
Covered by: Morgane Stapleton & Chris Stapleton, Southern Family (2016)


“He Stopped Loving Her Today”
Original: George Jones (1980)
Covered by: Johnny Cash, Unearthed (2003)


“Take Me Home Country Roads”
Original: John Denver (1971)
Covered by: Emmylou Harris and Brandi Carlile, The Music Is You: A Tribute to John Denver (2013)


“Runaround Sue”
Original: Dion (1961)
Covered by: Houndmouth, Spotify Sessions (2015)


“Rocket Man”
Original: Elton John (1972)
Covered by: My Morning Jacket, Chapter 1: Sandworm Cometh: Early Recordings (2004)


“Storms Never Last”
Original: Jessi Colter (1975), Waylon Jennings & Jessi Coulter (1981)
Covered by: John Prine and Lee Ann Womack, For Better, Or Worse (2016)


“Billie Jean”
Original: Michael Jackson (1982)
Covered by: The Civil Wars, Between the Bars (2013)


“Black Star”
Original: Radiohead (1995)
Covered by: Gillian Welch, Black Star (2005)


“The Promise”
Original: When In Rome (1987)
Covered by: Sturgill Simpson, Metamodern Sounds in Country Music (2014)


“Mama Tried”
Original: Merle Haggard (1968)
Covered by: Percy Sledge, Sings Country (1979)


“Heart on a String”
Original: Candi Staton (1969)
Covered by: Jason Isbell & the 400 Unit, Here We Rest (2011)


“After the Fire Is Gone”
Original: Conway Twitty & Loretta Lynn (1971)
Covered by: Buddy Miller & Lee Ann Womack, Cayamo Sessions at Sea (2016)


“The Story”
Original: Brandi Carlile (2007)
Covered by: Dolly Parton, Cover Stories: Brandi Carlile Celebrates 10 Years of The Story (2017)

The post G&G Playlist: Southerners Under Cover appeared first on Garden & Gun.

26 Jul 14:52

A Slice of Key Lime Pie History

by kalexander

If you want to get in a fight with a South Floridian, bring up Key lime pie. Should the crust be graham cracker or pastry? Crown the filling with meringue or whipped cream? And most hotly argued of all—do you have to use true Key limes?

Absolutely, says David Sloan, a co-founder of the Key Lime Festival (July 1-4 in Key West), and author of The Key West Key Lime Pie Cookbook. “The main difference is the acidity,” Sloan explains. “Key limes are more tart, acidic, and they’re juicier.” The golf-ball sized limes sport a skin that turns yellow when ripe—those bags of tiny green limes at the grocery store are likely imported fruit picked prematurely, he says.

Key limes, or Citrus aurantifolia, are native to Southeast Asia, made their way to Mediterranean Europe, and arrived in America with Christopher Columbus. By the nineteenth century, the limes thrived as a commercial crop in the Keys. “They adapted so well to the climate because they could survive heat and not a lot of rain fall,” Sloan says. By 1917, acres of groves in the Upper Keys shipped 60,000 crates annually.

photo: Photo courtesy State Archives of Florida, Florida Memory

Pruning lime trees on Upper Matecumbe Key, 1919.

As for the pie itself, Sloan credits another Sunshine State industry—fishing—with the creation of a proto version. Sponge harvesters in the mid-1800s worked on boats for days at a time, toting foods that would last. Sloan’s book shares the story of a passed-down recipe for a make-do snack on the sea: Soak stale bread in canned condensed milk, and then top with eggs gathered from the islands—wild bird or turtle—and squeeze lime juice on top. Stirred and allowed to sit, the mixture gelled atop the bread. “People debate if pastry or graham cracker is the true Key lime pie crust,” Sloan says. “But before anything else, it was actually Cuban bread.”

photo: Photo courtesy State Archives of Florida, Florida Memory

A sponge fisherman with his haul in Key West, 1930.

Perhaps the first recipe for what we think of today as Key lime pie came from a cook called “Aunt Sally” in the 1890s, Sloan says. Sally might have known fishermen who shared their tricks, or maybe she already knew how to make lemon icebox pie and swapped in limes. Whatever the case, Sally had access to plenty of sweetened condensed milk because her employer was the millionaire ship supplier who built the Curry Mansion, now an Inn on Key West that still uses her recipe.

photo: Courtesy State Archives of Florida, Florida Memory

A Key lime pie recipe from 1964.

Key lime cultivation dropped off when Persian limes became more popular, and in 1926, a devastating hurricane wiped out most of the commercial Key lime groves in Florida. “We still have them growing in the Keys, but they’re a true backyard crop,” Sloan says. “When Key limes are ripe, we share them with our friends and neighbors.”

photo: Photo courtesy State Archives of Florida, Florida Memory

Key Largo, 1953.

For all his expertise, Sloan is generous toward those who’d like to make a Key lime pie but can’t source the real thing—in a pinch, home cooks can create a similar flavor by mixing half lemon juice with half Persian lime juice, he says. But for an authentic taste of history, you’ll have to travel a little further South.

The post A Slice of Key Lime Pie History appeared first on Garden & Gun.

26 Jul 14:47

The Tortoise and the Lair

by Dacey Orr

When the fires burn hot, the ground temperatures in a longleaf pine blaze can reach five hundred degrees. The soaring thick-barked pines have evolved to thrive in such an inferno, but not many other trees can take the heat. Maples and sweet gums burn to coals. Oaks char and wither.

Deep underground, however, the only land tortoise found east of the Mississippi River keeps its cool. Gopher tortoises survive the South’s frequent fires—prescribed or otherwise—and simmering summer heat by retreating to the extensive burrows they dig in sandy soil up to ten feet deep and twenty-five feet long. In turn, those dens create a kind of condo living environment that benefits nearly four hundred species. Eastern diamondback rattlesnakes frequent the tunnels, as do Florida scrub lizards. The federally threatened Eastern indigo snake uses the burrows for breeding, egg laying, and fire escape. The Florida mouse and gopher frog, both rare species, live there, too, along with a perhaps unappreciated community of subterranean crickets, ticks, flies, and dung beetles.

The gopher tortoise ranks as one of the most important animals in the longleaf ecosystem, contends Dr. Christopher Jenkins, CEO of the Georgia-based Orianne Society, a reptile and amphibian conservation group. “It’s a true keystone species,” he says—protecting the gopher tortoise aids hundreds of other species as well. Habitat restoration methods, including controlled burns, even benefit other iconic Southern creatures, from the wild turkeys that feed and nest in fresh stands of wire grass and bluestem in the weeks and months after a fire—a crucial food supply for the tortoises as well—to the bobwhite quail chicks that easily move through newly thinned underbrush, chasing protein-rich insects.

The tortoise, though, could especially use a hand now. Fire suppression, development, and road building in its range have decimated populations. The animals, which can weigh up to fifteen pounds, are listed as a threatened species by the federal government in western Alabama, Louisiana, and Mississippi, and by the state in Georgia and Florida; South Carolina lists them as endangered.

Thankfully, taking care of the gopher tortoise is gaining traction in the South, particularly in Georgia, where it traditionally enjoys a large presence and range. There, a five-year $150 million public-private endeavor to keep the state’s population off the federal endangered species list is already largely financed. Georgia’s Gopher Tortoise Conservation Initiative aims to protect a minimum of one hundred thousand acres for gopher tortoises and sixty-five “viable populations,” each of which would include at least 250 adults, and has attracted a wide array of partners. In addition to conservation groups such as the Orianne Society, the Nature Conservancy, the Georgia Conservancy, and the Conservation Fund, and the nonprofit Bobolink Society and Knobloch Family Foundation, the group is joined by the U.S.
Fish and Wildlife Service, the U.S. Department of Defense, and the Georgia Chamber of Commerce, among others. “I’ve been in the natural resources field for twenty years,” says Steve Friedman of the Georgia Department of Natural Resources, “and I’ve never seen such a concerted effort.”

By collaborating, the group hopes to keep the tortoise from being listed federally as “threatened” in Georgia under the Endangered Species Act, leaving the partners more wiggle room to come up with solutions on their own. Even the Department of Defense has a vested interest in avoiding the gopher tortoise’s further demise. To manage, for instance, the federally endangered red-cockaded woodpecker—another species that helps create habitats for longleaf denizens and thrives on military lands across the Southeast—it spent more than $200 million between 1991 and 2016.

“Despite the different agendas, there was a common goal to make sure we could maintain viable populations of this interesting little fellow,” says Reese Thompson, who is partnering with the initiative to improve habitats on hundreds of acres of his family’s property near Vidalia, which holds stands of hundred-year-old longleaf pine. “We’ve got to be able to make a living off the land, but be good stewards of the land.”

And while tortoise projects such as controlled burns and longleaf restoration often occur on private lands such as Thompson’s, a cornerstone of the effort is to maximize the amount of land the public can access. Already, the initiative has purchased and turned over to the state of Georgia properties that comprise two new wildlife management areas open to hunting, fishing, birding, and other outdoor recreation, and plans are under way to permanently preserve nearly twenty thousand additional acres under state ownership.

Of course, the biggest feat will be simply to allow a creature that has lived through a few million years of cyclical fire the chance to crawl out of the ground to munch on mouthfuls of native little bluestem, gopher apple, and goat’s rue. “Watching a gopher tortoise move and forage is a thing of beauty,” says Dirk Stevenson, director of the Orianne Society’s Longleaf Savannas Initiative. “There’s something primitive and endearing about the pace of its existence.” One that now stands a much better chance of persisting.

The post The Tortoise and the Lair appeared first on Garden & Gun.

26 Jul 14:08

Don’t Pour Out That Pickle Juice!

by Deborah Tukua

There are many ways to put this salty, briny liquid to use: in the kitchen, as a home remedy, and even when gardening. See the list!

The post Don’t Pour Out That Pickle Juice! appeared first on Farmers' Almanac.

26 Jul 14:07

5 Tips For Successful Baking in High Humidity

by Tiffany Means

Steamy or rainy conditions can be a baker's worst nightmare. Our "weatherproofing" tips will ensure your breads and cookies turn out great even during these Dog Days of summer.

The post 5 Tips For Successful Baking in High Humidity appeared first on Farmers' Almanac.

26 Jul 12:38

Introduction to the Pig Pull

by David E. Petzal
Pig picking

Get your Southern fixin's ready for a pig pull

A pig pull is a form of gluttony practiced in the Deep South. It’s suitable for anywhere from half a dozen to 50 people.
26 Jul 00:06

STEVE MCQUEEN'S "BULLITT" MUSTANG LOCATED IN A MEXICAN JUNKYARD!

by nospam@example.com (Cinema Retro)

The legendary Ford Mustang driven by Steve McQueen in the famed car chase from the 1968 classic "Bullitt" has apparently been found by accident in a Mexican junkyard. Watch video above for the fascinating story. 

25 Jul 17:24

How to Get Into an Elite Photography MFA Program

by Marc Falzon

Over the past two years, I’ve looked for guides and made lots of phone calls to faculty, alumni, and current students to find ways to increase the likelihood of being accepted into a top tier MFA program.

Be it Yale, Hartford, RISD, Columbia, Bard — all of these programs have slightly different expectations, but there are consistencies between them as far as your application process goes. After two years of prepping, I’ve been accepted into a program, and I’ve kept careful notes so I could make a guide to help other people looking to apply for an MFA.

This article won’t focus on your art because that’s not something I can give any real advice on. But rather, this will focus on the application process starting up to two years before you even apply. I will show you the strategy I employed over the past two years to be accepted into the one and only school that I applied for.

I’ve broken everything down into twenty simple (but not obvious) steps to follow to greatly increase your chances. I’ve also included links to my actual application essay, the portfolio I submitted, my notes from my interview and various phone calls, and links to all of the resources I used.

As mentioned, this is broken down into twenty points in seven chapters. We’ll look at: (1) what you can do two years before applying, (2) one year before applying, (3) maximizing your recommendations, (4) how to navigate your essay, (5) making phone calls, (6) organizing your portfolio, and finally (7) handling your interview.

Chapter 1: Two Years Before Applying

I started strategizing two years before actually applying for a school. While you may do so sooner or later, it’s probably a good idea to give yourself time. Getting into a good school is more about just your work, but also showing your face in the art community. Giving yourself a reasonable amount of time (2 years) is a good start.

If you’re coming out of undergraduate, even better, as it’s good to have time away from school in “real life,” navigating your work alone before going back to school.

I’ve been told by various instructors that your late twenties or early thirties is the best time to pursue your MFA. Young twenties can still get into these programs, but usually, it’s not preferred.

Point 1: Brush Up on Your History

You’re going to need to know your photo history if you intend to be in a good program, period. While it’s probably not expected that you’re at the art-historian level, you should probably know all the major artists and movements in the art world.

For me: two years ago I bought a few text books on photography and general art history and read 15-20 minutes a night, making careful notes. Do the same, and take this seriously.

You’re going to be embarrassed if that the interview you’re asked to talk about your favorite movements in photography and you can only name one.

Resource: Here are my complete notes to American Photography: A Critical History. I found this to be an excellent crash course. This Google Doc are my 26 pages of notes from the book. Enjoy!

Point 2: Prime your Mentors

Eventually, you’re going to have to ask your mentors for a recommendation. It doesn’t make sense to ask them out of the blue, though. Two years before applying to my MFA, I asked my mentor Brian Ulrich to give me pointers on my work so that it’d have a chance on getting into an MFA program. I also asked him for recommendations on what grad schools were worth their salt. (He ended up recommending the school I applied and was accepted to.)

Asking ahead of time allows your mentors to give critical feedback on your work that you need to implement to increase your chances to be accepted. It also “primes” them that you’ll eventually ask for a recommendation. It’s less jarring, and a lot more considerate to approach it this way.

Resource: Here are my complete notes from that critique and school recommendation conversation I had with Brian Ulrich two years ago. (Note: It’s sloppy, but you’ll see what kind of questions I was asking. In point sixteen you’ll see the portfolio I submitted, the images in which corresponds to the critique notes here.)

Point 3: Long Term Project

Most programs want to see you investigate a long term project, rather than a disparate collection of images. If you don’t have a long-term body of work underway, start now. You’ll need it in two years when you apply for school. Resist the urge to work on many different projects at once. One, maybe two, is what you should be aiming for.

Nearly every school wanted a long term project as part — if not the only focus — of your submitted portfolio. Plan ahead.

Point 4: Exhibit Your Work

You’ve got two years to have something more on your CV than just your undergraduate program. It doesn’t matter how small the exhibition/zine/interview is, but get some lines in there. The reason? It shows that you’re integrating yourself into the arts community. This is an area that I fell short on and immediately began to start fixing two years ago knowing I’d apply to a program.

Chapter 2: One Year Before Applying

Moving on to one year before you intend to apply for school.

Point 5: Update Your Website

You need a good website when applying to schools. People will check your email signature, see your website, and view it. This includes faculty, current students, and alumni. You are representing not just yourself, but the school. Make sure your website is up to snuff. Don’t skimp on this. Squarespace is a good place to start. Look at the website of artists you look up to and construct your website based on what you see.

In fact, I blatantly copied Bryan Schutmaat‘s website to create mine.

Point 6: Attend Shows, Workshops

If you don’t already know: the art world for contemporary fine art photography is very, very small. Everyone knows each other. I attended a workshop with Jason Fulford at Apeture. Was it a pain to get to New York for it? Yes. Was it expensive? Yes. But I learned a lot, and guess what? His name actually came up during my faculty interview and I had a lot to talk about.

Make your life easy. Go to workshops and shows. Ideally, workshops, because you actually interact with the artists and get to know them. Shows are a close second, assuming you actually start conversations with people.

Point 7: Go to the MFA Thesis for the School!

Every program you’re applying to has a large end of the year thesis show. If you’re considering the school, you must attend this show.

This does two important things:

1. It shows you the work coming out of that program and gives you a good idea if you would get anything out of the school by attending yourself. Seriously. Your work is going to be largely influenced by the other students there. This will tell you a lot.

2. It connects your name with your face. Your ultimate goal with this long-term approach to applying for school is to reinforce who you are so when the faculty sees your application they instantly connect it with you, not a faceless name.

Obviously attending these shows are great for a lot more reasons… but for the purposes of applying to school, this is enough.

Chapter 3: Getting Recommendations

Now we’ll cover getting your recommendations for the program.

Point 8: Formal Requests

Two years ago you talked to your mentors about going to school. Time has flown by. Now it’s time to ask your mentors for a formal recommendation. The key word here: formal. I made a huge mistake asking for a request from a professor I hadn’t talked to in years, over Facebook Messenger… Luckily I realized what I did before he had a chance to respond, and quickly apologized. This may be one of the most embarrassing moments of my professional career.

Don’t make this mistake. There’s a lot on the line for a recommendation. You’re carrying their reputation with you, so treat it with the utmost respect. Here’s the process I followed with the other professors I contacted to write a recommendation:

  1. Contacted mentor by phone to ask for recommendation.
  2. Follow up immediately after thanking mentor formally, and including link to current work, artists statement, CV, and any information that will make their life easier. Include instructions of where to send recommendation.
  3. Write mentor a week before the deadline to remind them, re-thank them, and provide instructions again on where to send
  4. recommendation.
  5. Write mentor after they submit the recommendation to thank them, again.
  6. If possible, find them in person and thank them.

I thanked both of my mentors in real life and didn’t stop at just sending an email.

Chapter 4: How to Write Your Essay

There is a lot of weight on your essay. A lot. Your work is history but your essay is very much alive. This is where you get to speak with the faculty directly. I know at Hartford, the essay is weighted in the application process very heavily. I’m sure this is true for Yale, RISD, and other top tier programs.

“What do you look for in applicants? — The most important thing is the letter of intent.” —Robert Lyons, Hartford MFA Director

Point 9: Reinforce What You Bring to the Table

One of the big mistakes I did with my application essay was being too hard on myself with my first draft. Your goal with the essay, after all, is to get the faculty excited about you. Sure, you have things to learn. Sure, you want to improve. And you want that authenticity to come across, but you also want to reinforce to them what positives you bring.

From their perspective, they are looking for a student who will carry the torch of their school and reputation. Someone who will bring fresh ideas to the cohort of new students. Someone who is open to learning, but has something to teach. Make sure that comes across in your essay.

Point 10: Why get an MFA?

Everyone I spoke to — Brian Ulrich, Robert Lyons, Richie Lipscher (previous digital animation head of MICA) — all advised me the same thing: your essay should clearly express why you want an MFA. It’s an insidiously tough question to answer — at least until you really sit down and dig deep. Sure, there are surface reasons, but what’s at the core?

What was interesting is that the recommendations I got from Ulrich and Lyons were nearly at odds with each other. Make sure you talk to the director of your program (point thirteen, coming up) to get a sense of what they expect. Yes, you want this to come from you, but there are a lot of sides to you, and only a meager 1 page to write about it. Tailor your essay based on expectations.

Point 11: Check a Million Times

After you read your essay, read it again, then again, then again. Most importantly: sit on it. A week or two of not looking at it is a good amount of time. After you go away from it that long, you’ll come to the table with fresh new perspectives that have been percolating. You’ll remove things that looked great at the time but add nothing on a fresh gaze.

Most importantly, have your mentors give it a quick glance when you’re satisfied with it. A lot rides on this essay. Make sure it truly represents you.

Point 12: What I Wrote

Here, I’ll be sharing my essay with you. This will give you a sense of what things were important to me, and maybe provide you with some ideas on how to structure your own essay. Keep in mind (obviously) that appropriating my content probably won’t be a good idea. These faculty, especially at good programs, sniff through bulls**t all day. You want to be absolutely authentic with your writing.

Don’t write what they want to hear — write what you need to say.

Resource: Here is my full application essay to the Hartford MFA program.

Chapter 5: Prepping your Application

Sending the application isn’t enough, you need to reach out to the school’s community ahead of time. Here’s how I approached this.

Point 13: Contact the Director

A few months before you apply, you need to reach out to the director of the program personally. Email them requesting a phone conversation.
The goals here are: (1) Get answers to questions you have about the program. (2) Get a sense of how to best maximize your application to the school. (3) Get the director to recognize your name. (4) Get the name of students to contact about the program — more on this in the next point.

This step is very important. Make sure before you call you have a list of questions. Calling the director ahead of time is an important step: it shows you’re serious about pursuing this path.

Resource: Here are my written notes from the phone conversation with Robert Lyons, director at the Hartford MFA. It’s not pretty but gives you an idea of what I was thinking about.

Point 14: Contacting the Students

If things went well on the phone call, you should have a list of alumni to contact. Now you need to contact them.

You want to learn about their experience of the school. You want to find out any tips to prepare for classes to start. You want to avoid common pitfalls. Most importantly, you want to learn what they got out of the program after they graduated.

Here’s why this is so critical: you will be asked why you think the program is right for you at your interview with the faculty. If you speak with students, you can literally tell them that. You can explain how you spent considerable time researching the program, and you know exactly why and how it will benefit you, referencing the students you talked to and what they got from the program and how it relates to what you expect.

It’s a deadly 1-2 combo.

What was even more exciting that I found out after a conversation with one of the student is often the director will reach out to the students that he gave you the names of to see if you followed up, and what their opinion of you was.

Could you imagine calling the director, getting a list of names (and taking the time of the program director), only to not call the students and then have the director find out about it?

Don’t put yourself in that situation — and 100% frank here — if you’re not interested enough to contact those students to learn about the program you really shouldn’t be applying for an MFA anyway.

Still, sometimes you get busy. Don’t let yourself get busy here.

Point 15: Contact the Faculty

Follow up questions, pack them in an email and send them to one or two of the faculty. Be respectful. There’s no reason to call them or write them all. Keep it brief, contacting one faculty member with an email a month or two before you submit the application is enough.

You don’t want to “shout” by writing the program too often or too long. Keep things professional, and brief. Respect their time. Still, (and I’ll mention again) writing one email to a faculty member with one or two follow up questions is fine.

Chapter 6: Your portfolio

Now it’s time to send your work to the school. Here’s what I learned through my own process.

Point 16: 1-2 Bodies of Work

I’ve mentioned this before, but it’s important. Don’t send multiple bodies of work. Send primarily one, and maybe a second. You want to show the faculty that you can explore an idea over a long period of time. Investigate.

Personally, I chose to show 5 images from an older body of work (to show them some highlights) and 20 images from a newer body of work that I have been working on for the last 3-4 years (to show an investigation.)

Resource: Here is my actual portfolio PDF that I sent in with my MFA application.

Point 17: Concise Statement

If your application requires an artist statement, here’s some advice I’ve come across from educators:

  • Keep it concise.
  • Avoid “art speak” – you know what I’m talking about.
  • Avoid the word “juxtaposition” – AKA, aforementioned art speak.
  • Avoid layering abstraction upon abstraction. Write simply and genuinely about your work.
  • Focus less on why you started your project, and more about what your work actually says.

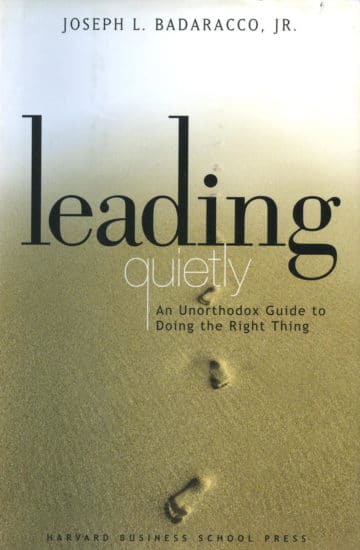
Resource: Buy this book and read it before you ever touch another artist statement. It’s actually required reading at Hartford.

Chapter 7: The Interview

At this point, your application and portfolio have won you an interview with the faculty. It won’t be easy. You’ll be nervous. You’ll doubt yourself until you hear back weeks later about a final decision — but we all go through it. Here are three tips:

Point 18: Be Candid

You’re going to be asked questions you don’t know the answer to. Be candid in your responses. They know you’re there to learn, so there’s no reason to hide that fact.

I know I was personally asked about what I saw in my work, and frankly, I gave a terrible “art speak” answer that really was answering why I started making the work, not what I saw in it. I couldn’t recover and just was honest by explaining that I hope to attend the program to better understand my own work – rather than come up with some BS on the spot answer that I obviously didn’t have.

Yeah, I was worried, but I think I’d be more worried if I tried to bulls**t the faculty with even more art speak.

Point 19: Have Specific Questions

The worst thing you can do at a job interview is waiting until the end and have no questions for the employer. It shows them that you’re not thinking critically about the job. It’s the same here.

Make sure you go into that interview with a notebook, pen, and a list of questions written down that you have. Don’t settle with one or two.
More likely than not, they’ll tell you more about the program and answer some of the questions you have written down.

Point 20: Take Risks

Show some courage. In my interview, I asked — effectively — for a critique. I wanted to know what I could work on, assuming they denied me entrance into the school. I wanted their knowledge, their perspective, and their thoughts on my work. And… they denied my question.

But, I asked. I showed them that I truly care about my work. That I want to improve. I showed some risk and dedication. Interestingly enough, they did give me a few things to do and consider: namely to write about more art and to visit the print viewing room at the Princeton Art Museum (which is exceptional, by the way) which I’ve been doing every week.

You’ve Done It

Hopefully, you’ve gotten accepted into your program of choice, and if not you’ve gained some insights into your own working practice. With my application, I made sure why to state not just why I wanted to attend, but why this was the right time in my life to attend.

Consider that when you apply. You may be destined to get your MFA, but the time might not be right. One school or two is enough. And tell them that. I was very bold in telling Hartford they are my own school I have in mind and why.

With all that said, best of luck on your journey!


About the author: Marc Falzon is a photographer who’s currently in the photography MFA program at the University of Hartford. The opinions expressed in this article are solely those of the author. Falzon is the man behind the YouTube channel Analog Process. You can visit his website here. This article was also published here.

25 Jul 17:18

Sold: A Fully Furnished 1989 FBI Spy Van

by Eric Grundhauser

You’ve seen it in a hundred films, the unmarked spy van, packed to the gills with screens and equipment, but it’s not often that you see the real thing up close, in real life. But thanks to the wonders of eBay, one lucky bidder was recently able to purchase a fully furnished FBI surveillance from 1989 that looks like it’s straight out of the movies.

The recently closed auction out of North Carolina, listed a vintage Dodge Ram 350 van in great condition, which also just so happened to be a fully-furnished, and totally awesome, surveillance vehicle. From the outside, the brown van doesn’t seem that notable save for a weird tube attached to the roof and the darkly tinted passenger windows. But in the back is an array of still-functioning spy gear, including video screens, recording equipment, a port for a periscope, and, yes, a toilet. There are even secret cameras hidden on the outside of the vehicle.

In a video tour of the van recorded by the sellers, they say the vehicle was used in a FBI stakeouts, and that the van even still had some of the original investigation tapes inside.

The winning bid for the van came in at $18,700 from a private buyer. The new owner's identity is unknown, but we can only hope that they bought the van for some next-level Sneakers cosplay.

25 Jul 15:58

An Animated Guide to Nature's Best Wayfinding Secrets

by Sommer Mathis

Tristan Gooley is an expert at what he calls "natural navigation." In a series of fascinating books, most recently How to Read Water, but also The Lost Art of Reading Nature's Signs and The Natural Navigator: The Rediscovered Art of Letting Nature Be Your Guide, he shares incredibly useful tips and insights aimed at helping people notice simple truths about the world around them. Gooley's particular genius is that once he shows you something about nature that you didn't realize before, you'll never be able to not see it again.

Recently, we sat down with Gooley and asked him to share five of his favorite natural navigation tricks with Atlas Obscura readers. The illustrator Chelsea Beck then took Gooley's concepts and created gorgeous animations for each one. The words that accompany them are Gooley's.

article-image

1. You can use the crescent moon to find south (or north)

The next time you see a crescent moon, draw a line that joins the horns together in a tangent, and then extend that line until it touches the horizon. In the northern parts of the world, at the bottom of the line, you’ll be looking roughly south.

This method isn't perfect, but it gives you a very fast, rough-and-ready measure. The higher the crescent moon is, the more dependable the method is, so if the moon is just about to set or it’s just risen, it won’t be quite as good. But as a very fast, very simple check on which direction you're facing, it's one of the best.

Some people are curious why this works. It’s because the sun and the moon rise in the east and set in the west, broadly speaking. So they’re moving in an east-west plane, which means when they’re not in the same part of the sky, what we call a New Moon, they’re either east or west of each other. We know the moon doesn’t have any light of its own, so when we see the bright side of the moon, what it’s effectively doing is pointing at the sun. So when we join the dots, what we’re really saying is it must be pointing east or west, we don’t necessarily know which one, but if we draw the tangent line, we know that’s 90 degrees to an east-west line, so it has to be a north-south line. And where it touches your horizon has to be either north or south—note that if you’re in the Southern Hemisphere, then the line would actually point you to the north.—T.G.


article-image

2. Paying attention to birds can help you predict the weather

An awareness of wind direction is a very important part of natural navigation. It's often one of the last useful clues left when all others have deserted us.

The next time you're walking through your neighborhood, keep an eye out for groupings of birds perched high up, say on the apex of a roof or on telephone pole wires. If you notice that they’re all mostly facing one way, there’s a pretty strong chance they’re facing into the wind. Why would that be? Well if you think of aircraft, they always take off into wind, that's just basic aerodynamics. So it’s the most sensible direction for a bird to be facing, all else being equal, in case they have to take off suddenly. It’s their equivalent of being on the runway ready to go.

Now try checking in with the group of birds in your chosen location regularly, say three or four times a day. If you suddenly notice that they’re all facing a slightly different way, they’re telling us that the direction of the wind is changing. And a significant shift in wind direction is a very strong indicator that the weather is about to change.

The thing to keep in mind with birds, like all animals and indeed people, is that individuals might do anything. So if you see an individual bird doing something, it might be interesting, it might be worth watching. But if you see a whole load of birds behaving in a certain way, then that's a pattern.—T.G.


article-image

3. Most trees grow in a check mark shape

Obviously, all green plants need sunlight. So it’s logical that plants will, all things being equal, tend to grow more abundantly on the side the light comes from. In the northern parts of the world, where the sun is due south in the middle of the day, that means plants are growing more abundantly on the south side.

Try noticing this in a tree the next time you take a walk outside. You should see that there’s more tree on the south side, unless there are other factors—for instance there are amazing examples of glass buildings that can make trees grow the wrong way. But generally speaking, there should be more of the tree on the south side.

Next, take this one step further. Because of a botanical effect called phototropism, all the branches on a tree are trying to grow toward the light. On the south side, they can take a fairly direct route. So they curve toward the sun, which creates a slightly more horizontal branch. On the north side, they’re still trying to grow toward the light, but they can’t take a direct route because the trunk and the rest of the tree are in the way. So they end up growing towards the sky. This is how you end up with what I call the “check effect," which is especially noticeable in trees. Together, the whole shape looks like a check mark.—T.G.


article-image

4. At a T junction, you can usually tell which way to turn

Let's say you're out hiking, and you've lost confidence in your route. If you come to a T junction, you may even panic a bit: Which way should you turn? But the thing is, you're very likely to be able to notice which way most people have turned here over time. More often than not, there’s a strong trend.

You might think it’s a 50-50 decision, but in fact it’s quite rare for the attractions in both directions to be equally strong. There’s nearly always a slightly bigger town, or even just a café that’s very popular—some reason why people turn one way more often than the other. The classic shape you get, for example, is when a bit of corner cutting goes on, so if there's grass where you are, you end up with the grass suffering in that corner of the T junction.

With practice, you'll start to see this in almost all environments. Even with a paved sidewalk, if you get your eyes low with low light, you’ll notice a little bit of shine and various other clues. It works absolutely everywhere. If you’re lost in the woods, or anywhere there’s a path network, there’s a temptation when you reach a crossroads to go, “Oh God, I don’t know which way to go.” But it’s nearly always a gift, because on average, if you turn the way most people have already turned, you’re nearly always going to be heading toward civilization.—T.G.


article-image

5. You can use Cassiopeia to find the North Star

To use Cassiopeia to find direction, we’re going to try to use it to find the North Star. Why are we trying to find the North Star? As its name suggests, the North Star is due north (technically, it’s within one degree of due north). If you can identify the North Star, you can draw a vertical line down to the ground, and you’ll be looking north.

There are lots of different ways to find the North Star, but Cassiopeia is one of the fun ones. So how do we find it? You're looking for five stars that are in the rough shape of a W. It’s not a perfect W—it’s a little stretched on one side and little squished on the other side, but it is quite a recognizable shape. Over the course of the year, Cassiopeia wheels anti-clockwise around the North Star.

So to start, look for a constellation in the shape of a W. Keep in mind that as it wheels around, depending on the time of year, you might see it on its side, or as an M—but if you think of it as a W you’ll always be able to orient this trick correctly. Once you've found the W, imagine laying a tray, just a flat tray, across the top of the W. Next, wheel that tray roughly 90 degrees anti-clockwise, so it’s pointing away from the W. Then, double the distance of the tray. Start looking in that part of the night sky, and you’ll find a star. That’s the North Star. This will work anywhere in the Northern Hemisphere.

One of the things about the North Star is if people aren’t familiar with it, they tend to think of it as the brightest star in the night sky. But in fact, the North Star isn’t all that bright—it's going to appear the same level of brightness as the stars in the W of Cassiopeia. But, what the North Star does have going for it is it’s on its own. You won’t see anything of comparative brightness in that part of the sky. And this trick doesn’t point perfectly at it: what this does is get you to the part of the night sky where the North Star is, a rough little target of where to look. If you find yourself looking at two or more stars close to each other, that's one way to tell that you are definitely not looking at the North Star.—T.G.

25 Jul 15:57

The Bear Gates of Traquair in Scottish Borders, Scotland

The gates with Traquair House in the background.

The Bear Gates of the Traquair House—Scotland's oldest continually inhabited house—have been locked since 1745 on the instruction they remain closed until the Stuart Dynasty returns to the throne. We may be waiting a long time.

The last direct male descendent of the Stuart Kings died in 1807, so it doesn’t look like the "Steekit Yetts" (that's Scots for "stuck gates") will be unstuck any time soon. All entrants to the fortified 12th-century house, from tourists visiting its microbrewery to the current 21st Laird (Lord) of Traquair, have to use the side entrance.

Many great houses and castles in Europe are approached by an impressive tree-lined driveway. The Traquair House had such a feature until the bear-topped gates at the end of the driveway were closed indefinitely behind "Bonnie Prince Charlie" Stuart as he rode away in 1745 to restore the Stuart Dynasty to the throne. This lead to the Bear Gates being given the nickname of "The Steekit Yetts." 

The house has been owned by relatives of the Stuart Royal Dynasty—a dynasty including Mary Queen of Scots and her son James VI who became the first king to hold the throne of both Scotland and England— since the 15th century.

James VI's great-grandson, James VII & II, was the last king of this dynasty. He was exiled from Britain for being Catholic and replaced by an imported Protestant king. Fearful of Catholic superpowers in mainland Europe, the English Parliament then passed laws to prevent any Catholics taking the English throne ever again.

This did not stop the exiled king's grandson, Bonnie Prince Charlie. Charlie, who had grown up in Rome, landed on Eriskay (an island in Scotland's Outer Hebrides) in 1745 and raised an army of clansmen who were sympathetic to his cause. They marched south through the recently United Kingdom to attempt to retake the throne.

It was during this advance that Bonnie Prince Charlie visited his distant cousin and staunch supporter, the 5th Earl at Traquair (also named Charles Stuart). It was this earl who ordered the gates at the top of the avenue to be shut after him until the Stuarts returned to the throne.

Unfortunately for the inhabitants of Traquair, Bonnie Prince Charlie and his Highland Army were defeated in the Battle of Culloden mere months later, and, though he escaped back to mainland Europe with his life, his dynasty never returned. 

25 Jul 00:59

21 Classic Camping Tips From Field & Stream

by H.G. Tapply

Essential advice from a legendary outdoor writer

Essential advice from an outdoor legend…
24 Jul 17:21

5 Ways to Auto-Schedule Your Day

by Kayla Matthews

In a world of juggling work, errands, and personal hobbies, even the slightest inconvenience can seem larger than life. When you’re already pressed for time, the little things that are bound to come up in your day-to-day can be stressful. Rather than getting exasperated over things you can’t control, plan ahead and auto-schedule some of the things you can control. Here are five auto-scheduling apps and tools you can use to make a little more room in your day. 1. Rethink Your Inbox Availability: Web only. Between work emails and personal emails, you’re undoubtedly sick of the mundane task of...

Read the full article: 5 Ways to Auto-Schedule Your Day