Shared posts

02 Jun 03:01

BCE Learning Activity 4-1 Learning via RSS

by nikkidell

https://theoldreader.com/profile/924cda852bd6485531965434

Above is the link to my “The Old Reader” account. My name is “Nicole Delevan” on the website.

I used Google Alerts to add to my RSS feed as per the module’s instructions. I added the following topics: educational technology, online learning resources kindergarten, special education resources, and synchronous learning tools. I started to follow fifteen blogs and read through them. I unsubscribed to some that were not the quality I thought they would be. I will add Professor Casciole, Kaitlin, and Chris when I find out their usernames. The blogs that I really enjoyed reading so far were as follows: Special Education and Disability Rights Blog, I Heart Teaching Elementary, For the Love of Kindergarten, The Kindergarten Smorgasboard (I follow them on Facebook and Teachers Pay Teachers), On Special Education – Education Week, Considerate Classroom: Early Childhood Special Education Edition, and Fluency Matters. I shared posts that I liked from initial skimming and went back to read the particular blogs later. In addition, it was relieving to read some posts about the ever-growing list of responsibilities of other teachers. I know it is happening everywhere, but to see that others are going through the same thing and feeling the same way makes you feel less alone.

I would be able to use RSS to enhance my own learning as a classroom teacher. Being able to look at updates on a particular topic with just a click would save so much time compared to having to type in every topic individually and scroll before going to the next topic. I would plan to research special education teaching strategies, early literacy and early numeracy teaching strategies, and online learning tools. I would plan to use my lunch time or time before school to read through the RSS feeds at least twice per week. One day would be for Kindergarten-related updates and another day would be for special education updates. I am always coming early and always staying late, anyways, so this doesn’t impact my schedule. I would aim to read posts that would help me develop professionally with ideas, strategies, and tools that I could use immediately versus posts that are strictly discussion of one’s day.

Descriptions of Five Blogs

Fluency Matters: The blogger discussed engagement and breakout room ideas for online learning and had multiple sample activities listed in detail. A digital note taking strategy called “sketchnoting” was discussed in relation to elementary language learning. This is where the students make sketches in their notes to help them represent what they were learning. Photo Reader’s Theater is an activity that was detailed with same pictures. This strategy is supposed to keep them engaged in literature through the online environment. Photo Reader’s Theater involves the students recreating a famous artwork or story cover with people or items from the home and posting for others to view. Another suggestion was to upload the pictures to Kahoot! to see if the students could match the recreated photo to the original.

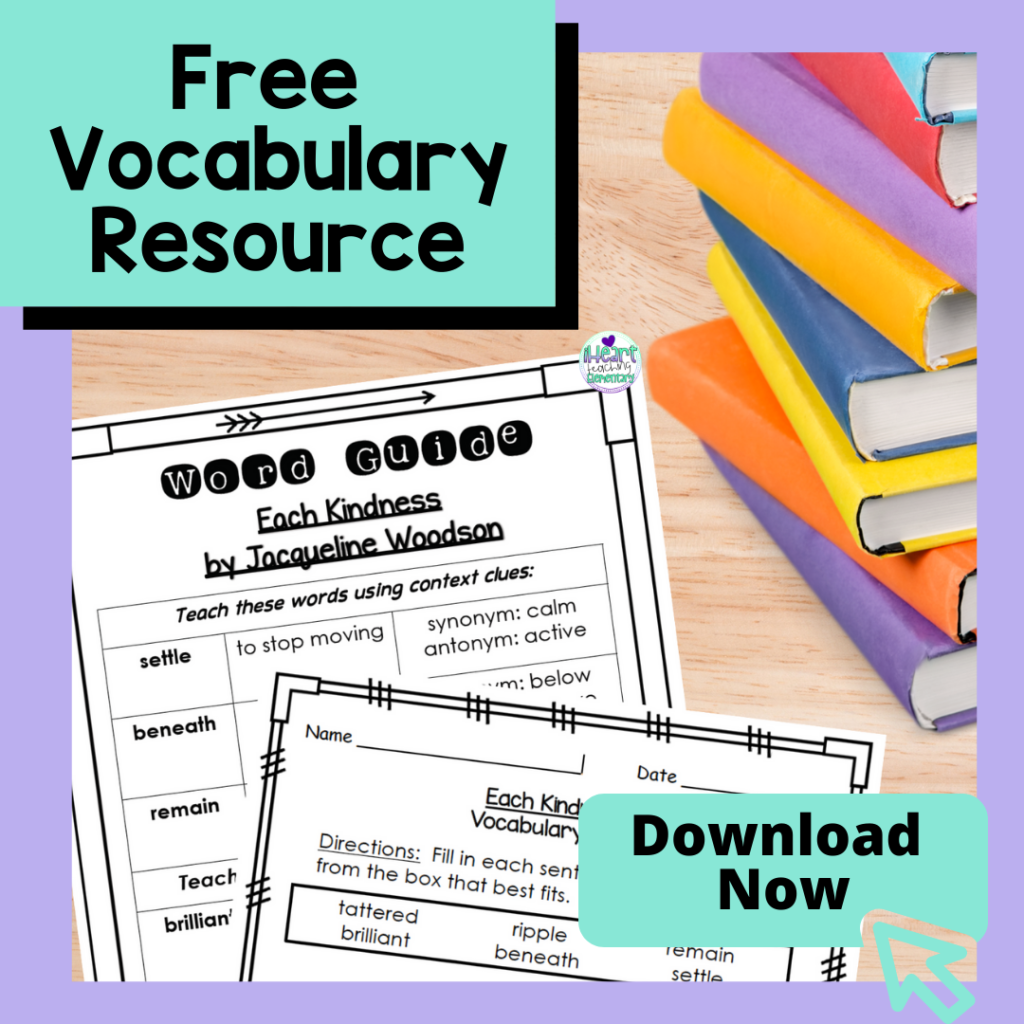
I Heart Teaching Elementary: This blogger discussed comprehension strategies such as using picture books, antonyms and synonyms, words of the day, drawing pictures for vocabulary, and writing sentences. The blogger recently posted ideas for the end of the school year along with stories that are great for read alouds for this time of year. The blogger suggested Blooket (which I think Professor Casciole mentioned somewhere) for middle elementary math review. They also suggested scavenger hunts and child-created review games. Multisyllabic word decoding assessments and activities were detailed along with reading strategies to help with motivation. There were virtual teaching strategies for math topics, too

For the Love of Kindergarten: This blogger has just recently begun posting again. She detailed some changes and struggles going on currently in her situation. She said that she loves using the following resources: Reading Raven, Monkey Math, and Teach Me Kindergarten, Debbie Diller worksheets, and Sign-up Genius, She also uses ABCMouse, which I am familiar with. I have to research the other resources, she mentioned, though, since I haven’t heard of any of them. She mentioned that Treasures will be her new curriculum next school year. We are looking for a new math curriculum to replace GoMath. I am currently in the group to help look through various programs like Bridges and Illustrative Math. I am interested to see what Treasures is all about. She made a most about Kindergarten Common Core, also.

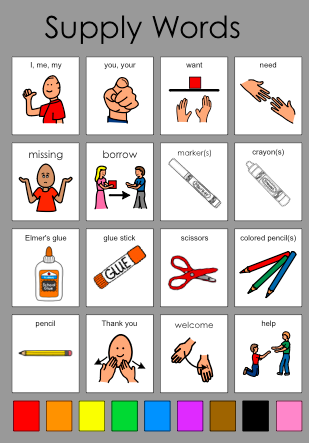
Considerate Classroom: This is my favorite blog out of all of them. Most recently, she posted an activity related to executive functioning skills and strategies/supports for the students to help improve their executive functioning. To accompany this skill, she has a supply word communication board and visual reminder board. She details synchronous and asynchronous learning rotations and plans as well as posts videos of her classroom. It sounds like her classroom is similar to mine. She has many students with a wide range of abilities but has much more support. She uses centers and flexible seating techniques which she wrote about at length. She also has individual work stations and a whole group area.

The Kindergarten Smorgasboard: He links blog posts that he writes on his website to his RSS account. He sells his creations on Teachers Pay Teachers and started posting on this account in early April of this year. The blogs on his website have visuals about the lessons he is talking about for the week so the viewer can get an idea of all that was involved. It seems as though he is promoting a lot of his for-sale materials through these posts. Although, his last post details a review of “Shifting the Balance: 6 Ways to Bring the Science of Reading into the Balanced Literacy Curriculum.” He discussed his takeaways. He said do not teach vocab in a watered-down way, use extended wait time, and have many opportunities for conversations.

02 Jun 01:09

Back to School: Get Ready with Organized School Records

by Carolina
It's that time of year again - time for the rush to buy school supplies, go to open house, complete all of that pesky enrollment paperwork, and get the kids back to school!

As parents prepare, this is a great time to get all of those IEP documents, assessments, and other school records into order. Organizing your child's files is a great way to ensure that you start the school year out right. With organized files, you are able to find documents quickly, access information regarding your child's needs, and track changes in your child's program. Ultimately, you become a better and more effective advocate for your child.

 Here's our tips for how to do it:

Records to Gather:
  • All of your child's IEPs, including annual IEPs, triennial / three-year reviews, and any addendums or amendments
  • Any assessments conducted by the school district, including protocols and notes from those assessments
  • Any assessment plans or written correspondence related to the district's assessments
  • Any assessments, evaluations or other reports that you have obtained privately / independently
  • Progress reports, report cards, and results from periodic classroom assessments
  • Statewide or districtwide assessment / testing results
  • Correspondence to and from your child's school, teachers, providers, etc
  • Discipline records or reports regarding your child's behaviors
  • Other relevant documentation regarding your child's unique needs and special education program
  • Copy of your "parent rights" that you recieve from the school district
* You have a right to review your child's records from the school district. Make a request in writing in order to review the records or obtain copies.

Supplies Needed:
  • Three-ring binders - you will need at least one large binder (more if your child is older / has a lot of records) for older records and one medium to large one to organize this year's documents as you receive them
  • Dividers with labels. Color-coded ones work well.
  • Inserts with pockets for loose documents
  • Hole-punch
  • Pen or marker
  • Colored paper
Organizing Your Records from Previous School Years:

1. If your child is older, and has many years worth of documents, start by dividing up the documents by elementary school years, middle school years, high school years.
2. Separate the documents in piles by the following categories:
a. IEPs
b. Assessments / Evaluations, Independent Reports
c. Progress Reports, Report Cards, Statewide Testing Results
d. Discipline records, behavior notes, behavior logs, etc
e. Correspondence, communications and emails
f. Other documents
* If your child has applicable medical needs, or other areas, you can add additional categories as needed
3. Within each category, put the documents into chronological order
4. Make labels for each section of your binder using the file dividers. The labels should correspond to the above categories. i.e. Make labels for "IEPs" "Evals" "Progress" "Behavior" "Correspondence" "Other"
5. Put documents into sections in chronological order, using a single colored sheet of paper between each separate document.
* Dividing records by category has the benefit of enabling you to easily find information in your child's files and track changes in IEPs, etc from year to year. Other methods could include dividing by school year; or simply putting all documents in chronological order with an index.

Tips for Setting Up a System for Current School Year:

1. Start with labels for your second binder that match the categories discussed above. Throughout the school year, you can add documents to these categories as you receive them, which will make it easy to transfer them into your archiving binder when the year is over.
2. Add an additional divider labeled "Notes." In that section, add blank paper or some format to use as a log or journal throughout the year. Make notes of any phone conversations, meetings or other discussions with teachers and staff regarding your child's educational program.
3. Insert a folder that can be used for forms and other communications that you need to sign and return.
4. Use either the front pocket of the binder or an insert to hold a contact list with teachers, providers, IEP case carriers, district administrators, your advocate, and others who are important to the development and implementation of your child's IEP.
5. Add additional dividers according to your needs.
6. If you can print out a school calendar, put a copy of it at the very beginning of this binder.

Remember that the goal here is to make this system easy for you to utilize and access, so organize in a way that works best for you!
02 Jun 01:08

The #1 Way to Improve Reading Comprehension

by Marlene

What’s the #1 way to improve reading comprehension? Well, it’s super complicated and I almost don’t want to tell you for fear of scaring you off. 

Just kidding. It’s not complicated at all! The best way to improve reading comprehension is by helping kids improve their vocabulary. That’s it. Sounds so simple right?

Here’s the thing though. The more words kids know, the better they can comprehend what they are read.

But the issue is, fitting in vocabulary instruction into your already busy schedule.

But it’s doable!

Let me share some ideas for ways you can fit vocabulary into your day. You can try all of these or just the ones that are best for you and your students.

3rd-grade-reading-comprehension-2

Read Picture Books

One way to help kids improve their vocabulary is by reading picture books and having kids figure out difficult words in context. Reading a picture book can not only help you teach context clues, but you can use it in conjunction with reading skills.

Word of the Day

Another way to fit vocabulary in is by having a word of the day and see how many times kids can use it throughout the day. Pick a tier 2 word each day and write it on the board.

You might want to plan out all of the words for the week ahead of time so you don’t have to search for a word each day. They can even come from one of the picture books you’ve read!

Challenge students to use the word as much as possible and have a contest to see who can use it the most in one day. 

Their prize doesn’t have to be anything that costs money. Winning the challenge can be enough motivation for 3rd graders. 

Find Synonyms and Antonyms 

Have students find synonyms and antonyms for the word of the day. This increases word knowledge to 15 words a week for a 5 day school week. Discuss them and talk about why the words mean almost the same thing or the opposite.

They can record them in a journal to keep track or put them in a word jar. Discuss synonyms and antonyms during morning meetings or at dismissal. 

Not only are the kids being exposed to more words, but they’re also practicing the reading skill of synonyms and antonyms.

3rd-grade-reading-comprehension-3

Write Sentences

Another way is having kids write sentences using the words they learn in class in their own context. This helps them make even more meaning and helps them retain the words.

They can write these sentences in vocabulary journals or on an ongoing Google document. 

When kids use words in their own context, they are more likely to comprehend the word meanings and remember them. 

3rd-grade-reading-comprehension-4

Use Pictures

Kids can draw pictures for each of their vocabulary words. They can even add them to sentences if they have a vocabulary journal. 

Helping them see the meaning visually helps with retention. For ESL kids, provide pictures that can help them understand the words when you teach the words.

Another option is to display a picture and 3 words. Ask the students which word they think goes with the picture and why. Asking them to explain why the picture goes with the vocabulary word can help you clear up any misunderstandings.

There are so many ways to fit vocabulary into your day. You’ll notice 3rd-grade reading comprehension improve greatly when you implement vocabulary regularly into your schedule.

Would you like some free vocabulary resources to use with the book Each Kindness by Jacqueline Woodson? You can download your FREE copy HERE!

This a great book to start the school year with and you’ll have vocabulary lesson plans all set to go!

The post The #1 Way to Improve Reading Comprehension appeared first on .

02 Jun 01:07

SO THANKFUL AND HERE COME THE HOLIDAYS!

by Freckleteacher
Hello all!  I am so sorry that I have been neglecting my blog, but happy to say I have been working and playing hard!  This past summer was really tough for my family and I, but thankfully things are looking much better and I can return to some fun passions like blogging.  I have always been reading other blogs and getting great ideas as well as buying amazing things on TpT.  That didn't stop! I just didn't have the extra energy to post on my own blog.  I will also admit that I feel less motivated to post because I don't sell on TpT. It seems that many of my favorite blogs are written by creative and hard working teachers who sell great units on TpT.  I'm just not ready for that, nor talented in that way.

Anyway...I hope to post weekly and share some ideas and things that I am doing in my classroom.  So many changes at my school that it is very overwhelming, but exciting!

Here are a few of the newset things I am doing:

  • I am using Aimsweb for benchmark assessments and just starting to progress monitor several of my low babies.  Lots of work, but so meaningful!
  • I have 2 ipads in my room now and I am loving apps like Reading Raven, Teach Me Kindergarten, Monkey Math and ABCMOUSE.com
  • I am using ABCMOUSE.com in the classroom and have sent invites to my students so they can use it at home.  What an awesome site!
  • I am doing Debbie Diller style Literacy Workstations.  My students work in pairs and I love it for the most part.  They are getting much more independent and I am ready to begin Guided Reading and small group work.
  • I used Sign-up Genius for conference sign-ups and I loved it and so did my parents!
  • We just got on board with Gmail as a district and that was a big change.
  • New principal, new kinder partner (we still share a classroom and do AM/PM) 30 students
  • Our District is beginning to put pressure on us for beginning Common Core (I know we are behind!)
  • Rumors have begun that we will be adopting Treasures for next year and I am both scared and excited. (any thoughts on Treasures would be greatly appreciated!)

So much new stuff and yet I am loving my class and my job!

I just got a new Windows 8 laptop with a touchscreen so I can do my assessments on the go.  It is really cool!!!!

Well, thanks for reading my post and I hope to get back into posting photos and such soon.  I use so many wonderful products from bloggers and I hope to share links to their work. 


02 Jun 01:06

Shifting The Balance: How Comprehension Begins

by Greg Smedley-Warren
Ya’ll! I am so excited to join my friend Abby from Kindergarten Chaos for our annual summer book study. This summer we’re reading the book, Shifting The Balance. We have…
02 Jun 01:02

Teacher Prep Needs More Focus on Students With Disabilities, Report Says

by Corey Mitchell
To their detriment, teacher preparation programs 'do not center students with disabilities in their curriculum,' a new report from the Center for American Progress concludes.
02 Jun 01:02

Just in Time: a Resource Hub on Remote Learning for Special Education Students

by Corey Mitchell
Nearly 30 disability rights and education advocacy organizations have launched a new resource hub and online network designed to help special educators during the coronavirus crisis.
02 Jun 01:02

Autism Amid Uncertainty: Expert Advice for Parents and Teachers

by Corey Mitchell
A leading autism researcher and former special education teacher offers advice to help students cope with the abrupt changes brought on by the novel coronavirus outbreak.
02 Jun 01:02

Virtual IEP Meetings: A 6-Step Guide for Parents and Teachers

by Corey Mitchell
A new resource offers tips on how to keep Individualized Education Program meetings focused and on-schedule.
02 Jun 01:00

An Inside Look at My Classroom Centers

by noreply@blogger.com (Considerate Classroom)
I often get asked how I keep up with it all!  Sometimes I actually wonder this myself, but I will say one of my key timesavers is the way I organize my classroom centers. 

Each week we focus on a letter and a number.  Each day, we do fifteen to twenty minute rotations at the literacy center, math center, and art center to work on concepts related to the letter and number of the week. 


As you can see in the photos each center is also detailed with a color. Red is literacy, orange is art, and blue is math.  This helps our students know where to go for each activity as the colors are used on the schedules of students who are not yet readers.  


At the literacy center the students practice writing the letter of the week (with the help of Heidi Songs and Handwriting Without Tears concepts).  Then they make and read a story about the letter (with the help of The Printable Princess). Then they identify words that start with the letter (with the help of Crystal McGinnis' I Know My Alphabet Sounds).  These three steps are done using a three drawer worksystem so students know how much work, what work, and when the work is finished as suggested by the TEACCH model.  


Students know that their work is done when they have completed the work in drawers A, B, and C.  For most the drawers themselves are enough for them to understand how much work but for some we add a picture frame to mark off each activity or a match to match icon system for those that need movement, as they stand up and match the icons to the drawers, then bring the contents of the drawer back to table and sit down to work.


Notice that each drawer also has a detailed description of what to do with the contents of the drawer this so staff can support students at each center in a consistent manner.  

But how did we make it simple to switch out materials at the end of the week?  By filing them in a Letter of the Week Bin that is stored on top of the metal cabinet at the literacy center that doubles as a magnetic letter wall and storage for other letter and literacy materials.  


Also inside the bin are letter of the week interactive letter books by Gabriella Dixon from Teaching Special Thinkers for the library center and art projects that are made at the art center each day.   In order to have the materials for the art projects ready for each week, I put them in my staffs' to do tube to work on during free moments a week or two before each letter is the letter of the week.  Then they go in drawer three (the STOP THIS IS FOR TEACHERS drawer) at the art center for future use. 


In drawer one, we have each day's art project and in drawer two we have art choices for the week that  students can play with after they finish each day's art project.  Note on Mondays the students do not have a daily art project as they simply learn how to use and play with the art choices of the week.  Then on Tuesday they do an art project with the capital letter, on Wednesday they do an art project with the lowercase letter and on Friday they make an alphabet zoo letter to add to their alphabet book.  
(On Thursday's our students have the privilege of doing adaptive art with our building's art teacher!)


Note the Friday art projects are stored in a small file system on the cabinet by the art center so we can simply begin alphabetizing each students' book as we complete it page.


That's all I have time for today, but stay tune for how I organize the math center and other classroom areas!

Happy Organizing, 
Lindy

02 Jun 01:00

The Power of Flexible Seating for Students with Autism

by noreply@blogger.com (Considerate Classroom)
Do you have students who struggle to sit at their desks?  If so this post is for you!

This year, we started the school year with several students who struggled to sit at their desks, let along do desk work and participate in classroom activities. As my colleagues and I began to brainstorm how we can help these students, we began reading about the Flexible Classroom.   

In taking this concept a step further, I began to think about students with Autism.  Many students with Autism have overwhelming sensitivities and preferences within their environment.  For example, one of my little gals hates hard surfaces, every morning when we start group she resists joining us.  For several reasons, number one their are too many people, number two it can be too loud and unpredictable, and number three she hates being confined to a desk with a hard cold chair. By the way I didn't come up with this conclusion just by watching her behavior, I also had a little help from Naoki Higashida after reading his book, The Reason I Jump.  

In the book Naoki shares many examples of why children with Autism have certain preferences and unusual behaviors.  After reading it, I had an overwhelming sense that our students with Autism do the best they can in each moment but sometimes the environment is just too much!  


By offering alternative seating, we can take some of the discomfort and hardship away so they can perform even better in each moment.  For example for the little girl I described above, we introduced several different chair options.  In doing so we learned that she prefers to sit in soft chairs that have some give and allow her body to sink in.  We started allowing her to use a Saucer Chair pulled up to her desk.  The chair itself was super comforting for her but when pushed up to the desk, she wanted nothing to do with it so instead we offered her a Big Joe Chair from Wal-Mart.  

It worked like a charm but was not conducive to being pushed up to a desk so I bit the bullet and removed her desk completely.  I say bit the bullet because this was a big step for me.  I am very type A and I want everything to be in perfect harmony.  By having one student sitting on the floor in a different seat than her peers what would others think, how would that look.  But after getting over my own personal feelings the chair turned out to be the best thing ever!  


The student is now able to participate in group comfortably and share what she knows in a whole group setting.  Her verbal skills have started to blossom in front of her peers and she is able to manipulate the Smart Board and use her morning lap book more consistently. Prior to adding the chair, she would either hum loudly, chew on her chewy and stim or be so overwhelmed by the whole experience that she would request a break.  

Now she is participating at a level equal to her peers, especially since we added this velcro white board to use as a table top for her to write.  (To make it my husband purchased a White Panel Board from Home Depot and cut it to size, then I added heavy duty soft velcro on the chair and hard on the back of the board.)  


We still work on in seat desk behavior other times throughout the day as we know at some point she will be in a general education classroom and other environments where flexible seating is not available for one reason or another.  But we no longer expect in seat desk behavior from her during large and small group activities because at this time these activities are hard enough without adding the element of a desk.  Instead we expect in seat desk behavior during preferred activities such as looking at alphabet books and using the iPad.  Over time the success of sitting at a desk for preferred activities will hopefully generalize to other activities throughout her day.

Until Next Time, Happy Flexible Classroom Making!
Lindy  

02 Jun 01:00

Milk Delivery with an Academic Twist

by noreply@blogger.com (Considerate Classroom)
Several months ago,  I shared a few of my favorite classroom jobs.  Today I bring you one more jobs- Milk Count!

Originally, my students were doing one to one correspondence with the milk visual below that sat inside dish tubs.  Students would deliver the dish tubs to the three kindergarten classrooms at snack using our delivery cart.  (NOTE: There are more than 12 students in each kindergarten class but only those that choose to pay for milk do 'special snack milk'.)


At semester I realized it was time for a revamp.  Although the students the job was designed for have not mastered one to one correspondence, with 100% accuracy they needed a change.  After a little brainstorming with my friend Tasha, we came up with this.


Now my students are able to work on looking at a chart for information. . .

  
Then transferring that information to a number line on our delivery cart made of duct tape and a permanent marker. (Note the number line only goes to 10 so our students have an opportunity to do real world addition as they count out snack for Kindergarten C since they need 12 milks.  Also note the numbers on the chart are written with a vis-a-v so my staff and I are able to change the numbers on the count if students are absent or if we want them to use a different set of numbers to get to 12 as many of my students will start to memorize that 7+5 is 12.)    


After finding the number they need on the duct tape number line they mark it with a bulldog clip.  


The students then simply line milk up to that number.   Next they have a second opportunity to count as they errorless-ly put the milk lined up on the number line into the three milk tubs (one for each classroom- Kindergarten A, Kindergarten B and Kindergarten C).  

The milk then gets put in our fridge until snack time.  Then our kindergartners deliver the milk to the corresponding classrooms yet another opportunity for academics as they match milk tub A with classroom A, and so on and so forth.  

Our delivery cart gets used for many other jobs throughout the day!  The cart is simply a repurposed technology cart that I added weights to- to help ground the kids, keep them from going to fast and give them some sensory input!  Stay tuned for more ideas using the cart as well as another job Tasha and I modified for this semester.

Best wishes, Lindy

02 Jun 00:59

Classroom Tour Part 2

by noreply@blogger.com (Considerate Classroom)
Time to take a look at room two of our kindergarten through fifth grade life skills classroom.  Click below for the video tour!


This room is more small group and center based.  Our kindergarten through first grade students work through a rotation of teacher led and student led activities twice a day in this space.


This took three adults, and significant planning, zoning, scheduling and structuring for our little guys, however by the end of the year they rolled through it like rock stars!  Each working at their own individual level on everything from following one step directives and attending to teacher instruction to reading sight words and adding and subtracting with objects.


The best part of the whole thing is that students learn how to manage their time safely and independently at the technology center (iPads and laptops), independent work area, and self-directed choice area between teacher led times.


I will get into the logistics of that later but I wanted to draw attention to it because so often I hear "I don't have enough staff to teach at each student's individual level."  By training students to work independently, we are able to maximize quality teaching time! Each student can work one on one with a teacher or in a 2 to 1 ratio depending on their needs and what they are working on.  If they need to work on turn taking, waiting or social skills we pair them up with a friend with the ultimate goal of getting them out into the inclusion setting as they gain skills.   If they are at the early stages of learning, and need to work on following teacher directives, in seat behavior, communicating appropriate, etc then their time at the teacher rotations is on a more one on one basis.

Until Next Time, Best Wishes!
Lindy

02 Jun 00:59

What I Need for My Work Today? (An Executive Functioning Skill)

by noreply@blogger.com (Considerate Classroom)
Preparing for an activity and getting the materials out that you need takes executive functioning skills that can be difficult for young children and students with special needs.  By providing them with a visual support system to prepare for center and desk work students gain the life skills necessary to be responsible and independent!

For example, at the art center, we have a box of supplies for each work area.  In each box, we have the materials students need for art instruction: crayons, markers, glue stick, pencils, colored pencils, and Elmer's glue as well as a What I need for art today tub.


When students come to the art center, they take a look at the What I need for art today board, and get the materials out they need.  Then they set them in their What I need for art today tub and begin their art project so not to be overwhelmed with a full box of supplies.  


Note the board is magnetic and all the visuals for the center are printed on magnet paper for easy use. Also note that I have leveled the visuals for student who are readers, non-readers, and emerging readers.

Because the visuals are all magnetic, we simply post the extras on the metal art supply cabinet so staff can switch them out depending on the daily activity and student needs. 


(Don't have a metal supply cabinet, no problem a cookie sheet can serve the same purpose!)
A similar system is used at the math and reading centers.  The only difference is that the items are stored in pencil bags with a visual on the outside that says what is inside.  The bags are stored in the chair pockets of each student chair.


These systems work so well at centers, I plan to use it for desk work next year as well!  Each student will have a pencil box with needed supplies in their desk to pull from.

If a student is missing a supply that they need, they can ask to borrow a friends using this matching language board.  A great communication and social opportunity for students!  (Sometimes something we manipulate so a student has to problem solve and practice the skills of asking for what they need.)


Because the visuals remind staff and students what should be in each box or bag, the supply systems also serve as a weekly job for students who are working on problem solving, assembling items, and stocking materials as they check to make sure all supplies are in the boxes and bags and restock as needed using our art supply area pictured below!


To ensure that students have all the crayons and markers they need, I created little checklists for markers, crayons, and pencils.  They are in word form for readers, and picture form for non-readers.


Because the cardboard marker, pencil, and crayon boxes you get them in at the store tend to break.  I tape these checklists to more durable containers to last longer.  I use bar soap containers for our crayons, zipper bags for our markers, small pencil boxes for our colored pencils, and toothbrush holders for our pencils.  The beauty is that this offers students' purposeful opportunities to practice zipping, buttoning, and opening snap containers.

Want to use these supply visuals in your classroom, click here to purchase them from My Teachers Pay Teachers Store!

Until next time- Best Wishes, Lindy

02 Jun 00:58

Photo Reader’s Theater – A Fun Online Teaching Activity!

by Site Admin

Photo Reader’s Theater – A Fun Online Teaching Activity!


By:

Cynthia Hitz

(Originally posted on Cindy’s blog)

Teachers, how’s that online instruction coming along?…

Do you wake up with that same excitement for teaching that you did before Covid-19 took over our lives, and the news, and the supermarkets, and … our classrooms? Or, if you’re like me, is the task of trying to provide the best educational experience for your students in a completely different format starting to wear you down and squeeze some of the joy out of teaching.

If so…READ ON!

The time is ripe for a fun activity that will allow your students to show their creativity and enjoy their classmates’ creativity. I have an idea on how to make that happen for your students! (And if you keep reading, you’ll see how Fluency Matters is REALLY going to make this fun for all of us!)

This week my daughter, (in-law…but she’s way too precious to officially add that to her name), who, by the way, is the most amazing elementary art teacher that exists, shared pictures of an art assignment on Facebook that she made for her students. When I saw the pictures I immediately started thinking about how I could use this with my students. 

Blog 4 16 Image 1

[Cindy’s daughter in-law’s class assignment]

For the assignment, her students need to find a famous artwork, or one that they like, and recreate it in photo form using the materials they have at home.

Currently my Spanish 4 and 5 students are reading a book as an ecourse on Fluency Matters’ website. They are reading Bananas, written by Carrie Toth. I grabbed my hard copy of the book and paged through it, looking at the illustrations and BINGO!…the idea of Distance Learning Photo Reader’s Theater started to formulate in my mind.

What is Distance Learning Photo Reader’s Theater? Whatever book you are reading with your students, ask them to recreate one of the illustrations that are in the book. I was careful to instruct them NOT to ask their friends to help, but they could have family members join in.

(Reminder: Don’t post the illustrations from the book unless you have written expressed consent from Fluency Matters! I checked with Fluency Matters before publishing this post on my blog to make sure I could use the illustrations.)

Blog 4 16 Image 5 Bananas

Blog 4 16 Image 3 Bananas

The photos are rolling in and, I have to say, this is making my day! I love that the students have the chance to do something super easy, creative and FUN related to the text. This is exactly what both they and I needed after 3 1/2 weeks of online teaching.

My Spanish 1 students are starting Fluency Matters’ ecourse Brandon Brown quiere un perro today. That book has loads of illustrations that will be a snap for students to replicate. Students love sharing pictures of their pets and this will give them that opportunity. If they don’t have a dog, they use what they have available – a cat, a turtle, a stuffed animal – all of them are possibilities!  

If you live in an urban area, tell the students the pictures do NOT have to be outside. For example, they could replicate the illustrations from Bananas INSIDE their homes and it gives the parents a chance to get involved in the assignment too. If they don’t have a younger sibling for the picture, use a teddy bear!

There are several ways the teacher can then use the photos after they receive them. (But remember: You have to get parental permission to share the photos online!)

1) Share them in your Learning Management System and let the students SIMPLY ENJOY the photos of their classmates!

As far as I’m concerned, that’s as far as you need to go, but…if you want other ideas or your administration will want more than that, you could…

2) Put the photos on Google Slides or PowerPoint and during a live online class using Zoom or something similar, use the photos to retell parts of the story and provide additional comprehensible input about the story.

3) Make a matching activity with the student photos and sentences from the book or sentences that you create.

4) Upload the photos to Kahoot and use them during a live session on Zoom. For example, the Kahoot page will show a photo and you can have the students choose which answer…

– correctly describes the photo

– is the only sentences that does NOT describe the photo

– is the thoughts of one of the characters

– is an event that happened immediately before or after the photo

You don’t have to limit the student created photos to the illustrations in the book. You could direct students to the page number of one of the illustrations and ask students to create a photo of an event that happened after that illustration; or give them a chapter and ask them to create their own photo.

The goal is to give your students the freedom to be creative and share that with your classmates. It will be a fun assignment for them and they will appreciate it. Some…may even thank you.

•••••••••••••••••••••••••••••••••••••••••••••

Cynthia Hitz has been teaching Spanish since 2000 and is currently teaching at Palmyra Area High School, Palmyra, Pennsylvania. She has a B.A. in Spanish and a M.A. in Curriculum and Instruction. She has presented at state and national conferences on teaching with CI and TPRS in high school levels 1-4. In 2011, she was instrumental in converting her school’s World Language Department into a department that teaches with TPRS/CI. Cindy is also a contributing author to many Fluency Matters Teacher’s Guides! Follow Cindy on Twitter @sonrisadelcampo

When we saw Cindy’s student photos, we immediately started thinking about how we could use this awesome activity with YOU!

Cindy and her daughter(-in-law) inspired us to create a Book Giveaway!

Read on if you want to have some fun and get a chance to win FREE BOOKS…

Giveaway dog 1

Would you like to have some fun and enter to win 3 free Comprehension-Based™ Readers from Fluency Matters? We are inviting you to submit an “Art Imitators Photo”! Here’s how:

  1. Re-create one illustration found in the Instagram post from a Fluency Matters Comprehension-Based™ Reader in photographic form.
  2. Post your photo on Instagram  with two hashtags: #FMArtImitators #FluencyMatters
  3. If you are not following Fluency Matters on Instagram, you must follow @FluencyMatters (on Instagram) to be eligible for entry into the Giveaway.
  4. Like the Fluency Matters Giveaway image/post.
  5. Entries must be received by Thursday, April 30, 2020 by 11:59 P.M. (MST), and the winners will receive their choice of 3 Fluency Matters Comprehension-based™ Readers.