This evening I received a question from a reader who was wondering what I use to create the annotated screen capture images that you see in the guides that I produce. I create those images by using Jing which I have installed on my Mac and Windows computers. There are other services that I have tried from time to time. Those services along with Jing are described below.
 Vessenger
, producers of a group messaging system, offers a free program for capturing and annotating images on your computer screen. The free program, called
Snaplr, is available for Windows and Mac. With Snaplr installed you can capture all or part of your screen. Snaplr's annotation tools include text boxes, highlighting, and free-hand drawing tools. When you've finished creating your annotated screen capture you can save it as a PNG file or attach it to an email message in Outlook.

Using the print screen key on your PC or "command+shift+4" on your Mac are easy ways to create a screen capture. But if you want do more and draw or annotate on that screen capture, give
Snaggy a try.
Snaggy is a web-based tool for drawing on, annotating, and sharing screen captures. To draw or write on your screen capture just paste your screen capture image into Snaggy. Snaggy offers tools for highlighting a section of your screen capture, typing on it, and drawing free-hand on your image. You can also use Snaggy to crop your image. When you're ready to share your screen capture, Snaggy assigns is a custom url that you can Tweet, email, or post anywhere you like. Snaggy lets you save your edited screen captures to your computer too.
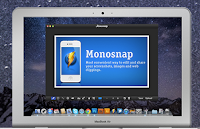
 Monosnap
 is a free screen capture tool for Mac and Windows. Monosnap is advertising that they will soon offer it for Android and iOS too. To get started download
Monosnap. Once installed you can use Monosnap to capture a portion or all of your screen. One neat option is to capture your screen after a ten second delay. After capturing your screen you can draw on your image, type on it, or highlight portions of the screen capture image. You can save your screen captures on your computer or upload them to a free Monosnap account.
Szoter is a free online tool for annotating images that are stored on your computer. You can also use Szoter to capture and annotate screenshots. You can use
Szoter on the web or download the Adobe Air version of it to run on your desktop. Either way you can upload images, draw on those images, and type on those images. When you're done annotating and drawing on your images you can save them to your local computer or share them online through your favorite social networks. Szoter can also be used to capture your screen and create annotated screen captures.
Explain and Send is a free Chrome extension that I have just installed in my browser. The extension allows me to quickly select all or a portion of my screen, draw on it, type on it, and share it. The extension installs in seconds and if you have synchronization enabled (
click here to learn how) it will be available to you on all of the computers that you use. After you have created your screen capture you can share it via email, Twitter, or Facebook.

Pixlr offers a large set of image creation and editing tools. One of the tools that can be quite handy is Pixlr Grabber.
Pixlr Grabber is Pixlr's screen capture tool. Pixlr Grabber is available as an extension for Chrome or Firefox. Using Pixlr Grabber you can capture your screen, crop the screen image, and print what you like. You can also send the image to Pixlr Editor for further editing options.
 Screenr
 is a very simple, easy-to-use tool for creating screencast videos. You do not need to register in order to use
Screenr, but if you want to save your recordings you do need a Twitter account.
Screenr uses your Twitter ID to save your recording and publish it to Twitter (you can opt not to publish to Twitter). The recordings you make using
Screenr can also be published to YouTube or you can download your recordings.
 Screen Castle
 is a simple screencast creation tool that is completely web-based. To use
Screen Castle simply visit their website, click the start button and you're recording. You have the option to enable voice recording for your screencasts. Screencasts made using
Screen Castle can be viewed on the Screen Castle website or embedded into your website or blog.
 Screencast-O-Matic
 is a web-based screencast creation tool similar to Screen Castle.
Screencast-O-Matic allows you to specify how much of your screen that you want to record. Screencast-O-Matic gives you up to fifteen minutes of recording time per video. If you want to include a webcam view of yourself talking you can do that too. To do that enable your webcam and then when you record a small video of you will appear in the corner of your finished video.
 Quick Screen Share
 is a free screen sharing service from the makers of
Screencast-o-matic. To use Quick Screen Cast just go to their website, select share your screen, and enter your name. Quick Screen Share will then provide you with a URL to share with the person with whom you are screen sharing. When that person opens the link you he or she will be able to see your screen.
Quick Screen Share doesn't require you to install anything (assuming you have Java installed) or require you to register for the service.
Show Me What's Wrong is a free service offered by
Screencast-O-Matic. The service is designed to help you help others with their computer problems. To use the service enter your name and email address to have a custom url assigned to you. You then send that url to the person who needs help. The person receiving your email opens the link and then starts recording his or her screen while talking about the trouble he or she is having. When the person you're trying to help finishes recording his or her screencast is sent directly to you.
Webpage Screenshot is a Chrome extension that you can use to capture all or part of webpage. You can draw and type on screenshots you make with Webpage Screenshot. One feature of Webpage Screenshot that is quite helpful is the option to capture the entire content of webpage even if it doesn't appear in your current view of the webapge.
The tool that I use most often of creating annotated screen capture images is
Jing. Jing enables you to take a picture of part of your screen or all of your screen. Once you've captured the area you want in your picture, you can type on it, draw arrows on it, and highlight sections of text within it. To use
Jing you must download and install the free software for your Mac or PC. Once it's installed, launch it and it runs in the background until you need it. You'll know that
Jing is ready for you to use because you will notice an orange ball in one of the top corners of your screen. It takes up very little screen real estate and is ready to use whenever you need it. You can also use
Jing to record a video of your screen. Simply select the area of your screen that you would like to show, click the record button and begin talking.
Jing will capture everything you say and do for up to five minutes.
Awesome Screenshot is a great Chrome, Firefox, and Safari browser extension for capturing, annotating, and sharing screenshots. Once you've installed Awesome Screenshot you can simply activate it from your browser to capture a page or region on a page, draw boxes, draw lines, blur out information, and add text to your screenshot. When you're satisfied with your screenshot you can save it locally or share it via the url provided by
Awesome Screenshot.
Bounce is a neat application that not only allows you to make annotated screen captures of websites but also allows you to instantly share those screen captures with others. To use
Bounce go to their website then type in the url of any website you like and click "Bounce."
Bounce will then create an image of that website on which you can draw boxes and annotate those boxes. You can create as many boxes and notes as you like. When you're done creating notes,
Bounce will provide you with a unique url for your screen captures that you can share with others. If you create a
Bounce account (optional) you and other
Bounce users can annotate the same screen capture.
Capturing and Annotating Your iPad's Screen
To capture whatever you're currently viewing on your iPad's screen simultaneously press the on/off switch and the center "home" button. Your screen capture will be saved to your iPad's camera roll. After creating my screen capture I like to use Skitch for iPad to draw and type on the image. Using the latest version of Skitch for iPad you can register for an Evernote account and then your images will automatically be saved in Evernote. You can
download Skitch for iPad here.
Capturing and Annotating Your Android Device's Screen
If you want to capture your screen on an Android device that is running Android 4.0 or higher you can do so by holding the "volume down" and "power" button at the same time. Then you can share those images to another service to mark them up.
There is one method that I've used to capture my Android tablet's screen. By using
AirDroid you can mirror your Android device to your Windows or Mac computer. Then you can use a desktop screen capture tool like Jing to capture an image of your Android tablet's screen. It's far from being a perfect or quick method, but it works.


