Shared posts

21 Mar 19:01

One Month Unlimited SLT Review (before and after)

by Krista Robertson

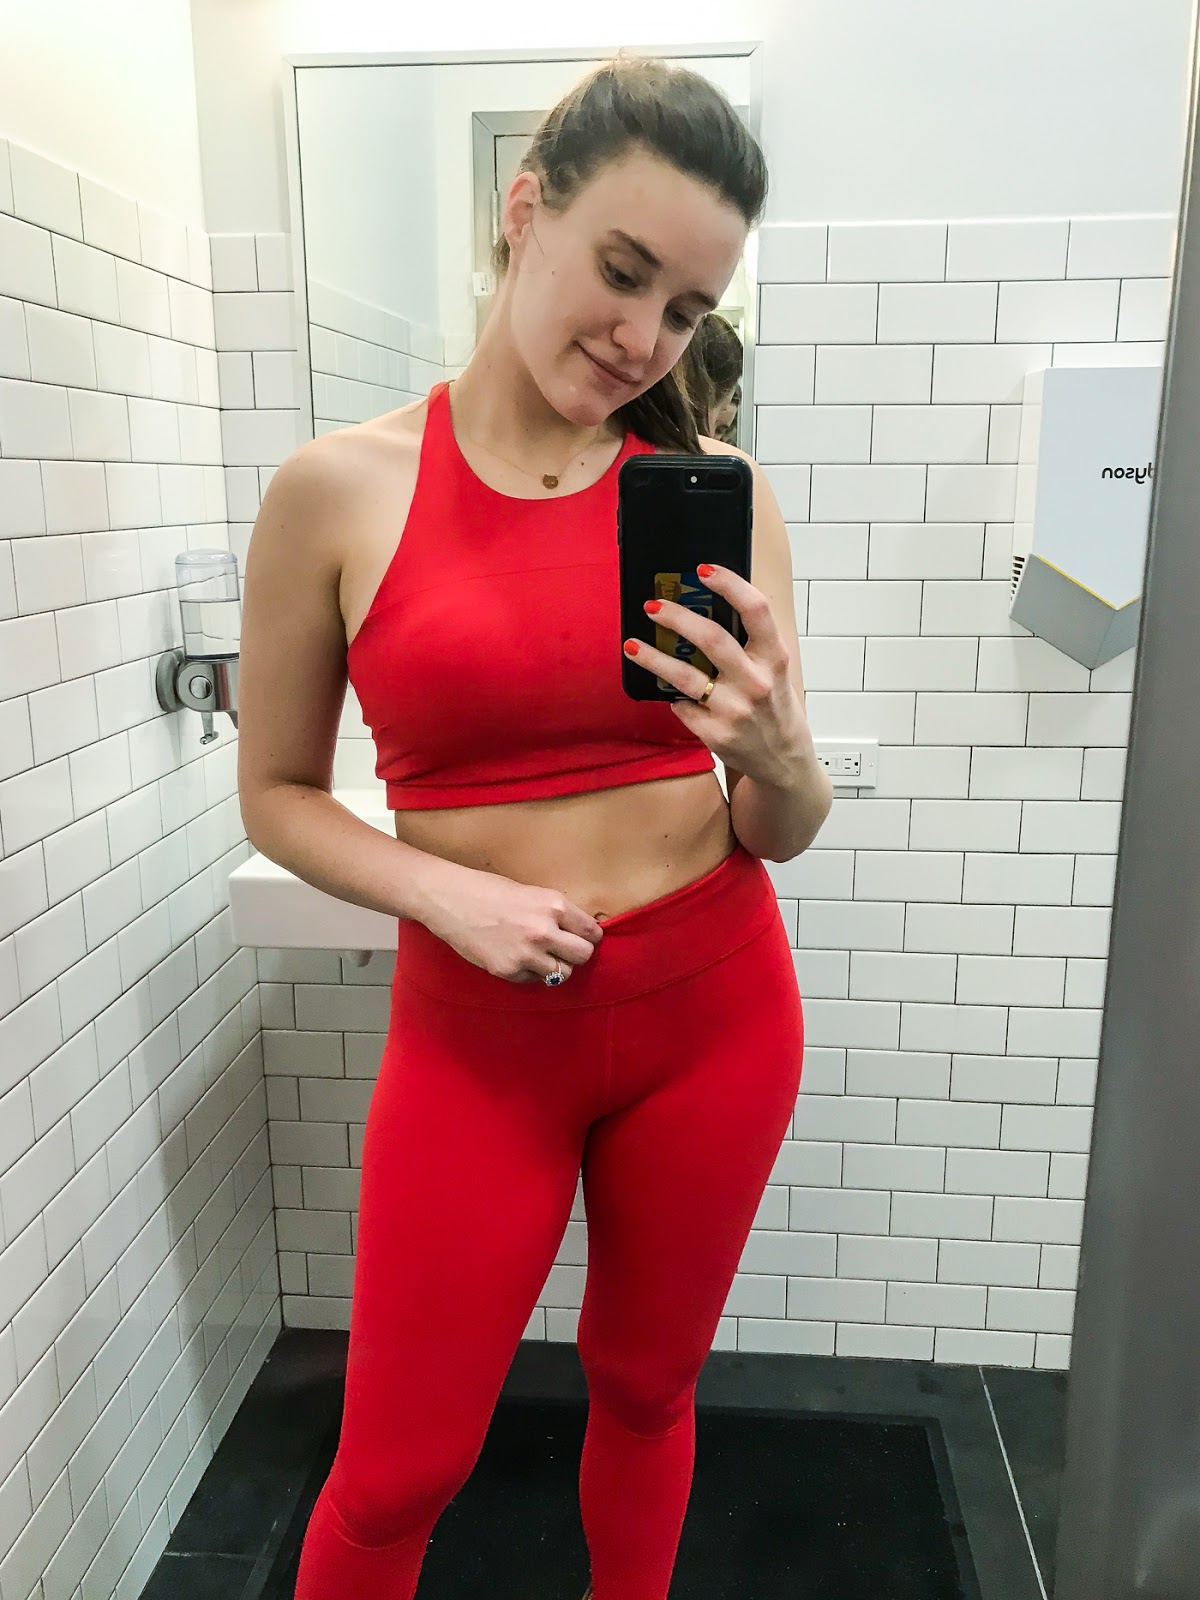
Finallllyyyy it's here! My SLT one month review. I tried out an unlimited month membership and wanted to talk to you guys about how it went! It's long so get ready and make sure you have some time to dedicate to this post!

(you can read my Outdoor Voices review here)

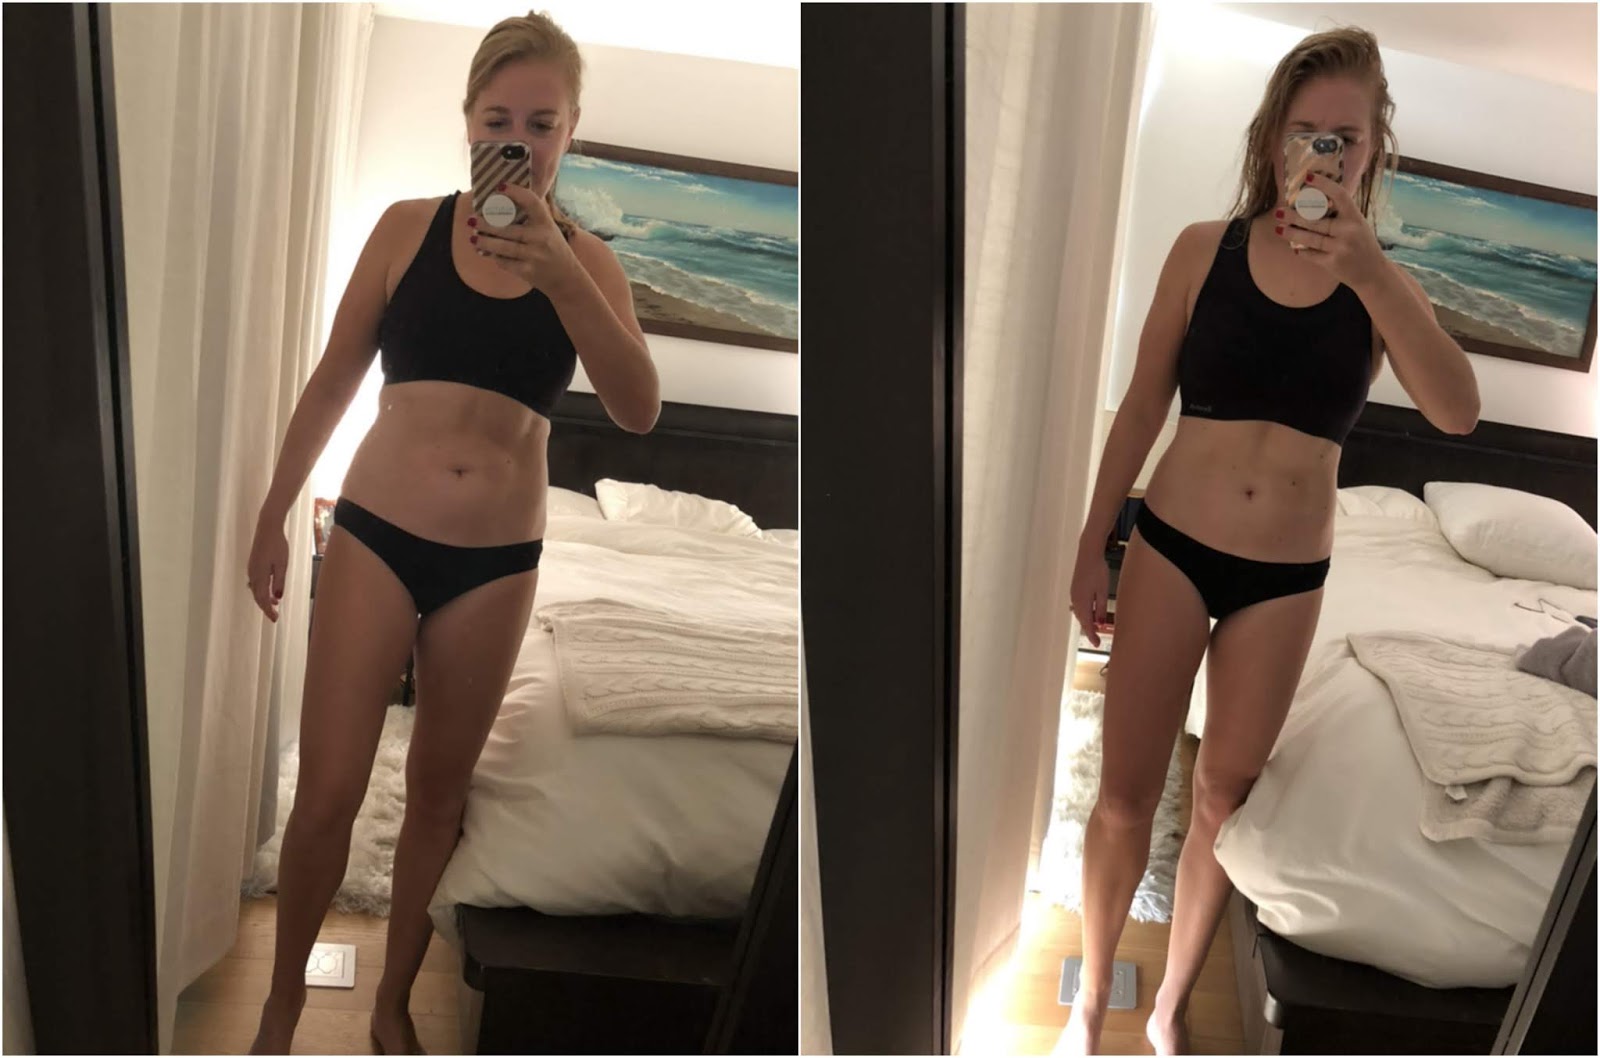
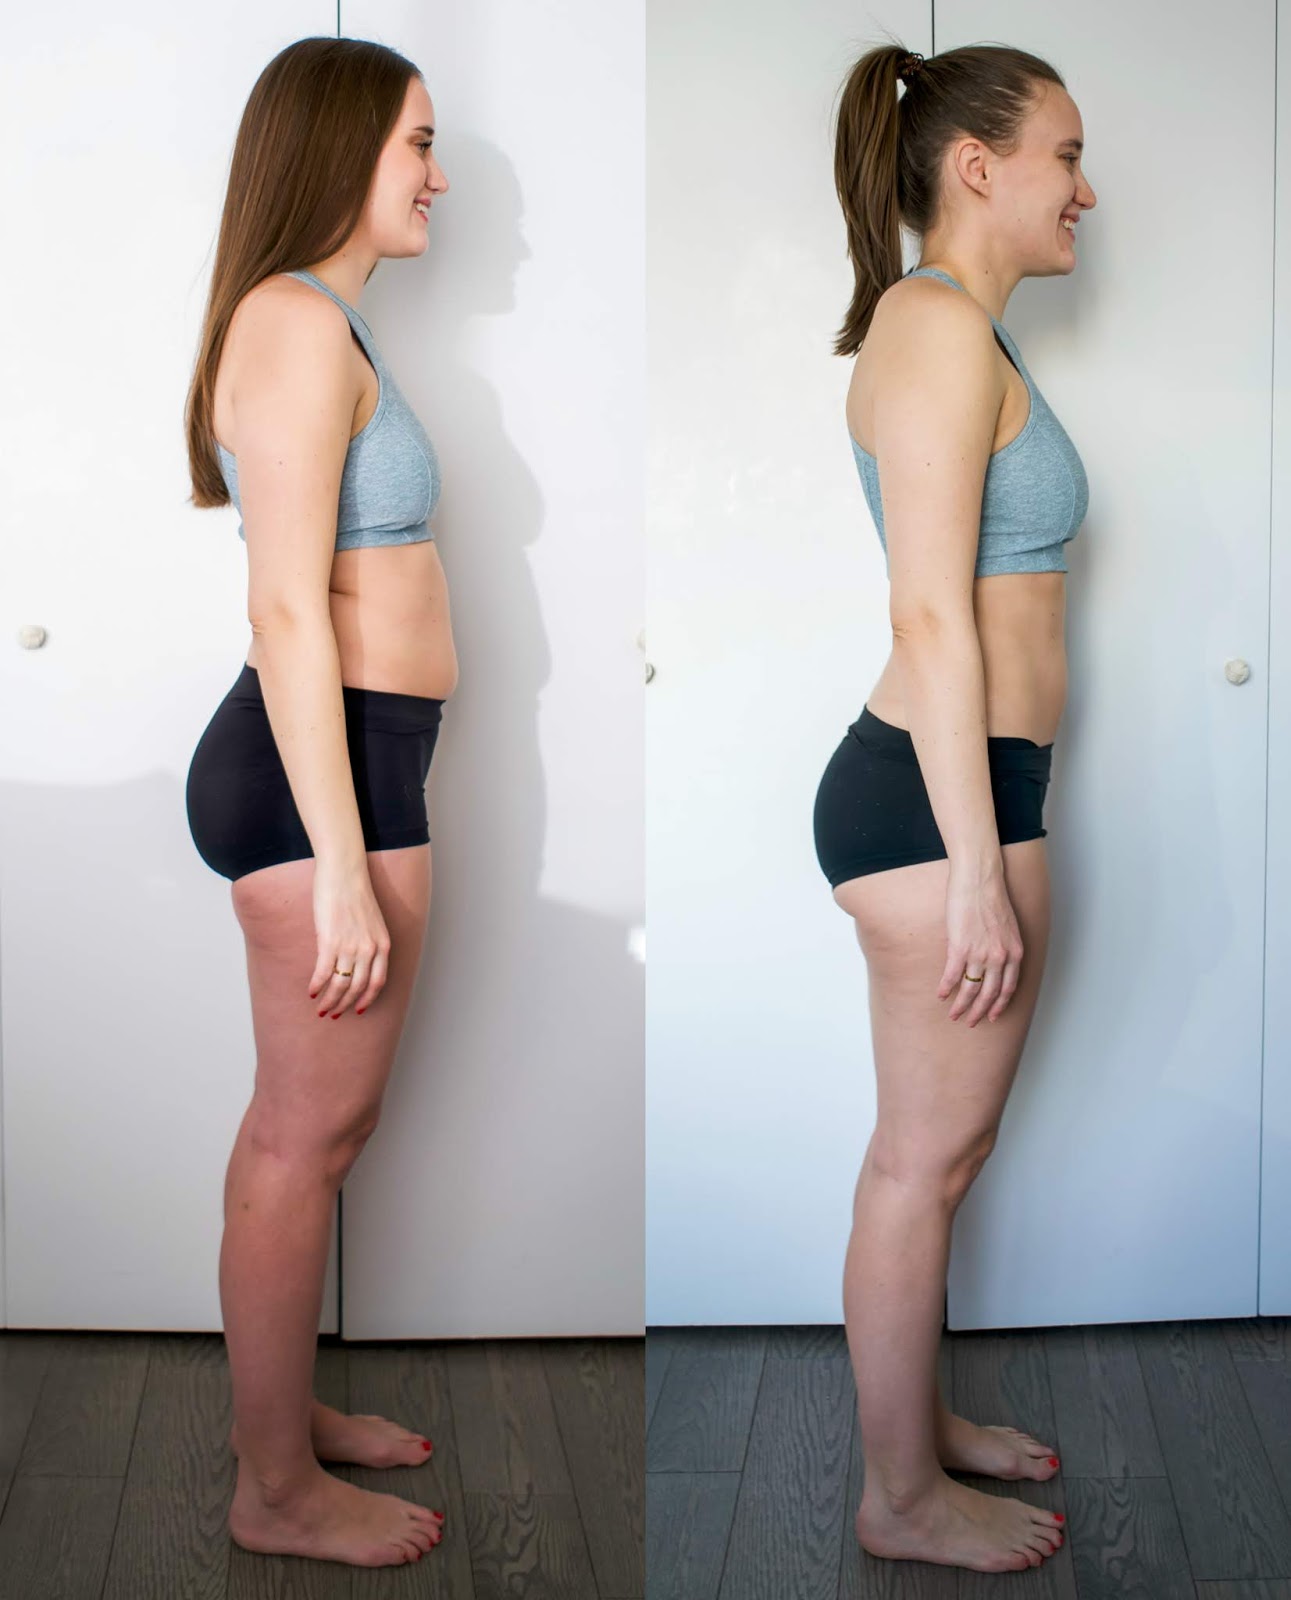
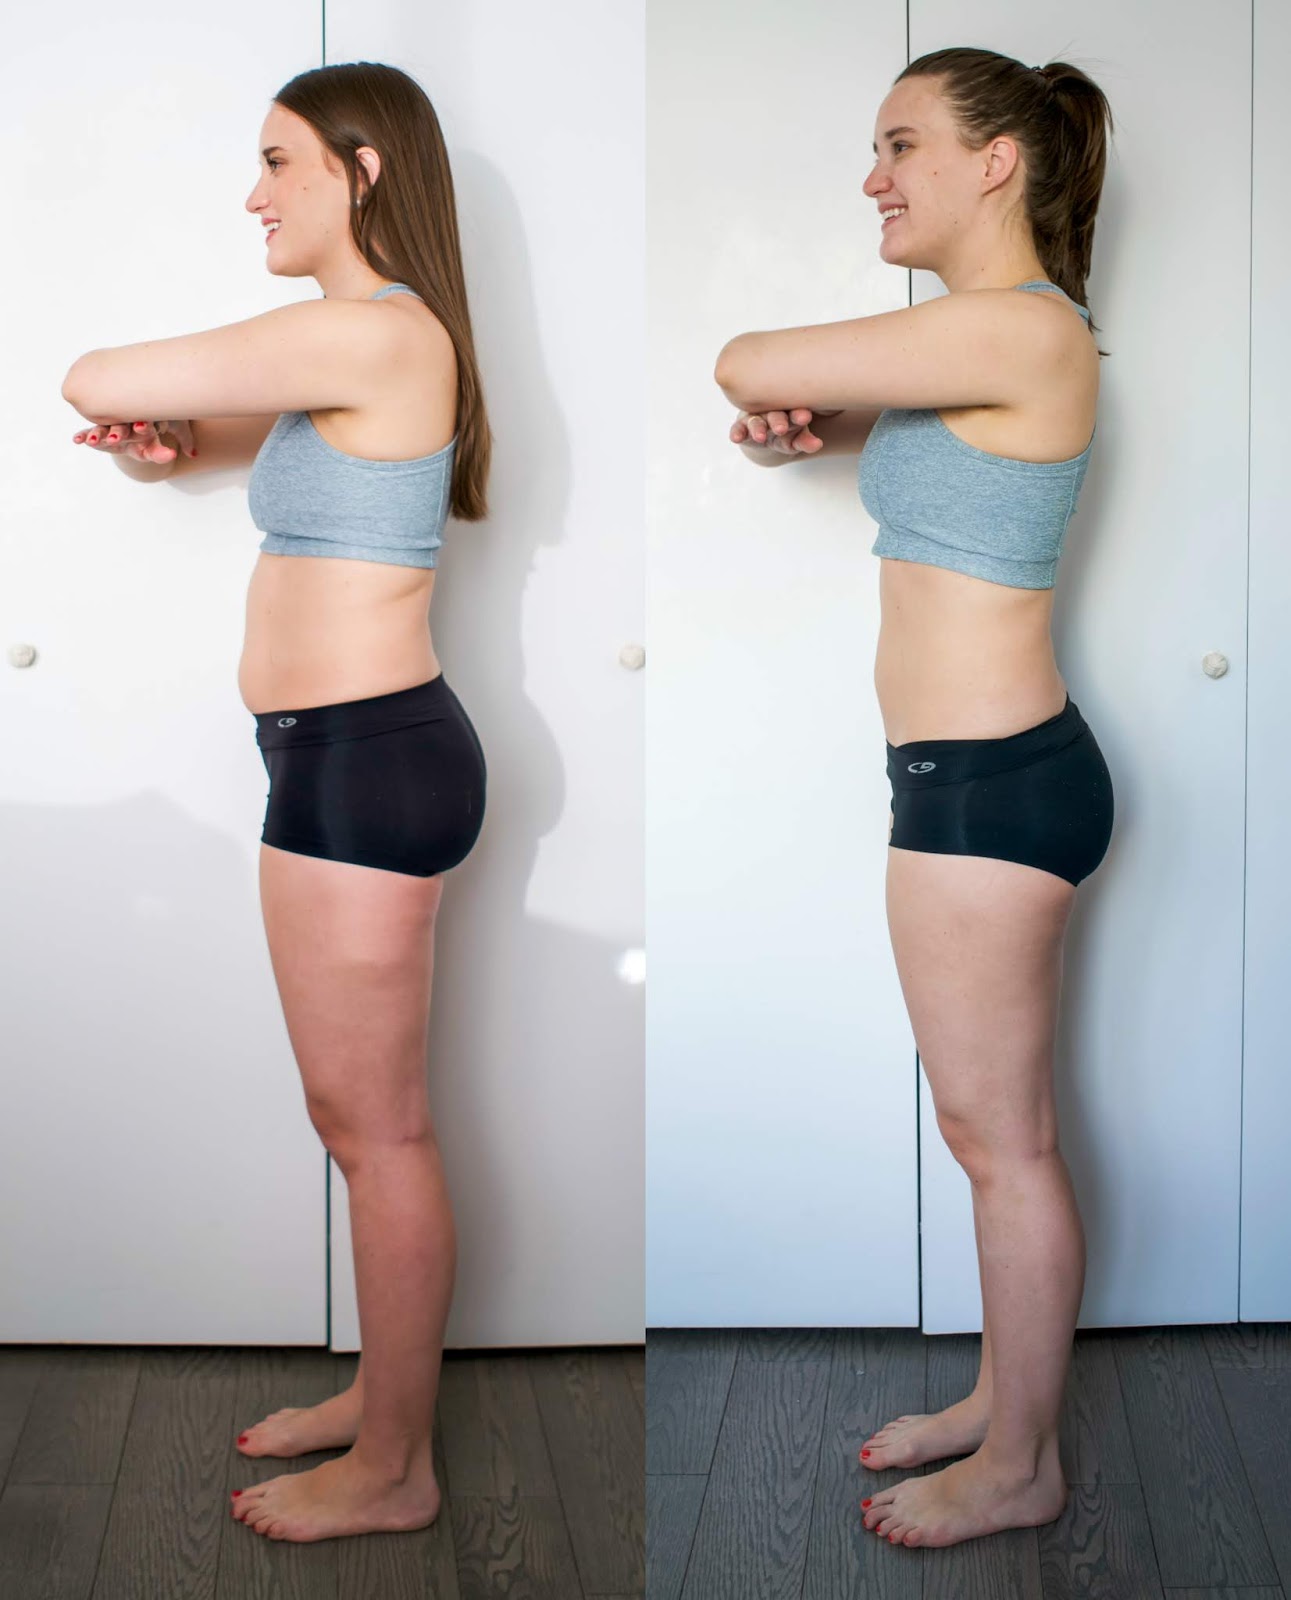
These are the before and after photos. I want to make it clear that I'm flexing in the after photos. I didn't change my diet. I was working out 5-6x a week (which is normal for my current routine) where a majority would be SLT and the rest included barre, yoga and a cardio dance class. To see my full routine, you can read this post here


I first heard of SLT through some friends who were prepping for their weddings last year. They talked about how it was the hardest class with the best results. I took a mental note and thought about it more and more while other friends talked about it or when I would notice locations in the city. You know how that happens -- where one person says something you've never heard about and then all of a sudden it's everywhere?? That was kind of what happened.

In January I was talking with Ashby about workout classes after she came to Barre3 with me and brought up how there are girls who always seem to have the best bodies who do a lot of pilates. You can see how the conversation unfolded in this vlog (at 3:00) but we decided to try a one month unlimited package at a studio in the city.

Obviously SLT was at the top of my mind and I somehow managed to convince Ashby that the most expensive place would be the best to test out (lol). So we did it. We first signed up for an intro two-pack, which is basically two classes for the price of one. We made sure to sign up for beginners classes at two different studios to find out which location worked best for both of us.

After that ended, we dove into the unlimited membership which is $400 a month. EEK! So crazy expensive, we fully acknowledge that. But if anyone is going to spend that much money to test something, wouldn't you rather it be us than you? To really make it worth your money you should go about 10x a month. A traditional 10-pack is $380 so why not do the unlimited package for an extra $20? It's how they get you!

Our first class was good but so confusing. It was the first time we were doing a lot of these moves We were like, "how is this possible???" There were lots of moves where I didn't think I could do it and would just hold it instead of doing the full twist/legs back deal. After our first class Ashby and I both agreed that we didn't give it our all since we were making sure to preserve ourself for what would be to come. And we found we weren't sore the next day either. At our next class we would put more effort into it!

We were not shy in telling our instructors that we were new. One, so they would take it easier on us, but also so they could help us really understand the moves. SLT is a good workout but it can be made easier by not doing the movements properly or going too fast throughout the class. It's SUCH a big difference when an instructor will come over and move your rib cage an inch or have you drop a hip over an inch. You're like "wowowowow that changes everything."

It's not something you learn right away. It takes practice. You remember to tuck your tailbone or tip your ribcage up throughout different movements. You will find that you get better and stronger!

If I'm remembering correctly it took about six classes to feel like I was getting the hang of it. I knew most of the moves. I had a general understanding of how I needed to do them and I didn't feel like a deer in headlights. I would say around class number eight I started to feel strong and around class 10 I started seeing some physical differences in my body.

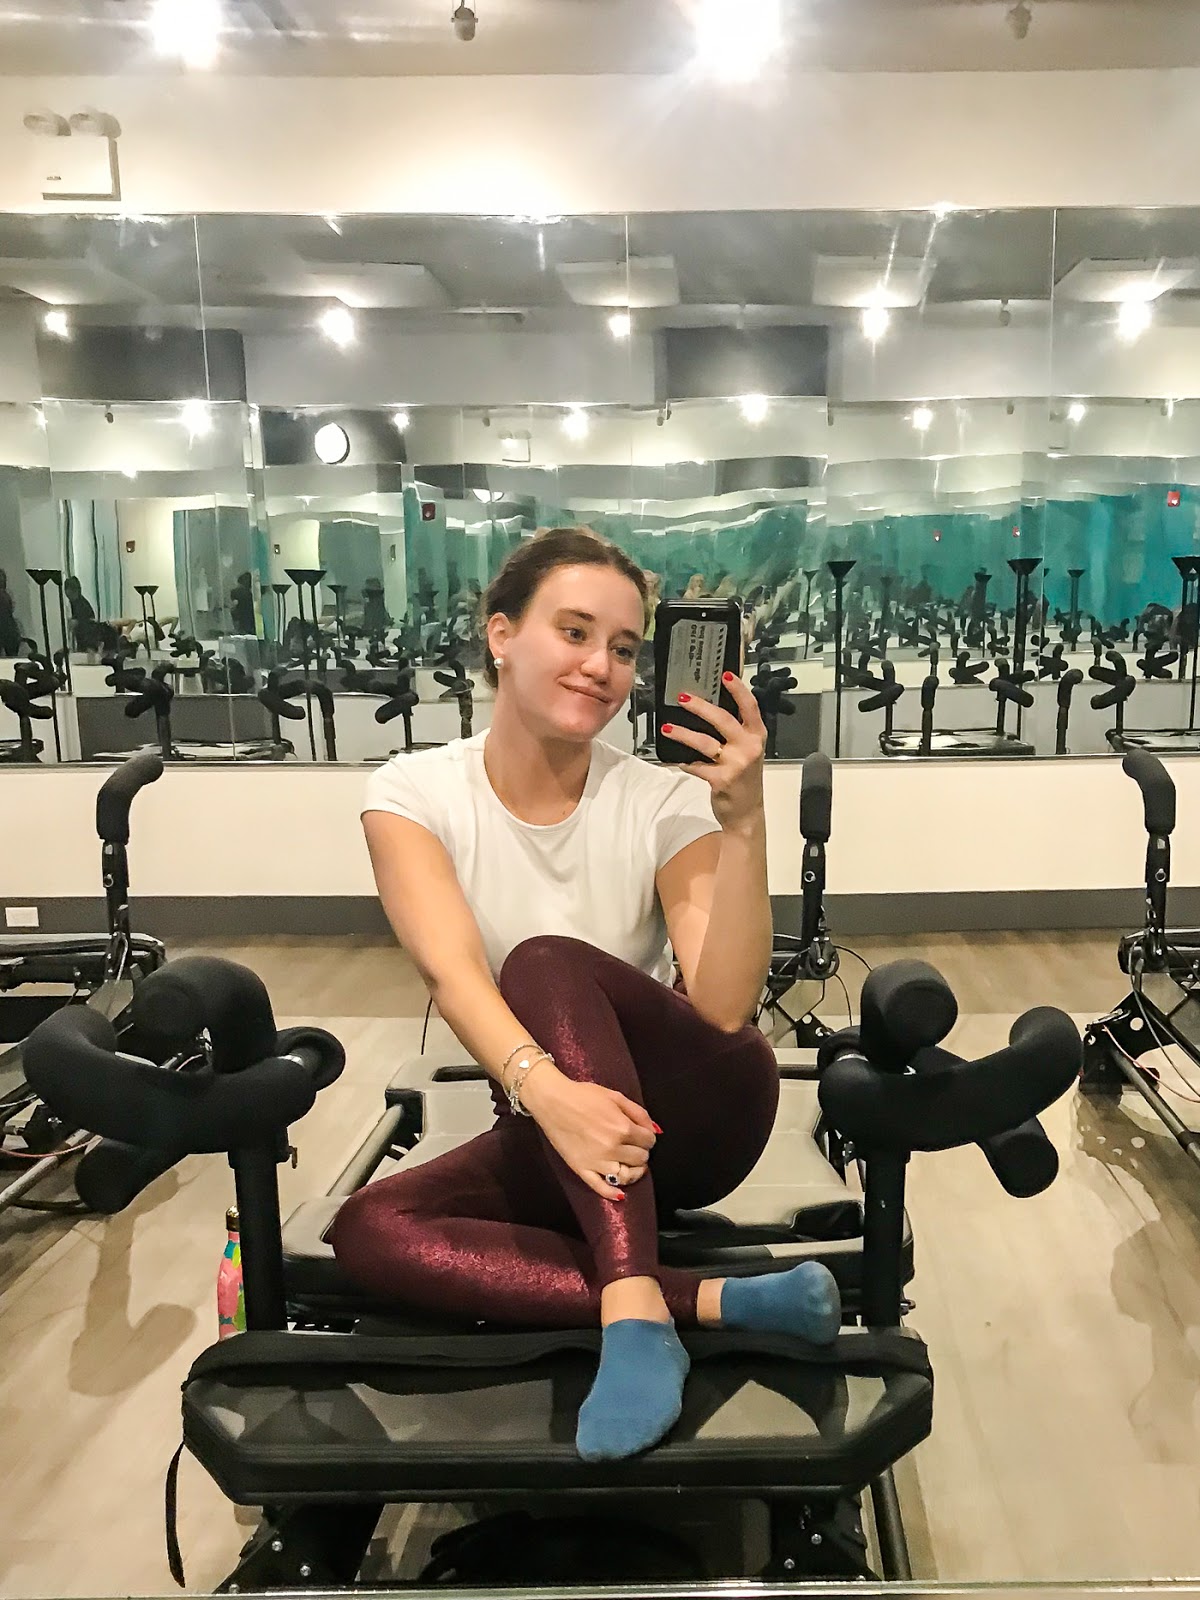
In all, I took 16 classes over the course of one month. That means I spent roughly $25 per class. Which is still a lot but in this city where most things are $30-35 it was pretty good! By the end I really felt good during the classes. I was strong, I knew what I was doing and even though I had gone so much for that month it was still challenging and hard.

That's the thing about SLT. You're moving so slowly and really working muscles that don't see a lot of action. Classes are still really tough no matter how good of shape you're in or how long you've been doing it. The pain is an,  "Oh gosh I think if I go another second I'll snap!" kind of pain but it really is mostly mental. I've never pushed my body this hard before -- especially my midsection. And it's not like you're worn out like you would be after lots of cardio. It's hard in the sense that I can't breathe because all of my oxygen and energy is going to my muscles to lift myself up. I don't even know if thats a good explanation. You just have to try it for yourself to understand!

So you did a one-month trial -- What did you think?
I kind of hate how good this class is. I really saw noticeable changes in my body and especially in my midsection (all the way around). I think it shows in the photos above. It really is a great class and an awesome workout but the obvious drawback is the price. It's so expensive that it's hard to justify even if the results are this good.

Ashby and I have both tried other pilates classes since our membership expired and we've found they aren't really as challenging as SLT. They tend to be much slower paced, have lots of breaks in between moves, and progress faster through movements. I did one yesterday that claimed to be advanced and I just kind of yawned my way through it. There was a challenging move here or there but nothing compared to SLT.

I didn't sign up for another month due to cost, but I did purchase a 10-pack (I know, I know) that I'm hoping will last me March and April. I will subsidize the SLT classes with my other go-to classes like Barre3, Y7 (hot yoga) and 305 (cardio dance class). Closer to the wedding I will sign up for another unlimited month and really focus on that until September.

In terms of diet, I didn't change anything. Ashby did, and she saw some great results as you can see above!!! I'm just not at that point yet. I want to eat what I want when I want and not have to stress over food or feeling guilty. I eat pretty healthy most of the time but I could always be better. I'm not really looking to lose weight currently but rather just tone the body I already have.


READER Q&A 
SO that was a lot... I asked you guys to send in your questions via IG stories and wanted to go through and answer them all below...

These are all reader questions that I will answer specifically about SLT and their NYC based classes. Remember since this is based off the Lagree method, there are other studios where you can get a similar workout and pricing will vary. I would Google your area and see what is available! I know SLT specifically has locations in Greenwich, Boston, Michigan, New Jersey, Philly and all over the New York area (18 locations!!).

Q: How much does it cost?
A: The one-month unlimited membership in New York City is $400. You can see other pricing breakdowns here

Q: Is it worth the price?
A: As much as I hate to admit it, yes. If you go and really get your money's worth (especially with the unlimited) I believe it's worth it.

Q: Will you continue to do the unlimited?
A: I didn't renew after my first month but I plan on going back in July and doing it through the wedding in early September. In the meantime, I signed up for a 10-pack to hopefully last me March and April. 

Q: What made you keep going back?
A: I was first motivated by a challenge I gave to myself to really see if this works. Then I was motivated by Ashby (and our classes together). Then it switched to being motivated to make the most of the cost and ended with being motivated by the results.

Q: Is it as hard as it sounds?
A: This is probably all relative but if you think reformer pilates or pilates in general is hard, then you will find this class challenging. There are modifications for everything but it is a difficult class!

Q: Whats the biggest change you saw?
A: The biggest difference is definitely in my core/midsection area. 

Q: How long before you started seeing changes?
A: I think it was about six or ten classes in before I started to notice my body changing (in the mirror and on the machine in terms of the moves I could do).

Q: What kind of workout is it?
A: I would call it an advanced pilates on a reformer machine. The Lagree website says this: 

The Lagree Fitness Method is a high-intensity low impact workout that is adaptable to everybody. It's the perfect alternative to other high-intensity training options that can potentially damage the joints. Lagree Fitness effectively combines resistance, endurance, core, and cardio training to safely stimulate strength, flexibility, and balance. 

Q: How flexible do you need to be?
A: This is again relative but you should be moderately flexible. There are lunge and squat movements that I would say require the most flexibility. I think, in comparison, you need to be more flexible in Barre and Yoga classes.

Q: Is it crowded?
A: No, there are only a certain number of megaformers (I think 8 or 10 in the location I go to) in the studio and no more people than that. So no, it's not crowded.

Q: How should beginners approach the classes?
A: I definitely suggest buying an intro 2-pack class (two classes for the price of one) and signing up for beginners classes. Thats what Ashby and I did to make sure we liked it but also to help learn about the machine and the moves. They are slower classes with mainly new people so you're in good hands! But just as a heads up, you wont start really knowing moves until about 10 classes in.

Q: How hard is it to start/get the hang of?
A: It's easy to start because you just do it. But I would say it takes about 10 or so classes to really get the hang of it. To know the moves, where you body placement should be and how to do the advanced versions of it all.

Q: Do I have to be in good shape before starting?
A: I think you should be somewhat coordinated or able to work out before going to this class. It's different for everyone, so I would contact your local studio if you're worried about it.

Q: Did you change your diet at all?
A: No, I don't believe in dieting and I didn't go into this trying to lose weight. 

Q: Can you do this on a lunch break?
A: Yes, there are some classes where you sweat more than others, but can easily be done without looking gross afterwards. 

Q: How long are you sore after class?
A: I was working out 5x a week before I started doing similar exercises so I wasn't ever really sore except for one class where I was a little sore on my side under my armpits and it only lasted one day. I've definitely felt more exhausted than sore after classes.

Q: Do you have a favorite instructor?
A: No, I really have liked everyone I've taken. I've taken a couple with Tracy (who I believe is the head instructor in NYC?) and she was H-A-R-D. At first I hated her but then I loved her. She'll really push you. If you're new, don't go to her haha!

Q: Favorite/least favorite move?
A: Favorite: plank to pike / Least: cobra

Q: What is the difference between this and Barre?
A: The Barre studio I go to has much bigger movements on the floor using your body and some weights. SLT is more pilates-focused, so you're working on a machine that sets the resistance and the moves are much, much slower. 

Q: Would you recommend SLT or ClassPass?
A: This would depend on what you want to get out of your workouts. If you're looking for something more budget friendly and like to mix up your routine with different kinds of workouts or finding new classes, ClassPass is for you! If you have more budget to spend on classes and want a dedicated set of studios and don't mind doing the same kind of workout daily, then SLT (or any other single studio) is a great option for you. 


08 Dec 21:32

Gift Guide: The Blogger

by Krista Robertson

We're back with another gift guide! Today's theme is for the Blogger/YouTuber in your life. These are all of the things I use to make this blog work. I hope you enjoy!

Tripod: This is great for anyone taking their own photos and videos. I use this tripod all the time and for the price, you really can't beat it!

Sony Camera: This is the camera Andrew and I shoot on and have been using for the past three or so years. It's SO advanced in the mirrorless camera space and I've put it through the ringer. There are over 100,000 photos taken on this camera! I couldn't do this blog without it. 

Lighting Boxes: These are the lights I use for my YouTube videos but also for when we're shooting inside and there are harsh shadows in the apartment or there isn't enough light. These come in handy more than you think!

Portable External Charger: This is a LIFE SAVER just because we're all on our phones all the time. This charger lasts me about a week without worry. It's good for anyone with a phone.

Video Stabilzer: This is a fun gadget that's great for when you want to shoot video while moving. It really makes a nice fluid motion for the camera and the video!

Rode Microphone: This is also more of a fun thing to have but a really important one for YouTubers! You want to make sure the sound quality is good and that it picks up your voice without echo. 

Lens Polarizer: I don't EVER shoot without this. It really helps temper lighting and makes it 1000 times easier to shoot in daylight without crazy flare or blown out backgrounds.

SD Card Case: I used to have a serious problem of always losing my SD cards, but now I finally have a real home for them and it's been a life saver. They are SO easy to lose but the case gives me peace of mind.

Flexible Tripod: I use this for vlogging on the go (easier than the big tripod). Watching Casey Neistat convinced me I needed it! The things he does with his are truly inspiring haha.

Diva Ring Light: Going back to lighting, the light ring IS THE BEST. Its like an automatic filter on your face and it looks so good when taking photos or videos. With this, you're ready for your closeup. 

SD Card: A girl can never have too many SD cards (you know, to fill out your SD case). It's good to have a variety of sizes so you can use them for different things and different cameras!

Light Reflectors: Not something that you *totally* need but these are SUCH a help with shadows and lighting when it's not ideal to shoot. They are also great for indoors to fill the extra light!
01 Aug 14:04

Blind Item #3

by ent lawyer
This B list mostly movie actor got busted by his B- list mostly movie actress girlfriend cheating when his kids let spill about a woman their dad saw when he was supposed to be playing golf.
24 Jun 15:51

Gestión de una Empresa de Moda.

De acuerdo a las tendencias mundiales que hoy exigen profesionales más competitivos y especializados para todo el sector textil-confección, sensibles al diseño y a la moda con perspectiva hacia el consumidor. Día tras día el sector evoluciona con los múltiples aportes y el desarrollo de nuevas tecnologías en el mundo, por ello los profesionales requieren cada vez más actualizarse y potenciar sus conocimientos.

Hoy te invitamos a inscribirte al Curso Online: Gestión de una Empresa de Moda.

OBJETIVO:
Dar a conocer un panorama de Moda como Negocio, buscando fortalecer la gestión de una Marca de Moda, proporcionar herramientas de gestión, planificación, logística y estrategias de un producto comercial, implantar una nueva perspectiva de la Moda como Negocio.

TEMARIO:
Producto.
El plan.
Creatividad.
Gestión del producto.
Materiales.
Producción.
Procesos de Producción.
Marketing y Branding.
El Precio.
El proceso de desarrollo del producto y de las colecciones.
La comunicación de la Moda.

Curso intensivo dirigido a:
Estudiantes de diseño de Moda y profesionales del sector, a personas relacionadas con el comercio y sensibles al sector moda como accesorios, calzado y marroquinería.
DIRECCIÓN DEL PROGRAMA:

Impartido por la Licenciada Erika Servín quien concluyó sus estudios en la Universidad Argentina de la Empresa UADE en el 2007, siguiendo hasta el año en curso con Diplomados como Fashion Business por Harvard, Tendencias y comunicación de la Moda en Intituto Europeo Di Design, Fashion Styling, Creativity in fashion Branding and Marketing en Central Saint Martins & London College of Fashion.

Erika Servín ha Diseñado vestuario para obras de teatro y puestas en escena del “Centro de Capacitación Artística” CECA , fue Conductora y crítica de Moda en CB Televisión, Asistió a diversos diseñadores mexicanos, Coordinó la imagen de empresas en la República, Distribuyó más de 29 productos de diseñadores en el punto Código Urbano, Maquiló para diversas empresas y fue participante de la segunda temporada de Project Runway Latin America, creadora de la marca de línea de ropa casual Erika Servín.

Cupo limitado 8 personas.

FECHAS: JULIO  19 y 20 , 26 y 27 del año en curso.
Total. 13hrs

Para mayores informes / info@erikaservin.com
www.erikaservin.com
12 May 22:41

{house tour: a san francisco dream}

by Marcus Design

Happy Friday! I wanted to end off your week with one of the best house tours I've seen in a very very long time. Seriously. I know most of you have likely already flipped through the pages of the new issue of Lonny magazine, but JUST IN CASE, you can't miss this one. I couldn't believe how many of my 'dream home' wishlist items were present, it's like owner Susan Greenleaf and I share a brain or something ;)


Black door and black garage, my fav!


Herringbone entry and millwork to die for.


Blue & white vases and grid panelling in the dining room - I did a version of this in my own dining room!


How amazing is that bathroom? The marble vanity, the sconces, and the walk-through to a gorgeous black closet.


I DIE for burled walnut. It's a serious dream of mine to own a burled piece one day.


Ok, is this getting a little crazy or is it just me? If you've been reading this blog for a while you will know of my obsession with this wallpaper. I need the Scalamandre zebras in black, for my future powder room of course.


Saarinen tulip table. Another dream.


AH-mazing. Into the 'dream home' inspiration files it goes!!

07 Feb 15:46

Our Thrift Store Chair Project

by Jennifer Jones
Hand over two crowns and a couple of over-sized chairs, because we have been the king and queen of procrastination. 

Although you may think I am also the queen of exaggeration, this project started back in September of 2012!  I guess that is why it feels so fabulous to finally call it done.  The funny thing is that it was a really simple update and was another one of those, "why did this take us so long?" moments.  You may have caught a glimpse of our new-ish studio chair back when I shared an update here.


Back in that 2012 month of September, I shared a little recap of some of my favorite local finds and my desire to diversify my shopping habits.  After that post, I realized that I should have jumped on one of the chairs I spotted at our local Habitat for Humanity ReStore.


Sexy right?  Check out the backside.


I am pretty sure they once lived in a nursing home dining room, but those curves.  So fabulous!  And I have been head over heals obsessed with chairs that offer an open back.  I really had to have one.

So, I went back and purchased one of the chairs with intentions of using it in my studio at one of our two workspaces, as they just were not going to work for our dining room situation.  Total cost - $15.

We tackled this chair project in three simple phases; phase one was painting the frame.

Painting the chair frame was a super simple paint job.  I just removed all of the cushions and used three thin coats of Annie Sloan's chalk paint in Pure White.


Fast forward a few months and phase two was about to begin!  I couldn't wait to get those maroon vinyl cushions reupholstered!

This part of the process started out with hours and hours of needle nose staple pulling to remove the original vinyl upholstery.  Not at all enjoyable, but so worth it in the end.


For the piece that shows through on the backside of the chair, we used the original insert as a template and sprayed it with adhesive glue.  This was to ensure that the patterned fabric would lay nice and super flat and allow me to press out any wrinkles.


Once the fabric was attached to the chair insert, I switched to a set of fabric sheers and cut around the template.  Then we popped it back into the painted chair frame and attached it with a staple gun.


I had wanted a pretty floral pattern for my studio, and I ultimately had landed on P Kaufmann Arabella Pink.  It doesn't seem that this particular pattern is available any longer as I purchased it over a year ago now.  But I really do love it! 


For the seat side, I found a super soft suede from a local fabric store in a tealy blue color.  The seat was a pretty straight forward upholstery process.  I always push down on the seat while my hubby pulls the fabric tight and staples. 


Because the back cushion didn't have anything for the fabric to wrap around and staple in, we had to staple the fabric directly to the frame of the chair.  We used the staple gun to follow the edges of the foam cushion and did the best we could to pull the fabric tight.


Then we very carefully cut away the excess fabric as close to the staples as possible.


The edge was looking a little rough at this point, and I would either need to add double welting or some decorative nailheads.


After seeing this amazing chair, I knew nailheads was the way to go. 

Fast forward to this past weekend and we finally busted out the hammer and needle nose pliers.  Another very time consuming part of the process that the hubby and I took turns tapping away at, literally.  It was fairly simple as we just used the pliers to hold the nailhead and gently tapped it in place with the hammer.  {I found the nailheads at JoAnn}.  It just required some patience to keep everything lined up as we added one nailhead at a time following the natural lines of the cushion. 


So a project that probably could have been completed in a single weekend, is finally done over a year later. 


Isn't she beeeeautiful!?


It has definitely come a long way from it's nursing home dining room days...


The solid colored front and nailhead detail adds a bit of sophistication...


While the back is unexpected whimsy!


Although the studio still has A LOT of work to be done, I have really been enjoying working at this space, while the fam has taken over the desk on the opposite side of the room.  Some days my desk faces out towards our family room {so I can watch a movie while working on emails}, and other days I face it towards my memo board.  I love the versatility.

Speaking of memo board, I made it years ago from a frame found at the Salvation Army paired with some cork and linen fabric.  I call it my "board of happiness".


It basically is covered top to bottom with things that make me smile throughout the day.  Photos of our family and friends, special cards received, inspirational quotes, fabric swatches, tokens from travels....


It does a good job at keep my spirits high, especially on days when I am feeling cooped up or stressed out.

Under the desk I keep a pile of inspiration. 


As I mentioned, the studio has a lot of changes ahead of it.  Although my vision for this area changes quite frequently, I am just taking it one day at a time.  I have been plucking away at it for a few years now, but it is where I spend so much of each day that I want to make sure I really, really heart it.


What is the longest you have had a project drag out?  Did you feel overwhelming amounts of joy once it was finally finished? 


26 Aug 16:55

i could live here: copenhagen home of vipp’s chief designer.

by french by design

vipp1-anders-hviid-sfgirlbybay

french-by-design

hello sfgirlbybay readers! si here, from the frenchbydesign blog, for a new “i could live here” house tour! today, we’re visiting the home of danish brand vipp’s chief designer.

in this circa 1910 pencil factory building, morten bo jensen, chief designer atvipp and his partner, graphic designer kristina may olsen have created a dreamy open space modern loft. morten and kristina have mixed repurposed vintage finds with their own creations – the carbon colored kitchen is a vipp design by morten himself. the home is also family and kid friendly for twin daughters merle and anine – p.s : i want their dollhouse, again, designed and built by super dad.

a light filled space, salvaged pieces, modern scandinavian design at its best, in the beautiful city of copenhagen? oh, yes, i could live here!

si –- french by design

vipp2-anders-hviid-sfgirlbybay

vipp-home

living-room-vipp

vipp-desingers-home

vipp-home-kitchen

vipp6-anders-hviid-sfgirlbybay

• Photography via  anders hviid for dwell; and tim Wahlfried for bo bedre.

14 Aug 22:32

Dispatches from S. Africa | Creative Home in Cape Town

by Jan Halvarson

A few tear sheets from the August/September'13 issue of Elle Decoration South Africa and the home of Cape Town milliner, Kurt Pio and housemate Gabrielle Guy. A playful space filled with lots of curio and creative vignettes.  From the art of the display (top pic of Kurt Pio's desktop) to the chalk portrait drawings on the kitchen cabinets by Gabrielle.  Each room as interesting as the next filled with a wonderful collection of Colonial Cape, English, Dutch and French influences.  (I picked up my copy of the August/September'13 issue of Elle Decoration South Africa on Zinio.com).


Photo's by Alexander Van Berge for Elle Decoration South Africa
Copyright 2005 - 2013 Poppytalk. All Rights Reserved poppytalk.blogspot.ca
22 May 13:42

My Life Scoop: Bike Gadgets

by Amy Azzarito


May is National Bike Month, which is a month long holiday that I can totally get behind.  So for this week’s My Life Scoop, I picked some of my favorite stylish gadgets. I ride my bike to work nearly everyday, and even though it’s just a short ride from in Brooklyn, there are few gadgets that can certainly make your life easier. My favorite gadget is my bike computer – when I’m heading to work, it keeps me on time. And when I’m on longer rides or trying to get a little exercise, I can keep track of my speed. But honestly, one of my favorite gadgets, is a simple bell. When you’re a New York commuter and competing for street space with both pedestrians and cars, there’s almost no gadget that is more helpful. It’s a simple and effective way to let people know you’re coming! Whether you ride to commute to work, for pleasure or for exercise, a few choice gadgets can make your ride much smoother! Do you have a favorite bike gadget? Click here for all the links and the full post!  -Amy Azzarito


10 Apr 15:16

Tocador para espacios reducidos. Algunas ideas.

by Eva [LaColoropata]
Hola chicas, como ya os dije hace no mucho, publiqué en Instagram una foto cuando acababa de montar mi nuevo tocador especial para espacio muy reducido, y a partir de ahí me empezaron a llegar bastantes preguntas sobre qué mueble era, cuánto media, etc., y me di cuenta de que muchas estamos en la misma situación, tenemos poco espacio para ponernos uno de esos tocadores tan monos y enormes que se ven por ahí, que son más tipo escritorio, pero necesitamos un rinconcito para sentarnos tranquilamente a hacer nuestras cosas. Así que pensé que lo mejor sería hacer una entrada aclarándolo todo y enseñaros algunas fotos ahora que ya está prácticamente al completo.


A parte del poco espacio del que disponía también me gustaba la idea de algo más "minimalista", si se puede llamar así después de todo lo que le he puesto encima ;) básicamente tenía dos razones, una es que desde ya hacía tiempo me agobiaba la idea de tener tantísimo maquillaje y cada vez tenía más la sensación de tener una adicción comprando cosas que realmente no necesito o que tengo parecidas, y aunque aún me doy mis caprichos de vez en cuando, me he moderado bastante y me gusta poder tener  todas mis cosas en una balda (aunque tengo maquillaje guardado en el maletín porque no lo utilizo para mi misma, por lo que no tiene sentido tenerlo en el tocador ocupando espacio pudiendo tenerlo bien guardado), así que en el tocador tengo mis básicos para cada día encima de la balda, los productos que más utilizo, y debajo tengo todas las paletas de ojos, que las puedo meter en un segundo en el maletín cuando las necesito y una selección de productos que no utilizo a diario.

Y el otro motivo es el estético y de espacio. Ya que es una habitación que iba a compartir con mi novio no quería que quedase demasiado femenino tipo camerino (es un estilo que me gusta mucho, pero si tuviese una habitación para mi sola) y como sé que aunque él no se queja y pasa un poco de la decoración, sé que tampoco le apetecia algo muy "de chica" que dice, así que cuando pensé en ponerme un tocador intenté ser lo más neutral posible. Además, la habitación es pequeña porque pusieron un tabique para poner los armarios por la parte de detrás y hacer como una especie de vestidor, algo que me gustó mucho de esta habitación, pero claro, restaba espacio, quedaba una espacio amplio para la cama pero que no permite poner más muebles demasiado grandes. Es una habitación para dormir, vaya.
Tampoco quería nada de cajoneras, a parte de que no me gustaban visualmente para el dormitorio porque quería algo muy despejado, ya he experimentado que tener las cosas en  cajones ayuda bastante a olvidarse de ellas y no usarlas.

Sobretodo quería que al poner el tocador la habitación no quedase como una lata de sardinas y agobiante con mucha cosa, que a pesar de ser un lugar donde iban a haber muchas cosas la habitación siguiese teniendo un aspecto simple y despejado.
Mirando muebles, veía que todos los tocadores tienen un fondo de 50 centímetros mínimo, y esto me suponía o tenerlo prácticamente pegado a la cama o desplazar la cama y quitarle espacio al lado de mi novio, cosa que tampoco me parecía justa porque no sería cómodo para él ni tendría espacio para sus cosas, así que necesitaba algo de 30 centímetros de fondo como mucho, y es cuando pensé en una balda con una tapa de cristal. En principio iba a hacerla yo misma, pero investigando por internet encontré cosas muy parecidas a las que tenía en mente.

Así quedó finalmente:


Después de las búsquedas por google acabé en Ikea Hackers con esta idea que me enamoró por su sencillez y decidí ponerla en práctica a mi manera, tenía claro que las patas no me gustaban al ser un mueble tan estrecho, y les tenía el ojo echado a unas escuadras de forja de Leroy Merlin que me gustaban más.
Yo quería que fuese negro, hemos pintado la pared de un inexplicable color raro que es entre gris claro y beige (que para variar no se aprecia en la foto y parece blanco, y para nada) que queda muy bien con el negro, y por otra parte el taburete se mantiene en muchas mejores condiciones si es negro que si es blanco.

La idea del espejo redondo, tan simple sin marco ni nada me encantó también, así que puse exactamente el mismo, como la habitación es pequeña no quería recargarla y poner un espejo enorme con luces (aquí un ejemplo) y además es una habitación con mucha luz por lo que preferí uno más sencillo y comprarme un espejo de tocador con luz, más abajo os hablaré de él. El espejo de pared es el Kolja de Ikea y es bastante económico, 14,99€

La balda es de Ikea también, la Ekby Gruvan, mide 119x28 cm, tiene poco fondo por lo que es perfecta para lugares estrechos pero aún así es una superficie suficiente para poner un montón de cosas encima cómodamente, aunque parezca pequeña caben muchísimas cosas. Su precio es de 41,99€

A mi personalmente me encanta lo del cristal y poder ver a través de él que es lo que hay debajo, pero si os gusta más que no se vea nada podéis optar por la balda Alex, que lleva cajones y también queda muy bonita, si la googleais encontraréis un montón de fotos de tocadores.

Esta otra idea de combinar la Gruvan y la Alex también me gustó muchísimo, la hubiese llevado a cabo si hubiesen vendido la Alex en negro.

El taburete es de el Sun de Conforama, lo elegí por ser uno de los más sencillos que habían. Es bastante cómodo, tiene reposapies y se puede regular la altura fácilmente. Cuesta 41,99€. El taburete sobresale de lo que es la balda, esto me preocupaba al principio pero una vez puesto todo quedó bien y no entorpece el paso.

La cuestión es que conseguí el mueble perfecto para mi tocador, después podría complementarlo con algunos accesorios para poder almacenar más cosas y a la vez tenerlas súper a mano.


Por el tema del polvo he intentado mantener en la parte de arriba solo lo justo, lo que más me gusta utilizar a diario y tener el resto de cosas más protegidas. Básicamente lo que más expuesto tengo son los productos del expositor de labiales y el otro pequeño contenedor de al lado, por lo que no se hace muy pesado de limpiar. Las brochas las he abierto para la foto, pero cuando lo las estoy utilizando están siempre cerradas. Están en el estuche-tubo de Sigma, que me encanta tanto para tenerlas protegidas del polvo en el tocador como para llevarlas de viaje. Incluso tengo uno para trabajar cuando no necesito una infinidad de brochas, es comodísimo. Al cambio sale más o menos por unos 16-17€


En la parte derecha, sobre la balda hay un módulo de dos cajones grandes de MUJI donde tengo sobre todo los polvos, bronceadores, coloretes, etc., que más utilizo y abajo todo para arreglarme las cejas, una paleta de labiales y algunas cosillas random. De momento no veo la necesidad de más, pero como veis cabrían sin ningún problema muchos más módulos, para quien necesite más espacio de almacenaje. Y sobre este módulo hay un expositor para 12 labiales y otros compartimentos que van muy bien para los perfiladores que van con los labiales que tengo expuestos y alguna cosa más de mucho uso como algún corrector, paintpots y sacapuntas.

Al lado hay otro pequeño organizador donde tengo mis tres bases favoritas y lápices para ojos y cejas y un par de máscaras. También hay cuatro brochas que no caben en el tubo.

Dentro de la balda tengo unos contenedores también de MUJI que son prácticamente de la misma altura que el hueco de la balda, por lo que todos los productos están bastante protegidos. Se pueden sacar fácilmente porque no están pegados, hay un espacio entre ellos, pero la idea el ponerle unos pequeños tiradores para que sea aún más fácil. En el más estrecho tengo lápices, eyeliners, sobras en stick, etc., el el contenedor de al lado están algunas sombras que tengo que no son para paleta, sombras en crema, gel liners y algún pigmento. En el siguiente hay una mezcla de correctores y polvos e iluminadores. En el último hay productos para labios, básicamente glosses, mis Lip Tars y otros labiales que no uso tan a menudo. Estos cajones los tengo un poco a lo salvaje, pero es que en eso soy un poco desastre, y si me pongo a alinear y ordenar todos los productos a la perfección sé que va a durar dos días... pero lo imprescindible es mantenerlo todo bien limpio.


En la parte izquierda, dentro de la balda están todas las paletas y algunos polvos sueltos. Esto es muy fácil de limpiar si es necesario.

Arriba hay poca cosa, el limpiador de brochas, otro pequeño contenedor opaco y cerrado de MUJI para cosas que no quiero tener a la vista, como bastoncillos, algodones, pestañas postizas y pegamiento... un perfumero de cristal que solo tiene una función decorativa y mi adorado espejo de Babyliss. Debajo de él tengo una caja que aprovecho para guardar algún complemente para el pelo y demás, pero no los utilizo demasiado y me va bien que el espejo esté un poco más alto.


Llevaba años pensando en comprar un espejo así y finalmente lo hice, es de Maquillalia y es una de las mejores compras que he hecho en mucho tiempo, es bastante caro, 69,50€ concretamente, pero para mi es la gran salvación para mis cejas, la depilación se hace mucho más fácil con los 8 aumentos y mucho más apurada. Además tiene luz, es una luz suave pero que ayuda mucho, al menos en mi caso es suficiente porque tengo la suerte de que la habitación tiene luz de sobra, si no quizá necesitaría algo más. Para mi es un lujazo para maquillarme.


Pero os dejo un par de fotos más extensas para que veáis más o menos la proporciones del tocador con respecto a todo lo demás.


Esta es la distancia que hay entre el tocador y la cama, ha quedado un espacio más que aceptable para moverse muy cómodamente sin chocar con nada ni tener que pasar de lado :)


Os dejo la información de todos los contenedores que tengo sobre el tocador ya que también se pueden comprar on-line:


1- Expositor acrílico de CASA VIVA 14,95€ (Aunque tengo que decir que lo he visto en algún bazar chino igual) 14,50€

2- Módulo acrílico de dos cajones (grande) de MUJI 19,99€

3- Este no es realmente el que tengo, que no sé por qué no aparece en la web, pero es de MUJI también, como el que aparece en la foto pero con otro compartimento delantero más bajo. 8€ aprox.

4- Bandeja PP Vanity estrecha de MUJI 3€

5- Bandeja PP Vanity grande de MUJI 3€

La caja-contenedor de PP que hay a la izquierda también es de MUJI, pero por alguna razón no aparece en la web aunque en la tienda está en diferentes tamaños. Costó alrededor de 5€.

Y lo dejo aquí porque me parece que me he pasado... espero haber resuelto algunas dudas, pero si os queda alguna, ya sabéis, dejad un comentario ;)

Nos vemos pronto!