I occasionally find someone asking this question in my inbox. I’ve learned
that for every person that bothers there are a bunch more with the same question,
so I thought I’d take a break from relentlessly plugging my side hustle
Later for Reddit to answer it publicly.
É comum no ambiente de equipes que trabalham com a construção ou evolução de produtos a necessidade da definição de objetivos, a projeção de resultados esperados e o planejamento de entregas. Se você convive com tais desafios, confira a seguir uma dinâmica na qual obtive ótimos resultados no processo de concepção de OKRs.
O que é OKR e para o que serve
Bom, antes de escrever sobre o assunto, vale a pena definir o termo OKR.
Segundo definição do pessoal da Lean Performance, OKR — do inglês Objectives and Key Results –, utilizado no Silicon Valley por empresas como Google, Facebook, Linkedin, Intel etc, é um framework para definir metas. Trata-se de um sistema simples para criar alinhamento e engajamento em torno de metas mensuráveis e dinâmicas, tipicamente definidas trimestralmente.
OKRs são uma ótima forma das organizações criarem e comunicarem objetivos e resultados. Seu maior propósito é promover conexão entre os objetivos da empresa, do time e dos indivíduos a partir de resultados mensuráveis, fazendo com que todos se movam na mesma direção.
Em resumo, utilizar OKRs adequadamente auxilia no aumento do alinhamento e do engajamento entre as pessoas, e torna o processo de planejamento estratégico mais ágil, com maior cadência de revisão, adaptação e participação de toda a equipe.
O alinhamento e engajamento entre as pessoas aumentam, pois o time passa a fazer parte do direcionamento do produto, gerando maior senso de pertencimento em cada um.
Certa vez, no projeto de um dos nossos clientes, após a equipe definir os OKRs, fui informado pelo QA que o bug que estava ocorrendo no ambiente de produção iria impactar diretamente um dos OKRs, se não fosse corrigido imediatamente. Esse fato me deixou realmente surpreso, pois jamais veria uma ação assim se não compartilhassemos a responsabilidade com todo o time.
Com a aplicação de OKRs, ganhamos mais uma ferramenta na priorização do backlog e, mais importante, temos o escopo direcionado para um objetivo comum.
Ao aplicar dinâmicas de OKRs, espera-se que a empresa, equipe ou pessoa tenha em mãos:
Objetivos: Possuem, por essência, característica qualitativa, inspiracional, com prazo definido e apontem para metas, ou seja, dizem para onde se deve ir.
Key results: Quantificam toda a ideia inspiracional. Devem ser atingíveis, mensuráveis e realistas. Em outras palavras, indicam como será possível atingir os objetivos.
Beleza Raphael, entendi os conceitos e percebi que isso pode ser útil, mas você pode dar um exemplo?
Objetivo: Aumentar o número de clientes a partir de melhor experiência de uso do aplicativo.
Período: Primeiro trimestre de 2017.
Key results:
Aumentar a taxa de conversão mobile global de 5% (último trimestre de 2016) para 10%.
Aumentar o volume de sessões entrantes de 161 mil (último trimestre de 2016) para 240 mil.
Vender 10.000 mil licenças básicas.
Vender 500 licenças premium.
De onde vamos tirar esses indicadores?
Aqui vai um ponto importante: para definir bons key results, que sejam mensuráveis e reflitam a situação real, é essencial que a organização seja orientada a dados e indicadores. Basicamente, a empresa deve possuir métricas de produto que assegurem uma tomada de decisão assertiva, dando a real noção de direção e esforço; e não somente baseada em intuições e experiências. Esses dados ajudam a definir as estratégias do próximo período com maior segurança e a otimizar os recursos empreendidos.
Os dados devem direcionar as seguintes questões:
Quais desafios temos à frente? Quais indicadores estão ruins? O que devemos fazer para melhorar tal indicador? Ex: Diminuir o churn, aumentar prospects e leads, melhorar os processos operacionais etc.
Qual frente do produto precisamos melhorar para atingir o objetivo X da organização?
Quais riscos esses dados evidenciam e onde devemos manter a atenção?
Feita essa introdução, vamos para a dinâmica de definição dos OKRs para que você possa aplicá-la e aprimorá-la.
Parte 1 – Compreendendo o negócio
O primeiro tópico a ser discutido diz respeito a revisão ou criação do modelo de negócios do produto.
Baseado nas personas, a equipe poderá analisar os canais, formatos de relacionamento com o cliente, fontes de receita, atividades chave, recursos chave, parceiros chave e estrutura de custo.
Para levantar tais informações, sugiro que você leve as seguintes perguntas:
Personas: qual o perfil de clientes que utilizam o produto?
Canais: como os clientes chegam ao produto, geralmente?
Formatos de relacionamento: como ocorre o relacionamento dos usuários com o produto atualmente?
Fontes de receita: quais são as fontes de receita atuais?
Atividades chave: quais as principais atividades que precisam ser realizadas no dia a dia da operação para que o produto possa entregar o valor que se propõe?
Recursos chave: o que o produto possui de diferencial competitivo?
Parceiros chave: quais parceiros ajudam a empresa a viabilizar/alavancar o produto?
Custos: qual a estrutura necessária para tornar a operação do produto viável?
Assim, a equipe terá maior clareza sobre o estágio atual do produto. Caso o produto não possua um modelo de negócios, não deixe de desenvolver um. Uma dica de leitura para que você possa construir um é o livro Business Model Generation.
Após a revisão do modelo de negócio, o próximo passo será analisar as principais métricas do produto. Cada pessoa da equipe poderá explorar o produto a partir de:
Informações financeiras: churn, ticket médio, custo de aquisição do cliente etc;
Comportamento de acesso: número de acessos, taxa de saída, tempo despendido nas páginas do fluxo de venda, origem do tráfego, dispositivo utilizado para acessar o fluxo de venda etc;
Perfil do cliente: dados demográficos, nível de serviço contratado, faixa etária etc.
A partir das métricas de produto, cada membro da equipe deverá identificar pontos de melhoria e pontos onde o produto aparenta estar bem.
Parte 2 – Definindo os OKRs
Feita a análise das métricas de negócio e do modelo de negócio, levante com a equipe os potenciais objetivos que serão trabalhados no período de tempo (exemplo: próximo trimestre).
Se você estiver facilitando a discussão, tenha em mãos as seguintes dicas antes da equipe determinar os objetivos:
Tenha poucos objetivos (de 3 a 4). Motivo? O trimestre, por exemplo, é curto para se assumir muitos objetivos.
Relacione os objetivos do produto com os objetivos da empresa.
Relacione os objetivos com problemas e necessidades reais.
Utilize as métricas de negócio para definir os objetivos.
Caso os objetivos levantados sejam complexos ou grandes, vale a pena fomentar discussões para que a equipe simplifique. O mantra que deve ser pensado aqui é: pequenos incrementos que geram valor econômico para o negócio.
Para medir os objetivos, a equipe deverá elencar quais serão os key results que serão acompanhados ao longo do período. Para que a equipe tenha um norte:
Defina poucos key results (de 3 à 4). Motivo? Se o objetivo precisa de muitos itens para ser medido é provável que ele seja complexo demais.
Os key results devem ser expressos através de números.
Quais resultados garantirão que alcancemos nossos objetivos?
Parte 3 – Definindo um roadmap
Dado que os objetivos e os key results estão definidos, a equipe pode se questionar: bom, e agora, o que vamos fazer para atingir nossos OKRs?
Sugiro como última parte da dinâmica o desenvolvimento de um roadmap, a fim de identificar entregáveis macro e quando eles deverão ser entregues ao longo do período (ex: trimestre).
Técnicas de brainstorming e story mapping ajudam a ter uma ideia de cronologia e dependência entre as possíveis funcionalidades que serão construídas para alcançar os OKRs.
Antes que alguém me crucifique dizendo que não estou sendo lean, gostaria de deixar algo claro. O roadmap criado será uma referência que COM CERTEZA (repita, C-O-M C-E-R-T-E-Z-A) sofrerá alterações ao longo do tempo por conta das mudanças e experimentações que acontecerão para atingir os objetivos e key results definidos.
Conclusão
A estrutura de OKR pode ser replicada no nível empresa, equipe e, até mesmo, indivíduo. Uma dica que sempre compartilho é: comece com poucos objetivos e trace em torno de 3 à 4 key results. O motivo? Foco. Quanto mais direcionado, mensurável e acionável for a sua estrutura de OKR, maiores serão as chances de alcançar o planejamento desenvolvido.
Lembre-se que os OKRs devem ser revistos com frequência para que o time possa tê-los sempre em mente e, juntos, decidirem onde despender esforços para caminharem na direção correta.
É essencial que a empresa possua uma cultura questionadora, desapegada de ferramentas e soluções revolucionárias e tenha um ambiente que promova aprendizado com as falhas, pois certamente haverão erros no início.
A dinâmica que apresentei teve como objetivo conectar negócio, resultados atuais e futuro (OKRs + funcionalidades).
E você, como tem aplicado dinâmicas de OKR? Compartilhe os resultados e desafios.
Curso gratuito em 7 e-mails, elaborado pelo autor do livro “Métricas Ágeis”, Raphael Albino.
Indicado para Agile Coach, Gerente de Produtos, Gerente de Projetos, Product Owner, Scrum Master e CTO/CIO.
I've been thinking about why we argue about code, and how we might transform vehement differences of opinion into active forces for good.
My thoughts spring from a very specific context. Ten or twelve times a year I go to an arbitrary business and spend three or more days teaching a course in object-oriented design. I'm an outsider, but for a few days these business let me in on their secrets.
Here's what I've noticed. In some places, folks are generally happy. Programmers get along. They feel as if they are all "in this together." At businesses like this I spend most of my time actually teaching object-oriented design.
Other places, folks are surprisingly miserable. There's a lot of discord, and the programmers have devolved into competing "camps." In these situations the course rapidly morphs away from OO Design and into wide-ranging group discussions about how to resolve deeply embedded conflicts.
Tolstoy famously said that "Happy families are all alike; every unhappy family is unhappy in its own way." This is known as the Anna Karenina Principle, and describes situations in which success depends on meeting all of a number of criteria. The only way to be happy is to succeed at every one of them. Unhappiness, unfortunately, can be achieved by any combination of failure. Thus, all happy businesses are similar, but unhappy ones appear unique in their misery.
Having now taught a fair number of classes, I've experienced various unhappy shops and am beginning to discern some common criteria for happiness. In this newsletter I'll discuss just one on them, with more to follow in future newsletters.
Today I'm interested in choices of syntax, i.e whether or not your shop has agreed upon and follows a style guide. If you're surprised that I'm starting with this apparently mundane issue, consider yourself lucky in your choice of workplace. If you're shaking your head in rueful agreement about the importance of this topic, I feel your pain.
Why Have A Style Guide?
I firmly believe that all of the code that I personally have to examine should come to me in a consistent format. Code is read many more times than it is written, which means that the ultimate cost of code is in its reading. It therefore follows that code should be optimized for readability, which in turn dictates that an application's code should all follow the same style. Adhering to a common style saves you money.
What Style Is Best?
Most programmers agree with the prior paragraph, but here's where things begin to break down. As far as I'm concerned, my personal formatting style is clearly the best. However, I'm quite sure that you feel the same. It's easy for a group of programmers to agree that all code should follow a common style, but surprisingly difficult to get them to agree on just what that common style should be.
The truth is, many stylistic choices are arbitrary, and purely a matter of personal preference. Choosing a style guide means building agreements in areas where we have strong differences of opinion about issues of little significance. It's not style that matters, but sameness of style.
Why Can't Teams Agree?
As I've already said, if you don't have a style guide, it's costing you money. However, if you can't agree on a style, the money may be least of your problems.
I have visited businesses where failure to come to agreement on this issue tore teams apart. The programmers had long since ceased verbal negotiations, choosing instead to employ change requests as an excuse to convert adjacent sections of code into their own preferred style. Code regularly flipped-flopped between competing styles. This not only made it difficult to discern actual changes in behavior, but it also infuriated the person who last touched the code the next time they looked at it.
These "style wars" are ostensibly about formatting code, but are actually about power. In mild forms, the wars create tension and cost money. In virulent forms, they poison team morale.
Don't I Deserve To Have My Own Way?
Well, no.
This is really a question of who gets to decide, and your approach to answering it lays bare the fissures in your shop. It's common to have three distinct lobbies, each with their own opinions about styling.
There's often a group of senior programmers who are convinced that they are right and that they deserve to have their own way. These folks attempt to rule by fiat, and when fiat fails, they feel empowered to ignore group agreements and employ their own stylistic preferences. After all, who's gonna fire them?
It's also common to see a group of programmers who came from another language writing Ruby in a style more suited to that other language. These programmers make choices that help them understand the code, disregarding the fact that their styling choices confound everyone else.
Finally, there are the newbies who don't yet have firm opinions about style. Because they are experimenting with all the styles, their code is characterized by inconsistency. Bless 'em, they mean well, but they're confusing everyone and need an intervention.
I've listed only three groups, but if your business has splintered in this way you're likely contending with many more variants of style. Once divisions form everyone goes their own way and you end up with as many styles as programmers. In shops like this, when I ask "Can you tell who wrote a piece of code by looking at it," everyone answers "Yes."
How Can Teams Reach Consensus?
The styling problem is actually twofold. First, everyone has to agree on a guide. Next, everyone has to follow it.
If you're in a shop with a history of conflict, it's best to outsource the guide. The community has throughly beaten the what-should-code-look-like horse; there's no reason for you to duplicate this effort. Just search for "Ruby (or language of choice) Style Guide" and chooseone.
Using an external guide allows you take advantage of the wisdom of the crowd while side-stepping internal squabbles. Most guides please and disappoint in equal measure, and so require compromises from all. Choosing an external guide means it's not personal when someone doesn't get their way.
It's not enough to just select a guide--once you do so everyone must follow it. The easiest way to enforce this is to put automatic processes in place to alert folks to violations in their own code. For Ruby, have a look at RuboCop, configured however works best for you.
Avoid appointing a human "style cop", which just forces someone to be an increasingly ill-tempered nag. Instead, supply programmers with the information they need to remedy their own transgressions. By the time a pull request is submitted, mis-stylings should long since have been put right. Pull request conversations ought to be about what code does rather than how code looks.
As a personal aside, I've been experimenting with Elm. My desire to format code like intentional Elm instead of awkward Ruby led me to install an automatic Elm formatter in my editor. I initially hated the look of the auto-reformatted code, but over the last few weeks I've transitioned from active dislike to genuine fondness. Repeated exposure to standard Elm styling gradually taught me to prefer it, proving again that normal is what you're accustomed to, and that it's easier to
act your way into a new way of thinking than vice versa.
What About Code That Already Exists?
Ignore it. You don't have to re-style all existing code, just do better from this day forward. Defer updating old code until you touch it for other reasons.
Following this strategy means that the code you most often work on will gradually take on a common style. It also means that some of your existing code might never get updated, but if you never look at it, who cares?
If you choose to re-style code that you otherwise have no need to touch, you're declaring that changing the look of this old code has more value to your business than delivering the next item on the backlog. The opportunity cost of making a purely aesthetic change includes losing the benefit of what you could have done instead. The rule-of-thumb is: Don't bother updating the styling of stable, existing code unless not doing so costs you money.
What If I Hate the New Style Guide?
If you disagree with the style guide upon which your team agrees, you have only two honorable options.
First, you can obey the guide despite your aversion. As with me in the Elm story above, this act is likely to change your thinking so that over time you come to prefer the new style. It's possible that if you follow the guide you'll begin to like it.
Alternatively, you can decide you will not obey the style guide. Making this decision demands that you leave your current job and find some other business whose guide matches your preferred style. Go there and follow that one.
Notice that both of these choices have you following a guide. This part is not optional.
The moral of this story? It's more important for all code to be formatted the same than it is for any one of us to get our own way. Commit to agreeing upon and following a style guide. And if you find that your team cannot come to an agreement, step away from this problem and start a discussion about power.
The 2nd Edition contains 3 new chapters and is about 50% longer than the 1st. Also, because 99 Bottles of OOP is about object-oriented design in general rather than any specific language, this time around we created separate books that are technically identical, but use different programming languages for the examples.
99 Bottles of OOP is currently available in Ruby, JavaScript, and PHP versions, and beer and milk beverages. It's delivered in epub, kepub, mobi and pdf formats. This results in six different books and (3x2x4) 24 possible downloads; all unique, yet still the same. One purchase gives you rights to download any or all.
By failing to prepare, you are preparing to fail. - Benjamin Franklin
Can you feel confident during your first conversation in another language?
I believe you can. Don’t get me wrong - feeling nervous is normal. But you can overcome this fear.
How?
A key factor is being prepared. In this post, I’m going to show you how to create a cheat sheet to help you prepare for your first conversation in a new language.
Proper Preparation Prevents Poor Performance
You’ve found a conversation partner or language tutor for your new language. And you’ve scheduled your first conversation.
What’s next? It’s time to prepare.
Being prepared will mean you can take full advantage of your time with your conversation partner.
Preparing starts a snowball effect. When you’re prepared, you speak with more confidence. And when you speak with confidence, you’ll have a more productive conversation. Which leads to your confidence growing even more!
See that positive snowball growing?
With good preparation, you can have your first conversation soon after you’ve started learning a new language. Maybe even within a few hours.
Will you speak perfectly? Probably not. But I’ve always found that having that first conversation early on helps me get a little more of a feel for the language and breaks some kind of invisible barrier.
While it might not necessary to speak so soon, I’ve always found it to be a good way to get the ball rolling and get me excited about learning more. Besides, most of us learn a language in order to speak it, right? Well, why not get into the fun of conversation from the very beginning?
Why I Use a Cheat Sheet to Prepare for Conversations in a New Language
When I’m preparing for that first conversation, I like to create a ‘cheat sheet’ I can study from to learn some basic introductory words and phrases. I do this because it means I can:
Gather all the information I need in one place
Keep the cheat sheet on hand in case I get stuck in my conversation!
Use the template again and again to learn the basics in any language
So how do you prepare a cheat sheet for your conversations? Read on to find out what you need to learn and where you can find this information.
What Should You Learn Before Your First Conversation?
When choosing what words to learn, you need to think about the kind of conversation you want to have.
If this is your first conversation in your target language, you’re likely to focus on introducing yourself and on asking introductory questions to your conversation partner. That’s the conversation we’re going prepare in this article, but obviously the techniques that I write about could be applied equally well to conversations on any subject. I’ve used the same methods to prepare for conversations about subjects as varied as food and technology, so talk about what you like talking about!
So, let’s assume this is your first conversation. What’re the first things you usually talk about when you meet somebody new? Most of us talk a little bit about ourselves and ask a little bit about the other person. No matter what language you’re speaking, you’ll find yourself having some form of this conversation over and over again.
So let’s consider what phrases you need to learn for this kind of conversation.
Run through the conversation in your mind in English and note down what information you want to be able to share and ask for. Why not grab a pen and paper and jot some ideas down now? Here are some of the main things I always have at the top of my list:
Hello
How are you?
My name
My profession
Where I’m from
Where I live
My interests
Why I’m learning [target language]
How to ask about the other person their name, profession, nationality and interests
This is my first conversation in …. [language].
Already you can see how we could start to form a short four or five minute conversation from this material!
The Must-Ask Questions for Your Cheat Sheet
Conversations are a two-way street! As well as talking about yourself, you’ll need to ask questions.
Make sure that if you learn how to say something about yourself, you also learn how to ask your partner the same thing. This helps extend the conversation, and makes the conversation more like one you’d have in your native tongue.
Don’t worry if you can’t remember all of the questions you need; in most languages a simple ‘and you?’ will work perfectly when you’re stuck. For example, you might say something like ‘I’m from Ireland. And you?’ This little catch-all phrase is super useful and it sounds really natural too. And in most languages it’s as simple as learning two or three little words!
Your “Get Out of Jail Free” Phrases
I also like to have another section on my cheat sheet for what I call the ‘Get Out of Jail Free’ phrases!
These are the phrases I use when I need to say that I don’t understand something or ask the other person to repeat a word.
These phrases will get you out of tricky situations over and over again. They keep you in control of the conversation even if you can’t remember or don’t understand something. Here are some of the main ones I always learn:
How do you say …. in [target language]?
I don’t understand
Can you repeat that please?
Can you speak more slowly please.
Can you type that for me please? (If you’re talking on Skype)
Where Can You Find the Words and Phrases for Your Cheat Sheet?
Once you’ve thought about your script in English, the next step is to actually find out how to say these things in your target language!
There are lots of different sources you can use and which one you choose doesn’t really matter. Just make sure you get your translations from a source you trust and that you know has been checked by native or proficient speakers of the language.
For this reason, Google Translate is not something I would suggest relying on! It’s really useful as a quick tool for checking words and phrases, but it’s not something to depend too much on because the translations are provided by a computer, with contributions from users who may not always know what they’re doing.
Most of us work with some kind of textbook or self-study book when we begin learning a new language, so if you have one of these it’s a great starting point for looking up these phrases. I’ve used both Teach Yourself and Colloquial books as sources for looking up words and phrases for past conversations. I know they’ve been double and triple checked by editors and native speakers so I can steal introductory phrases from them without having to worry!
Another source that I use every time I’m preparing one of these cheat sheets is Omniglot. This amazing site is an online encyclopedia of languages and it has a great section on useful phrases that you can use to look up what you need.
On Omniglot there are about 250 languages to choose from so you’ll almost certainly find what you need for the language you’re learning! Best of all, Omniglot also contains audio for a lot of the phrases so you can hear how they sound.
What if You Can’t Find a Phrase that You Need?
What should you do when you need to use a sentence that you can’t find in a book or on a site like Omniglot? There’s a good chance this will happen. A phrase like ‘I’m learning Russian because I’m interested in Russian history’ probably isn’t going to be in your book or on Omniglot.
Every language is different, which is why you can’t just look up words and piece them together using Google Translate. This is where you need to recruit the help of a native speaker.
The first thing I’ll do is look up the words I need myself and try my best to piece together a version of the sentence I want to learn. Once I’ve done this, I’ll try to get it corrected by a native speaker. There are lots of places you can get help with this, but my favourites are italki and Facebook because you normally get a quick response!
On italki, just go to the ‘notebook’ section of your account and write a short entry with the phrases you want to get corrected. Normally, you’ll start to receive a couple of corrections from natives, teachers and advanced learners within a couple of hours!
Facebook can also be a good option for rapid corrections. There are so many great groups for language learners and in most of them people will be very happy to help you out. Search for a group for learners/teachers of your target language and leave a short post asking if anyone can help you correct your phrases. If you’ve posted in an active group, you’ll be amazed by how many helpful people will be happy to respond!
I normally start by noting down the words and phrases I want to learn in a notebook. As I add more phrases, I start to create dialogues using these phrases to help get an idea of how the conversation might go.
[caption id="attachment_20224" align="aligncenter" width="1024"] My German cheat sheet, written out by hand.[/caption]
Once I’ve drawn up this ‘paper’ version, I’ll get it checked by a native speaker using the resources I discussed above. Finally, I like to create a digital cheat sheet that I can print out and keep beside me during my conversation.
[caption id="attachment_20227" align="aligncenter" width="1024"] My printed cheat sheet.[/caption]
Note: I’ve included a free PDF cheat sheet template you can download at the end of this article that you can fill out in advance of your first conversation.
The reason I write out my notes on paper first is that is helps me bring extra attention to the words I’m learning and get them to stick in my memory.
It’s also very useful to write out your dialogues in advance so that you begin to get a feel for the likely structure of the conversations you’re going to have. Seeing the phrases as building blocks in the context of a conversation makes them easier to learn.
Get Your Pronunciation Right With This Simple Trick
Learning a new language doesn’t just mean learning new words and grammar. It also means learning a new sound system and sometimes even a new alphabet! Before you start memorising the words from your cheat sheet it’s essential that you know how they sound. You don’t want to waste your time learning how to say them the wrong way!
If you used Omniglot to look up your phrases, you’ll be able to access audio recordings simply by clicking on the phrases on the website.
But what do you do if you can’t find the audio you need there? My favourite pronunciation tool is Forvo. This amazing website is, quite simply, a pronunciation dictionary. Want to know how a word is pronounced? Just type it into Forvo and you’ll be given a list of recordings made by native speakers that you can listen to!
How to Memorise New Words and Phrases
One of the biggest challenges many of us face when learning a language is memorising new vocabulary. There are just so many new words to learn and sometimes it can seem completely overwhelming.
There are so many different (and effective) approaches you can use to learn new words, but for the purposes of this post, I’m going to focus on on mnemonics.
What are mnemonics? Mnemonics are words, associations or images that you use to memorise things. These images can be as simple or as complex as you like but the most important thing is that they help you remember three key elements of a word:
The word itself
Its meaning
Its sound.
Here’s a recent mnemonic I created to help me remember the Russian word Брони́ровать (Branerovat), which means ‘to book’:
Emperor Nero eating Bran flakes from a giant vat (like a huge cauldron) while booking a room for his holidays in on his laptop.
[caption id="attachment_20226" align="aligncenter" width="512"] Emperor Nero, without the bran flakes.[/caption]
The word itself and its sounds come from 3 different words or elements that I’ve included in my mnemonic: Nero, bran and vat; the meaning comes from the action that Nero is taking.
Is it a ridiculous image? Of course. But the more ridiculous and vivid your mnemonics are, the more likely you are to remember them and the words they represent. Don’t be afraid to make your mnemonics a little crude or violent - it makes them stick in your mind even more. I’ve found Looney Tunes-style cartoon violence (ACME anvils and dynamite galore!) to be particularly effective for making my mnemonics vivid.
The “Talk to Yourself” Technique for Practising Conversations
A great way to get comfortable with what you’re learning is to practise the conversations with yourself. I like to create conversations in an ‘ask and answer’ format from the material in my cheat sheet. Once I’ve written out the conversation, I’ll practise it with myself in my mind.
This may sound silly but it’s actually incredibly effective!
By visualising yourself having the conversation you’re not only repeating the new vocabulary, but you’re preparing yourself mentally for the conversation. If you can visualise yourself speaking confidently, you’re going to have more confidence when it comes time to have the conversation for real!
You can also practise your pronunciation in advance by recording yourself on your phone. Listen to some audio of the words you want to pronounce and then recorded yourself copying these words.
Doing this will not only help you pronounce words more correctly, but it will help you sound more natural too. The reason we sometimes struggle to say words correctly when we speak foreign languages is that they use a different variety of sounds to our own.
As an example, this is why the French ‘R’, the uvular consonant, is difficult for English speakers. This sound doesn’t exist in our language so it takes us time to actually build up the muscle memory to be able to produce it correctly. Copying the pronunciation of native speakers and recording yourself is a good way to get used to sounds like this and iron out any major mistakes you’re making in your speech.
Time to Speak! Get Ready to Use Your Cheat Sheet
Now that you have your cheat sheet ready and you know how to say the phrases on it, it’s time to schedule your first conversation.
There are plenty of ways and places to do this but I generally prefer to hire a ‘community tutor’ on italki for my first few conversations. Community tutors are native speakers, normally with no formal teaching qualifications, who offer you the opportunity to speak with them and receive correction and help for a small fee.
If you don’t want to pay or are not in a position to do so, you can try setting up a language exchange instead, but I do feel that working with community tutors is the best option. I have two main reason for this:
You spend all of your time speaking in your target language, whereas in an exchange you only get to practise for half of the time.
Community tutors normally give you more feedback and correction than a language exchange partner but they’re cheaper than professional teachers.
To find community tutors on italki, just open the main website and click ‘Find a Teacher’ at the top and then enter any specifications you want to include in the search. You’ll notice that the list of results has three tabs - ‘All’, ‘Professional Teacher’ and ‘Community Tutor’. You can use this to filter between the different types of teacher and find someone you want to work with!
I like to contact a few tutors to explain why I’m learning the language and how I want to approach it. Then when they get back to me, I’ll choose the one who best matches my needs and learning style and book that first session!
Stop Trying to be Perfect - Communicate!
Communication is more important than perfection.
Don’t get me wrong, we all want to speak as fluently and correctly as possible, but in reality languages are about communication, not perfection. In fact, I’d go as far as to argue that perfect fluency in a language doesn’t even exist. Languages are living breathing mediums that are evolving constantly.
You’ve created your cheat sheet and learned the phrases you need. The next step is to simply take action and have a conversation in your target language - perfect or imperfect. After all, the only way to get better is by making a few mistakes along the way. And besides, you can always keep your cheat sheet on hand in case you get stuck!
Want to create your own cheat sheet? Sign up below, and we’ll send you the Fluent in 3 Months cheat sheet template to get you started.
O Java 8 trouxe algumas novas funcionalidades e dentre elas a possibilidade de usarmos lambdas e method references. Caso ainda não esteja familiarizado com esses recursos, talvez se interesse pelo nosso post de o mínimo que você deve saber sobre Java 8. As duas features são relacionadas e nos ajudam a reduzir a quantidade de código escrito, com uma abordagem um pouco mais funcional.
Para dar um exemplo de uso de cada uma delas, vamos supor que temos uma lista de nomes e que gostaríamos de imprimir seu conteúdo. Antes do lambda e method reference, o código ficaria dessa forma:
 List<String> nomes = Arrays.asList(“Lucas”, “Rodrigo”, “Paulo”);
  for(String nome : nomes) {
      System.out.println(nome);
  }
Que nos resultaria na saída:
Lucas
Rodrigo
Paulo
Esse mesmo código, com uso da expressão lambda e o método default forEach, poderia ficar assim, em uma única linha:
nomes.forEach(nome -> System.out.println(nome));
E daria para fazer o mesmo com o method reference, deixando ainda mais simples:
nomes.forEach(System.out::println);
Em todos os casos teríamos a mesma saída:
Lucas
Rodrigo
Paulo
Mas qual a real diferença entre essas abordagens? Qual das duas versões você prefere usar no seu dia a dia?
Existe uma opção melhor para todos os casos?
Ao perceber que as features fazem coisas parecidas é normal se perguntar qual delas é a melhor. A resposta seria depende, nenhuma delas é a melhor solução para todos os casos. Entender a diferença entre elas é fundamental para saber quando é o melhor momento de usar cada uma.
Podemos usar method reference sempre?
É importante ressaltar que nem sempre é possível substituir um lambda por um method reference. Para conseguir fazer uma chamada a um method reference é necessário que a invocação de método da direita receba os mesmos parâmetros da esquerda do lambda.
No exemplo abaixo temos a nossa lista de nomes e queremos criar uma nova lista apenas com apenas as primeiras 3 letras de cada nome.
List<String> nomes = Arrays.asList(“Lucas”, “Rodrigo”, “Alura”);

List<String> nomesReduzidos = nomes
    .map(nome -> nome.substring(0, 3))
    .collect(Collectors.toList());
Nesse caso não seria possível usar o method reference, uma vez que para chamar o método substring seria necessário passar um parâmetro externo, os números 0 e 3, que definem o início e fim da nova string.
Vantagens de se usar Method Reference
Apesar de não poder ser usado em todos os casos onde se usa a lambda, method references possuem algumas vantagens bem legais. A primeira delas está no fato de usar menos símbolos, o que facilita bastante a legibilidade do código.
Há uma outra vantagem, que é a facilidade de se entender o que está sendo manipulado, uma vez que o tipo do objeto fica sempre muito explícito. Para exemplificarmos: suponha que temos uma classe Pessoa e essa classe possui o método getName, utilizando lambda para chamar esse método faríamos algo do tipo:
p -> p.getName()
Veja que é necessário entender qual o contexto para poder entender o que é o *p*, enquanto com method reference, teríamos algo como
Pessoa::getName
Fica bem mais fácil identificar o elemento que está sendo manipulado, percebe? Está explicito.
Outros usos do method reference
Um uso para o method reference que nem sempre é de conhecimento geral é que ele também funciona em métodos que recebem mais de um parâmetro, contanto que a quantidade seja a mesma que a de atributo do objeto que estamos usando.
Imagine que temos um mapa de alunos e sua nota, e gostaríamos de passar isso para um outro mapa.
Veja que o lado esquerdo do lambda recebe dois parâmetros, o nome e a nota. O lado direito também recebe esses parâmetros, nessa mesma ordem. Que tal então fazer dessa forma, com method reference:
Map<String, Integer> novoMapaDeNotas = new HashMap<String, Integer>();
notasAlunos.forEach(novoMapaDeNotas::put);
E quanto a diferença de performance?
Pensando na questão de performance o lambda faz uma chamada de método a mais do que o method reference para executar o método, e as duas abordagens resultam em bytecodes diferentes, entretanto para a maioria dos casos essa diferença não chega a afetar performance. Só precisa ser levada em consideração em sistemas críticos onde a performance é essencial, não no forEach e manipulações simples do dia a dia.
E você, já tem usado Java 8 e esses recursos em seus projetos de produção? Aqui na Caelum e Alura usamos bastante. Tem até um curso dando uma visão bem legal sobre as novidades dessa versão.
Não são só os parênteses. É a falta de pistas sobre o significado dos elementos (fora o primeiro de todos) das listas; e também porque tudo “cresce para dentro”, criando mais níveis de aninhamento. Quer uma variável? Põe mais um let ou um destructuring-bind e indente todo o resto do código mais um nível! (estou pensando principalmente em Common Lisp porque foi um dos Lisps que eu “tentei gostar”, mesmo sabendo que não seria o mais elegante de todos).
A falta de pistas é um caso interessante. À primeira vista, a linguagem parece incrivelmente regular: tudo é uma chamada com parâmetros, assim: (chamada param1 param2 param3). Funções, macros, formas especiais (*), tudo igual.
Mas daí você vê que num (if «condição» «código if true» «código if false»), nem tudo tem o mesmo valor. Não dá para começar a ler do meio, porque o terceiro parâmetro do if só executa se a condição for falsa, e não há separador entre as três partes (uma palavrinha “else” seria bem útil). Você vê (a 1) e isso pode ser a chamada da função “a”, ou pode ser a inicialização de uma nova variável, se estiver na posição correta dentro de um “let”, “do”, etc. Isso da “posição correta” é o que complica. Em linguagens como-C (C-like), é mais fácil começar a “ler do meio”. Tem uma palavra “else”? Você está no meio de um “if”, procure-o mais acima. Abriu/fechou {chaves}? Então você está dentro de um bloco, o que em Common Lisp seria um mais ou menos um “progn”. Encontrou um “=”? É uma atribuição a uma variável existente ou a uma variável nova. Você já sabe que o lado esquerdo não terá seu valor calculado, e sim alterado. Não há como surgir uma nova variável numa chamada(normal, com, parâmetros). Encontrou um ponto-e-vírgula? Descanse e comece de novo na próxima linha (descanse = faça um flush mental do seu parser de expressões).
Para um iniciante, no caso do let e suas inúmeras variantes (let*, letrec, aliás, para que tantas?), até dá para administrar, mas em construções usadas com menos freqüência como “do” ou “handler-case” dá um desânimo: quais parênteses são agrupadores da “sintaxe” e quais são parênteses normais?
Eu preferiria que houvesse algum indicativo mais claro para elementos como:
Nova variável. Clojure faz isso com colchetes.
Código “normal” de tamanho indeterminado. É o chamado “progn implícito” do Common Lisp, que pode surgir a qualquer momento.
Decisões. Num cond os blocos de código ficam muito misturados com as condições, bastaria algo como when/then para melhorar a visualização.
Símbolos. Em Lisp existe o quote (como em: ‘a), mas como as macros têm liberdade de fazer o que quiserem, e como colocar «’» em tudo ficaria feio de qualquer jeito, o uso do quote é inconsistente. Make-instance usa nomes ‘quotados, diversas outras construções (let, setf, handler-case, destructuring-bind) não usam.
Tipos, anotações, valores default e qualquer coisa opcional. Lisps têm a mania de usar mais um nível de parênteses sempre que for necessário adicionar algo que era opcional.
Variável num let? Você pode usar simplesmente o nome da sua variável. Ah, você queria inicializá-la, como normalmente é o caso? Então coloque-a entre parênteses junto com o valor.
Parâmetro de função? Basta o nome. Ah, você quer colocar um valor default? De novo: parênteses adicionais. Quer colocar um tipo num parâmetro de defmethod? Parênteses.
Slot dentro de um defclass? Lista de nomes entre parênteses. Atributos adicionais? Então agrupe cada slot com seus atributos em mais um nível de parênteses.
E não há necessariamente nenhuma lógica na escolha do que vai ser agrupado ou não. As variáveis de um let ficam entre parênteses no primeiro argumento, e o resto é código. Nada impediria que as variáveis e o código fossem separadas por um símbolo, como “in” (ML-like). Isso evitaria vários parênteses duplos. Ou o bloco de código (o progn implícito) é que poderia ter um delimitador (como parênteses ou chaves). Os slots de uma classe ficam entre parênteses, mas poderiam ser separados do resto com uma palavra, como “slots”.
A forma handler-case ilustra diversos pontos que incomodam: o primeiro parâmetro é o código protegido (o “try” de outras linguagens). Ele não é um progn implícito (mas poderia ser, por que não?), então se quiser fazer mais de uma coisa, você precisa colocar seu próprio progn. Depois vêm os tratadores de exceção (os “catch”), cada um entre parênteses. O primeiro item de cada é o nome da condition (sem nenhum indicativo especial, é tudo posicional). Depois, entre parênteses (precisavam de um delimitador, adivinha qual escolheram?), fica o nome da variável que receberá a condition. E então você tem um espaço livre para escrever seu código tratador de exceções usando os parênteses no seu significado normal.
No exemplo hipotético acima, os parênteses são usados apenas para chamar funções/macros, enquanto que a estrutura dentro do handler-case é marcada de outras formas. Assim some-exception não fica parecendo uma chamada de função, a variável “e” é marcada com :as (que sugere ao leitor a ideia de um nome novo) e os blocos de código são marcados com :try e :catch/:do conforme seu propósito.
Dá para fazer isso com macros, claro que dá. Mas aí fica tão diferente da linguagem, que cada programador acaba tendo seu próprio dialeto. Se eu queria uma linguagem, acabei ganhando um kit de montagem em vez de uma linguagem usável.
O único lugar onde Common Lisp se permite usar algumas palavras a mais é no loop… Na verdade todas as ideias acima foram inspiradas no loop.
(*) Peraí, formas especiais? Pois é, nem Lisp escapa da necessidade de dar valor especial a certas formas. Fico agora pensando se TCL não acaba sendo mais regular…
“How has this gone so badly?” I thought.
I was taking the official listening exam in Chinese proficiency, and I could not understand a single word of the recording.
The test was "elementary" level, and I was there, handing the paper to the teacher at the entrance to the classroom, confused. I had studied by myself at home for years, and I had lived for nine months of "full immersion" in my new country. I’d also attended Chinese classes for three hours per week. How could I perform so badly?
When I received by mail the "Not-Passed Diploma", my confusion turned into frustration. Who was to be blamed for my failure? I had really spent a lot of time studying seriously, religiously, with friends, books, music, movies, and language exchange. Was it me? Was it the teaching system of the school? What was wrong?
It was not my first language learning experience. By the time I began learning Chinese, I was fluent in two languages besides my mother tongue and had studied other languages at a basic level. But this time, I entered into the adventure of an exotic language from a remote place, and I failed.
After some time, things got better, but it was a long and winding road with many obstacles. During the following years, I discovered some secrets about language learning. Certainly, these are not ideas I invented, and most of them have been well-known to many expert learners. But for me they were a discovery, and, in one way or another, made a big change in my perspective of my learning process.
Here’s what I learned...
1. Avoid Shifting Gears Between Languages
A drop of water falling on an uneven surface will follow the direction of the steepest slope. The brain does the same with languages.
In the presence of two messages in two different languages, the brain focuses on the easiest one, often blocking or ignoring the second one.
The brain seems to work at different speeds with different languages. Changing from one language to another implies changing speed, like shifting the gear in a car.
The moment I open a textbook and begin to study, my brain changes gear, which takes a small amount of effort. If for a moment I get distracted by a written text or an audio message in my mother tongue, my brain will shift gear again - no effort needed. In other words, it is easier to “shift gears” from a more difficult language to an easier one than the opposite.
Here’s the simple lesson I learned: while learning languages, don't get distracted by anything in a language different to the one you are learning. This is more difficult at a beginner’s level, because you might need an explanation in a language you can understand, or you might need to check the dictionary. But I always try to create, as much as possible, an environment without distractions in other languages.
Try it for yourself. Which language are you learning? French? Find a free day in your schedule. Try (as much as possible) not to read, listen or even say anything in a language other than French. From early in the morning (or even from the previous night) listen only to music in French, read the news (even if you understand just a bit) in that tongue, and make the effort to think, with simple phrases, in French.
If you want, you can be more radical with this. Remove all material from your desk that is not in French, and set your computer and your phone to French, so when you sit down to study, there are no "slopes" that will change the gears of your brain to non-learning mode, even if it is just for some seconds. Try this, even for half a day, and you will notice the difference.
2. Plan Exhaustion Into Your Study Goals
We’ve all had the experience of making a clear and decisive resolution: I will exercise twice a week, I will not lose my temper at the office, I will study Japanese every day. After a beginning full of energy and determination, our motivation fades out and we find ourselves in the same situation: no exercise, losing our temper and not studying Japanese.
The problem might be bad planning, unrealistic goals or lack of motivation. But there is another aspect we can take into consideration: often we make plans and take decisions for the times in which we will have a lot of energy. Why not plan instead for those moments in which we will be exhausted?
It is good to ask yourself: how do I rest? Walking in the forest? Reading novels? Listening to music? Watching sports? Doing handicrafts? Painting?
Take your preferred way of relaxing, and add an element of your target language.
Like walking in the park? What about listening a language podcast while you walk?
Enjoy reading novels? Look for a book adapted to your level.
Love listening to music? Have you tried learning a song in your target language?
Is watching sports your thing? Then watch the same sports matches you usually would, but listen to commentary in your target language. If this isn’t possible, then look for sports you can watch with commentary in your target language.
Is your favourite “hobby” spending time with friends? Then make a new friend interested in learning the same language as you. Learn together.
Still stuck for ideas? Then listen to the radio, music or news while doing other things, even if you only understand ten percent of the content.
At the beginning, these new ways of relaxing will feel unfamiliar - perhaps even difficult. You will need time to adapt, but after a while it will be as effortless as the way you used to rest before. And most importantly, your brain will work by itself without you noticing, and will store information that it will bring up again when needed.
You might ask: isn’t it more effective to study with intensity, order and attention? This question is a trap. I am not saying that you should only study in ways that allow you to rest, but there are many moments in which this is the only way you can study. Make the most of your rest time!
3. Before You Take Your First Step, Decide Where You Want to Go
What is my "level" in my mother tongue? Most probably I would say that it’s at least "advanced", or "native". But that is hardly a real description. Am I able to write a contract in precise legal terms? Do I understand the slang of my language from different countries or cities, or even age groups? Am I able to explain the intricacies of grammar to a foreigner? Each one of these abilities could be a goal to attain in my own language.
In the same way, each time I decide that I will start (or continue) learning a language, besides finding a reason to learn the language, I need to set clear goals. Not only dreams, but clear specific goals, including the time and resources I am willing to spend on learning a new language.
For example, it might be that I am learning Russian because I enjoy studying "something", and it happened that I found a Russian textbook at home. In this case my objective is to enjoy the act of studying. It is a valid objective and studying Russian is just a means to attain that goal.
Perhaps I sing in a choir that sometimes performs songs with French, Italian and Latin lyrics. I would like to understand a bit of these three languages to make the singing more meaningful. In that case what I need is good pronunciation, together with some basic ideas about grammar and vocabulary.
We can imagine a more demanding situation: I want to apply for a scholarship that requires a certain level in Japanese, or my boss just told me that in order to get promoted I need to be fluent (whatever that means) in Finnish.
It is then necessary to set clear goals. Here are some examples of goals:
Within one month acquire vocabulary concerning seafood products.
By 10th August be able to read in a loud voice fluently, without stammering, and clearly, even if I don't understand what I read.
At the end of the year understand what the evening news is about in my target language.
Pass the intermediate level test in Quenya as a Foreign Language in February.
Survive my trip to Inner Mongolia.
Teach a university course in French next September.
Some people explain goal setting in terms of motivation - to stay motivated, you need a goal. That’s true, but it’s also about putting in place habits that mean you’re likely to achieve your goal. This could be attending Chinese class on Tuesdays from 1-2 p.m. Or it might be reading for five minutes in the morning, listening to music while jogging on Thursday afternoons, or watching a video course on Saturdays at 8 a.m.
It’s important to connect your big goals with concrete activities that you can do at very precise moments of your schedule. If you do this, you’ll reach your goals.
4. Create Your Own Learning Activities
For some strange reason still unknown to me, at the language schools I’ve come across they always want to teach many different things, but very rarely do they want to teach you how to learn.
In a restaurant this approach would make sense; we go to a restaurant to eat, not to learn to cook. In language learning, it does not make sense. From my experience of many failures (which led to later successes), one of the most useful things you can do is develop personal learning activities. This is especially necessary when you get beyond the basic level in a new language.
Creating personal learning activities means you examine yourself and your progress (instead of the school examining you), and find direction in your study that’s relevant to you and your goals.
How can you examine yourself? On a regular basis, ask yourself:
What is my weak point now?
Which area do I want to strengthen now?
In which field do I need to acquire vocabulary?
Where do I commit more mistakes?
What am I afraid of?
Then create a simple learning activity to address the issues you discover. Not sure where to start with this? Just create something. Try. Fail. Work. Adjust. Change. Practise. Examine. Fail. Try again.
Some of the things I've tried (some of which work only in a full immersion situation) include:
Going to a shopping centre and trying to buy 101 different things, even if at the end I didn't buy anything. (Don't make the vendors waste much time.)
Listening to music while reading the lyrics and singing aloud. Then singing without reading the lyrics.
Creating a database of phrases and vocabulary from a novel, and reviewing the list using a free flashcards app.
Reading an article every day in my target language, and talking about it at lunch with friends or colleagues. This worked much better when they didn't know I was doing it as a language learning activity.
Keeping a diary in my target language. One or two phrases a day.
I didn’t choose these activities randomly or because they came to my mind. I chose them knowing that, at that moment in time, I needed to improve my vocabulary or listening skills, or reach some other concrete goal. I also chose them because they work for me. They deliver the results I want.
These activities work best when you persist at them. In my experience, they don’t seem very useful to start with. But after few weeks I really begin to notice the effects.
What do I do when I need ideas for creating or improving these personal learning activities? I draw inspiration from other learners, by reading blogs and websites.
5. Love Mistakes and Laugh at Yourself
I was supposed to teach at the university. I had to pretend that I was able to teach an entire semester in the language in which I had failed so many times. I knew my pronunciation was just terrible and I had not mastered the vocabulary.
So, I found myself in front of a classroom with almost one hundred students who were surprised to see that their new teacher was a foreigner hiding under a local name. I was so nervous that I had diarrhea that day, but that is another story. I tried to calm myself and began to speak. I greeted the students and thanked them for joining my class, but after some seconds a question came to my mind: "What are you doing here? This is ridiculous." Suddenly I got nervous again, blushed and started to sweat profusely.
I survived the semester without using a single word in English (or any other language besides Chinese). Every week I had to give birth to a new lecture. It was both a very tiring and enriching experience.
Did I perform well? Of course not. One year after the end of the semester I had dinner with one of the students, who is now a very good friend. He told me, laughing, that he didn't understand much of what I had said during class the year before. I loved that! It was another fantastic failure diploma, and coming from a friend it was a real treasure.
I enjoy my classes. I don't know if the students always do, but I do. One of the things I like is that we laugh at my mistakes. Often I mispronounce words, I forget terms, or forget the right stroke of a Chinese character. Sometimes my students cannot understand my questions, or I cannot understand their answers to my questions. Often they just smile, sometimes they laugh, they imitate my tones, they try to correct me on the spot. There is only one way to survive, and that is to learn how to enjoy failure. This has many advantages. First, we laugh, and it is good to laugh. Second, because I visibly enjoy failure, my students are not ashamed to correct me. Third, I no longer feel afraid of making mistakes.
There is a moment in which it’s particularly useful to laugh at yourself: on really bad days. We are not machines, we are not computers. In theory, once an app is installed on a phone it will work in spite of the weather and the day of the week. Human beings are not like that. It might happen that, for unknown reasons your Spanish is less fluent on Mondays. Don't get frustrated. Smile!
Even if you make hundreds of embarrassing mistakes in one day, your friends are still your friends.
6. Love Silence
Love silence, speak less. I know this sounds like poor advice. And I profoundly believe in the standard methods of language learning: listen more, speak more, read more, write more. Yes, and at the same time: love silence, and speak less.
Love silence. After each failure (grammatical mistake, wrong pronunciation), big or small, don't ignore it so as not to lose motivation. Instead, stop, in silence, and ask yourself: what went wrong? What can I learn from this? Even better, write down your mistakes. Which important word were you not able to say?
Loving silence, interior silence, enables you to be a better listener. I have seen trillions of learners who attain an intermediate level but don't progress any further. Even if they are often corrected by others, they don't notice it because they are too busy listening to themselves.
Loving silence also enables you to think a microsecond before speaking. For some language learners who love talking, it is difficult to turn long, rich, complex phrases in their mother tongue as they appear in their brains, into the simple, poor, ugly phrases in the language they are learning, but it is necessary to pass through that step.
I might want to say "Whether 'tis nobler in the mind to suffer the slings and arrows of outrageous fortune, Or to take arms against a sea of troubles, and by opposing end them." But if I want to translate that into the language I am just learning, I will fail. I need to learn to stop a bit, and turn that into something much simpler, like this: "I am tired. Should I sleep or work?"
7. Don't Forget Memorisation
Memorisation has bad press. We have heard many times that good education, including language learning, is about understanding, creativity, practising, or many other things, but it’s certainly not about memorisation, as it was in the past, in the dark, oppressive, terrible past.
Memorisation is the ugly duckling of learning. It’s boring, takes so much time, and so often is useless. These characterizations are partly true, but I would still say "train your memory". Then you might discover that memory is a fantastic realm to be explored.
One of the best ways to train your memory is through image association. This technique has been used for millennia and is about far more than simply improving your memory. I would go as far as to say that it’s a way of living, of seeing reality, of "reading" the world around us.
Image association not only helps you memorise and recall isolated facts. It helps you develop various habits of the senses and the imagination that reshape your brain.
After you’ve entered into this realm of memory training, you’ll find that the way you learn is completely different and far more effective. You’ll also have little patience for phrases such as "I have bad memory".
Because these techniques are about a new way of seeing the world, they take time to learn, and cannot be applied immediately. The time you invest will be repaid with a high interest rate.
8. Master the Art of Language Exchange
"We are here in front of a cup of coffee for the first time, ready to help each other to learn a language. Now what?" This is a common scenario in the first session of a language exchange.
How do you get past this awkward stage?
After finding a language exchange partner, one of the first things I do is to establish a common goal. If we don't have a common vision, the language exchange will hardly work.
In my case, language exchange partners come from two sources: friends-of-friends and websites. When you find people on websites, check out their profile to see why they want to learn a language. A person might write that he or she is interested in meeting new people, romance, or cultural experience. I avoid people who want these things. Instead, I search for people who want to learn a language, because that’s my focus. Also, I never contact anyone who wants to learn ten languages, because most probably they lack real motivation, and might not persevere.
For reasons unknown to me, for the first session of face-to-face language exchanges, almost all my exchange partners choose a place more expensive than what their budget would allow for a habitual meeting. I almost always begin with: "let's go to a cheaper place."
After we order a cup of coffee or dinner, I introduce myself and explicitly say that my focus is to learn a language. I let my exchange partner know that I have strong motivation, and that I have some experience teaching and learning. I also explain what I expect from them ("Don't worry if you don't have experience", "It's ok if you aren’t a grammar superhero", "If after some weeks you don't want to continue, just say it", etc.). Finally, I outline the rules of the game (one hour for your language, one hour for my language, frequency and time, etc.).
I have been doing language exchanges for years. Other people might have different experiences, but in my case they evolve in one of two directions:
After a few meetings we both realise that we are not going anywhere and the exchange naturally dies.
We meet for a long time, end up being friends, and after a while we don't care much about language.
In almost all cases, I need the exchange more than my partner does, so it is up to me to arrange the meetings and to prepare the material for both languages. Often I go to their place, spending more time travelling. If we’re short of time, I sacrifice my learning time. And all that is fine. It is normal that I, being the one who needs it more, should add fuel to the engine to keep it working. I should not expect my learning partner to have the same amount of interest and make the same effort; it's part of the game. In almost all cases, sooner or later my learning partner gets influenced by my enthusiasm and becomes more active, making the entire experience rich and pleasant (In my current exchange it is the opposite, he is more hardworking and says that I always arrive late).
I’d also say that an effective language exchange session requires a clear direction. The direction might be given by a textbook or a selection of topics, or a clear goal, such as preparing for a test. I try never to arrive to a session without knowing what we will do that day. With a private teacher, it is not so different. Unless I’m still at a basic level, I don't allow a private teacher to take the reins of the class. I always let my teacher know what I want, and what I need.
Learning is my objective and I need the help of others. I can use many means to learn such as books, recordings, and language apps. But I don't use people. Even if it might mean going slower or losing some good opportunities, I try to create situations in which both my exchange partner and I receive something. At the same time, sometimes I allow myself to be used. I have my goals, others have theirs.
Language exchange is something very personal and what works for some might not work for all, but one of the key components of a fruitful exchange is laughing lots and having fun. Show gratitude when you receive help from others.
What are Your Top Language Tips?
As I write these paragraphs, I’ve just moved to a new country. I want to be fluent in three months in the local language, but everything seems to be against this goal: I live surrounded by English, I don't have much time, and the language seems to be more difficult to me than Mandarin was when I began with it. Strictly speaking I don't need it as much as I needed Chinese few years ago. Will my "eight secrets" work? Any advice?
Since we started breaking our monolith and introduced a microservices architecture we rely a lot on synchronous request-response style communication. In this blog post we’ll go over our current status and some of the lessons we learned.
Finagle and jvmkit
Most of our microservices are built on top of Finagle and are written in Scala. Finagle is a highly extensible and protocol agnostic RPC framework developed by Twitter.
Finagle clients and servers use non blocking I/O on top of Netty. Non blocking I/O improves our scalability since we have a lot of scatter-gather style microservices or microservices that are I/O bound on external resources like databases.
Finagle is also highly configurable and extensible which means we can tailor it to work well with our infrastructure.
To make it easy for developers to build microservices that play nicely with the SoundCloud infrastructure and conventions we have an internal library called jvmkit which is maintained by our Core Services team. Some of the functionality jvmkit provides:
Wrappers around Finagle HTTP, memcached and MySQL with reasonable default configurations and integration with Prometheus
DNS based service discovery implementation
HTTP request routing on top of Finagle
JSON parsing support for request / response entities
Logging support according to our standards
API support for rollout our feature toggle system
Teams are responsible from development till running their microservices in production so they can decide not to use jvmkit as long as they stick to our standard protocol. In practice however most of our microservices do use jvmkit. By using jvmkit teams have more time to focus on delivering business features.
HTTP/1.1 + JSON
Almost all our services use HTTP/1.1 + JSON for communication.
The advantage of HTTP + JSON is that it is supported everywhere so we don’t lock ourselves into a specific technology or programming language.
There is very good tooling support for HTTP + JSON which makes it easy to debug and interact with our services.
The HTTP method indicates useful properties of requests. It indicates if a request is idempotent and safe (read-only). These properties tell us if requests can be safely retried or cached. We found this useful when replaying requests to test new revisions of a service. Indication of these properties are missing from other protocols we looked into.
Of course HTTP + JSON results in more overhead compared to other more optimized protocols. We have some services using Finagle ThriftMux and have thought about making ThriftMux the recommended protocol but we stepped away from that idea. ThriftMux is not ubiquitous and would lock us into Finagle if we want to get all the benefits.
Client side service discovery and load balancing
When we started using microservices we used separate load balancer processes as entry points for our services. With the increase in traffic we ran into failing load balancer processes which caused several outages. Our load balancers were single points of failure.
These outages made us move to client side service discovery and load balancing. We wrote a Java service discovery implementation that queries DNS SRV records to get the instances for a given service. Writing it in Java means it can be integrated in any JVM based language and framework that supports Service Discovery. We obviously integrated it in Finagle by using the Finagle Resolver api. Having support in Finagle means we have client side service discovery and load balancing support for HTTP, ThriftMux, MySQL and memcached.
Resilience against failures
When investigating the root cause of some of our outages we realized that we had to invest more in improving our resilience against failures. It quickly showed how important it is to use a mature library or system like Finagle which is already equipped with important features like:
Timeouts: every request across the network needs realistic timeouts. This protects you from issues with the systems you depend on.
Transport and application level Circuit Breakers: supports ignoring hosts that become unavailable or unhealthy with automatic recovery when they become healthy again. It protects you from issues with systems you depend on and allows them to recover.
Conditional retries: retrying can be effective but you shouldn’t retry unconditionally as this can result in retry storms that can overload the systems you depend on. Retry budgets allow you to configure a percentage of requests that can be retried on top of a minimum number within a time frame.
Limiting concurrent requests: If you know the capacity your service can handle you can protect it from overload by limiting the maximum number of concurrent requests and waiters (queue size).
Using and configuring these features have allowed us to better deal with failures which are inevitable in a distributed system like a microservices architecture.
We also introduced automated integration tests for jvmkit which show and document how our systems will react to failures. These tests also notify us about potential behavioural changes when upgrading Finagle.
No more client libraries
When we started implementing microservices teams who implemented a service typically also provided a client library that could be used by other teams to access their service. Those client libraries were implemented in the same programming language as the service and were hiding network communication and serializing / deserializing of requests and responses behind an easy to use api. The idea was that the code to access a service only needed to be written once and could be re-used by many.
After a while we noticed the client libraries approach also brings a lot of disadvantages:
A client library brings in dependencies. It might bring in a HTTP library, JSON parsing library etc. This might result in conflicts with the libraries already used by your service. If you depend on more than 1 client library this problem only increases resulting in unnecessary dependencies and conflicts between teams.
A client library might become bloated with custom logic. Using the client library might be the only way to successfully use the service and prevents it from being used by applications using other technologies. This imposes the use of a programming language and technology on other teams.
A client library can have default error handling logic which is probably not a good fit for all use cases. Users of a service should be aware of the error scenario’s that can happen and act upon them in the best way for their use case.
A client library will likely parse all returned fields of a response even if the client is only interested in a subset. This not only might have performance implications but also violates the tolerant reader principle.
We think these disadvantages far outweigh the benefits. The use of client libraries results in increased coupling and dependencies. Instead of publishing clients we encourage teams to publish their API’s. Consumers write their own clients in a way they find most appropriate using their technology of choice.
What’s next?
We hope to introduce Consumer Driven Contract tests soon. These tests will catch breaking changes between services and consumers during build time. Some teams are currently working on proof of concepts and are building out and validating the process.
A logical step for us would be to move from HTTP/1.1 to HTTP/2 as our default protocol. This would improve latency while sticking with a widely supported protocol without technology or programming language lock-in.
We might also replace JSON with a more efficient serialization protocol like protocol buffers. This would further improve performance and should result in less handwritten serialization and deserialization code but this still needs more experimentation and investigation.
The third post of Low Internal Software Quality series.
As well as a big software refactor, a rewrite is not a simple thing either. After many years, we have gotten experience enough to point what you had better consider when planning and executing a rewrite process.
Will the two platforms live together for some time or not?
Are you planning to maintain the legacy and the new version in production? If so, for how long? You should avoid maintaining two versions in production for too long because of opportunity and operating costs.
Who will work on the rewrite and who will work on the legacy version?
Developers usually prefer to work on green field projects. You should take that into account when planning who will maintain the legacy version and who will work on the new one.
It’s not viable to rewrite every single feature at once
It’s not viable to have a 1 to 1 feature mapping between the legacy version and the new one. That said, what features should you start rewriting?
Take into account how current clients will be impacted by a product with fewer features.
A rewrite will slow down or stop the launch of new features in the legacy version
Chances are you won’t launch new features for the legacy version during the rewrite process. Not only will end-users not get new features, but neither will internal clients (commercial and product departments). Your internal clients and stakeholders will pressure you to deliver new features.
Make sure that the communication before and during the rewrite is clear, and that every stakeholder is aligned with the end goals.
Keep it secret or public?
Imagine you are a potential customer of a software product. You’re planning to buy it, but you just found out that a completely new version will be launched in three months. Would you buy the legacy version or wait for three months? Multiply that by dozens or hundreds of potential buyers. The provider could lose a lot of money.
That’s why if you’re the provider, you should think carefully about how and when you’re going to publicize the launch of a brand new version.
Data migration
A rewrite process is not just shipping features. You also need to plan the data migration. People usually underestimate the complexity and effort needed to migrate data from the legacy version to the new version. That activity should not be just one task on your board called “data migration.”
For example, imagine that you need to migrate your users’ accounts. If your legacy version is managed by a third-party, chances are you won’t have access to the users’ encrypted passwords, so you won’t be able to migrate them. You’ll have to ask every single user to reset their passwords in the new version. That’s part of the data migration process, too.
Prepare for a possible decrease in conversion rates
You’ll launch a new version with fewer features. Who guarantees that the conversion rates will stay the same? Conversion rates are vital in some domains, like in e-commerce.
Ideally, you should be able to keep both the legacy and the new version running for a while so that you have a backup plan in case there’s a huge decrease in conversion rates.
Plan time to train internal users
This is another overlooked subject. The rewrite plan needs to have a phase of internal user training before taking your new product to production. Don’t underestimate that, either. It can take a long time since your internal users will give you feedback about stuff that might need to be changed.
Internal users can be found in a variety of areas, such as help desk and inside sales.
What about you? Do you have any more tips on what to worry about when doing a rewrite? Share with us!
O estado de Alagoas foi o primeiro do país em que uma Assembleia Legislativa aprovou um projeto de lei que pune professores que opinarem em sala de aula sobre questões políticas, culturais, econômicas[1]. A lei é inspirada no projeto escola…
Ainda ecoa na sociedade as manifestações que marcaram a votação do impeachment na Câmara em 17 de Abril deste ano. Enquanto Bolsonaro votou contra o comunismo, contra o Foro de São e em homenagem ao coronel e torturador da ditadura…
The purpose of a sticky footer is that it "sticks" to the bottom of the browser window. But not always, if there is enough content on the page to push the footer lower, it still does that. But if the content on the page is short, a sticky footer will still hang to the bottom of the browser window.
There is negative bottom margins on wrappers
There was a wrapping element that held everything except the footer. It had a negative margin equal to the height of the footer. That was the basis of this one.
html, body {
  height: 100%;
  margin: 0;
}
.wrapper {
  min-height: 100%;

  /* Equal to height of footer */
  /* But also accounting for potential margin-bottom of last child */
  margin-bottom: -50px;
}
.footer,
.push {
  height: 50px;
}
This one required an extra element inside the content area (the ".push"), to ensure that the negative margin didn't pull the footer up and cover any content. The push was also clever because it very likely didn't have any bottom margin of it's own. If it did, that would have to be factored into the negative margins, and having those two numbers not in sync doesn't look quite as nice.
There is negative top margins on footers
This technique did not require a push element, but instead, required an extra wrapping element around the content in which to apply matching bottom padding to. Again to prevent negative margin from lifting the footer above any content.
Kind of a wash between this technique and the previous one, as they both require extra otherwise unnecessary HTML elements.
There is calc() reduced height wrappers
One way to not need any extra elements is to adjust the wrappers height with calc(). Then there is not any overlapping going on, just two elements stacked on top of each other totaling 100% height.
Notice the 70px in the calc() vs. the 50px fixed height of the footer. That's making an assumption. An assumption that the last item in the content has a bottom margin of 20px. It's that bottom margin plus the height of the footer that need to be added together to subtract from the viewport height. And yeah, we're using viewport units here as another little trick to avoid having to set 100% body height before you can set 100% wrapper height.
There is flexbox
The big problem with the above three techniques is that they require fixed height footers. Fixed heights are generally a bummer in web design. Content can change. Things are flexible. Fixed heights are usually red flag territory. Using flexbox for a sticky footer not only doesn't require any extra elements, but allows for a variable height footer.
Grid layout is even newer (and less widely supported) than flexbox. We have a complete guide for it too. You can also fairly easily use it for a sticky footer.
After over a year of development and production use at Netflix, we’re excited to announce that our Continuous Delivery platform, Spinnaker, is available on GitHub. Spinnaker is an open source multi-cloud Continuous Delivery platform for releasing software changes with high velocity and confidence. Spinnaker is designed with pluggability in mind; the platform aims to make it easy to extend and enhance cloud deployment models. To create a truly extensible multi-cloud platform, the Spinnaker team partnered with Google, Microsoft and Pivotal to deliver out-of-the-box cluster management and deployment. As of today, Spinnaker can deploy to and manage clusters simultaneously across both AWS and Google Cloud Platform with full feature compatibility across both cloud providers. Spinnaker also features deploys to Cloud Foundry; support for its newest addition, Microsoft Azure, is actively underway.
If you’re familiar with Netflix’s Asgard, you’ll be in good hands. Spinnaker is the replacement for Asgard and builds upon many of its concepts. There is no need for a migration from Asgard to Spinnaker as changes to AWS assets via Asgard are completely compatible with changes to those same assets via Spinnaker and vice versa.
Continuous Delivery with Spinnaker
Spinnaker facilitates the creation of pipelines that represent a delivery process that can begin with the creation of some deployable asset (such as an machine image, Jar file, or Docker image) and end with a deployment. We looked at the ways various Netflix teams implemented continuous delivery to the cloud and generalized the building blocks of their delivery pipelines into configurable Stages that are composable into Pipelines. Pipelines can be triggered by the completion of a Jenkins Job, manually, via a cron expression, or even via other pipelines. Spinnaker comes with a number of stages, such as baking a machine image, deploying to a cloud provider, running a Jenkins Job, or manual judgement to name a few. Pipeline stages can be run in parallel or serially.
Spinnaker Pipelines
Spinnaker also provides cluster management capabilities and provides deep visibility into an application’s cloud footprint. Via Spinnaker’s application view, you can resize, delete, disable, and even manually deploy new server groups using strategies like Blue-Green (or Red-Black as we call it at Netflix). You can create, edit, and destroy load balancers as well as security groups.
Cluster Management in Spinnaker
Spinnaker is a collection of JVM-based services, fronted by a customizable AngularJS single-page application. The UI leverages a rich RESTful API exposed via a gateway service.
You can find all the code for Spinnaker on GitHub. There are also installation instructions on how to setup and deploy Spinnaker from source as well as instructions for deploying Spinnaker from pre-existing images that Kenzan and Google have created. We’ve set up a Slack channel and we are committed to leveraging StackOverflow as a means for answering community questions. Issues, questions, and pull requests are welcome.
This is the first in a two-part series about Monitoring at Spotify. In this, I’ll be discussing our history, the challenges we faced, and how they were approached.
Operational monitoring at Spotify started its life as a combination of two systems. Zabbix and a homegrown RRD-backed graphing system named “sitemon”, which used Munin for collection. Zabbix was owned by our SRE team, while sitemon was run by our backend infrastructure team. Back then, We were small enough that solving things yourself was commonplace. The reason that we took this approach was more because of who picked a problem off the table first rather than anything else.
In late 2013, we were starting to put more emphasis on self service and distributed operational responsibility. We wanted to stop watching individual hosts, and start reasoning about services as a whole. Zabbix was a bad fit due to its strong focus on individual hosts. The only ones who could operate it were SRE folks. The infrastructure was growing – a lot. And so our systems started to crack under the added load.
We tried to bandage up what we could: our Chief Architect hacked together an in-memory sitemon replacement that could hold roughly one month worth of metrics under the current load. While we had some breathing room, we estimated that we had at most a year until it would become unsustainable. From this experience, a new team was formed: Hero. Their goal was to ‘fix’ monitoring at Spotify and prepare it for the future. Whatever it takes. The following walks through our approach.
Alerting as a service
Alerting was the first problem we took a stab at.
We considered developing Zabbix further. It uses trigger expressions to check for alerting conditions. We observed a lot of bit-rot in the system, and many triggers were running that were hard to understand, broken, or invalid. This prompted us to specify one of the requirements for our next alerting system: It must be easy to test your triggers to increase understanding, and avoid regressions.The scalability of Zabbix was also a concern. We were not convinced that we could operate it at the size we were expecting to be in the coming two years.
We found inspiration from attending Monitorama EU where we stumbled upon Riemann. A solution that monitors distributed systems. Riemann does not provide scalability out of the box, but its favoring of stateless principles makes it easy to partition and distribute the load. We paired every host in a service with at least two instances that were running the same set of rules.
Every host talks to at least two Riemann instances.
We built a library on top of Riemann called Lyceum. This enabled us to set up a git repository where every squad could put their rules in an isolated namespace. With that setup, our engineers could play around and define reproducible integration tests. It gave us the confidence to open the repo to anyone, and deploy its changes straight into production. Our stance became: If the tests pass, we know it works. This proved to be very successful. Clojure is a vastly more comprehensible language than trigger expressions, and the git-based review process was a better fit for our development methods.
Graphing
We went a few rounds here. Our initial stack was Munin-based with plugins corresponding to everything being collected. Some metrics were standard, but the most important ones were service metrics.
It became desirable to switch to a push-based approach to lower the barriers of entry for our engineers. Our experience with Munin taught us that a complex procedure for defining metrics led to slow adoption. Pull-based approaches need to be configured on what and where to read. With push, you would fire and forget your samples at the closest API, preferably using a common protocol. Consider a short-lived task where there might not be sufficient time for it to be discovered by the collector. For push, this is not an issue since the task itself governs when metrics are sent.
If you want to know more, sFlow and Alan Giles have written good articles examining the topic in more depth.
Our initial experiment was to deploy a common solution based on collectd and Graphite to gather experience. Based on performance tests, we were unsatisfied with the vertical scalability we could get out of one Graphite node.
The difficulties in sharding and rebalancing Graphite became prohibitive. Some of these might have recently been solved using the Cyanite back-end. But Graphite still suffers from a major theoretical hurdle for us: hierarchical naming.
Data Hierarchies
A typical time series in Graphite would be named something like the following:
The exact style varies, but this can bee seen as a fixed hierarchy. For some things this works really well, some things are inherently hierarchical. Consider however, if we want to select all servers in a specific site.
We have two options: we can hope that server name is consistent across our infrastructure and perform wildcard matching; or we could reshuffle the naming hierarchy to fit the problem:
This type of refactoring is hard.
There is no right answer here. One team might require sites to be the principal means of filtering, another one is interested in roles. Both these requirements may be equal in merit. Therefore the weakness is the naming scheme.
Tags
A completely different school of thought flips the problem around and considers the identity of a time series to be made up of a set of tags.
Looking at our previous example, we would map the existing hierarchy into a set of tags.
With a filtering system that takes this into account it enables engineers to “slice and dice” a large pool of time series by the components attached to each of them. Increasing interoperability.
This way, there is no hierarchy to which we must strictly adhere. They may be part of the structure by convention (“site” and “host” are always present), but they are neither required nor strictly ordered.
Atlas, Prometheus, OpenTSDB, InfluxDB, and KairosDB are all databases that uses tags. Atlas and Prometheus would have been seriously considered, but were not available at the time. OpenTSDB was rejected because of our poor operational experience with HBase. InfluxDB was immature and lacked features we needed to promote self-service. KairosDB seemed like the best alternative, so we ran an extensive trial. It uncovered performance and stability problems and our attempts to contribute were unsuccessful. We felt the project lacked in community engagement and wasn’t moving in the direction we needed it to.
Inspired by KairosDB we started a new project. A small proof of concept yielded promising results, so we kept going and gave it the name; Heroic.
Stay tuned for the next post tomorrow where I’ll be introducing Heroic, our scalable time series database.
Whether you are forming a new agile team or mixing people in an already existing team you start somewhat afresh. In an existing team the balance and group
dynamics changes, in a new team people are experiencing each other for the first time and checking what the boundaries are. I don’t want to get into details
of what can possibly happen — it’s best if you dig into works of Bruce Tuckman and his four-stage model or Gustave Le Bon’s “[The Crowd]
(https://en.wikipedia.org/wiki/The_Crowd:_A_Study_of_the_Popular_Mind)”. The former indicated that the team goes through the stages of Forming - Storming -
Norming - Performing. I would like to concentrate on the very initial stage of “Forming” the team in the first weeks of it’s existence.
There are few things I learned when entering a team. One of them is that it’s better for people to start sitting together. Let them do it at the very beginning.
This indicates that something different has started, that allows them to concentrate on the future, mitigate the risk of misunderstandings or get
to know the character of people they are going to work with.
Below you will find a set of exercises and techniques that you can configure at your will. They might assist in the initial stages of building a team.
In order to get to know each other, find common ground and seek the ways you can work together, constantly verifying them as you go. In today’s hectic world
change is inevitable. Those who don’t change die. Therefore you will probably use these exercises multiple times just to keep up with the changes. That’s a good
thing. You can use them in various configurations — doing all in one day (which may be tiring), everyday in small chunks (one exercise at a time) or once or twice
per week. Anything that suits you best. Nevertheless, it’s best to start with getting to know the product, then get to know each other as the product starts to
create a context in which we all operate. Afterwards we find out how we are going to work and finally we can contract on the roles. Still, it’s your call.
Break the rules and see what happens. In the brackets you’ll find the approximate time required for a particular exercise session.
Agile chartering is a simple technique useful for building the basic knowledge of the product. It answers three simple questions which may, at times, turn out
to be difficult:
Why are we building this product?
How will we know if it is successful?
Who is the project community?
Doing this together with the Team and stakeholders will shed light on the vision that each of them has. It’s an opportunity to find common ground in terms of
perceiving a product and it’s success as well as acknowledge who the parties of interest are.
The session should start with a person responsible for the product (like a product owner in Scrum) or business sponsors explaining in a few statements the product
and it’s value. If other participants know a thing or two about it — they are welcome to share as well. It may be worth doing a brainstorming session for each of
the questions and closing each discussion with understanding the goals, vision and arguments that come with it before going to the next question. This approach
will also make answering consultative questions easier and encourage building on what was already agreed. These conversations will happen regularly if working in
iterations. This exercise will help you to start with what is already known and change as you go.
On the basis of the above information, the Team can start building a repository (a backlog in Scrum) however it looks and however you call it does not matter at
this stage. It’s probably going to be high level and not very detailed. Just go with it and add more as you discover more.
Getting to know each other (30–60 minutes)
When getting to know each other it’s worth to answer few simple questions that break the ice and shed some light on our expectations as well as talents.
What are the skills that we have? What are we good at and how can we help others thrive? Using [Team Competency Matrix]
(https://management30.com/leadership-resource-hub/team-competency-matrix/) can speed up the work and create a draft of
the development plan for the team members. If you want to work in agile you should have a team that is multifunctional so you are not dependent on others. And
this is where skills come in handy.
Which skills do we need? Contrary to the above we are narrowing and focusing on the fact that our team is cross-functional and enables us to
deliver without addressing things outside of it. The latter can slow down the work and create unwanted dependencies. Still, if we encounter such, is this
something we can cope with or do we need to hire someone to fill in the gap?
How would we like to work? What methodology, techniques, frameworks or any other tools would we like to use? This is high level brainstorming regarding what
the team is going to end up with, hopefully, an agreed method of working. If there are several ideas, maybe let’s try just some of them in an experiment.
You’re going to dig in deeper into how you would like to work in the next session.
When talking about the above it’s worth having few examples of your own up your sleeve. Something to start the conversation as some of the questions might seem a
little vague or too general. Let me give you an example.
I can help you with moderating, assist them in creating a development plan, coach them, give feedback, pay attention to the value they create, challenge them,
cooperate with the organisation to foster change that benefits all and many other. I would like us to work in Scrum because I find it valuable. To my mind it is
effective due to it’s simplicity, reducing the complexity of work and focusing on the most important things. It also leaves a lot of space for choosing the best
tools that we, as a Team, find useful.
Setting up working rhythm (up to 90 minutes)
At this stage we are digging deeper to setup the minimum details that we need to start doing the work. We will have plenty of chances to verify our approach and
improve on the way. In agile at least that’s one of the advantages. We are answering the questions: how do we want to work? In what rhythm would we like to
operate and why? In this step it’s good to define the agile framework or methodology you would like to use in more details. Establish repositories
(Jira, Confluence or any other that you want to use) on the meeting, if possible, and agree on how it is going to be verified if what we are doing really works
for us. This may take longer than expected if an introduction about the new (to some) framework needs to be carried out.
I start with five things and then check along the way:
Why do we want to use a particular approach (what motivates us)?
What is our mutual understanding on how this approach works?
What rules should we follow?
What are the success criteria stating that we are going in the right direction (that this works for us)
How often do we want to do a “check point” to see if this is what we need? (in Scrum this can be done during Retrospectives)
You can find a sample of such analysis in a Scrum-ban* experiment we’ve conducted. Another approach could be
looking at what we want to accomplish? Then following up with what do we need to accomplish this? and / or how will we accomplish this?.
Contracting (45–60 minutes)
It’s one of the most important things when people in a group meet and are supposed to work together. If you don’t have the time to do any of the other steps
described — do this one. I do contracting in two steps. Setting up expectations between Team members in terms of their roles as well as in terms of conflicts that
may arise when we work together and / or with other teams. It’s important to review the rules that we set in motion once in a while (eg. each 2–3 months) to check
if they are still valid and / or if there is anything we want to add.
Contracting roles
Whether it’s Scrum or something else, all of us work in roles. Some of them have been exercised and some might be new. It’s good to name them and
relate to the rules in terms of our understanding and expectations. A good thing to do it is to use a simple matrix.
It can be done in a way that each member writes his expectations on sticky notes and places them on the matrix. 10 minutes should be sufficient time to clear
one’s mind and write a sufficient number of things down. When all participants have done it, it’s time for reading aloud and clarifying / responding. In my role as
an Agile Coach I treat this as a point where we can share how I perceive my role and what I can, cannot and won’t do, always giving explanation why I think that
way. Another thing is that you can, instead of “x” (as seen on the above photo), share your expectations towards yourself in your role.
I had a team once that was working on a tight deadline. It was not really Scrum but the pace was so hectic that I gave up on this exercise and concentrated at the
work at hand. This has led to a couple big misunderstandings in terms of what they expected me to do (as a Scrum Master back then) and what I thought their
knowledge on Scrum roles were. This does not take huge amounts of time and can give you much more than you’d think in the long term when it’s sorted out.
Contracting conflicts
A sample contract for dealing with conflict. This can be customised to the teams needs.
Conflicts are inevitable in team building and, in general, in communicating with others. We filter the surrounding environment by our expectations, views, values
and so on. People do not have the same exact combination of them and this may lead to misunderstandings. Setting up the way we are going to deal with them will
help out when in a difficult situation or an emotional state. In such situations our prefrontal cortex (responsible for logical thinking) is not working at it’s
full potential. There is a correlation between emotions and logical thinking — the more emotions we experience the less logically we think. This can lead to
narrowed thinking and bad decision making and therefore the contract comes in handy. The “U model” (mentioned in the photograph) is one of the techniques that can
be used to better understand the other side. It involves three stages:
Active listening (paying attention to what is important to the speaker, what are his /hers emotions and what problem is he / she experiencing).
Reflecting on what the other person said (taking into account the filter from the first stage).
Using coaching questions to foster change and help find a solution to the situation.
Do a sidewalk test
Nothing connects people more than afternoon fun. The informal atmosphere of getting a beer, racing karts, playing squash or doing anything else that people
might want to check out together can break the ice. It’s good to unwind and go out as a team. I would recommend doing it after 1 or 2 weeks of working together so
people can first settle a bit in the new setup at work. One of the ways to check on how are people feeling with each other would be Atlassian’s “sidewalk test”:
“If you are walking downtown and you see someone you work with and want to cross to the other side of the street, that’s our culture test” — Jay Simons, CEO Atlassian
What you’ve read above is what I believe is worth remembering. Do not treat this as constans once you’ve done it. Review your findings as the team
grows. Some of the exercises you might want to skip, others may be put in different combinations. There is a logical key in the order I placed them but do not
follow the rules just to follow the rules. Break them, experiment and.. Do share here what you’ve come up with so we can all learn!
Foreword: This post was initiated by Andy Park, former agile coach here at Spotify. For years we’ve been experimenting with how to do “big retrospectives”. That is, how to capture and spread learnings from big complex multi-site efforts involving dozens of teams. We used to do the traditional “get everyone into one big room” version, but now with hundreds of people spread across different continents that’s a logistical nightmare. After some experimentation we’ve converged on a decentralized approach that scales much better. Andy has helped facilitate several of these retrospectives, and thankfully took the time to write an experience report about it. Here it is, with only minor additions from me. Enjoy! /Henrik
At Spotify, Kaizen is hugely valued and retros are one of our goto tools to help us reflect and continuously improve. Not just as part of squad level activities but also as a company level activity. Which sounds awesome in writing. In practice what we found is that when you grow like crazy, the size of company initiatives could scale just as crazy and retros for programs becomes larger and larger running into a diminishing return problem.
Does this look familiar to some of your large program retros?
In late 2014 we had an opportunity to run a program level retro for an innovation initiative that spanned across 80-90 people in NYC and Stockholm. Instead of a large session, we opted to try something bit different – and we found it to work better for these types of initiatives.
It worked well enough for us that we refined it further to apply it to our latest programs Moments and Running and Sony PlayStation™ Music which involved hundreds of people spread globally across many departments ranging from TPD (tech, product, design) to legal, business, licensing, partners, and much more.
In order for us to learn more effectively from programs of such size, here’s what we are doing for retro at scale, designed by Henrik Kniberg, and refined through couple executions!
How we do decentralized big retros
In summary:
How do we do this really
First we let out a deep sigh and deploy the fiery agile evangelists to wage a holy war to forcibly convert management over and secure company commitment.
Thankfully that isn’t the case at Spotify, so Step 1 begins with emailing agile coaches to seek volunteers to form a small working group of facilitators. Once the group is formed, most of the activities revolve around setting expectations, creating an objective for the retro, communicating to the company and participants about the retro as heads-up. We also craft a high level retro plan, a google spreadsheet that looks something like this:
As part of this we identify a handfull of “themes” that can be investigated independently (that’s the scaling trick!). For example “program management”, “new content”, “architecture”, etc. The choice of themes varies a lot dependending on context, so that’s one of the key decisions for the working group.
When the plan is good enough to start, the working group transitions into Step 2 – doing the actual retrospectives. We don’t need everyone involved in every conversation, instead we organize a number of smaller conversations. The facilitators spread out, pick a theme, gather a cross-section of people that have insights into that theme, and run a retrospective. Smaller groups make for better conversations, and also easier logistics (easier to find a time that works, a room that fits people, etc).
As for the specific format, we used to leave that up to each facilitator. Lately, though, we’ve started converging on a “standard” format, which gives the faciliator a starting point and also makes for easier merging later:
Introduction (purpose of this retro, introduce each other)
Timeline (draw a timeline together, annotate with milestones, what worked well, what didn’t, and any “elephants”)’
Cluster (find patterns and label them)
Recommendations (distill into concrete insights and recommendations, both for the how we work now, as well as how we might work in the future)
Closing (round-table final thoughts from people, and quick feedback about the retro itself)
Pretty standard retro format, so I’ll spare you the details.
The working group meets up from time to time, using the spreadsheet above as a sync and status tool. They support each other and address problems such as lack of facilitators.
As individual retros are wrapping up (after a few weeks typically), the working group gradually transitions into Step 3 – discussing and merging the collected data. The goal is to find patterns and condence it into a short and coherent summary with key insights and recommendations.
When ready, the working group enters the last phase Step 4 – spreading the word. That includes things like sharing the summary with stakeholders and retro participants; meeting in small groups to share learnings; speaking during town hall sessions; and so forth to really help the organization internalize and act and upon the learnings.
Benefits of this format
What we learned with this distributed retro model at scale is that it enables different groups to focus on different topics deeply to generate cross functional and impactful learnings across the company.
On the human level it provides a great venue and increased engagement for folks to have their say, get their voice heard, and just as importantly a neutral safe place to air dirty laundry. This helps strengthen the Spotify DNA and the transparent learning organization we’re trying to build.
Retro the retro
We learn as we go and continuously try to improve the way we do cross-functional retrospectives. Here are some plain yet sometimes overlooked points that have helped us do these more effectively since our initial attempts back in 2012.
Have a “Road manager” for the retro to help organize and drive the effort and schedule various regular check-ins with retro working group, stakeholders, etc.
Ask the The Spice girl question (“What do you want, really really want”) when carving out objectives of the retro.
Be explicit about expectations and priority. Facilitators are volunteers, and when signing up they need to understand the level of commitment and work involved.
If you want to move quickly, communicate the priority and importance of the retro to the company. That way the participants understand what’s expected of them and will make the time to attend. Without that, don’t be surprised if retros get moved around to find time rather than folks making time, which add up to individual retros for themes taking longer and overall retro effort taking longer. Ultimately diluting the learning as time passes.
On the whole, this format is the best we’ve found so far for large scale retros. We’ll keep experimenting though, so stay turned.
Feedback
We hope this gives you some ideas for how you might retrospectives, regardless of your context and scale! We would love to hear your thoughts and maybe you have done something similar. Please share your thoughts and comments below if you’d like.
Eu sempre me considerei uma vítima do sistema educacional brasileiro. E essa semana, gravei um vídeo pra explicar melhor o que quero dizer com isso — mas obviamente não devo ter me explicado bem o suficiente, porque dessa vez preciso fazer um Além do Vídeo.
Acho que o ponto mais crucial que preciso martelar aqui é que há muitos anos, te ensinaram uma ladainha mentirosa pra justificar o processo enlouquecedor (e caro, e ineficiente) de decorar inutilidades gerais por 13 ou 14 anos pra vomitar tudo numa prova para entrar num curso sobre o qual não te deram literalmente nenhuma informação.
Não, nem todo conhecimento é útil.
Eu já consigo ouvir você rejeitando a minha heresia anti-científica e bolando cenários absurdamente específicos pra justificar que sim, aprender multiplicação de matrizes ou logaritmos ou as regras de um verbo transitivo direto traz algum benefício. Seja porque “estimula o raciocínio”, ou porque em uma condição extremamente particular você conseguiu achar uma aplicação prática de algo que você aprendeu ao longo de mais de uma década pagando pra ser programado pra passar num vestibular.
Vamos por partes. Primeiro, a gente precisa questionar seriamente essa noção idealista e romântica de que passar horas enclausurado numa sala fazendo e refazendo equações de segundo grau é uma espécie de “ginástica mental” que exercita o raciocínio, e por extensão o pensamento crítico, analítico, científico.
Soa bonito no papel; é aquele tipo de coisa que alguém te oferece como justificativa e tu pensa “é, tem razão, faz sentido“, e para imediatamente de criticar o sistema.
Só que aí você percebe que o Brasil não tem um prêmio Nobel sequer, ou que somos um país em que milhares (milhões?) de pessoas protestam pelo “direito” da Telexfree de roubar seu dinheiro, e precisamos admitir que essa noção de que ficar passar horas divindo polinômios talvez não tenha o menor efeito positivo em nossa capacidade analítica ou científica.
Aliás, esse bizarro e auto-flagelante culto à práticas matemáticas abstratas não nos rende benefícios nem mesmo no domínio da matemática.
Já os americanos, a quem adoramos categorizar como burros porque acham que se fala espanhol no Brasil (a despeito do fato de que você provavelmente NUNCA ENCONTROU UM AMERICANO QUE ACHASSE ISSO, mas ouviu várias pessoas falando que acontece então deve ser verdade né? Olhaí os tais skills analíticos nos quais somos profissionais!), estão em segundo lugar no ranking.
Olha a posição brasileira. Você está entendendo o que eu estou tentando te dizer…? Esse foco todo na matemática abstrata não nos rende bom desempenho nem mesmo na matemática, que dirá então em faculdades mentais não-relacionadas. Eu simplesmente nunca vi evidência alguma de que passar anos decorando fórmulas de Física, e em seguida inserir números no lugar das variáveis, torna alguém mais intelectualmente apto a qualquer coisa. E OLHA QUE EU CURSEI BACHARELADO EM FÍSICA.
A segunda coisa que me incomoda nos defensores dessa teoria de que “todo conhecimento é útil” são as justificativas inacreditavelmente tortuosas pra justificar o currículo escolar que é essencialmente o mesmo há séculos. Por exemplo: nos comentários deste meu vídeo acima, alguém falou que o estudo de química é útil porque sem ele, você não saberia que compostos químicos são perigoso pra se ingerir.
Sim, porque sem decorar “Foi Clovis Bornay que Incendiou Atenas” (F Cl Br I At, a família 7A da tabela periódica), eu sou sair por aí bebendo querosene e água sanitária. Em seguida o mesmo rapaz falou que balanceamento de equações químicas é igualmente fundamental, porque sem ela sua mãe não conseguiria seguir uma receita de como fazer sabão.
O que me dá mais raiva é que eu, que sempre odiei química, teria achado FODA DEMAIS ver na escola uma aplicação prática de estequiometria como essa fabricação caseira de sabão aí. Consigo imaginar uma aula de equação química bolada em torno do processo de medição das proporções desses reagentes, mas obviamente isso seria muito interessante então é claro que não é assim que nos ensinaram.
Continuando o tema de “pessoas perdidamente acostumadas com um sistema caro e ineficiente inventando desculpas absurdas para defender sua perpetuação”, teve um outro sujeito (um médico!!!) que comentou que o ensino de geografia é igualmente essencial, porque é através dele que aprendemos as doenças típicas de uma região.
A absurdíssima insinuação aqui é que, sem ter ouvido uma vez na quinta série que há incidência de esquistossomose no Nordeste, um médico daria a esse paciente tratamento para dor de dente.
Os comentários do vídeo estão repletos de argumentos desse naipe. “Não, mas you see, eu trabalho com X e uma vez numa condição bem específica que só aconteceu comigo e que muito provavelmente jamais se repetirá eu pensei ‘ah é uma vez vi isso na escola’, logo, o currículo inteiro está justificado”.
Acho que o ímpeto por trás desse tipo de comentário é uma vontade irresistível de contradizer, mesmo que pra isso você defenda um caríssimo sistema de treinamento que demora mais de uma década porque UMA VEZ você conseguiu usar UMA COISA das 4789374892 que te ensinaram.
Não, nem todo conhecimento é útil. Seria se você fosse uma entidade imortal, com tempo de sobra pra dedicar a qualquer atividade (por mais trivial que fosse), e que pudesse aprender tudo de graça. Entretanto, não somos um Tio Patinhas vampiro. Nosso processo de aprendizado gasta tempo e dinheiro, dois recursos finitos que, como qualquer outro, precisam ser gerenciados e priorizados.
Na próxima vez que alguém vier com esse argumento idiota e pedante de que “todo conhecimento é útil”, pergunte imediatamente se essa pessoa está disposta a pedir uma folga no trabalho pra ler a biografia de Leonid Kravchuk, o primeiro presidente da Ucrânia. Ou um atestado médico pra faltar na faculdade e se ocupar lendo os artigos da Muneeza Shamsie sobre a literatura clássica paquistanesa. Pergunte quando foi a última vez que ele revisou um manual de conserto de videocassete.
Mas ué, se todo conhecimento é útil, por que você está priorizando o aprendizado de X mas não de Y…? Pelo motivo óbvio de que há uma distinção claríssima entre conhecimento PRÁTICO, necessário,e conhecimento sem uso algum, e apenas alguém num arroubo de empáfia acadêmica insistiria que não há diferença entre ambos. O problema é que o nosso modelo de educação — a preparação ao todo-poderoso vestibular — colocou conhecimento sem uso na categoria de conhecimento prático, ainda que seja prático APENAS no contexto “preciso saber disso pra passar numa prova”.
Você não tem noção de quanto eu odeio essa ladainha mentirosa de que aprender coisas inúteis te ajudam a “exercitar o cérebro”. Esse argumento é uma admissão de que a parada realmente não tem valor prático, mas ao mesmo tempo sem querer admitir isso totalmente.
“Sim, eu sei, você nunca na vida precisará calcular uma equação de segundo grau no braço, sem usar uma calculadora ou consultar fórmulas — mas nós determinamos que saber fazer isso vai te tornar uma pessoa inteligente. Por que? Porque sim. E você não quer ser burro, né?”
E não é apenas o ensino da ciência exata que tá errada, as humanas não são muito melhor que isso. Como qualquer pessoa que gosta de escrever, eu gostava também de ler. Aos 9 ou 10 anos lia calhamaços imensos do Crichton, Clarke, Clancy, repetidamente; aí na escola me obrigavam a ler O Cortiço — um livro de 200 anos atrás que não interessa de maneira alguma um moleque que curte viagem no tempo, espiões e robôs assassinos.
Aí eu não lia. E tentava chutar tudo na prova. Frequentemente me dava mal, e voltava pra casa com aquela nota vermelha que dizia implicitamente “desculpaí senhora Nobre mas esse teu filho é um vagabundo que não sabe ou não gosta de ler”.
E não apenas isso, mas o mais chato nesse currículo monolítico e imutável de literatura (O Cortiço. O Alienista. A Moreninha. Noite na Taverna. O Auto da Barca do Inferno, QUE FOI ESCRITO HÁ CINCO SÉCULOS) é que todas as interpretações manjadíssimas já foram determinadas e é justamente essas que os professores querem que você decore pra responder na prova.
E redação?! Redação deveria ser, idealmente, um exercício de criatividade e auto-expressão. No entanto, os meus professores determinavam o assunto sobre qual o deveria escrever, e ai de mim se eu “fugisse do tema” — era um zero no meio da cara. O que, por extensão, significava que eu não sabia ou não queria escrever.
Isso estimula tanto a criavidade quanto dizer que um moleque pode desenhar o que ele quiser, mas tem que ser só com esse lápis verde, e tem que ser uma árvore, e não pode ser uma árvore muito grande, e aliás aqui está o layout de árvore que eu quero. Faça uma igual.
OK IZZY já entendi é uma merda mesmo QUAL A SOLUÇÃO?
Eu já falei, mas no seu ímpeto de insistir que equações quadráticas são conhecimento valiosíssimo você não ouviu. Embora o sistema norte-americano definitivamente não seja perfeito, tratar o colegial como uma faculdade, com disciplinas obrigatórias somadas a matérias eletivas que dêem ao moleque 1) uma exposição maior a possíveis carreiras e 2) um marketeable skill que ele possa usar pra entrar no mercado de trabalho.
Eu sou o único que acha completamente insano que um moleque de 16 ou 17 anos tenha que decidir um futuro de carreira sendo que o mais próximo que ele chegou de Direito/Jornalismo foi decorando conjugação de verbos, ou a maior exposição que ele teve a Medicina foi aprender que DNA significa Ácido Desoxirribonucleico…?
Eu escolhi Física porque curtia ficção científica, somado ao fato de que minha tia é uma renomada Física brasileira e a jornada dela é uma fonte inesgotável de inspiração e orgulho pra mim. Mas e um moleque que queira fazer literalmente qualquer outra coisa…? A escola falha de forma estupenda em nos oferecer qualquer direcionamento nesse sentido.
Enquanto isso, o currículo colegial gringo ensina coisas como Introdução ao Direito — que é não apenas melhor pra preparar um aluno pra ser um advogado do que saber diferenciar um verbo transistivo de um verbo intransitivo, mas é por si só útil na formação cívica do indivíduo.
E alguém que queira fazer algo voltado às Artes? Você ri, claro, porque o contexto acadêmico brasileiro te treinou a ver como “ensino útil” apenas aquilo que é diretamente necessário pra passar no vestibular. Só que sem artes você não teria os filmes, ou música, ou quadrinhos, ou videogames, basicamente nenhum dos seus principais hobbies.
Aqui no Canadá tu pode estudar, através do sistema público de educação, Film and Video Production. Se interessa em atuação, ou talvez em performance como comediante? Há aulas de teatro. Minha esposa, aliás, foi atriz estudantil e atuou numa peça chamada The Insanity of Mary Girard.
Aliás, ela também participou de um Improv Club, que é um clube misto de atuação e comédia. Olha ela aí, circulada com caneta hidrocor vermelha no Yearbook da escola:
Você talvez tenha se perguntado alguma vez porque minha mulher é tão animada e dada a fazer gracinhas e palhaçadas o tempo todo; é o jeito dela.
Que é o meu jeito, também, exceto que enquanto aqui ela tinha um veículo pra exteriorizar isso de forma criativa/produtiva, no Brasil eu era mandado pra fora de sala diariamente — sem exagero — porque estava “distraindo os outros estudantes”.
Talvez você queira ser um chef. A experiência colegial brasileira não vai fazer absolutamente nada pra te ajudar nesse objetivo. Aqui, por outro lado? Eles te ensinam.
Resolver uma divisão de polinômios: talvez eu use uma vez na vida. Cozinhar: usarei literalmente todo dia, mais de uma vez por dia, pra mim mesmo e pra toda a minha família, até o dia da minha morte. Claramente polinômios é o que deveríamos priorizar na formação educacional de um indivíduo.
Eu terminei o colegial em 2003 sem saber basicamente nada sobre o mundo fora das fronteiras brasileiras. Os alunos secundaristas aqui, por outro lado, viajam pelo mundo, tendo uma imersão na cultura e língua estrangeira na época formativa de suas vida.
“IZZY MAS É QUE O CANADÁ É RICO AQUI NÃO TERIA DINHEIRO PRA ISSO” talvez porque estamos gastando dezenas de milhares de reais pagando alguém pra nos explicar, 5 dias por semana, 4 semanas por mês, 10 meses por ano, o que é um logaritmo ou um número irracional ou a “fórmula do sorvete”.
Enquanto eu aprendi NA MINHA TERRA TEM PALMEIRAS ONDE CANTA O SABIÁ/SENO A COSSENO B SENO B COSSENO A, o primo da minha esposa aprendeu a tocar bateria.
E ele toca bateria hoje. Já eu não sei mais nem o que é um cosseno OU um sabiá. Eu preferia INFINITAMENTE ter tido acesso a treinamento clássico em guitarra do que aprender trigonometria.
E a questão é essa. Preferência. Eu não estou dizendo que temos que matar todos os professores de matemática e queimar os livros; eu estou dizendo que deveriam haver outras opções que preparassem alguém melhor pra vida real. Estou dizendo que os 12 ou 13 anos que passamos enfurnado em cadeiras desconfortáveis vestidos exatamente iguais e fazendo exatamente a mesma coisa e dando exatamente a mesma intepretação pro mesmo livro de 300 anos atrás e ouvindo alguém explicar um monte de coisa que você nunca vai usar na sua vida não são um bom uso de dinheiro ou de tempo ou de energia.
Vamos parar com essa insistência da virtudes de saber balancear uma equação química, e admitir que tá passando da hora de considerar uma alternativa.
A few weeks ago, we discussed how to prepare your culture to move beyond agile. Let’s go a little further this week and examine how other companies have figured out what does and doesn’t work for them when it comes to development process.
Breaking the Rules of Scrum at Spotify
Spotify, for example, started as a scrum company. But as they grew, the scrum practices got in the way. They began to break the “rules” to fit their company’s growth.
“As @Spotify grew, their initial scrum practices got in the way.” – via @codeship Click To Tweet
First, scrum masters became agile coaches. Then they changed their scrum teams to squads that own the process from start to finish. Each squad has a long-term mission along with autonomy on how to go about achieving their goals. However, the squad does have boundaries they must adhere to around their mission and product strategy as well as short-term goals.
Spotify has found that giving people more autonomy gives people greater enjoyment and makes the company faster to respond to change. Decisions are handled locally so the squadron can respond quickly. There is an overall mission for all teams to move toward. They use the analogy of a jazz band in which the players listen to each other but make their own music.
Cross pollination > standardization
As a result, Spotify doesn’t have formal standards on how they do development. Each team has its own way of doing things. Ideas may pass from team to team via cross-pollination as the squadrons communicate with each other, but the overall architecture is composed of small services that each team owns from front to back. If one team needs something from another, they can ask the other team if they have the time or edit the code themselves.
Community > structure
Each employee is a member of a squadron; many squadrons make up a tribe. Overall, the corporate groupings are very fluid and can change often. They strive to build a strong community instead of a rigid corporate structure.
Spotify focuses on making it easier to release code and releasing it more often. This is the opposite of the typical waterfall environment where releases are big, seldom happen, and can be painful. They want releases to be common and routine, not rare and dramatic.
“Releases should be common and routine, not rare and dramatic.” – via @codeship Click To Tweet
Spotify’s release trains
Each application at Spotify has a release train that happens at a regular interval. If a feature is not complete when the train leaves, the feature is used to shut it off. The feature toggles work to hide code in testing and production environments. This also helps alleviate issues with merging code as it is always checked in one place.
Release trains work on a dependable schedule — similar to a real train — which provides a fixed cadence and predictable planning. Multiple development teams can push features and code into the train. One group is dedicated to the train, and its members are from various backgrounds. Dates and quality are fixed where the scope is the variable in the system. Each team has similar iteration lengths and velocities to support planning.
The release train has a set of roles that manage it, starting with the release train engineer (are we taking the train metaphor too far?) who is similar to a scrum master. They keep the process going. Release management will make decisions on scope and plan releases. Product managers have authority over the content to set the product backlog working with the product owners on the scrum teams.
How to set up your own release train
Want to try this on your own team? The first step of setting up a release train is to determine the release train domains or who will work on what. On web applications, for example, a natural breakdown could be the frontend and backend services. You would have two teams feeding code into the release train.
After you’ve settled on the features, products, and components for the application, it’s important to determine the iteration of the teams and release schedule. Support work for infrastructure, common components, and user interface design will need to operate ahead of the development teams.
Full integration should take place on a regular interval, say, two weeks. Along with this full integration of the work, demonstrations to stakeholders help to report progress and solicit feedback.
Em Campbell-Pretty, a partner at Context Matters, suggests that teams already familiar with agile will make the transition to release trains more quickly. She describes how they tried this out at one her initial engagements with a release train: “We decided that the five most mature agile teams would become the EDW Agile Release Train, and we would work to transition the other teams into the train over time.”
“Teams already familiar with agile will make the transition to release trains more quickly.” Click To Tweet
How to set up feature toggles
Feature toggles are a way to turn your code or feature on or off depending on the environment or user. For instance, say we want to add an email button to a screen. We could turn this off until we have the feature completely coded and tested. This would be a user feature toggle; a code feature toggle would be another version. The code feature toggle would turn the code off and on in the underlying application. Martin Fowler and others have written about this topic for a while, but it has gained popularity in many organizations.
Less branching. When you check in code with feature toggles, you can turn off incomplete portions. I know have dealt merging issues more than once and that is never fun.
Phased rollout. You don’t have to release all the changes at once. I really like this after having to roll back entire releases and hoping we didn’t miss something.
Safe to fail. This is important to many managers out there. You can simply shut off things that cause problems.
You can further classify your feature toggles into release toggles that the development team can use to push out features. So if you’ve got a release with an incomplete feature, simply have that feature turned off. Once it’s complete, turn it on in the next release. Of course, it’s important to remove the feature toggle once it’s fully released!
Another kind feature toggle classification is for business toggles. Perhaps you want to add a new option for your paid subscribing members to your application. Business toggles can be turned off and on to test responses or change marketing.
“Turn feature toggles on or off to test market response.” – via @codeship Click To Tweet
You can set up any of these feature toggles in an application properties file. For instance, in a .net application, you could set up these toggles in the app.config or web.config. Next time you want to change one of these feature toggles, don’t release new code — just change your app.config. No more rolling back code if there are issues with a feature.
Leaving room for failure
Spotify’s founder, Daniel Ek, has said, “We aim to make mistakes faster than anyone else.” They want to fail fast to learn fast and improve fast. Spotify tries to create a fail-friendly atmosphere where they put emphasis on failure recovery rather than failure avoidance. By conducting a post-mortem after each failure, they try to capture all lessons learned.
Spotify applications are architected with decoupled components to use a “limited blast radius” method. If something blows up, it doesn’t affect other components. They also use gradual rollouts to allow only a few people to see a new feature. This keeps failure contained, monitored, and measured. Each team performs small experiments constantly and reacts to them.
Before a Spotify team builds a new feature, they develop a narrative around the idea. They ask questions such as, “Would anyone want this?” and “Does this provide value?” Using lean startup principles, they build the minimum viable product. They test it by releasing it to a small number of people. By analyzing data and tweaking the prototype, they may eventually roll the feature out completely.
One principle obvious throughout Spotify’s entire development process is that the company seems to value innovation over predictability. They do very little planning to allow for more experiments and innovation. In this way, their squads have more freedom to achieve overall objectives and create new value.
Measuring the Continuous Agile Model at Assembla
Andy Singleton, CEO of Assembla, has written a book called Unblock that details how to use the continuous agile model to develop new products faster. Teams that release faster innovate more often and improve more rapidly.
Like Spotify, Assembla initially used Scrum for development process. As the company grew, they saw how Scrum didn’t effectively scale for larger teams and rapid releases. They began to break things up and eliminate large releases with a goal of releasing more often. They created a process of continuous agile and non-blocking development.
Using lean principles, Assembla began to focus on one thing at a time. They created an automated environment where nothing was hidden in manual commands; everything was visible to the whole team and in repeatable scripts. This gave people the ability to pull what features were ready.
Monitoring, automation, and test layering aid in frequent releases
Assembla constantly measures their usage. As a result, they’ll only work on features being used, rather than take the time to work on the unused portion. If something isn’t used, it’s removed.
Once you have the measurements in place, you can put out frequent releases and collect measurement data to guide your future. The principle of frequent releases was important for Assembla to gain a competitive advantage. Before this change, they were lagging behind their competitors.
“The principle of frequent releases was important for @Assembla to gain a competitive advantage.” Click To Tweet
Assembla also leveraged automation in the build, test, and deploy cycles to make these frequent releases possible. They ask questions like, “Where can we use machines more?” and “What can we automate?” Andy points out that you can add layers of testing to increase quality in your releases. Alternatively, you can remove layers to speed up the frequency of releases. Unit testing, code review, and human quality assurance are just a few examples he shares of test layers.
How to set up test layering
Test layering can start with unit tests using mock objects. These unit tests can be run from a developer’s machine before they check in code to the repository. This can be automated by setting up a continuous integration machine that runs all tests after any code is checked in.
Add another layer to this by having integration testing on a virtual machine to simulate the production environment. Make sure you have a VM with a database similar to the production or whatever environment you’re trying to test; this layer helps test any assumptions that developers have made in coding their solution.
Similar to the last layer, you’ll want to have integration tests plus a system test that will run in a shared environment, usually in a continuous integration system. This layer tests recent code changes that could prevent the team from moving forward. It can also check source control issues, merge issues, or batching changes.
Your second-to-last layer should be a mixture of load tests, disaster recovery tests, and performance tests that can be performed in a staging or pre-production environment. Ensure that this environment is as close to production as possible. These tests should be run regularly at a frequency that the team can determine.
The last layer of tests should focus on the production system. These check the system for partial outages and monitors how they are handled. This layer is a style of testing that the development team at Netflix has gained some notoriety for: the chaos monkey.
Separating release from launch
Similar to Spotify’s feature toggles, Assembla uses feature switches that give them the ability to hide functionality until it’s ready to reveal.
Andy talks about separating release from launch. As you work on a new feature, it’s hidden in the numerous releases that come about over time. As a result, the delivery process of releases changes from the big batch release to continuous and frequent releases of small changes. Enhancements are put out and measured to see what value they bring and changed or removed depending on the metrics.
It’s interesting to note that, in the end, Assembla developers are responsible for quality. They decide when a feature is ready for release. This puts the onus on the developer to produce quality code and gets them more engaged in code reviews and testing; the quality assurance staff becomes more of a consultant that aids in the testing strategy.
Beyond Agile: In Conclusion
If we examine these different approaches from Spotify and Assembla, we can begin to see the variety of methods available to us for managing the challenges that technology teams face as we try to move beyond agile development.
In the future, many of these “beyond agile” practices will become commonplace, but remember that the first step for building devops in your company is getting all of the roles on a team working together. Collaboration is a big change from the old “throw it over the wall” approach. Working closely with the business along with all technical staff to understand priorities and deliver value is a key part of devops.
“Going beyond agile like @Spotify and @Assembla” – via @codeship Click To Tweet
Fiz um pedido num site nacional o qual estou acostumada a fazer encomendas. O pedido foi postado nos correios dia 06/01, com um código de rastreamento. O pedido consta como entregue na data de 09/01. Qual a surpresa? Temos um pedido com status de entregue e que não foi recebido. As encomendas agora vão para outra dimensão.
Aí eu liguei pro atendimento ao cliente e a porta pessoa que me atendeu disse "Senhora, esse objeto já foi entregue". E eu disse "Meu bem, esse objeto não foi entregue, pois eu não recebi." "Senhora, esse objeto já foi entregue". E a assim a gente segue por tempo suficiente para eu entender que o negócio dessa pessoa não é ajudar. Repetir o que está no sistema eu também consigo. Aliás, se fosse pra ler o que está no sistema, eu não estaria perdendo meu tempo por telefone...
Tento pela forma mais óbvia: sempre que a gente recebe uma encomenda dessas registradas, o recebedor informa seus dados pessoais, geralmente nome e RG e assina. Pergunto pra porta, digo, pessoa: "Quem recebeu esse objeto?". "Senhora, esse tipo de informação não está disponível." PRA QUE SERVE O MALDITO CÓDIGO ENTÃO??
Quando eu digo que os Correios erraram que quero registrar uma reclamação, adivinha? A ligação cai! E não aconteceu só uma vez, pois o Rodrigo tentou ligar para reclamar também. Lá pela quinta vez que tentamos por telefone, nos instruem a abrir um pedido de informação, onde, pasmem, além do código (que é um identificador único, ou seja, não devem existir dois pacotes com o mesmo identificador) eu tenho que informar um monte de dados do remetente. DO REMETENTE. Como é que eu vou saber qual o CNPJ da empresa? Ou o nome completo? É muita, MUITA burrice associada.
O que eu fiz? Tive que mandar um e-mail para a loja onde comprei para que eles me passem uma informação que os Correios deveriam ter através desse identificador.
E agora é esperar para ter esses dados, para poder abrir um pedido de informação, para ver onde foi parar a minha encomenda.
Apesar de não ser uma das práticas mais populares em times ágeis (ela não é nem citada no questionário de 2014 da VersionOne, por exemplo), a revisão de código vem ganhando seu espaço nas equipes de desenvolvimento de software. Afinal, as ditas vantagens da prática são várias: a diminuição na quantidade de defeitos e aumento da qualidade do código produzido, facilitando sua manutenção e evolução.
O próprio nome “revisão de código” deixa claro o objetivo da prática. A ideia é que o código escrito por um desenvolvedor, antes de ser promovido ao ambiente de produção, seja revisado por outro membro da equipe. Essas revisões podem ser feitas de diversas maneiras, como, por exemplo, programação pareada, ou mesmo navegando pelos artefatos modificados. Comumente, o revisor anota todos os problemas encontrados e devolve ao autor original daquele código. O autor então avalia os comentários recebidos e eventualmente os propaga para o código-fonte.
Na Caelum, em particular, as equipes fazem uso do próprio Github, o serviço de hospedagem de código, para fazer suas revisões. Após a finalização de uma história, o desenvolvedor anota a lista de commits e artefatos modificados. Um outro membro do time, em posse dessa lista, inspeciona todo o código modificado; todo e qualquer problema encontrado pelo revisor é salvo em comentários no próprio Github. O desenvolvedor original, ao receber os e-mails enviados automaticamente pela ferramenta, discute e tira dúvidas com seu revisor, e eventualmente altera o código para satisfazer a sugestão.
Interessantemente, imaginamos que um código que tenha passado revisão, tenha uma qualidade melhor, seja menos complexo, mais simples e fácil de ser entendido e mantido. Mas será que isso acontece sempre e de maneira natural? Resolvemos fazer um pequeno estudo dentro das equipes da Caelum para entender quais eram os benefícios que a revisão de código nos trazia.
O primeiro passo foi tentar medir o aumento da qualidade de código. Decidimos automatizar isso olhando para nossos repositórios no Github. Dado que todas as nossas revisões acontecem no Github, decidimos pegar todas as classes que foram revisadas, e a versão dela antes e depois da revisão. Por exemplo, a classe Aluno. Pegamos a quantidade de linhas de código antes e depois da revisão. A ideia é que esse número diminua. Fizemos isso com várias métricas de código diferentes, como complexidade ciclomática, linhas de código, falta de coesão dos métodos e acoplamento eferente.
E, para nossa surpresa, percebemos que os números não mudaram tanto assim após uma revisão. Ou seja, a qualidade do código, sob o ponto de vista dessas métricas, continuou a mesma na maioria absoluta das vezes. No desenho abaixo, você pode ver que a complexidade do código não mudou na maioria das vezes. Interessante, não?!
Na sequência, optamos por mandar questionários para nossos desenvolvedores, perguntando a opinião deles sobre esses resultados, que eram bem contraditórios.
E a resposta deles foi bastante interessante! Os resultados mostraram que nossas equipes se beneficiam da inerente disseminação de conhecimento que acontece ao ler o código produzido por outro desenvolvedor. A percepção de redução de defeitos também acontece, já que o revisor comumente encontra problemas no código produzido pelo desenvolvedor original. Os desenvolvedores também têm a percepção de melhoria da qualidade interna, embora isso não tenha se refletido nas métricas de código coletadas.
Ou seja, a revisão de código não serve só para melhorar a qualidade do código, mas também para disseminar conhecimento entre os membros da equipe, e ajudar a encontrar bugs que o primeiro desenvolvedor deixou passar.
Se você quiser ler melhor sobre nosso estudo, pode ler o artigo que publicamos no WBMA 2014, o workshop acadêmico que acontece junto com a Agile Brazil. Em nossos cursos de agilidade, discutimos o uso de diversas práticas como revisão de código e programação pareada.
E você, faz revisão de código? Em sua opinião, no que ela ajuda sua equipe?
É o seguinte. Deixarei que a imagem abaixo fale por mim.
THAT’S FUCKING RIGHT. Já existe, no nosso planeta, sem que você tivesse conhecimento, um MMO GRA-TUI-TO de Pokemon FireRed. Meras palavras em idioma humano não são capazes de ilustrar bem este conceito magnífico. Segura essa outra imagem aí:
MMO. GRATUITO. DE POKEMON. A gente sairá alegremente passeando por Kanto, jogando juntinhos nas livestreams que ando fazendo. Jogaremos ao vivo, nas minhas livestreams, perante centenas de malucos que nos darão dicas e/ou aloprarão nossa falta de skill.
VAI SER LEGAL DEMAIS, CARA.
Vou te passar o esquema todo, passo a passo.
1) Crie uma conta no site do PokeMMO
Clique aqui e crie sua continha. É moleza — username, email, senha, confirma senha, e acerta o Captcha pra o serviço saber que tu é um ser humano de carne e osso e não uma das máquinas que nos matará um dia.
Depois disso, você…
2) Baixe o cliente do jogo
Isso aqui.
Aqui está o link pra Windows. Se sua praia é Mac, clique aqui.
Feito isso, agora…
3) Pegue a ROM do joguinho
Mano, já estamos QUASE capturando Rattatas e Pidgeys junto, lado a lado, como fomos destinados por Deus a fazer.
Clique aqui pra pegar a ROM do Pokemon FireRed. Esta é a versão que você tem que pegar:
Sacou? É a GBA Pokemon Fire Red Version ROM Download (U) (V1.0).zip
Estamos quase lá. Agora…
4) Extraia o .zip do cliente do joguinho
Estes são os arquivos do ZIP
Como a sua vida a partir de agora será jogar PokeMMO conosco, jogue dentro de uma pasta no desktop para fácil acesso.
Lembra da ROM que tu baixou? Tá vendo que tem uma pasta “ROMS” do cliente?
Este próximo passo deveria ser óbvio, mas vou explicar anyway porque né?
5) Coloque a ROM do FireRed dentro da pasta ROMS
Assim.
Não tem nem o que explicar. Apenas siga o GIF instrucional.
6) Clique no PokeMMO.exe e cabou-se
E é isso aí. Ao abrir o jogo, logue com a conta que você criou e tu verás duas opções de servidores:
Como o servidor “PTS” parece estar perenemente offline, não é exatamente uma “opção de servidores”, e sim “opção de clicar obrigatoriamente no servidor SERVER-0“. Mas mano, você vai jogar FireRed online, pare imediatamente de reclamar.
A escolha correta
Mano. Pokemon online. OLHA ISSO.
ESTOU PASSEANDO POR KANTO COM OUTROS JOGADORES
INACREDITÁVEL. Uma imensa galera correndo por aí, batalhando, vendendo/comprando/trocando pokemons…
O livre mercado em ação
É como se todos os coleguinhas dos tempos da escola subitamente ganhassem GameBoys com Pokemon pra jogar com você.
FODA PRA CARAIO. Aguarem nossa gangue tocando o terror em Kanto!
For almost three years now, I’ve no longer been going to a specific country to learn its language, and instead I use spoken sessions on Skype (or other video/audio tools that I’ll discuss later) to bring up speaking skills up a notch, so that when I do reach the country I can use my time there to enjoy the culture and get more practice, without being bogged down with studying.
I find Skype to be a superior means to learn a language in most cases, since it’s cheaper, more accessible, has huge variation for who you can speak to, and you don’t even need to leave the comfort of your own home. If you do happen to be in the country where your target language is spoken, private teachers can be hard to come by, and much more expensive – which is why when I was learning Mandarin in China, I still got a lot of my lessons on Skype (through itaki – my favorite resource for finding Skype partners online).
A crash course in maximizing your Skype language lessons
But what do you doonce you’ve found someone to practice their language with you on Skype? How do you maximize your sessions? I’ve been getting these questions a lot lately, and I’d like to give them some serious attention.
Now that I’m back into consistent Skyping again myself, I’ll be documenting my favourite Skype-learning strategies, and I’ll discuss on the blog various parts of the puzzle in this modern tool available to language learners. So, in coming weeks, I’ll be writing a new series of Skype-learning posts, in which I’ll cover:
* How to find the best Skype teacher or exchange partner for your own personal learning interests
* How to work with a teacher during a Skype session
* Advantages of online lessons: Best use of the latest technology not available to in-person lessons
* What to do after your Skype session so that the next one is better
Each one of these deserves a discussion in itself, so to really delve deep, I’ll talk first in this post about what to do before your Skype session begins.
Getting into the flow of starting a new language
If this is your first ever Skype session, or even if you had spoken the language some time back but haven’t practised it for a while, then you will be missing a lot of momentum, and that will make your first Skype lesson harder than it could be.
I made a big mistake when relaunching my Mandarin recently, and I decided that I was going to hop on Skype as the first thing I did to get back into things. You can see in this video that I looked like I was run over by a truck. I was finding the lesson so stressful, and I felt exhausted afterwards.
Whenever I’ve made this mistake, I’ve collapsed into my bed after the session and needed to take the rest of the day off from brain-melting exhaustion. Yikes!
Don’t make the same mistake I made –the “Oh shit I have a Skype lesson in 5 minutes!” approach to Skype-learning definitely won’t get you the maximum benefit.
I have done it right in other projects though, so let’s get into that now.
Build up momentum before you speak – listen to easy content
The reason my recent first lesson was hardest wasn’t because of my own lack of vocabulary (there are ways around that), but actually because everything that my teacher was saying was sounding like gibberish to me. It had been way too long since I had even heard the language spoken.
The same issue comes up if it’s your first lesson. You don’t want the first time you’ve ever heard the language to be someone asking you a question directly. This is a recipe for the conversation switching to English, and if you ever do that I want you to picture me wagging my finger disapprovingly at you!
I think it’s important to build up a little momentum – you don’t need to go into silent period mode and relinquish all contact with other human beings for years, but maybe listen to some content in that language for a half an hour before your class.
When I’ve done this before my sessions, the change has been dramatic. My third, fourth and other sessions in Chinese were way less stressful because I eased myself back in just before. My second session was just as bad as my first, so it wasn’t just the first-session-blues at play – it was starting my day with a Skype session and the pressure involved in that, without giving myself a little momentum first.
What you listen to shouldn’t be too intimidating though. I highly recommend you check out language learning podcasts that offer slow-spoken audio options (as your teacher or language partner would speak to you), since you can select the lower levels where they speak in a way similar to how a patient teacher would. For this I really like the Innovation Language podcasts, which start with a slow-speaking beginner series, and then pick up the pace and the complexity as you get better.
Learn vocabulary that will help you speak during the conversation
A mistake a lot of people make before trying to use their language with another human being is to do something like studying chapter 1 of their language course. Generally these introductions to the language are not good ways to prepare for real conversations, and will only make sense to you or be effective after you’ve completed the entire course.
Instead, I suggest you hop on Omniglot to find key phrases for your target language, and learn how to say things that are likely to come up in a first conversation like “Where are you from?” “Pleased to meet you” and pleasantries like “Sorry” and “Thank you”.
Make sure you look up words in advance related to basics about yourself – your country’s name, your profession, your age etc. in the target language, and have them written down if you can’t commit them to memory.
Finally, and especially if you already know the basics, hop on Memrise and go through one of their courses for your target language, so you have used interesting mnemonics to keep key words ready to launch at the right time.
When your first practice call is just about to start!
If you’ve listened to some audio to get your ear back in the flow, and you’ve revised the words you are more likely to say, or have them written down somewhere, then just make sure everything else is working well so that you don’t have unfortunate issues during the call.
If you are logged in to Skype, then test the connection speed between you and your conversation partner (click the connection icon when you have their profile open in Skype, before calling them), and if you can make the connection optimal, do so by closing any programs that take up your bandwidth. A slow connection is a major pain in the neck when you are trying desperately to understand the other person.
If you haven’t used Skype for a while, use its test call option to make sure your mic and audio settings work. Since I travel a lot, I do this pretty much before every Skype call I have. Otherwise, the first conversation you have will be mostly you apologizing for your crappy computer and abysmal Internet speed (can you guess how my first Mandarin relaunch conversation began…?)
Make sure you have tabs open on your computer screen to dictionaries, translators, and word lists you may need while you talk, or a separate document ready in another window with your phrases at the ready, and you can start the call!
Finally, don’t be afraid to tell your language teacher or exchange partner exactly what you want to do. Feel free to say “Today I just want to practice introducing myself” or “I want to talk for 10 minutes about my job and for you to correct my mistakes.” The more specific you are with them about what you’d like to accomplish during that call, the better they’ll be able to help you.
And we’ll cover how that call can go, and how to choose the perfect partner in upcoming posts.
How do you prepare just before your Skype calls? Let us know the comments below!
Programar em par é uma prática muito contraditória e que sempre gera discussões de amor e ódio. É difícil construir argumentos pois, assim como quase tudo em Engenharia de Software, é impossível reconstruir o mesmo cenário. Por exemplo, não dá pra comparar uma estória feita por uma pessoa e por um par e dizer qual foi […]
Entre os dias 27 de setembro e 2 de outubro aconteceu a 18ª edição do JavaOne, a maior conferência de Java do mundo organizada pela Oracle. Tivemos a honra de participar do evento, apresentando o VRaptor 4, nosso já conhecido framework MVC e tema de diversos posts aqui no blog.
O evento começou no sábado, com o tradicional Geek Bike Ride em que alguns participantes atravessaram oito milhas de bicicleta entre San Francisco e Sausalito.
As sessões técnicas do evento foram inauguradas com os keynotes no domingo. De maneira geral, todos os keynotes destacaram o lançamento do Java 8, diversos livros sobre o tema foram listados na apresentação e entre eles estava o Java 8 Prático, da Casa do Código.
Destaque para o keynote técnico comandado por Mark Reinhold, que iniciou a palestra destacando a evolução da plataforma Java. Brian Goetz mostrou exemplos práticos das principais features do Java 8 como os lambdas, Stream e o Optional. Além disso, os dois arquitetos da Oracle destacaram as novidades que estão por vir no Java 9 e 10, como o projeto Jigsaw e os Value Types do projeto Valhalla. A palestra já está disponível online.
O conteúdo do evento é muito extenso, contando com mais de 500 sessões técnicas que foram distribuídas 9 trilhas. Você pode ter uma ideia do conteúdo no site oficial do evento. Fique atento, pois algumas palestras foram gravadas e a organização confirmou que os vídeos estarão disponíveis no Parlays em breve.
Houve muitas sessões básicas sobre Java 8. Notamos também que boa parte dos participantes do evento ainda não tem conhecimento e/ou nunca usaram recursos da nova versão da linguagem. Então se você já está por dentro das novas features, tenha certeza que está a frente de diversos desenvolvedores do exterior.
Se você já conhece as novidades do Java 8, sem dúvida vai gostar da palestra Lambda Under the Hood do Brian Goetz. Ele mostrou detalhes de implementação do lambda, os problemas que encontraram desde o início do projeto e alguns dos passos que os levaram a trabalhar com uma nova instrução para invocação de métodos, o InvokeDynamic.
Boa parte do conteúdo do evento focou em temas relacionados a programação funcional, destaque para a palestra Thinking in Functional Style do Venkat Subramaniam, que mostrou com muita clareza os benefícios desse paradigma. Outras palestras que pudemos acompanhar e que não poderíamos deixar se destacar são:
Além das sessões relacionadas a programação funcional, tivemos a oportunidade de acompanhar algumas ótimas apresentações sobre outros temas. Mark Reinhold e Alan Bateman apresentaram com mais detalhes o projeto Jigsaw com direito a demo ao vivo das novas ferramentas que estão sendo desenvolvidas para possibilitar a criação de aplicações realmente modulares em Java. Engenheiros do Google revelaram alguns detalhes da próxima geração do Google App Engine, que será totalmente baseada no Docker possibilitando o fim das odiadas restrições do ambiente Java do cloud da empresa. Linda DeMichiel, da Oracle, apresentou os planos para o JavaEE 8 com novidades interessantes, como suporte ao HTTP/2 na especificação de Servlet 4.0 e melhor integração entre o CDI e JMS, além das novas especificações do MVC 1.0 e o Java EE Security 1.0.
Em nossa apresentação mostramos algumas das principais features do VRaptor 4 e os benefícios da adoção do CDI 1.1, como por exemplo a facilidade de integração com as demais especificações do Java EE 7. O Framework cada vez mais ganha destaque no mercado nacional e internacional. Os slides já estão disponíveis via slideshare, não deixe de comentar.
Uma pergunta frequente em muitos projetos é qual tipo de testes devo fazer? A resposta, como quase tudo em nossa área, não é única, e cada caso deve ser analisado separadamente, sendo um específico o de aplicações WEB e serviços REST.
Testes de sistema em aplicações WEB tradicionais são usados para garantir todo o fluxo de uso de uma aplicação: desde o usuário abrindo a página inicial até os cliques na interface apresentada no browser. Mas no caso de um serviço REST, o cliente é uma outra aplicação, o código de programação de um cliente.
Por exemplo, imagine o serviço REST que traz as informações de um carrinho fazendo uma requisição GET para http://www.meuservidor.com/carrinhos/2378634:
GET /carrinhos/2378634 HTTP/1.1
Host: www.meuservidor.com
Como escrever um teste para isso? Primeiro desejamos efetuar a requisição GET de verdade, isto é, criar um cliente web, como um navegador, que faça o GET e traga o xml que é o resultado esperado. Em Java temos a API HttpClient do Apache que permite fazer tais requisições, mas desde a última versão do JAX-RS temos uma API cliente ainda mais avançada, que vamos utilizar. Começamos criando um cliente HTTP:
Client client = ClientBuilder.newClient();
Precisamos de um cliente pois ele funciona como um navegador: diversas requisições efetuadas pelo mesmo cliente compartilham os mesmos cookies etc, portanto não pretendemos criar um cliente por requisição. O nosso servidor alvo é ‘www.meuservidor.com’:
Claro que o código completo acessa a URI desejada, faz a requisição e confere o resultado, mas ela não é necessariamente perfeita: ela só conferiu que parte da String está contida. Talvez o seu teste de sistema queira conferir que o resultado retornado era o esperado. O JAX-RS utiliza por padrão a serialização do JAXB, padrão oficial de serialização do Java. Portanto podemos pedir para ele deserializar o conteúdo utilizando o JAXB para um Carrinho, e então conferir sua rua:
Com isso temos um teste completo que acessa uma URI via GET, retorna o dado deserializado e garante o valor que estamos esperando. Podemos utilizar o resto da API cliente do JAX-RS para fazer diversos outros tipos de requisição, interagindo com o servidor, alterando o estado do mesmo e confirmando os resultados.
Mas para executar todos esses testes você precisa ter seu servidor ligado… e aí entra um problema antigo: posso levantar meu Tomcat, meu Jetty, meu servidor de aplicação ou qualquer outra aplicação, como desenvolvedor, mas os testes podem se misturar com o que estou fazendo no navegador e quebrarem. Por exemplo, se eu começo a interagir com o servidor enquanto os testes rodam, posso quebrar o teste.
O que fazer? Levantar um servidor só para o teste e só enquanto o teste é executado. No caso do Jersey (implementação padrão do JAX-RS), podemos fazer isso com o Grizzly antes de todo teste:
	ResourceConfig config = new ResourceConfig().packages("br.com.alura.loja");
        URI uri = URI.create("http://localhost:7575/");
        HttpServer server = GrizzlyHttpServerFactory.createHttpServer(uri, config);
E derrubá-lo após cada teste:
server.stop();
Pronto! A cada teste nosso servidor é levantado em uma porta específica, que não atrapalha meu desenvolvimento, o mesmo é executado, e o servidor é derrubado. Já existem diversas bibliotecas que facilitam esse trabalho de levantar servidores para rodar testes end-to-end, desde o antigo Cargo, até a API proprietária de cada servidor, como neste caso o Grizzly.
Você pode conhecer mais sobre testes end-to-end com sistemas REST, inclusive como navegar entre recursos no curso online do Alura.
É, pelo visto, muitos brasileiros conheceram outra caracterísca do povo japonês: a consideração para com o outro. Bom para quem não captou ainda, estou me referindo à cena que bombou na mídia brasileira e nas redes sociais que serviram para ovacionar os japoneses que recolheram o próprio lixo na partida do Japão contra a Costa do Marfim na Arena Pernambuco.
Para muitos brasileiros, a cena parecia algo utópico, algo inimaginável de se testemunhar no Brasil. A verdade é que no Japão tal ação não tem nada de extraordinário. Tanto que os japoneses com quem eu conversei em Recife - onde eu estava a trabalho acompanhando repórteres japoneses - se indagaram sobre o porquê de tanto alarde. Era como se, nós brasileiros, víssemos em algum jornal japonês uma matéria do tipo "Brasileiros beijam no rosto como forma de se cumprimentar".
Expliquei, que infelizmente, a cena não fazia parte da realidade do maioria dos brasileiros e, foi então, que eles entenderam porque um ato tão comum para eles deu tanto o que falar.
A maioria dos brasileiros apontou a "educação do povo japonês" como principal motivação que levou os torcedores a recolher o próprio lixo. Eu, na minha humilde insignificância, diria que não se trata somente de uma questão de educação. Se trata também, claro. Mas não é apenas isso. Por trás disso tudo, tem um sentimento comum à maioria dos japoneses que eu admiro muito que é a consideração para com os outros.
Recolher o lixo não é só uma questão de higiene. Tampouco se trata apenas de cuidar do que é seu ou limpar o que você mesmo sujou. Também! Mas acho que. para os japoneses, recolher o lixo é acima de tudo um ato de pensar nas outras pessoas que farão uso daquele mesmo local. É cuidar de um bem comum. Como o famoso dito "não faça com os outros o que não gostaria que fizessem com você" nos ensina, ninguém gostaria de chegar no cinema, por exemplo, e pisar em pipocas caídas no chão e não ter condições de deixar o copo cheio de refrigerante porque já há um copo vazio onde deveria estar sem nada para você colocar o seu.
Aí vem um brasileiro e diz: "Mas tem a moça da limpeza" - que deve ser o mesmo que diz que joga lixo no chão na rua para dar emprego ao lixeiro. E se pensássemos nestas pessoas também? Pensar como seria ter de limpar uma sala inteira com tapete forrado com pipocas e copos vazios por todo lado e, de repente, quando acaba a sessão e acendem-se as luzes, tchan tchan, tudo limpinho! É só passar uma feiticeirinha rápida no chão. Não seria legal?
Sobre a moça da limpeza e os lixeiros, não creio realmente que perderão seus empregos se o povo tiver mais educação E consideração com eles e com os outros. "Os japoneses" não pensam como "nós brasileiros" (generalizando japoneses e brasileiros). Não é que não existam estes profissionais. Eles existem. Mas como limpar o bem comum é ensinado desde os primeiros anos escolares no Japão, quando nas escolas os próprios alunos fazem a limpeza das salas, corredores e inclusive dos banheiros, para os japoneses isso já faz parte, está no DNA deles.
Lembro de vários pique-niques no Japão em que por todo lado havia grupos de pessoas bebendo e comendo como nós e quando acabava a festa, assim como o nosso grupo, todos saíam dali com um saquinho de supermercado na mão com parte do lixo do grupo e o local era deixado sem vestígio algum de farra ou comida. No Japão é assim, em pique-niques, em churrascadas, em " hanami" (pique-nique debaixo das cerejeiras) etc.
Quer um exemplo mais recente? Copa das Confederações. Ano passado tive o privilégio de trabalhar como intérprete da seleção japonesa e acampanhá-los nos voos, nos hoteis, nos estádios e até no vestiário. Eu era o único não-japonês autorizado a entrar no vestiário dos "samurais blue". Eis que quando todos já haviam deixado o vestiário e se dirigido para o ônibus, eu, como o último a sair, autorizei os voluntários a entrarem e fui embora. Ainda no corredor, um voluntário me chama da porta do vestiário e espantado me pergunta: "Vem cá. Eles usaram mesmo o vestiário?". Quando respondi que sim, já sabendo o que eles estaria pensando, ele comprovou: "Cara! Os caras são muito organizados! Tá tudo limpo!!!".
Na partida seguinte, o estádio era outro, os voluntários também. Mas o espanto, aliado à indignação com as outras equipes, foi o mesmo. "Foi daqui que você e a seleção japonesa saíram?", me perguntou rindo um voluntário. E completou: "Cara! Você tem que ver como os outros deixam o vestiário! Uma zona!".
Na outra partida, bom, vou resumir a história só com o comentário do voluntário do dia: "pô, os outros times deveriam aprender com os japoneses como deixar um vestiário arrumado e limpo! Quero ser responsável do vestiário japonês sempre!".
É isso. É o que eu sempre digo. Não dá para dizer qual é melhor que outro. Mas se for para comprara, que seja definido um quesito. Amizade. Segurança. Calor Humano. E se o quesito for Respeito ao Próximo, me desculpe meu povo, mas o Japão - neste quesito - sai líder do grupo.
O termo Data Science é uma das buzzwords do momento. Não vou me arriscar a defini-lo pois um post no blog não seria suficiente para definir com clareza o significado desta expressão. O livro Doing Data Science, publicado pela O’Reilly, dedica um capítulo inteiro a definição do termo e a wikipedia já tem um verbete dedicado a isso. O que posso afirmar com segurança é que Data Science envolve um conjunto de técnicas para processar e analisar dados para construir decisões de negócio inteligentes. É uma disciplina que utiliza diversas áreas do conhecimento, desde a estatística descritiva mais simples a complexos algoritmos da inteligência artificial.
Mas como começar a se envolver nessa área, que parece tão interessante mas ao mesmo tempo tão complexa? Nesse post apresentaremos uma introdução prática a esse tema, mãos a obra!
Onde conseguir dados?
Para se aventurar com Data Science precisamos, obviamente, de dados! Existem diversos sites na que oferecem grandes conjuntos de dados de graça. A Amazon Web Services hospeda grandes conjuntos de dados públicos e outra fonte interessante é o infochimps que oferece dados que podem ser baixados ou consultados por meio de uma API.
Neste post utilizaremos dados do Kaggle. Este site hospeda competições de Data Science. Em suas competições, o Kaggle libera dois conjuntos de dados sendo que o competidor tem acesso às respostas para apenas um conjunto dos dados e deve enviar as respostas do segundo. Ao final de um prazo estipulado, o competidor que tiver a maior precisão nas respostas vence a competição. Achou confuso? Ficará mais claro com o exemplo que usaremos nesse post.
A competição que participaremos é a do Titanic. O desafio é: sabendo dados dos passageiros como idade, sexo e classe de viagem, como prever quem teria sobrevivido ao desastre? É claro, essa é uma competição puramente educativa, o Kaggle hospeda competições para iniciantes e competições valendo premiações em dinheiro (nesse momento, existem competições valendo até 100 mil dólares!). Na nossa competição, são fornecidos dois arquivos .csv, no primeiro temos diversos dados pessoais de cada passageiro e sabemos se sobreviveram ou não ao desastre, costuma-se chamar esse conjunto de conjunto de treino. No segundo, temos os mesmos dados pessoais de outros passageiros e devemos definir quais sobreviveram ou não ao Titanic, este é o conjunto de teste e apenas o Kaggle tem as respostas para estes passageiros. O competidor que tiver a maior taxa de acerto no conjunto de teste vencerá a competição no dia 31 de dezembro.
Mão na massa!
Primeiro, faça uma conta no Kaggle e baixe os dois arquivos de dados da competição. Para analisar os dados utilizaremos o R. Esta linguagem foi idealizada para desenvolver programas voltados à estatística e já foi introduzida em um post anterior. A vantagem de utilizar o R é que podemos analisar facilmente os dados da competição e tirar conclusões rapidamente. Além disso, de acordo com uma pesquisa da a O’Reilly, é a linguagem mais usada em Data Science, então estamos no caminho certo!
Agora, vamos ler os dados do conjunto de treino e de teste:
> treino <- read.csv("train.csv")

> teste <- read.csv("test.csv")
A função read.csv recebe o caminho para um arquivo csv, lê o conteúdo do arquivo e devolve um data frame, que é um objeto que representa os dados de uma tabela. Neste post, cada linha se iniciando com “>” é instrução que pode ser executada no shell do R de forma interativa, ou escritos em um script com um editor de texto.
Para ter uma ideia do conteúdo do data frame podemos usar algumas funções exploratórias do R, como a função names, que devolve as colunas de um data frame:
O resultado desta função é um array onde cada elemento é o nome de uma coluna do data frame. Podemos acessar todos os valores de uma coluna usando o operador $:
Vamos começar a explorar os nossos dados. Quantos passageiros sobreviveram ao desastre?
> table(treino$Survived)

  0   1

549 342
A função table calcula o número de valores diferentes em um array. Podemos ver que a maioria dos passageiros no conjunto de treino morreram (549), o que já era esperado. Para ter uma ideia da proporção dos passageiros que morreram, podemos usar a função prop.table:
Portanto, aproximadamente 61% dos passageiros do conjunto de teste não sobreviveram ao desastre. Com isso, faremos a nossa primeira submissão ao desafio do Kaggle. Como a maioria dos passageiros não sobreviveram, podemos submeter a solução mais simples, em que nenhum passageiro sobrevive! A submissão deve ser feita por meio de um csv com duas colunas, com o id do passageiro do conjunto de teste e a previsão de seu futuro no desastre:
Para criar o csv com a submissão, criamos um novo data frame com as colunas PassengerId e Survived e escrevemos o csv no sistema de arquivos. Agora basta submeter nosso arquivo submissao.csv pela interface do Kaggle. O site compara a nossa submissão com as respostas corretas e exibe o resultado:
Conseguimos uma taxa de acerto de aproximadamente 62%, o que faz bastante sentido já que a taxa de passageiros que não sobreviveram no nosso conjunto de treino é de 61%. Parece ruim? Pois é ruim mesmo, mas repare que mesmo com uma estratégia tão simples já estamos à frente de alguns competidores!
Segunda tentativa
Agora podemos aplicar um pouco de conhecimento do domínio do nosso problema. Esse é um ponto importante, não basta simplesmente aplicar algum algoritmo que faça a mágica, sempre será necessário ter algum conhecimento sobre os domínio dos dados que estamos manipulando. Nesse caso o domínio é bem simples: um desastre em um navio. Quais passageiros teriam prioridade de acesso aos botes de emergência? Seguindo o bom senso, seria natural supor que as mulheres e crianças tiveram preferência no momento de salvação, mas será que os dados do Titanic comprovam essa suposição? Vamos separar os passageiros por sexo:
Portanto, podemos ver que apenas 18% dos homens sobreviveram enquanto esse número é muito maior para as mulheres, 74%!
Vamos analisar agora os passageiros com idade abaixo de 5 anos. Primeiro, precisamos corrigir nosso conjunto de treino pois nem todos os passageiros tem suas idades definidas. Podemos preencher os valores em branco com a média da idade dos passageiros (o que é uma aproximação grosseira, mas é uma boa tentativa inicial):
De acordo com nossos dados de treino, 61% dos passageiros com menos de 5 anos se salvaram ao desastre!
Agora podemos construir uma estratégia mais inteligente e fazer nossa segunda submissão. Uma aproximação muito mais realista seria supor que todos as crianças e mulheres se salvaram. Vamos construir nossa segunda submissão usando esta estratégia:
Submetendo o novo csv ao Kaggle conseguimos um resultado muito melhor, 76% de precisão!
Entra o Machine Learning
Mas será que 5 anos de idade é mesmo o melhor limiar para a idade? Será que esse é o valor que melhor separa os que sobreviveram dos que morreram no nosso conjunto? Além disso, e os outros atributos? Será que o preço da passagem também é determinante para o destino de um passageiro no acidente? E quanto a classe da passagem, será que os passageiros da primeira classe tiveram maiores chances de sobrevivência? Poderíamos construir regras mais inteligentes, combinando os atributos. Por exemplo:
Esta figura é a representação de um estrutura chamada de árvore de decisão. Uma árvore de decisão nos permite representar regras para tomar decisões. Na nossa segunda tentativa, acabamos criando indiretamente uma árvore de decisão mais simples:
Poderíamos gastar um bom tempo analisando cada um dos atributos e buscar quais são os valores que melhor separam os passageiros que sobreviveram, porém seria muito trabalhoso testar a quantidade imensa de combinações. Para a nossa sorte, existe um algoritmo da Inteligência Artificial que constrói a árvore de decisões a partir dos atributos que desejar e já existe uma implementação para o R! O algoritmo não percorre todas as possibilidades (esta estratégia seria muito lenta caso o número de atributos fosse muito grande) mas consegue encontrar uma resposta boa rapidamente.
Para usar a implementação no R precisamos instalar o pacote rpart. O ecossistema do R possui uma quantidade imensa de pacotes que podem ser instalados dentro do próprio shell, com a função install.packages:
> install.packages("rpart")

> library(rpart)
A função library carrega um pacote dentro de um script R. Agora, podemos utilizar a função rpart:
> arvore <- rpart(Survived ~ Age + Sex + Pclass + Fare, data=treino, method="class")
No primeiro argumento, definimos uma fórmula especificando quais são os atributos que o algoritmo vai considerar para construir a árvore de decisões. Neste caso, o algoritmo vai utilizar a idade, sexo, classe de viagem e o preço da passagem para construir a árvore. Além disso definimos a estratégia que será usada para construir a árvore, como queremos classificar os passageiros em categorias (se sobrevive ou não), especificamos method="class".
Podemos ver a árvore resultante, imprimindo o objeto:
Nesta representação, cada nó interno representa uma divisão entre os passageiros a partir do valor de um atributo. Cada nó final especifica a categoria que a árvore atribuirá a um passageiro que cair naquele nó. Por exemplo, no nó final da extrema esquerda, podemos observar que passageiros do sexo masculino com idade maior ou igual a 6.5 serão classificados com 0 (ou seja, não sobrevivem). Já passageiros do sexo masculino com idade menor que 6.5 seriam classificados com 1. Repare que o algoritmo encontrou algumas relações não tão triviais, como por exemplo: mulheres viajando na primeira ou segunda classe são classificadas com 1, enquanto as de terceira classe que pagaram menos que 23 são classificadas com 0.
Agora, vamos usar essa árvore para fazer as previsões sobre os dados de teste e gerar o csv e construir uma nova submissão, usando a função predict:
Submetendo o novo arquivo ao Kaggle, obtemos uma precisão de 77%:
Melhoramos menos que 1%, o que mostra que utilizar a técnica mais complexa nem sempre traz grandes resultados. Mas repare que subimos mais de 200 posições no ranking! Para melhorar nossa performance, o passo seguinte seria limpar nossos dados, a informação da idade dos passageiros parece muito importante para o nosso modelo e a aproximação que fizemos pela média é imprecisa.
Em resumo, data science é uma área interessante e vai muito além de aplicar bons algoritmos de Machine Learning. Inspencionar e limpar os dados é extremamente importante, além do conhecimento do domínio que estamos investigando. Misturar estas técnicas corretamente é o que faz a diferença nessa competição do Kaggle e o que faria a diferença, por exemplo, em um sistema de recomendação real.
Nota: este post foi baseado fortemente nesta série de posts de Trevor Stephens e neste markdown de Curt Wehrley.
Last Friday we went to Harajuku, when we were arriving I saw in a map at the station that there was an Evangelion store in an alley parallel to Takeshita-dori (Exact location in Google Maps). We had no idea there was an Evangelion store in Harajuku so we decided to check it out. In the first floor almost all the items were boring t-shirt but in the second floor there was a lot of original and interesting merchandising. If you are an Evangelion fan the visit is a must!
Ao longo desses anos nesta indústria vital já participei de inúmeros projetos… e foram tantos que os dedos das mãos seriam insuficientes para contá-los. Alguns deles me orgulho, outros nem tanto (afinal como você, eu também já produzi muita coisa de qualidade duvidosa). Ainda assim acredito na máxima que as pessoas sempre evoluem, uma vez que estas buscam sempre o melhor dentro da missão de cada uma.
Organizar código Javascript para quem está iniciando nem sempre é fácil, pois na ótica do programador novato a linguagem é o mesmo que um monte de blocos de código (leia funções) que este foi criando ou até mesmo copiando para resolver os problemas do dia-a-dia. Esse pensamento, somado a inúmeras más práticas vão tornando o código feito com Javascript um tanto que caótico.
Entre as principais (más práticas), eis algumas que a meu ver atrapalham e irritam grande parte dos membros de um time de desenvolvimento (ah e faz a mãe do programador, ser lembrada):
falta de indentação
falta de comentários
variáveis espalhadas
variáveis globais
funções e variáveis criadas sem propósito
Mas o objetivo deste artigo não é só citar as partes ruins do desenvolvimento, e sim propor uma forma elegante de resolver isso. Então vamos a uma solução simples para organização dos seus códigos feitos com JavaScript.
Funções nomeadas x funções anônimas
Todo mundo aqui, deve saber o que são funções nomeadas e anônimas em JavaScript. Se não sabe, eis alguns exemplos:
// função nomeada
function common() {
    return true;
}
Acima vemos uma função nomeada e, a seguir, uma função anônima:
Observando os dois códigos, vê-se pouca diferença, não é mesmo? Os dois quando executados retornam a mesma coisa (true), porém são padrões sintáticos bem distintos.
No primeiro, temos uma função definida com o nome common, e é através desse nome que será possível invocar essa função, desse jeito:
common();
// => true
No segundo, note que a função não possui um nome, então ela precisou ser atribuída a variável anonymous para que pudesse ser invocada. Neste caso a chamada seria idêntica ao exemplo anterior:
anonymous();
// => true
Entendeu o conceito? Em linhas gerais, desculpe a ambiguidade, a função nomeada chama-se assim porque tem um nome. A função anônima, por sua vez não possui um nome, então a única forma de utilizá-la é atribuindo-a algo (uma variável, uma propriedade em um objeto, etc). Perdi esse tempo, explicando isso, pois acho que vai valer a pena para você entender o que vamos fazer a seguir.
Começando a organização
Vamos iniciar os trabalhos, criando uma função anônima:
function() {}
Se você salvar esse código e tentar executá-lo em sua página, ou mesmo rodá-lo no console do seu navegador tomará um SyntaxError. E isso tem um motivo óbvio, pois se a função não tem nome como eu vou chamá-la? Então teoricamente eu seria obrigado a atribui-la a uma variável ou algo do tipo. Neste caso, vamos fazer diferente:
(function() {})
Colocando esse código entre parênteses, o SyntaxError que estava rolando até então sumirá. Mágica? Magia negra? Não! Simplesmente os parênteses agruparam a nossa função, formando uma espécie de expressão. Esse código servirá de embrulho (wrapper) para tudo que vamos fazer daqui pra frente. Farei um pequeno teste agora, colocando um simpático console.log dentro da nossa função e, se tudo der certo, o resultado será a exibição do texto “less is more!”:
(function() {
 console.log("less is more!");
})
Se você executou esse código na sua página, e deu uma olhadinha no console, vai perceber que não houve retorno algum. Ué, o que que houve? Ocorre que apesar de termos uma função que implementa uma única linha de código, ele só está definida, porém não foi executada. Para fazer isso, basta adicionar parênteses no final da expressão, desta forma:
(function() {
 console.log("less is more!");
})();
Bingo! A partir de agora, toda vez que a página for carregada, esse função será executada “automagicamente”! Então temos a base necessária para organização de nossos códigos.
Organizando seu código
Você já deve ter ouvido falar, que toda variável precisa ser declarada usando a palavra chave var. Não usar o var, custa caro, pois uma variável definida sem ele vai parar no escopo global, então para seguir a régua de boas práticas vamos sempre usá-lo.
(function() {
    console.log("less is more!");

    var box = {};

})();
No exemplo acima, defini uma variável box que armazena um objeto vazio. A grande vantagem dessa abordagem é que box não está disponível em nenhum outro escopo a não ser o definido pela função wrapper que fizemos. Então se algum espertinho tentar ir no console e digitar:
console.log(box);
// => ReferenceError: box is not defined
Vai tomar um belo de um ReferenceError no meio da cara! Bom né? Não sujamos o escopo global e ainda ganhamos privacidade!
Uma vez que temos o objeto box, podemos adicionar propriedades e métodos a este objeto. Imagine agora que precisamos criar um controle bem simples, para organizar uma fila com nomes de automóveis. A ideia é começar com a fila vazia, ir adicionando os veículos e retornar a lista no final. Para isso, vamos usar uma propriedade chamada queue e dois métodos, que vamos chamar de addItem e getQueue:
(function() {
    console.log("less is more!");

    // criando o objeto (vazio) box
    var box = {};

    // adicionando a propriedade queue (fila)
    box.queue = [];

    // adicionando o métodos addItem (adicionar item)
    box.addItem = function() {

    };

    // adicionando o métodos getQueue (recuperar fila)
    box.getQueue = function() {

    };
})();
Como podemos perceber, a propriedade queue é um array vazio. Então nosso método addItem precisa receber um veículo como parâmetro e adicioná-lo nesta fila. Por sua vez, o método getQueue apenas retorna uma string com os veículos que temos na fila, separados por um hífen.
(function() {
    console.log("less is more!");

    // criando o objeto (vazio) box
    var box = {};

    // adicionando a propriedade queue (fila)
    box.queue = [];

    // adicionando o métodos addItem (adicionar item)
    box.addItem = function(car) {
        return box.queue.push(car);
    };

    // adicionando o métodos getQueue (recuperar fila)
    box.getQueue = function() {
        return box.queue.join(" - ");
    };
})();
Feito isso, se você rodar esse código, deve estar se perguntando: como diabos vou invocar os métodos addItem e getQueue do objeto box que acabei de implementar, visto que ele não está acessível no escopo global? A resposta é simples, basta fazer com que nossa função wrapper retorne o objeto box (forma simples) ou podemos configurar exatamente o que vai ser retornado. Vamos ao primeiro exemplo:
var GLOBALCAR = (function() {
    console.log("less is more!");

    // criando o objeto (vazio) box
    var box = {};

    // adicionando a propriedade queue (fila)
    box.queue = [];

    // adicionando o métodos addItem (adicionar item)
    box.addItem = function(car) {
        return box.queue.push(car);
    };

    // adicionando o métodos getQueue (recuperar fila)
    box.getQueue = function() {
        return box.queue.join(" - ");
    };

    return box;
})();
Como você deve ter percebido, além de retornar o objeto box, eu atribui o nosso wrapper a uma variável global chamada GLOBALCAR (mesmo com a palavra chave var, como GLOBALCAR não está dentro de uma função, ela fica visível no escopo mais amplo do Javascript, podendo ser acessada de qualquer local). Dessa forma, GLOBALCAR tornou-se um objeto. Para testar nossa implementação podemos executar (eu incentivo você neste momento a testar via console):
E o método getQueue para retornar os itens que estão na fila:
GLOBALCAR.getQueue();
// => "Gol - Palio - Corsa"
Legal né? Mas ai se você souber um pouquinho mais de JavaScript vai se perguntar porque é possível acessar a propriedade queue diretamente!? Isso tem tudo a ver com a forma que retornamos o objeto box. Se você quiser esconder essa propriedade, deixando disponível apenas os métodos você pode fazer isso:
var GLOBALCAR = (function() {
    console.log("less is more!");

    // criando o objeto (vazio) box
    var box = {};

    // adicionando a propriedade queue (fila)
    box.queue = [];

    // adicionando o métodos addItem (adicionar item)
    box.addItem = function(car) {
        return box.queue.push(car);
    };

    // adicionando o métodos getQueue (recuperar fila)
    box.getQueue = function() {
        return box.queue.join(" - ");
    };

    // retornando um objeto personalizado (só com o necessário)
    return {
        add: box.addItem,
        get: box.getQueue
    };
})();
Note que ninguém, a não ser você saberá da existência da propriedade queue. O mesmo vale para outros métodos que você queira implementar, mais que não fazem sentido serem expostos.
Com base na nova implementação, o método addItem virou apenas add, e o getQueue virou um simples get. Para adicionar itens a nossa fila, usaremos então:
Elegante não? Agora você já tem uma base sólida para começar a organizar os seus projetos em JavaScript. O mais bacana, é que você pode entender a timeline do processo para chegarmos nesse objetivo. Aproveite o momento de satisfação, e divulge para a galera que agora você aprendeu a usar um pattern para organização do seu código, conhecido por aí como “Module Pattern“. Chique não?
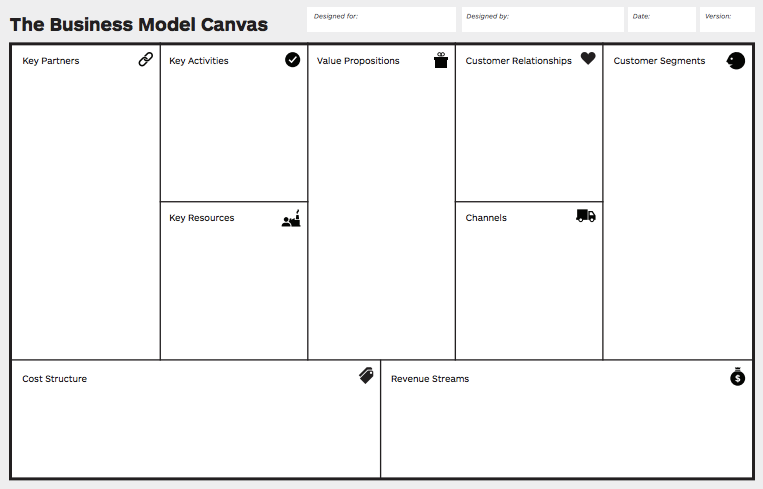
 A partir das métricas de produto, cada membro da equipe deverá identificar pontos de melhoria e pontos onde o produto aparenta estar bem.
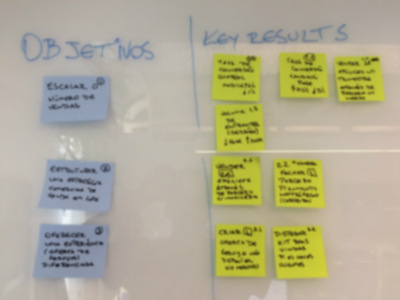


 On Omniglot there are about 250 languages to choose from so you’ll almost certainly find what you need for the language you’re learning! Best of all, Omniglot also contains audio for a lot of the phrases so you can hear how they sound.
 My German cheat sheet, written out by hand.[/caption]
Once I’ve drawn up this ‘paper’ version, I’ll get it checked by a native speaker using the resources I discussed above. Finally, I like to create a digital cheat sheet that I can print out and keep beside me during my conversation.
[caption id="attachment_20227" align="aligncenter" width="1024"]
My German cheat sheet, written out by hand.[/caption]
Once I’ve drawn up this ‘paper’ version, I’ll get it checked by a native speaker using the resources I discussed above. Finally, I like to create a digital cheat sheet that I can print out and keep beside me during my conversation.
[caption id="attachment_20227" align="aligncenter" width="1024"] My printed cheat sheet.[/caption]
Note: I’ve included a free PDF cheat sheet template you can download at the end of this article that you can fill out in advance of your first conversation.
The reason I write out my notes on paper first is that is helps me bring extra attention to the words I’m learning and get them to stick in my memory.
It’s also very useful to write out your dialogues in advance so that you begin to get a feel for the likely structure of the conversations you’re going to have. Seeing the phrases as building blocks in the context of a conversation makes them easier to learn.
My printed cheat sheet.[/caption]
Note: I’ve included a free PDF cheat sheet template you can download at the end of this article that you can fill out in advance of your first conversation.
The reason I write out my notes on paper first is that is helps me bring extra attention to the words I’m learning and get them to stick in my memory.
It’s also very useful to write out your dialogues in advance so that you begin to get a feel for the likely structure of the conversations you’re going to have. Seeing the phrases as building blocks in the context of a conversation makes them easier to learn.

 Emperor Nero, without the bran flakes.[/caption]
The word itself and its sounds come from 3 different words or elements that I’ve included in my mnemonic: Nero, bran and vat; the meaning comes from the action that Nero is taking.
Is it a ridiculous image? Of course. But the more ridiculous and vivid your mnemonics are, the more likely you are to remember them and the words they represent. Don’t be afraid to make your mnemonics a little crude or violent - it makes them stick in your mind even more. I’ve found Looney Tunes-style cartoon violence (ACME anvils and dynamite galore!) to be particularly effective for making my mnemonics vivid.
Emperor Nero, without the bran flakes.[/caption]
The word itself and its sounds come from 3 different words or elements that I’ve included in my mnemonic: Nero, bran and vat; the meaning comes from the action that Nero is taking.
Is it a ridiculous image? Of course. But the more ridiculous and vivid your mnemonics are, the more likely you are to remember them and the words they represent. Don’t be afraid to make your mnemonics a little crude or violent - it makes them stick in your mind even more. I’ve found Looney Tunes-style cartoon violence (ACME anvils and dynamite galore!) to be particularly effective for making my mnemonics vivid.


 After over a year of development and production use at Netflix, we’re excited to announce that our Continuous Delivery platform, Spinnaker, is available on GitHub. Spinnaker is an open source multi-cloud Continuous Delivery platform for releasing software changes with high velocity and confidence. Spinnaker is designed with pluggability in mind; the platform aims to make it easy to extend and enhance cloud deployment models. To create a truly extensible multi-cloud platform, the Spinnaker team partnered with Google, Microsoft and Pivotal to deliver out-of-the-box cluster management and deployment. As of today, Spinnaker can deploy to and manage clusters simultaneously across both AWS and Google Cloud Platform with full feature compatibility across both cloud providers. Spinnaker also features deploys to Cloud Foundry; support for its newest addition, Microsoft Azure, is actively underway.


 Fiz um pedido num site nacional o qual estou acostumada a fazer encomendas. O pedido foi postado nos correios dia 06/01, com um código de rastreamento.


 É, pelo visto, muitos brasileiros conheceram outra caracterísca do povo japonês: a consideração para com o outro. Bom para quem não captou ainda, estou me referindo à cena que bombou na mídia brasileira e nas redes sociais que serviram para ovacionar os japoneses que recolheram o próprio lixo na partida do Japão contra a Costa do Marfim na Arena Pernambuco.