Shared posts

04 Jul 17:55

Miso Roasted Brussels Sprouts

by Ali

Miso Roasted Brussels Sprouts Recipe -- this side dish is quick and easy to make, and kicked up a notch with this easy miso vinaigrette! | gimmesomeoven.com (Gluten Free / Vegan / Vegetarian)

I am on a mission to clean out the fridge this week.

Because after hosting a handful of happy hours this month, and testing a few dozen recipes for the blog in between, my fridge is literally overflowing right now with ingredients and leftovers galore.  I’d say that this is probably par for the course for any food blogger.  But even my friends — who by now are used to coming over and taking it upon themselves to shift stuff around for a minute to find a little spot for their bottle of white wine to chill — remarked at a happy hour this week that it was a freaking miracle that the fridge doors were even able to close.  Ha, oops.

Time to essentialize that fridge!!

My first priority, of course, is always using up that time-sensitive produce.  So yesterday, I made a smoothie with random leftover fruit, a big green salad with smoked salmon, and my third batch (in one week!) of these miso-roasted Brussels sprouts that I can’t seem to stop making.  They’re so easy that I hadn’t even thought of posting them on the blog.  But after eating the leftovers all week for literally breakfast, lunch, and dinner, it occurred to me that some of you might need these in your life too.

And the best part?  All you need are 5 easy ingredients to make them!

(more…)

07 Jun 04:47

These ‘Star Wars’ Bookends Are Extremely Shelfworthy

by Geek Girl Diva

download

I’ve seen a lot of Star Wars bookends in my day, but I think I’ve just found my new favorites. Etsy seller MokuShop uses wood to create Star Wars bookends based on the Death Star and AT-ATs.

He also did a Deadpool versoin. You bet I put it in this post because, Deadpool.

il_570xN.830470914_kmvw

il_570xN.836625142_rksp

il_570xN.841209705_e9i7

il_570xN.841209707_f32n

il_570xN.846888179_5oew

il_570xN.878158060_m9sv

il_570xN.1020673357_jxf6

deadpool

Star Wars Bookends ($59 – $78)

(Thanks to Katie Elhoffer for bringing these to my attention!)

26 May 18:01

Give Him A Dollar Thrill

by BD
Retail | TX, USA

(I am scanning up the order of a customer, who is rather elderly, and we are at the end when this happens:)

Customer: “For that $100 cash back, I don’t want a $100 bill.”

Me: *jokingly* “Okay, I’ll give you 100 ones.”

Customer: “Oh, no! That’s even worse. A man like me doesn’t need THAT much money. I’m too old to go to the strip clubs!”

The post Give Him A Dollar Thrill appeared first on Funny & Stupid Customer Stories - Not Always Right.

26 May 01:31

Mother’s Day Cake – Open Star Tip Cake

by Amanda
A beautiful cake that is easy to do but Mom will never know you didn't spend hours and hours on it!

Finally! A Mother’s Day Cake that anyone can do! Using an open star tip helps to create a beautiful technique but is easy enough for anyone to d0!

I recently make a Rainbow Open Star Tip Cake that people really seemed to like! One of the most common emails I got about this cake was, “How can I make this for Mother’s Day?” I thought I would do a softer version of my original cake that would be a little more appropriate for a Mother’s Day celebration!

To make this cake you will need:

Cake to decorate (I adore this Perfect White Cake recipe)

Buttercream recipe (I prefer Decorator’ Buttercream for piping, but Crusting Buttercream also works quite well)

Food coloring – I used McCormick food coloring and loosely followed this chart that details how to achieve certain colors.

Decorator’s tips: 16, 18, 22, 32, 172, 195, 2C, 4B, 8B, 9FT (this is simply a wide variety of the same style of tip- see how to store all of these tips HERE)

I also use a #4 tip to write “mom”.

One difference with this cake and the original cake is I added a few larger open star tips like the 2C, 4B, and 8B. I wanted to add a few more colors and thought that the larger star tips would be better than the smaller tips.

One thing that makes a BIG difference in the overall time spent on this cake is how I use my tips. What I mean by that is, how I bag and how I clean up after using frosting in disposable pastry bags.

I like to “double bag” my frostings. Why do I do this?

  1. If I run out of frosting I can easily drop in a bag of fresh frosting.
  2. Clean up is easier.
  3. If using a coupler set I can easily change tips. If not using a couple set I can easily create a new bag with the new tip and drop my frosting right in.

Here’s how simple it is:

I fill a disposable pastry bag with my frosting.

In a separate bag, I add a coupler set with tip OR just the tip. (depending on the size of the tip)

I then cut the tip off the bag with frosting. Make sure you cut an opening the is slightly bigger than the size of the tip. If the opening is not large enough the pastry bag could interfere with how to frosting comes out of the tip. (I hope that makes sense!)

Simply drop the frosting bag into the bag with the coupler set. When the frosting runs out, simply remove the frosting bag and drop in a new bag. I often store my frosting right in the pastry bag to save time.

Ok! So now that we have the supplies ready how do you actually make this adorable cake? Spoiler: It’s SO EASY!!

Another difference in this cake from the original Rainbow Open Star Tip Cake is the addition of the white frosting ring around the top that you see at the beginning of the video. I did this to create some varying height on the cake. (You can definitely leave this ring of frosting out if you prefer)

I think you can really tell on this image how dramatic and lovely the extra height is:

Ok, so the process for this cake is fairly easy!

Bake cake, cover in crumb coat, (here is a video of me adding a crumb coat) then go back and do your final “beauty” layer. Try and get the frosting as smooth as possible! I found that the contrast of the crisp, clean lines of the cake with the whimsical multi-colored buttercream “stars” is really quite impressive.

Color frosting and add it to pastry bags with open star tips in varying sizes.

Pipe dollops (stars) around the cake. Be sure to stop and look at the cake from different angle’s to see if it looks even and symmetrical.

PRO TIP: Try using ODD (not even) bunches of dollops. If you look at the image below you will see that I used FIVE big blue star dollops. Research shows that odd (like 1, 3, 5, 7, 9) groupings are more visually appealing. 

You can use as little as 3 different decorating tips as well as add other varieties and styles. I would recommend a small, a medium, and a large tip. Instead of rainbow colors consider pink, yellow, and blue or even red, dark pink and a light pink. You could also add some round tips in for detail or a leaf tip for extra added fun.

I share more about decorator’s tips and storage here.

As I mentioned above, I just piped out “mom” using a #4 tip. I removed the star tip from my coupler set on the dark pink frosting bag and added the #4 tip.

This is a great way to make a Mother’s Day Cake personalized for mom!!

The post Mother’s Day Cake – Open Star Tip Cake appeared first on i am baker.

25 May 14:38

New Super-Secret Project Reveal: Bringing The Labyrinth's "Junk Lady" To Life

by Jen
I generally hate sharing process photos before a cosplay is finished, since I'm semi-convinced it jinxes my ability to ever finish the thing, BUT... I think the time has come.

So let me walk you through the life-consuming project John and I began about three weeks ago, on the very day we learned there was going to be a Labyrinth Ball during Dragon Con this year. (A moment of sadness, however: the Ball tickets went on sale a few hours ago, sold out in less than 2 minutes, and we didn't get one. S'ok, though; this has been way too fun to let that get us down.)

As with all our previous cosplays, John and I wanted to do a character that's never - or very rarely - been done before. We also wanted a challenge we could both work on, which meant both structural elements for John and more creative, free-form elements for me. Plus it had to be something really over the top.

I think you'll agree this lovely lady fits all those criteria:


So. Let's begin.


First, a quick PVC frame:


With mandatory "head" jokes GALORE. (Just look at that grin.)
  
John continued work on the junk pile while I took over for the head. It's a big a Styrofoam ball, so I covered it with masking tape before re-attaching it to John's ingenious neck pivot:


She won't be a puppet, but she WILL move. Hopefully enough to seriously startle some unsuspecting con-goers. ;)

Then I sketched in features:

It's Balloony from Phineas & Ferb!


Adding crumpled tissue paper and more tape to rough out the more prominent features:

 
The eyes are a ping-pong ball, cut in half. 

A coat of paper maché for strength:


Which we placed outside to dry and/or scare the neighbors:

 Now on to sculpting with paper clay, since weight is a concern:


My only sculpting tools are from a $2 plastic cake decorating kit: a small spatula and a few pointy sticks. I think I'm ready to spring for something nicer now.

I only covered the visible areas with clay: her face and a little of her neck.

Next, paint!


I base-coated her with a sickly pale flesh tone, then stippled on areas of pink and lime green. (All of my paints are the 89 cent acrylics from the craft store.) At this point she's looking pretty zombie-like, but we're not done yet! Next, aging:


 A watered-down wash of brown really brings those wrinkles to life.

At this point I'd been literally nose-to-nose with this lady for maybe a week, and wasn't particularly phased by her nightmarish visage.

Then I added the eyes.
» Read More
25 May 14:38

Our Labyrinth Junk Lady... IS ALIVE!

by Jen
After a panicky sprint toward the finish line, John and I have managed to get our Junk Lady about 95% done  - which is good enough for some pictures, right?

Let's start with a quick video of this "poultry in motion:' [snerk]


(See the chicken?)

Now some still shots:


(Taken with my phone, sorry for the not-great quality.)


I'm sure you've already spotted my most obvious Easter Egg on the back, right? ('ELLO!) Closeups of that to come, further down.

Now let's break down some of these prop components, because you NEED to see John's workmanship on this stuff.
» Read More
19 Apr 03:08

Dino Lamps Are Bright Bedside Beasts

by Sean Fallon

dino lamps

Dinosaurs roam the earth once more thanks to a controversial cloning method that involves blending dinosaur DNA with origami and a bag of Skittles. After a heavy blast of radiation, this is the surprising and unholy result.

Seriously though—colorful dinosaur lamps. I want them all. Then I’ll get a giant unicorn light, put them all together and see what happens.

Check out more pics below.

p7529_s18927_column_grid_8

p7529_s18926_column_grid_8

p7529_s18928_column_grid_8

Dino Lamps ($42.49)

08 Apr 21:22

How to Make Crispy Hash Browns

by Beth M

I totally don’t utilize potatoes enough in my kitchen. They’re cheap and can be used about a bazillion different ways. So, when someone asked me for a tutorial on how to make crispy hash browns, I was on it! Besides, I like making an indulgent breakfast on the weekend to celebrate the time off and these crispy hash browns made the perfect base for what I like to call my “ultimate hash browns”. Scroll to the bottom of the post to check out what I topped my hash browns with that made them so ultimate. ;)

I’m sure everyone makes their hash browns differently, but there are three things that I have found to be key to making really great, golden brown hash browns:

  • Rinsing the starch off the potatoes
  • Drying the potatoes
  • Using an adequate amount of oil

Yes, that’s right, OIL. Hash browns are fried and there’s just no way around that, aside from not eating them. If you don’t use enough oil the potatoes will be dry and tend to go from white to burnt. Use enough oil and you’ll get crispy yet moist potatoes with a beautiful spectrum of golden brown color.

Also on that note, you’ll want to use an oil with a high smoke point, so something like canola, corn, peanut, or sunflower oil. Butter obviously gives amazing flavor to hash browns, but the butter solids tend to burn, so you’ll want to use clarified butter or ghee instead. I didn’t have patience to clarify any butter, so I just used canola oil. #lazybutt

I used my 10″ cast iron skillet because it offers non-stick protection while giving really even heat and a nice surface for crisping. While stainless steel is also great for crisping, starchy foods (like potatoes) tend to stick a lot more on stainless, so it can be tricky. If you’re not well practiced with keeping food from sticking on stainless steel, I’d suggest either cast iron or a non-stick skillet.

How to Make Crispy Hash Browns at home - BudgetBytes.com

4.9 from 8 reviews
How to Make Crispy Hash Browns
 
Prep time
Cook time
Total time
 
Total Cost: $1.25
Cost Per Serving: $0.31
Serves: 4 (1 cup each)
Ingredients
  • 2 large russet potatoes (about 2 lbs.) $1.00
  • 4 Tbsp cooking oil, or as needed $0.20
  • Seasoning salt to taste $0.05
Instructions
  1. Peel the potatoes, if desired. Use a large-holed cheese grater or food processor to shred the potatoes. Place the potatoes in a colander and rinse well, or until the water runs clear. Let the potatoes drain.
  2. Squeeze the potatoes of their excess water by pressing against the side of the colander or squeezing in your fist. Or, place the potatoes in a clean, lint-free dish towel, roll them up, then press to remove excess moisture.
  3. Heat a large cast iron or non-stick skillet over medium heat. Once hot, add a tablespoon of cooking oil. Tilt the skillet to spread the oil over the surface. Add about ⅓ of the shredded potatoes or enough to cover the surface of the skillet in a solid, yet thin layer (1/2 inch thick or so). Let the potatoes fry, without disturbing, until deeply golden brown on the bottom (3-5 minutes). Season lightly with seasoning salt.
  4. Flip the potatoes, and drizzle with additional oil if needed. Let the potatoes cook on the second side without disturbing until golden brown and crispy again. Season lightly on the second side.
  5. If needed, flip and cook one more time to achieve the ratio of brown to white that you like. Repeat the process until all of the potatoes are cooked. Serve hot.
3.4.3177

How to Make Crispy Hash Browns at home - BudgetBytes.com

How to Make Crispy Hash Browns:

Russet PotatoesStart with two russet potatoes, or about 2 lbs. You can either scrub them clean and leave the skin on, or peel them. 

Shred PotatoesUse a large-holed cheese grater or a food processor to shred the potatoes. I found that the potatoes shredded fairly easily with the cheese grater, so it wasn’t worth cleaning out the food processor.

Rinse PotatoesPlace the shredded potatoes in a colander and rinse them really, really, really well. The water running from the colander should be clear. Then, let them drain.

Dry PotatoesMaking sure the potatoes are as dry as possible is key to keeping them crispy. If they have too much water on them that water will turn to steam while they cook and basically steam the potatoes and make them soft. So, you can either let them drain a long time in the colander, squeeze them dry with your hands, or roll them up in a clean, lint-free towel and press them dry. I chose the towel method.

Potatoes in Hot SkilletHeat a large cast iron or non-stick skillet over medium heat. Once it’s hot, add about a tablespoon of oil. Spread the oil over the surface of the skillet, then add about 1/3 of the shredded potatoes, or enough to cover the bottom of the skillet in a solid but thin layer (only about 1/2 inch thick). You’re shooting for maximum surface contact here, so if they’re packed in there too thick, some won’t touch the skillet… and they’ll generate steam again and make everything mushy.

Seasoning SaltWhile the potatoes are cooking, sprinkle on a little seasoning salt. This is the kind I like because I live in Louisiana and we put it on EVERYTHING, but you can use whatever brand you like. I love the little bit of extra flavor and kick that seasoning salt adds to the crispy hash browns compared to just plain salt and pepper.

How to Make Crispy Hash Browns at home - BudgetBytes.comNow, the key here is to not touch them long enough for them to get really nice and brown and crispy. If you mess around with them, stirring or flipping too often, they won’t form a nice crust and the long strands will kind of break down. So, LEAVE THEM BE. :) Then, once they’re very golden, flip them. You might need to drizzle on a little more oil at this point to help the second side crisp up. Then, LET THE SECOND SIDE BE until it’s also golden and crispy. Now, depending on how many potatoes you have in the skillet, you may want to flip and cook one last time to get most of the potatoes crispy, but that’s up to you. Some people like a 50/50 ratio of crispy to soft, some people like almost all crispy.

How to Make Crispy Hash Browns at home - BudgetBytes.comOnce you get the ratio of crispy/soft that you like, it’s time to move on to the second batch. Remove the cooked crispy hash browns to a plate, then repeat the process a couple more times, or until you’ve cooked all the potatoes.

How to Make Crispy Hash Browns at home - BudgetBytes.comHash browns are great on their own and all, but why not make them ULTIMATE by adding lots of yummy toppings? I did a fried egg, some avocado slices, diced tomato, sliced jalapeño, green onion, and a dollop of sour cream. Waffle House ain’t got nuthin’ on my hash browns. 😎

How to Make Crispy Hash Browns at home - BudgetBytes.com

The post How to Make Crispy Hash Browns appeared first on Budget Bytes.

07 Apr 18:01

Dogs Playing Games by Lili Chin

by Katherine Becker

Dogs Playing Games by Lili Chin

We’re big fans of artist Lili Chin, and we love checking in on what she’s up to. Recently Lili released a collection of drawings of dogs playing games — an adorable spinoff of the classic dogs playing poker — as part of the Cute Every Day Art Show. The series features drawings of American dogs playing Twister, Asian dogs playing Mahjong, German dogs playing Wurstschnappen, and French dogs playing Baccarat (a nod to her Dogs of the World project), and they’re available as limited edition prints here.

lili-chin-dogs-playing-games-illustration-4

lili-chin-dogs-playing-games-illustration-3

lili-chin-dogs-playing-games-illustration-2


Share This: Twitter | Facebook | Don't forget that you can follow Dog Milk on Twitter and Facebook.
© 2016 Dog Milk | Posted by Katherine in For Humans, Other | Permalink | No comments
03 Apr 18:22

Did Bill Watterson Have Something To Do With This New ‘Calvin And Hobbes’ Strip?

by Sean Fallon

Untitled-1

Cartoonist Berkeley Breathed, creator of Bloom County, won April Fool’s Day when he “revealed” that he has taken over ownership of Calvin and Hobbes, noting that his Facebook page would host to the first brand-new strips since Bill Watterson’s retirement. Not only that, there were promises of “new merch”.

As you probably know, Watterson is legendary for his refusal to license Calvin and Hobbes despite the oodles of cash that would come with such a deal. Breathed, however, isn’t burdened by integrity. As you’ll see below, C&H fans will get what they want under his new management.

From Breathed’s Facebook page:

12923198_1169777789719639_6064579719458250978_n

March 11 — A big day for C&H fans: Bill Watterson and myself in Tuscany signing the franchise over to my “administration.” Watterson’s in great shape — he’s out of the Arizona facility, continent and looking forward to some well-earned financial security. You rock, Bill. –bb

The new strip (click to enlarge):

ch 2016

So the big question here is did Watterson have something to do with this joke?

Seems unlikely, but let’s not forget that this wouldn’t be the first time the notoriously private Watterson has come out of retirement. He resurfaced very briefly to “secretly” contribute to Pearls Before Swine back in 2014. He was also involved in the Stripped documentary.

Odds are that this is just Breathed pulling a very brilliant and ballsy joke, so I wouldn’t get my hopes up for a return of C&H. If that’s the case, at least something genuinely amusing came out of April Fools’ Day besides phony ThinkGeek products.

(via Comic Book Resources)

22 Mar 22:19

Super Simple Barn Door Tutorial

by Sara
Super Simple Barn Door Tutorial

Today’s contributor is Sara from The Aqua House. All posts written by Sara for Make It and Love It can be found HERE

. . . . .

Hello Everyone! It’s Sara from The Aqua House and I’m so excited to share with you my super simple barn door! I don’t know about you, but I am loving the barn door trend! Its a fabulous way to add some function and visual interest to a room.

Super Simple Barn Door Tutorial | via Make It and Love It


When we did our bedroom makeover I just knew that I wanted to add a barn door into our bathroom/closet area. Although I love the chippy look, I didn’t really want my door to be that way.  I wanted the look of a barn door but with a smooth, finished appearance. With a little bit of research and several drawings, my husband and I came up with this idea for a simple barn door.

Super Simple Barn Door Tutorial | via Make It and Love It


Why simple?  Because it is made out of only TWO pieces of wood! Yep, two! And out of those two pieces of wood you only cut one of the pieces! Simple, quick and no butt joints on the front of your door so it looks elegant and finished.

Super Simple Barn Door Tutorial | via Make It and Love It

super simple barn door tutorial (7)

(Still loving my Darling, I Love You Sign!)


Super Simple Barn Door Tutorial | via Make It and Love It


Are you ready to make your own Simple Barn Door?

For this project you will need:

  • 1 sheet 3/4 inch cabinet grade plywood
  • 1 sheet 3/4 inch MDF
  • table saw
  • construction adhesive
  • caulk
  • paint and brush or sprayer
  • jig saw
  • router with straight bit
  • chalk line with blue chalk
  • tape measure
  • long pull handle
  • clamps
  • drill with drill bit
  • wood putty

*All measurements are for a 33 inch by 84 inch door.  You may need to adjust your measurements to fit your own space.*


To start out, you will cut the cabinet grade plywood and MDF sheets down to 33 inches wide by 84 inches tall on a table saw or have your local hardware store cut it for you.

super simple barn door tutorial (11)


Set the plywood piece aside. We will be using the MDF piece as the front of the door and this is the piece that will be cut.  Place the MDF piece either on saw horses or the ground and measure to the center of the width which is 16 1/2 inches.  Make a tic mark on the top and bottom of the door front and flip a chalk line so you have a line running down the center of your board.(Make sure to use blue chalk because it’s non permanent.) We will use this line to make sure everything lines up when we do our X.

barn door chalk outline center line


Now we are going to lay out the outer border of the door. On my door the bottom border is 6 inches (to match my trim height) and the other three sides are laid out to 4 inches thick. Measure in from the edge four inches and flip a chalk line on the top and sides. Measure up 6 inches from the bottom and flip a chalk line.

barn door chalk outline border


Next we will  make a giant X on the door by taking our chalk line going from one top corner down to the bottom corner on the opposite side of the door.  Measure from the inside of the square (border) you just made and flip your chalk line. The X should cross on the center line. This X will be our “Center X”, and is a guide to help us make the bigger “Outside X”.

barn door chalk outline X


We are now going to make the “Outside X” which will be the edges of X on your barn door.  To do this you measure 2 inches away in each direction from the “center X” and flip a chalk line. Make sure your lines intersect at the center line.

barn door chalk outline outside X


When you are finished your door front should look like this.

super simple barn door tutorial (12)


Using a drill and a 1 1/4 inch paddle bit, drill a hole near the edge of the “Outside X”.  This hole is to help you start the jig saw.

super simple barn door tutorial (14)


Carefully and slowly start cutting out the triangle shaped pieces between the border and “Outside X”.

super simple barn door tutorial (15)

super simple barn door tutorial (16)


Once the front of the door is cut out apply construction adhesive to one side of it.

super simple barn door tutorial (19)


Flip the door top over onto the cabinet grade plywood and make sure all edges line up. Clamp it into place using as many clamps as you can.

super simple barn door tutorial (21)

super simple barn door tutorial (23)


Let the door sit for 24 hours so the construction adhesive can dry. To smooth out the edges use a router with a  straight bit and use a straight board as a guide along all the inside edges. Clamp the guide board to your door so it doesn’t move.

super simple barn door tutorial (24)


Once your edges are straightened up, caulk along the joints between the door front and door back. Take the wood putty and putty in the seam between the door front and back on all four outside edges.

super simple barn door tutorial (25)


Paint your door.  I used a paint sprayer to get a smooth finish.

super simple barn door tutorial (28)


Determine where you want your door handle and drill holes to attach. I put my handle 2 inches in from the outside edge and the top of the handle is 4 foot from the bottom of the door.  My handle is 12 inches long and was from Lowe’s.

super simple barn door tutorial (32)

super simple barn door tutorial (1)


You will need to purchase a barn door hanging kit (I got mine from Home Depot) and follow the directions to hang your door.

super simple barn door tutorial (5)


Now step back and enjoy your beautiful new simple barn door!

super simple barn door tutorial (2)

super simple barn door tutorial (4)


-Sara

sara-blog-contributor

. . . . .

Making little improvements and updates to your home doesn’t have to be difficult or break the bank. We love sharing our ideas for simple updates to your home that we just know you’ll love. Check out a few of our past favorites:

DIY Laundry Basket Organizer (…Built In)

DIY Laundry Basket Organizer (...Built In) | Make It and Love It

Home Improvement: Custom Couch (or Arm Chair) Legs

DIY Custom Couch (or Arm Chair) Legs --- Make It and Love It

Home Improvement: DIY Board and Batten

IMG_1407-001

The post Super Simple Barn Door Tutorial appeared first on Make It and Love It.

19 Mar 16:29

chicken and waffles

by michelle lopez

Guys, when did chicken and waffles become a thing? I feel like I first heard about it in college when a former acquaintance was singing praise for Roscoe's House of Chicken and Waffles in LA.

So I've always thought about it as Just Another Millennial Thing, but then I looked it up (FYI — chicken and waffles has its own dedicated Wikipedia page; I love the internet!) and, as I'm sure all you Southerners know, it turns out that it's been a THING since freaking 1917!

Oops. I hope you don't think I'm too much of an idiot. My bad.


In any case, I'm glad chicken and waffles have been around for a while since it is actually one of the most unexpected-but-freaking-delicious combos out there. The only bummer is that because it's become culturally appropriated by millennials for some time, lines at all the good places can get crazy.

But there's no need to put yourself through those two hour waits for brunch. Because I've got a recipe for chicken and waffles over on West Elm's blog, where I'm sharing a new brunch recipe every Friday this month:
get the recipe »
19 Mar 16:22

Summery Death Star And R2-D2 Maxi Skirts

by Sean Fallon

star-wars-skirtsFrom Fashionably Geek: These comfy, summery Star Wars maxi skirts feature Death Star and R2-D2 prints. They’re sheer, so a slip is recommended.

Otherwise…it will be a moon.

Product Pages: Death Star Skirt / R2D2 Skirt: ($49.99)

19 Mar 16:20

The Perfect Jurassic Bathroom Accessory To Pair With That 3D Printed T-Rex Showerhead

by Sean Fallon

trex tp

Remember the 3D printed T-Rex showerhead? Well, now’s your chance to complete that Jurassic Park-themed bathroom makeover you’ve been working on.

Product Page ($23)

(via GOA)

13 Mar 00:34

Oreo Peanut Butter Pie Cups

by noreply@blogger.com (Heather Baird)

Much as I love involved, intricate cake decorating and classical pastry with lots of elements (and you know I do), there are times when I just want a delicious sweet bite without a lot of work involved. I concoct desserts like this on the fly, usually about an hour before I cook dinner, with whatever ingredients I have on hand.

I've decided to start a new series on this blog called 'Five or Fewer'. These recipes will contain limited ingredients (five or less, of course) and they won't have you monitoring a candy thermometer or stressing over correctly tempering crème anglaise.

These peanut butter pie cups are my first in this series. They are rich and decadent and the Oreos provide a nice crunchy contrast to the smooth filling.
Continued, click to read more...
13 Mar 00:34

Black Forest Cake

by noreply@blogger.com (Heather Baird)

Friday is a good day for something chocolaty, wouldn't you agree?

This easy Black Forest Cake is my final post for Better Homes and Gardens' Month of Chocolate, and what a sweet month it has been! Here's a little recap in case you missed any of the previous posts.
Continued, click to read more...
13 Mar 00:25

chocolate peanut butter tart

by deb

peanut butter chocolate tart, tagalongs-style

Definitely one of the best things about having a 6.5 year old is that he now has classmates that can bestow upon us The Annual Gift of the Thin Mint Cookies. If there were any other Girl Scout Cookies worth celebrating, I knew nothing about them until pickup earlier this week when I saw other parents scurrying off with boxes of curiosities like Samoas and Tagalongs and launched a full investigation. Seriously, why did nobody tell me about those crispy chewy rings of caramel, coconut and stripes of chocolate? Was there always a cookie with both peanut butter and chocolate in it or is this some millennium baby voodoo? Making up for time lost to Thin Mint blinders begins here and now.

... Read the rest of chocolate peanut butter tart on smittenkitchen.com


© smitten kitchen 2006-2012. | permalink to chocolate peanut butter tart | 141 comments to date | see more: Chocolate, Peanut Butter, Photo, Tarts/Pies

10 Mar 18:28

Presidential Parody Pet Toys from FUZZU

by Capree Kimball

Presidential Parody Pet Toys from FUZZU

Let your dog have a voice in this year’s election with one of FUZZU’s Presidential Parody Pet ToysFUZZU, a woman-owned pet toy company based in Vermont, has launched their first collection of toys on Kickstarter, which features hilarious caricatures of Donald Trump, Hillary Clinton, and Bernie Sanders.

Presidential Parody Pet Toys from FUZZU

Presidential Parody Pet Toys from FUZZU

The Bernie toy features wild plush hair, rolled up sleeves, and is ready to start the revolution. With your vote, he and your pet will hit the floor running.

Presidential Parody Pet Toys from FUZZU

The Hillary toy is the heat to beat with her red pantsuit ablaze, and her fiery gaze fixed on the Oval Office. Fling her into the ring…and watch the fur fly.

Presidential Parody Pet Toys from FUZZU

The Donald toy is stylin’ with his golden tan, quaffed plush hair, and flashy garb. His well-heeled foot will inevitably end up in your pet’s mouth.

Presidential Parody Pet Toys from FUZZU

Each toy is available in 3 sizes, including an 8″ catnip-filled toy for cats and a 17″ or 27″ squeaker toy for dogs. Back FUZZU on Kickstarter to pre-order yours today!


Share This: Twitter | Facebook | Don't forget that you can follow Dog Milk on Twitter and Facebook.
© 2016 Dog Milk | Posted by capree in Toys | Permalink | No comments
26 Feb 19:41

Watch This Guy Build ‘Settlers Of Catan’ From A Single 2×4 [Video]

by Geek Girl Diva

woodworking catan

As part of last year’s Summers Woodworking 2×4 Challenge, Aaron Day made a full Settlers of Catan game using a single 2×4 and pretty much every tool in his shop.

See how he did it in the video below.

(via Sploid)

22 Feb 17:18

Check Out The Visual Effects That Were Used To Create ‘Deadpool’ [Video]

by Stefan A. Slater

deadpool vfx

Though Tim Miller didn’t rely heavily on VFX to bring Deadpool to life, the movie still featured its fair share of effects (which was made more interesting because of the tight budget).

CGMeetup posted a quick round-up video of some of the effects that Miller used in the film, and Wired posted another video that highlighted all of the effects (and actors) that went into creating Colossus.

You can check out both of the videos below.

(via GreekTyrant)

22 Feb 16:20

SNL Has No Love For Deadpool, But The Avengers Sure Do [Video]

by Geek Girl Diva

CbrQcx1UUAAhXzd

People are so in love with Deadpool that someone actually started a petition to have him host SNL. Not Ryan Reynolds…Deadpool.

Unfortunately, a NSFW video surfaced of an incident that got Deadpool kicked off the SNL hosting gig back in the ’90s. Much like Kanye, we’re guessing that he won’t be invited back.

However, there’s plenty of love for Deadpool among the Avengers, as both Chris Evans and Robert Downey, Jr. got in on the fun. Even artist Lord Mesa jumped in with a super timely bit of fan art.

Check out the video and the tweets below.

15 Feb 19:20

#AmazingPetExpo: Southern California Pet Expo, Pomona, CA, Feb. 20 – 21, 2016

by Grace Sydney
SoCal Pet Expo

SoCal Pet Expo
February is known as a month when we show our dogged devotion to those we love, and on February 20 – 21 pet parents (and their dogs!) in the area of Pomona, California are invited to celebrate the love that our furry, finned and feathered friends bring to our lives at the Southern California Pet Expo.

SoCal_Logo-1Activities

  • Spot can show off his special skill in the Pet Talent Contest.
  • Dogs decked out in duds will vie for a prize in the Pet Costume Contest.
  • Turn back the clock as you walk counter-clockwise with your tail-wagging companion in a Rover-fied rendition of the classic children’s game, Musical Chairs.
  • The expo is also a mega-adoption event, and potential pet parents can meet their new furry family member among adorable adoptables from the following rescue organizations and shelters: Adopt A Shelter, Angels for Animals, California Weimaraner Education and Rescue, Cause for SB Paws, Forgotten Angels Cat Rescue, From Cloud to Ground Animal Rescue, Hoofs and Woofs Animal Rescue, Hope to Home for Cats, Kitty Devore Rescue, Mission Underdog Rescue Team, Mutt Hut Rescue, Priceless Pets Rescue, Recycled Love Dog Rescue, The Dachshund Rescue of Los Angeles and Top Dogs Rescue and Adoptions.
  • Plus prize giveaways, free nail trims, discounted vaccinations, microchipping and heartworm and flea preventatives, a look at the latest pet products, and much more!

Admission: Free

When: February 20 – 21, 2016 (From 10 a.m. – 6 p.m. on Saturday and from 11 a.m. – 4 p.m. on Sunday)

Where: Fairplex at 1101 West McKinley Avenue in Pomona, California

For more information:

Photo Credit: Amazing Pet Expos

15 Feb 18:58

Episode VIII Announces The First Day Of Filming With A Perfect Video

by Geek Girl Diva

SWe8

Happy First Day Of Filming, Star Wars nerds. Episode VIII has started principal photography and StarWars.com was kind enough to release a new video and a press release with some new details about the cast and crew.

My favorite bit of casting news has to be Laura Dern (yay!), and not just because of the awesome Jurassic Park/Star Wars jokes that are already flying. Benicio del Toro is also officially confirmed, so there ya go.

The best part of this announcement has to be the accompanying video, which gives you a good hint of just where we’re starting things off. Also, Daisy’s pretty excited. I haven’t seen anything from John Boyega yet, but I’m sure we will.

Check out the video below:

The full announcement:

Rey took her first steps into a larger world in Star Wars: The Force Awakens and will continue her epic journey with Finn, Poe, and Luke Skywalker in the next chapter of the continuing Star Wars saga, Star Wars: Episode VIII, which began principal photography at Pinewood Studios in London on February 15, 2016.

Star Wars: Episode VIII, which is written and directed by Rian Johnson and continues the storylines introduced in Star Wars: The Force Awakens, welcomes back cast members Mark Hamill, Carrie Fisher, Adam Driver, Daisy Ridley, John Boyega, Oscar Isaac, Lupita Nyong’o, Domhnall Gleeson, Anthony Daniels, Gwendoline Christie, and Andy Serkis. New cast members will include Academy Award winner Benicio Del Toro, Academy Award nominee Laura Dern, and talented newcomer Kelly Marie Tran.

Star Wars: Episode VIII is produced by Kathleen Kennedy and Ram Bergman and executive produced by J.J. Abrams, Jason McGatlin, and Tom Karnowski. Joining the production crew will be some of the industry’s top talent, including Steve Yedlin (Director of Photography), Bob Ducsay (Editor), Rick Heinrichs (Production Designer), Peter Swords King (Hair and Make-Up Designer), and Mary Vernieu (US Casting Director). They will be joining returning crew members Pippa Anderson (Co-Producer, VP Post Production), Neal Scanlan (Creature & Droid FX Creative Supervisor), Michael Kaplan (Costume Designer), Jamie Wilkinson (Prop Master), Chris Corbould (SFX Supervisor), Rob Inch (Stunt Coordinator), Ben Morris (VFX Supervisor), and Nina Gold (UK Casting Director).

Star Wars: Episode VIII is scheduled for release December 15, 2017.

(via Star Wars)

01 Feb 17:31

Four Amazing Frostings You Don’t Want to Miss!

by Amanda
This is the classic frosting from Grandma's recipe box!

These four basic frosting recipes should be a staple in every baker’s recipe box!

Homemade frosting is much better tasting and easy to make.

These four frosting recipes are versatile and delicious. You will be the hit of any birthday or celebration!

CREAM CHEESE FROSTING

Cream Cheese Frosting is a delicious delight atop cupcakes and a favorite on pumpkin cake, carrot cake, red velvet cookies, and more. This recipe is smooth, fluffy and absolutely delicious!

I have been blessed to accidentally discover have this incredible cream cheese frosting that forms a nice crust after you have applied to cakes or cupcakes (Yes, you CAN use this recipe for Rosette Cakes!!) . It is ideal for passionate bakers. On top of the amazing texture, it really does taste the BEST!

My Cream Cheese Frosting Recipe is HERE.

COOKIE DOUGH FROSTING

Cookie Dough Frosting is a fabulous way to satisfy a cookie craving, fast! This frosting is so delicious, I recommend you make it immediately.

I love it on cupcakes, in dark chocolate chip cookie sandwiches, and even on cakes!

My Cookie Dough Frosting recipe is HERE.

WHIPPED CHOCOLATE BUTTERCREAM

Whipped Chocolate Buttercream. How I love thee, let me count the ways. I use it on everything! Marble Cake and my famous Rose Cake even cookies!

This truly is melt-in-your-mouth delicious, perfectly chocolatey, creamy, fluffy goodness.

My Whipped Chocolate Buttercream recipe is HERE.

CHERRY BUTTERCREAM

Cherry Buttercream frosting is an unsung hero in the baking world. It pairs beautifully with chocolate, with vanilla, with lime and lemon, even with pistachio!

My very favorite way to eat Cherry Buttercream is on sugar cookies with sprinkles. It brings back fond memories of my youth as it was a very special treat we were given as little girls! I can’t recommend it high enough!

My Cherry Buttercream recipe is HERE.

Enjoy!

The post Four Amazing Frostings You Don’t Want to Miss! appeared first on i am baker.

29 Jan 23:35

banana puddings with vanilla bean wafers

by deb

banana pudding with vanilla bean wafers

A year ago, I made what I called Bananas Foster Puddings — individual puddings in which the bananas had been lightly caramelized in butter, brown sugar and rum before being layered with vanilla custard and kind of mediocre homemade vanilla wafers before being topped with a tuft of broiled meringue. The evening I made them, I managed to spill a pint glass of water (full, I mean, of course) right next to my laptop, which led to all sorts of drama including the loss of the photos and recipe, in case you’re wondering why nobody’s going to be mistaking me for a lifestyle guru anytime soon.

... Read the rest of banana puddings with vanilla bean wafers on smittenkitchen.com


© smitten kitchen 2006-2012. | permalink to banana puddings with vanilla bean wafers | 130 comments to date | see more: Bananas, Cookie, Photo, Pudding

26 Jan 02:00

Classic Sour Cream Coffee Cake & Ninja Coffee Bar Review

by Beyond Frosting

Classic Sour Cream Coffee Cake with layers of brown sugar streusel.
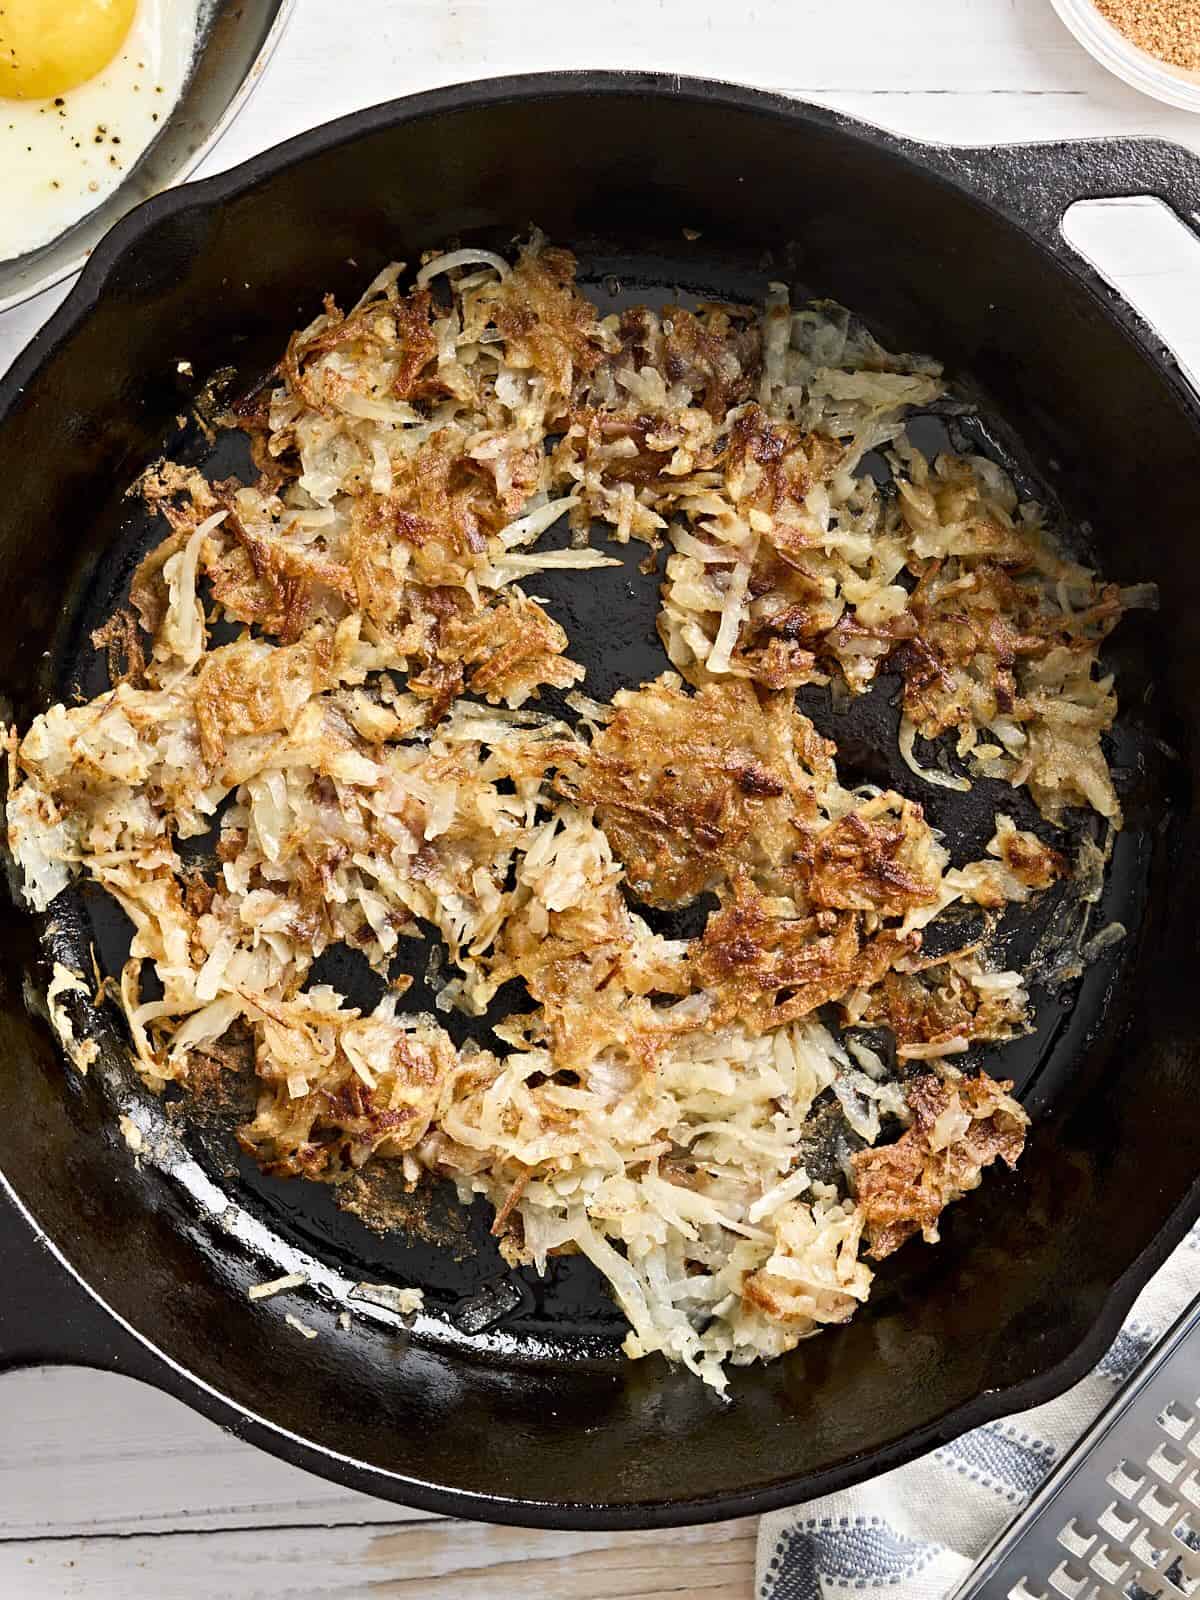
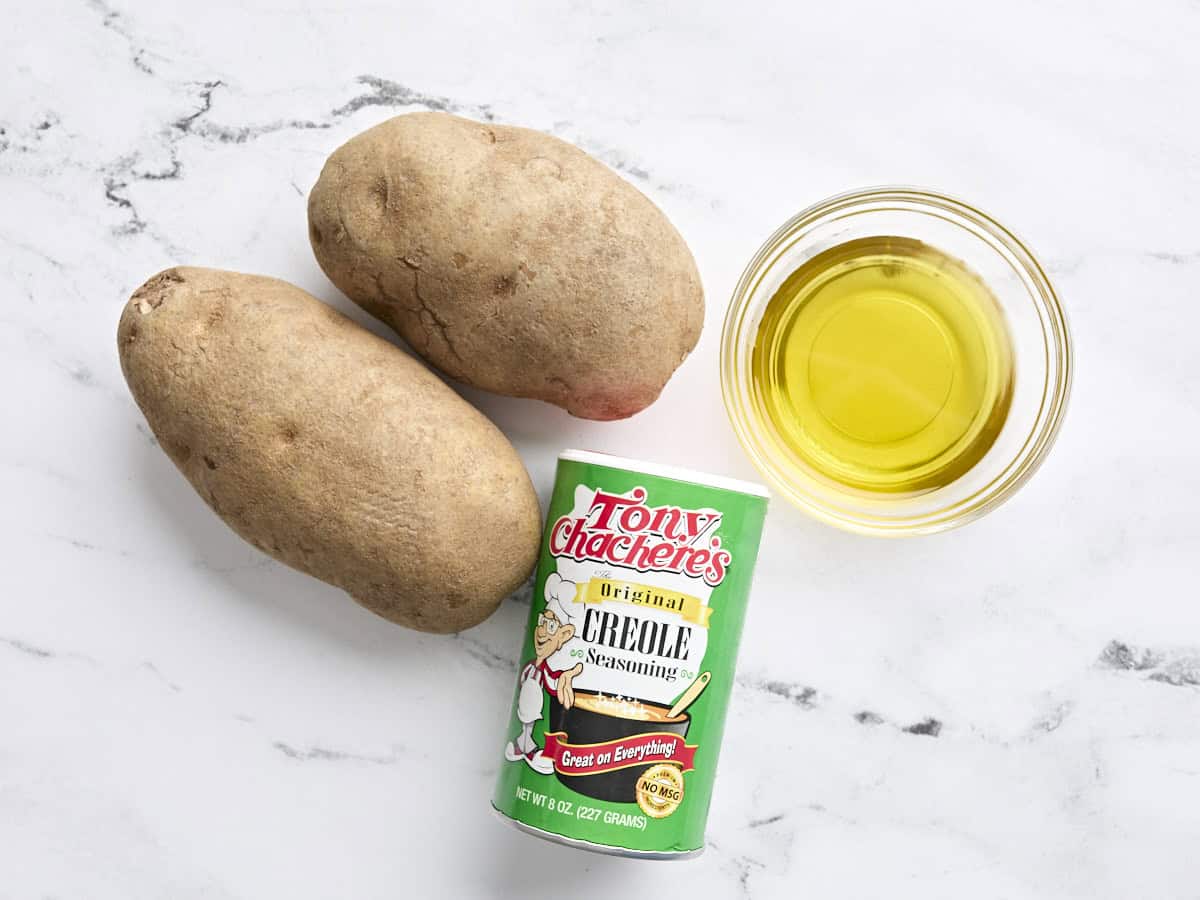
I love nothing more than a lazy weekend at home, although I can’t remember the last lazy weekend at home that I had. Usually my weekends involve all night baking and all day shooting photos and then cleaning over and over again. Part of a lazy weekend for me involves waking up, cooking a nice […]

The post Classic Sour Cream Coffee Cake & Ninja Coffee Bar Review appeared first on Beyond Frosting.

23 Jan 00:04

Well, These ‘Star Wars’ Vines Are Basically Marvelous

by Ben Paddon

star wars vine 2

The Force is strong with Viner Wahyu Ichwandari, also known as Pinot, who has created some stunning Star Wars-inspired Vines. Featuring illustrations that leap off of the page, his Vines once again prove that the creativity of Star Wars fans knows no bounds.

Check out Pinot’s handiwork below.

Here’s a Vine featuring everyone’s favorite Stormtrooper. No, not that one. The other one. Finn.

Here’s Han Solo and the Millennium Falcon.

Here’s Rey, who is canonically the daughter of every major character in the film franchise to date, no take-backsies.

And here is an epic Lightsaber duel between… well, I won’t spoil it for you. Just watch!

Check out more of Pinot’s work on his Vine page!

(via Nerdist)

22 Jan 04:28

Make a Sandwich Gift Box

by rhonda

sandwich gift box

Giving gifts is always fun, but it's even more fun when you get creative with the wrapping! Ashley from Let's Mingle cleverly dressed up a shoe box with some kraft paper and construction paper, turning it into a sandwich - complete with a pickle skewered into the top. You could also make a round version of this using a circular paper mache box from the craft store! [how to make a sandwich gift box]

Project estimate:

  • Shoe box, on hand
  • Kraft paper, on hand or $1
  • Construction paper, on hand or $1 and up
  • Glue, on hand
  • Bamboo skewer, on hand or $1

Total: Free and up!

21 Jan 18:33

Ultimate Sampler Cake

by noreply@blogger.com (Heather Baird)

I think now is a good time for a cheerful-looking cake, don't you? It's been a tough week for many of us. I'll be the first to admit that the recent losses in the headlines made me feel a little lonely. We all have our own way of dealing with these things, and I did what I usually do (aside from snuggling these faces), I baked things - a whole bunch of things. I whisked and whipped and folded and I may have listened to 'Life on Mars' on repeat for two hours straight.

During this time I decided to complete a recipe I've been working on for a long time. It's lengthy, so I'd never quite committed to its final scheme. The inspiration comes from a cake I saw at a local restaurant, and its mixed up layers had me awe-struck. My first thought was "Who allowed them to do that?" and my second thought was "I can't wait to do that!"
Continued, click to read more...
21 Jan 18:29

Thoughts on Wood Flooring (and My Favorite Engineered Wood!)

by Jenny at LGN
Alisa.wray

im in love with these floors!

My kids know that if the car makes a sudden U-turn, Mama found a new thrift store or saw an open house sign. :) A few months ago I flipped one of those big U's and walked through this pretty home that was for sale in Mesa's downtown historic district. 

 photo 5200385_3_1 1_1.jpg

 photo 5200385_6_0 1.jpg

 photo 5200385_29_0.jpg

The house had recently been gut-renovated and was gorgeous in person! The cabinetry and millwork everywhere was especially TOP NOTCH. I wish these photos did them more justice!

 photo Screen Shot 2016-01-19 at 10.45.23 PM.png

 photo Screen Shot 2016-01-19 at 10.45.59 PM_1.png

 photo Screen Shot 2016-01-19 at 10.46.17 PM.png

The staging was so much more tame than my style, but it was really pretty and soft. Those bobbin chairs have my hearth though. They were from Home Goods apparently!

 photo Screen Shot 2016-01-19 at 10.44.14 PM.png

 photo 5200385_7_0 1.jpg

I also fell in love with the floors. So much so that I poked around on the instagram feed of Project Beautify, who had rehabbed the house, and discovered that the floors were from my favorite flooring place Floor & Decor!

 photo IMG_5776.jpg

 photo Screen Shot 2016-01-19 at 10.47.31 PM_1.png

 photo 5200385_32_0.jpg

Later that week I went and checked out the product in person. It's called Montpellier and it's an oiled French Oak in almost a 9" wide plank. And it is only $5.49/sq ft! If you've ever shopped for wood flooring before you'll know that price is pretty unreal for the size of those planks!

 photo IMG_5773 1_1.jpg

Floor & Decor has a great selection of every type of wood flooring - solid (including Timberclick!), engineered, laminate, and everything you need to install the floors yourself if you're a DIYer.

It can be overwhelming to figure out what type of wood flooring is right for your house, but I always ask three questions that usually help narrow down the playing field:

1) Will the flooring be in a kitchen or bathroom? 

How terrified are you about the idea of potentially needing to pull up and repair areas effected by future leaks? If your answer is highly terrified, then you might want to consider a product like Aquaguard (which is a water-resistant laminate).

That said, I put engineered wood in kitchens and baths all the time. Rugs help a lot with day-to-day water spills and if a bigger issue happens, the wood can usually recover if the problem is caught the same day. I always suggest buying 50-100 sq ft of extra wood as a precautionary measure, just in case a few pieces have to be popped up and replaced down the road.

2) Wide or skinny planks?

Planks under 4 or 5" wide are usually only found in solid woods anymore or unfinished engineered wood. Usually wider planks are more expensive, especially in solid wood. Once you're looking beyond that 5" width in solid wood, the prices start to get astronomically higher. If your budget needs to be under $14/sq ft and you are wanting a 7-9" wide plank, you'll definitely need to be looking at pre-finished engineered wood or laminate.

3) Most importantly, what is your existing subfloor? 

Solid wood is a great option if you already have a plywood subfloor (though you'll want to get verification that it is level and does not need to be replaced before laying your beautiful new floors on top!).

And while I love the idea of being able to refinish a solid wood floor five or six times in it's lifetime, I almost always recommend engineered wood, especially in places like Arizona, where most houses are built on concrete slab. Speaking from experience, it can be a very expensive and time-consuming process to add plywood subfloors to a slab foundation. Also it is comforting to know that engineered wood is a more stable product than solid wood, which means the planks are more resistant to changes in humidity and moisture levels.

 photo IMG_5786.jpg

Laminate is another great option. Every time I look at the latest offerings, I'm blown away. So many of them look very similar to engineered wood and often they are half the price! Just don't skip on a good underlayment, which helps with the swooshing sound that old school laminate flooring is notorious for.

 photo IMG_5785.jpg

Here are a few of my favorite wood flooring picks from Floor & Decor. I usually prefer an ashy undertone to reds and pinks, but I don't usually want anything too bluey-gray either. All of these are gorgeous in person - and super affordable!


 photo Floor and Decor Wood LGN.jpg
C - Oak Coffee Wirebrushed - $4.99/sq ft
E - Allegheny Oak Laminate - $2.29/sq ft

Do you have any great tips for picking a wood flooring? What type did you chose in the end? I'd love to hear!

A big thanks to Floor& Decor for partnering with us on this series. Read about wood-look tile here and accent tiles here!