
Cube Slam is a online game conceived, designed & built for Google Creative Lab that showcases the possibilities with the WebRTC API in a playful manner. We, North Kingdom, together with Public Class and Dinahmoe, shaped the creative concept, user experience, technical direction, design, art direction and production. It’s a Pong-like game, taken to next level. We added in physics, obstacles, extras and effects. But most importantly, you can invite friends to play face to face, peer to peer, in real-time with your webcam. The game logic communicating via RTCDataChannels and you and your friend can see each other inside the WebGL-powered world with the help of getUserMedia and RTCMediaStream. If you want to play the game alone, we have created Bob, our AI bear. Try to beat him, the longer you play the better he becomes. And you as well.
As a Technical Director and developer on the project, it has been extremely educating, challenging and fun. I also got the chance to practice my WebGL skills for the first time in a real project, which was a huge opportunity, leaving the playground and make it for real. This blog has slowly faded away, but I’m glad to share this with you now, maybe I get time to make more stuff in this space.
In this article I will, as the title implies, share some insights and tips from the process of making the WebGL related stuff with the 3d-engine three.js. I will also reveal some easter-eggs and show some prototypes and demos.
Devices and desktop fallback
 Before we dive into the WebGL stuff I also want to mention the mobile version of the game, which Public Class pulled of with some CSS magic. We soon have WebGL and webRTC support in Chrome for Android (currently behind a flags and in beta) and hopefully other devices, but in the meantime we made a CSS version to reach as many users as possible. It’s still viewed in a 3D perspective but we are using sprite-sheets for the assets and CSS to position the elements. It runs smooth as long as hardware accelerated CSS-transitions is supported. It even runs in 60fps on a iPad 1, which is pretty amazing.
The game-logic in the game is completely separated from the presentation layer. This makes it possible to provide with different renderers. We have a canvas renderer in 2d for debugging purposes, a CSS3-version for mobile and browsers without WebGL, and a full blown version with three.js for those with support. Three.js has built-in support for different renderers like canvas and CSS, but we chose to build a CSS-version from scratch to make use of the features in the best way.
It turned out, many players have not noticed they are running the fallback version, since it’s still 3d and the gameplay is the same. But as long as they enjoyed it, it’s fine I guess. IE is still not supported though, since CSS3D is not fully implemented. Our approach needed nested 3d layers with inherited perspective for it to work and IE does not support that currently. I’m so happy that they decided to jump on board the WebGL train with IE11, so there is hope for IE users.
Creating the world
So here we go, lets start with the scene and how it’s built. The world is quite simple, in the low-poly style we have used in many of our earlier projects at North Kingdom. To make it a bit dynamic (and fun to program) I aimed at creating some elements procedurally to make each game unique. In the end pretty much everything is static meshes, but it really helped in the process of creating the world.
Terrain
The terrain in the distance is made of regular planes that is manipulated with the help of Perlin noise. Pretty redundant but a fun detail is that the mountains is random each time you visit the page. To avoid the faces to look like a grid when just offsetting the vertices of a plane I first added a random value to the vertex in the x- and z-direction, then merged some vertices if the distance between them was close enough and finally offsetting along the y-axis. Three different planes with the same process is added, but with different parameters, to create the different levels of terrain. The terrain closest to the arena needed to look more nature-like so that is a hand modeled mesh. We also have animals walking on the mesh, so a static model makes it easier to optimize away some raycasting when attaching them to the surface.

Forest
Trees are also distributed using Perlin noise, but the computation-time to place the trees on the terrain was too long when initiating the game. The method was used to generate the final distribution, but instead to save the position of the trees to an array that can be parsed during runtime. If I want to have another forest I can just regenerate the data. Since it’s just built with primitives, there is no need to load external models, just the positions to plot them out. I added a tool to create a new forest in the settings-panel if you want to try it out. Beware, it take some time to parse if it’s too many trees, mainly because of the ray-casting calculation. For better performance all trees is merged into a single geometry so there is only one draw-call for all the trees. And one call for the shadow-planes. The shadow is aligned to the normal of the collision-point (also saved during the generating), but I could not get 100% accuracy with the rotation, that’s why the shadows is sometimes colliding with the triangle underneath, which is also the case if the plane intersect a neighbouring triangle that is positioned higher.

Animals
These little fellows were fun to work with. So much personality in just a few polygons.
Here is an example of two ways to control a morph-animation. By manually setting the play-head or play it as an ordinary animation. Move your mouse to make the bear look, and click to trigger a little animation.
And here are all animals, click to look closer and swap between them.
To make them blend in nicely in the environment I did a little trick with the texturing. The texture does not contain the final colors, instead we store different information in them and doing the colouring in the shader. The texture look like this:
 Red channel for diffuse amount, green for ambient and blue for the white details on the animals. With these parameters we can change the diffuse color (including shadows and ambient occlusion) and making the terrain reflect colors on selected areas of the mesh and keep the white details like the nose or wings the same. We don’t calculate any light on these animals so the coloring is pretty cheap. Try to change the color of the terrain in the settings-panel and notice how the animals blend into the nature when the color changes. A downside is that the animations are not reflected in the lighting, so shadows are static on the mesh. All animals share the same texture so one material to rule them all.
uniform sampler2D map;
uniform vec3 ambient;
uniform vec3 details;
uniform vec3 diffuse;
varying vec2 vUv;

void main() {

  gl_FragColor = vec4(1.0);

  vec4 texelColor = texture2D( map, vUv );
  vec3 bodyColor = (diffuse*texelColor.r*0.3+(texelColor.g*ambient));
  gl_FragColor = vec4( bodyColor + vec3(step(0.9,texelColor.b)*details)*bodyColor*8.0,1.0);

  gl_FragColor.xyz = sqrt( gl_FragColor.xyz );

}
Here is the result, notice how the are blended with the color of the terrain.

To make them walk and fly around, TweenMax and TimelineMax from GreenSock has a nifty feature to animate objects along a spline made of control-points. I also wanted them to walk on the surface of the terrain so I saved a list of the raycasted y-positions during one loop. Next time those values are used instead.
var tl = new TimelineLite({paused:true});
tl.append( TweenMax.to(this.dummie, 1, {bezier:{values:this.controlPoints, autoRotate:["x","z","rotation",-Math.PI*2,true]}, ease: Linear.easeNone}) );

//3d-line for debugging path
var beziers = BezierPlugin.bezierThrough(this.path,1,true);
var line = new THREE.Line(new THREE.Geometry(), new THREE.LineBasicMaterial( { color: 0xffffff, opacity: 1, linewidth: 1 } ) );
scene.add(line)
The arena
This is created with simple planes and boxes. In the beginning of the project we were able to set all dimensions with settings during runtime. Later, when we found a good balance, dimensions were locked and the settings-option was taken away so we could adjust the surroundings. Most work was put into the reflections. Lots of trying out stuff like environment-maps, transparency, depth-sorting issues. More about that in the reflections-section below.

Bob
Bob the Bear. He became a annoying friend during development. As his teacher and trainer, I’m kind of proud of him now, at the time writing this, over 2 million players have met him :). He’s using a mix of morph-animations (idle loop, blinking, morph-frame expressions and triggered animations) and transforms (shaking, walking out, focusing or follow ball etc).
Video destruction

When you hit the opponent screen the display is partly destroyed, and when you win the game it is shattered into pieces. I tried some different approaches:
Screen front made up of small tiles that fall apart: (same demo as one of the above, but this time focus on the video-screen and see how it breaks when you click it):
http://www.inear.se/cubeslam-demos/cpu
Cubes falling apart:
http://www.inear.se/cubeslam-demos/cpu2
Cubes with real physics (slow)
http://www.inear.se/cubeslam-demos/cpu3
Animated cubes
http://www.inear.se/cubeslam-demos/cpu4/
http://www.inear.se/cubeslam-demos/cpu5/
http://www.inear.se/cubeslam-demos/cpu6/
Reflections
If you have noticed, the table is slightly reflective. This is done with a mix of simple tricks. We are not dealing with ray-traced rendering here so we have to use geometry and shaders. One way could be to use the stencil buffer while rendering to use the floor as a mask and invert all the geometry along the y-axis. Instead, the floor is made of a box where we create our local clear-color so to speak. The top is transparent and the inner sides has the same color, but opaque, so it will act like its part of the floor plane. Now, geometry put inside this box will look as reflections if we adjust the transparency in the floor, without the need of extra draw-calls. The pucks, paddles and obstacles is just twice as high with the center point at the level of the floor, so no need for multiple geometry there. And animating the height is automatically correct. The extras-icons is a bit more special. These floating objects is duplicated and put underneath the floor. Since the bouncy animation is handled in the vertex-shader we can just invert the y-scale, and the mesh will animate correctly.
The video-box reflection is also reflected in the floor. This box moves up and down, so the reflection can not just be an inverted geometry, it looks wrong if the reflection-box just scales. Instead, it has to be the same height as the visible part of the box, but without distorting the uv:s. A plane with the same material as the video in the cube is placed under the floor, inside the reflection-box mentioned above. Then the uv-coordinates is adjusted to match the face of the box above while animating. For a nice gradient fade a second plane is placed in front, just a couple of units away. I could do this in a shader but I wanted to reuse the material in the video-cube. The trick here is to make this gradient the same color as the floor, so it blends with the reflection-box. A canvas is created and a gradient filled rectangle is drawn with the floor diffuse color and alphas ranging from 0 to 1. I struggled a bit with alpha here and the solution might not be best in class, but when dealing with transparent objects and depth sorting I always get into strange iterations, sometimes it works and I keep it.
It’s hardly noticed, but an extra gradient is added into the bottom area of the video-screen to reflect back the floor color.
Seen from above:

Seen from inside the reflection box:

Optimising performance
Performance was really important because we needed to make room for the game-engine and especially the webRTC encoding/decoding. I can mention some of the things I implemented:
Disabling anti-aliasing
An obvious one. This parameter has been toggled on/off many times during the development. I really wanted to have it enabled, because the many straight lines that squared-shaped objects creating, is looking pretty jagged, especially with all the slow camera movements. But the performance on slower machines made us take the decision to turn it off by default. Too bad you can’t toggle anti-aliasing during runtime.
Anti-aliasing substitute trick
When having simple planes, with just a basic color-material and no anti-aliasing, it looked better to use a texture instead and having a small padding in the texture. Then the smooth edge is created by the fragment-shader. So instead of having the graphics right to the edge of the texture, add a small space before the edge to allow the texture-filtering to create a smooth edge for you. Maybe not great for performance with extra texture lookups, but it’s always a balance. The whole arena could have been a model with a single texture, but I wanted full and dynamic control of all dimensions and elements.

Post-effects alternatives
Post rendering effects were also too slow to implement when the frame-budget was so restrictive. But we do have an overlay rendered on top of the scene, the dusty tape-texture and a scanline effect (the lines was removed in the final version, but optional in the settings menu). This would naturally be added in a post-effect stage. Instead we used a plane that is added as a child of the camera, placed at a z-position with a specific scale to match the screen (thanks mr.Doob for the advice). Note that the plane will be part of the depth writing so be careful in which distance you place the plane and if you have geometry close to your camera, otherwise the fragments will be overwritten by your scene. Without depth-writing, you need to be sure the plane is drawn last to the screen. One limitation is that you don’t have access to the pre-rendered scene, so effects like depth-of-field, blur or color-correction are not possible.
Multiple render targets
Some of the effects needed more render targets. A render target is a canvas that we render to, and you can have ones that are not displayed on screen, and use them as a texture in your main scene. The camera that records Bob for example. That is a separate scene, rendered separately and sent as input to the video-box shader. Adjusting the resolution of the separate render-target is important for performance so we don’t render more pixels than we need. And set generateMipMap to false if the texture is not power of two.

The mirror effect is also using a render target of it’s own. You can try the effect by pressing “M” in the game. The scene is rendered to this a render target and put as a texture on a plane that matches the screen size which we can animate. When the transition is completed the body-tag is styled with a “transform scaleX(-1)” and we can switch to regular render-mode again. A bonus is that all the html is inverted as well. Try it out, but it’s really hard to play, so add ?god to the url to keep playing.
Garbage and object pooling
Keeping the garbage collector as calm as possible is very important. The GC will always have stuff to do even with highly optimized code, but avoid unnecessary garbage. A basic example; instead of creating new THREE.Vector3() when you position objects each frame, use .set(x,y,z) on the existing object instead. And use object pooling. For common objects, allocate as much of them that you know you will use up front and save and reuse objects that you know will appear again. Allocate more objects by extending the pool automatically, or perhaps in a state where it’s not that equally important with a steady framerate, like right after you get game over or between rounds. Not everything needs to be pooled, sometimes it’s better to let the GC take care of them. It’s a balance, and measuring is the key. You can also put in a console.warn each if you allocate more than a fixed threshold and you can quickly see if there is a potential leak.
Mini tutorial 1: Making a simple pool
function Pool(C,size){
  var totalPooled = size || 1;
  var freeList = [];

  function expand(howMany){
    console.warn('pool expand %s: %s',C.name,howMany)
    for(var i=0; i < howMany; i++ ){
      freeList[i] = new C;
    }
    totalPooled += howMany;
  }

  expand(totalPooled)

  C.alloc = function(){
    if( freeList.length < 1 ){
      expand(totalPooled) // *= 2
    }
    var instance = freeList.pop();
    instance.alloc && instance.alloc()
    return instance;
  }

  C.free = function(instance){
    instance.free && instance.free()
    freeList.push(instance)
  }
}
To use it just wrap your function with the Pool-function like this.
var MyObject = {}
pool(MyObject, 5);
Then the methods alloc and free are available. So instead of using var myObject=new MyObject(), use:
var myObject = MyObject.alloc();
and the pool will return a new or a recycled object. To give it back to the pool run:
MyObject.free(myObject);
Remember to reset stuff before you return it or when initiating it, it’s easy to forget that the instance have the variables and previous state inside it.
Mini tutorial 2: Making a scaleable frame
Some little tips regarding the overlay-texture. If you want an overlay to act like a frame, you can use a 9-slice-scale trick with the vertices and the UVs on a plane geometry with 9 faces. You can then lower the texture-size and make the plane match full screen, and still keep the ratio of the borders.
Here is the result rendered with a UV debug texture, notice the fixed margin values:

To see how it behaves in action, try this demo. The texture used then look like this:

Some code:
Create the plane:
var planeGeo = new THREE.PlaneGeometry(100,100,3,3);
var uvs = planeGeo.faceVertexUvs[0];

/*
face-index:      vertex-index:   uv-mapping:
-------------    1---2           0,1 --- 1,1
| 0 | 1 | 2 |    |  /|              |  /|
-------------    | / |              | / |
| 3 | 4 | 5 |    |/  |              |/  |
-------------    0---3           0,0 --- 1,0
| 6 | 7 | 8 |
-------------
*/

var marginTop = 0.1
  , marginLeft = marginTop
  , marginBottom = 0.9
  , marginRight = marginBottom;

//center face
var face = uvs[4];
face[0].x = face[1].x = marginLeft;
face[0].y = face[3].y = marginRight;
face[1].y = face[2].y = marginTop;
face[2].x = face[3].x = marginBottom;

//top left
face = uvs[0];
face[0].x = face[1].x = 0;
face[0].y = face[3].y = 1;
face[1].y = face[2].y = marginRight;
face[2].x = face[3].x = marginLeft;

//top right
face = uvs[2];
face[0].x = face[1].x = marginBottom;
face[0].y = face[2].x = 1;
face[1].y = face[2].y = marginRight;
face[3].x = face[3].y = 1;

//top center
face = uvs[1];
face[0].x = face[1].x =marginLeft;
face[0].y = face[3].y =1;
face[1].y = face[2].y = marginRight;
face[2].x = face[3].x = marginBottom;

//bottom left
face = uvs[6];
face[0].x = face[1].x = 0;
face[0].y = face[3].y = marginTop;
face[1].y = face[2].y = 0;
face[2].x = face[3].x = marginLeft;

//bottom center
face = uvs[7];
face[0].x = face[1].x = marginLeft;
face[0].y = face[3].y = marginTop;
face[1].y = face[2].y = 0;
face[2].x = face[3].x = marginBottom;

//top bottom
face = uvs[8];
face[0].x = face[1].x = marginBottom;
face[0].y = face[3].y = marginTop;
face[1].y = face[2].y = 0;
face[2].x = face[3].x = 1;

//center left
face = uvs[3];
face[0].x = face[1].x = 0;
face[0].y = face[3].y = marginRight;
face[1].y = face[2].y = marginTop;
face[2].x = face[3].x = marginLeft;

//center right
face = uvs[5];
face[0].x = face[1].x = marginBottom;
face[0].y = face[3].y = marginRight;
face[1].y = face[2].y = marginTop;
face[2].x = face[3].x = 1;

planeGeo.uvsNeedUpdate = true;

var plane = new THREE.Mesh(planeGeo, Materials.overlay )
camera.add(plane);
And scale and position the plane on init and window resize:
var w = window.innerWidth
, h = window.innerHeight
, cornerDistW = 50-texture_width/10/w*100
, cornerDistH = 50-texture_height/10/h*100;
this.overlay.scale.set( w/1000, h/1000,1);

this.overlay.position.z = -h*0.1 /(2*Math.tan( this.cameraController.camera.fov*(Math.PI/360)) );

var verts = this.overlay.geometry.vertices;
verts[1].x = -cornerDistW;
verts[5].x = -cornerDistW;
verts[9].x = -cornerDistW;
verts[13].x = -cornerDistW;

verts[2].x = cornerDistW;
verts[6].x = cornerDistW;
verts[10].x = cornerDistW;
verts[14].x = cornerDistW;

//height
verts[4].y = cornerDistH;
verts[5].y = cornerDistH;
verts[6].y = cornerDistH;
verts[7].y = cornerDistH;

verts[8].y = -cornerDistH;
verts[9].y = -cornerDistH;
verts[10].y = -cornerDistH;
verts[11].y = -cornerDistH;

this.overlay.geometry.verticesNeedUpdate = true;
Try the game to see how the final result looks like.
Optimizing workflow
3d assets
One thing that can be really repetitive is to convert and load 3d-models. There is numerous ways of doing this, but in this setup we exported obj-files from 3d Studio Max, and converted them with the python script that is available as a standalone command line tool. So to make life easier we added this command to the build process and the folder with models to the watch list to monitor changes, so when dropping a file in the folder it automatically created the json-model. We took it even a couple of steps further and stringified it and converted it as a js-file that could be added as a module in requirejs. So drop a file, register it in packages.json and the model was automatically referenced as an object ready to be used in the application without the need of loading it during runtime.
The same setup with shader-files, a folder with glsl-files was easy referenced as shortcuts in the material-module.
Settings panel and querystrings
Building tools to streamline the workflow is really important, everyone making applications and games know that. It can be a hidden menu, keyboard shortcuts, querystrings/deeplinking, build processes or anything that makes you test quicker or collaborate smoother.
Like adding this to the URL: “?level=4&extras=multiball,extralife&god&play&dev”. That loads the game on level 4, jumps straight to gameplay, makes you and Bob immortal, spawning the extras you want to debug and showing the settings-panel. A time saver indeed, and good to be able to send around to clients or team-mates, or letting designers try the new specific asset quickly. We also using a debug component in each module. And we can select a query to choose what to output, like this: ?d=networking:webrtc. No need to adding and removing console.logs all the time. And handy to send a URL with a selected query to the client and ask for the result in the console.
The dat.GUI settings panel have also been really helpful.

With that we could adjust colors, lights, gameplay params, camera-settings and more in real-time. Try for yourself with the ?dev querystring.
Some of the settings also bind to a key. In the game, try to select thedifferent cameras by pressing 1-5. Or press E and H to preview the explosion/heal effect. Or perhaps stresstest the physics by enable God Mode in the menu and press “Create Puck” or hit the P.

Early prototypes
Well, what I just explained so far is what we ended up doing in the project, graphics wise. To get to that point the process was, as always, full of iterations and changes, trial and most of all errors. When we started the project the idea was based around motion tracking as input control. We started to explore that as primary control plus a secondary control with mouse or keyboard. We got the motion-tracking working ok, but not good enough. And as the game was progressing it was more and more about speed and accuracy, which wasn’t really playing well with the lack of precision with motion tracking in general. Problems related to camera processing, lighting conditions and noise, was too severe and not as stable that the wider public would rightfully expect. It also did not feel intuitive and simple enough to select a tracking-color, or learning the boundaries of the motion area. With more forgiving gameplay, or a better feature/color-tracking, and the right visual feedback, it might still be feasible. But there is another problem that we would have tackled if we took that path. The logic to keep the game in sync in two player mode depend on delta-movements, like saying ‘I moved the mouse in this direction with this speed’, which works well with touch and keyboard, but less optional with direct controls like mouse or a position of an object in your webcam. For the latter you need to send the exact position every frame causing bloated data traffic. And it makes it harder to interpolate/extrapolate the game to hide latency. So I’m glad we took the decision to steer away from motion-tracking, even though I spend almost a month waving in the air with random colourful objects.
Here is some of the early test-prototypes. To process the image and isolate the movement I use a modified version of glfx.js. Don’t miss to allow webcam, it’s not that good UX in these demos. Also, be sure to select a good tracking-color by clicking in the video monitor up in the left corner. No game-logic here, just color-tracking exploration:
Air-hockey:
http://www.inear.se/cubeslam-demos/motion-1/

Ping-pong-pong:
http://www.inear.se/cubeslam-demos/motion-2/

3d-pong
http://www.inear.se/cubeslam-demos/motion-3/

Extras
Most of the available easter-eggs is available is the dev-menu up in the left corner when you append ?dev to the url, or click this link: http://cubeslam.com?dev. But there is some more, so I created this page for some more info. Another thing you might not know, is that you can run the WebGL version on your device if you go to this url: http://cubeslam.com?quality=mobile. There are other flags you can enable for even more fun, but more on that in a forthcoming version 
Credits
There is a bunch of people at North Kingdom that made this come true, but I want to send some extra love to the guys at Public Class that made most of the heavy code lifting. They made the framework, took lead on the game engine, did html5 front-end, did magic in the mobile game, handled webRTC, set up TURN servers, coded backend in the Go language! They have really shown their dedication and their excellent skills, working their asses off during a long time, and for that I’m really happy, so hats off to you guys! Love you!
Dinahmoe did also a excellent work as always, reinventing themselves over and over. Next time you play the game, take some time to really listen to the original music and the effects. Feel how responsive and dynamic it is, reacting to everything you do, and always on the beat.
Thanks to all the folks at Google that has given us the opportunity and helped on with this amazing project!
Also, many thanks to all gamers! Over 2 million visitors in a month!

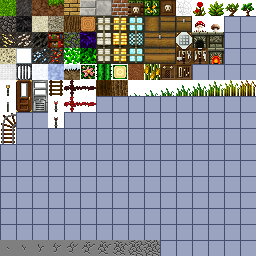
 Having trouble getting your terrain textures to blend properly? This short tutorial, with code samples, will put you on track. ...


 Ce billet est une présentation très succincte d'une publication de Walt Disney Animation Studios datant de 2013 visant à expliquer les tenants et aboutissants du "tri" des rayons et shading points avant leur calcul:

 ).
).


 ) de Pixar et Arnold de Solid Angle.

 Imaginez chaque zone comme un énorme asset avec beaucoup de géométrie et beaucoup de textures. On ne peut pas tout loader en RAM. Du-coup, pour calculer l'illumination global d'un point ça risque de faire tourner le cache inutilement.


 ) reflection effects.


 := \frac{\mathbf{v}_1}{\|\mathbf{v}_1\|}")
 \mathbf{u}_1)")
 \mathbf{u}_1 - (\mathbf{v}_3 \cdot \mathbf{u}_2) \mathbf{u}_2)")

 = \left( \begin{array}{rrr} 1.0000 & 0.0000 & 0.0000 \\ 0.0001 & 0.0000 & -0.7071 \\ 0.0001 & -1.0000 & -0.7071 \end{array} \right)")
 = \left( \begin{array}{rrr} 1.0000 & 0.0000 & 0.0000 \\ 0.0001 & 0.0000 & -1.0000 \\ 0.0001 & -1.0000 & 0.0000 \end{array} \right)")


.png)
.png)


 The
The 


 Morgan McGuire is a professor of Computer Science at Williams College and a professional game developer. He is the author of


