I didn’t find out about National Kale Day until after the fact, but seeing pictures of delicious kale recipes all day made me really crave kale bad. What’s the fastest, easiest fix? Kale & pasta!
I chose to use whole wheat pasta for this dish because I felt like the nutty whole wheat flavor would go really great with kale’s earthiness. Whole wheat pasta with kale may sound like the most boring, torturous diet meal of all time, but when you lace them with garlic, parmesan, and a little butter, they take on a whole new personality. Add a pinch of crushed red pepper flakes if you’re feeling sassy and it’s like pasta heaven.
This recipe makes four side dish sized servings, but you can bulk it up and make it a meal by adding a chopped hard boiled egg (or topping with a fried egg, like I did), adding some chopped fresh tomatoes (or sun dried), or even crumbling some bacon over top. This is just a starting point and it can go in about a million different directions. Have fun with it!
Garlic Parmesan Kale Pasta

- ½ lb. (or one large bunch) kale $1.25
- ½ lb. (8 oz.) whole wheat angel hair pasta $0.89
- 2 Tbsp olive oil $0.32
- 2 Tbsp butter $0.30
- 2 cloves garlic, minced $0.16
- salt & pepper $0.05
- ¼ cup grated Parmesan $0.87
- pinch red pepper flakes (optional) $0.05
- Tear the kale leaves from the woody stems and rinse well in a colander under cool, running water. Allow the kale to drain. Cut the kale into thin strips or small pieces.
- Bring a large pot of water to a boil. Break the pasta in half, add it to the boiling water, and cook according to the package directions. Drain the pasta in a colander.
- While the pasta is cooking, add the olive oil, butter, and minced garlic to another large pot or skillet. Cook over medium heat for 2-3 minutes, or until the garlic is soft and fragrant. Add the kale and continue to sauté until the kale has wilted and has turned a deep green color (about 5-7 minutes). Turn the heat off.
- Add the drained pasta to the pot with the sautéed kale. Toss the pasta and kale together. Allow them to cool to the point that steam is no longer rising from the pot. You want the pasta warm, but not hot enough to melt the Parmesan.
- Season the pasta and kale with salt and freshly cracked pepper to your liking. Add the grated Parmesan cheese and toss to coat. Add a pinch of red pepper flakes over top if desired.

Step by Step Photos

I was lucky enough to get this HUGE bag of pre cut kale for $2.50. It’s equal to about two large bunches of kale. If yours is not pre-cut, simply tear the leaves from the stems, give them a good rinse, then cut them into small pieces or strips.

You’ll want to get the pasta going first because the rest of the dish will be finished cooking in the time that it takes the pasta to boil. I like to break the pasta in half before boiling it so that you still have the illusion of long strands, but it is MUCH easier to mix in with other ingredients. Long pasta is really tough to stir together with other things. You usually end up with a blob of pasta in the center and all of the “add-ins” around the outside of the bowl or pot. Breaking it in half helps prevent this considerably.

Add your butter, oil, and minced garlic to a large pot or skillet. I like to us a pot with tall-ish sides so that the kale doesn’t spill out as I try to stir it.

Sauté the garlic over medium heat for a few minutes, or just until it becomes soft and really fragrant (it should smell like the best garlic bread you’ve ever laid your nostrils on).

Add the kale and continue to sauté until the kale wilts down and is a really beautiful deep jade green. When I first put the kale in the pot it pretty much filled it up to the top, but it wilts down pretty quickly. This was after about 5 minutes. Turn the heat off after it’s wilted.

By now your pasta has finished cooking and you can let it drain in a colander. Let it cool for just a minute…

Then add it to the pot with the kale and toss them together. Also let it rest a few minutes here until it cools to the point where no steam is coming off of the pasta. You want the pasta to be warm, but not so hot that the Parmesan melts into it and disappears. Use this time to season the pasta and kale with salt and pepper. I just sprinkle some on as if it was my dinner plate, give it a toss, taste, then add more if needed.

Finally, add the grated parmesan and toss to coat. You can add a pinch of red pepper flakes if you want a little kick, too.

I went ahead and made it a meal by topping it with a fried egg because that’s how I roll. A diced hard boiled egg would also be awesome.
And maybe some sriracha.
When vegetables taste good it’s like…

http://www.singsnap.com/karaoke/forum/topic/b9258e5
The post Garlic Parmesan Kale Pasta appeared first on Budget Bytes.


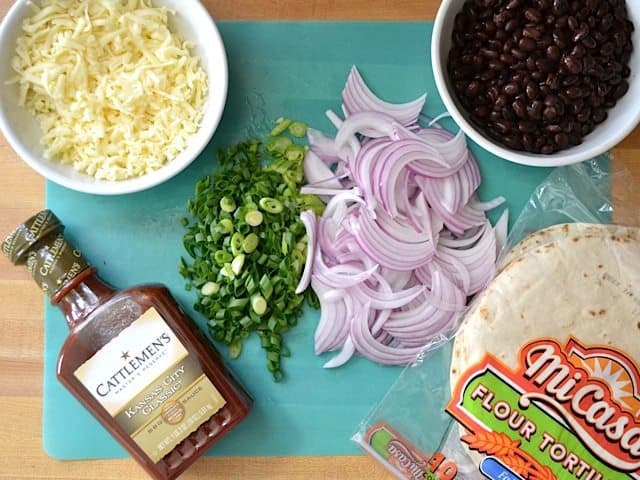 This is all it takes to make some super quick and delicious pizzas! Most of this I already had on hand. The fajita-sized tortillas are bout 6-8 inches in diameter.
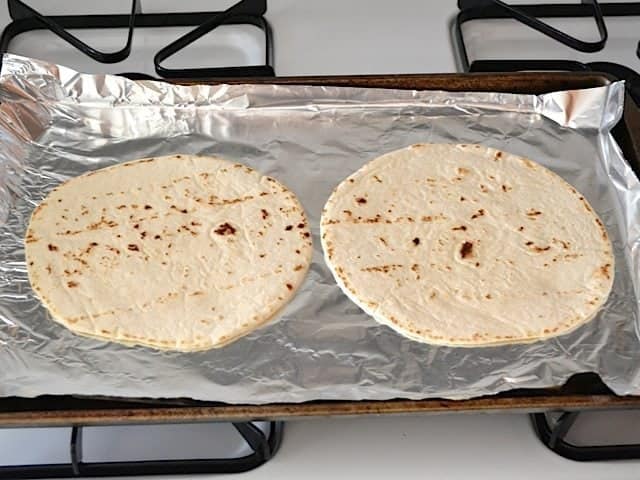 Preheat the oven to 400 degrees and then pre-bake the tortillas for about five minutes. This will stiffen them up just enough so that they can be topped and put back in the oven without being all floppy. I pre-baked mine on a baking sheet and the baked the topped pizzas directly on the oven rack. That was a bit tricky, though, and while they were baking I thought about this…
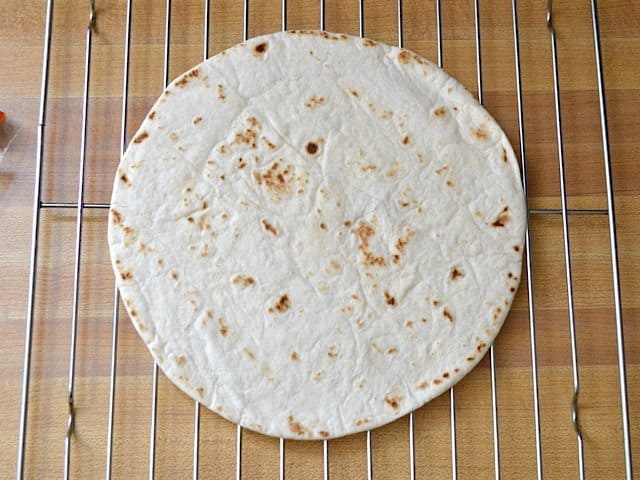 If you have a wire cooling rack, it is perfect for allowing the bottom to crisp up while giving the pizza enough support with the heavy toppings. It will also make them easy to transport in and out of the oven. The wires on the cooling rack are closer together than the wires on the oven rack, which will help prevent the edges from falling through and dripping sauce and cheese onto the floor of the oven.
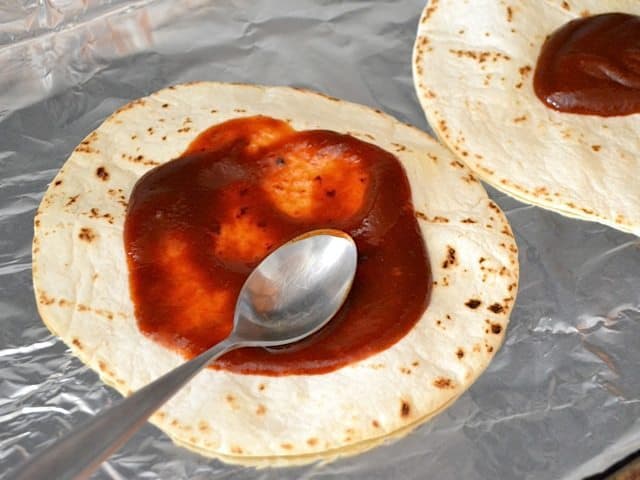
 Then sprinkle about 1/4 cup of WELL DRAINED black beans on each pizza. You want to make sure they’re not dripping wet because the more moisture there is on top of the pizzas, the heavier they’ll be and the less the tortilla will hold up.
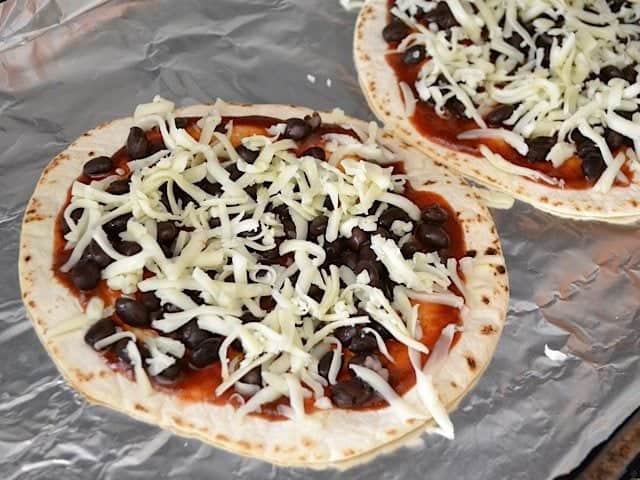 Then add about 1/4 cup of shredded cheese to each. One thing I learned back when I made pizzas for a living is that you always need less cheese than you think. Sprinkle it on sparingly, so that you can still see the sauce underneath. Once it melts, it will cover sufficiently. Cheese is usually one of the most expensive pizza toppings, so this is a trick that most commercial pizzarias use.
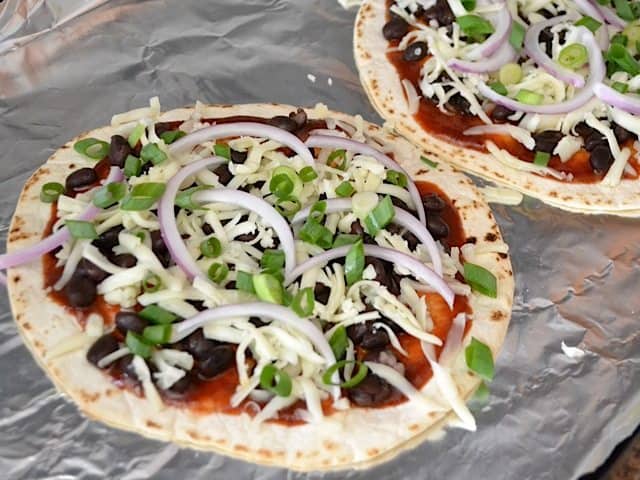 Lastly, add your onions. Now, I baked my pizzas directly on the oven rack so that the bottom would crisp up, but the cooling rack is a much better option. I had to use a wide spatula to transfer the pizzas from the baking sheet into the oven, which was tricky because they were not yet completely crisp.
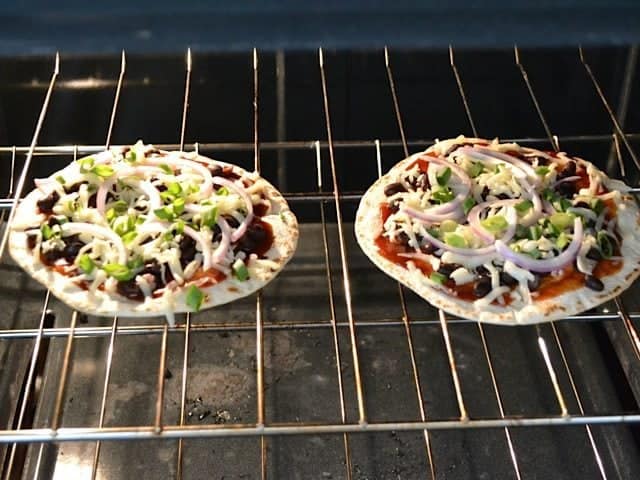 The wires of the oven rack were kind of far apart and the sides of the pizzas kind of fell down in as they baked. If I had thought of the wire cooling rack before, it would have been much easier. Anyway. Bake for about five minutes more (still 400 degrees), or until the edges are nicely golden brown and the cheese is melted and bubbly.
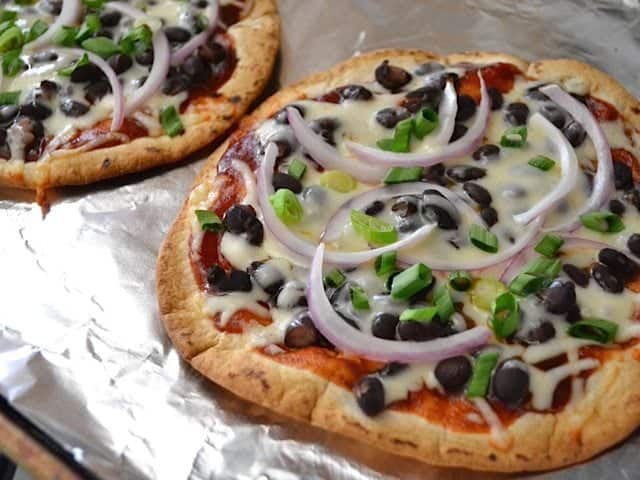 And then they’re freakin’ gorgeous and equally as delicious! The tortilla are still a bit flexible when you take them out, but within a minute or so of taking them out of the oven that steam evaporates and they crisp right up.
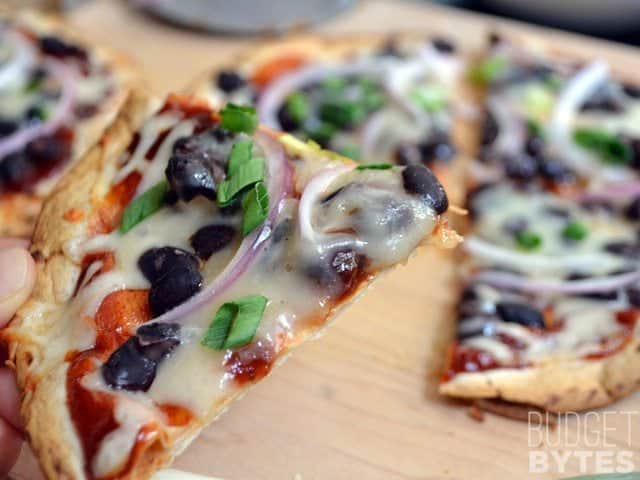 Proof that it was crispy! No bending or flopping with this tortilla pizza! OMG, it was so delish.
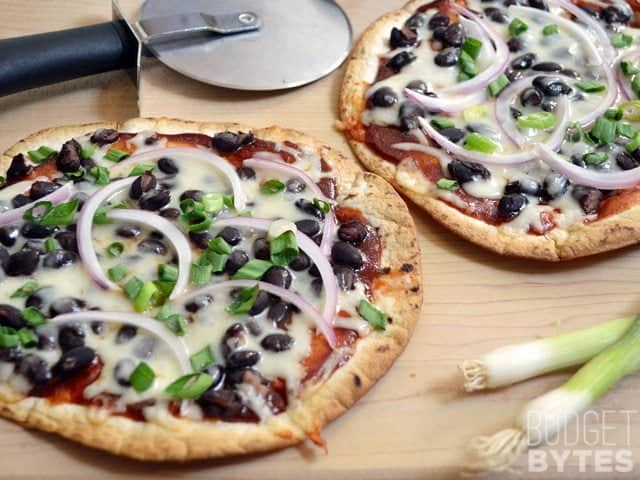 This was a TOTAL WINNER. It’s all too easy to eat two of these, so you might want to think ahead and make a side salad :P