Shared posts

29 Sep 06:27

Can You Woodwork In An Apartment?

by Tom Seevers

Can you woodwork in an apartment? If you’ve ever wondered about pursuing your woodworking passion while living in an apartment, you’re in the right place. In this article, we’ll explore the exciting world of woodworking and the possibilities of creating in the comfort of your apartment. So, let’s dive in and discover all the ins and outs of woodworking in an apartment setting.

Woodworking is a fascinating hobby that allows you to craft beautiful pieces from wood. But can you indulge in this creative endeavor in an apartment? The answer is a resounding yes! While space limitations can pose a challenge, there are plenty of ways to pursue woodworking in an apartment without compromising on your passion. From carving to sanding, and even limited woodworking projects, you can make it work within your apartment’s confines.

Whether you’re a beginner or an experienced woodworker, this article will provide you with practical tips, clever hacks, and creative solutions to set up a woodworking space in your apartment. Get ready to delve into the world of apartment woodworking and unlock the potential to unleash your creativity, even within the limited space of your apartment. Let’s get started on this exciting woodworking journey!

Woodworking in an apartment is possible with a few considerations. First, invest in noise-reducing tools and a sturdy workbench to minimize disruptions. Use hand tools or small power tools for smaller projects. To control dust, set up a dedicated work area with proper ventilation and a dust collection system. Remember to check your lease or apartment rules regarding woodworking. By taking precautions and being respectful of your neighbors, you can enjoy woodworking in your apartment without any issues.

can you woodwork in an apartment?

Woodworking in an Apartment: Is It Possible?

Woodworking is a popular hobby and craft that allows individuals to create beautiful and functional pieces using various types of wood. However, one common obstacle for those living in apartments is the limited space and potential noise concerns. In this article, we will explore whether it is possible to engage in woodworking activities in an apartment setting, and if so, the strategies and tips to make it work. Whether you’re a beginner looking to start woodworking or a seasoned woodworker in need of a space-saving solution, this article will provide valuable insights.

The Challenges of Woodworking in an Apartment

Living in an apartment presents unique challenges when it comes to woodworking. One of the primary concerns is the available space. Apartments typically have limited square footage, making it difficult to set up a dedicated workshop area. Additionally, many apartments have restrictions on noisy activities, and woodworking can be quite noisy. These challenges may discourage individuals from pursuing their woodworking passion. However, with some creativity, planning, and consideration, it is possible to overcome these obstacles and enjoy woodworking in an apartment setting.

One solution to the space issue is to utilize a compact and portable workbench. These workbenches are designed specifically for small spaces and can be folded or stored away when not in use. Additionally, investing in space-saving tools and equipment, such as multifunctional tools or compact power tools, can help maximize the available workspace. It is also important to consider noise reduction strategies, such as using quieter tools, working during specific hours designated by apartment management, or soundproofing the workspace.

Another challenge is the potential for sawdust and debris in an apartment environment. Woodworking often generates a significant amount of sawdust and wood chips, which can be difficult to clean in a confined space. Implementing a dust collection system or using a portable vacuum with a dust extraction feature can help minimize the mess. Additionally, setting up a designated area with proper ventilation or using a dust containment product can aid in containing the sawdust and maintaining a clean living space.

Strategies for Woodworking in an Apartment

When it comes to woodworking in an apartment, strategic planning and organization are key. Here are some strategies to make woodworking in an apartment more feasible:

  1. Create a Dedicated Workspace: Even if you don’t have an entire room to spare, designate a specific area for your woodworking activities. It can be a corner of a room or a section of a balcony. Having a dedicated space helps in organizing tools and materials and creates a sense of focus.
  2. Invest in Noise Reduction: Use tools and equipment specifically designed for quiet operation. Look for tools with built-in noise reduction features or consider purchasing sound-dampening mats or panels to absorb excess noise.
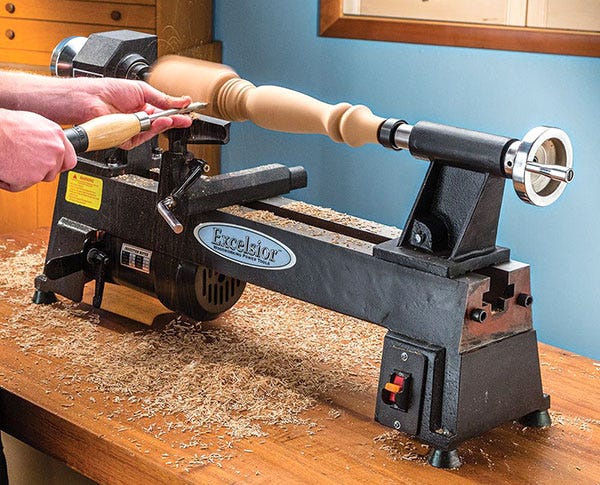
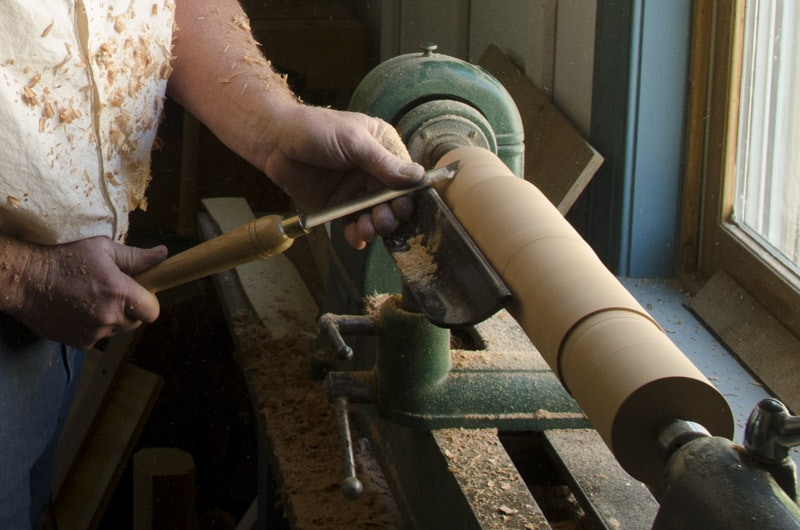
  3. Use Hand Tools: Hand tools can be an excellent alternative to power tools in an apartment setting. They are typically quieter and require less space. Consider learning traditional hand tool techniques to achieve the same results without the noise and space constraints.
  4. Utilize Community Spaces: Explore if your apartment complex offers shared workspaces or creative studios that can be used for woodworking activities. This option allows you to work in a larger area with specialized equipment while minimizing disturbance to your neighbors.
  5. Time Management: Be considerate of your neighbors and try to schedule your woodworking activities during reasonable hours. Communicate with your neighbors about your hobby and let them know your working hours to avoid any potential conflicts.

Tools and Equipment for Apartment Woodworking

When it comes to woodworking in an apartment, choosing the right tools and equipment is crucial. Here are some recommendations for apartment-friendly woodworking tools:

  • Compact Power Tools: Look for power tools that are specifically designed for compact spaces. Many manufacturers offer compact versions of table saws, drills, and sanders that are portable and space-saving.
  • Multifunctional Tools: Opt for tools that serve multiple purposes. For example, a combination miter saw and table saw can save space and provide versatility.
  • Hand Tools: Invest in a set of quality hand tools. Hand planes, chisels, and saws are essential for traditional woodworking techniques and are typically quieter and require less space than power tools.
  • Compact Workbench: Choose a workbench that can be folded or stored away when not in use. Look for benches with integrated tool storage to maximize space.

Benefits of Woodworking in an Apartment

While woodworking in an apartment comes with its challenges, there are several benefits to pursuing this craft in a confined space:

1. Accessibility and Convenience

Having a dedicated woodworking area in your apartment allows you to pursue your hobby conveniently and whenever inspiration strikes. You won’t need to commute to an external workshop or deal with the hassle of renting a dedicated space.

2. Skill Development

Woodworking in an apartment encourages you to hone your skills to work within space limitations. You’ll learn to be resourceful, efficient, and creative in utilizing your available workspace, which can enhance your problem-solving abilities.

3. Stress Relief and Mindfulness

Woodworking has been proven to be a therapeutic activity that promotes relaxation and mindfulness. Engaging in woodworking in the comfort of your apartment can provide a much-needed escape from everyday stressors.

4. Sense of Accomplishment

Completing woodworking projects in an apartment setting allows you to witness the transformation of raw materials into a finished piece right within your own living space. The sense of accomplishment and pride derived from creating something with your own hands is immensely rewarding.

Tips for Successful Apartment Woodworking

To make your woodworking experience in an apartment enjoyable and successful, consider the following tips:

1. Plan Ahead

Before starting a project, plan out your space and tools. Ensure you have all the necessary materials and equipment, and organize your workspace to optimize efficiency.

2. Noise Reduction

Invest in noise-reducing tools and equipment. Use sound-dampening materials and consider adding rugs or carpeting in the workspace to absorb excess noise.

3. Utilize Storage Solutions

Maximize your storage space by using wall-mounted shelves, storage bins, and tool organizers. Keeping your workspace organized will make it easier to find tools and materials and create a clutter-free environment.

4. Work in Phases

If space is limited, consider breaking down your projects into smaller phases. This allows you to work on one aspect at a time and reduces the need for large work areas.

5. Adapt to Hand Tools

Embrace hand tools to minimize noise and space requirements. Learn traditional woodworking techniques that rely on hand tools, such as hand planing and using chisels, to achieve the same results as power tools.

Conclusion

Woodworking in an apartment is indeed possible, although it comes with its unique challenges. By utilizing space-saving tools, implementing noise reduction strategies, and practicing good organization, you can pursue your woodworking hobby in the comfort of your apartment. The key is to plan ahead, be considerate of your neighbors, and embrace the versatility of hand tools. Remember, woodworking is a rewarding craft that can be enjoyed regardless of the limitations of your living space.

Key Takeaways:

  1. Woodworking can be done in an apartment if you have the right tools and take proper precautions.
  2. Choose smaller projects that don’t require heavy machinery or excessive noise.
  3. Invest in noise-reducing tools and equipment, such as a quiet woodworking router.
  4. Consider setting up a dedicated workspace in a spare room or corner of your apartment.
  5. Be mindful of your neighbors and communicate with them about your woodworking activities.

Frequently Asked Questions

Are you wondering if you can pursue woodworking in an apartment? We have compiled some frequently asked questions that will help you understand the possibilities and limitations.

1. Can I do woodworking in a small apartment?

Absolutely! Woodworking can be done in a small apartment with careful planning and consideration. While you may not be able to do large-scale projects that require heavy machinery, there are plenty of woodworking activities that can be done in a small space. Consider investing in compact tools, such as a benchtop table saw or a small workbench, that can be easily stored when not in use. You can also explore hand tool woodworking, which requires less space and equipment.

Additionally, think about noise and dust control. Using hand tools, such as hand planes and chisels, will generate less noise compared to power tools. To minimize dust, consider setting up a dust collection system or working near a window with a fan for ventilation. With the right setup and precautions, woodworking in a small apartment is definitely achievable.

2. What types of woodworking projects are suitable for an apartment?

There are various woodworking projects that are well-suited for an apartment setting. Some examples include:

– Small furniture pieces, like stools or end tables.

– Decorative items, such as shelves, picture frames, or wall art.

– Storage solutions, such as floating shelves or compact organizers.

– Woodworking accessories, like cutting boards or jewelry boxes.

When choosing projects, consider the space available in your apartment and the tools you have. Opt for projects that don’t require large pieces of wood or complicated joinery techniques. Starting with smaller projects will allow you to build your skills and confidence while working within the limitations of an apartment.

3. How can I minimize noise when woodworking in an apartment?

Woodworking can be noisy, but with some simple techniques, you can minimize the noise generated:

– Use hand tools whenever possible, as they produce less noise than power tools.

– Place rubber pads or foam mats under your workbench and tools to dampen vibrations.

– Consider using noise-reducing accessories, such as earmuffs or noise-canceling headphones.

– Schedule your woodworking activities during hours when your neighbors are less likely to be disturbed.

– Communicate with your neighbors about your hobby and assure them that you will take necessary measures to minimize noise.

By being mindful of the noise you generate and taking steps to minimize it, you can enjoy woodworking in your apartment without causing disturbances.

4. What safety precautions should I take when woodworking in an apartment?

Woodworking safety is crucial, regardless of the space you work in. Here are some important precautions to consider when woodworking in an apartment:

– Ensure proper ventilation by working near a window or using a fan to prevent the buildup of dust and fumes.

– Wear appropriate personal protective equipment (PPE), such as safety glasses, ear protection, and a dust mask.

– Organize your tools and materials to maintain a clutter-free workspace and reduce the risk of accidents.

– Use a fire extinguisher and have a first aid kit readily available in case of emergencies.

– Familiarize yourself with the proper handling of tools and follow safety guidelines provided by manufacturers.

By following these safety precautions, you can create a safe woodworking environment within your apartment.

5. How can I deal with limited space for storing woodworking tools in an apartment?

Storing woodworking tools in a limited space can be a challenge, but it’s not impossible. Here are some tips to maximize your storage space:

– Invest in modular tool storage systems that can be customized to fit your available space.

– Utilize vertical storage solutions, such as wall-mounted racks or pegboards, to make the most of your wall space.

– Consider portable toolboxes or tool chests with wheels, which can be easily moved and stored in a corner when not in use.

– Utilize multipurpose furniture, like a workbench with built-in storage or a coffee table with hidden compartments.

– Optimize your workspace layout to have tools easily accessible, minimizing the need for excessive storage space.

By being inventive and utilizing every inch of available space, you can find efficient storage solutions for your woodworking tools in your apartment.

can you woodwork in an apartment? 2

5 Ways to Start Woodworking NOW!

Summary

Wondering if you can do woodworking in an apartment? Well, the good news is that you can! Although space might be limited, there are ways to pursue your woodworking hobby. You can try smaller projects and use portable tools. Just make sure to be considerate of your neighbors and take proper safety precautions.

Woodworking in an apartment requires some creativity and planning, but it’s definitely possible. Start by setting up a dedicated workspace and organizing your tools. Opt for quieter methods like hand tools and use noise-reducing techniques. Remember, with some adjustments, you can enjoy woodworking right from your apartment.

29 Sep 06:27

What Is A Woodturning Lathe?

by Tom Seevers

Hey there, curious about woodturning lathes? Wonder no more! Let’s dive into the fascinating world of woodturning and find out what exactly a woodturning lathe is.

So, what is a woodturning lathe? Well, imagine a machine that has the power to transform a simple block of wood into a beautiful work of art. A woodturning lathe is just that – a tool used by craftspeople to shape wood into various forms. Whether it’s a graceful bowl, an intricate spindle, or a stunning vase, a woodturning lathe brings the artist’s vision to life.

Using a woodturning lathe is like having a superpower – you can shape and manipulate wood in ways that seem almost magical. With the help of sharp tools and a bit of skill, the lathe spins the wood while you guide the tools, turning it into amazing creations. It’s a blend of craftsmanship, creativity, and a touch of wizardry!

So, if you’re ready to embark on an exciting woodturning journey, grab yourself a woodturning lathe and let your imagination run wild. Transform a rough piece of wood into something extraordinary and unleash your inner artist. The possibilities are endless, and the satisfaction of creating something unique with your own hands is truly priceless. Get ready to spin, shape, and create wonders with a woodturning lathe!

Woodturning lathes are powerful machines used by woodworkers to shape wood into various forms. They consist of a motor, a spinning headstock, and a tool rest. With a woodturning lathe, you can create beautifully turned bowls, vases, and other decorative objects. These lathes are versatile, allowing you to adjust speed and direction, making them suitable for both beginners and experienced woodturners. Invest in a quality woodturning lathe and unlock your creativity in woodworking!

what is a woodturning lathe?

What is a Woodturning Lathe? Exploring the Art of Woodworking

Welcome to the fascinating world of woodturning! If you’ve ever wondered what a woodturning lathe is and how it works, you’re in the right place. Woodturning is a traditional craft that involves shaping and sculpting wood by rotating it on a lathe. In this article, we’ll dive deep into the world of woodturning lathes and explore the techniques, tools, and benefits of this timeless art form.

Understanding Woodturning Lathes: The Basics

A woodturning lathe is a machine used by woodworkers to shape and carve wood into various shapes and forms. The lathe consists of a motor, a headstock, a tailstock, and a bed. The wood is mounted between the headstock and the tailstock, and the motor rotates the wood at high speed. This rotation allows the woodworker to shape the wood using specialized chisels and gouges.

Woodturning lathes come in different sizes and designs, depending on the type of woodworking being done. Some lathes are designed for small-scale projects, while others are capable of handling large, intricate pieces. The choice of lathe depends on the size of the wood being turned and the level of precision required.

Woodturning lathes are commonly used to create items such as bowls, vases, furniture legs, and decorative pieces. The possibilities are endless, and woodturners often use their creativity and skill to push the boundaries of what can be achieved with this versatile tool.

The Art of Woodturning: Techniques and Tools

Woodturning is more than just shaping wood; it’s a specialized art form that requires skill, precision, and creativity. As a woodturner, you’ll need a variety of tools and techniques to create stunning pieces of art.

One of the fundamental techniques in woodturning is spindle turning, which involves turning long, thin pieces of wood to create items like furniture legs, candlesticks, and pens. Bowl turning, on the other hand, focuses on creating hollow, circular forms such as bowls and vases.

When it comes to tools, woodturners rely on chisels, gouges, and scrapers to shape the wood. These tools have unique shapes and cutting edges that allow the woodworker to remove material and create intricate details. Each tool serves a specific purpose, and mastering their use is essential for achieving excellent results.

Choosing the Right Wood for Woodturning

The type of wood used in woodturning can greatly impact the final result. Different woods have varying hardness, grain patterns, and colors, which can all contribute to the beauty of the finished piece. Common wood species used in woodturning include maple, cherry, walnut, and oak.

When selecting wood for a project, it’s important to consider its moisture content and stability. Green or freshly cut wood is known to have a higher moisture content and may undergo changes in shape or crack as it dries. Seasoned wood, on the other hand, has a lower moisture content and is more stable, making it a better choice for woodturning.

Additionally, woodturners often enjoy experimenting with exotic woods that offer unique characteristics and colors, such as padauk, purpleheart, and ebony. These woods can add depth and beauty to the finished piece, but they may also require special techniques and tools for proper handling.

Benefits of Woodturning: A Creative and Meditative Pursuit

Woodturning offers a range of benefits beyond the satisfaction of creating beautiful objects. It allows individuals to express their creativity, explore their artistic side, and develop a deep connection with the natural beauty of wood. The process of shaping wood on a lathe can be meditative and calming, providing a sense of peace and relaxation.

Woodturning also offers a unique way to connect with the past. The craft has a rich history dating back centuries, and by learning and practicing woodturning, you become a part of that legacy. It’s a craft that brings joy and fulfillment to both beginners and experienced woodturners alike.

Furthermore, woodturning can be a great hobby or even a profession. Many woodturners find enjoyment in selling their creations, participating in craft shows, or even teaching others the art of woodturning. It’s a rewarding pursuit that can be shared with others and appreciated by people from all walks of life.

Tips for Getting Started with Woodturning

Getting started with woodturning can be an exciting and fulfilling journey. Here are some tips to help you begin your woodturning adventure:

  • Invest in quality tools: Having the right tools is crucial for achieving good results. Start with a basic set of chisels and gradually expand your collection as your skills progress.
  • Practice safety: Woodturning involves sharp tools and high-speed spinning wood, so it’s essential to prioritize safety. Always wear protective gear, such as gloves and safety glasses, and make sure your workspace is well-ventilated.
  • Seek guidance and education: Join a local woodturning club or take classes to learn from experienced woodturners. They can provide valuable guidance, tips, and techniques to help you improve your skills.
  • Start with simple projects: Begin by tackling smaller, straightforward projects to build your confidence and skills. A pen or a small bowl can be a great first project.
  • Experiment with different woods: Try working with various wood species to discover their unique characteristics and learn how they respond to different cutting techniques.
  • Be patient and persistent: Woodturning is a skill that takes time and practice to master. Embrace the learning process, be patient with yourself, and have fun along the way!

Choosing the Right Wood Lathe for Your Woodturning Needs

Woodturning Safety: Tips for a Secure and Enjoyable Experience

Exploring the Art of Woodturning: Techniques, Designs, and Inspiration

The satisfying art of woodturning offers endless possibilities for creativity and self-expression. By understanding the basics of woodturning lathes and learning essential techniques and tools, you can unlock a world of artistic possibilities. Whether you’re a beginner or an experienced woodturner, the joy of shaping wood on a lathe and creating unique pieces is unmatched. So go ahead, grab your tools, and embark on a woodturning adventure to discover the beauty and satisfaction that comes with this timeless craft. Happy turning!

Key Takeaways: What is a Woodturning Lathe?

  • A woodturning lathe is a machine used to shape wood into various forms and designs.
  • It consists of a motor that rotates the wood and tools to cut and shape the wood.
  • Woodturning lathes are commonly used by artisans and craftsmen to create beautiful objects like bowls and vases.
  • They allow for precision and control, enabling the woodworker to shape the wood as desired.
  • Woodturning lathes can be manual or powered, and they come in different sizes to accommodate different projects.

Frequently Asked Questions

Are you curious about woodturning lathes? We’ve got you covered! Check out these common questions and answers to learn more about this fascinating tool.

1. How does a woodturning lathe work?

A woodturning lathe is a machine used to shape wooden objects with precision. It consists of a motor that drives a spindle, which holds the workpiece, and a tool rest, where the cutting tools are positioned. The wood is mounted on the lathe and rotates at varying speeds while the operator uses the cutting tools to shape it. The rotation allows for even and symmetrical cuts, creating smooth and intricate designs.

By adjusting the speed, position, and type of cutting tool, woodturners can create a wide range of shapes, including bowls, spindles, and decorative wood pieces. The process requires skill, technique, and creativity, but with practice, anyone can produce stunning wooden objects using a woodturning lathe.

2. What are the main components of a woodturning lathe?

A woodturning lathe consists of several key components. The most important ones include:

– Bed: This is the main horizontal beam that supports the lathe and provides stability.

– Headstock: It houses the motor and spindle, and is responsible for rotating the workpiece.

– Tailstock: Located at the opposite end of the lathe from the headstock, it helps secure and stabilize longer workpieces.

– Tool rest: Positioned near the workpiece, it provides support for the cutting tools during shaping and turning.

– Banjo: A movable bracket that holds the tool rest, allowing it to be adjusted closer or further from the workpiece.

– Drive center: Attached to the headstock, it helps secure the workpiece and transmit power from the motor to the wood.

– Live center: Attached to the tailstock, it supports the opposite end of the workpiece, providing balance during turning.

– Speed control: Modern woodturning lathes often have adjustable speed settings to accommodate various projects and wood types.

3. What safety precautions should I take when using a woodturning lathe?

When using a woodturning lathe, safety should be a top priority. Here are some essential precautions to follow:

– Wear appropriate protective gear, such as safety goggles, a face shield, and ear protection to safeguard against wood chips and noise.

– Securely fasten the workpiece to prevent it from flying off during rotation. Use a chuck or faceplate for extra stability.

– Keep your fingers, hair, and loose clothing away from moving parts. Never attempt to touch or adjust the workpiece while the lathe is operating.

– Ensure the cutting tools are sharp and properly positioned before turning on the lathe. Dull or incorrectly positioned tools can lead to accidents.

– Work in a well-ventilated area to minimize exposure to wood dust. Consider using a dust collection system or wearing a respirator.

– Familiarize yourself with the lathe’s emergency stop button and always have it within easy reach in case of an emergency.

By following these safety guidelines, you can enjoy the art of woodturning while minimizing any potential risks.

4. What types of projects can I create with a woodturning lathe?

A woodturning lathe opens the doors to a wide array of creative possibilities. Here are a few types of projects you can undertake:

– Bowls and plates: From small decorative bowls to larger salad bowls, a lathe enables you to turn exquisite wooden vessels.

– Spindles: Crafting chair legs, table legs, or even stair balusters becomes easier with a woodturning lathe.

– Pens and other writing instruments: Create unique and personalized pens, pencils, or even bottle stoppers using different wood types and designs.

– Handles and knobs: Enhance cabinets or drawers by turning elegant wooden handles or decorative knobs.

– Artistic pieces: Let your imagination run wild and create one-of-a-kind sculptures or art pieces using the lathe to shape the wood.

The possibilities are endless, and the joy of seeing your ideas come to life through wooden creations is immensely satisfying.

5. Can beginners learn how to use a woodturning lathe?

Absolutely! Beginners can definitely learn how to use a woodturning lathe. While it may seem intimidating at first, with proper guidance and practice, anyone can start turning. Here are some tips for beginners:

– Start with simple projects: Begin with small projects that allow you to familiarize yourself with the lathe and basic techniques, such as turning a pen or a small bowl.

– Seek guidance: Take a woodturning class, watch online tutorials, or join a local woodturning club. Learning from experienced woodturners will help you understand the fundamentals and gain confidence.

– Practice patience: Woodturning is a skill that requires practice and patience to master. Be prepared to make mistakes and learn from them. Each project will enhance your skills.

– Focus on safety: As a beginner, prioritize safety precautions and follow the guidelines we mentioned earlier. Understanding and adhering to safety measures will ensure a positive and injury-free woodturning experience.

With time and dedication, you’ll develop the skills necessary to create beautiful wooden objects and unleash your creativity with a woodturning lathe.

what is a woodturning lathe? 2

The Wood Turning Lathe A to Z for Beginners, a Roger Webb easy learning tutorial

Summary

So, you’ve learned about woodturning lathes. These machines are used to shape wood into different forms. They have a spinning motor and a tool rest to hold the cutting tools. Woodturning lathes are great for making bowls, vases, and even furniture legs. They allow you to be creative with wood and bring your ideas to life. Just remember to always use them safely and under adult supervision!

In conclusion, woodturning lathes are fascinating tools that help create beautiful wooden objects. With a spinning motor and cutting tools, you can shape wood into various shapes. So, next time you see a wooden bowl or a cool furniture leg, you’ll know it was made with a woodturning lathe!

29 Sep 06:27

What Rpm Should A Bandsaw Run At?

by Tom Seevers

Are you curious about what RPM a bandsaw should run at? Well, you’ve come to the right place! If you’re like me, you love working with power tools and want to make sure you’re using them safely and efficiently. In this article, we’ll explore the optimal RPM for bandsaws and why it matters. So, let’s dive in and discover the magic number!

When it comes to bandsaw RPM, finding the sweet spot is crucial for achieving clean and precise cuts. Whether you’re a woodworking enthusiast or a professional carpenter, understanding the ideal speed for your bandsaw can make a world of difference. So, let’s get acquainted with the factors that influence the RPM and how to determine the perfect range for your specific cutting needs.

Now, you might be wondering, “Okay, but how do I know which RPM is right for my bandsaw?” Don’t worry; we’ve got you covered! In the following sections, we’ll discuss the key considerations, including the type of material and blade size, to help you find the optimal RPM setting. So, get ready to unleash the full potential of your bandsaw and take your woodworking skills to the next level!

A bandsaw should run at different RPMs depending on the material being cut. For hardwoods, an RPM of 1500-3000 is recommended, while for softwoods, an RPM of 3000-4500 is suitable. When cutting metals, a slower RPM of 500-1000 is ideal. It’s important to adjust the bandsaw’s speed according to the material’s density and thickness to achieve optimal cutting results and prevent overheating. Always consult the manufacturer’s guidelines for specific RPM recommendations.

what rpm should a bandsaw run at?

What RPM Should a Bandsaw Run At?

Bandsaws are powerful tools used in woodworking and metalworking industries for cutting various materials with precision. The ideal RPM (rotations per minute) at which a bandsaw should run depends on several factors, including the type of material being cut and the desired cutting speed. In this article, we will explore the recommended RPM for different bandsaw applications, factors to consider when determining the appropriate RPM, and tips for optimizing bandsaw performance.

The Importance of RPM in Bandsaw Performance

RPM plays a crucial role in the performance and cutting capabilities of a bandsaw. Running the bandsaw at the correct RPM ensures efficient cutting, prolongs the blade’s lifespan, and reduces the risk of accidents or damage to the material being cut. The RPM determines the blade’s speed, which affects the heat generated during cutting, the quality of the cut, and the overall productivity of the bandsaw.

For woodworking applications, the recommended RPM range for cutting wood is typically between 3000 and 5000. This range allows for clean cuts and minimizes the risk of burning the wood. However, the specific RPM within this range will depend on the type and thickness of the wood being cut. Hardwoods, such as oak or maple, may require a slower RPM to prevent burning, while softer woods, like pine or cedar, can tolerate higher RPMs.

In metalworking, the recommended RPM for cutting metal with a bandsaw depends on the type and thickness of the metal. Generally, slower RPMs in the range of 80 to 300 are suitable for cutting various metals. However, harder metals, such as steel, might require even slower RPMs to maintain cutting accuracy and prevent blade wear. It is important to refer to the manufacturer’s guidelines and consult professionals to determine the optimal RPM for specific metal-cutting applications.

Determining the Appropriate RPM for Bandsaw Applications

When selecting the RPM for a bandsaw, it is essential to consider the material to be cut, the blade type, and the size of the bandsaw. Here are some factors to consider when determining the appropriate RPM for different applications:

1. Material Type: Different materials require different cutting speeds. Softer materials like wood can be cut at higher RPMs, while harder materials like metal require lower RPMs to prevent damage.

2. Blade Teeth Per Inch (TPI): The TPI indicates the number of teeth on the blade. Blades with a higher TPI are better suited to cutting softer materials, allowing for higher RPMs. Blades with a lower TPI are designed for cutting thicker and harder materials, requiring lower RPMs.

3. Blade Thickness: Thicker blades can withstand higher tension and RPMs compared to thinner blades. It is crucial to use the appropriate blade thickness for the material being cut to avoid blade breakage or poor cutting performance.

4. Workpiece Thickness: Thicker workpieces require slower RPMs to maintain cutting accuracy and prevent overheating. Thinner workpieces can tolerate higher RPMs.

5. Bandsaw Size: Smaller bandsaws typically operate at higher RPMs, while larger industrial bandsaws can handle lower RPMs due to their heavy-duty construction.

By considering these factors and consulting manufacturer recommendations, users can determine the optimal RPM for their specific bandsaw applications.

Tips for Optimizing Bandsaw Performance

To ensure optimal bandsaw performance and maximize cutting efficiency, here are some tips to keep in mind:

1. Regular Blade Maintenance: Proper blade maintenance, including periodic cleaning, sharpening, and tensioning, is essential for achieving clean and precise cuts. Dull or improperly tensioned blades can lead to poor cutting performance and premature blade wear.

2. Use the Right Blade for the Job: Different blades are designed for specific materials and cutting applications. Choosing the right blade for the job, based on material type, thickness, and desired cutting accuracy, is crucial for achieving optimal results.

3. Adjust Blade Speed Based on Material: Adjusting the bandsaw’s speed to match the material being cut significantly impacts the cutting quality and blade longevity. By adhering to the recommended RPM range for the specific material, users can achieve clean cuts and avoid overheating.

4. Feed Rate: Maintaining a consistent feed rate when operating the bandsaw is important to prevent blade binding, overheating, and poor cutting performance. Users should avoid forcing the material through the blade and instead allow the saw to do the work at a steady pace.

5. Safety First: Always prioritize safety when using a bandsaw. Follow proper safety procedures, wear appropriate personal protective equipment, and ensure the bandsaw is well-maintained and free from any potential hazards.

By following these guidelines and implementing best practices, users can optimize their bandsaw’s performance and achieve the desired cutting results.

Finding the Right RPM for Your Bandsaw

Finding the optimal RPM for your bandsaw depends on various factors. Understanding the material, blade type, and bandsaw specifications is crucial in determining the appropriate speed. It is recommended to consult the manufacturer’s guidelines and seek advice from industry professionals to ensure safe and efficient cutting. Remember, the right RPM contributes to a clean cut, extends the blade’s lifespan, and enhances overall cutting performance.

Key Takeaways: What RPM Should a Bandsaw Run At?

  • Choosing the right RPM (Revolutions Per Minute) for a bandsaw is important for optimal performance.
  • A general rule of thumb is to set the bandsaw’s blade speed between 3000 to 5000 feet per minute.
  • Lower RPMs are suitable for cutting through thick and hard materials.
  • Higher RPMs are ideal for cutting softer materials and achieving cleaner, smoother cuts.
  • Always consult the manufacturer’s recommendations and adjust the speed according to the type and thickness of the material being cut.

Frequently Asked Questions

Welcome to our FAQ section where we answer common questions about the ideal RPM for a bandsaw. Read on to find out more!

How do I determine the optimal RPM for my bandsaw?

To determine the optimal RPM for your bandsaw, you need to consider two factors: the type of material you are cutting and the size of the blade being used. For softer materials like wood, a lower RPM is typically recommended, while harder materials like metal require a higher RPM. Additionally, the size of the blade will also impact the ideal RPM. Thinner blades require a higher RPM, while wider blades are better suited for lower RPMs. Consult your bandsaw’s manual or the manufacturer’s guidelines for specific recommendations based on your bandsaw model.

It’s worth noting that finding the right RPM may require a bit of trial and error. Start with the manufacturer’s suggested RPM range for your specific material and blade size, and then make small adjustments as needed. Remember, the goal is to achieve a smooth and precise cut while avoiding any strain or damage to the blade or material.

What happens if I run my bandsaw at too high of an RPM?

If you run your bandsaw at too high of an RPM, it can result in several issues. Firstly, the excessive speed can cause the blade to cut too aggressively, leading to a rough and unrefined cut. This can be problematic if you’re working with delicate or expensive materials where precision is crucial. Additionally, running the bandsaw at a high RPM can create excessive heat, which can damage the blade, warp the material, or even pose a safety risk.

Running a bandsaw at an excessively high RPM can also place undue stress on the motor, potentially shortening its lifespan. If you notice the motor straining or overheating, it may be a sign that the RPM is set too high. To avoid these problems, always consult the manufacturer’s recommendations and adjust the RPM accordingly based on the specific material and blade being used.

What are the drawbacks of running a bandsaw at too low of an RPM?

If you run your bandsaw at too low of an RPM, you may encounter some drawbacks. One of the main issues is a decrease in cutting efficiency. The blade may struggle to cut through the material smoothly, resulting in a slower and less precise cut. This can be frustrating and time-consuming, especially if you’re working on a large project or cutting thick materials.

An excessively low RPM can also increase the risk of the blade getting stuck or binding in the material. This not only interrupts the cutting process but can also lead to damage to the blade or the bandsaw itself. Additionally, running the bandsaw at a low RPM may cause more vibrations, making it harder to achieve a clean and accurate cut. To prevent these issues, it’s important to find the optimal RPM range for your bandsaw based on the material and blade size.

Can I use the same RPM for all types of materials?

No, you cannot use the same RPM for all types of materials when using a bandsaw. Different materials require different cutting speeds to achieve optimal results. For example, cutting through wood requires a slower RPM compared to cutting through metal.

The density and hardness of the material determine the ideal RPM. Soft materials like wood can generally be cut at lower RPMs, while harder materials like metal require higher RPMs. It’s essential to consult the manufacturer’s recommendations or guidelines specific to your bandsaw model to determine the appropriate RPM range for each type of material you plan to cut. Adhering to these guidelines will ensure clean cuts and extend the lifespan of the blade.

What are the benefits of using the correct RPM on a bandsaw?

Using the correct RPM on a bandsaw offers several benefits. Firstly, it helps ensure a clean and precise cut. The right RPM allows the blade to maintain consistent and efficient cutting speed throughout the material, resulting in smooth edges and minimal tear-out.

Using the correct RPM also enhances safety. Operating a bandsaw at the recommended RPM range reduces the risk of blade breakage or binding, minimizing the chances of accidents or injury. Additionally, running the bandsaw at the appropriate RPM keeps the motor operating within its intended range, promoting longevity and preventing unnecessary strain.

what rpm should a bandsaw run at? 2

Summary

Finding the right RPM for a bandsaw is crucial for safety and performance. It depends on the type of material and the size of the blade. Too high or too low RPM can lead to poor cuts and accidents. For general woodworking, a bandsaw should run at around 3000-3500 RPM. Metal cutting requires lower speeds, around 1500-2000 RPM. Consult the manufacturer’s recommendations for best results.

Remember to always use the appropriate blade and tension it properly. Take precautionary measures when changing speeds, and be mindful of blade alignment. Safety should always come first when operating a bandsaw. By following these guidelines, you can achieve precise and efficient cuts, ensuring a successful woodworking or metalworking experience.

29 Sep 06:27

Is Willow Any Good For Woodturning?

by Tom Seevers

If you’ve ever wondered, “Is willow any good for woodturning?”, you’ve come to the right place! In this article, we’re going to dive into the world of woodturning and explore whether willow is a suitable wood for this craft. So grab your lathe and let’s get turning!

Now, you may be wondering why willow specifically caught your attention. Well, willow is known for its unique properties that make it popular among woodturners. With its soft texture and smooth grains, willow offers a great choice for those looking to create intricate and finely detailed woodturning projects.

But, is willow really as good as they say for woodworking? Stick around as we uncover its strengths and weaknesses, so you can make an informed decision on whether willow is the right wood for your woodturning adventures. So, let’s begin exploring the fascinating world of willow and its potential for woodturning projects.

Woodturning enthusiasts often wonder if willow is a suitable wood for their craft. While willow can be used for woodturning, it does have its pros and cons. Willow is known for its softness, making it easy to carve and shape. However, it may not be as durable or stable as other hardwoods. Consider the specific project and intended use before deciding if willow is the right choice for your woodturning needs.

is willow any good for woodturning?

Is Willow Any Good for Woodturning?

Willow is a versatile wood often used in various woodworking projects, including woodturning. Its unique characteristics make it suitable for certain types of woodturning projects. In this article, we will explore the qualities of willow and discuss its pros and cons when it comes to woodturning. Whether you are a beginner or an experienced woodturner, this article will provide valuable insights into using willow in your projects.

The Qualities of Willow Wood

Willow wood has several notable qualities that make it desirable for woodturning. Firstly, it is relatively soft and easy to work with. The woodturning process requires precision and control, and willow’s softness allows for smooth cuts and intricate details. Additionally, willow has a straight and even grain, which enhances its stability during the turning process. This makes it less likely to split or warp compared to other types of wood. Its light color and subtle grain patterns also contribute to the visual appeal of the finished pieces.

However, it’s important to note that willow wood can be prone to tear-out, especially if the cutting tools are not sharp. Tear-out occurs when the wood fibers lift during the turning process, resulting in an uneven surface. To minimize tear-out, it is crucial to use sharp tools and employ proper cutting techniques. With the right approach, willow’s qualities can be harnessed to create beautiful and functional woodturned pieces.

Applications of Willow in Woodturning

Willow wood is often used in woodturning projects that require delicate and intricate details. Its softness and stability make it suitable for crafting small items such as pens, bottle stoppers, and jewelry. The smooth cutting experience that willow provides allows for precise shaping and detailing. Furthermore, the light color of willow lends itself well to finishing techniques that highlight the natural beauty of the wood, such as staining or painting.

Another application of willow in woodturning is in larger projects like bowls and vases. The stability of willow wood, combined with its light weight, makes it an excellent choice for hollowing and shaping larger vessels. Woodturners can achieve thin walls and graceful curves without compromising the structural integrity of the piece. Additionally, willow’s natural resistance to moisture makes it suitable for items that may come into contact with liquids.

However, it’s important to consider the intended use of the woodturned items when using willow. Willow wood is not as durable as some other hardwoods and may not withstand heavy or frequent use. Therefore, it is more suited for decorative or lightly-used items rather than functional pieces that will undergo significant wear and tear.

Best Practices for Working with Willow Wood

When working with willow wood in woodturning projects, there are several tips and best practices to keep in mind. To minimize tear-out and achieve a smooth finish, ensure that your tools are sharpened properly. Dull tools tend to rip and tear the wood, resulting in a less desirable surface. Regularly sharpening and honing your tools will greatly enhance your woodturning experience with willow.

Furthermore, it’s recommended to take smaller cuts when turning willow wood to reduce the risk of tear-out. Applying too much pressure or attempting to remove larger amounts of material at once can cause the wood fibers to lift and result in an uneven surface. Take your time and make light cuts, gradually shaping the piece as you go.

Lastly, consider the finishing techniques that will complement the qualities of willow wood. As mentioned earlier, staining or painting can enhance the visual appeal of the wood, allowing you to create unique and personalized woodturned pieces. Experiment with different finishes and find the one that best showcases the beauty of willow in your projects.

Choosing the Right Tools for Woodturning with Willow

Essential Tools for Woodturning

Woodturning is an art form that requires the right tools to achieve the desired results. When working with willow wood, certain tools are essential for a successful woodturning experience. Let’s explore the key tools you’ll need:

  • Woodturning lathe: The lathe is the central piece of equipment in woodturning. It holds the workpiece in place and allows for precise rotation while shaping the wood.
  • Woodturning chisels: Chisels come in various shapes and sizes, each designed for specific tasks. Roughing gouges, spindle gouges, and parting tools are commonly used in woodturning.
  • Skew chisels: Skew chisels are versatile tools used for smoothing surfaces and creating fine details. They require skill and practice to use effectively.
  • Woodturning gouges: Gouges are designed for cutting concave shapes, such as bowls or hollow forms. Bowl gouges, spindle gouges, and bowl scrapers are among the most commonly used.
  • Woodturning parting tool: A parting tool is used to create sharp grooves or separate the workpiece from the lathe.
  • Woodturning calipers: Calipers are used to measure and ensure consistent dimensions throughout the turning process.

These are some of the essential tools needed for woodturning with willow wood. However, it’s worth noting that the specific tools required may vary depending on the project and personal preferences. As you gain experience, you may discover additional tools that complement your woodturning style.

Considerations When Choosing Woodturning Tools for Willow

When selecting tools for woodturning with willow wood, there are a few considerations to keep in mind to ensure optimal results:

  1. Sharpness: As mentioned earlier, willow wood can be prone to tear-out. Using sharp tools is essential for achieving smooth cuts and minimizing tear-out. Regularly sharpen and hone your tools to maintain their effectiveness.
  2. Tool Size: The size of the tools you use depends on the scale of your woodturning projects. For smaller items, such as pens or jewelry, smaller tools like spindle gouges and skew chisels may be sufficient. For larger projects like bowls or vases, larger tools like bowl gouges may be more appropriate.
  3. Tool Shape: Different tools have different shapes and cutting edges designed for specific tasks. Consider the type of cuts you want to make and choose tools with the appropriate shape. For example, roughing gouges are excellent for removing excess material quickly, while parting tools are ideal for creating grooves or separating the workpiece.

Experimenting with different tools and techniques is key to finding what works best for you when woodturning with willow. As you gain experience, you’ll develop your own preferences and style, allowing you to create unique and beautiful woodturned pieces.

Choosing Willow for Woodturning Projects

When it comes to choosing willow for woodturning projects, there are a few factors to consider to ensure the best possible results:

Types of Willow Wood

There are several species of willow, each with its own characteristics and qualities. The type of willow wood you choose can affect the outcome of your woodturning projects. Some common types of willow include:

  • Black Willow: Black willow is a popular choice for woodturning due to its attractive color and smooth texture. It is known for its stability and ease of working.
  • White Willow: White willow is another type commonly used in woodturning. It has a slightly paler color compared to black willow but shares similar characteristics.
  • Crack Willow: Crack willow is a fast-growing species that is widely available. It is known for its strength and durability, making it suitable for larger woodturning projects.

Consider the visual appeal, stability, and availability of different types of willow when choosing the wood for your projects. Each type will have its own unique qualities that may influence the end result.

Source and Quality of Willow Wood

The source and quality of willow wood can significantly impact your woodturning experience. Ideally, choose wood from reputable sources that specialize in providing high-quality turning blanks. This ensures that the wood has been properly dried and prepared, reducing the risk of warping or cracking during the woodturning process.

Inspect the willow blanks for any signs of defects, such as knots, cracks, or rot. These imperfections can affect the overall integrity and aesthetics of the finished piece. It’s best to select blanks that are free from any major defects or blemishes.

The Benefits of Using Willow in Woodturning

Using willow in woodturning projects offers several benefits that make it a popular choice among woodturners:

Easy to Work With

Willow wood’s softness and straight grain make it easy to work with, especially for beginners. It responds well to cutting tools and allows for precise shaping and detailing. The ease of working with willow enables woodturners to explore and develop their skills, whether they are new to the craft or experienced.

Stability

Willow wood’s stability during the turning process is another significant advantage. Its even grain and resistance to splitting or warping contribute to a more enjoyable woodturning experience. Woodturners can focus on their creativity and craftsmanship without worrying about excessive movement in the wood.

Visual Appeal

The light color and subtle grain patterns of willow wood lend themselves well to a variety of finishes and styles. Whether you prefer natural finishes that highlight the wood’s beauty or more vibrant painted designs, willow provides a versatile canvas. The finished pieces often exhibit a warm and inviting aesthetic.

Versatility

Willow wood’s suitability for both small and large projects makes it a versatile choice in woodturning. Whether you’re crafting delicate jewelry or intricate bowls, willow’s properties can accommodate a wide range of design possibilities. This versatility allows woodturners to explore different techniques and create unique pieces.

Conclusion

Willow is indeed a good choice for woodturning projects, thanks to its easy workability, stability, and visual appeal. Its softness and straight grain make it suitable for intricate detailing, while its stability ensures a smooth turning process. Willow wood is often used for smaller decorative items like pens and jewelry, as well as larger vessels like bowls and vases. By following the best practices and using the right tools, woodturners can harness the qualities of willow to create beautiful and functional woodturned pieces.

Key Takeaways: Is Willow Any Good for Woodturning?

1. Willow wood is a popular choice among woodturners because of its softness and ease of carving, making it suitable for beginners.
2. Its pale color and beautiful grain patterns add an aesthetic appeal to turned projects, making them visually pleasing.
3. Willow wood has a tendency to warp and crack, so it may not be the best choice for intricate or delicate designs.
4. It is important to properly dry and stabilize willow wood before turning to minimize the risk of warping and cracking.
5. While not as durable as other hardwoods, willow wood can still be used for a variety of turned items like bowls, vases, and small decorative pieces.

Frequently Asked Questions

Woodturning is a popular woodworking technique that involves shaping wood on a lathe, creating beautiful and functional objects. Willow is one of the many types of wood used for woodturning. Below are some frequently asked questions about using willow for woodturning.

1. Can willow be used for woodturning?

Yes, willow can be used for woodturning. Willow wood is known for its softness, which makes it ideal for delicate and intricate woodturning projects. It is relatively easy to work with, as it cuts smoothly and does not splinter easily. However, it is worth noting that willow is a softer wood compared to hardwoods like oak or maple, so it may not be suitable for certain projects that require more durability.

When using willow for woodturning, it is important to consider the moisture content of the wood. Green willow, which is freshly cut and still has a high moisture content, is easier to turn compared to dry willow. Green willow is less prone to cracking or splitting during the turning process. It is recommended to seal the ends of freshly cut willow to slow down the drying process and prevent excessive cracking.

2. What are the advantages of using willow for woodturning?

There are several advantages to using willow for woodturning. Firstly, the softness of willow makes it easy to work with and manipulate on the lathe. It cuts smoothly and allows for intricate detailing and fine finishes. Willow’s softness also reduces the risk of damaging turning tools or the lathe itself.

Additionally, willow has a unique and attractive grain pattern, which enhances the aesthetic appeal of woodturned objects. The natural color variations in willow wood can create visually stunning patterns and textures, adding an extra dimension to your woodturning projects.

3. Are there any drawbacks to using willow for woodturning?

While willow has its advantages, there are also some drawbacks to consider when using it for woodturning. The main drawback is its softness, which means that finished woodturned pieces may be more prone to denting or scratching compared to harder woods. This may not be a concern for decorative or ornamental items but could be a consideration for functional pieces that will be subject to regular use.

Another factor to consider is the availability of willow wood. Willow trees are not as common as some other hardwood species, so finding a good source of willow lumber or logs for woodturning may require more effort. It is also important to ensure that the willow wood you use is properly dried and seasoned to avoid issues with warping or cracking.

4. What types of woodturning projects are suitable for willow?

Willow is suitable for a wide range of woodturning projects. Its softness and ease of cutting make it ideal for projects that involve intricate details or delicate shapes, such as small bowls, vases, or ornamental objects. Willow’s attractive grain patterns also make it well-suited for creating visually appealing artistic pieces.

However, due to its softer nature, willow may not be the best choice for functional items that require more durability or resistance to wear and tear. It is important to consider the specific requirements of your project and the intended use of the finished piece when deciding whether willow is a suitable choice.

5. How should I finish and care for woodturned pieces made from willow?

When it comes to finishing woodturned pieces made from willow, it is important to take into account the softer nature of the wood. Willow can be finished with various types of wood finishes, such as oil-based finishes or lacquers, to enhance its appearance and provide protection. It is recommended to apply multiple coats of finish to ensure durability.

As for care, it is advisable to avoid exposing woodturned pieces made from willow to excessive moisture or extreme temperature changes, as this can potentially cause warping or cracking. Regularly dusting and cleaning the pieces with a soft cloth will help maintain their beauty. Applying a fresh coat of finish as needed can also help preserve the wood’s appearance and protect it from daily wear and tear.

is willow any good for woodturning? 2

Woodturning – Old Willow Log Becomes Elegant Gift

Summary

So, is willow good for woodturning? Well, it depends on what you’re looking for. Willow is a softwood, which means it’s not as strong or durable as hardwoods like oak or maple. However, it does have some advantages. Willow is lightweight and easy to work with, making it great for beginners or anyone who wants to experiment with different shapes and designs. It also has a beautiful grain pattern and can be finished to a smooth, glossy surface. Just keep in mind that willow may not be the best choice for large or heavy projects that require a lot of strength.

In conclusion, while willow is not the most durable option for woodturning, it does offer some benefits like being lightweight and having a lovely grain pattern. Whether or not it’s good for you will depend on your specific needs and preferences as a woodturner. So, don’t be afraid to give it a try and see how it works for you!

29 Sep 06:27

What Is Carpentry In Tesda?

by Tom Seevers

Are you curious about what carpentry is in TESDA? Well, let me tell you all about it! Carpentry in TESDA is an exciting skill that allows you to create amazing things with your own hands. Whether it’s building furniture, constructing structures, or crafting intricate designs, carpentry opens up a world of possibilities!

TESDA, which stands for Technical Education and Skills Development Authority, is the leading government agency in the Philippines that provides technical-vocational education and training. Carpentry is one of the many courses offered by TESDA, and it equips individuals with the knowledge and skills needed to become skilled carpenters.

In TESDA’s carpentry program, you’ll learn everything from the basics of woodworking to advanced techniques in construction. You’ll acquire skills in measuring, cutting, shaping, and assembling various materials like wood, metal, and concrete. With hands-on training and guidance from experienced instructors, you’ll develop the skills necessary to build structures, create furniture, and execute intricate designs. Exciting, right? Join me as we explore the world of carpentry in TESDA!

Carpentry in TESDA is a vocational course that focuses on teaching the skills and techniques needed for woodworking and carpentry. Students learn how to read blueprints, use various tools and equipment, and construct different structures. This program provides hands-on training and prepares individuals for a career in carpentry, where they can work in construction, manufacturing, or as self-employed contractors.

what is carpentry in tesda?

What is Carpentry in TESDA? Exploring the World of Carpentry Training

When it comes to building, repairing, and crafting with wood, carpentry is a skill that plays a vital role. The Technical Education and Skills Development Authority (TESDA) in the Philippines recognizes the importance of carpentry and offers training programs to equip individuals with the necessary skills and knowledge. In this article, we will delve into the world of carpentry in TESDA, exploring the training programs, career opportunities, and benefits it brings. Whether you are considering a career in carpentry or simply looking to acquire some handy skills, TESDA has something to offer you.

The Carpentry Training Landscape in TESDA

TESDA has developed a robust framework for carpentry training, catering to a range of individuals with different skill levels and interests. Let’s take a closer look at some of the programs offered:

1. Carpentry NC I

The Carpentry NC I program is an entry-level course for individuals who have little to no experience in carpentry. This program introduces students to the fundamental concepts of carpentry, such as understanding construction drawings, using hand and power tools, and performing basic woodworking techniques. Upon completion, students will have the competence to perform simple carpentry tasks.

Throughout the program, students will engage in both theoretical and practical lessons. They will learn about safety precautions, workplace communication, and proper tool usage. The hands-on training will enable them to demonstrate their skills in constructing simple wooden structures, such as shelves and small furniture items.

Benefits:

  • Acquire essential carpentry knowledge and skills
  • Build a solid foundation for further training and career advancement
  • Potential entry into the workforce as a carpenter’s assistant

2. Carpentry NC II

Building upon the Carpentry NC I program, the Carpentry NC II program aims to develop intermediate-level carpentry skills. It is designed for individuals who already possess basic carpentry knowledge and experience. The program focuses on honing specific skills, such as advanced woodworking techniques, construction principles, and project planning.

During the Carpentry NC II program, students will learn to construct more complex wooden structures, such as cabinets and built-in furniture. They will be trained in the proper use of advanced tools and equipment and will gain a deeper understanding of construction processes and materials. Additionally, they will develop skills in project estimation and costing.

Benefits:

  • Enhance carpentry skills and techniques
  • Increase employability and career prospects
  • Opportunity to work on larger-scale carpentry projects

3. Carpentry NC III

The Carpentry NC III program is a comprehensive training course that prepares individuals for supervisory roles in the carpentry industry. This program is suitable for experienced individuals looking to advance their careers and take on leadership positions. It covers advanced topics, such as project management, cost control, and quality assurance.

Students enrolled in Carpentry NC III will develop the skills needed to plan, coordinate, and supervise carpentry projects. They will learn to interpret complex construction plans, estimate costs, and manage resources effectively. The program also emphasizes the importance of adhering to safety standards and compliance regulations.

Benefits:

  • Acquire managerial and leadership skills
  • Open doors to supervisory and project management positions
  • Expand knowledge in construction practices and regulations

4. Specialized Carpentry Training Programs

Besides the core carpentry programs, TESDA also offers specialized training programs catering to specific types of carpentry, such as formwork carpentry and finishing carpentry. These programs provide individuals with the opportunity to specialize in a particular area, equipping them with specialized skills and expertise.

With the diverse range of carpentry training programs available in TESDA, individuals can choose the program that aligns with their interests, skill level, and career goals. Whether you are starting from scratch or looking to advance your carpentry career, TESDA has a program to suit you.

Why Choose Carpentry Training in TESDA?

With several options available for obtaining carpentry skills, you might wonder why you should choose TESDA. Here are some compelling reasons to consider:

1. Recognized Training Programs

TESDA is a reputable government agency dedicated to providing quality skills training. The carpentry programs offered by TESDA are recognized and endorsed by industry experts, ensuring that you receive training that meets industry standards. This recognition can significantly enhance your employability and credibility as a carpenter.

2. Hands-on Training

One of the key advantages of TESDA carpentry training is the emphasis on practical, hands-on learning. Through both simulated and real-world projects, you will have the opportunity to apply the skills and knowledge you acquire. This experiential learning approach equips you with the confidence and competence to tackle real-life carpentry challenges.

3. Industry-Experienced Instructors

TESDA instructors are industry professionals with vast experience in the field of carpentry. They bring a wealth of practical knowledge and expertise, ensuring that you receive top-notch training. Their guidance and mentorship can be invaluable in honing your skills and gaining industry insights.

4. Comprehensive Skill Development

TESDA’s carpentry training programs are designed to cover the entire breadth of carpentry skills, from basic concepts to advanced techniques. By completing a TESDA program, you can develop a well-rounded skillset that encompasses foundational carpentry knowledge, technical expertise, and managerial skills.

5. Career Opportunities

Carpentry skills are in demand across various industries, including construction, woodworking, and furniture-making. By acquiring TESDA certification, you enhance your chances of securing employment and advancing in your career. TESDA’s strong ties with industry partners also provide networking opportunities that can further boost your career prospects.

6. Affordability and Accessibility

TESDA’s carpentry training programs are known for their accessibility and affordability. They are designed to be accessible to individuals from different backgrounds and provide financial support options. This ensures that individuals can access quality training without significant financial burdens.

7. Continuous Learning and Development

TESDA’s commitment to lifelong learning is reflected in its approach to carpentry training. Beyond the core programs, TESDA offers a range of skills enhancement courses and short-term programs that allow you to further develop your carpentry skills. This enables you to stay updated with industry trends and broaden your expertise.

Key Takeaways: What is Carpentry in TESDA?

  • Carpentry in TESDA refers to the training program offered by TESDA, a government agency in the Philippines.
  • It teaches the skills and knowledge necessary for working with wood, such as measuring, cutting, shaping, and joining wood pieces.
  • Students learn how to build and construct various wooden structures like furniture, cabinets, and housing frameworks.
  • The program also covers safety practices, tools and equipment used in carpentry, and proper wood finishing techniques.
  • Completing the carpentry course in TESDA can lead to job opportunities in the construction industry and the chance to become a certified carpenter.

Frequently Asked Questions

Welcome to our FAQ section where we answer commonly asked questions about carpentry in TESDA. Here, you’ll find information about carpentry programs, skill development, and other aspects related to TESDA’s carpentry courses.

1. How long does it take to complete a carpentry program in TESDA?

Completion time for a carpentry program in TESDA depends on the specific course and level of certification. Generally, TESDA offers short-term certificate courses that can be completed in a matter of weeks or months. However, if you aim for a higher level of certification, such as the National Certificate Level II, it may take longer, usually around six months to a year. The duration of the program also depends on your learning pace and commitment.

It’s important to note that TESDA’s carpentry programs focus on providing practical skills training, giving students the necessary knowledge to succeed in the industry. The programs are designed to equip individuals with essential carpentry skills in a relatively short period of time, enabling them to quickly enter the workforce or start their own carpentry business.

2. What are the career opportunities in carpentry after completing a TESDA program?

Completing a carpentry program in TESDA opens up various career opportunities in the field of construction and woodworking. With the skills acquired, you can pursue a career as a carpenter in construction companies, furniture manufacturing firms, or even become a self-employed carpenter. Additionally, you may find employment in home improvement stores, interior design firms, or companies specializing in custom woodworking.

Moreover, if you wish to enhance your skills further, you can pursue advanced training or enroll in additional TESDA courses to specialize in a specific area, such as furniture making or cabinetry. This can broaden your career prospects and offer opportunities for growth and specialization within the carpentry industry.

3. Are there age requirements to enroll in a carpentry program at TESDA?

No, there are typically no age requirements to enroll in a carpentry program at TESDA. TESDA welcomes individuals of different ages who are interested in learning and developing carpentry skills. Whether you are a young student looking for a vocational course or an adult seeking a career change or acquiring new skills, you can apply for a carpentry program at TESDA.

TESDA’s inclusive approach ensures that anyone with a passion for carpentry can access quality training and education opportunities, regardless of age or background. The programs are designed to cater to the diverse needs of individuals who aspire to embark on a career in carpentry or expand their existing skill set in the field.

4. Can I take a carpentry program in TESDA even if I have no prior experience?

Yes, you can definitely take a carpentry program in TESDA even if you have no prior experience. TESDA offers programs that cater to individuals at different skill levels, including beginners. These programs provide step-by-step instruction and hands-on training to help you build a solid foundation in carpentry.

Whether you’re completely new to carpentry or have some basic knowledge, TESDA’s carpentry programs are structured to meet your needs. The courses start with the fundamentals, ensuring that even beginners can grasp the concepts and techniques required in carpentry. With hands-on practice and guidance from experienced instructors, you can develop the necessary skills and confidence to pursue a career in carpentry.

5. How do I enroll in a carpentry program at TESDA?

To enroll in a carpentry program at TESDA, you can visit the nearest TESDA regional or provincial office. They will provide you with the necessary information and guide you through the enrollment process. You may be required to bring certain documents, such as a valid ID, proof of educational attainment, and other supporting documents specified by TESDA.

Additionally, TESDA also collaborates with various technical vocational institutions, training centers, and accredited assessment centers that offer carpentry programs. You can inquire directly at these institutions to learn more about their enrollment requirements and procedures. It’s recommended to contact or visit the specific institution you’re interested in to get accurate and up-to-date information about their carpentry programs.

what is carpentry in tesda? 2

Summary

So, to sum it up, carpentry in TESDA is all about learning how to build things with wood. It’s a practical skill that can lead to many job opportunities. TESDA offers carpentry training to help people learn the necessary skills and techniques. With carpentry skills, you can work on construction sites, create furniture, or even start your own carpentry business. It’s a hands-on skill that allows you to bring your ideas to life using wood. So if you enjoy building things and working with your hands, carpentry in TESDA could be a great career path for you.

29 Sep 06:27

How Wide Should A Woodworking Bench Be?

by Tom Seevers

Are you a budding woodworker wondering how wide your woodworking bench should be? Well, you’re in the right place! Whether you’re building a bench from scratch or buying one, getting the width just right is essential for a comfortable and functional workspace. In this article, we’ll delve into the factors that determine the ideal width for a woodworking bench.

When it comes to woodworking benches, one size definitely does not fit all. The width of your bench primarily depends on the type of woodworking projects you’ll be undertaking. If you mostly work on smaller projects like jewelry boxes or model making, a narrower bench might be more suitable. On the other hand, if you’re tackling larger pieces like cabinets or tables, a wider bench can provide the stability and surface area you need.

But it’s not just about the size of your projects. Consider your own body size and working style as well. Are you taller or shorter? Do you prefer to work with your materials spread out or in a more compact space? These factors should also play a role in determining the width of your woodworking bench. So, let’s explore various bench widths and find the perfect fit for your woodworking adventures!

When determining the width of a woodworking bench, there are a few factors to consider. Firstly, think about the types of projects you’ll be working on. A general rule of thumb is to make it at least as wide as your arms can comfortably reach. Additionally, take into account the available space in your workshop and the size of your tools. Ultimately, the width of your woodworking bench should be tailored to your specific needs and preferences.

how wide should a woodworking bench be?

How Wide Should a Woodworking Bench Be?

Woodworking is a popular hobby that requires the use of a sturdy and spacious workbench. When it comes to choosing the width of a woodworking bench, there are several factors to consider. The width of the bench affects the amount of work surface available, the types of projects that can be completed, and the comfort of the woodworker. In this article, we will delve into the details of determining the ideal width for a woodworking bench and provide valuable insights to help you make an informed decision.

The Importance of Choosing the Right Width

A woodworking bench is the foundation of any woodworking shop. It is where projects are built, assembled, and refined. The width of the bench plays a crucial role in the overall functionality and efficiency of the workspace.

Factors to Consider When Determining Bench Width

1. Available Space:

The amount of space available in your workshop is an important consideration when determining the width of your woodworking bench. Measure the dimensions of your workspace and consider other equipment and tools that will be housed in the area.

2. Types of Projects:

The types of projects you plan to undertake will also impact the ideal width of your woodworking bench. If you primarily work on smaller projects such as boxes or small furniture pieces, a narrower bench may suffice. However, if you frequently work on larger items such as cabinets or tables, a wider bench will provide more stability and a larger work surface.

3. Ergonomics and Comfort:

Consider your own height, reach, and comfort when choosing the width of your woodworking bench. A bench that is too narrow may force you to lean over and strain your back, while a bench that is too wide may cause discomfort by requiring excessive reaching or stretching. Finding a balance that allows you to work comfortably for extended periods is key.

Determining the Ideal Width for Your Bench

1. Assess Your Needs and Available Space

Before settling on a specific width, it is essential to assess your woodworking needs and the space available in your workshop. Take into account the size of the projects you typically work on and ensure that the bench will comfortably accommodate your workpieces while leaving enough space for maneuverability.

2. Consider the Rule of Thumb

A commonly recommended guideline is to choose a bench width that is equal to your own height. This rule of thumb provides a good starting point, as it ensures that the bench is ergonomically suited to your stature.

3. Experiment and Customize

The ideal width for a woodworking bench can vary depending on personal preferences and working styles. It is worth experimenting with different widths and customizing your bench to fit your specific needs. Some woodworkers find that a wider bench offers more versatility and space, while others prefer narrower benches for their efficiency and ease of movement.

Choosing the Right Width: Tips and Considerations

1. Adjustability:

Consider incorporating adjustability features into your woodworking bench design. This allows for customization and flexibility, as the width can be modified to suit different projects and tasks.

2. Additional Workspace:

If space allows, consider adding a secondary workbench or an extension to your primary bench. This provides additional workspace for larger projects or when more surface area is required.

3. Storage and Organization:

When determining the width of your woodworking bench, take into account your storage and organizational needs. Leave space for tool storage, shelves, and other accessories that will enhance the functionality of your workspace.

Overall, choosing the right width for your woodworking bench requires careful consideration of available space, project requirements, and personal comfort. By following these guidelines and tailoring the width to your specific needs, you can create a functional and comfortable workspace that enhances your woodworking experience. Experiment, customize, and enjoy the process of setting up your ideal woodworking bench. Happy woodworking!

Key Takeaways: How Wide Should a Woodworking Bench Be?

1. A woodworking bench should typically be around 24 to 36 inches wide, providing enough space to work comfortably.
2. The width can depend on your specific needs and the types of projects you’ll be working on.
3. A wider bench may be necessary for larger projects or if you frequently work with wide boards.
4. Consider the available space in your workshop or garage before determining the width of your bench.
5. Finally, make sure the bench is sturdy and well-built to handle the weight and pressure of your woodworking projects.

Frequently Asked Questions

Welcome to our FAQ section where we provide answers to some commonly asked questions about woodworking bench width. Whether you’re a beginner or a seasoned woodworker, finding the right width for your bench can make a big difference in your projects. Read on to learn more!

1. What factors should I consider when determining the width of a woodworking bench?

When determining the width of a woodworking bench, several factors come into play. Firstly, consider the space you have available in your workshop. You want to ensure that the bench is wide enough to accommodate your projects but doesn’t take up unnecessary space. Secondly, think about the types of projects you typically work on. If you primarily work on smaller items, a narrower bench may suffice. However, if you often work on larger pieces or need extra workspace, a wider bench would be beneficial.

Additionally, consider your own comfort and working style. If you prefer having more room to spread out your tools and materials, a wider bench will be more comfortable to work on. However, keep in mind that a wider bench might require more effort to reach across, so it’s important to find a balance that works for you.

2. What is the recommended width for a standard woodworking bench?

While the perfect width for a woodworking bench can vary depending on individual preferences and needs, a standard width range is typically between 20 inches (50 cm) and 30 inches (75 cm). This width provides enough space for most woodworking tasks and allows for comfortable maneuverability around the bench. However, it’s important to remember that these dimensions are not set in stone, and you can adjust them based on your specific requirements.

If you often tackle larger projects or work with wide boards, you may want to opt for a wider bench, such as 36 inches (90 cm) or more. On the other hand, if you have limited space or primarily work on smaller projects, you can consider a narrower bench, around 14 inches (35 cm) to 20 inches (50 cm). Ultimately, finding the right width involves considering your needs, available space, and personal preferences.

3. Should the width of my woodworking bench be the same height as my workbench?

While it’s not necessary for the width of your woodworking bench to be the same as its height, there are some factors to consider. The height of your workbench should be determined by your personal comfort and the type of work you’ll be doing. If you primarily work with hand tools, a lower workbench might be more suitable, while power tool use may require a higher workbench.

On the other hand, the width of your bench is more influenced by the size and nature of your projects. It should provide enough space to work comfortably and accommodate the materials you typically use. So while the height and width are related, they serve different purposes and can be determined independently based on your specific needs.

4. How does the width of a woodworking bench affect stability?

The width of a woodworking bench can indeed affect its stability. A wider bench tends to be more stable due to the increased surface area in contact with the floor. This added stability is especially beneficial when working on larger projects or when applying force during certain woodworking tasks. However, it’s important to strike a balance and avoid making the bench excessively wide, as it may hinder your ability to reach across it comfortably.

While width plays a role in stability, it’s not the sole factor. The construction and design of the bench, including the type of joinery used, the quality of materials, and the overall rigidity, also contribute to its stability. Make sure to consider all these aspects when building or purchasing a woodworking bench.

5. Are there any specific guidelines for the width of a hand tool workbench?

When it comes to a hand tool workbench, there are some general guidelines to consider. Since hand tool work often requires precision and control, a narrower bench is typically preferred. A width ranging from 12 inches (30 cm) to 18 inches (45 cm) can provide enough space to comfortably maneuver hand tools and allow for accurate work.

This narrower width allows for better visibility over the workpiece and provides easier access to the material being worked on. However, keep in mind that these are general guidelines and can be adjusted based on your personal preferences and the specific hand tool tasks you’ll be performing.

how wide should a woodworking bench be? 2

Summary

So, to sum it up, the width of a woodworking bench depends on a few factors. First, think about the kind of projects you’ll be working on. If you’re making small items like jewelry boxes or frames, a narrower bench around 18 to 24 inches should suffice. But, if you plan on tackling larger projects like cabinets or tables, a wider bench between 30 to 36 inches would be more suitable. Ultimately, it’s about finding a width that allows you to work comfortably and efficiently.

The second factor to consider is your workspace and available area. If you have a limited space, you might need to opt for a bench that is narrower. However, if you have a spacious workshop, you can go for a wider bench that provides you with more working area. Remember, it’s important to have enough room to move around comfortably and accommodate your tools and materials.

Overall, the width of your woodworking bench should be determined by the size of your projects and the space you have available. It’s all about finding the right balance that allows you to work comfortably and enjoy the process of woodworking. So, go ahead, choose the width that suits your needs, and get started on your next woodworking masterpiece!

29 Sep 06:27

What Is The Uses Of Water In Carpentry?

by Tom Seevers

Have you ever wondered about the unexpected ways that water can be used in carpentry? Well, you’re in for a treat! In this article, we’ll explore the uses of water in carpentry and how it can make a big difference in woodworking projects. So, let’s dive right in!

When it comes to carpentry, water is more than just a refreshing drink. It can actually be a handy tool. From softening wood fibers to preventing splits and cracks, water has a wide range of applications in the world of woodworking. So, if you’re curious to know how water can help you achieve those perfect finishes and durable structures, keep reading!

Water plays a crucial role in shaping wood and making it more malleable for various carpentry tasks. Whether you’re bending wood, reducing friction during sanding, or improving the absorption of wood stains and finishes, water is a versatile ally that every carpenter should have in their toolbox. So, let’s get ready to uncover the fascinating world of water’s role in carpentry!

Water plays several important roles in carpentry. Firstly, it can be used to clean tools and surfaces, helping to maintain their longevity. It is also used for wetting wood, making it easier to shape and mold. Additionally, water is commonly used in conjunction with adhesives and finishes to enhance their performance. Lastly, water is crucial for maintaining a stable humidity level in woodworking environments, preventing wood from warping or shrinking. Overall, water is a versatile and essential resource in carpentry.

what is the uses of water in carpentry?

Exploring the Uses of Water in Carpentry

Water, a commonly available resource, plays a crucial role in the field of carpentry. From enhancing the quality of wood to improving the efficiency of tools, water offers a wide range of benefits to carpenters. In this article, we will delve into the various uses of water in carpentry and discover how it can contribute to achieving exceptional results in woodworking projects. So, let’s explore the fascinating ways carpenters utilize water in their craft.

Creating Moisture Balance in Wood

Wood is a natural material that is prone to expansion and contraction due to changes in temperature and humidity. Carpenter’s often face the challenge of working with wood that is either too dry or too wet. This is where water comes to the rescue. By applying water strategically, carpenters can manipulate the moisture content of the wood to achieve an optimal balance. When working with dry wood, applying water can increase its moisture content and make it more pliable and easier to shape. Similarly, when working with wet wood, drying it out using techniques like air drying or kiln drying can help make it more stable and suitable for carpentry projects.

Beyond moisture balance, water also facilitates the staining, painting, and finishing processes. Before applying any paint or stain, carpenters often use water-based sealers or primers as a preparatory step. These products help the paint or stain adhere better to the wood surface, resulting in a more even and long-lasting finish. Water-based finishes are also widely used in carpentry due to their low toxicity and environmental friendliness.

In conclusion, water not only helps achieve moisture balance in wood but also contributes to the overall aesthetics and longevity of carpentry projects.

Tool Maintenance and Cooling

Carpenters rely on a wide range of tools, from saws and drills to routers and sanders, to bring their creative visions to life. These tools generate heat during operation, which, if not managed properly, can damage the tool or compromise its efficiency. Water comes to the rescue by providing a cooling mechanism for these power tools. By using water-based coolants or setting up water cooling systems, carpenters can effectively regulate the temperature and prevent the tools from overheating.

An additional benefit of water in carpentry tools is the lubricating effect it offers. When cutting, drilling, or sanding wood, friction can generate a lot of heat and cause the tool to wear down quickly. By using water as a lubricant, carpenters can reduce friction, extend the tool’s lifespan, and achieve smoother and more precise cuts. They can use a spray bottle or dipping the tool in water to maintain a constant flow of water during the woodworking process.

To summarize, water plays a vital role in tool maintenance and cooling, ensuring the longevity and efficiency of carpentry tools. It also contributes to achieving better results by reducing friction and heat generation during woodworking tasks.

Adding Structural Support and Stability

In carpentry, there are instances where water is used to add structural support and stability to wooden structures. As wood absorbs moisture, it tends to swell and become denser. This property is sometimes utilized to reinforce joints and connections in woodworking projects. For example, when fitting a tenon into a mortise, a carpenter may wet the tenon slightly to make it expand and create a tighter fit with the mortise. This technique, known as “swelling joints,” strengthens the connection and provides added stability to the overall structure.

Additionally, water is used in the process of steam bending wood. By subjecting a piece of wood to steam, it becomes more pliable and can be bent into complex shapes without breaking. This technique is commonly used in the creation of curved furniture pieces, architectural elements, and musical instruments. The steam softens the wood fibers, making them more flexible and allowing carpenters to achieve unique and intricate designs that would be challenging to replicate using traditional woodworking techniques.

To conclude, water can be employed to add structural support and enable the creation of curved wooden elements, expanding the possibilities in carpentry projects.

Benefits of Using Water in Carpentry

Utilizing water in the carpentry process offers several benefits:

  • Improved workability of wood by modifying its moisture content
  • Better adherence and durability of finishes
  • Efficient cooling, reducing the risk of tool damage and enhancing precision
  • Enhanced stability and strength through the technique of swelling joints
  • Creative possibilities through steam bending and shaping wood

How to Safely Use Water in Carpentry?

While water has numerous advantages in carpentry, it is important to use it judiciously and safely. Here are some tips to ensure you make the most of water in your woodworking projects:

1. Control Moisture Levels

Ensure that you have a good understanding of the moisture content requirements for your woodworking project. Use water strategically to achieve the desired moisture balance in the wood. Monitor and control humidity levels in your workshop to prevent damage caused by excessive moisture.

2. Use Proper Protection

When working with water and finishes, wear appropriate protective gear such as gloves, goggles, and a respirator. This will safeguard your health and prevent any potential adverse effects caused by exposure to chemicals present in water-based products.

3. Proper Tool Maintenance

Clean and dry your tools thoroughly to prevent rusting and damage. Use appropriate lubrication techniques when incorporating water into the woodworking process to ensure your tools function optimally.

4. Educate Yourself

Stay informed about the different techniques and applications of water in carpentry. This will help you make better decisions and achieve superior results in your woodworking projects.

5. Use Distilled Water

Consider using distilled water in your woodworking processes to avoid any impurities or chemicals present in tap water that may negatively affect the wood or finishes.

The Future of Water Usage in Carpentry

As the field of carpentry continues to evolve, so does the utilization of water. With advancements in technology and sustainability practices, carpenters are exploring innovative ways to maximize the benefits of water. From water-based adhesives and finishes to waterjet cutting techniques, the future promises exciting opportunities for harnessing the power of water in carpentry.

Incorporating Water: A Carpenter’s Best Ally

Water has proven to be an invaluable resource in the world of carpentry. Its ability to enhance the workability of wood, provide cooling for tools, and offer structural support opens up a world of possibilities for carpenters. By understanding the various uses of water and employing it skilfully, carpenters can elevate their craft and achieve exceptional results in their woodworking projects. So, embrace water as a carpenter’s best ally and unlock the full potential of your creative vision!

Key Takeaways: What is the Use of Water in Carpentry?

  • Water is essential for mixing wood glue, which is commonly used in carpentry to join pieces of wood together.
  • Water can be used to dilute paint or stains, making them easier to apply and providing a smooth finish to wooden surfaces.
  • Water can be used to moisten wooden boards, making them more pliable and easier to work with when shaping or bending.
  • Water can be used to clean tools and equipment after carpentry work, helping to remove sawdust and debris.
  • Water can be used to control the moisture content of wood, preventing it from warping, shrinking, or expanding.

Frequently Asked Questions

Welcome to our FAQ section on the uses of water in carpentry! Below, you’ll find some common questions about the role of water in this craft, along with detailed answers that aim to clarify any doubts you may have. Read on to learn more!

1. How is water used in carpentry?

Water plays several important roles in carpentry. One of the primary uses is for wood conditioning and swelling. When wood is exposed to water, it absorbs the moisture, causing it to expand. This can be beneficial in certain carpentry projects where a tight fit is required. By soaking or spraying wood with water, carpenters can slightly increase its size, making it easier to fit joints together.

Water is also used to dilute and apply finishes and adhesives. Many carpentry projects require the use of stains, paints, and varnishes, and water is often used to thin these substances for easier application. Additionally, water-based adhesives are commonly used in carpentry to bond materials together. The water in the adhesive activates the bonding agents, allowing for a strong and durable connection.

2. Can water damage wood in carpentry?

While water can be useful in certain carpentry applications, it’s crucial to note that prolonged exposure to water can indeed damage wood. When wood absorbs too much moisture, it can lead to swelling, warping, or even rotting. For this reason, it’s important to use water mindfully and protect wood from excessive exposure.

Carpenters must take precautions to prevent water damage, such as properly sealing and protecting wood surfaces. This can be done by applying waterproof finishes or using protective coatings like varnish or paint. It’s also important to store wood in a dry environment and avoid leaving it exposed to standing water or extreme humidity for extended periods.

3. Are there any benefits to using damp wood in carpentry?

Yes, there can be benefits to using damp wood in certain carpentry applications. Damp wood is more pliable and easier to work with, especially for bending or shaping. The moisture in the wood makes it more flexible, allowing carpenters to achieve desired curves or bends that might otherwise be difficult to achieve with dry wood.

However, it’s important to note that damp wood will eventually dry out, which can cause it to shrink and potentially compromise the structural integrity of the carpentry project. Therefore, it’s essential to factor in the drying and shrinking process when working with damp wood in carpentry.

4. Why is water used when cutting wood in carpentry?

Water is commonly used when cutting certain types of wood in carpentry to reduce heat and friction. When sawing or cutting through wood, especially hardwoods, the friction between the blade and the wood can generate heat, which can dull the blade or even cause the wood to burn. By applying water to the cutting area, carpenters can keep the temperature down and prevent damage to both the wood and the cutting tool.

Water also helps to clear away sawdust and debris, allowing for better visibility of the cutting line and reducing the chance of the blade getting stuck. It’s important to note that water should only be used with certain saws or cutting tools that are specifically designed for wet cutting.

5. How does water help with wood glue in carpentry?

Water plays a vital role in the performance of wood glue in carpentry. Most wood glues, such as white glue or carpenter’s glue, rely on moisture to activate the bonding process. When applying wood glue, the moisture in the glue interacts with the wood surface and starts a chemical reaction that forms a strong bond as the glue cures.

By applying a thin layer of water to the wood surface before applying the glue, carpenters ensure that the moisture level is sufficient for the glue to work effectively. This step helps to achieve a secure and durable bond between the wood pieces being joined, ensuring the longevity and strength of the carpentry project.

what is the uses of water in carpentry? 2

Summary

Water plays an important role in carpentry because it helps with several tasks. For example, water helps to soften wood and make it easier to work with. It can also be used to clean tools and surfaces, removing dirt and debris. Additionally, water can be used for mixing adhesives and paints, helping to create a smooth and consistent mixture. Overall, water is a versatile and valuable tool in carpentry that aids in various aspects of the craft.

In conclusion, water is a handy resource in carpentry. It softens wood, cleans tools, and assists in mixing adhesives and paints. Its multiple uses make it an essential part of the carpentry process.

29 Sep 06:27

How Old Is Wood Turning?

by Tom Seevers

Welcome to a fascinating journey through the history of woodturning! Have you ever wondered how old woodturning is? Well, you’re in the right place to find out!

Woodturning, my friend, has a long and rich history that dates back thousands of years. This ancient craft involves using a lathe to shape wood into beautiful and functional objects. So, let’s dive into the story of how woodturning came to be!

First things first, let’s travel back in time to ancient Egypt and Mesopotamia, where evidence of early woodturning has been discovered. Imagine skilled artisans using primitive tools to turn wood on a horizontal lathe. It’s truly awe-inspiring to think about the creativity and craftsmanship that existed in those ancient times!

So, are you ready to explore the captivating history of woodturning? Let’s embark on this exciting journey together and delve into the origins and development of this incredible craft. From ancient civilizations to modern techniques, we’ll uncover the secrets of how woodturning has evolved over the centuries. So, buckle up and get ready for a thrilling ride through time!

Wood turning is an ancient craft that dates back thousands of years. Its exact origins are unclear, but evidence of wood turning techniques can be found in ancient Egyptian and Roman artifacts. This traditional woodworking method involves shaping wood using a lathe. Wood turning has evolved over time, with different cultures and generations adding their own unique styles and techniques. Today, it remains a popular hobby and art form for woodworking enthusiasts around the world.

how old is wood turning?

How Old is Wood Turning? Unveiling the Ancient Art of Shaping Wood

Wood turning, a traditional craft that has stood the test of time, dates back thousands of years and continues to captivate artisans and enthusiasts alike. This article delves deep into the origins and evolution of wood turning, shedding light on its rich history and importance in various cultures. From ancient Egypt to modern-day workshops, let’s embark on a journey to discover the age-old art of shaping wood.

Ancient Origins: Tracing Wood Turning Back to its Roots

Wood turning can be traced back to ancient civilizations where it played a vital role in crafting functional and decorative objects. The earliest evidence of wood turning dates to ancient Egypt, around 1300 BC, where wooden vessels and furniture were skillfully created using primitive lathes. The ancient Egyptians mastered the art of wood turning, showcasing their craftsmanship through intricate designs and precise forms.

As the art of wood turning spread across different civilizations, each culture added its unique touch. The Greeks, for instance, elevated wood turning to an art form, incorporating elaborate carvings and intricate details in their creations. The Romans, on the other hand, utilized wood turning techniques to produce utilitarian items such as bowls, platters, and even furniture.

During the Middle Ages, wood turning became an essential skill amongst European craftsmen. It found its place in the construction of church interiors, with intricately turned wood elements adorning the ceilings and panels. The Renaissance period further refined wood turning techniques, introducing more complex designs and incorporating ornate patterns.

The Renaissance of Wood Turning: From Hand-Powered Lathes to Modern Innovations

The Renaissance witnessed a resurgence of interest in wood turning, with the development of better lathes and tools. The introduction of the pole lathe, a foot-powered device, revolutionized the craft, enabling turners to work with greater precision and control. This period also saw the emergence of specialized wood turners who focused solely on mastering this skill.

Fast forward to the Industrial Revolution, and wood turning underwent another significant transformation. Steam-powered lathes replaced manual labor, allowing for mass production of turned items like chair legs, table legs, and stair railings. This marked a shift towards more standardized designs and practices, making wood turning accessible to a broader audience.

In recent times, technological advancements have further propelled the art of wood turning. Electric lathes equipped with variable speed control and enhanced cutting tools have made the process more efficient and precise. Additionally, modern wood turners experiment with a wide range of materials, from traditional hardwoods to exotic species, pushing the boundaries of creativity and innovation.

The Multifaceted Nature of Wood Turning: Functional and Artistic Expressions

Wood turning is a versatile craft that encompasses both functional and artistic expressions. On one hand, turned wooden items serve practical purposes, such as bowls, vases, and furniture. Wood turning’s ability to shape wood into intricate and ergonomic forms makes it an ideal technique to create items with both beauty and utility.

On the other hand, wood turning transcends functionality and ventures into the realm of artistic expression. Many contemporary wood turners create sculptural objects that push the boundaries of traditional forms. By exploring innovative design concepts and incorporating various embellishment techniques like carving, piercing, and coloring, artisans infuse their pieces with a unique artistic flair.

Whether it’s a magnificent turned bowl displayed in a gallery or a finely crafted table leg supporting a family dining table, wood turning continues to capture our imagination and showcase the timeless beauty of wood. The ancient art form has evolved through the ages, adapting to changing times and embracing technological advancements while maintaining its core essence – the sheer joy of shaping wood.

Wood Turning Techniques: Mastering the Craft with Skill and Precision

The Tools of the Trade: Essential Equipment for Wood Turning

Wood turning is a craft that requires specific tools to shape and refine the wood. Let’s explore the essential equipment every wood turner should have in their arsenal:

1. Lathe: The central piece of equipment, a lathe is used to hold and rotate the wood while the artisan shapes it with cutting tools. Modern lathes come in various sizes and types, with features like variable speed control and digital displays for precise control and ease of use.

2. Chisels and Gouges: These cutting tools are used to shape the wood and create different profiles and designs. The chisels and gouges come in various sizes and shapes, each serving a specific purpose in the wood turning process.

3. Parting Tools: Parting tools are used to create deep grooves and separate the turned piece from the lathe. They are available in different widths to accommodate various project sizes.

4. Calipers: Calipers help the wood turner measure the thickness and diameter of the wood accurately. They ensure consistency and symmetry in the turned piece.

5. Sandpaper and Finishing Supplies: Sandpaper is used to smoothen the wood surface and remove any imperfections. Finishing supplies like lacquer, wax, or oil are applied to protect and enhance the final product.

Spindle Turning vs. Bowl Turning: Exploring Different Wood Turning Techniques

Wood turning encompasses various techniques, each suited for specific projects and objectives. Let’s take a closer look at two fundamental techniques: spindle turning and bowl turning.

1. Spindle Turning: Spindle turning involves shaping long, slender pieces of wood, such as chair legs or table legs. It requires precision and careful measurement to achieve consistent dimensions. Chisels and gouges are the primary tools used in spindle turning to remove wood and create intricate details.

2. Bowl Turning: Bowl turning, as the name suggests, revolves around the creation of bowls and other hollow vessels. It involves mounting a wooden blank, usually in the shape of a square or a circle, on the lathe and hollowing it out using specialized turning tools. The process requires careful consideration of wood grain and orientation to achieve structural integrity and aesthetic appeal.

Each wood turning technique requires practice and skill development to master. Aspiring wood turners can start with simpler projects and gradually progress to more complex forms, experimenting with different cuts, designs, and finishes along the way.

Benefits of Wood Turning: Beyond the Craftmanship

The art of wood turning extends beyond the sheer joy of creating remarkable pieces. Here are some benefits and advantages associated with wood turning:

1. Creative Outlet: Wood turning provides a creative outlet for self-expression, allowing artisans to transform a raw piece of wood into a functional or aesthetic masterpiece.

2. Therapeutic and Relaxing: The process of turning wood can be meditative and relaxing, providing a calming effect and serving as a stress-relieving activity.

3. Sustainable Craft: Wood turning promotes sustainability by utilizing wood from renewable sources, minimizing waste, and creating long-lasting, eco-friendly products.

4. Functional and Decorative Items: Wood turned objects serve a practical purpose while adding beauty and elegance to any space. From bowls and platters to candle holders and jewelry, the possibilities are endless.

5. Community and Collaboration: Wood turning fosters a sense of community amongst artisans, providing opportunities for collaboration, sharing knowledge, and appreciating each other’s work.

Wood turning is a craft that combines tradition, skill, and creativity. It connects us to our roots while allowing us to explore new possibilities. Whether you choose to embark on this journey as a hobbyist or a professional wood turner, the art of shaping wood is a fulfilling and enriching endeavor.

Preserving the Art of Wood Turning: Tips for Aspiring Wood Turners

Invest in Quality Tools and Equipment

To begin your wood turning journey on the right foot, invest in quality tools and equipment. While it’s tempting to opt for the most budget-friendly option, remember that the tools you choose will directly impact the quality of your work. Look for reputable brands that offer durability, precision, and ergonomic designs.

Start with Small Projects

As a beginner, it’s essential to start with small and relatively simple projects. This will allow you to grasp the basic techniques and develop your skills progressively. Turning smaller items like pens or bottle stoppers will help you understand the nuances of wood turning and gain confidence in handling the tools.

Join a Wood Turning Club or Community

One of the best ways to learn and improve as a wood turner is by joining a local wood turning club or community. These gatherings provide an opportunity to connect with experienced turners, attend workshops, and share tips and tricks. Learning from others and being a part of a supportive community will fast-track your progress as a wood turner.

Experiment with Different Wood Species

Wood turning opens the door to a fascinating world of wood species, each with its unique characteristics and beauty. Experiment with different types of wood to understand their properties, figure out which species you enjoy working with the most, and explore new design possibilities. Remember to consider the hardness, grain pattern, and color when selecting wood for your projects.

Develop a Design Philosophy

While technical skills are essential, it’s equally important to develop a design philosophy. Think about the style and aesthetic you want to achieve in your wood turned pieces. Consider elements like proportion, balance, and harmony to create visually appealing and cohesive designs. Developing your own design language will set your work apart and establish your signature style.

Embrace Continuous Learning

Wood turning is a craft that offers endless opportunities for growth and learning. Stay curious and seek knowledge through books, online tutorials, and workshops. Explore new techniques, experiment with different finishes, and never shy away from trying something outside your comfort zone. Embracing continuous learning will keep your passion for wood turning alive and push you to new creative heights.

Share Your Knowledge and Inspire Others

As your skills progress, don’t hesitate to share your knowledge with others. Teaching others not only allows for the exchange of ideas but also reinforces your own understanding of the craft. Inspire others to take up wood turning and contribute to the preservation of this ancient art form for future generations.

In conclusion, wood turning is an art form that connects us to our ancient roots while allowing for contemporary expressions of creativity. By understanding the history, mastering the techniques, and embracing the journey of continuous learning, we can keep the flame of wood turning alive for generations to come. So, pick up your chisels, set up your lathe, and let the beauty of wood unfold at your fingertips.

Key Takeaways: How Old is Wood Turning?

  • Wood turning is an ancient craft with a rich history.
  • Wood turning can be traced back to ancient Egypt and Mesopotamia.
  • It was popularized during the Renaissance period in Europe.
  • The lathe, a key tool in wood turning, has been around for thousands of years.
  • Wood turning continues to be a popular craft today, enjoyed by people of all ages.

Frequently Asked Questions

Welcome to our FAQ section where we answer common questions about the age of wood turning. Whether you’re new to wood turning or simply curious, we’ve got you covered!

1. How long has wood turning been around?

Wood turning is an ancient craft that has been around for thousands of years. Historians believe that it dates back to ancient Egypt, as early as 1300 BCE. From there, wood turning spread to other civilizations, such as the Greeks and Romans, who used the technique to create intricate and decorative items.

Throughout history, wood turning has evolved and adapted to different cultures and styles, but the core technique of shaping wood using a lathe has remained relatively unchanged. So, to answer the question succinctly, wood turning is indeed an ancient art form with a rich history.

2. How has wood turning evolved over time?

Wood turning has evolved significantly over time, thanks to advancements in technology and the availability of new tools and materials. In its early days, wood turning was primarily done by hand using simple handheld tools.

However, with the advent of more sophisticated machinery, such as the power lathe, wood turning became more accessible and efficient. Modern equipment has made it easier to achieve precise shapes and intricate details, pushing the boundaries of what can be created through wood turning.

3. What are some popular wood turning techniques?

Wood turning encompasses a wide range of techniques, each with its own unique characteristics and applications. Some popular techniques include spindle turning, bowl turning, and hollow form turning.

Spindle turning involves creating cylindrical shapes, such as table legs or chair spindles. Bowl turning focuses on creating bowls of various sizes and shapes, often emphasizing the beauty of the wood’s grain. Hollow form turning, on the other hand, involves creating hollow vessels, like vases or urns, with thin walls and intricate designs.

4. Is wood turning still practiced today?

Absolutely! Wood turning remains a vibrant and thriving craft in contemporary times. While it may have evolved and adapted to modern tools and techniques, the art of turning wood still captivates artisans and enthusiasts alike.

Wood turning is practiced by a diverse community of individuals, ranging from professional wood turners to hobbyists exploring their creativity. It continues to be valued for its ability to transform raw wood into functional and artistic pieces.

5. Can anyone learn wood turning?

Yes, anyone with an interest in wood turning can learn this craft! While it does require practice and patience, wood turning can be enjoyed by people of all ages and skill levels. Whether you’re a beginner or an experienced woodworker, there are resources available, such as classes, tutorials, and online communities, where you can learn and improve your skills.

Wood turning offers a rewarding and creative outlet, allowing individuals to unleash their imagination and create unique wooden objects. So, if you’re considering picking up wood turning, don’t hesitate to dive in and explore this fascinating craft!

how old is wood turning? 2

Inside A Woodturners Woodshop – Old vs. New

Summary

So, how old is wood turning? Well, wood turning has been around for thousands of years! It dates back to ancient Egypt and has evolved over time. Today, it is a popular craft and art form enjoyed by many people around the world. Wood turning involves shaping wood using a lathe and various cutting tools. It allows for the creation of beautiful and functional objects like bowls, vases, and even furniture. Whether you’re a beginner or an expert, wood turning offers endless possibilities for creativity and craftsmanship. So why not give it a try and see what you can create?

29 Sep 06:27

Can I Use Dewalt Battery On Milwaukee?

by Tom Seevers

Looking to use a Dewalt battery on your Milwaukee tools? Curious if it’s a match made in tool heaven? Well, you’ve come to the right place! In this article, we’ll delve into the exciting world of power tool compatibility and find out if you can mix and match these popular brands. So, let’s dive in and uncover the answer to the burning question: “Can I use Dewalt battery on Milwaukee?”

If you’ve ever found yourself standing in the tool aisle, torn between Dewalt and Milwaukee, wondering if you can interchange their batteries, you’re not alone. Many tool enthusiasts have wondered about this compatibility quagmire. Fear not! We’ll explore whether cross-brand battery usage is a possibility, and you might be surprised by what we uncover.

Now, before we jump into the nitty-gritty details, let’s set the stage and give you a quick overview of Dewalt and Milwaukee. Both are renowned brands in the power tool industry. Dewalt offers a wide range of high-quality power tools and accessories, while Milwaukee focuses on creating durable and innovative tools for professionals and DIY enthusiasts alike. With their reputation for excellence, it’s no wonder people ask if their batteries can be interchanged. So, let’s find out!

Can You Use a Dewalt Battery on a Milwaukee Tool?

While it may be tempting to mix and match batteries, it’s important to note that Dewalt and Milwaukee tools have different battery systems. Dewalt batteries are designed specifically for Dewalt tools, and the same goes for Milwaukee batteries. Using a Dewalt battery on a Milwaukee tool could potentially damage both the battery and the tool. It’s best to stick with the recommended battery type for each tool to ensure optimal performance and avoid any potential issues.

can I use dewalt battery on milwaukee?

Can I Use Dewalt Battery on Milwaukee?: Exploring Compatibility and Performance

When it comes to power tools, having a reliable and compatible battery is essential. As a DIY enthusiast or professional tradesperson, you may find yourself wondering, “Can I use Dewalt battery on Milwaukee?” In this article, we delve into the world of power tool batteries to uncover the compatibility between Dewalt and Milwaukee brands. Whether you’re looking to upgrade your tools or simply want to know if you can interchange batteries, read on to find out everything you need to know.

The Dewalt Battery: A Closer Look

Dewalt is a renowned name in the power tool industry, known for its high-quality products and innovative designs. Dewalt batteries, particularly those from their 20V MAX series, have become popular among both professionals and DIYers. These lithium-ion batteries offer long-lasting power, quick charging times, and exceptional runtime. With their wide range of tools that run on these batteries, Dewalt has established a loyal customer base.

While Dewalt batteries are designed specifically for Dewalt tools, the question remains: can they be used on Milwaukee tools? Let’s explore the compatibility between these two brands and whether you can mix and match their batteries.

Compatibility Between Dewalt and Milwaukee Batteries

The short answer to the question of whether you can use Dewalt batteries on Milwaukee tools is no. Dewalt and Milwaukee use different battery platforms and technologies, which means their batteries are not compatible. Dewalt’s 20V MAX batteries have a different voltage rating and form factor compared to Milwaukee’s M18 batteries.

Attempting to use a Dewalt battery on a Milwaukee tool or vice versa can result in damage to the battery, tool, or both. It’s essential to use batteries specifically designed for the brand of tools you own to ensure optimal performance and safety. While it may be tempting to try cross-brand compatibility, it is not recommended.

If you do find yourself in a situation where you need to use a different brand’s battery temporarily, it may be possible with the use of adapter devices. However, these adapters are not widely available, and their compatibility and performance can vary.

The Importance of Using Compatible Batteries

Using compatible batteries is crucial for several reasons. Firstly, different brands use varying voltage ratings, so using a battery with the wrong voltage can damage the tool, battery, or both. Additionally, using an incompatible battery may result in reduced performance and run time. Power tools are designed to work optimally with the batteries they were designed for, so using a different brand’s battery may not provide the same power and efficiency.

Furthermore, using incompatible batteries can void warranties and may compromise safety. Power tools undergo rigorous testing and certification processes with the batteries they are designed to work with. Using a different brand’s battery can introduce risks, including overheating, short circuits, and potentially dangerous malfunctions. To ensure your safety and the longevity of your tools, it is essential to stick to using compatible batteries.

It’s worth noting that many power tool brands offer a range of tools that run on the same battery platform. If you already own a set of tools from a particular brand, it’s often more cost-effective to stick with that brand’s batteries and expand your collection of tools accordingly.

Can I Use Milwaukee Battery on Dewalt?: Examining Cross-Brand Compatibility

So, we’ve established that using a Dewalt battery on a Milwaukee tool is not recommended. But what about the opposite scenario? Can you use a Milwaukee battery on a Dewalt tool? Let’s dive into the world of cross-brand compatibility and see if it’s possible.

The Milwaukee Battery: A Versatile Power Source

Milwaukee is another well-known brand in the power tools industry, with a solid reputation for durability and performance. Like Dewalt, Milwaukee offers its own line of lithium-ion batteries, known as the M18 system. The M18 batteries are compatible with a wide range of Milwaukee power tools, providing consistent power and runtime.

While Milwaukee batteries are designed specifically for Milwaukee tools, the question remains: can they be used on Dewalt tools? Unfortunately, the answer is the same as before. Dewalt and Milwaukee use different battery platforms and technologies, making their batteries incompatible with each other.

It’s important to remember that mixing and matching batteries from different brands can lead to potential damage and reduced performance. While it may seem convenient to have interchangeable batteries, it’s best to stick to using batteries designed specifically for the brand of tools you own.

The Importance of Manufacturer Recommendations

When it comes to power tools and their batteries, it’s crucial to follow the manufacturer’s recommendations. Each brand designs its tools and batteries to work together seamlessly, ensuring optimal performance, safety, and longevity. Mixing and matching batteries from different brands can lead to compatibility issues, reduced performance, and even safety hazards.

Investing in reliable, high-quality batteries is just as important as investing in the tools themselves. Stick to using batteries specifically designed for your tools, whether they are Dewalt, Milwaukee, or any other brand. Doing so will ensure that you get the most out of your tools and enjoy a safe and efficient working experience.

Conclusion

When it comes to using power tool batteries, compatibility is key. While it may be tempting to mix and match batteries from different brands, it is not recommended. Using Dewalt batteries on Milwaukee tools, or vice versa, can lead to compatibility issues, reduced performance, and potential damage to tools and batteries.

Stick to using batteries specifically designed for the brand of tools you own. Dewalt and Milwaukee offer a wide range of tools and batteries that work harmoniously together, providing optimal performance and safety.

Investing in high-quality, compatible batteries will ensure that your power tools run smoothly and efficiently, helping you tackle any project with confidence and ease. So, when it comes to your power tools and their batteries, remember: stick to the brands they were designed for, and you’ll have a reliable and hassle-free experience every time.

Can I Use Dewalt Battery on Milwaukee? – Key Takeaways

  1. While both Dewalt and Milwaukee are popular power tool brands, their batteries are not interchangeable.
  2. Dewalt batteries are designed specifically for Dewalt tools, and Milwaukee batteries are designed specifically for Milwaukee tools.
  3. Using a Dewalt battery on a Milwaukee tool may lead to compatibility issues and potential damage to both the battery and the tool.
  4. It is always recommended to use the appropriate battery for your specific tool brand to ensure optimal performance and avoid any potential safety risks.
  5. If you are unsure about battery compatibility, it is best to consult the manufacturer’s guidelines or reach out to customer support for clarification.

Frequently Asked Questions

Welcome to our frequently asked questions section about using Dewalt batteries with Milwaukee tools.

1. Can I use a Dewalt battery with my Milwaukee tool?

No, you cannot use a Dewalt battery with a Milwaukee tool. These two brands have different battery systems that are not compatible with each other. Dewalt uses a 20V MAX or 60V MAX battery system, while Milwaukee uses an 18V or 12V battery system. The connectors and voltage output are not the same, so they cannot be interchanged.

If you want to use a Milwaukee tool, it’s best to use a Milwaukee battery designed specifically for that tool. This ensures optimal performance and prevents any potential damage to the tool or battery.

2. Will using a Dewalt battery on my Milwaukee tool void the warranty?

Yes, using a Dewalt battery on a Milwaukee tool can void the warranty. Manufacturers design tools and batteries to be used with their specific brand, and using a different brand’s battery can lead to compatibility issues, damage, or reduced performance. Manufacturers may reject warranty claims if they determine that the tool was used with an incompatible battery.

To protect your warranty and ensure proper functioning of your Milwaukee tool, it’s advisable to use Milwaukee batteries that are designed for your specific tool model. This guarantees compatibility and peace of mind.

3. Can I modify the battery connectors to make a Dewalt battery work on my Milwaukee tool?

While it may be technically possible to modify the battery connectors to make a Dewalt battery work on a Milwaukee tool, it is strongly discouraged. Modifying the connectors can lead to safety hazards, damage to the tool, or even injuries.

It is always best to use the batteries and tools as they are intended by the manufacturers. If you need to use a Milwaukee tool, it’s recommended to use a Milwaukee battery for the best performance and safety.

4. Are there any adapters available to use Dewalt batteries on Milwaukee tools?

No, there are no adapters available to use Dewalt batteries on Milwaukee tools. The battery systems of Dewalt and Milwaukee are fundamentally different, and there are no universal adapters that can convert the voltage output or connector types between the two brands.

If you need to use a Milwaukee tool, it’s best to stick with Milwaukee batteries that are specifically designed for your tool model. This ensures optimal performance and compatibility.

5. Can using a Dewalt battery on a Milwaukee tool damage the tool or battery?

Using a Dewalt battery on a Milwaukee tool can potentially damage both the tool and the battery. Dewalt and Milwaukee have different battery systems with different voltage outputs and connector designs. Plugging a Dewalt battery into a Milwaukee tool may result in electrical incompatibility, overheating, or even permanent damage to the tool or the battery.

To ensure the longevity of your tool and battery, it’s always recommended to use batteries and tools from the same brand, as they are designed to work together seamlessly.

can I use dewalt battery on milwaukee? 2

Summary

So, can you use a Dewalt battery on a Milwaukee tool? The answer is no. These two brands have different battery platforms and are not compatible. It’s important to use the correct battery for your specific brand of tool to ensure optimal performance and avoid damage.

If you have a Milwaukee tool, stick with Milwaukee batteries, and if you have a Dewalt tool, stick with Dewalt batteries. Remember, always read the manufacturer’s instructions and consult their websites or customer service for any doubts or questions about battery compatibility.

29 Sep 06:26

Are Old Woodworking Magazines Worth Anything?

by Tom Seevers

Hey there, young woodworker! Wondering if those old woodworking magazines collecting dust in your attic are worth anything? Well, let’s dive in and find out if they’re hidden treasures or just old news.

Now, you might be thinking, “Are old woodworking magazines worth anything?” Well, my woodworking enthusiast, the answer isn’t as straightforward as you might expect. While some folks might consider these magazines nostalgic relics, others see them as valuable sources of knowledge and inspiration.

So, buckle up and join me on this woodworking adventure as we explore the world of old magazines and discover their worth. Are you ready to uncover the hidden gems in your magazine collection? Let’s get started!

Wondering if your old woodworking magazines hold any value? While it depends on factors like rarity, condition, and demand, some vintage woodworking magazines can be worth a pretty penny. Collectors and woodworking enthusiasts are often interested in purchasing these magazines for their historical and instructional value. To determine the worth of your specific magazines, consider consulting antique dealers, online marketplaces, or woodworking forums. Remember, the value of old magazines can vary, so make sure to do your research before selling.

are old woodworking magazines worth anything?

Are Old Woodworking Magazines Worth Anything?

Woodworking magazines have long been a valuable resource for both novice and experienced woodworkers. They provide inspiration, knowledge, and step-by-step instructions for various projects. However, in this digital age, where information is readily available online, many wonder if old woodworking magazines still hold any value. In this article, we will explore whether or not old woodworking magazines are worth anything, both from a practical and monetary perspective.

The Historical Significance of Old Woodworking Magazines

Old woodworking magazines not only offer practical tips and techniques but also hold historical significance. They provide a window into the past, showcasing the evolution of woodworking practices and trends over the years. For woodworking enthusiasts or collectors, these magazines serve as a treasure trove of information and inspiration.

Moreover, older woodworking magazines often feature articles and tutorials from renowned woodworkers of their time. These experts have made significant contributions to the craft and reading their insights can be invaluable. So, if you have a passion for woodworking history or appreciate the craftsmanship of the past, old woodworking magazines hold immense value.

That being said, it is important to note that the value of old woodworking magazines can vary depending on factors such as the rarity of the issue, the condition of the magazine, and the demand in the market. While some collectors might be willing to pay a premium for a particular vintage magazine, others may prioritize content over the condition of the publication. Therefore, it’s essential to consider these factors when determining the worth of old woodworking magazines.

Monetary Value of Old Woodworking Magazines

When it comes to the monetary value of old woodworking magazines, it is essential to consider several factors. Rarity and demand play a significant role in determining the worth of these publications. Here are some key points to consider:

1. Rarity: Magazines that are difficult to find or have limited print runs are generally more valuable. If you come across a rare edition of a woodworking magazine, it could be worth a significant amount to the right collector.

2. Condition: The condition of the magazine is crucial. Magazines in excellent condition, with minimal wear and tear, will command a higher price compared to those in poor condition.

3. Collectibility: Some magazines have a cult following or are highly sought after by collectors. These publications may have a higher market value, especially if they feature iconic woodworking projects, influential woodworkers, or groundbreaking techniques.

4. Market Demand: The demand for old woodworking magazines can fluctuate over time. It is essential to research current market trends and determine if there is a willing market for the magazines you have.

While some old woodworking magazines can fetch a considerable sum, it is essential to manage expectations. Not every magazine will hold significant monetary value, and it may take time and research to find the right buyer willing to pay the desired price.

Tips for Navigating the World of Old Woodworking Magazines

If you are interested in exploring the world of old woodworking magazines, here are a few tips to get you started:

1. Research: Before buying or selling old woodworking magazines, research the market. Understand which publications are in demand and what factors contribute to their value. Websites, forums, and collector communities can be valuable resources for gathering information.

2. Condition Matters: Take care of your magazines to preserve their value. Store them in climate-controlled environments away from direct sunlight and moisture. Use acid-free archival sleeves or folders to protect the magazines from damage.

3. Networking: Connect with other woodworking enthusiasts, collectors, and sellers to learn from their experiences. Attend woodworking events, join online communities, and participate in forums to expand your network and gain insights on the market.

Benefits of Collecting Old Woodworking Magazines

Collecting old woodworking magazines offers several benefits beyond potential monetary value. Here are some advantages of building a collection:

1. Inspiration and Ideas

Old woodworking magazines are a treasure trove of inspiration and ideas. Leafing through the pages of these publications can spark creativity and provide unique perspectives on woodworking projects and techniques. Whether you are a seasoned woodworker or just starting, the wealth of knowledge contained within these magazines can help you expand your skill set and find new projects to tackle.

2. Historical Perspective

Old woodworking magazines provide a glimpse into the history of woodworking practices. They showcase how the craft has evolved over time and offer insights into traditional techniques and tools. By studying the articles, advertisements, and photographs from different eras, you can gain a deeper appreciation for the craftsmanship of the past and understand how it has influenced modern woodworking.

3. Connection to the Community

Collecting old woodworking magazines allows you to connect with a community of like-minded individuals. Whether through online forums, collector groups, or attending woodworking events, you can engage in discussions, share knowledge, and learn from others who appreciate the artistry and craftsmanship of woodworking.

4. Preservation of History

By collecting old woodworking magazines, you contribute to the preservation of woodworking history. These publications serve as valuable artifacts that document the evolution of the craft. By ensuring their longevity and protecting them from deterioration, you help preserve their historical value for future generations of woodworkers.

Conclusion

Old woodworking magazines hold significant value, both in terms of practical knowledge and historical significance. While not every magazine will have high monetary value, they offer inspiration, ideas, and a connection to the woodworking community. If you have a passion for woodworking or appreciate the history of the craft, building a collection of old woodworking magazines can be a rewarding endeavor. Remember to research the market, pay attention to the condition of the magazines, and network with others who share your passion. Happy collecting!

Key Takeaways: Are Old Woodworking Magazines Worth Anything?

  • Old woodworking magazines can hold value for collectors and enthusiasts.
  • The value depends on factors such as rarity, condition, and demand.
  • Some magazines may have valuable articles, plans, or advertisements.
  • Research and appraisals can help determine the worth of specific magazines.
  • Online marketplaces and forums are great places to buy or sell old woodworking magazines.

Frequently Asked Questions

Are old woodworking magazines worth anything?

Many collectors and woodworking enthusiasts wonder whether their old woodworking magazines have any value. While it can depend on various factors, such as the magazine’s age, condition, and rarity, old woodworking magazines can indeed be worth something.

Q: How can I determine the value of my old woodworking magazines?

When determining the value of your old woodworking magazines, several aspects need to be considered. First, check the date of publication. Magazines that are older or from a specific era may have higher value. Additionally, look for magazines with iconic covers or special editions.

Next, evaluate the condition of the magazines. Magazines in excellent condition, with minimal wear and tear, are generally more valuable. Finally, consider the demand for specific magazines. Some woodworking magazines are more sought after by collectors, which can drive up their value.

Q: What are some popular collectible woodworking magazine titles?

Several woodworking magazines have become popular among collectors. Popular titles include “Fine Woodworking,” “Popular Woodworking,” and “Woodworker’s Journal.” These magazines often feature articles and projects from renowned woodworkers and are highly sought after by enthusiasts.

Special editions and magazines that focus on niche woodworking topics, such as traditional handtool techniques or specific woodworking styles, can also hold value. Keep an eye out for magazines that have limited distribution or were only printed for a short period, as they may be more collectible.

Q: Where can I sell old woodworking magazines?

When looking to sell your old woodworking magazines, there are several options available. Online marketplaces like eBay and Etsy can be great platforms for reaching a wide audience of collectors and enthusiasts. You can create listings with detailed descriptions and images to attract potential buyers.

Antique and collectible shops, especially those specializing in vintage publications, may also be interested in buying old woodworking magazines. Additionally, you can consider attending woodworking trade shows or flea markets, where you may find individuals interested in purchasing these magazines.

Q: How should I store my old woodworking magazines to maintain their value?

To preserve the value of your old woodworking magazines, proper storage is crucial. Avoid exposing them to direct sunlight or extreme temperature changes, as these can damage the paper and ink. Store magazines in acid-free archival sleeves or clear plastic sleeves to protect them from moisture and dust.

It’s also important to maintain a stable humidity level in the storage area to prevent deterioration. Keep your magazines in a cool and dry environment, away from basements or attics that may have fluctuating humidity levels. By taking these precautions, you can help ensure the longevity and value of your old woodworking magazines.

Q: Can I find useful woodworking techniques and projects in old magazines?

Absolutely! Old woodworking magazines can be treasure troves of knowledge and inspiration. They often contain detailed tutorials, step-by-step project plans, and tips from experienced woodworkers. Even though some techniques and tools may have evolved over time, the core principles of woodworking can still be found in older publications.

Exploring vintage woodworking magazines not only provides historical context but can also give you a deeper appreciation for the craft. You may discover unique projects or innovative approaches that have stood the test of time. So, don’t hesitate to dive into your collection of old woodworking magazines and discover the wealth of information they hold.

are old woodworking magazines worth anything? 2

Summary

So, are old woodworking magazines worth anything? Well, it depends on a few factors. First, if the magazine is rare or highly sought after by collectors, it could fetch a good price. However, most old woodworking magazines are not particularly valuable. They may hold sentimental value for some people, but in terms of monetary worth, they might not be worth much. It’s always a good idea to do some research and check with experts or collectors to see if your specific magazine has any value.