Shared posts

28 Nov 23:43

Don’t use iOS’s ‘highlighter’ tool to censor information in screenshots

by Jonathan Lamont

If you commonly take screenshots on your iPhone and use the marker tools to cover-up sensitive information, you may be leaving your information exposed.

iOS includes some excellent tools for editing screenshots. Users can mark up screenshots with various types of markers or pencil tools, there’s a ruler to help draw straight lines and more. However, as noted by a recent Reddit post, some people like to use the ‘highlighter’ tool (or, as some prefer to call it, the chisel-tipped marker) to cover up sensitive information in screenshots.

Unfortunately, since the tool is meant as a highlighter, the default opacity isn’t at 100 percent — in other words, it’s semi-transparent. The problem with this is, even if the opacity is close to 100, it’s easy to bypass with some photo editing.

Here is why you shouldn’t censor sensitive info with the black highlighter on iOS, this video shows just how easy it is to reveal sensitive info censored with the black highlighter from ios

Redditor ‘M1ghty_boy,’ who started the post, shared a video recording that shows just how easy it is. In the video, M1ghty_boy colours over text using the highlight tool and, after a few passes, the text appears unreadable. However, M1ghty_boy opens it in the iOS photo editor and adjusts settings like exposure, highlights, shadows and contrast. Before long, you can make out the text again.

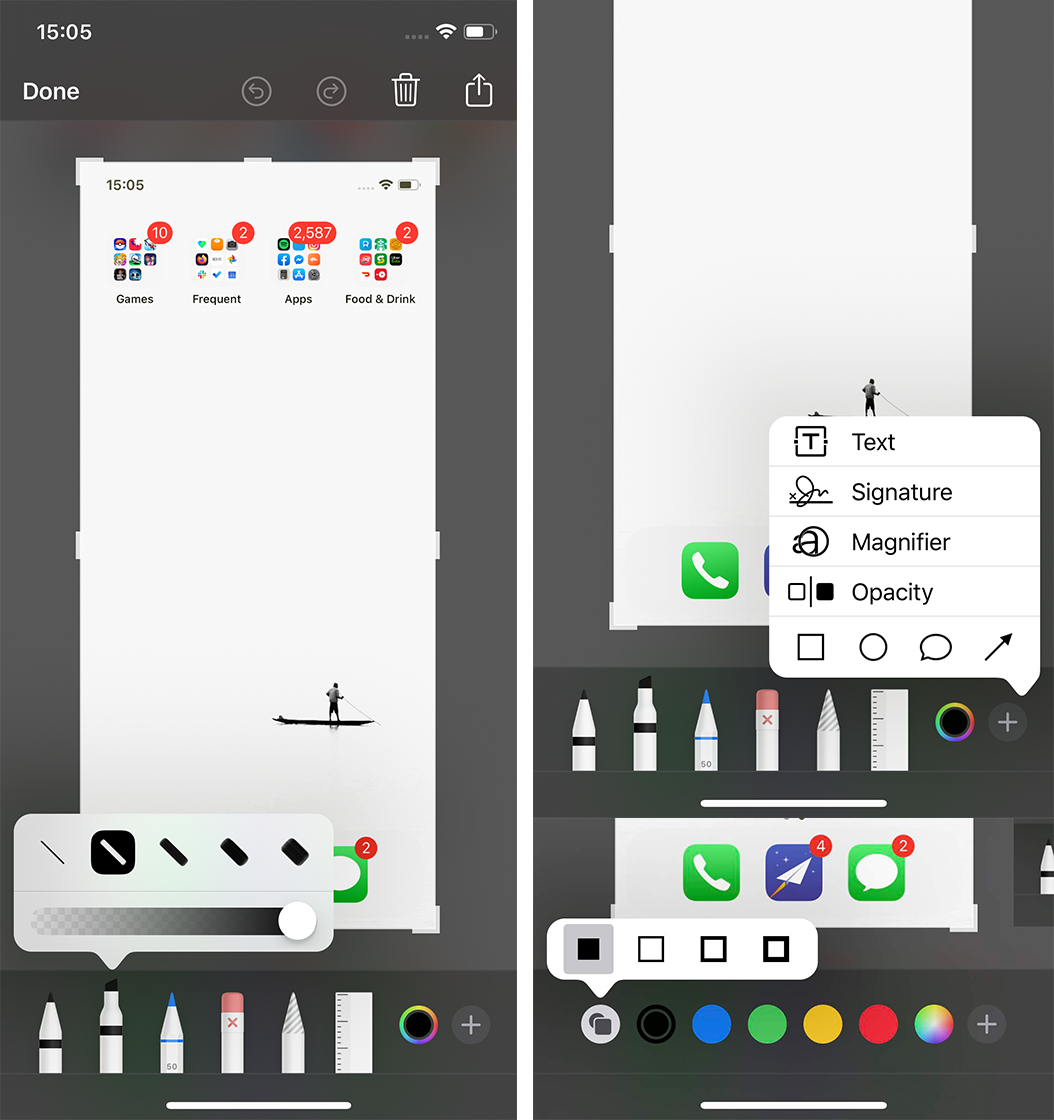
The easiest way to avoid someone editing your screenshot to see censored information is to set the highlighter tool to 100 percent opacity. To do this, just tap on the tool to select it, then tap a second time to open a small pop-up with controls for the tool. Then drag the opacity slider all the way to 100.

A more foolproof way would be to use the colour-filled shape option. To do this, tap the ‘plus’ icon in the bottom right corner, then tap one of the shape icons. Once added, on the bottom left you’ll see an icon with a square and a circle in it.

Tap that and select the filled-in shape. This creates a filled shape, which you can place over any information you want to keep hidden.

Source: Reddit Via: The Next Web

The post Don’t use iOS’s ‘highlighter’ tool to censor information in screenshots appeared first on MobileSyrup.

28 Nov 19:15

Happy Thanksgiving!

by Brent Simmons
mkalus shared this story from The Omni Group.

To everyone celebrating the US Thanksgiving holiday tomorrow, we wish you the very best day. We’ll be celebrating too!

In the past few months, we’ve shipped updates to our Mac and iOS apps, and now we’re all looking forward to a long weekend with friends and family — and delicious food.

As always, we’re thankful for you. Last year, we wrote, “Because of you, we can do what we love — which is to make apps that help people get their work done, whatever it is, and hopefully have some fun while they do it.”

That was true then and it’s true now. So we’re going to take a few days off — and then re-open the office on Monday, ready to go!

28 Nov 19:15

Still Playing Destiny (On a PC)

by rands

I’m currently on the Pro Leisure Circuit, and with a lot of time on my hands, so I have been playing a lot of video games. Strike that. I’ve been playing one single game, Destiny 2. Yes, I am still playing Destiny, but there’s a twist.

I bought a PC.

No one is more surprised than I.

Before I explain why Destiny remains my go-to video game, let’s talk about why I left PCs many years ago. The short answer is: Apple. I joined the Mothership in July 2002, and Apple hardware quickly dominated my life. Joyfully. The longer explanation of what was frustrating me on a PC was:

  • I was spending an excessive amount of time tweaking my PC. A new piece of hardware usually meant an extra 30 minutes digging up and tweaking drivers. This sometimes “just worked,” but this was a time before all support was credibly done on the Internet, so the exceptions were notable and lengthy. (This is now better in Windows 10.)
  • The Window registry. The black magic necessary to debug random problems was legit and usually involved hacking on the registry. (This is also better in that I’ve required less black magic, but I’ve already been to registry once and it’s exactly the same black magic situation.)
  • The hardware design. I bought an Alienware PC, and there is industrial design going on, but it’s still a ginormous wind tunnel sounding thing sitting on my floor. When I bought the machine and set-up it on the floor, my wife walked and immediately said, “What… is that?” (This is pretty much the same.)
  • There’s a yard sale of random software on this PC. It’s not being shoved in my face. Alienware does an excellent job of keeping me focused on the video game task at hand. Still, whenever I wander the operating system, there’s random software from whomever the hell software vendor. What is the “Killer Control Center”? Do I need it? Who is “Rivet Networks LCC?” Do I trust them? (This is worse than before.)

There are things I missed about Windows:

  • It’s fast. Super fast. Jumping between full-screen window A and B is a blink of the eye. It’s fast on Mac OS, but I am now aware that it’s microseconds slower. This isn’t a big deal until you’re furious Alt-Tabbing between windows. You think this a function of the beefy hardware I purchased, but I remember the fast window switching situation from prior much slower machines. This is a Windows thing.
  • Window management is a non-negotiable religion on an operating system. I’m a deft operator on Mac OS with the additions of SizeUp and LaunchBar. They give me the ability to organize windows and jump to random parts of my computer easily, and I never have to use the mouse. Here’s the thing: in about an hour, I was again a deft operator on Windows 10. The window management is the same. Sure, I had to remember how to close a window, but getting around was fast. I remembered that Windows out of the box gently promotes a full window lifestyle1, and I remember liking this. It focused me on the thing I was doing, and when combined super-fast window switches, I could move hither and fro effortlessly.

Windows 10 presents a polished face. They’ve worked hard to clean up the common areas, but dig deep… dig deep anywhere, and you’ll be shocked to find to windows and dialogs that are precisely the same look and feel as Windows from a decade ago. I was shocked by their lack of change.

Wait, I was going to write about Destiny. I bought a PC for Destiny. Right.

I Want to Aim Well

I’m not going to dig up the number of hours I’ve played on Destiny. It’s a lot, and there’s a lot more coming. Given the number of hours I’ve played, I’ve been noodling a PC for a good year. Why? It’s simple: a mouse and a keyboard.2

I’ve become competent at controller-based first-person shooters, but every part of my being remembers the Quake 2 mod of the Grappling Hook on that pyramid level. Jump off the top ramp, swirl around and grapple a side wall, and swing into the pyramid to grab the invulnerability artifact. Jump into the now harmless lava where the quad damage artifact is hiding, jump through the portal, grapple the ceiling, starting swinging, and… just destroy everyone.

All of this is theoretically do-able on a console controller, but the fidelity, the precision… is alarming. Destiny (and most video games) have “aim assist” built into consoles, which helps with target acquisition. Bullets literally get pulled towards the enemy — larger hit boxes for critical hits. On snipers, you’ll find the reticle stickiness will slow down as you get closer to the enemy.

THIS IS CHEATING. Ok, it’s not cheating, but it’s a game mechanic designed to account for the fact that controllers on the console are imprecise and inaccurate. I’ve been the great beneficiary of aim assist for years, but it makes me feel dirty because I remember when we were supposed to aim without help.

I can confirm that the mouse and keyboard lifestyle presented by Destiny 2 on a PC is an absolute delight. It was a few days ago when I was grinding out the Undying Seal. I needed bow kills against Vex. I stood in the corner of an area and PLUNK PLUNK PLUNK CRIT CRIT CRIT with my bow. I haven’t felt this in control of my character for years. I realized that aim assist had been helping for years, but the fact it was messing my aim ultimately (and subconsciously) left me feeling out of control.

It’s only been a few weeks since the PC landed, which means I’m still getting comfortable with this set-up, but each day that passes, I feel more competent and in control of my character.

Wait, What About the Frame-rate?

Oh, yeah. Frames. I got all the frames. Alienware Aurora. NVIDIA GeForce 2070. It’s an incredible amount of frames, and the game feels smooths and looks just gorgeous. Running on all the highest settings, Destiny’s a different game. Menus load much faster, item management is a delight, and scenes you’ve taken for granted are worth another look:

But it’s the details of the gameplay that make Destiny great, and those details revolve around the gunplay. I gave Borderlands 3 a recent whirl. Beautiful game, but after years of Destiny gunplay made the Borderland guns feel like clumsy toys. Bungie obsesses about how a gun feels, whether it’s the look of the gun and the sound of how it shoots.

Bungie gives their weapons personality. This is why you play Destiny – it’s acquiring, understanding, and mastering the weapons. To do so, yes, you must learn the ways of the Crucible, Raids, and Strikes and exploring this with others is ideal, but the constant tools are the weapons you choose to master.


  1. I’m sure there is a SizeUp equivalent for Windows. Do tell. 
  2. Another game-changer for me. Destiny 2 started to provide Cross Save, which allows me to play on both PS4 and PC. 
28 Nov 19:14

The Stages of Innovative Change

Eric Sheninger, A Principal's Reflections, Nov 28, 2019
Icon

Ever since Piaget, I guess, educators have embraced and endorsed 'stages' theories of, well, everything. Here we have 'stages of innovative change'. There are, to my mind, two major weaknesses to this approach. First, it presents the series of events as inevitable, as though 'innovative change' (whatever that may be) cannot be derailed. But surely it can, and in many cases, should be. Second, and related, it does not represent the graph of causal factors in which the sequence is embedded. This it leaves unstated what drivers and attractors motivate the change, the causes of friction, the list of who benefits and who is hurt, the cost of the change in people, dollars, and resources, and more.

Web: [Direct Link] [This Post]
28 Nov 19:14

I hear your concerns about the export issue. Th...

by Ton Zijlstra

I hear your concerns about the export issue. That certainly makes me think, as we are moving my company into 1pw accounts this month (I use a local version). Two elements stand out though: the actual silo you’re trying to escape is the company as it blocks 1pw. Two, it reinforces my dislike of subscription based software as a service, because it makes offline and local first impossible, and creates dependencies you cannot circumvent.

Replied to The Unnoticed Silo by Chris M.Chris M.
My employer has started blocking 1Password.com recently, breaking my ability to access my passwords and Two-Factor Authentication (2FA) details using the browser extension. I can still get these details on my phone, but typing a completely random 22-character password by hand is far from ideal, and ...
28 Nov 19:14

Job negotiation for programmers: the basic principles

You need to negotiate at a new job: for your salary, or benefits, or my personal favorite, a shorter workweek. You’re not sure what to do, or how to approach it, or what to say when the company says “how much do you want?” or “here’s our offer—what do you say?”

Here’s the thing: that final conversation about salary might be the most nerve-wracking part, but the negotiation process starts much much earlier. Which means you can enter that final conversation having positioned yourself for success—and feeling less stressed about it too.

The way you can do that is following certain basic principles, which I’ll be covering in this article. I’m going to be focusing on salary negotiation as an example, but the same principles will apply when negotiating for a shorter workweek.

In particular, I’ll be talking about:

  1. An example from early in my career when I negotiated very very badly.
  2. The right way to negotiate, based on four principles:
    1. Employment is a negotiated relationship.
    2. Knowledge is power.
    3. Negotiate from a position of strength.
    4. Use the right tactics.

The wrong way to negotiate

Before moving on to the principles of negotiation, let me share a story of how I negotiated badly.

During my first real job search I interviewed at a company in New York City that was building a financial trading platform. They were pretty excited about some specific technologies I’d learned while working on Twisted, an open source networking framework. They offered me a job, I accepted, and my job search was over.

But then they sent me their intellectual property agreement, and I actually read legal documents; you should read them too. The agreement would have given the company ownership over any open source work I did, including work on Twisted. I wanted to ensure I could keep doing open source development, especially given that was their reason for hiring me in the first place. I asked for an exemption covering Twisted, they wouldn’t agree, and so we went back and forth trying to reach an agreement.

Eventually they came back with a new offer: in return for not working on Twisted I’d get a 20% salary increase over their initial offer. I thought about it briefly, then said no and walked away from the job. Since I had neither a CS degree—I’d dropped out—nor much of an employment history, open source contribution was important to my career. It was how I’d gotten contracting work, and it was the reason they’d offered me this job. And I enjoyed doing it, too, so I wasn’t willing to give it up.

I posted about this experience online, and an employee of ITA Software, which was based in the Boston area, suggested they were happy to support contributions to open source projects. It seemed worth a try, so I applied for the position. And when eventually I got a job offer from ITA and they asked me for my salary requirements, I asked for the second offer I’d gotten, the one that was 20% higher than my original offer. They accepted, and I’ve lived in the Boston area ever since.

As we go through the principles below, I’ll come back to this story and point out how they were (mis)applied in my two negotiations.

The four principles of negotiation

You can think of the negotiation process as building on four principles:

  1. Employment is a negotiated relationship.
  2. Knowledge is power.
  3. Negotiate from a position of strength.
  4. Use the right tactics.

Let’s go through them one by one.

Principle #1: Employment is a negotiated relationship

If you’re an employee, your employment relationship was negotiated. When you got a job offer and accepted it, that was a negotiation, even if you didn’t push back at all. Your choice isn’t between negotiating and not negotiating: it’s between negotiating badly, or negotiating well.

Negotiate actively

If you don’t actively try to negotiate, if you don’t ask for what you want, if you don’t ask for what you’re worth—you’re unlikely to get it. Salaries, for example, are a place where your interests and your employer’s are very much at odds. All things being equal, if you’re doing the exact same work and have the same likelihood of leaving, would your employer prefer to pay you less or more? Most employers will pay you less if they can, and I almost had to learn that the hard way.

Applying the principle: In my story above, I never proactively negotiated. Instead, I accepted a job offer from the financial company without any sort of additional demands. If they were happy to offer me a 20% raise just to quit open source, I probably could have gotten an even higher salary if I’d just asked in the first place.

Negotiation starts early, and never ends

Not only do you need to negotiate actively, you also need to realize that negotiation starts much earlier than you think, and ends only when you leave to a different job:

  • The minute you start thinking about applying to a company, you’ve started the negotiation process; as you’ll see, you’ll want to do research before you even talk to them.
  • Your interview is part of your negotiation, and you can in fact negotiate the interview process itself (e.g. suggest sharing a code sample instead of doing a whiteboard puzzle).
  • As an employee you will continue to negotiate: if you always say “yes” when your boss asks you to work long hours, your contract for a 3-day weekend will mean nothing.

In short, your whole relationship as an employee is based on negotiation.

Distinguish between friend and foe

A negotiation involves two sides: yours, and the company’s. When you’re negotiating it’s important to remember that anyone who works for the company is on the company’s side. Not yours.

I once had to negotiate the intellectual property agreement at a new job. My new employer was based in the UK, and it had a US subsidiary organized by a specialist company. These subsidiary specialists had provided the contract I was signing.

When I explained the changes I wanted to make, the manager at the subsidiary specialist told me that my complaint had no merit, because the contract had been written by the “best lawyers in Silicon Valley.” But the contract had been written by lawyers working for the company, not for me. If his claim had been true (spoiler: they were not in fact the best lawyers in Silicon Valley), that would have just made my argument stronger. The better the company’s lawyers, the more carefully I ought to have read the contract, and the more I ought to have pushed back.

The contracts the company wants you to sign? They were written by lawyers working for the company.

Human Resources works for the company, as does the in-house recruiter. However friendly they may seem, they are not working for you. And third-party recruiters are paid by the company, not you. It’s true that sometimes their commission is tied to your salary, which means they would rather you get paid more. But since they get paid only once per candidate, volume is more important than individual transactions: it’s in their best interest to get you hired as quickly as possible so they can move on to placing the next candidate.

Since all these people aren’t working for you, during a negotiation they’re working against you.

The only potential exception to this rule are friends who also work for the company, and aren’t directly involved in the negotiation process: even if they are constrained in some ways, they’re probably still on your side. They can serve as a backchannel for feedback and other information that the company can’t or won’t share.

Principle #2: Knowledge is power

The more you know about the situation, the better you’ll do as a negotiator. More knowledge gives more power: to you, but also to the company.

Know what you want

The first thing you need to do when negotiating is understand what you want.

  • What is your ideal outcome?
  • What can you compromise on, and what can’t you compromise on?
  • What is the worst outcome you’re willing to accept?

Do your research

You also want to understand where the other side is coming from:

  • What is the company’s goal, and the negotiator’s goal? For example, if you discover their goal is minimizing hassle, you might be able to get what you want by making the process a little smoother.
  • What resources are available to them? An unfunded startup has different resources than a large company, for example.
  • Has the company done something similar in the past, or will your request be unprecedented? For example, what hours do other employees in similar positions work? How much are other employees paid?
  • What do other companies in the area or industry provide?
  • How is this particular business segment doing: are they losing money, or doing great?

The more you understand going in, the better you’ll do, and that means doing your research before negotiation starts.

Applying the principle: In my story above I never did any research about salaries, either in NY or in Boston. As a result, I had no idea I was being offered a salary far below market rates.

As a comparison, here’s a real example of how research can help your negotiation, from an engineer named Adam:

Adam: “Being informed on salaries really helped my negotiating position. When my latest employer made me an offer I asked them why it was lower than their average salary on Glassdoor.com. The real reason was likely ‘we offer as little as possible to get you on board.’ They couldn’t come up with a convincing reason and so the salary was boosted 10%.”

Glassdoor is a site that allows employees to anonymously share salaries and job reviews. Five minutes of research got Adam a 10% raise: not bad at all!

Listen and empathize

If you only had to make yourself happy this wouldn’t be a negotiation: you need to understand the other side’s needs and wants, what they’re worrying about, what they’re feeling. That means you need to listen, not just talk: if you do, you will often gather useful information that can help you make yourself more valuable, or address a particular worry. And you need to feel empathy towards the person you’re talking to: you don’t need to agree or subordinate yourself to their goals, but you do need to understand how they’re feeling.

Share information carefully

Sharing information at the wrong time during a negotiation can significantly weaken your position. For example, sharing your previous salary will often anchor what the company is willing to offer you:

Adam: “I graduated from university and started working at the end of 2012. At my first job I worked for way under my market rate. I knew this and was OK with it because they were a good company.

Then I switched jobs in 2013. What I hadn’t accounted for was that my salary at my first job was going to limit my future salary prospects. I had to fight hard for raises at my next job before I was in line with people straight out of school, because they didn’t want to double my salary at my previous company.”

In general, when interviewing for a job you shouldn’t share your previous salary, or your specific salary demands—except of course when it is helpful to do so. For example, let’s say you’re moving from Google to a tiny bootstrapped startup, and you know you won’t be able to get the same level of salary. Sharing your current salary can help push your offer higher, or used as leverage to get shorter hours: “I know you can’t offer me my previous salary of $$$, but here’s something you could do—”. Just make sure not to share it too early, or they might decide you’d never accept any offer at all and stop the interview process too early.

Most of the time, however, you shouldn’t share either your previous salary or specific salary requirements. If the company insists on getting your previous salary, you can:

  • If you work somewhere with relevant laws (e.g. California and Massachusetts), point out that this question is illegal. Asking about salary expectations is not illegal in these jurisdictions, so be careful about the distinction.
  • Ask for the company’s salary range for the position, as well as the next level up in the salary tree. Chances are they will refuse to share, in which case you can correspondingly refuse to share your information.
  • Say something like “I expect to be paid industry-standard pay for my experience.”

Applying the principle: I shouldn’t have told ITA Software my salary requirement. Instead, I should have gotten them to make the first offer, which would have given me more information about what they were willing to pay.

Principle #3: Negotiate from a position of strength

The stronger your negotiation position, the more likely you are to get what you want. And this is especially important when you’re asking for something abnormal, like a 3-day weekend.

Have a good fallback (BATNA)

If negotiation fails, what will you do? Whatever it is, that is your fallback, sometimes known as the “Best Alternative to a Negotiated Agreement” (BATNA). The better your fallback, the better your alternative, the stronger your negotiating position is. Always figure out your fallback in advance, before you start negotiating.

For example, imagine you’re applying for a new job:

  • If you’re unemployed and have an empty bank account, your fallback might be moving in with your parents. This does not give you a strong negotiating position.
  • If you’re employed, and more or less content with your current job, your fallback is staying where you are. That makes your position much stronger.

If you have a strong fallback, you can choose to walk away at any time, and this will make asking for more much easier.

Provide and demonstrate value

The more an organization wants you as an employee, the more they’ll be willing to offer you. The people you’re negotiating with don’t necessarily know your value: you need to make sure they understand why you’re worth what you’re asking.

For example, when you’re interviewing for a job, you need to use at least part of the interview to explain your value to your prospective employer: your accomplishments and skills. Once you’ve established the value of your skills, asking for more—more money, unusual terms—can actually make you seem more valuable. And having another job offer—or an existing job—can also help, by showing you are in demand.

Finally, remember that your goal is to make sure the other side’s needs are met—not at your own expense, but if they don’t think hiring you is worth it, you aren’t going to get anything. Here’s how Alex, another programmer I talked to, explains how he learned this:

Alex: “Think about the other person and how they’re going to react, how you can try to manage that proactively. You need to treat your negotiating partner as a person, not a program.

Initially I had been approaching it adversarially, ‘I need to extract value from you, I have to wrestle you for it’ but it’s more productive to negotiate with an attitude of ‘we both need to get our needs met.’ The person you’re talking to is looking to hire someone productive who can create value, so figure out how can you couch what you want in a way that proactively addresses the other person’s concerns.”

Principle #4: Use the right tactics

Once you’ve realized you’re negotiating, have done your research, and are negotiating from a position of strength, applying the right negotiation tactics will increase your chances of success even more.

Ask for more than you want

Obviously you don’t want to ask for less than what you want. But why not ask for exactly what you want?

First, it might turn out that the company is willing to give you far more than you expected or thought possible.

Second, if you ask for exactly what you want there’s no way for you to compromise without getting less than what you want. By asking for more, you can compromise while still getting what you wanted.

Applying the principle: If I’d wanted a $72,000 salary, and research suggested that was a fair salary, I should have asked for $80,000. If I was lucky the company would have said yes; if they wanted to negotiate me down, I would have no problems agreeing to a lower number so long as it was above $72,000.

Negotiate multiple things at once

Your goal when negotiating is not to “win.” Rather, your goal is to reach an agreement that passes your minimal bar, and gets you as much as is feasible. Feasibility means you also need to take into account what the other side wants as well. If you’ve reached an impasse, and you still think you can make a deal that you like, try to come up with creative ways to work out a solution that they will like.

If you only negotiate one thing at once, every negotiation has a winner and a loser. For example, if all you’re negotiating is salary, either you’re making more money, or the company is saving money: it’s a zero-sum negotiation. This limits your ability to come up with a solution that maximizes value for you while still meeting the other side’s needs.

Applying the principle: In my story above, the financial company wanted intellectual property protection, I wanted to be able to write open source, and we were at an impasse. So they expanded the scope of the negotiation to include my salary, which allowed them to make tradeoffs between the two—more money for me in return for what they wanted. If I’d cared less about working on open source I might have accepted that offer.

Never give an answer immediately

During the actual negotiation you should never decide on the spot, nor are you required to. If you get a job offer you can explain that you need a little time to think about it: say something like “I have to run this by my spouse/significant other/resident expert.” This will give you the time to consider your options in a calmer state of mind, and not just blurt out “yes” at the first semi-decent offer.

Having someone else review the offer is a good idea in general; a friend of mine ran her job offers by her sister, who had an MBA. But it’s also useful to mention that other person as someone who has to sign off on the offer. That gives you the ability to say you’d like to accept an offer, but your spouse/expert thinks you can do better.

Notice that the employer almost always has this benefit already. Unless you’re negotiating with the owner of the business, you’re negotiating with an agent: someone in HR, say. When you make a demand, the HR person might say “I have go to check with the hiring manager”, and when they come back with less than you wanted it’s not their fault, they’re just passing on the bad news. The implication is that the low offer is just the way it is, and there’s nothing they can do about.

Don’t fall for this trick: they often can change the offer.

Beyond negotiating for salary

You can negotiate for a higher salary—or rather, you should negotiate for a higher salary. The Adam I interviewed in this article is now a partner in DangoorMendel, who can help you negotiate a higher salary.

But salary isn’t the only thing you can negotiate for. You can also negotiate for a shorter workweek.

And yes, this is harder, but it’s definitely possible.

In fact, this article is an excerpt from a book I wrote to help you do just that: You Can Negotiate a 3-Day Weekend.


Tired of scrambling to get your job done?

If you were productive enough, you could take the afternoon off, confident you’d produced high value work. Not to mention having an easier time finding a new job when you need one.

Learn the secret skills of productive programmers.

28 Nov 19:14

Declining Engagement Isn’t Always A Problem

by Richard Millington

Two companies this week complained about a decline in engagement.

But is a decline in engagement a bad thing?

If your community goal is to reduce support questions, a decline in engagement could simply mean you’ve already solved most of the problems your members face. Because of your community they can find answers without having to ask questions.

That’s a success you should be celebrating, not a cause for concern.

This is one of the many problems with measuring any form of engagement. You’re not measuring the things that matter to your company or to your members.

Feelings matter more than actions. Often, simply knowing there is a world-class community supporting the product is even more important than how often they use it.

Yet the things that really matter (and influence buying decisions) are rarely the things we’re measuring. For example:

  • Do customers feel the community adds unbeatable value to your products/services?
  • Do customers feel any problems they have would be quickly resolved?
  • Do customers feel they would be listened to and have influence over what you do?
  • Do customers feel they could hire great people from the community to work for them?
  • Do customers feel the community could give them feedback on what they’re doing and suggest ideas they haven’t discovered before?
  • Do customers feel they have a place to vent and receive emotional support from people just like them?

All of these things are measurable through surveys and interviews, but we rarely try to measure them.

If you ask your members to rank how important each product/support feature is in their buying decision, you will soon see how important the community ranks. That gives you a good baseline to work from.

Your members aren’t sitting around right now wishing they were more engaged in a community. I bet they are wishing for more of each of the above.

28 Nov 19:14

Drafts for Mac getting actions - Luhmann

Very exciting news:

https://talk.automators.fm/t/drafts-for-mac-getting-actions/6051

28 Nov 19:14

My Second-Longest Ride: 304km Adventure with Gorm

by Jeffrey Friedl

My Latest Ride
304km (189mi) with 3,596m (11,798') of climb

I haven't done a whole lot of riding since last fall, and in particular over the last month or so have been beset on and off by a persistent throat infection, so I probably bit off more than I could chew with a 300km ride with Gorm, but while he's in town I want to take the opportunity for such epic adventures.

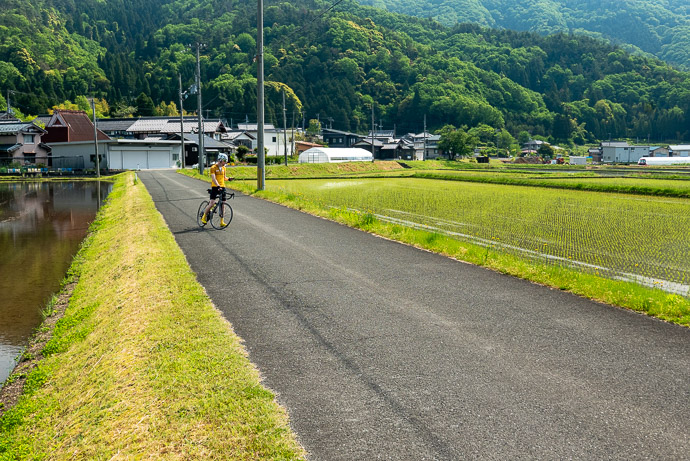
The ostensible goal of the ride was to visit a mountain area of Gifu Prefecture known as “Machu Picchu of Gifu”, due to a view of it that calls to mind the famous Machu Picchu of Peru.

(I can't remember “Machu Picchu”, so it's somehow morphed to “Pikachu” in my head.)

The simplest route would get us there and back in less than 250km (150mi), but we had other plans.


Panasonic LX100 at an effective 50mm — 1/100 sec, f/2.7, ISO 200 — map & image datanearby photos
Gorm Arrives for our Departure
5:25am

Panasonic LX100 at an effective 24mm — 1/125 sec, f/4.5, ISO 200 — map & image datanearby photos
Empty Streets

We popped over the mountains to Lake Biwa (the largest lake in Japan, introduced four years ago in “Bicycle Ride Around Japan’s Largest Lake”), and kept a steady pace along the lake for the 60km to the mountains at its north.


Panasonic LX100 at an effective 24mm — 1/160 sec, f/5.6, ISO 200 — map & image datanearby photos
Heading North

Panasonic LX100 at an effective 24mm — 1/2000 sec, f/7.1, ISO 200 — map & image datanearby photos
Gorm
taken at 33 kph (21 mph)

Panasonic LX100 at an effective 24mm — 1/500 sec, f/5.6, ISO 200 — map & image datanearby photos
Passing By
the Shirohige Shrine Gate
two hours in; taken at 34 kph (21 mph)

This shrine gate was first featured on my blog more than 10 years ago, in “Main Gate of the Shirohige Shrine” and also as the subject of the example photos in “Overexposure and Underexposure, and the Compensation Thereof”. It's a bit special to me now as a cyclist because it was the destination for my first 100+km ride four years ago, as seen here, which Gorm also joined on.

Today, we barely slowed down as we passed, along the way to Gorm's first 300+km ride. (My longest ride is 408km / 254mi double loop around the lake; today's ride would become my second-longest).


Panasonic LX100 at an effective 24mm — 1/500 sec, f/5.6, ISO 200 — map & image datanearby photos
Lovely Views
a common theme for rides in this area

Panasonic LX100 at an effective 24mm — 1/1600 sec, f/6.3, ISO 200 — map & image datanearby photos
A Lakeside Shrine Gate
that I had never noticed before

Panasonic LX100 at an effective 24mm — 1/320 sec, f/5.6, ISO 200 — map & image datanearby photos
Riding Through Makino

Panasonic LX100 at an effective 24mm — 1/125 sec, f/5.6, ISO 200 — map & image datanearby photos
Back in the Mountains

Panasonic LX100 at an effective 24mm — 1/320 sec, f/5.6, ISO 200 — map & image datanearby photos
Farming Valley

Panasonic LX100 at an effective 52mm — 1/250 sec, f/5.6, ISO 200 — map & image datanearby photos

Panasonic LX100 at an effective 44mm — 1/250 sec, f/5.6, ISO 200 — map & image datanearby photos

Panasonic LX100 at an effective 24mm — 1/250 sec, f/5.6, ISO 200 — map & image datanearby photos
First Destination Climb of the Day
3½ hours in

In researching areas for the route — research that took much longer than the ride itself — I found what looked to be a lovely climb (4km /2.4mi at 7%) that for some reason had only a handful of registered attempts on Strava. Indeed, it was lovely.


Panasonic LX100 at an effective 24mm — 1/125 sec, f/2, ISO 200 — map & image datanearby photos

Panasonic LX100 at an effective 25mm — 1/125 sec, f/2.2, ISO 200 — map & image datanearby photos
Dangerous Grating
(not so lovely; need to take extreme care on the descent)

Panasonic LX100 at an effective 28mm — 1/1600 sec, f/2.2, ISO 200 — map & image datanearby photos
Gorm Waiting at the Top

Without trying hard or even knowing how long the climb was, Gorm missed the KOM by just five seconds. We still had a very long day ahead, so it was prudent to pace ourselves, but it makes one want to return to give it an earnest effort.


Panasonic LX100 at an effective 24mm — 1/1600 sec, f/2.8, ISO 200 — map & image datanearby photos
Good Spirits

We descended into yet another fertile valley...


Panasonic LX100 at an effective 24mm — 1/2000 sec, f/2.8, ISO 200 — map & image datanearby photos
Preparing the Rice Paddy

Panasonic LX100 at an effective 24mm — 1/1250 sec, f/2.8, ISO 200 — map & image datanearby photos
Approaching the Kusaoka Shrine
草岡神社

Part of the day's agenda was to visit the Kusaoka Shrine (草岡神社), the shrine owned by the family of a friend. I had been here two weeks earlier to photograph a wedding, so had promised to stop by on my bicycle some time.


Panasonic LX100 at an effective 28mm — 1/250 sec, f/5.6, ISO 200 — map & image datanearby photos
Towering Trees

Panasonic LX100 at an effective 54mm — 1/400 sec, f/5.6, ISO 200 — map & image datanearby photos

Panasonic LX100 at an effective 25mm — 1/250 sec, f/5.6, ISO 200 — map & image datanearby photos

After a short visit, we took a detour to Yogo Lake, which looked just lovely in my research. It did not disappoint. A loop around it took about 11 minutes.


Panasonic LX100 at an effective 24mm — 1/640 sec, f/5.6, ISO 200 — map & image datanearby photos
Starting Around Yogo Lake

Panasonic LX100 at an effective 46mm — 1/500 sec, f/5.6, ISO 200 — map & image datanearby photos

Panasonic LX100 at an effective 75mm — 1/320 sec, f/5.6, ISO 200 — map & image datanearby photos
Small Village

Panasonic LX100 at an effective 24mm — 1/250 sec, f/5.6, ISO 200 — map & image datanearby photos
Just Lovely

Panasonic LX100 at an effective 24mm — 1/640 sec, f/5.6, ISO 200 — map & image datanearby photos

Panasonic LX100 at an effective 24mm — 1/640 sec, f/5.6, ISO 200 — map & image datanearby photos
Half Way Around

We actually went around it twice. The first time, not knowing just how lovely it would be, we gave it somewhatg of an earnest effort, and ended up with the #6-best effort on the loop segment (though bumped down considerably when a group of five guys did a team effort yesterday). We could have gone quite a bit faster if we didn't have another 200km of ride in front of us.

It was so lovely, though, that we decided to do it again for enjoyment and photos.

I'd noticed a restaurant near the end of the loop, so we stopped in there for lunch.


Panasonic LX100 at an effective 24mm — 1/125 sec, f/5.6, ISO 200 — map & image datanearby photos
Stop for Lunch

Panasonic LX100 at an effective 24mm — 1/100 sec, f/1.7, ISO 200 — map & image datanearby photos
Well-Earned Ice Coffee

Panasonic LX100 at an effective 24mm — 1/80 sec, f/1.7, ISO 200 — map & image datanearby photos
Chicken-Nugget Lunch for Two

We stopped for almost an hour, which was way way too long, but it was certainly enjoyable.


Panasonic LX100 at an effective 24mm — 1/200 sec, f/5.6, ISO 200 — map & image datanearby photos
Takin' it Easy
it took a while to figure out whether it was real; it was

Now we had a short 25km and a couple of small climbs to get to the start of the big climb of the day...


Panasonic LX100 at an effective 24mm — 1/800 sec, f/5.6, ISO 200 — map & image datanearby photos
Lovely Rural Area

Panasonic LX100 at an effective 24mm — 1/800 sec, f/5.6, ISO 200 — map & image datanearby photos

Panasonic LX100 at an effective 24mm — 1/200 sec, f/5.6, ISO 200 — map & image datanearby photos
At the Top
of one of the short climbs

Panasonic LX100 at an effective 24mm — 1/60 sec, f/1.7, ISO 1000 — map & image datanearby photos
Old Tunnel

Panasonic LX100 at an effective 28mm — 1/200 sec, f/5.6, ISO 200 — map & image datanearby photos
Last Rest Before the Big Climb

The main climb of the day was the eastern approach to Kunimi Pass. “Kunimi” (国見) in this case means “Kingdom View”, and indeed we were treated with sweeping views that a photo like this does no justice:


Panasonic LX100 at an effective 24mm — 1/250 sec, f/5.6, ISO 200 — map & image datanearby photos

After almost an hour of slow, hot (but visually stunning) slog, we arrived at the top:


Panasonic LX100 at an effective 24mm — 1/200 sec, f/5.6, ISO 200 — map & image datanearby photos
Halfway Point: Kunimi Pass
8½ hours into the ride; only 150km remains until home

This was followed by more than 10 minutes of lovely descent, plummeting down the other side of the mountain.

Just before we were to rejoin civilization at a main road, we were suddenly stopped by an elderdly construction worker blocking the road, saying that the road was closed and that we would have to go back. This was an extremely unappealing proposition for us, as it would me that we would have to make an hour's climb back to the top, retracing our steps for hours in the opposite direction.

Bicycles and pedestrians can often get by road damage that cars can't, so I wanted to investigate the nature of the closure. The old man was adamant, though, that “it had been decided” that no one should pass. I was persistent, and eventually could peek around a curve in the road to see that the road was completely open; it was closed due to a worry that some unstable rocks might fall onto it.

I was willing to take the risk for the one second it would take to pass the area in question, and so told the guy that I was sorry that I'd be making trouble for him, but that I would accept my own responsibility and proceed. He kept saying “but it's been decided!”, but he can't physically stop me as he's not a police officer, so Gorm and I proceeded. Indeed we did not die during the one second it took to pass, and as we passed the guard on the other side, I yelled out farther apologizes.

I feel bad for the guy, just doing his job, but he was given a ridiculous job.


Panasonic LX100 at an effective 24mm — 1/125 sec, f/4, ISO 200 — map & image datanearby photos
Back in Civilization

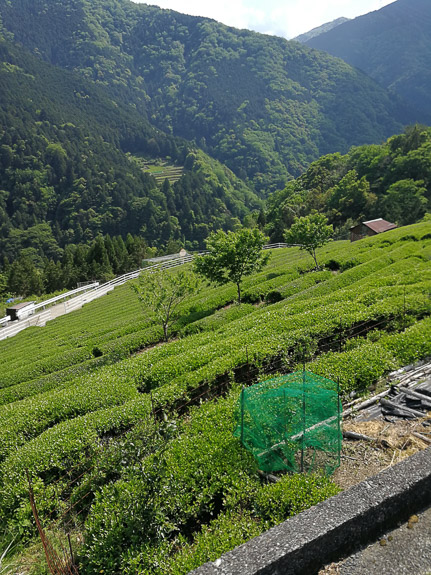
With renewed energy we proceeded toward the steep climb that leads to the “Machu Picchu” view. The initial climb to the village itself is a lovely 1.9km @ 9.2% through tea fields.


Panasonic LX100 at an effective 24mm — 1/320 sec, f/5.6, ISO 200 — map & image datanearby photos
Steep

Panasonic LX100 at an effective 24mm — 1/400 sec, f/5.6, ISO 200 — map & image datanearby photos
Steep Selfie

VTR-L29 at an effective 27mm — 1/730 sec, f/2.2, ISO 50 — map & image datanearby photos
photo by Gorm Kipperberg

VTR-L29 at an effective 27mm — 1/750 sec, f/2.2, ISO 160 — map & image datanearby photos
Me
photo by Gorm Kipperberg

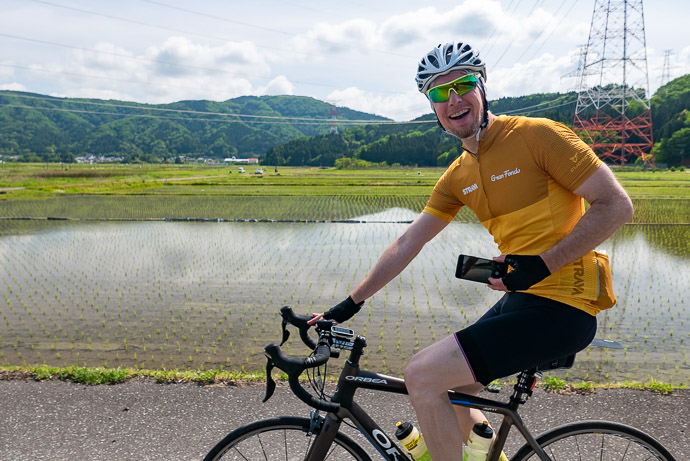
I was quite the stylish sight. 🙂 My tonsils seem to be extremely sensitive to temperature and pollution, so I have learned that wearing a mask makes things much better. Without it, I invariably come down with a cold the next day.

I was also wearing long sleeves and leggings (Under Armour Heatgear) so that I didn't have to deal with sun lotion.

Once one reaches the village after the steep climb, it seems that one can hike for 15 minutes to get to the “Machu Picchu” view back down to the village, but in my research I found a small road that looked to curve around from the top, so I thought I might be able to ride to the view. That adds an extra 1.5km at an even steeper 11.1%, until the road turns gravel:


Panasonic LX100 at an effective 24mm — 1/125 sec, f/5, ISO 200 — map & image datanearby photos
End of the (Paved) Road

I thought that we might get the nice view by continuing on the gravel for a while, but it didn't work out.... the best we got was to some big valley elsewhere:


Panasonic LX100 at an effective 75mm — 1/160 sec, f/5.6, ISO 200 — map & image datanearby photos
Not the View We Hoped For
but still nice

Panasonic LX100 at an effective 24mm — 1/125 sec, f/4.5, ISO 200 — map & image datanearby photos
Back in the Village

At this point we'd done 170km (105mi) over almost 10 hours, and now it was time to head home. There was just one final mountain in the way...


Panasonic LX100 at an effective 24mm — 1/320 sec, f/5.6, ISO 200 — map & image datanearby photos
Entering the Final Climb

The final climb is more than 12km (7½mi) of gradually-steepening back mountain road. The final kilometer averages 9%.

This road, too, was not without its challenges. Half an hour in, we come across a sudden unannounced road closure:


Panasonic LX100 at an effective 24mm — 1/200 sec, f/5.6, ISO 200 — map & image datanearby photos
Blocked-Off Road

Panasonic LX100 at an effective 24mm — 1/125 sec, f/4, ISO 200 — map & image datanearby photos
Not Closed to Bicycles

The soil under parts of the road was washed out, so it certainly wasn't safe for cars, but it was fine for bicycles keeping to one side.

Then I got my first flat tire in more than two years.
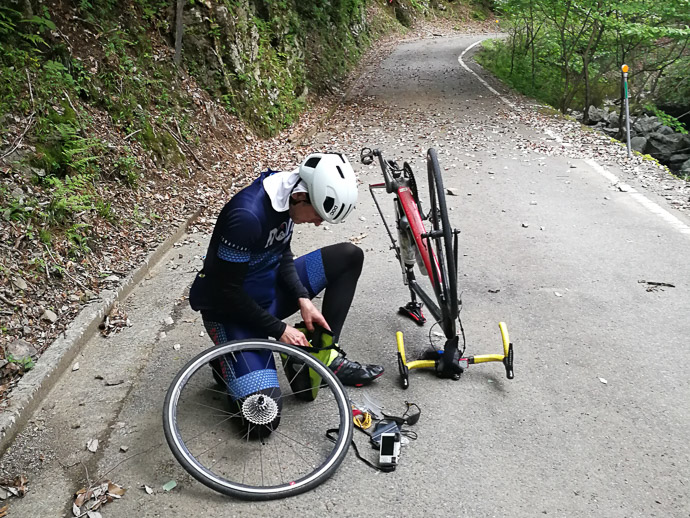

VTR-L29 at an effective 27mm — 1/120 sec, f/2.2, ISO 250 — map & image datanearby photos
Fixing a Flat
My first in over two years, but it's like riding a bike...
photo by Gorm Kipperberg

I used to get flat tires all the time, but that stopped when I switched to Continental Gatorback tires, and after that switch I went for 11,000 tire kilometers until I got a pinch flat two years ago on this ride. One gets a pinch flat when they don't have enough tire pressure for the conditions, and that's exactly what happened today. I probably should have checked the tire pressure before heading out on a 300km ride. Doh!

I've gone almost 23,000 tire kilometers since the previous flat. Not bad. That's two flats, due to my own stupid fault, in almost 21,000 tire miles. Not bad indeed.

What was bad was my spare tube. I used to always bring two spare tubes, but after 1½ years of no flats, I switched to carrying just a single spare, and it turns out that this single spare had a manufacturing defect. Doh!

Thankfully Gorm had two spares, so I didn't have to resort to patching a broken tube.

My tire pump then broke.

I'd not needed it for years for myself, but had used it plenty in helping others, so I'm not sure why it decided to die now, but had Gorm not been there, I would have been stranded. I used his pump to pump up his tube in my tire.

Now I was paranoid about another pinch flat, as it's difficult to get really high pressure with these small hand pumps. I took it slowly and carefully up, then down the other mostly-bumpy side.
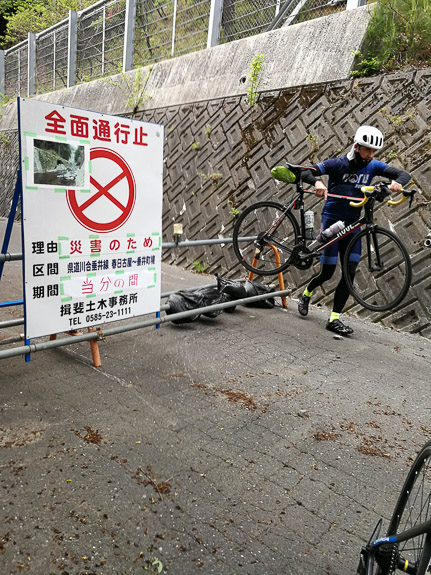

VTR-L29 at an effective 27mm — 1/120 sec, f/2.2, ISO 160 — map & image datanearby photos
Passing the Barrier
leading from the other direction
photo by Gorm Kipperberg
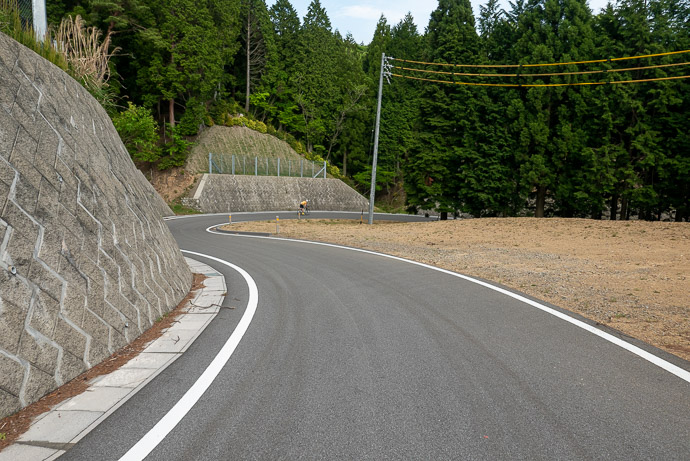
Panasonic LX100 at an effective 24mm — 1/125 sec, f/5.6, ISO 200 — map & image datanearby photos
Lovely New Tarmac
though the road surface for most of the descent was, unfortunately, lunar

We descended into the historic city of Sekigahara. I'd intended to stop by the site of The Battle of Sekigahara, which 420 years ago set Japan on the path to being a single political unit instead of a collection of warring kingdoms, but instead I stopped by a bike stop to fill my tire properly, and to buy another spare tube.

10km of rolling hills later, we stopped for dinner, but it turns out that we were both slightly nauseous, so we barely ate anything.


Panasonic LX100 at an effective 24mm — 1/125 sec, f/1.7, ISO 1250 — map & image datanearby photos
Wasted Dinner
13 hours and 210km (130mi) into the ride

Once we left at about 6:30pm, we had about 92km of mostly-flat lakeside road between us and home, so we put the pedal to the metal.


Panasonic LX100 at an effective 24mm — 1/125 sec, f/1.8, ISO 200 — map & image datanearby photos
Back at Lake Biwa
last light
7:02pm — taken at 33 kph (21 mph)

Our average speed during the last few hours, mostly in the dark, was faster than during the first few hours. We wanted to get home.


VTR-L29 at an effective 27mm — 1/4 sec, f/2.2, ISO 1250 — map & image datanearby photos
Last Few Hours
photo by Gorm Kipperberg

Unfortunately, I got another flat with about an hour to go. It turns out that the tube I'd gotten from Gorm also had a manufacturing defect, and the rubber had slowly separated from the stem. I switched to the tube I'd bought, and we could finally head home.

I arrived at home at 11pm, 17½ hours after starting. It became my 2nd-longest ride, and the 4th-most amount of climb.

28 Nov 19:13

New Lightroom Plugin: Collection Mechanic

by Jeffrey Friedl
28 Nov 19:13

webOS on Raspberry Pi 4

by Rui Carmo

Surprisingly enough, I had zero idea this was going on.

Using the Pi 4 as a reference platform is interesting, but I wonder if I could get it to work on older boards (with the touch screens I have lying around) to build a home automation console…


Support this site
28 Nov 19:13

Twitter Favorites: [ReneeStephen] Do I want to go out to the Meetup full of strangers who, despite being strangers, share a common interest... or do… https://t.co/oOa7u0yevs

Renée Stephen @ReneeStephen
Do I want to go out to the Meetup full of strangers who, despite being strangers, share a common interest... or do… twitter.com/i/web/status/1…
28 Nov 19:13

Twitter Favorites: [rtanglao] @bmann @awsamuel @kk @sillygwailo it's not just business; it's communities of interest like Archive of Our Own… https://t.co/2H9XB4B8RB

Roland Tanglao 猪肉面 @rtanglao
@bmann @awsamuel @kk @sillygwailo it's not just business; it's communities of interest like Archive of Our Own… twitter.com/i/web/status/1…
28 Nov 19:13

Apple Smart Battery Case für iPhone 11 :: Das ist ein Kameragriff

by Volker Weber

b537fd28325b41e46c6d5e50d85a4bda

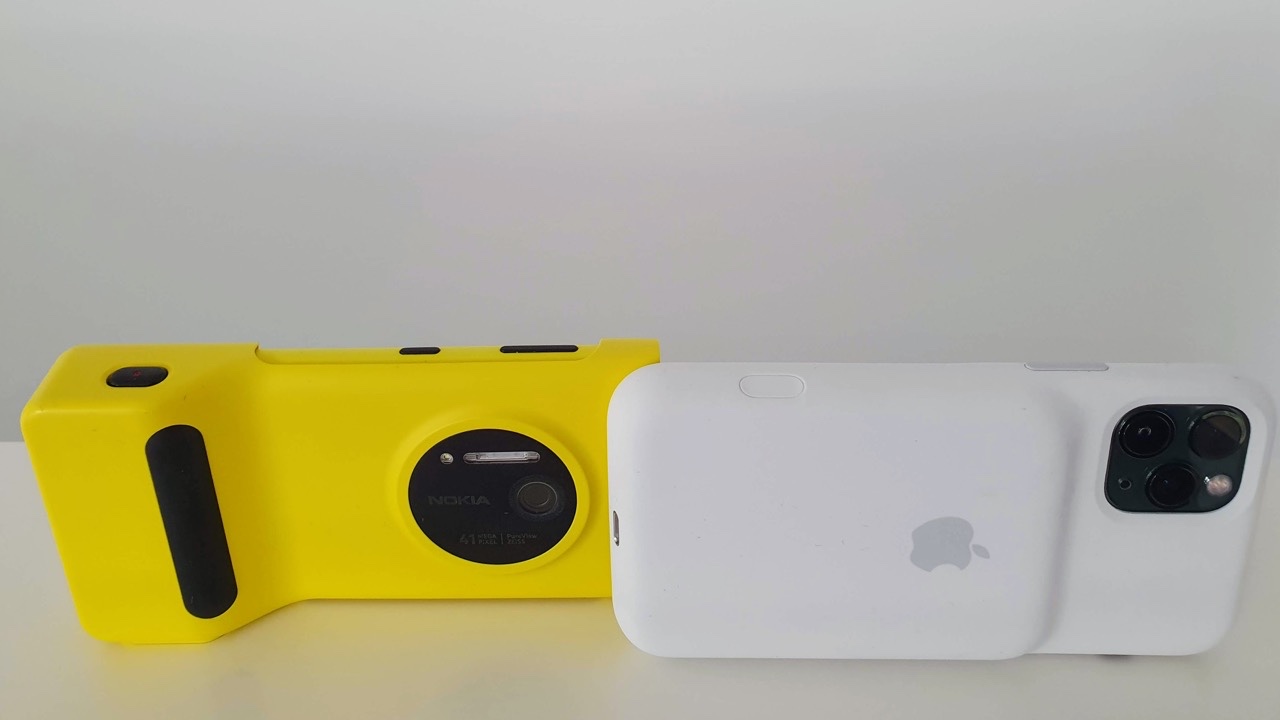
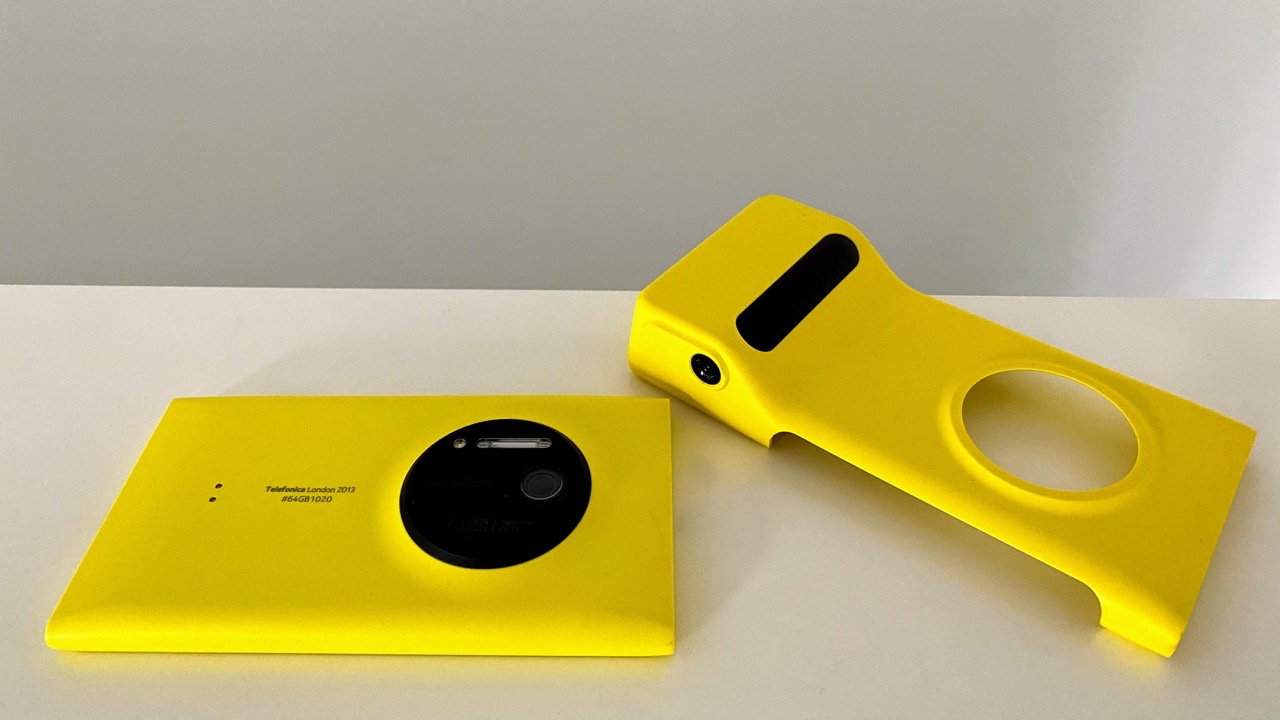
Das neue Smart Batterycase hat einen kaum sichtbaren Auslöser. Drückt man lange drauf, startet die Kamera. Danach löst ein kurzer Druck ein Photo aus und ein langer Druck nimmt ein Video auf. Das sehe ich nicht zum ersten Mal, denn auch das Nokia Lumia 1020 hatte so einen Zusatzakku. Und wie damals braucht das Smartphone selbst eigentlich keine erweiterte Batterie, wenn man nicht den ganzen Tag die Kamera laufen hat.

b230ee3a94c667a34798d6b976ddcbdb

Ergonomisch war der Battery Grip des Lumia 1020 noch ähnlicher wie eine Kamera. Die Schräge war so gestaltet, dass man das Lumia gerade noch sicher mit einer Hand halten konnte und dass man es auch gerade noch so in die Hosentasche stecken konnte. Das Apple Smart Battery Case ist wesentlich "stumpfer", so dass man es auch ohne diese Schräge gut greifen kann.

f423739791aea94970850ab449509231

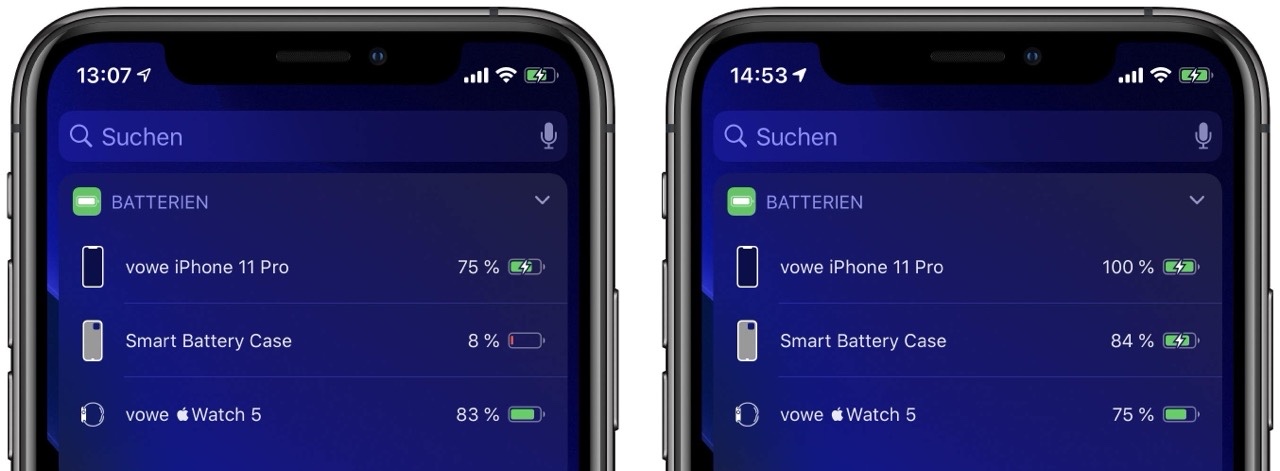
Die Akkufunktion ist wie beim Smart Battery Case des iPhone XS. Zuerst wird das Telefon geladen, dann der Akku. Umgekehrt lehrt sich erst das Case, ohne den Akku des iPhones anzurühren. Ich werde das Case jetzt mal ein paar Tage drauf lassen, um zu beobachten, ob es ein ähnlich erratisches Verhalten wie das alte Case zeigt. Das hatte sich manchmal über Nacht nicht aufgeladen. Als ich es aus der Verpackung nahm, zeigt das iPhone 8% Ladung an, aber es wollte per USB PD keinen Strom annehmen. Das sieht man auf dem linken Bild. Dann habe ich es eine Zeit lang an USB-A geladen. Danach hat es auch an USB C PD funktioniert, wie man rechts sieht.

28 Nov 19:02

Google Photos now lets users manually tag someone in an image

by Aisha Malik
Google Phots on iOS

Google is finally allowing users to manually tag someone in Google Photos in the app’s latest update.

Google Photos has been able to recognize people’s faces and sort them, but the system often misses faces and there hasn’t been a way to fix it until now.

The tech giant confirmed to The Verge that the feature is rolling out now, and will allow users to add in faces that the system has been missing.

There is a catch to the feature because it doesn’t just let you go in and tag anyone in a picture. The app has to first detect that there is a face in the image. If it is able to detect a face, you can then go in and tag someone.

However, if the app doesn’t realize that there is a face in the image, you won’t be able to tag someone. This usually happens when a face is turned or slightly blurry. Although this isn’t ideal, it’s still a step up from not having the option to manually tag at all.

The feature is part of the latest Google Photos update but it seems to be a slow rollout because it’s not appearing for everyone just yet.

Source: The Verge 

The post Google Photos now lets users manually tag someone in an image appeared first on MobileSyrup.

28 Nov 18:59

This app turns the iPhone into an iPod Classic

by Patrick O'Rourke
iPod Classic

Roughly seven years ago, my already ancient iPod Classic fell out of my back pocket while walking down the hallway at work, smashed on the tile floor, and then never turned on again.

Since then, I’ve longed to purchase another iPod Classic, but given the expensive price tag of the now not-very-useful music playing artifact, I likely never will. Fast-forward to 2019 and an inventive developer seems to have created a solution to my existential crisis.

Elvin Hu (@elvin_not_11), the creator of the project, has developed an iPhone app that recreates the nostalgic magic of the iPod Classic, including even the iconic ‘Click Wheel.’ Hu recently tweeted a video of the app in action, which you can view below. The first tweet featuring a video of Hu swiping through the iPod Classic ‘Cover Flow’ album art has been viewed over a million times since November 27th.

In an interview with The Verge, Hu explained that he was never able to afford Apple products as a child and would often draw the UI of the iPhone on the lids of Ferrero Rocher boxes. He says that the iPod Classic, along with Windows Vista and even Microsoft’s ill-fated Zune HD, influenced his decision to go into a career in design.

Hu has been working on the app for a few months and aims to complete it by the end of the year. The more important question is whether Apple will approve it in the App Store.

On the surface, it doesn’t seem to break any of Apple’s stringent App Store rules, but there’s also a possibility the tech giant could reject the Hu’s iPod Classic project because it violates a patent of some sort. If this happens, Hu says that he will likely release the app as an open-source project.

Source: @elvin_not_11), The Verge

The post This app turns the iPhone into an iPod Classic appeared first on MobileSyrup.

28 Nov 18:59

Twitter to add way to memorialize accounts, only remove inactive users in EU

by Jonathan Lamont

After announcing plans to remove inactive accounts from its social media platform, Twitter has clarified the details and plans to implement a service for memorializing the accounts of people who died.

When the news first broke on November 26th, Twitter warned that any account that’s been inactive for more than six months could be removed if users didn’t log in by December 11th. However, the company failed to disclose that this would only impact accounts in the EU to start. Twitter’s choice to focus on the EU owes to the General Data Protection Regulation (GDPR), but could spread to other regions in the future.

More importantly, Twitter acknowledged that should have a way to memorialize accounts belonging to the deceased. “We’ve heard you on the impact that this would have on the accounts of the deceased. This was a miss on our part. We will not be removing any inactive accounts until we create a new way for people to memorialize accounts,” the company tweeted.

While it isn’t currently clear what memorializing an account would mean, at least people won’t have to worry about losing accounts belonging friends, partners family members, celebrities or other influential Twitter accounts.

Presumably, this means the December 11th deadline will shift, but it depends on how quickly Twitter is able to build out the memorialization function.

The upside to the inactivity policy — if and when Twitter enforces it — is that several usernames will free up as it removes dormant accounts. Unfortunately, that may mean users’ follower counts will drop as well.

Twitter says it will update users if the new policy expands to their region.

Source: Twitter Via: The Verge

The post Twitter to add way to memorialize accounts, only remove inactive users in EU appeared first on MobileSyrup.

28 Nov 18:59

Facebook, Instagram suffering outages in North America, Europe

by Jonathan Lamont

Both Instagram and Facebook appear to be suffering through intermittent outages.

Instagram shared on Twitter that it’s “aware that some people are currently having trouble accessing Facebook’s family of apps.” Further, it said it was working to fix things.

It seems nearly everyone is experiencing some degree of issue. According to DownDetector, Instagram’s outage seems to be impacting Europe the most, while Facebook’s problems are concentrated in North America. However, reports of issues seem to be coming from nearly everywhere. Messenger also appears to be having issues.

For our part, Facebook seems to be most impacted as we can’t share anything through the platform. Instagram appears to be working fine on my device, if a little slowly.

Earlier this year, Facebook, Instagram and WhatsApp went down in one of the company’s biggest outages. It was caused by a “server configuration change” that lasted 14 hours. Hopefully we don’t see a similar issue here.

We’ll update this story if and when Facebook and Instagram get back up and running.

Source: Instagram Via: The Verge

The post Facebook, Instagram suffering outages in North America, Europe appeared first on MobileSyrup.

28 Nov 18:59

Costco offering the new 10.2-inch iPad for just $346.99 for Black Friday

by Jonathan Lamont

If you’ve been thinking about picking up Apple’s latest 10.2-inch iPad, now may be the time to do it if you’re a Costco member.

The company launched a one-day Black Friday deal for the new iPad, selling it for $70 off ($346.99). Apple typically sells the iPad for $429.

For the record, other retailers like Best Buy are selling the iPad for $369.99. While still a discount, the Costco deal is much better.

According to Costco’s website, the price applies to orders made on November 28th. It’s not clear if the deal will still be available tomorrow, so you may want to act fast.

Plus, if you want to save even more, you can sign up for the Costco email newsletter and get an extra $20 off.

You can learn more over on the Costco website.

The post Costco offering the new 10.2-inch iPad for just $346.99 for Black Friday appeared first on MobileSyrup.

28 Nov 01:59

Librem 5 Birch Shipping Announcement

by Todd Weaver

We are delighted to share that early yesterday we shipped the first Librem 5 Birch devices to backers. US backers should start receiving their devices throughout the day and international backers can expect theirs within a few days. The Librem 5 is just one part of our mission to give the world ethical alternatives to Big Tech products and services that respect your privacy and security. From myself and the rest of the Purism team we would like to thank you for your support and your belief in us, by doing so you’ve made it your mission too.

Librem 5 Birch

Birch Hardware Improvements

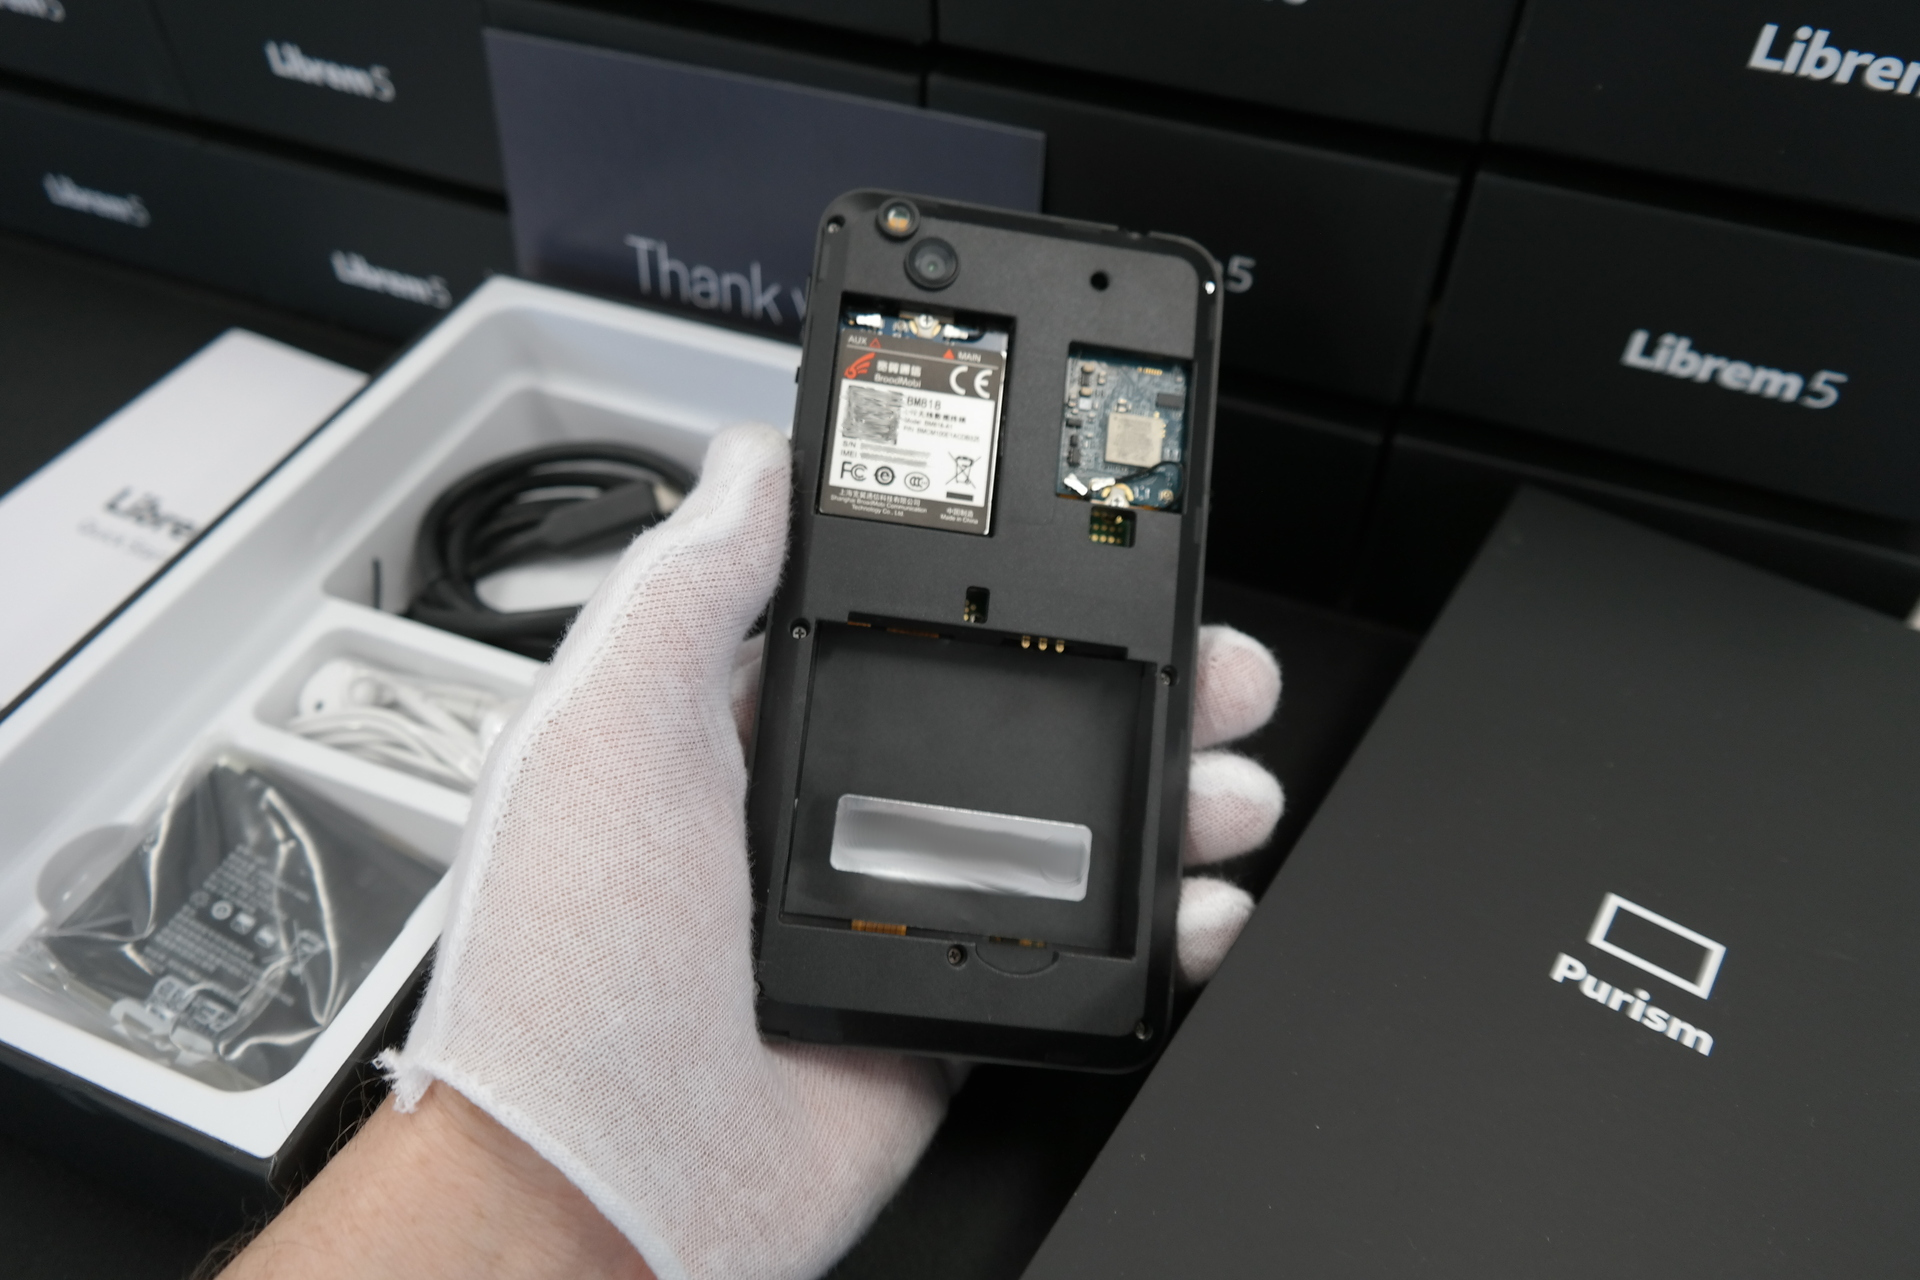
We made a number of hardware improvements from the Librem 5 Aspen to the Librem 5 Birch batch. We have a much improved antennae design, shield protectors across all components on the PCBA, rubber bumpers to help tighten up the fit of component placement, strong clips to secure the WiFi and Cellular cards, shorter cables to clean-up the cable routing, tighter overall tolerance, improved thermal dissipation into the case. To say that we are proud of what the team was able to accomplish in the short time since our last batch does not do them enough justice.

Librem 5 Birch Back

Ongoing Software Improvements

The largest area new Librem 5 owners will see is the rapid pace of software and kernel development to greatly improve thermal management and power consumption. It is an area with a lot of opportunities to make significant development; mainline Linux and power optimizations on the Librem 5 are green-field opportunities to see giant leaps forward now that we have the hardware in the field. An analogy which may help those who don’t follow the depths of hardware and software innovation, the Librem 5 hardware is sprinting around a track (when it should sit idle until you need it to sprint for a millisecond), so utilizes a lot of power; power equals heat, so you will see a lot of great “better ways to do nothing” while we ask the CPU, RAM, Radios, to all idle to save power and in turn save heat.

If you speak to long term Purism customers they will tell you that we are always constantly improving our products. What we ship today will be better tomorrow and the day after that through software upgrades.

When we created the first crowdfunding campaigns for our Librem 15 and Librem 13 laptops, we announced we would replace the existing proprietary firmware with coreboot and disable the Intel Management Engine. At the time some people criticized us not only to say that we couldn’t do it, but that we didn’t even intend on doing it.

It took time and a lot of effort but we followed through with our promise and now we maintain updated coreboot images going back to the earliest public releases of product and PureBoot images going back to the Librem 13v2 and Librem 15v3–all of which disable and neutralize the Intel Management Engine. You can find out more on our coreboot page.

This is why we’ve pledged to offer life time software updates for the Librem 5. We want you to be using your Librem 5 for years to come and this is also echoed in the hardware design with a modular and easy to replace components.

Another humorous example of delivering and updating is when we were deciding to ship our Librem 5 devkit (to developers) in 2018 we confirmed that the screen hardware worked, but the kernel and graphics stack needed more development by our team; rather than wait we told backers that they will get the hardware, then do a future software update to get a working screen (it was a devkit afterall 🙂 ). We subsequently released the software to bring the screen up, and have continued to make improvements rapidly.

Turns out while testing we confirmed the Librem 5 Birch devices have two software issues (outside our larger roadmap of enhancements): a delayed power-up process and a call audio routing bug. What does that mean for Birch backers receiving their phone now? To turn on your Librem 5 disconnect it from a power source and hold down the power button until it turns on. Currently calling is established (e.g. both sides connect fine) but audio is not routed (no voice heard or sent), this will be a few days until the bug is fixed. We will notify Birch backers as soon as an update is ready. To check for updates for your Librem 5 open the Software app and go to “Updates” tab.

Lastly we are constantly making improvements to thermals and power consumption. With the current software image Birch devices will throttle and run through the battery quickly but we decided that we still wanted to get them into the hands of backers so that they can be part of the journey and experience the weekly progress our team ships to you. Over the coming weeks and months we will add software support for more hardware such as camera, video out etc.

Thank You

All of us at Purism can’t wait to hear what the community thinks of the progress we’ve made. We know there are some rough edges and that it currently isn’t an Android or iOS replacement (although it is for me). Two years ago we took on the mission of building a phone on a CPU never put in a mobile device, running PureOS, and writing the mobile bits of the OS, to give people the choice of a truly freedom and privacy respecting phone. Today we are one step closer to realizing that goal. Thank you to everyone who believed in us and stuck with us during the challenges. Here’s to many more shipping announcements and Librem 5 software updates.

Discover the Librem 5

Purism believes building the Librem 5 is just one step on the road to launching a digital rights movement, where we—the people—stand up for our digital rights, where we place the control of your data and your family’s data back where it belongs: in your own hands.

Preorder now

The post Librem 5 Birch Shipping Announcement appeared first on Purism.

28 Nov 01:59

Breaking Ground

by Nicole Faerber

We are often asked, why does the Librem 5 cost that much? Well, there are several reasons and I will try to explain the most important ones.

First of all, the design of the Librem 5 is unique in many ways. Most importantly the hardware is designed from the ground up by us and for us. The Librem 5 is a complete custom design, not based on any reference design, specifically designed with all the goals we all want to achieve – open, safe, secure, respecting your privacy and digital rights. This rules out existing mobile phone reference designs, like from MTK, Qualcomm and the others. When we first approached hardware manufacturers almost two years ago with this project most of them instantly said “No, sorry, impossible, we can not help you.”. Others warned us, that it could never work, that it was too complicated, “the industry does not do that” and so forth.

And yet here we are, later than we wanted, but we are actually shipping first hardware! It is possible but it comes at a price.

From-scratch Hardware Design

What made and makes the hardware design expensive are several things. First of all the lack of reference design. Most other phones (especially Android phones) are based more or less on reference designs of the chipset, (i.e. from the CPU manufacturers). If you go with a, say, MTK-based design, then the hardware design is more like going shopping. You pick some peripheral hardware choices like display, cameras, storage and very few other things. Your differentiator compared to other MTK-based phones are these choices and the customization of the Android system–as far as you can customize it at all. The nice part is that you get pretty much everything from the chipset maker. The SDK (Software Development Kit) or BSP (Board Support Package) comes with all the drivers ready to go, but beware, many of them are binary-only mystery code.

We did not have this luxury. We had to design the hardware from scratch and we also have to develop many drivers ourselves–everything that is not yet available as free software in upstream mainline Linux kernels. This also includes a lot of low level work we had to do for the support of the i.MX8M Quad CPU we chose. The i.MX8M was, at the time when we made this choice, still pretty young and mainlining its support in the Linux kernel had just begun. Some critical drivers were just barely starting to work, like the GPU support. Other mission critical things like power management, clock scaling (for the CPU, GPU and RAM) are just now starting to hit mainline and still need a lot of work. Peripherals like charge controller, accelerometer, gyroscope and magnetometer were only partially implemented. We had to work around bugs in the display controller of the i.MX8M to support the LCD and so on and so on.

Separated Chipsets

Current smartphone chipsets also make hardware design a lot easier since most of the critical components of a smartphone are already integrated into the main CPU, onto the single silicon die. This has lots of advantages but also a ton of problems concerning security and privacy. These integrated peripherals are sitting on the same silicon, tied tightly to the CPU. Complex parts like the cellular modem or the WiFi can access the very same RAM that is used at runtime to store your most private data, but at the same time they are controlled by binary-only firmware that no one except the manufacturer of that chip has access to. You have to trust that this firmware does not contain any malicious code to eavesdrop or spy on you. Trust in closed non-auditable complex computer systems is something everyone has learned the hard way we should not have. The news is full each day of zero day bugs and exploits throughout the stack–from applications to operating systems and even down to the very silicon the whole stuff runs on.

So we chose to separate the most critical parts from the CPU. The WiFi, Bluetooth and cellular modems are sitting on separate M.2 cards, separated from the CPU by defined interfaces (SDIO and USB) and–a Purism signature feature–can be physically switched off by hardware kill switches. All of that makes the hardware design even more complicated, more parts, more components, more interfaces. But we are convinced this is the only way to be as safe as possible.

Groundbreaking Work

This low level Linux kernel work and the hardware design work do not come for free. We started to research and develop this for the development kit in early 2017, the development kit started shipping in December 2018. We learned a lot from doing the dev kit and this experience is now going into the hardware design of the Librem 5 phone.

We were the first to announce, develop and deliver a Linux based mobile device development platform. Funny fact, a few months after we made the dev kit public others announced development boards following the very same principles (separating CPU and baseband/radios), using very similar hardware design ideas (like the 18650 battery holder) and some more details–even our hardware kill switches found new friends 🙂 We don’t mind this! We made this available, for free, to share, to study, to modify and to use for whatever others see fit. We made it available for the greater public good, to foster ethical products that protect digital rights and don’t exploit.

I am convinced we laid out a path and have been breaking ground, not only for the Librem 5 but also for other projects and products.

But this of course is expensive. The hardware with its separated peripherals costs a lot more just in parts alone than a comparable smartphone. The hardware design effort took many person months of hard work, a lot more than an off-the-shelf smartphone design would have cost.

The Software

And then there is the software. I already talked about all the Linux kernel work we had to invest in, to support peripherals, to tune things and also in parts to–frankly speaking–do NXP’s job in developing free software support for their CPU. Especially in the beginning (early 2018 and into 2019), it was pretty tough, but I also have to point out that NXP has heard us and many others and has significantly ramped up their Linux mainlining efforts – thanks!

But it is not only the kernel and drivers that we had and have to invest in. We also chose not to use a platform like Android, we chose to base on a system and platform that is maintained by a huge open source community, that is openly governed and to which anyone can contribute. We chose to use the same operating system base as we use on the Purism Librem laptops (PureOS), which is a Debian derivative. For applications and the graphical user interface we chose the same pattern: open governance, free software and active community and thus based on the same environment we use on our Librem laptops – GNOME.

In the beginning people called us crazy for that choice. It would be too much effort, there are alternatives (Plasma Mobile, Ubuntu Touch etc.) and that we would never make it with GNOME. Well, here we are, we are shipping with GNOME / GTK+ and we achieved exactly what we wanted: convergence between the desktop / laptop and the phone. Applications written for or modified with some care and not too much effort can now seamlessly run on the desktop and on smaller screens like the phone. This is simply amazing! And all of that with the same tools, the same programming environment and the same libraries and packages as on the desktop–truely write once and run everywhere (maybe having to recompile 🙂 ).

This convergence is a very unique feature now coming to PureOS. Quite a few have tried before us but did not get it this far. We created one of the first truly convergent environments: the same operating system base (Debian, deb packages), the same tools and SDK and the (pretty much) same applications for the desktop and the phone.

Again we are breaking ground, paving the way for many more to follow. All of our code is public, all our changes to upstream projects go upstream as soon as possible. The GNOME project has for a long time been thinking about mobile applications but never came around. Purism is making this a reality now, together with the GNOME community.

Only the Beginning

This development comes at a high price. We have a team of about 15 developers full time working on this for almost two years. You can easily figure how much money we already put into this, and we are not done yet. The release of the Librem 5 is only the beginning. We are committed to continue to develop the software and the hardware, this is not a single-shot project, this is breaking ground and making use of it afterwards.

With the release of the Librem 5 the story has just begun.

Discover the Librem 5

Purism believes building the Librem 5 is just one step on the road to launching a digital rights movement, where we—the people—stand up for our digital rights, where we place the control of your data and your family’s data back where it belongs: in your own hands.

Preorder now

The post Breaking Ground appeared first on Purism.

28 Nov 01:59

Burnaby Builds A City – 3

by Gordon Price

From William Whyte to Jan Gehl, there have been many attempts to find the formula for great public spaces.  And we do have a good idea of what goes into them. And yet really great spaces remain illusory, or we’d have so many more.

Here’s the one soon to be opening at ‘Amazing Brentwood’:

This is only a segment of the main plaza, still under construction.  It can’t fail insofar as there is a SkyTrain station on the south and lots of appealing attractions in every other direction.  And it feels like it has the right proportions given the way the height and curve of the buildings frame the space.

As Ian Wasson observed, the developer and designers have used really fine materials to realize their vision.

There’s a fountain off-centre that occupies a good percentage of the plaza.  You can see it from almost anywhere, but you have to walk around it – like a cog in the elaborate machinery of humanity in motion.

As night it’s a place that plays with light – ostentatiousnessl well done.  Here are some shots taken from Skyscraper Page by vanman:

Those whose job it is to take advantage of places that attract people obviously think this one will.

I know, a Starbucks.  Let the dishing begin.  But as a celebration of transit, this pavilion is terrific, seemingly cantilevered to catch the best view of the station and the trains gliding by.  Given its visibility, it’s an obvious place to meet, to connect, to wait patiently or do some busy work.  The Starbucks at Brentwood – everyone will know it.

So it’s clear that Brentwood Plaza (it needs a name) will be a good public space.  A great one?  Possibly.  Soon it will be full of people and we’ll see what happens.

28 Nov 01:58

Reflective vs Reflexive Practice

by Bryan Mathers
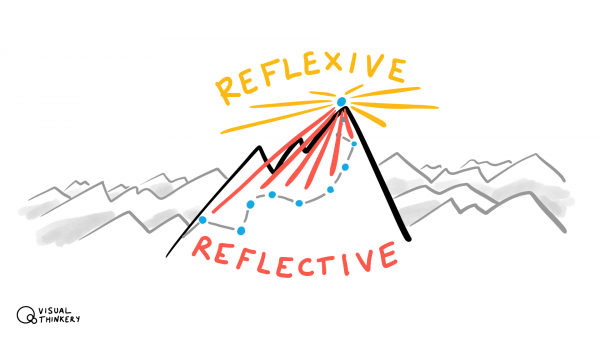
Reflexive vs Reflective practice

I’ve been creating visual landscapes with people from the Chartered Institute of Professional Development recently, and in one of the conversations with Andy Lancaster, this interesting contrast arose…

Reflective practice: where the learner reflects on what they have learnt and what it means to them;

Reflexive practice: where the learner considers implications from what they have learnt on the wider context they work within.

The post Reflective vs Reflexive Practice appeared first on Visual Thinkery.

28 Nov 01:58

Maintaining an Online Presence

by Eugene Wallingford

Earlier this year, many people were passing around this article about "re-learning how to be yourself online". Near the end the author reaches a set of questions that are motivating him:

Here I was retreating from the web because I thought my online presence was unimportant and inconsequential. Meanwhile, a foreign power was using its resources to pretend to be someone like me to try to influence someone like me. What kind of influence does that mean I really have? What kind of influence does that mean each of us has? And who fills that vacuum if we fail to fill it ourselves?

Given the size of my following on Twitter and the size of my blog's readership, it's easy for me to think my online presence is unimportant or inconsequential. When time gets tight and work crushes me down or other interests call, feeling that my writing is inconsequential can be all that it takes not to take the time to write. I have to remind that that is never been why I tweet or blog.

With so much of modern life happening online, sometimes it can feel as if online writing has much higher stakes than it really does, especially for someone with my limited audience. It's worth reminding ourselves that tweeting and blogging can be simple reflections of who we are, nothing more and nothing less. The stakes don't have to be high, and our influence can be small. That's okay. Writing has its own benefits, and connecting with readers, however few there might be, is a bonus.

I am unlikely ever to write much about politics here, so my influence is unlikely to fill a space coveted by foreign powers. Whatever influence I may have will come from being myself. I need to overcome the inertia of busy days and make time to write.

Actually, that is not quite right. Much as I mention in my first blog entry ever, linked above, I have amassed a folder of ideas for blog entries. I also have a single org-mode file containing entries to write. Some, like the item that became this post, consist only of a quoted passage or some other trigger and a single idea waiting to be expanded. The most depressing items in the file are a seemingly endless collection of partially-written posts, some nearly finished, that never quite crossed the finish line.

So: I need to overcome inertia and make time to finish. That is easier said than done some days. Writing takes time, but finishing often takes a surprising amount of time. Finishing also means putting the words out in the world for others to read. That feels risky for many different reasons, and our minds can trick us into thinking we are better off saving the file somewhere and never finishing. But I like to think and write, and connecting with readers, however few there might be, is a bonus.

Oh, and as we in America enter a long weekend dedicated to gratitude, I thank all of you who are still reading my blog after all these years. I appreciate that you spend even a few of your scarce minutes reading what I write. Indeed, I marvel at it. I hope you find it time well spent.

28 Nov 01:58

Lego’s version of Tesla’s Cybertruck is far sleeker than the real thing

by Patrick O'Rourke
Lego Tesla

In a move that aims to poke fun at Tesla’s recent reveal of the electric automotive company’s first truck, Lego has shown off its own version of the Cybertruck.

In a recent tweet, Lego showed off a Lego brick with wheels, along with the text, ‘The Evolution of the truck is here. Guaranteed shatterproof.” While both the real Cybertruck and the Lego Cybertruck look nearly identical, the rims of both vehicles seem to be slightly different.

Beyond this though, Lego’s Cybertruck is a near-perfect, brick-by-brick creation of Tesla’s controversial electric truck.

It’s obvious Lego is making fun of the Cybertruck’s reveal with this tweet. During the presentation, Elon Musk, the CEO Tesla, had designer Franz von Holzhausen throw a heavy metal ball at both the driver and rear passenger windows of the Cybertruck, resulting in them smashing.

Musk later claimed the Holzhausen’s earlier sledgehammer hits on the Cybertruck’s door panels compromised the integrity of the vehicle’s windows.

Since the reveal of the Cybertruck, more than 250,000 customers have put down a deposit for the futuristic-looking vehicle.

While I was initially put off by its Blade Runner-like design, it’s quickly grown on me. The design is out there, but I can appreciate that it looks unlike any other vehicle I’ve ever seen.

The post Lego’s version of Tesla’s Cybertruck is far sleeker than the real thing appeared first on MobileSyrup.

28 Nov 01:58

NewsBlur Blurblog: Time in a box – Union Station prepares to retire a vast interlocking system that’s guided every train in and out of Toronto for almost 90 years

sillygwailo shared this story from Metrolinx News.

Behind a city that has grown with the times, sits a remarkable system of handle-pulls, audible clicks and banks of early 20th century electrical technology – all housed in three castle-like downtown towers. Combined, it has constantly shepherded trains in and out of Canada’s largest city. Designed in the late 1920s, the complicated contraption is … Continue reading Time in a box – Union Station prepares to retire a vast interlocking system that’s guided every train in and out of Toronto for almost 90 years


27 Nov 18:58

The Best Toaster Oven

by Michael Sullivan and Brendan Nystedt
The Best Toaster Oven

Today’s high-end toaster ovens are Mini-Me versions of full-size ovens, useful for so much more than just making toast. They can also do everything from roasting a beautiful, golden-brown chicken to baking a cake. After many hours of testing since 2015—making stacks and stacks of toast, mini pizza bagels, and cookies—we think the small Panasonic FlashXpress toaster oven and the large Cuisinart Chef’s Convection Toaster Oven are the best options, depending on your space and needs.

27 Nov 18:50

All three of Apple’s 2020 iPhones will reportedly feature OLED displays

by Patrick O'Rourke

All three of Apple’s 2020 iPhones will reportedly feature OLED displays, though one is expected to not be as high-quality as the others.

Apple’s next two flagship iPhones, likely the successors to the iPhone 11 Pro and iPhone 11 Pro Max, are rumoured to feature more advanced, thinner display technology. The next version of the iPhone 11, on the other hand, is tipped to include a slightly thicker OLED screen.

Samsung was reportedly able to remove a touch-sensitive layer in its displays in order to make them thinner, according to ETNews.

The publication says that Samsung will be the sole supplier of the 2020 iPhones’ 5.4-inch and 6.7-inch OLED display, while the lower-end 6.1-inch screen will be split between Samsung and LG.

Apple is expected to reveal its next-generation of iPhones in September of 2020. This means we still have a few months to wait before more concrete information about the devices begins to leak.

If this rumour is accurate, it’s great to see Apple finally making the jump to OLED with all of its 2020 smartphones. While the iPhone 11 is still the Apple smartphone I recommend to most iPhone users, the fact that the handset features older LCD technology when nearly all Android manufacturers have moved on to OLED, has always been one of its most significant issues.

Source: ETNews Via: 9to5Mac

The post All three of Apple’s 2020 iPhones will reportedly feature OLED displays appeared first on MobileSyrup.

27 Nov 18:50

Loupedeck+ Review: Faster, More Natural Image and Video Editing with a Dedicated Control Panel

by John Voorhees
Source: Loupedeck

Source: Loupedeck

The Loupedeck+ is a hardware control panel for editing photos and video that transforms the software tools you’re accustomed to using with a mouse or trackpad into physical buttons, knobs, and dials. By eliminating the need to dive into menus and hunt for software, the Loupedeck+ changes the image editing process into something much closer to the feeling of editing on an iPad with the Apple Pencil. The seemingly endless series of swipes, drags, and clicks are replaced by something far more tactile and natural.

The result is a clear example of the benefit of using a dedicated tool for a particular task. Photo and video editing is often a high-volume, high-precision activity with lots of repetition, and depending on your job, tight deadlines. That makes any tool that can shave a little time off of editing each photo a win for professionals who often edit thousands of images in a week.

What I didn’t expect, though, is that the Loupedeck+ also makes editing more accessible for beginners like myself. As I’ll explain in more detail below, when Loupedeck sent me their device to test, I spent most of my time using it in Adobe Lightroom Classic, which I hadn’t used before. However, after a short time familiarizing myself with the Loupedeck+ layout, I found myself deep in the editing process with my eyes fixed on the images I was working on instead of darting back and forth hunting for the tools I wanted to use.

I may never enjoy the sort of time savings that a professional photographer could squeeze out of the Loupedeck+. However, simply knowing that I can dip in and out of Lightroom Classic for my editing needs with virtually no learning curve eliminates a significant hurdle that has slowed me down in the past. Although there are aspects of the Loupedeck+ that could be improved, it’s an incredibly powerful tool that fits into more workflows than I anticipated, which makes it an accessory worth considering for a wide range of users.

Hardware

Source: Loupedeck

Source: Loupedeck

The body of the Loupedeck+ is roughly the same dimensions as an Apple Magic Keyboard with Numeric Keypad, but thicker and about one inch longer and wider. The exterior is constructed of matte black plastic that makes it lighter than I expected. It’s heavier than a Magic Keyboard, but I’ve been using the Logitech Craft and MX Keys keyboards the past couple of months, and it’s lighter than both of those. There are also six rubber pads on the bottom that prevent the Loupedeck+ from slipping on your desk.

The surface of the Loupedeck+ combines an array of rectangular keys that are similar in look and feel to standard keyboard keys, along with smaller circular buttons, dials, and knobs. As much as I’ve loved using the Loupedeck+ overall, I’m not a big fan of the rectangular keys. Compared to a well-constructed keyboard like Logitech’s MX Keys keyboard or Apple’s Magic Keyboard, the keys on the Loupedeck+ are a little unstable and wobbly. It’s not entirely fair to judge the keys against a standard keyboard, though, because the Loupedeck+ isn’t meant for typing. Available keys include modifier, copy, paste, undo, redo, and tool switching keys, which are pressed frequently, but still nothing close to as often as the keys on a standard keyboard.

Still, I prefer the knobs and dials on the Loupedeck+ to its keys. The Control Dial is a large knob that clicks in regular intervals as it is turned. The dials that you slide under your finger have the same clicky feel too. In contrast, the smaller, more numerous knobs rotate smoothly and effortlessly as you edit an image. All three can be pressed, which is reminiscent of clicking a mouse or trackpad. In addition to the physical hardware, the Loupedeck+ makes tasteful use of color and white LED lights to indicate functionality and identify controls that have been activated.

The Loupedeck+ connects using a built-in USB-A cable, which I wish was removable for a couple of reasons. First, if you don’t work with the Loupedeck+ connected to your Mac all the time, you need to find a place to store it and its dangling cable. That isn’t a huge deal, but it looks messy. Second, I’d like the option to plug the Loupedeck+ into a USB-C port using a USB-A to USB-C cable, but I can’t because the attached cable is USB-A. For many Mac users, being limited to USB-A will mean using a USB-A to USB-C dongle to connect the Loupedeck+, which is a shame.

Overall, though, I like the design of the Loupedeck+. It feels sturdy, takes up about the same space as a keyboard, making it fit on any desk as long as you have somewhere to stash your keyboard temporarily, and the soft-touch, smooth plastic surface feels good to use and resists fingerprints well.

Using the Loupedeck+

I rarely edit video, and most of my photo editing consists of product photography for MacStories and personal pictures I take at family gatherings and on trips. I typically use Adobe Lightroom CC on the Mac or an iPad Pro and on the handful of occasions when I’ve had a video project, I’ll use Final Cut Pro X.

I started using Lightroom CC not long after it was introduced. I didn’t have the attachment to Lightroom Classic that many people have or the need for some of its tools that weren’t initially available in the Creative Cloud version. Lightroom CC has caught up to Classic in many ways since then, but in one way it hasn’t: Lightroom CC doesn’t support third-party plug-ins, so it doesn’t work with Loupedeck+, which is too bad. Still, a lot of people continue to use Classic, with which Loupedeck+ does work, and it’s important to note that the Loupedeck+ also supports several other apps, including:

  • Photoshop
  • Camera RAW
  • Lightroom 6.4
  • Premier Pro
  • After Effects
  • Audition
  • Final Cut Pro
  • Capture One Pro
  • Skylum Aurora HDR

For these tests, though, I decided to stick to what I know best: photo editing but with a twist. Because I couldn’t use the Loupedeck+ with Lightroom CC, I downloaded the Classic edition to see not only what the Loupedeck+ can do, but also how it fared in the hands of someone just learning the ropes of a new photo editor.

Controlling Lightroom Classic with the Loupedeck+

In Lightroom Classic, you can customize most of the Loupedeck+'s controls for the app's Develop and Library modes.

In Lightroom Classic, you can customize most of the Loupedeck+’s controls for the app’s Develop and Library modes.

The Loupedeck+ requires the installation of a helper app on your Mac that sits in the menu bar and looks a little like Pac-Man looking down on you as you work. Once installed and given Accessibility privileges in the Security & Privacy section of System Preferences, the Loupedeck+ can interact with Lightroom Classic and the other apps mentioned above as soon as it’s plugged in via its USB-A cable.

The most visually dominant feature of the Loupedeck+ is its Control Dial, which sits on the left side of the device surrounded by buttons. The Control Dial can be used for navigating among photos in Library mode, and in Develop mode the app enters cropping mode when the Control Dial is turned, allowing you to straighten a shot.

The smaller D1 knob next to the Control Dial allows you to zoom your crop frame in and out. Pressing on the Control Dial commits the change, though you can always undo the change with the dedicated Undo button in the top right-hand corner of the Loupedeck+, beneath which is a Redo button. Positioning these keys where you’d normally reach for the Escape key on a standard keyboard makes using Undo/Redo on the Loupedeck+ feel perfectly natural.

Below the Control Dial are modifier keys: Shift, Control, Command, Alt, and Tab, which are activated in combination with the Fn button. Those keys double as rating keys that are color-coded with dashes above each modifier symbol to show that you can use them in Lightroom’s Develop mode to rate images from 1-5. Tapping a rating key a second time toggles the photo back to unrated. Combined with the inverted ‘T’ of arrow keys on the right side of the Loupedeck+, which allow you to navigate between photos, you can quickly rate large collections of images. Also, pressing the –/Col button switches the modifier keys from rating images to assigning color labels to them.

Below those buttons are keys to copy and paste photo adjustments from one picture to another and C1 and C2 buttons for setting images as picks or rejects. The Fn button provides each of these buttons with secondary functionality too.

Where the Loupedeck+ really shines, though, is when you get to the series of smaller knobs that dominate the lower center portion of the device. Here you’ll find knobs to adjust:

  • Contrast
  • Exposure
  • Clarity
  • Blacks
  • Shadows
  • Whites
  • Highlights
  • Vibrance
  • Temperature
  • Saturation
  • Tint

Each of these knobs corresponds with a slider you’ll find in the right-hand sidebar of Lightroom Classic. In fact, as you twist them, you’ll see the sliders and associated values change. If a set of tools is collapsed, so it’s out of view, twisting the knob also opens it up to reveal the tool being used. If you go too far and want to reset a value to where you started, all you have to do is press the knob, and the value is reset.

What I love about these knobs is how tactile they make the process of editing. It’s much closer to how it feels to work on an iPad with an Apple Pencil. There’s still a level of abstraction and disconnect between the image on the screen and your hands, but less so than using a trackpad or mouse. The knobs also allow for a level of precision that can be hard to achieve with a trackpad or mouse, which usually takes longer too.

Speed is at the core of a lot of what the Loupedeck+ is about. Making exact adjustments swiftly and error-free is far easier when twisting the device’s knobs. It also allows you to work with your eyes locked on the image you are editing. There’s no need to look back and forth to make sure your pointer is grabbing the tiny slider handle.

In fact, after using the Loupedeck+ for a while, I used its Screen Mode button to open an image fullscreen, hiding Lightroom’s panels and other chrome. I was still able to edit using the Loupedeck+’s controls, creating the sort of distraction-free photo editing workflow that is so common when it comes to text editors. The only downside was that even on my 2018 6-core i7 Mac mini, the experience was laggier than I would have liked, and it wasn’t long before the mini’s fans spun up to a noticeable level. Fullscreen editing on a 4K display requires substantial horsepower that the mini simply can’t provide with its integrated graphics.

The top of the middle section of the Loupedeck+ is dominated by a series of eight dials capped with small round buttons labeled P1-P8. The dials are for adjusting individual colors in a photo. The color assigned to each is identified by a dot below the dial. To switch between Hue, Saturation, and Luminance for each color dial, simply press the appropriate button to the left of the dials. As with the knobs, pressing the dial reverts the change you made. The P1-P8 buttons are assigned to filter presets, which with the Fn button gives you quick access to a total of 16 presets.

There is a lot more functionality built into the Loupedeck+. There’s a button for toggling black and white mode, activating the before and after view for an image, opening the Export window, and more. Most of the device’s controls can also be customized using the Mac setup app to adjust the Loupedeck+ to exactly how you work.

The Applications dropdown and other customizations don't appear in the Loupedeck+ setup app until you engage the Custom Mode button on the device.

The Applications dropdown and other customizations don’t appear in the Loupedeck+ setup app until you engage the Custom Mode button on the device.

One quibble I have with the Loupedeck+ setup software, though, is that the options to customize its hardware only appear if you first press the Custom Mode button on the device. If you open the app without doing that, you won’t see any of the supported apps in the Applications dropdown or the supported modes. Once you’ve figured that out, however, switching between the modes that can be customized and applying custom actions to the Loupedeck+’s controls is straightforward.

The setup app is the device’s weakest link. I don’t know how it was developed, but the app behaves like a thin wrapper around a web app. That makes the app feel out of place and cheap on the Mac, which is in stark contrast to the hardware that’s obviously been built with care for a professional audience. Supporting multiple operating systems isn’t easy, but this is nonetheless disappointing for a product that has otherwise paid such close attention to the details. Fortunately, you don’t have to use the setup app very often.

The Loupedeck+ setup app is functional but detracts from the experience of using the device.

The Loupedeck+ setup app is functional but detracts from the experience of using the device.

The extensive use of modifier keys and customization allows for a level of flexibility that enables the Loupedeck+ to adapt to any user’s needs. As a newcomer to Lightroom Classic and someone with fairly simple photo editing needs, I was perfectly content to work with the default set of features built into the Loupedeck+. It’s great to know, however, that the power to access even deeper functionality is available.

It’s worth recalling that I’ve only covered how the Loupedeck+ works with Lightroom Classic. The device works with all the other apps I listed above too, making it an incredibly versatile tool for anyone working in a creative field with images, video, or, to a lesser extent, audio. Coupled with the speed with which I was able to edit images, I expect that the Loupedeck+ would be attractive to a lot of professionals.

I was surprised by how quickly the Loupedeck+ helped me learn Lightroom Classic. Beginners trying Lightroom, Photoshop, or one of the other supported apps for the first time may balk at the Loupedeck+’s $250 price tag, but serious hobbyists and people starting out in a creative field should consider it. Not only was the Loupedeck+ hardware intuitive and easy to use, but the more direct manipulation of images that it allowed eliminated the frustration of hunting for the tools I wanted in an unfamiliar UI.

The Loupedeck+ made exploring Lightroom Classic’s UI fun and intuitive. For example, instead of hunting for the saturation slider in Classic’s sidebar, I just twisted the saturation knob on the Loupedeck+. That section of Classic’s sidebar happened to be collapsed, but as soon as I adjusted saturation on the Loupedeck+, it opened in Classic, and I could see my experimentation play out in the image I was editing and with the sliders in the app’s sidebar. The low barrier to entry using the Loupedeck+ with Lightroom Classic combined with the visual feedback provided an immediate feedback loop that accelerated the learning process substantially.


It’s worth noting that since I began my testing of the Loupedeck+, Loupedeck released the Loupedeck CT, a more compact version that combines LED screens with some of its buttons and knobs to create an even more flexible and portable keyboard for editing images and sound. I haven’t tried the CT, and it looks like an interesting option, but at $549 it’s more than double the price of the Loupedeck+. The Loupedeck+ is not cheap either, but if you edit thousands of photos every week for a living or are looking to jump-start your way into complex image, video, and audio apps, it’s an investment that will save you valuable time.

There isn’t anything the Loupedeck+ does that can’t be done in more traditional ways with a standard keyboard, pointing device, and keyboard shortcuts. However, that isn’t the point. What the Loupedeck+ offers users is a better way of accomplishing those tasks. A way that is faster, more intuitive, and frankly, more fun than dragging sliders with a cursor. The Loupedeck+ is the sort of purpose-built accessory that is a fantastic addition for anyone who uses apps for which it’s built.

I’ve only scratched the surface of what the Loupedeck+ can accomplish with Lightroom Classic. Loupedeck’s own manual for the app runs for nearly 30 pages. When you consider the other apps the device supports, the depth and breadth of ways the device can be used are immense. Especially if you use more than one of the apps supported or are looking for a good way to get started with them, the Loupedeck+ is an accessory worth considering.

The Loupedeck+ can be purchased directly from Loupedeck for $249.


Support MacStories Directly

Club MacStories offers exclusive access to extra MacStories content, delivered every week; it’s also a way to support us directly.

Club MacStories will help you discover the best apps for your devices and get the most out of your iPhone, iPad, and Mac. Plus, it’s made in Italy.

Join Now
27 Nov 18:50

Some Videos to Watch as You Digest

by noreply@blogger.com (VeloOrange)
By Scott

We'll be closed Thursday and Friday of this week for Thanksgiving. We'll be back in the office on Monday, Dec 2nd at 9 am.

Normally, I'm all for the world of the written word - I've recommended books and such in the past, but I thought perhaps I'd throw some videos into play this year. Here in the Northern Hemisphere, the darkness is falling and unless you have skookum lights like the one Igor has on the Pass Hunter, you are likely still spending more time inside rather then out.

So here are some movies/videos/features to watch over the next while. I'm not trying to encourage anti-social behaviour (watching these around the dinner table may get you hairy eyeballs) - but I think these are entertaining for even the non-cycling members of the family.

I Just Want To Ride - Lael Wilcox's story of this years Tour Divide from Banff, Canada down to the Mexico border. Some great views of a wonderful part of the country and a very interesting person to get to know over the 38 minutes of the movie.
https://youtu.be/AEEGIt6FC34


The Suilven Escape by Alastair Humphrey's is a great example of multi model travel- Train, bikes and pack rafts, with a bit of hiking thrown in there. Al does great videos and this little 7 minute movie will get you looking at Scotland and train schedules quickly
https://www.youtube.com/watch?v=Rh2Y68zbW6I&feature=emb_title


Last Woman Standing- a movie not cycling related at all, but a great story of persistence and fortitude. It's a movie about one woman- Nicky Spinks from the UK- and her attempt to finish the Barkely Marathons. Its a trail running race in Tennessee and it's one of the hardest events to finish in the world.
https://www.youtube.com/watch?v=dJAW8STfiko


This is one of my favorite one-shot, continuous videos. It features Brandon Semenuk, a world-renowned slopestyle rider doing what he does best.
https://www.youtube.com/watch?v=oQDLAoPs-as


The Stars and The Water Carriers is a documentary following the 1973 Grio d'Italia. If you haven't watched classic cycling races, this is a great one to get into the mindset.
https://www.youtube.com/watch?v=ZUIr9LG1juw


Have a safe and wonderful Thanksgiving! We'll see you on Monday!