Shared posts

03 Dec 23:49

Ashton Kutcher's portrayal of Steve Jobs to debut at the Sundance Film Festival in January

by Dan Seifert
--

aaaaaaah

via www.hollywoodreporter.com

This coming January is likely to be the first time that anyone outside of a production facility will get a look at jOBS, the new biopic of Steve Jobs starring Ashton Kutcher. The movie, which was initially announced in April of this year, covers 30 years of Jobs' life from 1971 to 2000 as an entrepreneur and leader of such companies as Apple, NeXT, and Pixar. It also stars Dermot Mulroney, Josh Gad, Lukas Haas, J.K. Simmons, and Matthew Modine.

The movie is not based on Walter Isaacson's biography of Jobs, released shortly after Jobs' death last fall. A separate film that is based on Isaacson's book is also in the works, and is being written by famed screenplay author Aaron Sorkin.

jOBS is set to be screened on January 27, 2013, the...

Continue reading…

03 Dec 23:48

Mister Fluffins! Wait! Please! NO. Are you doing this because I...


Mister Fluffins! Wait! Please!

NO.

Are you doing this because I put screencaps from popular TV shows on the internet 20 minutes after they air, completely ruining them for anyone who might have to work that night or that lives in a different time zone, robbing those people of the joy that I experience when watching the shows in some sort of pointless race to be the first to prove I saw them, despite how absolutely stupid that premise is and the fact that there’s no legitimate reward for my actions, only disdain?

YES. YOU HAVE RUINED BOARDWALK EMPIRE FOR THE LAST TIME.

03 Dec 23:48

Create Fan Art for Mortal Kombat’s "Liu Kang" in Photoshop

by George Patsouras
--

psdtuts you so cray

Liu Kang is one of the most iconic characters from the world of Mortal Kombat. In this tutorial, George Patsouras will discuss how to paint a Bruce Lee-inspired Liu Kang in Photoshop. Since this will deal with portrait painting, you can use these techniques to recreate the Liu Kang painting, or you can come up with something entirely on your own. Let’s get started!

Step 1

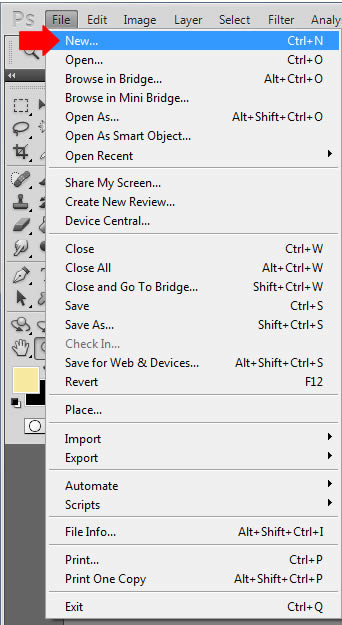
The first step is to create a new document for your painting. Simply go to ‘File’ > New

Step 2

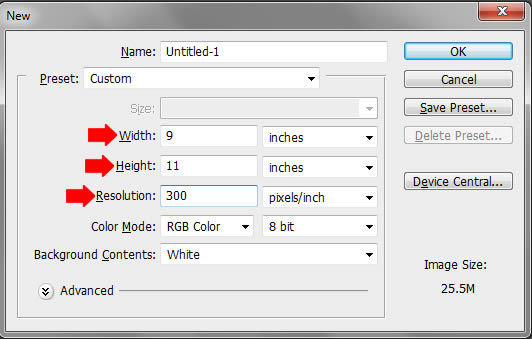
You’ll be asked to decide on the dimensions of the canvas, as well as the resolution. Type ’300′ for the resolution, as this is standard printing size and will allow us to achieve a fairly detailed portrait. Make a habit of working with a large canvas when painting! Now we can decide on the canvas size. Usually for portrait work I find that 9 inches by 11 inches works best, but there are no rules when it comes to this. Just go with what feels right – remember, we can easily crop, expand, and further manipulate the image if needed, so don’t be afraid to experiment to achieve the best results possible.

Step 3

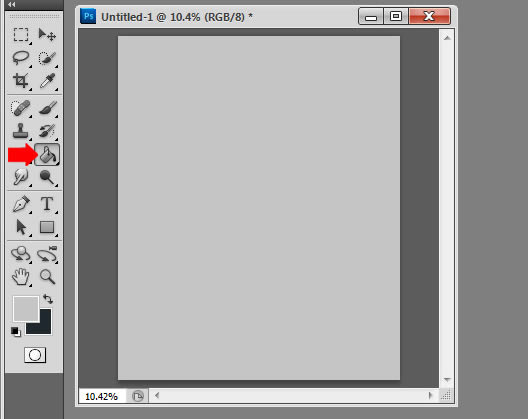
Use the Gradient tool (G) to fill in the canvas with a very light gray tone to ensure our eyes won’t be overwhelmed during the sketching process. Since we’re going to be tackling the line work first, color won’t even be considered at this point.

Step 4

We’re almost ready to begin sketching! Before laying down a single stroke however, it’s essential to study any useful reference material before beginning on the subject. In this case I referenced some screenshots from the original ‘Mortal Kombat’ movie, as well as the 2012 video game, and even Bruce Lee, whom the character itself is inspired by. I envisioned Liu Kang having his hands posed together, so I looked at some reference photos of that as well (hands can be very difficult to draw/paint, so reference material in that regard is especially helpful). My goal with this image was to pretty much mix up all the incarnations together to come up with something unique, while staying true to the character.

Once we have our references in place and have a solid understanding of the subject matter, it’s time to begin drawing. I create a new layer, and select a pure black color as the foreground color. I use a fairly small hard-edged brush (anywhere from 8px to 12px should be fine, generally speaking) at this stage with a very low opacity of 20%. This ensures that my preliminary work will be fairly loose, and will enable me to focus on gesture and proportions without getting caught up in details. Keep in mind that these are just guidelines, if you feel something else for you works better, than don’t be afraid to experiment and alter the tutorial to fit your needs.

I start by drawing a circle for the head, and draw a vertical line directly in half to establish the line of symmetry on the face. Then I draw another ‘axis’ for the eyes, which also helps establish the perspective of the face. The technique I use for drawing heads is exactly the same as those discussed in Andrew Loomis’ ‘Drawing The Head and Hands’. The ‘ball and plane’ method ensures that the face will always be correctly proportioned at any angle, so I highly recommend this material if you’re serious about drawing heads.

Once the head is loosely established, I begin to quickly draw the hands, thinking of them as huge blocks as opposed to individual fingers. I quickly mark down where the fingers are as well. Remember to think of hands as a bunch of cylinders when drawing and painting them; This will not only make it easier to draw and paint, but you’ll also get more believable results using this technique as well.

Step 5

Once everything is vaguely defined and readable, it’s time to begin refining the sketch to give it a crisper look. You can do this in two ways, really; You can clean up the existing layer using the Eraser (E) tool, or you can simply create a new layer on top of it and draw over the existing line work. I generally prefer the latter as my line work is always a bit messy on my first pass. In this case, I lower the opacity of the original layer down to roughly 60%, and create a new layer titled ‘sketch’. Using the Brush tool with an opacity of 25%, I draw over the existing line work and fill out the details as well.

One thing that I need to mention at this point is that the composition is pretty much symmetrical, which means we don’t necessarily need to draw the whole image; Just half would suffice, as we can easily duplicate it and flip it around. Firstly, drag a guide to split the composition in half. To do this, make sure the rulers/guides are activated (Command/Ctrl + R). Simply hold down the vertical ruler and drag it halfway on the image to create a new guide, which will split the composition in half. You can move the guide again if you wish to ensure that the composition is split evenly. Once that’s done, simply refine the line work on one side as much as you can. When it’s finalized, simply duplicate the layer (right click on the layer, and select ‘Duplicate Layer’) and flip it horizontally (Command/Ctrl + T, right click, select ‘Flip Horizontally’). Make sure it’s placed properly on the image (i.e. not too close to the existing layer, and not too far). Here you can see the final line work:

Step 6

The next step is the easiest one, and arguably the most important – picking a color theme. I knew right off the bat that I wanted warm tones throughout the image, as that would fit perfectly with the character. I use the Gradient tool (G) to quickly fill in the background color with a fairly dark red-ish color.

Step 7

With our color theme in mind, it’s time to establish our basic colors for each element of the painting. To keep things organized, keep everything in layers. In this case, I created a layer for the Skin, Bandana, and Hair and named them accordingly. The trickiest color choice would be the skin; We need to pick a color that’s a nice balance between peach and the general color theme of the image. The trick is not too go too crazy with the saturation, and keeping the skin tone fairly bright in comparison to the background.

Choosing the local colors for the bandana and hair is much simpler in comparison; The bandana is basically a brighter and more saturated color variation of the background, while the hair is simply a much darker and slightly less saturated variation of the background color. I apply the colors on all the said elements exclusively with a hard edged brush set too 100% hardness for a crisp and clean definition, and make sure not to paint outside of the line work we’ve already established.

Step 8

Once our base tones are clearly established, the next step is to decide on the lighting. Ask yourself where is the light source coming from, and shade accordingly. In this case, I choose a standard 45 degree light, which is excellent for helping define the forms of the figure. I decide to focus on shading the skin, so I pick a darker, slightly more saturated red-ish tone for the shadows, and a much brighter, slightly more warm color the highlights.

My color choices are fairly close to the base color we established, as I prefer to work in fairly limited color ranges at this point to focus strictly on values. Some artists actually prefer to work strictly in grayscale to focus on values first, and add colors at a later stage. Personally I find that method fairly time consuming, but I do value it’s importance with values and lighting, so I make sure to focus on that during the beginning stages of the painting process. Also remember that colors can easily be changes early on, so if you’re not happy with your color choices early on, don’t be afraid to scrap it and change it for something else.

Step 9

Once we have our light source defined, the next step is to push it even further to make it even more evident. Doing this is as simple as picking a much brighter highlight color the skin; In this case, I simply select the lightest tone with the color picker tool (Alt+ left click) and pick a much brighter, and slightly more yellowish tone to reflect the highlight color. Always remember to do some slight variations for your skin choices for a more believable result. For example, don’t just simply use the same color tone with just the brightness adjusted; Also do some adjustments to the color as well; For example, if you’re painting skin against a red background, make sure this is reflected on the figure by playing up the reddish tones in the shadowed areas of the skin. Also make sure your highlight color has some variation to the tone as well; Usually a bright yellow tone as chosen here will yield fairly believable results.

Step 10

We’ve worked on shading the skin long enough; Now it’s time to paint the hair! The technique is the same as shading the skin; Begin by painting the highlights reflecting the same light source from the left. Pick a brighter, and slightly less saturated and more warmer tone, and begin shading the hair. Think of the hair as big strands first, as opposed to thin lines, which will give you a ‘straw-like’ effect which we don’t want. To avoid this, use a larger brush than you think you need; Detailing the hair too early will not only be very time consuming and difficult, but the results won’t be as good and natural looking as if you would obtain using larger brushes at this point. You’ll notice that I barely even touched the right side of the hair at this point, as this area is fairly shadowed. You’ll also noticed I tried out some ‘Bruce Lee’ inspired scratches on his face as well.

Step 11

I decide the background is a bit too saturated and reddish for my tastes; I want more natural looking tones that would also compliment his skin tone better as well, so I decide to quickly alter it by using Photoshop’s Hue/Saturation tool (Image > Adjustments > Hue Saturation) and altering the tone slightly for a more greenish-yellowish hue.

I enhance the results even further by using Photoshop’s ‘Color Balance’ tool (Image > Adjustments > Color Balance), and play up the greens on the ‘Shadows’ options for an even more natural looking effect. I notice the shading resembles fire a bit as well, which is excellent given the character utilized this as well. I use a large, soft edged brush to add some slight ‘flames’ as well. I don’t want them to be clearly defined as that would take away too much attention from the figure. Instead I choose to be subtle to keep the focus on the figure.

Speaking about the figure, we need to do some slight color variation on him to reflect the new background shading as well. I again select the Color Balance tool (Image > Adjustments > Color Balance) and play up the greens a bit for the shadows. This unifies the image and really brings everything together. I also decide to do some more shading work on the hair, picking again a lighter and slightly more yellowish-tone to reflect the shading already established. I also uses smaller brushes at this point, but with fairly soft edges to keep the hair nice and smooth. Additionally, I use a soft-edged brush with an opacity of 33% to blend the harsh transitions on the skin for a much more smoother and natural looking feel.

Step 12

I’m happy with my color choices, but I’d like to push them even further to really help the figure pop out of the background. To do this, I decide to play up the complimentary colors here, so I introduce more Cyan and Greenish tones for the background. I paint everything manually at this stage with a fairly large, and soft-edged brush. Using complimentary colors neutralizes the color tones, which is great here as we want the focus to be on the figure, and not on the background. Of course, we also need to find a good balance as well, so I do keep some of the warmer tones on the left side of the image, to not only unify it with the figure, but to also play up the lighting we have already established as well.

I also decide to play up the cuts on his face, so I choose a slightly brighter tone and paint in the lighter parts of the scar, and also randomly place them surrounding that area to give his skin more texture as well. The technique is a bit random and messy, but ironically that works well for the effect we’re trying to achieve here, so don’t be too ‘careful’ here. Just go with what feels right.

I also vaguely introduce a greenish-blue tone on the right side of the skin; This would be coming from an invisible light source to the right, but would also keep to the tones we’ve established on the background (it’s essentially a much brighter and saturated variation of the more greenish tones in the background). Not only does adding this tone help unify the figure more with the environment further, but it also helps bring out the structure and from of the anatomy of the face as well, which is always a plus. It’s worth noting that I handle this in a new layer; Adding another light source this late during the painting process is a bit risky, I admit, so I make sure to keep it on a separate layer in case I’m not satisfied with the results. This is why painting with a program like Photoshop is very beneficial, you never have to worry about taking these types of risks since reverting back to the original image literally takes seconds to do. So don’t be afraid to be bold and experiment!

Step 13

I like the effect that the added light source brings, so I decide to play it up more by incorporating it on the right side of the image. To help unify the image, it’s important that all the elements of the figure are affected by this light source, as that would be the case in real life. I add the bright blue/green tone on the right side of his face, the right side of the hands, and finally, the right side of the hair. Again, I’m using several layers here just to make sure I don’t mess anything up, and merge them only when I’m completely satisfied with the results. It’s worth noting that I’m using a soft-edged brush for this step; The added light source doesn’t need too much definition as that would be too distracting, so a softer look is definitely preferred in that regard.

Conclusion

I’m satisfied with how the image is turning out, but I want it to be a bit darker and grittier, so I decide to give him more scars. Again, this is a fairly risky addition, so I make sure to handle it with a new layer. I pick a darker and much more saturated tone for the cuts and bruises, and make special care in making sure that they follow the form of the anatomy for a much more natural looking result. After I’m satisfied with the effect, I merge it down with the skin layer. At this point I also decide to introduce more ‘reddish’ tones on the bandana. To do this, I select a fairly bright and saturated red tone and apply it on the bandana with a soft edged brush, with a fairly low opacity. This creates great color harmony and helps to separate the hair, bandana, and skin more, which is always a plus.

The image is pretty much finished at this point; I simply have to do some slight color enhancement with Photoshop’s ‘Color Balance’ tool, playing up more Cyan and Greenish tones for the ‘Shadows’, and more Yellowish tones for the ‘Highlights’ to unify and enrich the color tones even further. I hope you enjoyed this tutorial, and make sure to leave any questions/comments here, as I’d be more than happy to answer any inquiries. Happy painting!

03 Dec 23:47

New food cart pod coming to downtown Portland

by Michael Russell, The Oregonian
A cart already on the lot at Southwest Sixth Avenue and Columbia Street in downtown Portland. Michael Russell/The Oregonian A new food cart pod is coming to downtown Portland.Spots in the parking lot at the southwest corner of Southwest...
03 Dec 23:46

'Prince of Persia' Creator Documents The Making Of Original 'Karateka'

by Charles Webb

Back in 1982, when developing the punishing martial arts classic "Karateka," famed designer Jordan Mechner kept a journal of his working experience. And now he's put all of those thoughts and memories together into an eBook, "The Making of Karateka."

Mechner, whose remake of "Karateka" was released on consoles in November, is dropping the DRM-free eBook in time with the Steam release of the remake developed by Liquid Entertainment. Mechner describes it as "a time-capsule record of that early Apple II era, and a window into the maniacal brain of a teenager obsessed with “breaking in” to making games and/or movies," an interesting but not unexpected direction in the chronicle of a game that had, at the time, surprisingly cinematic aspirations.

Mechner was 18 at the time of the game's release, and would likely have been primed by the tail end of the second generation of martial arts movies made in the West as Hollywood (and beyond) attempted to capitalize on the tremendous success of the Hong Kong kung fu flicks from 10 years prior.

[Source: Jordan Mechner]

Related posts:

'Mortal Kombat: Legacy' Season 2 In Production, More Details Revealed
Nintendo Brings Holiday Joy To Some Littles

--

Follow @MTVMultiplayer on Twitter and be sure to "like" us on Facebook for the best geek news about comics, toys, gaming and more! And don’t forget to follow our video gaming and TV writer @TheCharlesWebb.

03 Dec 23:46

Graham Hughes, First Backpacker to Visit Every Country Without Flying

by Rusty Blazenhoff

Graham Hughes

In 2009, adventurer and filmmaker Graham Hughes set a Guinness World Record for visiting 133 countries in one year by scheduled ground transport. He left Uruguay on January 1, 2009 and finished in Egypt on December 31, 2009. For his Odyssey Expedition, Hughes has achieved a new accomplishment: visiting every country (201 of them) in the United Nations Member States without flying to get there (map). His budget: less than $100 a week. The rules of The Odyssey Expedition (as set by Guinness World Records): he cannot fly, drive and he must use scheduled ground transport and must step foot on dry land. Here is a video of Graham celebrating the end of the expedition in South Sudan on November 26, 2012 and here’s a look at all of his Odyssey Expedition videos on YouTube. There is a lot more information about Graham’s journey around the world at his site and at The Daily Mail (link). His trip raised money for WaterAid, “a UK-based registered charity fighting to alleviate the disease, misery and death caused by open sewers, contaminated drinking water and lousy sanitation in developing countries around the world.”

It has been an adventure of epic proportions. I spent four days crossing open ocean in a leaky wooden boat to reach Cape Verde, I was imprisoned for a week in Congo and was arrested whilst attempting to sneak into Russia.

I ran the blockade into Cuba, blagged my way into Eritrea, ran around Iraq with an AK-47, spent seven days in Tibet and warned schoolchildren in Afghanistan about the dangers of men with beards.

I met the Prime Minister of Tuvalu, rode on top of a 18-wheeler through the northern badlands of Kenya, hitched a ride on a cruise ship to The Dominican Republic, joined a Bwiti tribe in Gabon, screamed at the ocean in El Salvador and watched a space shuttle blast off in the USA.

I’ve fed the crocs in Australia, hunted the dragons of Komodo, befriended the orangutans in Borneo, played with the lemurs in Madagascar, washed the elephants in India and eaten live octopus in South Korea.

I tip-toed into North Korea, took the slow boat to Nauru, danced with the Highlanders of Papua New Guinea and was rescued from Muslim fundamentalists in The Philippines by a ladyboy called Jenn.

image via Graham Hughes

via Andrew Hyde

03 Dec 22:36

Apple shoots down rumor about pro audio team "decimation"

by Jacqui Cheng

Apple officially shot down a rumor about the demise of its internal pro audio group in a response to a concerned user. Music marketing head Xander Soren responded to an e-mail on Monday, originally sent to Apple CEO Tim Cook, saying the pro audio team is safe and sound, according to a copy seen by MacRumors. Soren added the team is "hard at work" on the next version of Logic Pro.

Apple's commitment to its pro users has been increasingly called into question since the release of Final Cut Pro X in mid-2011. Numerous users of Apple's previous versions of Final Cut Pro were put off by the changes and perplexed by the number of useful features seemingly dropped from the new release. Combined with Apple's lengthy gap between major Mac Pro hardware releases, pro users have begun to loudly voice their concerns about Apple's commitment to their sliver of the market.

This sentiment, no doubt, is what fed a recent rumor claiming Apple's pro audio team had been "decimated," according to sources speaking to Pro Tools Expert. The sources claimed Apple's European team was down to two employees with no replacements in sight, and that the "next big audio application from Apple will be for the iPad."

Read 2 remaining paragraphs | Comments

03 Dec 22:33

Steam's TV-friendly Big Picture mode comes out of beta, Valve holds week-long sale to celebrate

by Chris Welch
Big picture mode

Steam's Big Picture mode, which aims to carve Valve's gaming platform a presence in your living room, today moved out of beta and is ready for general public consumption. When enabled, the feature optimizes Steam's on-screen presentation for an HDTV rather than your typical PC monitor. In doing so, Valve is making a big play at both the casual gaming sector and console owners that may be growing bored with aging hardware from Microsoft and Sony. Now users can assemble so-called Steamboxes that dramatically outpace the current crop of consoles, with the experience they ultimately take away limited only by their budget.

Valve recognizes the controller's importance in the living room

One thing Valve doesn't want you to replace any time...

Continue reading…

03 Dec 22:33

Canine Care

Canine Care

03 Dec 22:33

What Are Your Odds Of Winning The Lottery? [Infographic]

by Colin Lecher
In a word, terrible. On the bright side, your odds of becoming a pro athlete are good by comparison!

People have just won that ridiculous, record-breaking $579.9 million Powerball jackpot. Two people, even! But you know who didn't win the jackpot? A lot more people. This infographic shows exactly how crappy your chances are of winning the lottery--and how lucky today's winners really are.

Probability Of Winning The Lotto (And Other Unlikely Things) by Shane Snow. Learn about data visualization tools.

[visaul.ly]

03 Dec 22:31

Google announces updated Maps API for Android developers

by Florence Ion
Enlarge Screenshot courtesy of Google

Google announced in an official blog post that it has launched an update to the Google Maps Android API. The move brings new features for developers who want to integrate Google's framework into their own applications.

Google Maps Android API version 2 features vector-based maps that allow users to navigate through 2D and 3D dimensional views, as well as tilt and rotate via gestures. Google also tacked on a few other notable features for developers, including flexible user interface designs for larger Android devices like tablets. (We could see this also benefiting handsets with gargantuan displays, like the Droid DNA.) Google also added a new layer called indoor maps, which will help users navigate major airports and shopping centers. Developers can now create markers and pop-up info boxes without needing to use as much code as before, and the API will work on devices running Android 2.3 Froyo or later.

Apps like Trulia, Expedia Hotels, and FlightTrack all utilize the Google Maps API, though none have the update. Several screenshots show the API will produce a lot of what Google has already done with its browser-based Maps service, which should allow third parties to produce some beautiful and functional apps.

Read on Ars Technica | Comments

03 Dec 22:05

Moonshine Marshmallows by Blue Bottle Coffee

by Rusty Blazenhoff

Moonshine Marshmallow

At Food52, Caitlin Freeman of Blue Bottle Coffee shares her recipe for Moonshine Marshmallows, homemade marshmallows flavored with 3 tablespoons of Kings County Distillery Moonshine. Freeman is the co-author of the recently published book, The Blue Bottle Craft of Coffee: Growing, Roasting, and Drinking, With Recipes. The full story behind these marshmallows, along with the recipe, can be found at Food52.

Pouring

Pouring

S'mores

S’mores made with Moonshine Marshmallows

photos by Clay McLachlan

03 Dec 22:04

Brick or Block Lego Tournament @ Cruzroom | FREE, Lego Building Competition, Prizes

by PDXPIPELINE

From our sponsors at Shanrock’s Trivia:
Brick or Block Lego Tournament @ CruzroomBrick or Block Lego Tournament
Wednesday, December 5, 2012
7 p.m. | FREE | 21+
More Info: shanrockstrivia.com

Cruzroom
2338 Northeast Alberta Street Portland, OR 97211
(503) 208-3483

This monthly competition challenges your originality, your building skill, and your ability to create according to a theme randomly chosen by your host. Your team will have 75 minutes to build a Lego creation which will be judged by a panel of three. The top two submissions compete in an additional round held immediately after the first, and will build a piece emulating a different theme. Prizes will be awarded to the builders of the two highest scoring masterpieces. We supply the Legos; you supply the talent!

Limit: 8 teams; 2 – 6 people per team (come early – slots fill up fast!)
Hosted by ShanRock, along with special guest judges!

03 Dec 22:02

Super no bueno

And then the American Government made the Native Americans walk the Trail of Tears, and that was super no bueno. 

03 Dec 21:52

dansolomon: This is the sort of thing that I usually find...


dansolomon:

This is the sort of thing that I usually find annoying, but I really love how happy DMX is here to be asked to perform “Rudolph The Red-Nosed Reindeer.” 

“I know the lyrics!” X declares, before doing the preamble that I would have forgotten 100 times out of 100 if someone at gunpoint had insisted I sing this song properly. DMX clearly loves Christmas. 

03 Dec 19:30

Whisky cures blindness in vodka-poisoned man

by Aaron Cohen

Denis Duthie was recently struck blind by vodka reacting poorly to his diabetes medication. Doctors in his native New Zealand thought he might have formaldehyde poisoning, which you can get from drinking methanol. The cure? More cowbell, er, ethanol. Since the hospital didn't have enough medical ethanol for treatment, a nurse went to the liquor store for Johnnie Walker Black, which was then dripped directly into Duthie's stomach.

It worked because the ethanol competed with the methanol and prevented it from being metabolised into harmful formaldehyde, which can cause blindness.

"There are two potential ways of doing it: one is to give intravenous ethanol through a drip, but that is not available in all hospitals. There is also nothing wrong with supplying that alcohol via the gastro-intestinal tract, which is what they've chosen to do in this circumstance, and that's a well established treatment. If the patient's awake they can just drink it."

Science! No word on if Duthie had been eyeballing, butt-chugging, or using vodka tampons before going blind. (via @jamie_bear)

Tags: alcohol   medicine
03 Dec 18:27

Cards Against Humanity Game for $25 + free shipping, more (updated)

--

"Although that's list price, it's tied with our October mention as the lowest total price we could find for this hard-to-find game. (It's selling for $50 or more via several sellers at eBay.)"

Cards Against Humanity, LLC via Amazon offers its Cards Against Humanity Game for $25 with free shipping. Although that's list price, it's tied with our October mention as the lowest total price we could find for this hard-to-find game. (It's selling for $50 or more via several sellers at eBay.) Described as "a party game for horrible people," it shares a similar format as Apples to Apples with more adult content.

Update: Cards Against Humanity, LLC offers its new Cards Against Humanity Holiday Pack for whatever you want to pay. If you opt to get the pack for free, you'll get a stern scolding, but it'll eventually let you place an order. (They suggest paying $5.) That's the best deal we've seen for a Cards Against Humanity expansion pack.

Warning: The video includes some harsh language, but you can pause it and begin the ordering process, thus bypassing it entirely.

03 Dec 18:19

While overestimating the importance of her hobby...

by MRTIM

03 Dec 18:19

Photo


03 Dec 18:18

Scientists Develop Sixty Day Bread

by Unknown Lamer
--

what could possibly go wrong

Hugh Pickens writes writes "BBC reports that scientists have developed a technique that can make bread stay mold-free for 60 days that could also be used with a wide range of foods including fresh turkey and many fruits and vegetables. At its laboratory on the campus of Texas Tech University in Lubbock, Don Stull of Microzap showed off the long, metallic microwave device that resembles an industrial production line. Originally designed to kill bacteria such as MRSA and salmonella, the researchers discovered it could kill the mold spores in bread in around 10 seconds. 'We treated a slice of bread in the device, we then checked the mold that was in that bread over time against a control,' says Stull. 'And at 60 days it had the same mold content as it had when it came out of the oven.' Food waste is a massive problem in most developed countries. In the US, figures released this year suggest that the average American family throws away 40% of the food they purchase — which adds up to $165 Billion annually. There is some concern that consumers might not take to bread that lasts for so long and Stull acknowledges it might be difficult to convince some people of the benefits. 'We'll have to get some consumer acceptance of that. Most people do it by feel and if you still have that quality feel they probably will accept it.'"

Share on Google+

Read more of this story at Slashdot.


03 Dec 18:17

Diss Tinguished

--

please to forward to Musher

kitty in a turkey
03 Dec 18:16

Dungeons & Dragons? No, This Is Dungeons & Golf

by Spencer
--

haven't played; shared for concept

Where do fantasy heroes do when they aren't fighting dragons? Japanese game developer AppBankGames thinks wizards and warriors go golfing because they created Dungeons & Golf.

Read Dungeons & Dragons? No, This Is Dungeons & Golf on Siliconera!

03 Dec 18:15

Coverage

My resonant tunneling diode phone has limited range but a short enough wavelength to penetrate even the densest cages. This gives me a major combat advantage, hopefully.
03 Dec 18:15

NASA unveils discovery of organic compounds on Mars, still no 'definitive evidence' of life

by Kimber Streams
Curiosity soil scoops

While discussing the results of Curiosity's highly anticipated soil tests at a press conference today, NASA revealed that the rover did in fact discover evidence of organic compounds. However, NASA has not yet determined the source of the oxygen and chlorine compound perchlorate — Curiosity may have brought the organic carbon from Earth. If NASA does rule out the possibility that it was brought from Earth, another analysis is required to determine if the perchlorate originated on Mars, and yet another to find out if the carbon is actually biological.

In addition to being the first soil analysis to make use of all of the rover's instruments, principal Curiosity investigator John Grotzinger explained that the test served the dual...

Continue reading…

03 Dec 18:14

Directly Is a TaskRabbit for Online Customer Service

by Liz Gannes
--

anticipating the day when all service jobs are contractors of the same company talking to each other in the same room

A new site called Directly.com wants to outsource customer service. But it doesn’t want to help companies outsource their own customer service — it wants to help customers get better service by asking questions and getting answers from outside “experts,” often for a fee.

Think of it like TaskRabbit, Redbeacon, Pearl.com or LawPivot — but instead of getting help around the house or medical or legal advice, Directly helps people with their problems related to AT&T, Bank of America, DirecTV or one of the other 24 companies it independently supports.

For those companies’ customers, Directly wants to be an alternative to tweeting out into the ether, struggling through often-unhelpful overseas call centers, or scanning the dead ends of online forum discussions to find the occasional relevant comment.

Directly co-founder Antony Brydon claimed in an interview last week that companies don’t mind that Directly is stepping in between them and their customers. He said that, in testing — Directly has been operating for the past year under the name Insidr.com — companies often informally asked staffers to participate with their own expert knowledge.

Unlike some Q&A sites like Quora that shun actual cash payments, Directly supports both karmically driven and monetarily driven helpers.

Directly’s questioners can opt to assign a reward — say $10 — for an answer. Answerers can cash out the money or donate it. The two can connect to each other for a one-on-one consultation.

Also, contrary to the trend of using social authentication from Facebook to make a marketplace more transparent, Directly allows for pseudonyms, with answerers ranked on their “helpfulness.”

After customer service, Directly wants to target mortgage advice. The company — which currently has six employees and is based in San Francisco — sees itself as a platform for matching up customers and experts in all sorts of fields, Brydon said.

Brydon and his co-founders have a history of starting and selling companies together, including Visible Path and IUMA. They’ve raised $1.75 million in seed funding from True Ventures and other investors.

03 Dec 18:13

Pleasure Without Planescape: A New Torment?

by Alec Meer
--

LIKE SERIOUSLY WHY WASN'T THIS THE FIRST THING YOU DUDES THOUGHT OF DAMN DANGIT

Despite all the talk over the years, I think we’d all long ago given up on there ever being a proper, official, original team sequel to the RPG that can change the nature of a man, Planescape: Torment. However, one of its original devs has expressed his interest in a follow-up and come up with an intruiging way around the licensing issue.

Colin McComb, who played a major design role in PST, now works at InXile, where the bulk of his work on the upcoming Wasteland 2 is now complete. So he’s wondering what grindstone to put his nose to next. “Of all the games I’ve written, the one that I keep circling back to is Torment.”
(more…)

03 Dec 18:12

Page 1

by dorothy


Nixonland Brooklyn Public Library

03 Dec 18:11

Confessions Of A Reluctant Brony

by Jon

Confessions Of A Reluctant Brony

I have watched a lot of pony-centric cartoons in the last year. A LOT. While I admit that these cartoons are much better than they have any right to be, they are NOT for teenage boys. They are for little girls. You can tell because there’s very little murder and lots of pinks and purples.  Are we clear, bronies? Good. Now go outside and try talking to real people.

If you missed Friday’s strip, why not click here? That way you can read it even though it is no longer Friday. Everybody wins!

Check out these excellent products for sale in the SFAM store! They all make excellent gifts and will win you the affections of anyone you give them to.

Bunnies!

hint hint

buy a book damn you

03 Dec 18:10

Typographers and Their Handwriting

Typographers and their handwriting. Via Swiss Miss.
03 Dec 18:07

For Sale: House With a Built-in Restaurant

by Kara Baskin

Can't dine and dash here.

What to get for the food-lover on your list who already has everything? How about a four-bedroom home with an in-house bar and restaurant, described as "trendy" by the discerning real-estate mavens on Craigslist? The house itself has a "beautiful large kitchen with custom made oak cabinets." And on the lower level is the aforementioned "trendy" restaurant, which is rented out for $3,000 per month and, judging by the photo, currently doubles as a dive bar.

Anyway, if you're interested in living above your customers and aren't afraid of being awoken in the night by bar brawls, this Everett abode could be just the investment (or reality show waiting to happen) for you! Or for Gordon Ramsay?

$700000 / 4br - 3945ft² - 4 bedroom house with bar/restaurant (Everett) [CL]

Read more posts by Kara Baskin

Filed Under: real estate, craigslist, for sale, trendy restaurant