Shared posts

02 Feb 18:24

Cleaning with Steam

by KCS Team

In this article, we will explore how steam cleaning can revolutionize your cleaning routine and help you achieve a spotless and sanitized home or workspace.

You’ll learn how to effortlessly removing dirt, grease, and grime from surfaces without using harmful chemicals or spending hours scrubbing.

By harnessing the power of high-pressure steam, this method provides a deep clean that not only eliminates surface dirt but also kills bacteria and germs lurking beneath.

Whether it’s your kitchen countertops, bathroom tiles, or even upholstery – steam cleaning can tackle them all with ease.

Why Clean with Steam

One of the main advantages of cleaning with steam is that it eliminates the need for harsh chemicals. Steam alone has natural sanitizing properties, making it safe for use on various surfaces such as tile floors, countertops, upholstery, and even clothing. Not only does this help protect your home from harmful chemical residues, but it also reduces the impact on the environment.

Steam penetrates deep into pores, grout lines, and crevices, loosening dirt and grime that other cleaning methods leave behind. This means that even the most hard-to-reach areas in your home can be thoroughly cleaned with ease.

By choosing to clean with steam, you’re embracing a natural way of cleaning that not only delivers outstanding results but is also environmentally safe.

How to Clean With Steam

Steam cleaning is a highly efficient method that uses hot water vapor to disinfect surfaces and remove even the toughest stains.

The process involves using a steam cleaner, which heats up water to produce high-pressure steam. This powerful steam is then directed onto the surface being cleaned, penetrating deep into pores and cracks, killing bacteria, and loosening dirt for easy removal.

Equipment

When it comes to cleaning with steam, it’s important to have the right equipment – namely, a steam cleaner!

There are different types of steam cleaners available, each designed for specific tasks.

Additionally, you may want to consider accessories that can enhance your cleaning experience.

Lastly, don’t forget about safety and maintenance – understanding how to properly use and care for your steam cleaner will ensure long-lasting performance.

Types of Steam Cleaners

Whether you’re looking to clean floors, upholstery, or even sanitize surfaces, there’s a steam cleaner out there that can get the job done efficiently and effectively.

Handheld Steam Cleaner

handheld steam cleaners are compact devices that are lightweight and portable, making them ideal for quick spot cleaning tasks. They often come with multiple attachments that allow you to clean various surfaces such as countertops, windows, and even clothing. The handheld steam cleaners heat up quickly, producing high-pressure steam that can effectively remove dirt and grime. However, their small water tanks may require frequent refilling during longer cleaning sessions.

Canister Steam Cleaner

Another popular option is the canister steam cleaner. These versatile machines have a larger water tank capacity than handheld models, allowing for longer continuous cleaning sessions without frequent refills. Canister steam cleaners often come with a variety of attachments for different cleaning tasks like mopping floors or steaming carpets. They provide powerful steam pressure and temperature control options for tackling tough stains and sanitizing surfaces. However, their larger size and heavier weight may make them less convenient for smaller spaces or those who prefer lighter equipment.

To summarize:

Type of Steam Cleaner Advantages
Handheld Steam Cleaner – Compact and portable
– Multiple attachments for different surfaces
– Quick heat-up time but small water tank capacity
Canister Steam Cleaner – Larger water tank capacity
– Versatile with various attachments
– Powerful steam pressure but larger size and heavier weight

Remember to choose a steam cleaner based on your specific needs and preferences to achieve optimal results in your cleaning endeavors!

Accessories

Check out the wide range of accessories available for your steam cleaner to enhance your cleaning experience and make it a breeze. With these accessories, you’ll be able to tackle even the toughest cleaning tasks with ease. Here are some must-have accessories that will take your steam cleaning to the next level:

Extension Wand

Reach those high shelves, ceilings, and corners effortlessly with an extension wand. No more straining or bending over, this accessory will save you time and energy.

Upholstery Brush

Give your furniture a fresh new look by using an upholstery brush. It’s perfect for removing dirt, stains, and pet hair from sofas, chairs, and mattresses.

Grout Brush

Say goodbye to dirty grout lines! This small but mighty accessory is designed specifically to clean grout. With its stiff bristles, it can easily remove stubborn dirt and grime from tile floors or bathroom walls.

Squeegee Attachment

Achieve streak-free windows and mirrors with a squeegee attachment. It’s quick and efficient at removing water droplets without leaving any marks behind.

These accessories will not only make your cleaning tasks easier but also ensure that every nook and cranny is thoroughly cleaned. So why wait? Upgrade your steam cleaner today and enjoy a hassle-free cleaning experience like never before!

Safety

To ensure your safety while using your steam cleaner, always remember to follow the manufacturer’s instructions and take necessary precautions. Start by reading the user manual thoroughly before operating the machine. It may seem like a tedious task, but it’ll provide you with valuable information on how to handle the equipment safely.

Additionally, make sure to wear appropriate protective gear such as gloves and safety goggles to safeguard yourself from any potential hazards.

When using a steam cleaner, it’s crucial to be mindful of your surroundings. Keep children and pets away from the area you’re cleaning to prevent accidents or injuries. Also, be cautious of hot surfaces and avoid touching them directly after steam treatment. Give them ample time to cool down before handling or wiping them clean.

Remember that prevention is better than cure! Before starting any cleaning session, check for any damage or leaks in the machine as this could pose a risk during operation. Regularly maintain and clean your steam cleaner according to the manufacturer’s guidelines to ensure its optimal performance and longevity.

By following these safety measures, not only will you protect yourself from potential harm but also maximize the effectiveness of your cleaning efforts. Your wellbeing matters, so prioritize safety while making your home shine with the power of steam!

Maintenance

Before you start using your steam cleaner, it’s important to regularly maintain and clean it according to the manufacturer’s guidelines in order to ensure its optimal performance and longevity.

Taking care of your steam cleaner will not only help it last longer, but also keep it working at its best so that you can continue to enjoy the benefits of steam cleaning. Here are some simple maintenance tips to keep in mind:

Clean the Water Tank

Empty and rinse out the water tank after each use to prevent any buildup or residue from affecting the performance of your steam cleaner.

Check for Clogs

Inspect the nozzles and hoses regularly for any blockages that may hinder the flow of steam. If you notice a clog, carefully remove it using a small brush or needle.

Descale as Needed

Over time, mineral deposits can accumulate inside your steam cleaner’s heating element. Follow the manufacturer’s instructions on how to descale your machine effectively.

By following these maintenance practices, you’ll be able to keep your steam cleaner in top shape and ensure that it consistently delivers powerful cleaning results.

Remember, a well-maintained machine is not only beneficial for yourself but also for those who may borrow or use it after you. So take pride in caring for your steam cleaner and enjoy its long-lasting performance!

Applications for Steam Cleaning

Discover the endless possibilities of utilizing steam cleaning throughout your home to effortlessly achieve a pristine and germ-free environment.

Here are five areas in your home where steam cleaning can make a significant difference:

Floors

Steam mops are perfect for tackling all types of flooring, from hardwood to tile. The high temperature of the steam not only lifts dirt and grime but also kills bacteria and allergens lurking on your floors.
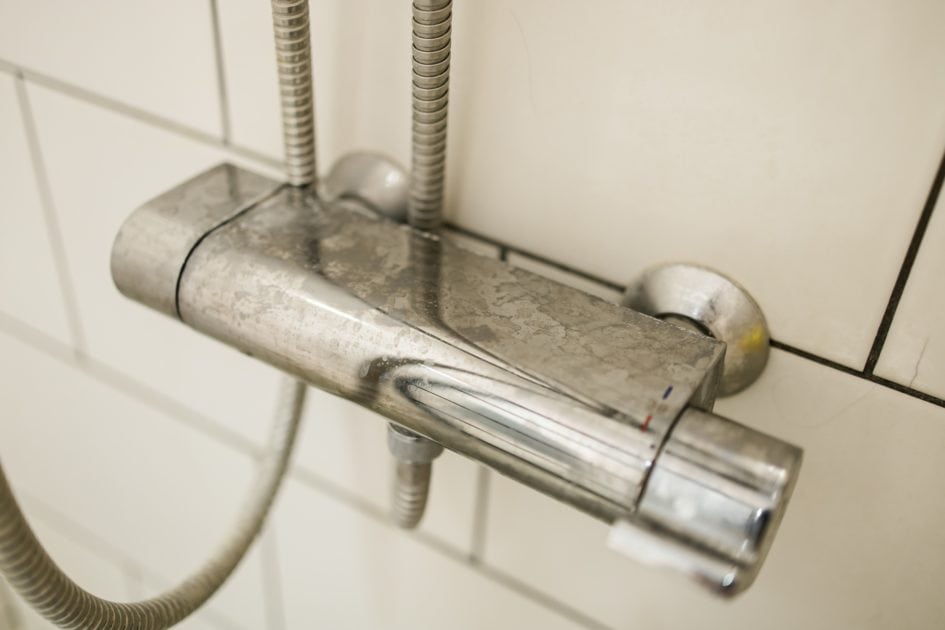
Bathrooms

Say farewell to stubborn soap scum, mold, and mildew. A steam cleaner effortlessly blasts away buildup in showers, sinks, toilets, and even hard-to-reach corners.

Kitchen

Steam is an excellent tool for deep-cleaning kitchen surfaces. From countertops to stovetops, it can eliminate grease stains while sanitizing at the same time. You can also use it on appliances like microwaves or refrigerators to remove food spills and odors.

Upholstery

Steam cleaners work wonders on fabric sofas, chairs, curtains, and mattresses. They effectively remove stains without leaving any residue behind while killing dust mites that may trigger allergies.

Windows

Achieve streak-free windows with ease by using a steam cleaner equipped with a squeegee attachment. It quickly eliminates dirt and grime from both inside and outside windows, leaving them sparkling clean.

Frequently Asked Questions

Can steam cleaning effectively remove tough stains and grime from carpets?

Yes, steam cleaning can effortlessly eliminate even the most stubborn stains and grime from carpets. Its powerful hot steam penetrates deep into the fibers, effectively removing dirt and leaving your carpets refreshed and spotless.

Is steam cleaning safe for use on delicate or sensitive surfaces, such as hardwood floors?

Yes, steam cleaning is safe for delicate surfaces like hardwood floors. The high temperature of the steam kills germs and removes dirt without causing damage. You can trust it to give your floors a thorough clean!

Can steam cleaning eliminate allergens and bacteria from upholstery and mattresses?

Yes, steam cleaning is a powerful weapon against allergens and bacteria lurking in your upholstery and mattresses. It’s like a superhero swooping in to save the day, leaving your home fresh and clean.

Are there any limitations to steam cleaning, such as certain materials or surfaces that should not be treated with steam?

When it comes to steam cleaning, there are a few limitations you should be aware of. Some materials, like silk or waxed surfaces, may not be suitable for steam treatment. Always check manufacturer guidelines to ensure you don’t damage your belongings.

How does steam cleaning compare to traditional cleaning methods in terms of effectiveness and efficiency?

Steam cleaning outshines traditional methods, like a radiant sun piercing through storm clouds. Its unparalleled effectiveness and efficiency leave no surface untouched. Harness its power to effortlessly serve your cleaning needs.

02 Feb 18:24

Cleaning with Hydrogen Peroxide

by KCS Team

Cleaning with hydrogen peroxide is the practice of using the chemical compound to disinfect and clean different surfaces.

Hydrogen peroxide is a commonplace and cheap product found in just about any pharmacy or grocery store and provides an easy solution for cleaning and sanitizing without relying on harsh chemicals or specialized equipment.

It can be used in a variety of situations and has a number of advantages that make it a great cleaning tool.

Uses of Hydrogen Peroxide

Hydrogen peroxide is a powerful oxidant, in the form of a clear liquid, with myriad uses around the home and in industrial processes.

It has been used in industrial and medical settings for many years, though recently has found increasing popularity due to its ability to safely disinfect and whiten a variety of materials.

In this article, we will discuss how to use hydrogen peroxide for disinfecting, stain removal, and whitening purposes.

Disinfecting

Hydrogen peroxide is an excellent option for killing off germs and bacteria on surfaces. It can be used to effectively disinfect anything from countertops and kitchen utensils to wounds, cuts, and scrapes.

Its germicidal properties make it valuable in a variety of applications and it works by releasing a special type of oxygen when applied, which is toxic to bacteria and other microorganisms.

Hydrogen peroxide is very effective in killing off a wide range of bacteria and viruses, making it a great choice for reducing the spread of infections and for providing ongoing protection against germs on frequently touched surfaces.

It does not leave any residue or discoloration, making it an ideal option for disinfecting surfaces in the home and in medical settings.

Stain Removal

Hydrogen peroxide is a versatile cleaning agent that can be used for stain removal. It is a mild bleach, making it a great choice for lightening up stubborn set-in stains. It can remove a variety of stains, including blood, sweat, grass, and oil.

To use it for stain removal, dilute it with water and apply directly to the stain. Allow the solution to sit for a few minutes, then rinse with hot water.

For tough stains, use a brush to agitate the solution into the fabric and allow it to sit for a few more minutes. Once done, launder the item as usual.

For easier spot cleaning, it is best to use a spray bottle, which dispenses the solution more evenly and allows for better control of the amount used.

Hydrogen peroxide can be used on white and colored clothing, upholstery, and carpets. It is effective on natural fibers, such as cotton and linen, as well as synthetic fibers, such as polyester and rayon.

Whitening

Hydrogen peroxide is a compound that is widely used for whitening teeth, fabrics, and other materials. In dentistry, hydrogen peroxide is found in a variety of forms, including toothpastes, gels and whitening strips.

When applied to the teeth, hydrogen peroxide molecules enter the tiny holes on the enamel of the teeth and oxidize, removing stains and resulting in a whiter and brighter smile.

Additionally, hydrogen peroxide is effective at brightening fabrics and materials. Applying hydrogen peroxide directly on fabrics or linens with minor discoloration is an effective measure for restoring its original color quickly.

Furthermore, unique bleaches made from hydrogen peroxide are used to brighten hair and fabrics and provide an extra boost to get whiter and brighter results faster.

In essence, hydrogen peroxide is a versatile and effective tool for whitening teeth, fabrics, and other materials.

Safety Precautions

When cleaning with hydrogen peroxide, it’s essential to ensure proper safety precautions are taken at all times. It is an effective, yet powerful cleaning agent, so you should take the proper precautions when handling and storing it. In this section, we look at storage, handling, and dilution of hydrogen peroxide for optimal use and safety. We will also investigate relevant safety protocols for avoiding any risks.

Storage

Storing hydrogen peroxide is often overlooked as a safety precaution, but it can be an important factor for both general storage safety, and for the safety of your cleaning projects.

It should be kept away from direct heat or flame, as well as from combustible materials such as paper, fabric, cardboard, wood and other organic materials.

It should be kept in a cool, dry and temperature-controlled room, and it should be kept out of direct sunlight. Do not store hydrogen peroxide at temperatures exceeding 77°F (25°C); extreme temperatures can cause the bottle to burst.

Hydrogen peroxide should be stored in tightly sealed glass or plastic containers, preferably in an upright position.

Additionally, it is important to label all of your hydrogen peroxide bottles with cautionary warning signs and a display of the current expiration date in large and clear text.

Handling

When handling hydrogen peroxide for cleaning, it is important to take proper safety precautions to ensure its safe and effective use.

Safety precautions include wearing protective eyewear, protective clothing, and rubber or neoprene gloves.

When pouring or applying hydrogen peroxide, it is important to use a measured container and chemical-resistant gloves to prevent contact with eye or skin.

When using hydrogen peroxide with other cleaners, it is important to read manufacturer’s instructions and separate the products to prevent dangerous chemical reactions.

When using hydrogen peroxide to clean surfaces, it is important to first test it in an inconspicuous area to make sure it won’t cause discoloration or other damage.

Following the manufacturer’s instructions and proper safety precautions can help ensure the safe and effective use of hydrogen peroxide for cleaning.

Dilution

When diluting Hydrogen Peroxide, it is important to use caution. Always make sure to read the instructions on the label for the appropriate dilution ratio of water to Hydrogen Peroxide.

For most purposes, you can mix 15-20 parts water to 1 part Hydrogen Peroxide. In some cases, the shelf-stable, hydrogen peroxide available from stores range from 3-12% concentration, and should be diluted appropriately.

It is important to keep Hydrogen Peroxide in a tightly closed container and diluted solutions should be used the same day for maximum effectiveness.

Additionally, the concentration of Hydrogen Peroxide should be checked to ensure that it is within acceptable standards for the job. Users should be mindful that Hydrogen Peroxide can stain surfaces and cause discoloration, so extra precautions should be taken to protect vulnerable areas.

Cleaning with Hydrogen Peroxide is a powerful way to help maintain a safe, sanitized environment.

Cleaning Techniques

Cleaning with hydrogen peroxide entails a variety of techniques which can be used on various materials, such as hard surfaces, carpets, and upholstery. In this section we will cover the most important cleaning techniques for each of these materials. We will look at how hydrogen peroxide can be used to clean hard surfaces, carpets and upholstery.

Hard Surfaces

When it comes to cleaning hard surfaces with hydrogen peroxide, a dilute version of hydrogen peroxide should be used to safely these surfaces. This dilution can be achieved by mixing one cup of hydrogen peroxide with one gallon of water.

The areas that need to be cleaned should then be soaked with the solution, while taking precautions to protect the skin. After, use a microfiber cloth to wipe away the dirt and grime from the surface. For especially stubborn stains, using a brush might be necessary before wiping away the dirt.

The hydrogen peroxide solution can be used for all types of hard surfaces, including granite, laminates and ceramic tile.

Before using this cleaning solution, it is best to check the manufacturer’s recommendations for the specific surface being cleaned.

Carpets

Cleaning carpets with hydrogen peroxide is a safe and effective way to quickly break down dirt and stains. As a natural cleaner, it is ideal for deep cleaning carpets in order to maintain their appearance and keep them looking fresh and clean.

To start, pre-treat the carpet with a generous amount of hydrogen peroxide and let it sit for several minutes.

Then, use a carpet cleaning machine with a foam or deep cleaning solution to further break down the dirt and stains.

Finally, vacuum the entire area and let it fully dry before anyone walks on the carpet. Repeat this process as needed, and your carpets will remain clean and livable for longer periods of time.

Upholstery

When cleaning upholstery, hydrogen peroxide can be used to tackle a variety of tough stains and odors.

To remove ink, grease, or oil stains, mix equal parts of hydrogen peroxide and water, and then spray onto the affected area. Using an old, clean cloth or towel, work the cleaner into the stain, continuing until the material is stain-free.

Hydrogen peroxide can also be used to counter strong odors. Blot the smelly area with a damp towel saturated in a 3% hydrogen peroxide solution. If needed, let the fabric dry before doing a final check for residual odors.

For fabric upholstery, mix warm water with three tablespoons of hydrogen peroxide and a few drops of liquid dish soap. Using a clean cloth, work the solution in with a circular motion, then rinse with warm water. Finally, blot with an absorbent cloth to absorb the water. Finally, hang the fabric upholstery to dry.

Benefits of Hydrogen Peroxide

Cleaning with hydrogen peroxide offers a multitude of advantages over using traditional cleaning methods. Not only is it non-toxic and eco-friendly, it is also cost-effective. In this section, we will discuss the many benefits of using hydrogen peroxide for cleaning. Specifically, we will cover non-toxicity, eco-friendliness, and cost-effectiveness.

Non-Toxic

Hydrogen peroxide cleaning offers a number of significant benefits over other cleaning solutions, such as being non-toxic.

With hydrogen peroxide, no harsh chemicals are needed for effective cleaning. This quality makes it safe to use on a variety of surfaces, from walls and floors to countertops and delicate furniture. It also means that there is no strong smell or fumes that linger in the air.

Plus, hydrogen peroxide is biodegradable, meaning it will not pollute the environment. Furthermore, since it is a natural germ-killer, it is often used by hospitals to sanitize medical equipment and to protect patients from harmful pathogens.

For these reasons, hydrogen peroxide is becoming increasingly popular as a part of eco-friendly cleaning practices and has become a staple in many households.

Eco-Friendly

Cleaning with hydrogen peroxide provides eco-friendly advantages to traditional chemical-based cleaning agents.

It is less toxic than bleach and many other cleaning products, making it safer to use in the home while still achieving desired results.

Hydrogen peroxide also breaks down into oxygen and water, meaning its byproducts will not harm the environment when washed away. There are no chemical-based scents that linger after a hydrogen peroxide cleaning, as the compound is odorless, non-abrasive, and free of fillers, making it an effective and safe option for the environment.

Additionally, because it is eco-friendly, it is often sold in recyclable containers, making it a great choice for those with a conscious mindset when it comes to waste and sustainability.

Cost-Effective

When it comes to cost-efficient cleaning agents, hydrogen peroxide is a clear winner. As a homeowner, you’re always looking for ways to save money without compromising on quality, and that’s exactly what hydrogen peroxide offers.

Firstly, hydrogen peroxide is incredibly inexpensive compared to many other cleaning products. You can find it at most grocery and drug stores for just a few dollars per bottle. This means you’ll be able to stock up on this versatile cleaner without breaking the bank.

Secondly, the beauty of hydrogen peroxide lies in its multi-purpose nature. Instead of purchasing separate products for various cleaning tasks around your home, you can rely on this one solution to tackle multiple jobs. From disinfecting surfaces to removing stains and brightening laundry, hydrogen peroxide covers a wide range of applications which translates into cost savings.

Moreover, since hydrogen peroxide has a long shelf life when stored properly (in a cool and dark place), you won’t have to worry about it going bad before you have the chance to use it all up. This means less waste and more money saved in the long run.

Lastly, as hydrogen peroxide is so widely available in stores across Kitchener, Waterloo, Guelph and beyond, you’ll never have trouble finding it when needed. Its accessibility ensures that homeowners can consistently rely on this cost-effective solution for their cleaning needs.

Frequently Asked Questions

What is hydrogen peroxide?

Hydrogen peroxide is a clear liquid with strong oxidizing properties and is a pure chemical compound made of two hydrogen atoms and two oxygen atoms.

What are the benefits of using hydrogen peroxide for cleaning?

Hydrogen peroxide is effective at killing viruses and bacteria on surfaces, it is non-abrasive and leaves no residue, it is a natural bleaching agent, and it is inexpensive and non-toxic.

How do I use hydrogen peroxide for cleaning?

Mix a solution of three parts water and one part hydrogen peroxide. Use a cloth or sponge to spread the cleaning solution onto the surface. Leave the solution on the surface for a few minutes before wiping it off.

Are there any safety precautions when using hydrogen peroxide for cleaning?

Wear protective equipment such as goggles, gloves and a face mask when handling hydrogen peroxide. Keep hydrogen peroxide away from heat, flames, and combustible materials. Avoid ingesting or inhaling hydrogen peroxide and use in a well-ventilated area.

Is hydrogen peroxide suitable for all types of surfaces?

No, hydrogen peroxide is not suitable for use on certain surfaces such as mirrors, painted surfaces and ceramics as it may cause discoloration and damage.

What are some other uses for hydrogen peroxide?

In addition to cleaning, hydrogen peroxide can be used for laundry whitening, treating scrapes and cuts, removing blood stains from fabrics and floors, and for disinfecting counters and cutting boards.

02 Feb 18:24

Cleaning with Baking Soda

by KCS Team

This comprehensive guide is the go-to resource for everything you need to know about using baking soda for cleaning. It delves into the chemistry behind baking soda, detailing its structure and properties that make it a potent cleaning solution. It also compares baking soda to other popular cleaning agents, highlighting its efficiency and eco-friendly nature. The article also features practical ways to use baking soda for dry and wet cleaning and how it can be combined with other products for enhanced cleaning effects. Furthermore, it dives into specific applications of baking soda in household and outdoor cleaning—from the kitchen, bathroom, laundry to even jewelry and automobile cleaning. Lastly, the article discusses important safety measures, potential risks and proper disposal methods when cleaning with baking soda. From science facts to cleaning hacks—this is your ultimate guide to cleaning with baking soda.

Understanding Baking Soda

Baking soda, scientifically known as Sodium Bicarbonate, is a mild alkaline compound that has numerous applications in baking, cooking, cleaning, and health care due to its unique physical and chemical properties. It appears as a fine white powder that is odorless and slightly salty.

Introduction to Baking Soda

Baking soda is a staple ingredient found in nearly every kitchen. Known formally as Sodium Bicarbonate, it is derived from a naturally occurring mineral called Nahcolite. It is mostly popular for its function as a leavening agent in baking. Besides baking, its practical uses span across various domains like health care, personal hygiene, and cleaning.

Bonafide Benefits of Baking Soda

When you clean your home with baking soda, you sidestep the toxins and harsh chemicals found in some commercial cleaning products. This means a safer, healthier home for you and your family.

Baking soda also provides lots of cleaning power! It’s a mild abrasive, which can help scrub away tough dirt and grime. It’s also great at neutralizing odors, making your home smell fresh and clean. Plus, its natural whitening properties can help brighten up surfaces.

Last but not least, baking soda is a cost-effective solution for cleaning. It’s inexpensive and versatile. You can use it in every room of your house, from the kitchen to the bathroom, and even the laundry room.

In short, cleaning with baking soda is an affordable, effective, and healthy alternative to commercial cleaning products. Whether you’re tidying up your kitchen counters or freshening up your living room, baking soda might just be your new best friend.

Two children wearing safety glasses using chemistry set at home

The Science Behind Cleaning with Baking Soda

The efficacy of baking soda as a cleaning agent goes beyond old-fashioned wisdom. There’s practical chemistry at play here.

Chemical Composition of Baking Soda

Baking soda is composed of sodium ions and bicarbonate ions. It forms a weak base when dissolved in water. This property enables it to neutralize acids, break down proteins, and facilitate the removal of grime and grease.

How Baking Soda Works as a Cleaning Agent

Baking soda cleans in two ways. First, it acts in its dry form as a mild abrasive, scrubbing and exfoliating surfaces without causing damage. Second, when dissolved, it forms a basic solution that neutralizes acidic odours and substances, making it easier to eliminate stains and dirt.

Comparing Baking Soda with Other Cleaning Agents

Compared to commercial cleaning agents, baking soda has less environmental impact and is non-toxic. While other agents may have stronger chemicals that work faster, baking soda is gentler and safer for use around children and pets.

wipe clean

How to Clean with Baking Soda

Cleaning with baking soda can be done in several ways, depending on the task at hand.

Dry Cleaning with Baking Soda

Baking soda is a remarkably effective and environmentally friendly cleaning agent. When used in its dry form, baking soda works as a mild abrasive, able to tackle tough stains and build-up without scratching the surfaces. It’s known for its deodorizing properties as well, which makes it a favored solution for freshening up areas in your home that are susceptible to bad odors.

The science behind baking soda’s cleaning prowess lies in its pH scale. Being a mild alkali, baking soda causes dirt and grease to dissolve easily in water for effective removal. It’s a natural deodorizer because it interacts with odor particles and neutralizes them, rather than simply masking them like many commercial products.

The most common use-cases for using dry baking soda in cleaning are:

Carpet Deodorizer

Sprinkle a generous layer of baking soda over your carpets and rugs, let it sit for at least 15 minutes (or even overnight for bad odors), and then vacuum as usual. The baking soda will absorb any unpleasant odors leaving your carpets smelling fresh and clean.

Fridge Freshener

Place a box, or small, open container of baking soda in your fridge. The baking soda will work to absorb any strong smells from foods and keep your fridge smelling fresh.

Scrubbing Agent

Make a paste out of baking soda and a small amount of water. This paste can be used to scrub off grime and stains from various surfaces including kitchen counters, ovens, and bathtubs.

Shoe Deodorizer

If your shoes are developing a particularly unpleasant smell, baking soda can help. Sprinkle a small amount of baking soda into your shoes and leave overnight. It will absorb the odors, leaving your shoes smelling fresh. Remember to tap out any excess baking soda before wearing them!

Wet Cleaning with Baking Soda

In wet cleaning, baking soda is mixed with warm water to create a paste or solution. This is applied to the dirty surface, allowed to sit, and later wiped off.

Baking soda may be a powerhouse when used dry, but its versatility truly shines when it is combined with liquid. As a mild, natural alkaline product, baking soda in a wet form creates a reaction that helps lift grime and dirt, making it easier to eliminate. It’s this chemical reaction that also aids in deodorizing; baking soda targets the acidic molecules (which cause foul odors) and neutralizes them.

Here are some practical and most common methods of using baking soda in wet cleaning:

Drain Cleaner

Baking soda and vinegar can be used to clear buildup in your drains. Pour half a cup of baking soda down the drain, followed by half a cup of vinegar. Wait 15-20 minutes for the mixture to work and then rinse with hot water.

Grout Cleaner

A paste made from baking soda and water can effectively clean tile grout. Apply the paste to the grout, let it sit for 10 minutes, then scrub with a toothbrush before rinsing.

Produce Wash

Baking soda can help remove pesticides and dirt from fruits and vegetables. For this, sprinkle a little baking soda onto a clean, damp sponge. Scrub your produce and then rinse.

Silver Polish

Tarnished silver can be brought back to life with a solution of baking soda and water. Make a paste, rub it onto the silver with a clean cloth, and then rinse and dry.

Toilet Cleaner

Pour a cup of baking soda into the toilet and let it sit for an hour. Then flush. If staining persists, scrub with a toilet brush before flushing.

Stovetop Cleaner

Make a mixture of equal parts baking soda and warm water. Apply it to stubborn grease stains and scrub using a soft cloth or sponge. Rinse thoroughly after.

Combining Baking Soda with Other Products for Enhanced Cleaning

While baking soda is a standalone star in the cleaning world, coupling it with other natural products can amplify its cleaning power. Here are some combinations that work exceptionally well together:

Baking Soda and Vinegar

The combination of baking soda and vinegar creates a powerful cleaning solution. The acidic nature of vinegar and the alkalinity of baking soda cause a fizzing reaction that helps break down stains, dirt, and grime. This dynamic duo works wonders for cleaning drains, freshening up dishwashers, and removing hard water stains.

Baking Soda and Lemon Juice:

Baking soda and lemon juice together can tackle tough cleaning tasks. The citric acid from the lemon boosts the potency of baking soda, making it a great solution for cleaning greasy stovetops, freshening up cutting boards, and brightening up bathroom fixtures.

Baking Soda and Hydrogen Peroxide

For those stubborn spots and stains, mixing baking soda with hydrogen peroxide can create a powerful paste. This mixture can whiten tile grout, clean up greasy pans, and even serve as a non-toxic way to bleach laundry.

Baking Soda and Salt

A blend of baking soda and salt can be an effective abrasive cleaner. It’s great for scrubbing away grime without scratching surfaces and can be used to clean pots, pans, sinks, and ovens.

Baking Soda and Essential Oils

Mixing baking soda with essential oils can add a fresh, pleasant scent to your cleaning tasks. In addition to fragrance, many essential oils have antimicrobial properties that increase the effectiveness of baking soda. This mix is perfect for carpet cleaning, mattress freshening, and general room deodorizing.

By combining these readily available ingredients with baking soda, not only can you enhance the cleaning power, but you also get to customize it to your needs. Remember, always test a small area first when using these combinations to ensure they are safe for the material you’re cleaning.

Other Applications of Baking Soda in Household Cleaning

Baking soda’s versatility makes it applicable in several cleaning scenarios in the home.

Kitchen Cleaning

Baking soda can be used to clean dirty pots and pans, brighten dull silverware, and deodorize refrigerators and other kitchen appliances.

Bathroom Cleaning

In the bathroom, it can be used to scrub bathtubs, shower doors, and tiles, as well as to deep-clean toilets and unclog drains.

Laundry Cleaning

When combined with bleach, baking soda increases bleach’s effectiveness by 20%, making it excellent for whitening clothes. It helps eliminate tough stains, brighten dull clothes, and deodorize laundry.

Silverware and Jewelry

Baking soda restores shine to silverware and jewelry. A paste of baking soda and water, applied and washed off after a few minutes, can do wonders.

Safety Measures and Considerations

It’s important to remember that while baking soda is a natural and safe product, it should be used responsibly.

Understanding the Limitations of Baking Soda

Although it is versatile, baking soda cannot be used on aluminum items, antiques, marble, or delicate fabrics. It is also not capable of killing bacteria or fungi.

Potential Risks and How to Avoid Them

Despite its low toxicity, it can irritate the eyes and skin. It can also cause respiratory distress if inhaled. Always wear protective equipment if possible.

Disposal of Baking Soda after Cleaning

It’s essential to rinse and thoroughly clean areas or items after using baking soda to prevent potential damage due to prolonged exposure.

Frequently Asked Questions

It’s common to have queries about the appropriate use of baking soda. Can it be mixed with all cleaning agents? What concentration is best for different cleaning applications? Can it damage particular materials? The answers to such questions are critical for effective and safe cleaning with baking soda.

1. How effective is baking soda for stain removal?

Baking soda proves highly effective as a stain remover due to its mild alkaline nature. This composition helps to dissolve dirt and grease easily, making it beneficial for many cleaning needs (Cleanipedia, 2020).

2. Is baking soda safe for all surfaces?

While baking soda is generally safe, using this cleaning agent on aluminum, antiques, and delicate surfaces could result in damage. Always conduct a small spot test before applying widely (Gascoyne, 2014).

3. Can baking soda provide a deep cleaning solution?

Yes, baking soda is a powerful deep-cleaning agent. When combined with vinegar or hydrogen peroxide, baking soda can pack a stronger punch for deep cleaning tasks (Good Housekeeping, 2020).

4. How can baking soda help eliminate bad odors?

Baking soda naturally absorbs and neutralizes odors. This capacity to absorb foul smells makes baking soda a popular choice for eliminating odors from refrigerators, trash cans, and other areas (Truini, 2021).

5. What makes baking soda an environmentally friendly cleaning option?

Baking soda is environmentally friendly because of its natural properties, non-toxic nature, and biodegradability, making it a preferable option for individuals concerned about reducing chemical use in cleaning (Miller, 2017).

6. Can baking soda be used for cleaning silver?

Indeed, baking soda is commonly used for cleaning silver. By making a paste of baking soda and water, one can gently remove tarnish and restore the shine of silver items (Springs, 2018).

02 Feb 18:24

Techniques for Safe Dust and Cobweb Cleaning

by KCS Team

Cleaning homes can be a fulfilling task, especially when you see the fruits of your labour – a sparkling, dust-free space. But, what about those pesky dust bunnies and cobwebs lurking in corners or little nooks you can hardly reach? Don’t worry, we’ve got you covered!

In this article, we’ll equip you with effective techniques and tips for safe dust and cobweb cleaning. It’s a comprehensive guide that ranges from your choice of cleaning tools, to hard-to-reach areas, and even when to consider professional help.

We’ll also provide insights on how to take good care of your cleaning tools, ensuring they’re always in top shape and ready for the next cleaning day. And, let’s not forget the preventive measures to keep dust and cobwebs at bay.

Ready to wield your cleaning tools like a pro? Let’s dive right in!

Choice of Cleaning Tools

The success of any cleaning task often depends on the tools you use. In dust and cobwebs cleaning, the right choice of tools can make the process smoother, more efficient, and safer. This section highlights the types and specifications of dusters and vacuum cleaners, as well as protective gear that can enhance your safety during cleaning.

Types of Dusters

When it comes to removing dust and cobwebs, dusters are a cleaning staple. But remember, not all dusters are created equal. There are different types, each designed for specific tasks and surfaces.

First, we’ve got the classic feather duster. These are light, easy to manoeuvre and great for dusting around delicate items. However, they can sometimes spread dust around, so they’re best used for light dusting.

Microfiber dusters, on the other hand, are brilliant dust magnets. They have a static charge that attracts and holds onto dust particles instead of just shifting them around. Plus, they’re machine washable, making them an environmentally friendly choice.

Then we have lambswool dusters. Similar to feather dusters in design, these natural wool dusters effectively pick up dust without scratching surfaces.

Lastly, there are extendable dusters. These come with telescoping handles and are perfect for reaching high or awkward places.

Choosing a Vacuum Cleaner

Vacuum cleaners are another indispensable tool for dust and cobweb cleaning. From handheld models to full-sized machines, knowing which is right for your cleaning needs can make a huge difference.

Handheld vacuums are portable and easy to navigate, ideal for spot cleaning dust and cobwebs in corners, behind furniture or in your car. However, they might not be the best choice for larger cleaning tasks due to their smaller capacity.

Upright and canister vacuum cleaners offer more power and capacity which is ideal for larger areas or more intensive cleaning jobs. Many models come with a variety of attachments, including long, narrow nozzles and soft brush tools perfect for getting the cobwebs from corners and ceilings.

For those hard-to-reach cobwebs and dust, a vacuum with a long hose or an extension wand could be a game changer. Some models even come with HEPA filters that can improve the air quality in your home by trapping allergens.

Protective Gear

Cleaning dust and cobwebs, while very satisfying, can also result in tiny particles falling into your eyes or being inhaled. This is where protective gear comes into play.

Safety glasses or goggles are recommended to keep your eyes safe from dust and other small particles. They are especially handy when you’re tackling those high, hard-to-reach corners where cobwebs love to gather.

A dust mask or a respirator is also vital. This protects you from inhaling dust particles, which can lead to respiratory discomfort. They are particularly important if you or a family member have allergies or asthma.

Going a step further, if you’re sensitive to dust, you could add a pair of gloves to your cleaning gear – as they can prevent skin irritation from dust particles.

Remember, cleaning is not just about making your space sparkle, it’s also about maintaining your health and safety. Using the right protective gear ensures that you can clean effectively, without risking your well-being.

Cleaning Techniques and Approaches

Once you’ve got the right tools in hand, it’s time to explore different cleaning techniques and approaches. In this section, we’ll delve into manual cleaning techniques, tips on using vacuum cleaners, and the difference between spot cleaning and deep cleaning. Your approach to cleaning is just as important as the tools you use. Let’s find out what techniques work best for dust and cobweb eradication!

Using a Duster

Manual cleaning may require a little elbow grease, but it often delivers the most satisfying results, especially for dust and cobweb removal. Here are some techniques and tips to help you make the most of it.

Start by dusting from the top down. This way, any dust or cobwebs knocked loose will fall onto yet-to-be-cleaned areas. This includes starting with ceilings and corners, then moving onto furniture and finally, the floor.

Choosing the right duster is key. For light dusting, a feather or lambswool duster works wonders. For more persistent dust, a microfiber duster should be your go-to tool. Remember to clean or shake out your duster frequently to prevent dust from spreading.

When dealing with cobwebs, always remember to keep your distance to avoid getting debris in your face. An extendable duster can be your best friend here.

Don’t rush. Slow and steady movements will prevent dust from being thrown into the air.

Remember to wear your protective gear while cleaning.

Using Vacuum Cleaner

Using a vacuum cleaner is an excellent way to amp up your cleaning power, especially when dealing with dust and cobwebs. Let’s explore some techniques to get the most out of your vacuum cleaner.

First, using the right attachments is key. Use a narrow nozzle to reach corners and crevices and a soft brush tool ideally for webs on ceilings and in corners.

Remember to vacuum slowly. Rushing might leave some dust behind or, worse, scatter it around. Give your vacuum cleaner time to pick up as much dust as possible.

Just like in manual cleaning, it’s best to start from the top and work your way down when vacuuming. This ensures that any dust stirred up by the vacuum is eventually caught as you make your way down to the floor.

If your vacuum has adjustable suction, use a higher setting for stubborn dust or heavily-soiled areas and a lower one for delicate surfaces such as lamp shades or curtains.

Empty or change your vacuum’s bag or bin regularly to maintain its suction power and prevent dust from escaping back into your home.

Spot Cleaning vs Deep Cleaning

Spot cleaning is your everyday clean-up. It targets visible dust and cobwebs that crop up in highly-trafficked or easily accessible areas. An example of spot cleaning would be quickly dusting the living room shelves or removing a cobweb from a corner. It’s ideal for maintaining a clean space in between deep cleaning sessions.

On the other hand, deep cleaning is more thorough and comprehensive. It tackles both the visible and hidden dust and cobwebs, often in hard-to-reach areas like corners of ceilings, under furniture, or behind appliances. Deep cleaning requires more time and effort but typically doesn’t need to be done as frequently.

Both spot and deep cleaning have their places in maintaining a clean and comfortable home. Use spot cleaning for daily or weekly touch-ups, and schedule deep cleaning sessions every few months or as needed.

Cleaning Hard-To-Reach Areas and Corners

Cleaning hard-to-reach areas and corners can be challenging, but it’s a lot easier with the right tools and techniques. In this section, we’ll discuss the use of extension poles and ladders, and provide safety precautions along with special considerations when cleaning high areas. Whether it’s dust on the top shelf or a cobweb hiding behind the wardrobe, we’ll help you tackle those tricky spots.

Use of Extension Poles

Extension poles, often used with dusters or other cleaning attachments, literally give you an extra hand when cleaning. With an extendable pole, you can reach high ceilings, corners, and other awkward areas without stretching or straining yourself.

When using an extension pole, be sure to extend it gradually. Start by reaching the lower areas and then extend the pole as necessary. This approach ensures more stability and control.

It’s also important to make sure the cleaning attachment is firmly attached to the pole. The last thing you want is for it to fall off while you’re in the middle of dusting.

Finally, always be aware of your surroundings when using an extension pole. Be mindful not to knock over items or hit light fixtures while cleaning.

Use of Ladders and Safety Precautions

Ladders can also be a handy solution for reaching those high, hard-to-reach areas. However, climbing a ladder does come with its own set of safety precautions.

First, always ensure your ladder is sturdy and secure before climbing. A shaky ladder is an accident waiting to happen.

Keep both hands free as much as possible. This means you should keep your cleaning tools in a tool belt or caddy. This will ensure your balance is maintained while you clean.

Never overreach when on a ladder. If you can’t comfortably reach an area, get down and move the ladder closer.

Keep your body centred between the ladder sides. Leaning too far one way could cause the ladder to topple.

Lastly, never rush when you’re on a ladder. Take your time and ensure you’re safely positioned before you start to clean.

Professional Cleaning Services

In this section, we’ll discuss when it might be necessary to hire a professional cleaner, how to choose the right cleaning service, and an estimate of the average costs and what to expect. Let’s discover how professional cleaning services can be a viable option for maintaining a dust and cobweb-free home.

When to Hire a Professional Cleaner

There are times when hiring a professional cleaner is the best course of action. Here’s when you should consider it.

Health or Physical Limitations

Dust and cobweb cleaning can be physically demanding, especially when it involves climbing ladders or reaching difficult areas. If you have health concerns or physical limitations, a professional cleaner can be a safer, stress-free option.

You’re Too Busy

We all have those times when work, family, and other responsibilities take over, leaving little room for thorough house cleaning. Hiring a professional can free up your time and ensure your home stays clean.

Remember, while DIY cleaning can be effective, there are times when calling in a professional is the best choice. They can provide a thorough, deep cleaning that not only makes your home sparkle, but also enhances the quality of your indoor environment, and quality of living for you and your family.

Choosing the Right Cleaning Service

Selecting the ideal cleaning service requires careful consideration. Start by exploring online reviews on various platforms to assess the reputation of the service provider. This will provide you with insights into the experiences of previous clients and the quality of service offered.

It’s crucial to ensure that the cleaning service is licensed and insured. This protects you from being held responsible for any unforeseen damages or accidents that may occur during the cleaning process, providing a necessary safeguard.

Finally, inquire about their cleaning procedure. A professional service should readily provide a comprehensive plan outlining their approach to handle dust and cobwebs, and the tools or products they use. This clarifies what you can expect from their service, ensuring your home is in capable and reliable hands.

Average Costs and What to Expect

When contemplating professional cleaning services, having an idea of the costs can assist in your decision-making process.

The average cost for cleaning services can vary greatly based on factors such as location, size of your home, and the extent of cleaning needed. Generally, they can range anywhere from $35 to $50 per hour per cleaner or about $35 to $50 per room.

However, don’t let cost be the only determining factor. Remember, a good cleaning service should provide excellent results, saving you time and effort, and potentially preventing health issues related to dust and cobwebs. Investing in a professional cleaning service can be a worthwhile investment when you consider the value of your health and time.

Care and Maintenance of Cleaning Tools

Taking care of your cleaning tools is just as important as the cleaning itself. In this section, we’ll discuss how to clean and preserve dusters, maintain vacuum cleaners, and store your cleaning tools safely.

Cleaning and Preserving Dusters

Maintaining dusters properly extends their lifespan and enhances their effectiveness. For microfiber dusters, simply shake off the loose dust after use, and occasionally wash them in warm, soapy water. Avoid using fabric softeners as they can damage the microfibers.

Feather dusters should be shaken outside to remove dust. For a deeper clean, gently hand wash them with mild soap and warm water, then air dry.

Lambswool dusters can be cleaned by shaking them out or gently vacuuming the wool. If they need a deeper clean, hand wash them with wool-safe detergent and warm water, then air dry. Remember to fluff the wool as it dries to maintain its full shape.

Maintaining Vacuum Cleaners

Keeping your vacuum cleaner in optimum condition is key to its performance. Start by emptying the vacuum bag or bin regularly. A full bag or bin can reduce suction power, making your vacuum less effective.

Filters are important too. They should be cleaned or replaced on a regular schedule as per the manufacturer’s instructions. A clogged filter can reduce suction and allow dust to escape back into the air.

Lastly, keep an eye on the attachments and hoses. If they’re worn out or damaged, they may need replacing. And don’t forget to occasionally give the exterior of the vacuum a good wipe down.

Storing Cleaning Tools Safely

Storing your cleaning tools safely is just as important as cleaning them. Proper storage not only prolongs the tools’ lifespan but also prevents accidental injuries.

Store your cleaning tools in a dry place to prevent mold or mildew. For tools like brooms and vacuums, storing them upright or hanging can help maintain their shape and functionality.

Remember to keep cleaning tools out of children’s reach, especially those with small parts or sharp edges. Also, if you have used any cleaning chemicals, make sure they are securely closed and stored in a safe area.

Preventive Measures and Regular Maintenance

Clean regularly. By dusting and vacuuming regularly, you can prevent dust accumulation and cobweb formation. It’s easier to clean a light layer of dust than a thick one that’s been building up for weeks.

Another measure is to control humidity in your home. Spiders, the architects behind cobwebs, love damp, moist areas. By using a dehumidifier or air conditioner, you can create a less inviting environment for them.

Lastly, keep your home well-lit. Spiders prefer darker spaces for their webs. Keeping your home filled with natural or artificial light can deter spider habitation.

With these preventive measures and regular maintenance, you can enjoy a cleaner, healthier, and more comfortable home environment. And, let’s not forget, less cleaning!

02 Feb 18:24

Step-by-Step Guide to Removing Soap Scum

by KCS Team

Step-by-Step Guide to Remove Soap Scum

Interested in tackling the stubborn yet common household problem of soap scum? If so, you’re in the right place. This article offers an in-depth look at understanding what soap scum is, its causes and effects – and importantly, how to remove it safely and effectively from your surfaces. From preparation to clean up, choosing the right cleaning agents to DIY soap scum removers, we will guide you through the full process. We will even tackle steps for preventing future build-up, troubleshooting persistent problems and when it might be best to call in the professionals. In short, a comprehensive guide to say goodbye to soap scum and hello to sparkling clean surfaces.

Preparation

Before jumping straight into the cleaning process, a little preparation can go a long way in efficiently removing soap scum. In this section, we’ll guide you on how to identify the affected areas and what cleaning supplies you’ll need.

Identifying Affected Surfaces

Primarily, soap scum is found on surfaces that are frequently in contact with soap and water. These include the walls of your shower or bathtub, bathroom tiles, sink, and even on your shower curtain or door. Soap scum often appears as a dull, cloudy, or chalky residue, and is typically white or grey in colour. Once you have identified the affected surfaces, and the degree of build-up, you can decide on the best approach to remove the soap scum.

Gather Cleaning Supplies

For a successful soap scum removal, you would need a cleaning solution, a non-abrasive scrub brush or sponge, and microfiber cloths for drying. Depending on your preference, the cleaning solution could be a commercially available soap scum remover or a homemade mix. Finally, don’t forget to grab a pair of gloves to protect your hands during the process.

Cleaning Solutions

There’s a range of options available for removing soap scum, from commercial cleaners to homemade concoctions. In this section, we’ll explore both types and help you decide the best fit for your cleaning needs.

Commercial Solutions

Commercial cleaners are readily available and can be very effective at dealing with soap scum. They are specially formulated with ingredients designed for breaking down and removing soap scum. Brands like CLR, Scrubbing Bubbles, and Lime-A-Way are a few examples. However, bear in mind that some commercial products contain harsh chemicals that may irritate sensitive skin or produce strong odours. Always follow the instructions on the packaging and consider ventilation while using them.

Natural Solutions

For those who prefer a greener approach, there are several natural solutions for soap scum removal. Vinegar, for instance, is an excellent natural cleaner. Its acidity helps to break down the grime and residue. Another option is baking soda, which, due to its mild abrasive nature, aids in scrubbing away the soap scum without scratching the surface. Even a simple solution of dish soap and warm water can work wonders. Remember, while these natural methods can be effective, they may require a bit more scrubbing effort compared to commercial cleaners.

DIY Soap Scum Remover Recipe

If you’re up for a bit of DIY, you can make your own effective soap scum remover using ingredients that are likely already in your home. This route offers the satisfaction of a clean bathroom without the use of harsh chemicals.

Ingredients

To whip up your own soap scum remover, you’ll need only a few key ingredients:

  • 1 part white vinegar
  • 1 part dish soap
  • A clean, empty spray bottle

Instructions

Creating your DIY soap scum remover is straightforward. Here’s how:

  1. Mix the vinegar and dish soap in your spray bottle and shake well until thoroughly combined.
  2. It’s important to shake the bottle before each use to ensure the ingredients are well-mixed. Spray the solution onto the surface you want to clean, making sure to cover all the soap scum.
  3. Let the solution soak for several minutes, then wipe away with a microfiber cloth or cleaning sponge.
  4. After cleaning, rinse the area with fresh water. This can be done using a handheld shower head, or if you don’t have one, a large cup will work just fine.

Step-by-Step Process for Removing Soap Scum

Armed with your cleaning solution of choice and necessary supplies, it’s now time to tackle that soap scum. This section will provide a step-by-step guide to ensure you achieve the clean, soap scum-free surfaces you’re aiming for. Let’s get started on the process of removing soap scum efficiently and effectively.

Step 1: Pre-Cleaning

Start by removing any items from the area to be cleaned. Then, pre-clean the area by wiping it down with a wet sponge to remove superficial dirt and grime. This will enable the cleaning agent to penetrate the soap scum more effectively.

Step 2: Applying the Cleaner and Scrub

Then apply the cleaner generously and let it sit for a while, usually 10-15 minutes, depending on the strength of the cleaner. After that, scrub away using a scrub brush or sponge, using circular motions and applying sufficient pressure to remove the soap scum. Remember, different surfaces can handle different levels of scrubbing, so adjust your pressure accordingly.

Step 3: Rinse and Dry

After scrubbing, rinse the area thoroughly with warm water to remove the cleaner residue and any loose soap scum. Make sure to get rid of all cleaning solution residues as it can leave streaks or spots if left to dry. Finally, dry the area well with a microfiber cloth to prevent water spots and further soap scum formation.

Preventing Soap Scum Build-up

While removing soap scum is a necessary task, preventing its build-up can save you a lot of effort in the future. In this section, we’ll share some simple strategies that can help you reduce and potentially prevent the formation of soap scum.

Clean Regularly

One of the most effective ways to prevent soap scum build-up is to clean your surfaces regularly, or establish a regular cleaning routine. A quick wipe down after each use can do wonders. By not allowing the soap and minerals to sit and react, you’re less likely to face soap scum issues. Plus, regular cleaning reduces the need for heavy scrubbing later.

A quick tip: keep a small squeegee in the shower and use it to wipe down the walls and doors after each use.

Change the Type of Soap You Use

The type of soap you use can also contribute to the amount of soap scum that builds up. Bar soaps, for example, often contain talc which reacts with hard water to produce soap scum. Switching to liquid or gel soaps can be a good move, as these types of soaps usually contain little to no talc.

Use Water Softener

Since soap scum is a result of soap reacting with hard water minerals, using a water softener can help prevent soap scum build-up. A water softener works by replacing hard water minerals like calcium and magnesium with softer minerals, such as sodium. This means there are fewer minerals in your water to react with soap, resulting in less soap scum. While installing a water softener represents an investment, it can help not only prevent soap scum but also protect your plumbing and appliances from the damaging effects of hard water.

Close up of shower mixer faucet with limescale, white chalky deposit and stains Formed on the plumbing system by a combination of soap residues and hard water Concept of cleaning limescale plumbing

Understanding Soap Scum

Before tackling the task of removing soap scum, it’s essential to understand what it is and why it forms. In this section, we’ll dive into the details behind those pesky soap scum stains and preventing damage to surfaces.

What is Soap Scum?

Soap scum is a stubborn residue that often forms on bathroom surfaces such as showers, bathtubs, and sinks. It’s a result of soap mixing with hard water minerals like calcium and magnesium. This combination creates a film or coating that sticks to surfaces, leading to those familiar white or gray stains. It’s not just unattractive but can also be quite tricky to remove.

Causes of Soap Scum

Soap scum is caused primarily by the reaction between the fatty acids in your soap and minerals in your water. If you’re in an area with hard water, which is high in minerals like calcium and magnesium, soap scum can form more readily. However, it’s worth noting that it can also occur with soft water, though generally to a lesser extent. The more soap and shampoo you use, and the fattiness of the soap you use, increases the likelihood of soap scum build-up over time. And lastly, soap scum can accumulate if you don’t regularly clean wet areas such as showers, tubs, and sinks.

Consequences of Soap Scum

Soap scum is not just unsightly; it can cause various problems. First, it makes surfaces look dirty and unattractive. Second, it can be tough to remove, especially when it has been left to build up over a long period. Third, soap scum can provide a conditioned environment for the growth of mildew and bacteria. Fourth, soap scum, when built up in drains, may cause clogs and slow water drainage.

Tackling Difficult Soap Scum Situations

Despite our best efforts, there may be instances when soap scum build-up is particularly stubborn or has caused some damage to your surfaces. But don’t worry, we’ve got tips for these tough situations as well.

Persistent Soap Scum

Persistent soap scum that doesn’t budge with the methods outlined above may require a more intensive approach.

If soap scum remains difficult to remove, consider leaving the cleaner on the surface for a longer time or applying a stronger solution. You can also reapply the cleaner and scrub again.

Another option is to use a stronger commercial cleaner specifically designed for heavy-duty soap scum removal. Always remember to follow the instructions for these products to avoid causing damage to your surfaces.

If the soap scum still refuses to budge, you may want to consider seeking professional help. A professional cleaning service, like KCS Kitchener Cleaning Services, have the tools and know-how to tackle even the toughest soap scum situations.

Surface Damage

Soap scum can sometimes cause surface damage like discoloration or etching. If this happens, consider seeking advice from a professional cleaner or the surface manufacturer to find suitable surface repair techniques.

Sometimes, if soap scum has been left to build up for too long, it can cause damage (like discoloration or etching) to the surface underneath.

In such cases, the solution goes beyond just cleaning. Depending on the extent of the damage, you may need to consider professional restoration services or replacing the damaged components or surfaces.

To avoid reaching this point, it’s crucial to address soap scum regularly and prevent its build-up.

Hiring a Professional

Sometimes it’s challenging to keep on top of house cleaning, particularly tasks like regular soap scum removal. That’s where the benefits of a professional house cleaning service truly shine.

Signing up for regular cleaning services isn’t just about maintaining an aesthetically pleasing home. It’s about preventing long-term damage caused by persistent problems like soap scum. Consider enrolling in regular services if you find yourself constantly battling stubborn soap scum, or if your busy schedule just doesn’t leave you enough time to clean your home regularly.

KCS Kitchener Cleaning Services offers regular cleaning services that can help maintain your home and keep soap scum at bay. We take pride in using green cleaning solutions that are tough on grime but gentle on your surfaces. What’s more, we back all our services with a 100% Satisfaction Guarantee. If there’s an aspect of our cleaning you’re not completely satisfied with, inform us within 24 hours and we’ll send someone to rectify the issue.

Leave the hard work to us!

Free up your time, protect your home, and enjoy the assurance of our satisfaction guarantee. Get in touch with KCS Kitchener Cleaning Services today for a free estimate, and let us take the worry of cleaning off your hands.

02 Feb 18:23

Finding Quality Cleaning Supplies: Top Home Improvement Stores in Cambridge Ontario

by KCS Team

Keeping your home clean and fresh is a task that demands time, effort, but most importantly, the right tools for the job. That’s why having quality cleaning supplies is paramount for every homeowner. Not only can these make your cleaning tasks easier, but they can also help ensure your home is as clean as it can possibly be. But with so many stores out there, choosing where to buy your cleaning supplies can feel overwhelming.

No worries, we’ve got you covered! In this article, we’ll be guiding you through some of the top-rated home improvement stores in Cambridge, Ontario, where you can find a diverse range of high-quality cleaning supplies. These stores have been ranked based on a combination of the number of reviews and their average review ratings, to help you make a decision you can trust. So, let’s dive in and find the perfect store for your cleaning needs!

The Home Depot

  • Name: The Home Depot
  • Address: 35 Pinebush Rd, Cambridge, ON N1R 8E2
  • Phone Number: (519) 624-2700

The Home Depot, a trusted name among homeowners, takes the top spot on our list. Known not just for its vast range of home improvement items, but especially for the extensive array of cleaning supplies they offer.

With a significant number of reviews, their customers have voiced their satisfaction. Their average rating suggests people really value the breadth of their product offerings and the helpfulness of the staff. Plus, their extended opening hours, from 6 a.m to 9 p.m on most days, adds to the convenience of your shopping experience.

For your next batch of cleaning supplies, consider The Home Depot – a reliable and popular choice for many in the Cambridge community.

Zehrs Cambridge Centre

  • Name: Zehrs Cambridge Centre
  • Address: 400 Conestoga Blvd, Cambridge, ON N1R 7L7

Not far behind is Zehrs Cambridge Centre. Much like its counterpart, this store also offers a variety of cleaning products alongside their extensive grocery offerings.

With their high volume of reviews, it’s clear that Zehrs Cambridge Centre is a local favourite. The store’s average rating provides further evidence of customer satisfaction.

Whether you’re planning a major cleaning overhaul or just need to replenish your cleaning supplies, Zehrs Cambridge Centre provides a wide range of choices.

Walmart Supercentre

  • Name: Walmart Supercentre
  • Address: 22 Pinebush Rd, Cambridge, ON N1R 8K5

Next up is Walmart Supercentre; a popular choice for the savvy homeowner. Known for its comprehensive variety of goods, the store also carries an impressive array of cleaning supplies.

Walmart has an abundance of customer reviews, with the average rating reflecting a generally satisfying shopping experience. The store’s inventory is expansive, with products catering to every cleaning need imaginable.

With Walmart’s extended operating hours and convenient online shopping options, you can easily purchase your cleaning supplies either in-store or from the comfort of your own home. For a one-stop shopping experience, Walmart Supercentre is a tried and trusted choice.

Zehrs South Cambridge

  • Name: Zehrs South Cambridge
  • Address: 200 Franklin Blvd, Cambridge, ON N1R 8N8

Zehrs South Cambridge is another excellent place to secure quality cleaning supplies. Known primarily for groceries, the store also offers a variety of cleaning products.

Praised in numerous reviews for its selection and customer service, Zehrs South Cambridge has earned an impressive average rating.

Zehrs is a clear contender when it comes to finding a store that balances quality, variety, and convenience in Cambridge.

Zehrs Hespeler

  • Name: Zehrs Hespeler
  • Address: 180 Holiday Inn Dr, Cambridge, ON N3C 3Z4

Last but certainly not least, Zehrs Hespeler is another commendable choice for homeowners seeking reliable cleaning supplies. Falling under the same reliable banner of Zehrs, this store carries a multitude of cleaning products.

Zehrs Hespeler enjoys a solid base of customer reviews, with an average rating that speaks to their reliability and quality. Providing both a diverse range and a convenient shopping experience, this store has proven itself to be a trusted source for cleaning supplies in Cambridge.

Rona+

  • Name: Rona+
  • Address: 575 Conestoga Blvd, Cambridge, ON N1R 7P5
  • Phone Number: (519) 620-5800

Next on our list is Rona+, another well-respected name in home improvement circles. This store is a go-to destination for many Cambridge residents in search of quality cleaning supplies.

With a substantial number of customer reviews, Rona+ is appreciated for its diverse product range, and their review rating tells us customers are generally satisfied with their purchases. Further adding to its appeal are the store’s convenient opening hours, welcoming customers as early as 6 a.m. and closing as late as 9 p.m. on weekdays.

So, whether you’re performing a full house deep clean, or just need to restock your cleaning essentials, Rona+ is always there to supply your needs.

Cambridge Home Hardware Building Centre

  • Name: Cambridge Home Hardware Building Centre
  • Address: 200 Franklin Blvd, Cambridge, ON N1R 8N8
  • Phone Number: (519) 267-2670

The Cambridge Home Hardware Building Centre is a valued destination for homeowners seeking quality cleaning supplies. Known for their wide variety of home improvement products, their cleaning section does not fall short.

With an admirable amount of positive reviews, the store’s average rating points to a favourable shopping experience. Customers frequent this store for its wide-ranging products, helpful staff, and quality items.

What’s more, the store’s opening hours are conducive to any busy schedule. Open from 8 a.m. to 9 p.m. on weekdays, and slightly reduced hours on the weekend, you’re likely to find a suitable time to shop.

When you’re ready for your next cleaning mission, you can count on the Cambridge Home Hardware Building Centre to provide the tools and supplies you need.

Bowman’s Home Hardware

  • Name: Bowman’s Home Hardware
  • Address: 718 King St E, Cambridge, ON N3H 3N9
  • Phone Number: (519) 653-4663

Next up on our list is Bowman’s Home Hardware, a beloved favourite among local homeowners due to its unique blend of product variety and excellent customer service.

Bowman’s has earned a solid reputation, as shown by its remarkable average review rating. The store’s satisfied customers frequently mention the quality of the cleaning products, the friendly staff, and the overall positive shopping experience.

With operation hours from 8 a.m to 6 p.m on weekdays, extended hours till 5 p.m on Saturdays, and from 11 a.m to 4 p.m on Sundays, Bowman’s ensures they can accommodate you at your convenience.

So, whether you’re tackling a big cleaning project or simply topping up your supplies, Bowman’s Home Hardware is undoubtedly a top choice to consider.

Squares Hardware Inc.

  • Name: Squares Hardware Inc.
  • Address: 1090 Fountain St N unit 1-3, Cambridge, ON N3E 1A3
  • Phone Number: (519) 650-8088

Coming up next is Squares Hardware Inc, a store whose products primarily include tools. Located conveniently in the heart of Cambridge, this store promises not just quantity, but quality.

Squares Hardware is a great place to source cleaning appliances such as vacuums and degreasers.

Although Squares doesn’t have a large selection of cleaning supplies and appliances, with an impressive number of upbeat reviews, their customers’ testimonials speak volumes on their behalf. The store’s stellar average customer rating stands testament to the excellent customer service and quality of their products.

Operating from 7:30 a.m. to 5:30 p.m. on weekdays, with reduced hours on Saturday and closed on Sundays, Squares Hardware Inc. can accommodate your cleaning supply shopping needs throughout the week.

02 Feb 18:23

A Complete Guide to Deep Cleaning a Bathroom

by KCS Team

The bathroom is one of the most important areas of a home when it comes to cleanliness and hygiene. Deep cleaning your bathroom not only helps maintain its appearance but also keeps you and your family safe from harmful bacteria and viruses.

In this guide, we will walk you through the process of deep cleaning your bathroom, covering everything from clearing the clutter to sanitizing surfaces and tackling specific areas like sinks, showers, and toilets.

By following these steps, you can ensure that your bathroom remains a clean and healthy space for everyone. So, let’s dive into the complete guide to deep cleaning a bathroom

Clear the Clutter

A clutter-free bathroom not only looks more organized but also makes cleaning much easier. Start by removing any items from the bathroom counter and giving them a good wipe-down with a gentle cleanser. This includes toiletries, toothbrush holders, soap dishes, and any other objects that may accumulate dust and grime.

Next, tackle the bath mats and towels. These items can easily harbor bacteria and odors, so it’s important to give them a thorough cleaning. Launder the bath mats according to the manufacturer’s instructions, and don’t forget to include the shower curtain if it’s fabric. As for towels, wash them on a high heat setting with a quality detergent to ensure they are properly sanitized.

Additionally, take a moment to wipe down bathroom items, such as the toilet paper holder, soap dispenser, and toothbrush holder, with a solution of vinegar and water or an antibacterial spray. This will help eliminate any lingering germs and keep these frequently touched surfaces clean.

Vacuum Bathroom Surfaces

Before diving into the scrubbing and washing, it’s important to start by vacuuming the surfaces in your bathroom. Vacuuming helps remove loose hair, dust, and debris that may have accumulated on the floor, corners, toilet, vanity, shower floor, and countertops.

Using a vacuum cleaner with a brush attachment or a handheld vacuum, carefully go over these areas, paying close attention to corners, crevices, and hard-to-reach spots. This will ensure that any loose dirt and particles are thoroughly removed before you proceed with the cleaning process.

By vacuuming first, you not only make the cleaning process more efficient but also minimize the risk of spreading dirt and debris around while you’re cleaning.

Clean the Bathroom Sink

Start by using a mild cleanser, such as dish soap or a bathroom cleaner, and a soft brush or sponge to scrub the sink surface. Pay extra attention to areas around the drain, faucet, and other fixtures where grime and residue tend to accumulate.

Gently scrub the sink in circular motions, working your way from the edges towards the center. Rinse the sink thoroughly with water, ensuring all traces of the cleanser are removed. Use a clean cloth or towel to wipe down the sink, leaving it dry and shiny.

Don’t forget to clean other components of the sink as well. Wipe down the faucet handles, drain stopper, and any other accessories with a disinfectant wipe or a cloth soaked in a mild cleaning solution. This will help eliminate any lingering germs and maintain a clean and sanitary sink area.

Wipe all Bathroom Surfaces

To maintain a clean and sanitized bathroom, it’s crucial to regularly wipe down all surfaces. Start by using a disinfecting spray or wipes to scrub down all the surfaces in your bathroom, including the shower floor, countertops, vanity, and any other areas prone to dirt and germs.

Make sure to pay special attention to commonly touched areas such as doorknobs, faucet handles, and light switches. These areas can harbor bacteria and viruses and should be thoroughly disinfected to prevent the spread of germs.

Additionally, don’t forget about the smaller surfaces and fixtures in your bathroom. Wipe down vanity tops, cabinet doors, sink surfaces, and bathroom windows using a mixture of water and a gentle, non-abrasive cleaner.

Clean the Shower

Regular cleaning and maintenance of your shower are essential to prevent the buildup of soap scum, mildew, and stains. Follow these steps to deep clean your shower effectively:

  1. Wet the shower floor and walls: Start by wetting the shower floor and walls with warm water. This will help to identify areas that require extra attention during the cleaning process.
  2. Apply the cleaning solution: Apply a suitable cleaning solution to the areas affected by mildew, soap scum, or stains. You can use a commercial bathroom cleaner or make your own natural solution using ingredients like vinegar and baking soda. Allow the cleaning solution to sit for a few minutes to effectively break down the dirt and grime.
  3. Scrub the surfaces: Using a sponge or a soft-bristle brush, scrub the walls and floors of your shower. Pay close attention to areas with stubborn stains or mildew. Gently scrub in circular motions, working from top to bottom. Don’t forget to clean the grout lines as well.
  4. Rinse: Once you have thoroughly scrubbed the shower surfaces, rinse everything clean with warm water. Ensure that all cleaning residue and soap scum are completely washed away.
  5. Clean shower curtains or doors: If you have a shower curtain, remove it from its hooks and wash it according to the manufacturer’s instructions. For shower doors, wipe them down with a clean cloth or sponge using a mild cleaner. Rinse thoroughly and wipe dry.

Regularly cleaning and maintaining your shower can prevent the buildup of soap scum and grime.

Cleaning Soap Scum

If you have a lot of soap scum build-up you will need to clean the soap scum first by using an effective cleaning solution.

Clean the Bathtub

Keeping your bathtub clean is not only important for hygiene but also for creating a pleasant bathing experience. Here are some steps to deep clean your bathtub effectively:

  1. Remove any items: Before cleaning, remove any items such as shampoo bottles, bath toys, or soap dishes from the bathtub.
  2. Prepare a cleaning solution: Mix a solution of warm water and a suitable bathtub cleaner or mild dish soap. Alternatively, you can create a paste using baking soda and water for a natural cleaning option.
  3. Apply the cleaning solution: Use a sponge or cloth to apply the cleaning solution to the bathtub surface. Make sure to cover all areas, including the sides, bottom, and any stained or grimy spots.
  4. Scrub the bathtub: Using a non-abrasive sponge or brush, scrub the bathtub surface in circular motions. Pay extra attention to any areas with tough stains or soap scum buildup. For delicate surfaces, such as acrylic or enamel, use a soft sponge or cloth to avoid scratching.
  5. Rinse thoroughly: Once you have finished scrubbing, rinse the bathtub thoroughly with warm water. Make sure to remove all traces of the cleaning solution and any loosened dirt.
  6. Dry the bathtub: Use a clean towel or cloth to dry the bathtub surface. This will help prevent water spots and keep the surface looking clean and shiny.

Clean the Toilet

The toilet is one of the most important fixtures in the bathroom to keep clean for both hygiene and aesthetics. Follow these steps to deep clean your toilet effectively:

  1. Apply toilet cleaner: Start by applying a toilet cleaner to the inside of the bowl. Ensure the cleaner covers the entire surface, including under the rim and around the waterline.
  2. Scrub the toilet bowl: Use a toilet brush to scrub the inside of the bowl, paying attention to areas with stains or mineral deposits. Scrub from the top of the rim downwards, working in circular motions. Allow the cleaner to sit in the bowl for around 10-15 minutes to effectively clean and disinfect.
  3. Clean the exterior: While the cleaner is doing its job, use a disinfectant wipe or a cloth soaked in a mild cleaning solution to clean the exterior of the toilet. Wipe down the seat, lid, tank, and any other surfaces that may come in contact with hands.
  4. Clean the toilet seat: Lift the seat and clean both sides using a disinfectant wipe or a cloth soaked in a mild cleaning solution. Pay attention to the hinges and any hard-to-reach areas.
  5. Sanitize the toilet handle and tank: Use a disinfectant wipe or cloth soaked in a mild cleaning solution to clean and sanitize the toilet handle. Wipe down the tank as well, focusing on any grime or buildup.
  6. Flush and rinse: Once you have finished scrubbing and cleaning, flush the toilet to rinse away the cleaner and any residue. Use a clean cloth or paper towel to wipe down the external surfaces one more time, ensuring they are clean and dry.

Deep Clean the Bathroom Floors

Cleaning the bathroom floors is an essential part of deep cleaning your bathroom. Follow these steps to effectively deep clean your bathroom floors:

  1. Sweep or vacuum: Start by sweeping or vacuuming the bathroom floors to remove any loose dirt, hair, or debris. Pay close attention to corners and edges where dust and dirt tend to accumulate.
  2. Choose the right cleaning solution: Select a suitable cleaning solution for your specific flooring material. For tiles, you can use a mild multi-purpose cleaner or a mixture of vinegar and water. For other flooring types, such as vinyl or laminate, use a cleaner specifically designed for those surfaces.
  3. Mop the floors: Dilute the cleaning solution according to the manufacturer’s instructions or create your own mixture. Use a mop or a microfiber cloth to apply the solution to the floors. Start from one corner and work your way towards the exit, ensuring complete coverage.
  4. Scrub stubborn areas: For any stubborn stains or grime, use a soft-bristle brush or scrub brush to gently scrub the affected areas. Be cautious not to use abrasive brushes that could damage the flooring surface.
  5. Rinse or wipe down: Depending on the cleaning solution used, you may need to rinse the floors with clean water or simply wipe them down with a damp cloth or mop to remove any residue.
  6. Dry the floors: After cleaning, allow the floors to dry completely. If necessary, use towels or a dry mop to speed up the drying process..

Now You Know How to Deep Clean Your Bathroom

Congratulations! You have now learned the essential steps to deep clean your bathroom effectively. By following these steps, you can maintain a clean, hygienic, and fresh bathroom environment for you and your family. Remember to be thorough in your cleaning process, paying attention to all surfaces, fixtures, and areas where dirt and grime can accumulate.

In addition to deep cleaning, it’s important to establish a regular cleaning routine to keep your bathroom in top condition. Regularly wiping down surfaces, clearing clutter, and maintaining cleanliness will help prevent the buildup of dirt, grime, and bacteria.

When choosing cleaning products, consider using environmentally-friendly and non-toxic options, particularly if you have children or pets. Natural solutions like vinegar, baking soda, and mild dish soap can be effective alternatives to harsh chemicals.

By taking the time to deep clean your bathroom, you not only create a healthier and more pleasant space, but also ensure that your bathroom remains a clean and inviting oasis for relaxation and personal hygiene.

Let KCS Do The Hard Work For You!

Deep cleaning your bathroom can be a time-consuming and labor-intensive task. If you’re looking to save time and ensure a thorough and professional deep clean, why not leave it to the experts at KCS?

Our team is trained in the latest cleaning techniques and uses environmentally-friendly and safe cleaning solutions that are suitable for homes with children and pets.

From scrubbing the surfaces to cleaning the shower and tub, and even tackling the floors, our dedicated team will handle all aspects of deep cleaning your bathroom. You can trust us to leave your bathroom sparkling clean and sanitized, ready for you and your family to enjoy.

Contact us today to schedule a professional deep cleaning!

02 Feb 18:23

How to Clean Artificial Flowers

by KCS Team

Every artificial flower owner should read this article because it provides a comprehensive guide filled with tried-and-true methods for maintaining the beauty and longevity of your faux botanicals. 

Enjoying the benefits of artificial plants and flowers, such as their low-maintenance nature and year-round aesthetic appeal, is something many people have come to appreciate. 

However, to preserve their vibrant colours and realistic appearance, it’s important to give them a good clean periodically.

What You Will Learn In This Article:

  • Tools and techniques for dusting and regular maintenance of artificial flowers
  • Cleaning methods for different types of artificial flowers: silk, plastic, and metal
  • How to effectively clean artificial flower arrangements
  • Deep-cleaning techniques for stubborn dirt and grime
  • DIY natural cleaner solutions for artificial flowers
  • Strategies to address stains and discoloration on artificial flowers

Cleaning Different Types of Artificial Flowers

Not all artificial flowers are created equal, and thus they do not come with a one-size-fits-all cleaning method. 

Cleaning techniques can vary based on the material of your faux blooms – be it silk, plastic, or even metal. 

In the following subsections, we will walk you through the best ways to clean each type of artificial flower, providing you step-by-step guidance to ensure your flowers continue to look beautiful and lifelike for years to come.

Cleaning Silk Flowers

Silk flowers are delicate and require careful handling. Silk can trap dust and dirt easily, but with the right methods, you can have your blooms looking fresh and clean in no time.

Cleaning silk flowers with salt can be very effective. Here is how you do it:

  1. Take a plastic bag that is big enough to accommodate your silk flowers.
  2. Put the flowers and about half a cup of table salt into the bag.
  3. Gently shake the bag for a minute or two.
  4. Take out the flowers and shake off any remaining salt. This should remove the dust.

If the salt method doesn’t remove all the dirt, or if your silk flowers need a more thorough clean, you can use a vinegar and water spray:

  1. Mix equal parts of white vinegar and water into a spray bottle.
  2. Spritz the solution onto the flowers, but don’t overdo it. You want the flowers to be damp, not soaking wet.
  3. Let the flowers air dry.

An alternative to vinegar and water is a gentle soap and warm water solution.

  1. Mix mild soap with warm water.
  2. Use a cloth dampened with the solution to gently wipe the flowers.
  3. Rinse with a cloth dipped in plain water and let the flowers air dry.

Remember, silk flowers can fade if exposed to sunlight for prolonged periods. After cleaning, place them in an area with indirect sunlight.

Cleaning Plastic Flowers

Cleaning plastic flowers is a relatively easy task given their durable material. Here’s how you can do it:

For a simple dusting routine, follow these steps:

  1. Use a soft cloth or feather duster to gently remove dust from the surface of the flowers.
  2. You can use a hairdryer set on cool to blow away dust from hard-to-reach areas.

For a deeper clean, you can take advantage of the hardy nature of plastic and use a cleaning agent, such as lemon juice:

  1. Mix one part lemon juice with one part water in a spray bottle.
  2. Spray the solution onto the flowers, avoiding getting them too wet.
  3. Let the flowers air dry or gently pat dry with a clean towel.

The acidity of the lemon juice should help break down any stubborn grime without damaging the plastic. The result is a clean, fresh scent that can rejuvenate your artificial flowers. Remember to rinse your flowers off with water if you notice any residue from the cleaning solution.

Cleaning Metal Flowers

Metal artificial flowers offer a unique aesthetic appeal but can present a different cleaning challenge – tarnish and rust. Here are some methods you can use to keep your metal flowers shining:

  1. For general dust removal, use a soft cloth or feather duster. Be gentle to avoid scratching the surface of the flowers.
  2. If your flowers show signs of tarnish, use a mixture of white vinegar and salt. Apply it with a soft cloth and gently rub, then rinse with warm water and dry thoroughly.
  3. Rust can be removed using a paste of baking soda and water. Apply it to the rusted area, let it sit for about 30 minutes, and then gently scrub it off using a soft cloth or toothbrush. Rinse and dry well after.

Remember, metal flowers must be dried completely after cleaning to prevent the formation of rust. To reduce the chance of tarnish, store them in a dry area away from harsh sunlight and moisture.

Cleaning Artificial Flower Arrangements

Artificial flower arrangements are often larger and may contain a variety of material types, which can make them a bit trickier to clean. Here’s how you can effectively tidy up your arrangements without damaging them:

  1. Start by gently dusting the entire arrangement with a soft cloth or feather duster. A hairdryer set on cool can also be used to blow away dust from hard-to-reach areas.
  2. If part of the arrangement includes silk flowers, use the salt-shake method or vinegar-water spray method mentioned above.
  3. For plastic flowers, a gentle wipe with a cloth dampened with diluted lemon juice can be effective.
  4. Metal flowers in the arrangement can be wiped clean with a dry, soft cloth.

Remember to also clean the vase or pot that houses the arrangement. Use a cloth dampened with soapy water to wipe the interior and exterior of the container, rinse with plain water, then dry thoroughly.

Deep Cleaning Techniques for Stubborn Dirt and Grime

When your artificial flowers have accumulated stubborn dirt and grime, they might require a deep cleaning session. Don’t fret – with the right cleaning agents, your blooms can be restored to their former glory.

Using Soapy Water

One proven method involves the use of mild detergent:

  1. Fill a sink or large container with warm water and a few drops of mild detergent.
  2. Immerse the flowers into the soapy water and gently agitate them.
  3. Be gentle not to damage petals and leaves, especially for silk flowers.
  4. Rinse thoroughly with clean, lukewarm water.
  5. Shake off the excess water and allow the flowers to air dry.

Using Rubbing Alcohol

For a more potent clean, consider rubbing alcohol:

  1. Fill a spray bottle with one part rubbing alcohol to two parts water.
  2. Lightly mist your artificial flowers, ensuring all areas are covered.
  3. Allow the flowers to air dry. The solution will evaporate, leaving the flowers clean and sanitized.

Remember: always test a small, inconspicuous area first before cleaning the entire flower, especially when using cleaning agents. This will help ensure that your cleaning solution won’t cause discoloration or damage to the material.

Come Home to a Sparkling Clean House!

Let our professional cleaners help you live a more comfortable and relaxing life. Sign up for a regular cleaning service and let our team keep your home looking and smelling fantastic!

DIY Natural Cleaning Solutions for Artificial Flowers

For those who prefer using natural and home-made cleaning solutions, there are effective options that can be easily prepared. Natural cleaners are not only cost-effective but also environmentally friendly and safe for homes with kids and pets.

Below are two simple recipes using everyday items.

Vinegar and Lemon Solution

  1. Combine equal parts of white vinegar and lemon juice in a spray bottle.
  2. Shake the bottle to mix the ingredients together well.
  3. Lightly mist the artificial flowers. Be careful not to drench them.
  4. Allow the flowers to air dry.

Salt Scrub

  1. Place the silk flowers in a bag with a half cup of table salt.
  2. Secure the bag and shake it gently.
  3. The abrasive salt will scrub away the dust and dirt while being gentle on the flowers.
  4. Carefully remove the flowers from the bag and shake off any remaining salt.

These natural cleaning solutions are gentle on your artificial flowers and can leave them looking fresh and clean.

Addressing Stains and Discoloration on Artificial Flowers

Over time, artificial flowers, especially lighter colored or white ones, may show signs of stains or discoloration. Here’s how you can tackle these issues and restore your blooms to their original beauty:

For general discoloration:

  1. Prepare a mixture of equal parts white vinegar and water in a spray bottle.
  2. Spray the solution onto the discolored areas of the flowers.
  3. Allow the flowers to sit for a few minutes before gently blotting them with a clean cloth.
  4. Rinse the flowers well with warm water and let them air dry.

If you have stubborn stains on your silk or white flowers:

  1. Make a gentle cleaning paste with baking soda and water.
  2. Apply the paste to the stained area with a soft cloth or a soft-bristle toothbrush.
  3. Gently scrub the stain, taking care not to damage the flower.
  4. Rinse thoroughly with warm water and allow the flowers to air dry.

Remember to test the cleaning solution on a hidden spot of the flower first to ensure it will not cause additional discoloration. Regular cleaning and routine checks for stains can help maintain the beauty of your artificial flowers.

02 Feb 18:23

How to Safely Remove Limescale from a Kettle

by KCS Team

Limescale buildup in kettles can significantly affect the taste of your hot beverages and reduce the longevity of your appliances. 

A seemingly mundane problem, limescale is a stubborn, crusty deposit you must have noticed at the bottom or on the sides of your kettle. It’s a deposit of minerals, like calcium and magnesium, left behind as the water evaporates during the boiling process. They not only leave behind a metallic aftertaste but can also hamper the functioning of your kettle over time. 

In this article, we will guide you through some simple, safe, and effective methods you can use to remove limescale from a kettle.

Safe and Effective Methods for Removing Limescale

Before you consider replacing your kettle due to limescale buildup, try using some safe and effective methods for removal.

In our experience, the upcoming descaling techniques that use common household items, like vinegar, baking soda, and lemon juice, are very effective.

Descaling with Vinegar and Water Mixture

If you’re looking for a simple yet efficient way to descale your kettle, a vinegar and water mixture could be your answer. 

Here are the steps to do this:

  1. Make a solution of equal parts vinegar and water; the quantity should be enough to fill the kettle.
  2. Bring this solution to boiling in the kettle.
  3. Once boiled, unplug your kettle and let it sit with the solution overnight. This allows the acetic acid in the vinegar ample time to break down the limescale.
  4. The next morning, pour out the solution from the kettle. It’s essential to rinse the kettle thoroughly with clean water after this process to eliminate any residual vinegar taste.

Remember, the efficacy of this method lies in the soaking period. The longer you let the kettle sit with the vinegar solution, the more effective the descaling process will be at removing the limescale

Descaling with Baking Soda

Baking soda is yet another magical household product that can come to your aid when looking to remove limescale from a kettle. 

Here’s how you can put it to use:

  1. Fill your kettle with water and add about a teaspoon of baking soda.
  2. Bring the water and baking soda solution to a boil inside the kettle.
  3. After boiling, turn off the kettle and let the solution sit for about 20 minutes. This waiting period allows the baking soda to work on the limescale.
  4. Once cooled, if you notice any stubborn areas, scrub them gently with an old toothbrush.
  5. Rinely clean the kettle thoroughly using water to ensure there’s no residual baking soda left.

It should be noted that besides being a potent cleaning agent, baking soda also helps in neutralizing any unpleasant odors that might be lingering in your kettle.

Descaling with Lemon Juice or Citric Acid

For those who prefer natural alternatives, lemon juice or citric acid can be an excellent choice for descaling your kettle. Both are efficient at breaking down limescale deposits, and they leave your kettle smelling fresh. 

Here’s how to do it:

  1. Fill the kettle with water and add the juice of one lemon or a teaspoon of citric acid.
  2. Bring this solution to a boil, then turn off the kettle.
  3. Leave the boiled mixture in the kettle for 1 to 2 hours. This soaking allows the acidic properties of the lemon juice or citric acid to act on the limescale.
  4. After soaking, scrub any stubborn spots with a soft brush or cloth.
  5. Lastly, make sure to rinse the kettle thoroughly with water to remove any leftover citric residue.

While these natural methods may take a little longer compared to vinegar or baking soda, they are equally effective and add a pleasant, refreshing citrus aroma to your kettle.

Video Walkthrough


Additional Tips for Deeper Cleaning

Now that we’ve covered some of our favorite methods for descaling your kettle using household items, it’s worth covering additional tips that can help you get a deeper clean. 

Below, we explain how to deal with persistent or stubborn limescale, or methods for achieving a greater level of cleanliness.

Using Commercial Descaling Solutions

While home remedies can be effective, there are also commercial descaling solutions available in the market that are specifically designed to combat limescale buildup. These can be especially helpful for stubborn deposits or for those who prefer a quick and easy solution. 

Remember, while these commercial solutions can be highly effective, it’s crucial to follow the instructions carefully to get the best results and to avoid damaging your kettle

Using Vinegar and Baking Soda Combination

For those stubborn limescale deposits that refuse to budge, a combined solution of vinegar and baking soda can be a powerful descaling option. The bubbling reaction produced by mixing these two substances has a potent effect on limescale. 

Here’s how to do it:

  1. Fill your kettle halfway with equal parts of water and vinegar and bring it to a boil.
  2. After boiling, add a teaspoon of baking soda. Be cautious as the mixture will fizz.
  3. Let this solution sit inside the kettle for about 20 minutes to an hour depending on the scale buildup.
  4. Use an old toothbrush or scrubbing tool to tackle any remaining stubborn areas.
  5. Finally, rinse the kettle multiple times with water to make sure no residue remains.

When using this method, always be careful with the fizzing reaction to avoid any spills. In our point of view, this combination may require a little more effort, but the outcome definitely justifies it.

Preventing Limescale Buildup in Kettles

While it’s essential to know how to descale your kettle, prevention is always better than cure. So, in the next few sections, we’ll delve into some preventive measures that can be taken to minimize limescale formation in your kettle. 

Using Filtered Water or Distilled Water

The type of water you use can directly impact the level of limescale formation in your kettle. Hard water, which is high in mineral content, often leads to a more rapid buildup of limescale. 

Here’s how you can mitigate this:

  1. Opt for using filtered water or distilled water in your kettle. These forms of water have fewer minerals, specifically calcium and magnesium, which contribute to limescale buildup. 
  2. Consider investing in a water filter if you use tap water. This can significantly reduce the mineral content in the water before it goes into your kettle.
  3. Alternatively, you can buy distilled water for the exclusive purpose of using it in your kettle.

Switching to filtered or distilled water can significantly decrease the rate of limescale buildup, making your kettle last longer and operate more efficiently.

Regular Cleaning and Maintenance

Regular cleaning and maintenance of your kettle are fundamental to preventing limescale buildup and ensuring the longevity of the appliance. 

Below are some useful tips on how to maintain your kettle:

  1. Make it a habit to rinse and dry your kettle after each use. This simple step can help prevent mineral deposits from settling in the kettle.
  2. Depending on the hardness of your water, schedule a regular deep clean with one of the descaling methods we discussed above. This could be weekly, bi-weekly, or monthly.
  3. Consider using a kettle-cleaning product or descaling solution periodically for a more extensive cleanup. These are specifically formulated to manage limescale and can be very effective when used as part of a regular maintenance schedule.
  4. Some kettles have a scale filter which should be cleaned regularly. If it’s removable, soak it in a descaling solution to keep it working efficiently.

Implementing these maintenance steps into your routine can go a long way in keeping your kettle free from limescale, ensuring its optimum performance, and preserving its lifespan.

Conclusion

By leveraging household staples such as vinegar, baking soda, and lemon juice, you can effectively descale your appliance and keep it running optimally. Commercial descaling solutions and a combination of vinegar and baking soda serve as alternatives, or solutions for tough limescale buildup.

Opting for filtered or distilled water can also be a significant step in reducing limescale formation. But remember, regular cleaning and maintenance are the best practices for preventing limescale buildup.

By implementing these strategies, you can not only prolong your kettle’s lifespan but also ensure that every cup of tea or coffee you make tastes its best. Clean kettle, better brews!

02 Feb 18:23

How to Clean Shower Glass

by KCS Team

Shower glass doors can transform a simple bathroom into an elegant space but keeping them clean is a common challenge. In our daily routines it’s easy for soap scum hard water deposits and grime to accumulate on glass surfaces creating a foggy and unsightly appearance. As a business specializing in selling cleaning products and services we understand the importance of a pristine shower space not just for aesthetics but also for hygiene. Our methodical approach to cleaning shower glass is designed to offer clarity and ease ensuring that even the most stubborn stains and buildup can be effectively addressed. This guide provides detailed instructions on maintaining the transparency and shine of your shower glass. Whether you’re a homeowner seeking efficient cleaning tips or a cleaning professional looking to refine your techniques these steps will lead to crystal clear results.

Before You Get Started

Embarking on the task of cleaning shower glass requires a structured approach to achieve the best results. The initial step involves donning protective gear such as gloves to safeguard your skin from harsh cleaning solutions. Next gather your arsenal of cleaning tools and agents ensuring you have everything at hand. The cleaning process itself unfolds in a series of deliberate actions: applying the cleaning solution methodically wiping or scrubbing the surface rinsing off any lingering residue and finally drying the glass to avert water marks. It’s also crucial to address the adjacent areas including fixtures and seals to achieve a comprehensive clean. These foundational steps which we will delve into with greater specificity in the sections that follow are the cornerstone of an effective shower glass cleaning routine. They pave the way for the advanced techniques and maintenance tips that will elevate the clarity and shine of your shower glass.

Preparing for the Clean

Initiating the cleaning process for your shower glass begins with meticulous preparation which is instrumental in ensuring both efficiency and safety. Commence by assembling all the necessary equipment: gloves for hand protection a bucket to mix your cleaning solution a spray bottle for easy application sponges or soft cloths for gentle wiping and a squeegee for a streak-free finish. It’s imperative to maintain adequate ventilation in the bathroom so open the windows or activate an exhaust fan to dissipate any harsh fumes from the cleaning products.

Remove all personal items from the shower to facilitate unimpeded access to the glass surfaces. It’s wise to consult the manufacturer’s care instructions for your specific shower glass to prevent any inadvertent damage from unsuitable materials or cleaners. A preliminary rinse with warm water can be beneficial in softening soap scum and mineral build-up thereby streamlining the subsequent cleaning steps. With these preparatory measures in place you are now well-equipped to proceed to the next phase: choosing the most effective cleaning agent for your shower glass.

Choosing Your Cleaning Agent

Selecting the right cleaning agent is pivotal to the success of your shower glass cleaning endeavor. The cleaner must be potent enough to cut through grime yet gentle enough not to compromise the integrity of the glass or the materials around it. Here’s a rundown of the options at your disposal:

  • Commercial Cleaners: Seek out a formulation tailored for shower glass which will adeptly handle soap scum and water spots without inflicting damage. It’s imperative to adhere to the manufacturer’s guidelines for use.
  • Vinegar and Water Solution: A 50/50 blend of white vinegar and water can serve as a green alternative adept at breaking down mineral deposits. However exercise caution if you have stone in your shower as vinegar’s acidity could be detrimental.
  • Baking Soda Paste: Combine baking soda with water to tackle thicker accumulations. This gentle abrasive works wonders on stubborn areas without leaving scratches.
  • Ammonia-based Cleaners: These can be highly effective but require careful handling. It’s a cardinal rule never to mix them with bleach or other chemicals due to the risk of toxic fumes.
  • Alcohol or Ammonia-Free Glass Cleaners: Ideal for a streak-free sheen these cleaners are safer for enclosed spaces though they may necessitate more elbow grease for persistent stains.
  • Specialty Surface Protectors: Consider applying a protective product post-cleaning to create a barrier that repels water and soap thus extending the intervals between cleanings.

In choosing your cleaner weigh the environmental footprint and health implications of chemical agents. Ensure the space is well-ventilated during use. With your cleaner selected you’re ready to move on to the application techniques which we will explore in the upcoming section.

Executing the Cleaning Process

Armed with your chosen cleaning solution and having prepped the area you’re set to embark on the cleaning journey. The process is a meticulous one designed to maximize efficacy while safeguarding the glass. Start by evenly distributing the cleaner across the glass following the product’s format—be it a spray or direct application. Allow it to sit as per the instructions to soften the soap scum and mineral deposits.

Next embrace the scrubbing phase with the right tools and strokes which we’ll delve into shortly to banish the loosened dirt without harming the glass. Pay special attention to the nooks and crannies that often harbor the most buildup.

Once scrubbed it’s imperative to rinse off all traces of the cleaner with clean water. The subsequent steps will involve drying and polishing the glass to a gleaming finish ensuring no water marks or streaks tarnish your efforts.

By following these steps diligently you’ll achieve a pristine and clear shower glass. However for that extra sparkle some additional finishing touches might be necessary which we will outline in the sections that follow.

Applying the Cleaner

To achieve the best results a meticulous application of your chosen cleaning solution is paramount. Begin by coating the shower glass with the cleaner ensuring complete coverage. When utilizing a spray disperse the solution uniformly from the uppermost part of the glass to the bottom mitigating any potential for streaks due to drips. With gel-based cleaners or pastes use a sponge or cloth to spread a consistent thin layer across the surface.

Adhering to the product’s instructions allow the cleaner to dwell for the specified duration usually a few minutes. This interval is critical for the cleaner to effectively dissolve soap scum lime scale and other residues. Nevertheless it’s vital to avoid overexposure particularly with acidic or abrasive cleaners to prevent any damage to the glass.

For those opting for a homemade cleaner such as a vinegar-based solution a more generous application or extended dwell time may be necessary to match the potency of commercial cleaners. Certain pastes might necessitate the use of a non-scratch scrubber or cloth employing circular motions to target etched areas prone to grime accumulation.

Once the cleaner has set it will be ready for the subsequent step of scrubbing or wiping which we will explore in the next section to ensure thorough removal of all unwanted residue.

Techniques and Tools for Scrubbing

The scrubbing stage is critical for dislodging and eradicating buildup on your shower glass. The choice of tools coupled with the scrubbing method will guarantee an effective clean without inflicting any harm on the surface.

Non-abrasive sponges or microfiber cloths are recommended for their gentle yet effective nature perfect for circular motions that lift grime and for back-and-forth strokes to clean larger expanses. Squeegees are excellent for a streak-free finish and can be used post-scrub to eliminate both the cleaner and the dissolved debris.

For areas needing additional agitation such as corners or edges opt for a soft-bristled brush rather than harsh pads or wire brushes that could scratch the glass. And for those persistent spots a plastic scraper can be employed with care to remove buildup without damaging the surface.

When scrubbing it’s best to start from the top and work your way down applying steady gentle pressure. This approach ensures that any dislodged particles naturally move downward simplifying the rinsing and wiping process that follows. Refrain from vigorous scrubbing to maintain the integrity of the glass.

Equipped with the right tools and methods we are now prepared to delve into the rinsing and drying strategies which are crucial for that pristine streak-free appearance.

Finishing Touches for a Sparkling Shower Glass

Achieving the perfect gleam on your shower glass hinges on the final steps of the cleaning routine. Once you’ve diligently applied the cleaning solution and rigorously scrubbed away the grime it’s time to focus on the rinse and dry. This phase is pivotal to avoid the unsightly streaks and water spots that can mar an otherwise pristine surface.

A squeegee is your best ally in this endeavor effectively clearing water from the glass and leaving behind a surface that’s primed for polishing. Follow this with a soft lint-free cloth or a high-quality microfiber towel to buff the glass to a lustrous finish. This attention to detail is what transforms a clean surface into a radiant one reflecting the high standards of your cleaning efforts.

As we move forward we’ll delve into strategies that not only maintain this level of cleanliness but also safeguard against future buildup ensuring that your shower glass remains as clear and sparkling as the day it was installed.

Rinsing and Drying Strategies

After you’ve given the shower glass a thorough scrub the rinsing stage comes into play sweeping away any lingering suds and cleaning agents. A handheld showerhead is ideal for this task allowing you to direct the flow of water and ensure that every inch of the glass is rinsed clean. Start from the top and guide the water down to the drain leaving no residue behind. In the absence of a handheld showerhead a large container will suffice to pour water evenly across the glass.

Drying is just as crucial as the rinse. A swift pass with a squeegee from the uppermost edge of the glass to the bottom prevents water droplets from settling into spots. Wipe the squeegee blade after each stroke to maintain its efficiency. Then with a microfiber cloth or an absorbent towel mop up any remaining moisture especially around the edges and in the corners where water tends to linger.

For that extra sparkle a final polish with a dry microfiber cloth can make all the difference eradicating any residual water marks and leaving your shower glass with a mirror-like shine. This step is not merely about aesthetics; it also plays a significant role in prolonging the intervals between thorough cleanings as a dry and spotless surface is less prone to soap scum and hard water deposits.

Post-Cleaning Care and Maintenance

Once the shower glass gleams with cleanliness it’s crucial to establish a regimen that upholds this clarity over time. Post-cleaning care is not merely about reacting to visible blemishes but proactively preserving the glass’s spotless appearance. Engaging in simple yet consistent practices can significantly reduce the recurrence of soap scum and hard water deposits.

A daily swipe with a squeegee can work wonders effectively banishing water droplets before they have a chance to mar the surface with spots or buildup. For added convenience consider stationing a microfiber cloth within arm’s reach for swift touch-ups.

To further defend your shower glass against the elements consider applying a commercial surface protector. These products form a transparent shield that wards off water and impurities. Adhering to the manufacturer’s instructions when applying these protectants can extend the time between thorough cleanings.

As we progress we will explore in greater detail the daily routines that contribute to ongoing cleanliness preventive strategies to deter residue accumulation and solutions for those persistent stains that occasionally elude even the most meticulous upkeep efforts.

Maintaining Daily Cleanliness

The secret to enduring shower glass transparency lies in the daily maintenance rituals we adopt. A few straightforward practices can have a profound impact on keeping the glass pristine and reducing the frequency of intensive cleaning sessions.

Employing a squeegee right after showering is a swift move that wards off potential hard water stains and soap scum formation. For corners and edges that a squeegee might miss a dry microfiber cloth can be just as effective.

Incorporating a daily shower spray into your routine can also be beneficial. These gentler solutions can be applied swiftly and require no rinsing working to dissolve residues before they become problematic.

Proper ventilation is another key factor; it minimizes humidity and consequently the likelihood of mold and mildew taking hold. This can be achieved by using an exhaust fan or cracking open a window during and after showering.

Switching to liquid body wash can also contribute to soap scum prevention as it typically leaves behind less residue than traditional bar soaps.

For those in regions with hard water installing a water softener could be a worthwhile investment to curtail mineral deposits on the glass.

By weaving these actions into your daily routine you can maintain the luster of your shower glass with ease thereby lengthening the intervals between deep cleaning sessions.

Preventing Future Buildup

To ensure the longevity of your shower glass’s clarity preemptive action is essential. Adopting certain habits can significantly reduce the frequency and intensity of your cleaning routine.

Consider the application of a water repellent treatment. These products form a shield on the glass surface causing water to bead up and glide away thereby diminishing the likelihood of water spots and the accumulation of minerals.

Incorporating the use of a squeegee into your post-shower ritual is a simple yet effective strategy to combat buildup. With each use you’re actively preventing hard water stains and soap residue from taking hold.

Daily maintenance sprays can also be a valuable addition to your arsenal. A quick spritz and wipe down with these gentle solutions can extend the time between deep cleans and lessen the need for abrasive chemicals.

Ensuring your bathroom has adequate ventilation is another critical step. This practice not only deters the formation of mold and mildew but also preserves the pristine condition of your shower glass. After bathing make it a point to either leave the door ajar or run the exhaust fan for a minimum of twenty minutes.

For those with shower curtains remember to fully extend them post-use to expedite drying. Similarly leaving shower doors slightly open can promote air circulation and drying.

Lastly a consistent deep cleaning regimen tailored to your water type and shower usage can prevent the most stubborn of stains from ever taking root. By integrating these preventative measures you’re not just cleaning—you’re safeguarding your shower glass against future challenges.

Addressing Persistent Stains and Buildup

Occasionally you may encounter tenacious stains or buildup on your shower glass that seem impervious to your regular cleaning efforts. These could manifest as hard water marks or perhaps as mold and mildew that have firmly established themselves.

When standard cleaning falls short it’s time to escalate your approach. The key is to employ more potent cleaning solutions or specialized techniques that can dissolve these stubborn spots without causing damage to the glass.

Remember the use of stronger cleaning agents necessitates caution. Don protective gloves and ensure the room is well-ventilated to safeguard your health while you tackle these more challenging tasks.

In the following sections we will delve deeper into specific strategies for addressing these stubborn stains including when it might be wise to enlist the expertise of professional cleaners. These insights will equip you with the knowledge to restore your shower glass to its original luster even in the face of persistent blemishes.

Remedies for Stubborn Stains

Confronting tenacious stains on your shower glass can be a formidable challenge necessitating a shift to more intensive cleaning strategies. Consider these potent options:

  • Targeted Lime and Scale Removers: Seek out commercial solutions designed to break down the tenacity of hard water stains and mineral deposits. It’s crucial to adhere to the manufacturer’s guidelines as these substances can be potent and require careful handling.
  • Baking Soda Concoction: A thick paste crafted from baking soda and water can be your ally against persistent stains. Spread this mixture over the affected areas and allow it to penetrate for a quarter of an hour. Afterward employ a soft non-abrasive pad to gently dislodge the residue followed by a thorough rinse.
  • Heated White Vinegar: When battling mineral accumulations heated (yet not boiling) white vinegar can be a savior. Saturate a sponge or cloth with the warm vinegar and press it against the stains letting it sit for up to half an hour before washing it away. Caution is advised if your shower encompasses stone surfaces as vinegar’s acidity can cause etching.
  • Hydrogen Peroxide for Organic Matter: For stains stemming from organic sources like mildew hydrogen peroxide offers a potent remedy. Apply it directly let it stand to work its magic and then rinse thoroughly.
  • Specialized Shower Glass Polish: There are products on the market that can polish away fine scratches and water spots rejuvenating the glass’s smoothness and transparency.
  • Gentle Abrasives: Products such as the Magic Eraser can be effective for mild abrasion addressing certain stains without inflicting scratches on the glass.

Should these methods not restore your shower glass to its original luster or if the staining proves too extensive professional cleaning services are equipped with advanced techniques and specialized solutions to tackle even the most stubborn cases.

Recognizing When to Call Professionals

At times despite one’s best efforts the expertise of a professional cleaning service is indispensable for resolving certain shower glass dilemmas:

  • Persistent Deep-Set Stains: When stains defy all at-home remedies professionals can administer specialized treatments that are both more potent and gentler on the glass.
  • Repairing Etching and Scratches: Minor scratches or etchings may be within the purview of professional repair potentially restoring the glass’s clarity without necessitating replacement.
  • Advanced Protection and Restoration: Professionals have access to commercial-grade coatings that form a durable bond with the glass providing a shield against future stains and simplifying subsequent cleanings.
  • Navigating Safety Concerns: For those hesitant to handle potent chemicals or tackle challenging stains professional services guarantee a safe cleaning process with the proper equipment.
  • Conserving Time and Energy: The thorough cleaning of shower glass can be labor-intensive. Professional cleaners not only save you time but also achieve a standard of cleanliness that might be elusive when done individually.
  • Complex Structural Issues: Issues like mold and mildew infiltration within caulking or grout may require professional remediation to ensure both thorough cleaning and the mitigation of any health risks.

Understanding when to seek professional assistance is a matter of recognizing the limits of do-it-yourself methods and ensuring that your shower glass is cared for in a manner that is both safe and effective without compromising the integrity of the surfaces or your well-being. Our cleaning business is poised to deliver exemplary professional services when these challenging situations arise.

Frequently Asked Questions:

What is the best way to clean shower glass?

The best way to clean shower glass is to mix equal parts of vinegar and water in a spray bottle then spray the solution onto the glass. Use a soft cloth or sponge to scrub the glass in circular motions and rinse thoroughly with warm water.

Can I use bleach to clean shower glass?

Bleach is not recommended for cleaning shower glass as it can damage the glass surface and cause discoloration. It is better to use non-abrasive cleaners specifically designed for glass.

How often should I clean my shower glass?

It is recommended to clean shower glass at least once a week to prevent soap scum and mineral buildup. Regular cleaning helps maintain the clarity and shine of the glass.

What should I avoid using when cleaning shower glass?

Avoid using abrasive scrubbers harsh chemicals or acidic cleaners when cleaning shower glass. These can scratch or etch the glass surface leading to permanent damage.

How can I prevent water spots on shower glass?

To prevent water spots on shower glass wipe the glass dry after each use with a clean lint-free cloth or squeegee. This helps to remove water droplets and minimize mineral deposits.