

This lemony salmon asparagus pasta salad recipe is full of the best fresh springtime flavors, it’s quick and easy to make, and can be served warm or as a cold pasta salad.

Yes, salmon! ♡
I thought it would be fun to mix things up with the usual pasta salads that I tend to make this time of year. So for something different, I flaked up a filet of smoked salmon and tossed it with some chopped asparagus, herbs, pine nuts, Parmesan and a quick lemony dressing. And you guys — this simple orzo salad was such a winner!
The smokiness of the salmon was downright irresistible paired with the rest of those bright, herby, and citrusy flavors. And with a bit of light multitasking, I was doubly pleased to find that the whole dish came together in just 30 minutes or so. It’s the perfect make-ahead dish for easy weekday lunches or weekend dinners on the patio this time of year. And after testing this recipe a few times here at our house, we can vouch that it tastes even better the next day too. ♡
Feel free to use whatever type of salmon here that you prefer — hot-smoked, cold-smoked, baked or sautéed. And if you’re not a big fan of dill, this recipe is incredibly flexible and would work well with fresh basil, parsley, or chives too. Alright, let’s make some pasta salad!
This is the best thing I’ve cooked with the least amount of effort in the past month. Most of my lazy lunches never make it to the site, but this pasta is an exception. If you have a favorite dried pasta, a few cloves of garlic, walnuts, and black pepper you can make it too. The other ingredients – lemon zest, a bit of grated cheese, a finishing cascade of breadcrumbs and herbs are encouraged, but not essential. It’s the kind of meal that checks the box when you’re in the mood for creamy pasta, but no cream is needed. You get rich, nutty, walnut sauce from pounding garlic and toasted walnuts into a paste and thinning with a good amount of salted pasta water. Peak comfort food.
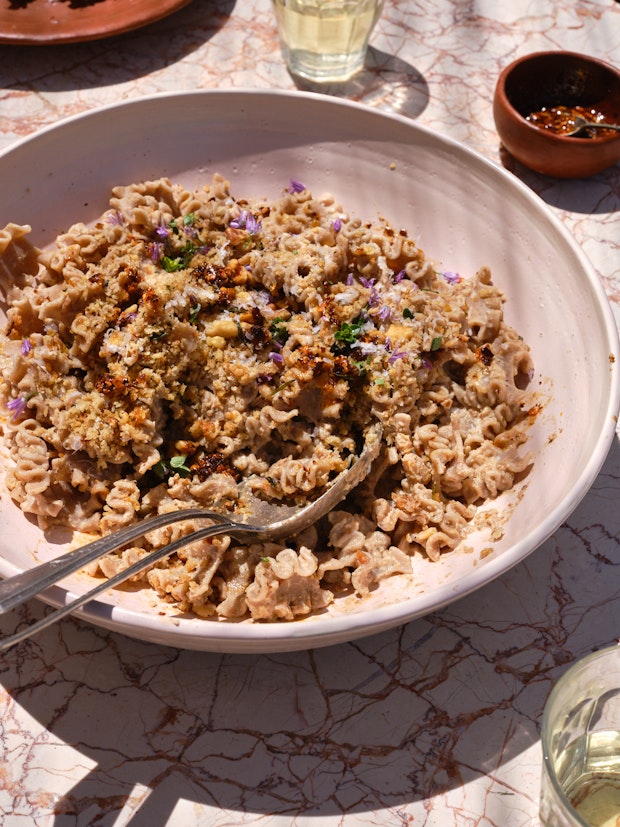
I vote for short pasta here, preferably something whole grain and somewhat rustic. The pasta you see pictured is emmer reginetti. I grabbed it on a whim the first time I cooked this and it worked beautifully for this recipe. The way the ruffles catch just the right amount of creamy walnuts is a thing of beauty. That said, play around with different pastas, and experiment with shapes you love. Fusilli might be great, or even little shells.

– Experiment with other nuts: You might be able to do a nice alternative version of the walnut sauce with toasted almonds, or toasted pecans instead. Or a blend of whatever nuts you have available. I’ve been doing 100% walnuts but suspect using other nuts would be great. The key is seasoning well – salt, pepper, and a bit of lemon juice. Take your time getting this part right.
– Add some green! Throw a bunch of broccoli florets or asparagus in to the pasta pot at the last minute to add a veg component to this without getting another pot dirty. We were out of both (yikes) or you would have seen one of them make an appearance here.
– Leftovers! Make a quick pasta & bean stew if you have leftovers. Combine the walnut-y pasta with some white beans in a saucepan. Add good tasting broth, heat, season, and add a bit of grated cheese to bring it all together. A handful of well-chopped kale wouldn’t be unwelcome.

If you need more pasta inspiration try this Pasta with Etruscan Sauce, or my favorite go-to tomato sauce (for pasta & pizzas), Curried Tomato Tortellini Soup, or Pasta with Smashed Zucchini Cream (in summer). A fun project is making homemade gnocchi, but if that’s a bit too ambitious try this Last-Minute Lasagna recipe, Orzo Super Salad, or family-favorite stuffed shells. There’s also a huge archive of pasta recipes and dinner ideas!
Continue reading Pasta with Creamy Crushed Walnut Sauce on 101 Cookbooks

A little while ago, a friend asked for help in a way that really impressed me. She reached out to me and another friend, explaining a difficult situation she was dealing with and simply asking whether we wouldn’t mind checking in on her from time to time in the coming weeks. It was proactive, straightforward, and it put me and our mutual friend in the happy position of being able to do something small and supportive.
It’s been my overall experience that people are really happy to help, when they can. There are so many problems we can’t fix and suffering we can’t alleviate, both globally and within our relationships. When something can be done, it’s a gift to be entrusted with doing it for another person.
My friend’s intelligent self-care made me think about ways in which I can be similarly proactive in asking for help. A lot of the things I struggle with most are internal, alleviated by the passage of time and my own process of responding. Sometimes, this makes me believe that it’s futile to ask anyone for help—what exactly would I be asking for?
This year especially, I haven’t much wanted to talk about what’s going on inside. Writing helps, journaling helps, yoga helps, food helps. Talking, not so much. It feels tiring, and it doesn’t bring much relief. This presents a dilemma, as dialog and discussion is one of the ways in which I’ve always enlisted friends to support me when I’m dealing with an issue.
Yet the past seven days have given me all sorts of examples of how asking for help needn’t take the form of confiding in someone or talking about anything. It can be what my friend asked for—a quick check in from time to time, via text or even over social media. It could be the offer another friend made me, which was simply to share space at some point (talking not necessarily included—we were thinking about a co-working date at a coffee shop).
It could be asking someone to hold you in his or her thoughts. I’ve gotten better at this last one recently with people I love, since I’m not in a talkative mood. The energetic exchange is still meaningful, still a form of support.
Recently, I found out that my friend Maria had been knitting adorable “chill pill” pillows for those who need the softness and the message in their lives. I asked her if I could commission one.
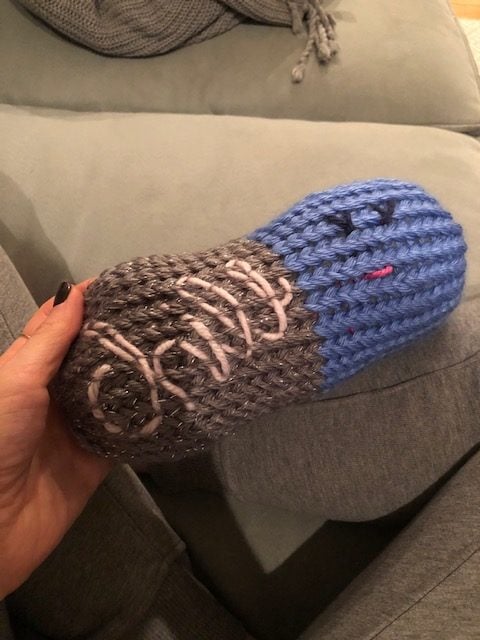
This is my chill pill pillow. Everything about it is sweet, from the feel of it in my hands to the little smile to the colors and script. Maria’s making it for me was an act of tenderness, and my asking her to do it was a form of tenderness, too—helping takes two, and there’s trust and love on both sides.
Asking for support can look like a lot of things. It can take the form of big asks and small, spoken or unspoken communication, physical presence or energetic exchange. The more I remember this—the more we all remember it—the easier it is to avoid the feelings of isolation and loneliness that are so common when one is up against something difficult, or painful.
I wish you a week of asking for what you need, whatever that looks like, and of receiving it. Here are some recipes and reads.

First, a beautiful, wintery Tuscan white bean soup that’s Instant Pot friendly. I don’t have an Instant Pot myself, but Susan’s instructions make it easy to modify!
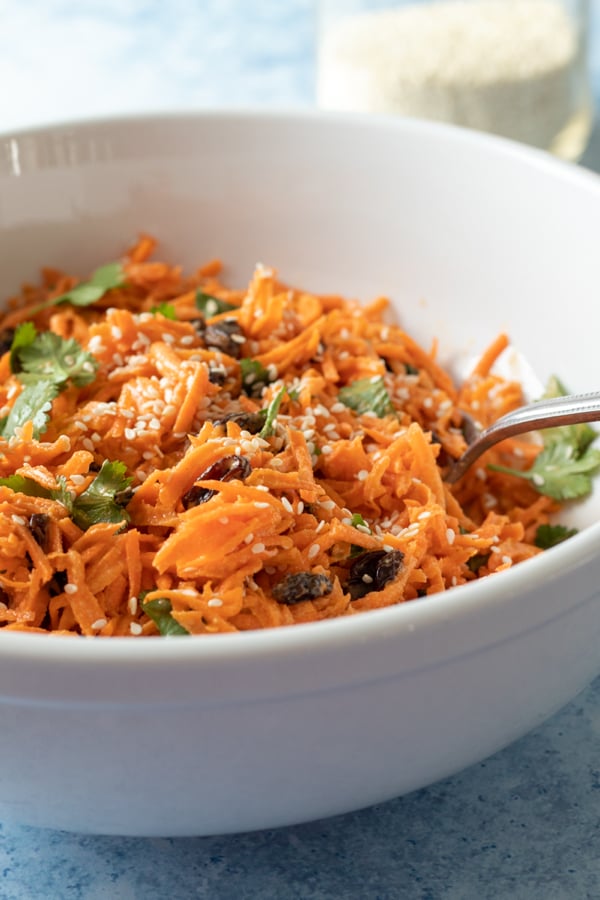
I love carrot raisin salads! And I love the tahini sriracha dressing in this one.

Why choose between hot chocolate and chai? This drink looks so warming and cozy.
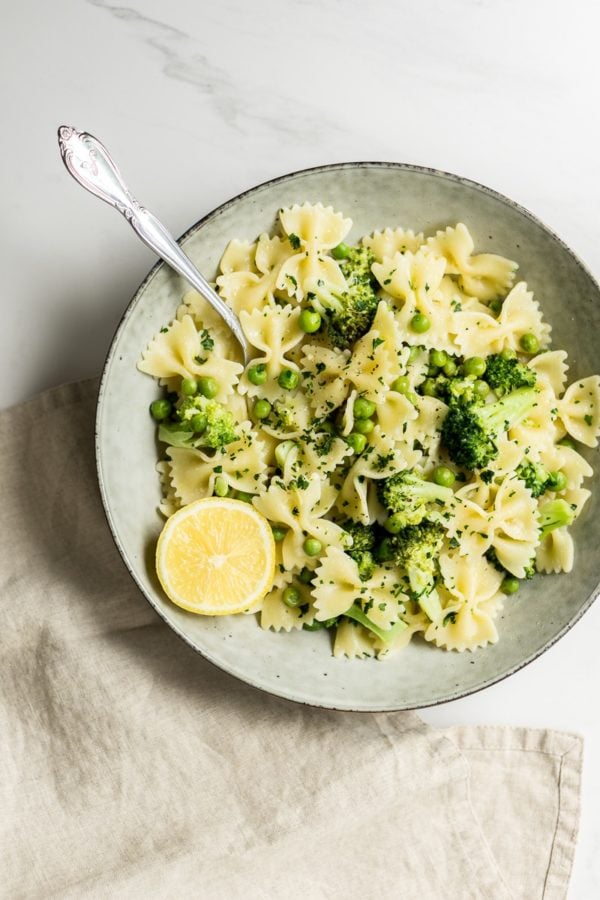
Easy and fast bowtie pasta for a comforting weeknight meal.
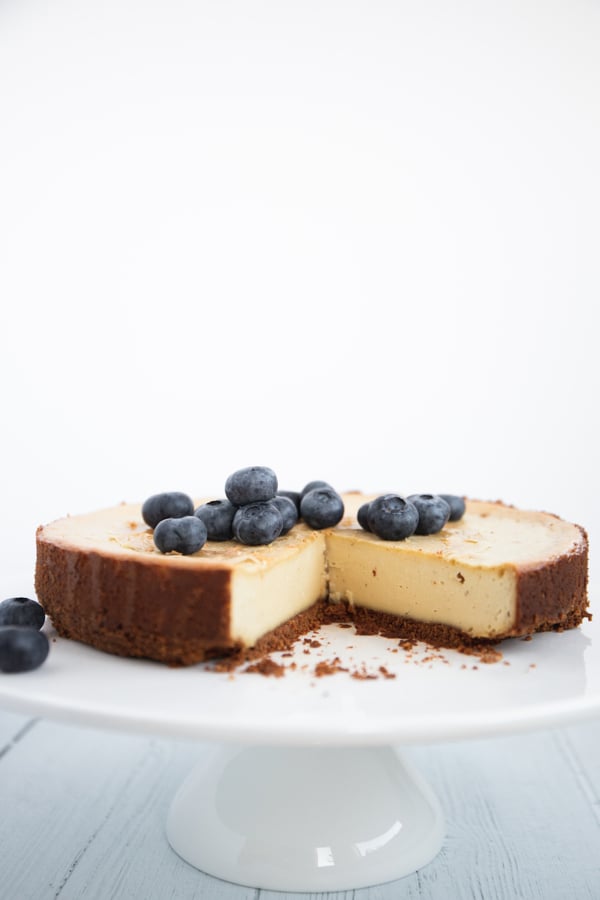
I’ve made vegan cheesecake. I’ve made several vegan cheesecakes. I’m not sure I’ve ever made a really good vegan cheesecake, though 😉
I’ll have to give this one a try!
1. Important and valiant work: scientists who’ve tracked down the use of illicit, ozone-destroying chemicals (and are committed to safeguarding against other instances of illegal emissions).
2. An important interview with a psychologist who is investigating how best to treat the trauma of family separation.
3. Sleep apnea is common, but it can be dangerous. More reporting on it means greater awareness, and awareness can help people take a more proactive approach to living with it.
4. A new study shows that food insecurity, even in a wealthy country, is linked to premature death.
5. A new meta-analysis of coconut oil demonstrates a link between coconut oil consumption and higher LDL (or “bad) cholesterol levels. The study didn’t actually examine disease states or health outcomes, just serum cholesterol levels, but it’s still worth noticing.
I’m often asked by nutrition clients about coconut oil, and my response is usually to say that coconut in moderation is OK, with the exception of individual health circumstances that would contraindicate it (that’s my disclaimer for everyone—bodies are unique, and the question of whether or not a food is healthful is always unique, too).
Plant-based eaters may have a little more wiggle room here, because plant-based diets are generally lower in saturated fats than diets that include animal foods. This creates some space for sensible inclusion of the saturated fat in coconut, and let’s face it: a lot of fun vegan products and sweets include coconut in some form! But my viewpoint is that coconut oil is still more of a “once-in-a-while” than an everyday cooking oil, and this review study strengthens the case for informed consumption.
Happy Sunday, friends. I’ll be back soon with a wintertime (and Superbowl-friendly) recipe.
xo
PS. If you could use some tenderness this week, Maria is still making her chill pills, and it’s easy to reach out to her about them on her Facebook page!
The post Weekend Reading, 1.26.19 appeared first on The Full Helping.
It happened! Charlie is 13 weeks old – we made it past the fourth trimester with two babies under two!

It goes without saying we used a lot more products than those listed below, but these are the “used every day without fail / made life significantly easier / my must-have” list of things, tips, and tricks that made those first 12 weeks a little bit easier. A couple items are repeats from Henry (sound machine, Lovevery playmat), but a lot are different! Different babies; different things work.
Overall I’d say I remember Henry being a bit easier; but there was also one of him and two of us. With two, you never get a break so who knows if it’s actually the baby or just life.
Charlie was definitely tougher in terms of naps. He wanted to be worn – not just held – but worn close to a warm body – and he prefers you be standing bouncing or rocking with a noise machine going. Hah I call him my high maintenance baby. And he’s very sensitive to sound and light and motion – so there were many days I was sitting alone in a dark room upstairs with him trying to get him to fall asleep and stay asleep. Or I get him asleep, sit down to give my feet a break, and he wakes right up because he knows I sat down. That being said – he’s been really good at night since around week 4 and for that alone I can’t complain. But naps have definitely been tricky. Henry would nap in his Mamroo, in his SnuggleMeOrganic pillow, in his bassinet, in your arms with the TV on… Charlie, not so much.
Here were the things that got us through the first 12 weeks of newborn life this time around.
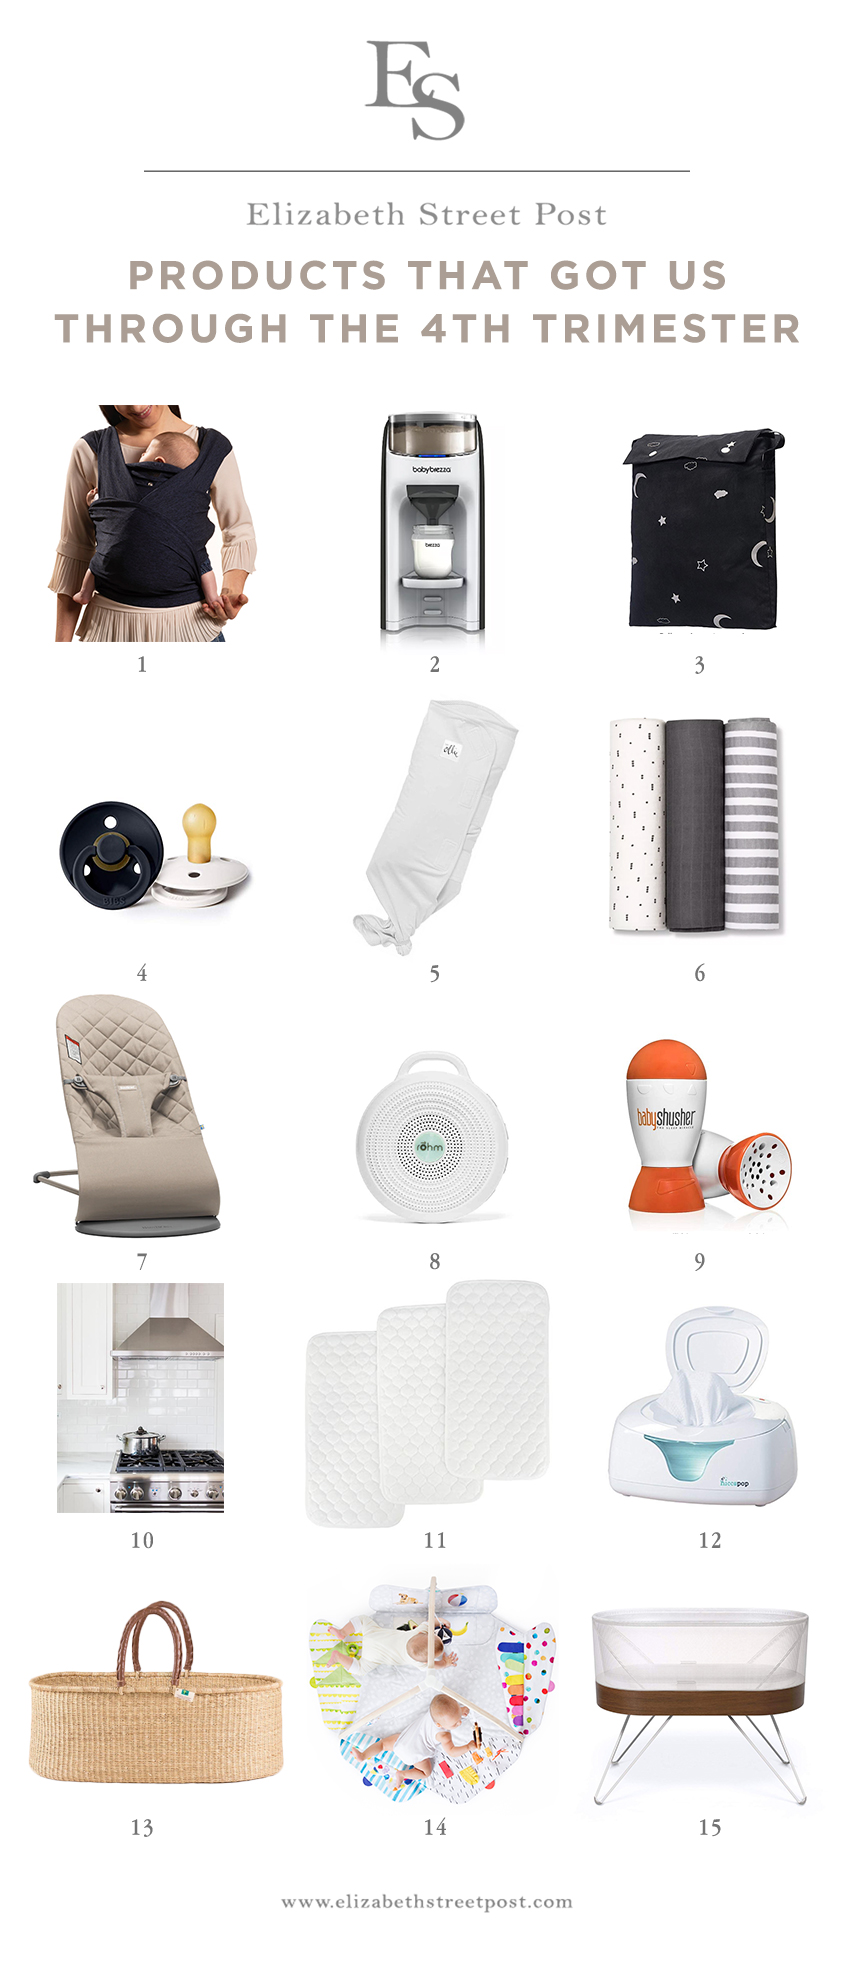
I don’t know what we would do without this carrier. Funny because Henry was not a fan of being worn. Charlie – it’s all the boy wants and how he takes his best, longest naps. I wanted a really soft carrier for his tiny newborn body but was intimidated by the wraps.

This thing is so easy to put on and tighten once he’s in. We all wear it and have even had family members wear Charlie in it when they visit, giving us a little break. I have about 1054 more photos like the ones above… that is mainly where Charlie spent his first 12 weeks of life. Snuggling someone’s chest.
2. BabyBrezza Formula Pro Advanced
I just shared in stories – this thing is basically a gift from the gods for anyone going the formula route. And from what I heard from followers, for anyone with multiples! We use this with the Comotomo bottles. Our formula is Holle PRE and we used it with both boys.* If that wasn’t available we’d likely just stick with the Similac the boys both had at the hospital! With Henry we used this much more budget-friendly Dr. Brown’s mixing pitcher ($17). Also works great! We would make a pitcher in the morning to fill his bottles throughout the day.
*Charlie is now 13 weeks and we changed his bottle nipple to medium flow last week which has been better because he’s eating a lot more like he should, but he’s really spitting up a lot – like drenching a burp cloth after a burp – and cries from gas pain kind of a lot. We were going to try switching him to the HIPP hypoallergenic formula which is often compared to Holle but it’s lactose free. I really hope it helps and will share in a month or so.
We have one in Henry’s room and got another to use in our room to make it completely dark in the morning and for naps. Also use it when traveling!
Pacis are like swaddles… you don’t know which one your babe will like. Henry loved the green hospital pacis when he was a baby. Charlie loves the Bibs. The shape of the nipple and the outward shape of the plastic part lets him get a good suction and most importantly it stays in his mouth (most of the time).
Swaddle are a real b, let me tell you. Why? Because they’re expensive and there is no guarantee which one will be “the one” your nugget loves.
The first few weeks at home we used the hospital swaddles for both boys. They barely stretch and go on nice and tight so the boys can’t really get out of them. Once they outgrow them we switch… Henry loooved the Sleepea swaddle by Happiest Baby, but Charlie loooves the Ollie. That being said, the kid is a master at wriggling his arms out of everything so we learned and started using the double swaddle technique, using a muslin swaddle under the Ollie to keep his arms down. Read more about the double swaddle technique here.
6. Aden & Anais muslin swaddles
We got a 4-pack of these for Henry, used them to death with him, and are now using them nightly with Charlie as the inside swaddle of the double swaddle mentioned above. They’re lightweight so he won’t overheat. They’re also amazing for summer babies like Henry. Also, like I said, we’ve used and washed them hundreds of times at this point and they’re still in perfect condition. Like new. Awesome investment.

This lives on our kitchen island and in the family room and is so great for docking Charlie when I’m trying to cook or tend to Henry or anything else. Henry also plays in it and bounces – it’s good for kids up to three years old! Gotta love that Swedish engineering. We also just added the toy bar to it.
We also use the Bloom Coco Bouncer that we got with Henry – but we keep that one upstairs in his room and use it mainly for bathtime or if I’m getting right. The vibrate feature keeps Charlie calm.
I weighed in on these two in my insta stories… they’re both great. I prefer how the Bloom looks a lot more, and I love the vibrate feature; but I prefer how Babybjorn folds flat very easily and more so – the harness makes it very easy to get the baby in and out. If I had to get one, I’d say Babybjorn.
We use it at night in the nurseries, we use it in our car, we use it at grandparents’ homes. We use this thing everywhere, and we have for both boys. Love the volume adjustment, the different sound options, and its small portability. Make sure you use a decibel app though to make sure your sound machines aren’t on too high and causing damage to your and your little one’s hearing.

9. Baby Shusher
Lordy was this a savior. As I’ve said, Charlie needed a lot of rocking and shh-ing his first 6 weeks out of the womb. Hell, he still does at times. And this thing helps us stretch his sleep at night. Whenever I hear him rustling, I turn this on and he magically goes back to sleep. He’s now done 8-11 hour increments this past week!
I posted on instagram that I recorded myself shh-ing since my throat was getting so dry from the constant shh-ing, and a ton of you recommended this. It’s not super cheap ($35) considering what it is – but I figured if he hated it we could return it. But he LOVES it. Helps him fall asleep and calm him. We also use this in the car to get him to fall asleep. Comes with us everywhere. Only downside is it has 15 and 30 minute settings then shuts off. I wish it had a “stay on all night long” option.
10. The oven vent fan
This is no joke. We’ve clocked a lot of hours in front of this thing the first 6 weeks, and we still rely on it if Charlie gets overtired hysterical. He’s 13 weeks tomorrow and even yesterday when he was so so upset at my mom’s house for no apparent reason (well, we think gas), I put on her oven fan and it calmed him almost instantly.
11. Quilted Bamboo changing pad liners
These are lovely and practical! Win win. We line his changing pad and bassinet with them; but also use them when we have to change him on our bed or the floor. They are machine washable, fold flat for your diaper bag. Overall – great product.
12. Wipes warmer
Cannot recommend this enough for fall and winter babies. Wipes get so cold for their tiny tushes – this offers a lot of comfort especially in the cold nights and early mornings when the house is colder.

13. DesignDua Moses Basket, Liner and Rocking Stand
This is what Charlie slept in at night the first 7 weeks and it now lives at my mom’s house if he needs to nap there. I explain more about his night sleeping in the Snoo section below!
14. Lovevery Playmat
Had this with Henry; still use it daily with Charlie. Huge fan of the brand and everything they make! We push the Babybjorn bouncer up to it so he can grab and play with the dangling toys – plus that’s a great trick for after meals so they’re not laying flat after eating.

15. Snoo bassinet
Oh the Snoo. Arguably the most debated baby product on the market – largely due to the $1300 price tag (granted it’s frequently on sale for almost half off). And the fact that some parents consider it a godsend.
Listen, this thing 100% IS a godsend. If it works for your baby. Problem is there is no way to know unless you try using it. It absolutely calms many babies and gets them sleeping through the night. We obviously didn’t want to shell out $1200, so we went with the rental option where you pay a bit over $100 month to month. I figured if it worked like magic, it’d be worth it! And if it wasn’t, we would’ve stopped using a bassinet at 4 months anyway so it was a much smaller price to pay. With two little ones, I was willing to gamble to see if it worked.
Unfortunately, we fell into the group of folks whose newborns just don’t like it – much like some babies who reject pacifiers and bottles. That was Charlie the first 7 weeks. He did not like this thing despite technically loving all the things it offers – white noise, vibrating, motion, rocking… so he technically should have loved it. But he slept most soundly at night in his Moses basket the first 7-8 weeks. Then a few weeks ago we started putting him in the Snoo again for naps… I was determined to get this thing working so we wouldn’t have to sit next to the Moses basket and rock him to sleep every night for the next month or two. And somewhere along the way… he did start liking it!
Well, kind of.
He does not like when it starts increasing. The Snoo’s settings do not calm him at all. It actually makes him more upset when the settings increase. Yes, we know there are caps on the motion and sound, and we have them set so they don’t go above level 2. But he doesn’t like level 2. Once he’s awake and crying, he’s awake and crying. He’s either peed through his diaper and is all wet poor dude, or is super hungry and this thing is not putting him back to sleep. But we do keep it on the initial base setting of motion and sound when we put him down at night – and he seems to like it. He falls asleep “on his own” with it. And kid has been doing basically 10-13 hour nights w/ 1-2 middle of the night feeding the last month. And he’s been getting much better at naps the past three weeks!
NIGHTTIME SCHEDULE:
Just FYI since I’m sure you’re curious about his nighttime schedule… as of 8/9 weeks, he’s usually asleep between 6-7pm. Ideally he wakes for a feeding between 1-3am. That was his “long stretch.” Then he goes another 3-4 hours, waking up to eat between 4-6am.* So if he makes it to 2-3am, and goes to 5-6am, he technically did 12 hours w/ one feed. But if he’s up at 1am and up again at 4am, I consider that 2 nighttime feedings. We largely follow the Taking Cara Babies newborn sleep course guidelines. No light, TV, phone screens, anything for those nighttime feedings. Keep stimulation to a minimum. (We technically have a nightlight in our bathroom that is on and gives us enough dim light in the room to see what we’re doing.)
The 1-3am feeding usually goes like this: We pick him up, change him, often have to change his clothes since he’s likely peed through his diaper, feed him, burp him, reswaddle (we do the double swaddle), feed the last small amount of the bottle so it doesn’t require another burp, and put him down, and he puts himself back to sleep.
We (Dan, nanny, myself) are all starting to practice putting him down with the Snoo off so he’s not totally dependent on it. And we plan to start testing the Magic Merlin sleepsuit in his crib in the next week to see if he likes it. Henry loved it and we used it for three weeks to help him transition to the crib before transitioning to a sleep sack.
So that is that! Hope this helps.
*The last week (Charlie being 12 weeks old), he’s pretty much dropped to one middle of the night feed usually around 4am. So his long stretch is 6-7pm until 4am, then back to sleep until 6-7am. He starts rustling around 12-1am, but we use the Shh-er to get him staying asleep. He really only wakes if he’s peed through his diaper.
16. Gas Drops by LittleRemedies (not shown above)
Thank you, Ally Pagar Wolf, for telling me about this! We used Gripe Water with Henry and it was hit or miss as to whether it helped. But this is actual medication – Simethicone – same stuff they gave me in the hospital after delivery to deal w/ post-surgical gas pains. And it works. Charlie has been very irritable at times and it was almost always caused by gas (unless it was the overtired thing which is his other pain point). This stuff works in minutes if not seconds, and he’s back to smiling or eating. We frequently give him some before bed and it helps him sleep comfortably throughout the night and not wake up crying due to a burp that’s crept up and needs help getting out.
I am a big fan of gowns for newborn life (they make changes very easy) and we loved the cozy Aden and Anais gowns for night time – but the Mori pajamas are hands down the winners and what Charlie mostly lives in. Truly. As long as we have a clean set, this is what he is wearing, day or night. I had bought a set of four zip-up sleepers during one of their sales and these are his favorite and ours. They’re extra roomy making them easy to get on and off and the material is so soft, he loves it. Some brands have tighter arms and legs and it’s really tough to get his arms through. Not these. They are not cheap but again, the price per wear makes them worth it to us since again – he LIVES in them.
I cannot recommend these enough for your registry or to give someone as an extra special gift. Again, I know the price is high. And I have small-average size babies and they run big FYI. Definitely ran big on Henry; they’re a bit more true to size for Charlie.
You can see the full list of my updated baby registry here (this post includes the changes I would have made if I could do it all over again).
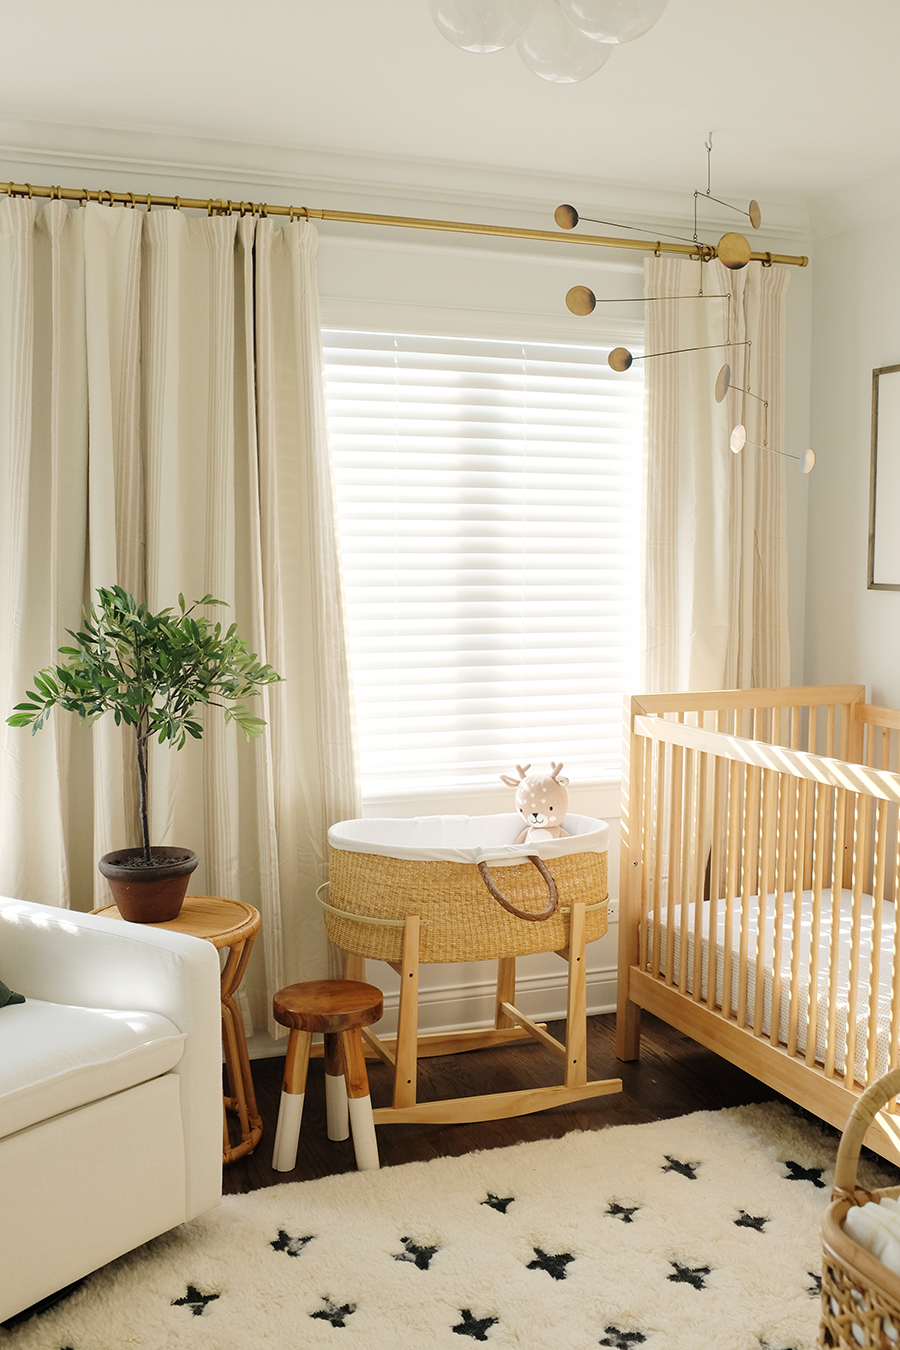
And you can see Charlie’s nursery tour here! He’s not sleeping in it yet – but we’ll start transitioning him to his crib this month!
The post The Must-Have Baby Products That Got Us Through the 4th Trimester appeared first on Elizabeth Street Post.
 Including favorites like All-Clad, Anthro, and more.
READ MORE...
 I love, love, love wooden toys for kids that are mini versions of grownup things (like this wooden princess phone I made for Lola last year). My toddler is super into wanting to help clean and wipe things down when we clean up around the house (she loves to vacuum with our mini dustbuster!) and when she saw a kid’s size cleaning set at a friend’s house she swept their kitchen for about 15 minutes. Kids just want to do what they see adults doing, so I thought it would be a really fun challenge to make her own cleaning set that was super duper cute but also totally functional. I even made removable dusting pads so I can throw them in the wash as needed, so she can really dust and clean just like the grownups do! I also love the little cleaning kits that have a stand, so I made a little coat rack-type stand to hang them all from as well and it fits perfectly in her playroom. Let’s get started!
For stand:
-1″ wooden handle wood leaf rake handle cut to 41″ long (keep the tapered end as one of your ends)
-12″ wooden circles (I stacked two circles that were 1/2″ thick)
-12″ wooden circle for star cutout (optional)
–wooden knob foot with screw base
-4 small cup hooks
For broom:
-1″ wooden handle wood leaf rake handle cut to 37″ long (keep the tapered end as one of your ends)
–brush head
For hand duster:
-1″ wooden pole (or leftover remnant from the wood leaf rake) cut to 13″ long
-6.5″ section of 2 1/2″ wide pool noodle (if the center hole is different from 1″ wide then get a wooden pole that matches the size for the handle)
-shaggy material for duster (I used this rug)
For floor duster:
-1″ wooden handle wood leaf rake handle cut to 35″ long (keep the tapered end as one of your ends)
-3/4″ x 1 1/5″ board cut to 1 1/2″ long pieces (you need two of these)
-1/2″ x 3 1/2″ board cut to 9″ long
-shaggy material for duster ( I used this rug)
–velcro for attaching cloth to hard surfaces
–3″ course thread hex bolt
–1/4″ nut for bolt
–washers for bolt (you need 2)
–locking washer for bolt
General supplies:
-drill and drill bits
–1″ hole saw for drill
-wood glue
-sandpaper
-hand saw, jigsaw or mitersaw
-hot glue gun
-thin leather cord for hanging items
–snaps and snap setter
–template for star shape (optional)
NOTE: I cut the lengths of these brooms and stand, which were made for an almost 3-year-old, so you can make them a little taller if you want for an older child.
OK! Let’s start with an easy one—the broom! Basically, you are going to take your cut tapered handle, put some wood glue on the tapered end, and insert it into the brush head. Once it’s dry, you can drill a small hole through the top of the handle (about 1 1/2″ from the top) and thread a leather cord through for hanging.

Next up is the floor duster! Take your rectangle of wood and mark where the center is with a pencil.

Your rake handle will be centered between your two small blocks and will pivot between them so space the blocks so there is enough room for your 1″ handle and two washers to fit between the blocks. Mark the desired location of the two blocks with tape or light pencil lines and then drill a hole with a 5/16″ drill bit centered through each block almost 1″ up from the bottom of the block. This will give your bolt a hole to go through to keep your rake handle in place. Glue your blocks in place on the wood surface. The wood glue felt super strong on mine but you can also run a screw up into each block from the bottom if you think your duster will encounter some rough play.
Place the tapered end of your rake handle between the two blocks and mark where the hole needs to be to keep the rake handle hovering over the wood so it can pivot freely (should be about 3/4″ from the bottom of the tapered pole). Drill your hole with your 5/16th drill bit and start with smaller drill bits to work your way up to that size so you don’t split the wood.

This is basically the order of the hardware when putting your setup together once your glue is set—you’ll put your bolt through the block on the left, then through a washer, through the rake, through another washer, through the next block, through a locking washer, and then through the nut on the end.

See? All together! Drill a small hole through the top of the handle (about 1 1/2″ from the top) and thread a leather cord through for hanging. We’ll make the fluffy cover for this in a few steps from now.

For the stand, you are going to glue your two circles together with wood glue and then use a 1″ hole saw to drill a hole in the center of the circle.

 If you want to add a decorative element you can print out the star shape and trace it onto another piece of wood (only half fits on a page so just flip it to trace the other half) and cut it out with a jigsaw. Drill a hole in the middle with the hole saw and glue it to your base. Optional but it makes it extra cute.
Check how big the screw is on your knob foot and drill a hole into the top of your cut rake handle (the flat side not the tapered side) so that you can screw in the knob onto the top of the handle (I think I ended up using a 5/16″ bit, but I did two smaller bits first to work up to that size so I wouldn’t split the wood).

Once your knob is attached, use a small drill bit to pre-drill 4 evenly spaced holes on the knob and screw in your cup hooks.

Double check the tapered end of your stick to see if it will stick out too far past the bottom of your stand once pounded in (and just cut a little off if you need to). Add some wood glue to the tapered end of your stick and use a rubber mallet or a hammer with a folded washcloth on top of the knob and gently hit the pole into the bottom of the stand. It’s helpful to use a level or square to make sure your pole isn’t crooked before letting the glue set. Now your stand is ready for action!
 Now for the hand duster! Glue your wooden dowel into your pool noodle with some hot glue and let it set.

To make the cloth for our hand duster and floor duster, get two sections of fluffy or shaggy fabric and cut them to be 7.5″ x 9.5″ for your floor duster and 9.5″ x 9″ for the hand duster. I really liked the color and look of the bath mat I bought for mine, but I did have to do a binding all the way around the edges so it wouldn’t fall apart (I just took off and reused the binding from the mat). If you get one that’s woven differently or has that full rubber backing like some rugs and bath mats do, you may not need to do that step to keep it from unraveling.
For the hand duster, I folded over the fabric with the fluffy part inside (with the 9″ sides meeting up) and sewed up that side and along the top to make a pocket leaving the bottom open. Depending on how thick your fabric is this may be hard on a machine, so hand-sew if needed.

Then, I turned the fabric right side out and added two sets of snaps so I could pinch the opening closed around the handle once I added the noodle end in so it would stay in place when she’s using it. But I could unsnap them to remove it for washing. 
Add your cover over the noodle, snap your snaps, and drill a small hole through the top of the handle (about 1 1/2″ from the top) and thread a leather cord through for hanging. How cute is that!?

To complete your floor duster, sew four looped velcro strips (about 3″ long each) to the fabric side (two on each end) and stick four of the hooked sides onto the wood so it will stay in place for play but come off for washing as needed. Now your set is done and ready to hang!


It’s juuuuust too cute to watch her clean with this! I toyed around with the idea of making a wooden dust pan too, but then I saw this smiley face one and it was just too perfect for the set to pass up (and it saved me a little work as well, haha!). Overall, I love that she gets to participate in grownup chores now, but with tools that are just her size so she can help more easily (watching her with the full-size broom looks like a comedy routine). Do you have any mini helpers that would love to use this to help you clean too? xo. Laura

In February, I fell into an I Miss GBBO rabbit hole (my interest waned when Mel, Sue and Mary Berry left, although perhaps it’s my loss) and found myself on Chetna Makan, the talented semifinalist from the 2014 season’s YouTube page, watching her make her mom’s chicken curry. It looked absolutely amazing. I watched the video, “BEST Chicken Curry recipe!” three times, and, having failed to find the recipe online or in her cookbooks, did that thing I imagine we had to in the pre-internet era of food television: wrote down the recipe from what she was saying. My kids were in the backseat and I kept saying “shh! I need to hear what spice this is!” (I’m fun.)
There is one fact about me that some people know, and once you know it, I like to think I begin to make sense. I’m obsessed with Twitter. Without a doubt, Twitter is my favorite social media. At any given time, you’ll find me scrolling through memes, reading funny tweets aloud, obsessing over this cute Twitter-famous boy, reading the news (with the perfect humorous spin), and trying to find the perfect tweet to bring me to Twitter stardom.
So, during one of my daily Twitter scrolls, I came across this very tweet:
got a new vibrator just based off these reviews pic.twitter.com/bBVmwPHyIb
— alexa (@mariokartdwi) October 21, 2019
I laughed out loud for about 20 minutes before realizing these were real reviews for a real vibrator I could buy on Amazon. Dozens of women reviewed saying they “died” (relatable AF) after using this; one woman said she was “seeing colors.” I saw tweets where women said this vibrator cured their depression, increased their credit score, and cleared their acne. Alright, so, it got me interested.
Because of the nature of my job, it would be irresponsible if I didn’t try it, right? I ordered it almost immediately, and that two-day free Prime shipping came in clutch. Let me start this by saying reviewing a sex toy for all of my coworkers to read is weird, but I’m leaning in completely for the sake of women everywhere who deserve to know how this works and why it’s quite possibly the greatest piece of happiness equipment in this very galaxy.
Amazon has completely changed the sex toy game. Most people feel weird ordering from other sex toy websites, in fear that the packages will arrive and their mailman will eternally look at them differently. With Amazon, your toys arrive in typical Amazon packaging. There’s no telling if you just bought a scarf, a kitchen gadget, a moisturizer, or a vibrator. Being able to order this on Amazon and read reviews made purchasing this vibrator a much easier decision than other sex toys.
Instead of just a vibration, they actually suction against the clitoris and move in a fan motion, mimicking the sensation of oral sex. Genius, right? This vibrator does double-duty, as it is a suction vibrator on one end and a G-spot vibrator on the other.
Some other notable features: it charges via USB and takes about 1.5 hours to fully charge, and one charge should last at least 60 minutes (for reference, I’ve used it about eight times so far and haven’t needed to charge yet). It has 10 different vibration modes and 10 suction modes, and they don’t have to be on the same mode at the same time. You could be at a #2 vibration with a #7 suction, for example. It’s also waterproof and made with smooth silicone that isn’t irritating or uncomfortable on/in the body (here are the best way to clean silicone toys!).
If you’re not used to dual-ended vibrators, it can be an odd sensation and a little difficult to get used to at first. If you’ve watched Grace and Frankie, you’ll remember their discussion about typical vibrators aggravating carpal tunnel and making their joints hurt. When I first tried this vibrator, my 23-year-old self completely understood why their (unfortunately fictional) vibrator sold off the shelves. You have to position it in just the right way to reach both areas, which can be a little tricky and annoying at first.
Finally, I figured out the positioning and actually turned it on. OK, I see you, Amazon vibrator. With my other vibrators, I generally go straight for the highest speed. Not with this guy. I quickly realized that you should start slow and build up to higher speeds. TBH, I still haven’t even gone past #3!
It tackles the two areas that are typically most pleasurable to vaginas: the clitoris and the G-spot. If it’s hard for you to orgasm, this toy might help by targeting those nerve endings that often aren’t addressed in typical vaginal sex.
I’m not sure I’d recommend this to someone who’s never used a vibrator before. There are many other beginner-friendly vibrators on the market. Aside from the intricate (yeah, that’s the word we’ll use) design, she is powerful. Don’t use this if you have an acute heart condition because this will seriously rattle your body in ways that are absolutely inappropriate to describe on this here website.
After using this vibrator, I truly feel on top of the world.
After using this vibrator, I truly feel on top of the world. Masturbation can make you feel sexy and give you a kind of sexual confidence that you can’t get from just having sex with a partner. I go about my day in a different way than before. It’s like that post-sex glow except even better because I did it all by myself. We stan an independent, sex-positive queen!
Oh, and my final nod to this vibrator? Men ain’t sh*t. As one reviewer said, if they aren’t giving it to you like this vibrator can, deuces.
The post We Tried the Amazon Vibrator the Internet is Obsessed With appeared first on The Everygirl.

This is a great time of year for sandwiches and wraps. They’re quick and easy, which means that they free up time for me to take a walk on my lunch break, rather than staying in and fussing over my lunch. They don’t demand an oven, a stovetop, or any other heat source, which is attractive in a New York City August. And they’re portable, so I can carry them with me if I’m working outside of the home. I can even make the most of my lunch hour and take a sandwich or a lunch wrap to the park near my apartment, getting a taste of green space and some nourishment at the same time.
When I was in grad school, my go-to sandwiches were one of the following:
1. Hummus and veggies
2. Tempeh and avocado
3. Vegan deli meats and veggies
They’re all great. They did, after three straight years, become a little boring.
Now that I can prepare a sandwich or a wrap from home, albeit with the desire not to spend too much time on lunch, I’m trying to experiment with slightly more creative options. This vegan chickpea Caesar wrap is my latest favorite.
The wrap uses a slightly simplified version of the Caesar dressing from Power Plates. I sometimes double the amount I make so that I can also have some nearby for sandwiches and bowls, because it’s so good: creamy, savory, with a little umami. It’s cashew based, and I throw in some capers and nutritional yeast for authentic flavor.
Making the dressing is actually the most time-consuming part of making this wrap, so if you’re really in a hurry, you could use a store-bought vegan Caesar instead (Follow Your Heart and Daiya both make them).
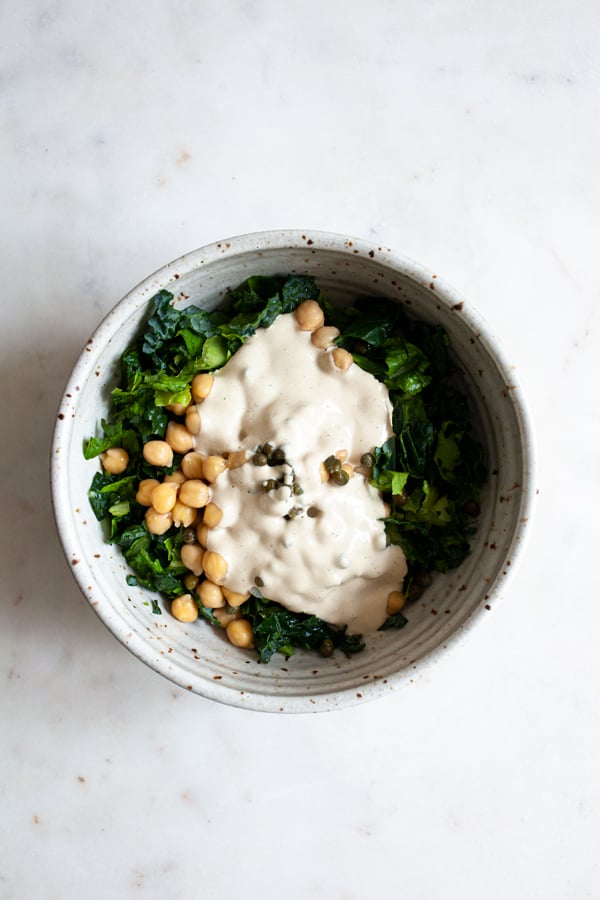
Once the dressing is ready, the wrap is as simple as throwing chickpeas, greens, and a few more capers together and wrapping it all up. I like to use a combination of Tuscan kale and romaine for texture contrast, and sometimes I’ll throw in some extras, like grape tomatoes or vegan bacon (tempeh and seitan bacon are especially nice because they add protein to the meal, but shiitake bacon is also delicious).
You can chop all of the greens up well with your chef’s knife, of course: that’s how I usually do it. If my food processor happens to be out because I’ve been making hummus or something, I often pulse all of the filling ingredients together. It’s ridiculously fast, and I like how well chopped everything gets (it’s a handy trick for stuffing pita pockets with veggies, too).

I’m listing the recipe to serve two, because I rarely prepare this kind of meal more than two servings at a time, and the filling will only keep about two days in the fridge once it’s mixed. But if you’re prepping lunch for a bunch, you can of course double the quantities. Here’s the recipe.

First, prepare the dressing by adding all of the dressing ingredients to a powerful speed blender or food processor. Blend or process till smooth (1-2 minutes). You should have a scant cup dressing; you won't need all of it for two wraps. Dressing will keep in an airtight container in the fridge for up to 5 days.
Chop the greens well with a chef's knife (or pulse them in the food processor to make chopping fast). Throw them in a bowl. Add the chickpeas, capers, and anything else you'd like to add to the wrap, along with 1/4-1/3 cup of the dressing. Mix well.
Divide the filling along the center of two wraps (or save half for tomorrow). The filling should be arranged vertically. Tuck the top and bottom over the filling, then cover it with the right side of the wrap. Tuck the wrap over the filling well, then roll it up from right to left. Slice in half and serve.
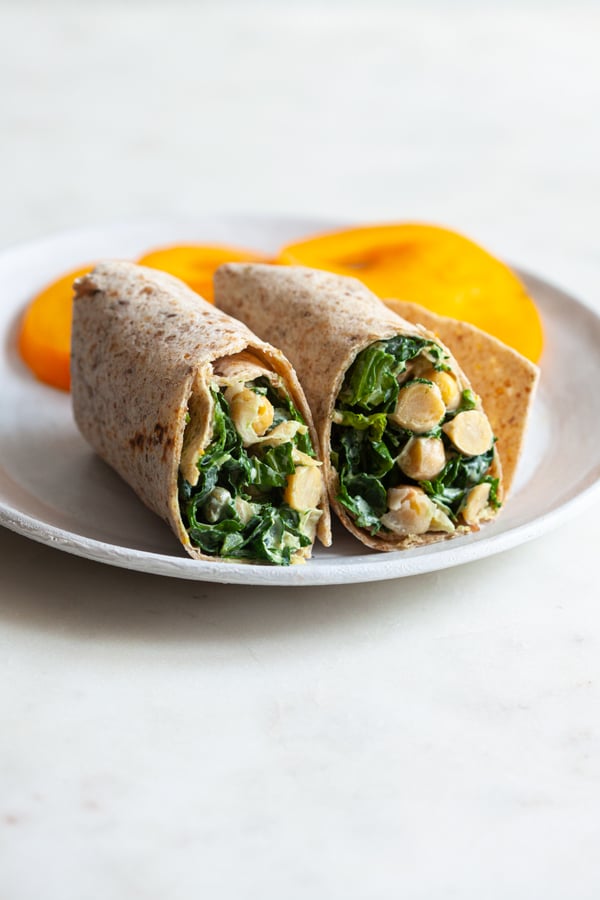
Don’t have any chickpeas at home? White beans of any kind (cannellini, navy, Great Northern) will also work really well in the wraps. And at some point I’d like to try replacing the beans with chopped vegan chick’n (like my chick’n style soy curls).
As I continue to ease back into a steady work routine and study for my exam, I love having lunches that give me something to look forward to without demanding too much of my time. This one is perfect, and I hope you’ll enjoy it as much as I do.
xo
The post Vegan Chickpea Caesar Wraps appeared first on The Full Helping.

I asked for fun summer activity ideas on IG and compiled all the ideas here. I’m so inspired by this list! Thank you to everyone who sent an idea. This is memory making GOLD.
1. Run through the sprinklers. 2. Go airplane watching at the airport (park in the cell phone lot and bring snacks!) 3. Go to your local farmer’s market. 4. Make s’mores. 5. Sip n’ slide. 6. Stay up late and catch fireflies. 7. Go to a pool or splash pad. 8. Play with sidewalk chalk. 9. Make a donation box of toys they are no longer playing with and talk to them about what it means to “donate” and why it’s important. 10. Go for a hike. 11. Go camping (even if it’s in your own yard!). 12. Make a bonfire. 13. Go berry picking. 14. Do sparklers. 15. Go to the park for a picnic. 16. Tie dye anything you and everything. 17. Watch a movie outside. 18. Make no bake cookies or energy balls. 19. Have ice cream or popsicles outside as the sun is setting. 20. Water balloon war! 21. DIY scavenger hunt (don’t over-think it!) 22. Blow bubbles. 23. Plant flowers. 24. Go to the library. 25. Bake a peach pie. 26. Do a blindfolded taste test of different fruits. 27. Visit a local museum (check online for kids activities) 28. Make a lemonade stand 29. Make jewelry with Sculpey or air dry clay, paint and string. 30. Make homemade popsicles. 31. Get (fake) tattoos. 32. Make potato stamps. 33. Go on a ceramics painting date and make coffee mugs for the whole family. 34. Paint outside (then take a hose bath). 35. Make dry pressed flowers. 36. Freeze small toys in ice cubes. 37. Wash the car together (bonus points if you have a mini car or tricycle to wash- or even just let your kids wash their toys). 38. Use sun printing paper to make art with leaves, flowers and plants outside. 39. Search science experiments ideas on Pinterest and go crazy. 40. Make slime. 41. Decorate a pot and plant a new plant. 42. Go to a lake or a river. 43. Make bubble paintings outside. 44. Attend an outdoor concert. 45. Fly a kite. 46. Make chalk paint. 47. Make your own puppet show. 48. Go out for snow cones. 49. Paint with water on the fence or concrete (just a paintbrush and water- genius!) 50. Take a nature walk and make a nature journal. 51. Make huge bubbles with a kids pool, hula hoop, soap and water- love this! 52. Take a nighttime bike ride with glow sticks. 53. Encourage your kids to write their own song, and record it. 54. Make a fort with blankets and twinkle lights. 55. Look up state parks near you to visit. 56. Make your own “water table” it can be as simple as a tub of water with some toys to play. 57. Go mini golfing. 58. Make elephants toothpaste (google) and homemade play dough. 59. Make a fancy tea party together. 60. Go to the park or a public place and write kind messages in sidewalk chalk for strangers to read. 61. Explore the murals in your city. 62. Have a DIY makeover night (you have to let your child do your makeup too- it’s the rules!) 63. Make a time capsule. 64. Have a clean up day where you clean up other people’s litter. 65. Make flower arrangements. 66.Do a big puzzle. 67. Make homemade t-shirts (I loved making my own “fashion” as a child). 68. Get a blank children’s book and let your children write and illustrate their own stories. 69. Make a sticker chart with a reading goal for the summer. 70. Make homemade bird feeder ornaments to hang outside (google recipes, they’re simple). 71. Save large cardboard boxes and let your kids paint their own houses outside (just cut holes the the door and windows and let them go crazy). 72. Paint rocks and make a rock family. 73. If you haven’t yet, start a music jar. 74. Organize gummy bears by color. 75. Sew a toy together. 76. Make flower crowns. 78. Send letters in the mail to grandparents. 79. Dance in the rain. 80. Put raspberries on all your fingers and eat them. 81. Go to a drive in movie. 82. Go roller skating. 83. Make smoothies. 84. Watch a movie from your childhood. 85. Recreate a photo from your childhood. 86. Plant some herbs together. 87. Make funny costumes out of paper grocery bags. 88. Have a dance contest. 89. Dig up dinosaurs in the sandbox. 90. Make fruit salad. 91. Paint flower pots. 92. Make binoculars out of toiler paper rolls, string and paint. 93. Make sock puppets. 94. Make rainbow noodles with food coloring. 95. Melt crayons into fun shapes using silicon molds. 96. Do a photo scavenger hunt. 97. Make rice krispies treats. 98. Make frozen bananas! 99. Make a car wash for toy cars. 100. And if all else fails… go out for ice cream. 
I hope this is helpful for some of you. I know we’ll be doing a lot of these this summer…. I’m so excited to make memories!
Remember mamas- YOU ARE DOING A GREAT JOB. xx
 This post is sponsored by Shutterfly. Awaken your space with your vision. Shop Shutterfly Home Décor for personalized home accents that are uniquely you.