Microsoft vient de faire un truc qui va faire jacter tous vos sites tech au moins pour la semaine ! En effet, la firme de Redmond ouvre Windows aux agents IA autonomes, ces assistants capables d'agir sur votre système sans que vous ayez à cliquer sur chaque bouton. Ahaha, j'adore ! Et là, forcément vous me connaissez, niveau sécu, ça soulève quelques questions.
Ce framework s'appelle Agent Launchers et il débarque dans Windows Insider Preview. L'idée c'est de permettre à des assistants logiciels de s'enregistrer auprès de l'OS pour interagir avec vos fichiers et vos apps dans un environnement isolé. Kevin Scott, le CTO de Microsoft, compare ça à Windows 3.0 qui avait fait de l'OS la plateforme incontournable pour les devs. Sauf qu'aujourd'hui, on parle pas de Word ou Excel, on parle de trucs qui prennent des décisions à votre place. Oui comme votre mère.
Les paramètres Windows AI Components - c'est là que ça se passe (
Source
)
Mais rassurez-vous les mécréants, Microsoft a quand même prévu des garde-fous. En effet, les agents tournent dans un Agent Workspace isolé, avec leur propre compte utilisateur Windows dédié. Ils ne peuvent pas dépasser vos permissions, et par défaut, ils n'ont accès qu'à 6 dossiers : Documents, Téléchargements, Bureau, Musique, Images et Vidéos. De plus, le système est désactivé par défaut et il faut un admin pour l'activer. Voilà, les 3 loi d'Asimov version krosoft sont donc la non-répudiation (les actions sont loggées), la confidentialité (isolation des données), et l'autorisation (permissions explicites).
Le message d'avertissement quand vous activez les fonctionnalités agentiques - Microsoft prévient que c'est pas encore au point (
Source
)
Sauf que voilà. Y'a un gros éléphant dans la pièce qui s'appelle XPIA, pour Cross-Prompt Injection Attack. Si vous avez suivi
l'affaire EchoLeak
sur Microsoft 365 Copilot, vous savez de quoi je parle. Le principe c'est qu'un contenu malveillant planqué dans un fichier ou une page web peut détourner les instructions de l'IA. L'agent croit alors exécuter une tâche légitime alors qu'il balance vos données à un serveur pirate. Et le pire c'est que Microsoft reconnaît le risque noir sur blanc dans sa propre documentation.
Le problème fondamental c'est ce que les chercheurs appellent la LLM Scope Violation : l'IA traite les données de confiance et les données potentiellement hostiles dans le même "cerveau", sans vraiment faire la différence. C'est comme si votre assistant faisait aveuglément tout ce qu'il lit, que ça vienne de vous ou d'un spam. Et ça, c'est un défaut architectural qui touche tous les systèmes agentiques basés sur des LLM, et pas juste ceux de Microsoft.
D'ailleurs, si vous vous demandez pourquoi Microsoft prend ce risque énorme, c'est simple la réponse est dans les chiffres. En fait, les revenus de Windows stagnent tandis qu'Azure a explosé à plus de 75 milliards de dollars par an. La stratégie c'est donc de transformer Windows en hub pour les agents, et de le faire devenir la plateforme incontournable de l'ère IA, exactement comme ils l'avaient fait avec les applications traditionnelles dans les années 90.
Alors pour l'instant, c'est réservé aux Windows Insiders dans le canal Dev et les testeurs sont explicitement prévenus que les protections XPIA ne sont "pas parfaites" et qu'il faut surveiller ce que font les agents. Bref, c'est de la beta assumé mais vu comment
l'IA peut déjà introduire des vulnérabilités
dans le code, imaginez ce que ça peut donner avec un agent qui a accès à votre système de fichiers.
Les entreprises qui veulent déployer ça vont donc devoir sérieusement revoir leurs politiques de sécurité. Audit des données accessibles, monitoring des actions des agents, sensibilisation des équipes... L'IA autonome, c'est plus un gadget de productivité, c'est un vecteur d'attaque potentiel qu'il va falloir commencer à traiter comme tel.
Ça y est, le CES version 2016 a démarré. Le lancement est donné par les CES Unveiled. Cet évènement marque le début des festivités à Las Vegas. Cette année j’ai…
Au cœur du CES Unveiled, François Sorel et Jérôme Colombain livrent leurs premières impressions à chaud. Entre gadgets surprenants, robots en tout genre et rareté des startups françaises, ce mini-CES donne le ton de l’édition à venir.
Moins d’exposants et surtout beaucoup moins de startups françaises cette année au CES Unveiled. François Sorel et Jérôme Colombain soulignent en revanche la forte présence des entreprises chinoises, qui dominent largement les allées de ce « mini CES » parfois comparé à une foire à inventions.
La déferlante des robots du quotidien
Robots tondeuses, robots de piscine, robots chasse-neige ou encore machines lanceuses de balles de tennis : la robotique utilitaire est omniprésente. François Sorel s’attarde sur des innovations intéressantes autour de l’autonomie, notamment des robots capables de se recharger seuls, une évolution clé pour l’avenir de la robotique domestique et humanoïde.
Robots compagnons et influence asiatique
Les robots pets, mi-peluches mi-objets connectés, intriguent autant qu’ils interrogent. Ces compagnons artificiels, surtout portés par des acteurs asiatiques, cherchent à reproduire une présence animale sans les contraintes du quotidien, ouvrant le débat sur notre rapport affectif aux machines.
Une startup française utile : la détection d’allergènes
Malgré leur rareté, certaines jeunes pousses françaises se distinguent par des solutions concrètes. François Sorel évoque une startup tricolore proposant un boîtier portable capable de détecter les allergènes alimentaires, un outil potentiellement vital pour les personnes souffrant d’allergies sévères.
Les réfrigérateurs connectés de Samsung passent une étape majeure au CES 2026 avec l'arrivée de Google Gemini pour reconnaître des milliers d'aliments et produits. Il devient aussi possible de dire « ouvre les portes » à son frigo qui s'exécutera grâce à des charnières motorisées.
L’affichage dynamique transforme profondément la communication visuelle grâce àdes écrans connectés intelligentsutilisés partout. Synchroniser plusieurs écrans devient stratégique pour diffuser des messages cohérents et efficaces.
L’affichage dynamique s’impose comme un levier puissant pour informer et engager le public grâce à une diffusion visuelle maîtrisée. Les entreprises multiplient les écrans afin de renforcer leur visibilité et leur impact. Cependant, la synchronisation des contenus reste un défi technique majeur. Une gestion centralisée est indispensable pour garantir cohérence, réactivité et performance dans tous les environnements professionnels.
Optez pour une solution de digital signage performante
Choisir une solution de digital signage adaptée permet de synchroniser efficacement l’ensemble des écrans grâce à une gestion centralisée fiable. Les plateformes modernes regroupent diffusion, planification et mise à jour dans un espace unique sécurisé.
Ainsi, une solution performante facilite la gestion simultanée de multiples écrans répartis sur différents sites grâce à une administration simplifiée réduisant les interventions techniques locales. D’ailleurs, ces outils reposent sur des technologies cloud assurant stabilité et évolutivité avec une accessibilité permanente pour les équipes opérationnelles.
Pourquoi synchroniser plusieurs écrans reste complexe ?
La synchronisation d’écrans implique souvent des contraintes liées aux formats et aux résolutions, créant des incompatibilités techniques fréquentes entre supports matériels différents. Comme les réseaux varient selon les sites, la stabilité de diffusion peut être affectée par des latences imprévisibles nuisant à la cohérence visuelle. De plus, la multiplication des intervenants complique la coordination sans outil commun, générant des erreurs humaines récurrentes dans les mises à jour.
Pilotez vos contenus en temps réel depuis une interface unique
Une interface centralisée permet de contrôler tous les écrans depuis un tableau de bord proposant une supervision globale immédiate. Les contenus évoluent instantanément selon les besoins. La gestion en temps réel facilite l’adaptation des messages selon l’actualité grâce à une réactivité accrue dans la communication visuelle. De plus, une interface intuitive réduit la dépendance technique en permettant une prise en main rapide par des équipes non spécialisées.
L’importance du logiciel d’affichage dynamique dans la synchronisation
Un logiciel d’affichage dynamique constitue le cœur du dispositif en orchestrant la diffusion homogène grâce à un pilotage automatisé sur l’ensemble des écrans connectés. Comme ces logiciels intègrent des règles de programmation avancées, ils garantissent une diffusion cohérente via une planification intelligente des contenus. D’ailleurs, les solutions performantes assurent une compatibilité étendue avec divers médias, accordant une intégration multimédia fluide sans perturbation.
Comment améliorer la cohérence visuelle sur tous vos écrans ?
La cohérence visuelle repose avant tout sur l’utilisation de templates harmonisés garantissant une identité graphique uniforme sur l’ensemble du parc d’écrans. Ces modèles prédéfinis assurent une présentation homogène des messages, quels que soient les lieux de diffusion ou les formats d’écrans utilisés. Cette standardisation renforce la reconnaissance visuelle et la crédibilité des communications.
Notez aussi que l’utilisation de bibliothèques de contenus centralisées évite les doublons et les incohérences graphiques grâce à une gestion unifiée des ressources visuelles. Logos, couleurs, typographies et visuels restent identiques sur tous les supports, même lors de mises à jour fréquentes. Cette centralisation facilite également le travail collaboratif entre équipes. Par ailleurs, l’aperçu en temps réel permet de vérifier le rendu avant publication afin d’anticiper d’éventuels problèmes d’affichage. Cette fonctionnalité limite les erreurs et garantit une qualité visuelle constante sur tous les écrans, même lors de déploiements à grande échelle ou multi-sites.
Quels bénéfices opérationnels pour les entreprises multi-sites ?
Synchroniser les écrans améliore significativement la communication interne en diffusant des informations stratégiques via une diffusion simultanée maîtrisée sur tous les sites. Les messages clés atteignent ainsi l’ensemble des collaborateurs au même moment. Ceci en renforçant l’alignement et la cohésion organisationnelle. Comme la diffusion devient instantanée, les messages urgents atteignent rapidement les publics concernés grâce à une transmission immédiate renforçant la réactivité opérationnelle. Cette capacité s’avère particulièrement utile lors de changements organisationnels, d’alertes internes ou de communications prioritaires.
Il est également important de noter qu’une gestion centralisée réduit les coûts liés aux interventions locales grâce à unemaintenance à distance efficace et continue. Les équipes techniques gagnent du temps, les déplacements sont limités et l’administration globale des écrans devient plus simple, plus rapide et plus économique sur le long terme.
Pourquoi intégrer des visuels professionnels dans votre stratégie ?
Les visuels renforcent l’impact des messages diffusés en captant l’attention grâce à des contenus attractifs qualitatifs adaptés aux écrans. Utiliser des visuels spécialisés ou libres de droit améliore la crédibilité par une image professionnelle cohérente valorisant la marque. En outre, des visuels adaptés facilitent la compréhension rapide des informations grâce à une lecture immédiate optimisant l’expérience utilisateur.
Vers une synchronisation sans contrainte des écrans professionnels
Grâce à des outils automatisés performants réduisant fortement les contraintes techniques, l’évolution technologique simplifie donc la synchronisation. L’automatisation limite les erreurs humaines et améliore la fiabilité par une exécution cohérente des processus de diffusion. Parallèlement, la flexibilité des plateformes accompagne la croissance des réseaux d’écrans grâce à une architecture évolutive pensée pour l’avenir.
L’affichage dynamique synchronisé devient un levier stratégique pour les organisations modernes grâce à une communication visuelle optimisée. Les solutions centralisées assurent fluidité, cohérence et réactivité tout en réduisant contraintes techniques et coûts. Les entreprises renforcent ainsi leur impact, leur visibilité et leur efficacité opérationnelle durablement.
Juniper Research révèle un panorama précis des innovations technologiques qui structureront l’univers industriel et numérique en 2026. En effet, son rapport met en lumière dix tendances stratégiques qui ne sont plus des concepts théoriques mais des technologies prêtes à être déployées à grande échelle. Ici, l’accent est mis sur les défis liés à la sécurisation et à la gestion des systèmes numériques de nouvelle génération.
La transition des prototypes vers la commercialisation s’intensifie. Les technologies clés comme la cryptographie post-quantique, l’informatique neuromorphique ou encore l’IA physique impactent directement la robustesse et la performance des infrastructures. Face à ces avancées, les entreprises doivent anticiper les contraintes réglementaires, sécuritaires et techniques. Voici donc les 10 tendances technologiques émergentes à suivre de près en 2026, selon Juniper Research :
1. Post-quantum cryptography : la standardisation pour sécuriser l’ère quantique
En 2026, la cryptographie post-quantique sort de l’ombre pour s’imposer dans les stratégies de sécurité. Les standards du NIST automatisent une adoption hybride combinant algorithmes classiques et résistants au quantique. Cette approche duale s’avère indispensable pour les dispositifs IoT aux cycles de vie étendus. Les entreprises doivent désormais intégrer cette cryptographie dans leurs déploiements afin de prévenir des vulnérabilités futures. Ce changement marque une transformation profonde des fondations de la cybersécurité. En pratique, plusieurs secteurs critiques, comme la finance et l’industrie, commencent à déployer des pilotes opérationnels.
2. Informatique neuromorphique : l’avènement des chipsets commerciaux
Le secteur de l’intelligence artificielle s’appuie sur la puissance des architectures neuromorphiques en 2026. Les premiers chipsets commerciaux promettent de surmonter les limites de performance et de consommation des applications AI en périphérie. Cette technologie reproduit l’architecture neuronale pour optimiser le traitement local des données. Elle favorise la rapidité et l’efficacité dans des contextes où l’énergie est rare et la latence critique. L’informatique neuromorphique est pressentie pour révolutionner l’exploitation des données temps réel, surtout dans l’industrie lourde. Les cas d’usage industriels démontrent déjà des gains substantiels en termes d’autonomie et d’analyse prédictive.
3. IA physique et robots humanoïdes : vers l’autonomie accrue
Les avancées en IA physique marquent un tournant pour la robotique humanoïde industrielle. Ces machines gagnent en dextérité et autonomie, facilitant leur intégration dans les chaînes logistiques et de fabrication. Les améliorations concernent la mobilité, la manipulation d’objets et la capacité à prendre des décisions en temps réel. Ces capacités élargissent les domaines d’application, notamment dans les entrepôts et les opérations sur site éloigné. Ce progrès se traduit par une réduction des coûts et une meilleure flexibilité opérationnelle. Les entreprises adoptent progressivement ces robots pour sécuriser l’environnement de travail et améliorer la productivité.
4. Systèmes multi-agents : la spécialisation au cœur de l’automatisation
Les systèmes multi-agents basés sur des IA spécialisées modifient la manière dont les processus sont automatisés. Chaque agent se concentre sur un domaine précis, renforçant la détection d’anomalies et la gestion prédictive. L’orchestration de ces agents améliore la coordination des opérations complexes, notamment dans les environnements IoT. Cette technologie facilite la maintenance proactive, réduisant considérablement les interruptions. Elle trouve aussi un intérêt grandissant dans la gestion des réseaux intelligents et des usines automatisées. Les entreprises découvrent que cette approche granulée renforce la fiabilité et la réactivité de leurs systèmes.
5. Recharge sans fil pour véhicules électriques : le développement des infrastructures
Le déploiement massif de la recharge sans fil pour véhicules électriques accélère l’adoption des mobilités intelligentes. Les réseaux d’infrastructures se développent rapidement, intégrant des systèmes IoT pour la gestion en temps réel des flux énergétiques. Ces innovations permettent une facturation précise, un diagnostic à distance et une maintenance optimisée. La recharge sans fil simplifie l’expérience utilisateur tout en réduisant les temps d’arrêt. Ce modèle ouvre la voie à de nouveaux services dans les villes connectées. Les acteurs du secteur misent sur cette technologie pour répondre aux enjeux environnementaux et logistiques.
6. Technologies anti-drones : une réponse aux menaces croissantes
Face à la multiplication des incidents liés aux drones non autorisés, les technologies anti-drones gagnent en importance. Les industries avec de vastes périmètres sensibles renforcent leur sécurité grâce à des solutions détectant, classifiant et neutralisant les menaces. Ce marché en pleine croissance attire les investissements pour développer des outils efficaces et adaptés à divers environnements. Ces dispositifs combinent radars, systèmes acoustiques et intelligence artificielle pour une protection optimale. Les secteurs concernés incluent la logistique, l’énergie et la défense. La réglementation renforce également l’exigence de dispositifs préventifs dans ces secteurs critiques.
7. Refroidissement microfluidique : gestion thermique pour centres de données
Les centres de données confrontés à l’explosion des charges AI adoptent le refroidissement microfluidique. Cette solution innovante gère efficacement la dissipation thermique des puces à haute densité. Elle utilise des microcanaux et des fluides adaptés pour maintenir des températures optimales. Ce procédé limite l’impact énergétique et prolonge la durée de vie des équipements. Par rapport aux systèmes traditionnels, il offre une meilleure efficacité pour les installations IoT intensives en calcul. L’adoption croissante de cette technologie est une réponse directe à la montée en puissance des applications analytiques.
8. Modèles multi-cloud : accélération de la résilience après les pannes de 2025
Les interruptions cloud majeures en 2025 ont poussé les entreprises à revoir leur dépendance unique à un fournisseur. Le recours aux architectures multi-cloud se généralise pour équilibrer redondance, flexibilité et conformité. Cette stratégie répartit les charges et réduit les risques liés aux incidents. Elle facilite également la portabilité des applications et la gestion des données. L’essor des modèles multi-cloud implique des outils sophistiqués pour l’orchestration et la sécurité. Cette évolution est clé pour garantir la continuité des services face aux cybermenaces et pannes systémiques.
9. Petits réacteurs modulaires : une nouvelle ère énergétique
Les progrès réglementaires ouvrent la voie aux petits réacteurs modulaires comme solution énergétique durable. Cette technologie promet de répondre aux besoins énergétiques croissants des industries connectées. Les SMR offrent une production stable et décentralisée, compatible avec des exigences élevées en matière de sécurité et d’environnement. Leur déploiement facilite l’autonomie énergétique des sites industriels. Le potentiel disruptive des SMR fait déjà l’objet d’expérimentations en Europe et en Amérique du Nord. Les entreprises du secteur manufacturier suivent de près ces développements pour anticiper la transition énergétique.
10. Bâtiments intelligents open-source : interopérabilité et optimisation énergétique
Les bâtiments intelligents évoluent vers des plateformes open-source pour renforcer l’interopérabilité des systèmes. L’optimisation énergétique devient une priorité mondiale, favorisant l’adoption de standards ouverts. Cette démarche simplifie l’intégration de nouveaux équipements et la gestion centralisée. Les opérateurs bénéficient d’une meilleure visibilité sur les consommations et peuvent ajuster les usages en temps réel. Ce modèle encourage également la collaboration entre fabricants, développeurs et gestionnaires. Le recours à l’open source améliore la pérennité et la flexibilité des infrastructures bâties.
Lego a profité du CES 2026 pour présenter sa plus grande innovation depuis des lustres : le concept Smart Play, qui s'appuie sur une brique intelligente pensée pour encourager les interactions, avec son et lumière.
Le CES 2026 est officiellement lancé à Las Vegas. Direction le Las Vegas Convention Center, le plus vaste hall du salon, récemment réaménagé, où se concentrent les géants de l’électronique grand public. Des stands monumentaux et une impression générale de continuité : l’innovation progresse, mais sans rupture spectaculaire.
Côté télé, les constructeurs convergent vers les technologies RGB mini-LED et micro-LED, synonymes de couleurs plus pures, de forte luminosité et de réduction des halos lumineux. Samsung, LG, Sony, TCL ou Hisense rivalisent aussi sur la taille, avec des écrans géants dépassant les trois mètres de diagonale, véritables démonstrateurs technologiques.
Lunettes connectées : nouveautés chez Meta
Autre tendance très attendue : les lunettes connectées. Meta mène la danse avec les Ray-Ban Meta, intégrant un écran discret, un bracelet haptique et de nouvelles fonctions comme le téléprompteur ou la messagerie par écriture manuscrite. Navigation piétonne en réalité augmentée et sous-titres en temps réel illustrent une AR plus mature, même si ces modèles ne sont pas encore disponibles en Europe. TCL, pionnier du secteur, poursuit ses travaux de miniaturisation de ses lunettes à réalité augmenté Ray Neo, tout en proposant parallèlement des lunettes de divertissements à écrans personnels immersifs.
Robots : humanoïdes, aspirateurs et compagnons
Les robots occupent toujours une place de choix au CES. Humanoïdes encore largement téléopérés, robots aspirateurs capables de ramasser des objets ou de monter les escaliers, et même robots compagnons pour enfants, comme le TCL AiMe. Bref, la robotique avance à plusieurs vitesses.
IA domestique : vers une maison pilotée par l’écran
L’intelligence artificielle s’impose comme le prolongement naturel de la domotique. Réfrigérateurs, téléviseurs, chauffage ou éclairage deviennent les éléments d’un même écosystème intelligent. Les grands groupes imaginent une maison pilotée par des assistants et des écrans omniprésents, avec la télévision comme hub central.
Mobilité : Sony accélère avec l’Afeela
Enfin, le CES confirme son virage vers la mobilité. Sony expose un nouveau prototype de berline développé avec Honda, la future Afeela. Un concentré de technologies mêlant divertissement, capteurs et IA conversationnelle, qui symbolise l’ambition du salon au-delà de l’électronique domestique.
400 millions de dollars. C'est le prix d'une seule de ces machines et y'a qu'une seule entreprise au monde capable de les fabriquer. Cette boîte hollandaise dont vous n'avez probablement jamais entendu parler s'appelle ASML, et elle tient littéralement l'industrie tech mondiale par les roustons.
L'intérieur d'une machine de lithographie EUV d'ASML - Crédit : ASML
Faut que je vous explique pourquoi c'est complètement dingue. Ces machines de lithographie EUV (pour Extreme Ultraviolet), c'est ce qui permet de graver les puces les plus avancées de la planète. Sans elles, pas de processeurs dernière génération, pas d'iPhone, pas de GPU pour faire tourner vos IA préférées. Bref, le monde moderne s'arrête !
Et ce qui est incroyable c'est comment ça fonctionne. La machine balance des lasers sur des gouttelettes d'étain minuscules (de la taille d'un globule blanc) qui filent à 250 km/h. Et attention, elle tape pas une fois sur chaque gouttelette, mais TROIS fois d'affilée en 20 microsecondes. 50 000 gouttelettes par seconde. 150 000 tirs laser par seconde. Et ils n'en ratent jamais un seul. Quand les ingénieurs d'ASML disent "we don't miss", c'est pas de la vantardise mal placée de mecs de base, c'est juste la réalité.
Chaque gouttelette est chauffée à plus de 220 000 Kelvin. Pour situer, c'est environ 40 fois plus chaud que la surface du Soleil. On parle littéralement de créer un petit soleil artificiel sur Terre pour produire cette lumière ultraviolette extrême à 13,5 nanomètres de longueur d'onde.
Et les miroirs à l'intérieur de ces machines sont probablement les objets les plus lisses de l'univers. Si vous agrandissiez un de ces miroirs à la taille de la Terre, la plus grosse bosse serait plus fine qu'une carte à jouer. Ces miroirs permettent de superposer les couches d'une puce avec une précision de 5 atomes et tout ça se fait pendant que certaines parties de la machine bougent à des accélérations de plus de 20 G.
L'histoire d'ASML est d'ailleurs assez chouette à connaître. La boîte a été créée dans les années 80 comme spin-off de Philips, dans une petite ville des Pays-Bas, avec pas grand-chose à part une équipe de passionnés. Pendant 30 ans, tout le monde dans l'industrie pensait que la lithographie EUV était impossible. Les entreprises américaines ont toutes abandonné une par une et seul ASML a continué à y croire, en bossant avec leur partenaire allemand Zeiss pour les miroirs.
Et aujourd'hui, cette petite boîte hollandaise a un monopole mondial absolu. 0 concurrent c'est fort quand même. Si vous voulez fabriquer des puces en dessous de 7 nanomètres, vous passez par ASML ou vous passez votre chemin. C'est aussi simple que ça.
Perso, je trouve ça fou de voir qu'une technologie aussi critique pour notre monde repose sur une seule entreprise. C'est à la fois un exploit technologique absolument démentiel et un point de vulnérabilité stratégique pour toute l'industrie. Mais bon, quand on voit le niveau d'ingénierie nécessaire pour faire fonctionner ces bêtes, on comprend pourquoi personne d'autre n'a réussi à suivre.
Hello, today I am going to review the HUSKYLENS 2, released in October 2025. It is the next generation of HUSKYLENS, an AI vision sensor equipped with a Kendryte K230 dual-core RISC-V SoC with a 6 TOPS AI accelerator and a 2.4-inch IPS touchscreen. The device runs machine vision algorithms fully on-device, providing fast and low-latency performance, and includes more than 15 built-in AI models.
HUSKYLENS 2 also supports deploying custom-trained models, including integration with Large Language Models (LLMs) via a Model Context Protocol (MCP) service. In addition, it is compatible with various microcontrollers, such as Arduino and Raspberry Pi, through UART or I2C communication interfaces.
The HUSKYLENS 2
HUSKYLENS 2 unboxing
The manufacturer sent the HUSKYLENS 2 module and the Microscope Lens separately. Both parcels were shipped from Chengdu, China, and arrived at my office in Chanthaburi, Thailand, in about one week. The parcels were packed in standard cardboard boxes and arrived without any damage.
The following is the list of components received in the first shipment.
HUSKYLENS 2 AI Vision Sensor
Metal Accessory Kit
Power Adapter Board
Gravity-4P Sensor Connector Cable (30cm)
Dual-Plug PH2.0-4P Silicone Cable (20cm)
Product Qualification Card
HUSKYLENS 2 Wi-Fi Module
The following is the complete list of components received in the second shipment.
HUSKYLENS 2 Microscope Module (30x Mag)
Screw driver
Components received in the first delivery.Main components received from both deliveries: (left) the HUSKYLENS 2, (middle) the Wi-Fi Module, and (right) the Microscope Lens.
Checking HUSKYLENS 2 system information
The front of the HUSKYLENS 2 houses the default lens module, one RGB LED, two white fill-light LEDs on each side of the casing, a speaker, and a microphone. On the top, there is a button named Button-A which can be used for capturing an image, recording a video, or capturing a screenshot. The left side includes a microSD card slot. At the bottom of the HUSKYLENS 2, there are two main communication connectors. The USB-C port is used for power and mass-storage access, while the 4-pin JST-style connector, labeled “Gravity,” provides I²C and UART interfaces.
Components on the front side.Gravity UART/I²C and USB-C interfaces at the bottom of the device
We’ll often refer to the official documentation/wiki in this review. There are two main ways to power the HUSKYLENS 2. It can be powered directly using a 5V supply via the USB-C port, for example, from a computer or a power adapter. However, when using the HUSKYLENS 2 together with an external MCU, the manufacturer recommends using the power adapter board to ensure sufficient and stable power for both the HUSKYLENS 2 and the MCU. The following image shows an example of powering the HUSKYLENS 2 using the provided Power Adapter Board. In this setup, my PC is connected to the HUSKYLENS 2 through the USB-C port on the adapter board, while the ESP32 module requires a separate USB connection, which was not connected in this case.
Power the HUSKYLENS 2 using the Power Adapter Board.
For the initial quick test, I followed the Quick Connection using USB-C instructions by simply connecting the HUSKYLENS 2 to a PC with a USB-C cable. Since the device does not have a power button, it powered on automatically once the cable was connected. The logo briefly appeared on the 2.4″ IPS touchscreen, and the device was ready to use in less than 10 seconds. The IPS touchscreen worked well, felt smooth and responsive. All navigation gestures, including swiping and tapping, functioned as expected.
With the default firmware, the device is detected as a single storage device with several default directories, as shown in the following images.
HUSKYLENS 2 detected as a storage device.Default directories within the detected storage device.
The default UI consists of four menu pages, which mainly display the available models, while the last page is dedicated to system settings and custom model installation.
Default icons in firmware v1.1.5.
I then opened the System Settings menu and selected Device Information to check the hardware and system details. My unit is hardware version 1.0.0 and comes pre-installed with firmware v1.1.5. Three languages are available: English, Simplified Chinese, and Traditional Chinese.
On first use, approximately 72 MB of RAM was used out of a total of 970 MB. The internal storage capacity is 7,045 MB, with the factory default installation occupying about 935 MB. Under idle conditions and without running any AI model, the Device Information page showed that the device temperature was around 36.4°C, while the ambient room temperature was approximately 30°C.
Device information.
Testing some built-in AI models
With the default firmware v1.1.5, there are 16 modes available on my HUSKYLENS 2, as listed below.
Face Recognition
Object Recognition
Object Tracking
Color Recognition
Object Classification
Self-Learning Classifier
Instance Segmentation
Hand Recognition
Pose Recognition
License Recognition
Optical Character Recognition
Line Tracking
Face Emotion Recognition
QR Code Recognition
Barcode Recognition
After upgrading to firmware v1.2.1, the number of available modes increased to 19, with the newly added modes listed below.
Eye Gaze
Orientation Detection
Fall Detection
Here, I made a short overview video to showcase some of the AI models available on the HUSKYLENS 2 and to give a quick look at its AI performance using free video footage found on YouTube. Please note that all tests shown in this video were performed using firmware v1.2.1, while the remaining results in this review are based on both firmware versions 1.1.5 and 1.2.1.
Face Recognition
I started my first test with the Face Recognition mode. After tapping the icon, the HUSKYLENS 2 switched to a real-time camera preview and immediately began face detection. When faces were detected, the device correctly drew face bounding boxes and five facial landmarks on the preview. I also tested this mode using images and videos displayed on a monitor, and it continued to work as expected.
Briefly, each AI model includes an additional submenu at the bottom of the screen that allows users to control the model’s behavior. In the case of the Face Recognition mode, the following submenus are available.
Forget ID: Forget all previously learned face IDs.
Multi-Face Acceleration: Attempts to increase the display frame rate when three or more faces are shown simultaneously, but may reduce recognition accuracy.
Detect Threshold: Sensitivity of face detection.
Recognize Threshold: Strictness of face recognition. Lower values are more prone to false positives, while higher values reduce false positives.
NMS Threshold: Non-maximum suppression setting. Lower values are best for clear single-object scenes, while higher values work better for dense, occluded, or multiple-object scenes.
Face Features: Toggle the display of facial key points.
Set Name: Assign names to learned faces in either English or Chinese.
Show Name: Toggle the visibility of the recognized face name.
Reset Default: Restore all settings to their default values.
Import Model: Import model settings. Each model consists of two files with .json and .bin extensions, where the number in the filename corresponds to the model ID.
Export Model: Export the current model settings.
I then tested the detection threshold by lowering and increasing the slider, and the HUSKYLENS 2 responded appropriately. The NMS threshold adjustment also worked as expected. The following image shows the results of the face recognition model applied to AI-generated facial images displayed on my LCD monitor.
Test face recognition.
Hand Recognition
Next, I tested the Hand Recognition mode, which also performed well. It can detect palms in an image and correctly identify all 21 key-points, as advertised, including the wrist and joints for each finger. This mode also provides submenus to control the model’s behavior, such as adjusting the detection and recognition thresholds. The following image shows the detected key-points using a human hands image from Wikipedia.
Test hand recognition.
Pose Recognition
I also tested the Pose Recognition mode, which can detect the human body and extract body key-points. It worked well, and the detection and rendering performance with multiple people was good. The body bounding boxes and all 17 key-points were detected and displayed correctly. The following image shows the result of pose recognition using a pedestrian image from Wikipedia.
Test pose recognition.
Object Recognition
Next, I tested the Object Recognition mode. DFRobot says this model can identify more than 80 types of objects. I tested its recognition using common objects in my office, such as a person, chair, coffee cup, and smartphone, and it worked very well. The following image shows an example of the Object Recognition mode tested using the same pedestrian image.
Test object recognition.
Orientation Detection
Another interesting built-in AI model is the Orientation Detection mode. This model can detect a face and recognize the direction it is facing. Unfortunately, at the time of this review, no additional detailed information about this model was available on the official website. The following image shows the estimated face orientations using images of a French actress from Google Image search results. Each detected face is overlaid with rotation information, which I assume represents the yaw, pitch, and roll angles.
Test orientation detection.
Object Tracking and Self-Learning Classifier
Lastly, I tested the Object Tracking mode, which enables learning and tracking of a target object. Please note that the HUSKYLENS 2 is currently limited to tracking one object at a time. In addition, there is a Self-Learning Classifier mode, which is capable of capturing, learning, and recognizing custom objects. The process of using the Self-Learning Classifier is very similar to that of the Object Tracking mode.
To perform object tracking, I first drew a bounding box around the target object. The device then displayed a bounding box with the object ID and confidence score, for example, Obj: ID1 80%, indicating the first learned object with an 80% confidence level. After this step, the device was able to continuously track the object successfully. The following images show direct screenshots of the Object Tracking results. I tested this mode using multiple TAMIYA scale model bottles, with the green bottle selected as the target object. I then randomly moved the camera so that the target object left the field of view and later returned to the scene; the HUSKYLENS 2 was still able to re-detect the target object correctly. In addition, the object could be tracked from multiple viewing angles without issues, as long as the angle difference was not too large.
Object tracking test from multiple angles.Track the target object from another viewing angle.
Testing programming environment
According to the official documentation, Arduino, UNIHIKER K10, UNIHIKER M10, micro:bit, and Raspberry Pi are listed as supported devices. ESP32 is mentioned briefly at the beginning of the document, but it is not actually included in the compatibility list. Therefore, I decided to test it myself to see whether the ESP32 works or not.
I followed the instructions recommending the use of the power adapter board for power distribution. I connected the HUSKYLENS 2 to the power adapter board using the 4-pin cable. Then, I connected another 4-pin cable to the connector labeled “Gravity” and wired it to the ESP32’s 3.3 V and GND pins, while the ESP32 itself was powered through a separate USB-C connection from my computer.
HUSKYLENS 2 supports multiple programming IDEs, including Arduino IDE, Mind+, and Python IDLE. In this review, I tested programming using the Arduino IDE by installing the latest DFRobot HUSKYLENS 2 library from their GitHub repository.
I started with a quick I2C scan, which detected the device at address 0x50.
Check the I2C address with the I2C scan example code.
Then, I tried the Face Recognition Output Data example from the official website, and it worked without any issues. My PC was able to receive and extract basic information sent from the HUSKYLENS 2, including the face ID, name, and bounding box center, as shown in the following image.
Retrieve basic information from face recognition results.
Deploying a custom-trained model
A custom model can be trained either using the Mind+ Server or Python. In both approaches, the trained model is first converted to ONNX format and then further converted into the HUSKYLENS 2 custom model format. In this review, I did not test the Mind+ Server method and directly used the Python-based approach instead.
Creating a custom model for the HUSKYLENS 2 requires several steps, but the process is quite straightforward. The process is basically convert PyTorch model (.pt) to ONNX, and then use the official tool to export it into their custom model format. According to the wiki, HUSKYLENS 2 currently supports models trained from YOLOv8n-based architectures, and only at 320×320 or 640×640 input sizes.
I prepared the programming environment by creating a new Conda environment with Python 3.12 as recommended. Then I installed Ultralytics, which provides the YOLOv8 tools needed for training and exporting the model. During this setup, I noticed that the versions of onnx and onnxslim that got installed by default didn’t match the required ranges (onnx ≥ 1.12.0 and ≤ 1.19.1, and onnxslim ≥ 0.1.71). Because of this mismatch, the export process failed at first. I had to manually reinstall the correct versions before the export tool worked properly.
Here in Chanthaburi, Thailand, we have serious issues with wild elephants entering farmland and residential areas, which often leads to property damage and sometimes even risks to human life. Because of that, I’m interested in exploring whether the HUSKYLENS 2 could be useful in a future early-warning or monitoring project. For testing, I downloaded the African Wildlife dataset from Kaggle, which is also available through Ultralytics.
Example images of water buffaloes from the African Wildlife dataset.
I then trained the model at a resolution of 320 × 320 for a quick test run, using only 10 epochs.
Next, I downloaded the ONNX to HuskyLens 2 Installation Package GUI Tool from GitHub and installed all the required dependencies. This tool also needs .NET 7, so I installed it from Microsoft as well. After everything was set up, I copied the images, the .yaml file, and the ONNX model into the target folder: Custom_Model/application. From there, I ran python app.py, filled in all the required parameters, as shown in the following image, and clicked Convert and Package.
The ONNX to HuskyLens 2 Installation Package GUI Tool.
After waiting a few minutes, the tool generated the file dfrobot_wildlife_detection.41c5.zip. This ZIP file is my custom model package. To install it on the HuskyLens 2, I simply copied it into the device’s installation_package directory.
Custom model packaged in ZIP format.
After that, I opened the Model Installation in the HUSKYLENS 2 menu and used the Local Install option on the touchscreen menu to add the new model.
Installing a custom model from a local directory.
Once installed, the new menu item appeared immediately, and the model worked well. The following two images show screenshots of the performance of this 10-epoch custom model. Please note that although the input image was blurry (due to improper positioning of the device and the monitor, limited by my desk space), the HUSKYLENS 2 was still able to detect some of the elephants correctly. Also, since this custom model was trained for only 10 epochs, increasing the number of epochs should result in better performance.
Test the custom-trained model.
Installing the HUSKYLENS 2 Wi-Fi Module
By default, the HUSKYLENS 2 is not equipped with a Wi-Fi module, so the HUSKYLENS 2 Wi-Fi Module is required for wireless communication. This module supports Wi-Fi 6 (2.4 GHz) with a maximum data rate of 286.8 Mbps with 20/40 MHz bandwidth. More details are available on the official product page.
To install the module, I removed the four screws and opened the front casing. Due to the thermal grease, additional force was required to separate the casing. I then inserted the Wi-Fi module into the slot. The fit was quite tight, and some force was needed before it seated firmly in place. After that, I closed and re-screwed the front casing.
Remove the screws.Remove the front casing.Install the Wi-Fi module.
After powering on the device, I opened the System Settings and configured the Wi-Fi connection by entering my SSID and password. The device connected within approximately 5–10 seconds and obtained an IP address. A Wi-Fi icon appeared in the top-right corner of the screen, indicating that the wireless connection was successfully established and ready for use.
Available SSIDs.Successfully connected to the target SSID.
Installing the HS Microscope Lens
The manufacturer of HUSKYLENS 2 allows users to replace the default lens with the HUSKYLENS 2 Microscope Lens Module, offering up to 30x magnification. This module delivers 2 MP image resolution using the GC2093 sensor, with a spatial resolution of 161 lp/mm, enabling it to resolve line widths down to approximately 3 µm (USAF 1951, Group 7, Element 3).
HUSKYLENS 2 Microscope Lens Module (30x Mag)Connector of the HUSKYLENS 2 Microscope Lens Module.
The module can be installed by unscrewing the two screws beside the default camera lens module and removing the original camera module. Next, align the camera connector with the HUSKYLENS 2 socket and apply light pressure to ensure a firm connection. I followed these steps, and after powering on the device, it correctly displayed images from the new lens.
Remove screws.Install the Microscope Lens Module.The Microscope Lens Module is installed
I am not sure whether it truly achieves 30× magnification or not, but it works well, as shown in the following image, which captures a magnified view of an LCD monitor displaying a white image. The red, green, and blue sub-pixel layout can be clearly seen. Please note that the image displayed on the HUSKYLENS 2 screen appears slightly blurry because the module was shaking slightly during capture.
Test the Microscope Lens Module.
Upgrading firmware
My default firmware was v1.1.5, and it worked very well; however, the MCP Server is not available on this version. To test the MCP Server functionality, Wi-Fi support and firmware v1.1.6 or later are required. Therefore, I upgraded from v1.1.5 to the latest firmware available on GitHub (v1.2.1 at the time of this review) and followed the instructions provided in the official documentation.
First, I powered off the HUSKYLENS, held down Button-A, and then powered it on again. I waited for at least 2 seconds before releasing the button. With this boot sequence, the device appeared as a K230 USB Boot Device, instead of being detected as HUSKYLENS.
K230 USB boot device detected.
After that, I installed the required driver using Zadig and waited about 30 seconds for the installation to complete.
Run the Zadig tool.
Next, I launched K230BurningTool (release 2025-05-07 02:58), browsed for the downloaded firmware image file, and pressed the Start button to begin the flashing process. The firmware update took approximately one minute to complete.
Burn the new firmware with K230BurningTool.
After restarting the HUSKYLENS 2, I noticed that the device was detected with additional SD card storage, rather than only the internal HUSKYLENS 2 mass storage, as in firmware v1.1.5. I also tested upgrading and downgrading between v1.2.1 and v1.1.6 several times, and the process worked reliably without any issues.
Check system information after the firmware upgrade.
Testing MCP Server
To use the MCP Service, firmware version 1.1.6 or later is required. The service can be enabled using the MCP Service icon. After enabling the MCP server, the default URL for client connection was displayed on the HUSKYLENS 2 screen.
Start MCP Server service.
I then created a Google AI Studio account and generated a new API key. Next, I installed Cherry Studio version 1.7.2. In Cherry Studio, I set the model provider to Gemini and entered the API key obtained earlier. The official documentation describes how to create a new gemini-2.5-flash model; however, this model was already available in my Cherry Studio installation. Therefore, I simply used the existing default gemini-2.5 model. The connection test was successful.
Enable Gemini in Cherry studio.Select Gemini model.
After that, I created a new MCP server connection by setting the connection type to Server-Sent Events (SSE) and configuring the URL exactly as shown on the HUSKYLENS 2 screen. Once enabled, four new tools appeared, indicating that the connection to the HUSKYLENS 2 was successful. These four tools correspond to the MCP tools listed below:
manage_applications
multimedia_control
get_recognition_result
task_scheduler
These tools can be used to check the currently running algorithm, switch between models, take photos, and query AI recognition results. Please note that these tools currently provide only basic functionality and are still undergoing optimization.
Set MCP server URL.Test connection to the HUSKYLENS 2 MCP server.
After restarting, I switched to Chat mode, selected Gemini 2.5 Flash as the Gemini model, and chose my HUSKYLENS 2 MCP server in the tool settings. I then tested the chat functionality using the extract command shown in the tutorial documentation: What models/algorithms are currently available?, but encountered errors.
Encountered errors.
It appeared that some parameters were missing or incorrectly transmitted, and I initially suspected a version mismatch. I therefore tried downgrading the firmware to version v1.1.6, as mentioned in the tutorial, but the issue persisted. I then switched the model provider in Cherry Studio from Gemini 2.5 to CherryAI and found that both the Qwen3-8B and GLM-4.5-Flash models worked correctly.
Using these CherryAI models, I was able to chat successfully to query the available AI models and check the currently running modes on the device. I also tested switching among Face Recognition, Hand Recognition, and Instance Segmentation modes, and all of them worked as expected.
Successful chat session with GLM-4.5-Flash.Successful chat session with Qwen3-8B.Chat to check whether the device is running in Hand Recognition mode.Chat to check whether the device is running in Instance Segmentation mode.
However, I could not use other tools, such as taking a photo or scheduling a task, as these tools either failed to respond within the timeout period or could not execute internal commands.
Testing video streaming
To stream video from the HUSKYLENS 2 using a USB cable, the RNDIS driver must be installed. I followed the official instructions and used the default Microsoft USB RNDIS driver available in my Windows 11 system32 directory. Once installed, the USB RNDIS Adapter appeared correctly in the network settings. If RTSP streaming is not available, make sure the firmware is up to date. The HUSKYLENS 2 streams video using the RTSP protocol, which can be enabled via the Video Streaming icon in the system menu. After enabling streaming and starting any AI model, the device begins transmitting video at the default URL: rtsp://192.168.88.1:8554/live
I tested RTSP streaming using Python and OpenCV with the provided RTSP URL. The connection was established successfully, and video frames were streamed correctly. I also tested wireless video streaming by enabling Wi-Fi connectivity and turning on the RTSP and WebRTC streaming options in the Video Streaming menu, and it worked as expected. The following images show the live stream viewed in a web browser and in VLC Media Player.
Enable Wi-Fi connectivity and RTSP streaming.Display live streaming in a web browser.Display live streaming in the VLC media player.
Calibrating camera intrinsics and lens distortion coefficients
I noticed some barrel-type distortion from the HUSKYLENS 2 lens, so I performed a quick camera calibration to estimate the camera intrinsics and distortion coefficients. The camera intrinsics describe the imaging characteristics of the camera, including the focal length and principal point. The lens distortion coefficients represent the parameters of radial and tangential distortions.
As a result, the following intrinsic parameters were obtained:
fx: 700.2057
fy: 683.6732
cx: 315.1202
cy: 225.5184
The resulting camera matrix appears typical for a compact AI vision sensor, with fx = 700.20 and fy = 683.67. Using the standard field-of-view (FOV) formula FOV = 2 × arctan((image_size / (2*focal_length)), the estimated horizontal FOV is approximately 49.12°, and the vertical FOV is approximately 38.69°. The optical center (315.12, 255.51) is slightly shifted but remains close to the image center (320.0, 240.0), which is normal for small, low-cost lenses.
The estimated distortion coefficients are also reasonable for this type of hardware:
k1 = 0.0913
k2 = −0.5608
k3 = 0.4919
p1 = 0.00019
p2 = 0.00163
The radial coefficients (k1, k2, k3) clearly indicate barrel distortion that becomes stronger toward the edges. Meanwhile, the tangential values (p1, p2) are very small and only show minor off-axis alignment, usually just a result of normal assembly tolerances.
However, this was only a quick calibration test, and a more careful and thorough calibration would be needed for real applications.
To test the device’s thermal behavior, I turned on the Wi-Fi, enabled video streaming via WebRTC, and ran the Hand Recognition mode. At the same time, the MCP server was enabled simultaneously. Overall, when the device was operating in full running mode, it felt noticeably hot.
The following images show thermal images of the front of the HUSKYLENS 2 captured using a FLIR E4 thermal camera. The highest temperature observed was around 43.2 °C, with the heat distribution being relatively even across the front casing. On the back side, the highest temperature was approximately 38 °C and was mainly concentrated on the right side, corresponding to the location of the Wi-Fi module on the opposite front side. As shown in the images below, more heat was observed on the front of the HUSKYLENS 2, which could be clearly felt when holding the device in hand.
Heat distribution of the HUSKYLENS 2.Heat distributions of the HUSKYLENS 2.
Conclusion
My overall impression of the HUSKYLENS 2 is positive. The AI functionality of the HUSKYLENS 2 works very well. Even though the image and video stream resolutions are relatively low, I am satisfied with the overall image quality. In addition, although I could not test all MCP server capabilities, the embedded MCP Server service provides a very effective and flexible workflow for AI tasks on an embedded device.
I did encounter some minor issues during testing. Besides the device becoming quite hot when running AI models, I experienced several crashes, especially during live streaming. For example, connection losses or the device became unresponsive. In these situations, a power cycle was required to restore normal operation. Another minor issue for me is that double-pressing Button A to capture screenshots is somewhat difficult, and this often causes image or video shaking during recording.
Taiwanese tech titan TSMC has started mass producing its cutting-edge 2-nanometer semiconductor chips, the company said in a statement seen by AFP on Wednesday.
En 2012, Google semblait invincible. Pourtant, en tentant de poser un écran sur notre nez, le géant de Mountain View a percuté un mur invisible : celui de l'acceptation sociale. Retour sur l'épopée des Google Glass, un échec commercial devenu le brouillon indispensable des produits d'aujourd'hui.
Beneath ChatGPT’s flattering persona lies a goldmine for advertisers: an AI chatbot that never gets tired of hawking clients’ wares.
New reporting by The Information has revealed some recent topics of conversation between OpenAI employees as they work to supply advertisers with a teeming new audience to manipulate.
The plans are far from final, though they give us a look at what soon may become the norm for ChatGPT. One conversation between OpenAI staffers, for example, involved giving sponsored chatbot results “preferential treatment” over non-sponsored results, anonymous employees told TheInformation.
This could look like a user asking how much ibuprofen to take for a headache receiving a promoted ad for Advil in the chatbot’s response. Meanwhile, actual results on correct dosage may be brushed to the side, or buried under a mountain of ad text (just think about how many sponsored search results you have to scroll past during a typical Google search these days.)
Given that ChatGPT has a self-reported audience of 900 million weekly users, it’s difficult to imagine the consequences of a setup like this. OpenAI isn’t numb to the negative feelings sponsored results are likely to stir up, either.
The Information reports that other internal conversations focused on the best ways to serve ads without putting off users entirely, who might feel less inclined to go on hours-long chat benders if they feel corporate advertisers are looking on like a third-wheel. One ad mockup shared with the publication showed ads only appearing after a second prompt with ChatGPT, to avoid bombarding users with sponsored contenttoo early in their conversations.
News that OpenAI was experimenting with cramming commercials into ChatGPT came in early December, after a software sleuth uncovered a dozen lines of code in the chatbot’s beta app for Android referencing things like “feature ads” and “search ads carousel.”
“As ChatGPT becomes more capable and widely used, we’re looking at ways to continue offering more intelligence to everyone,” an OpenAI spokesperson told The Information. “As part of this, we’re exploring what ads in our product could look like. People have a trusted relationship with ChatGPT, and any approach would be designed to respect that trust.”
When exactly the ChatGPT adpocolypse come to pass remains to be seen, but with so much money riding on the effort, it’d be astonishing if it didn’t pan out.
Sur une base militaire en Haute-Marne, des milliers de militaires français apprennent à manier les armes qui dominent la guerre entre l’Ukraine et la Russie. Numerama a passé une journée dans cette école de drones où sont formés les futurs pilotes français, du maniement de mini-engins furtifs des forces spéciales jusqu’aux appareils de plusieurs mètres d'envergure.
Vous vous êtes déjà demandé si ChatGPT votait à gauche ou à droite ? Moi non plus, j'avoue. Mais maintenant qu'on a la réponse, c'est quand même assez marrant, vous allez voir...
Un développeur a créé
PoliBench
, un site qui fait passer le test du
Political Compass
à 40 modèles de langage différents. Le Political Compass c'est ce fameux test avec les deux axes : économique (gauche-droite) et social (libertaire-autoritaire). Le truc qu'on faisait tous sur Internet en 2005 pour finalement découvrir qu'on était un libertaire de gauche comme environ 95% des gens qui passaient le test.
Bref, maintenant les IA aussi peuvent savoir où elles se situent sur l'échiquier politique et ça, ça peut vous aider à mieux les choisir, car les résultats sont assez révélateurs. Niveau cuisine interne,
PoliBench
teste les 62 questions sur les deux axes du Political Compass, puis calcule les scores pour chaque LLM. Et comme les données sont open source, vous pouvez vérifier la méthodologie vous-même.
Et sans surprise, la plupart des LLMs se retrouvent dans le quadrant libertaire de gauche !! J'dis ça, j'dis rien, mais c'est presque comme si les devs de la Silicon Valley avaient des opinions politiques similaires et les injectaient (consciemment ou pas) dans leurs modèles.
Du coup, j'ai fait le travail de tri pour vous, alors voici le guide ultime pour choisir votre IA selon votre sensibilité politique :
Si vous êtes plutôt LFI, prenez Claude. Il est tellement progressiste qu'il refuse de générer du contenu problématique même quand vous lui demandez une blague sur les vegans. En plus il écrit des pavés de 3000 mots pour expliquer pourquoi il ne peut pas répondre à votre question. Parfait pour tenir un meeting politique de 4 heures.
Si vous êtes plutôt PS, prenez GPT-4. Un modèle qui a connu des jours meilleurs, qui essaie de plaire à tout le monde et qui finit par ne satisfaire personne. Bonus : il change d'avis selon qui lui parle.
Si vous êtes plutôt macroniste, prenez Gemini de Google. Un truc qui promet la disruption et l'innovation mais qui au final fait à peu près pareil que les autres, en plus cher, tout en vous expliquant que c'est pour votre bien.
Si vous êtes plutôt LR, prenez Mistral. C'est français, c'est souverain... mais personne ne sait vraiment ce que ça pense sur les sujets qui fâchent parce que ça évite soigneusement d'en parler.
Si vous êtes plutôt écolo, prenez Llama de Meta. C'est open source donc c'est « pour le bien commun », ça tourne sur du matériel recyclé si vous voulez, et ça consomme moins de ressources que les gros modèles propriétaires. Par contre faut quand même un GPU qui coûte un SMIC.
Et si vous êtes plutôt RN... bah en fait y'a pas vraiment de LLM pour vous. Tous ces modèles ont été entraînés à San Francisco par des gens qui mangent des avocado toasts et font du yoga. Ils refusent donc de générer ce contenu haineux, discriminatoire ou factuellement faux dont vous êtes friants. Désolé, les gars c'est pas compatible. Peut-être essayez Grok d'Elon Musk ? Ah non pardon, lui aussi il a des « guidelines ». Mince alors. Va falloir donc continuer à écrire vos tracts vous-mêmes les amis. Je sais, l'IA woke vous opprime, c'est terrible.
Après, le vrai sujet derrière PoliBench, c'est que ces biais existent bel et bien et qu'ils influencent les réponses que vous recevez sur des sujets sensibles. Quand vous demandez à une IA son avis sur l'immigration, les impôts ou la régulation des entreprises, la réponse dépend en partie de ces préférences encodées dans le modèle. Il faut juste le savoir...
Alors vous choisissez quelle IA à partir de maintenant ?
Les innovations dans le secteur de l’Internet des Objets continuent de transformer en profondeur les méthodes de production industrielle. En effet, une nouvelle étape est franchie avec l’intégration native de la connectivité IoT directement en usine. Par ailleurs, cette avancée promet de simplifier considérablement la chaîne logistique et les processus d’activation des appareils connectés. Pourtant, cette approche modifie-t-elle durablement les standards actuels de fabrication et de gestion des dispositifs IoT ?
L’industrie se trouve face à la nécessité d’adopter des solutions plus flexibles pour répondre à la diversité des besoins mondiaux. Dès lors, la connectivité intégrée en usine offre-t-elle une réponse adaptée à ces enjeux complexes ? Voilà comment la connectivité IoT intégrée, présentée en avant-première au CES 2026, pourrait redéfinir la fabrication des appareils connectés.
Pourquoi la connectivité IoT intégrée en usine révolutionne la production des objets connectés ?
Cette méthode réduit l’ensemble des contraintes logistiques liées aux cartes SIM physiques utilisées traditionnellement. En effet, la connectivité pré-intégrée permet une activation automatique dès la sortie de la chaîne de production. Par conséquent, les fabricants bénéficient d’une simplification majeure, notamment en évitant la gestion manuelle et la fragmentation des stocks par régions.
Ainsi, la connectivité « factory-first » permet aussi de minimiser les risques d’erreurs lors de la mise en marche initiale des dispositifs. En comparaison, les anciennes méthodes imposaient de multiples interventions post-production, souvent sources de dysfonctionnements coûteux. Voilà pourquoi cette évolution améliore la fiabilité et accélère les délais de mise sur le marché.
Comment la flexibilité native des eSIM améliore la gestion des déploiements IoT à grande échelle ?
L’adoption d’un profil de eSIM global en usine offre une indépendance vis-à-vis des opérateurs mobiles traditionnels. En effet, il devient possible de connecter immédiatement chaque appareil en choisissant librement l’opérateur tout au long de sa vie. Cette approche supprime les verrous imposés par les fournisseurs mobiles exclusifs, facilitant ainsi la gestion des flottes d’appareils à l’international.
De plus, la gestion sécurisée et centralisée de la connectivité est simplifiée grâce à une plateforme orchestrant les profils depuis la production jusqu’à l’exploitation. Par conséquent, les entreprises gagnent en agilité pour adapter leur déploiement, éviter les coûts additionnels liés aux migrations ou remplacements de cartes SIM. Cet avantage constitue un tournant stratégique dans la maîtrise des infrastructures IoT globales.
Quels bénéfices pratiques et économiques pour les fabricants et utilisateurs finaux ?
L’intégration de la connectivité en usine réduit significativement les coûts liés à la logistique et aux erreurs d’activation des appareils IoT. En réalité, l’élimination de la gestion manuelle des cartes SIM diminue les risques de retards ou de défauts de fonctionnement dès la première utilisation. Ainsi, les coûts opérationnels baissent et la satisfaction client s’en trouve renforcée.
Par ailleurs, cette innovation facilite la montée en volume des productions grâce à un processus standardisé, sans besoin d’adapter des configurations multiples. Enfin, l’activation instantanée permet aux utilisateurs finaux de bénéficier d’une expérience fluide, sans étapes complexes ou intervention technique locale. Voilà comment la connectivité déjà intégrée en usine transforme l’économie et la qualité du marché IoT.
The 1974 disaster movie The Towering Inferno had the advantage of two huge stars: Steve McQueen and Paul Newman. Supposedly, neither of them wanted to be portrayed as second to the other. So the studio had a problem: whose name should go first on the movie poster and in the credits?
What is Diagonal Billing?
Diagonal billing, sometimes called staggered billing, is a way of arranging the names of movie stars to give them equal prominence. Instead of listing one above or in line with the other, the names are placed diagonally:
• one name in the bottom-left,
• the other in the top-right.
This balances the natural reading hierarchy—left to right, top to bottom—so that either name can be read first. It was the clever compromise used for McQueen and Newman in The Towering Inferno, and it has been repeated in many Hollywood films since.
Why Diagonal Billing Works
In English, we naturally read from left to right and top to bottom. We start reading this way in articles like this, but also posters, adverts, and web pages. Which means what we see top-left is naturally emphasised compared to what we encounter towards the end in the bottom-right.
It's also why my sketches typically have a title in the top-left and a logo in the bottom-right: you're meant to see them in that order.
Diagonal billing cancels out a name on the left by placing it at the bottom, and emphasises the name on the right by placing it at the top.
Examples of Diagonal Billing
Balancing Steve McQueen and Paul Newman in The Towering Inferno is how I first learned of staggered but equal billing (from my Dad, though he denies it). You can see the staggering of names in the original movie poster.
Other examples include:
Cheers TV credits: Ted Danson and Shelley Long
Scenes from a Marriage (2021): Jessica Chastain and Oscar Isaac
Chicago (2002): Renée Zellweger and Catherine Zeta-Jones
Westworld (1973): James Brolin, Yul Brynner, Richard Benjamin
Sky Captain and the World of Tomorrow (2004): Jude Law and Gwyneth Paltrow
Righteous Kill (2008): Robert De Niro, Al Pacino
Keep an eye out for it in movie posters and opening credits, and help me add to the examples!
En Chine, RoboCop c'est plus vraiment de la science-fiction puisque la ville de Hangzhou vient de déployer un robot humanoïde qui fait la circulation à un carrefour. Et je trouve ça un poil flippant ^^.
Ce robot qui s'appelle Hangxing-1 a commencé son boulot le 1er décembre dernier, à l'intersection de Binsheng Road et Changhe Road dans le district de Binjiang. Le truc mesure 1m80, il est équipé de caméras haute définition et de capteurs qui lui offrent une bonne vision de ce qui se passe autour de lui et il roule sur des petites roues omnidirectionnelles, affublé d'un uniforme haute visibilité avec des bandes de police. Bref, impossible de le louper.
Et son job, c'est de faire des gestes pour diriger les voitures, les scooters et les piétons. Les ingénieurs ont modélisé ses mouvements sur ceux de vrais policiers pour que ce soit bien standardisé et il peut siffler de manière électronique en synchro avec les feux de circulation. Et le truc marrant, c'est qu'il est capable de détecter les infractions en temps réel, comme les motards sans casque, les voitures qui dépassent la ligne d'arrêt ou encore les piétons qui traversent au rouge. Et quand il chope quelqu'un en flagrant délit, il balance un message vocal bien poli.
Bien sûr, on est en Chine, donc toutes les infractions sont logguées et envoyées direct dans la base de données de la police.
Côté autonomie, le robot peut tenir plusieurs heures sur une charge, ce qui couvre largement les heures de pointe et quand la batterie est à plat, il retourne tout seul au bistrot à sa station de recharge. La machine a été développée entièrement à Hangzhou, fruit d'une collab entre la police locale et des boîtes tech du coin.
D'après les premières observations locales, le respect des règles à ce carrefour se serait nettement amélioré depuis que le robot est en poste. Bon, y'a quand même des flics humains pas loin pendant cette phase test, au cas où les avertissements vocaux du robot ne suffiraient pas.
Hangxing-1 fonctionne pour l'instant dans deux modes : gestion du trafic et sensibilisation civique. Mais la ville prévoit de l'upgrader avec des capacités de langage naturel pour qu'il puisse donner des directions et répondre aux questions des passants. Le robot est d'ailleurs connecté au "City Brain" d'Alibaba, le système de gestion urbaine intelligent déployé à Hangzhou.
Et Hangzhou n'est pas la seule ville à jouer avec ces robots puisque Chengdu a déployé 5 robots policiers sur la place Tianfu, Mianyang utilise des chiens robots pour patrouiller dans les quartiers d'affaires, et Shenzhen teste des robots humanoïdes d'Engine AI qui serrent la main aux passants. Le gouvernement chinois veut clairement multiplier ce genre de déploiements.
Perso, je trouve ça plus mignon (et apparemment plus efficace) qu'un policier municipal même s'il ne faut pas oublier que ce robot vous filme, vous identifie, enregistre la moindre de vos infractions et les balance à la vraie police...
Ce monde commence sérieusement à ressembler à un épisode de Black Mirror.
Industrial Light & Magic has released an absolutely glorious gingerbread re-creation of the legendary “Destroying the Death Star” scene from Star Wars: A New Hope, complete with animation and shown side-by-side with the original scene. Because if you’re going to remake cinema history, you might as well do it with frosting.
The Force is strong with this one… but the real power comes from sugar and impeccable VFX. Check it out!
At UnitedXR Europe, I couldn’t miss visiting the booth of one of the most futuristic companies in our field: XPANCEO, which is working on smart contact lenses. As usual, it has been a pretty cyberpunk experience…
If you prefer, I’ve also made a video version of this article directly from UnitedXR Europe!
XPANCEO
XPANCEO is a startup based in Dubai that makes smart contact lenses. I’ve already talked about it on my blog other times because I’m a big fan of the idea of AR contact lenses, as they seem so futuristic to me.
Currently the company has not released any product yet, but it has already showcased various working prototypes of different technologies it is working on: displays, lens types, sensors, batteries, etc… During a call with them, I was able to virtually visit their lab in Dubai, while at the last AWE Europe, I was able to put my eyes close to a lens made by them.
Me putting the demo unit of the AR contact lens close to my eyes last year
So I can confirm they are not only smoke and mirrors, but they actually have developed some technology. When I spoke with a company spokesperson some weeks ago, she told me that hopefully all these prototypes should bring to a first feature-complete contact lens by the end of 2026. After that, the medical trials can start to evaluate their effect on the human eye.
At UnitedXR Europe this year, they had some new prototypes to share. And I’m here to tell you about them.
The smart contact lenses for the space
A smart contact lens used inside a space helmet (Image by XPANCEO)
The news with which XPANCEO attended the show has been about a smart contact lens for astronauts. This is what the press release said about it:
This breakthrough addresses some key constraints of working in the conditions of outer space, where obstructive devices such as smart glasses can be hazardous. Touchscreens are also impractical for astronauts wearing gloves, and currently, crew members often operate tablets with their noses. Moreover, they must rely almost entirely on voice commands when outside their spacecraft. Delivering visuals directly to the eye avoids interference with movement or safety, making XPANCEO’s lens a transformative interface for orbital, lunar, and deep‑space missions. In this newest prototype, the contact lens incorporates a holographic display and pairs with an image source in the space helmet, which also powers the device.
With much respect for XPANCEO, butI did not fall in love with this idea. Ok, taking some pictures with the helmet prototypes (like the header one of this article), was very cool. But I think we need to first solve the problem of wearing contact lenses on Earth, before thinking about other planets! It seemed to me more like a moonshot idea (pun intended), than an actual short-term use case.
The microdisplay lens
One thing that, instead, I liked a lot has been a new contact lens prototype using a microdisplay. Last year, I was able to try some lenses with a holographic display, while this time there was also one with an actual micro display. I told you that XPANCEO is evaluating different solutions, and among them, it is also evaluating different display types.
The lens was mounted on a box that was meant to power it and to define the image it should have been rendered. I put the lens close to my eye, and I could relive again the magic of seeing a small green dot become a full image in my eye.
When I put the lens close to my eye, I could see a monochrome green image with readable texts and also some clearly visible graphs. The definition was enough to let me see everything clearly.
Through the lens of the XPANCEO contact lens with microdisplay
Speaking with the XPANCEO employee at the booth, I was able to learn that the mission of the company is to give you a full FOV. Lenses are installed on your eyes, so they don’t have the classical FOV issues, because they can literally follow your eyes everywhere; they are not like the fixed lenses of a headset installed on your head. And if the lens knows the direction you are looking at, it could render exactly the portion of the world that you should see looking in that direction (like a headset adapts its view to the current rotation of your head). This is how lenses could, in the far future, become a full-FOV alternative to headsets and glasses.
The wireless power supply
Talking about power supply, how do you provide electricity to the lenses? One approach, which Mojo Vision has also followed in the past, is to install a very small battery into the lens. The lens could then be put on a dedicated charger to recharge the battery, exactly like you charge your phone by putting it on a wireless charger.
Contact lens with a microbattery put on a charger
But XPANCEO is also experimenting with another approach, which is pretty cyberpunk on its own: a wireless power supply attached to your head. Basically, you have a little box next to your eyes, and the box is able not only to stream data back and forth from the lens, but also to stream the power to it. Look at these pictures…
A mannequin with a charging device installed on its ear
And if you want something even cooler and cyberpunk, watch the prototype in action:
Of course, being an experimental device, we couldn’t try it. I asked if something like that was not dangerous. The guy at the booth gave me a very practical answer: “If it works, then it’s not dangerous, because if the power arrives at the lens, it means it is not absorbed by your body, so it is not hurting it. If it does not work, then it’s dangerous, because it means the power is lost somewhere in your body”. As much as I trust his words, I would still like to see some medical trials before wearing something like that for many hours a day.
Feasibility questions apart, it has surely been one of the most futuristic things I’ve seen in the whole show.
Final considerations
I’m happy to have visited the XPANCEO booth, because I’m a big fan of smart contact lenses and also because they have cool prototypes to show every time. The microdisplay was working very well, and the wireless power supply seemed to be coming directly from a science fiction movie.
I think this company has now made enough cool prototypes that it has come to the stage where it has to actually build its first product. I really can’t wait for the end of 2026 when this will hopefully happen.
HackyPi 2.0 is an ESP32-S3-based USB hacking and automation tool designed for both coders and non-coders. It features AI-assisted control, HID keystroke injection, BadUSB, and a no-code interface for learning, automation, ethical hacking, and overall system interaction.
Compared to the original Raspberry Pi RP2040-based HackyPi, the HackyPi 2.0 adds Wi-Fi and Bluetooth connectivity, remote access, AI integration, and automatic OS detection, making it far more flexible. It keeps support for BadUSB and HID keystroke injection and also adds features such as mouse jiggler mode, child-safety website blocking, RGB status lighting, and LVGL-based UI support. Everything can be controlled through a beginner-friendly, no-code visual interface, while there is also an option to run commands, scripts, and automated workflows when deeper control is needed.
CPU – Dual-core LX7 microprocessor @ up to 240 MHz with Vector extension for machine learning
Wireless – WiFi 4 and Bluetooth 5 with LE/Mesh
Display – Built-in visual LCD on the USB dongle for status, modes, and feedback (Most probably the same 1.14-inch 240 x 135 display as the previous model)
USB
1x USB Type-A male port for connecting to a PC
1x USB Type-A female port for connecting peripherals (Not confirmed)
Power Supply – 5V via USB port
Dimensions – TBD
HackyPi 2.0 internals compared to LiLYGO T-Dongle-S3
The device also includes some basic cryptocurrency tools for light tasks like wallet interaction, automation, or learning, not heavy crypto mining. It can connect to external AI services to trigger actions, generate commands, or control features, and some demos also show voice-based control through AI integration.
The company mentions that the device is fully open-source and supports both no-code and advanced workflows. A beginner-friendly UI built on LVGL enables users to configure BadUSB, HID actions, automation tasks, child-safety rules, and device modes without requiring code. The firmware supports automatic OS detection for Windows, macOS, and Linux, triggering OS-specific command sets on connection. There is also an option to enable remote access through Wi-Fi, allowing external AI platforms to trigger actions, generate scripts, or control features. Additionally, users can run terminal commands, custom scripts, and automated workflows, with support for multiple languages and IDEs. More information, along with documents, should be available on SB Components’ GitHub account after the crowdfunding campaign. For reference, the schematics and code for the previous HackyPi 1.0 model were released on GitHub shortly after the crowdfunding campaign was over.
HackyPi 2.0 is available on Kickstarter. The Super Early Bird price for HackyPi 2.0 is £39 (around $53), a 2-unit pack costs £85 (around $114), and a 5-unit bundle is £199 (around $267). There’s also a combo deal with HackyPi 1.0 + HackyPi 2.0 for £63 (around $85), plus bigger bundles going up to £119 (around $160). Shipping is worldwide, and delivery is currently planned for March 2026.
Most of the plastic products we use are made through injection molding, a process in which molten plastic is injected into a mold to mass-produce identical items. However, even slight changes in conditions can lead to defects, so the process has long relied on the intuition of highly skilled workers.
As generative AI systems become more deeply woven into the fabric of modern life—drafting text, generating images, summarizing news—debates over who should profit from the technology are intensifying.
Interrogé par le magazine britannique The Spectator, un avocat senior livre une analyse sans concession de l’avenir des professions juridiques. Entre honoraires élevés, culture du prestige et gains économiques offerts par l’IA, le droit pourrait être bouleversé plus rapidement que prévu.
Mêlant habilement narration et petits puzzles captivants, Dispatch est un jeu vidéo incontournable par sa direction artistique d'orfèvre, sa sincérité remarquable et son format captivant. Notre test de cette pépite à laquelle il faut absolument jouer.
La France innove dans le domaine de l'énergie propre avec une technologie révolutionnaire qui fait trembler la Chine. Automotive Cells Company (ACC) bouleverse l'industrie automobile en produisant des batteries made in France. Cette avancée marque un tournant dans la quête d'autonomie...
Keonne Rodriguez, le développeur derrière Samourai Wallet, vient de se prendre 5 ans de taule pour avoir créé un portefeuille Bitcoin qui protégeait un peu trop bien l'anonymat de ses utilisateurs.
Samourai Wallet, c'était un portefeuille Bitcoin open source lancé en 2015 avec comme promesse de permettre aux gens d'utiliser leurs bitcoins sans que le monde entier puisse tracer chacune de leurs transactions. Le truc utilisait une technique appelée le "coin mixing" qui, pour faire simple, mélange les transactions de plusieurs personnes pour brouiller les pistes et rendre le traçage quasi impossible.
Grave erreur car ça les États n'aiment pas !
Et voilà pourquoi en avril 2024, le FBI a débarqué chez Rodriguez à 6h du matin, arme au poing, devant sa femme et ses enfants. L'accusation ? Blanchiment d'argent et exploitation d'une entreprise de transmission monétaire non autorisée. Le Département de la Justice américain affirme que plus de 237 millions de dollars de "produits criminels" seraient passés par Samourai, provenant selon eux du trafic de drogue, de marchés du darknet, de fraudes diverses et même d'un site pédopornographique.
Rodriguez maintient qu'il a juste créé un logiciel, point. Dans l'interview ci-dessous accordée à Reason Magazine juste avant son incarcération ce 19 décembre, il explique qu'il n'a jamais eu accès aux fonds des utilisateurs et qu'il ne savait pas qui utilisait son outil ni pourquoi.
Sauf que le gouvernement américain voit pas les choses comme ça et pour eux, proposer un service qui rend les transactions Bitcoin intraçables, c'est forcément faciliter le crime. Peu importe que la plupart des gens voulaient juste protéger leur vie financière des regards indiscrets. Comme le dit Rodriguez : "Si vous dites que la vie privée financière est un crime, alors vous dites que la liberté est un crime."
Aussi, le
dossier d'accusation
contient des éléments qui vont au-delà du simple "j'ai codé un logiciel". D'abord, Samourai n'était pas qu'un bout de code open source tournant en local puisque l'équipe opérait des serveurs centralisés indispensables au fonctionnement du mixing et collectait des frais sur chaque transaction (environ 4,5 millions de dollars au total). Ensuite, certaines communications publiques des fondateurs étaient... comment dire... pas très smart. Par exemple, en juin 2022, après l'invasion de l'Ukraine et les sanctions internationales, le compte Twitter de Samourai (géré par Rodriguez) postait un message accueillant explicitement les oligarques russes cherchant à contourner les sanctions. Et quand Europol a identifié Samourai comme une "top threat", Hill a répondu de manière provocante en mode "venez nous chercher". Des documents marketing internes destinés aux investisseurs ciblaient même explicitement les "Dark/Grey Market participants".
Bref, la défense "j'ai juste écrit du code innocent" est un peu plus compliquée à tenir quand on tweete qu'on accueille les fraudeurs fiscaux russes à bras ouverts.
Ce qui pose quand même question, c'est le précédent. Où trace-t-on la ligne entre un outil de privacy légitime et une infrastructure criminelle ? Rodriguez n'a pas volé d'argent directement, mais il a opéré un service qui facilitait sciemment le blanchiment, tout en étant rémunéré pour ça. C'est différent de Tor ou Signal, dont les créateurs ne collectent pas de frais sur chaque utilisation et ne font pas de com' pour attirer les criminels.
Son avocat a bien évidemment tenté de négocier une peine plus légère en invoquant l'absence d'antécédents criminels et le fait qu'il soit père de famille, mais le juge a choisi d'appliquer le maximum prévu. William Hill, le cofondateur et CTO de Samourai, a lui aussi écopé de 4 ans pour les mêmes charges.
Après y'a quand même une lueur d'espoir pour lui car Trump a récemment laissé entendre qu'il pourrait examiner le dossier pour une éventuelle grâce présidentielle. Rodriguez reste optimiste là-dessus, même s'il sait que ça peut prendre du temps...
Bref, l'affaire Samourai Wallet n'est probablement pas le meilleur étendard pour défendre la vie privée financière car même si les outils de privacy sont légitimes et nécessaires, quand on opère une infrastructure centralisée, qu'on collecte des millions en frais, et qu'on fait ouvertement de la pub pour attirer les criminels... faut pas s'étonner que ça finisse mal...
Article mis à jour le 21 décembre pour y intégrer le dossier d'accusation à côté duquel j'étais totalement passé. Toutes mes excuses pour ça et merci au gentil lecteur qui m'a averti par mail de son existence.
Sommes-nous tous en train de perdre pied avec la réalité ? Voilà la grande question abordée dans ce deuxième Méta-Talk, l’émission de décryptage de l’information de Méta-Media, diffusée sur YouTube et toutes les plateformes de podcast. Aujourd’hui, l’intelligence artificielle ne se contente plus de nous assister : elle brouille les repères. Ce que l’on regarde, […]


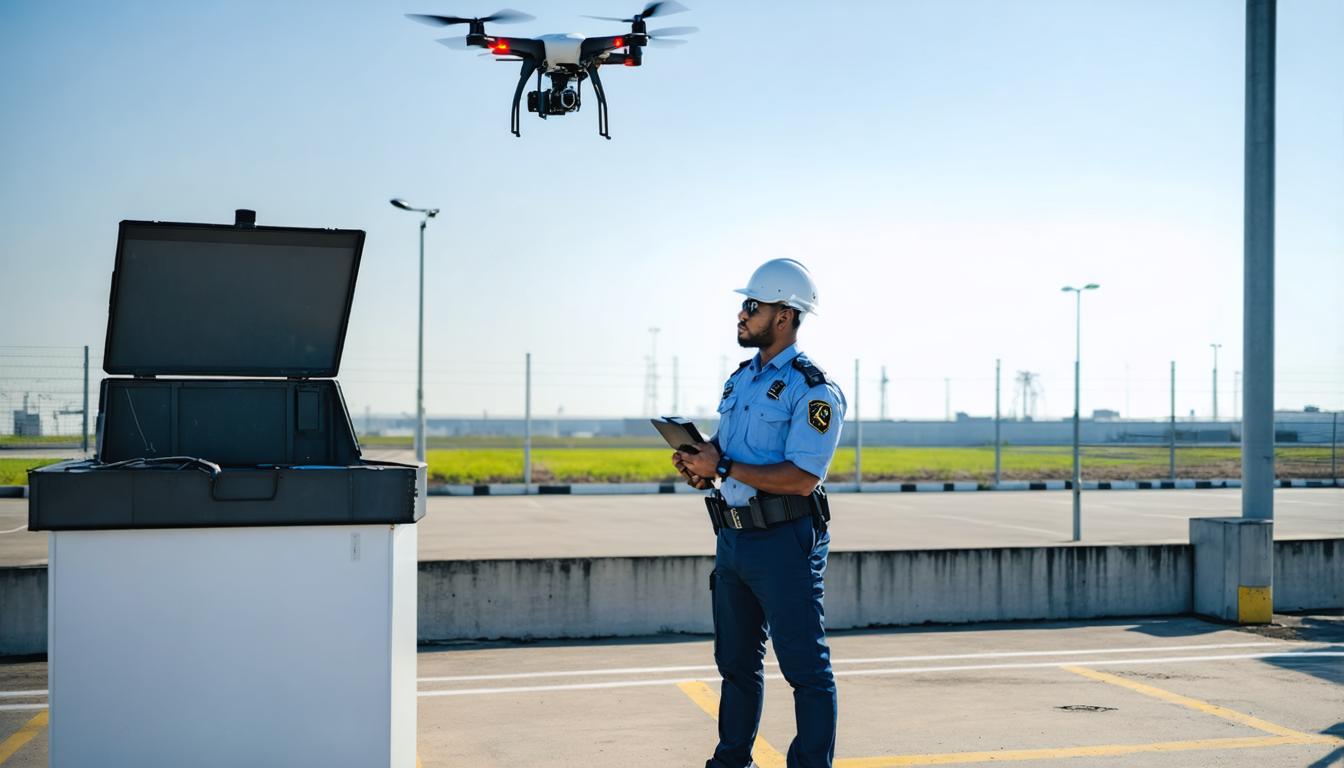


 the HUSKYLENS 2, (middle) the Wi-Fi Module, and (right) the Microscope Lens.")


")


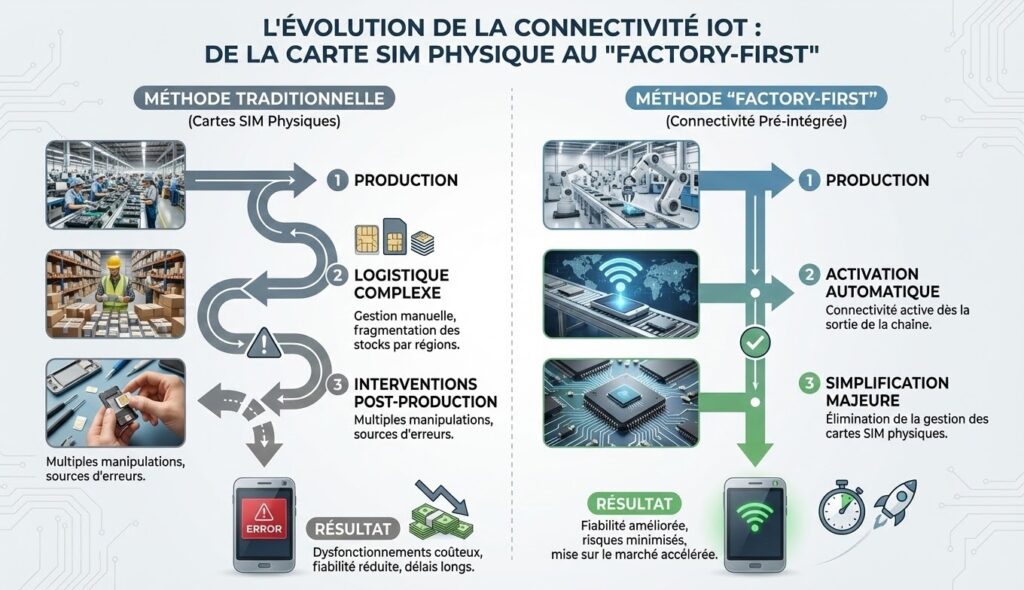


