Shared posts

11 May 09:58

Application Insights integration with Functions now in preview

by Chris Anderson (Azure)

Azure Functions support for Application Insights has moved out of limited beta and into a wider public preview. We’ve also added support to add Application Insights on create, as well as, a direct link from Azure Functions’ portal to the Application Insights blade. We’ve also added additional settings to help control what data get sent and how much to send, helping you to control the volume of data that is sent.

Getting Started

To get started with Azure Functions and Azure Application Insights, you can create a new Function App and set the Application Insights toggle to “On”, which will create an Application Insights resource for you, automatically.

create-function-app

If you want to use add an existing Application Insights resource or you have an existing Azure Function App, you can add Application Insights by adding an App Setting with your instrumentation key.

  1. Create an Application Insights instance.
    1. Application type should be set to General
    2. Grab the instrumentation key
  2. Update your Function App’s settings
    1. Add App Setting – APPINSIGHTS_INSTRUMENTATIONKEY = {Instrumentation Key}

grabikey

Once you’ve done this, you can navigate to your Application Insights resource from the “Configured Features” page of your Function App.

configuredfeatures

Using Application Insights

Live Stream

If you open your Application Insights resource in the portal, you should see the option for “Live Metrics Stream” in the menu. Click on it and you’ll see a near-live view of what’s coming from your Function App. For executions, it has info on #/second, average duration, and failures/second. It also has information on resource consumption. You can pivot all of these by the “instance” your functions are on; providing you insight on whether a specific instance might be having an issue or all of your Functions.

Known issues: there are no dependencies being tracked right now, so the middle section is mostly useless for now. If you send your own custom dependencies, it’s not likely to show up here since they won’t be going through the Live Stream API since you’re normally using a different client, today.

livestream

Metrics Explorer

This view gives you insights on your metrics coming from your Function App. You can add new charts for your Dashboards and set up new Alert rules from this page.

Failures

This view gives you insights on which things are failing. It has pivots on “Operation” which are your Functions, Dependencies, and exception messages.

Known issues: Dependencies will be blank unless you add custom dependency metrics.

Performance

Shows information on the count, latency, and more of Function executions. You can customize this pretty aggressively to make it more useful.

Servers

Shows resource utilization and throughput per server. Useful for debugging Functions that might be bogging down your underlying resources. Putting the servers back in Serverless. J

Analytics

The analytics portal provides you the ability to write custom queries against your data. This is one of the most powerful tools in your tool box. Currently, the following tables are full of data from the Functions runtime:

  • Requests – one of these is logged for each execution
  • Exceptions – tracks any exceptions thrown by the runtime
  • Traces – any traces written to context.log or ILogger show up here
  • PerformanceMetrics – Auto collected info about the performance of the servers the functions are running on
  • CustomEvents – Custom events from your functions and anything that the host sees that may or may not be tied to a specific request
  • CustomMetrics – Custom metrics from your functions and general performance and throughput info on your Functions. This is very helpful for high throughput scenarios where you might not capture every request message to save costs, but you still want a full picture of your throughput/etc. as the host will attempt to aggregate these client side, before sending to Application Insights

The other tables are from availability tests and client/browser telemetry, which you can also add. The only thing that’s currently missing is dependencies. There is also more metrics/events we’ll add over the course of the preview (based off your generous feedback on what you need to see).

Example:

This will show us the distribution of requests/worker over the last 30 minutes.


analytics

Configuring the telemetry pipeline

We wanted to be sure you can still control what data and how much gets sent, so we’ve exposed a handful of configuration settings for your host.json which allows you to finely control how we send data. We our latest updates to the configuration, you can now control the verbosity levels of the various telemetry pieces, as well as enable and configure aggregation and sampling.

Limitations during preview

Now that we’ve moved out of beta, we don’t have any planned breaking changes, but we’ll still consider the feature in preview from a supportability point of view. Once we’ve had a wider set of users using Application Insights and we complete some missing features like automatic dependency tracking, we’ll remove the preview flag. This means if you should avoid using our Application Insights integration for business critical applications, and instead continuing to instrument your code yourself with Application Insights.


11 May 09:54

Start writing applications TODAY with the new Microsoft Authentication SDKs

by Vittorio Bertocci

At Build 2016 we announced the first developer preview of the new generation of authentication SDKs for Microsoft identities, the Microsoft Authentication Library (MSAL) for .NET.

Today I am excited to announce the release of production-ready previews of MSAL .NET, MSAL iOS, MSAL Android, and MSAL Javascript.

In the past year, we made significant progress advancing the features of the v2 protocol endpoint of Azure AD and Azure AD B2C. The new MSALs take advantage of those new capabilities and, combined with the excellent feedback you gave us about the first preview, will simplify integrating authentication features in your apps like never before.

The libraries we are releasing today are still in preview, which means that there’s still time for you to give us feedback and change their API surface – however they are fully supported in production: you can use them in your apps confidently, and if you have issues you’ll be able to use all the usual support channels at your disposal for fully released products. More details below.

Introducing MSAL

MSAL is an SDK that makes it easy for you to obtain the tokens required to access web API protected by Microsoft identities, that is to say by the v2 protocol endpoint of Azure AD (work and school accounts or Personal Microsoft Accounts), Azure AD B2C, or the new ASP.NET Core Identity. Examples of web API include Microsoft Cloud API, such as the Microsoft Graph, or any other 3rd party API (including your own) configured to accept tokens issued by Microsoft identities.

MSAL offers an essential set of primitives, helping you to work with tokens with few concise lines of code.

Under the hood, MSAL takes care of many complex and high risk programming tasks that you would otherwise be required to code yourself. Specifically, MSAL takes care of displaying authentication and consent UX when appropriate, selecting the appropriate protocol flows for the current scenario, emitting the correct authorization messages and handling the associated responses, negotiating policy driven authentication levels, taking advantage of device authentication features, storing tokens for later use and transparent renewal, and much more. It’s thanks to that sophisticated logic that you can take advantage of secure APIs and advanced enterprise-grade access control features even if you never read a single line of the OAuth2 or OpenId Connect specifications. You don’t even need to learn about Azure AD internals: using MSALs both you and your administrator can be confident that access policies will be automatically applied at runtime, without the need for dedicated code.

You might be wondering, should I be using MSAL or the Active Directory Authentication Library (ADAL)? The answer is straightforward: if you are building an application that needs to support both Azure AD work and school accounts and Microsoft personal accounts (with the v2 protocol endpoint of Azure AD), or building an app that uses Azure AD B2C, then use MSAL. If you’re building an application that needs to support just Azure AD work and school accounts, then use ADAL. In the future, we’ll recommend all apps use MSAL, but not yet. We still have a bit more work to do on MSAL and the v2 protocol endpoint of Azure AD. More on ADAL later in the post.

MSAL programming model

Developing with MSAL is simple.

Everything starts with registering your app in the v2 protocol endpoint of Azure AD, Azure AD B2C, or ASP.NET Core Identity. Here you’ll specify some basic info about your app (is it a mobile app? Is it a web app or a web API?) and get back an identifier for your app. Let’s say that you are creating a .NET desktop application meant to work with work & school and MSA accounts (v2 protocol endpoint of Azure AD).

In code, you always begin by creating an instance of *ClientApplication - a representation in your code of your Azure AD app; in this case, you’ll initialize a new instance of PublicClientApplication, passing the identifier you obtained at registration time.

[sourcecode language='csharp' padlinenumbers='true'] string clientID = "a7d8cef0-4145-49b2-a91d-95c54051fa3f"; PublicClientApplication myApp = new PublicClientApplication(clientID); [/sourcecode]

Say that you want to call the Microsoft Graph to gain access to the email messages of a user. All you need to do is to call AcquireTokenAsync, specifying the scope required for the API you want to invoke (in this case, Mail.Read).

[sourcecode language='csharp' ] string[] scopes = { "Mail.Read" }; AuthenticationResult ar = await myApp.AcquireTokenAsync(scopes); [/sourcecode]

The call to AcquireTokenAsync will cause a popup to appear, prompting the user to authenticate with the account of his or her choice, applying whatever authentication policy has been established by the administrator of the user’s directory. For example, if I were to run that code and use my microsoft.com account, I would be forced to use two-factor authentication – while, if I’d use a user from my own test tenant, I would only be asked for username and password.

After successful authentication, the user is promoted to grant consent for the permission requested, and some other permissions related to accessing personal information (such as name, etc).

MSALconsentPrompt

As soon as the user accepts, the call to AcquireTokenAsync finalizes the token acquisition flow and returns it (along with other useful info) in an AuthenticationResult. All you need to do is extract it (via ar.AccessToken) and include it in your API call.

MSAL features a sophisticated token store, which automatically caches tokens at every AcquireTokenAsync call. MSAL offers another primitive, AcquireTokenSilentAsync, which transparently inspects the cache to determine whether an access token with the required characteristics (scopes, user, etc) is already present or can be obtained without showing any UX to the user. Azure AD issues powerful refresh tokens, which can often be used to silently obtain new access tokens even for new scopes or different organizations, and MSAL codifies all the logic to harness those features to minimize prompts. This means that from now on, whenever I need to call the mail API, I can simply call AcquireTokenSilentAsync as below and know that I am guaranteed to always get back a fresh access token; and if something goes wrong, for example of the user revoked consent to my app, I can always fall back on AcquireTokenAsync to prompt the user again.

[sourcecode language='csharp' ] try { ar = await App.AcquireTokenSilentAsync(scopes, myApp.Users.FirstOrDefault()); } catch (MsalUiRequiredException UiEx) { ar = await App.PCA.AcquireTokenAsync(scopes); } [/sourcecode]

This is the main MSAL usage pattern. All others are variations that account for differences among platforms, programming languages, application types and scenarios – but in essence, once you mastered this couple of calls you know how MSAL works.

Platforms lineup

We are making MSAL available on multiple platforms. The concepts remain the same across the board, but they are exposed to you using the primitives and best practices that are typical of each of the targeted platforms.

Like every library coming from the identity division in the last three years, MSAL is OSS and available on github. We develop MSAL in the open, and we welcome community contributions. For example, I would like to acknowledge Oren Novotny, Principal Architect at BlueMetal and Microsoft MVP, who was instrumental in refactoring MSAL to work with .NET Standard targets. Thank you, Oren!

Below you can find some details about the MSALs previews we are releasing today.

MSAL .NET

You can find the source at https://github.com/AzureAD/microsoft-authentication-library-for-dotnet.

MSAL .NET is distributed via Nuget.org: you can find the package at https://www.nuget.org/packages/Microsoft.Identity.Client.

MSAL .NET works on .NET Desktop (4.5+), .NET Standard 1.4, .NET Core, UWP and Xamarin Forms for iOS/Android/UWP.

MSAL.NET supports the development of both native apps (desktop, console, mobile) and web apps (code behind of ASP.NET web apps, for example).

There are many code samples you can choose from: there’s one on developing a WPF app, one on developing a Xamarin forms app targeting UWP/iOS/Android, one on developing a web app with incremental consent, one on server to server communication, and we’ll add more in the coming weeks. We’ll also have various samples demonstrating how to use MSAL with B2C: a Xamarin Forms app, a .Net WebApp, a .Net Core WebApp and a .Net WPF App.

MSAL JavaScript

You can find the source at https://github.com/AzureAD/microsoft-authentication-library-for-js.

You can install MSAL JS using NPM, as described in the libraries’ readme. We also have an entry in CDN, at https://secure.aadcdn.microsoftonline-p.com/lib/0.1.0/js/msal.min.js.

You can find a sample demonstrating a simple SPA here. A sample demonstrating use of MSAL JS with B2C can be found here.

MSAL iOS

You can find the source at https://github.com/AzureAD/microsoft-authentication-library-for-objc.

MSAL iOS is distributed directly from GitHub, via Carthage.

A sample for iOS can be found here. A sample demonstrating use of MSAL iOS with B2C can be found here.

MSAL Android

You can find the source at – https://github.com/AzureAD/microsoft-authentication-library-for-android.

You can get the binaries via Gradle, as shown in the repo’s readme.

A sample showing canonical usage of MSAL Android can be found here.

System webviews

MSAL iOS and MSAL Android display authentication and consent UX taking advantage of OS level features such as SafariViewController and Chrome Custom Tabs, respectively.

This approach has various advantages over the embedded browser control view used in ADAL: it allows SSO sharing between native apps and web apps accessed through the device browser, makes it possible to leverage SSL certificates on the device, and in general offers better security guarantees.

The use of system webviews aligns MSAL to the guidance provided in the OAuth2 for Native Apps best current practice document.

What does “production-supported preview” means in practice

MSAL iOS, MSAL Android and MSAL JS are making their debut this week; and MSAL .NET is incorporating features of the v2 protocol endpoint of Azure AD and Azure AD B2C that were not available in last year’s preview.

We still need to hear your feedback and retain the freedom to incorporate it, which means that we might still need to change the API surface before committing to it long term. Furthermore, both teh v2 protocol endpoint of Azure AD and B2C are still adding features that we believe must be part of a well-rounded SDK release, and although we already have a design for those, we need them to go through the same preview process as the functionality already available today.

That means that, although the MSAL bits were thoroughly tested and we are confident that we can support their use in production, we aren’t ready to call the library generally available yet.

Saying that MSAL is a “production-supported preview” means that we are granting you a golive license for the MSAL previews released this week. You can use those MSALs in your production apps, being confident that you’ll be able to receive support through the usual Microsoft support channels (premier support, StackOverflow, etc).

However, this remains a developer preview, which means that if you pick it up you’ll need to be prepared to deal with some of the dust of a work in progress. To be concrete:

  • Each future preview refresh can (and likely will) change the API surface. That means that if you were waiting for the next refresh to fix a bug affecting you, you will need to be prepared to make code changes when ingesting the new release – even if those changes are unrelated to the bug affecting you, and just happen to be coming out in the same release.
  • When MSAL will reach general availability, you will have 6 months to update your apps to use the GA version of the SDK. Once the 6 months elapse, we will no longer support the preview libraries – and, although we’ll try our best to avoid it, we won’t guarantee that the v2 protocol endpoint of Azure AD and Azure AD B2C will keep working with the preview bits.

We want to reach general availability as soon as viable; however, our criteria are quality driven, not date driven. MSAL will be on the critical path of many applications and we want to make sure we’ll get it right. The good news is that now you are unblocked, and you can confidently take advantage of Microsoft identities in your production apps!

What about ADAL?

For all intents and purposes, MSAL can be considered ADAL vNext. Many of the primitives remain the same (AcquireTokenAsync, AcquireTokenSilentAsync, AuthenticationResults, etc) and the goal, making it easy to access API without becoming a protocol expert, remain the same. If you’ve been developing with ADAL, you’ll feel right at home with MSAL. If you rummage through the repos, you’ll see that there was significant DNA lateral transfer between libraries.

At the same time, MSAL has a significantly larger scope: whereas ADAL only works with work and school accounts via Azure AD and ADFS), MSAL works with work and school accounts, MSAs, Azure AD B2C and ASP.NET Core Identity, and eventually (in a future release) with ADFS… all in a single, consistent object model. Along with that, the difference between the Azure AD v1 and v2 endpoints is important – and inevitably reflected in the SDK: incremental consent, scopes instead of resources, elimination of the resource owner password grant, and so on.

Furthermore, the experience and feedback we accumulated through multiple versions of ADAL (the ADAL.NET nuget alone has been downloaded about 2.8 million times) led us to introduce some important changes in the programming model, changes that perhaps go beyond the breaking changes you’d normally expect between major versions of the same SDK.

For those reasons, we decided to clearly signal differences by picking a new name that better reflects the augmented scope – Microsoft Authentication Library.

If you have significant investment in ADAL , don’t worry: ADAL is fully supported, and remains the correct choice when you are building an application that only needs to support Azure AD work and school accounts.

Feedback

If you are at Build and you want to see MSAL in action, stop by session B8084 on Thursday at 4:00 PM. The session recording will appear 24 to 48 hours later at https://channel9.msdn.com/Events/Build/2017/B8084.

Keep your great feedback coming on UserVoice and Twitter (@azuread, @vibronet). If you have questions, get help using Stack Overflow (use the ‘MSAL‘ tag).

Best,

Vittorio Bertocci (Twitter: @vibronet – Blog: http://www.cloudidentity.com/)

Principal Program Manager

Microsoft Identity Division

11 May 09:54

Optimize your apps for your business with Azure Application Insights

by Shiva Sivakumar

Starting today, you can watch the health of all the components of your cloud application on a single Application Map – even if they’re written in different languages or as serverless functions. Smart Detection notifies you of performance issues and helps you identify the causes. You can trace specific client requests through your whole system. You can debug execution snapshots of problematic operations, complete with variable and parameter values. Azure Application Insights offers the best monitoring solution for cloud applications, helping you to find and fix issues rapidly. In addition, we now offer enhanced usage analysis tools to help you improve your app’s usability.

If you’re familiar with Application Insights, I hope you’ll be as excited as I am about the enhancements we’re announcing today. Here’s a quick summary:

  • Snapshot debugger and profiler show you execution traces from your live web app where customers encountered problems (and a few, for comparison, where they didn’t). No more hours trying to reproduce a rare failure or performance issue, and much faster fixes!
  • Application Map now shows all the dependent roles and components of your application on one active diagram – including clients, web services, backend services, Azure Functions, Service Fabric, Kubernetes. Every node shows its performance and has click-through to diagnostics.
  • Smart Detection helps you quickly identify the root causes of performance anomalies.
  • Usage and retention analysis tools help you discover what users do with your app, so that you can measure the success of each feature and improve its popularity in each iteration.

If Application Insights is new to you and you develop web apps in ASP.NET, Node.JS, or Java, why not give it a try - it’s easy to get started and free for experimental volumes of use. And it works for apps run on your servers or in any host environment (although some of today’s updates are for apps that run in Azure).

Simplified debugging and profiling

Snapshot Debugger and Application Insights Profiler are for live debugging and profiling in the Cloud. By working on web request instances that showed problems in the live app, you avoid having to replicate the problem on your test machines.

Snapshot Debugger, in preview, uses telemetry to capture debug snapshots at the point exceptions are thrown in your application. You can view snapshots in the portal to see variables and parameters, or open them with Visual Studio Enterprise for a full snapshot debugging experience.

Debug Snapshot

The Application Insights Profiler, now generally available for Azure App Services, automatically collects sample profiles of your code running in production and allows you to see code level breakdowns of where time is spent when executing requests. Preview support is also available for virtual machines, VM scale sets and Cloud services.

POST Shopping Cart

Enhanced development support

Without any coding, you can now enable support for Node.js, JavaScript, ASP .NET Core from the Azure portal.

Using the Node.js SDK improvements, you can select Node.js as option in resource creation blade, and collect common Node.js dependencies such as MongoDB, Redis, MySQL, and common Node.js logging solutions.

You can also leverage the preview support of Application Insights SDK for .NET Core running in Kubernetes and get the related properties into Application Map and analytics.

For web apps using JavaScript, you can update your application settings on the fly from the Azure portal and restart your web app to see client side telemetry.

image

Azure Functions and Service Fabric provide direct integrations to Application Insights, in preview, making it easy to get rich monitoring and in-depth analytics.

Application Settings

User monitoring

Which features of your app are most popular? How often do users return to your site? Is your latest enhancement helping users or making it more difficult for them? To help answer questions like these, Application Insights has new usage analysis tools, now in preview, to empower you to better understand how customers use your web apps.

Using the segmentation tools, you can investigate how many people are using a feature, see trends in that usage, and even go deeper to see whether different subgroups of users have similar or different behavior patterns.

Similarly, if you have been wondering how many users come back after first engaging with your web app, the retention analysis tool lets you see patterns of engagement between two actions.

Users

Although you can apply these tools to the standard page view telemetry, the most effective knowledge is gained when you insert a few lines of code to record key business events or user actions, such as opening an account or completing a purchase.

You and your team can use this data to make educated and informed decisions about feature investment and prioritization to help you achieve your business goals.

Custom live metrics

You can now select and filter the metrics and events that you see in Live Metrics Stream. Live Metrics Stream is the near-instant live feed of key metrics which is extremely useful for monitoring live updates and on-the-spot diagnosis. Now you can use it to easily monitor in real time any custom KPI or Windows performance counters.

Query Builder

Azure Monitor integrations

With native integration of Application Insights to Azure Monitor, you can bridge the gap between your app and infrastructure, making it easier to diagnose and fix app issues related to infrastructure. You can now use an Application Insights metric as the source for an Autoscale setting, including new configuration UX and troubleshooting improvements, helping your apps perform the best even when their demands change.

Moreover, the Azure resource health and alert information that helps you diagnose and get support when an Azure issue impacts your application, is now available as part of the Application Map along with the dependency KPI. The application map can now show data coming from multiple applications and roles within an application.

Application Map

I encourage you to take advantage of these capabilities in Application Insights to improve your DevOps experience and drive business impact. Stay tuned on the Application Insights tagged blog posts and learn more about our continued innovation to help you be successful. 

As always, please share your ideas for new or improved features on the Application Insights UserVoice page. For any questions visit the Application Insights Forum.

03 May 19:17

Watch F1’s Fernando Alonso try the Indy 500 oval for the first time

by Jonathan M. Gitlin

One of F1's biggest stories in 2017 actually involves a rival open-wheel series. Two-time F1 World Driver's Champion Fernando Alonso is going to skip the Monaco Grand Prix later this month, because he'll be 4,500 miles away competing in the 101st Indianapolis 500 instead. Alonso races in F1 for the McLaren-Honda team, and for the third season running that partnership is plumbing new depths of unreliability.

Inarguably one of the very best drivers of his generation, Alonso would surely have more championships to his name but for some bad career decisions. But after 14 years in the sport he realizes the chances of beating Michael Schumacher's record seven championships is not in the cards, and so he has set his sights on a different challenge: winning the triple crown—the Monaco Grand Prix, Indianapolis 500, and 24 Hours of Le Mans.

Read 4 remaining paragraphs | Comments

28 Apr 05:35

Announcing TypeScript 2.3

by Daniel Rosenwasser

Today we’re excited to bring you our latest release with TypeScript 2.3!

For those who aren’t familiar, TypeScript is a superset of JavaScript that brings users optional static types and solid tooling. Using TypeScript can help avoid painful bugs people commonly run into when writing JavaScript by type-checking your code. TypeScript can actually report issues without you even saving your file, and leverage the type system to help you write code even faster. This leads to a truly awesome editing experience, giving you time to think about and test the things that really matter.

To get started with the latest stable version of TypeScript, you can grab it through NuGet, or use the following command with npm:

npm install -g typescript

Visual Studio 2015 users (who have Update 3) as well as Visual Studio 2017 users using Update 2 Preview will be able to get TypeScript by simply installing it from here. To elaborate a bit, this also means that Visual Studio 2017 Update 2 will be able to use any newer version of TypeScript side-by-side with older ones.

For other editors, default support for 2.3 should be coming soon, but you can configure Visual Studio Code and our Sublime Text plugin to pick up whatever version you need.

While our What’s New in TypeScript Page will give the full scoop, let’s dive in to see some of the great new features TypeScript 2.3 brings!

Type checking in JavaScript files with // @ts-check and --checkJs

TypeScript has long had an option for gradually migrating your files from JavaScript to TypeScript using the --allowJs flag; however, one of the common pain-points we heard from JavaScript users was that migrating JavaScript codebases and getting early benefits from TypeScript was difficult. That’s why in TypeScript 2.3, we’re experimenting with a new “soft” form of checking in .js files, which brings many of the advantages of writing TypeScript without actually writing .ts files.

This new checking mode uses comments to specify types on regular JavaScript declarations. Just like in TypeScript, these annotations are completely optional, and inference will usually pick up the slack from there. But in this mode, your code is still runnable and doesn’t need to go through any new transformations.

You can try this all out without even needing to touch your current build tools. If you’ve already got TypeScript installed (npm install -g typescript), getting started is easy! First create a tsconfig.json in your project’s root directory:

{
    "compilerOptions": {
        "noEmit": true,
        "allowJs": true
    },
    "include": [
        "./src/"
    ]
}

Note: We’re assuming our files are in src. Your folder names might be different.

Now all you need to do to type-check a file is to add a comment with // @ts-check to the top. Now run tsc from the same folder as your tsconfig.json and that’s it.

// @ts-check

/**
 * @param {string} input
 */
function foo(input) {
    input.tolowercase()
    //    ~~~~~~~~~~~ Error! Should be toLowerCase
}

We just assumed you didn’t want to bring TypeScript into your build pipeline at all, but TypeScript is very flexible about how you want to set up your project. Maybe you wanted to have all JavaScript files in your project checked with the checkJs flag instead of using // @ts-check comments. Maybe you wanted TypeScript to also compile down your ES2015+ code while checking it. Here’s a tsconfig.json that does just that:

{
    "compilerOptions": {
        "target": "es5",
        "module": "commonjs",
        "allowJs": true,
        "checkJs": true,
        "outDir": "./lib"
    },
    "include": [
        "./src/**/*"
    ]
}

Note: Since TypeScript is creating new files, we had to set outDir to another folder like lib. That might not be necessary if you use tools like Webpack, Gulp, etc.

Next, you can start using TypeScript declaration files (.d.ts files) for any of your favorite libraries and benefit from any new code you start writing. We think you’ll be especially happy getting code completion and error checking based on these definitions, and chances are, you may’ve already tried it.

This JavaScript checking mode also allows for two other comments in .js files:

  1. // @ts-nocheck to disable a file from being checked when --checkJs is on
  2. // @ts-ignore to ignore errors on the following line.

You might already be thinking of this experience as something similar to linting; however, that doesn’t mean we’re trying to replace your linter! We see this as something complementary that can run side-by-side with existing tools like ESLint on your JavaScript. Each tool can play to its strengths.

If you’re already using TypeScript, we’re sure you have a JavaScript codebase lying around you can turn this on to quickly catch some real bugs in. But if you’re new to TypeScript, we think that this mode will really help show you what TypeScript has to offer without needing to jump straight in or commit.

Language server plugin support

One of TypeScript’s goals is to deliver a state-of-the-art editing experience to the JavaScript world. This experience is something our users have long enjoyed, whether it came to using traditional JavaScript constructs, newer ECMAScript features, or even JSX.

However, in the spirit of separation of concerns, TypeScript avoided special-casing certain content such as templates. This was a problem that we’d discussed deeply with the Angular team – we wanted to be able to deliver the same level of tooling to Angular users for their templates as we did in other parts of their code. That included completions, go-to-definition, error reporting, etc.

After working closely with the Angular team, we’re happy to announce that TypeScript 2.3 officially makes a language server plugin API available. This API allows plugins to augment the regular editing experience that TypeScript already delivers. What all of this means is that you can get an enhanced editing experience for many different workloads.

You can see the progress of Angular’s Visual Studio Code Plugin here which can greatly enhance the experience for Angular users. But importantly, note here is that this is a general API – that means that a plugin can be written for many different types of content. As an example, there’s already a TSLint language server plugin, as well as a TypeScript GraphQL language server plugin! The Vetur plugin has also delivered a better TypeScript and JavaScript editing experience within .vue files for Vue.js through our language server plugin model.

We hope that TypeScript will continue to empower users of different toolsets. If you’re interested in providing an enhanced experience for your users, you can check out this example plugin.

Default type arguments

To explain this feature, let’s take a simplified look at React’s component API. A React component will have props and potentially some state. You could encode this like follows:

class Component<P, S> {
    // ...
}

Here P is the type of props and S is the type of state.

However, much of the time, state is never used in a component. In those cases, we can just write the type as object or {}, but we have to do so explicitly:

class FooComponent extends React.Component<FooProps, object> {
    // ...
}

This may not be surprising. It’s fairly common for APIs to have some concept of default values for information you don’t care about.

Enter default type arguments. Default type arguments allow us to free ourselves from thinking of unused generics. In TypeScript 2.3, we can declare React.Component as follows:

class Component<P, S = object> {
    // ...
}

And now whenever we write Component<FooProps>, we’re implicitly writing Component<FooProps, object>.

Keep in mind that a type parameter’s default isn’t necessarily the same as its constraint (though the default has to be assignable to the constraint).

Generator and async generator support

Previously, TypeScript didn’t support compiling generators or working with iterators. With TypeScript 2.3, it not only supports both, it also brings support for ECMAScript’s new async generators and async iterators.

This is an opt-in feature when using the --downlevelIteration flag. You can read more about this on our RC blog post.

This functionality means TypeScript more thoroughly supports the latest version of ECMAScript when targeting older versions. It also means that TypeScript can now work well with libraries like redux-saga.

Easier startup with better help, richer init, and quicker strictness

Another one of the common pain-points we heard from our users was around the difficulty of getting started in general, and of the discoverability of new options. We had found that people were often unaware that TypeScript could work on JavaScript files, or that it could catch nullability errors. We wanted to make TypeScript more approachable, easier to explore, and more helpful at getting you to the most ideal experience.

First, TypeScript’s --help output has been improved so that options are grouped by their topics, and more involved/less common options are skipped by default. To get a complete list of options, you can type in tsc --help --all.

Second, because users are often unaware of the sorts of options that TypeScript does make available, we’ve decided to take advantage of TypeScript’s --init output so that potential options are explicitly listed out in comments. As an example, tsconfig.json output will look something like the following:

{
  "compilerOptions": {
    /*  Basic  Options */
    "target": "es5",              /* Specify ECMAScript target version: 'ES3' (default), 'ES5', 'ES2015', 'ES2016', 'ES2017', or 'ESNEXT'. */
    "module": "commonjs",         /* Specify module code generation: 'commonjs', 'amd', 'system', 'umd' or 'es2015'. */
    // "lib": [],                 /* Specify library files to be included in the compilation:  */
    // "allowJs": true,           /* Allow javascript files to be compiled. */
    // "checkJs": true,           /* Report errors in .js files. */
    // "jsx": "preserve",         /* Specify JSX code generation: 'preserve', 'react-native', or 'react'. */
    // "declaration": true,       /* Generates corresponding '.d.ts' file. */
    // "sourceMap": true,         /* Generates corresponding '.map' file. */
    // ...
  }
}

We believe that changing our --init output will make it easier to make changes to your tsconfig.json down the line, and will make it quicker to discover TypeScript’s capabilities.

Finally, we’ve added the --strict flag, which enables the following settings

  • --noImplicitAny
  • --strictNullChecks
  • --noImplicitThis
  • --alwaysStrict (which enforces JavaScript strict mode in all files)

This --strict flag represents a set of flags that the TypeScript team believes will lead to the most optimal developer experience in using the language. In fact, all new projects started with tsc --init will have --strict turned on by default.

Enjoy!

You can read up our full what’s new in TypeScript page on our Wiki, and read our Roadmap to get a deeper look at what we’ve done and what’s coming in the future!

We always appreciate constructive feedback to improve TypeScript however we can. In fact, TypeScript 2.3 was especially driven by feedback from both existing TypeScript users as well as people in the general JavaScript community. If we reached out to you at any point, we’d like to especially thank you for being helpful and willing to make TypeScript a better project for all JavaScript developers.

We hope you enjoy TypeScript 2.3, and we hope that it makes coding even easier for you. If it does, consider dropping us a line in the comments below, or spreading the love on Twitter.

Thanks for reading up on this new release, and happy hacking!

21 Apr 05:32

Announcing Azure Time Series Insights

by Joseph Sirosh

Today we are excited to announce the public preview of Azure Time Series Insights, a fully managed analytics, storage, and visualization service that makes it incredibly simple to interactively and instantly explore and analyze billions of events from sources such as Internet of Things. Time Series Insights gives you a near real time global view of your data across various event sources and lets you quickly validate IoT solutions and avoid costly downtime of mission-critical devices. It helps you discover hidden trends, spot anomalies, conduct root-cause analysis in near real-time, all without writing a single line of code through its simple and intuitive user experience. Additionally, it provides rich API’s to enable you to integrate its powerful capabilities in your own existing workflow or application.

Azure Time Series Insights

Today more than ever, with increasing connected devices and massive advances in the collection of data, businesses are struggling to quickly derive insights from the sheer volume of data generated from geographically dispersed devices and solutions. In addition to the massive scale, there is also a growing need for deriving insights from the millions of events being generated in near real time. Any delay in insights can cause significant downtime and business impact. Additionally, the need to correlate data from a variety of different sensors is paramount to debug and optimize business processes and workflows. Reducing the time and expertise required for this is essential for businesses to gain a competitive edge and optimize their operations. Azure Time Series Insights solves these and many more challenges for your IoT solutions.

Customers from diverse industry sectors like automotive, windfarms, elevators, smart buildings, manufacturing, etc. have been using Time Series Insights during its private preview. They have validated its capabilities with real production data load, already realized the benefits, and are looking for ways to cut costs and improve operations.

For example, BMW uses Azure Time Series Insights and companion Azure IoT services for predictive maintenance across several of their departments. Time Series Insights and other Azure IoT services have helped companies like BMW improve operational efficiency by reducing SLAs for validating connected device installation, in some cases realizing a reduction in time from several months to as little as thirty minutes.

Near real-time insights in seconds at IoT scale

Azure Time Series Insights enables you to ingest 100’s of millions of sensor events per day, and makes new data available to query for insights within 1 minute. It also enables you to retain this data for months.  Time Series Insights is optimized to enable you to query over this combination of near real-time and historic TB’s of data in seconds. It does not pre-aggregate data, but stores the raw events, and delivers the power of doing all aggregations instantly over this massive scale. Additionally, it also enables you to upload reference data to augment or enrich your incoming sensor data. Time Series Insights enables you to compare data across various sensors of different kinds, event sources, regions and IoT installations in the same query. This is what enables you to get a global view of your data, lets you quickly validate, monitor, discover trends, spot anomalies, and conduct root cause analysis in near real time.

“Azure Time Series Insights has standardized our method of accessing devices’ telemetry in real time without any development effort. Time to detect and diagnose a problem has dropped from days to minutes. With just a few clicks we can visualize the end-to-end device data flow, helping us identify and address customer and market needs,” said Scott Tillman, Software Engineer, ThyssenKrupp Elevator.

Trends and correlation

Easy to get started

With built-in integration to Azure IoT Hub and Azure Event Hubs, customers can get started with Time Series Insights in minutes. Just enter your IoT Hub or Event Hub configuration information through the Azure Portal, and Time Series Insights connects and starts pulling and storing real-time data from it within a minute. This service is schema adaptive, which means that you do not have to do any data preparation to start deriving insights. This enables you to explore, compare, and correlate a variety of sensors seamlessly. It provides a very intuitive user experience that enables you to view, explore, and drill down into various granularities of data, down to specific events. It also provides SQL-like filters and aggregates, ability to construct, visualize, compare, and overlay various time series patterns, heat maps, and the ability to save and share queries. This is what enables you to get started, and glean insights from your data using Azure Time Series Insights in minutes. You can also unleash the power of Time Series Insights using the REST query APIs to create custom solutions. Additionally, Time Series Insights is used to power the time series analytics experiences in Microsoft IoT Central and Azure IoT Suite connected factory preconfigured solutions. Time Series Insights is powered by Azure Platform and provides enterprise scale, reliability, Azure Active Directory integration, and operational security.

Codit, based in Belgium, is a leading IT services company providing consultancy, technology, and managed services in business integration. They help companies reduce operational costs, improve efficiency and enhance control by enabling people and applications to integrate more efficiently. “Azure Time Series Insights is easy to use, helping us to quickly explore, analyze, and visualize many events in just a few clicks.  It’s a complete cloud service, and it has saved us from writing custom applications to quickly verify changes to IoT initiatives,” said Tom Kerkhove, Codit. “We are excited to use Time Series Insights in the future.”

Heatmap and outlier

Azure Time Series Insights extends the broad portfolio of Azure IoT services, such as Azure IoT Hub, Azure Stream Analytics, Azure Machine Learning and various other services to help customers unlock deep insights from their IoT solution. Currently, Time Series Insight is available in US West, US East, EU West, and EU North regions. Learn more about Azure Time Series Insights and sign up for the Azure Time Series Insights preview today.

Learn more about Microsoft IoT

Microsoft is simplifying IoT so every business can digitally transform through IoT solutions that are more accessible and easier to implement. Microsoft has the most comprehensive IoT portfolio with a wide range of IoT offerings to meet organizations where they are on their IoT journey, including everything businesses need to get started — ranging from operating systems for their devices, cloud services to control them, advanced analytics to gain insights, and business applications to enable intelligent action. To see how Microsoft IoT can transform your business, visit www.InternetofYourThings.com.​

20 Apr 06:15

ASP.NET - Overposting/Mass Assignment Model Binding Security

by Scott Hanselman

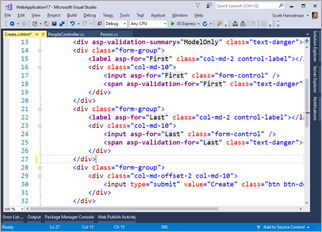
imageThis little post is just a reminder that while Model Binding in ASP.NET is very cool, you should be aware of the properties (and semantics of those properties) that your object has, and whether or not your HTML form includes all your properties, or omits some.

OK, that's a complex - and perhaps poorly written - sentence. Let me back up.

Let's say you have this horrible class. Relax, yes, it's horrible. It's an example. It'll make sense in a moment.

public class Person

{
public int ID { get; set; }
public string First { get; set; }
public string Last { get; set; }
public bool IsAdmin { get; set; }
}

Then you've got an HTML Form in your view that lets folks create a Person. That form has text boxes/fields for First, and Last. ID is handled by the database on creation, and IsAdmin is a property that the user doesn't need to know about. Whatever. It's secret and internal. It could be Comment.IsApproved or Product.Discount. You get the idea.

Then you have a PeopleController that takes in a Person via a POST:

[HttpPost]

[ValidateAntiForgeryToken]
public async Task<IActionResult> Create(Person person)
{
if (ModelState.IsValid)
{
_context.Add(person);
await _context.SaveChangesAsync();
return RedirectToAction("Index");
}
return View(person);
}

If a theoretical EvilUser found out that Person had an "IsAdmin" property, they could "overpost" and add a field to the HTTP POST and set IsAdmin=true. There's nothing in the code here to prevent that. ModelBinding makes your code simpler by handling the "left side -> right side" boring code of the past. That was all that code where you did myObject.Prop = Request.Form["something"]. You had lines and lines of code digging around in the QueryString or Form POST.

Model Binding gets rid of that and looks at the properties of the object and lines them up with HTTP Form POST name/value pairs of the same names.

NOTE: Just a friendly reminder that none of this "magic" is magic or is secret. You can even write your own custom model binders if you like.

The point here is that folks need to be aware of the layers of abstraction when you use them. Yes, it's convenient, but it's hiding something from you, so you should know the side effects.

How do we fix the problem? Well, a few ways. You can mark the property as [ReadOnly]. More commonly, you can use a BindAttribute on the method parameters and just include (whitelist) the properties you want to allow for binding:

public async Task<IActionResult> Create([Bind("First,Last")] Person person)

Or, the correct answer. Don't let models that look like this get anywhere near the user. This is the case for ViewModels. Make a model that looks like the View. Then do the work. You can make the work easier with something like AutoMapper.

Some folks find ViewModels to be too cumbersome for basic stuff. That's valid. There are those that are "All ViewModels All The Time," but I'm more practical. Use what works, use what's appropriate, but know what's happening underneath so you don't get some scriptkiddie overposting to your app and a bit getting flipped in your Model as a side effect.

Use ViewModels when possible or reasonable, and when not, always whitelist your binding if the model doesn't line up one to one (1:1) with your HTML Form.

What are your thoughts?


Sponsor: Check out JetBrains Rider: a new cross-platform .NET IDE. Edit, refactor, test, build and debug ASP.NET, .NET Framework, .NET Core, or Unity applications. Learn more and get access to early builds!


© 2017 Scott Hanselman. All rights reserved.
     
16 Apr 09:27

Azure Functions Tools Roadmap

by Andrew B Hall - MSFT

Update 5-10-2017: The first release of Visual Studio 2017 Tools for Azure Functions is now available to try

We’ve been humbled by the intense interest in Visual Studio tools for Azure Functions since we shipped our initial preview for Visual Studio 2015 last fall. Unfortunately, given other constraints, Visual Studio 2017 did not include Azure Functions when we shipped in March. So, we’d like to provide an update to our roadmap for Functions Tooling including Visual Studio 2017 support now.

Using the feedback we received from our first preview of the tools, we’ve decided that our next iteration of Azure Function tools will focus on creating precompiled Azure Function apps using .NET Standard 2.0 class libraries.

Why the pivot?

When we shipped the preview tools in Visual Studio 2015 last winter, two of the most common requests we received were for project to project references, and unit testing support (both locally and as part of a continuous integration pipeline). These feature requests along with many others made it clear that people desired a very standard Visual Studio experience for developing and working with Functions.

So rather than attempting to re-invent the wheel, we felt the right direction was to move to the standard C# artifact (class libraries) that has decades of investment and first class support for these capabilities. Additionally, as mentioned in the Publishing a .NET class library as a Function App blog post, precompiled functions also provide better cold start performance for Azure Functions.

What does this mean?

As with any change, there are both costs and benefits to the change. Overall we believe this will be a great thing for the future of Azure Functions for the following reasons:

  • These will be C# class libraries, which means that the full tooling power of the Visual Studio eco-system will be available including project to project references, test support, code analysis tools, code coverage, 3rd party extensions, etc.
  • NET Standard 2.0 is designed to work across the .NET Framework and .NET Core 2.0 (coming soon). This means .NET Standard 2.0 Azure Function projects will run with no code changes on both the current Azure Functions runtime, as well as on the planned .NET Core 2.0 Functions runtime. At that point, you can build .NET function apps on Windows, Mac, and Linux using the tools of your choice.

So, to ease the transition we recommend that you start new Azure Functions projects as C# class libraries, rather than using the 2015 preview tooling.

Conclusion

We hope that this helps to clarify what our current plans are, and why we think that it is the right thing to do for the long-term future of Azure Functions tooling. We’d also like to say that we’re working on on building this experience, and will have more details to share within the next month. As always, we would love your feedback, so let us know what comments and questions you have below, or via twitter at @AndrewBrianHall and @AzureFunctions.

13 Apr 05:56

.NET Futures: Type Classes and Extensions

by Jonathan Allen

Another feature being considered for future versions of .NET are type classes. Referred to as “shapes” in the Shapes and Extensions proposal, they would greatly increase the capabilities of .NET generics.

By Jonathan Allen
11 Apr 19:36

Considerations on using Deployment Slots in your DevOps Pipeline

by Donovan Brown

The goal of DevOps is to continuously deliver value.  Using deployment slots can allow you to do this with zero downtime. In the Azure Portal, in the Azure App Service resource blade for your Web App, you can add a deployment slot by navigating to “Deployment slots,” adding a slot, and giving the slot a name. The deployment slot has its own hostname and is a live app.

2017-04-10_8-02-58

Deployment slots are extremely powerful, but care must be taken when you start to integrate them into your DevOps Pipeline.  The goal of this post is to focus on best practices and anti-patterns.

Often when I see people using deployment slots in their pipelines, they attempt to swap across environments. This can lead to undesirable results.  One example I witnessed had two deployment slots: Dev and QA.

2017-04-03_9-35-36

The thinking was they would copy the files to Dev, then swap to QA, and finally swap into Production.  On paper, this seems logical. However, rarely are you only dealing with the web application.  You also must deploy the database and other dependencies. In the Dev and QA environments, you will also want to run tests such as load and performance tests.

First, we will address testing. Each slot of the web application shares the same resources. Therefore, if you were to run load tests against the QA slot, it would impact the performance of the Production slot as well. Therefore, if you intend to run load tests you need two separate web applications with matching App Service Plans. Matching the level of the App Service Plan is important so that you will be using comparable sized resources.

Second, I want to address restarting an environment deployment. Like many deployment products, Visual Studio Team Services allows you to restart a failed deployment. If you swap deployment slots and deploy a database in your production environment, you may have to restart the deployment if the database fails.  When you restart your deployment, you would swap the slots again. This would swap the desired code back out of Production when you restart the deployment.

Rolling back with slots

Many users of slots get excited when they realize they can swap in both directions to “roll back” a change.  Although this is true, you need to consider that rarely are you only dealing with the web application. In the cases where you also deployed a database, simply swapping the slots back might leave you in a worse place. You must remember that you are only swapping the web application and not all its dependencies.  You must only make changes to your database that do not break the current version of the application. So, to be able to roll back the web application, you must engineer your database deployments to always be at least one version backwards compatible. This will allow you to swap your slots and allow your previous version to function as expected. You may also have to support multiple API versions for web services as well.

Never do anything for the first time in Production

When I use deployment slots, I do so in every environment. If we return to the Dev, QA, and Production example, I would create three different web applications, each with a Stage and Production slot.  Notice in the images below that everything I intend to do in production is also done in Dev and QA.

2017-04-07_10-20-022017-04-07_10-20-29 2017-04-07_10-22-32

The reason I do this is so each environment is the same. This allows me to verify all my deployment tasks in Dev and QA before I attempt to deploy to Production. If anything is going to fail, it should fail in Dev and/or QA where I can resolve without impacting Production. If you do something for the first time in your Production deployment, the only time you will know if it will work or not is in Production.

For more information on deployment slots see the Azure Documentation.

11 Apr 14:56

Mourning the Victims of the Stockholm Attack (25 photos)

Over the weekend memorials and ceremonies were held in Stockholm, Sweden, to remember the victims of Friday’s attack, and to stand together in defiance of terrorism. Four people were killed and fifteen injured when a hijacked truck was driven into a crowd on a busy pedestrian street on April 7, 2017. An Uzbek man, reportedly an asylum-seeker who had been rejected, was arrested and is being held on terrorism charges. Thousands of Swedes attended a “Lovefest” in central Stockholm on Sunday, and the shopping district filled with pedestrians once more, as soon as it was re-opened.

A couple hug in front of a flower-covered police car at the site where a truck drove into a department store in Stockholm, Sweden, on April 10, 2017. (Jonathan Nackstrand / AFP / Getty)
11 Apr 14:48

Announcing TypeScript 2.3 RC

by Daniel Rosenwasser
The TypeScript 2.3 Release Candidate is here today! This release brings more ECMAScript features, new settings to make starting projects easier, and more.

To get started with the release candidate, you can grab it through NuGet or over npm through

npm install -g typescript@rc

You can also get TypeScript for Visual Studio 2015 (if you have Update 3). Our team is working on supporting Visual Studio 2017 in the near future, with details available on our previous blog post.

Other editor support will be coming with the proper release, but you can follow instructions to enable newer versions of TypeScript in Visual Studio Code and Sublime Text 3.

In this post we’ll take a closer look at the new --strict option along with async generator and iterator support, but to see a more detailed list of our release, check out the TypeScript Roadmap.

The --strict option

By default, TypeScript’s type system is as lenient as possible to allow users to add types gradually. But have you ever started a TypeScript project with all the strictest settings you could think of?

While TypeScript has options for enabling different levels of strictness, it’s very common to start at the strictest settings so that TypeScript can provide the best experience.

The problem with this is that the compiler has grown to have a lot of different options. --noImplicitAny, --strictNullChecks, --noImplicitThis, and --alwaysStrict are just a few of the more common strictness options that you need to remember when starting a new project. Unfortunately if you can’t remember these, it just makes TypeScript harder to use.

That’s why in TypeScript 2.3, we’re introducing the --strict flag. The --strict flag enables these common strictness options implicitly. If you ever need to opt out, you can explicitly turn these options off yourself. For example, a tsconfig.json with all --strict options enabled except for --noImplicitThis would look like the following:

{
    "compilerOptions": {
        "strict": true,
        "noImplicitThis": false
    }
}

In the future --strict may include other strict checks that we believe will benefit all users, but can be manually toggled off by disabling them explicitly (as mentioned above.)

Downlevel generator & iterator support

Prior to TypeScript 2.3, generators were not supported when targeting ES3 & ES5. This stemmed from the fact that support for generators implied that other parts of the language like forof loops could play well with iterators, which wasn’t the case. TypeScript assumed these constructs could only work on arrays when targeting ES3/ES5, and because generalizing the emit would lead to drastic changes in output code. Something as conceptually simple as a forof loop would have to handle cases that might never come up in practice and could add slight overhead.

In TypeScript 2.3, we’ve put the work in for users to start working with generators. The new --downlevelIteration flag gives users a model where emit can stay simple for most users, and those in need of general iterator & generator support can opt in. As a result, TypeScript 2.3 makes it significantly easier to use libraries like redux-saga, where support for generators is expected.

Async generators & iterators

With our support for regular generator & iterator support, TypeScript 2.3 brings support for async generators and async iterators. You can read more about these features on the TC39 proposal, but we’ll try to give a brief explanation and example.

Async iterators are an upcoming ECMAScript feature that allows iterators to produce results asynchronously. They can be cleanly consumed from asynchronous functions with a new construct called async for loops. These have the syntax

for await (let item of items) {
    /*...*/
}

Async generators are generators which can await at any point. They’re declared using a syntax like

async function* asyncGenName() {
    /*...*/
}

Let’s take a quick look at an example that use both of these constructs together.

// Returns a Promise that resolves after a certain amount of time.
function sleep(milliseconds: number) {
    return new Promise<void>(resolve => {
        setTimeout(resolve, milliseconds);
    });
}

// This converts the iterable into an async iterable.
// Each element is yielded back with a delay.
async function* getItemsReallySlowly<T>(items: Iterable<T>) {
    for (const item of items) {
        await sleep(500);
        yield item;
    }
}

async function speakLikeSloth(items: string[]) {
    // Awaits before each iteration until a result is ready.
    for await (const item of getItemsReallySlowly(items)) {
        console.log(item);
    }
}

speakLikeSloth("never gonna give you up never gonna let you down".split(" "))

Keep in mind that our support for async iterators relies on support for Symbol.asyncIterator to exist at runtime. You may need to polyfill Symbol.asyncIterator, which for simple purposes can be as simple as

(Symbol as any).asyncIterator = Symbol.asyncIterator || Symbol.from("Symbol.asyncIterator");

or even

(Symbol as any).asyncIterator = Symbol.asyncIterator || "__@@asyncIterator__";

If you’re using ES5 and earlier, you’ll also need to use the --downlevelIteration flag. Finally, your TypeScript lib option will need to include "esnext".

Enjoy!

Keep an eye out for the full release of TypeScript 2.3 later this month which will have many more features coming.

For our Visual Studio 2017 users: as we mentioned above, we’re working hard to ensure future TypeScript releases will be available for you soon. We apologize for this inconvenience, but can assure you that a solution will be made available.

We appreciate any and all constructive feedback, and welcome you to leave comments below and file issues on GitHub if needed.

11 Apr 05:18

New integrated portal for Azure Functions

by Donna Malayeri

I’m excited to announce a new integrated portal experience for Azure Functions. Previously, there was somewhat disjoint experience between Function Apps and App Service. For many management operations, customers had to navigate to the App Service resource blade, and we heard feedback that customers wanted a more integrated and streamlined experience. In addition, we want to provide an easier way to manage multiple Function Apps from within one view.

We’ve made several enhancements to the experience, including:

  • A dedicated browse blade for Function Apps. Function Apps are still listed in the App Service blade, but that’s no longer the only way to find Function Apps
  • A tree view that allows viewing and managing multiple Function Apps
  • Filters on subscription and app name, as well as an option to scope the view to just one app
  • One-click access to all App Service platform features
  • A convenient way to manage features that have already been configured
  • Overall UI enhancements to be more consistent with the rest of the Azure portal

For a visual introduction, the short video below walks through the main features. The video is also available on YouTube.

Function App browse and management

There is now a new browse blade for Function Apps that you can pin to the left-hand service menu. Under More services, search for Functions.

service-menu

Once you’re on the browse blade, you’ll see all Function Apps in your active subscription in a tree view on the left. You can filter on one or more subscriptions or search for an app name. In the list view on the right, apps are listed in a grid view that includes the subscription, resource group, and location.

If you select an app in the grid view, you’ll see a scoped view for just that Function App. Clearing the search box at the top will show all Function Apps in the selected subscriptions. See animated gif below.

function-navigation-filter-and-scope

You can also scope to a particular Function App by selecting the chevron to the right of the app name. The refresh button will update the function and proxies list. On a Consumption plan, the refresh button also synchronizes triggers with the central listener. (This is required if you FTP or Kudu to modify your function.json files.)

Function App management

Once you’ve selected a Function App, the Overview tab on the right displays information about your app and is similar to the App Service resource blade. From here, you can stop, restart and delete your app, download the publish profile, and reset publish credentials.

The Configured features section lists any platform features that you’ve customized. For instance, if you have configured a deployment option, you can navigate to the settings directly from the overview page.

configured-features

The Settings tab includes Function App level settings, such as the runtime version, proxies configuration, and host keys. The Platform features tab lists all relevant App Service settings. If you miss the App Service resource blade, you can still get to it from General Settings -> All settings. Features that are not available for your app are still displayed, but include a tooltip on why they are not available. You can also search settings based on either exact name or a descriptive tag. For instance, searching on “git” will highlight the option Deployment source.

search-platform-features

The API definition tab allows you to configure a Swagger API definition. For more information on the feature, see the blog post Announcing Azure Functions OpenAPI (Swagger) support preview.

Function navigation

Navigating to an individual function is also much easier. If you select the Functions or Proxies node within a Function App, you’ll see a list of items you can use to navigate. We’ll be making more improvements to the Functions list, including the ability to search functions, change the enabled state, and delete functions. (For more details, see the GitHub issue AzureFunctionsPortal #1062.)

functions-node

See animated gif below.

functions-and-proxies-list

New Function page

The New Function page has a few changes. Since the main Function App page now shows the Overview tab, that displaced the Quickstart experience. We’ve incorporated it as part of the New Function page. If a Function App has no functions, you’ll see the quickstart below. To get to the full template view, select Create custom function at the bottom of the page. To get to the quickstart view below from the template view, select “go to the quickstart.”

quickstart-page

template-page

Upcoming improvements

Today’s release is just the start of the improvements to the Functions portal. Here’s a list of some of the other improvements we have planned:

Feedback survey

As this is a big change to the Azure Functions portal, we’d love to hear your feedback. Help improve the product by filling out a 2-minute survey: https://aka.ms/functions-portal-survey.

Provide feedback

Ask questions in the comments section below or reach out to me on Twitter @lindydonna. For general feedback and questions about Azure Functions:

Acknowledgements

We’d like to thank our Azure MVPs and Azure Advisors for trying out an early version of the portal and providing feedback. Functions team members @bktv99, @crandycodes, and @phaseshake filed the most bugs during the bug bash.

09 Apr 05:10

California Airbnb Host Cancels Woman's Reservation Due to Her Race, Noting That 'It's Why We Have Trump'

by Lauren Evans on Jezebel, shared by Rhett Jones to Gizmodo

Dyne Suh, a 25-year-old law student from Riverside, California, just wanted to enjoy a relaxing Presidents’ Day weekend with her fiancé and a couple of friends in nearby Big Bear Lake. What she was not expecting was for her Airbnb host to abruptly cancel on her because of her race. And yet!

Read more...

07 Apr 05:03

Announcing the .NET Framework 4.7

by Rich Lander [MSFT]

Update 5/2/2017: Added support for other Windows versions.

Updated 4/6/2017: Added Q&A section.

Today, we are announcing the release of the .NET Framework 4.7. It’s included in the Windows 10 Creators Update. We’ve added support for targeting the .NET Framework 4.7 in Visual Studio 2017, also updated today. The .NET Framework 4.7 will be released for additional Windows versions soon. We’ll make an announcement when we have the final date.

The .NET Framework 4.7 includes improvements in several areas:

  • High DPI support for Windows Forms applications on Windows 10
  • Touch support for WPF applications on Windows 10
  • Enhanced cryptography support
  • Performance and reliability improvements

You can see the complete list of improvements and the API diff in the .NET Framework 4.7 release notes.

To get started, upgrade to Windows 10 Creators Update or install the .NET Framework and then install the update to Visual Studio 2017.

Q&A

We’ve had some great questions since publishing this post. Thanks for asking!  Here are the answers:

Does .NET Framework 4.7 support .NET Standard?

Yes. It implements .NET Standard 1.6. You can reference .NET Standard 1.0 through 1.6 class library projects from .NET Framework 4.7 projects. The same is true of NuGet packages. You can reference any NuGet package that was built for .NET Standard 1.0 through 1.6.

The .NET Standard 2.0 spec will ship later this year. .NET Framework 4.6.1 and later will support .NET Standard 2.0. At the point that .NET Standard 2.0 class library projects and NuGet packages start being created, you’ll be able to reference them from .NET Framework 4.6.1 or later projects.

Does .NET Framework 4.7 include System.ValueTuple?

Yes. This type is included in the .NET Framework 4.7. You can learn more about the tuple syntax in the New Features in C# 7.0 and What’s New in Visual Basic 2017 posts.

Here are some good examples of projects taking advantage of the new C# syntax: progaudi/MsgPack.Light, chtoucas/Narvalo.NET, aspnet/Microsoft.Data.Sqlite.

You no longer have to reference the System.ValueTuple NuGet package with .NET Framework 4.7 projects. You can continue to reference it or reference projects that reference it. There is a known issue for debugging with the System.ValueTuple package, which will get fixed in an upcoming Visual Studio 2017 update and the next .NET Framework release.

You need to reference the System.ValueTuple NuGet package with .NET Core 1.x and .NET Standard 1.x projects. System.ValueTuple will be included in .NET Core 2.0 and .NET Standard 2.0.

.NET Framework 4.7 is part of Windows 10 Creators Update. What about other Windows versions?

You can start using .NET Framework 4.7 today on Creators Update. Please read Announcing the .NET Framework 4.7 General Availability to install the .NET Framework 4.7 on other Windows versions. The .NET Framework 4.7 will support the same Windows versions as .NET Framework 4.6.2. It is an in-place update.

.NET Framework Documentation

We are also launching a set of big improvements for the .NET Framework docs, today. The .NET Framework docs are now available on docs.microsoft.com. The docs look much better and easier to read and navigate. We also have a lot of navigation and readability improvements planned for later this year. The .NET Framework docs on MSDN will start redirecting to the new docs.microsoft.com pages later this year. Some table of contents and content updates will be occurring over the next few days as we complete this large documentation migration project, so please bear with us.

The docs will show up on open source on GitHub later this week @ dotnet/docs, too! Updating and improving the docs will now be easier for everyone, including for the .NET writing and engineering teams at Microsoft. This is the same experience we have for .NET Core docs.

We also just released a new experience for searching for .NET APIs. You can now search and filter .NET APIs, for .NET Core, .NET Framework, .NET Standard and Xamarin all in one place! You can also filter by version. UWP APIs are still coming. When you do not filter searches, a single canonical version of each type is shown (not one per product and version). Try it for yourself with a search for string.  The next step is to provide obvious visual queues in the docs so that you know

Check out the new .NET API Browser, also shown below.

api-browser

High DPI for Windows Forms

This release includes a big set of High DPI improvements for Windows Forms DPI Aware applications. Higher DPI displays have become more common, for laptops and desktop machines. It is important that your applications look great on newer hardware. See the team walking you through Windows Forms High DPI Improvements on Channel9.

The goal of these improvements is to ensure that your Windows Forms apps:

  • Layout correctly at higher DPI.
  • Use high-resolution icons and glyphs.
  • Respond to changes in DPI, for example, when moving an application across monitors.

See: High DPI Support In Windows Forms documentation.

Rendering challenges start at around 150% scaling factor and become much more obvious above 200. The new updates make your apps look better by default and enable you to participate in DPI changes so that you can make your custom controls look great, too.

The changes in .NET Framework 4.7 are a first investment in High DPI for Windows Forms. We intend to make Windows Forms more High DPI friendly in future releases. The current changes do not cover every single control and provide a good experience up to 300% scaling factor. Please help us prioritize additional investments in the comments and at microsoft/dotnet issue #374.

These changes rely on High DPI Improvements in the Windows 10 Creators Update, also released today. See High DPI Improvements for Desktop App Developers in the Windows 10 Creators Update (a video) if you prefer to watch someone explains the what’s new.
You may want to follow and reach out to @WindowsUI on twitter.

Improvements for System DPI aware Applications

We’ve fixed layout issues with several of the controls: calendar, exception dialog box, checked list box, menu tool strip and anchor layout. You need to opt-into these changes, either as a group or fine-tune the set that you want to enable, giving you control over which HDPI improvements are applied to your application.

Calendar Control

The calendar control has been updated to be System DPI Aware, showing only one month. This is the new behavior, as you can see in the example below at 300% scaling.

calendar-control-display-300-correct

You can see the existing behavior below at 300% scaling.

calendar-control-display-300-incorrect

ListBox

The ListBox control has been updated to be System DPI Aware, with the desired control height, as you can see in the example below. This is the new behavior, as you can see in the example below at 300% scaling.

listbox-control-display-300-correct

You can see the existing behavior below at 300% scaling.

listbox-control-display-300-incorrect

Exception Message box

The exception message box has been updated to be System DPI Aware, with the correct layout, as you can see in the example below. This is the new behavior, as you can see in the example below at 300% scaling.

exception-messagebox-display-300-correct

You can see the existing behavior below at 300% scaling.

exception-messagebox-display-300-incorrect

Dynamic DPI Scenarios

We’ve also added support for dynamic DPI scenarios, which enables Windows Forms applications to respond to DPI changes after being launched. This can happen when the application window is moved to a display that has a different scale factor, if the current monitors scale factor is changed, you connect an external monitor to a laptop (docking or projecting).

We’ve exposed three new events to support dynamic DPI senarios:

Ecosystem

We’ve recently been talking to control providers (for example, Telerik, and Grape City) so that they update their controls to support High DPI. Please do reach out to your control providers to tell them which Windows Forms (and WPF) controls you want updated to support High DPI. If you are a control provider (commercial or free) and want to chat, please reach out at dotnet@microsoft.com.

You might be wondering about WPF. WPF is inherently High DPI aware and compatible because it is based on vector graphics. Windows Forms is based on raster graphics. WPF implemented a per-monitor experience in the .NET Framework 4.6.2, based on improvements in the Windows 10 Anniversary Update.

Quick Lesson in Resolution, DPI, PPI and Scaling

Higher resolution doesn’t necessarily mean high DPI. It’s typically scaling that results in higher DPI scenarios. I have a desktop machine with a single 1080P screen that is set to 100% scaling. I won’t notice any of the feature discussed here. I also have a laptop with a higher resolution screen that is scaled to 300% to make it look really good. I’ll definitely notice the high DPI features on that machine. If I hookup my 1080P screen to my laptop, then I’ll experience the PerMonitorV2 support when I move my Windows Forms applications between screens.

Let’s look at some actual examples. The Surface Pro 4 and Surface Book have 267 PPI displays, which are likely scaled by default. The Dell 43″ P4317Q has a 104PPI at its native 4k resolution, which is likely not scaled by default. An 85″ 4k TV will have a PPI value of half that. If you scale the Dell 43″ monitor to 200%, then you will have a High DPI visual experience.

Note: DPI and PPI are measurements that takes into account screen resolution, screen size and scaling. You can use them interchangeably.

You can use Magnifier to help you see if your app is correctly scaling the elements when running on high-dpi monitor, by “zooming-in” to see the pixels.

Take advantage of High DPI

You need to target the .NET Framework 4.7 to take advantage of these improvements. Use the following app.config file to try out the new High DPI support. Notice that the sku attribute is set to .NETFramework,Version=v4.7 and the DpiAwareness key is to set PerMonitorV2.

You must also include a Windows app manifest with your app that declares that it is a Windows 10 application. The new Windows Forms System DPI Aware and PerMonitorV2 DPI Aware features will not work without it. See the required application manifest fragment below. A full manifest can be found in this System DPI Aware sample.

Please see Windows Forms Configuration to learn about how to configure each of the Windows Forms controls individually if you need more fine-grained control.

You must target and (re)compile your application with .NET Framework 4.7, not just run on it. Applications that run on the .NET Framework 4.7 but target .NET Framework 4.5 or 4.6, for example, will not get the new improvements. Updating an the app.config file of an existing application will not work (re-compilation is necessary). You only need to re-compile the application/EXE project. You can continue to use libraries and components built for earlier .NET Framework versions.

WPF Touch/Stylus support for Windows 10

WPF now integrates with the touch and stylus/ink support in Windows 10. The Windows 10 touch implementation is more modern and mitigates customer feedback that we’ve received with the current Windows Ink Services Platform (WISP) component that WPF relies on for touch data. You can opt into the new Windows touch services with the .NET Framework 4.7. The WISP component remains the default.

The new touch implementation has the following benefits over the WISP component:

  • More reliable – The new implementation is the same one used by UWP, a touch-first platform. We’ve heard feedback that WISP has intermittent touch responsiveness issues. The new implementation resolves these.
  • More capable – Works well with popups and dialogs. We’ve heard feedback that WISP doesn’t work well with popup UI.
  • Compatible – Basic touch interaction and support should be almost indistinguishable from WISP.

There are some scenarios that don’t yet work well with the new implementation and would make staying with WISP the best choice.

  • Real-time inking does not function. Inking/StylusPlugins will still work, but can stutter.
  • Applications using the Manipulation engine may experience different behavior
  • Promotions of touch to mouse will behave slightly differently to the WISP stack.

Our future work should address all of these issues and provide touch support that is completely compatible with the WISP component. Our goal is to provide a more modern touch experience that continues to improve with each new release of Windows 10.

You can opt-into the new touch implementation with the following app.config entry.

ClickOnce

The ClickOnce Team made a set of improvements in the .NET Framework 4.7.

Hardware Security Module Support

You can now sign ClickOnce manifest files with a Hardware Security Module (HSM) in the Manifest Generation and Editing Tool (Mage.exe). This improvement was the second most requested feature for ClickOnce! HSMs make certificate mangement more secure and easier, since both the certificate and signing occur within secure hardware.

There are two ways to sign your application with an HSM module via Mage. The first can be done via command-line. We’ve added two new options:

-CryptoProvider <name> -csp
-KeyContainer <name> -kc

The CryptoProvider and KeyContainer options are required if the certificate specified by the CertFile option does not contain a private key. The CryptoProvider option specifies the name of the cryptographic service provider (CSP) that contains the private key container. The KeyContainer option specifies he key container that contains the name of the private key.

We have also added a new Verify command, which will verify that the manifest has been signed correctly. It takes a manifest file as it’s parameter:

-Verify <manifest_file_name> -ver

The second way is to sign it via the Mage GUI, which collects the require information before signing:

Mage Signing Options

Store Corruption Recovery

ClickOnce will now detect if the ClickOnce application store has become corrupted. In the event of store corruption, ClickOnce will automatically attempt to clean-up and re-install broken applications for users. Developers or admins do not need to do anything to enable this new behavior.

API-level Improvements

There are several API-level improvements included in this release, described below.

TLS Version now matches Windows

Network security is increasingly important, particularly for HTTPS. We’ve had requests for .NET to match the Windows defaults for TLS version. This makes machines easier to manage. You opt into this behavior by targeting .NET Framework 4.7.

HttpClient, HttpWebRequest and WebClient clients all implement this behavior.

For WCF, MessageSecurity and TransportSecurity classes were also updated to support TLS 1.1 and 1.2. We’ve heard requests for these classes to also match OS defaults. Please tell us if you would like that behavior.

More reliable Azure SQL Database Connections

TCP is now the default protocol to connect to Azure SQL Database. This change significantly improves connection reliability.

Cryptography

The .NET Framework 4.7 has enhanced the functionality available with Elliptic Curve Cryptography (ECC). ImportParameters(ECParameters) methods were added to the ECDsa and ECDiffieHellman classes to allow for an object to represent an already-established key. An ExportParameters(bool) method was also added for exporting the key using explicit curve parameters.

The .NET Framework 4.7 also adds support for additional curves (including the Brainpool curve suite), and has added predefined definitions for ease-of-creation via the new ECDsa.Create(ECCurve) and ECDiffieHellman.Create(ECCurve) factory methods.

This functionality is provided by system libraries, and so some of the new features will only work on Windows 10.

You can see an example of .NET Framework 4.7 Crypography improvements to try out the changes yourself.

Building .NET Framework 4.7 apps with Visual Studio 2017

You can start building .NET Framework 4.7 apps once you have the Windows 10 Creators Update and the Visual Studio 2017 update installed. You need to select the .NET Framework 4.7 development tools as part of updating Visual Studio 2017, as you can see highlighted in the example below.

vs2017-dotnet47-install

Windows Version Support

The following Windows versions will be supported (same as .NET Framework 4.6.2):

  • Client: Windows 10 Creators Update (RS2), Windows 10 Anniversary Update (RS1), Windows 8.1, Windows 7 SP1
  • Server: Windows Server 2016, Windows Server 2012 R2, Windows Server 2012, Windows Server 2008 R2 SP1

A .NET Framework 4.7 targeting pack is available on the .NET targeting packs page.

Closing

The improvements in the .NET Framework take advantage of new Windows 10 client features and make general improvements for all Windows versions. Please do tell us what you think of these improvements.

07 Apr 04:54

Azure Functions now has direct integration with Application Insights

by Chris Anderson (Azure)

Today we’re encouraging everyone to go give Azure Functions’ Application Insights integration a try. You can find full instructions and notes on how it works at https://aka.ms/func-ai. Now it takes (nearly) zero effort to add Application Insights to your Azure Functions and immediately unlock a powerful tool for monitoring your applications.

Application Insights is now available for all Functions users on “~1”. If you’re on “beta” now, please switch back to “~1” which has the latest version. If you stay on “beta”, it’s very likely you’ll be broken by something at some point.

A note of caution – Application Insights is only available on our “beta” version of Azure Functions. This means we don’t yet recommend using it for production Applications. We’re in the process of merging into dev right now, which will then lead to a stable (~1) release.

We want as many people to try it in their non-production Function Apps as possible to help us harden it before we release it more broadly, so please give us a hand and try these simple steps below.

Getting Started

It’s fairly simple to get started – there is just two steps.

  1. Create an Application Insights instance.
    1. Application type should be set to General
    2. Grab the instrumentation key
  2. Update your Function App’s settings
    1. Add App Setting – APPINSIGHTS_INSTRUMENTATIONKEY = {Instrumentation Key}

Once you’ve done this, your App should start automatically sending information on your Function App to Application Insights, without any code changes.

Using Application Insights to the fullest

Now that your Function Apps are hooked up to Application Insights, let’s take a quick look at some of the key things you’ll want to try.

Live Stream

If you open your Application Insights resource in the portal, you should see the option for “Live Metrics Stream” in the menu. Click on it and you’ll see a near-live view of what’s coming from your Function App. For executions, it has info on #/second, average duration, and failures/second. It also has information on resource consumption. You can pivot all of these by the “instance” your functions are on; providing you insight on whether a specific instance might be having an issue or all of your Functions.

Live stream graphs

Analytics

The analytics portal provides you the ability to write custom queries against your data. This is one of the most powerful tools in your tool box. Currently, the following tables are full of data from the Functions runtime:

  • Requests – one of these is logged for each execution
  • Exceptions – tracks any exceptions thrown by the runtime
  • Traces – any traces written to context.log or ILogger show up here
  • PerformanceMetrics – Auto collected info about the performance of the servers the functions are running on
  • CustomEvents – Custom events from your functions and anything that the host sees that may or may not be tied to a specific request
  • CustomMetrics – Custom metrics from your functions and general performance and throughput info on your Functions. This is very helpful for high throughput scenarios where you might not capture every request message to save costs, but you still want a full picture of your throughput/etc. as the host will attempt to aggregate these client side, before sending to Application Insights

The other tables are from availability tests and client/browser telemetry, which you can also add. The only thing that’s currently missing is dependencies. There is also more metrics/events we’ll add over the course of the preview (based off your generous feedback on what you need to see).

Example:

This will show us the median, p95, and p99 over the last 30 minutes graphed in a timeplot.

While you can copy+paste this query, I’d recommend trying to type it out yourself to get a sense of the amazing intellisense features that the editor has. You can learn about all the language features with some amazing examples from the Analytics reference page.

You can also pin these graphs to your dashboard, which makes for a really powerful tool for having a way to know how your application is behaving at a glance.

Highlighting the pin to dashboard

Alerts

While it’s great that I can see what’s happening and what happened, what’s even better is being told what’s happening. That’s where alerts come into play. From the main Application Insights blade, you can click on the alerts section and define alerts based on a variety of metrics. For example, you could have an alert fire when you’ve had more than 5 errors in 5 minutes, which sends you an email. You can then create another one which detects more than 50 errors in 5 minutes, and triggers a Logic App to send you a text message or PagerDuty alert.

Next steps

We’ll be working hard to get Application Insights ready for production workloads. We’re also listening for any feedback you have. Please file it on our GitHub. We’ll be adding some new features like better sampling controls and automatic dependency tracking soon. We hope you’ll give it a try and start to gain more insight into how your Functions are behaving. You can read more about how it works at https://aka.ms/func-ai

06 Apr 19:14

JWT Validation and Authorization in ASP.NET Core

by Jeffrey T. Fritz

This post was written and submitted by Michael Rousos

In several previous posts, I discussed a customer scenario I ran into recently that required issuing bearer tokens from an ASP.NET Core authentication server and then validating those tokens in a separate ASP.NET Core web service which may not have access to the authentication server. The previous posts covered how to setup an authentication server for issuing bearer tokens in ASP.NET Core using libraries like OpenIddict or IdentityServer4. In this post, I’m going to cover the other end of token use on ASP.NET Core – how to validate JWT tokens and use them to authenticate users.

Although this post focuses on .NET Core scenarios, there are also many options for using and validating bearer tokens in the .NET Framework, including the code shown here (which works on both .NET Core and the .NET Framework) and Azure Active Directory packages like Microsoft.Owin.Security.ActiveDirectory, which are covered in detail in Azure documentation.

JWT Authentication

The good news is that authenticating with JWT tokens in ASP.NET Core is straightforward. Middleware exists in the Microsoft.AspNetCore.Authentication.JwtBearer package that does most of the work for us!

To test this out, let’s create a new ASP.NET Core web API project. Unlike the web app in my previous post, you don’t need to add any authentication to this web app when creating the project. No identity or user information is managed by the app directly. Instead, it will get all the user information it needs directly from the JWT token that authenticates a caller.

Once the web API is created, decorate some of its actions (like the default Values controller) with [Authorize] attributes. This will cause ASP.NET Core to only allow calls to the attributed APIs if the user is authenticated and logged in.

To actually support JWT bearer authentication as a means of proving identity, all that’s needed is a call to the UseJwtBearerAuthentication extension method (from the Microsoft.AspNetCore.Authentication.JwtBearer package) in the app’s Startup.Configure method. Because ASP.NET Core middleware executes in the order it is added in Startup, it’s important that the UseJwtBearerAuthentication call comes before UseMvc.

UseJwtBearerAuthentication takes a JwtBearerOptions parameter which specifies how to handle incoming tokens. A typical, simple use of UseJwtBearerAuthentication might look like this:

app.UseJwtBearerAuthentication(new JwtBearerOptions()
{
    Audience = "http://localhost:5001/", 
    Authority = "http://localhost:5000/", 
    AutomaticAuthenticate = true
});

The parameters in such a usage are:

  • Audience represents the intended recipient of the incoming token or the resource that the token grants access to. If the value specified in this parameter doesn’t match the aud parameter in the token, the token will be rejected because it was meant to be used for accessing a different resource. Note that different security token providers have different behaviors regarding what is used as the ‘aud’ claim (some use the URI of a resource a user wants to access, others use scope names). Be sure to use an audience that makes sense given the tokens you plan to accept.
  • Authority is the address of the token-issuing authentication server. The JWT bearer authentication middleware will use this URI to find and retrieve the public key that can be used to validate the token’s signature. It will also confirm that the iss parameter in the token matches this URI.
  • AutomaticAuthenticate is a boolean value indicating whether or not the user defined by the token should be automatically logged in or not.
  • RequireHttpsMetadata is not used in the code snippet above, but is useful for testing purposes. In real-world deployments, JWT bearer tokens should always be passed only over HTTPS.

The scenario I worked on with a customer recently, though, was a little different than this typical JWT scenario. The customer wanted to be able to validate tokens without access to the issuing server. Instead, they wanted to use a public key that was already present locally to validate incoming tokens. Fortunately, UseJWTBearerAuthentication supports this use-case. It just requires a few adjustments to the parameters passed in.

  1. First, the Authority property should not be set on the JwtBearerOptions. If it’s set, the middleware assumes that it can go to that URI to get token validation information. In this scenario, the authority URI may not be available.
  2. A new property (TokenValidationParameters) must be set on the JwtBearerOptions. This object allows the caller to specify more advanced options for how JWT tokens will be validated.

There are a number of interesting properties that can be set in a TokenValidationParameters object, but the ones that matter for this scenario are shown in this updated version of the previous code snippet:

var tokenValidationParameters = new TokenValidationParameters
{
    ValidateIssuerSigningKey = true,
    ValidateIssuer = true,
    ValidIssuer = "http://localhost:5000/",
    IssuerSigningKey = new X509SecurityKey(new X509Certificate2(certLocation)),
};

app.UseJwtBearerAuthentication(new JwtBearerOptions()
{
    Audience = "http://localhost:5001/", 
    AutomaticAuthenticate = true,
    TokenValidationParameters = tokenValidationParameters
});
The ValidateIssuerSigningKey and ValdiateIssuer properties indicate that the token’s signature should be validated and that the key’s property indicating it’s issuer must match an expected value. This is an alternate way to make sure the issuer is validated since we’re not using an Authority parameter in our JwtBearerOptions (which would have implicitly checked that the JWT’s issuer matched the authority). Instead, the JWT’s issuer is matched against custom values that are provided by the ValidIssuer or ValidIssuers properties of the TokenValidationParameters object.The IssuerSigningKey is the public key used for validating incoming JWT tokens. By specifying a key here, the token can be validated without any need for the issuing server. What is needed, instead, is the location of the public key. The certLocation parameter in the sample above is a string pointing to a .cer certificate file containing the public key corresponding to the private key used by the issuing authentication server. Of course, this certificate could just as easily (and more likely) come from a certificate store instead of a file.

In my previous posts on the topic of issuing authentication tokens with ASP.NET Core, it was necessary to generate a certificate to use for token signing. As part of that process, a .cer file was generated which contained the public (but not private) key of the certificate. That certificate is what needs to be made available to apps (like this sample) that will be consuming the generated tokens.

With UseJwtBearerAuthentication called in Startup.Configure, our web app should now respect identities sent as JWT bearer tokens in a request’s Authorization header.

Authorizing with Custom Values from JWT

To make the web app consuming tokens a little more interesting, we can also add some custom authorization that only allows access to APIs depending on specific claims in the JWT bearer token.

Role-based Authorization

Authorizing based on roles is available out-of-the-box with ASP.NET Identity. As long as the bearer token used for authentication contains a roles element, ASP.NET Core’s JWT bearer authentication middleware will use that data to populate roles for the user.

So, a roles-based authorization attribute (like [Authorize(Roles = "Manager,Administrator")] to limit access to managers and admins) can be added to APIs and work immediately.

Custom Authorization Policies

Custom authorization in ASP.NET Core is done through custom authorization requirements and handlers. ASP.NET Core documentation has an excellent write-up on how to use requirements and handlers to customize authorization. For a more in-depth look at ASP.NET Core authorization, check out this ASP.NET Authorization Workshop.

The important thing to know when working with JWT tokens is that in your AuthorizationHandler‘s HandleRequirementAsync method, all the elements from the incoming token are available as claims on the AuthorizationHandlerContext.User. So, to validate that a custom claim is present from the JWT, you might confirm that the element exists in the JWT with a call to context.User.HasClaim and then confirm that the claim is valid by checking its value.

Again, details on custom authorization policies can be found in ASP.NET Core documentation, but here’s a code snippet demonstrating claim validation in an AuthorizationHandler that authorizes users based on the (admittedly strange) requirement that their office number claim be lower than some specified value. Notice that it’s necessary to parse the office number claim’s value from a string since (as mentioned in my previous post), ASP.NET Identity stores all claim values as strings.

// A handler that can determine whether a MaximumOfficeNumberRequirement is satisfied
internal class MaximumOfficeNumberAuthorizationHandler : AuthorizationHandler<MaximumOfficeNumberRequirement>
{
    protected override Task HandleRequirementAsync(AuthorizationHandlerContext context, MaximumOfficeNumberRequirement requirement)
    {
        // Bail out if the office number claim isn't present
        if (!context.User.HasClaim(c => c.Issuer == "http://localhost:5000/" && c.Type == "office"))
        {
            return Task.CompletedTask;
        }

		// Bail out if we can't read an int from the 'office' claim
        int officeNumber;
        if (!int.TryParse(context.User.FindFirst(c => c.Issuer == "http://localhost:5000/" && c.Type == "office").Value, out officeNumber))
        {
            return Task.CompletedTask;
        }

        // Finally, validate that the office number from the claim is not greater
        // than the requirement's maximum
        if (officeNumber <= requirement.MaximumOfficeNumber)
        {
            // Mark the requirement as satisfied
            context.Succeed(requirement);
        }

        return Task.CompletedTask;
    }
}

// A custom authorization requirement which requires office number to be below a certain value
internal class MaximumOfficeNumberRequirement : IAuthorizationRequirement
{
    public MaximumOfficeNumberRequirement(int officeNumber)
    {
        MaximumOfficeNumber = officeNumber;
    }

    public int MaximumOfficeNumber { get; private set; }
}

This authorization requirement can be registered in Startup.ConfigureServices with a call to AddAuthorization to add a requirement that an office number not exceed a particular value (200, in this example), and by adding the handler with a call to AddSingleton:

// Add custom authorization handlers
services.AddAuthorization(options =>
{
    options.AddPolicy("OfficeNumberUnder200", policy => policy.Requirements.Add(new MaximumOfficeNumberRequirement(200)));
});

services.AddSingleton<IAuthorizationHandler, MaximumOfficeNumberAuthorizationHandler>();

Finally, this custom authorization policy can protect APIs by decorating actions (or controllers) with appropriate Authorize attributes with their policy argument set to the name used when defining the custom authorization requirement in startup.cs:

[Authorize(Policy = "OfficeNumberUnder200")]

Testing it All Together

Now that we have a simple web API that can authenticate and authorize based on tokens, we can try out JWT bearer token authentication in ASP.NET Core end-to-end.

The first step is to login with the authentication server we created in my previous post. Once that’s done, copy the token out of the server’s response.

Now, shut down the authentication server just to be sure that our web API can authenticate without it being online.

Then, launch our test web API and using a tool like Postman or Fiddler, create a request to the web API. Initially, the request should fail with a 401 error because the APIs are protected with an [Authorize] attribute. To make the calls work, add an Authorization header with the value “bearer X” where “X” is the JWT bearer token returned from the authentication server. As long as the token hasn’t expired, its audience and authority match the expected values for this web API, and the user indicated by the token satisfies any custom authorization policies on the action called, a valid response should be served from our web API.

Here are a sample request and response from testing out the sample created in this post:

Request:

GET /api/values/1 HTTP/1.1
Host: localhost:5001
Authorization: bearer eyJhbGciOiJSUzI1NiIsImtpZCI6IkU1N0RBRTRBMzU5NDhGODhBQTg2NThFQkExMUZFOUIxMkI5Qzk5NjIiLCJ0eXAiOiJKV1QifQ.eyJ1bmlxdWVfbmFtZSI6IkJvYkBDb250b3NvLmNvbSIsIkFzcE5ldC5JZGVudGl0eS5TZWN1cml0eVN0YW1wIjoiM2M4OWIzZjYtNzE5Ni00NWM2LWE4ZWYtZjlmMzQyN2QxMGYyIiwib2ZmaWNlIjoiMjAiLCJqdGkiOiI0NTZjMzc4Ny00MDQwLTQ2NTMtODYxZi02MWJiM2FkZTdlOTUiLCJ1c2FnZSI6ImFjY2Vzc190b2tlbiIsInNjb3BlIjpbImVtYWlsIiwicHJvZmlsZSIsInJvbGVzIl0sInN1YiI6IjExODBhZjQ4LWU1M2ItNGFhNC1hZmZlLWNmZTZkMjU4YWU2MiIsImF1ZCI6Imh0dHA6Ly9sb2NhbGhvc3Q6NTAwMS8iLCJuYmYiOjE0Nzc1MDkyNTQsImV4cCI6MTQ3NzUxMTA1NCwiaWF0IjoxNDc3NTA5MjU0LCJpc3MiOiJodHRwOi8vbG9jYWxob3N0OjUwMDAvIn0.Lmx6A3jhwoyZ8KAIkjriwHIOAYkgXYOf1zBbPbFeIiU2b-2-nxlwAf_yMFx3b1Ouh0Bp7UaPXsPZ9g2S0JLkKD4ukUa1qW6CzIDJHEfe4qwhQSR7xQn5luxSEfLyT_LENVCvOGfdw0VmsUO6XT4wjhBNEArFKMNiqOzBnSnlvX_1VMx1Tdm4AV5iHM9YzmLDMT65_fBeiekxQNPKcXkv3z5tchcu_nVEr1srAk6HpRDLmkbYc6h4S4zo4aPcLeljFrCLpZP-IEikXkKIGD1oohvp2dpXyS_WFby-dl8YQUHTBFHqRHik2wbqTA_gabIeQy-Kon9aheVxyf8x6h2_FA

Response:

HTTP/1.1 200 OK
Date: Thu, 15 Sep 2016 21:53:10 GMT
Transfer-Encoding: chunked
Content-Type: text/plain; charset=utf-8
Server: Kestrel

value

Conclusion

As shown here, authenticating using JWT bearer tokens is straightforward in ASP.NET Core, even in less common scenarios (such as the authentication server not being available). What’s more, ASP.NET Core’s flexible authorization policy makes it easy to have fine-grained control over access to APIs. Combined with my previous posts on issuing bearer tokens, you should have a good overview of how to use this technology for authentication in ASP.NET Core web apps.

Resources

05 Apr 19:02

Real-time machine learning on globally-distributed data with Apache Spark and DocumentDB

by Denny Lee

At the Strata + Hadoop World 2017 Conference in San Jose, we have announced the Spark to DocumentDB Connector. It enables real-time data science, machine learning, and exploration over globally distributed data in Azure DocumentDB. Connecting Apache Spark to Azure DocumentDB accelerates our customer’s ability to solve fast-moving data science problems, where data can be quickly persisted and queried using DocumentDB. The Spark to DocumentDB connector efficiently exploits the native DocumentDB managed indexes and enables updateable columns when performing analytics, push-down predicate filtering against fast-changing globally-distributed data, ranging from IoT, data science, and analytics scenarios. The Spark to DocumentDB connector uses the Azure DocumentDB Java SDK. You can get started today and download the Spark connector from GitHub!

What is DocumentDB?

Azure DocumentDB is our globally distributed database service designed to enable developers to build planet scale applications. DocumentDB allows you to elastically scale both, throughput and storage across any number of geographical regions. The service offers guaranteed low latency at P99, 99.99% high availability, predictable throughput, and multiple well-defined consistency models, all backed by comprehensive SLAs. By virtue of its schema-agnostic and write optimized database engine, by default DocumentDB is capable of automatically indexing all the data it ingests and serve SQL, MongoDB, and JavaScript language-integrated queries in a scale-independent manner. As a cloud service, DocumentDB is carefully engineered with multi-tenancy and global distribution from the ground up.
These unique benefits make DocumentDB a great fit for both operational as well as analytical workloads for applications including web, mobile, personalization, gaming, IoT, and many other that need seamless scale and global replication.

What are the benefits of using DocumentDB for machine learning and data science?

DocumentDB is truly schema-free. By virtue of its commitment to the JSON data model directly within the database engine, it provides automatic indexing of JSON documents without requiring explicit schema or creation of secondary indexes. DocumentDB supports querying JSON documents using well-familiar SQL language. DocumentDB query is rooted in JavaScript's type system, expression evaluation, and function invocation. This, in turn, provides a natural programming model for relational projections, hierarchical navigation across JSON documents, self joins, spatial queries, and invocation of user defined functions (UDFs) written entirely in JavaScript, among other features. We have now expanded the SQL grammar to include aggregations, thus enabling globally-distributed aggs in addition to these capabilities.

Apache Spark

Figure 1: With Spark Connector for DocumentDB, data is parallelized between the Spark worker nodes and DocumentDB data partitions

Distributed aggregations and advanced analytics

While Azure DocumentDB has aggregations (SUM, MIN, MAX, COUNT, SUM and working on GROUP BY, DISTINCT, etc.) as noted in Planet scale aggregates with Azure DocumentDB, connecting Apache Spark to DocumentDB allows you to easily and quickly perform an even larger variety of distributed aggregations by leveraging Apache Spark. For example, below is a screenshot of calculating a distributed MEDIAN calculation using Apache Spark's PERCENTILE_APPROX function via Spark SQL.

select destination, percentile_approx(delay, 0.5) as median_delay
from df
where delay < 0
group by destination
order by percentile_approx(delay, 0.5)

Figure 2

Figure 2: Area visualization for the above distributed median calculation via Jupyter notebook service on Spark on Azure HDInsight.

Push-down predicate filtering

As noted in the following animated gif, the queries from Apache Spark will push down predicated to Azure DocumentDB and take advantage that DocumentDB indexes every attribute by default. Furthermore, by pushing computation close to the where the data lives, we can do processing in-situ, and reduce the amount of data that needs to be moved. At global scale, this results in tremendous performance speedups for analytical queries.

Figure 3

For example, if you only want to ask for the flights departing from Seattle (SEA), the Spark to DocumentDB connector will:

  • Send the query to Azure DocumentDB.
  • As all attributes within Azure DocumentDB are automatically indexed, only the flights pertaining to Seattle will be returned to the Spark worker nodes quickly.

This way as you perform your analytics, data science, or ML work, you will only transfer the data you need.

Blazing fast IoT scenarios

Azure DocumentDB is designed for high-throughput, low-latency IoT environments. The animated GIF below refers to a flights scenario.

Figure 4

Together, you can:

  • Handle high throughput of concurrent alerts (e.g., weather, flight information, global safety alerts, etc.)
  • Send this information downstream for device notifications, RESTful services, etc. (e.g., alert on your phone of an impending flight delay) including the use of change feed
  • At the same time, as you are building up ML models against your data, you can also make sense of the latest information

Updateable columns

Related to the previously noted blazing fast IoT scenarios, let's dive into updateable columns:

Figure 5

As the new piece of information comes in (e.g. the flight delay has changed from 5 min to 30 min), you want to be able to quickly re-run your machine learning (ML) models to reflect this newest information. For example, you can predict the impact of the 30min for all the downstream flights. This event can be quickly initiated via the Azure DocumentDB Change Feed to refresh your ML models.

Next steps

In this blog post, we’ve looked at the new Spark to DocumentDB Connector. The Spark with DocumentDB enables both ad-hoc, interactive queries on big data, as well as advanced analytics, data science, machine learning, and artificial intelligence. DocumentDB can be used for capturing data that is collected incrementally from various sources across the globe. This includes social analytics, time series, game or application telemetry, retail catalogs, up-to-date trends and counters, and audit log systems. Spark can then be used for running advanced analytics and AI algorithms at scale on top of the data coming from DocumentDB.

Companies and developers can employ this scenario in online shopping recommendations, spam classifiers for real time communication applications, predictive analytics for personalization, and fraud detection models for mobile applications that need to make instant decisions to accept or reject a payment. Finally, internet of things scenarios fit in here as well, with the obvious difference that the data represents the actions of machines instead of people.

To get started running queries, create a new DocumentDB account from the Azure Portal and work with the project in our Azure-DocumentDB-Spark GitHub repo. Complete instructions are available in the Connecting Apache Spark to Azure DocumentDB article.

Stay up-to-date on the latest DocumentDB news and features by following us on Twitter @DocumentDB or reach out to us on the developer forums on Stack Overflow.

02 Apr 05:08

One Line of Code that Compromises Your Server

Forgive the click-bait title, but Jack Singleton really is talking about how one line in a web-application configuration can hand the keys of a server out to an attacker. The line of code in question sets the key for signing and encrypting cookies. In this first installment, Jack shows how it's surprisingly easy to crack a poorly chosen key for this purpose, which is the first step that will lead him to a shell on the server.

more…

02 Apr 04:57

VS Code Extension with Azure Function Intellisense

by John Papa
VS Code Extension with Azure Function Intellisense

Lately, I've been hooked on Azure Functions, which are incredibly easy to get started to create some of your own APIs.

One thing I love about editors is their ability to look up language syntax and JSON schemas to provide features like intellisense. I recently posted about how to add JSON schemas to a VS Code settings.json file to add intellisense for Azure Functions. After a short chat with my colleagues, I decided to create an extension that makes it even easier.

You can find the extension Azure Functions Tools here in the marketplace.

Cleanup

If you followed my previous post, remove the JSON schema setting from your settings.json file

Installation Steps

  1. Launch VS Code Quick Open ⌘+P
  2. Paste this command
    ext install azure-functions-tools
  3. Press the enter key

VS Code Extension with Azure Function Intellisense

Azure Functions can be configured a few ways. One of the most flexible is to use JSON files. This extension handles providing intellisense for the key configuration files in Azure Functions: function.json and host.json.

VS Code Extension with Azure Function Intellisense

Shayne Boyer and I will be adding more features over time. You can discuss future features on our GitHub repo.

I'll follow up with more posts on how to create and configure Azure Functions. In the meantime, check out this post on using the Azure CLI with Azure Functions, by Shayne Boyer

31 Mar 05:08

Azure Web Application Firewall (WAF) Generally Available

by Yousef Khalidi

Last September at Ignite we announced plans for better web application security by adding Web Application Firewall to our layer 7 Azure Application Gateway service. We are now announcing the General Availability of Web Application Firewall in all Azure public regions.

Web applications are increasingly targets of malicious attacks that exploit common known vulnerabilities, such as SQL injection and cross site scripting attacks. Preventing such exploits in the application requires rigorous maintenance, patching, and monitoring at multiple layers of the application topology. A centralized web application firewall (WAF) protects against web attacks and simplifies security management without requiring any application changes. Application and compliance administrators get better assurance against threats and intrusions.

Azure Application Gateway is our Application Delivery Controller (ADC) layer 7 network service offering capabilities including SSL termination, true round robin load distribution, cookie-based session affinity, multi-site hosting, and URL path based routing. Application Gateway provides SSL policy control and end to end SSL encryption to provide better application security hardening. These capabilities allow backend applications to focus on core business logic while leaving costly encryption/decryption, SSL policy, and load distribution to the Application Gateway. Web Application Firewall integrated with Application Gateway’s core offerings further strengthens the security portfolio and posture of applications protecting them from many of the most common web vulnerabilities, as identified by Open Web Application Security Project (OWASP) top 10 vulnerabilities. Application Gateway WAF comes pre-configured with OWASP ModSecurity Core Rule Set (3.0 or 2.2.9), which provides baseline security against many of these vulnerabilities. With simple configuration and management, Application Gateway WAF provides rich logging capabilities and selective rule enablement.

Benefits

Following are the core benefits that Web Application Firewall provides:

Protection

  • Protect your application from web vulnerabilities and attacks without modifying backend code. WAF addresses various attack categories including:
    • SQL injection
    • Cross site scripting
    • Common attacks such as command injection, HTTP request smuggling, HTTP response splitting, and remote file inclusion attack
    • HTTP protocol violations
    • HTTP protocol anomalies
    • Bots, crawlers, and scanners
    • Common application misconfigurations (e.g. Apache, IIS, etc.)
    • HTTP Denial of Service
  • Protect multiple web applications simultaneously. Application Gateway supports hosting up to 20 websites behind a single gateway that can all be protected against web attacks.

WAF - App Gateway

Ease of use

  • Application Gateway WAF is simple to configure, deploy, and manage via the Azure Portal and REST APIs. PowerShell and CLI will soon be available.
  • Administrators can centrally manage WAF rules.
  • Existing Application Gateways can be simply upgraded to include WAF. WAF retains all standard Application Gateway features in addition to Web Application Firewall.

Monitoring

  • Application Gateway WAF provides the ability to monitor web applications against attacks using a real-time WAF log that is integrated with Azure Monitor to track WAF alerts and easily monitor trends. The JSON formatted log goes directly to the customer’s storage account. Customers have full control over these logs and can apply their own retention policies. Customers can also ingest these logs into their own analytics system. WAF logs are also integrated with Operations Management Suite (OMS) so customers can use OMS log analytics to execute sophisticated fine grained queries.

WAF - Access Log

  • Application Gateway WAF will shortly be integrated with Azure Security Center to provide a centralized security view of all your Azure resources. Azure Security Center scans your subscriptions for vulnerabilities and recommends mitigation steps for detected issues. One such vulnerability is the presence of web applications that are not protected by a WAF.

WAF - 1

WAF - 2

Customization

  • Application Gateway WAF can be run in detection or prevention mode. A common use case is for administrators to run in detection mode to observe traffic for malicious patterns. Once potential exploits are detected, turning to prevention mode blocks suspicious incoming traffic.
  • Customers can customize WAF RuleGroups to enable/disable broad categories or sub-categories of attacks. Therefore, an administrator can enable or disable RuleGroups for SQL Injection or Cross Site Scripting (XSS). Customers can also enable/disable specific rules within a RuleGroup. For example, the Protocol Anomaly RuleGroup is a collection of many rules that can be selectively enabled/disabled.

WAF - 3

Embracing Open Source

Application Gateway WAF uses one of the most popular WAF deployments –  OWASP ModSecurity Core Rule Set to protect against the most common web vulnerabilities. These rules, which conform to rigorous standards, are managed and maintained by the open source community. Customers can choose between rule set CRS 2.2.9 and CRS 3.0. Since CRS 3.0 offers a dramatic reduction in false positives, we recommend using CRS 3.0.

Summary and next steps

General availability of Web Application Firewall is an important milestone in our Application Gateway ADC security offering. We will continue to enhance the WAF feature set based on your feedback. You can try Application Gateway Web Application Firewall today using portal or ARM templates. Further information and detailed documentation links are provided below.

31 Mar 05:05

Configuring Azure Functions: Intellisense via JSON Schemas

by John Papa
Configuring Azure Functions: Intellisense via JSON Schemas

I build a lot of Angular apps. They all need data, and often I find myself building a Node server to host my API calls and serve my data. There is a lot of ceremony in setting up a web API, which is one reason why I have been interested in serverless functions. Enter Azure Functions, which are incredibly easy to get started to create some of your own APIs.

I'll be posting more about Angular apps and Azure Functions and my experiences with them, including some quickstarts.

Configuring

Azure Functions can be configured a few ways. One of the most flexible is to use JSON files.

When I set up an Azure Function, there are two key configuration files I often use: function.json and host.json. The entire Azure Function app service has one host.json file to configure the app. Every end-point function has its own configuration, defined in a function.json file. Pretty straightforward overall.

Now, I love JSON. It makes configuring the functions so easy ... except when I have to remember every setting. Ugh. This is where JSON schemas make a huge and positive difference in the development experience.

Configuring Azure Functions: Intellisense via JSON Schemas

I use VS Code, which has an easy way to provide intellisense for JSON files. Fortunately, each of the Azure Functions JSON files has a defined schema in the popular GitHub repo https://github.com/SchemaStore/schemastore. This makes it easy to reference the schema from most modern code editors.

Identifying the JSON Schemas to VS Code

Add this json.schemas property to your settings.json file in VS Code.

"json.schemas": [
  {
    "fileMatch": [
      "/function.json"
    ],
    "url": "http://json.schemastore.org/function"
  },
  {
    "fileMatch": [
      "/host.json"
    ],
    "url": "http://json.schemastore.org/host"
  }
],

Once added, go back to a function.json file and we can see we get some help in the editor! This makes it easy to focus on writing the function code, and less on remembering every JSON property and its domain of values.

Configuring Azure Functions: Intellisense via JSON Schemas

I'll follow up with more posts on how to create and configure Azure Functions. In the meantime, check out this post on using the Azure CLI with Azure Functions, by Shayne Boyer

31 Mar 04:53

Announcing Azure Functions OpenAPI (Swagger) support preview

by Alex Karcher

Today we are announcing preview support for editing and hosting OpenAPI 2.0 (Swagger) metadata in Azure Functions. API authoring is a popular application of Functions, and Swagger metadata allows a whole network of Swagger compliant software to easily integrate with those APIs.

OpenAPI definition page

We are adding a Swagger template generator to create a quickstart Swagger file from the existing metadata in your HTTP Trigger Functions. You just fill in the operation objects for each of your HTTP verbs and you’re off!

We host a version of the swagger editor to provide rich inline editing of your Swagger file from within the Function UI. Once you save your Swagger file we’ll host it for you at a url in your Function App’s domain.

Head on over to the documentation to learn more

Integrations

These features integrate with the existing Azure App Service API definition support to allow you to consume your API on a variety of 1st party services, including PowerApps, Flow, and Logic Apps, as well as the ability to generate SDKs for your API in Visual Studio.

Creating your first Open API definition

Check out our getting started guide for in-depth instructions

  1. To create your first OpenAPI (Swagger) definition you must first have a function App with at least one HTTP Trigger Function. Instructions.
  2. Next head over to the “API Definition (preview)” tab in the lower left hand corner of your Function App.
  3. Toggle your Swagger source to “Internal.” This will enable hosting and inline editing of an OpenAPI definition for this Function App.
  4. Click “Load Generated API Definition” to populate the Swagger editor with a quickstart OpenAPI definition.
    1. This definition uses your function.json, represented as the settings in the “Integrate tab,” for each Function to populate the definition.
  5. Add an operation object for the POST operation of your function with the expected type of input.
    1. For the HTTP Trigger sample code you can use the following Operation object:
  6. Remove the entries under Paths/api/<yourFunctionName> for every verb except POST. (get, delete, head, etc)
    1. For the default HTTP Trigger, all HTTP verbs are allowed, so our quickstart will have a blank entry for all 8 possible verbs. We want our definition to only contain the available functionality of our API.
  7. Test your Swagger definition
    1. In the right-hand pane of the swagger editor add your API key as Authentication info, click “try this operation,” and enter a name to test your Swagger.

Provide Preview Feedback

Try out Swagger support in Functions and let us know how you like it! We are continuing to develop this set of features and would love to know what matters most to you.

If you run into any problems, let us know on the forums, ask a question on StackOverFlow, or file an issue on GitHub. If you have any additional features you would like to see, please let us know on Uservoice.

30 Mar 17:53

Smart Home : Ikea s’oriente vers l’éclairage intelligent

by Geoffray

Ikea, le géant suédois du meuble en kit, s’oriente vers la maison connecté en dévoilant une gamme de produits d’éclairage intelligent. Baptisés Trådfri, qui signifie « sans fil », les objets connectés utiliseront la norme ZigBee, comme pour les ampoules connectées Philips Hue.

Ikea lancera prochainement en Suède une nouvelle gamme de produits luminaires connectés. L’entreprise suédoise s’apprête à casser les prix sur ce marché qui reste l’un  des plus populaire du Smart Home.

Cette nouvelle gamme d’objets connectés, nommée « Trådfri »qui signifie « sans fil » en suédois – utilisera une passerelle ZigBee reliée à internet via Ethernet, permettant de créer facilement un réseau local pour piloter les ampoules de la maison.

L’éclairage intelligent chez Ikea

Grâce à une application mobile, l’utilisateur pourra gérer la luminosité de son domicile sur place ou à distance, et en modifier l’intensité ou la tonalité lumineuse.

Jusque là, rien de nouveau puisque c’est déjà la promesse que remplie (plutôt bien) la gamme Hue de Philips.

Mais Ikea compte surtout se distinguer au niveau des prix : le kit comprenant 2 ampoules, le hub et une télécommande sera proposé à 749 couronnes soit 79€ environ.

La passerelle seule coûtera 25€ et 15€ pour la télécommande. Les ampoules supplémentaire seront vendues 20€ à l’unité. Des prix agressifs !

Disponibilité

D’autre part, Ikea proposera aussi des meubles avec LED intégrés dont la lumière est aussi contrôlable à distance.

L’ensemble de ces nouveaux objets connectés devrait être disponible dès demain en Suède. La disponibilité pour la France est encore inconnue, mais il est fort probable que la gamme Trådfri arrivera chez nous dans quelques mois.

Via

27 Mar 16:56

Anti-Corruption Protests Across Russia (28 photos)

On March 26, 2017, thousands of Russians rallied across the country to protest government corruption, in one of the largest opposition demonstrations in years. Demonstrators defied bans by authorities and were arrested by the hundreds. Alexei Navalny, a prominent critic of Russia’s President Putin and Prime Minister Medvedev, called for the protests after posting reports accusing Medvedev of controlling properties far beyond what he could afford on his government salary, including mansions, yachts, and vineyards. Navalny was also arrested, and has now been fined and jailed for 15 days for organizing the rallies. See also “What Russia's Latest Protests Mean for Putin” from the Atlantic’s Julia Ioffe.

Police officers detain a man during an unauthorized anti-corruption rally in central Moscow on March 26, 2017. (Alexander Utkin / AFP / Getty)
26 Mar 21:23

Five Visual Studio 2017 Extensions for Web Developers

by Jeffrey T. Fritz

You’ve downloaded and installed Visual Studio 2017, and it’s a great improvement over previous versions.  Now what?  How can you make your web development experience better?  In this article, we will recommend five Visual Studio extensions that will make your day-to-day tasks easier and even more enjoyable.

Razor Language Service

When you’re building ASP.NET Core applications using the MVC pattern, it would be nice to have some assistance when writing your views in razor templates.  The Razor Language Services extension gives you IntelliSense for .NET expressions, hover tooltips for elements, and syntax highlighting for tag helpers.

Syntax Highlighting and IntelliSense in ASP.NET Core razor files

Syntax Highlighting and IntelliSense in ASP.NET Core razor files

Project File Tools

In older versions of .NET project files, the files were difficult to hand-author.  With the .NET Core project file updates, the syntax and content of the project file has become much simpler and now includes references to NuGet packages.  With the Project File Tools extension, you can get IntelliSense on these new features and on the NuGet packages that you are adding to your project.  The extension will show you both local and remote packages hosted on the NuGet services referenced for your project.

IntelliSense for NuGet packages in csproj files

IntelliSense for NuGet packages in csproj files

EditorConfig Language Service

We introduced a new Code Style feature in Visual Studio 2017 with Kasey and Mads demonstrating how to use it in this launch video:

Kasey showed us how to define some of our own preferences in an .editorconfig file, and the EditorConfig Language Service is the extension that makes writing those files a breeze.

IntelliSense inside of an .EditorConfig file

IntelliSense inside of an .EditorConfig file

Productivity Power Tools

The amazing Productivity Power Tools extension has been updated for Visual Studio 2017 with some new bits that you’re sure to want.  This extension is now a collection of 15 other extensions, making it easier to manage and update the child extensions with new features without having to re-install the entire Productivity Power Tools collection.  Check out some of our favorite capabilities like Peek Help for quickly showing appropriate help pages for an API inside of the editor window.

Peek Help inside of the editor window

Peek Help inside of the editor window

Also included is the Solution Error Visualizer so that you can see indicator in Solution Explorer of exactly where your compiler warnings and errors are.

Solution Explorer showing errors in your project

Solution Explorer showing errors in your project

Web Essentials for Visual Studio 2017

No list of extensions for Visual Studio would be complete without mentioning Web Essentials.  Like the Productivity Power Tools, Web Essentials is now a collection of 25 child extensions that can be updated and maintained separately.  Among the cool features in Web Essentials this time around are:

  • Browser Reload on Save that will work with BrowserLink to force any web browser to reload that is viewing a file that was updated to disk.
  • JavaScript Snippet Pack – a collection of useful code snippets that you can use in the JavaScript editor.

JavaScript Snippet Pack samples

JavaScript Snippet Pack samples

Web Essentials also includes the Razor Language Service and Project File Tools extensions, so you don’t need to install those separately.  Web Essentials will detect if you already have either of those extensions installed and not attempt to reinstall them.

Summary

There are hundreds of extensions available for you to try in the Visual Studio Marketplace.  These are just a selection of some that we have enjoyed and recommend.  Visual Studio 2017 is extensible, so you can write your own extensions to customize the editor as you need.  Let us know what extensions you have built or recommend in the space below.

25 Mar 05:52

Azure App Service (Web, API, Mobile, ASE) & Azure Functions SKU Comparison Matrix

by Cory Fowler (MSFT)

App Service has come a very long way in the nearly 5 years it has been a service in Azure. Along the way, we’ve added a number of features, changed the pricing model, we’ve even gone as far as to make App Service available in an isolated capacity with App Service Environment and with the recent addition of Azure Functions a new type of hosting plan.

With all of these changes it’s become clear to us that we need to provide a clear breakdown as to which features are available in which tiers because that enables you, our beloved customers, to be successful on our platform.

In an attempt to clarify which features are available where, we have created the below matrix. We are posting this to our blog first, as we would like to hear your feedback if this is effective way of relaying this information to you. For Example, should we merge the below matrix with the App Service Plan limits page.

Please leave your feedback in the comments below and we will work on getting a more formal piece of documentation together that will provide you with all of the details you need to get to market in the quickest way possible using Azure App Service.


Features SKU
App Deployment Free Shared Basic Standard Premium ASE ILB ASE App Service Linux Consumption Plan (Functions)
Continuous Delivery    
Continuous Deployment  
Deployment Slots          
Docker (Containers)               1  
Development Tools Free Shared Basic Standard Premium ASE ILB ASE App Service Linux Consumption Plan (Functions)
Clone App            
Kudu 2
PHP Debugging 3      
Site Extensions    
Testing in Production          
Monitoring Free Shared Basic Standard Premium ASE ILB ASE App Service Linux Consumption Plan (Functions)
Log Stream 4  
Process Explorer  
Networking Free Shared Basic Standard Premium ASE ILB ASE App Service Linux Consumption Plan (Functions)
Hybrid Connections    
VNET Integration          
Programming Languages Free Shared Basic Standard Premium ASE ILB ASE App Service Linux Consumption Plan (Functions)
.NET  
.NET Core  
Java   alpha
Node.js
PHP alpha
Python   alpha
Ruby                
Scale Free Shared Basic Standard Premium ASE ILB ASE App Service Linux Consumption Plan (Functions)
Auto-scale        
Integrated Load Balancer  
Traffic Manager         4
Settings Free Shared Basic Standard Premium ASE ILB ASE App Service Linux Consumption Plan (Functions)
64-bit    
Always On        
Session Affinity    
Authentication &Authorization  
Backup/Restore        
Custom Domains  
FTP/FTPS
Local Cache          
MySQL in App 5    
Remote Debugging (.NET)    
Security Scanning      
SSL (IP/SNI)     SNI SSL
Web Sockets 6    

1 Supports a one-time pull model from Docker Hub, Azure Container Registry or a private Docker Registry.

2 Kudu on Linux doesn’t have the same feature set as Kudu on Windows.

3 PHP Debugging is currently only supported on Windows. PHP Debugging for version 7.x is unavailable.

4 Consumption SKU Function App URL needs to be added as an External URL in Traffic Manager.

5 ILB ASE has no public connectivity to the internet. Management actions on ILB ASE must be performed using the Kudu Console.

6 The number of Web Socket ports are limited by the sku, review the App Service Constraints, Service Limits and Quotas.

24 Mar 20:38

Visual Studio 2017 can automatically recommend NuGet packages for unknown types

by Scott Hanselman

There's a great feature in Visual Studio 2015.3 and Visual Studio 2017 that is turned off by default. It does use about ~10 megs of memory but it makes me so happy that I turn it on.

It's under C# | Advanced in Tools Options. Or you can just type "Advanced" in the Quick Launch Bar (via Ctrl+Q if you like) to jump there.

I turn on "Suggest usings for types in NuGet packages" and "Suggest usings for types in reference assemblies."

I turn on "Suggest usings for types in NuGet packages" and "Suggest usings for types in reference assemblies."

For example, if I am typing some code and start referencing a Type that isn't in my project but could be...you know how sometimes you just need a using statement to bring in a namespace? In this Web App, I already have Json.NET so it recommends a using statement to bring it into scope.

Can't find JSON

But in this Console App, I have no packages beyond the defaults. When I start using a type like JObject from a popular NuGet, Visual Studio can offer to install Json.NET for me!

Find and install latest version

Or another example:

XmlDocument

And then I can immediately continue typing with intellisense. If I know what I'm doing, I can bring in something like this without ever using the mouse or leaving the line.

JObject is now usable

Good stuff! 


Sponsor: Check out JetBrains Rider: a new cross-platform .NET IDE. Edit, refactor, test, build and debug ASP.NET, .NET Framework, .NET Core, or Unity applications. Learn more and get access to early builds!


© 2017 Scott Hanselman. All rights reserved.
     
24 Mar 08:18

Battle Dev, un concours de programmation en ligne ouvert à tous

by webmaster@futura-sciences.com (Futura-Sciences)
Le 28 mars prochain, RegionJobs, partenaire de Futura, organise la neuvième édition du concours de programmation online Battle Dev. Les inscriptions sont ouvertes et on dénombre déjà 2.000 participants qui s’affronteront à coup de code C, C++, Java, PHP… À la clé, des récompenses et surtout...
23 Mar 12:39

Azure Resource Manager template reference now available

by Tom FitzMacken

We have published new documentation for creating Azure Resource Manager templates. The documentation includes reference content that presents the JSON syntax and property values you need when adding resources to your templates.

Templates 1If you are new to Resource Manager and templates, see Azure Resource Manager overview for an introduction to the terms and concepts of Azure Resource Manager.

Simplify template creation by copying JSON directly into your template

The template reference documentation helps you understand what resource types are available, and what values to use in your template. It includes the API version number to use for each resource type, and all the valid properties. You simply copy the provided JSON into the resources section of your template, and edit the values for your scenario.

The property tables describe the available values.

Property Values

Find a resource type

You can easily navigate through the available types in the left pane. However, if you know the resource type, you can go directly to it with the following URL format:

https://docs.microsoft.com/azure/templates/{provider-namespace}/{resource-type}

For example, the SQL database reference content is available at:

https://docs.microsoft.com/azure/templates/microsoft.sql/servers/databases

show-navigation (002)

Please give us your feedback

The template reference content represents a new type of documentation for docs.microsoft.com. As you use it to build your templates, let us know how it can be improved. Please provide feedback about your experience.