Shared posts

02 Dec 15:05

Pandas and Python Tips and Tricks for Data Science and Data Analysis

by Zoumana Keita

Pandas and Python Tips and Tricks for Data Science and Data Analysis

Take your efficiency to the next level with these Pandas and Python Tricks!

Photo by Andrew Neel on Unsplash

Motivation

This blog regroups all the Pandas and Python tricks & tips I share on a basis on my LinkedIn page. I have decided to centralize them into a single blog to help you make the most out of your learning process by easily finding what you are looking for.

The content is is divided into two main sections:

  • Pandas tricks & tips are related to only Pandas.
  • Python tricks & tips related to Python.

Pandas tricks & tips

This section provides a list of all the tricks

1. 𝗖𝗿𝗲𝗮𝘁𝗲 𝗮 𝗻𝗲𝘄 𝗰𝗌𝗹𝘂𝗺𝗻 𝗳𝗿𝗌𝗺 𝗺𝘂𝗹𝘁𝗶𝗜𝗹𝗲 𝗰𝗌𝗹𝘂𝗺𝗻𝘀 𝗶𝗻 𝘆𝗌𝘂𝗿 𝗱𝗮𝘁𝗮𝗳𝗿𝗮𝗺𝗲.

Performing simple arithmetic tasks such as creating a new column as the sum of two other columns can be straightforward.

🀔 But, what if you want to implement a more complex function and use it as the logic behind column creation? Here is where things can get a bit challenging.

Guess what


✅ 𝙖𝙥𝙥𝙡𝙮 and 𝙡𝙖𝙢𝙗𝙙𝙖 can help you easily apply whatever logic to your columns using the following format:

𝙙𝙛[𝙣𝙚𝙬_𝙘𝙀𝙡] = 𝙙𝙛.𝙖𝙥𝙥𝙡𝙮(𝙡𝙖𝙢𝙗𝙙𝙖 𝙧𝙀𝙬: 𝙛𝙪𝙣𝙘(𝙧𝙀𝙬), 𝙖𝙭𝙞𝙚=1) 

where:

➡ 𝙙𝙛 is your dataframe.

➡ 𝙧𝙀𝙬 will correspond to each row in your data frame.

➡ 𝙛𝙪𝙣𝙘 is the function you want to apply to your data frame.

➡ 𝙖𝙭𝙞𝙚=1 to apply the function to each row in your data frame.

💡 Below is an illustration.

The `candidate_info` function combines each candidate’s information to create a single description column about that candidate.

Result of Pandas apply and lambda (Image by Author)

2. Convert categorical data into numerical ones

This process mainly can occur in the feature engineering phase. Some of its benefits are:

  • the identification of outliers, invalid, and missing values in the data.
  • reduction of the chance of overfitting by creating more robust models.

➡ Use these two functions from Pandas, depending on your need. Examples are provided in the image below.

1⃣ .𝙘𝙪𝙩() to specifically define your bin edges.

𝙎𝙘𝙚𝙣𝙖𝙧𝙞𝙀
Categorize candidates by expertise with respect to their number of experience, where:

  • Entry level: 0–1 year
  • Mid-level: 2–3 years
  • Senior level: 4–5 years
Result of the .cut function (Image by Author)

2⃣ .𝙊𝙘𝙪𝙩() to divide your data into equal-sized bins.
It uses the underlying percentiles of the distribution of the data, rather than the edges of the bins.

𝙎𝙘𝙚𝙣𝙖𝙧𝙞𝙀: categorize the commute time of the candidates into 𝙜𝙀𝙀𝙙, 𝙖𝙘𝙘𝙚𝙥𝙩𝙖𝙗𝙡𝙚, or 𝙩𝙀𝙀 𝙡𝙀𝙣𝙜.

Result of the .qcut function (Image by Author)

𝙆𝙚𝙚𝙥 𝙞𝙣 𝙢𝙞𝙣𝙙 💡

  • When using .𝙘𝙪𝙩(): a number of bins = number of labels + 1.
  • When using .𝙊𝙘𝙪𝙩(): a number of bins = number of labels.
  • With .𝙘𝙪𝙩(): set 𝙞𝙣𝙘𝙡𝙪𝙙𝙚_𝙡𝙀𝙬𝙚𝙚𝙩=𝙏𝙧𝙪𝙚, otherwise, the lowest value will be converted to NaN.

3. Select rows from a Pandas Dataframe based on column(s) values

➡ use .𝙊𝙪𝙚𝙧𝙮() function by specifying the filter condition.

➡ the filter expression can contain any operators (<, >, ==, !=, etc.)

➡ use the @̷ sign to use a variable in the expression.

Select rows from a Pandas Dataframe based on column(s) values (Image by Author)

4. Deal with zip files

Sometimes it can be efficient to read and write .zip files without extracting them from your local disk. Below is an illustration.

5. Select 𝗮 𝘀𝘂𝗯𝘀𝗲𝘁 𝗌𝗳 𝘆𝗌𝘂𝗿 𝗣𝗮𝗻𝗱𝗮𝘀 𝗱𝗮𝘁𝗮𝗳𝗿𝗮𝗺𝗲 𝘄𝗶𝘁𝗵 𝘀𝗜𝗲𝗰𝗶𝗳𝗶𝗰 𝗰𝗌𝗹𝘂𝗺𝗻 𝘁𝘆𝗜𝗲𝘀

You can use the 𝙚𝙚𝙡𝙚𝙘𝙩_𝙙𝙩𝙮𝙥𝙚𝙚 function. It takes two main parameters: 𝚒𝚗𝚌𝚕𝚞𝚍𝚎 𝚊𝚗𝚍 𝚎𝚡𝚌𝚕𝚞𝚍𝚎.

  • 𝚍𝚏.𝚜𝚎𝚕𝚎𝚌𝚝_𝚍𝚝𝚢𝚙𝚎𝚜(𝚒𝚗𝚌𝚕𝚞𝚍𝚎 = [‘𝚝𝚢𝚙𝚎_𝟷’, ‘𝚝𝚢𝚙𝚎_𝟞’, 
 ‘𝚝𝚢𝚙𝚎_𝚗’]) means I want the subset of my data frame WITH columns of 𝚝𝚢𝚙𝚎_𝟷, 𝚝𝚢𝚙𝚎_𝟞,
, 𝚝𝚢𝚙𝚎_𝚗.
  • 𝚍𝚏.𝚜𝚎𝚕𝚎𝚌𝚝_𝚍𝚝𝚢𝚙𝚎𝚜(𝚎𝚡𝚌𝚕𝚞𝚍𝚎 = [‘𝚝𝚢𝚙𝚎_𝟷’, ‘𝚝𝚢𝚙𝚎_𝟞’, 
 ‘𝚝𝚢𝚙𝚎_𝚗’]) means I want the subset of my data frame WITHOUT columns of 𝚝𝚢𝚙𝚎_𝟷, 𝚝𝚢𝚙𝚎_𝟞,
, 𝚝𝚢𝚙𝚎_𝚗.

✹ Below is an illustration

select_subset_column_types.py
Columns subset selection (Image by Author)

6. Remove comments from Pandas dataframe column

Imagine that I want clean this data (candidates.csv) by removing comments from the application date column. This can be done on the fly while loading your pandas dataframe using the 𝙘𝙀𝙢𝙢𝙚𝙣𝙩 parameter as follow:

➡ 𝚌𝚕𝚎𝚊𝚗_𝚍𝚊𝚝𝚊 = 𝚙𝚍.𝚛𝚎𝚊𝚍_𝚌𝚜𝚟(𝚙𝚊𝚝𝚑_𝚝𝚘_𝚍𝚊𝚝𝚊, 𝙘𝙀𝙢𝙢𝙚𝙣𝙩=’𝚜𝚢𝚖𝚋𝚘𝚕’)

In my case, 𝙘𝙀𝙢𝙢𝙚𝙣𝙩=’#’ but it could be any other character (|, /, etc.) depending on your case. An illustration is the first scenario.

✋🏜 Wait, what if I want to create a new column for those comments and still remove them from the application date column? An illustration is the second scenario.

Remove comments from pandas dataframe (Image by Author)

7. Print Pandas dataframe in Tabular format from consol

❌ No, the application of the 𝚙𝚛𝚒𝚗𝚝() function to a pandas data frame does not always render an output that is easy to read, especially for data frames with multiple columns.

✅ If you want to get a nice console-friendly tabular output
Use the .𝚝𝚘_𝚜𝚝𝚛𝚒𝚗𝚐() function as illustrated below.

8. Highlight data points in Pandas

Applying colors to a pandas data frame can be a good way to emphasize certain data points for quick analysis.

✅ This is where 𝚙𝚊𝚗𝚍𝚊𝚜.𝚜𝚝𝚢𝚕𝚎 module comes in handy. It has many features, but is not limited to the followings:

✹ 𝚍𝚏.𝚜𝚝𝚢𝚕𝚎.𝚑𝚒𝚐𝚑𝚕𝚒𝚐𝚑𝚝_𝚖𝚊𝚡() to assign a color to the maximum value of each column.

✹ 𝚍𝚏.𝚜𝚝𝚢𝚕𝚎.𝚑𝚒𝚐𝚑𝚕𝚒𝚐𝚑𝚝_𝚖in() to assign a color to the minimum value of each column.

✹ 𝚍𝚏.𝚜𝚝𝚢𝚕𝚎.𝚊𝚙𝚙𝚕𝚢(𝚖𝚢_𝚌𝚞𝚜𝚝𝚘𝚖_𝚏𝚞𝚗𝚌𝚝𝚒𝚘𝚗) to apply your custom function to your data frame.

Highlight data points in Pandas (Image by Author)

9. Reduce decimal points in your data

Sometimes, very long decimal values in your data set do not provide significant information and can be painful 🀯 to look at.

So, you might want to convert your data to about 2 to 3 decimal points to facilitate your analysis.

✅ This is something you can perform using the 𝚙𝚊𝚗𝚍𝚊𝚜.𝙳𝚊𝚝𝚊𝙵𝚛𝚊𝚖𝚎.𝚛𝚘𝚞𝚗𝚍() function as illustrated below.

Reduce decimal points in your data (Image by Author)

10. Replace some values in your data frame

You might want to replace some information in your data frame to keep it as up-to-date as possible.

✅ This can be achieved using the Pandas 𝚍𝚊𝚝𝚊𝚏𝚛𝚊𝚖𝚎.𝚛𝚎𝚙𝚕𝚊𝚌𝚎() function as illustrated below.

Replace some values in your data frame (Image by Author)

11. Compare two data frames and get their differences

Sometimes, when comparing two pandas data frames, not only do you want to know if they are equivalent, but also where the difference lies if they are not equivalent.

✅ This is where the .𝚌𝚘𝚖𝚙𝚊𝚛𝚎() function comes in handy.

✹ It generates a data frame showing columns with differences side by side. Its shape is different from (0, 0) only if the two data being compared are the same.

✹ If you want to show values that are equal, set the 𝚔𝚎𝚎𝚙_𝚎𝚚𝚞𝚊𝚕 parameter to 𝚃𝚛𝚞𝚎. Otherwise, they are shown as 𝙜𝚊𝙜.

Compare two data frames and get their differences (Image by Author)

12. Get a subset of a very large dataset for quick analysis

Sometimes, we just need a subset of a very large dataset for quick analysis. One of the approaches could be to read the whole data in memory before getting your sample.

This can require a lot of memory depending on how big your data is. Also, it can take significant time to read your data.

✅ You can use 𝚗𝚛𝚘𝚠𝚜 parameter in the pandas 𝚛𝚎𝚊𝚍_𝚌𝚜𝚟() function by specifying the number of rows you want.

Get a subset of a very large dataset for quick analysis (Image by Author)

13. Transform your data frame from a wide to a long format

Sometimes it can be useful 𝚝𝚛𝚊𝚗𝚜𝚏𝚘𝚛𝚖 𝚢𝚘𝚞𝚛 𝚍𝚊𝚝𝚊𝚏𝚛𝚊𝚖𝚎 𝚏𝚛𝚘𝚖 𝚊 𝚠𝚒𝚍𝚎 𝚝𝚘 𝚊 𝚕𝚘𝚗𝚐 𝚏𝚘𝚛𝚖𝚊𝚝 which is more flexible for better analysis, especially when dealing with time series data.

  • 𝙒𝙝𝙖𝙩 𝙙𝙀 𝙮𝙀𝙪 𝙢𝙚𝙖𝙣 𝙗𝙮 𝙬𝙞𝙙𝙚 & 𝙡𝙀𝙣𝙜?

✹ Wide format is when you have a lot of columns.
✹ Long format on the other side is when you have a lot of rows.

✅ 𝙿𝚊𝚗𝚍𝚊𝚜.𝚖𝚎𝚕𝚝() is a perfect candidate for this task.

Below is an illustration

Transform your data frame from a wide to a long format (Image by Author)

14. Reduce the size of your Pandas data frame by ignoring the index

Do you know that you can reduce the size of your Pandas data frame by ignoring the index when saving it?

✅ Something like 𝚒𝚗𝚍𝚎𝚡 = 𝙵𝚊𝚕𝚜𝚎 when saving the file.

Below is an illustration.

Reduce the size of your Pandas data frame by ignoring the index (Image by Author)

15. Parquet instead of CSV

Very often, I don’t manually look 👀 at the content of a CSV or Excel file that will be used by Pandas for further analysis.

If that’s your case, maybe you should not use .CSV anymore and think of a better option.

Especially if you are only concerned about

✹ Processing speed

✹ Speed in saving and loading

✹ Disk space occupied by the data frame

✅ In that case, .𝙥𝙖𝙧𝙊𝙪𝙚𝙩 format is your best option as illustrated below.

Parquet instead of CSV (Image by Author)

16. Transform your data frame into a markdown

It is always better to print your data frame in a way that makes it easier to understand.

✅ One way of doing that is to render it in a markdown format using the .𝚝𝚘_𝚖𝚊𝚛𝚔𝚍𝚘𝚠𝚗() function.

💡 Below is an illustration

17. Format Date Time column

When loading Pandas dataframes, date columns are represented as 𝗌𝗯𝗷𝗲𝗰𝘁 by default, which is not ❌ the correct date format.

✅ You can specify the target column in the 𝗜𝗮𝗿𝘀𝗲_𝗱𝗮𝘁𝗲𝘀 argument to get the correct column type.

DateTime Formating

Python tips and tricks

1. Create a progress bar with tqdm and rich

Using the progress bar is beneficial when you want to have a visual status of a given task.

#!pip -q install rich
from rich.progress import track
from tqdm import tqdm
import time

Implement the callback function

def compute_double(x):
return 2*x

Create the progress bars

rich progress bar implementation
tqdm progress bar implementation

2. Get day, month, year, day of the week, the month of the year

Get day, month, year, day of the week, the month of the year (Image by author)

3. Smallest and largest values of a column

If you want to get the rows with the largest or lowest values for a given column, you can use the following functions:

✹ 𝚍𝚏.𝚗𝚕𝚊𝚛𝚐𝚎𝚜𝚝(𝙜, “𝙲𝚘𝚕_𝙜𝚊𝚖𝚎”) → top 𝙜 rows based on 𝙲𝚘𝚕_𝙜𝚊𝚖𝚎

✹ 𝚍𝚏.𝚗𝚜𝚖𝚊𝚕𝚕𝚎𝚜𝚝(𝙜, “𝙲𝚘𝚕_𝙜𝚊𝚖𝚎”) → 𝙜 smallest rows based on 𝙲𝚘𝚕_𝙜𝚊𝚖𝚎

✹ 𝙲𝚘𝚕_𝙜𝚊𝚖𝚎 is the name of the column you are interested in.

Smallest and largest values illustration (Image by Author)

4. Ignore the log output of the pip install command

Sometimes when installing a library from your jupyter notebook, you might not want to have all the details about the installation process generated by the default 𝚙𝚒𝚙 𝚒𝚗𝚜𝚝𝚊𝚕𝚕 command.

✅ You can specify the -q or — quiet option to get rid of that information.

Below is an illustration 💡

pip install illustration (Animation by Author)

5. Run multiple commands in a single notebook cell

The exclamation mark ‘!’ is essential to successfully run a shell command from your Jupyter notebook.

However, this approach can be quite repetitive 🔂 when dealing with multiple commands or a very long and complicated one.

✅ A better way to tackle this issue is to use the %%𝐛𝐚𝐬𝐡 expression at the beginning of your notebook cell.

💡 Below is an illustration

Illustration of %%bash statement (Animation by Autor)

6. Virtual environment.

A Data Science project can involve multiple dependencies, and dealing with all of them can be a bit annoying. 🀯

✹ A good practice is to organize your project in a way that it can be easily shared with your team members and reproduced with the least amount of effort.

✅ One way of doing this is to use virtual environments.

⚙ 𝗖𝗿𝗲𝗮𝘁𝗲 𝘃𝗶𝗿𝘁𝘂𝗮𝗹 𝗲𝗻𝘃𝗶𝗿𝗌𝗻𝗺𝗲𝗻𝘁 𝗮𝗻𝗱 𝗶𝗻𝘀𝘁𝗮𝗹𝗹 𝗹𝗶𝗯𝗿𝗮𝗿𝗶𝗲𝘀.

→ Install the virtual environment module.
𝚙𝚒𝚙 𝚒𝚗𝚜𝚝𝚊𝚕𝚕 𝚟𝚒𝚛𝚝𝚞𝚊𝚕𝚎𝚗𝚟

→ Create your environment by giving a meaningful name.
𝚟𝚒𝚛𝚝𝚞𝚊𝚕𝚎𝚗𝚟 [𝚢𝚘𝚞𝚛_𝚎𝚗𝚟𝚒𝚛𝚘𝚗𝚖𝚎𝚗𝚝_𝚗𝚊𝚖𝚎]

→ Activate your environment.
𝚜𝚘𝚞𝚛𝚌𝚎 [𝚢𝚘𝚞𝚛_𝚎𝚗𝚟𝚒𝚛𝚘𝚗𝚖𝚎𝚗𝚝_𝚗𝚊𝚖𝚎]/𝚋𝚒𝚗/𝚊𝚌𝚝𝚒𝚟𝚊𝚝𝚎

→ Start installing the dependencies for your project.
𝚙𝚒𝚙 𝚒𝚗𝚜𝚝𝚊𝚕𝚕 𝚙𝚊𝚗𝚍𝚊𝚜


All this is great 👏🏌, BUT
 the virtual environment you just created is local to your machine😏.

𝙒𝙝𝙖𝙩 𝙩𝙀 𝙙𝙀?🀷🏻‍♂

💡 You need to permanently save those dependencies in order to share them with others using this command:

→ 𝚙𝚒𝚙 𝚏𝚛𝚎𝚎𝚣𝚎 > 𝚛𝚎𝚚𝚞𝚒𝚛𝚎𝚖𝚎𝚗𝚝𝚜.𝚝𝚡𝚝

This will create 𝚛𝚎𝚚𝚞𝚒𝚛𝚎𝚖𝚎𝚗𝚝𝚜.𝚝𝚡𝚝 file containing your project dependencies.

🔚 Finally, anyone can install the exact same dependencies by running this command:
→ 𝚙𝚒𝚙 𝚒𝚗𝚜𝚝𝚊𝚕𝚕 -𝚛 𝚛𝚎𝚚𝚞𝚒𝚛𝚎𝚖𝚎𝚗𝚝𝚜.𝚝𝚡𝚝

7. Run multiple metrics at once

Scikit learn metrics

8. Chain multiple lists as a single sequence

You can use a single for loop to iterate through multiple lists as a single sequence 🔂.

✅ This can be achieved using the 𝚌𝚑𝚊𝚒𝚗() ⛓ function from Python 𝗶𝘁𝗲𝗿𝘁𝗌𝗌𝗹𝘀 module.

List chaining

9. Pretty print of JSON data

❓ Have ever wanted to print your JSON data in a correct indented format for better visualization?

✅ The indent parameter of the dumps() method can be used to specify the indentation level of your formatted string output.

Pretty print your JSON data

Conclusion

Thank you for reading! 🎉 🍟

I hope you found this list of Python and Pandas tricks helpful! Keep an eye on here, because the content will be maintained with more tricks on a daily basis.

Also, If you like reading my stories and wish to support my writing, consider becoming a Medium member. With a $ 5-a-month commitment, you unlock unlimited access to stories on Medium.

Feel free to follow me on Medium, Twitter, and YouTube, or say Hi on LinkedIn. It is always a pleasure to discuss AI, ML, Data Science, NLP, and MLOps stuff!

04 Oct 10:50

Formattazione valutaria con CurrencyFormatterJS

by Claudio Garau

La libreria può essere scaricata dal code hosting di GitHub e prelevata via Git tramite la clonazione del repository, il alternativa Ú possibile installarla attraverso npm o bower per poi includerla nel proprio progetto in versione completa o minificata:


La formattazione valutaria avviene tramite il metodo OSREC.CurrencyFormatter.format() a cui passare come parametri il valore da formattare e le variabili che devono determinare la formattazione; l'esempio seguente mostra come impostare le variabili per la formattazione di una cifra espressa in Euro con localizzazione italiana, migliaia separate tramite il punto fermo e virgola per la separazione dai decimali:

var parameters = 
{ 
	currency: 	'EUR', 			
	symbol: 	'€',			
	locale: 	'it',			
	decimal:	',',			
	group: 		'.',			
	pattern: 	'#,##0.00 !'		 
} 

I parametri definiti dall'utilizzatore determinano l'override di quelli di default; come impostazione predefinita infatti CurrencyFormatter ha il dollaro americano quale valuta di riferimento e di conseguenza il suo simbolo. In mancanza di override il pattern per la formattazione segue le regole dello standard Unicode, quindi adotta la virgola per la separazione delle migliaia e il punto per i decimali, mentre il punto esclamativo indica la posizione del simbolo della valuta.

Non Ú comunque necessario determinare l'override di tutti i parametri i default, se per esempio si desidera specificare unicamente la valuta da utilizzare e la localizzazione si può agire in questo modo:

OSREC.CurrencyFormatter.format(123456, { currency: 'EUR', locale: 'it' });

Via CurrencyFormatter

19 Jul 14:53

Python 201: An Intro to mock

by Mike

The unittest module now includes a mock submodule as of Python 3.3. It will allow you to replace portions of the system that you are testing with mock objects as well as make assertions about how they were used. A mock object is used for simulating system resources that aren’t available in your test environment. In other words, you will find times when you want to test some part of your code in isolation from the rest of it or you will need to test some code in isolation from outside services.

Note that if you have a version of Python prior to Python 3, you can download the Mock library and get the same functionality.

Let’s think about why you might want to use mock. One good example is if your application is tied to some kind of third party service, such as Twitter or Facebook. If your application’s test suite goes out and retweets a bunch of items or “likes” a bunch of posts every time its run, then that is probably undesirable behavior since it will be doing that every time the test is run. Another example might be if you had designed a tool for making updates to your database tables easier. Each time the test runs, it will do some updates on the same records every time and could wipe out valuable data.

Instead of doing any of those things, you can use unittest’s mock. It will allow you to mock and stub out those kinds of side-effects so you don’t have to worry about them. Instead of interacting with the third party resources, you will be running your test against a dummy API that matches those resources. The piece that you care about the most is that your application is calling the functions it’s supposed to. You probably don’t care as much if the API itself actually executes. Of course, there are times when you will want to do an end-to-end test that does actually execute the API, but those tests don’t need mocks!

Simple Examples

The Python mock class can mimic and other Python class. This allows you to examine what methods were called on your mocked class and even what parameters were passed to them. Let’s start by looking at a couple of simple examples that demonstrate how to use the mock module:

>>> from unittest.mock import Mock
>>> my_mock = Mock()
>>> my_mock.__str__ = Mock(return_value='Mocking')
>>> str(my_mock)
'Mocking'

In this example, we import Mock class from the unittest.mock module. Then we create an instance of the Mock class. Finally we set our mock object’s __str__ method, which is the magic method that controls what happens if you call Python’s str function on an object. In this case, we just return the string “Mocking”, which is what you see when we actually execute the str() function at the end.

The mock module also supports five asserts. Let’s take a look at how at a couple of those in action:

>>> from unittest.mock import Mock
>>> class TestClass():
...     pass
... 
>>> cls = TestClass()
>>> cls.method = Mock(return_value='mocking is fun')
>>> cls.method(1, 2, 3)
'mocking is fun'
>>> cls.method.assert_called_once_with(1, 2, 3)
>>> cls.method(1, 2, 3)
'mocking is fun'
>>> cls.method.assert_called_once_with(1, 2, 3)
Traceback (most recent call last):
  Python Shell, prompt 9, line 1
  File "/usr/local/lib/python3.5/unittest/mock.py", line 802, in assert_called_once_with
    raise AssertionError(msg)
builtins.AssertionError: Expected 'mock' to be called once. Called 2 times.
>>> cls.other_method = Mock(return_value='Something else')
>>> cls.other_method.assert_not_called()
>>>

First off, we do our import and create an empty class. Then we create an instance of the class and add a method that returns a string using the Mock class. Then we call the method with three integers are arguments. As you will note, this returned the string that we set earlier as the return value. Now we can test out an assert! So we call the **assert_called_once_with** assert which will assert if we call our method two or more times with the same arguments. The first time we call the assert, it passes. So then we call the method again with the same methods and run the assert a second time to see what happens.

As you can see, we got an AssertionError. To round out the example, we go ahead and create a second method that we don’t call at all and then assert that it wasn’t called via the assert_not_called assert.


Side Effects

You can also create side effects of mock objects via the side_effect argument. A side effect is something that happens when you run your function. For example, some videogames have integration into social media. When you score a certain number of points, win a trophy, complete a level or some other predetermined goal, it will record it AND also post about it to Twitter, Facebook or whatever it is integrated with. Another side effect to running a function is that it might be tied to closely with your user interface and cause it to redraw unnecessarily.

Since we know about these kinds of side effect up front, we can mock them in our code. Let’s look at a simple example:

from unittest.mock import Mock
 
 
def my_side_effect():
    print('Updating database!')
 
def main():
    mock = Mock(side_effect=my_side_effect)
    mock()
 
if __name__ == '__main__':
    main()

Here we create a function that pretends to update a database. Then in our main function, we create a mock object and give it a side effect. Finally we call our mock object. If you do this, you should see a message printed to stdout about the database being updated.

The Python documentation also points out that you can make side effect raise an exception if you want to. One fairly common reason to want to raise an exception if you called it incorrectly. An example might be that you didn’t pass in enough arguments. You could also create a mock that raises a Deprecation warning.


Autospeccing

The mock module also supports the concept of auto-speccing. The autospec allows you to create mock objects that contain the same attributes and methods of the objects that you are replacing with your mock. They will even have the same call signature as the real object! You can create an autospec with the create_autospec function or by passing in the autospec argument to the mock library’s patch decorator, but we will postpone looking at patch until the next section.

For now, let’s look at an easy-to-understand example of the autospec:

>>> from unittest.mock import create_autospec
>>> def add(a, b):
...     return a + b
... 
>>> mocked_func = create_autospec(add, return_value=10)
>>> mocked_func(1, 2)
10
>>> mocked_func(1, 2, 3)
Traceback (most recent call last):
  Python Shell, prompt 5, line 1
  File "<string>", line 2, in add
  File "/Library/Frameworks/Python.framework/Versions/3.5/lib/python3.5/unittest/mock.py", line 181, in checksig
    sig.bind(*args, **kwargs)
  File "/Library/Frameworks/Python.framework/Versions/3.5/lib/python3.5/inspect.py", line 2921, in bind
    return args[0]._bind(args[1:], kwargs)
  File "/Library/Frameworks/Python.framework/Versions/3.5/lib/python3.5/inspect.py", line 2842, in _bind
    raise TypeError('too many positional arguments') from None
builtins.TypeError: too many positional arguments

In this example, we import the create_autospec function and then create a simple adding function. Next we use create_autospec() by passing it our add function and setting its return value to 10. As long as you pass this new mocked version of add with two arguments, it will always return 10. However, if you call it with the incorrect number of arguments, you will receive an exception.


The patch

The mock module has a neat little function called patch that can be used as a function decorator, a class decorator or even a context manager. This will allow you to easily create mock classes or objects in a module that you want to test as it will be replaced by a mock.

Let’s start out by creating a simple function for reading web pages. We will call it webreader.py. Here’s the code:

import urllib.request
 
 
def read_webpage(url):
    response = urllib.request.urlopen(url)
    return response.read()

This code is pretty self-explanatory. All it does is take a URL, opens the page, reads the HTML and returns it. Now in our test environment we don’t want to get bogged down reading data from websites especially is our application happens to be a web crawler that downloads gigabytes worth of data every day. Instead, we want to create a mocked version of Python’s urllib so that we can call our function above without actually downloading anything.

Let’s create a file named mock_webreader.py and save it in the same location as the code above. Then put the following code into it:

import webreader
 
from unittest.mock import patch
 
 
@patch('urllib.request.urlopen')
def dummy_reader(mock_obj):
    result = webreader.read_webpage('https://www.google.com/')
    mock_obj.assert_called_with('https://www.google.com/')
    print(result)
 
if __name__ == '__main__':
    dummy_reader()

Here we just import our previously created module and the patch function from the mock module. Then we create a decorator that patches urllib.request.urlopen. Inside the function, we call our webreader module’s read_webpage function with Google’s URL and print the result. If you run this code, you will see that instead of getting HTML for our result, we get a MagicMock object instead. This demonstrates the power of patch. We can now prevent the downloading of data while still calling the original function correctly.

The documentation points out that you can stack path decorators just as you can with regular decorators. So if you have a really complex function that accesses databases or writes file or pretty much anything else, you can add multiple patches to prevent side effects from happening.


Wrapping Up

The mock module is quite useful and very powerful. It also takes some time to learn how to use properly and effectively. There are lots of examples in the Python documentation although they are all simple examples with dummy classes. I think you will find this module useful for creating robust tests that can run quickly without having unintentional side effects.


Related Reading

10 Jul 14:54

10 JavaScript Libraries and Plugins For Web Designers

by Darrel Henry

10_JavaScript_Plugins_and_Libraries_For_Web_Designers-785X391

Today, website development is one of the fastest growing fields in the technology market. Today, there are a range of software solutions available to meet the various requirements of modern websites. These software solutions cater to the various aspects of website development. Today, web designing is considered an important part of website development. Web designing helps in providing a rich visual experience for website visitors. A smart user interface (UI) enhances the overall user experience of online visitors during website engagement. Hence, web designers and front-end developers are keen on using the right technology solutions in their projects.

Today, JavaScript has evolved to become a useful programming language in web designing projects. JavaScript allows transforming user interface components for delivering visual effects and providing modern functionality. There are a range of resources available in the form of tools, plugins, libraries and more which allow web designers to leverage the power of modern web development technologies, such as JavaScript, HTML5, CSS3 and others. So, here we will take a look at some of the most essential JavaScript plugins and libraries available, which will allow developers to incorporate the right user interface and web designing solutions in their web development projects. Alright, so get ready to check out the list of 10 JavaScript Plugins and Libraries for Web Designers.

1. Layzr.js

Layzr
Layzr.js is a lightweight JavaScript library which allows web designers to apply lazy loading effect for images. It is written in ES6 and has an updated build system. The library offers native support for multiple browsers, including Google Chrome, Firefox, Android, Safari, Opera and more. Layzr.js is an ideal solution for implementing lazy loading images on different websites, such as portfolio, e-commerce and more.

2. Dense

Dense
Dense is a modern jQuery plugin which enables web designers to display retina-ready images on a website based on a device’s pixel ratio. The plugin runs on modern web browsers as well as mobile and desktop browsers, including Chrome, Safari, iOS and more. Dense is a useful plugin for incorporating retina support in to websites and rendering crisp images for enhancing a website’s visual appeal.

3. Full Page.js

FullPage
Full Page.js is an important JavaScript plugin for implementing full-screen vertical scrolling for websites. Apart from vertical scrolling, the plugin also supports horizontal scrolling and allows designers to easily integrate horizontal sliders in to websites. Full Page.js works with a range of mobile devices and tablets and fits in to various screen sizes. The plugin is used by popular companies, such as Google and Sony.

4. Lunr.js

Lunr
Lunr.js is a minimalist text search engine for client websites and applications. It does not require any external dependencies and runs on any modern browser with ES5 support. It has default processors, such as a stemmer based on Martin Porter’s algorithms and an auto-filter for stop words. Lunr.js allows adding custom processors and removing default ones. Its default tokenization system supports English text but one can add language-specific tokenizers as well.

5. Lity

Lity
Lity is a lightweight plugin for applying lightbox effect for displaying images, iframes and inline content in an overlay window. The plugin supports jQuery and Zepto JavaScript library. Lity also offers support for displaying Google Maps as well as Youtube and Vimeo videos in a modal window. The plugin supports responsive design and works on various smart phones, tablets and other mobile devices.

6. Dynamics.js

Dynamics
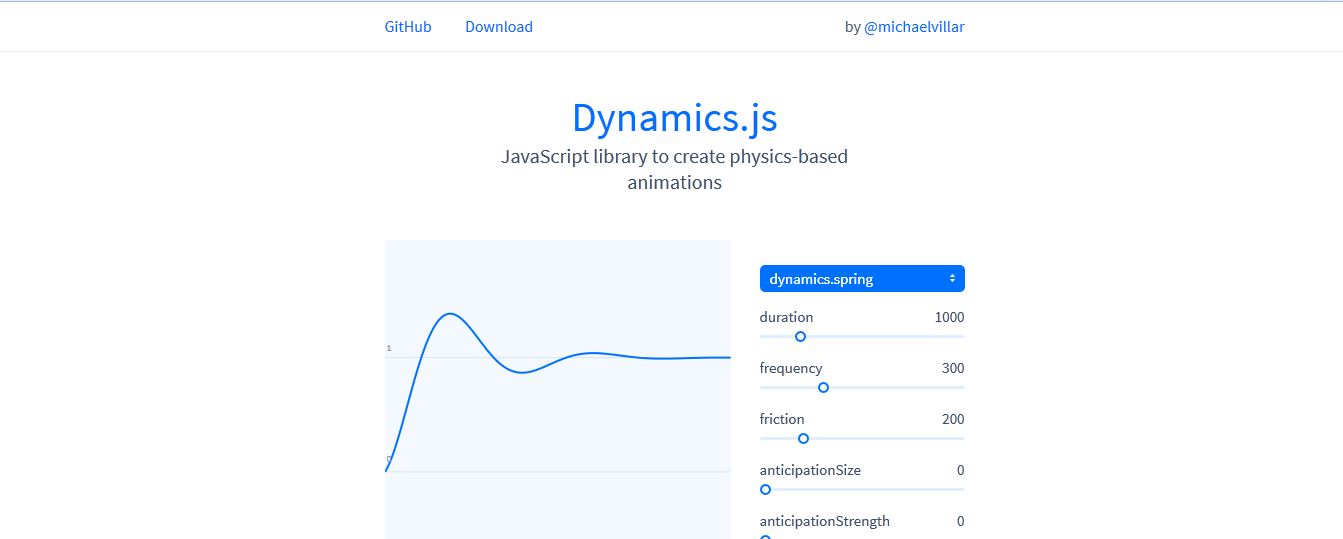
Dynamics.js is a full-fledged JavaScript library for designing modern physics-based animations. One can easily animate a range of user interface components, such as buttons, menu bars, location pins, loaders and more. The library allows designing a variety of animation effects based on bounciness, rotation, spin, frequency and more.

7. Accordion Pro JS

Accordion Pro JS
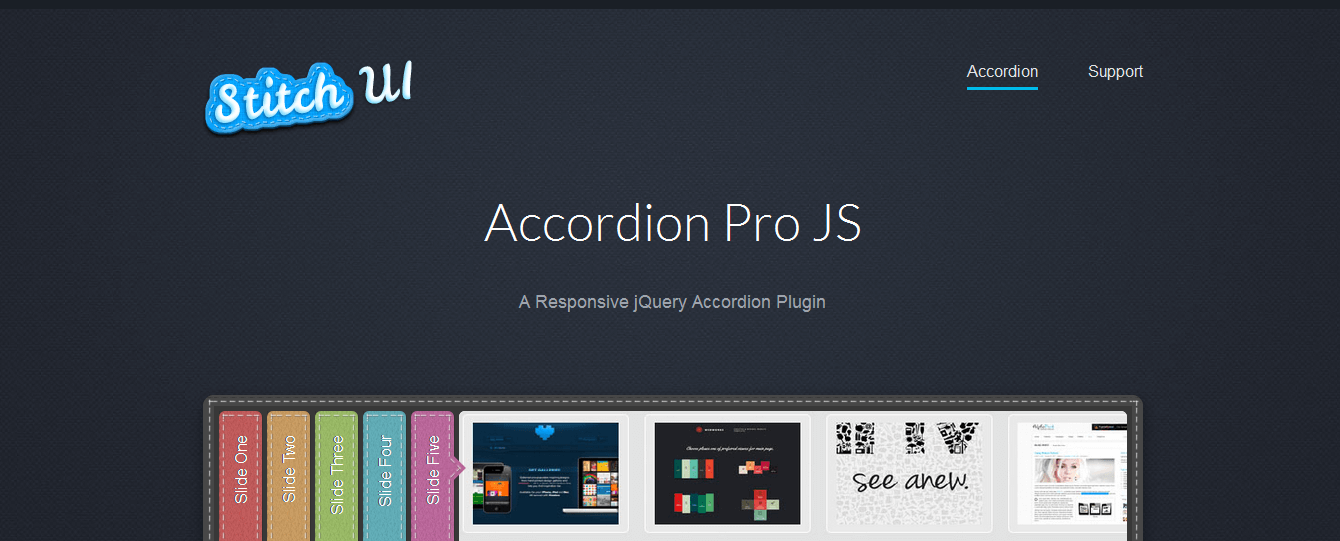
Accordion Pro JS is a very useful jQuery plugin for integrating horizontal and vertical accordions on the web pages. It is a responsive and mobile-friendly jQuery accordion plugin with support for multiple themes styles and customization settings. Accordion Pro JS offers a robust support for swipe gestures and CSS3 animations. It also offers other great features, such as auto-play mode, multiple options for setting slide transition speed and play/pause feature for animation.

8. Arbor.js

Arbor
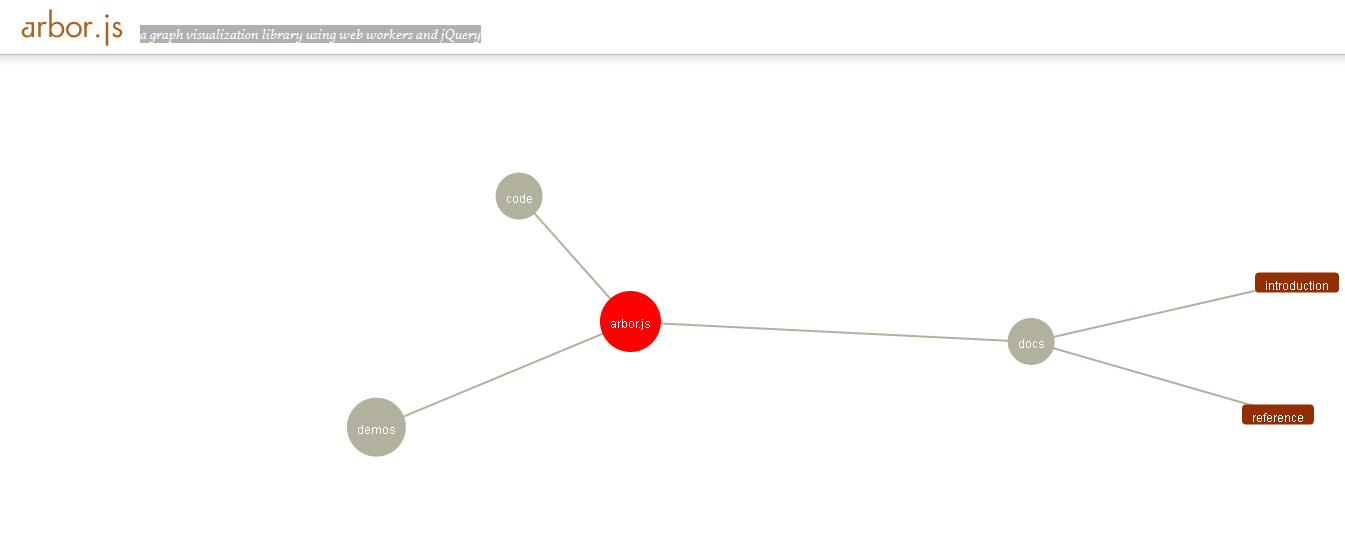
Arbor.js is a graph visualization library for displaying graphs and site maps on websites. It is built with jQuery and provides force-directed layout instructions with support for usage with SVG, Canvas or HTML elements for graph display and drawing. It is a good resource for displaying graph data with multiple layout types and visual styles.

9. jNotify

jNotify
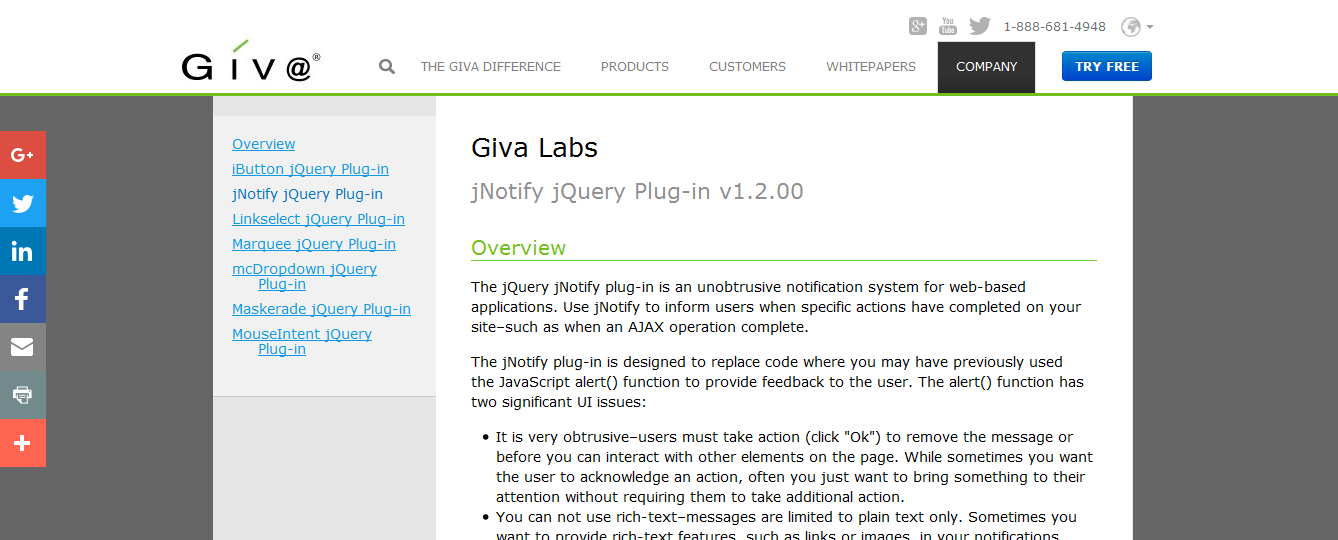
jNotify is a robust jQuery plugin for implementing notification system in websites and web-based applications. It is a great way to keep a user informed about the result of a specific action with messages, such as loading in progress or Ajax operation finished. jNotify allows providing notification messages which fade away after a set time duration and does not require users to perform any action, such as clicking the ‘OK’ button. Besides, the plugin allows including rich-text messages, links and images in the notifications.

10. jQuery Form Validator

jQuery Form Validator
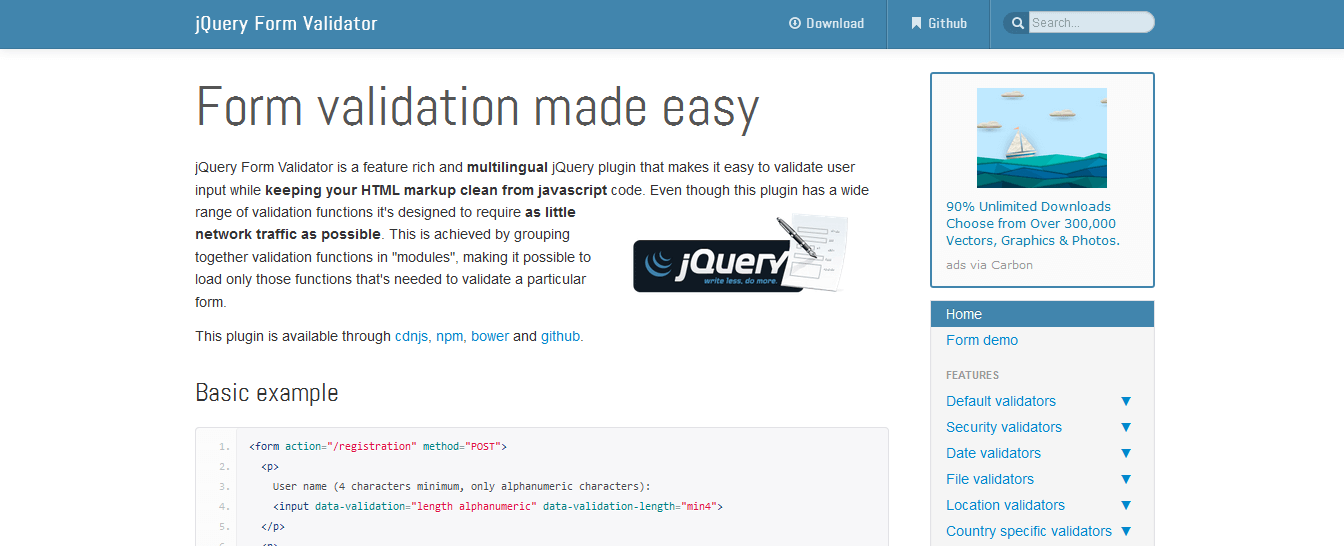
jQuery Form Validator is a modern jQuery plugin for implementing client-side form validation. The plugin supports a range of validation methods as well as allows writing custom validation methods. It offers validation support for a range of input types, such as URL, Name, Address, Location, E-mail, Numbers and more. The plugin can also be used for displaying error messages, help text and input suggestions.

Conclusion:
There are a range of JavaScript libraries and plugins available which offer a diverse range of solutions in web designing and website development. If you want to add some more names to the list or suggest any feedback, then you can write in the comments section below. Thank you.

The post 10 JavaScript Libraries and Plugins For Web Designers appeared first on Web Development & Technology Resources.

14 Jun 13:54

10 Free Mockup Tools for Web Designers

by Darrel Henry

10-Free-Mockup-Tools-for-Web-Designers-785X391

Creating a professional website may take you a considerable amount of time if you do not know the right tools to use every step of the way. If you are to create a new design concept, you will need to set aside several hours to just write the new code for it. However, with mock up tools, you can easily create example designs that will end up saving you a considerable amount of time. This is not the only reason why you may need mockup tools. These tools also open you up to more ideas, helping you to always see the big picture and avoid making mistakes.

With these tools, it is easy to see how the end result will appear as you start, making it possible for you to put these pieces together for a perfect result. You will finally end up with a layout that can help you analyze the layout, the designs and the functionality of your website even before you get started. That is why these mockup tools are very important. Here are 1o of the best free mockup tools that you can consider using today:

1.

Naview
This is an online service that will let you design and build navigation prototypes as well as test the navigation usability with your users. This is the best tool to use if you want to create amazing state of the art navigation for your website. It has some of the best features that you will enjoy using or instance the one that will help you build a very deep menu. With this tool, you can save the time that could have been spent drawing sketches and mind maps.

2. Lumzy

Lumzy
This mockup tool allows you to create and experience the functionality of your site or application. For example, you can add events from the tool’s list of controls. This tool comes with a good number of features that will help you create functions on your website. You can create message alerts, add links to external content, interactive page navigation among other things. There are tools for live team editing as well as a chat engine for pondering over the designs used. Lumzy is absolutely free.

3. MockFlow

MockFlow
This is a popular tool that you can use to create, design and collaborate on website projects. With this tool, you can create sitemaps in the pages that you have already created, in any format of your choice. MockFlow comes with a good number of features that you can use easily for free.

4. Mockup Builder

Mockup Builder
This is a new mockup tool that is slowly gaining popularity because of the many features that it comes with. Other than its core features, it is a very versatile tool that will let you create different prototyping styles. Some of these include interactive wireframes, UI mockups, desktop software prototypes, website layouts, sitemaps, and screen navigation among many others. The good news is that it comes with collaboration tools that will help you share it out to your clients and colleague, all for free.

5. Mockplus

Mockplus
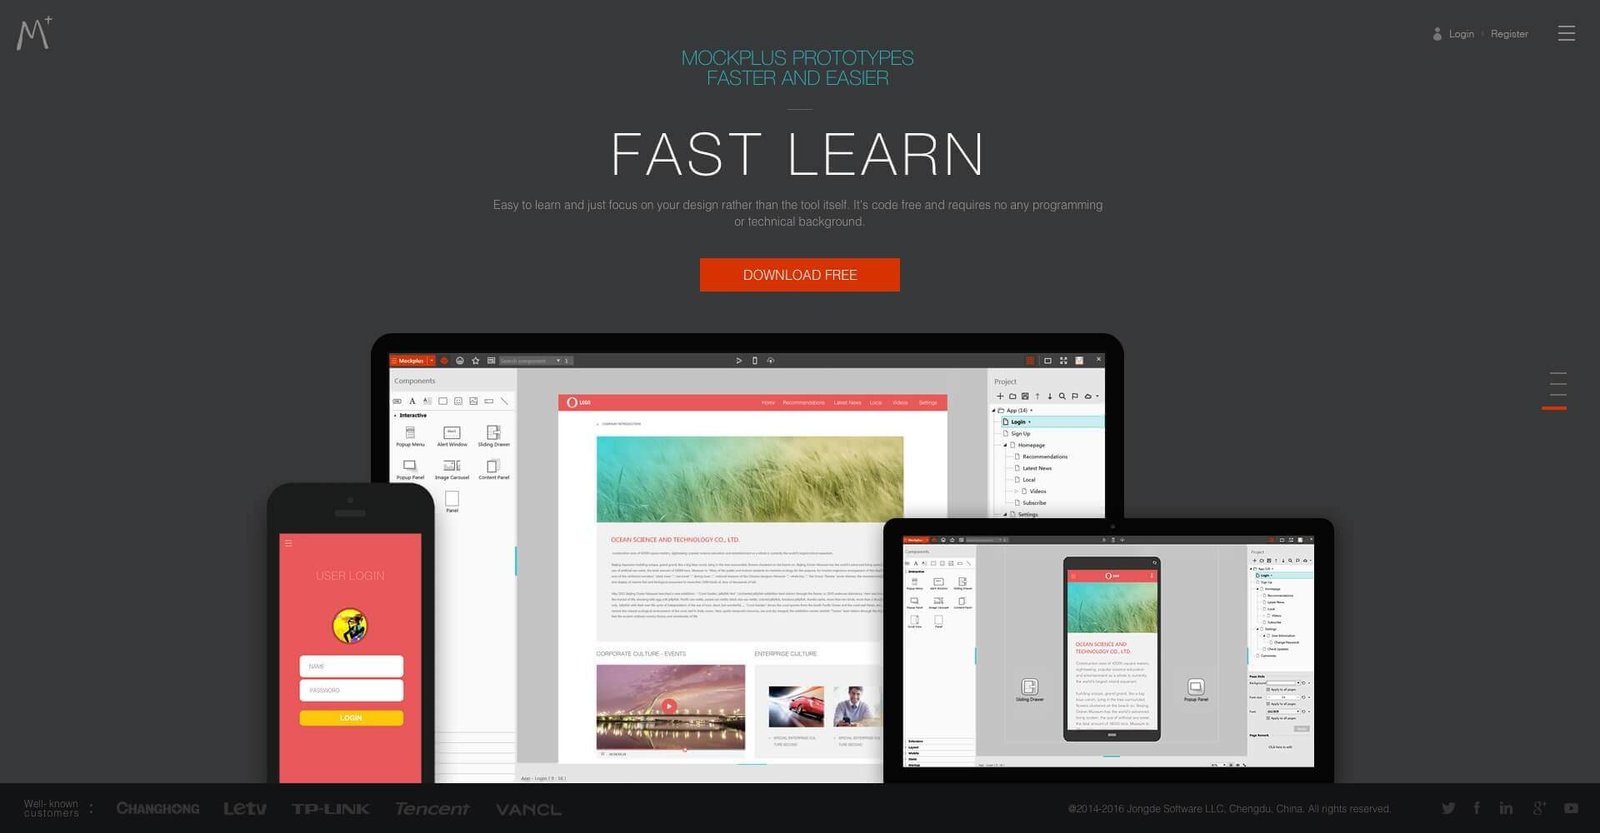
This is a rather quick mockup desktop based application that you can use to prototype both mobile and web applications. It is suitable for all web designers, whether you are new in web designing or you are an experienced designer. It is very easy to use and it has a clean interface. If what you want is to save time when creating very interactive prototypes, this is the right tool to go for. It comes with a number of useful features and its newest version comes with value added features such as popup menu, image carousel, sliding drawer among many others.

6. iPhone Mockup

iPhone Mockup
This mockup tool comes with two choices; a designer can either use a pencil styled editor or an illustration editor. Both of these editors comes with the same functionality. The tool is very easy to use and you can use it to create any iPhone mockup as fast as you want. You can also share it out to other people with just one click of a button. Any change that you make is synched to the other people you have shared this mock-up tool with.

7. Pidoco

Pidoco
This mockup tool is a very easy solution that web designers can use to build very fast prototypes that clients will love. It has a simple interface that will help you achieve results, while maintaining excellent quality standards. It also has the ability to function offline, which is an added benefit to many web designer. Online users are able to test it easily and quickly.

8. Axure

Axure
If you are looking for a versatile mockup tool that will give you access to some of the best features you may need in your web design, this is just what you need. With this tool, you should be able to create mockups, prototypes, iPad mockups, wireframes, iPhone mockups, flow charts, web designs, and presentation slides, among others in an easy and fast way.

9. Visual Paradigm

Visual Paradigm
This is a very useful mockup tool that comes with an easy to use wireframe editor as well as a rich set of wireframe widgets. These will help you create wireframes for any website and applications that you are working on. It is the best tool to use for iOS and Android apps. It comes with a storyboard feature that will enable you connect wireframes in order to form storyboards that are more meaningful and scenario-based. This is the tool to use if you want to make effective and more rewarding presentation of screen design ideas

10. DUB – DENIM

Dub Denim
This mockup tool offers the benefits of a paper based sketching plus an existing electronic prototype tool. This is the tool that will enable you to quickly sketch an interface. With it, you can come up with a perfect rough drawing very fast. It is a very flexible tool as well. The electronic sketch on the other hand is very interactive and you can easily interpret and modify it to what you need. The tool is available for Windows, UNIX, and Mac OS X.

Before you launch your website, be sure that it meets your needs and requirements by creating a mock up first. You will find that you can hit the ground running once you launch the website.

The post 10 Free Mockup Tools for Web Designers appeared first on Web Development & Technology Resources.

10 Jun 13:57

Fix Dropbox Indicator Icon And Menu Not Working In Xubuntu, Lubuntu Or Ubuntu MATE

by noreply@blogger.com (Andrew)
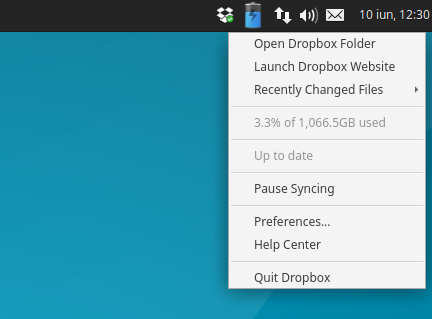
I recently stumbled on an issue with Dropbox and the Ubuntu flavors that support AppIndicators (except Unity), like Xubuntu and Lubuntu: the Dropbox AppIndicator icon shows up as broken and the menu doesn't work. This isn't a new issue though, and it seems to occur starting with Ubuntu 14.04.

The issue occurs with the Dropbox packages in the official Ubuntu repositories (called "nautilus-dropbox", which doesn't depend on Nautilus and can be used to install Dropbox on any desktop environment) as well as the Dropbox package downloaded from its official website. 

It does not occur with the caja-dropbox package available in the official Ubuntu MATE 16.04 repository though (but it does occur in older Ubuntu MATE versions if you've enabled AppIndicators), because it was patched with a fix similar to the one in this article.

Below you'll find a fix / workaround for this issue. Important: using the instructions below, Dropbox will use a tray (notification area) icon instead of an AppIndicator.

Here's a screenshot with the issue (taken in Xubuntu 16.04):


And another screenshot taken after using the fix below:


Tested in Xubuntu 16.04, Xubuntu 14.04, Lubuntu 16.04, Ubuntu MATE 16.04 (the issue does not occur with the caja-dropbox package in this Ubuntu MATE version) and Ubuntu MATE 14.04.

To fix it, you need to add "dbus-launch" before the actual command for the "Exec" line in both the application autostart file and launcher. For Dropbox this is a bit tricky because it overwrites any modifications to its autostart file. So here's what you need to do to fix this Dropbox issue:
  • if you've installed Dropbox by downloading the .deb from its website or by using the nautilus-dropbox package from the repositories:
    • rename the Dropbox autostart file, located in ~/.config/autostart/, and edit the file, changing the "Exec" line to "Exec=dbus-launch dropbox start -i";
    • copy the Dropbox desktop file, located under /usr/share/applications/, to ~/.local/share/applications/, so it's not overwritten when updating the package, and change the "Exec" line to "Exec=dbus-launch dropbox start -i"
    • disable the built-in Dropbox autostart (because it automatically creates an autostart file) using the "dropbox autostart n" command.
  • for the caja-dropbox package (except for Ubuntu MATE 16.04 which doesn't have this issue):
    • rename the dropbox-caja autostart file, located in ~/.config/autostart/, and edit the file, changing the "Exec" line to "Exec=dbus-launch caja-dropbox start -i";
    • copy the caja-dropbox desktop file, located under /usr/share/applications/, to ~/.local/share/applications/, so it's not overwritten when updating the package, and change the "Exec" line to "Exec=dbus-launch caja-dropbox start -i";
    • disable the built-in Dropbox autostart (because it automatically creates an autostart file) using the "caja-dropbox autostart n" command.

This sounds a bit complicated on a first look, right? Well, it's not, but to make it easier, you can use the following commands to apply the changes I mentioned above.

If you've installed Dropbox by downloading the .deb from its website or by using the nautilus-dropbox package, you can fix the broken Dropbox appindicator icon and menu by using the following commands:
cp ~/.config/autostart/dropbox.desktop ~/.config/autostart/start_dropbox.desktop
sed -i 's/^Exec=.*/Exec=dbus-launch dropbox start -i/' ~/.config/autostart/start_dropbox.desktop
dropbox autostart n
mkdir -p ~/.local/share/applications/
cp /usr/share/applications/dropbox.desktop ~/.local/share/applications/
sed -i 's/^Exec=.*/Exec=dbus-launch dropbox start -i/' ~/.local/share/applications/dropbox.desktop

For Ubuntu MATE (except 16.04), if you've used the dropbox-caja package to install Dropbox, you can fix the broken Dropbox appindicator icon and menu by using the following commands:
cp ~/.config/autostart/caja-dropbox.desktop ~/.config/autostart/start_caja-dropbox.desktop
sed -i 's/^Exec=.*/Exec=dbus-launch caja-dropbox start -i/' ~/.config/autostart/start_caja-dropbox.desktop
caja-dropbox autostart n
mkdir -p ~/.local/share/applications/
cp /usr/share/applications/caja-dropbox.desktop ~/.local/share/applications/
sed -i 's/^Exec=.*/Exec=dbus-launch caja-dropbox start -i/' ~/.local/share/applications/caja-dropbox.desktop

Then restart the session (logout/login) and the Dropbox icon and menu should work correctly.

via / thanks to: TuxDiary and AskUbuntu
10 Jun 13:51

Python 201: What are descriptors?

by Mike

Descriptors were introduced to Python way back in version 2.2. They provide the developer with the ability to add managed attributes to objects. The methods needed to create a descriptor are __get__, __set__ and __delete__. If you define any of these methods, then you have created a descriptor.

The idea behind the descriptor is to get, set or delete attributes from your object’s dictionary. When you access a class attribute, this starts the lookup chain. Should the looked up value be an object with one of our descriptor methods defined, then the descriptor method will be invoked.

Descriptors power a lot of the magic of Python’s internals. They are what make properties, methods and even the super function work. They are also used to implement the new style classes that were also introduced in Python 2.2.


The Descriptor Protocol

The protocol to create a descriptor is really quite easy. You only need to define one or more of the following:

  • __get__(self, obj, type=None), returns value
  • __set__(self, obj, value), returns None
  • __delete__(self, obj), returns None

Once you’ve defined at least one, you have created a descriptor. If you can you define both __get__ and __set__, you will have created a data descriptor. A descriptor with only __get__() defined are known as non-data descriptors and are usually used for methods. The reason for this distinction in descriptor types is that if an instance’s dictionary happens to have a data descriptor, the descriptor will take precedence during the lookup. If the instance’s dictionary has an entry that matches up with a non-data descriptor, then the dictionary’s own entry will take precedence over the descriptor.

You can also create a read-only descriptor if you define both __get__ and __set__, but raise an AttributeError when the __set__ method is called.


Calling a Descriptor

The most common method of calling a descriptor is for the descriptor to be invoked automatically when you access an attribute. A typical example would be my_obj.attribute_name. This will cause your object to look up attribute_name in the my_obj object. If your attribute_name happens to define __get__(), then attribute_name.__get__(my_obj) will get called. This all depends on whether your instance is an object or a class.

The magic behind this lies in the magic method known as __getattribute__, which will turn my_obj.a into this: type(my_obj).__dict__[‘a’].__get__(a, type(a)). You can read all about the implementation in Python’s documentation here: https://docs.python.org/3/howto/descriptor.html.

According to said documentation, there are a few points to keep in mind in regards to calling a descriptor:

  • The descriptor is invoked via the default implementation of the __getattribute__ method
  • If you override __getattribute__, this will prevent the descriptor from getting automatically called
  • object.__getattribute__() and type.__getattribute__() don’t call __get__() the same way
  • A data descriptor will always, ALWAYS override instance dictionaries
  • The non-data descriptor can be overridden by instance dictionaries.

More information on how all this works can be found in Python’s data model, the Python source code and in Guido van Rossum’s document, “Unifying types and class in Python”.


Descriptor examples

At this point, you may be confused how you would even use a descriptor. I always find it helpful when I am learning a new concept if I have a few examples that demonstrate how it works. So in this section, we will look at some examples so you will know how to use descriptors in your own code!

Let’s start by writing a really simple data descriptor and then use it in a class. This example is based on one from Python’s documentation:

class MyDescriptor():
    """
    A simple demo descriptor
    """
    def __init__(self, initial_value=None, name='my_var'):
        self.var_name = name
        self.value = initial_value
 
    def __get__(self, obj, objtype):
        print('Getting', self.var_name)
        return self.value
 
    def __set__(self, obj, value):
        msg = 'Setting {name} to {value}'
        print(msg.format(name=self.var_name, value=value))
        self.value = value
 
class MyClass():
    desc = MyDescriptor(initial_value='Mike', name='desc')
    normal = 10
 
if __name__ == '__main__':
    c = MyClass()
    print(c.desc)
    print(c.normal)
    c.desc = 100
    print(c.desc)

Here we create a class and define three magic methods:

  • __init__ – our constructor which takes a value and the name of our variable
  • __get__ – prints out the current variable name and returns the value
  • __set__ – prints out the name of our variable and the value we just assigned and sets the value itself

Then we create a class that creates an instance of our descriptor as a class attribute and also creates a normal class attribute. Then we run a few “tests” by creating an instance of our normal class and accessing our class attributes. Here is the output:


Getting desc
Mike
10
Setting desc to 100
Getting desc
100

As you can see, when we access c.desc, it prints out our “Getting” message and we print out what it returns, which is “Mike”. Next we print out the regular class attribute’s value. Finally we change the descriptor variable’s value, which causes our “Setting” message to be printed. We also double-check the current value to make sure that it was actually set, which is why you see that last “Getting” message.

Python uses descriptors underneath the covers to build properties, bound / unbound methods and class methods. If you look up the property class in Python’s documentation, you will see that it follows the descriptor protocol very closely:

property(fget=None, fset=None, fdel=None, doc=None)

It clearly shows that the property class has a getter, setter and a deleting method.

Let’s look at another example where we use a descriptor to do validation:

from weakref import WeakKeyDictionary
 
class Drinker:
    def __init__(self):
        self.req_age = 21
        self.age = WeakKeyDictionary()
 
    def __get__(self, instance_obj, objtype):
        return self.age.get(instance_obj, self.req_age)
 
    def __set__(self, instance, new_age):
        if new_age < 21:
            msg = '{name} is too young to legally imbibe'
            raise Exception(msg.format(name=instance.name))
        self.age[instance] = new_age
        print('{name} can legally drink in the USA'.format(
            name=instance.name))
 
    def __delete__(self, instance):
        del self.age[instance]
 
 
class Person:
    drinker_age = Drinker()
 
    def __init__(self, name, age):
        self.name = name
        self.drinker_age = age
 
 
p = Person('Miguel', 30)
p = Person('Niki', 13)

Once again, we create a descriptor class. In this case, we use Python’s weakref library’s WeakKeyDictionary, which is a neat class that creates a dictionary that maps keys weakly. What this means is that when there are no strong references to a key in the dictionary, that key and its value will be discarded. We are using that in this example to prevent our Person instances from hanging around indefinitely.

Anyway, the part of the descriptor that we care most about is in our __set__ method. Here we check to see that the instance’s age parameter is greater than 21, which is what you would need to be in the USA if you wanted to drink an alcoholic beverage. If you’re age is lower, then it will raise an exception. Otherwise it will print out the name of the person and a message. To test out our descriptor, we create two instances with one that is greater than 21 in age and one that is less. If you run this code you should see the following output:

Miguel can legally drink in the USA
Traceback (most recent call last):
  File "desc_validator.py", line 32, in <module>
    p = Person('Niki', 13)
  File "desc_validator.py", line 28, in __init__
    self.drinker_age = age
  File "desc_validator.py", line 14, in __set__
    raise Exception(msg.format(name=instance.name))
Exception: Niki is too young to legally imbibe

That obviously worked the way it was supposed to, but it’s not really obvious how it worked. The reason this works the way it does is that when we go to set drinker_age, Python notices that it is a descriptor. Python knows that drinker_age is a descriptor because we defined it as such when we created it as a class attribute:

drinker_age = Drinker()

So when we go to set it, we actually call our descriptor’s __set__ method which passes in the instance and the age that we are trying to set. If the age is less than 21, then we raise an exception with a custom message. Otherwise we print out a message that you are old enough.

Getting back to how this all works, if we were to try to print out the drinker_age, Python would execute Person.drinker_age.__get__. Since drinker_age is a descriptor, its __get__ is what actually gets called. If you wanted to set the drinker_age, you would do this:

p.drinker_age = 32

Python would then call Person.drinker_age.__set__ and since that method is also implemented in our descriptor, then the descriptor method is the one that gets called. Once you trace your way through the code execution a few times, you will quickly see how this all works.

The main thing to remember is that descriptors are linked to classes and not to instances.


Wrapping

Descriptors are pretty important because of all the places they are used in Python’s source code. They can be really useful to you too if you understand how they work. However, their use cases are pretty limited and you probably won’t be using them very often. Hopefully this chapter will have helped you see the descriptor’s usefulness and when you might want to use one yourself.


Related Reading

31 May 14:44

Il trono di Spade 6: in arrivo un brutto colpo di scena per Sansa?

by Alessandra Pellegriti
Spoiler
Sansa StarkSansa Stark
Una nuova e inquietante teoria su Il Trono di Spade – Game of Thrones e soprattutto su Sansa Stark (interpretata da Sophie Turner) Ú emersa in rete da qualche giorno.

Il fatto che The Door, quinto episodio della sesta stagione dello show – attualmente in corso – si sia concluso con la scioccante vicenda di Hodor (Kristian Nairn) potrebbe aver distratto i telespettatori da alcuni dettagli legati alla giovane Stark, ora al sicuro al Castello Nero con suo fratello Jon Snow (Kit Harington). Per addentrarci velocemente nel discorso vi invitiamo a guardare con attenzione l’immagine sottostante

Sansa Stark_full

Sansa Stark_full

Notate la rotondità sotto il cappotto? Ebbene sì, Sansa potrebbe essere rimasta incinta di Ramsay Bolton (Iwan Rheon). A rafforzare tale teoria ciò che Ú accaduto nell’episodio sopracitato:

Certo, potrebbero tutte essere delle semplici coincidenze. Tuttavia sappiamo per certo che Ramsay ha abusato di Sansa più volte, quindi non possiamo catalogare questa teoria come inverosimile.

Voi cosa ne pensate? E’ possibile che questo si riveli come il prossimo colpo di scena che coinvolgerà la giovane Stark?

La descrizione ufficiale della sesta stagione de Il Trono di Spade – Game of Thrones:

Per la prima volta nella storia dello show, la sceneggiatura dei nuovi episodi si discosta in modo significativo dai romanzi, rendendo una completa incognita il futuro dei Sette regni e quello dei personaggi stessi della serie.. Ma Ú proprio questo, la sua natura imprevedibile, a dare fascino alla serie: né il potere, né il prestigio, né interi eserciti di uomini e nemmeno la magia possono garantire la sicurezza di nessuno. No One Is Safe!
Come sempre, sulla trama della nuova stagione c’Ú il riserbo più assoluto. Quel poco che sappiamo Ú quanto contenuto nel trailer ufficiale della sesta stagione de Il trono di Spade, oltre un minuto e mezzo di sequenze mozzafiato. Sulle note in sottofondo di Wicked Games, il video mostra qualcuno posare le mani sul corpo senza vita di Jon Snow; Daenerys camminare in mezzo a un immenso khalasar mentre Jorah segue le sue tracce; Cersei, sottoposta a umiliazione pubblica alla fine della quinta stagione, scegliere la violenza e concedersi ancora all’amore del fratello; Melisandre lamentarsi che la grande vittoria vista nelle fiamme era una bugia; Tyrion ricordare che il gioco del trono si Ú fatto terrificante; Sansa viva, e molto sicura di sé; un’Arya cieca presa a schiaffi in faccia e un cresciuto Bran vicino al Re della Notte.

Tra le grandi new entry di questa 6° stagione, Ian Mac Shane (“Deadwood”), James Faulkner (“Downtown Abbey”, “Il Diario di Bridget Jones”), Richard E. Grant (“The Iron Lady”) e Max von Sydow (“Star Wars: Il risveglio della forza”). Un energico gruppo di re e regine, nobili e cavalieri alla conquista dell’agognato Trono di Spade.

Vi ricordiamo che la sesta stagione dello show va in onda su Sky Atlantic HD la notte tra la domenica e il lunedì alle 3:00 in simulcast con la HBO in lingua originale sottotitolata. Il giorno dopo viene poi trasmessa la replica alle 22:10, mentre il lunedì della settimana successiva alla messa in onda ogni episodio viene trasmesso doppiato in italiano. La serie Ú inoltre disponibile su Sky On Demand e Sky Online.

Trovate tutte le informazioni sulle stagioni precedenti nel nostro speciale, mentre nella scheda della serie trovate tutte le notizie e le recensioni.

Via Huffington Post


26 May 13:06

Netflix Hack Day, tante idee folli pronte a diventare realtà

by Franco Aquini

Netflix Hack Day, tante idee folli pronte a diventare realtà

di Franco Aquini - 25/05/2016 16:161

Durante l'Hack Day di Netflix, più di 200 ingegneri e progettisti si sono sbizzarriti nell'immaginare modi nuovi di interagire con gli strumenti di Netflix (e non solo). Molti di questi rasentano la follia, ma non così tanto da non essere presi in considerazione dal gigante dello streaming.

Gli Hack Day di Netflix sono un laboratorio di idee aperto a più di 200 ingegneri e progettisti che per un giorno decidono di dare libero sfogo alle proprie fantasie tecnologiche. Quello che ne esce sono visioni futuristiche e un po' folli di interazioni tramite realtà virtuale, prodotti completamente nuovi, interfacce drag & drop per giocare con le categorie dei contenuti Netflix come fosse Tetris e piattaforme che si mescolano al mondo di Minecraft. 

Tutte idee "al limite" che potrebbero però suggerire qualcosa di molto interessante: la riproduzione remota dell'audio, per esempio, che consiste nel vedere il video sul TV tramite chromecast e ascoltare l'audio con le cuffie collegate allo smartphone. Così non si disturba nessuno e non si deve avere un paio di cuffie wireless. Ecco una carrellata delle idee più interessanti:

Virtual Reality - Netflix Zone 

Netflix incontra la realtà virtuale di HTC Vive. Certo la grafica non Ú il massimo, ma il concetto di trovarsi dentro Daredevil non Ú affatto male.


Spinnacraft

​Ecco cosa succede quando la piattaforma opensource di Netflix, Spinnaker, incontra Minecraft. Roba da 100% nerd.


Tetris

Se l'interfaccia a blocchi orizzontali di Netflix Ú troppo statica, allora Ú venuto il momento di rendere i singoli blocchi trasportabili da una zona all'altra dello schermo. Con il drag & drop, Ú possibile spostare il genere fantasy in cima alla lista, oppure eliminare del tutto il genere che piace meno. Ecco, questa Ú un'idea davvero niente male.


Family Catch-up Viewing

Una delle funzionalità più interessanti di Netflix Ú che con un solo account si possono gestire i profili di tutta la famiglia. Ma se volessi sapere cosa guardano gli altri senza abbandonare il mio profilo? Ecco la soluzione.


QuietCast

Il top: guardi un episodio dal tablet inviandolo al TV tramite chromecast. Ma Ú notte fonda e non vuoi disturbare, quindi infili le cuffie nello smartphone e ascolti l'audio da lì. Eccellente.


© riproduzione riservata

Resta aggiornato sugli ultimi articoli di DDay.it
FonteNetflix Techblog EntertainmentSmarthomenetflix hack day
21 Jan 11:54

A Brief Intro to the sh Package

by Mike

The other day, I came across an interesting project called sh, which I believe refers to the shell (or terminal). It used to be the pbs project, but they renamed it for reasons I haven’t figured out. Regardless, the sh package is a wrapper around subprocess that allows the developer to call executables a little more simply. Basically it will map your system programs to Python functions. Note that sh only supports linux and mac, whereas pbs supported Windows too.

Let’s look at a couple of examples.

>>> from sh import ls
>>> ls
<Command '/bin/ls'>
>>> ls('/home')
user_one  user_two

In the code above, I simply imported the ls “command” from sh. Then I called it on my home folder, which spits out what user folders exist there. Let’s try running Linux’s which command.

>>> import sh
>>> sh.which('python')
'/usr/bin/python'

This time we just import sh and call the which command using sh.which. In this case, we pass in the name of the program we want to know the location of. In other words, it works the same way as the regular which program does.


Multiple Arguments

What do you do if you need to pass multiple arguments to the command? Let’s take a look at the ping command to find out!

>>> sh.ping('-c', '4', 'www.google.com')
PING www.google.com (74.125.225.17) 56(84) bytes of data.
64 bytes from ord08s12-in-f17.1e100.net (74.125.225.17): icmp_seq=1 ttl=55 time=16.3 ms
64 bytes from ord08s12-in-f17.1e100.net (74.125.225.17): icmp_seq=2 ttl=55 time=15.1 ms
64 bytes from ord08s12-in-f17.1e100.net (74.125.225.17): icmp_seq=3 ttl=55 time=21.3 ms
64 bytes from ord08s12-in-f17.1e100.net (74.125.225.17): icmp_seq=4 ttl=55 time=23.8 ms
 
--- www.google.com ping statistics ---
4 packets transmitted, 4 received, 0% packet loss, time 3002ms
rtt min/avg/max/mdev = 15.121/19.178/23.869/3.581 ms

Here we call ping and tell it we only want a count of four. If we don’t do that, it will basically run until we tell it to stop, which hung Python on my machine.

You can actually use keyword arguments for the parameters that you pass to the called program too. Here’s an equivalent example:

>>> sh.ping('www.google.com', c='4')

This is a little counter-intuitive in that the keyword arguments come after the URL whereas in the previous example it was the reverse. However, this is more of a Python construct that something that the sh package is doing deliberately. In Python, you can’t have a keyword argument followed by a regular argument after all.


Wrapping Up

When I stumbled across this project, I thought it was a really neat idea. Is it really that much harder to just use Python’s subprocess module? Not really, but this way was a lot more fun and some might even call sh more “Pythonic”. Regardless, I think it’s worth your time to check out. There are a few other pieces of functionality that aren’t covered here, such as “baking”, so it would be a good idea to check out the project’s documentation if you want to know more about its other features.


Additional Reading

23 Nov 15:05

Compri un buono Amazon da 50 euro e ricevi uno sconto di 10 euro

by Emanuele Villa

Compri un buono Amazon da 50 euro e ricevi uno sconto di 10 euro

di Emanuele Villa - 21/11/2015 08:000

Interessante iniziativa in casa Amazon che anticipa il periodo delle feste: acquistando un Buono Regalo da 50 euro o superiori si riceve uno sconto di 10 euro da usare su qualsiasi acquisto. Vale fino al 15 dicembre

Anticipando il periodo natalizio, Amazon ha pubblicato un'iniziativa interessante avente per oggetto i propri buoni regalo, un'idea sempre utile quando non si sa bene cosa regalare, si rischia di sbagliare, non si conoscono bene i gusti o, semplicemente, manca tempo per andare in giro per regali.

In pratica l'acquisto di un buono da 50 euro o superiore dà diritto a ricevere uno sconto di 10 euro da usare su qualsiasi altro acquisto all'interno dello store. Considerando che si avvicinano le festività e le grandi offerte del Black Friday, acquistare un buono Amazon potrebbe servire per ottenere 10 euro di sconto su un'ulteriore offerta che si dovesse presentare da oggi in avanti.

Consultando la pagina Amazon relativa all'iniziativa si scopre che la promozione vale fino al 15 dicembre, Ú necessario avere già un account Amazon e aver fatto un ordine dal 12 novembre 2010, oltre al fatto che “Non possono beneficiare della promozione i clienti che hanno effettuato ordini di uno o più Buoni Regalo dal 12 novembre 2013 al 12 novembre 2015”. Nella pagina dell'iniziativa ci sono poi altre clausole che vanno considerate, compreso il fatto che il Buono Sconto Ú utilizzabile fino al 31 gennaio 2016 e alcune esclusioni. Per ulteriori informazioni, rimandiamo comunque alla pagina ufficiale.

© riproduzione riservata

MercatoSocial Media e Webofferteamazon
22 Sep 11:02

Kodi: film streaming, serie TV, partite e altro

by Giuseppe F. Testa

Kodi ha conquistato tantissimi utenti amanti dei PC da salotto (HTPC) grazie ai suoi numerosissimi plugin, all’estrema personalizzazione, alla compatibilità con molti telecomandi IR e per la flessibilità con cui può essere controllato da smartphone Android. Tanti utenti ci hanno chiesto come poter sfruttare davvero al massimo Kodi integrando al suo interno plugin dedicati a film streaming, streaming di canali TV e streaming serie TV reperiti dai siti più “underground”, così da rimpiazzare per sempre i servizi dedicati e costruirsi un vero e proprio HUB multimediale in grado di gestire in completa autonomia lo streaming di qualsiasi contenuto del Web (anche in italiano).

No dovete più cercare nel Web: ecco la guida definitiva allo streaming di contenuti! Preparate i vostri PC e mettete nei segnalibri questo articolo, vi sarà molto utile.

DOWNLOAD | Installer

NOTA BENE: Chimera Revo non Ú responsabile per l’utilizzo scorretto del materiale proposto. Il sito declina ogni responsabilità per danni a persone o cose derivate dall’utilizzo del materiale presente nella guida.

Di seguito un indice per i contenuti della guida.

Kodi streaming

Per poter visionare i contenuti in streaming possiamo affidarci ad alcuni addon in grado di indicizzare tutti i siti Web dedicati allo streaming in italiano, in grado quindi di recuperare da soli i link per lo streaming e farceli vedere senza alcun problema, alla massima qualità!

Yatse, l’app telecomando

Per sfruttare al meglio Kodi possiamo installare sul nostro dispositivo Android (sia esso uno smartphone o tablet) l’app Yatse, che permetterà di sfruttare appieno il potenziale del media center open source.

2016-11-22-15_43_08-telegramdesktop

Possiamo trovare una guida completa a Yatse al seguente link.

Scaricare sottotitoli su Kodi

Necessitiamo di scaricare i sottotitoli per i video e i film in lingua straniera o con dialoghi forzati? Possiamo utilizzare i servizi sottotitoli integrati in Kodi per recuperare automaticamente i sottotitoli per qualsiasi film o serie TV. Di seguito la nostra guida a riguardo.

StreamOnDemand

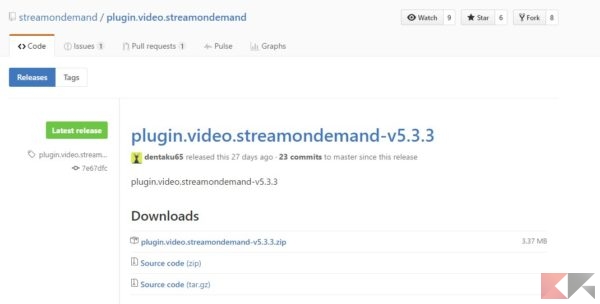
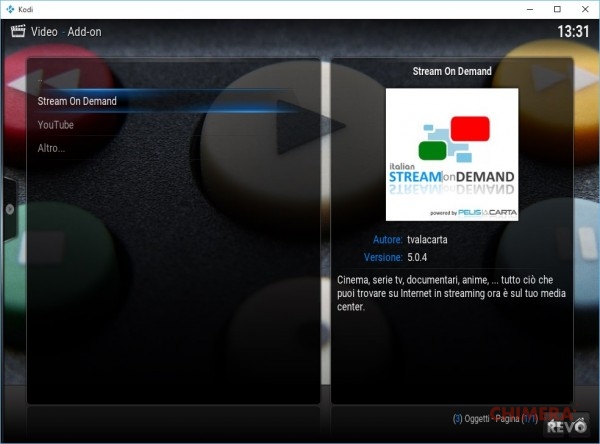
Vi ricordate di Pelisalacarta? Alcuni sviluppatori italiani ne hanno recuperato i sorgenti, facendo rinascere il plugin per visualizzare solo contenuti italiani in streaming! Il plugin derivato si chiama Stream on Demand; scarichiamo il file ZIP dalla pagina GitHub del progetto (tasto Download ZIP).

DOWNLOAD | Stream on Demand

Releases · streamondemand_plugin.video.streamondemand · GitHub

Per installarlo seguiamo la stessa procedura descritta in alto, Sistema->Impostazioni->Add-on->Installa da un file zip. Apriamo l’addon dentro Kodi dal percorso Video->Add-on.

stream on demand 2

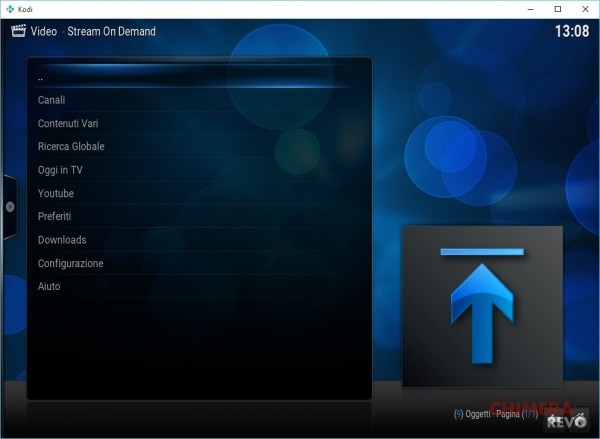
La home dell’addon Ú semplice: possiamo visitare i singoli siti usando il menu Canali, effettuare una ricerca globale, vedere un video su YouTube, controllare i preferiti e visualizzare i video scaricati.

SOD home

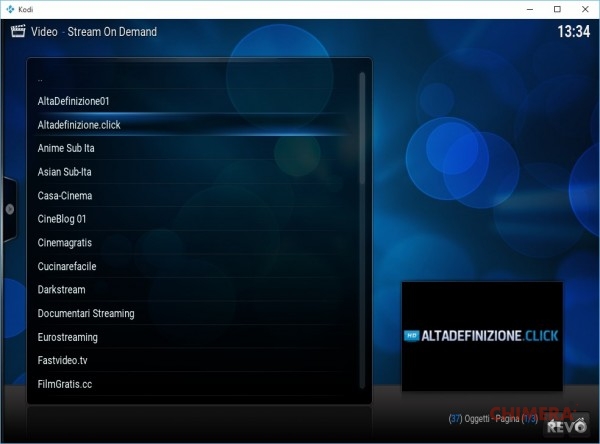
Se interessati a raggiungere un sito specifico per lo streaming (tipo CB01) basta aprire il menu Canali e trovare quello di vostro interesse.

tutti i siti

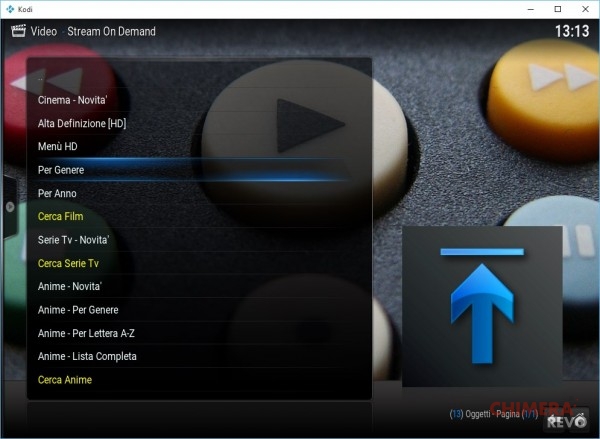
Apriamo per esempio Cineblog 01, uno dei più famosi, e scegliamo nella sua home quale film, telefilm o anime aprire.

cineblog1

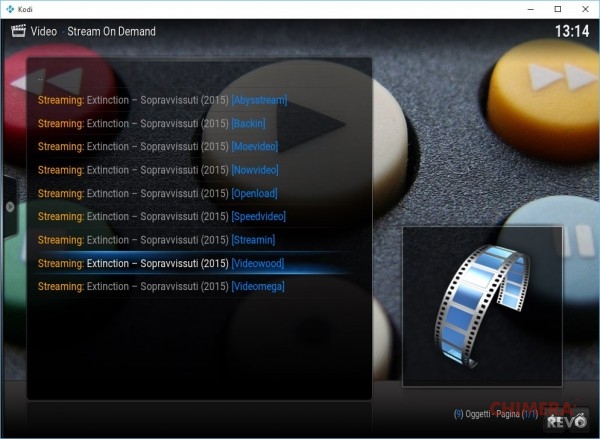
Aprendo un contenuto qualsiasi ci ritroveremo una lista di link utili per avviare lo streaming.

vari link streaming

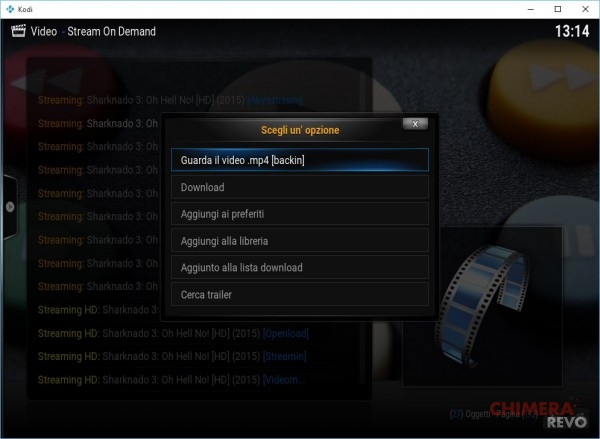
Avviamone uno e attendiamo; Kodi ci chiederà se avviare la riproduzione o scaricare il video in locale.

NOTA: non tutti i link sono gestibili dal player, alcuni di essi cambiano, vengono cancellati o non sono più disponibili.

backin streaming

Clicchiamo su Guarda video o Download a seconda delle necessità. I migliori servizi sono finora Backin, Moevideo, SpeedVideo e Streamin.

Add-on streaming

Possiamo provare ulteriori add-on per ottenere contenuti in streaming. Ecco un elenco di guide a riguardo presenti su Chimera Revo.

Streaming serie TV

Se amiamo le serie TV possiamo utilizzare l’add-on sMyTvShow, a cui abbiamo dedicato un articolo in cui spieghiamo come installarlo ed usarlo al meglio.

Streaming eventi sportivi

Per poter visualizzare eventi sportivi in streaming possiamo seguire la nostra guida dedicata, con i migliori add-on per lo streaming delle partite di calcio (e non solo). Tutti gli add-on sono auto-aggiornanti.

Streaming TV

Per aggiungere i canali TV del digitale terrestre consiglio di leggere le nostre guide dedicate all’IPTV e allo streaming dei canali televisivi (digitale terrestre italiano e canali TV europei).

Per lo streaming dei canali della TV satellitare possiamo anche installare Catoal IPTV.

Liste IPTV

Voglia di guardare i contenuti della TV satellitare e i canali a pagamento? Ecco le guide per voi.


Add-on streaming repository ufficiale

Alcuni canali del digitale terrestre sono presenti come plugin ufficiali; in basso il nostro articolo per approfondire l’argomento.

Kodi 17

Possiamo provare il nuovo Kodi, attualmente in fase di testing, seguendo la nostra guida dedicata.

Kodi su TV

Vogliamo installare il media center sul nostro nuovo TV? Ecco i metodi per portare il media center open source sulla TV del salotto.

Altre guide Streaming

In alternativa possiamo utilizzare alcune app che offrono lo streaming dei contenuti Sky e Mediaset gratis. Di seguito le guide dedicate.

L'articolo Kodi: film streaming, serie TV, partite e altro appare per la prima volta su ChimeraRevo - Il miglior volto della tecnologia.

11 Sep 13:33

Agents of SHIELD: nuovo promo della terza stagione

by Ilaria Ercoli

Agents of SHIELD: nuovo promo della terza stagione
Telefilm Central

Un nuovo promo dell serie targata Marvel, Agents of SHIELD, Ú stato rilasciato in questi giorni. Nel breve filmato abbiamo la possibilità di dare uno sguardo alla nuova Skye (Chloe Bennet), ormai diventata a tutti gli effetti Daisy Johnson, ma anche ad un nuovo Inumano chiamato Joey (interpretato da Juan Pablo Raba). Negli ultimi fotogrammi si intravede invece una creatura mostruosa che si presume sarà la grande minaccia dei primi episodi dello show.

Agents of SHIELD torna sugli schermi della ABC martedì 29 settembre. Vi ricordiamo inoltre che proprio in questi giorni Ú in corso la battaglia benefica a suon di Dubsmash tra il cast dello SHIELD e quello della serie Agent Carter, potete dare la vostra preferenza sul sito https://www.crowdrise.com/dubsmashwars

Ecco il promo:

Agents of SHIELD: nuovo promo della terza stagione
Telefilm Central

27 Apr 15:16

Telecom, una chiamata da Agcom

L'Authoriy diffida la telco per l'offerta Tutto Voce: manca il consenso dei consumatori nel passaggio al nuovo listino previsto per il prossimo primo maggio


27 Sep 08:13

Linux: Where is my memory?

More ultra nerdiness. Here's a tutorial explaining how to use the kernel slab allocation data under /proc/slabinfo to troubleshoot memory consumption related problems in Linux, with additional tips and tricks on memory management and system administration. Ugh. But fun, yes?
10 Jan 16:22

Re: Il mondo dei doppiatori 2.0 #114 – Spazio critico: Philomena – CineAnteprima: The Counselor – TeleAnteprima: The Tomorrow People – Voci dal Forum: American Hustle di Antonio Genna

Su The Counselor: in gran parte sono scelte stilistiche del regista Ridley Scott e dei suoi collaboratori, a quanto mi risulta.

29 Aug 14:33

Notizie: Scacco al tempo su Urania Collezione

Scacco al tempo su Urania Collezione

Un romanzo dai toni fantastici, che ci fa dubitare della nostra percezione di ciò che Ú reale. Uno dei migliori lavori di Fritz Leiber, contrassegnato da una gestazione lunga e travagliata.

Pochi romanzi hanno avuto una gestazione lunga e tribolata come Scacco al tempo. Fritz Leiber iniziò a scriverlo nel 1943, contando di venderlo alla rivista Unknow, ma arrivato al quarto capitolo venne informato dal direttore John W. Campbell jr. che la penuria di carta causata dalla guerra imponeva il sacrificio di alcune riviste del gruppo, e Unknow era tra queste. Leiber abbandonò l'opera, dato che le riviste di fantascienza non avrebbero ospitato una storia che virava decisamente verso il fantastico, e Weird Tales pubblicava solo racconti. Dopo la guerra Leiber ampliò il... -


Sezione: Notizie - canale: Editoria - 26 agosto 2013 - articolo di Giampaolo Rai