Shared posts

30 Aug 09:02

Bootstrap 5.1.0

The first minor release of Bootstrap 5 is here! v5.1.0 has arrived and is packed with exciting new features and improvements. There’s experimental support for CSS Grid, offcanvas in the navbar, a new placeholders component, horizontal collapse support, new helpers, new CSS variables in our utilities, refactored JavaScript, and more.


Jump to a section:


CSS Grid

CSS Grid docs

We’ve added an experimental version of a new CSS Grid as an opt-in replacement to our default grid system. To enable it, disable the default grid, by setting $enable-grid-classes: false and enable the CSS Grid by setting $enable-cssgrid: true. Once recompiled, you’ll be able to switch to the new classes. Our new CSS Grid docs page has all the details and some helpful examples to get you started.

Shipping CSS Grid support as experimental allows us to play with things a bit without breaking backward compatibility for folks. Please help us out by testing it and sharing feedback. We expect it to go stable for widespread use in a future minor release.

Read the Bootstrap CSS Grid docs for more info.

Offcanvas in navbars

Offcanvas navbar example

We’ve expanded our .navbar-expand-* classes (see what we did there?) to include support for offcanvases inside the navbar. Wrap your navbar elements with the appropriate offcanvas HTML, point your navbar toggler button to the offcanvas, and voila.

Head to the offcanvas navbar docs for more information and a live demo.

Placeholders

Placeholders example

There’s a new component in town with placeholders, a way to provide temporary blocks in lieu of real content to help indicate that something is still loading in your site or app. Our first iteration here aims to only provide the HTML and CSS—it’s up to you to implement these placeholders with whatever custom code you might need.

Consider the basic Bootstrap card component shown above.

<div class="card">
  <img src="..." class="card-img-top" alt="...">
  <div class="card-body">
    <h5 class="card-title">Card title</h5>
    <p class="card-text">Some quick example text to build on the card title and make up the bulk of the card's content.</p>
    <a href="#" class="btn btn-primary">Go somewhere</a>
  </div>
</div>

Here it is rebuilt with glowing placeholder bars to indicate something is still loading.

<div class="card" aria-hidden="true">
  <img src="..." class="card-img-top" alt="...">
  <div class="card-body">
    <h5 class="card-title placeholder-glow">
      <span class="placeholder col-6"></span>
    </h5>
    <p class="card-text placeholder-glow">
      <span class="placeholder col-7"></span>
      <span class="placeholder col-4"></span>
      <span class="placeholder col-4"></span>
      <span class="placeholder col-6"></span>
      <span class="placeholder col-8"></span>
    </p>
    <a href="#" tabindex="-1" class="btn btn-primary disabled placeholder col-6"></a>
  </div>
</div>

Head to the placeholder docs to learn more.

Horizontal collapse

Hot damn, we’ve finally added official support for horizontally collapsing! The collapse plugin has been able to detect width vs height for some time (even in v4), but we never had a working example in our docs until now. Add the .collapse-horizontal modifier class to transition the width instead of height and set a width on the immediate child element.

<button class="btn btn-primary" type="button" data-bs-toggle="collapse" data-bs-target="#collapseWidthExample" aria-expanded="false" aria-controls="collapseWidthExample">
  Toggle width collapse
</button>

<div style="min-height: 120px;">
  <div class="collapse collapse-horizontal" id="collapseWidthExample">
    <div class="card card-body" style="width: 300px;">
      This is some placeholder content for a horizontal collapse. It's hidden by default and shown when triggered.
    </div>
  </div>
</div>

Heads up! You may need some min-height or height to avoid excessive browser repainting, as we’ve included in our demo above.

Stack and vertical rule helpers

While utilities get most of the spotlight these days, helpers are still incredibly useful. Our newest helpers are called stacks and they’re shortcuts for vertical and horizontal stacks of elements. They’re inspired by the open source Pylon project, which was in turn inspired by iOS’s stacks. Right now, stacks aren’t responsive, but that can easily change with your feedback.

To create a vertical stack, wrap a series of elements in .vstack. Use .gap-* utilities on the parent (or set individual margin utilities) to quickly space elements.

Bootstrap vstack example

<div class="vstack gap-3">
  <div class="bg-light border">First item</div>
  <div class="bg-light border">Second item</div>
  <div class="bg-light border">Third item</div>
</div>

Want a horizontal stack? Use .hstack instead.

Bootstrap vstack example

<div class="hstack gap-3">
  <div class="bg-light border">First item</div>
  <div class="bg-light border">Second item</div>
  <div class="bg-light border">Third item</div>
</div>

To support these stacks, we’ve also added an additional new helper—.vr, or vertical rule. HTML has had native <hr> elements for the longest time to create horizontal rules, but never anything for vertical rules. The new .vr helper works great in horizontal stacks and other situations where borders are a little trickier.

Bootstrap vstack example

<div class="hstack gap-3">
  <input class="form-control me-auto" type="text" placeholder="Add your item here...">
  <button type="button" class="btn btn-secondary">Submit</button>
  <div class="vr"></div>
  <button type="button" class="btn btn-outline-danger">Reset</button>
</div>

Learn more in the stacks helper docs.

New CSS variables

We’ve expanded our :root CSS variables to include our gray color palette, new <body> variables, and new RGB variables for our theme colors. The grayscale colors join our existing color and theme color variables to complete the set of globally available CSS colors. As the development of v5 progresses, these variables will be used more and more in our components to better enable global theming.

Speaking of, our new <body> CSS variables now control the styling of the <body>. This is what you’ll find in the compiled CSS:

body {
  margin: 0;
  font-family: var(--bs-body-font-family);
  font-size: var(--bs-body-font-size);
  font-weight: var(--bs-body-font-weight);
  line-height: var(--bs-body-line-height);
  color: var(--bs-body-color);
  text-align: var(--bs-body-text-align);
  background-color: var(--bs-body-bg);
  -webkit-text-size-adjust: 100%;
  -webkit-tap-highlight-color: transparent;
}

Like all our other :root CSS variables, the values for these are generated from our Sass variables. That means that no matter how you customize Bootstrap—via Sass or CSS variables—you haven’t lost any functionality or convenience.

Read the CSS variables customization docs for more info.

Updated .bg-* and .text-* utilities

Our new RGB values are built to help us make better use of CSS variables across the entire project. To start, our background-color and color utilities have been updated to use these new RGB values for real-time customization without recompiling Sass and on-the-fly transparency for any background or text color.

Here’s how our .bg-* and .text-* color utilities look now once compiled:

.bg-success {
  --bs-bg-opacity: 1;
  background-color: rgba(var(--bs-success-rgb), var(--bs-bg-opacity)) !important;
}

.text-primary {
  --bs-text-opacity: 1;
  color: rgba(var(--bs-primary-rgb), var(--bs-text-opacity)) !important;
}

We use an RGB version of each color’s CSS variable and attach a second CSS variable, --bs-text-opacity or --bs-bg-opacity, for the alpha transparency (with a default value 1 thanks to a local CSS variable in the ruleset). That means anytime you use .text-primary now, your computed color value is rgba(13, 110, 253, 1). The local CSS variable inside each .text-* class helps avoid inheritance issues when nesting instances of these classes.

To support these changes, we’ve added some new .text-opacity-* and .bg-opacity-* utilities. Choose from a predefined set (which you can modify in the utilities API) of classes to quickly change the local CSS variable when a given .text-* or .bg-* utility is used. For example:

Bootstrap text opacity example

<div class="text-primary">This is default primary text</div>
<div class="text-primary text-opacity-75">This is 75% opacity primary text</div>
<div class="text-primary text-opacity-50">This is 50% opacity primary text</div>
<div class="text-primary text-opacity-25">This is 25% opacity primary text</div>

We expect this approach to make its way to border utilities next. Have more CSS variables you’d like to see added? Share your thoughts on a new issue on GitHub. Head to the color utilities or background utilities docs to learn more.

Four new examples

Bootstrap examples

We’ve expanded on our component examples with four new examples that customize some of our core components and implement common patterns. Here’s what’s new:

Explore all our examples to see more.

Modal and offcanvas backdrops

We’ve variablized the class name for our backdrops that are used across our modal and offcanvas components. This comes with a new class for the offcanvas backdrop, .offcanvas-backdrop, and perhaps more importantly, some updated z-index values.

Previously, there was a single offcanvas z-index between the modal and modal backdrop z-indexs, due to offcanvas sharing the modal’s backdrop.

// Before v5.1.0
$zindex-modal-backdrop:       1040 !default;
$zindex-offcanvas:            1050 !default;
$zindex-modal:                1060 !default;

We’ve changed this to allow offcanvases and modals to work together better with separate z-index values for offcanvas, the offcanvas backdrop, modal, and the modal backdrop.

// After v5.1.0
$zindex-offcanvas-backdrop:   1040 !default;
$zindex-offcanvas:            1045 !default;
$zindex-modal-backdrop:       1050 !default;
$zindex-modal:                1055 !default;

Unless you’ve modified the offcanvas component or its Sass variables, there should be no breaking changes for you.

And more!

There’s a lot more in this release that we didn’t include in the highlights above:

  • Reverted the ability for .col-* classes to override .row-cols-* as it caused some breaking bugs in our layouts. We’ll revisit and restore it when we can engineer it in a more scalable and easy to maintain way.
  • Added new .opacity-* utilities (with 0, .25, .5, .75, and 1 as default values).
  • Updated several JavaScript plugins with some major cleanups—alerts, collapse, dropdowns, popovers, and tooltips.
  • Plugins now accept arguments of different types in the getInstance method.
  • Added new Sass maps for all our colors, as well as a new map-merge-multiple() function to combine Sass maps.
  • Updated data-dismiss on modals so that it can be outside of a modal using bs-target.
  • Updated toasts to change show timings and classes to keep toast display: none by default.
  • Added Shift + Tab keyboard support to modal and offcanvas components.
  • Renamed Build Tools page to Contribute to better communicate its purpose.
  • Fixed Manipulator.offset() in Scrollspy to improve scroll position detection.
  • Added examples of live alerts to the docs.

Get the release

Head to https://getbootstrap.com for the latest. It’s also been pushed to npm:

npm i bootstrap

Review the GitHub v5.1.0 release changelog for a complete list of changes since our last release.

Support the team

Visit our Open Collective page or our team members’ GitHub profiles to help support the maintainers contributing to Bootstrap.

26 Feb 21:02

The Flippy Disk Thing

by Jason Scott

This is meant to be a quick overview and primer of the flippy disk and disk hardware situation with regards to 5.25″ floppy drives. It is for reference and referral by others for an easy understanding of the issues.

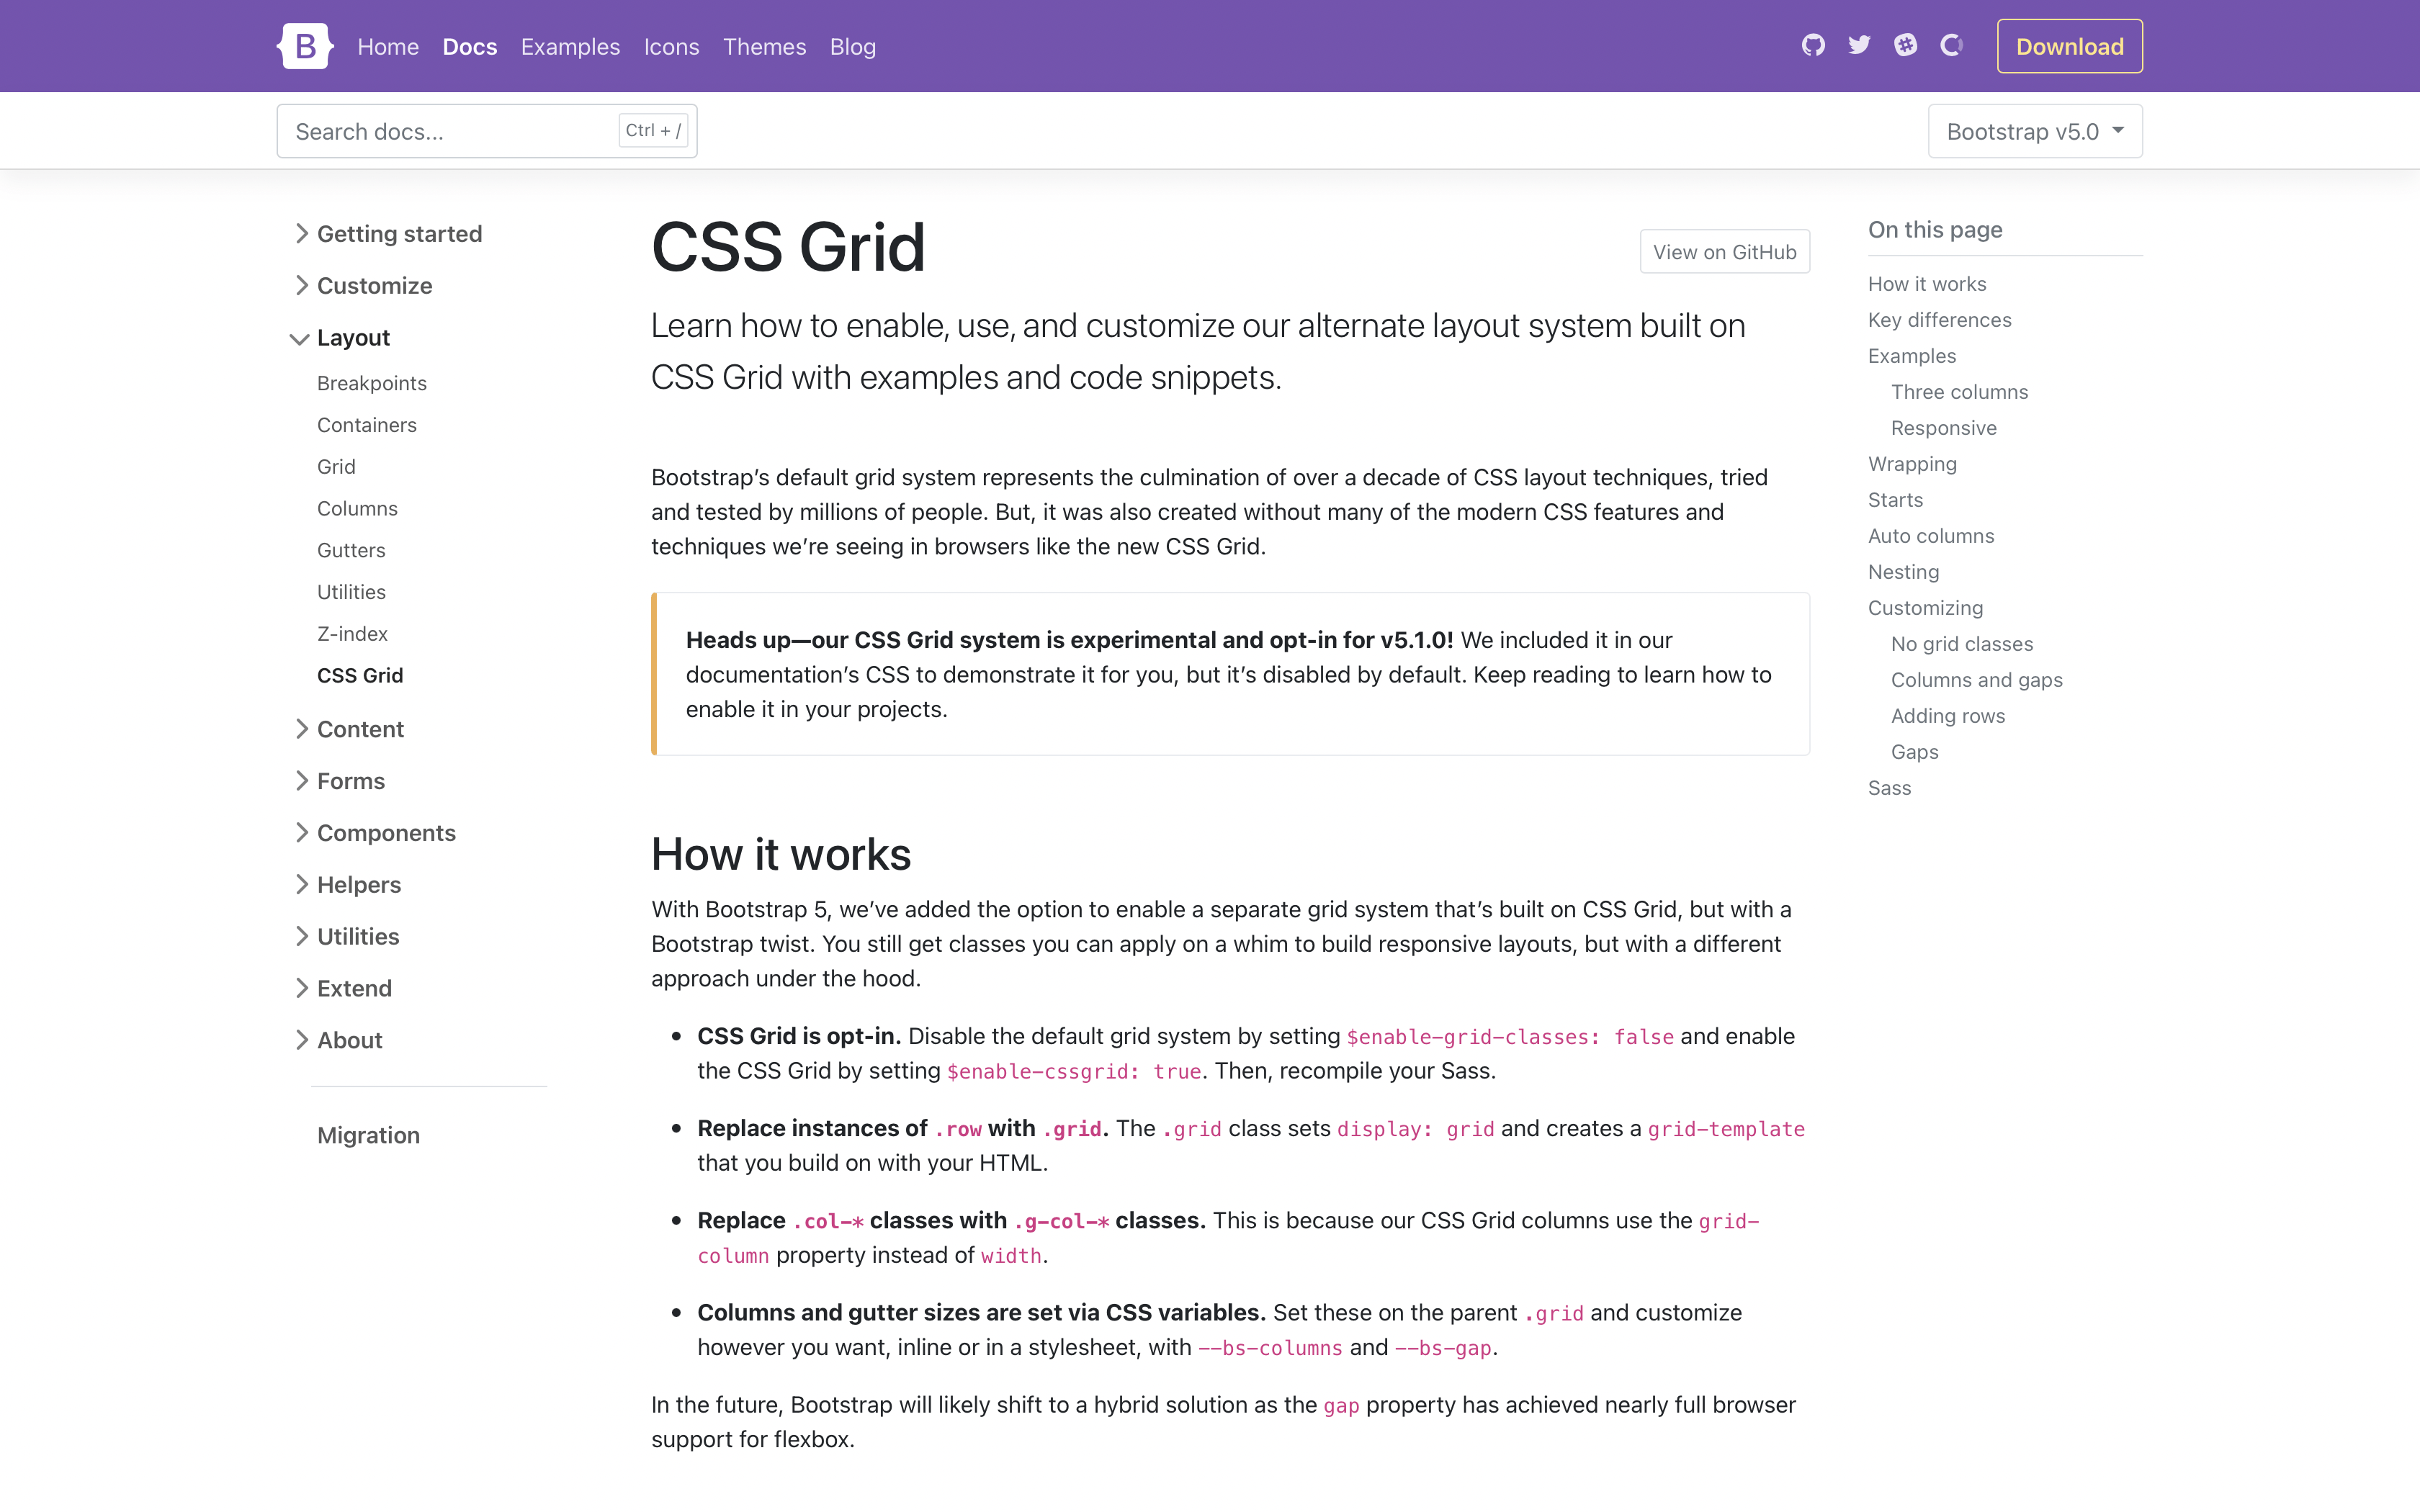
Right now, there are tens of thousands of floppy disks out there that were used extensively in the 1980s and 1990s to store data, much of it one of a kind, on home computers. They looked like this:

1983-maxell-catalog_0011

Yes, even with the lighting and glowy strings. This is what the 1980s looked like, deal with it.

The capacity of these floppies ranged, but were generally very small by today’s standards – between 88k and 3 megabytes, with a lot of them being 140k. To give perspective, that image of the floppy disk is 144k.

Myself and many others have said that with the floppy disks now going into decades of existence, the ability for them to read any data that was put on them so long ago is a bit of a crapshoot. Either it works great to the present day, or it is gone, gone, gone.

It is incumbent on the present-day world to rescue and preserve the data off these floppies, as the choice won’t be left to the next generations to do so. Debates about the worthiness of the data are fine enough, but in another few years the debate will not be about whether items can be saved, but how best to work with, present, and study all that was saved. It is a dying medium and resource.

Currently, there are three methods to transfer the data off these floppy disks, one of which doesn’t exist yet.

  • Original Floppy Drive from Original System
  • Repurposed General-Purpose Floppy Drive
  • The Flop-o-suckerator 3000

The Flop-o-Suckerator 3000, while not currently extant, is likely to be a customized piece of hardware that takes in a floppy disk and “does stuff” to it 100% geared towards pulling all the data off it, and having no other real function. There are examples of this approach for audio cassettes, books, and even business cards. Chris Fenton famously made such a device for Cray Disk Packs, so this isn’t entirely theory – there just will be one made for floppies. Anyway, back to contemporary reality.

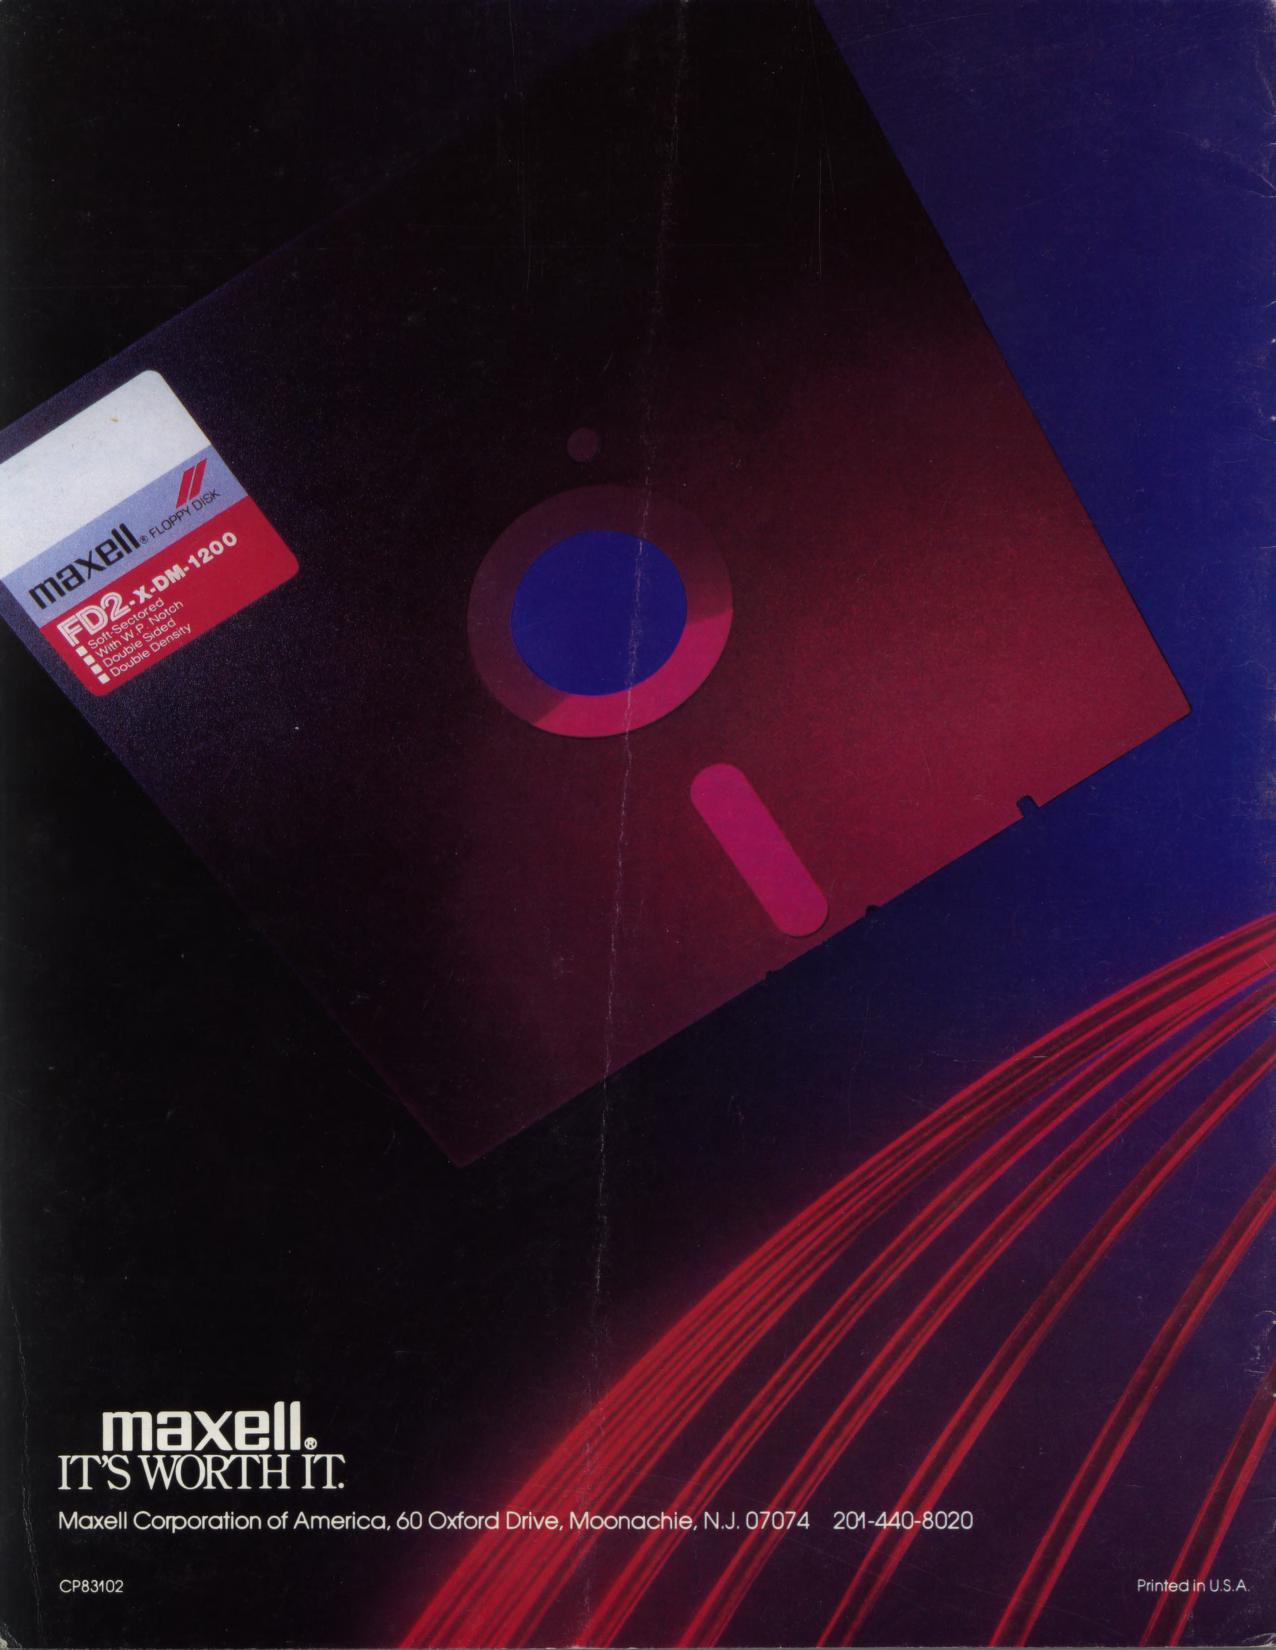
It is still possible to acquire, use, or otherwise work with the original floppy drives from the original hardware. Here’s a few for you to see how they look:

Disk_II

TCMI_Atari810_front

IMAG0337


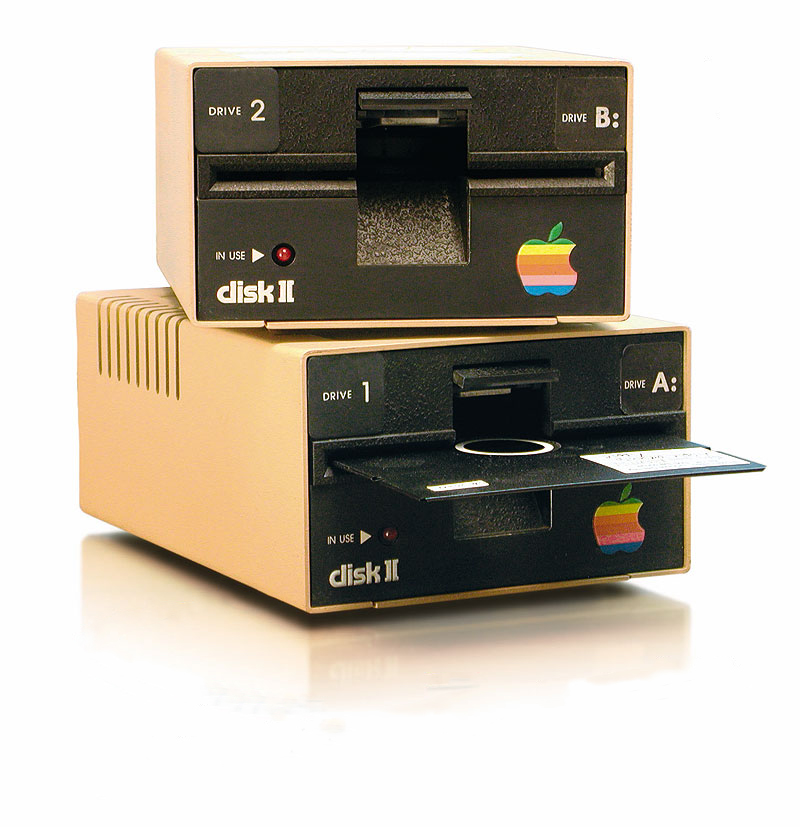
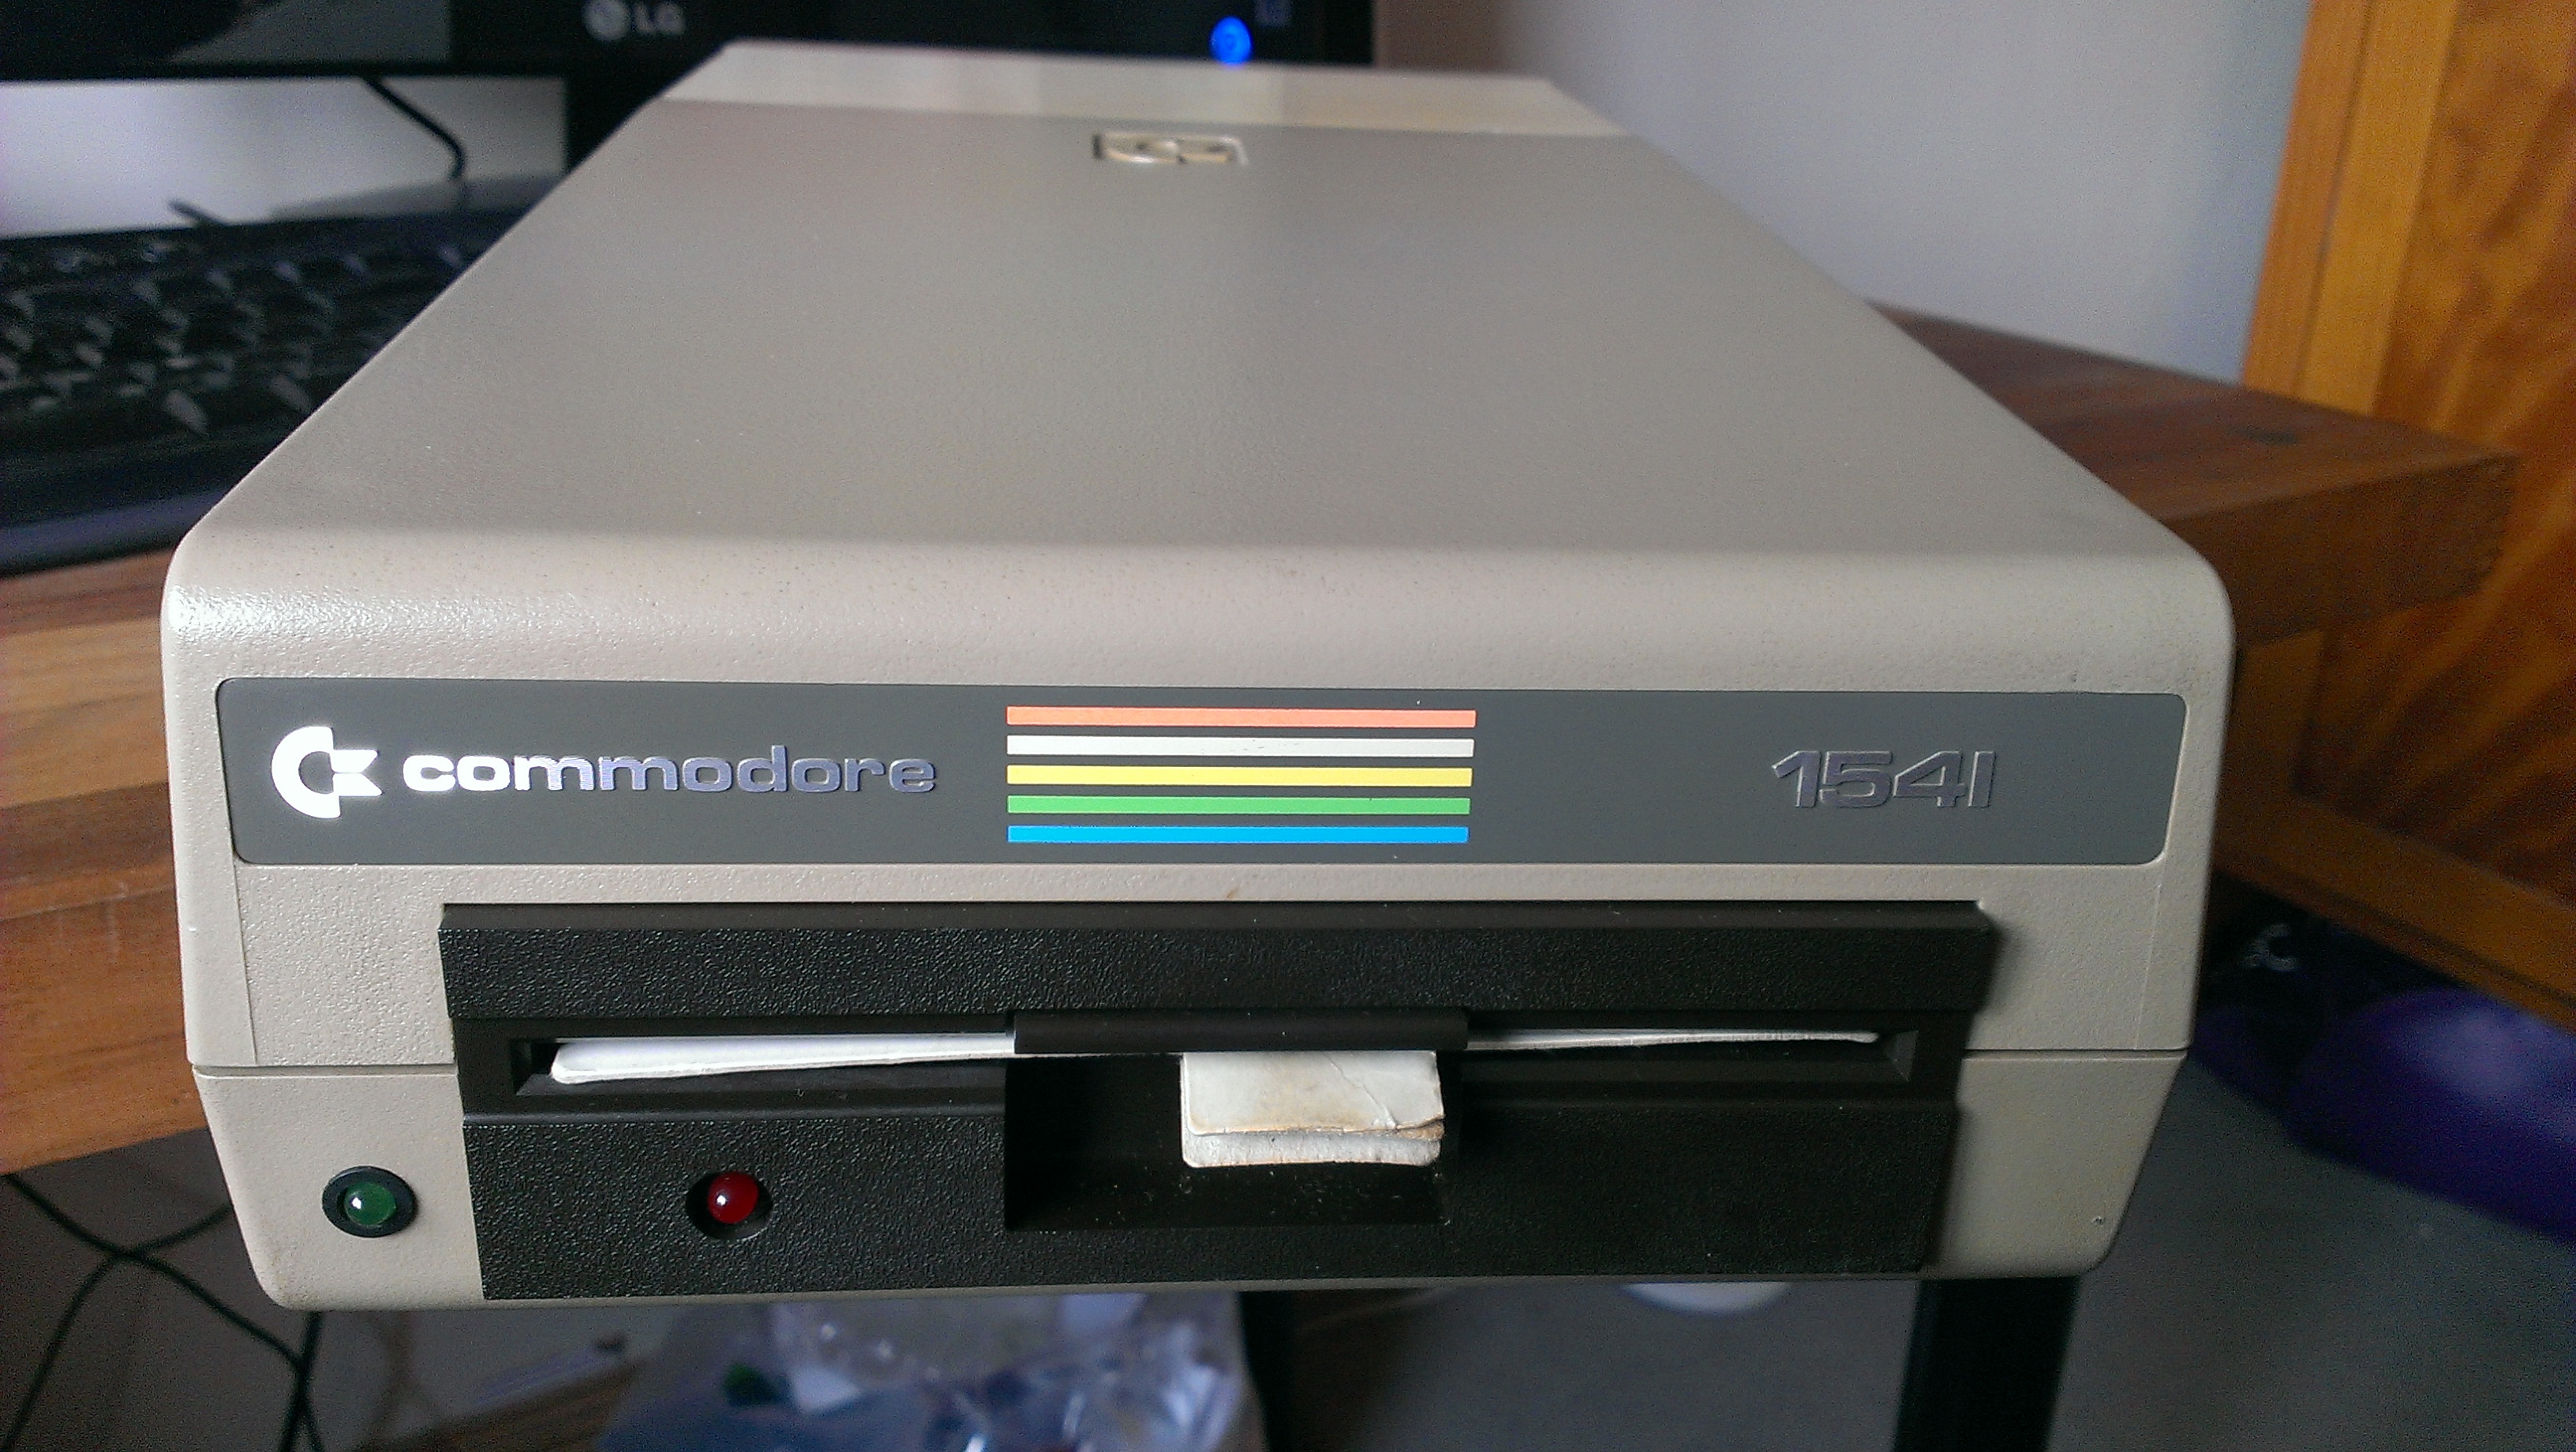
There are two sub-options with these original hardware drives – connect them to the original hardware and run programs to pull the data off (an example of this method is Apple Disk Transfer) or connect the drive to an intermediate piece of hardware designed for that kind of drive, to let it be hooked up to a modern system. (For example, the ZoomFloppy for Commodore 1541 floppies).

Let’s set that aside for the purposes of clarity. This option exists, but sourcing original drives is vaguely harder than sourcing general-purpose floppies made in the 1990s.

So let’s go to the third option: Repurposed General-Purpose Floppy Drive.

flopperrrrs

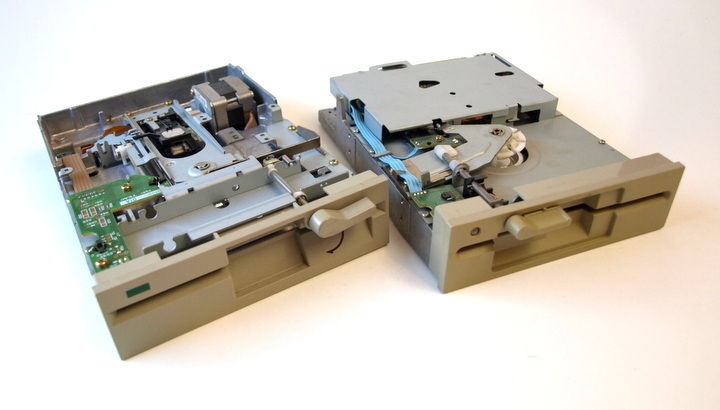
There are a lot of these out there – at least, a lot more of them were made than the other vintage hardware. They were commodity, getting shoved into a lot of generic boxes and low-cost servers and bargain-basement discount computers and electronics stores. Sometimes they were built well and sometimes they were not built well.

They pretty much all share one fatal flaw, hence this entry.

To make them run with modern systems, there’s a number of pieces of hardware out there that basically connect them via USB and let you run software to pull data off floppies.As a bonus, using these commodity drives and the right software/hardware will allow you to use them for a full range of floppy disk formats, such as Apple II, TRS-80, Commodore 64, Atari 400/800, IBM DOS, and so on. In some cases, you can just pull in a raw “disk image” (which will be very large) if the format is proprietary or there’s aspects we want to save for later study. It’s a generally good situation.

Among the floppy drive-to-USB hardware out there, there is the FC5025, Kryoflux, and DiscFerret.

So, this sounds almost perfect, really – just get stacks of floppy disks, put them into these different solutions, pull out the disk images, and we’re golden. And for many, many thousands of disks out there, this has been done for nearly 20 years. It’s great.

But.

It used to be, in ye olde days, that it was possible to use floppy disks a different way. Quick explanation.

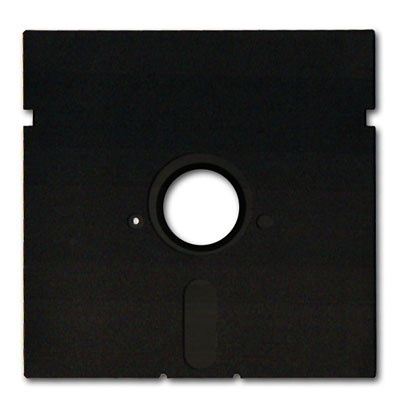
Floppy disks look like this:

5.25-inch_floppy_disk
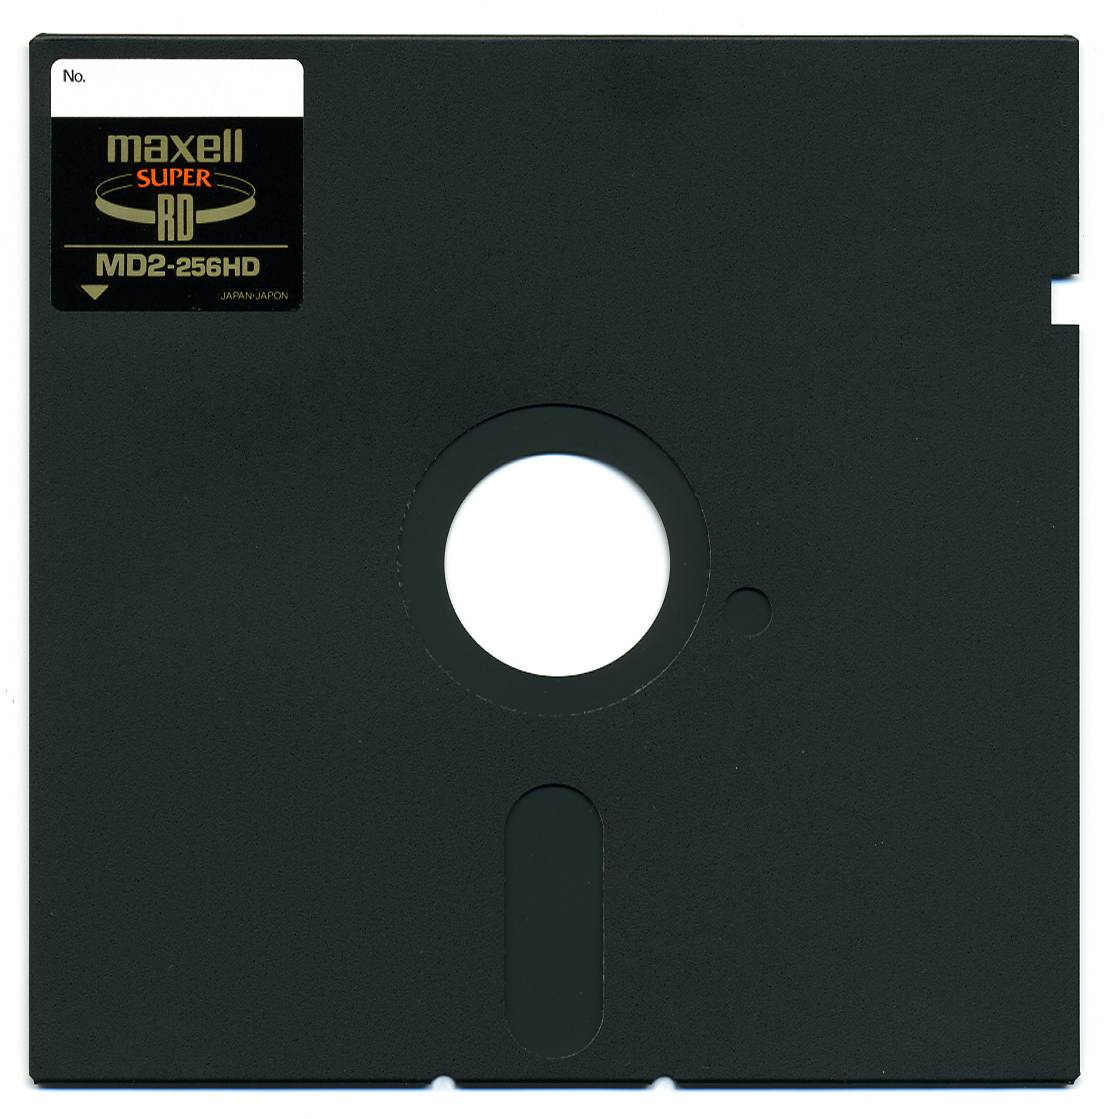
The disk goes into the floppy drive with the little oval “window” on the bottom going in first. You then clamp down on the floppy by closing the drive door.

Inside, the floppy drive has a number of indications about the disk coming from the disk shape itself. Specifically, there’s that notch in the upper right of the image, and there’s that tiny, tiny circle to the left of the big white circle in the center.

The notch on the upper right means “can the disk drive write to this floppy”. If there’s a notch, the answer was/is “yes”. If there’s no notch, the answer was “no”. It was possible to buy little stickers (yes, little stickers) that you would put over the notch to say “don’t write on this anymore”, and those stickers could be removed to say “go ahead, write over this”.

When commercial copies were made, they used drives modified to ignore the notch. So you could have a floppy with NO notch on it, meaning “never write on this disk”, with data on it put there by a modified drive. This is why if you see a commercial floppy disk from the time, like this one:

Rampage

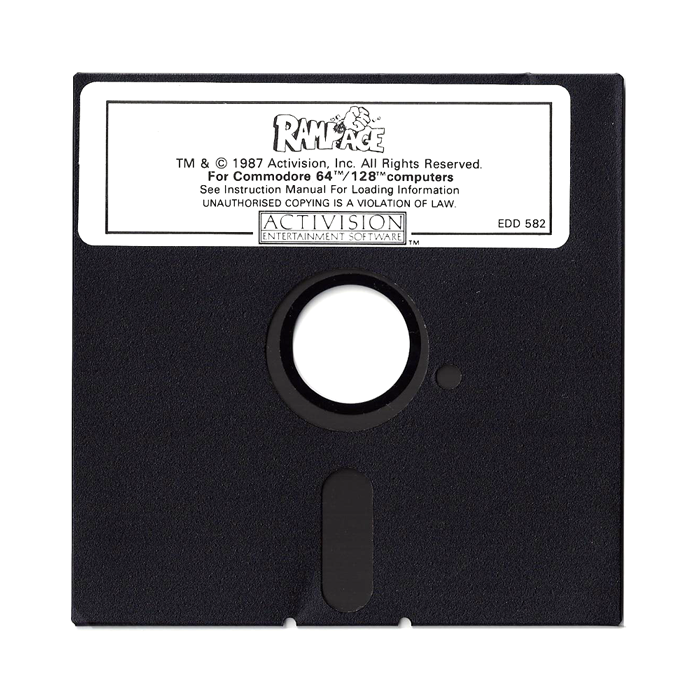
…there’s no notch, protecting the data inside from you accidentally writing over the poor thing during some late night of floppy switching.

Without going too much into variations, floppy disks were either single-sided, or double-sided. In some cases, there were floppy drives you could put the floppy disk into and it would read both sides. In most cases for early 1980s stuff, that’s not the case.

So if a disk was double-sided, it had notches on both sides of the disk. Here’s what that looks like:

floppydisk

So, if you look at this floppy closer, you’ll also notice it has not one, but two holes to either side of the big white circle in the center. That’s the issue, that’s the rub.

While these commodity new floppy drives do a lot of things, they don’t handle a disk that can be turned upside down and inserted very well. These two-sided floppies are known colloquially as “flippy disks”.

Therefore, these newer commodity floppy drives need to be modified.

Modification is a pain in the ass, summarized by this image:

7071618303_c1199b1f50_b


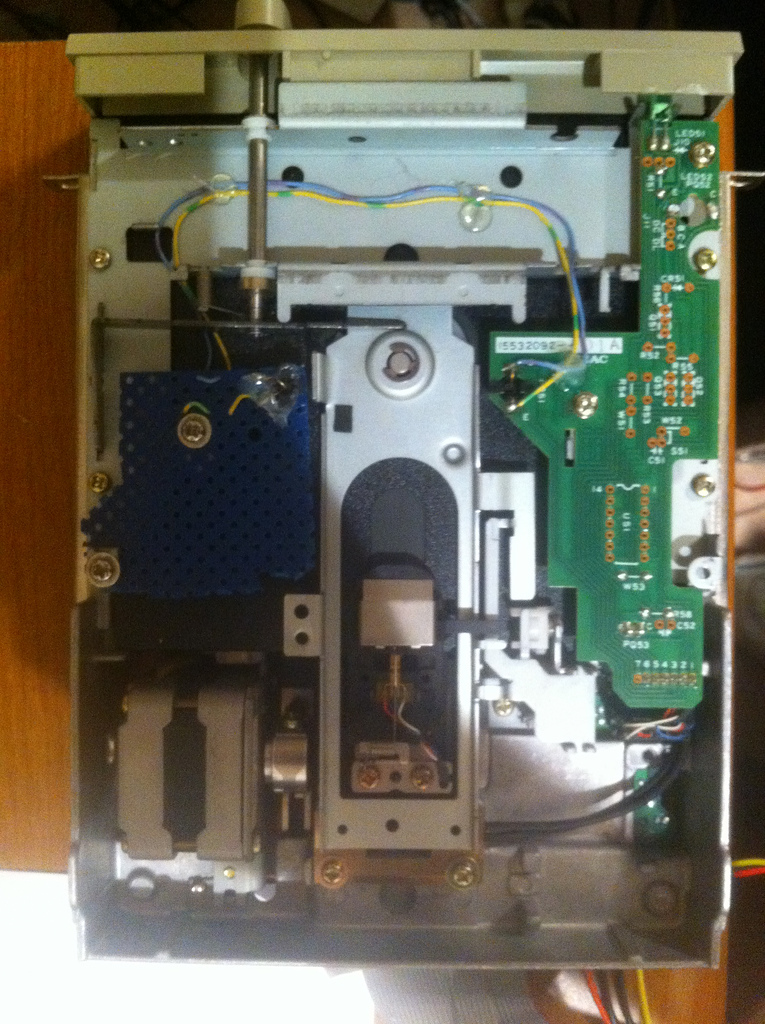
Therefore, for most people, buying a flippy disk or using original hardware will be a good choice. Otherwise, you will only be able to save the images of floppies that use a single side.

If you know the entire collection is one-sided, then that’s fine. But many aren’t. Luckily, many collections tend to be of a type, so if you find a stack of old DOS floppies in need of transfer, and one works, many might work. It’s not a perfect situation, but you’re now armed with a little more insight as to what’s going on.

I realize this entry is a mash-up of really basic knowledge and really obscure, specific knowledge, but I wanted it all in one place for people to understand what’s going on. One of the biggest tropes in the vintage community is mentioning, sneeringly, this specific flippy disk problem as why we can’t have Regular People doing disk imaging, and we are well past the point that it can be assumed Regular People will want to venture and root around for the right people to talk to and the right hardware to buy without being given some idea of what they’re getting into.

You’re getting into buying a drive and a USB adapter. If your disks have two sides as described above, you are buying a flippy drive or having a drive converted to flippy. That’s it. 

Your disk images have a welcome home at the Internet Archive. I will help you put them there. Your questions have a welcome home with me as well.

Enjoy.


11 Nov 23:40

Why am I doing more than just fixing bugs?

by Dukus

I’ve found that testing a game and getting it bug free for release is harder than I thought it would be. These last few weeks have seen some hard to find bugs and grueling debugging sessions. There’s reports of hardware configurations where the game won’t start, problems restoring from the computer being in a locked state, various crashes, asserts, and a myriad of unexpected behaviors. So far fixing these has been going pretty well. It just takes time.

Beyond the bugs, I’ve been taking suggestions from some of my newer testers – and implementing some of them. While I’m excited to get this game released, I want to have a good user experience beyond just a game that doesn’t crash.

At first I was worried that the suggestions and requests were going to consist of major changes to the game, but in fact most of them are reasonable and good ideas that are mostly about the user interface and interacting with the game. I’ve been working on Banished long enough that I don’t notice the short falls in user experience – I’m just used to them. So getting suggestions like these are great and really help polish up the game.

They tend to be questions like:

  • – Can the inventory lists be sorted either by name or quantity?
  • – I pause and unpause time passage quite a bit, can a button be bound to toggle this?
  • – Can the placement tool remember the previous buildings rotation?
  • – Can there be an option to lock the mouse to the game window? Edge scrolling doesn’t work with multiple monitors or windowed mode.
  • – ESC doesn’t back out of certain menus, can you add it to all of them?

Those things are all easy to implement, and I agree they are needed.

Then there are suggestions that are harder to implement like:

  • – After I have a large population, and at some point there is a food shortage, everyone dies. Is this expected? Shouldn’t some percentage of the population survive?
  • – In a large city, the citizens sometimes live very far from their workplace and spend more time walking than working. Can this be fixed?

I’ve been working on fixing these types of issues as well, but they are a bit harder to deal with since they involve changing the way the simulation works – this can break balancing and introduce new bugs. But again, I feel the game is better with these types of issues fixed, so I’m fixing them.

That last suggestion about citizens not being productive led me to optimize who is assigned to what job relative to where they live.

When I first started writing Banished I envisioned a simulation where everyone was unique and had a fixed job for their lives. This led to people trying to live near their workplaces, but in the situation where a married couple had two jobs at opposite ends of the map, they’d live somewhere in-between and hardly get any work done since they were always walking back and forth.

As a town gets bigger and bigger, resource production really slows down because of this. But being busy with other things, I never really revisited the way job/house placement worked.

After some suggestions from testers, and realizing that the townsfolk weren’t really tied to any one job, I decided that this sticking to a job once it was assigned wasn’t really needed. In fact, the player can reassign a worker to a different profession any time. Furthermore, testers found if they unassigned everyone’s jobs, then reassigned them, the placement of people relative to their workplaces was much better.

So I wrote some code that tries to optimize the jobs assigned relative to the work places and homes automatically. This increased resource production significantly in most of my test maps. Of course it was hard to know that the code I wrote was actually working properly in a town of 700 people and 200 work sites. So I wrote a quick tool to visually check citizens home locations relative to their workplaces and the paths in-between.

Pathing Tool

The tool worked really well and gave me a lot of information about areas in the town that could have better layout. This in turn helped me increase resource production even further in my test maps by placing more homes in areas where workers were traveling long distances. This of course turned out much like the Follow Mode addition to the game.

It was so useful that I decided to keep it. It’s a little feature creepy, but I needed it to verify things were working correctly anyway. After an hour more of prettying up the graphics and making the code nice, I had added the Pathing Tool to the game. It will show where all the workers at a work site live, or where all the people in a house go to work, as well as the paths they take when traveling in-between.

Now back to debugging some of those hard to reproduce crashes….