Shared posts

03 Oct 03:25

Honeycrisp Galette with Cheddar Crust and Thyme Butter.

by Jessica

This apple cheddar galette is giving me LIFE. 

This apple cheddar galette is made with honeycrisp apples, set in a cheddar herb crust and brushed with thyme butter! So delicious and perfect for fall.

Yessss I know I’m going over the top with apples. But can you blame me?

The best of the best are in season and to make them into almost-pie is the first step.

unbaked apple galette

If you have a copy of my first book, Seriously Delish, then you know that I have a white cheddar apple cobbler in there. Or crumble! Maybe it’s a crumble.

Whatever it is, it’s fantastic and it’s one of the first recipes that got my family on board with the whole apple + cheddar combo.

I know that a lot of you have enjoyed the combo for ages. That there hasn’t been an apple pie slice served without cheddar cheese. But not here! 

This apple cheddar galette is made with honeycrisp apples, set in a cheddar herb crust and brushed with thyme butter! So delicious and perfect for fall.

At least, not in that way. Apples have always been one of my favorite snacks so it wasn’t unusual for me to have an apple AND cheddar on a plate as a snack, but never eaten together. You know?

Well. If you haven’t tried the combo, you must.

It’s everything!

This apple cheddar galette is made with honeycrisp apples, set in a cheddar herb crust and brushed with thyme butter! So delicious and perfect for fall.

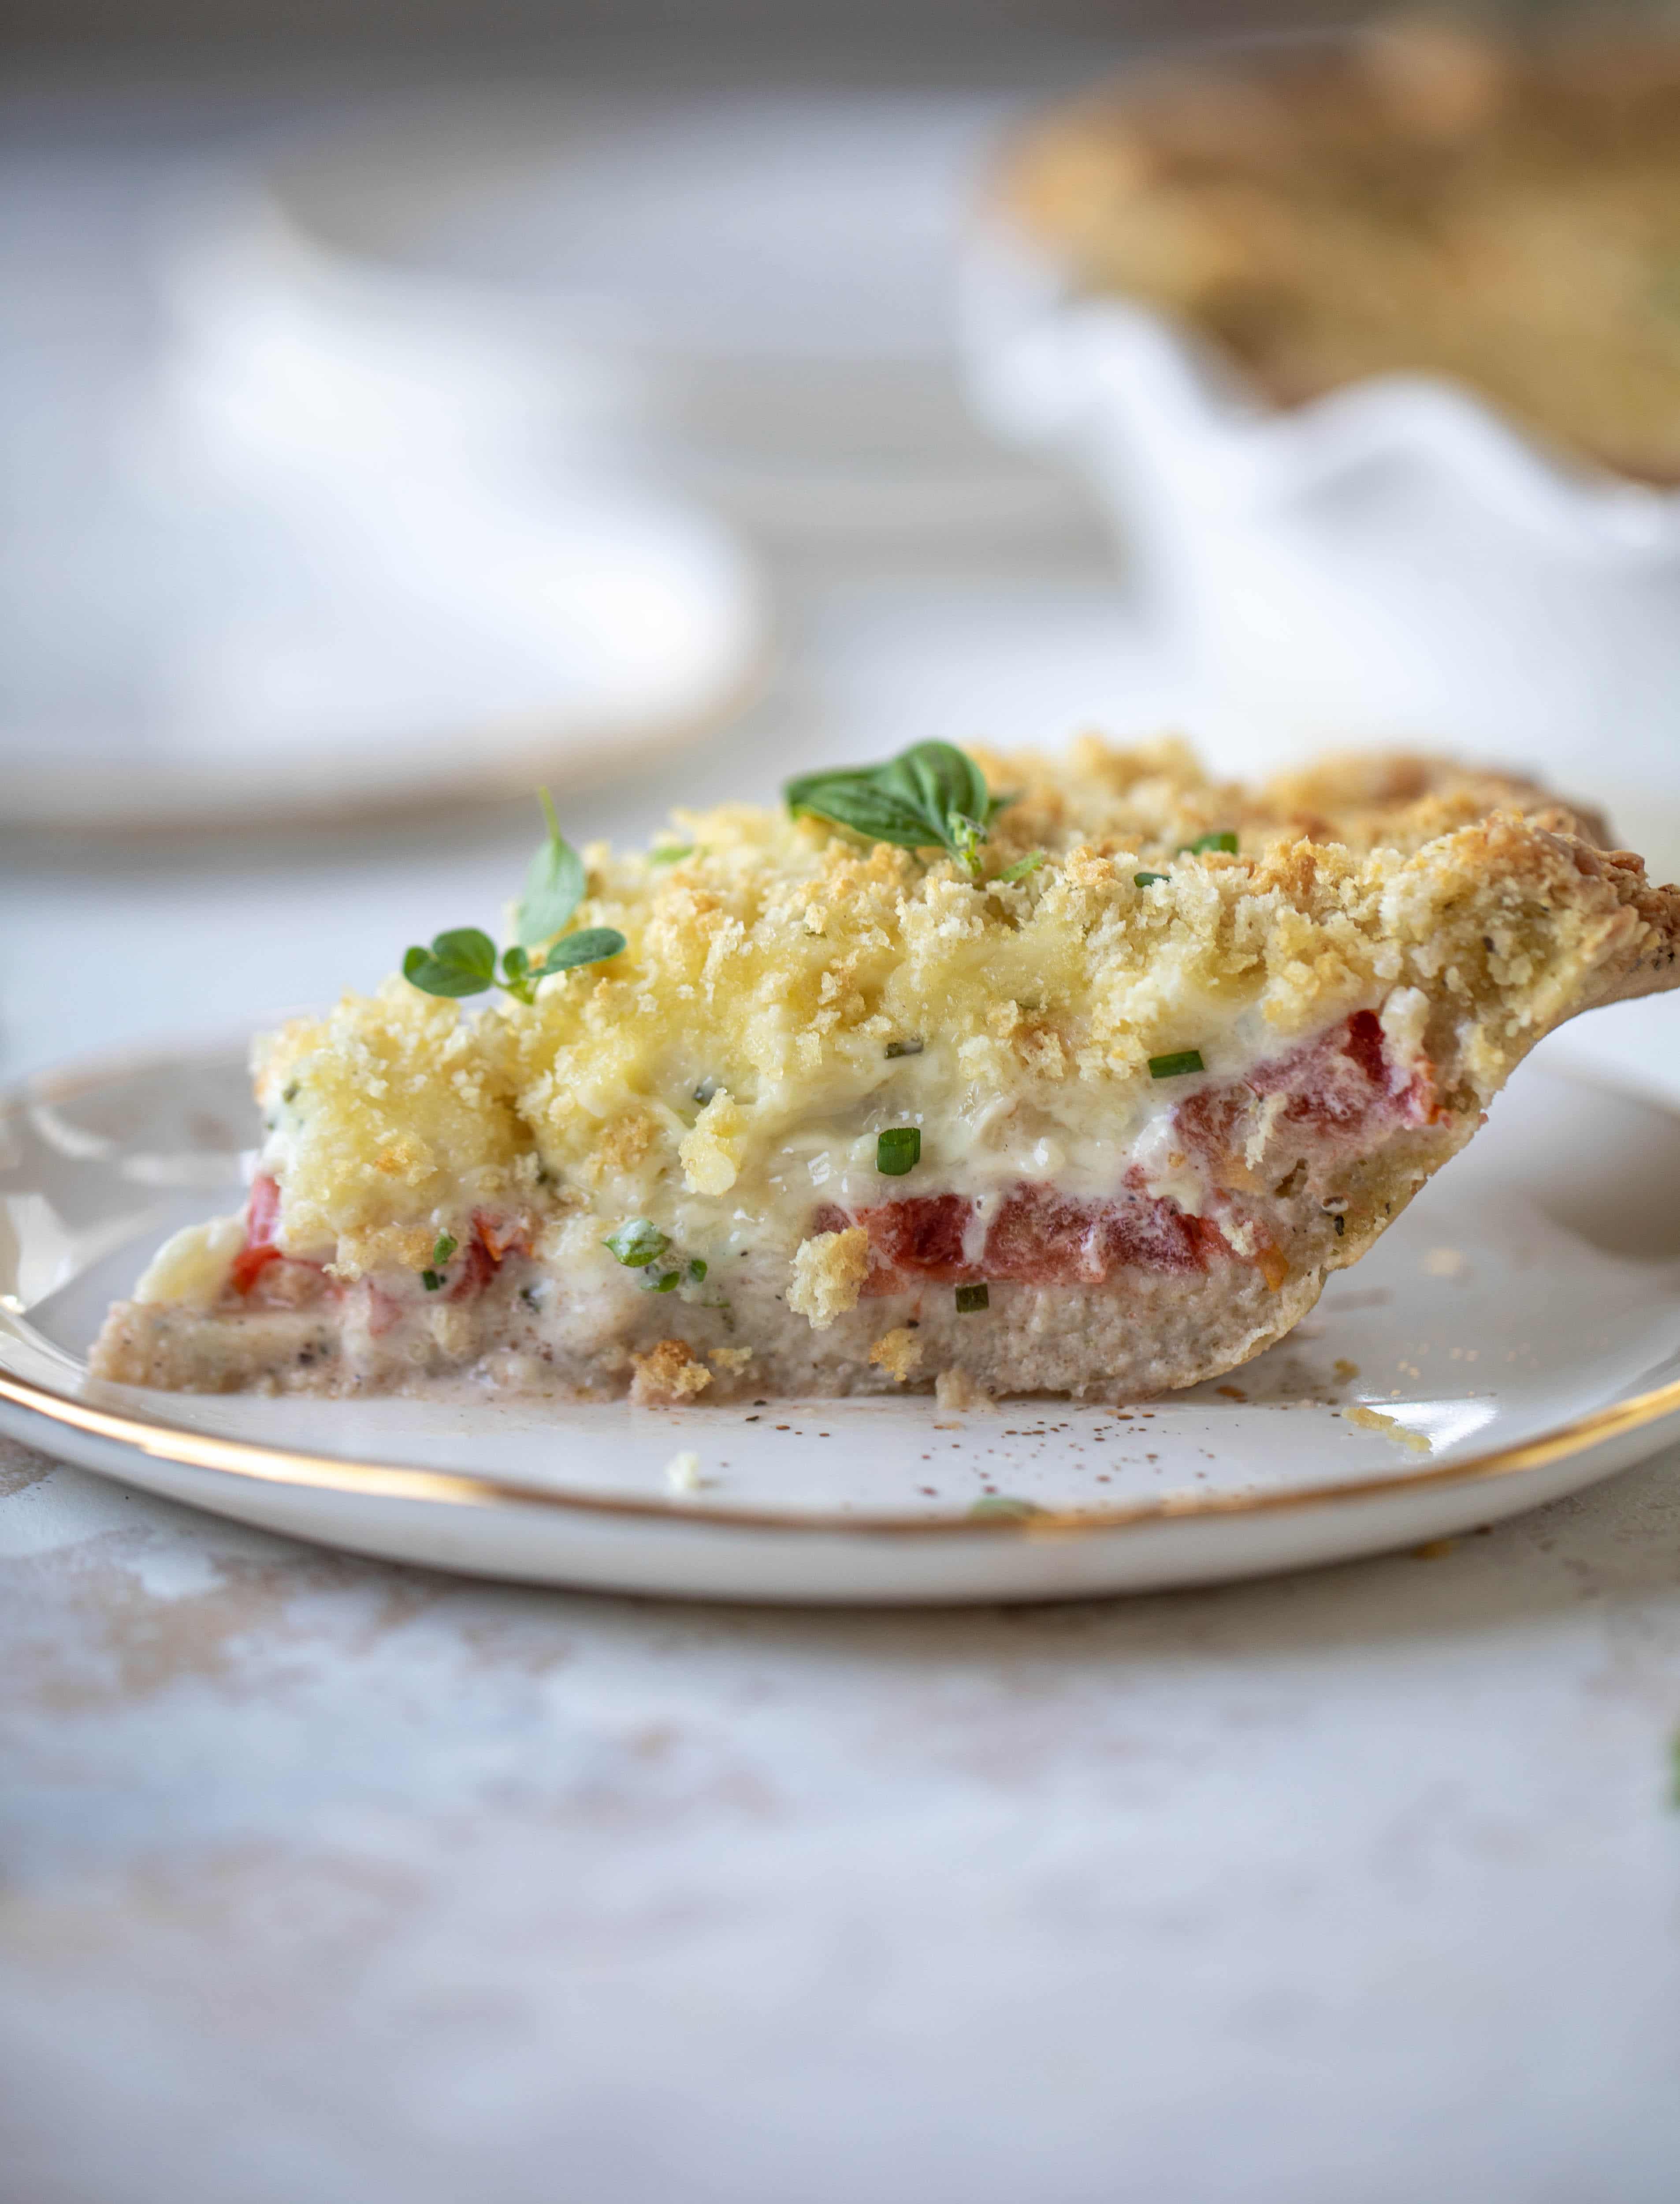
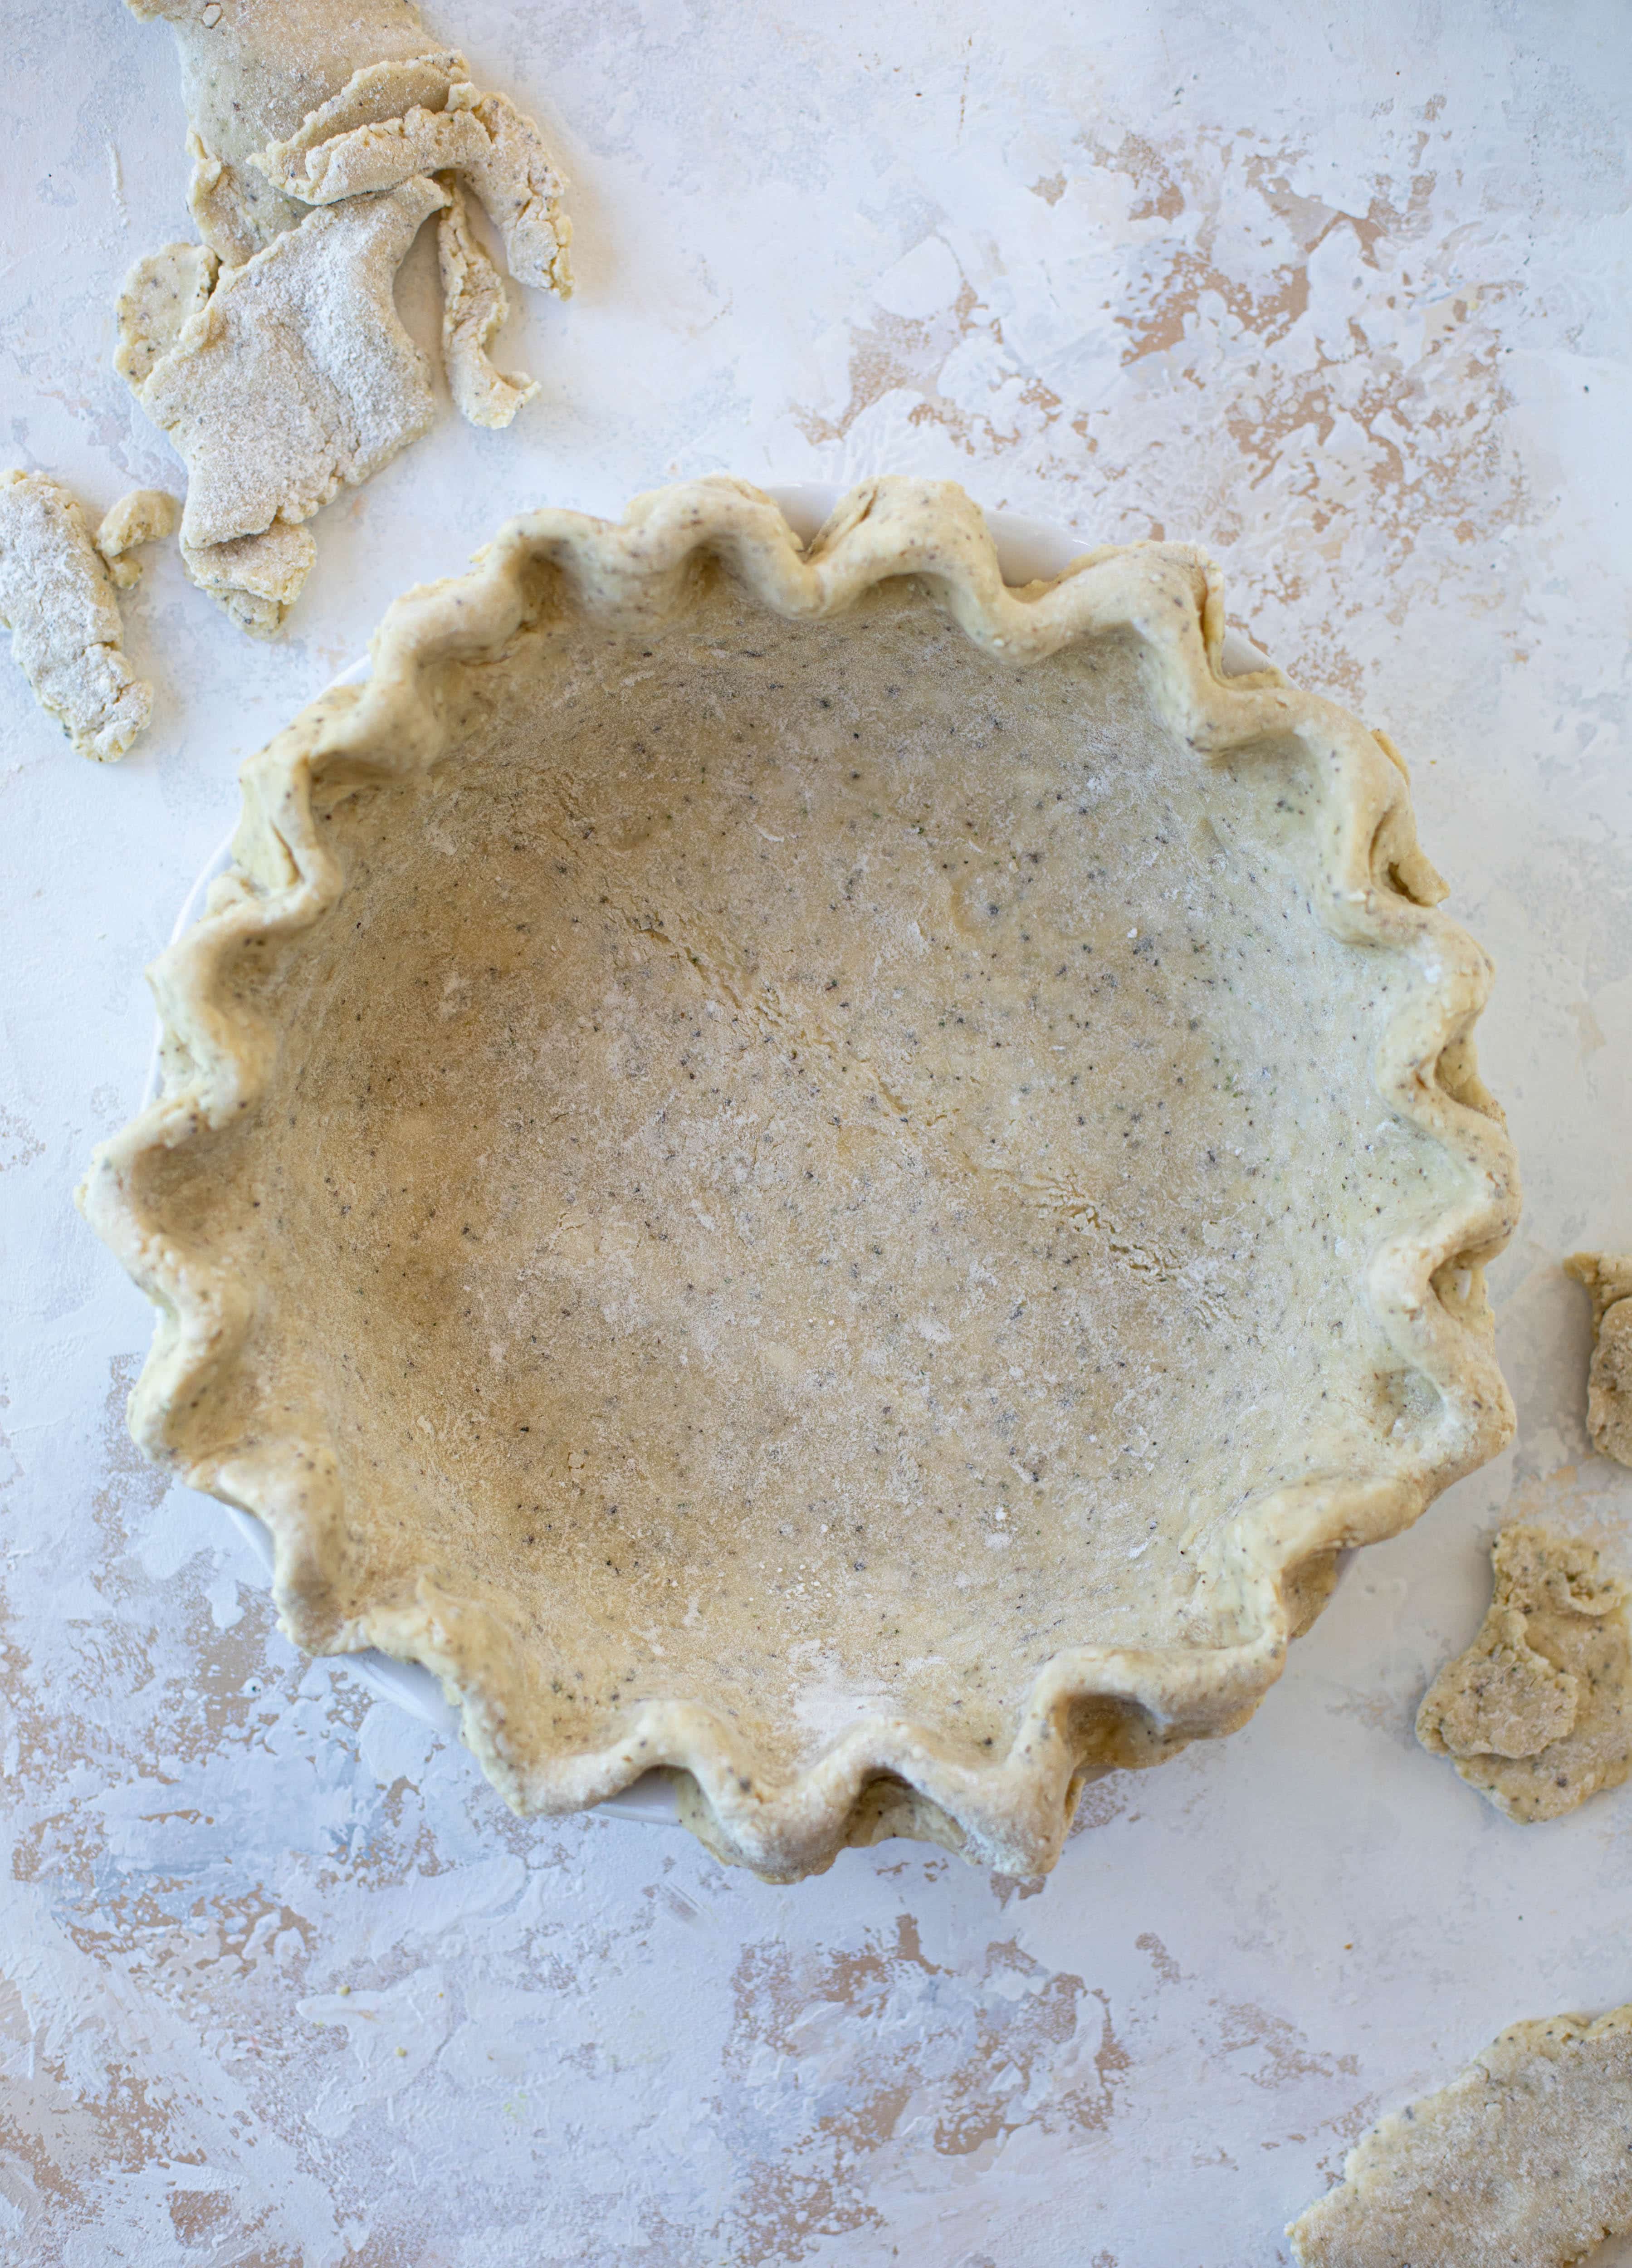
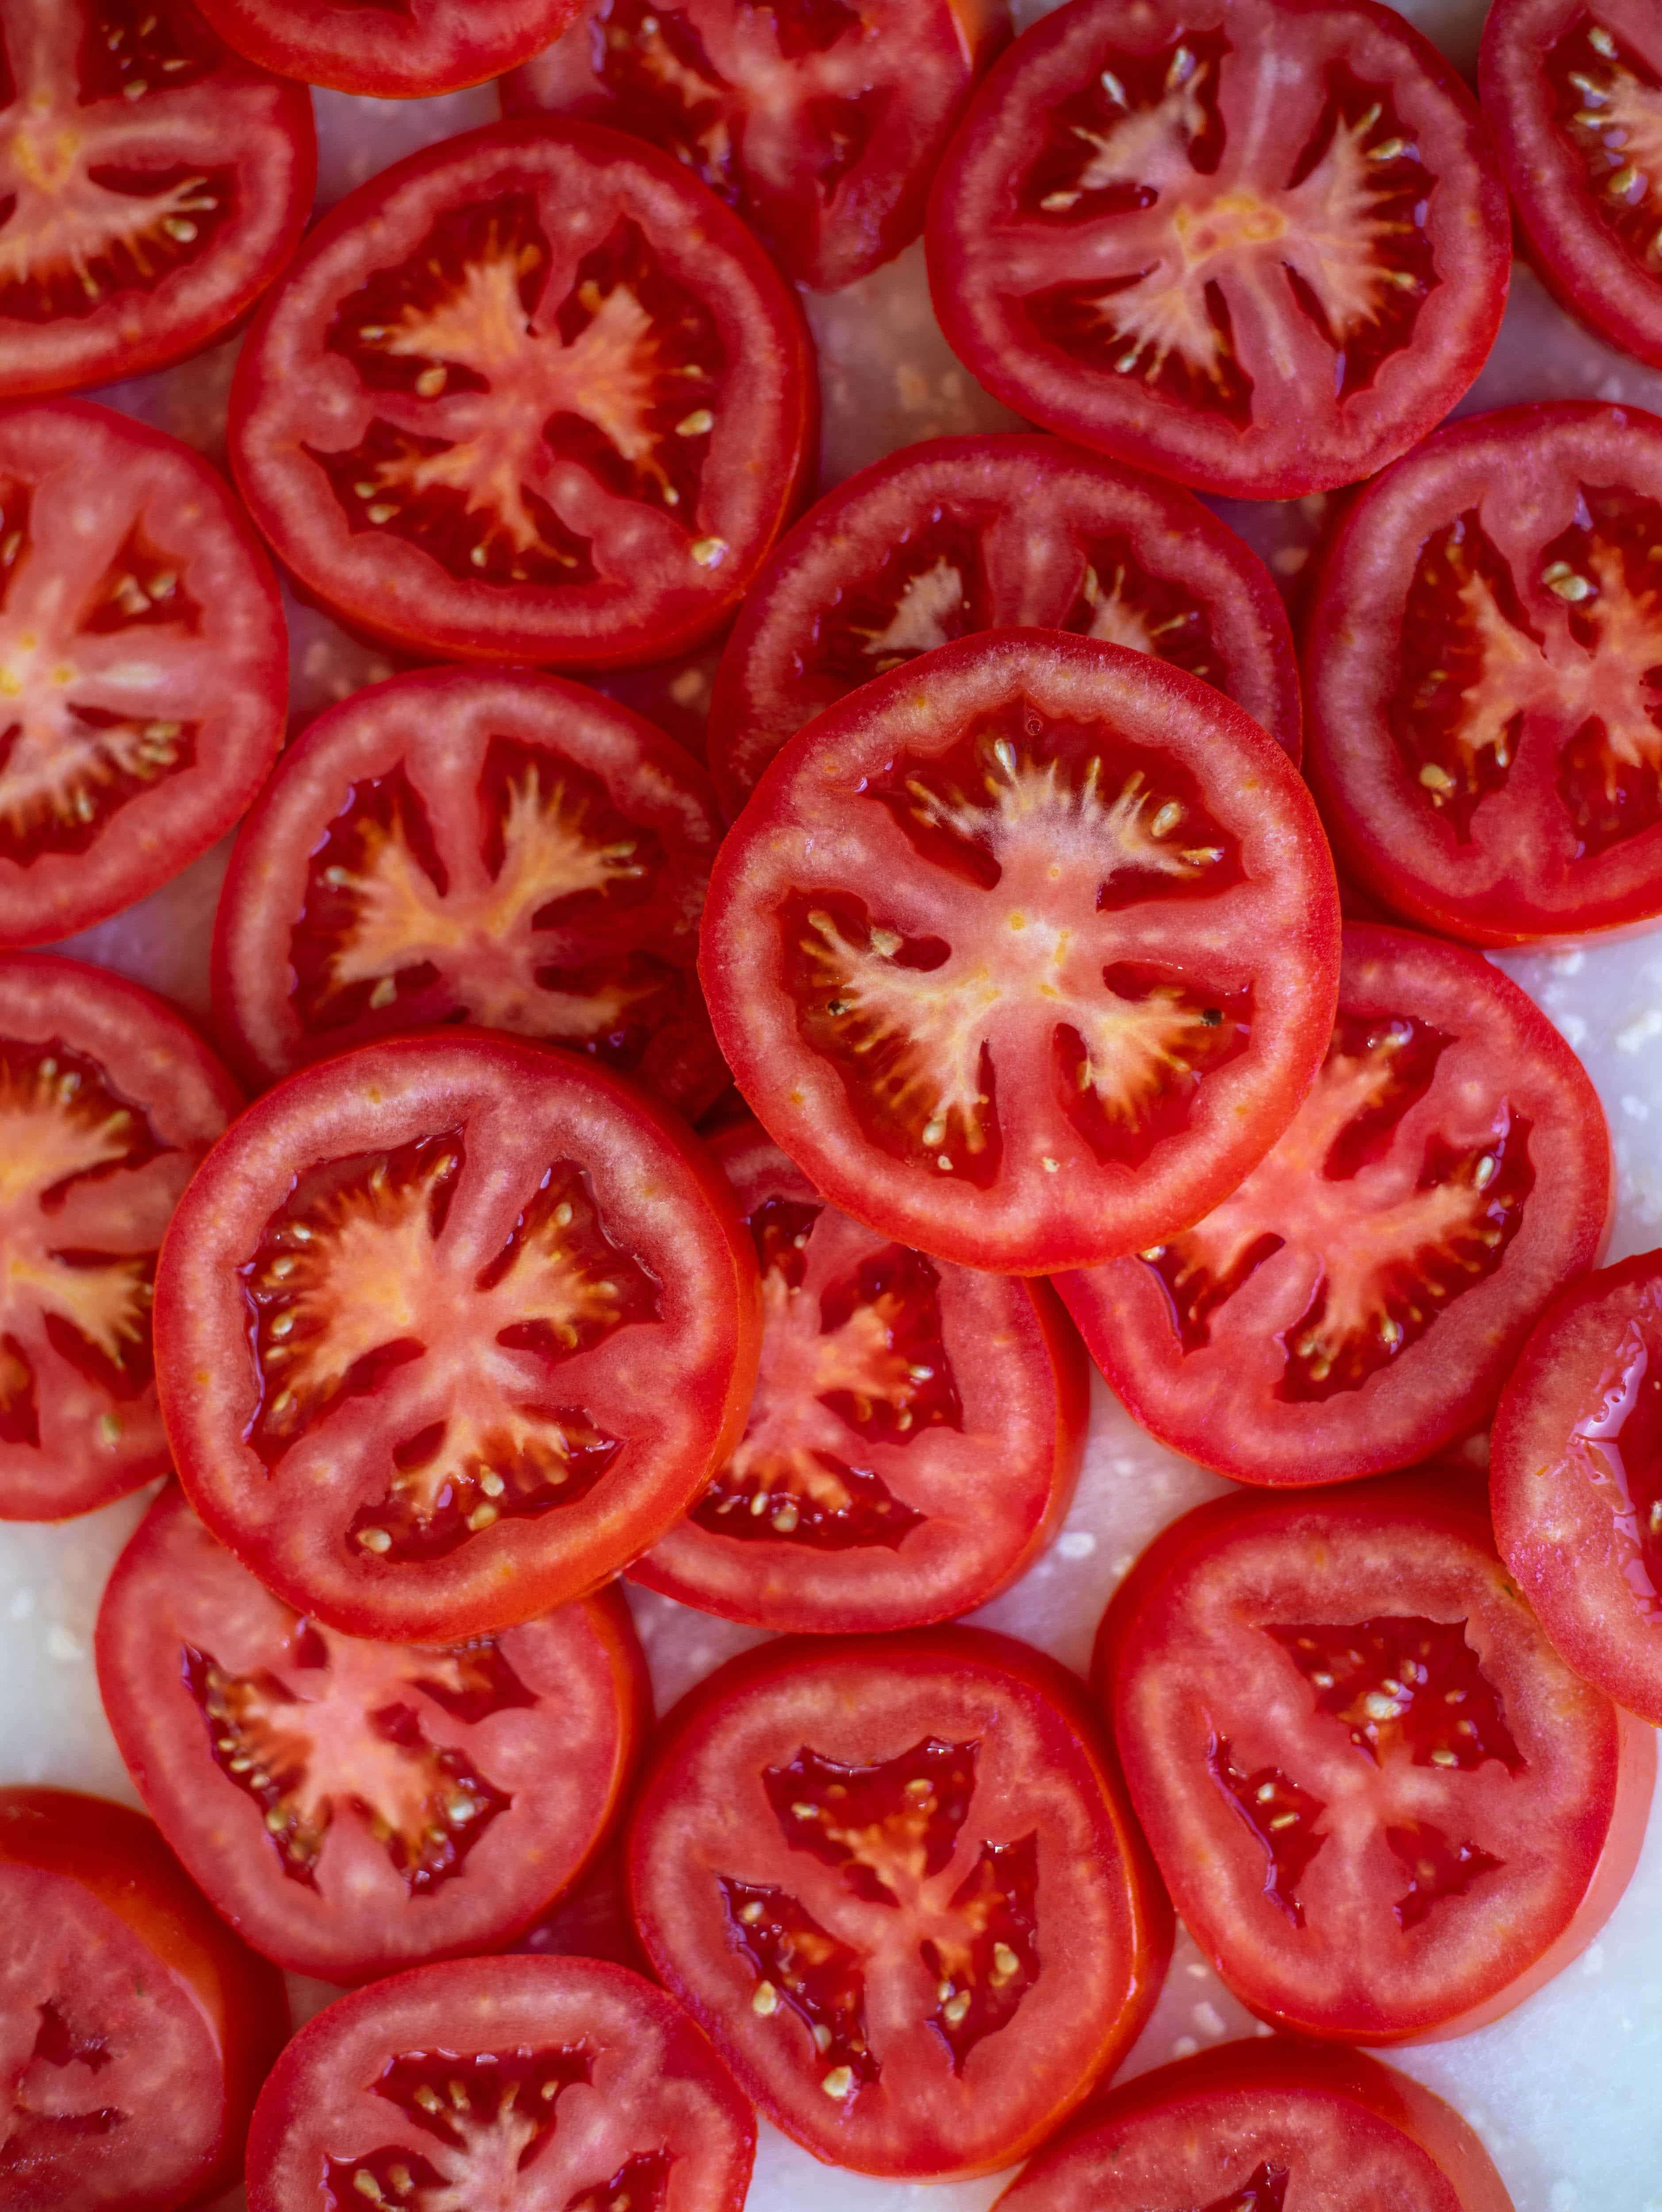
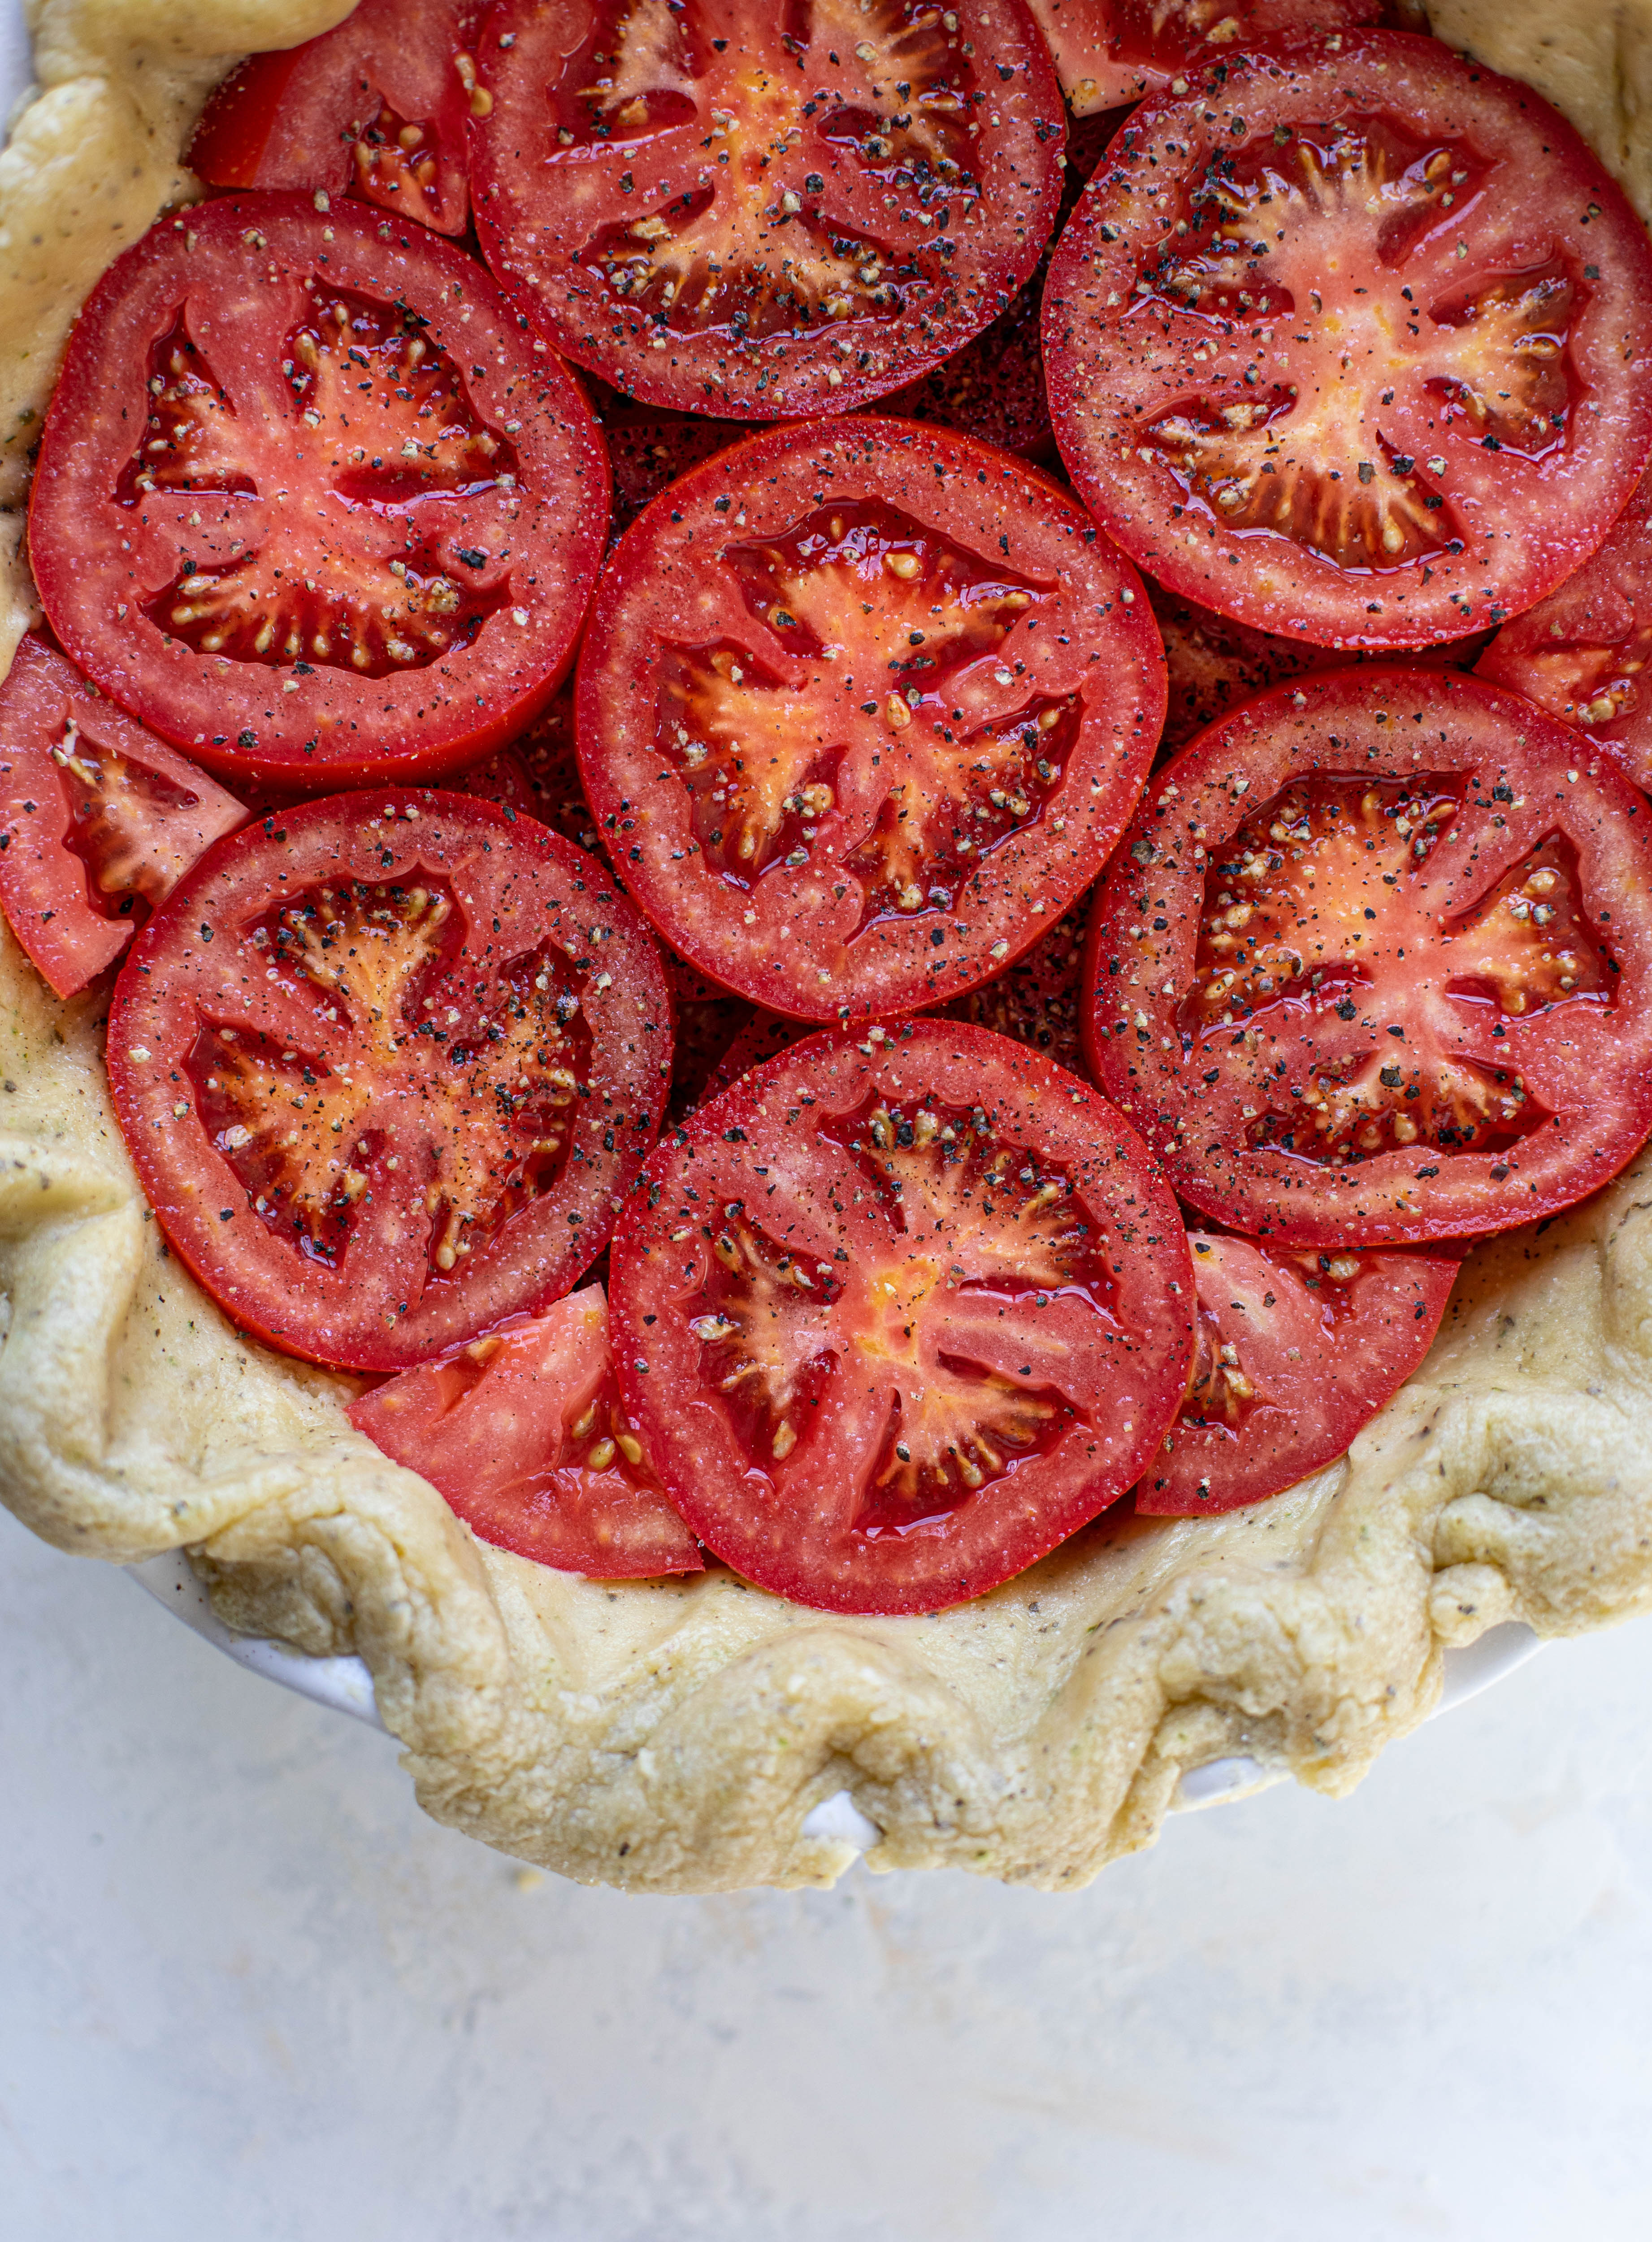
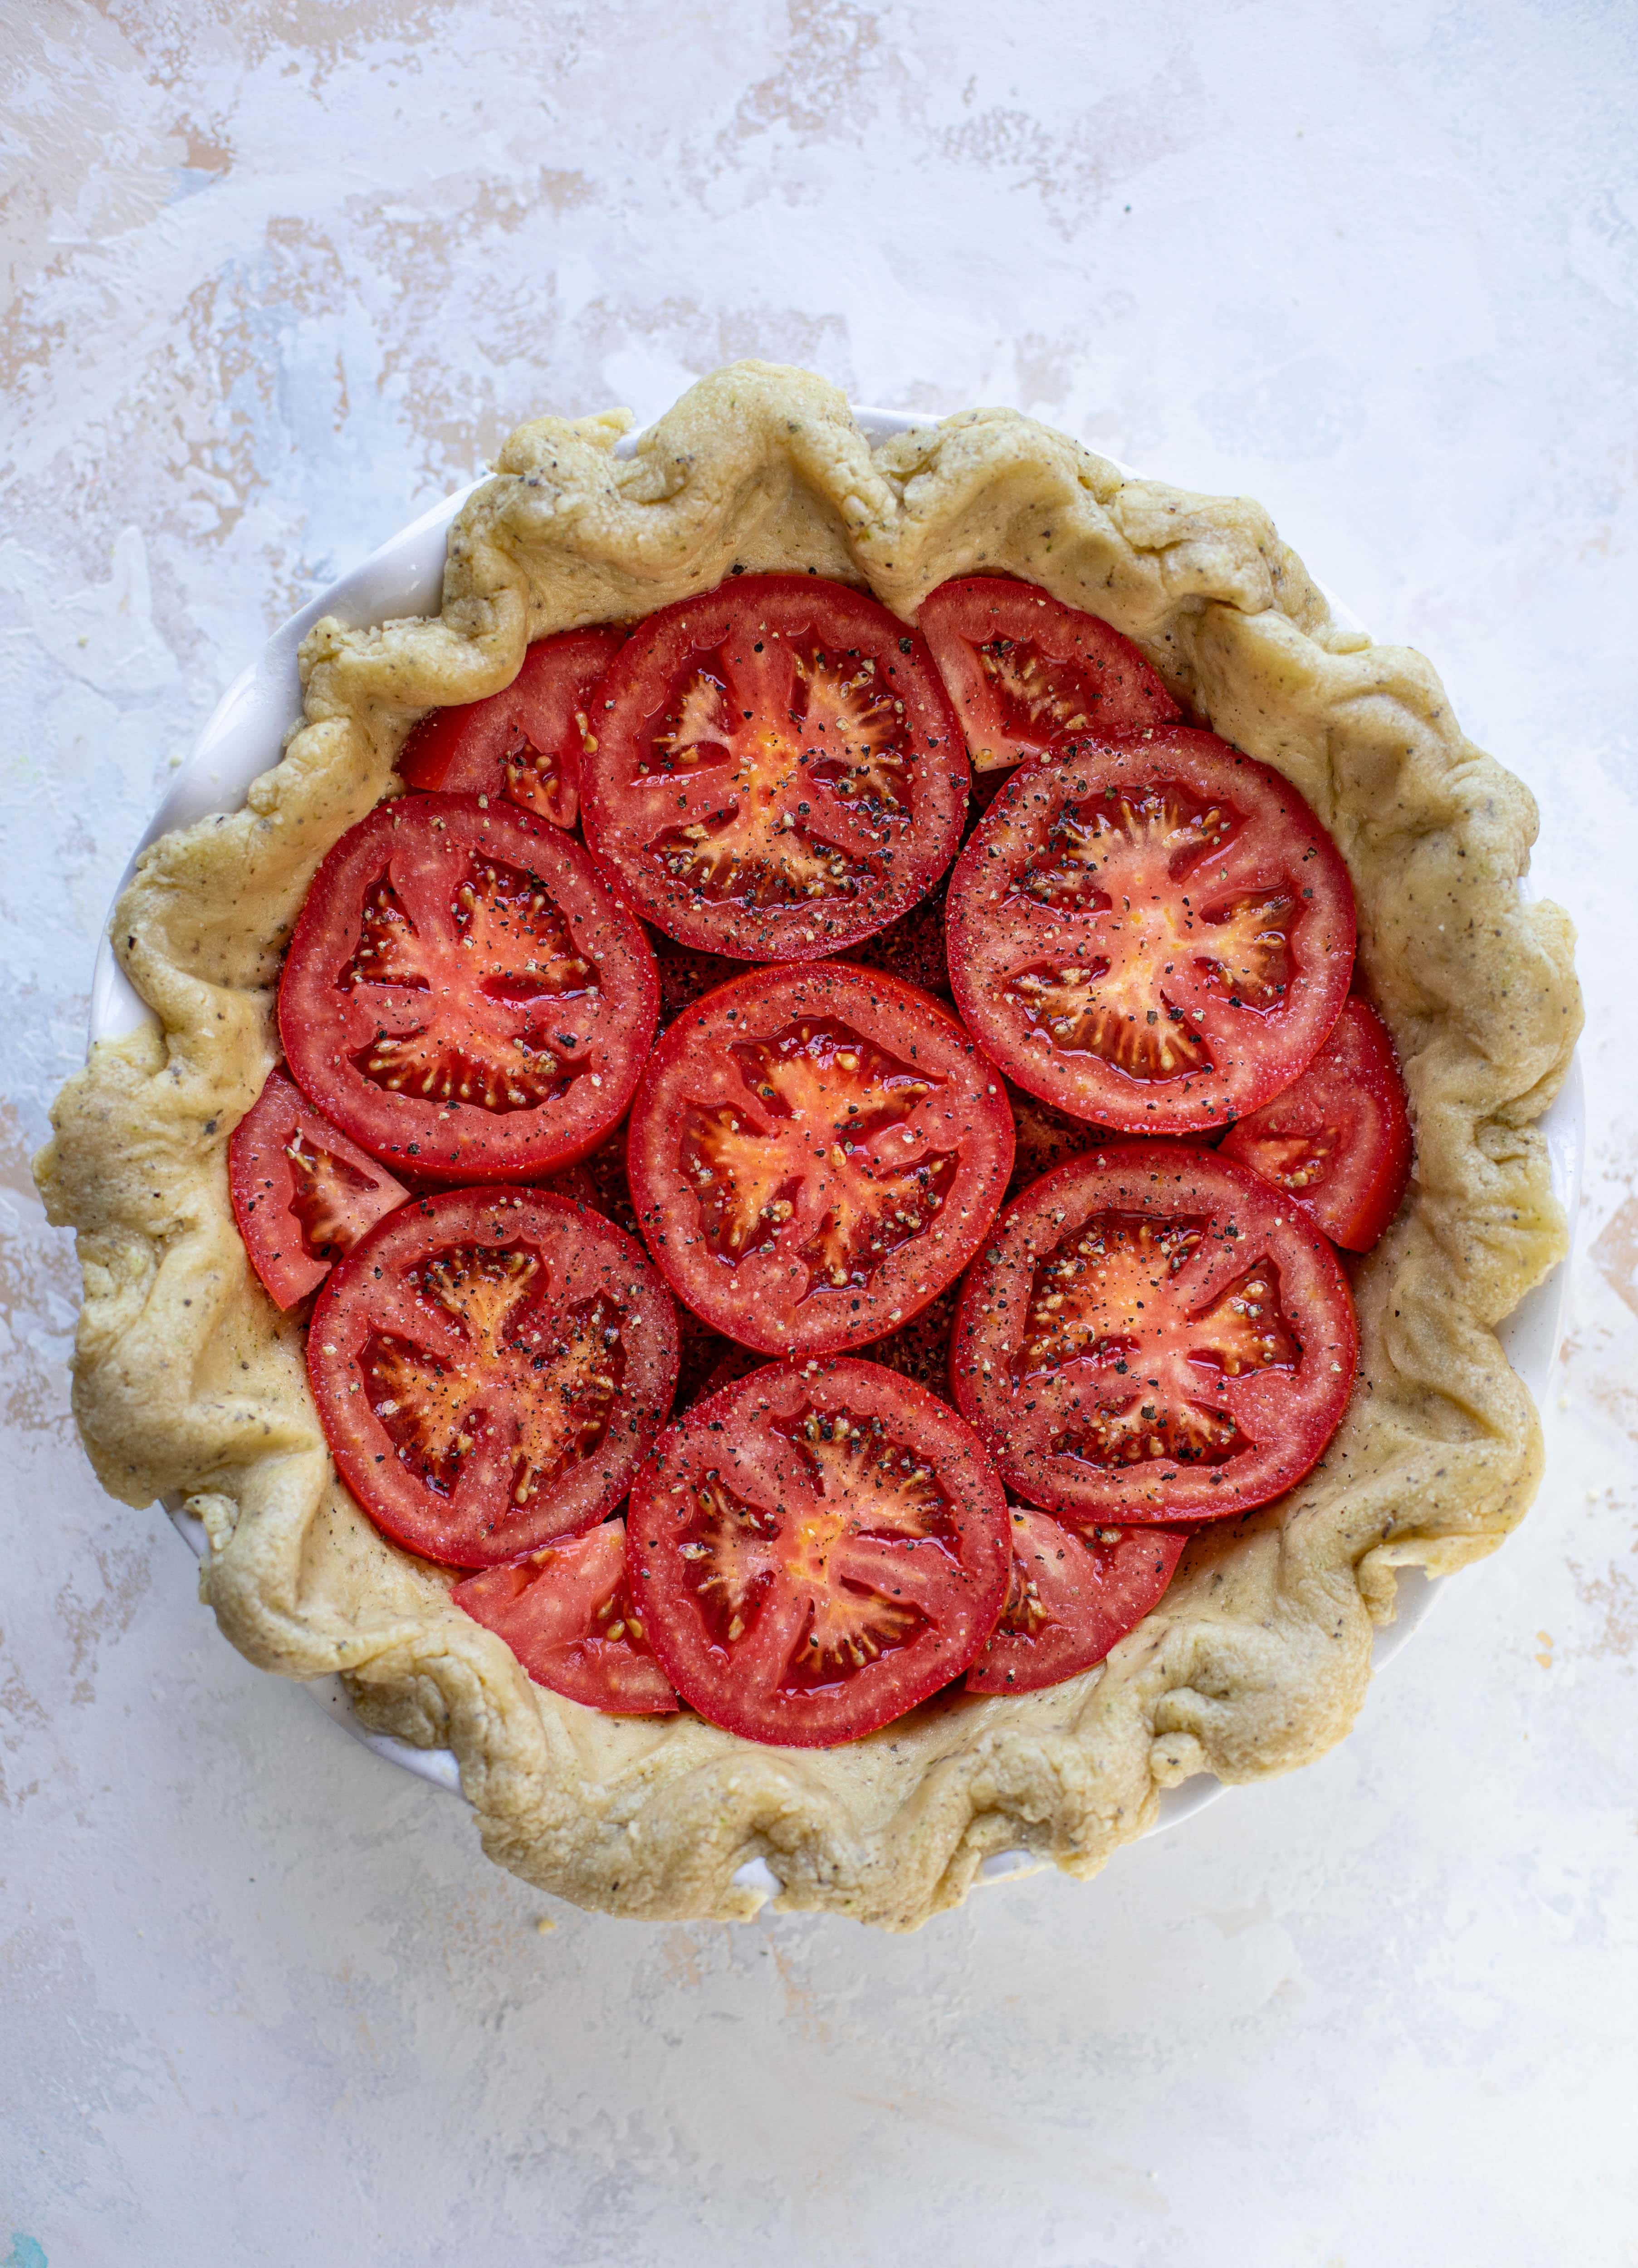
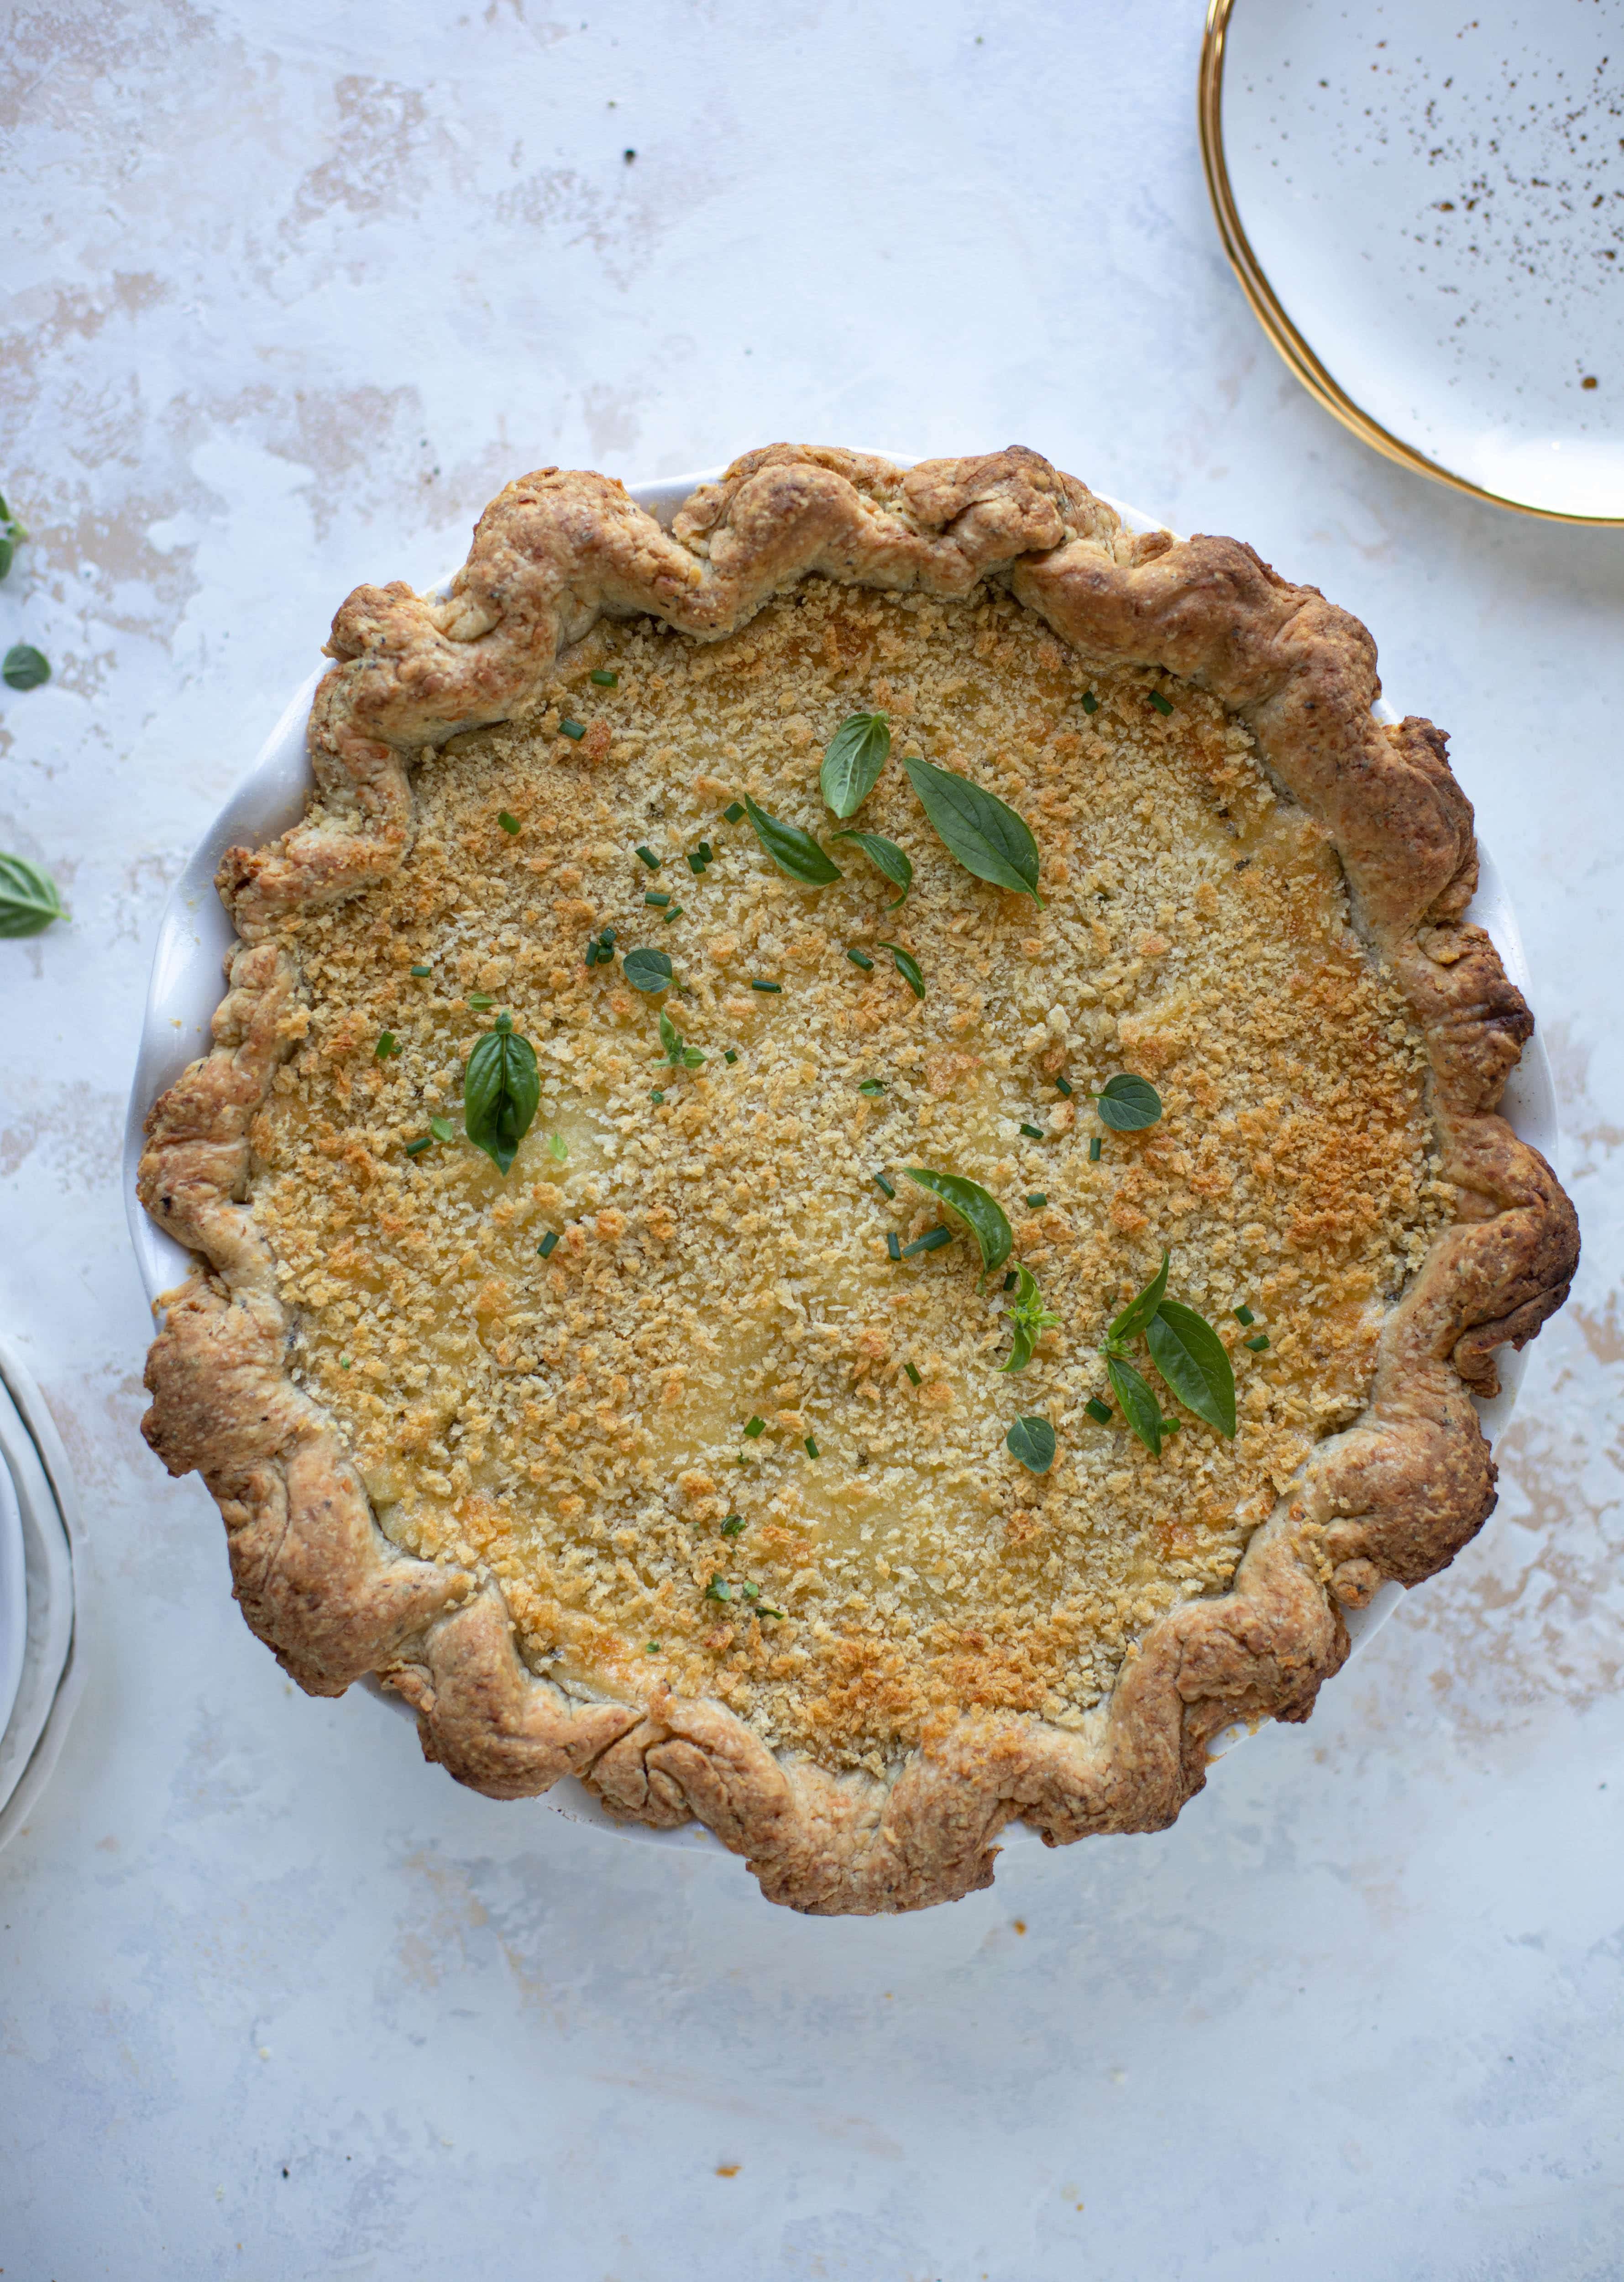
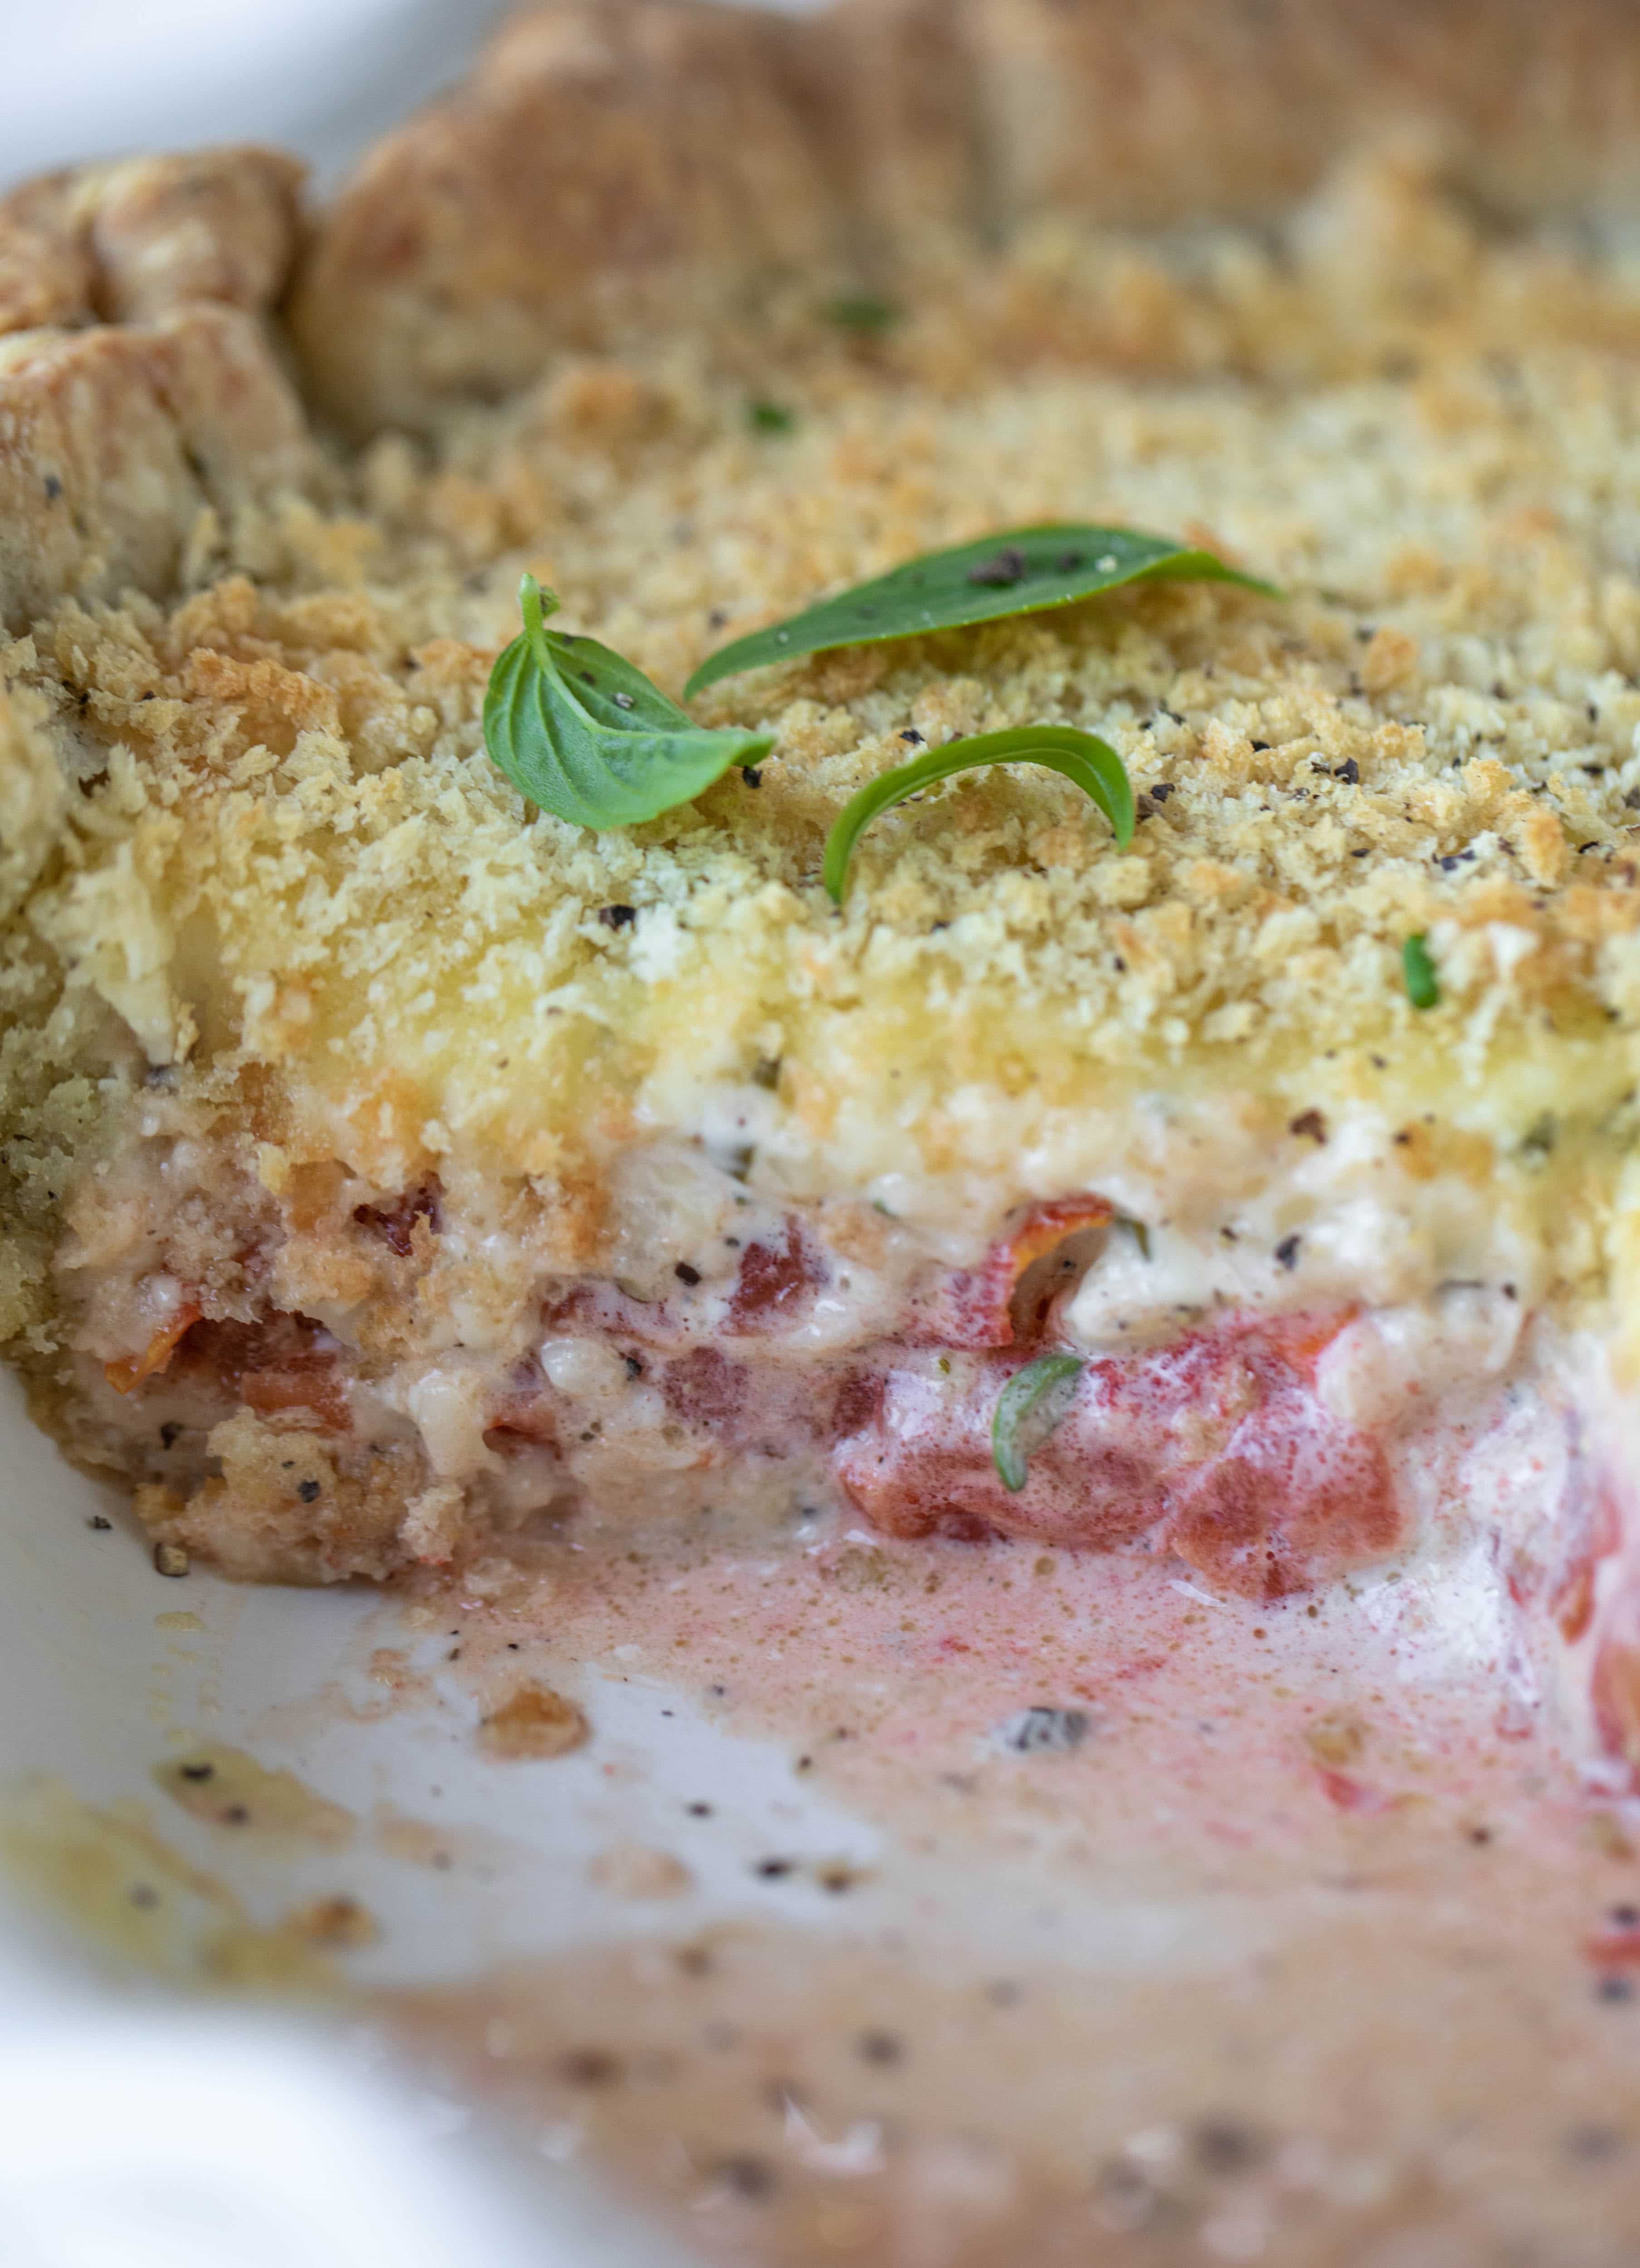
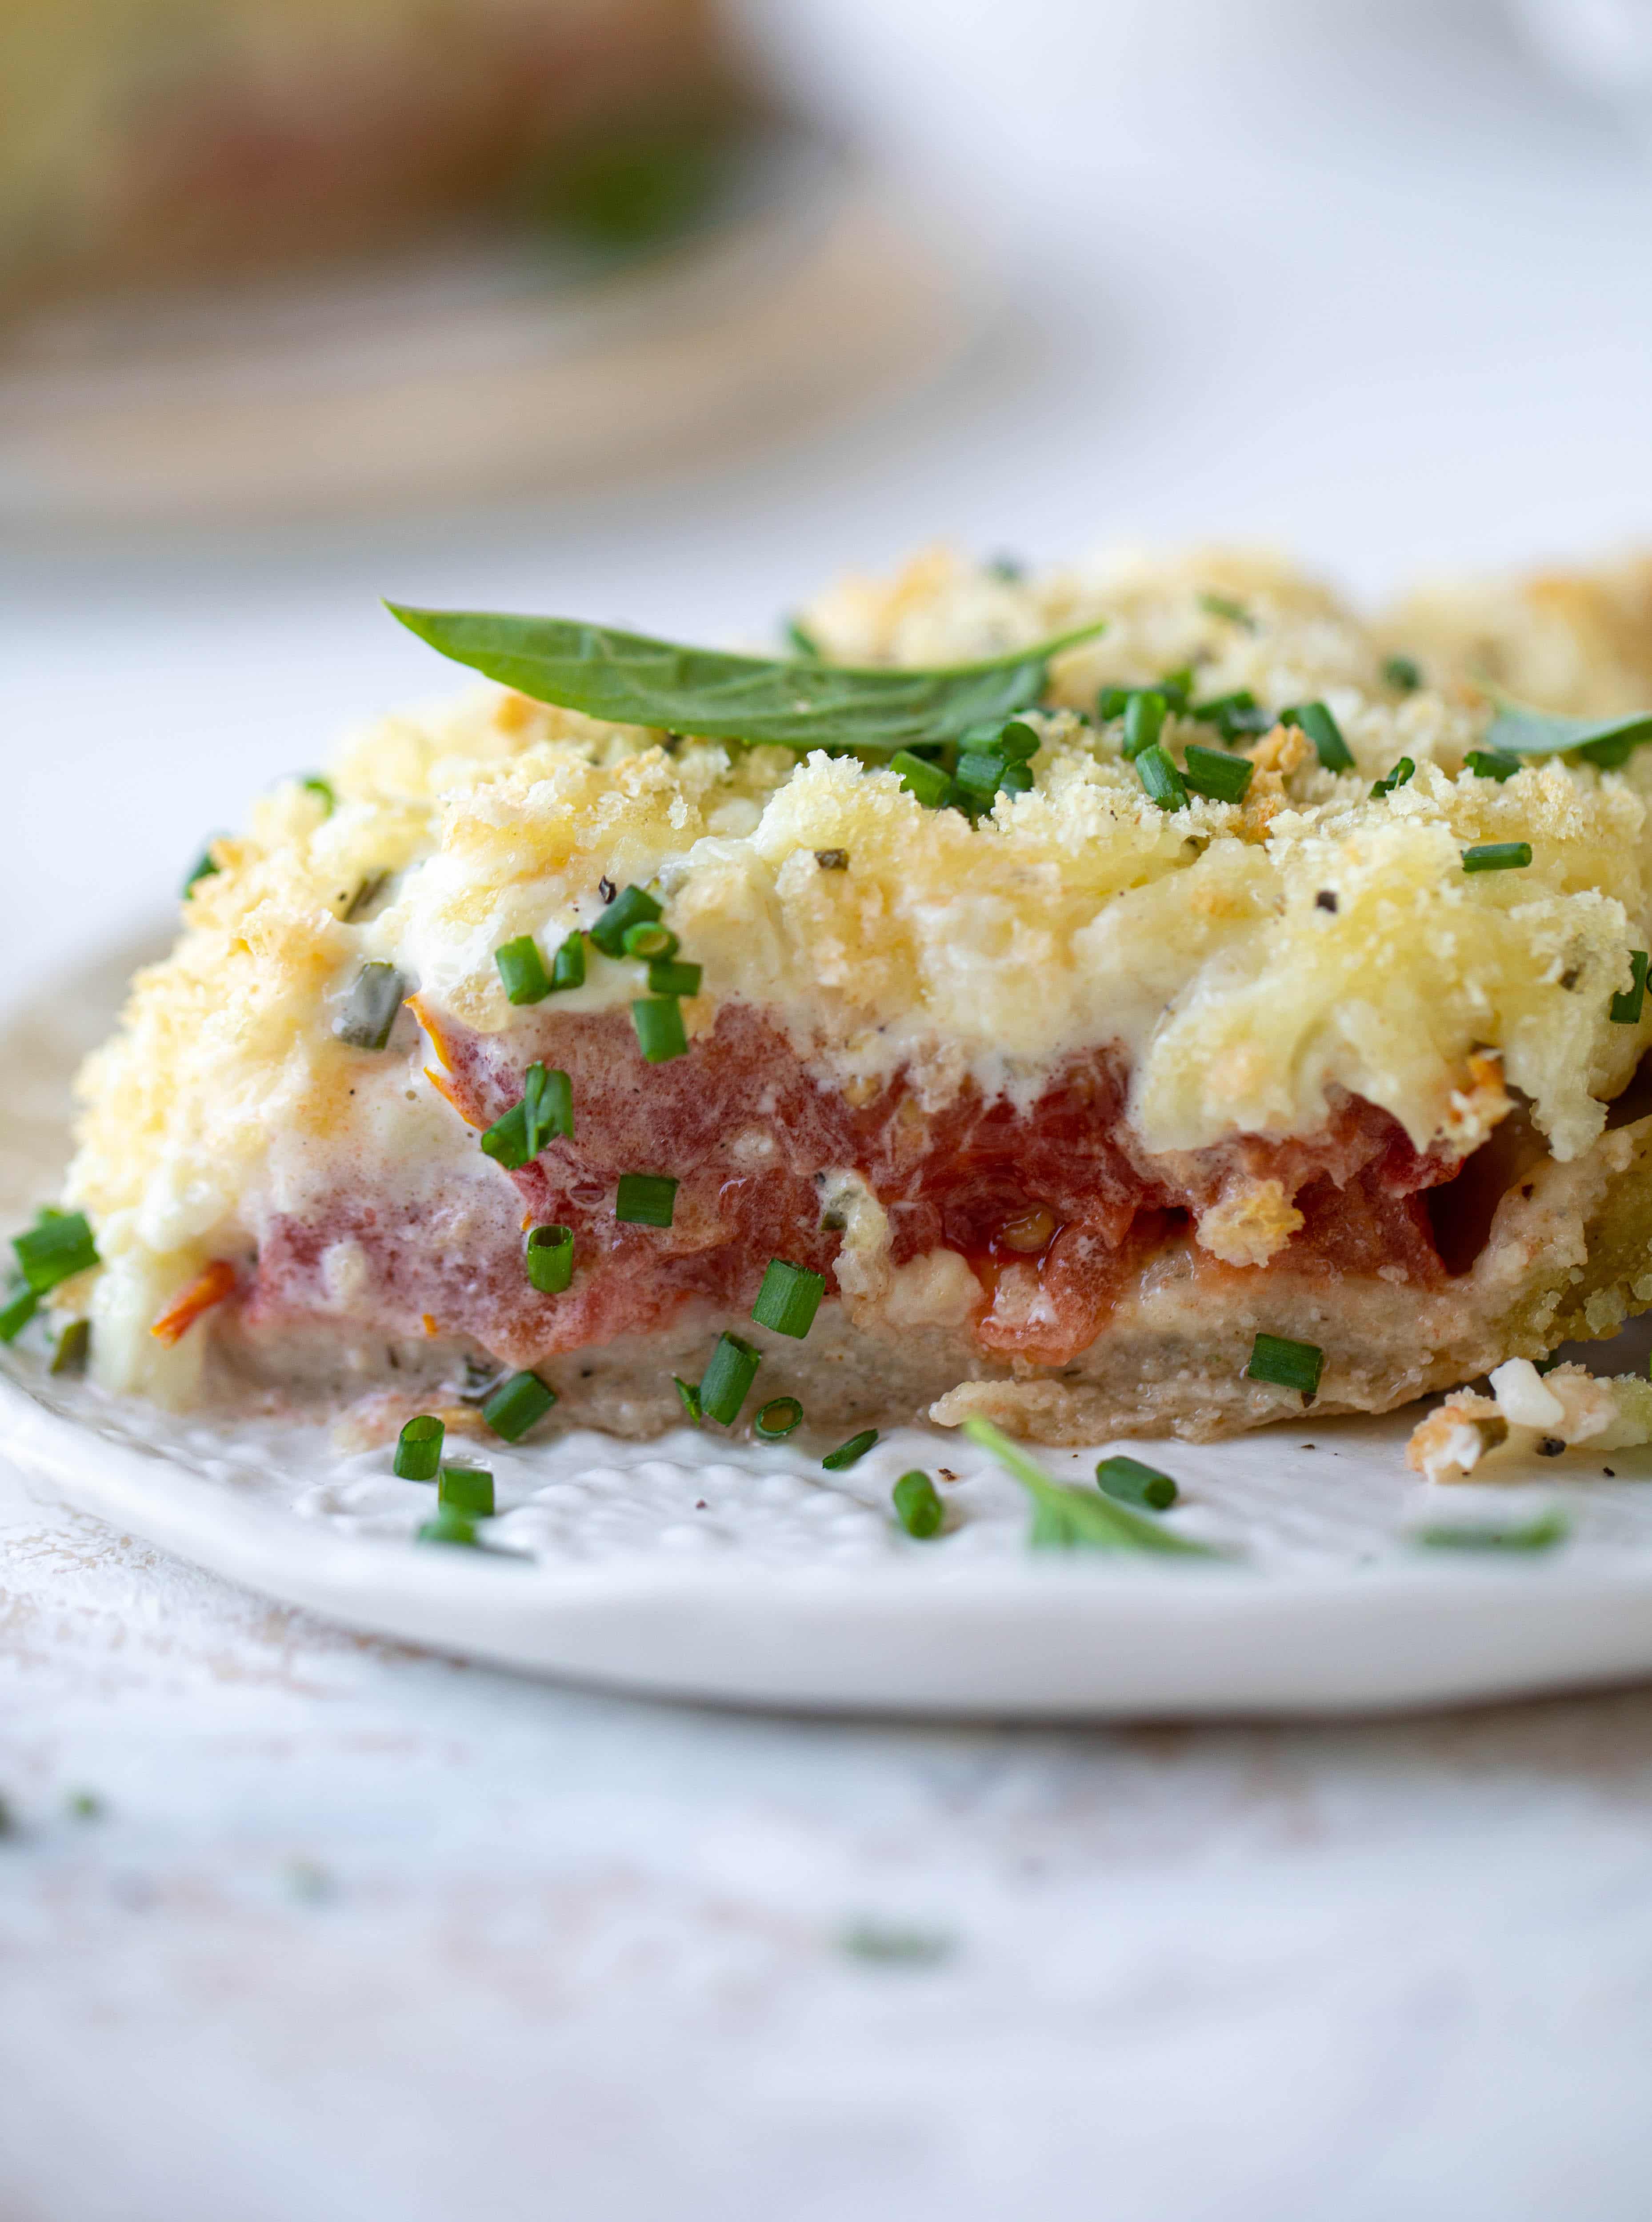
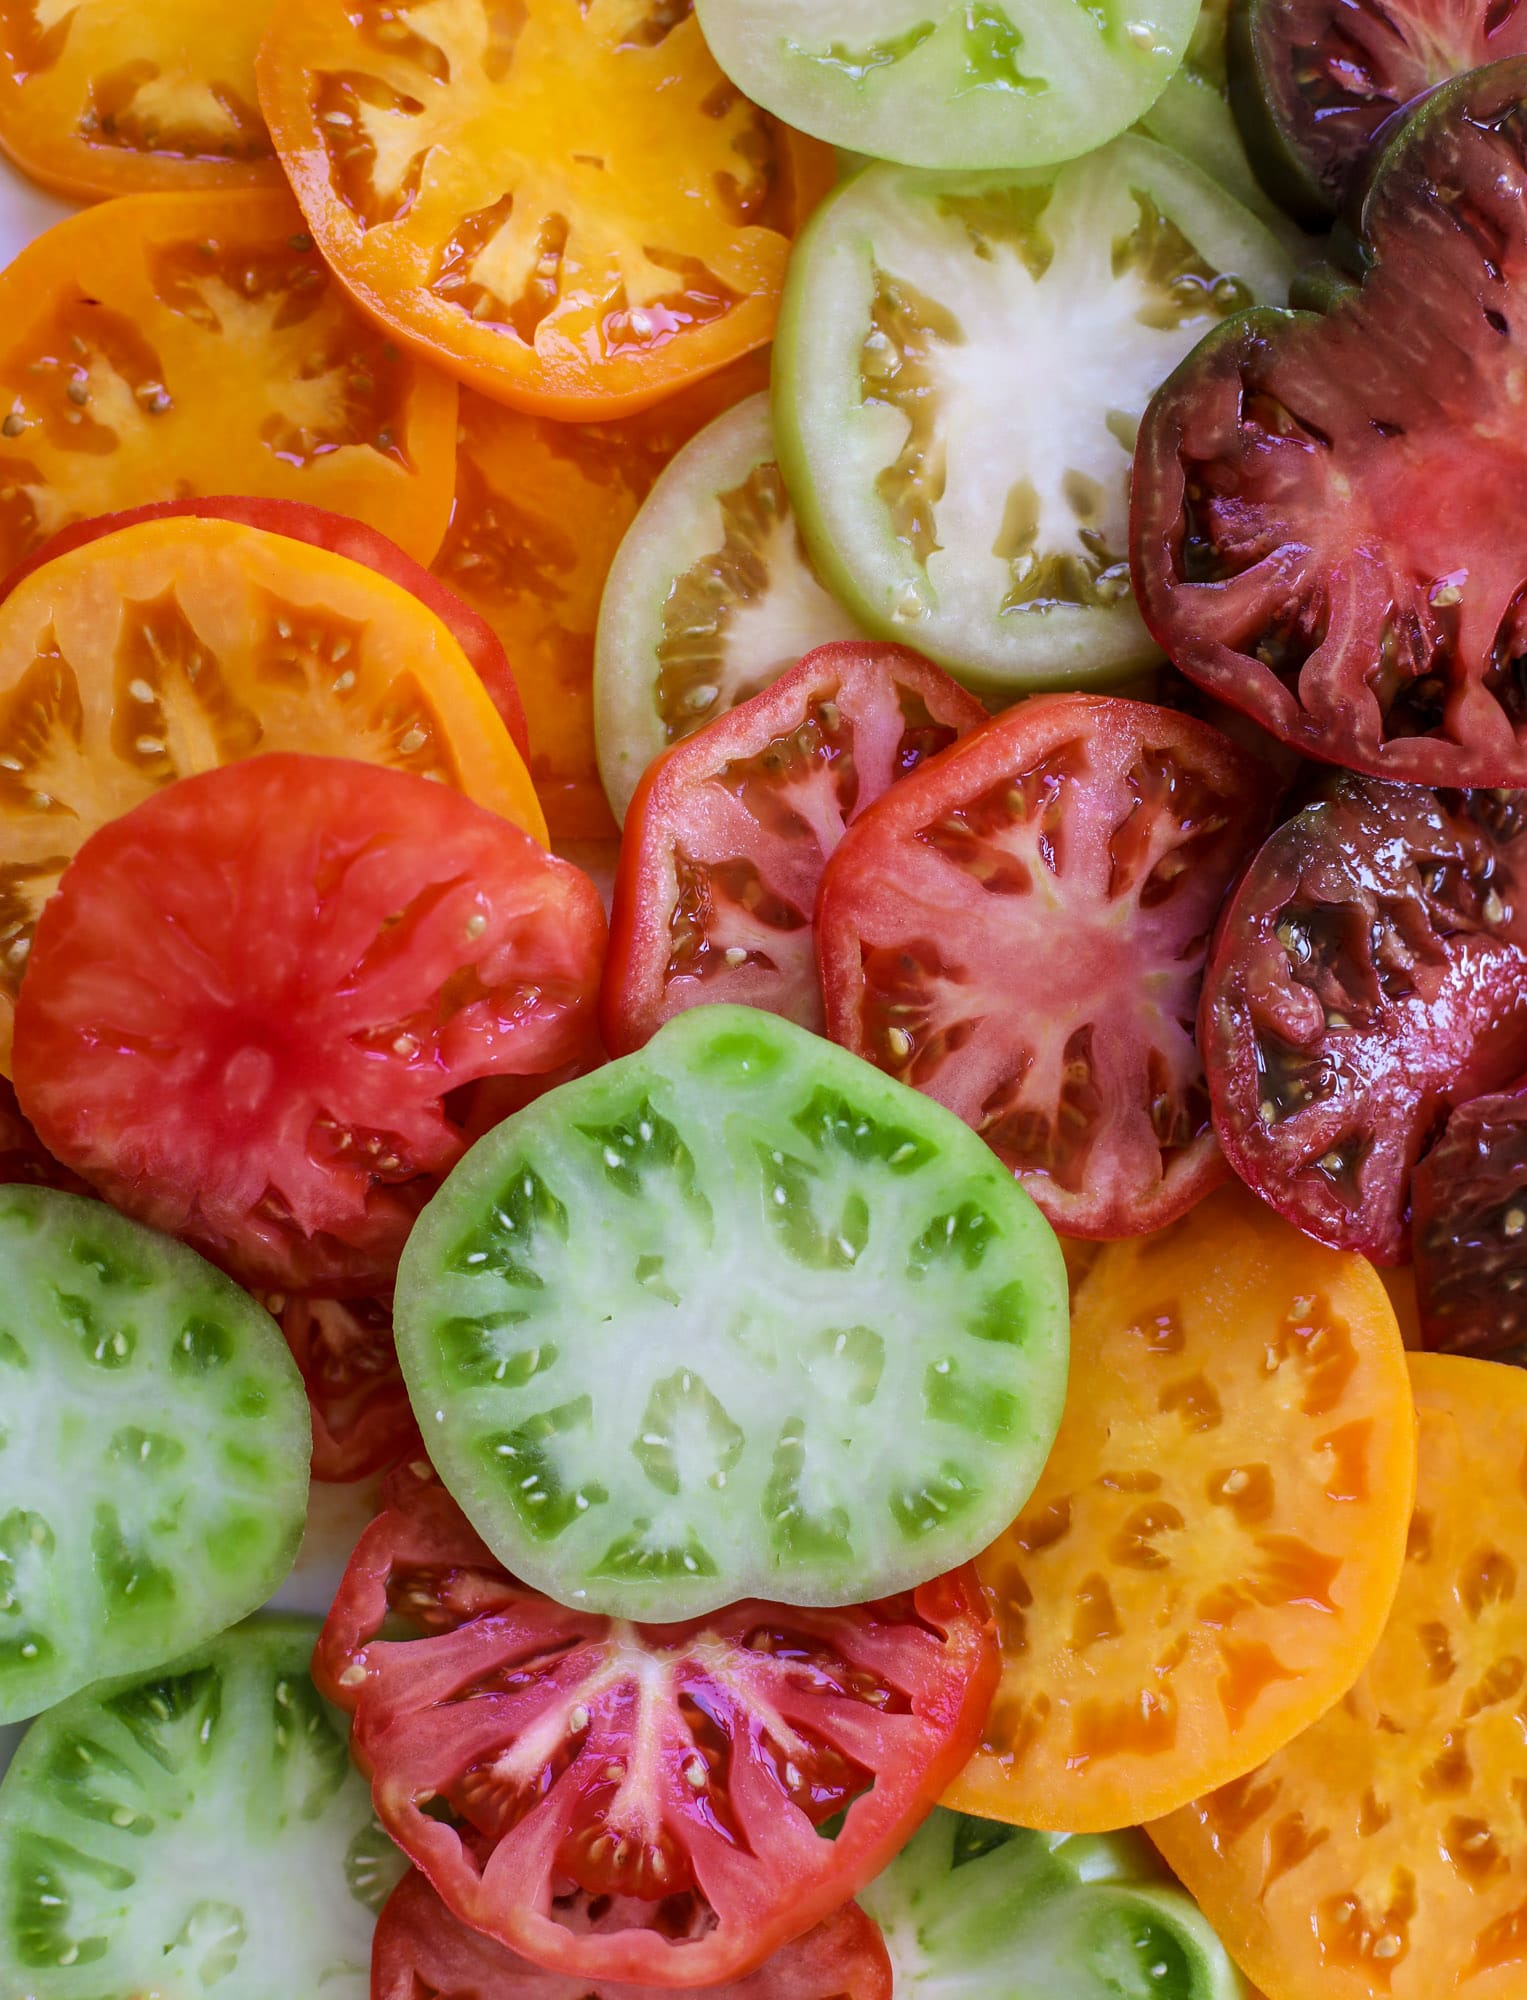
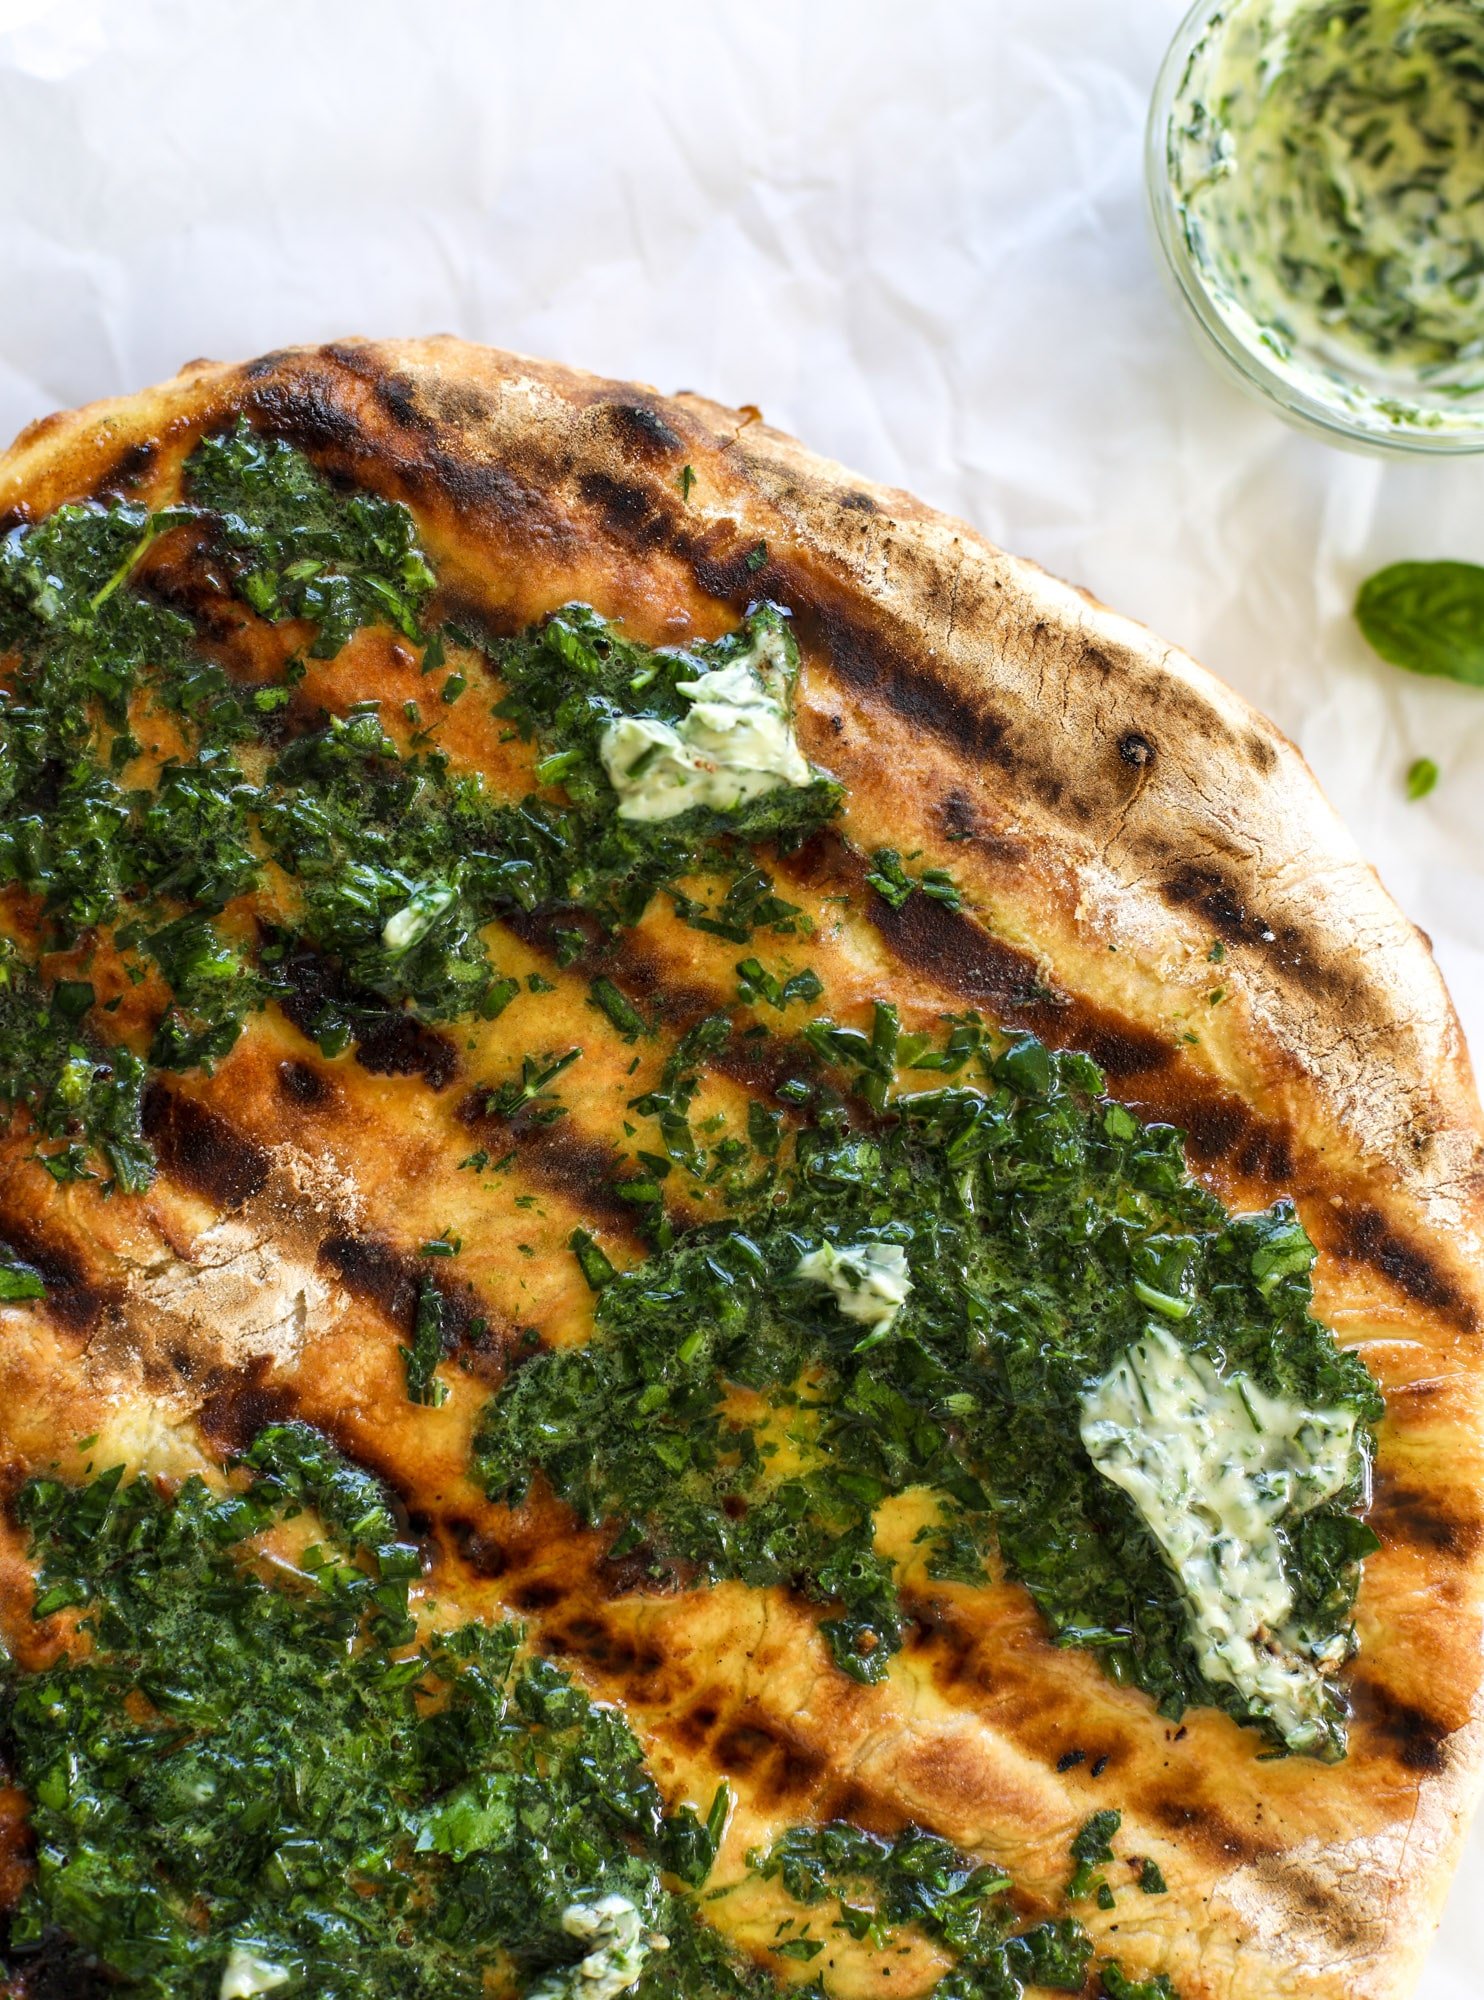
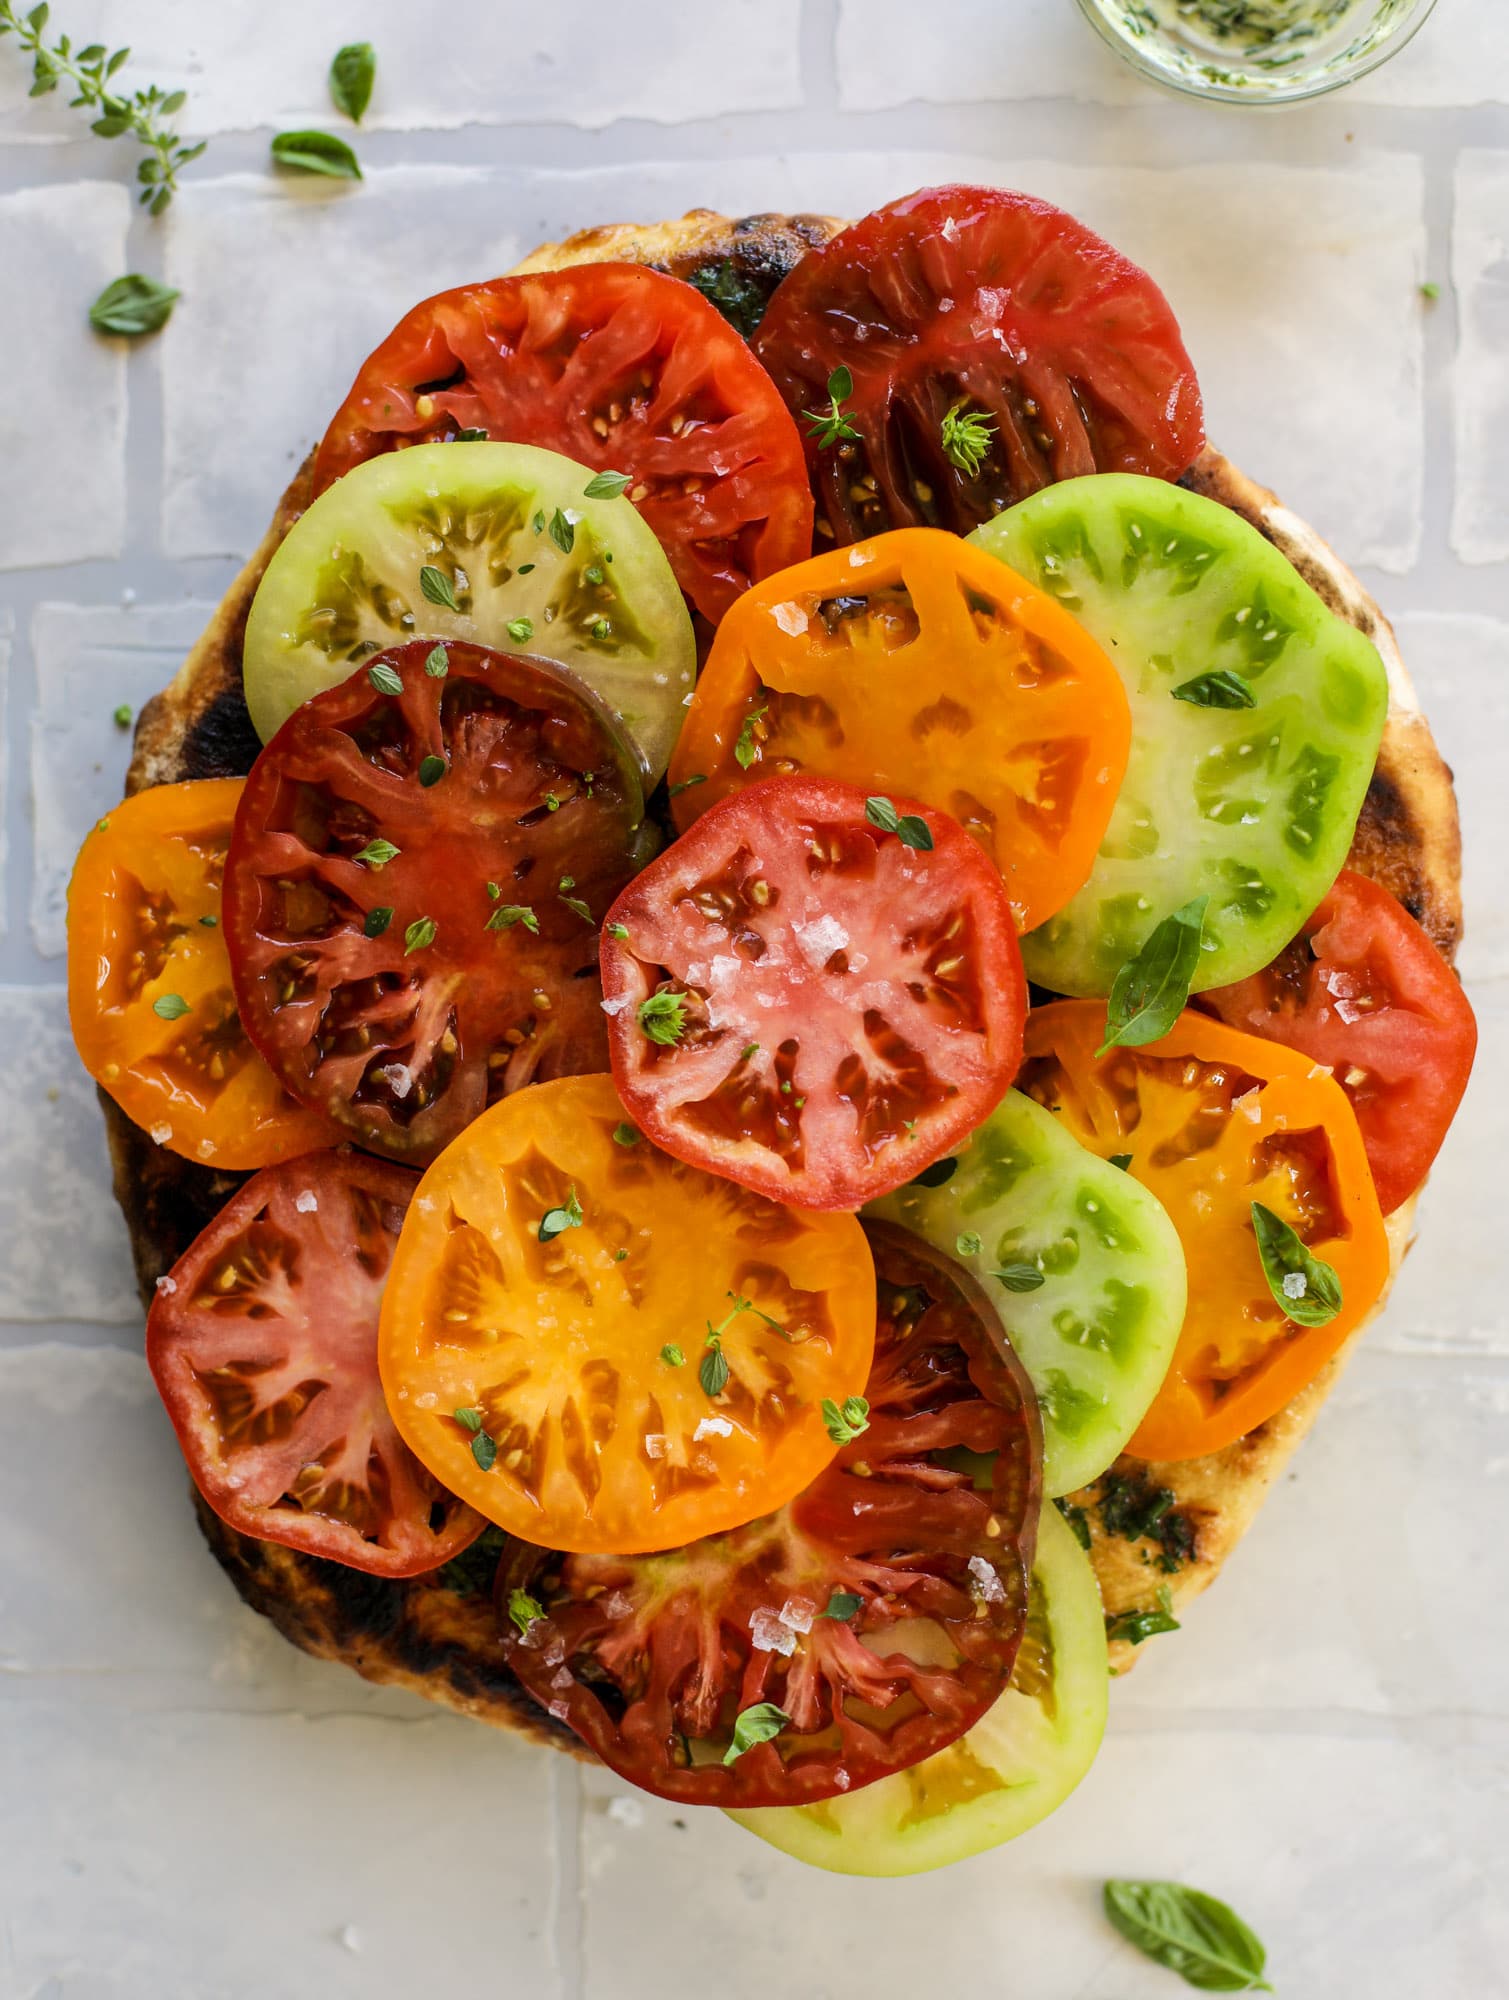
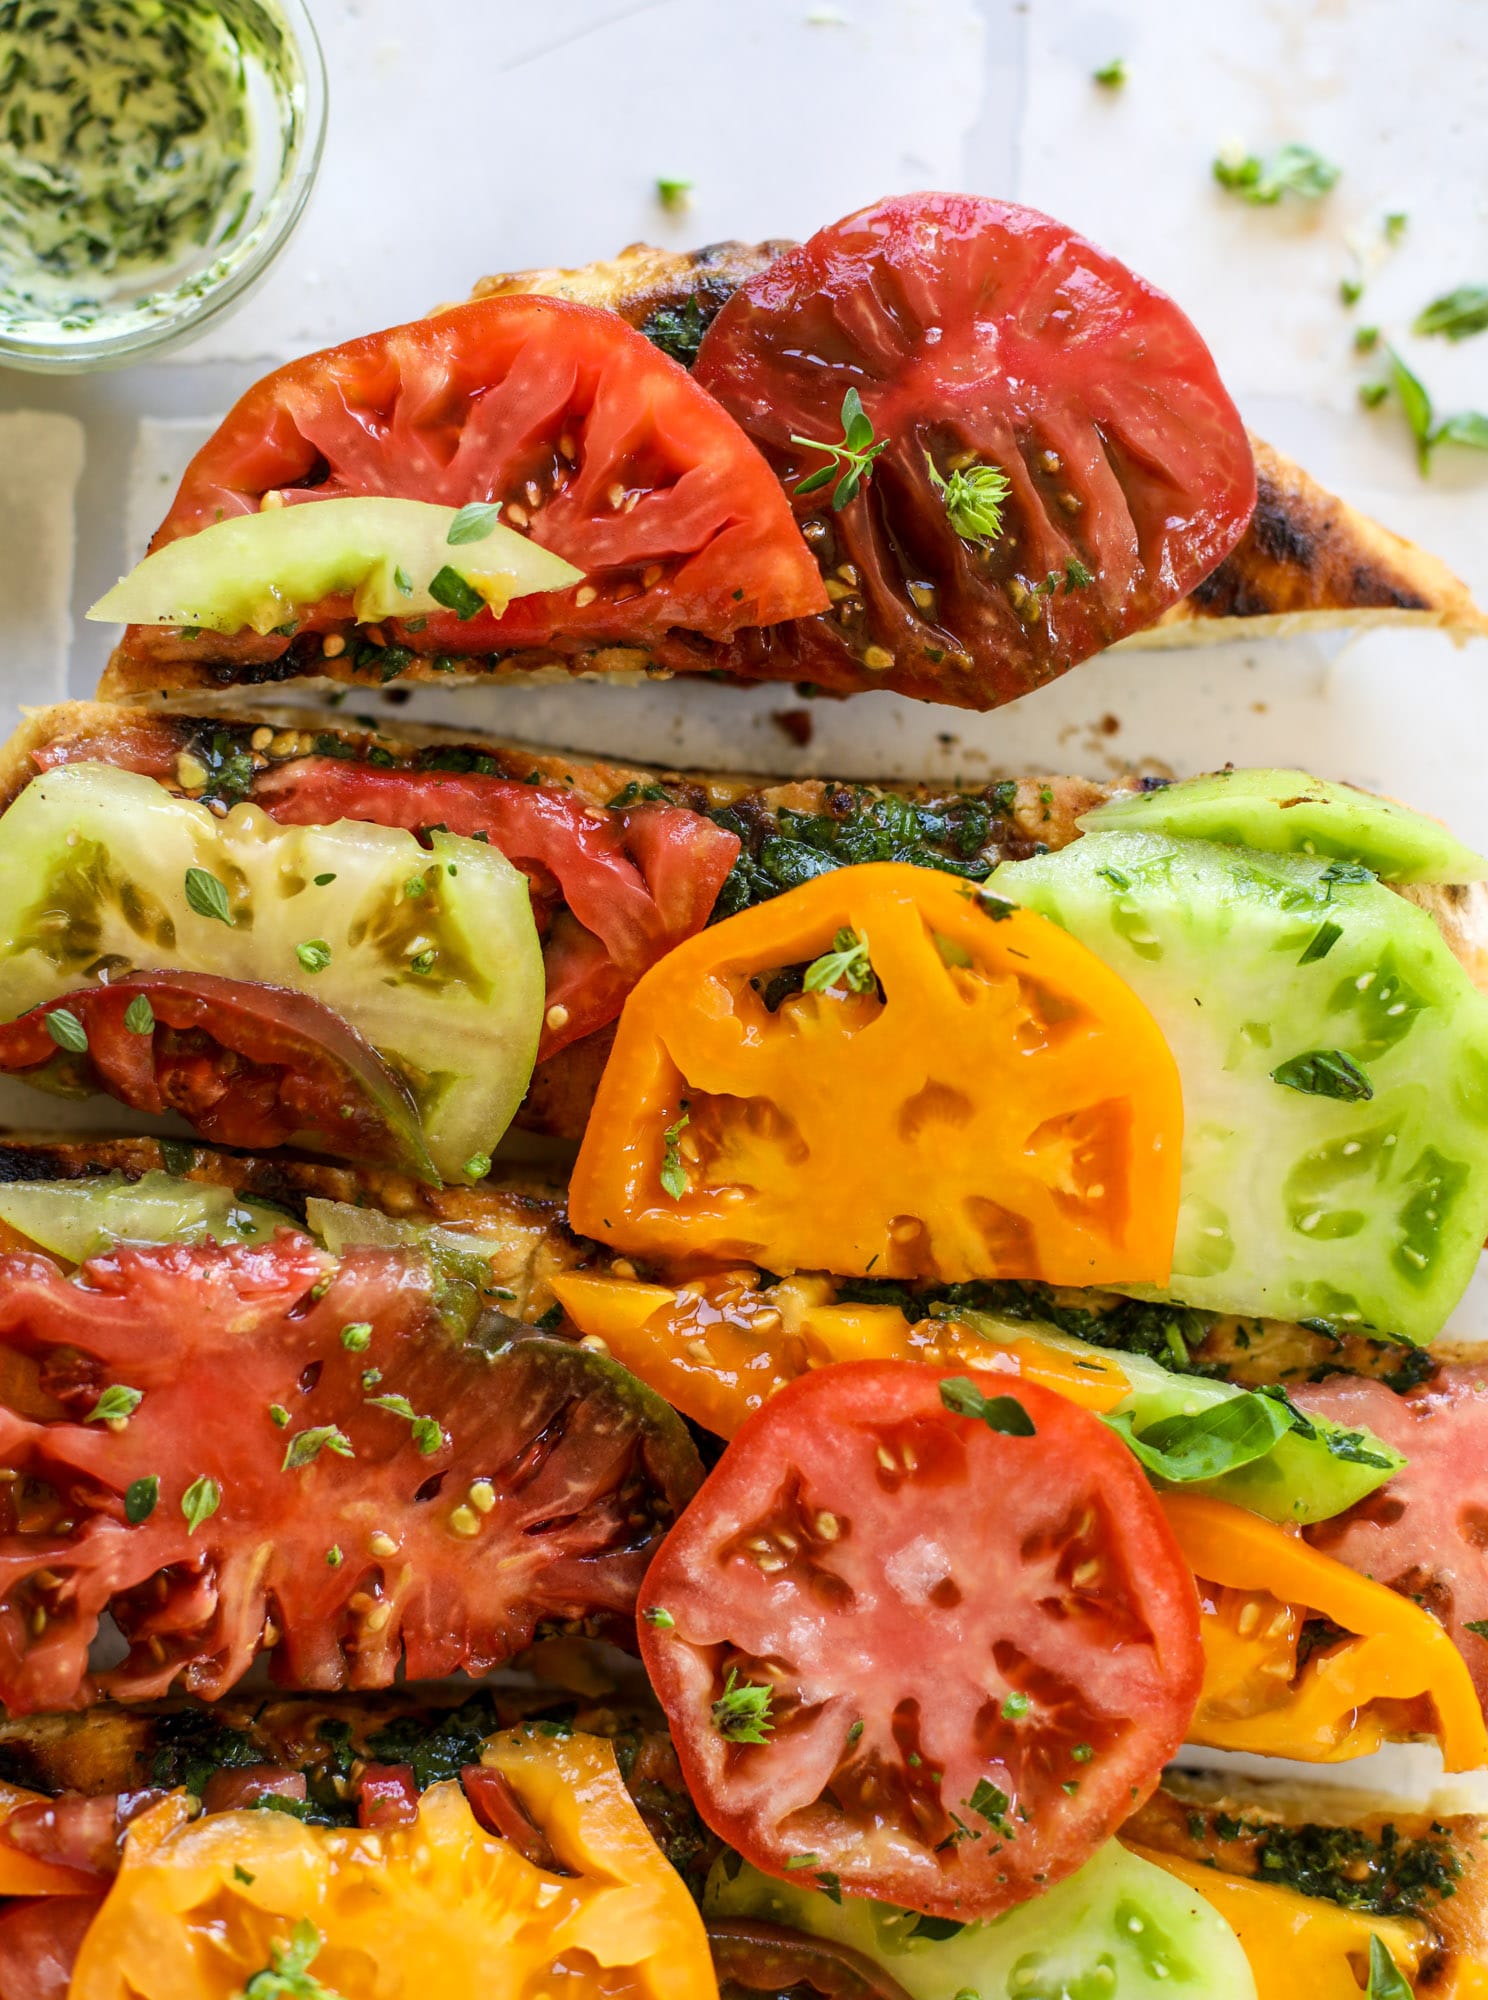
I used my regular galette crust (why do I feel like the queen of galettes? I googled howsweeteats + galettes and I have so many! Because pie is terrifying?) and went with this cheddar version. I first shared it this past summer when I made tomato pie (it’s life changing, for real) and it’s a dreamy, cheesy crust! 

This apple cheddar galette is made with honeycrisp apples, set in a cheddar herb crust and brushed with thyme butter! So delicious and perfect for fall.

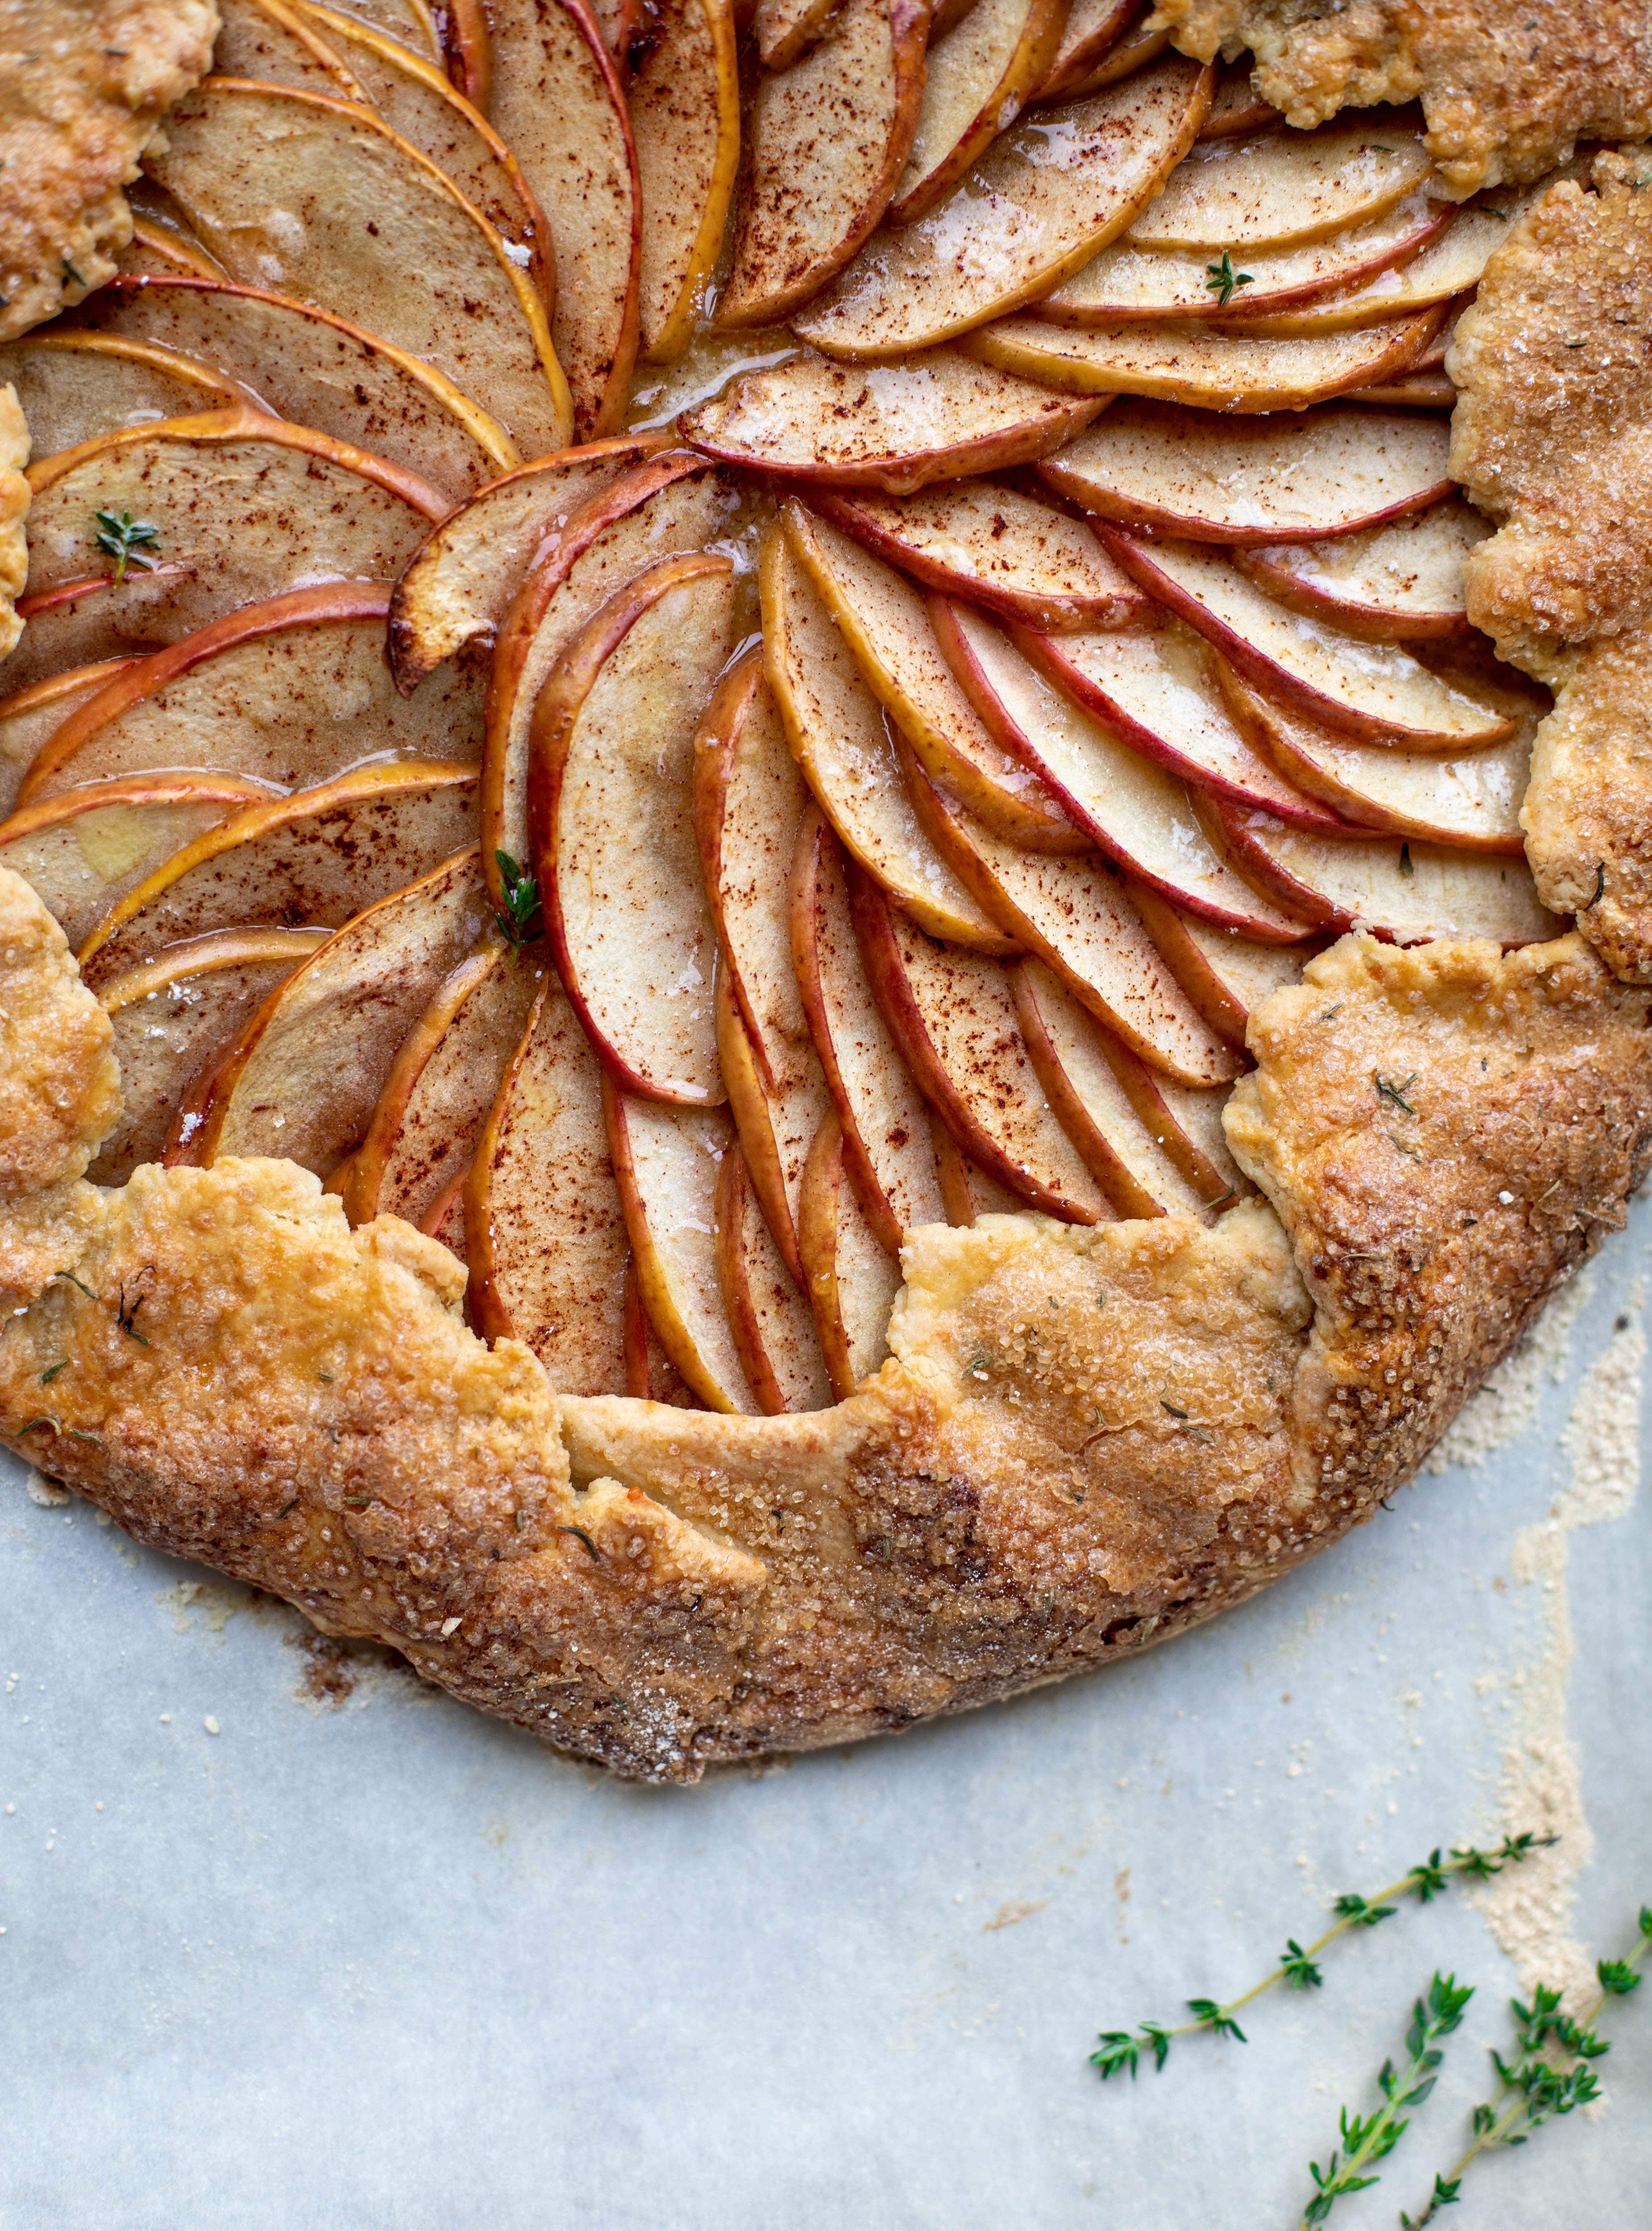
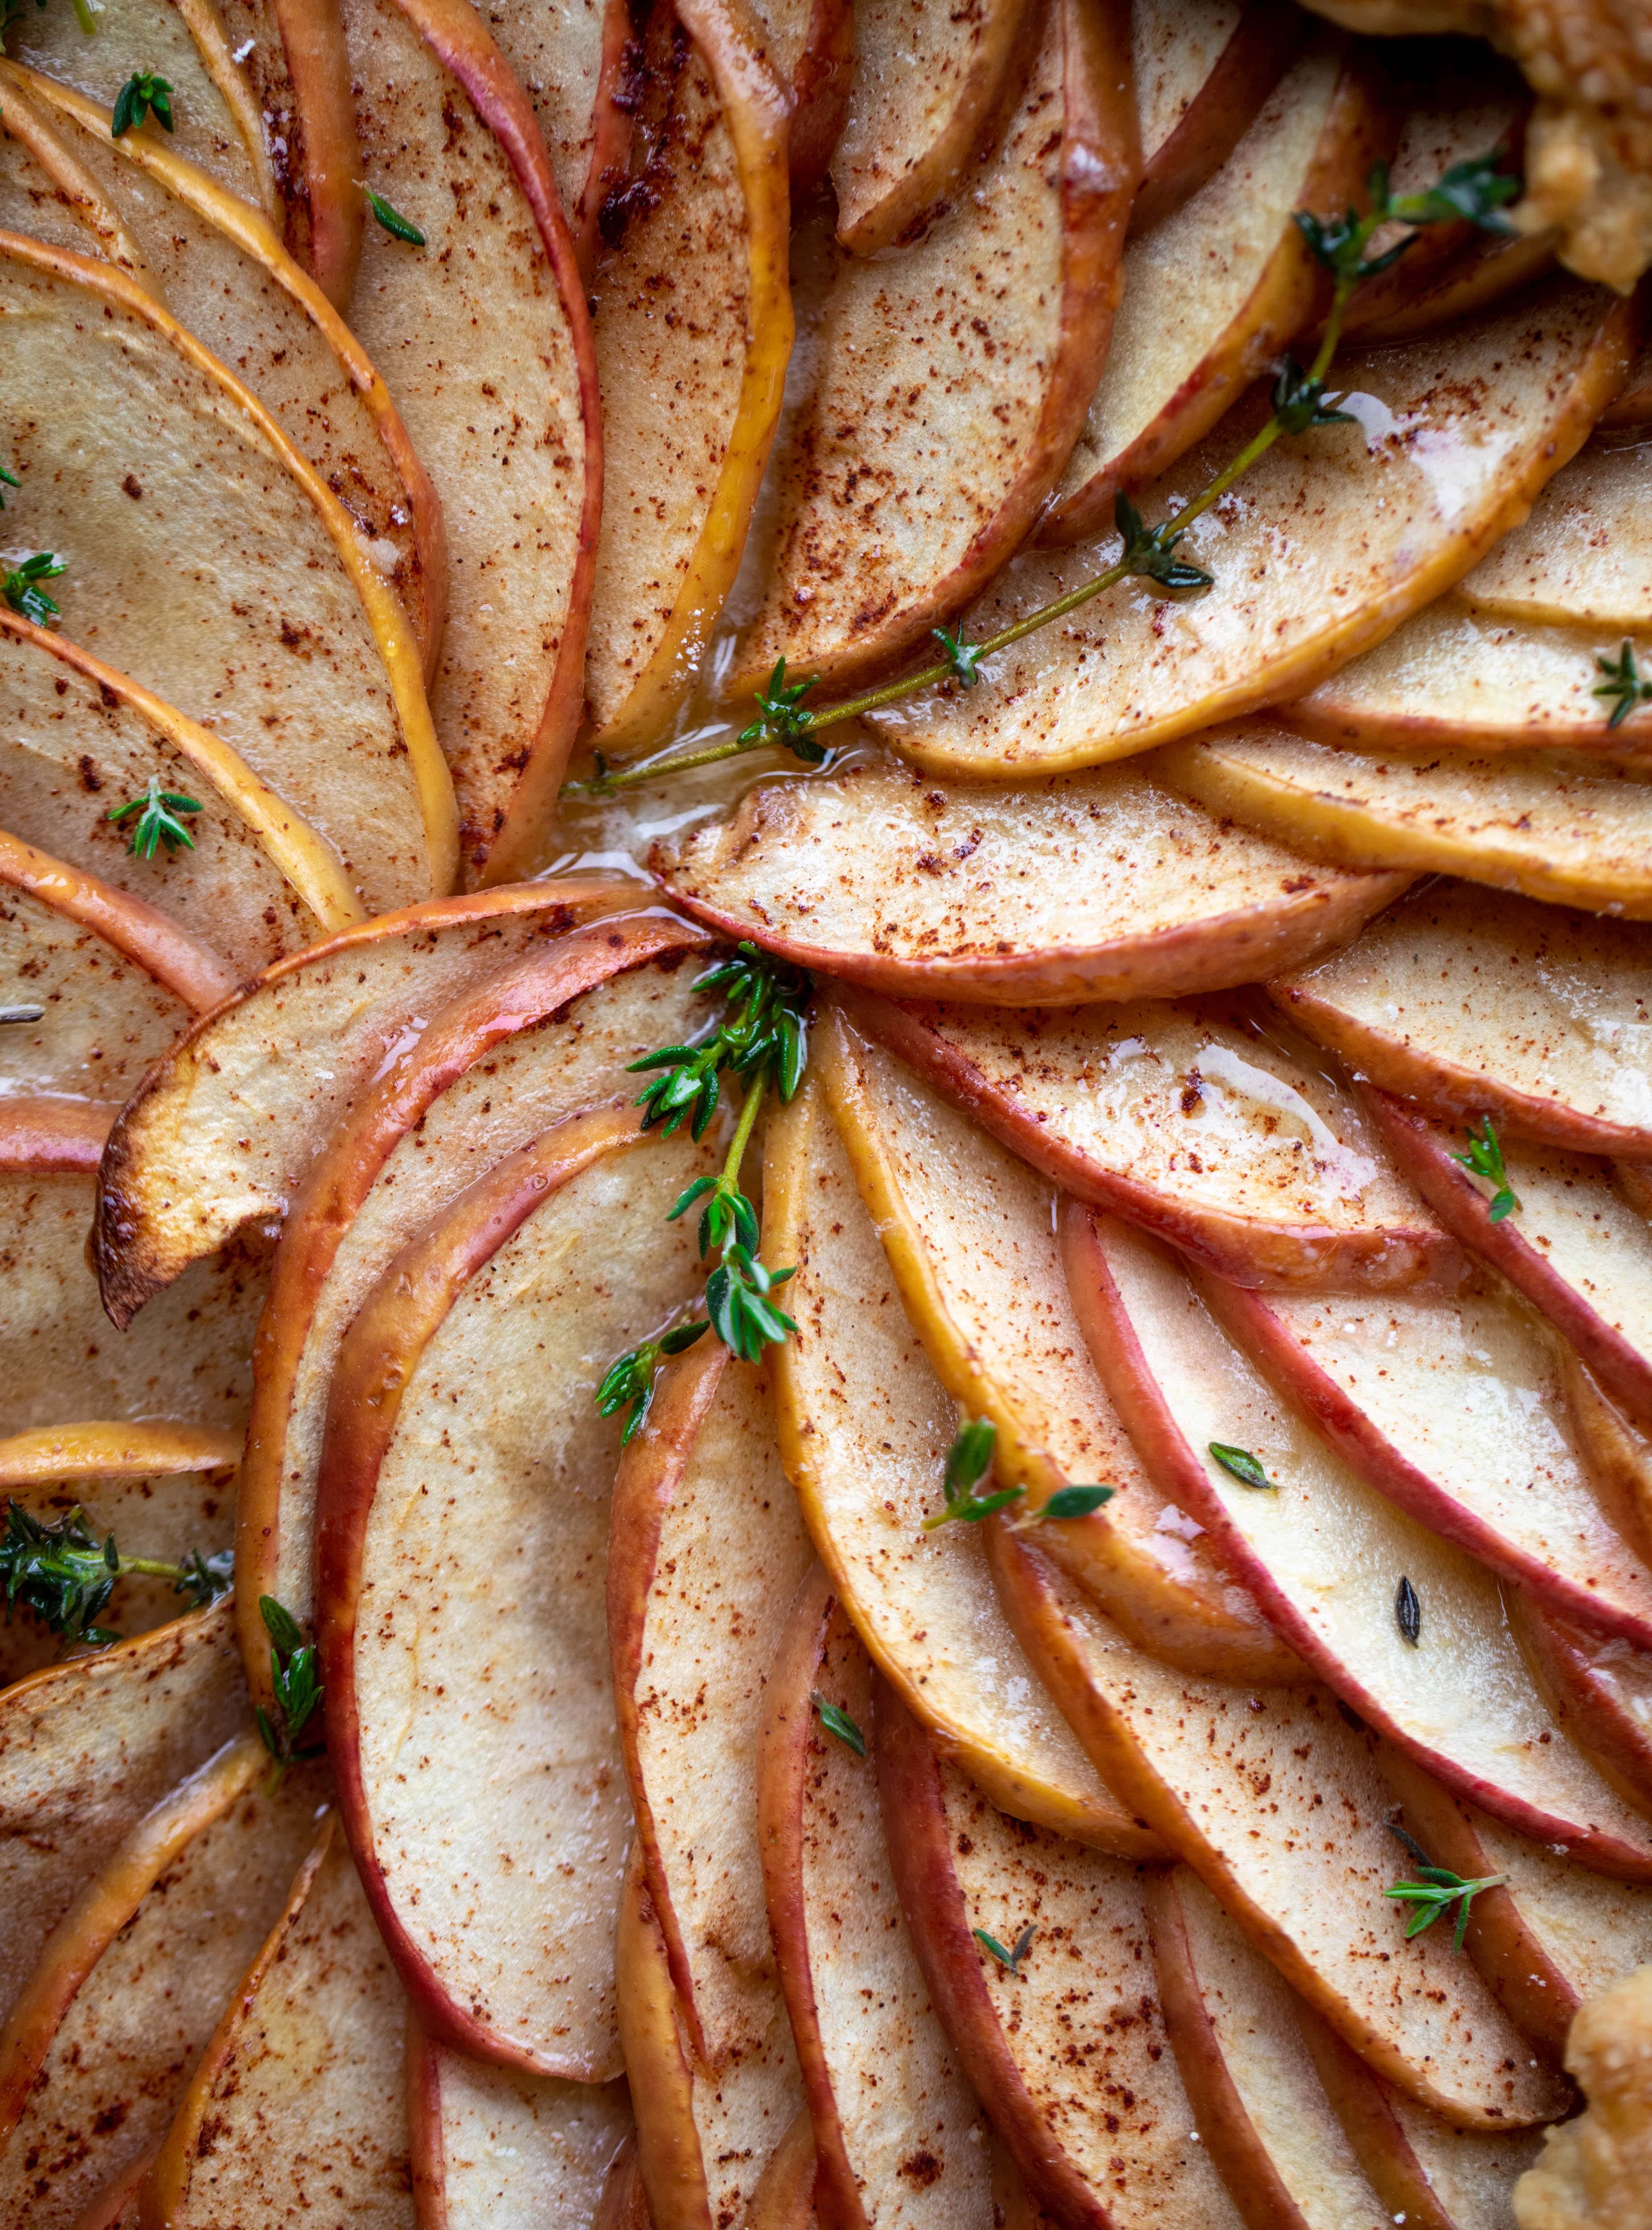
But! My favorite part of this whole thing might be the thyme butter. Brush just a touch of it on the apples once the whole thing comes out of the oven and you will be in heaven. It’s so decadent and buttery and indulgent and delicious. While still being a slightly lighter fruit dessert!

Before you tell me I’m crazy, I’m not saying this is LIGHT, but it’s not as decadent as a huge slice of double chocolate cake or something. Right?

I mean, it’s made with fruit… SO. 

https://www.howsweeteats.com/2015/07/summer-chicken-pot-pie-crostata-with-herbed-crust/

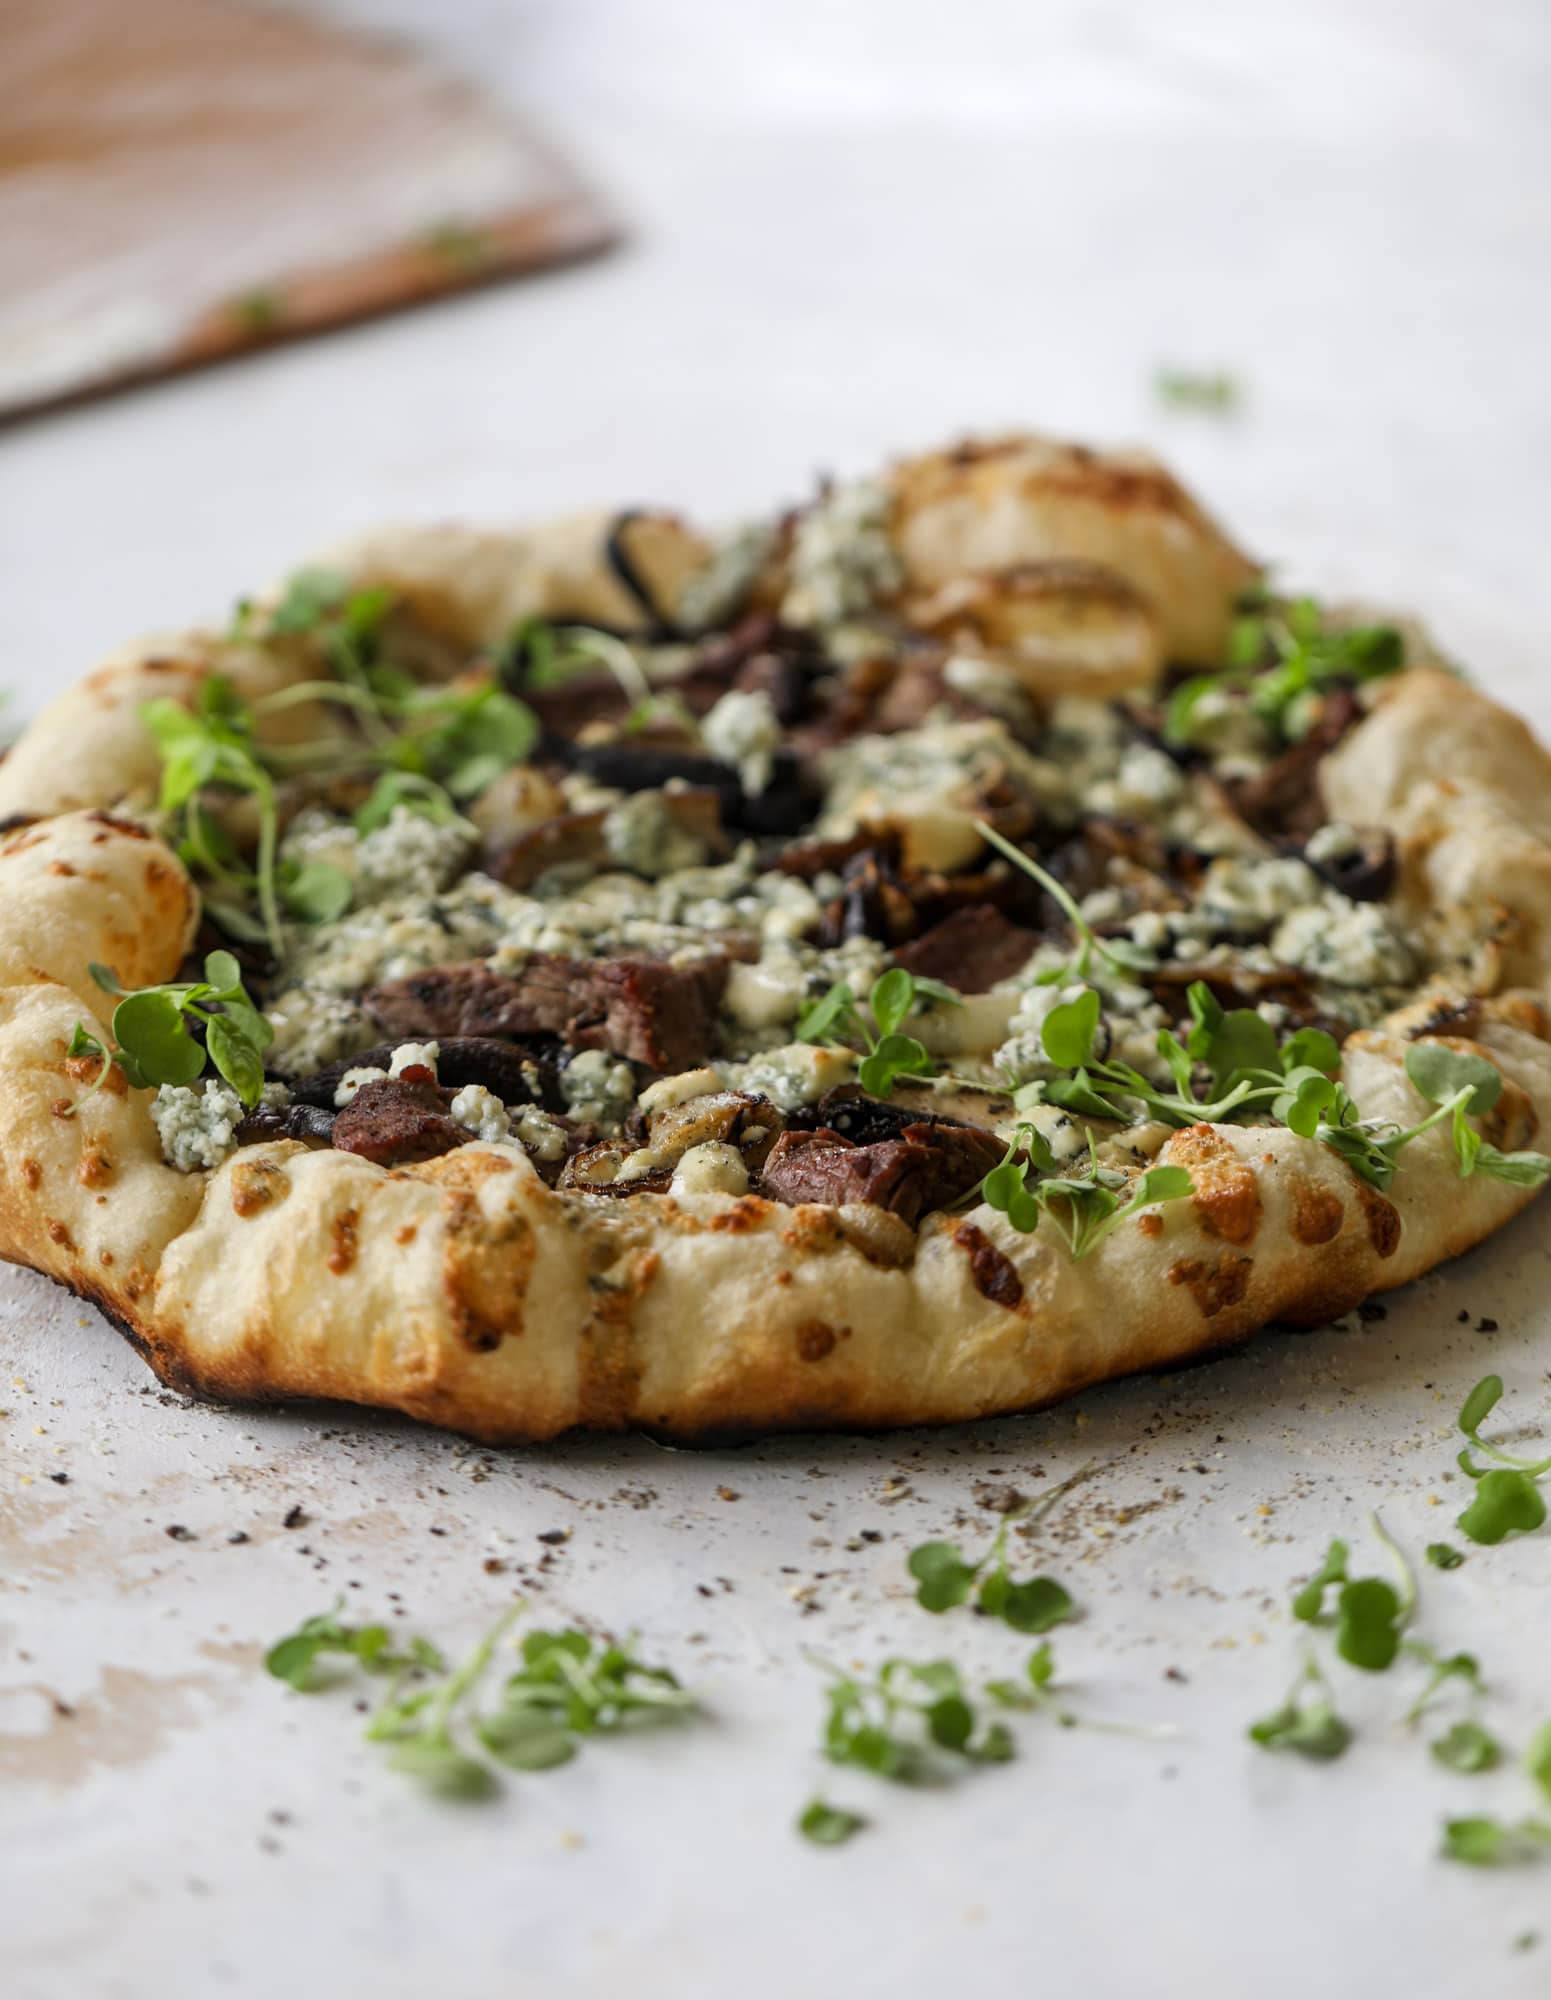
Anyhoo, you know I love a galette because it’s quicker and easier than pie. There is no stress over perfection – you just fold it into a “rustic” shape and then serve it on a fancy tray or plate from “Pottery Barn” (read: Home Goods or TJ Maxx) for that whole rustic vibe. 

And it feels fancy! 

https://www.howsweeteats.com/2015/07/summer-chicken-pot-pie-crostata-with-herbed-crust/

Seriously tastes like the best slice of fall you’ve ever had.

https://www.howsweeteats.com/2015/07/summer-chicken-pot-pie-crostata-with-herbed-crust/

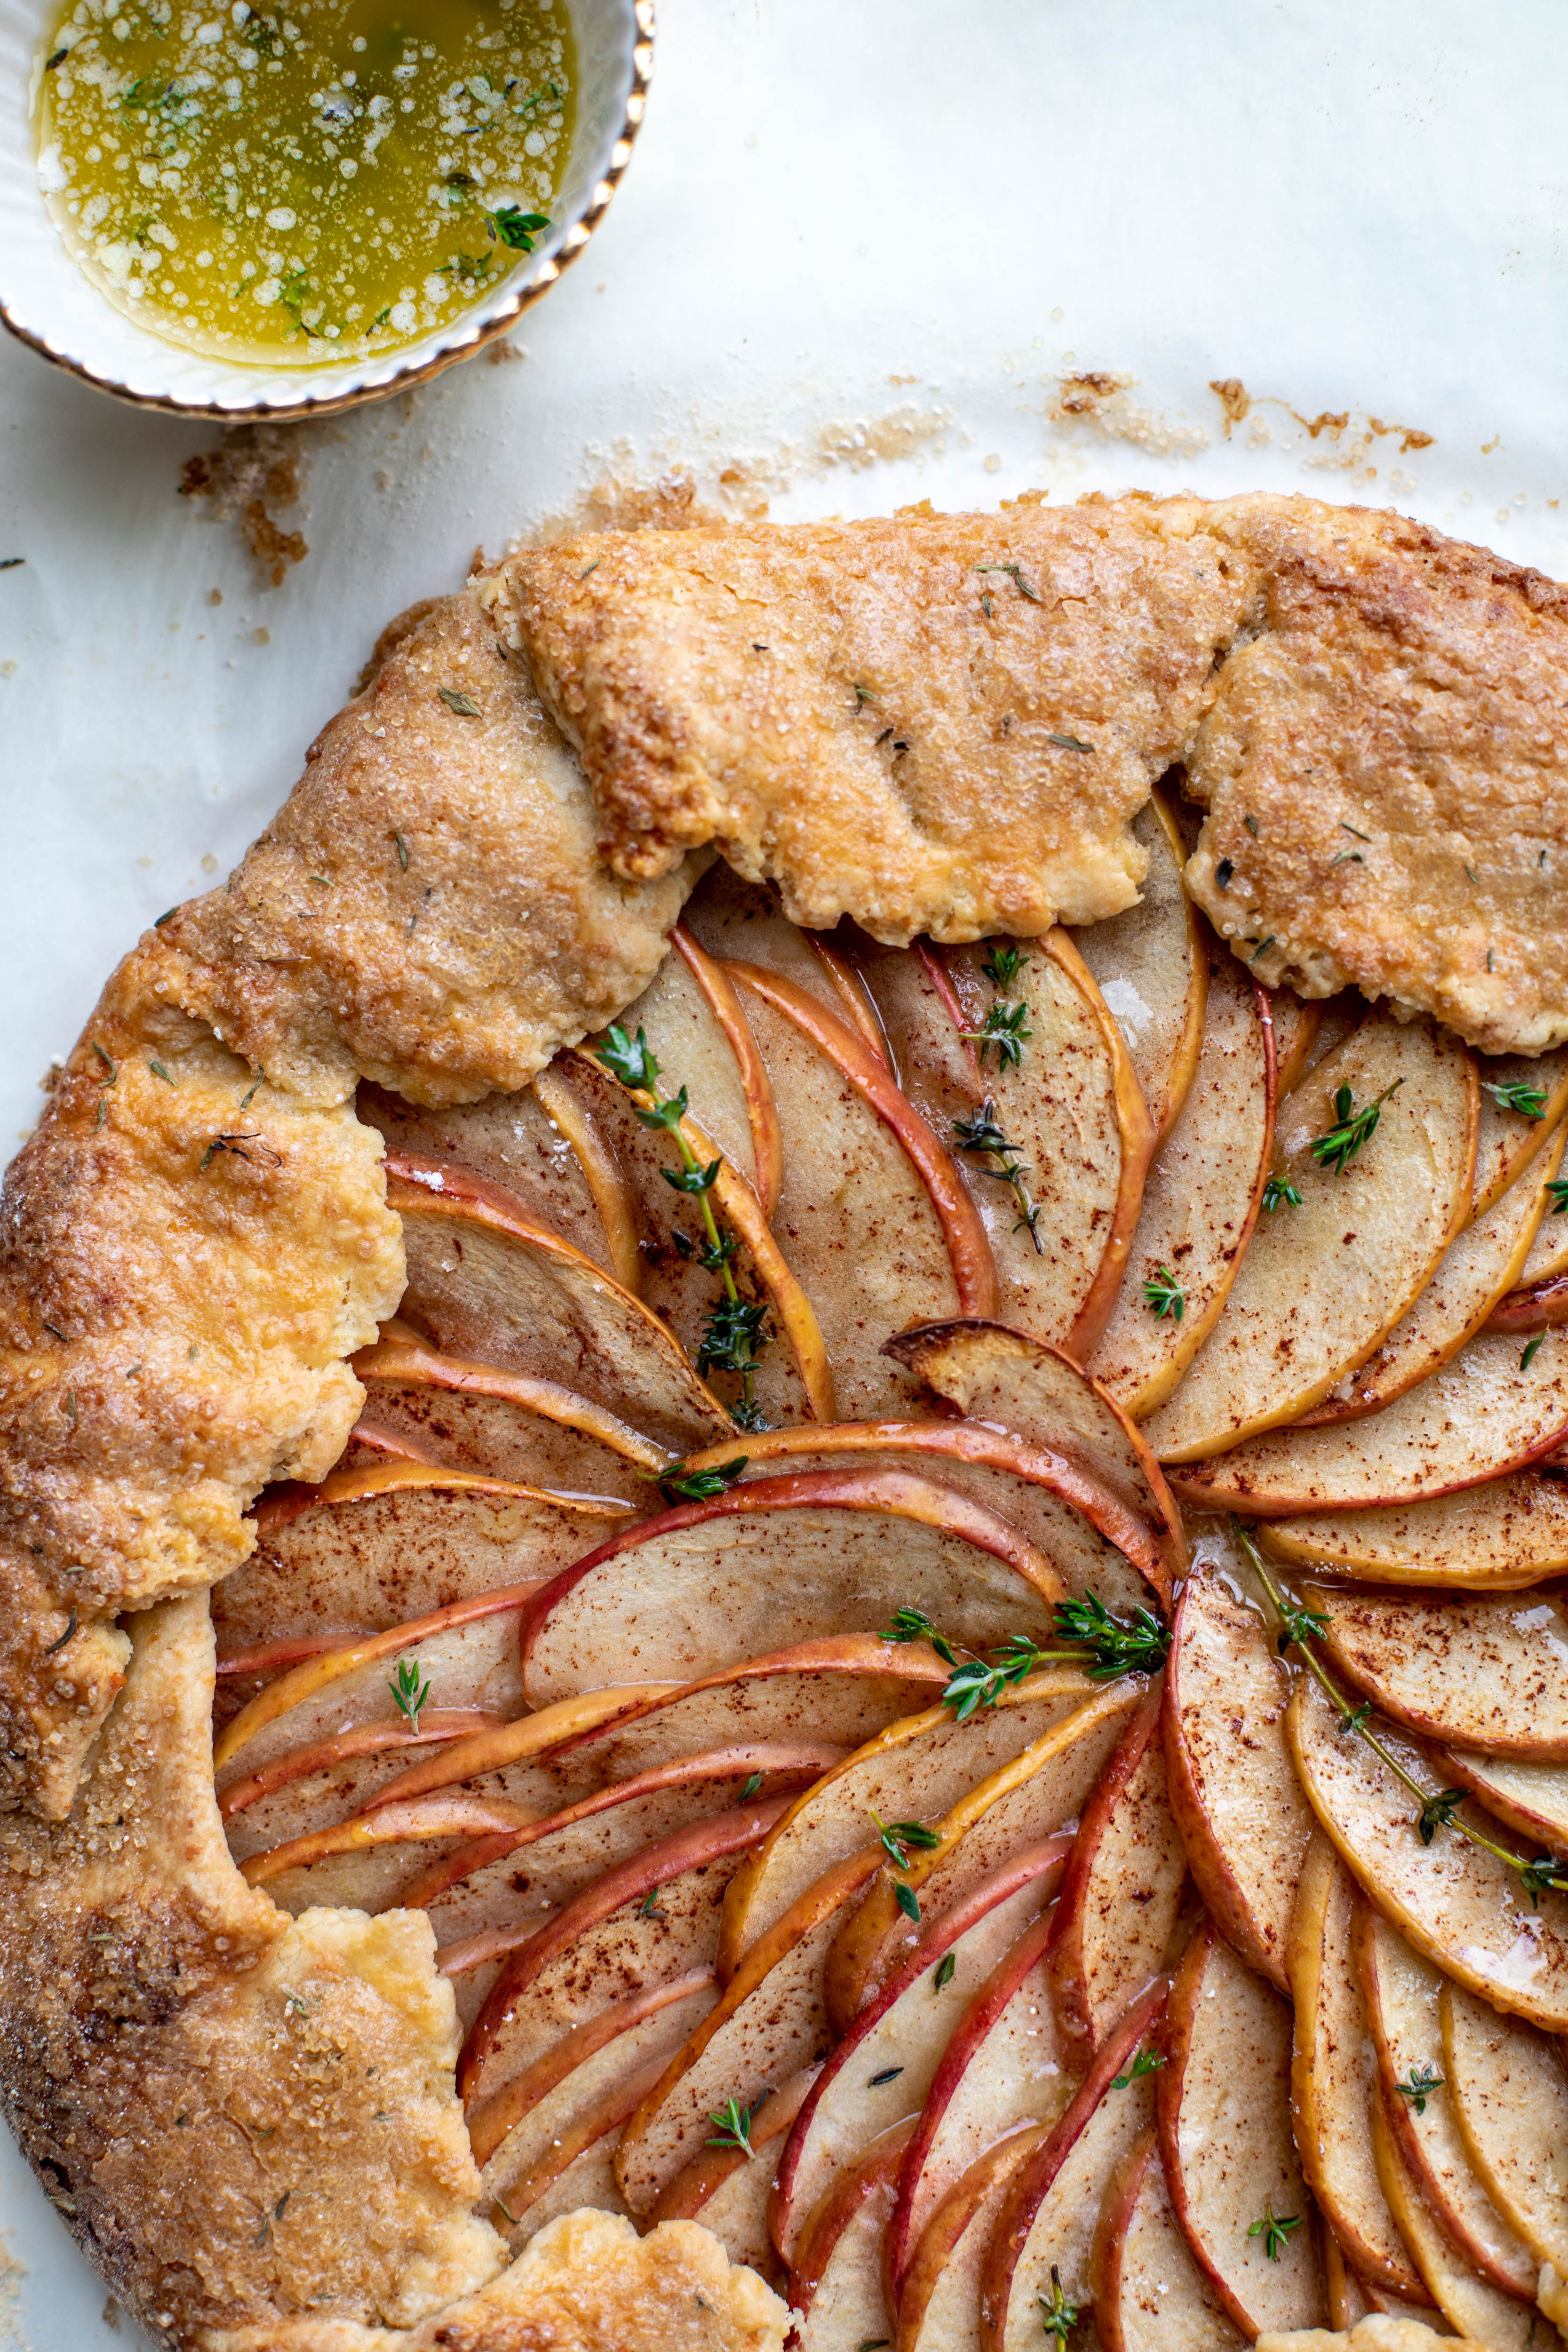
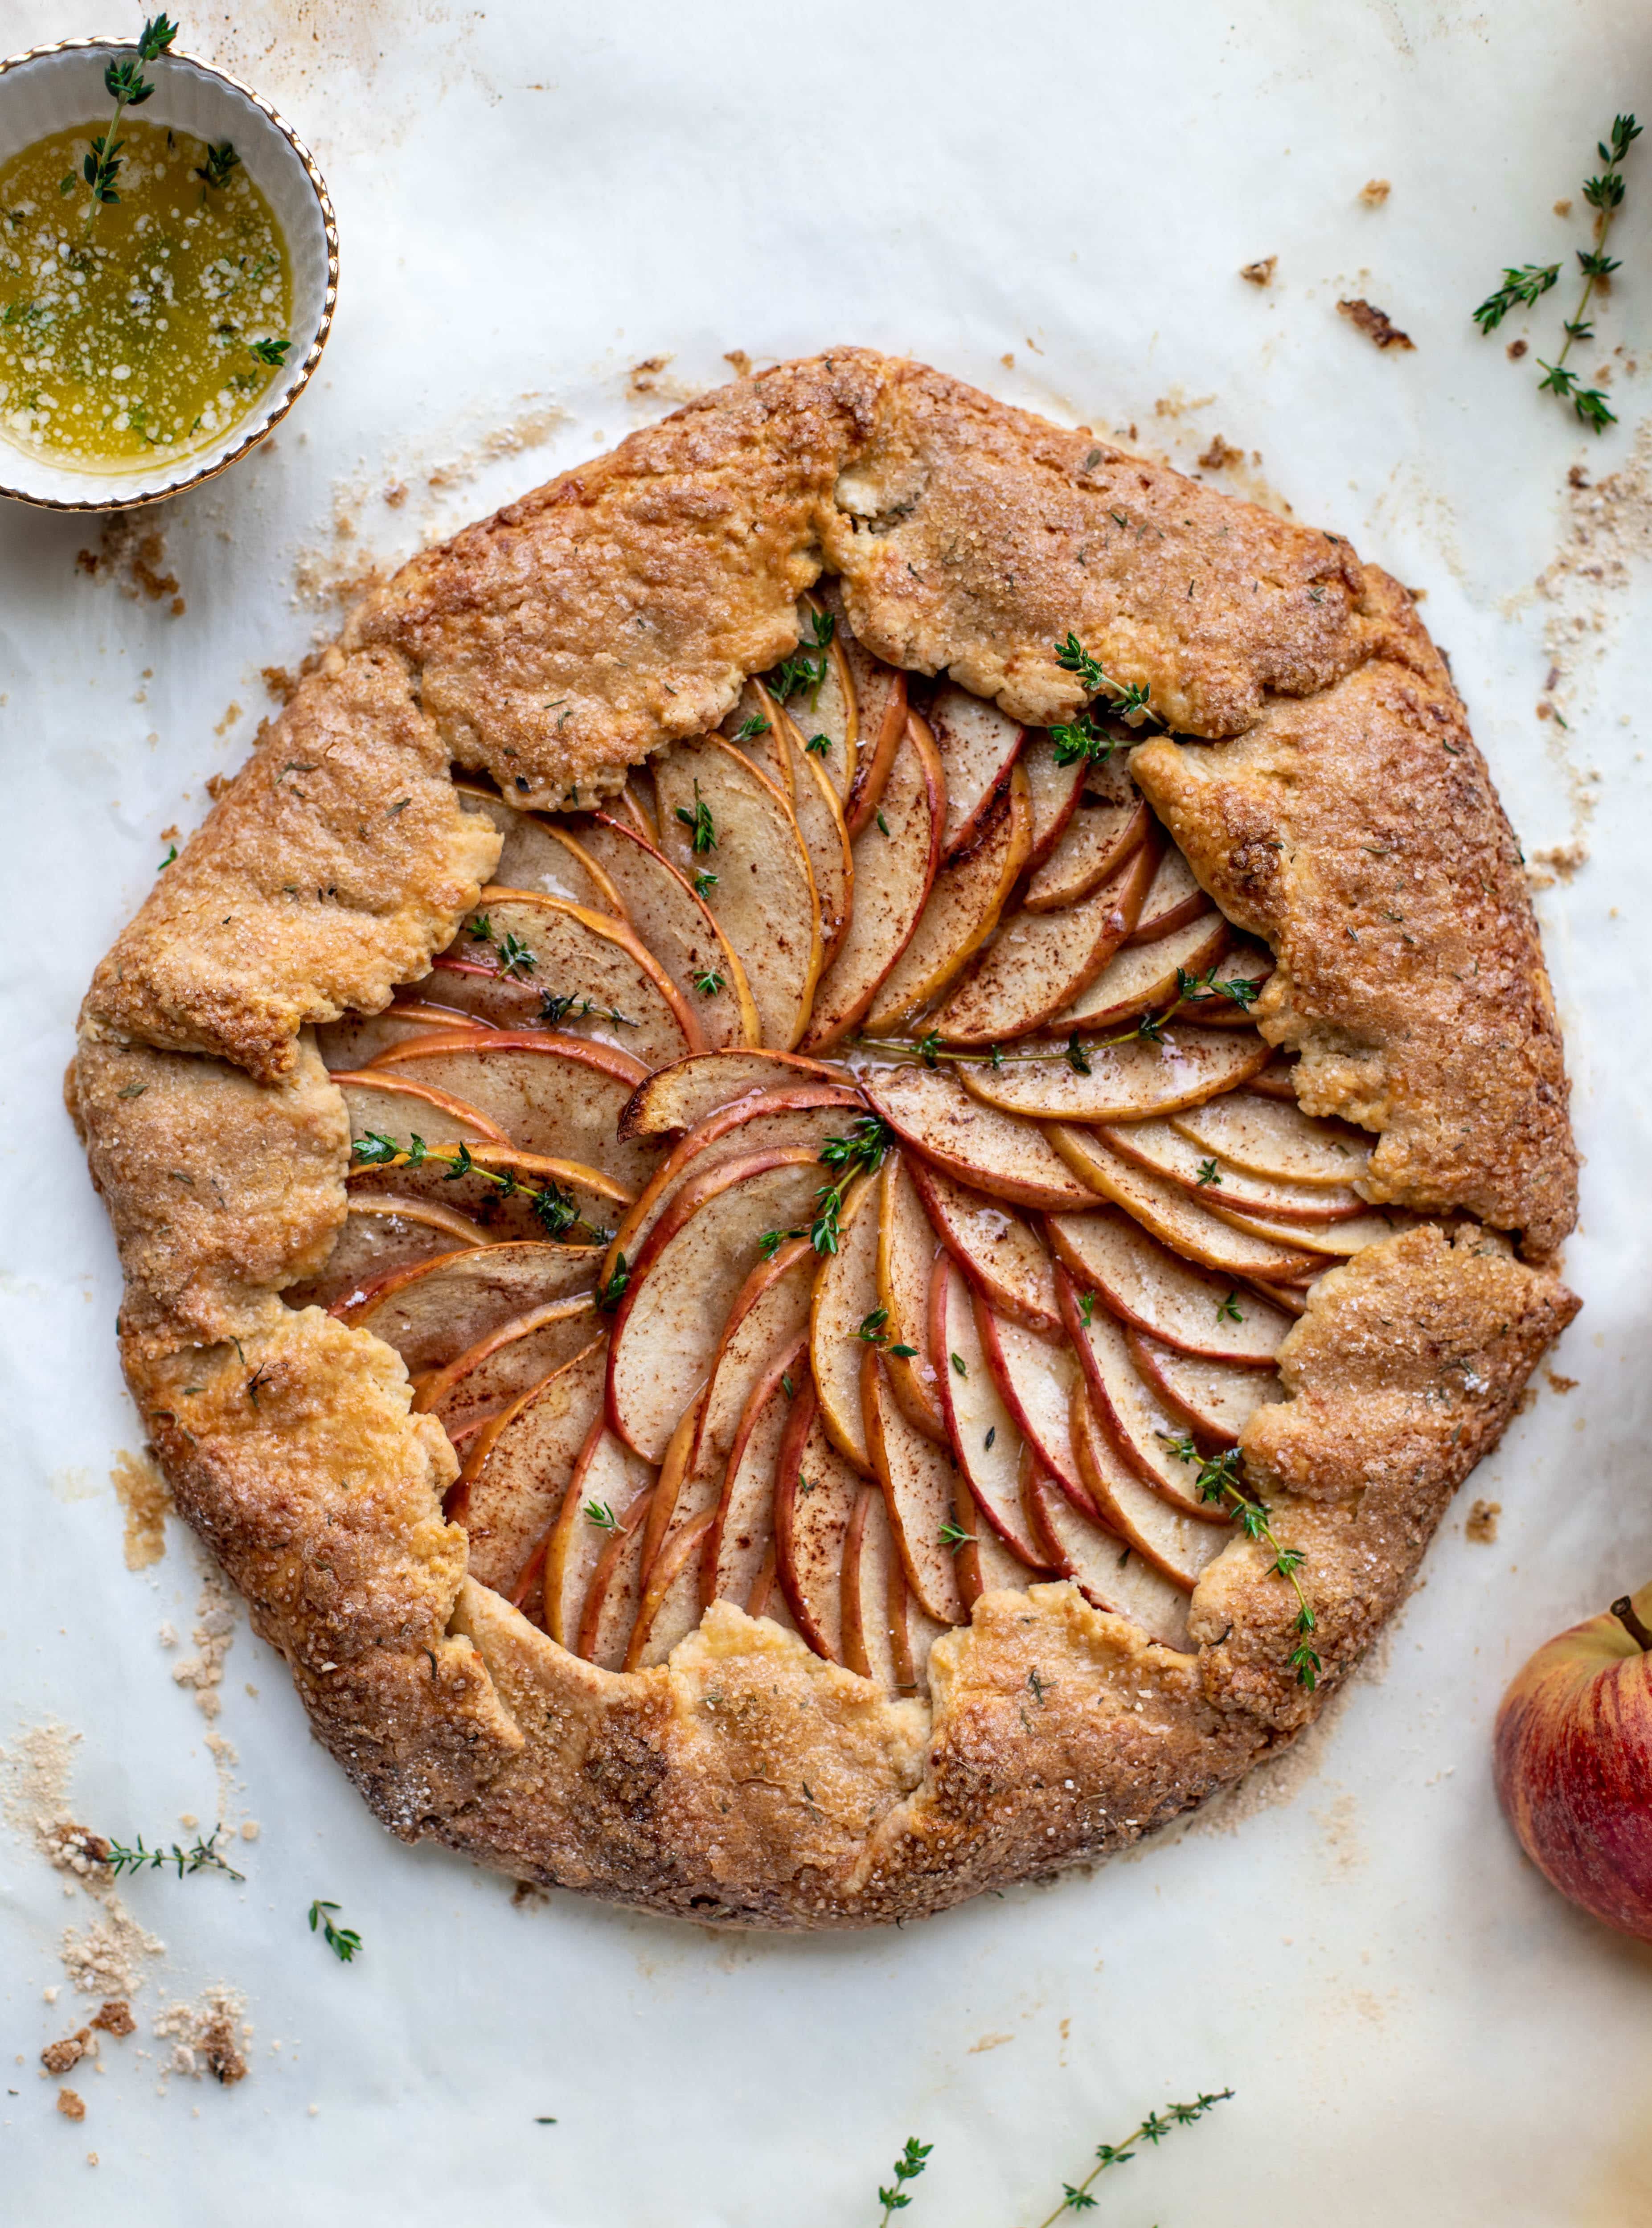
Apple Cheddar Galette with Thyme Butter

Apple Cheddar Galette

This apple cheddar galette is made with honeycrisp apples, set in a cheddar herb crust and brushed with thyme butter! So delicious and perfect for fall.

crust

  • 4 cups sifted all-purpose flour
  • 1 tablespoon sugar
  • 3 teaspoons salt
  • ¼ teaspoon dried thyme
  • 1 large egg, (lightly beaten)
  • 1 teaspoon white vinegar
  • 1/2 cup ice cold water
  • 1 cup cold unsalted butter, (cut into pieces)
  • 2/3 cup finely grated sharp cheddar cheese
  • for brushing: 1 egg + a few drops of water, (beaten together)
  • coarse sugar mixed with a pinch of dried thyme, (for sprinkling)

filling

  • 2 large honeycrisp apples, (thinly sliced)
  • 1 1/2 tablespoons cornstarch
  • 1 1/2 tablespoons sugar
  • 1/4 teaspoon ground cinnamon
  • 1/4 teaspoon ground ginger
  • 1/4 teaspoon salt

salted thyme butter

  • 3 tablespoons unsalted butter
  • 1 tablespoon fresh thyme leaves
  • pinch of salt
  1. Add the flour, sugar, thyme and salt to a food processor and pulse just until combined. In a small bowl, whisk mix together the egg, vinegar and water. Add the cold butter pieces and cheddar into the food processor and pulse until small coarse crumbs remain. Sprinkle the water/egg mixture over the flour and pulse again until the dough comes together.
  2. Remove the dough with your hands and wrap it in plastic wrap. This dough makes enough for 2 galette crusts, so you can either separate it into 2 sections now, or separate it after it’s refrigerated. Refrigerate the dough for 30 minutes. (The other dough can be thrown in the fridge for a few months!)
  3. After 30 minutes, preheat the oven to 400 degrees F.

filling

  1. Add the sliced apples to a bowl. Sprinkle the apples with cornstarch, sugar, cinnamon, ground ginger and salt. Toss the apples well and let them sit for 10 minutes.
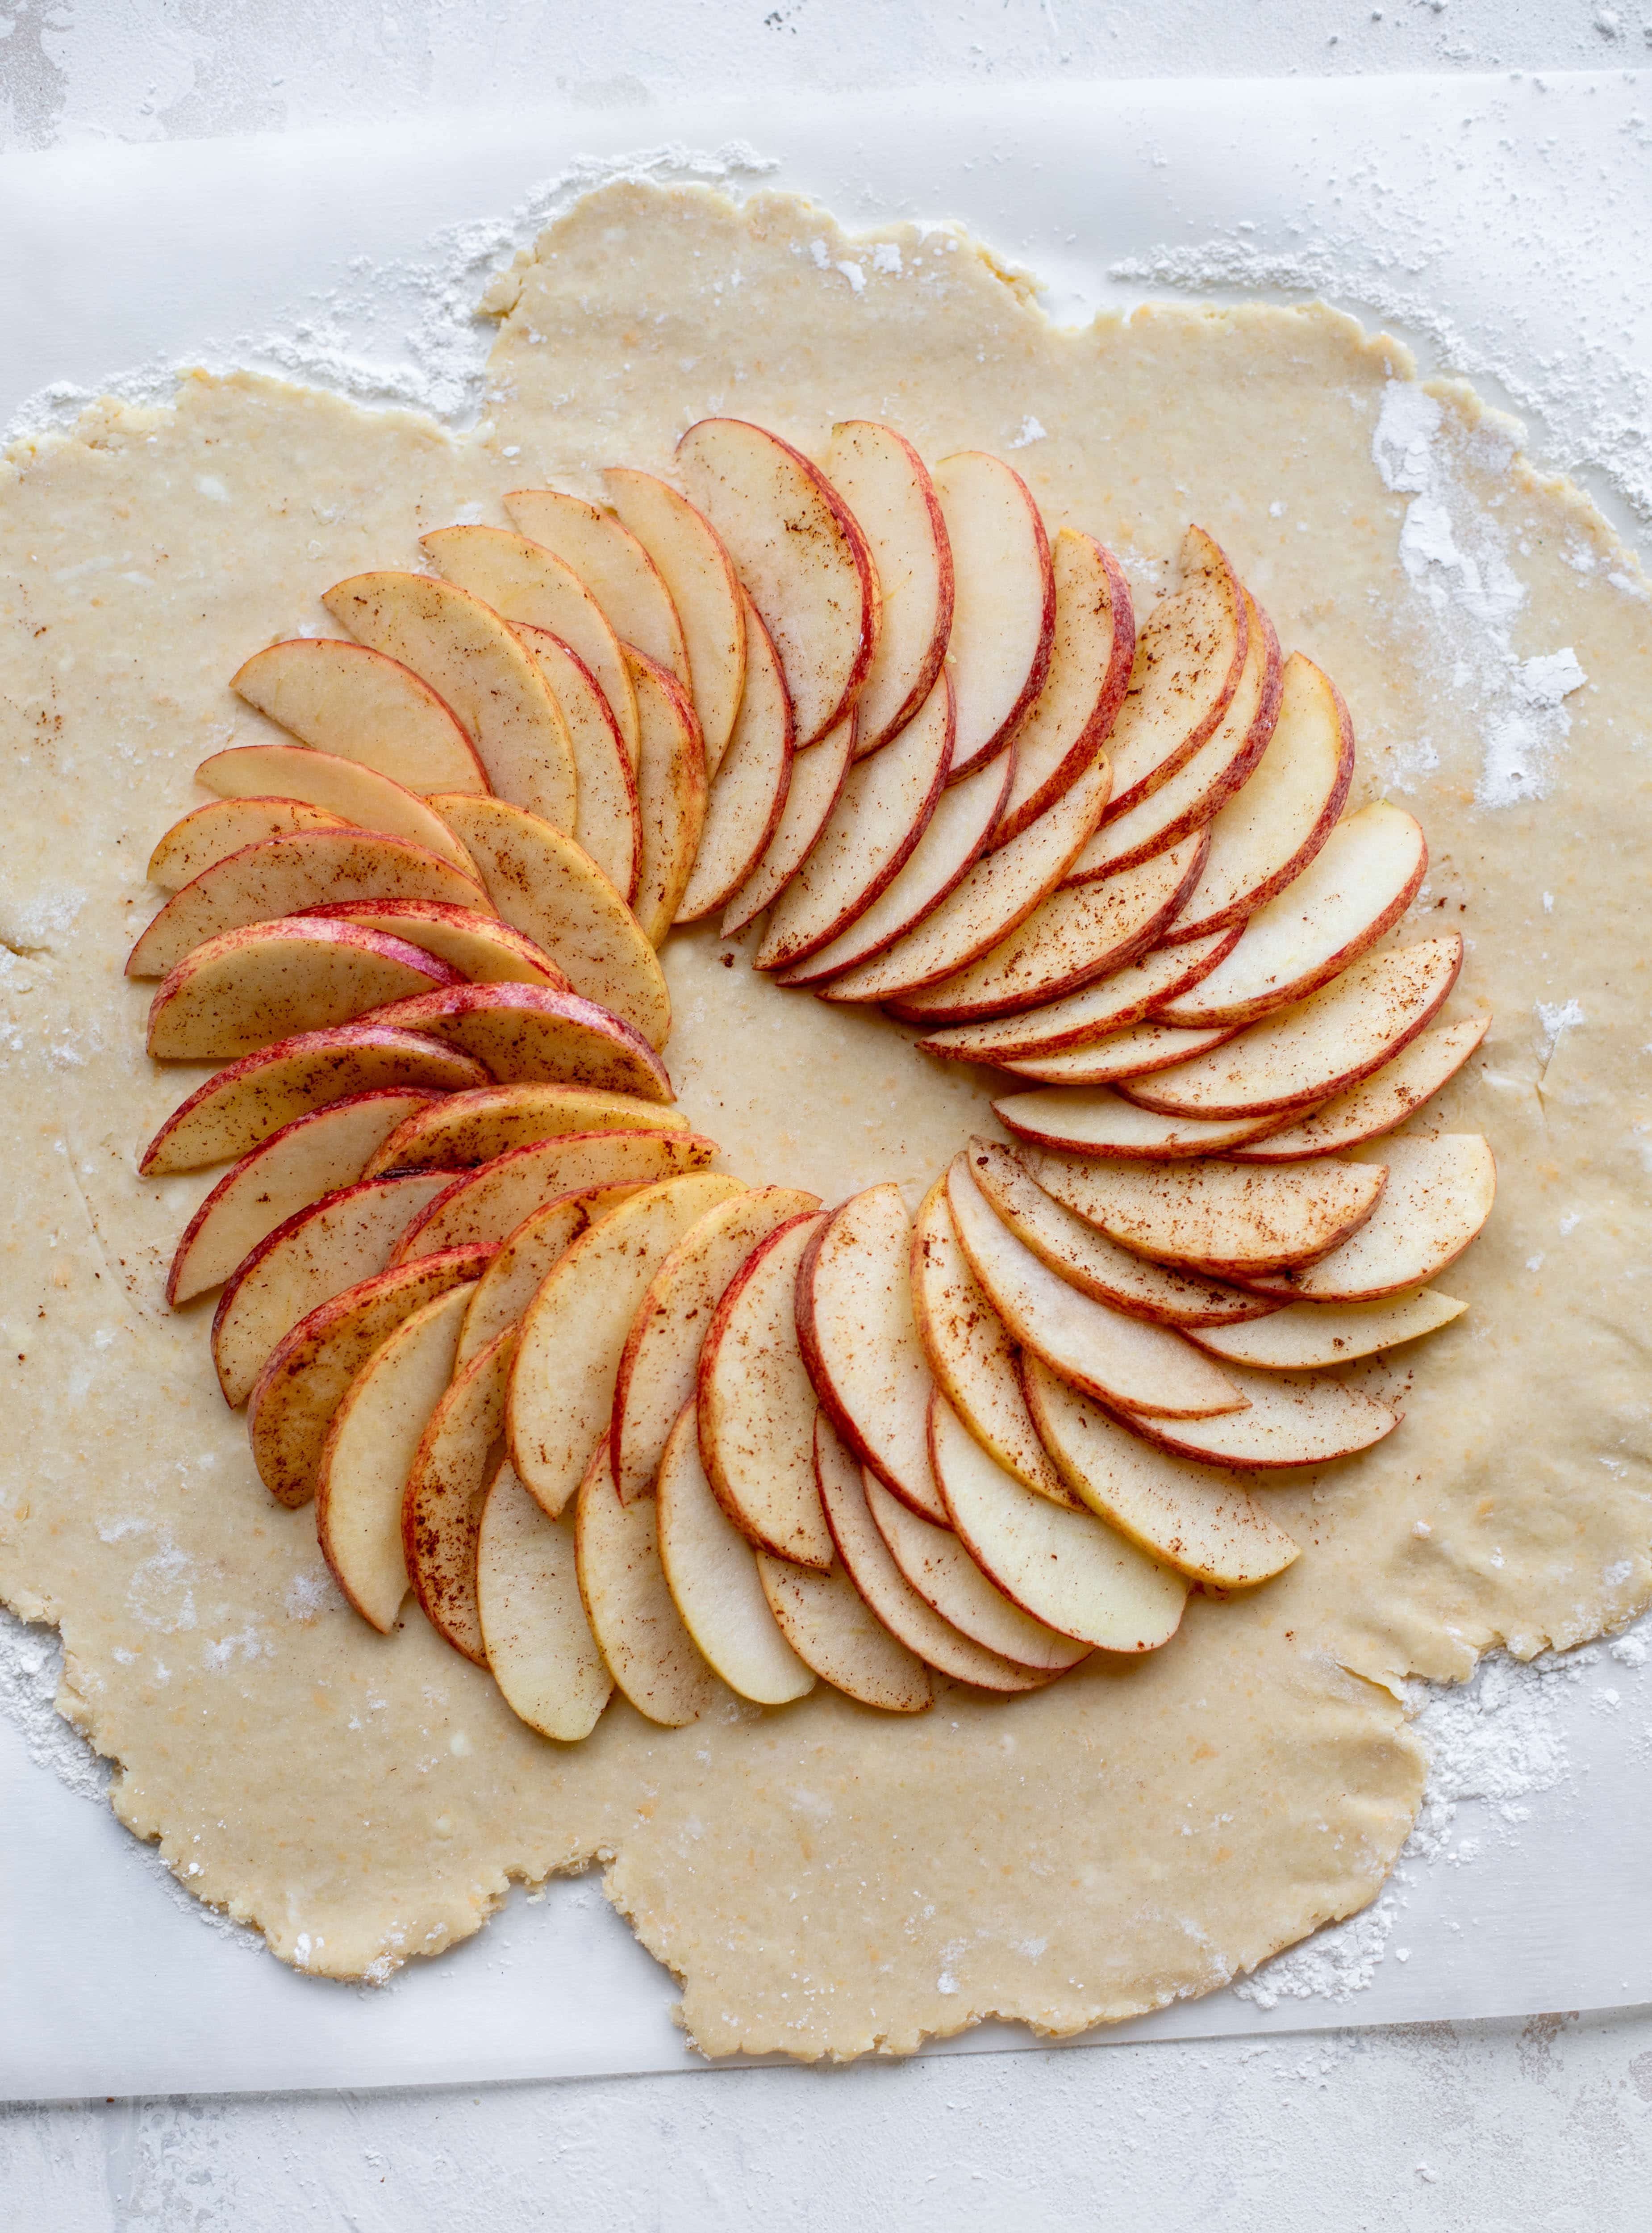
  2. Remove one of the crusts from the fridge. (The other is good for another week or so, or it can be frozen.) Roll one of the pie crusts into a… “rustic” shape – no shape necessary really – until it is about 1/4 inch thick. Place the dough on a parchment-lined baking sheet.
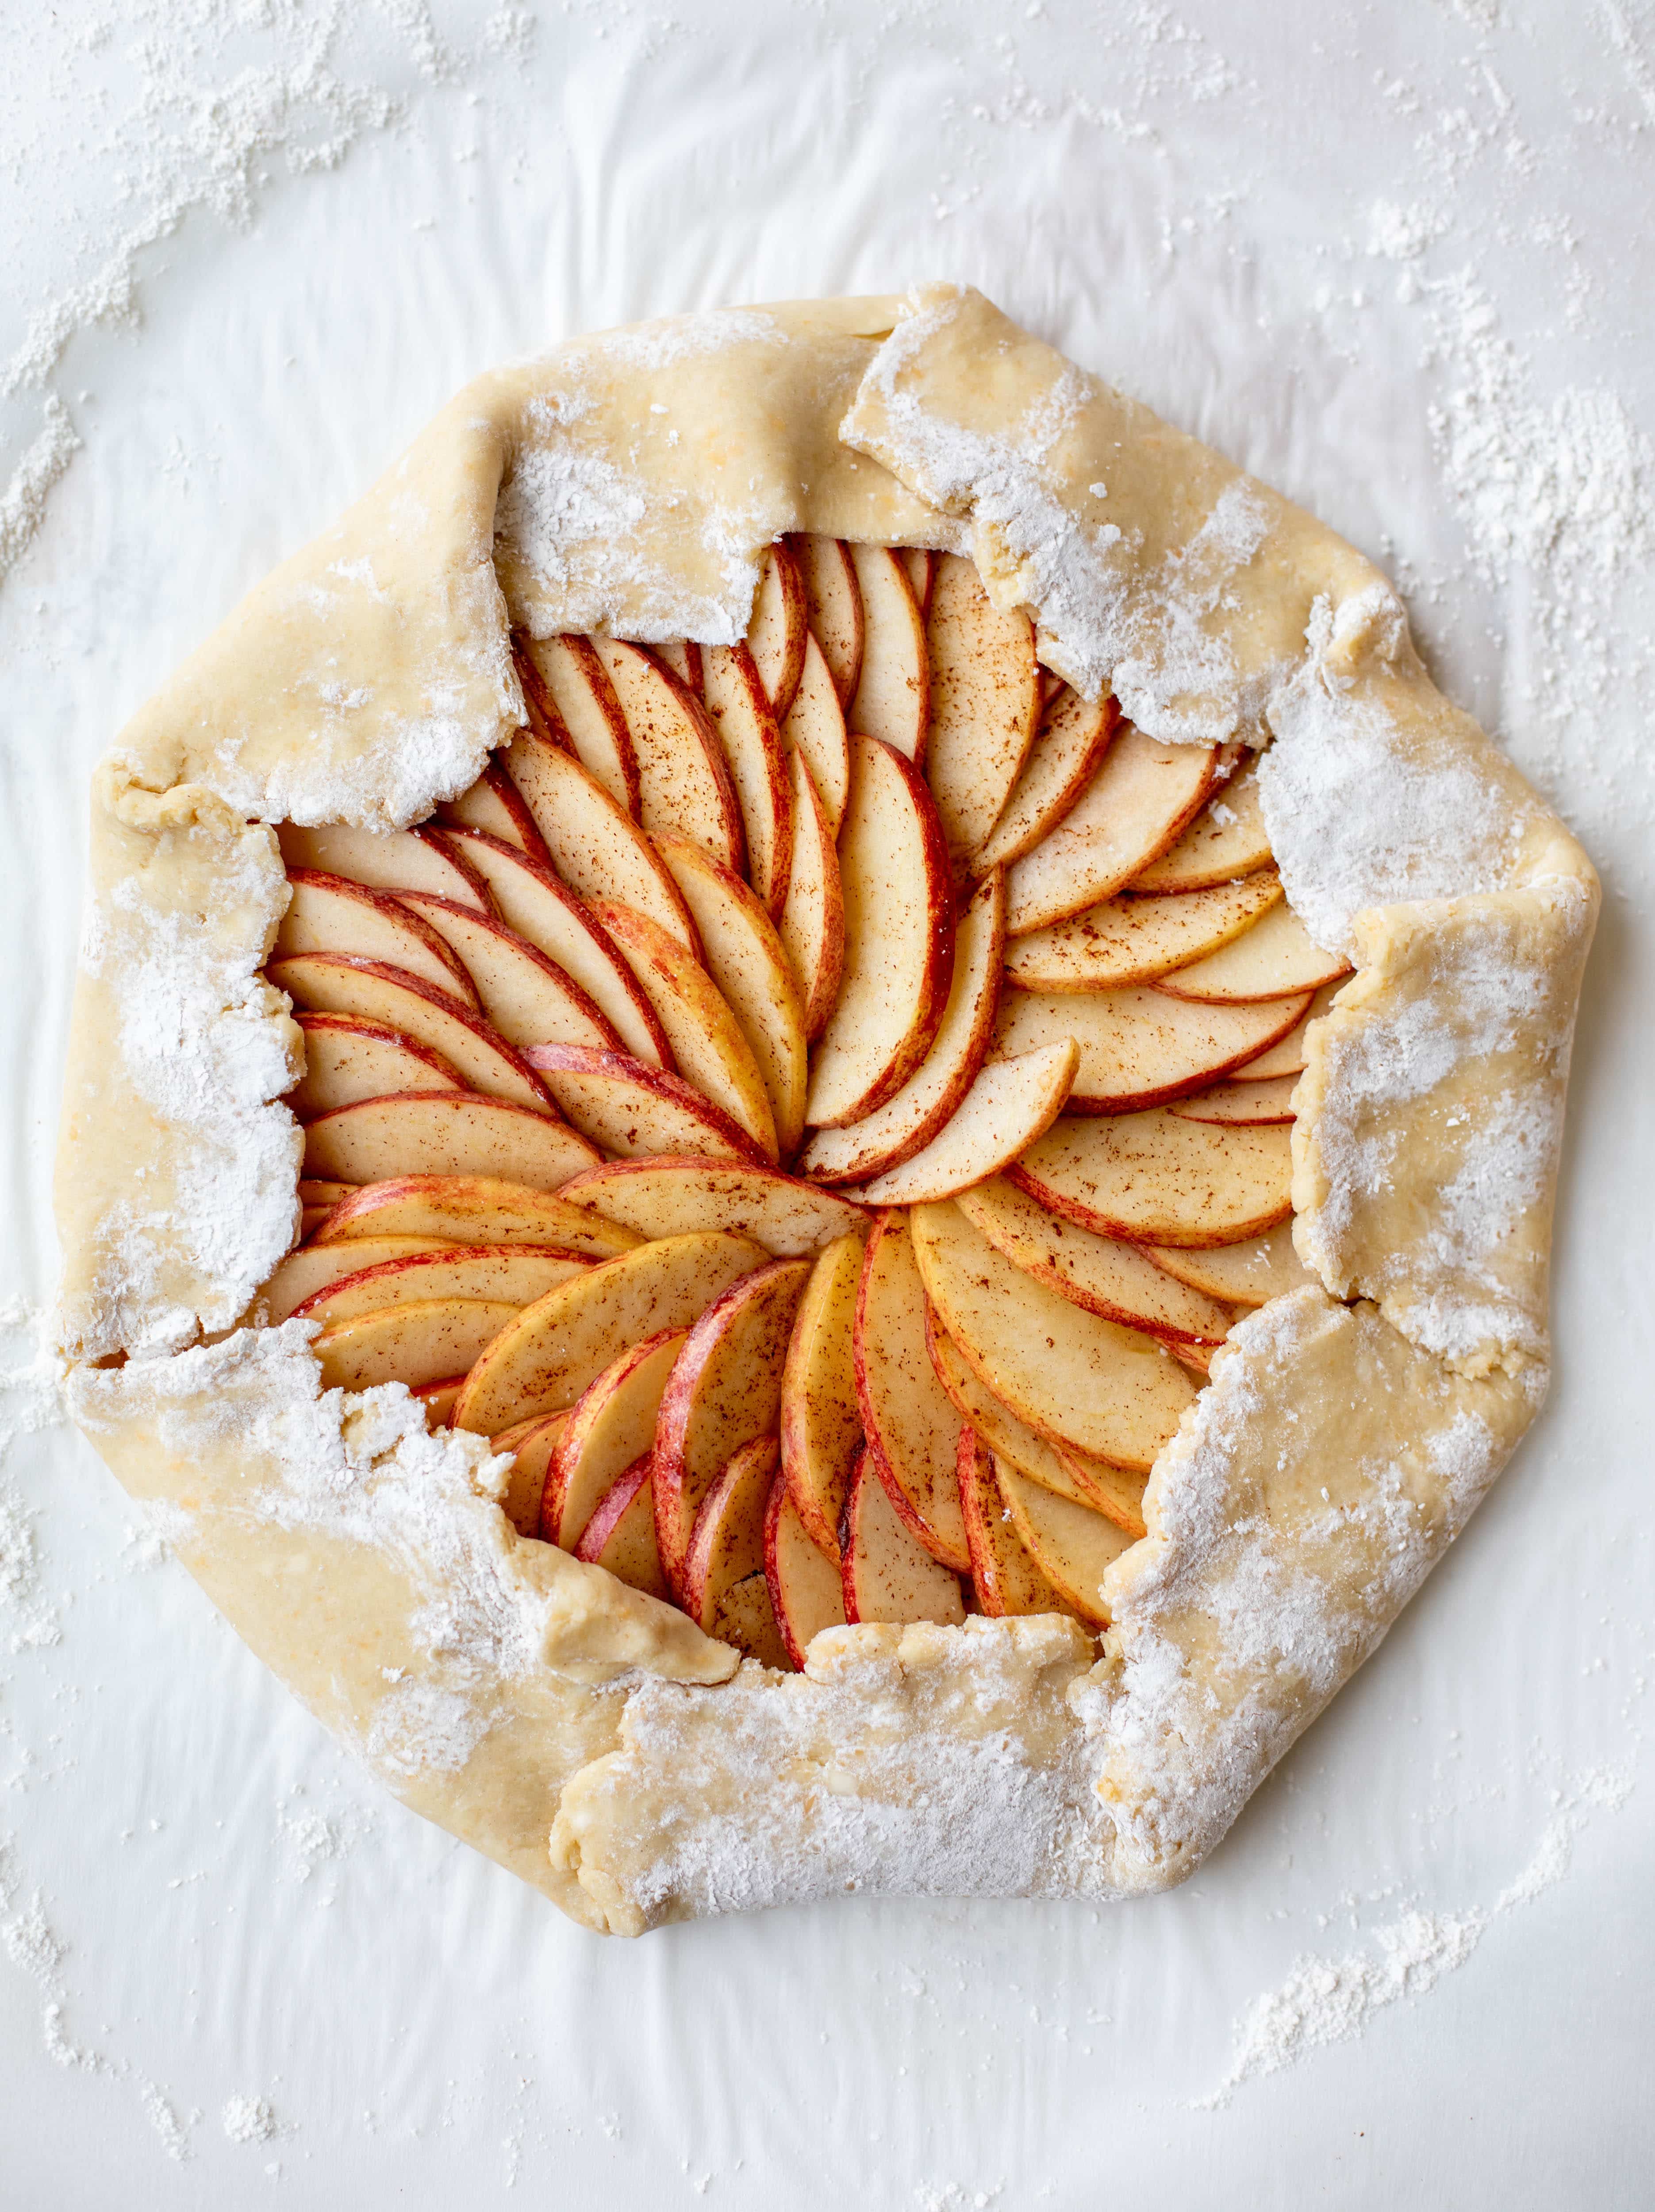
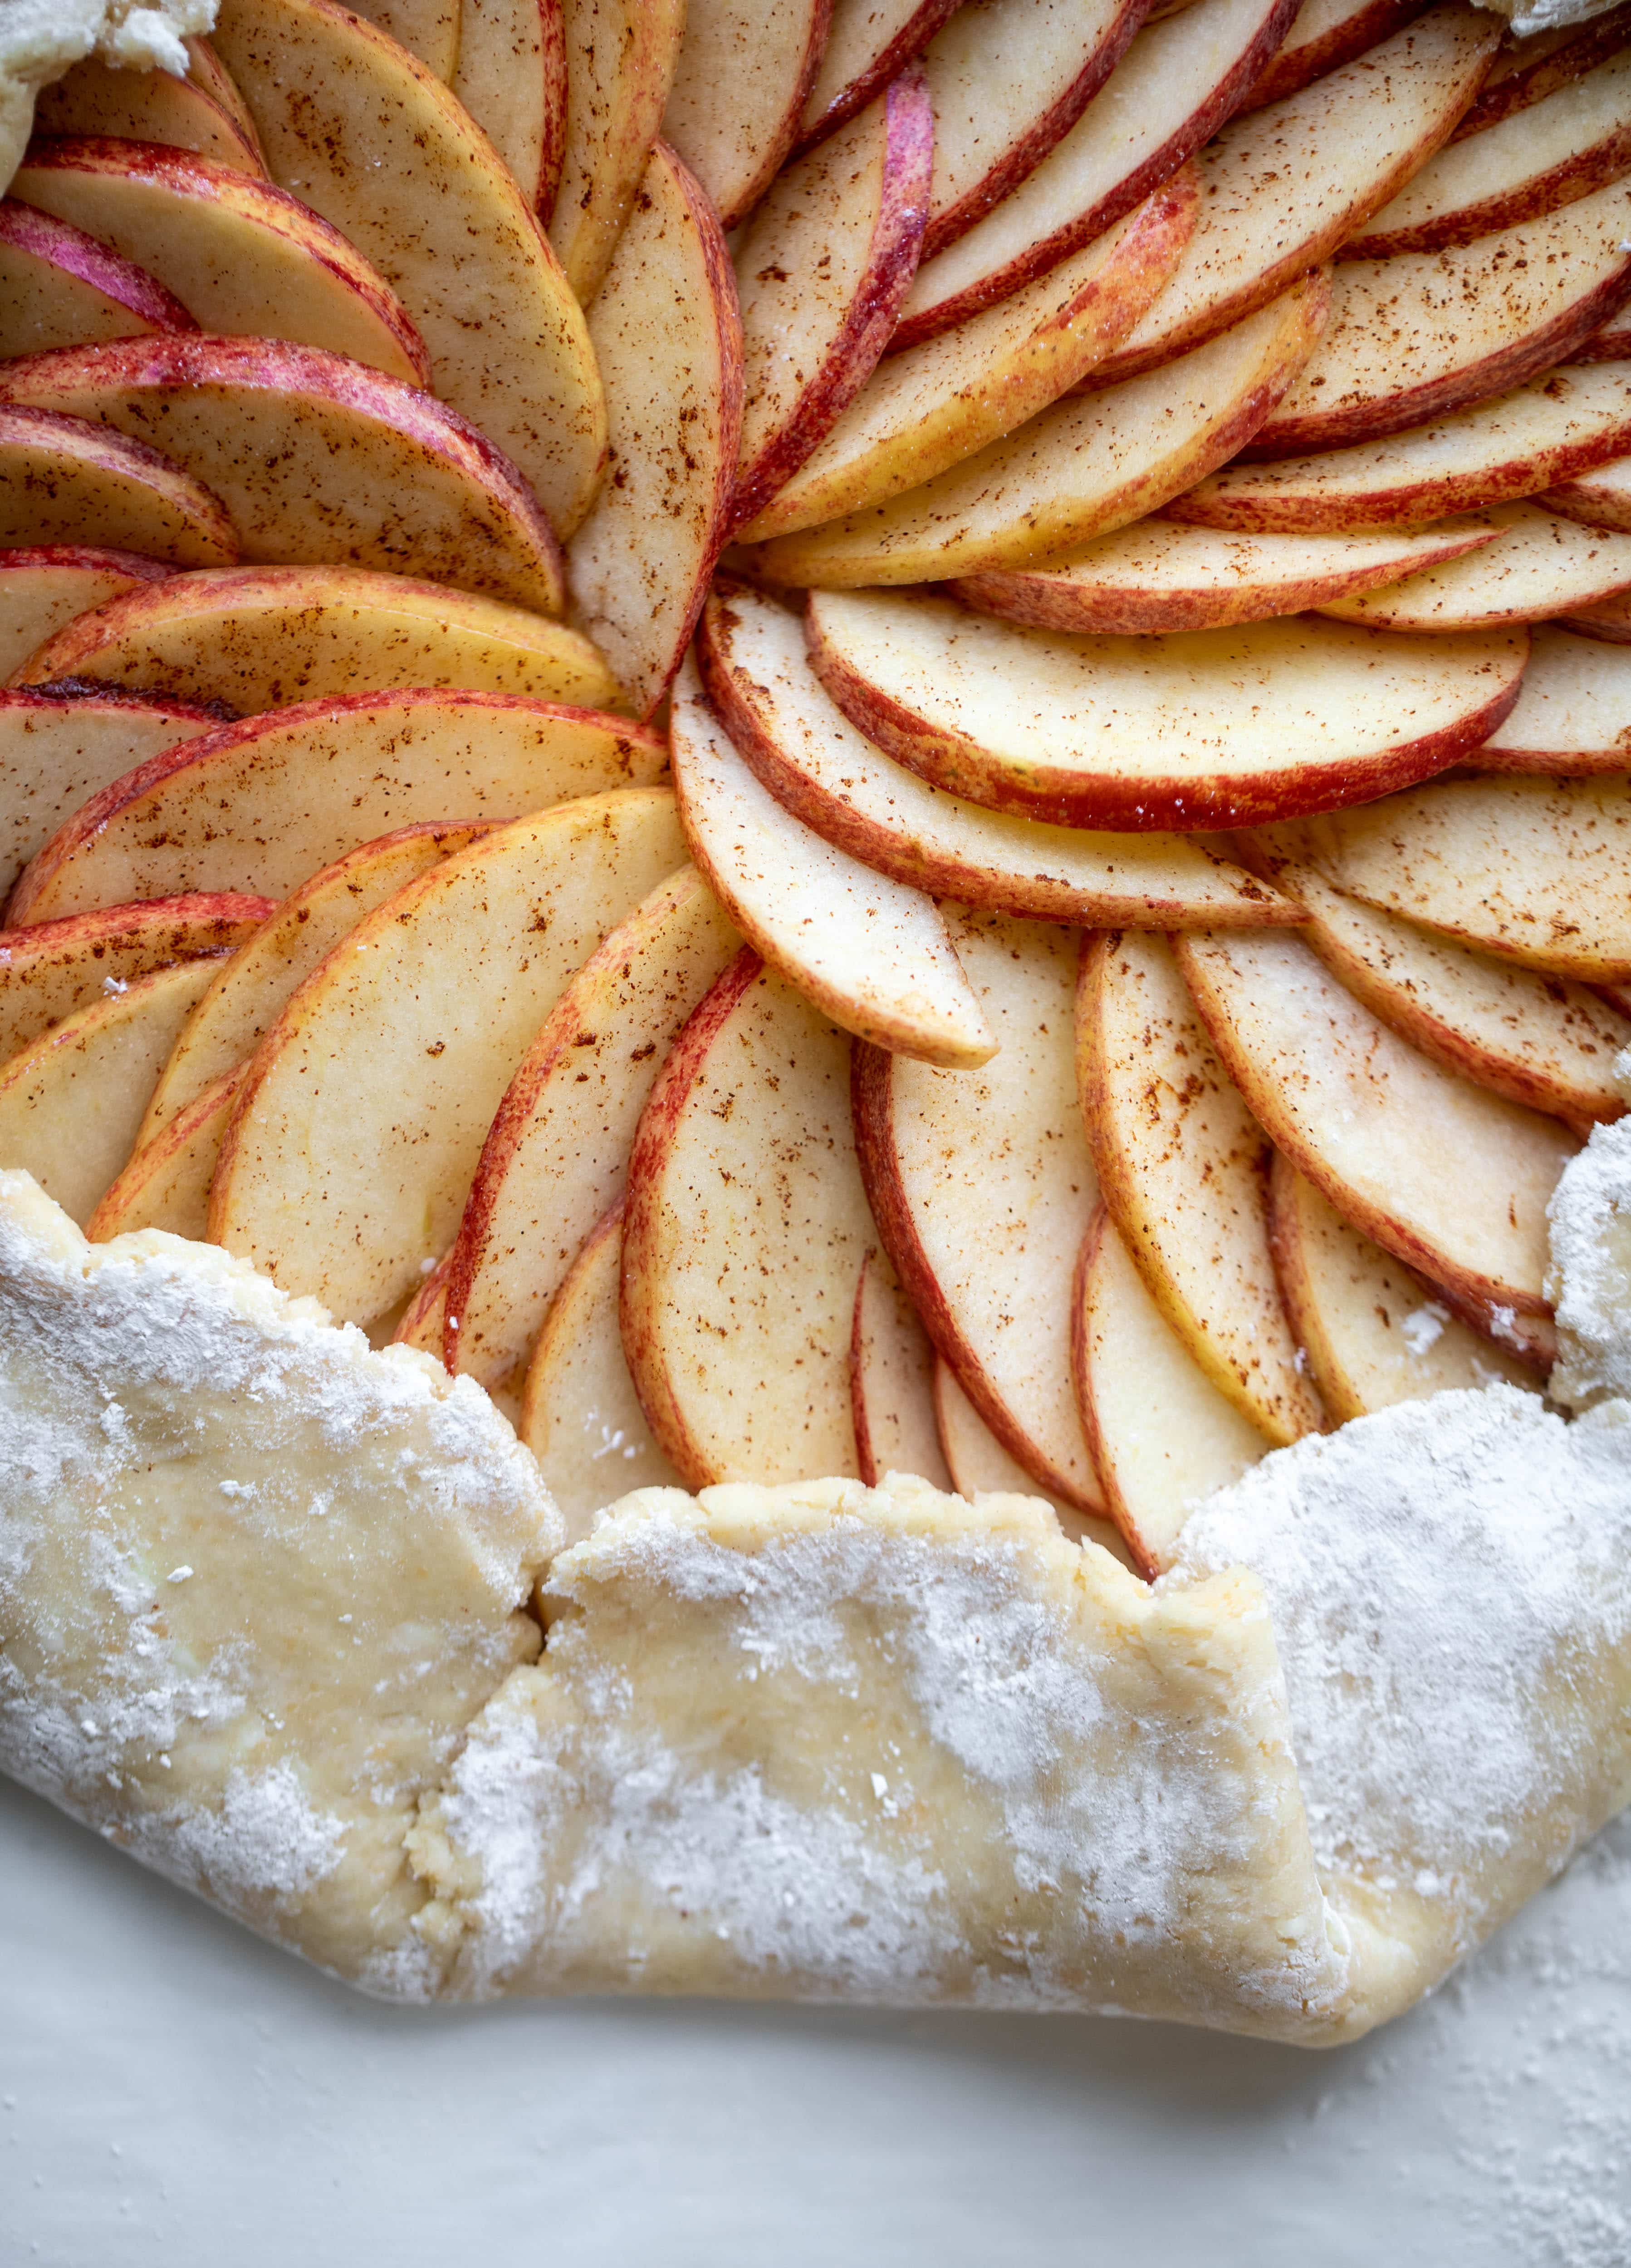
  3. Layer the apples in the center leaving a 2-inch+ border of crust. Once the apples are layered, fold the crust over top of the apples. Brush the crust with the beaten egg wash. Sprinkle any of the exposed crust with coarse sugar. Bake the galette until the crust is golden, about 40 to 45 minutes.
  4. Before serving, brush the apples with the thyme butter.

thyme butter

  1. Place the butter and thyme in a saucepan. Heat over low heat until the butter melts, then let it sit for 10 minutes. Sprinkle in the pinch of salt and stir.

https://www.howsweeteats.com/2015/07/summer-chicken-pot-pie-crostata-with-herbed-crust/

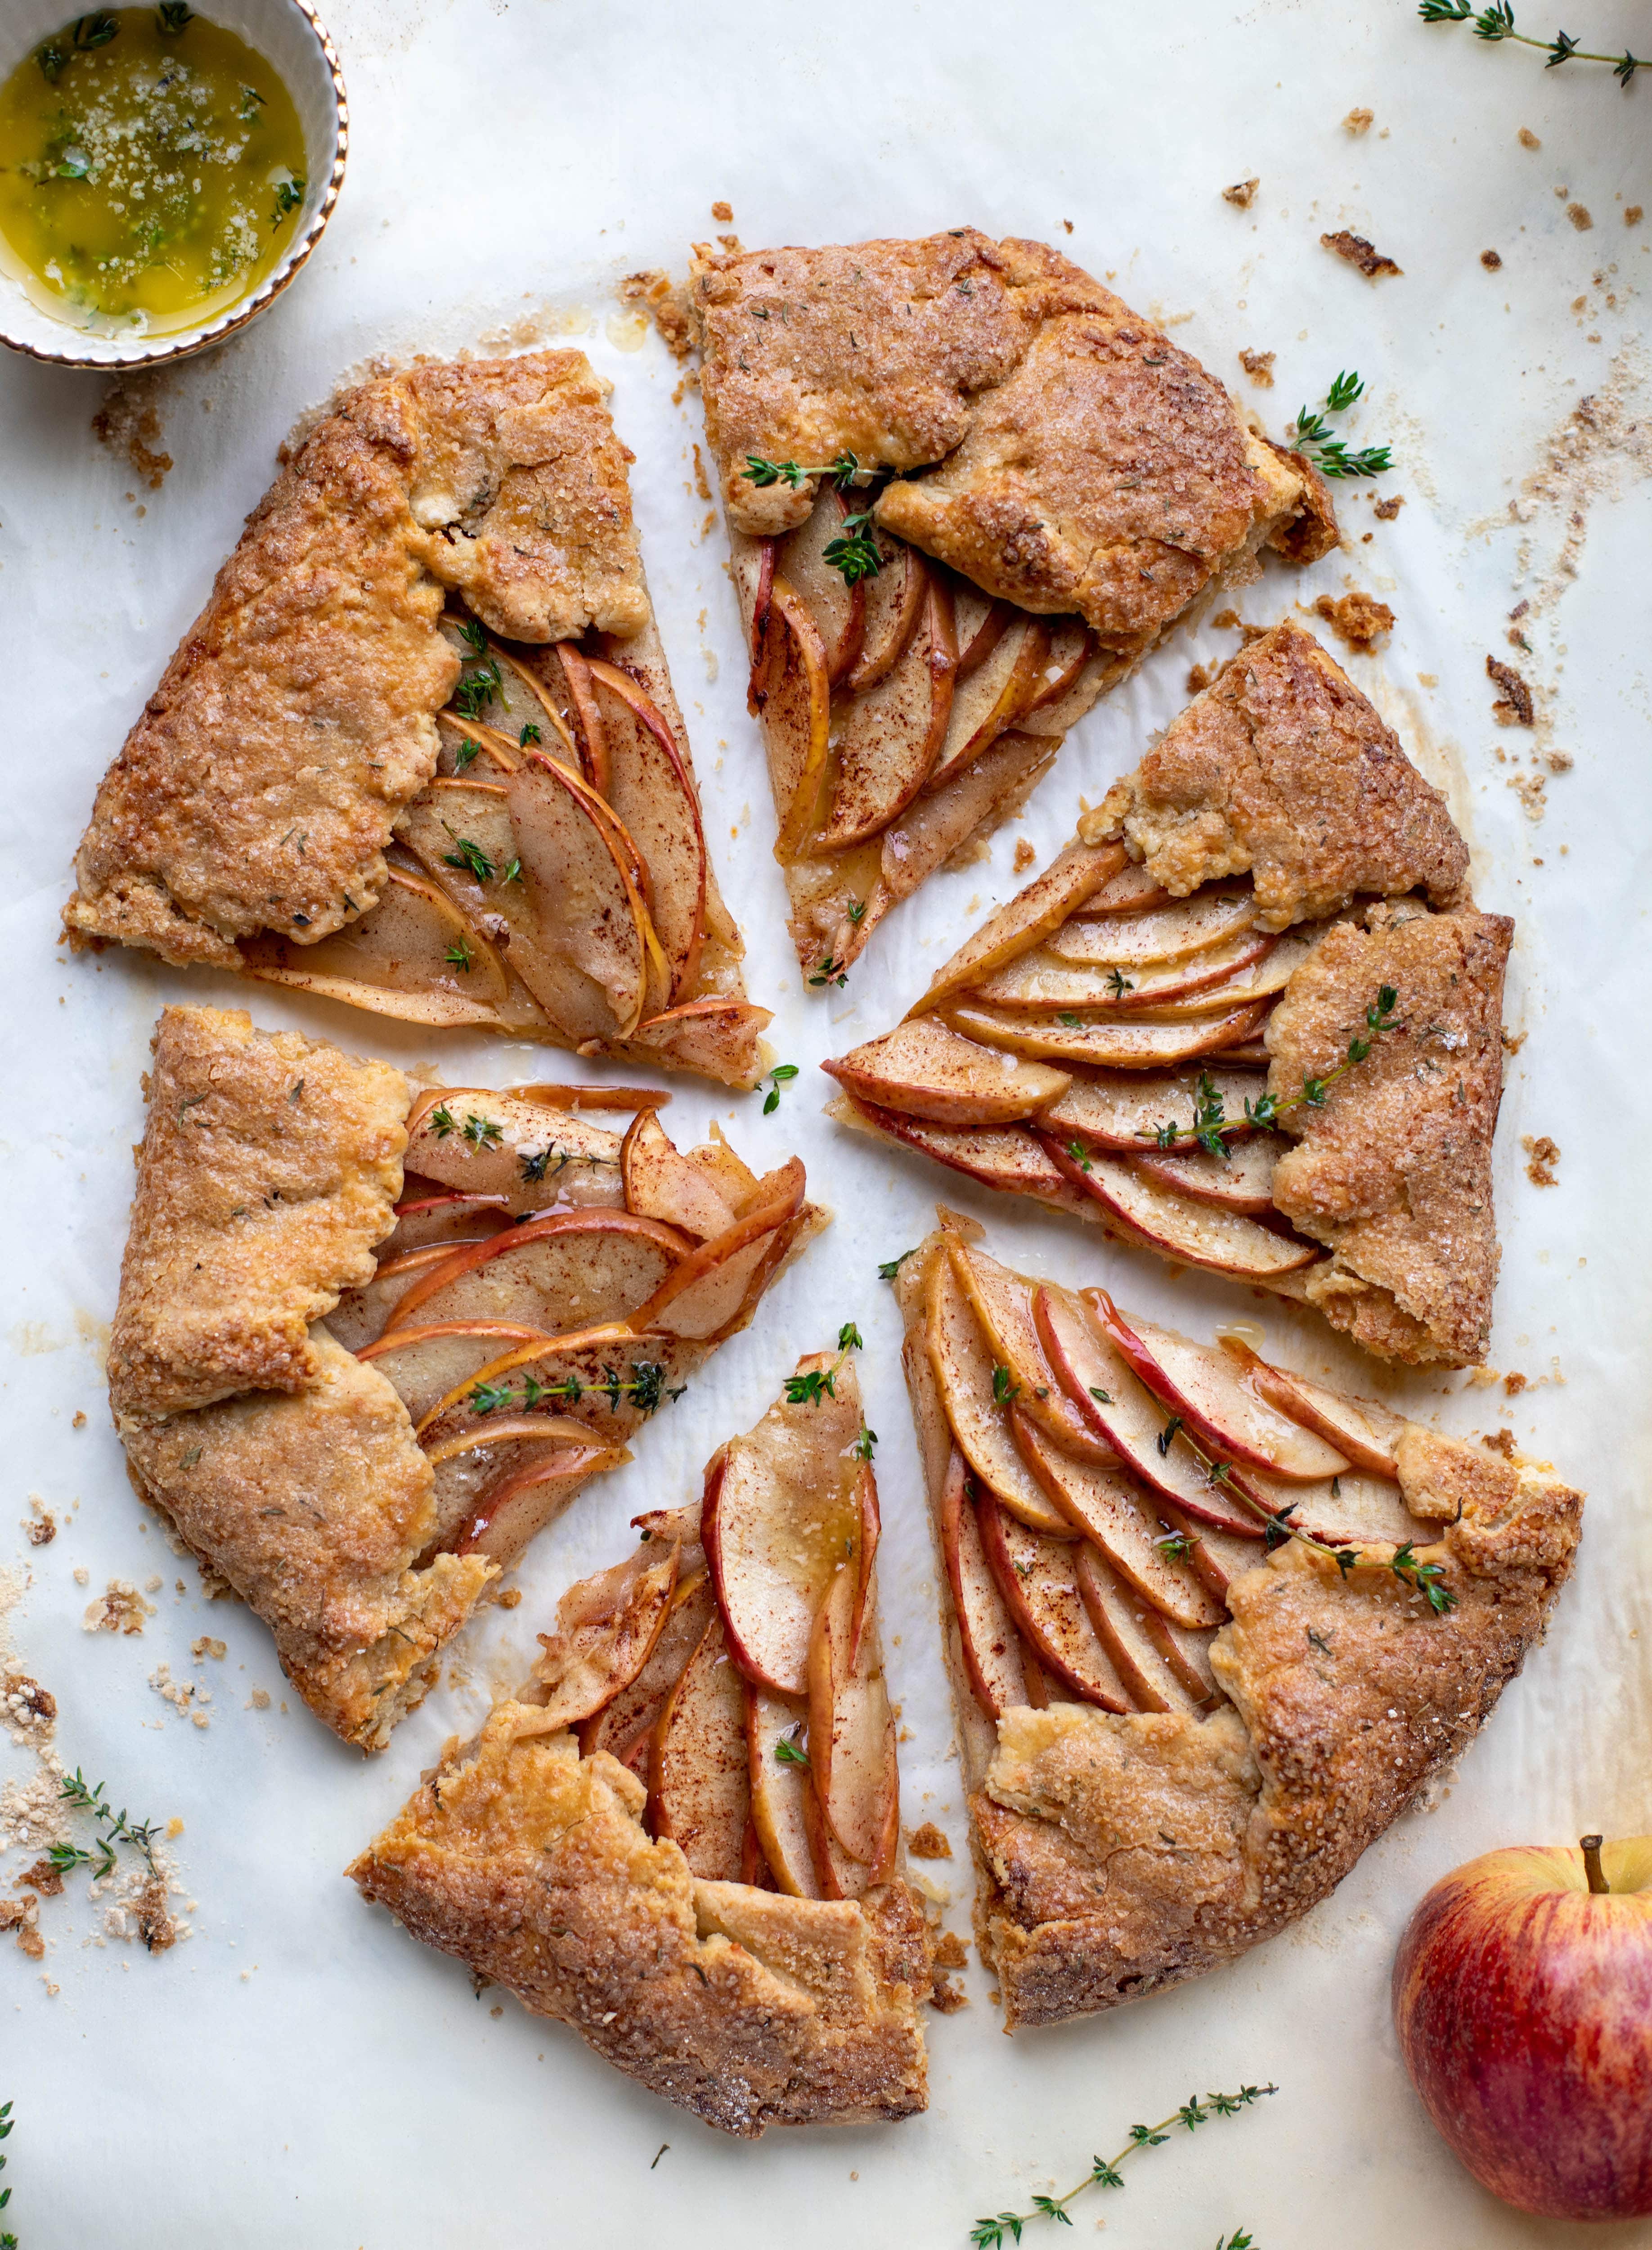
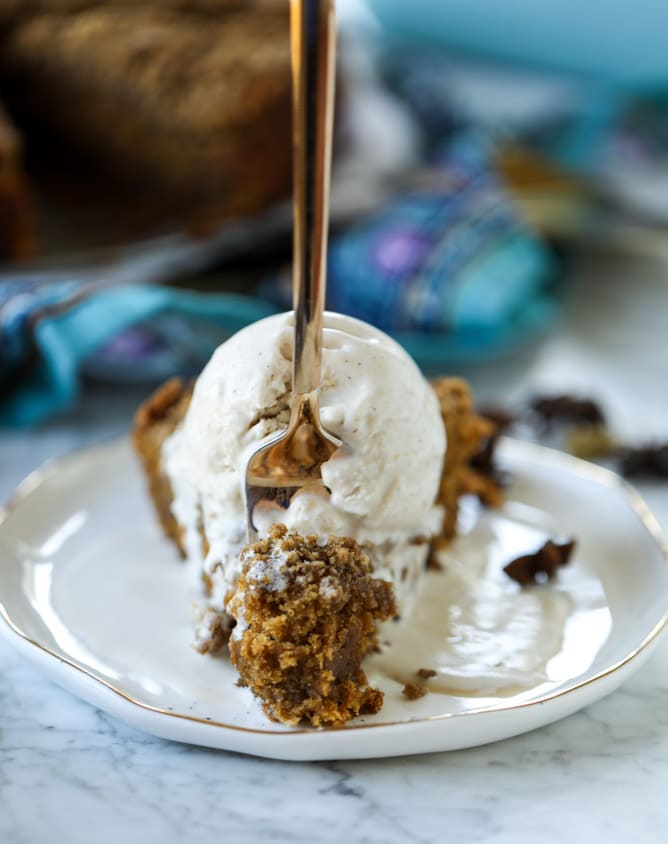
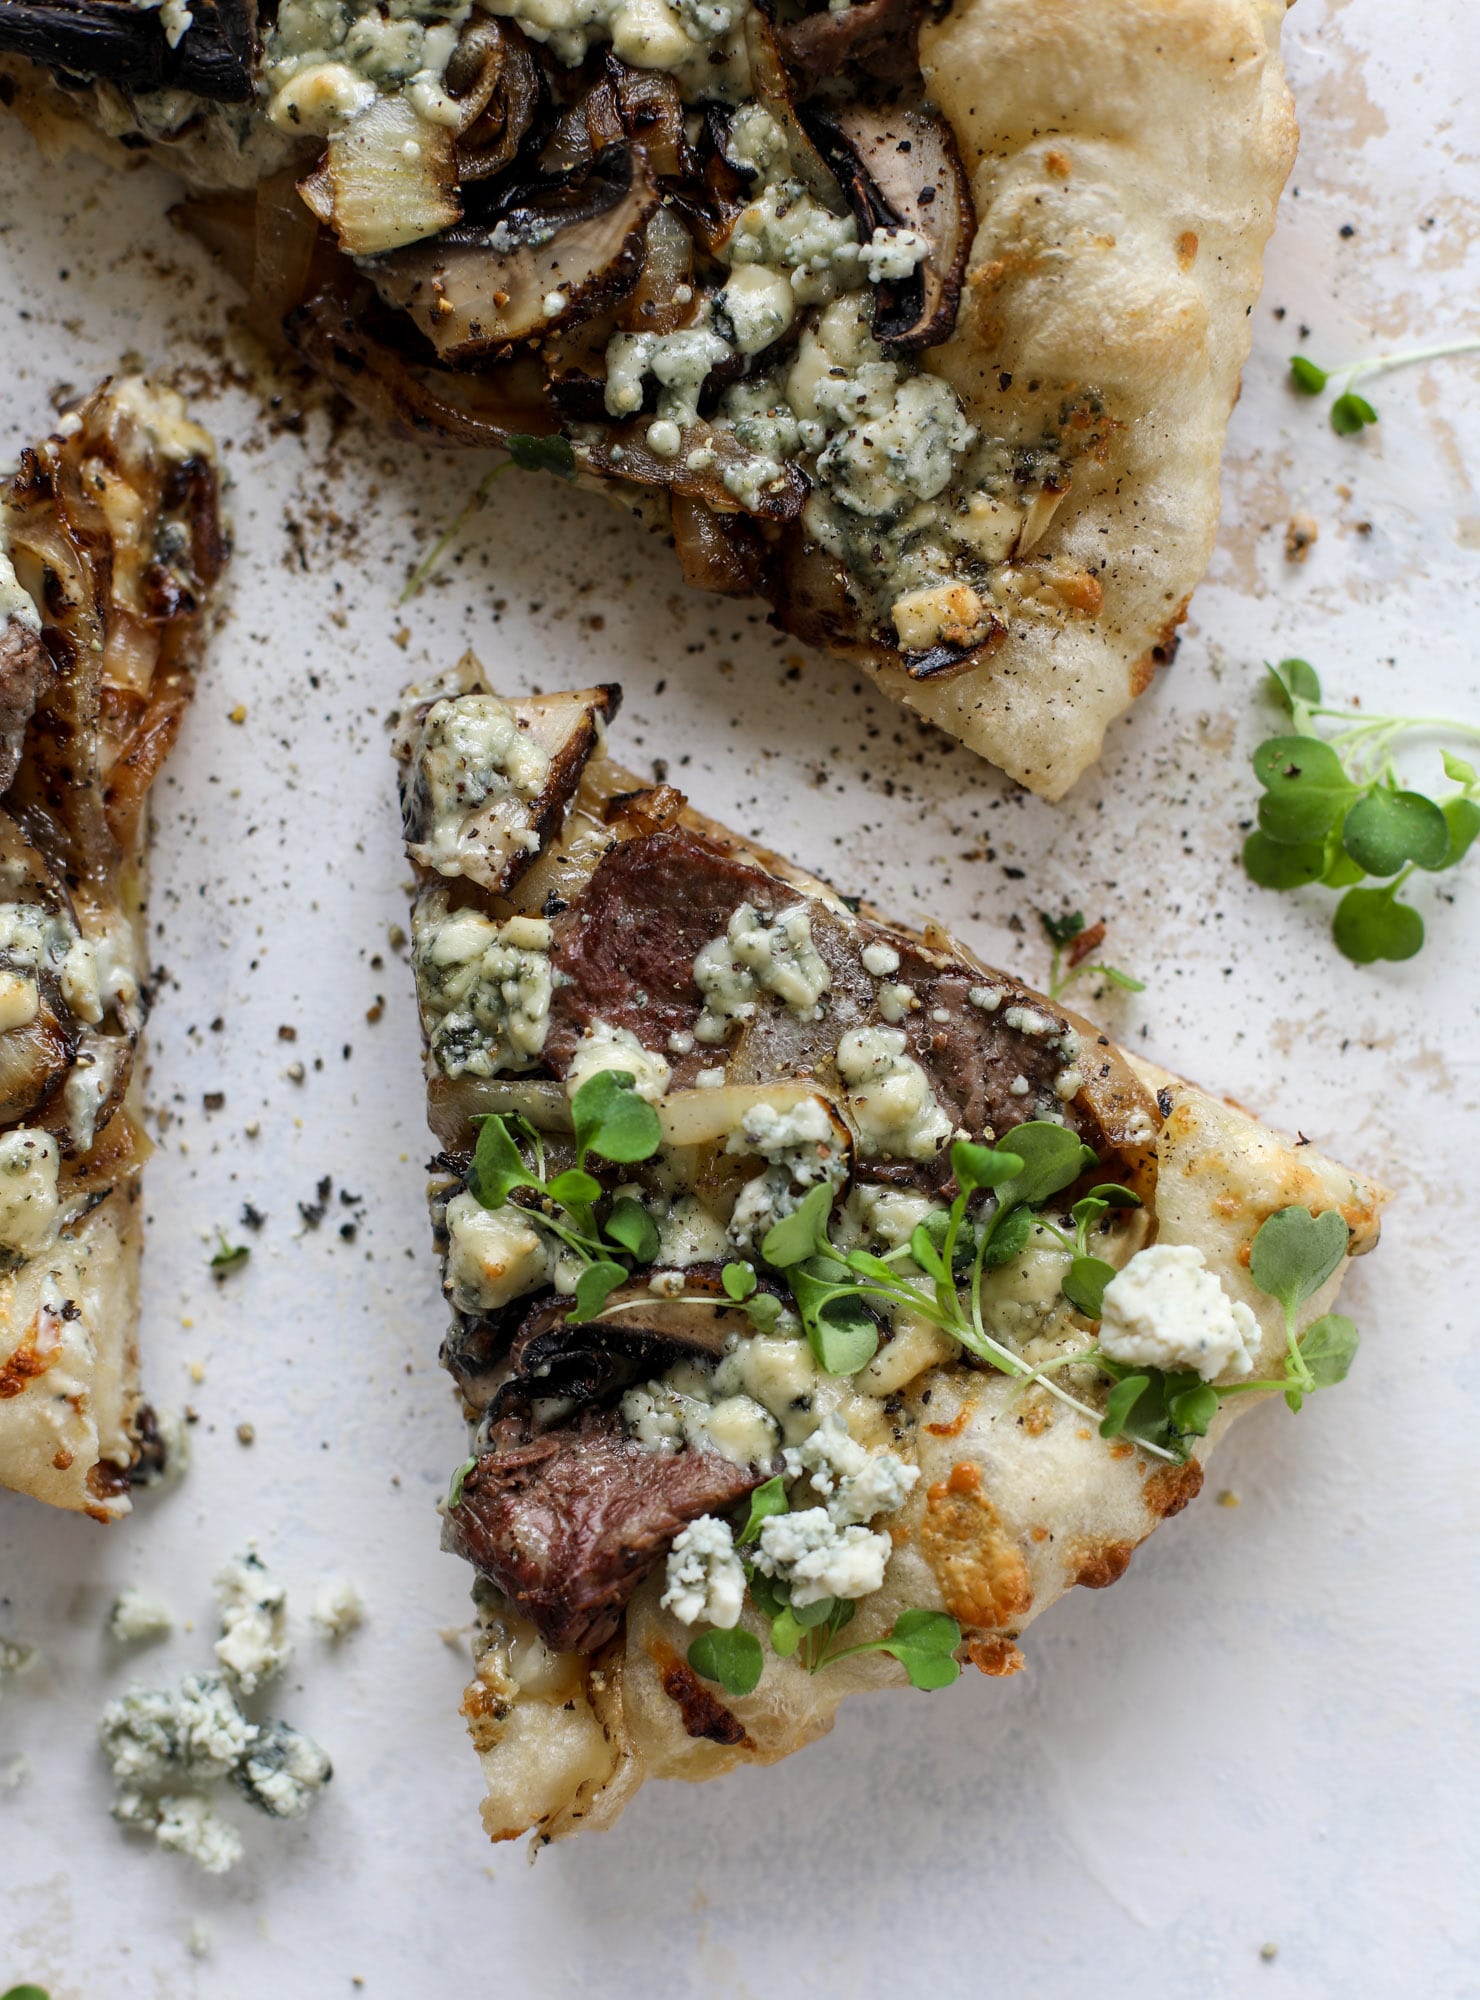
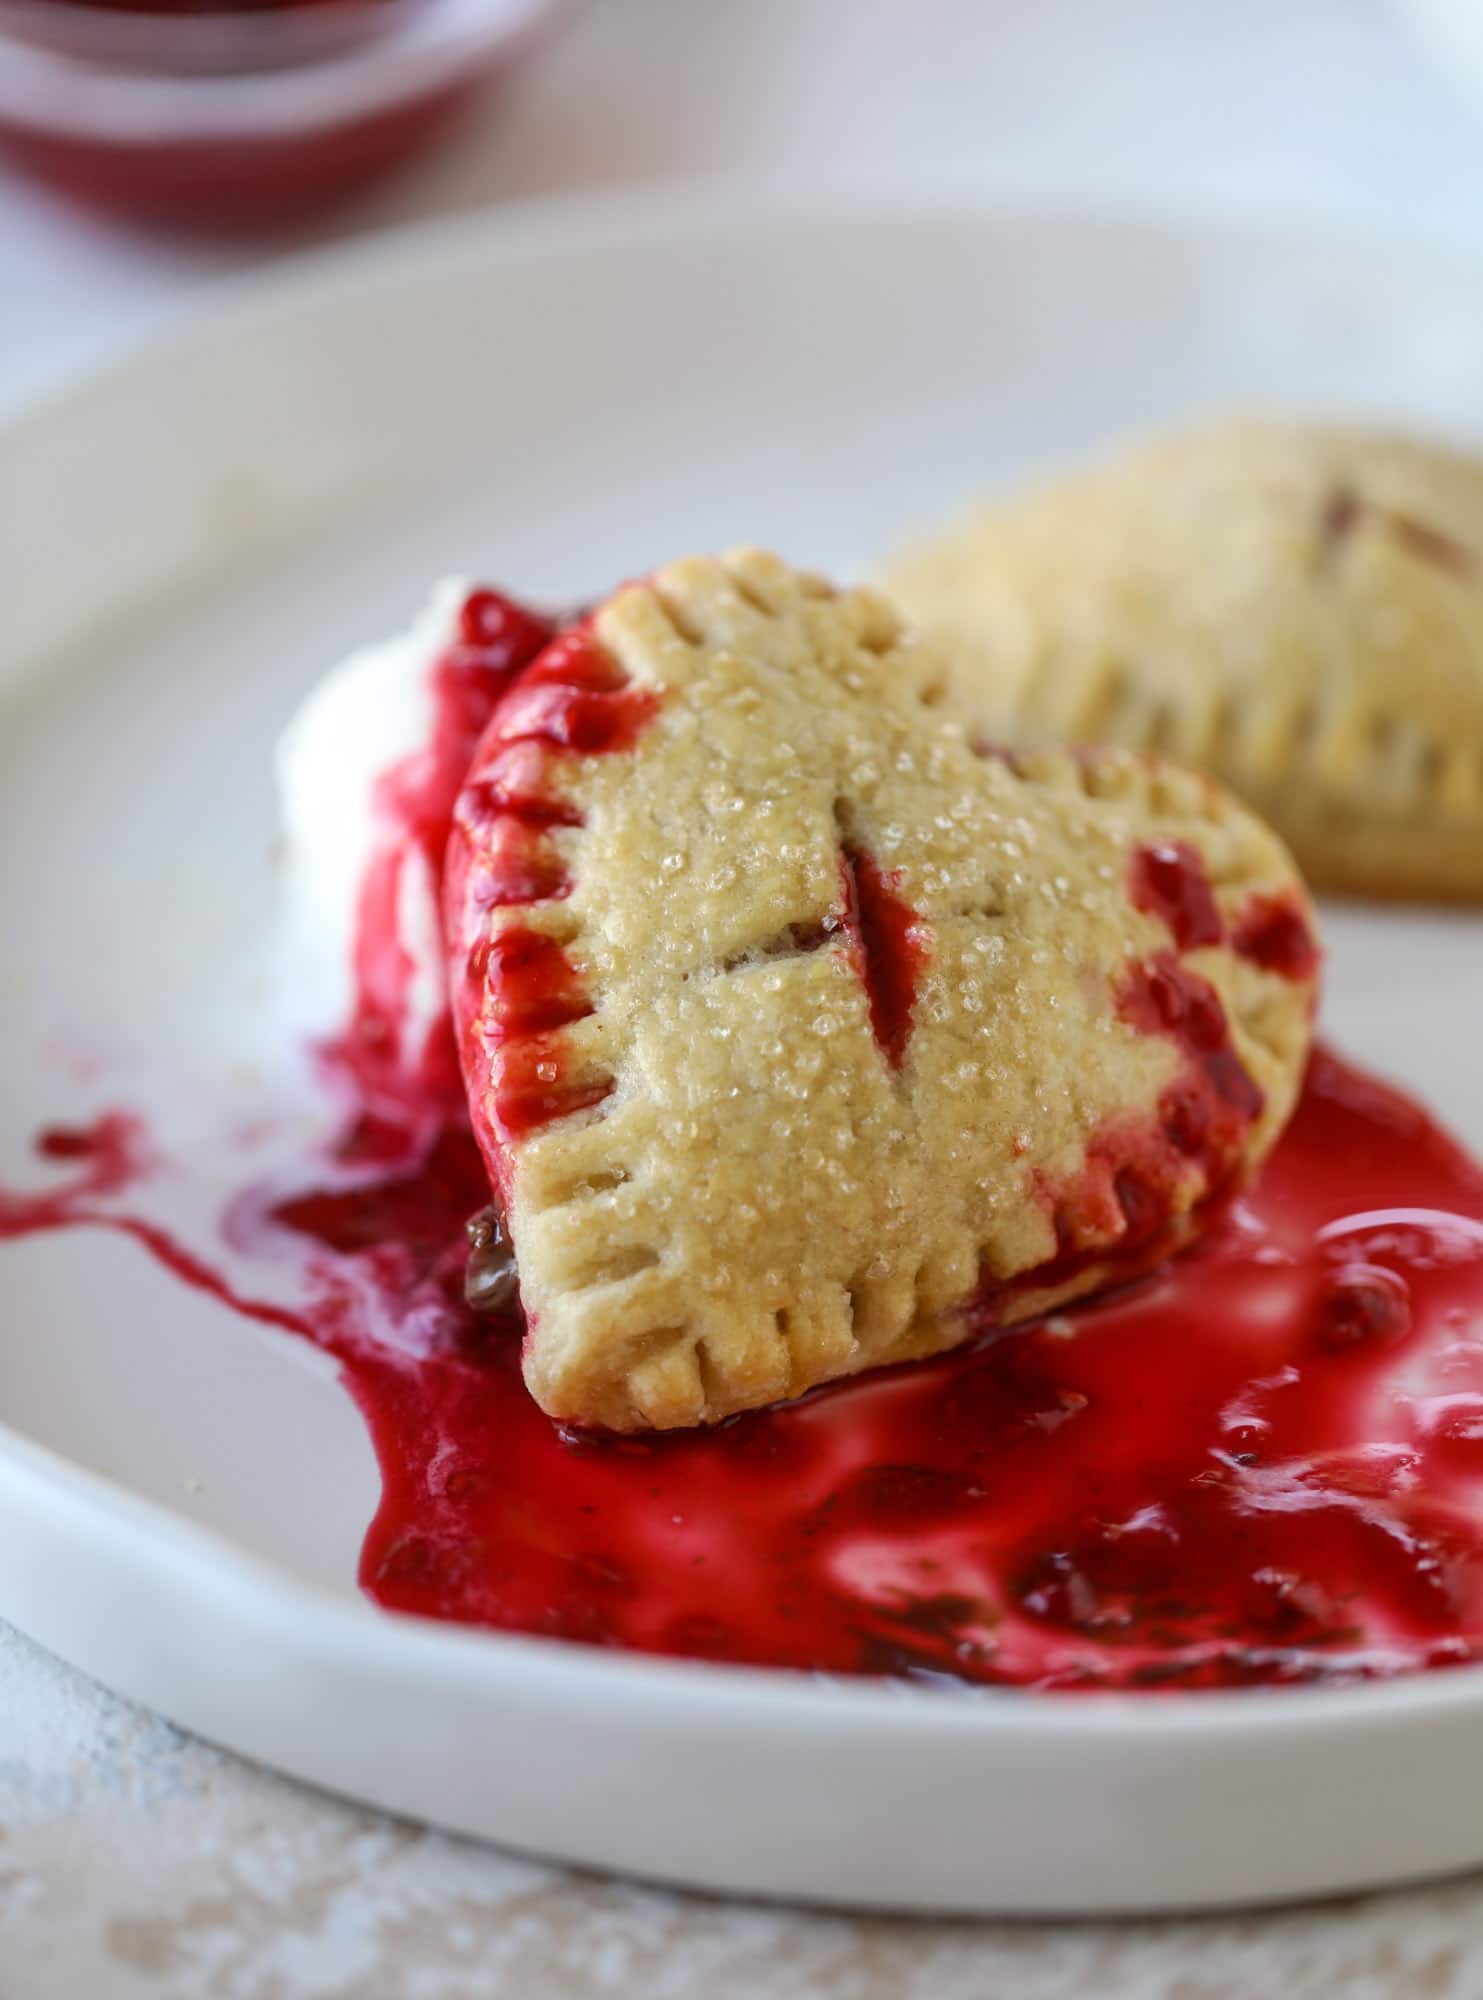
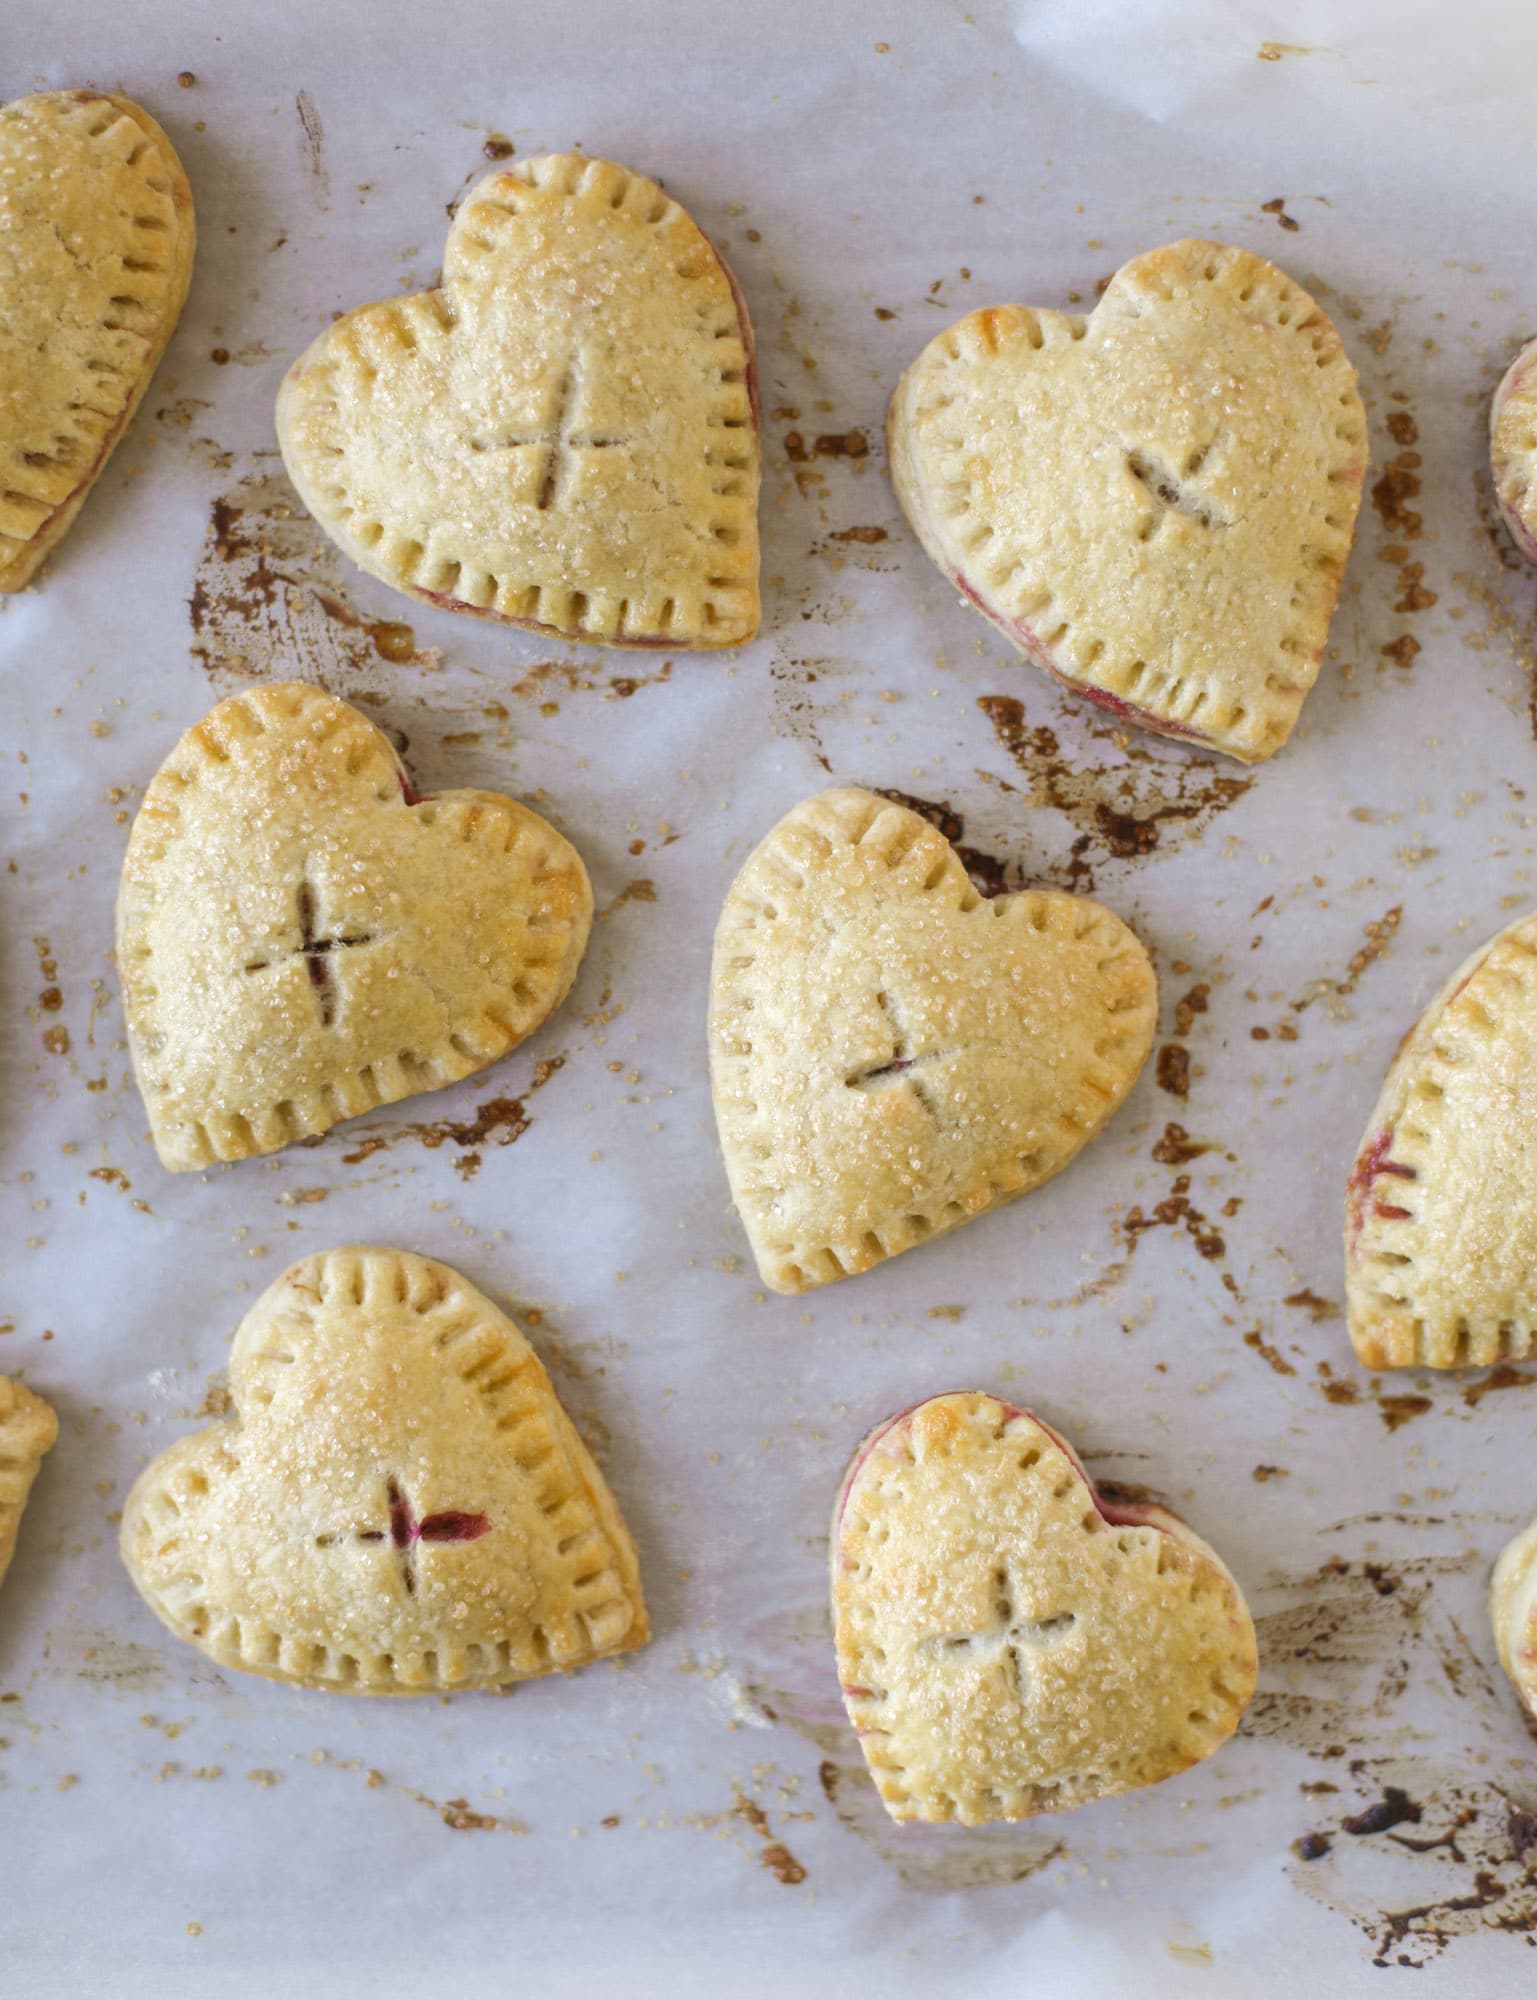
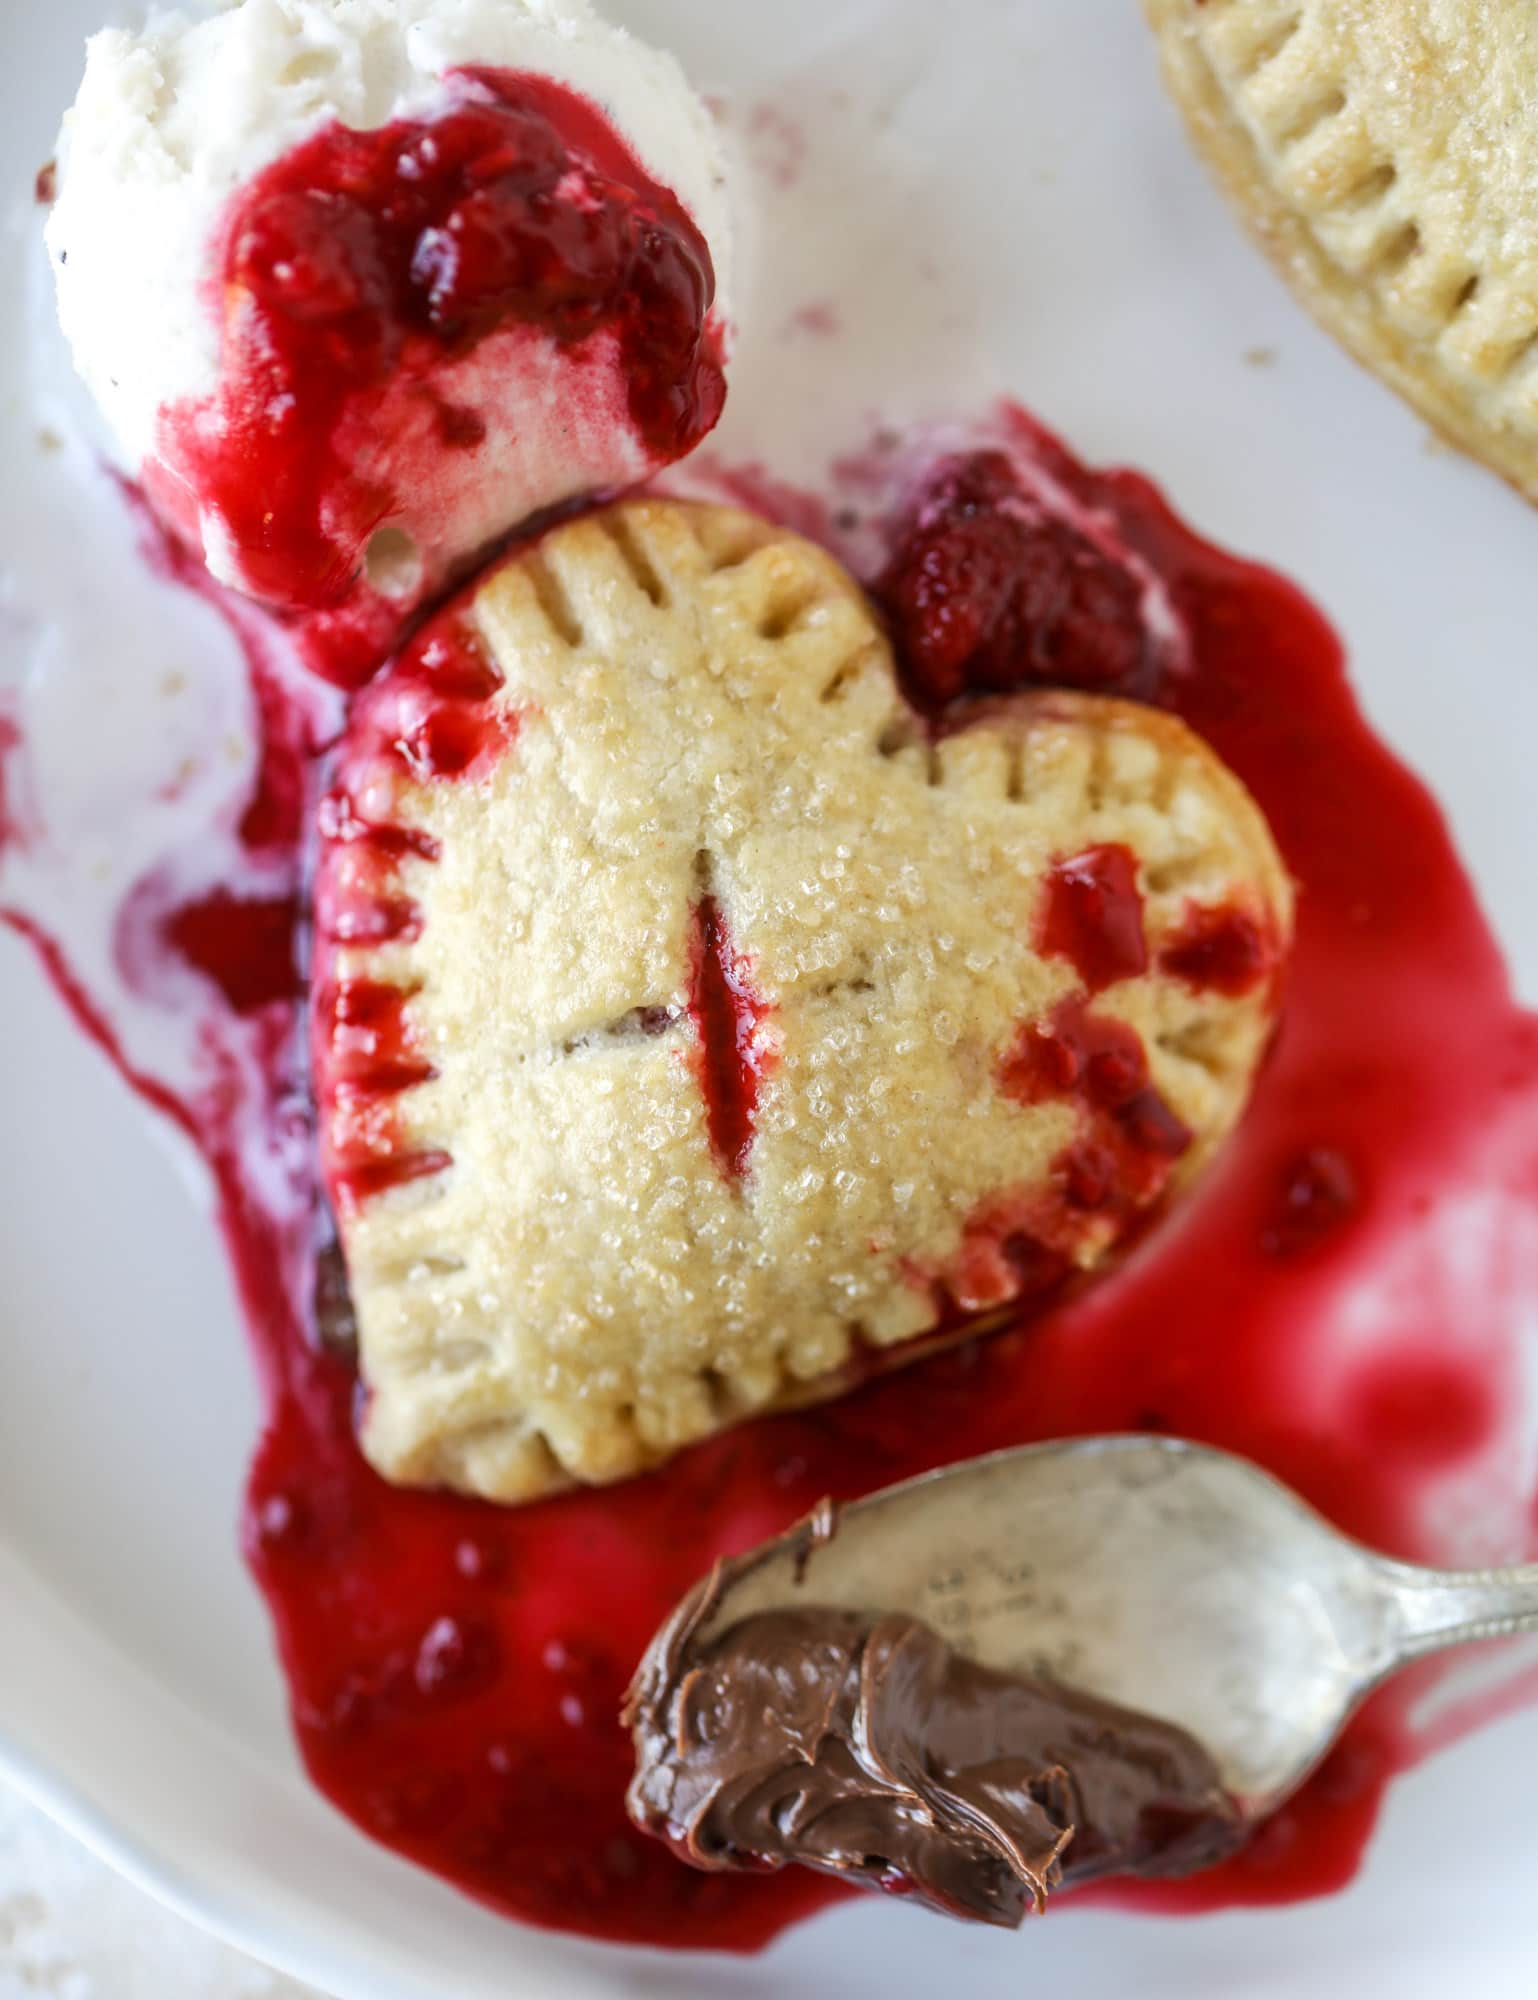
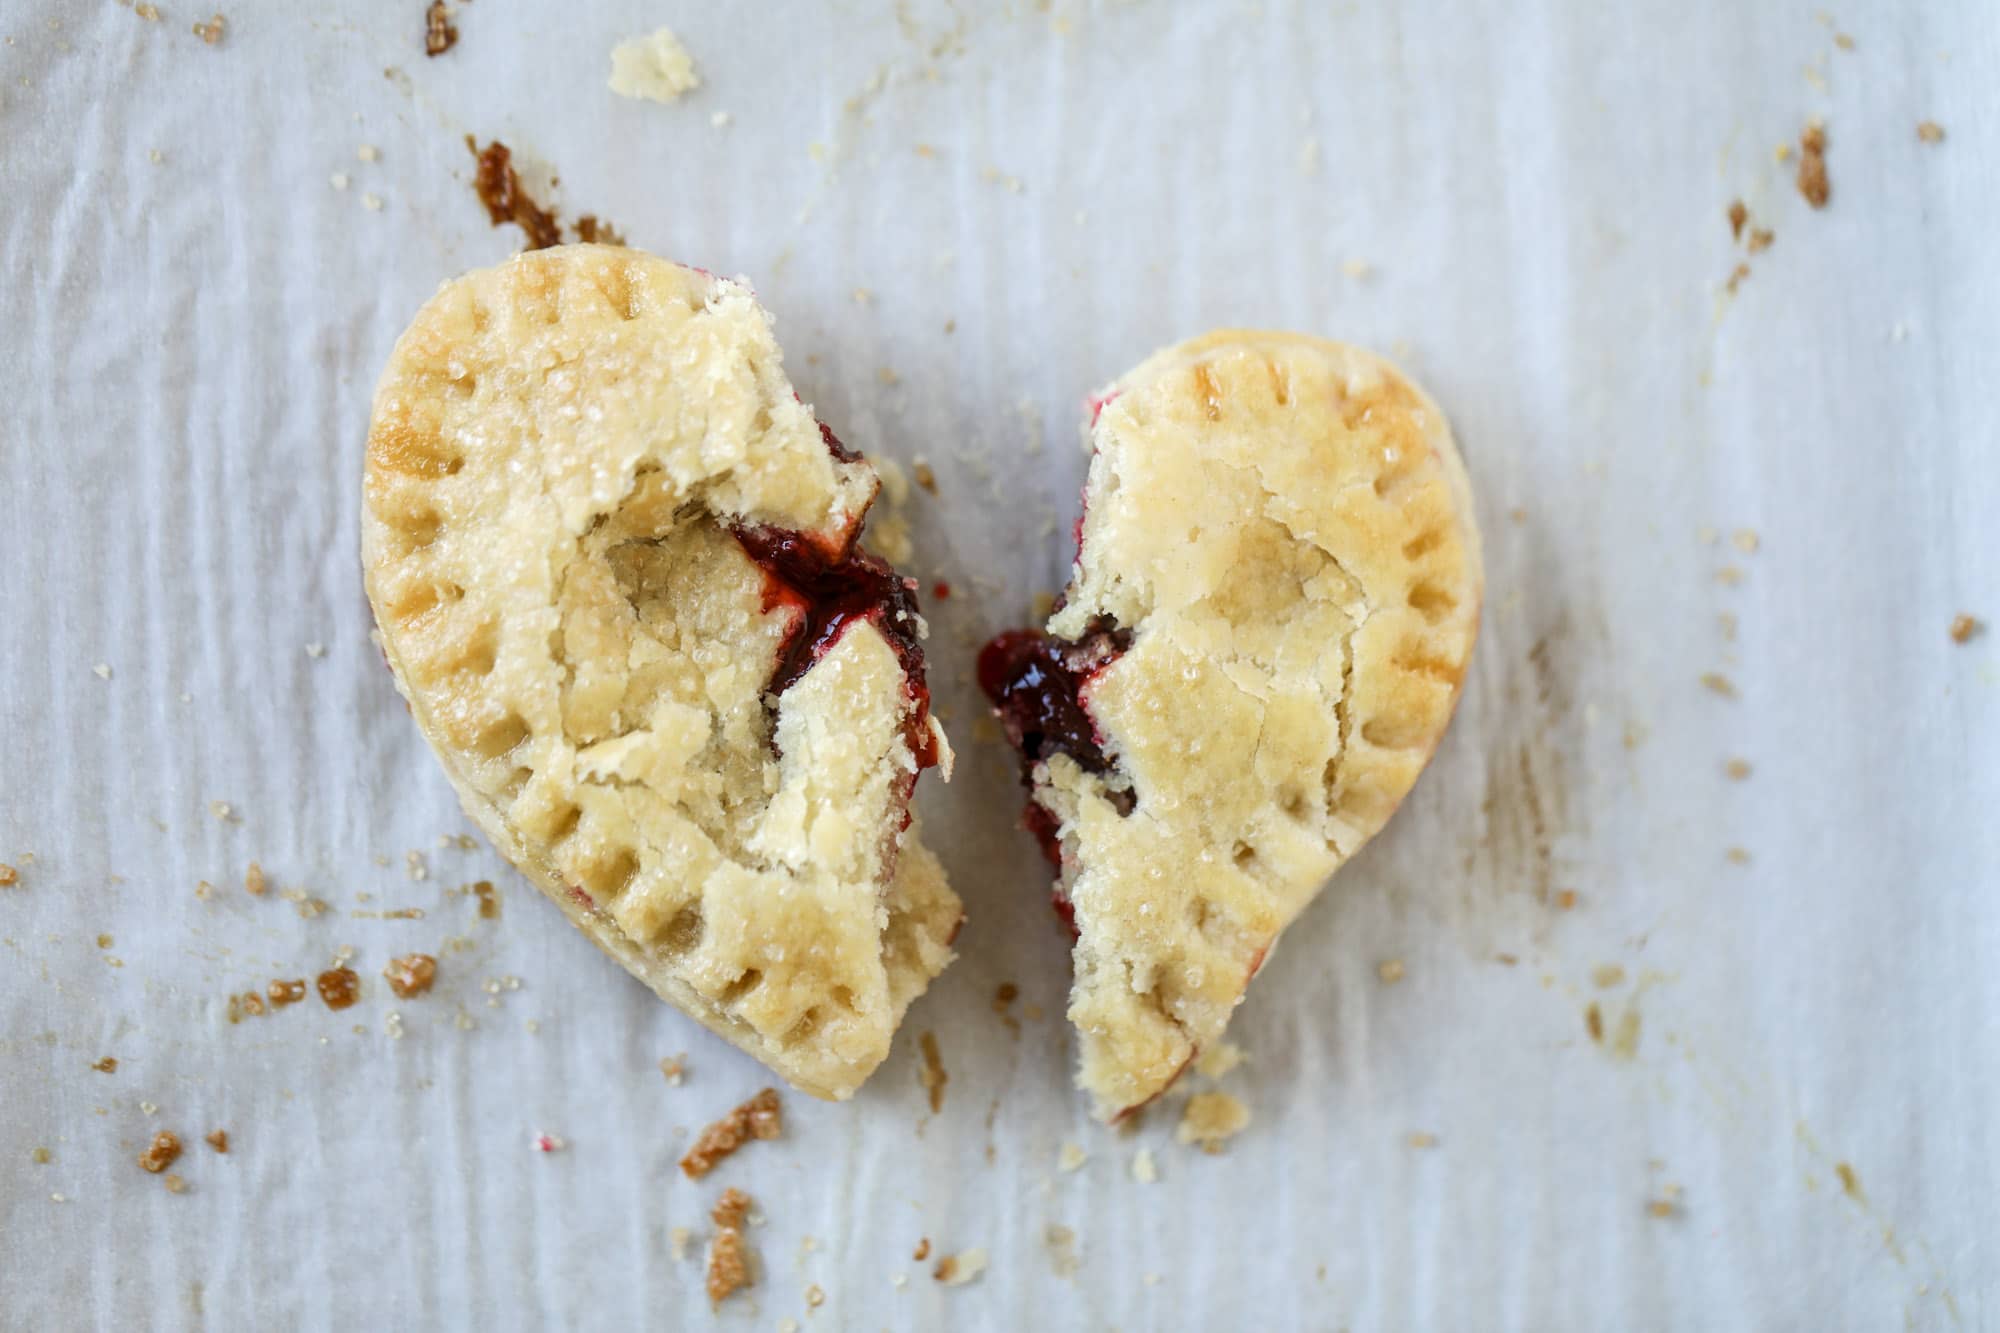
Those little triangles of love though!

The post Honeycrisp Galette with Cheddar Crust and Thyme Butter. appeared first on How Sweet Eats.

23 Sep 01:22

Salted Honeycrisp Fritters.

by Jessica

I never wanted an apple fritter until I made salted apple fritters!

These salted apple fritters use honeycrisp apples and flaked sea salt for a fall flavor explosion. These are the best treat ever!

Because say it with me: honeycrisp season is the best season.

dipping apple fritters

I mean whyyyy are these apple babes so good?

Here’s the thing. To me, honeycrisps taste like caramel apples without the caramel. That probably makes zero sense. But I think it’s a nostalgia thing. Honeycrisps would be made into caramel or candy apples when I was a kid and they were around for such a short period of time (especially back then) that they were SO special. One bite of them instantly transports me back to those magical fall days as a kid and into my head pops CARAMEL. 

These salted apple fritters use honeycrisp apples and flaked sea salt for a fall flavor explosion. These are the best treat ever!

Obviously, I still find the apples super special today. And they will forever be my favorite apple variety. I don’t crave caramel with an apple (I’m much more of an apple + peanut butter girl) but I love the combination once or twice during the season. 

These salted apple fritters use honeycrisp apples and flaked sea salt for a fall flavor explosion. These are the best treat ever!

Enough about caramel, because that has nothing to do with this recipe. And just how fantastic honeycrisps taste.

But this recipe has evvvvverrrrrything to do with honeycrisps.

SALTED HONEYCRISP FRITTERS?!

These salted apple fritters use honeycrisp apples and flaked sea salt for a fall flavor explosion. These are the best treat ever!

Let me start by saying I know what a royal pain it is to fry, well… anything. Especially if you have kids! Lacy and I had this full blown discussion about just.how.good a recipe has to LOOK in order to convince us to fry something.

Well, this is it. The batter is easy. Embarrassingly easy, in fact. You stir in some chopped honeycrisps and then fry in a bit of oil. Remove the fritter, glaze it and shower with flaked sea salt.

Can you even take that?! 

These salted apple fritters use honeycrisp apples and flaked sea salt for a fall flavor explosion. These are the best treat ever!

If you’re a lover of apples and cheddar then you will freak over this. It’s salty and sweet and crispy on the outside but soft on the inside.

I mean, OMG.

These salted apple fritters use honeycrisp apples and flaked sea salt for a fall flavor explosion. These are the best treat ever!

Are fritters more breakfast or dessert?

I couldn’t do them for breakfast because of the carb coma that would come over me. But I could possibly do them for brunch (definitely), a snack and then even as a late night treat. Wowzas.

These salted apple fritters use honeycrisp apples and flaked sea salt for a fall flavor explosion. These are the best treat ever!

I’m usually very much team-apple cider doughnut but it’s quite possible that I’m asking to be traded.

These salted apple fritters use honeycrisp apples and flaked sea salt for a fall flavor explosion. These are the best treat ever!

Salted Apple Fritters

Salted Honeycrisp Fritters

These salted apple fritters use honeycrisp apples and flaked sea salt for a fall flavor explosion. These are the best treat ever!

  • 1 1/2 cups all-purpose flour
  • 1 tablespoon brown sugar
  • 2 teaspoons baking powder
  • 1/2 teaspoon salt
  • ½ teaspoon cinnamon
  • Pinch of freshly ground nutmeg
  • ⅔ cup milk
  • 2 eggs, (lightly beaten)
  • 1 tablespoon butter, (melted)
  • 1 teaspoon vanilla extract
  • 3 cups peeled and chopped apples
  • vegetable or canola oil for frying

glaze

  • 2 cups powdered sugar
  • 1/4 cup milk
  • 2 teaspoons vanilla extract
  • flaked sea salt for sprinkling
  1. Heat a few inches of oil in a large saucepan over medium-low heat. You want the oil to reach about 350 degrees Line a plate with paper towels.
  2. In a large bowl, whisk together the flour, sugar, baking powder, salt, cinnamon and nutmeg. In a small bowl, whisk together the milk, eggs, butter and vanilla. Stir the wet ingredients into the dry until just combined. Stir the chopped apples into the batter.
  3. Once the oil is hot, drop ¼ cups of batter into the oil, only doing 1 or 2 at a time, and fry until golden on both sides, about 3 to 4 minutes. Be sure to flip the fritter once or twice. Remove the fritters with a slotted spoon and place them on the paper towel to drain excess grease. Repeat with remaining batter.
  4. Once the fritters are all finished and slightly cool, dip them in the glaze. Place them on a sheet of parchment paper and immediately sprinkle with flaked salt. Serve!

glaze

  1. Whisk the sugar, vanilla and milk together until combined and smooth. If the mixture is too thick, add more milk 1 teaspoon at a time until it’s thin enough to dip the fritters.

slightly adapted from allrecipes

These salted apple fritters use honeycrisp apples and flaked sea salt for a fall flavor explosion. These are the best treat ever!

The crunchiest salt bite though!

The post Salted Honeycrisp Fritters. appeared first on How Sweet Eats.

18 Sep 02:36

Sheet Pan Nacho Chicken.

by Jessica

I present to you: sheet pan nacho chicken!

This sheet pan nacho chicken recipe results in the juiciest, more flavorful chicken that can be served in a multitude of ways!

Otherwise known as, Eddie’s new favorite chicken. It’s true!

Remember a few years ago when I was dead set on creating new unboring chicken recipes constantly? I’m still in that mode (thanks to Eddie!) but it’s rare that I find something different and good enough to share. 

THIS IS IT.

sheet pan chicken for the oven

It’s not super different, I mean, it’s a different way to make taco-like chicken. I always like to have one of those. Especially one that isn’t made in a slow cooker. And triple-especially one that isn’t made in the instant pot, because I still loathe that thing. Whomp whomp.

But I have the answer.

This sheet pan nacho chicken recipe results in the juiciest, more flavorful chicken that can be served in a multitude of ways!

This recipe contains three things that I almost always have on hand: chicken, bell peppers and onions.

The major flavor comes from lots of spices. You can leave one or two out if you don’t have them! 

And… I love to sprinkle corn cut straight from the cob into the sheet pan and roast it with everything else.

This creates the most flavorful, juiciest chicken ever.

After that? Well, it’s all about your toppings. Or your favorite condiments or whatever you deem necessary to serve with this juicy flavorbomb bite! 

This sheet pan nacho chicken recipe results in the juiciest, more flavorful chicken that can be served in a multitude of ways!

Because here’s the thing. 

There are so many things you can do with this chicken!

Serve it just like this, straight off the sheet pan smothered in pico, maybe with rice or something on the side.

Shred it and serve it in tacos, of course. Or on nachos, hence the name. (My personal fave, obvs.) 

Shred it or slice it and serve it on slider buns topped with guac and salsa. 

Shred it, slice it or chop it and serve it on top of a salad, on your own burrito bowl, in a wrap of some sort (that isn’t a taco, I guess!) 

I love it.

This sheet pan nacho chicken recipe results in the juiciest, more flavorful chicken that can be served in a multitude of ways!

And one more reeeeeally good idea? This might be the ultimate.

When it’s finished? Before you add anything else on top, cover it with a slice of sharp cheddar or monterey jack and stick it back in the oven for a minute or two.

UM YES.

Then do any of the above like we talked about. 

This sheet pan nacho chicken recipe results in the juiciest, more flavorful chicken that can be served in a multitude of ways!

Hello new favorite chicken! Right?!

This sheet pan nacho chicken recipe results in the juiciest, more flavorful chicken that can be served in a multitude of ways!

Sheet Pan Nacho Chicken

Sheet Pan Nacho Chicken

This sheet pan nacho chicken recipe results in the juiciest, more flavorful chicken that can be served in a multitude of ways!

  • 1 tablespoon brown sugar
  • 1 tablespoon cumin
  • 2 teaspoons chili powder
  • 2 teaspoons smoked paprika
  • 1 teaspoon garlic powder
  • 1/2 teaspoon chipotle chili powder
  • 1/2 teaspoon salt
  • 1/2 teaspoon black pepper
  • 1 pound boneless skinless chicken breasts, ( (or a mix of breasts and thighs))
  • 2 bell peppers, (thinly sliced)
  • 1 red onion, (thinly sliced)
  • ⅔ cup uncooked sweet corn, (cut from the cob)

quick pico

  • 1 pint cherry tomatoes, (quartered)
  • ½ sweet onion, (diced)
  • ¼ cup cilantro, (chopped)
  • ½ lime, (juiced)
  • pinch of salt and pepper
  • cotija cheese, (for sprinkling)

for serving

  • guacamole
  • cilantro
  • sliced jalapeno peppers
  1. Preheat the oven to 425 degrees F.
  2. In a bowl, stir together the brown sugar, cumin, chili powder, smoked paprika, garlic powder, chipotle chili powder, salt and pepper.
  3. Rub the spice mixture all over the chicken breasts, reserving a bit for the peppers and onions. Place the chicken on the sheet pan and surround it with the sliced peppers and onions. Sprinkle the remaining spices over top. Sprinkle the corn all over the sheet pan.

    (As a note, you can also use frozen corn, it may release a bit more liquid.)

  4. Roasted for 20 to 25 minutes, or until the chicken is cooked through. Use a cooking thermometer to test the internal temperature, which should be 165 degrees If at any time the peppers and onions look like they may burn, you can pull out the sheet pan and toss the veggies with a fork.
  5. Let the chicken cook for 5 to 10 minutes before slicing or shredding. Sprinkle the pico de gallo on top along with the cotija cheese. Serve with extra lime wedges, guacamole, jalapenos and cilantro.

quick pico

  1. Toss the tomatoes, onion, cilantro and lime juice together in a bowl. Season with a pinch of salt and pepper.

This sheet pan nacho chicken recipe results in the juiciest, more flavorful chicken that can be served in a multitude of ways!

Just give me some chips to scoop this up!

The post Sheet Pan Nacho Chicken. appeared first on How Sweet Eats.

13 Sep 00:35

Cheesy Smoked Chicken Pesto Dip.

by Jessica

This pesto chicken dip is going to change your weekends!

This cheesy pesto chicken dip is a great way to use up your end-of-summer herbs! Lots of delicious smoky flavor and tons of bubbly cheese.

If you’re in major football mode like I am, then you need a good dip.

Right? It’s dip season after all.

I have lots of them here on the blog (I’m looking at you, white pizza dip) but am obviously always searching out new ones. Especially for this time of year, when it’s still super hot outside and we’re craving summer flavors. Yet, everyone wants potluck-like tailgate recipes.

This cheesy pesto chicken dip is a great way to use up your end-of-summer herbs! Lots of delicious smoky flavor and tons of bubbly cheese.

While this dip is definitely a comfort food, it has a bit of summer swirl in to it. In my eyes, that definitely counts.

P.S. if you’re making out this outside of the summer, say, like, mid-January? Then totally use whatever you’ve got or can find in terms of ingredients. I mean, it might sound like a good idea when you’re snowed in. 

This cheesy pesto chicken dip is a great way to use up your end-of-summer herbs! Lots of delicious smoky flavor and tons of bubbly cheese.

This feels so old-school to me; like a dip I would have posted ten years ago! It’s one of those dishes that you can bring to a potluck and it will be devoured. It’s one where you think you will just have a bite or two and end up scraping the bottom of the dish with a baguette slice or cracker. 

It’s one where EVERYONE ends up asking for the recipe and one where you will find yourself making it over and over.

Those are the recipes I live for.

This cheesy pesto chicken dip is a great way to use up your end-of-summer herbs! Lots of delicious smoky flavor and tons of bubbly cheese.

This dip contains lots of delicious late summer things, like the end of the tomatoes and your own pesto. It gets mixed up with smoked cheddar, cream cheese and shredded chicken – AND a dash of liquid smoke.

That’s the kicker! Everything else may taste a leeeettle smoky with the cheese, but that liquid smoke is the key. I’ve been loving it lately! 

A note about the pesto? Use whichever is your favorite. I have a classic-ish pesto here, a pistachio pesto and even a kale pesto.

This cheesy pesto chicken dip is a great way to use up your end-of-summer herbs! Lots of delicious smoky flavor and tons of bubbly cheese.

Pesto chicken dip is like a last late summer hug. Tastes a little bit like your garden and a lot like indulgence. You’re going to loooovvvve it.

This cheesy pesto chicken dip is a great way to use up your end-of-summer herbs! Lots of delicious smoky flavor and tons of bubbly cheese.

Pesto Chicken Dip

Cheesy Pesto Smoked Chicken Dip

This cheesy pesto chicken dip is a great way to use up your end-of-summer herbs! Lots of delicious smoky flavor and tons of bubbly cheese.

  • 12 ounces cream cheese, (at room temperature)
  • 12 ounces smoked cheddar cheese, (freshly grated)
  • 2 garlic cloves, (minced)
  • 1 cup cherry tomatoes, (chopped)
  • 1 cup shredded chicken
  • ¼ to 1/2 cup of your favorite pesto
  • ½ teaspoon freshly ground black pepper
  • ¼ teaspoon kosher salt
  • ¼ teaspoon liquid smoke
  • baguettes, (chips or crackers for serving)
  1. Preheat the oven to 375 degrees F.

  2. In a large bowl, stir together the softened cream cheese, grated cheese and garlic. Stir until combined and the cheeses are thoroughly mixer. Stir in the garlic, tomatoes, chicken, pesto, salt, pepper and liquid smoke. If you want more pesto flavor, stir in a little more!
  3. Scoop the mixture into a 8-inch pie plate or baking dish. Bake for 25 to 30 minutes, until the dip is bubbly and golden on top.
  4. Serve immediately with baguette slices, chips or crackers.

This cheesy pesto chicken dip is a great way to use up your end-of-summer herbs! Lots of delicious smoky flavor and tons of bubbly cheese.

Save me all the crackers.

The post Cheesy Smoked Chicken Pesto Dip. appeared first on How Sweet Eats.

10 Sep 17:23

Stuffed Fig Focaccia Bread.

by Jessica

This is how we make the best fig focaccia bread!

This stuffed fig focaccia bread is such an amazing way to use figs! Golden, toasty, salted focaccia studded with fig jewels. It's delicious and pretty!

Remember earlier this year when I made that caramelized onion focaccia?! It’s one of my favorite recipes of this year because it’s JUST SO GOOD.

And I’ve been dying to make something else similar.

See? That’s what happens to me. It’s how so many of my recipes are born. I make something… and I love it. And I decide that because I love it so much, I should try to recreate it in another form.

Honestly, it barely works out. Usually the thing I make/do is never as good as the original that I love the most.

But! In this case?

WE HAVE A WINNER.

fresh figs

Figs on focaccia bread. If you’re a freak for alliteration like I am, enjoy. 

Not only does this focaccia bread have tons of fresh rosemary and garlic and lots of sliced figs, it also has prosciutto wrapped blue cheese stuffed figs.

YES.

Let me say that again. Prosciutto wrapped. Blue cheese stuffed. FIGS.

The prosciutto wrapped blue cheese stuffed figs aren’t a crazy phenomenon here. I’ve made a similar version before for my summer cheese plate (you still have time to make that happen, FYI!) and they are always a favorite appetizer when fig season rolls around.

But putting said prosciutto wrapped blue cheese stuffed figs ON something? Or IN something?

I mean, that’s a mouthful. Literally. 

focaccia dough

So I did it. And it works! 

The key is to just make a few of the stuffed figs. Kind of “stud” your bread with the figs. That means that now, it’s prosciutto wrapped blue cheese stuffed fig studded focaccia.

Aren’t you so glad I didn’t name the entire recipe that above?

Once baked, the stuffed figs work their magic in the bread. The prosciutto that is exposed crisps up, as expected. The inside of the fig and blue cheese gets a little jammy, almost like you spread actual fig jam on the bread. 

Speaking of that, you could totally spread fig jam on the bread if you wanted. I wouldn’t turn it down. 

fig focaccia dough

This is an appetizer. Or a pizza. Or a side dish. It’s actually whatever you want it to be. Where does it fit into your life?

For me, it fits right in with a late summer greens salad. So good.

For Eddie, it’s basically a starter to a larger meal. Shocking, right?

This stuffed fig focaccia bread is such an amazing way to use figs! Golden, toasty, salted focaccia studded with fig jewels. It's delicious and pretty!

Stuffed Fig Focaccia Bread

Stuffed Fig Focaccia Bread

This stuffed fig focaccia bread is such an amazing way to use figs! Golden, toasty, salted focaccia studded with fig jewels. It’s delicious and pretty!

  • 1 3/4 cups warm water
  • 2 1/4 teaspoons active dry yeast
  • 1 tablespoon honey
  • 5 cups all-purpose flour, (plus more for your workspace)
  • 2 teaspoons garlic powder
  • 2 teaspoons kosher salt
  • 1 cup extra virgin olive oil
  • 6 whole fresh figs, (sliced)
  • 6 whole fresh figs
  • 2 to 3 ounces blue cheese, (plus more for sprinkling on top if you wish!)
  • 3 slices prosciutto
  • 4 tablespoons chopped fresh rosemary, (plus more for garnish)
  • pinch of flaked sea salt
  1. In a bowl, stir together the water, yeast and honey. Let it sit for 10 to 15 minutes until foamy.
  2. In the bowl of your stand mixer, add the flour, 1 tablespoon of salt, 1/2 cup of olive oil and the yeast mixture. Stir, using the dough hook, until the mixture comes together. Knead it on medium-low speed for 5 to 6 minutes. If it’s super sticky, sprinkle in a bit of extra flour. You want it to be silky!
  3. Put the dough in an oiled bowl and cover it. Place it in a warm spot and let it rise for 1 hour, or until it’s doubled in size.
  4. After it’s doubled, place the remaining oil in a 15 1/2 x 10 inch jelly roll sheet pan. Place the dough in the sheet pan and turn it over to cover it in the oil once, then press and spread it until it fits in the pan (or almost fits in the pan. it’s going to rise again!). While doing this, press to make finger marks in the dough so it looks like traditional focaccia. Cover the sheet pan and place the dough back in a warm place to rise for another hour.
  5. Preheat the oven to 425 degrees Slice the fresh figs. To stuff the whole figs, take each fig and slice and “x” in the bottom center to create a little opening. Press about 1/2 an ounce of blue cheese inside the center of the fig. Wrap each fig with half a slice of prosciutto.

  6. Press the slice figs and the stuffed figs into the focaccia bread dough. Sprinkle with fresh rosemary and flaked salt. Bake the focaccia for 20 to 25 minutes, or until golden on top and crunchy on the edges. Let cool slightly before slicing!

This stuffed fig focaccia bread is such an amazing way to use figs! Golden, toasty, salted focaccia studded with fig jewels. It's delicious and pretty!

This is a ridic amount of flavor. Because figs. And cheese!

The post Stuffed Fig Focaccia Bread. appeared first on How Sweet Eats.

04 Sep 04:43

15 Recipes I Can’t Wait to Make This Season!

by Jessica

I’ve got the BEST line up of fall recipes for you today!

Here are a few of my all-time favorite fall recipes - pumpkin and apple cider and sangria oh my! Lots of breakfast, dinner, dessert and cocktails here!

For the last few years, I’ve shared some of my favorite football food recipes on Labor Day. You can find my ultimate tailgate menu here, 125 of my favorite football season recipes here and the perfect ALDI tailgate I shared last week here!

SO since that’s pretty much covered, I figured I’d look back through the archives and find a few recipes that I’m already DYING to make… and it’s still only September 2nd. It’s funny, sometimes I’m not ready for summer to end, and other years, I’m all in on fall immediately. This year, it’s definitely the latter. I cannot even WAIT for what this season has to bring! Here are 15 recipes that I can’t wait to make.

15 amazing recipes for Fall

Here are a few of my all-time favorite fall recipes - pumpkin and apple cider and sangria oh my! Lots of breakfast, dinner, dessert and cocktails here!

I may be most excited to bring hasselback butternut squash back into my life. Sweet and savory versions!

Here are a few of my all-time favorite fall recipes - pumpkin and apple cider and sangria oh my! Lots of breakfast, dinner, dessert and cocktails here!

And apple cider sangria?! THE BEST! I also have a white wine version here.

Here are a few of my all-time favorite fall recipes - pumpkin and apple cider and sangria oh my! Lots of breakfast, dinner, dessert and cocktails here!

If you haven’t made these oatmeal baked apples yet, you must must must!

Here are a few of my all-time favorite fall recipes - pumpkin and apple cider and sangria oh my! Lots of breakfast, dinner, dessert and cocktails here!

This slow cooker buffalo chicken chili is one of our all-time favorites. Such a great flavor.

Here are a few of my all-time favorite fall recipes - pumpkin and apple cider and sangria oh my! Lots of breakfast, dinner, dessert and cocktails here!

These pumpkin protein pancakes were a HUGE hit last year.

Here are a few of my all-time favorite fall recipes - pumpkin and apple cider and sangria oh my! Lots of breakfast, dinner, dessert and cocktails here!

And this pumpkin pie oatmeal brûlée is such an indulgent, fun seasonal breakfast!

Here are a few of my all-time favorite fall recipes - pumpkin and apple cider and sangria oh my! Lots of breakfast, dinner, dessert and cocktails here!

Smothered skillet chicken might be my favorite dinner EVER.

Here are a few of my all-time favorite fall recipes - pumpkin and apple cider and sangria oh my! Lots of breakfast, dinner, dessert and cocktails here!

And have you made this soft pretzel panzanella with mustard vinaigrette?!

Here are a few of my all-time favorite fall recipes - pumpkin and apple cider and sangria oh my! Lots of breakfast, dinner, dessert and cocktails here!

Seriously, who can resist apple cider churros with cider beer caramel?!

Here are a few of my all-time favorite fall recipes - pumpkin and apple cider and sangria oh my! Lots of breakfast, dinner, dessert and cocktails here!

Or these pumpkin cider donut holes with hot fudge. Amazing.

Here are a few of my all-time favorite fall recipes - pumpkin and apple cider and sangria oh my! Lots of breakfast, dinner, dessert and cocktails here!

Verrrry excited for this pumpkin bisque with grilled cheese croutons.

Here are a few of my all-time favorite fall recipes - pumpkin and apple cider and sangria oh my! Lots of breakfast, dinner, dessert and cocktails here!

This butternut squash chili isn’t the prettiest, but it’s super good.

Here are a few of my all-time favorite fall recipes - pumpkin and apple cider and sangria oh my! Lots of breakfast, dinner, dessert and cocktails here!

Hello pumpkin fudge brownies. OMG.

Here are a few of my all-time favorite fall recipes - pumpkin and apple cider and sangria oh my! Lots of breakfast, dinner, dessert and cocktails here!

And this pumpkin coffee cake with homemade chai ice cream is a dream.

Here are a few of my all-time favorite fall recipes - pumpkin and apple cider and sangria oh my! Lots of breakfast, dinner, dessert and cocktails here!

Finally, celebrate all the things with pomegranate cider mimosas rimmed in salted caramel!

What recipes are you SO looking forward to this season?! I can’t wait to hear!

The post 15 Recipes I Can’t Wait to Make This Season! appeared first on How Sweet Eats.

28 Aug 14:59

Smoky Summer Chicken Salad.

by Jessica

No more sad summer chicken salad lunches! 

This smoky summer chicken salad is incredible! So much flavor from grilled chicken, sweet cherry tomatoes, corn, cheddar cheese and a secret ingredient!

This smoky chicken salad is going to make you want to have chicken salad every.darn.day.

Loaded with flavor. Super easy. And totally versatile!

It may come as a surprise, but I have to freaking LOVE a chicken salad recipe in order to share it. I still have nightmares from my childhood of chicken (or tuna… or egg…) salad swimming in mayo, with barely any flavor, and worst of all – loaded with celery.

I just can’t. 

chicken salad prep

I never HATED any of the salads like some people do, but the experience from a deli or cafeteria left a lot to be desired. So when I started making my own versions, I was blown away at how much I loved them. 

And yes, in case you think you’re going crazy: I’ve made a chicken salad similar to this before. My sweet corn and bacon chicken salad is creamier than this but just as good. But the winner by far is my lemon almond roasted chicken salad. You guys love this!

This smoky summer chicken salad is incredible! So much flavor from grilled chicken, sweet cherry tomatoes, corn, cheddar cheese and a secret ingredient!

First off, this isn’t even my own recipe.

This recipe comes from Lacy (again!) and is a chicken salad she has been loving for years. She has wanted to recreate it forever, so we got down to business.

It’s SO GOOD.

The smokiness? We grill the chicken which imparts a smoky flavor (you could totally grab a rotisserie chicken in a pinch) but we also dropped some liquid smoke in the mix! Just a tiny tiny drop. Makes it tastes SO good. 

We added both corn cut from the cob (or course because #summer) and tomatoes. They are just so sweet right now, so combined with the smoky flavor? We knew it would be everything.

Scallions and cheddar cheese also found their way into the bowl.

This smoky summer chicken salad is incredible! So much flavor from grilled chicken, sweet cherry tomatoes, corn, cheddar cheese and a secret ingredient!

The dressing is a yogurt and mayo hybrid with some seasonings and again, the liquid smoke. It’s amazing! 

This salad is SO delish served in lettuce cup (like the very crunchy iceberg ones). But it also works on top of salads and inside of sandwiches. I grabbed the multigrain croissants from my local grocery store and the combo was just dreamy. They are fabulous.

This smoky summer chicken salad is incredible! So much flavor from grilled chicken, sweet cherry tomatoes, corn, cheddar cheese and a secret ingredient!
It’s also pretty amazing when you stand over the bowl with a fork and eat it like that. Or scoop it up with chips. I am very very into this.

This smoky summer chicken salad is incredible! So much flavor from grilled chicken, sweet cherry tomatoes, corn, cheddar cheese and a secret ingredient!

Smoky Summer Chicken Salad

Smoky Summer Chicken Salad

This smoky summer chicken salad is incredible! So much flavor from grilled chicken, sweet cherry tomatoes, corn, cheddar cheese and a secret ingredient!

  • 1 pound boneless, skinless chicken thighs
  • 2 tablespoons olive oil
  • ½ teaspoon kosher salt
  • ½ teaspoon freshly ground black pepper
  • 1 cup cherry tomatoes, (halved or chopped)
  • 1 cup sweet corn kernels ((raw, grilled, cooked, frozen, etc!))
  • ⅓ cup sliced scallions
  • ¼ cup grated sharp cheddar cheese
  • ¼ cup plain greek yogurt
  • ¼ cup mayonnaise
  • 1 ½ tablespoons freshly squeezed lemon juice
  • ¼ teaspoon liquid smoke
  • Pinch of salt
  • Pinch of freshly ground black pepper
  1. Preheat your grill to the highest setting.
  2. Season the chicken thighs with salt, pepper and garlic powder. Brush them with olive oil. PLace the chicken on the grill and cook for 6 minutes per side. When finished, let the chicken rest for 15 minutes. After 15 minutes, cube or shred the chicken.
  3. Place the chicken, tomatoes, corn, scallions and cheese in a large bowl. Toss it together.
  4. In a small bowl, whisk together the yogurt, mayo, lemon juice, liquid smoke, salt and pepper.
  5. Pour the dressing over the chicken mixture and toss well. Combine and stir until every bit is covered. Serve the chicken on croissants or toast with lettuce or microgreens.
  6. This stays great in the fridge for about 3 days. It tastes even better!

This smoky summer chicken salad is incredible! So much flavor from grilled chicken, sweet cherry tomatoes, corn, cheddar cheese and a secret ingredient!

Crunch! Flavor! I can’t get enough.

The post Smoky Summer Chicken Salad. appeared first on How Sweet Eats.

28 Aug 14:58

Summer Garden Quinoa with Marinated Flank Steak.

by Jessica

So chimichurri quinoa with flank steak may be my new favorite thing!

This chimichurri quinoa with flank steak is so incredibly delicious and flavorful! The steak is juicy and tender; the quinoa is loaded with flavor. Love it!

And say hello to the best summer dinner ever. 

grilled flank steak with chimichurri

Everything you want in this bowl, right here!

I love 2019. I love that we can throw whatever we want in a bowl, call it a “bowl” and have an acceptable dinner. Sure, I mean, maybe it wouldn’t happen like that if said bowl was filled with salted cookie dough ice cream, but this is almost as good.

Almost!

You know that I’m a flank steak freak. Or, should I say that I basically only cook flank steak because that’s what we grew up eating and it’s what I gravitate to the most for easy weeknight meals. It’s easy, it’s simple, it’s flavorful, it cooks quickly – what more do I need?! Of course, I make it with chimichurri all the time.

chimichurri quinoa

Since you might have leftovers from one of my many steak + chimichurri escapades, I figured I’d add another option to the list.

The flank steak here is MAJORLY marinated. I used my mom’s marinade from when I was a kid – I posted the marinade recipe on the blog during the first week or so that I was blogging, so needless to say, the post is horrifying. Thankfully, I included the marinade recipe down below (because, hi, I don’t want to go look at a million other posts for recipes either!) and it’s one of those that we just love and adore on everything. It works on all cuts of meat, salmon steaks and even vegetables. It’s really delish.

And what I love about that marinade here is that it doesn’t take away from the chimichurri quinoa!

This chimichurri quinoa with flank steak is so incredibly delicious and flavorful! The steak is juicy and tender; the quinoa is loaded with flavor. Love it!

Yes, let’s get to that.

Can I just call it the chimi quinoa? Because that’s what I’m calling it in my head. 

Also, excuse all the exclamation points. It’s a heavy exclamation point day over here.

ANYHOO. This is my new favorite way to flavor quinoa. I actually LOVE quinoa because it has that little pop of texture, but sometimes it’s just rather bland for my liking. This version is fantastic.

And the good news is that you can use pesto instead of chimichurri. 

Right now in this late summer season, I’m making a batch of pesto or chimichurri every other week or so. I store the leftovers in the fridge to add a bit of oomph to our weeknight meals. It’s such a good way of changing things up by having a prepared sauce in the moment. However, I often find myself left with a lot of it. Using it up in ways like this? It’s such a great idea. 

Together, the marinated steak and chimi quinoa are AMAZING. I love the combo. It’s a satisfying meal but also fairly light. Like, as light as steak can be, you know?

I know you know and that’s why I love you.

This chimichurri quinoa with flank steak is so incredibly delicious and flavorful! The steak is juicy and tender; the quinoa is loaded with flavor. Love it!

Chimichurri Quinoa with Flank Steak

Chimichurri Quinoa + Flank Steak Bowls

This chimichurri quinoa with flank steak is so incredibly delicious and flavorful! The steak is juicy and tender; the quinoa is loaded with flavor. Love it!

  • 1 (2 pound) flank steak
  • 1/3 cup low-sodium soy sauce
  • 2 tablespoons olive oil
  • 1/4 cup dry sherry
  • 2 tablespoons brown sugar
  • 3 garlic cloves, (minced)
  • 1 tablespoons fresh grated ginger
  • pinch of kosher salt
  • freshly ground black pepper
  • 2 cups cooked quinoa
  • 1 cup cherry tomatoes, (halved)
  • 2 ears grilled corn, (cut from the cob)

chimichurri

  • 1 cup fresh cilantro
  • 2/3 cup fresh parsley
  • 1/4 cup fresh oregano
  • 2 garlic cloves, (minced)
  • 1/4 cup red wine vinegar
  • 2/3 cup olive oil
  • 1/2 teaspoon salt
  • 1/2 teaspoon pepper
  • 1/4 teaspoon crushed red pepper flakes
  1. I like to take the flank steak and use a meat tenderizer on it – pound it out a few times all over. Place the flank steak in a baking dish or a ziplock bag. In a bowl, whisk together the soy sauce, olive oil, sherry, brown sugar, garlic, ginger, salt and pepper. Pour it over the flank steak and marinate anywhere from 30 minutes to 2 hour or even overnight!
  2. When you’re ready to cook the steak, you can grill, broil or pan sear it to your liking. I tend to broil it as I find that easiest. Preheat the broiler in your oven and move the oven rack as close as possible. Remove the steak from the marinade and let the excess drip off. Place the steak on a broiler pan or baking sheet and broil on each side for about 5 minutes. This usually results in a medium doneness in my oven – but since the edges are thinner, they tend to be more well done.
  3. Allow the steak to rest for 10 minutes before slicing it thinly against the grain.
  4. While the steak is rest, toss the quinoa with 2 to 3 tablespoons of the chimichurri. This makes it so super flavorful!
  5. To serve the meal, scoop the quinoa in a bowl and toss with the cherry tomatoes and grilled corn. Top with the flank steak and drizzle with extra chimichurri. Devour.
  6. chimichurri
  7. Combine the parsley, cilantro, oregano and garlic in a food processor and pulse until small leaves and pieces remain. Add in the vinegar and pulse once more. With the processor going, stream in the olive oil and mix until just combined. Stir in the salt, pepper and red pepper flakes. Taste and season additionally if needed. Store the chimichurri sealed in the fridge for up to a week or so.

This chimichurri quinoa with flank steak is so incredibly delicious and flavorful! The steak is juicy and tender; the quinoa is loaded with flavor. Love it!

p.s. throw it whatever else you have in your garden!

The post Summer Garden Quinoa with Marinated Flank Steak. appeared first on How Sweet Eats.

22 Aug 02:24

Kung Pao Cauliflower, or My New Favorite Dinner!

by Jessica

I’ll do almost anything to convince you to make kung pao cauliflower today.

This kung pao cauliflower recipe is roasted on one sheet pan and covered in a delicious sauce! Serve alongside jasmine rice for the best dinner ever.

Seriously if there is one other thing I can’t stop eating right now (I’m looking at you, green bean salad), it’s THIS.

sheet pan kung pao cauliflower

I always find myself in limbo this time of year. I still love that it’s summer, that we can swim and enjoy all the incredible tomatoes and peaches and grill all the things. 

And at the same time, I start to crave fall. I become so excited for what’s to come – the recipes, the comfort food, the scents, the sounds, everything. 

Everywhere we go, whether it’s the grocery store or Target or the mall or farmer’s markets – it’s all in limbo. This past weekend, all of the apples were overflowing at our local farm and the peaches are dwindling. 

It’s a time of year where I’m caught between wanting to make an easy sheet pan dinner and making the best tomato panzanella. Once requires turning on the oven and the other just requires lots of salt and homemade dressing!

This kung pao cauliflower recipe is roasted on one sheet pan and covered in a delicious sauce! Serve alongside jasmine rice for the best dinner ever.

Like this. This felt more like a cooler-weather recipe to me, but I couldn’t even WAIT to make it.

I saw a bon appetit recipe for kung pao cauliflower a few weeks ago and couldn’t get it out of my head. It seemed a little complicated for what I wanted at the time. So I made it all work on a sheet pan with a quick sauce. Tons of flavor. We are talking TONS.

And I just love that you could make the cauliflower as a side dish to something else, or you could make the cauliflower with rice and serve it like that. 

I opt for the latter. Eddie likes it as a side dish to something else.

Of course! 

This kung pao cauliflower recipe is roasted on one sheet pan and covered in a delicious sauce! Serve alongside jasmine rice for the best dinner ever.

When I first when to PF Changs as a kid (which was super exciting, I must add. It was a rare  occasion that we got chinese take-out food at home and it was always the same thing – my parents would order szechuan beef, lemon chicken, maybe some egg rolls, and that’s it. When PF Changs came along, I felt like my options were endless!), their kung pao shrimp and scallops were my go-to. 

It’s crazy, because I never had an affinity for spicy food but I reeeeeally loved that dish. And it’s stuck.

This kung pao cauliflower recipe is roasted on one sheet pan and covered in a delicious sauce! Serve alongside jasmine rice for the best dinner ever.

Kung pao cauliflower just SOUNDS like something I’d like to eat everyday. 

This is SO flavorful. It’s crunchy and crisp. But it’s sweet and saucy. But it’s kind of spicy. And then it’s even good cold. 

It’s HEAVEN.

This kung pao cauliflower recipe is roasted on one sheet pan and covered in a delicious sauce! Serve alongside jasmine rice for the best dinner ever.

Kung Pao Cauliflower

Kung Pao Cauliflower

This kung pao cauliflower recipe is roasted on one sheet pan and covered in a delicious sauce! Serve alongside jasmine rice for the best dinner ever.

  • 1 head of cauliflower, (cut into florets (about 3 to 4 cups))
  • olive oil spray
  • sea salt
  • freshly cracked black pepper
  • 2 tablespoons low-sodium soy sauce
  • 2 tablespoons hoisin sauce
  • 2 tablespoons sherry vinegar
  • 1 tablespoon toasted sesame oil
  • 2 teaspoons brown sugar
  • 2 teaspoons cornstarch
  • 2 garlic cloves, (minced)
  • 2 teaspoons freshly grated ginger
  • 1 handful of chiles de arbol
  • ⅓ cup peanuts, (chopped)
  • 4 green onions, (thinly sliced)
  • jasmine rice, (for serving)
  1. Preheat the oven to 425 degrees F.
  2. Place the cauliflower on a nonstick baking sheet and spritz it with olive oil. Sprinkle it with a pinch of salt freshly ground pepper. Roast the cauliflower for 15 minutes, until just slightly crisp.
  3. While the cauliflower is roasting, whisk together the soy sauce, hoisin, sherry vinegar, sesame oil, brown sugar, cornstarch, garlic and ginger. You may need to whisk a few times to get rid of any cornstarch lumps.
  4. After 15 minutes, pull the cauliflower out. Add the chiles and pour the sauce all over the cauliflower. Toss well to coat all the cauliflower. Return the pan to the oven. Roast for another 15 to 20 minutes, stirring and tossing the cauliflower ever 5 to 10 minutes. This will depend on your oven – you just don’t want the sauce to burn in the corners, but you want to give it enough time to thicken up between tossings.
  5. When the cauliflower is roasted and sauce, remove the pan from the oven. Cover it with the green onions and peanuts. Serve immediately as a side or on top of jasmine rice!

adapted from bon appetit

This kung pao cauliflower recipe is roasted on one sheet pan and covered in a delicious sauce! Serve alongside jasmine rice for the best dinner ever.

Really, just grab a fork and eat it right off the pan.

The post Kung Pao Cauliflower, or My New Favorite Dinner! appeared first on How Sweet Eats.

14 Aug 13:54

Grilled Smoke Shack Cheeseburger Pizza.

by Jessica

 This grilled cheeseburger pizza almost turned me into a crazy person. 

This grilled cheeseburger pizza is my take on the smoke shack burger! Cheddar, bacon, cherry peppers and special sauce make this impossible to resist.

That probably doesn’t surprise you, since I’m the person putting a burger on a pizza. But still.

I don’t know why, but I could NOT stop thinking about this combination. Couldn’t stop. Remember a few years ago when I made a copycat smoke shack burger?! For some reason, a few months ago the idea of putting it all on pizza, like, yes, the idea of immensely trashing up TWO recipes, was stuck in my head.

pizza dough

Every time we are near a Shake Shack, we have to stop. I’m team Shake Shack over everything else, even In and Out (which we don’t have) and Five Guys (which we do have). Shake Shack all the way. Eddie agrees and I won’t even begin to tell you his order. It’s basically a sin. 

The crazy thing is that I usually just want a classic cheeseburger when it comes to a place like that. However, every single time I’m there, the smoke shack burger screams my name from the menu. It’s the first burger I ever tasted there and I just can’t pass it up. It’s smoky and slightly spicy and just so.dang.good. Bacon, cherry peppers, cheddar and special sauce… now tell me that doesn’t sound good? 

So I had to pizza it. Yes, a verb. To pizza something. Welcome to my English lesson.

It’s not the most photogenic pizza, but it is heaven off the grill.

pizza on the grill

Let’s get to it! 

It comes as no surprise since this is a cheeseburger pizza that there is beef and cheese. Shocking! The specials twist on here is the delish sauce that you’ll want to eat with a spoon, the crispy crunch bacon and the cherry peppers. 

Oh, and that it’s grilled! The smoky flavor is fantastic. 

This grilled cheeseburger pizza is my take on the smoke shack burger! Cheddar, bacon, cherry peppers and special sauce make this impossible to resist.

When I first made a cheeseburger pizza (in a cast iron skillet!) I was really making it for Eddie. Figured he’d LOVE it. I never expected to love it as much as I did. And sometimes I get these crazy cheeseburger pizza cravings and want to make one – but they do take a little extra time. You have to brown the beef, make the sauce, grate the cheese, all that jazz.

It is so so so worth it though. This is a hearty, heavy pizza and you may only need one slice. Serve it with a big greens salad (spring greens, salt, pepper, lemon, olive oil) and it may just become your new favorite dinner. 

This grilled cheeseburger pizza is my take on the smoke shack burger! Cheddar, bacon, cherry peppers and special sauce make this impossible to resist.

Grilled Cheeseburger Pizza

Smoke Shack Cheeseburger Pizza

This grilled cheeseburger pizza is my take on the smoke shack burger! Cheddar, bacon, cherry peppers and special sauce make this impossible to resist.

crust

  • 1 1/8 cups warm water
  • 3 teaspoons active dry yeast
  • 1 tablespoon honey
  • 1 tablespoon olive oil
  • 3 cups all-purpose flour
  • 1 teaspoon salt
  • Flour and coarse cornmeal for dusting

topping

  • 4 slices bacon, (diced)
  • 1 shallot, (diced)
  • ½ pound lean ground beef
  • 1/2 cup mayo
  • 2 teaspoons diced dill pickles
  • 1 teaspoon smoked paprika
  • 1/2 teaspoon yellow mustard
  • 2 cups freshly grated white cheddar
  • 1/2 cup hot and sweet cherry peppers, (or pimentos, diced)
  • Fresh chopped chives for topping
  1. In a large bowl, combine water, yeast, honey and olive oil. Mix with a spoon, then let sit until foamy, about 10 minutes. Add in 2 1/2 cups flour and salt, stirring with a spoon until the dough comes together but is still sticky. Using your hands, form the dough into a ball and work in the additional 1/2 cup flour, kneading it on a floured surface for a few minutes. Rub the same bowl with olive oil then place the dough inside, turning to coat. Cover with a towel and place in a warm place to rise for about 1-1 1/2 hours.
  2. After the dough has risen, punch it down and place it back on the floured surface. Using a rolling pin or your hands, form it loosely into your desired shape. Place the towel back over the dough to rest.
  3. While the dough is resting, prepare the ingredients.
  4. Heat a skillet over medium heat and add the bacon. Cook until the bacon is crisp and the fat has rendered, about 6 to 8 minutes. Remove the bacon with a slotted spoon and place it on a paper towel-lined plate to drain any excess grease.
  5. Pour all but 1 teaspoon of the bacon fat from the skillet (save it or discard!) and keep the skillet over medium heat. Add the shallot with a pinch of salt and stir. Cook for 2 minutes so it softens. Add in the ground beef and break it apart with a wooden spoon. Cook until the beef is browned and crumbled. Turn off the heat and transfer the beef to another bowl.
  6. In a small bowl, whisk together the mayo, pickles, paprika and mustard until combined.
  7. Preheat your grill to the highest setting.
  8. Once the grill is hot, now is the time to be prepared! You have to move fast. Have all of your ingredients near your pizza peel and dough.
  9. Generously cover the pizza peel with flour and coarse grind cornmeal. This will help prevent the dough from sticking.
  10. Moving quickly, transfer your pizza dough to the pizza peel, quickly rolling it a bit more if needed but making sure the entire bottom is floured/cornmeal very well. Brush or spray the dough with olive oil. Spoon the sauce onto the dough and spread it around. Sprinkle on half of the cheese then add on the ground beef mixture and the cherry peppers. Top with with the remaining cheese and the cooked bacon.
  11. Quickly and gently use a spatula or additional pizza peel to slice your pizza directly on to the grill grates. Close the lid and cook until the pizza dough is bubbly and golden, anywhere from 5 to 8 minutes – but this will depend on the thickness of your crust. Just be sure to continue to check it. It will be finished when the edges are golden and puffed up!
  12. Once the pizza is finished, slide the peel under it and transfer it to a cutting board. Cover it with chives and slice it to serve. Enjoy!

This grilled cheeseburger pizza is my take on the smoke shack burger! Cheddar, bacon, cherry peppers and special sauce make this impossible to resist.

Definitely all the heart eyes.

The post Grilled Smoke Shack Cheeseburger Pizza. appeared first on How Sweet Eats.

14 Aug 13:53

Life-Changing Summer Tomato Pie with Cheddar Herb Crust.

by Jessica

This summer tomato pie is basically changing my life.

This summer tomato pie is the best dinner ever! Cheddar herb crust, ripe, juicy tomatoes and a cheesy, crunchy layer on top. It's irresistible.

Hence the title!

And I’m here to tell you that I’ve been involved in another battle with pie crust and I surely didn’t win, but luckily we can judge this by taste. And then we win everything. This is like a fresh summer tomato pizza with a more flavorful crust and a creamy, cheesy topping.

It’s a real winner.

cheddar herb pie crust

Much like this green bean salad, Lacy has been making a tomato pie for a million years. Or, eh, since 2010. Feels like a million years though!

And unlike the green bean salad, she had actually told me about the tomato pie year after year and tried to convince me to make it.

I don’t know why I wouldn’t get on board. 

Sometimes I’m like that with recipes. Something that I wasn’t interested in four years ago, something that didn’t have much appeal for me, ends becoming ALL I can think about. And it’s not like I hadn’t ever heard of a tomato pie, it just didn’t sound incredible to me. Until now.

Yes, file me under the worst. 

vine ripe tomatoes

Here’s how I started my own tomato pie. There had to be a twist of course, a little bit of trashing up.

I did a sharp cheddar herb crust. Lots of sharp cheddar, basil, oregano, chives, rosemary. Oh and some garlic powder for fun! 

This summer tomato pie is the best dinner ever! Cheddar herb crust, ripe, juicy tomatoes and a cheesy, crunchy layer on top. It's irresistible.

Layers of sliced tomatoes go on next – that’s nothing life-changing on its own. Then a mixture of more sharp cheddar, a little fontina, parmesan (triple cheese, what what!), mayo, herbs and breadcrumbs. Baked until hot and melty. 

YES.

As a note, there is a lot of mayo in this recipe. I was not a huge mayo fan until I fell in love with it via summer BLTs. I know some of you will be turned off because you hate mayo too. Unfortunately there isn’t a great replacement here. Even doing half yogurt will yield a watery result in the pie. The good news is that there is so much cheese in the top layer, some mayo-haters may not even know it’s mayo!

The bad news is that you can’t really swap it out for anything (I use avocado mayo, btw)… but maybe you could just top it with tons of cheese.

This summer tomato pie is the best dinner ever! Cheddar herb crust, ripe, juicy tomatoes and a cheesy, crunchy layer on top. It's irresistible.

This is RIDICULOUS. There is so much flavor. More flavor than I ever expected. The filling is reminiscent of white pizza and it’s such a great dinner idea. 

Two people who I was unsure would enjoy it – my mom and Eddie – both loved it. Eddie actually ate an embarrassingly large triangle of the pie for dinner accidentally on purpose. I had made something else for dinner but set this out too and he couldn’t stop eating it. 

This summer tomato pie is the best dinner ever! Cheddar herb crust, ripe, juicy tomatoes and a cheesy, crunchy layer on top. It's irresistible.

This pie is incredible when you serve it with a greens salad. It serves a bunch because it’s a heavy (oh-so cheesy!) dish. It’s very rich and indulgent and a little slice goes a long way, trust me. Eat your veggies with it, pour a glass of chilled wine and ENJOY the tomato bounty!

This summer tomato pie is the best dinner ever! Cheddar herb crust, ripe, juicy tomatoes and a cheesy, crunchy layer on top. It's irresistible.

Summer Tomato Pie

Tomato Pie with a Cheddar Herb Crust

This summer tomato pie is the best dinner ever! Cheddar herb crust, ripe, juicy tomatoes and a cheesy, crunchy layer on top. It’s irresistible.

cheddar herb crust

  • 2 cups sifted all-purpose flour
  • 1 tablespoon sugar
  • 1 teaspoon salt
  • 1 teaspoon garlic powder
  • 1 teaspoon dried basil
  • ½ teaspoon dried oregano
  • ½ teaspoon dried chives
  • ¼ teaspoon dried rosemary
  • 1 large egg lightly beaten
  • 1/2 teaspoon white vinegar
  • 1/4 cup ice cold water
  • 10 tablespoons cold unsalted butter, (cut into pieces)
  • ⅔ cup freshly grated sharp cheddar cheese

filling

  • 4 to 5 large tomatoes, (cut into ½ inch slices)
  • Pinch of salt
  • 1 teaspoon sugar
  • freshly ground black pepper
  • 1 cup mayonnaise
  • 1 garlic clove, (minced)
  • ½ cup freshly grated sharp cheddar cheese
  • ½ cup freshly grated fontina cheese
  • ¼ cup freshly grated parmesan cheese
  • ½ cup bread crumbs, (panko or fine crumbs both work!)
  • 2 tablespoons chopped chives

cheddar herb crust

  1. Add the flour, sugar and salt to a food processor and pulse just until combined. Add in the garlic powder and herbs and pulse again. In a small bowl, whisk together the egg, vinegar and water. Add the cold butter pieces and cheese into the food processor and pulse until small coarse crumbs remain. Sprinkle the water/egg mixture over the flour and pulse again until the dough comes together.
  2. Remove the dough with your hands and wrap it in plastic wrap. Refrigerate the dough for 30 minutes.
  3. After 30 minutes, preheat the oven to 400 degrees F.
  4. Roll the pie crust out into a 12-inch circle (if you’re using a 9-inch pie plate). Fold it in half to pick it up and gently place it in the plate, unfolding as you go and trimming any excess off of the edges – you can also use a fork (or another decorative idea!) to press the edges down. I like to fold the edges over slightly and then use my finger and thumb to make a ripple in the crust.
  5. Cover the crust with parchment paper and fill it with pie weights or dried beans. Bake the crust for 15 minutes, just until it’s lightly baked and barely golden. Remove it from the oven and let it cool slightly.

filling

  1. Slice the tomatoes and place them on a towel. Sprinkle them with salt and cover them with another towel (or paper towefor 15 minutes. This will help remove some of the liquid so you don’t have a super watery pie.
  2. Layer the tomato slices in the pie crust – you will most likely have 2 or 3 layers. I wouldn’t do more than 3! Sprinkle the tomatoes with the sugar and black pepper.
  3. In a bowl, stir together the mayo, garlic and 3 cheeses. Add a sprinkle of salt and pepper and the chives. Stir to combine. Transfer the mayo layer over the tomatoes – spread it in a single layer. Top the layer with bread crumbs.
  4. Bake the pie for 25 to 30 minutes, or until it’s golden on top. Let it sit for at least 20 minutes before serving. This is delicious served hot or cold! Keep leftovers in the fridge once they have cooled to room temp.

Very very into all the savory pies now.

The post Life-Changing Summer Tomato Pie with Cheddar Herb Crust. appeared first on How Sweet Eats.

08 Aug 17:27

Blueberry Ricotta Cake with Lavender Glaze.

by Jessica

Blueberry ricotta cake is on tap for your weekend!

This lovely blueberry ricotta cake is covered in a lavender glaze and the perfect recipe for blueberry season! It's rich and light and super flavorful.

Just LOOK at that glaze!

BRB, going to eat a huge slice of this right now.

blueberry ricotta cake before baking

I always get so excited to bake a weekend treat come Thursday afternoon or Friday morning. Something to have to snack on all weekend or, let’s be real – eat for breakfast. 

My mom is the queen of cake for breakfast. This is one of those treats that you can bake and snack on or share first thing in the morning.

It’s incredible with a cup of coffee – hot or iced! 

culinary lavender

And the best part about it? It’s blanketed in that incredible lavender glaze. 

lavender glaze

The blueberry lavender combo is one I love so much. Remember when I made this blueberry lavender chia jam? It’s quick and easy and incredible. The florals add a little bit of interest to the blueberries and mixed with the sugar, the combo is so delicious!

This lovely blueberry ricotta cake is covered in a lavender glaze and the perfect recipe for blueberry season! It's rich and light and super flavorful.

You know I’m crazy about the lavender glaze on top of banana bread too. I figured it could only be better on a blueberry loaf! Berries + lavender is a match made in heaven. 

And it’s just so gorgeous.

For the glaze, I used this lavender extract again. You don’t HAVE to use the extract – you can definitely use dried culinary lavender! That is what I’ve done for years and once I found the lavender extract, I realized it was a little easier than the dried flowers. 

This lovely blueberry ricotta cake is covered in a lavender glaze and the perfect recipe for blueberry season! It's rich and light and super flavorful.

If you want to use the dried culinary lavender instead, I suggest infusing the cream/milk with the flowers and letting it cool. Then straining it for an amazing lavender flavor. You can use it in hot coffee too, FYI. 

This lovely blueberry ricotta cake is covered in a lavender glaze and the perfect recipe for blueberry season! It's rich and light and super flavorful.

The ricotta cake is light but dense – sort of like a pound cake. You could use another fruit if you wish, like raspberries or blackberries. Throw it on the grill and serve it with extra blueberries. You can toast it too. 

This lovely blueberry ricotta cake is covered in a lavender glaze and the perfect recipe for blueberry season! It's rich and light and super flavorful.

Isn’t that the best sight ever?!

This lovely blueberry ricotta cake is covered in a lavender glaze and the perfect recipe for blueberry season! It's rich and light and super flavorful.

Blueberry Ricotta Cake with Lavender Glaze

Blueberry Ricotta Cake

This lovely blueberry ricotta cake is covered in a lavender glaze and the perfect recipe for blueberry season! It’s rich and light and super flavorful.

  • 1 ½ cups all-purpose flour
  • 2 teaspoons baking powder
  • ½ teaspoon salt
  • 5 tablespoons unsalted butter, (softened)
  • ¾ cup sugar
  • 3 large eggs
  • ¾ cup ricotta cheese
  • 1 tablespoon lemon juice
  • 2 teaspoons vanilla extract
  • 1 ½ cups fresh blueberries
  • 1 tablespoon all-purpose flour

lavender glaze

  • 1 1/4 cups of powdered sugar
  • ½ teaspoon vanilla extract
  • ¼ teaspoon lavender extract
  • 2 tablespoons heavy cream
  • 2 1/2 tablespoons milk
  • a drop of light pink or purple food coloring
  • optional: culinary lavender flowers
  1. Preheat the oven to 350 degrees Spray a 9×5 inch loaf pan with nonstick spray. In a bowl, whisk together the flour, baking powder and salt.
  2. In the bowl of an electric mixer, beat the butter and sugar until light and fluffy, about 5 minutes. Beat in the eggs 1 at a time. Beat in the ricotta cheese, lemon juice and vanilla extract until combined.
  3. With the mixer on low speed, beat in the dry ingredients until they are just combined. Do not overmix!
  4. Toss the blueberries with the 1 tablespoon of flour. Add the blueberries to the batter and use a spatula to fold them in.
  5. Spread the batter in the loaf pan. Bake the cake for 55 to 60 minutes, or until a tested inserted in the center comes out clean. Remove the cake from the oven and let it cool for 20 to 30 minutes before inverting it onto a dish, cooling rack or parchment paper. Let it cool completely before glazing.

lavender glaze

  1. To make the lavender glaze, whisk all ingredients together until smooth. If it seems to thick, add in more milk 1 teaspoon at a time. If desired, you can add a drop of food coloring to make it pinkish-purple!
  2. Once the glaze is smooth, drizzle it over the cake. Let it sit until it firms up before slicing.
  3. Optional: sprinkle a teaspoon of culinary lavender over top of the glaze.

This lovely blueberry ricotta cake is covered in a lavender glaze and the perfect recipe for blueberry season! It's rich and light and super flavorful.

I’ll take a cake full of antioxidants any day.

The post Blueberry Ricotta Cake with Lavender Glaze. appeared first on How Sweet Eats.

08 Aug 01:25

Slow Roasted Tomato Basil Pasta.

by Jessica

I should say: high maintenance tomato basil pasta.

This tomato basil pasta is a labor of love! Made with slow roasted tomatoes, basil oil and tons of parmesan, it's ridiculously full of flavor.

Because that is definitely what this is.

It’s easily the BEST tomato basil pasta I’ve ever had, but yes… it’s high maintenance.

Technically, it’s going to take you two whole hours to make. Yes, two! It’s not a huge deal because those two hours are mostly hands off. 

But it’s dreamy. It’s a treat. A dinner treat!

homemade basil oil

Instead of pasta and chopped or burst tomatoes, I do basil oil and slow roasted tomatoes. 

YES.

Major flavor players.

And tons of freshly grated parm, of course.

spaghetti tossed in basil oil

However!

Let me tell you that this recipe works overtime. It does double duty, maybe even more.

This tomato basil pasta is a labor of love! Made with slow roasted tomatoes, basil oil and tons of parmesan, it's ridiculously full of flavor.

First, I’m still mid-moment with slow roasted tomatoes because they are so good. You can make the tomatoes ahead of time – or make them for another recipe (like my farro!) and save extras for this pasta. Or just make a huge batch on a Sunday to keep you going all week.

Even though they do take two hours, you can make them while you do laundry, schedule your meals for the week or watch a Sex and The City marathon and whimper that the show is 20 years old. (I mean, HOW?!)

This tomato basil pasta is a labor of love! Made with slow roasted tomatoes, basil oil and tons of parmesan, it's ridiculously full of flavor.

You can also obviously make the basil oil ahead of time. It’s pretty easy to do, makes a bunch and is incredible on salads or garlic bread too.

The shade is such a gorgeous, vibrant green. It seriously tastes wonderful drizzled on tomatoes or zucchini. It’s a delicious add in for a dressing or marinade. Basically, you will love it!

This tomato basil pasta is a labor of love! Made with slow roasted tomatoes, basil oil and tons of parmesan, it's ridiculously full of flavor.

We should probably discuss the pasta itself. Cook some whole wheat spaghetti or bucatini or fettuccine, whatever your noodle of choice is. You’re going to toss the hot pasta with a bit of basil oil. It’s so pretty and actually, more striking to the eye than pesto because it’s not chunky. So it will turn your noodles a lovely shade of green.

That means HEALTH FOOD right?

Toss some cheese in there while you’re at it so it gets all melty and wonderful. I like to throw in minced garlic too. The warm noodles tend to take away some of the garlic bite, but this is a personal choice. You gotta love the garlic. 

Next, you add in the slow roasted tomatoes. A few more herbs, like torn fresh basil. Lots of extra parmesan and just keep tossing.

If you think about it, the pasta is really easy and doesn’t consist of that many ingredients! Just basil oil, tomatoes, cheese and herbs. But when we actually make all the ingredients, it’s a labor of love and one that truly tastes delicious. 

Very very very into it.

This tomato basil pasta is a labor of love! Made with slow roasted tomatoes, basil oil and tons of parmesan, it's ridiculously full of flavor.

Tomato Basil Pasta

Slow Roasted Tomato Basil Pasta

This tomato basil pasta is a labor of love! Made with slow roasted tomatoes, basil oil and tons of parmesan, it’s ridiculously full of flavor.

slow roasted tomatoes

  • 2 pints cherry or grape tomatoes, (halved)
  • 1 tablespoon olive oil
  • 1/2 tablespoon sugar
  • 1 garlic clove, (minced)
  • 1/2 teaspoon salt
  • 1/2 teaspoon pepper
  • 1/2 teaspoon dried thyme

basil oil

  • 2 cups tightly packed sweet basil leaves
  • 1 cup olive oil
  • ½ teaspoon salt
  • Freshly ground black pepper

pasta

  • 1 pound whole wheat spaghetti noodles
  • 3 to 4 tablespoons basil oil, (or more if you wish!)
  • 2 garlic cloves, (minced (optional))
  • ½ cup freshly grated parmesan cheese, (plus more for sprinkling)
  • 2 pints slow roasted tomatoes
  • freshly shaved parmesan cheese, (for garnish)
  • a few fresh basil leaves, (for topping)

slow roasted tomatoes

  1. Preheat the oven to 300 degrees Line a baking sheet with parchment paper.
  2. Place the cherry tomatoes on the sheet and drizzle with olive oil. Sprinkle with garlic, sugar, salt, thyme and toss well. Roast for 1.5 to 2 hours, tossing every 30 minutes, until the tomatoes are super caramely and shriveled and sweet.
  3. P.These keep great in a sealed container in the fridge for a few days if you have extra!

basil oil

  1. Bring a pot of water to a boil to blanch the basil. Prepare a bowl of ice water next to it. Once boiling, add the basil to the pot and cook for 10 seconds. Remove it and immedaitely place it in the ice bath. Leave it in there for a few minutes to make sure it is cold, then remove it and squeeze excess liquid from the leaves. Chop the basil into pieces
  2. Place the basil in a high powered blender or food processor. Add the olive oil and salt and puree until the oil is smooth and green. It may be frothy, so let the oil sit for 30 minutes. After 30 minutes, strain it through a fine mesh sieve or cheesecloth to remove the basil bits. Ues a spoon to push any oil through the sieve.
  3. At this point you can use the oil right away or store it in the fridge for a week!

pasta

  1. Bring a pot of salted water to a boil and cook the pasta according to the directions. Once it’s finished, drain the water and place the pasta in a large bowl. Toss immediately with 3 to 4 tablespoons of the basil oil (more if you wish!) and the garlic. Toss in the parmesan cheese.
  2. Stir in the tomatoes (and any extra oil/juice that may be on the pan). Taste and season with salt and freshly ground black pepper if you need it. Toss in some extra cheese and basil leaves. Serve immediately!

basil oil from fine cooking

Keeping the whole bowl to myself, thank you very much.

The post Slow Roasted Tomato Basil Pasta. appeared first on How Sweet Eats.

24 Jul 20:25

Grilled Garlic Herb Butter Pizza with Heirloom Tomatoes.

by Jessica

Heirloom tomato pizza is theeee definition of summer!

This heirloom tomato pizza starts with a grilled garlic herb butter crust! Melty herb butter and sliced fresh tomatoes top it off for a delicious bite!

Vibrant produce, grilled dough, every herb from your (hopefully overflowing garden) smashed into butter with salt and slathered on the crust… all I need is a glass of sauvignon blanc and I’ll be happy.

Doesn’t a sight like this make you so happy? I must frame it and hang it on the wall to remind me of the looong February days.

heirloom tomatoes

In the last few weeks I’ve had a Sunday dinner revelation.

See, I’ve always WANTED to be the Sunday dinner type. I want to be the Sunday dinner house. The place where everyone gathers for Sunday dinner before the week starts. The house that serves a hearty, filling meal on Sundays that warms your SOUL before the start of a week.

I’ve always wanted that! You may see it on my instagram too.

Maybe it’s because I’ve always suffered from the Sunday scaries, and I mean always. Probably since I was in kindergarten or first grade. And even though I’m obsessed with my work and kids and life in general, I still get the Sunday blues. You’d think that having a Sunday dinner would solve all that!

garlic herb butter

What I’ve learned though, is that at this stage of life, with little kids and work, Sunday dinner at, well, dinnertime? Just doesn’t work for me. I end up making a huge mess that has to be cleaned up. The kids need to get baths, a bedtime routine and then I need a make a completely clean kitchen happen (like complete – no clutter!) because early Monday morning starts a big work day for me. Eddie and I end up scrambling to get everything done without relaxing at all.

So I’ve started making Sunday lunch instead!

And this heirloom tomato pizza is riiiiight at the top of the menu.

sliced heirloom tomatoes

Our Sunday lunches consist of grilled corn, tons of tomatoes, maybe grilled pizza, maybe grilled vegetables. It’s so hot that I have zero desire to turn on the oven, unless I’m making something like chocolate chip cookies because one will do anything for good chocolate chip cookies.

grilled pizza with garlic herb butter

I love the idea of the Sunday lunch. Sometimes it does turn into dinner. Sometimes we have the leftovers for dinner. And sometimes the meal is so hearty that we don’t eat for the rest of the day! I love it. It’s stress free!

This heirloom tomato pizza starts with a grilled garlic herb butter crust! Melty herb butter and sliced fresh tomatoes top it off for a delicious bite!

Every summer when heirloom tomatoes hit their peak, I try to come up with a delicious way to serve them that is similar to one of my favorite meals: grilled bread, sliced heirlooms and burrata cheese.

This is the 2019 version! It’s warm and buttery. A little smoky. Juicy and savory.

It can be an appetizer or a summer dinner entree. It can be your salad because, well, TOMATOES.

There is green on it too. Lots of green.

Get crazy and add some burrata! Because I said so.

This heirloom tomato pizza starts with a grilled garlic herb butter crust! Melty herb butter and sliced fresh tomatoes top it off for a delicious bite!

Heirloom Tomato Pizza

Grilled Garlic Herb Butter Pizza with Heirloom Tomatoes

This heirloom tomato pizza starts with a grilled garlic herb butter crust! Melty herb butter and sliced fresh tomatoes top it off for a delicious bite!

crust

  • 1 cups  warm water
  • 2 1/4  teaspoons  active dry yeast
  • 1  tablespoon  honey
  • 1  tablespoon  olive oil
  • 2 1/2  cups  all-purpose flour
  • 1 teaspoon garlic powder
  • 1  teaspoon  salt
  • 3 heirloom tomatoes, (thinly sliced)
  • pinch of flaked salt
  • sprinkling of fresh herbs

garlic herb butter

  • 6 tablespoons unsalted butter, (softened)
  • 2 garlic cloves, (minced)
  • 2 tablespoons chopped basil
  • 2 tablespoons chopped parsley
  • 1 tablespoon chopped oregano
  • 1 tablespoon chopped chives
  • 1 teaspoon chopped dill
  • 1 teaspoon chopped rosemary
  • ½ teaspoon salt

crust

  1. In a large bowl, combine water, yeast, honey and olive oil. Mix with a spoon, then let sit until foamy, about 10 minutes. Add in 2 1/2 cups flour, garlic powder and salt, stirring with a spoon until the dough comes together but is still sticky. Using your hands, form the dough into a ball and work in the additional 1/2 cup flour, kneading it on a floured surface for a few minutes. Rub the same bowl with olive oil then place the dough inside, turning to coat. Cover with a towel and place in a warm place to rise for about 1 to 1 1/2 hours.
  2. After the dough has risen, punch it down and place it back on the floured surface. Using a rolling pin or your hands, form it loosely into your desired shape Place the towel back over the dough to rest.
  3. While the dough is resting, preheat your grill to the highest setting. At this point, you can make the butter and slice the tomatoes.
  4. Roll the dough out into a circle (or whatever shape! I never worry about a perfect circle on the grill.). Generously flour your pizza peel and place the dough on the peel, then immediately take it to the grill. Brush or spray the top of the dough with olive oil.
  5. Quickly and gently use a spatula or additional pizza peel to slide your pizza directly on to the grill grates. I like to turn off the heat directly under the dough to help the crust from burning. Close the lid and cook until the pizza dough is bubbly and golden on one side, anywhere from 3 to 5 minutes. Flip the dough and grill the other side for 2 to 3 minutes more.
  6. Slide the dough off the grill with a pizza peel. Spread the garlic herb butter on top of the crust so it melts immediately. Top with the sliced tomatoes right after, so they get a bit warm too. Sprinkle the tomatoes with flaked salt and additional herbs. Slice and serve!

garlic herb butter

  1. In a large bowl, stir together the softened butter, garlic, herbs and salt. Stir and combine and mash until everything is mixed. You can store this in the fridge and use it on garlic bread too!

This heirloom tomato pizza starts with a grilled garlic herb butter crust! Melty herb butter and sliced fresh tomatoes top it off for a delicious bite!

Happy happy joy joy.

The post Grilled Garlic Herb Butter Pizza with Heirloom Tomatoes. appeared first on How Sweet Eats.

11 Jul 03:31

Hot Honey Pretzel Chicken Fingers with House Sauce.

by Jessica

We’re doing it! Major flavor game changer here with pretzel crusted chicken fingers!

These pretzel crusted chicken fingers are baked, crunchy and ridiculously flavorful. Drizzle with hot honey and dip in house sauce. Yum!

I’ve basically never loved chicken fingers more in my life than I do right now.

crushed pretzels

If you’ve been around for a while then you are aware of the ridiculous arsenal of chicken finger recipes I have here on the blog. To this day, they remain one of Eddie’s favorite foods – they are his ultimate comfort food. Sometimes he even orders a salad with chicken fingers on it!

pretzel crusted chicken fingers

My go-to method for making the chicken is much like the way I showed you how to do this parmesan chicken a few weeks ago. A wire rack is necessary because it helps keep the chicken crispy all the way around. If you don’t have one already, I suggest putting one on your wish list because I use it all the time.

The other necessary ingredient is olive oil spray or some form of cooking spray. Back in the day when I started making chicken fingers like this, the only available option was Pam cooking spray! I would literally spray them with Pam. These days, you can find avocado oil spray (our fave), olive oil spray, coconut oil spray and so on. Spraying the crusted tender and using the rack when baking practically makes the tenders taste “fried.” Or least have that “fried” texture.

It’s imperative for my perfect chicken finger recipe.

These pretzel crusted chicken fingers are baked, crunchy and ridiculously flavorful. Drizzle with hot honey and dip in house sauce. Yum!

Now… on to the flavor! First of all, crushed pretzels are what we use for the breading here and let me just tell you… it’s incredible. Max and Emilia LOVE pretzels. In fact, pretzels might be their favorite snack of all time. So I knew that making pretzel-crusted chicken would be a huge, gigantic, enormous hit.

I was right!

To make these a little more grown up-friendly, I added in the hot honey drizzle. We adore hot honey in this house too. I’ve used it on pizza, on pineapple wedges, sweet potatoes and even salmon. It elevates the simplest, most boring meal and makes it exciting.

For instance, I don’t necessarily want plain chicken fingers. But I definitely always want hot honey chicken fingers!

These pretzel crusted chicken fingers are baked, crunchy and ridiculously flavorful. Drizzle with hot honey and dip in house sauce. Yum!

The honey is not overly spicy either. Well, technically I guess that depends on your peppers, but I remove the seeds before drizzling and it’s perfect. And I don’t love spicy food. To me, adding hot sauce on everything just… ruins it for me. Dishes that are ridiculously spicy aren’t enjoyable for me; it’s almost like they paralyze my taste buds and I can no longer taste the flavor of the food.

So when I say the hot honey is worth it… it’s worth it. However, it’s not the only sauce here.

My house sauce is from The Pretty Dish and it’s to die for. Creamy, a little tangy and the perfect dip for pretty much everything. Like every food under the sun.

These pretzel crusted chicken fingers are baked, crunchy and ridiculously flavorful. Drizzle with hot honey and dip in house sauce. Yum!

Now go RUN and make these delicious crunchy bites!

These pretzel crusted chicken fingers are baked, crunchy and ridiculously flavorful. Drizzle with hot honey and dip in house sauce. Yum!

Pretzel Crusted Chicken Fingers with Hot Honey

Hot Honey Pretzel Chicken Fingers

These pretzel crusted chicken fingers are baked, crunchy and ridiculously flavorful. Drizzle with hot honey and dip in house sauce. Yum!

pretzel chicken

  • 1 ½ pounds boneless (skinless chicken tenders)
  • ¼ teaspoon salt
  • ¼ teaspoon pepper
  • 2 cups mini pretzel twists (crushed)
  • 1 teaspoon garlic powder
  • 2 eggs (lightly beaten)

hot honey

  • 1/2  cup  honey
  • 1   jalapeño pepper thinly sliced

How Sweet Eats house sauce

  • ½  cup  mayonnaise
  • 2  tablespoons  dijon mustard
  • 1  tablespoon  yellow mustard
  • 1  tablespoon  honey
  • 1  tablespoon  your favorite BBQ sauce

pretzel chicken

  1. Preheat the oven to 450 degrees Line a baking sheet with foil and place a wire rack on top. Spray the rack with nonstick spray.
  2. Season the chicken tendres with the salt and pepper. Place the pretzels in a food processor and blend until mostly fine crumbs remain. Place the pretzels in a bowl. Stir in the garlic powder.
  3. In another bowl, lightly beat the eggs.
  4. Take each chicken tender and coat it in the beaten egg. Dredge it through the pretzel crumbs, pressing gently so the crumbs adhere. Place the tender on the rack and repeat with remaining chicken. Once all the chicken is finished, spray it with avocado or olive oil spray.
  5. Bake the chicken for 12 minutes. Flip it gently and spray the other side with the oil spray. Bake for another 10 to 12 minutes.
  6. Let cool slightly before serving with the house sauce and hot honey.

hot honey

  1. Heat the honey and the jalapeños in a saucepan over medium-low heat. Let the honey come to a light simmer then turn off the honey. Let it sit for 5 minutes. Strain the honey through a fine mesh sieve to remove the peppers and the seeds.

How Sweet Eats house sauce

  1. Whisk all ingredients together until creamy and smooth and combined. This stores great in the fridge for a few days.

These pretzel crusted chicken fingers are baked, crunchy and ridiculously flavorful. Drizzle with hot honey and dip in house sauce. Yum!

I want to float on a pretzel raft in that house sauce.

The post Hot Honey Pretzel Chicken Fingers with House Sauce. appeared first on How Sweet Eats.

04 Jul 02:58

Basil Butter Crostini with Burrata, Grilled Peach and Pancetta.

by Jessica

Let’s add peach burrata crostini to this segment of things I love to eat on toast!

This peach burrata crostini is the best summer appetizer! it starts with grilled basil butter toasts that are topped with burrata, peach and pancetta!

Just whyyyy is toast so perfect? Because it truly is.

It’s the crunch factor, right?

baguette with basil butter

I’ve asked you all a million times how you like your toast. I like it super toasty. To the point of almost being burnt. Eddie likes warm bread. AKA, one round in the toaster on the lowest setting, no golden color and very little (if any) crunch.

Who wins?

Don’t let me down here.

grilled peaches and basil

Happy July 3rd! I love this week. It’s so fun, and we all know the days leading up to a holiday are always as exciting AS the day itself. I might just be the anticipation queen.

But now… peaches!

Raise your hand if you are freaking out that it’s peach season! Or, almost peach season. They are just getting good here and I’ll spare you my usual chat about how I’m lucky to get one or two good peaches a year, etc. It’s been 10 years after all!

But my way to solve the issue with peaches? Cook them or bake them or grill them. You should definitely make a grilled peach crostini too.

This peach burrata crostini is the best summer appetizer! it starts with grilled basil butter toasts that are topped with burrata, peach and pancetta!

It’s been a while since I made a high-maintenance crostini. It was time! This baby here? We’re spreading a quick compound butter on a baguette, grilling it, grilling peaches, pulling burrata apart, frying pancetta and shoving it ALL on toast. As a result, it’s also pretty.

Now that is toast to me.

Good gosh. The day we photographed there I was losing my mind because they were SO good. Lots of crunch, some sweetness, the creamy burrata, the salty pancetta. Serious dreamboat.

This peach burrata crostini is the best summer appetizer! it starts with grilled basil butter toasts that are topped with burrata, peach and pancetta!

My go-to summer crostini with grilled corn and whipped goat cheese has been a staple for years (people just die over it!), but these may be taking their spot. Or maybe I can make both for the 4th of July and do a little savory and a little sweet?

I don’t know! Just give me all the toast.

This peach burrata crostini is the best summer appetizer! it starts with grilled basil butter toasts that are topped with burrata, peach and pancetta!

Peach Burrata Crostini

Grilled Peach Crostini

This peach burrata crostini is the best summer appetizer! it starts with grilled basil butter toasts that are topped with burrata, peach and pancetta!

  • 3 ounces pancetta, (diced)
  • 1/3 cup unsalted butter, (softened)
  • 3 tablespoons chopped fresh basil
  • 1 garlic clove, (minced)
  • pinch of salt
  • 1 large baguette, (sliced into rounds)
  • 3 peaches, (cut in half, pits removed)
  • 1 ball burrata cheese
  • fresh basil, (for garnish)
  1. Preheat your grill to the highest setting.
  2. Heat a skillet over medium-low heat and add the diced pancetta. Cook, stirring often, until the pancetta is crisp and the fat has rendered. Remove the pancetta with a slotted spoon and place it on a paper towel to drain any excess grease.
  3. In a bowl, stir together the butter, fresh basil, garlic and salt until combined. Slice the baguette into rounds and spread the butter on one side (or both!! If you wish!). Place the slices on a baking sheet to easily take them out to the grill.
  4. Prepare the peaches for the grill! Slice them in half, remove the pits, spray them with olive oil and sprinkle on salt and pepper. Place them on a baking sheet too!
  5. Take everything out to the grill. Put the peaches on first, cut-side down, because they will need a few minutes – about 4 to 5 minutes. You can grill the uncut side for 1 to 2 minutes if you wish.
  6. While the peaches are on the grill, place the bread slices on the grill. They will only need 1 to 2 minutes on the grill, so you can start flipping them as soon as every slice gets on the grill!
  7. Transfer the grilled bread and peaches back to the baking sheet.
  8. Slice the peaches once they are cool enough to touch. To assemble the crostini, pull apart the burrata and place it on each slice of toast. Top with a grilled peach slice (or 2, there are no rules here!). Sprinkle on the pancetta. Garnish with fresh basil.
  9. Serve immediately.

This peach burrata crostini is the best summer appetizer! it starts with grilled basil butter toasts that are topped with burrata, peach and pancetta!

These are absurdly mouthwatering.

The post Basil Butter Crostini with Burrata, Grilled Peach and Pancetta. appeared first on How Sweet Eats.

27 Jun 20:20

Let’s Make a Pineapple Palm Tree Fruit Tray!

by Jessica

Today we’re making the cuuuuutest pineapple palm tree!

This is the cutest way to display fruit! A pineapple palm tree fruit tray will be the star of the show at your next summer BBQ or party!

It will be your 4th of July party trick. Ready?

Two years ago for the 4th of July, one of our family members made this pineapple palm tree and we were all DYING over it. I put it on Instagram and you guys were dying over it too! And I have wanted to recreate it ever since!

I can barely hammer a nail into the wall and I had no plans to attempt to stack pineapples with stakes. Sure, I can chop a lot of fruit, but could I really stack pineapples? Who knows. It was time to find out.

building a pineapple palm tree

The good news is that it is so much easier than it looks. We used garden stakes (from a hardware store, the skinny ones) and bamboo skewers (yes, like the ones you would use on the grill!) and these things stuck together just fine.

The key is to not stack them too high! Three pineapples is the perfect height. Two would be great as well. No need for four (and certainly not more!) unless you’re making an INSANE spread for a wedding or party of a few hundred people. You know? It will just look unbalanced.

You can stick any sort of palms or ferns (we got some at Costco) in the top to create the leaves. Whatever fruit you love all chopped up on the bottom.

building a pineapple palm tree

It’s just such a cute and fun way to display fruit for a party! No, I wouldn’t do it spur of the moment or for a small Sunday night dinner party, but it would be fantastic for your 4th of July cookout.

Yes yes yes! I love it oh-so much.

adding the ferns!

The only downside is that you can’t really assemble it beforehand. Well, I should tell you that I didn’t try to assemble it before hand, because everything I found online told me not to do so. Since the pineapple is a softer fruit, if you try to assemble it the night before, it won’t hold up.

But luckily, it doesn’t take that long to put together, as intimidating as it may seem.

I suggest chopping the fruit ahead of time and storing it in the fridge. Then, once your pineapple tree is assembled, just add the fruit!

EASY.

Promise it gets easier once you do it. You’ll love it!

This is the cutest way to display fruit! A pineapple palm tree fruit tray will be the star of the show at your next summer BBQ or party!

Some notes on the pineapple palm tree:

*Don’t worry if the pineapple tree is a little crooked! Real palm trees are crooked! It gives them more character. Ha.

*Some suggest coring the pineapple. I did not core the pineapple, because I thought it would be easier for it to stay together. It worked great for me, but it’s tricky to move once it’s set up.

*Have all the fruit washed and chopped for the bottom of the tree before assembling the pineapple tree.

*Decide where you want the tree to go and place it in the spot. Build it there so you don’t have to move it. Easy!

*This actually is transportable! Like I said above, a family member brought it to a party a few years ago. You can transport it in a large box or my preference would be to assemble most of it at the party. Just take the chopped fruit in glass containers.

rainbow fruit tray

How to Make a Pineapple Palm Tree Fruit Tray

This is the cutest way to display fruit! A pineapple palm tree fruit tray will be the star of the show at your next summer BBQ or party!

  • 3 whole pineapples ((try to find 1 with a flat bottom that stands well!))
  • assorted chopped fruit of your choice
  • bamboo skewers
  • thin garden stakes
  • ferns/greenery for the top
  1. Note: you can core the pineapples if you wish. This will make them less heavy and slightly more sturdy. You just want to make sure there is enough pineapple left to stick the stakes and skewers in so they hold together.
  2. Slice the tops off the pineapples. Take the one that stands the best (ha!) and place it on a cutting board. Stick 3 to 4 bamboo skewers around the edges, then stick the next pineapple on top, pressing it into the bamboo skewers.
  3. Stick another 3 to 4 bamboo skewers (or more if necessary! It depends on the size/weight of your pineapplein the second pineapple. Stick the third pineapple on top, then stick another 3 to 4 bamboo skewers straight down through.
  4. Take 1 or 2 garden steaks and gently press them straight down, starting at the top pineapple, into the next two pineapples. This may take another stake – you just want to make sure the pineapple is somewhat sturdy.
  5. At this point, place your pineapple on a large plate, tray or dish where you will be serving the fruit.
  6. Take one of the pineapple tops and press a bamboo skewers into the bottom, then set that on top of the pineapple tree. From there, take your ferns and greenery and stick them into the top pineapple (right into the fruito create your leaves. There is no “right” way to do it!
  7. Assemble the cut fruit around the bottom of the tree. Again, no right way to do it – just display it around, as much or as little as you’d like! It’s sort of like assembling a cheeseboard.
  8. ENJOY!

This is the cutest way to display fruit! A pineapple palm tree fruit tray will be the star of the show at your next summer BBQ or party!

This is how I want to eat the rainbow.

The post Let’s Make a Pineapple Palm Tree Fruit Tray! appeared first on How Sweet Eats.

20 Jun 01:16

Cheesy Cauliflower Rice Arancini.

by Jessica

I don’t even know how to profess my love for this cauliflower rice arancini.

This cheesy cauliflower rice arancini is every bit as delicious as traditional arancini, and so much lighter! Cheesy on the side, crunchy on the outside.

YES. You read that correctly!

Cauliflower.Rice.Arancini.

I can’t believe it’s a thing but it’s definitely a thing and certainly a thing that you should try for dinner tonight!

cauliflower rice arancini filling

We are full-on obsessed with arancini – and I’m so picky about it too. We get it at a local restaurant and you are probably sick of seeing it on my instagram stories. I love to make it at home but it’s definitely time consuming… and also usually requires a hot pot of oil.

Until now.

Oh my gosh. How do I even begin about this cauliflower arancini?

It is SO GOOD.

This recipe comes from my friend Gina’s new cookbook, the Skinnytaste Air Fryer Cookbook – and Gina also sent me her Skinnytaste air fryer to try out the recipes. And you know what? Now I want to shout from the rooftops my love for the air fryer.

rolling cauliflower arancini

If you’ve been following along for a while, then you might remember that this isn’t my first foray into the air fryer! I created some recipes for Crate and Barrel a few years ago when the air fryer first came on the scene. And while I liked the concept, I just couldn’t get over another appliance in my kitchen at the time. Especially when it felt like I could get the same results in my oven.

My oh my was I wrong.

Now, I’m crazy over it. If you’re a texture freak like I am, if you love crispy crunchy food but don’t want something deep fried, you will be in LOVE with the air fryer. The food comes out of it with so much of a crispy bite that you’d almost think it was fried.

I don’t store mine in the kitchen (yet?), but it is light enough to grab (sometimes even daily!) when I want to use it. It is so super user friendly.

This cheesy cauliflower rice arancini is every bit as delicious as traditional arancini, and so much lighter! Cheesy on the side, crunchy on the outside.

The Skinnytaste air fryer also has a HUGE basket, and that was the predicament with the first air fryer I used years ago. The basket was small – like way too small for even just Eddie and I to use it. We’d have to cook things in multiple batches, not just one or two.

This basket is HUGE. Depending on what you’re cooking, you might need to do two batches, but it has a very large capacity and that’s the key!

I honestly can’t believe how crispy and crunchy the food gets in the fryer.

This cheesy cauliflower rice arancini is every bit as delicious as traditional arancini, and so much lighter! Cheesy on the side, crunchy on the outside.

Let’s talk about the arancini though.

I always want the insides super cheesy and the outside super crunchy. Gina’s recipe is not like any other arancini I’ve had, but it is to die for. Cauliflower rice, Italian chicken sausage, and lots of cheese make for the most delicious bite here. These come together SO quickly, actually stick together with ease and get super crispy in the fryer.

The chicken sausage helps take the flavor over the top. But I think you could even skip it and do all cauliflower rice and cheese!

The flavor is insane. This is SO much more flavorful than I expected and it checks all the arancini boxes I want, with it being on the lighter side too.

And now that I’ve professed my undying love, I’m just going to let you have at it. Make this!!

This cheesy cauliflower rice arancini is every bit as delicious as traditional arancini, and so much lighter! Cheesy on the side, crunchy on the outside.

Cauliflower Rice Arancini

Cheesy Cauliflower Arancini

This cheesy cauliflower rice arancini is every bit as delicious as traditional arancini, and so much lighter! Cheesy on the side, crunchy on the outside.

  • 2 italian chicken sausage links, (any casing removed)
  • 4 ½ cups frozen cauliflower rice
  • ½ teaspoon salt
  • 1 ½ cups marinara sauce
  • 1 cup freshly grated mozzarella cheese
  • olive oil spray for spritzing
  • 2 large eggs
  • ½ cup seasoned bread crumbs
  • 2 tablespoons freshly grated parmesan cheese
  1. Heat a large skillet over medium high heat. Add the sausage and cook it, breaking it apart with a spoon until it’s in small crumbles. Cook for about 4 to 5 minutes.
  2. Stir in the cauliflower rice, salt, and ½ cup of the marinara sauce. Cook the mixture over medium heat, stirring often, until the cauliflower is tender, about 6 to 8 minutes. Remove the skillet from the heat and let it cool for 5 minutes, then stir in the mozzarella cheese. Let the mixture cool slightly until it’s easy to handle.
  3. Scoop out ¼ cup of the mixture and form it into a ball with your hands. Place the ball on a baking sheet. Repeat this with the remaining cauliflower mixture.
  4. Lightly beat the eggs in a small bowl. In another bowl, stir together the bread crumbs and grated parmesan. Take each ball and lightly dip it in the egg mixture, then roll it through the bread crumbs to coat it completely. Repeat with the remaining balls.
  5. Once all the arncini are made, preheat the air fryer to 400 degrees. Spray the arancini with the cooking spray all over – this really helps to crisp them up! Once the air fryer is heated, add the arancini in the basket (you may need to do 2 batches) and cook for 9 to 10 minutes, gently flipping the arancini half way through.

  6. Heat the remaining marinara sauce and serve the arancini with it immediately for dipping.

The cheese pulls are everything.

The post Cheesy Cauliflower Rice Arancini. appeared first on How Sweet Eats.

13 Jun 20:17

Grilled Steakhouse Pizza.

by Jessica

[This post is sponsored by The Home Depot! I am so so excited to be partnering with them through the rest of 2019 to share amazing grilling recipes with you, using the new Weber Genesis II E315 grill! You’re going to LOVE this grilled steakhouse pizza for Father’s Day.]

It’s no secret that pizza is one of my love languages.

This grilled steakhouse pizza has all the amazing smoky flavors of your favorite steakhouse. Grilled onions, mushrooms and creamy gorgonzola finish it off.

Making it AND eating it, of course.

I get a thrill from both and it’s easily one of my favorite dishes to serve those I love. Easily! I mean, who can resist a perfect crust with tons of bubbly cheese? Not I.

weber genesis II grill

And when it’s getting all cheesy and bubbly on the grill? Eeep! I can’t even contain my excitement.

Today, I’ve partnered with The Home Depot again to bring you the most delicious steakhouse pizza! I wanted to create something that Eddie would absolutely LOVE for Father’s Day, and this is it. I’ve been using the Weber Genesis II E315 grill that we are loving this year (so easy! So simple for me to use! Everything is seamless and it’s sleek and looks pretty!), and I’ve been grilling pizza like a mad woman. You’ve probably seen it on instagram. Maybe once a week already? And we’re barely in mid-June.

Things are about to get more pizza heavy over here.

pizza dough rising

While our usual grilled pizzas tend to be more of the pepperoni and margherita variety (because, let’s be real, it’s so simple and kid friendly and I don’t even have to think about a recipe), every now and then I love creating something fancy and high maintenance for our pizza. I mean, I even have a chapter partly dedicated to pizza in my first book, because pretty much EVERYTHING can be pizza-fied, right?

Right.

In this case, we’re going with steakhouse pizza. Think of super smoky, juicy filet topped high on your fluffy crust. Yep, I did it.

grilling onions and mushrooms

This steakhouse pizza is everything I want with my steak… and it’s NOT philly cheesesteak! That is probably one of Eddie’s favorite pizza flavors, but I wanted something a little… lighter?

Ha, I don’t think we can call this “lighter” per se, but I love the flavors on here and that they aren’t covered in cheese sauce. Instead, they are covered in crumbly gorgonzola and it’s melty and tangy and SO delicious.

how to grill pizza

Everything that goes ON the pizza can be made on the grill too. The steak, cooked however you like it, the mushroom caps, sliced and juicy, and the onions – grilled and filled with tons of flavor. Once everything is sliced and chopped and ready, it all goes back on the dough to be set on the grill!

We LIVE for grilled pizza in the summer. And I love to throw my dough directly on the grill, all toppings piled high. The key to this is moving quickly. Everything has to be ready, and once it’s ready, you have a maximum of two minutes to assemble the pizza so it doesn’t stick to the peel. And even with two minutes, it may stick a little so you have to be prepared.

You gotta move quick and slide it on to the hot grill like a pro, but I promise it is SO worth it. So so worth it.

This grilled steakhouse pizza has all the amazing smoky flavors of your favorite steakhouse. Grilled onions, mushrooms and creamy gorgonzola finish it off.

LOOK at that. Bubbly crust. Loads of flavor.

I can’t get enough!

This grilled steakhouse pizza has all the amazing smoky flavors of your favorite steakhouse. Grilled onions, mushrooms and creamy gorgonzola finish it off.

As crazy and wild as this pizza is – as loaded as it is – if you pair it with a crisp, chilled wine and serve it on a sunny patio, you have the most perfect dinner. It’s the loveliest bite!

Seriously, grilled steakhouse pizza forever.

This grilled steakhouse pizza has all the amazing smoky flavors of your favorite steakhouse. Grilled onions, mushrooms and creamy gorgonzola finish it off.

Grilled Steakhouse Pizza

Grilled Steakhouse Pizza

This grilled steakhouse pizza has all the amazing smoky flavors of your favorite steakhouse. Grilled onions, mushrooms and creamy gorgonzola finish it off.

crust

  • 1 1/8 cups warm water
  • 3 teaspoons active dry yeast
  • 1 tablespoon honey
  • 1 tablespoon olive oil
  • 3 cups all-purpose flour
  • 1 teaspoon salt
  • Flour and coarse cornmeal for dusting

pizza

  • 3 large portabella mushroom caps
  • 1 sweet onion, (thinly sliced)
  • 1 (4 to 5 ounce) filet mignon steak
  • Kosher salt, (for sprinkling)
  • Freshly cracked black pepper
  • Olive oil for brushing or olive oil spray
  • 2 garlic cloves, (minced)
  • 1 cup freshly grated provolone cheese
  • ½ cup freshly grated mozzarella cheese
  • ½ cup crumbled gorgonzola cheese
  • 1 cup arugula microgreens
  1. In a large bowl, combine water, yeast, honey and olive oil. Mix with a spoon, then let sit until foamy, about 10 minutes. Add in 2 1/2 cups flour and salt, stirring with a spoon until the dough comes together but is still sticky. Using your hands, form the dough into a ball and work in the additional 1/2 cup flour, kneading it on a floured surface for a few minutes. Rub the same bowl with olive oil then place the dough inside, turning to coat. Cover with a towel and place in a warm place to rise for about 1-1 1/2 hours.
  2. After the dough has risen, punch it down and place it back on the floured surface. Using a rolling pin or your hands, form it loosely into your desired shape Place the towel back over the dough to rest.
  3. While the dough is resting, preheat your grill to the highest setting. The best way to grill the onions is to use a grill basket or tray, so place that on the grill to preheat at the same time.
  4. Place the mushroom caps and onions on a baking sheet. Drizzle or spray them with olive oil – the mushrooms on both sides and the onions, tossing them gently. Season the onions with a pinch of salt and pepper. I like to wait to season the mushrooms until they have been grilled.
  5. Place the mushroom caps directly on the grill. Place the onions in the grill basket or tray. Close the grill and cook the mushrooms for 2 to 3 minutes per side. Toss the onions often, cooking them until they have charred and become slightly golden in color. Remove both and place them back on the baking sheet – the onions may take a few more minutes than the mushrooms. Once the onions have finished and are on the baking sheet, toss in the minced garlic. Sprinkle the mushrooms with salt and pepper.
  6. Sprinkle the filet with salt and pepper and stick it on the grill. Cook until it reaches your desired doneness – for this recipe, I like to do cook it to a medium doneness on the grill, because it will continue to cook a bit on the pizza. Cook the filet for about 3 minutes per side, then remove it from the grill and let it rest for 10 minutes. After 10 minutes, thinly slice the filet. Be sure that the grill remains over high heat. When it comes time to grill the pizza in a few minutes, you want the temperature to be around 450 to 500 degrees F.

  7. Now comes the time when you need to be prepared! Slice your mushrooms and onions and steak. Have your cheese grated and ready to go. Generously cover a pizza peel with flour and coarse grind cornmeal. This will help prevent the dough from sticking.
  8. Moving quickly, transfer your pizza dough to the pizza peel, quickly rolling it a bit more if needed but making sure the entire bottom is floured/cornmeal very well. Brush or spray the dough with olive oil. Add on the provolone cheese and mozzarella cheese, Layer on the mushrooms, onions and sliced steak. Sprinkle on the gorgonzola.
  9. Quickly and gently use a spatula or additional pizza peel to slice your pizza directly on to the grill grates. Close the lid and cook until the pizza dough is bubbly and golden, anywhere from 5 to 8 minutes – but this will depend on the thickness of your crust. Just be sure to continue to check it. It will be finished when the edges are golden and puffed up!
  10. Once the pizza is finished, slide the peel under it and transfer it to a cutting board. Cover it with the arugula greens and slice it to serve. Enjoy!

This grilled steakhouse pizza has all the amazing smoky flavors of your favorite steakhouse. Grilled onions, mushrooms and creamy gorgonzola finish it off.

Gimme that slice.

The post Grilled Steakhouse Pizza. appeared first on How Sweet Eats.

04 Jun 01:09

Caprese Skillet Lasagna.

by Jessica

Your Monday just got super dreamy; enter caprese skillet lasagna!

Quick caprese skillet lasagna is a lovely and comforting summer meal! Lots of fresh basil, ripe tomatoes and cheese bring this easy weeknight meal together.

I MEAN. The only way to make caprese better is to lasagna it, right? Yes, we’re making it a verb.

Quick caprese skillet lasagna is a lovely and comforting summer meal! Lots of fresh basil, ripe tomatoes and cheese bring this easy weeknight meal together.

I made my first ever skillet lasagna years ago (remember it?!) and we’ve been in love ever since. If you’ve been following for a while, then you know that it was a huge deal because Eddie claimed to “hate” ricotta cheese, so he didn’t think he’d like it. In reality, we think he probably had been eating lasagna with watery cottage cheese, and not creamy ricotta. Or something like that. Because now he loves it!

This is evidenced by my making of allll the skillet lasagnas. We have the classic, then a kale and sausage, then a butternut squash, then a spring vegetable.

the start of skillet lasagna

Oh, and I’ve made white pizza lasagna before too, which is almost like this caprese version but takes a lot more work.

And it’s summer! So who wants to do work?

tomatoes, basil, mozzarella, noodles

This caprese skillet lasagna has SO much the flavor. The bottom layer starts with a bunch of garlic, shallot and burst cherry tomatoes. This creates a rustic “sauce” of sorts without adding in tomato sauce and I just love that. You can mash the tomatoes into a sauce or leave them whole.

Make it your own!

Quick caprese skillet lasagna is a lovely and comforting summer meal! Lots of fresh basil, ripe tomatoes and cheese bring this easy weeknight meal together.

It’s also loaded with tons of fresh basil, pesto, some extra sliced tomatoes and LOTS of cheese. Like, lots of cheese. Creamy ricotta cheese, provolone cheese, mozzarella cheese, parmesan cheese.

Basically… all the cheese!

finex cast iron skillet lasagna

However, I did use brown rice noodles so can’t we just call this a health food?

I’m thinking yes. That cancels out all the cheese.

cheesy lasagna scoop

I live for a weeknight meal that is this delish.

Quick caprese skillet lasagna is a lovely and comforting summer meal! Lots of fresh basil, ripe tomatoes and cheese bring this easy weeknight meal together.

Caprese Skillet Lasagna

Caprese Skillet Lasagna

Quick caprese skillet lasagna is a lovely and comforting summer meal! Lots of fresh basil, ripe tomatoes and cheese bring this easy weeknight meal together.

  • 2 tablespoons olive oil
  • 1 shallot (diced)
  • 4 garlic cloves (minced)
  • 8 ounces grape tomatoes
  • 8 ounces fresh mozzarella balls (cigliene)
  • 4 campari tomatoes (thinly sliced)
  • ¼ cup pesto (fresh, leftover or jarred)
  • ¼ cup fresh chopped basil
  • 1 (10 ounce) package whole wheat/brown rice lasagna noodles
  • 1 cup ricotta cheese
  • ½ cup freshly grated provolone cheese
  • ½ cup freshly grated mozzarella cheese
  • ½ cup freshly grated parmagiano-reggiano cheese
  • fresh basil leaves for garnish
  1. Preheat the oven to 350 degrees F.
  2. Heat a 10 or 12 inch cast iron skillet over medium-low heat. Add the olive oil, then add in the shallots, garlic and and grape tomatoes with a pinch of salt. Cook, stirring often, until, the tomatoes begin to burst and break open, about 6 to 8 minutes. Turn the heat off under the skillet. You can mash up the tomatoes a bit if you’d like!
  3. While the tomatoes are cooking, bring a pot of salted water to a boil so you can cook the lasagna noodles. Cook them according to the package directions, but shave 1 minute off the cook time so the noodles are al dente. Drain the noodles once they are finished boiling.
  4. Take the noodles and begin to layer your lasagna. Put a few noodles down into the skillet, then add on some spoonfuls of ricotta cheese, pesto, some sliced tomatoes, some fresh mozzarella and some grated cheese. Add on a sprinkle of fresh basil. Arrange the noodles and repeat this process until all of your noodles and ingredients are used. Make sure you save a bit of grated cheese for topping.

  5. Bake the lasagna for 25 to 30 minutes. Remove it from the oven and garnish with extra fresh basil. Serve!

Quick caprese skillet lasagna is a lovely and comforting summer meal! Lots of fresh basil, ripe tomatoes and cheese bring this easy weeknight meal together.

Melty cheese in my caprese is just how I like it.

The post Caprese Skillet Lasagna. appeared first on How Sweet Eats.

16 May 15:41

Cacio e Pepe Pie.

by Jessica

Calling all cheese lovers! You need a cacio e pepe pie in your life.

Hello lover! Cacio e pepe pie is made with parmigiano-reggiano cheese, black pepper and bucatini pasta. Baked until cheese and bubbly, it's to die for.

Why yes.  I did say cacio e pepe PIE. A pie made of pasta and cheese.

This could be the only pie I want to eat.

Swear to me that before it gets too hot outside, like too-hot-to-turn-the-oven-on hot, that you will make a cacio e pepe pie for dinner!

Or brunch. Your call.

cacio e pepe pie ingredients

I’m a pasta convert. I’ve rambled for a million years on this blog about how I hated pasta when I was growing up. How every Thursday night was spaghetti night at our house and I would pout and eat scrambled eggs or something like it (for, like, 12 years? Maybe?) because I disliked pasta that much.

That has all changed (thank goodness!) but it’s still not a dish I gravitate towards. Or one that I order on a menu. It’s rare!

ready to bake the cacio e pepe pie

Unless… unless it’s cacio e pepe. Or something similar covered in tons of cheese and very much minus the tomato sauce.

Hello lover! Cacio e pepe pie is made with parmigiano-reggiano cheese, black pepper and bucatini pasta. Baked until cheese and bubbly, it's to die for.

The weird thing about my conversion is that this is not the first pasta pie I’ve shared on the blog! Remember when I made a bucatini pie with mini meatballs? Ooooh it’s such a fun and slightly high maintenance but delicious meal. I love how it looks so I love to serve it!

And I used bucatini here again because it’s easily my favorite cut of pasta. Those fat noodles are just to die for.

Hello lover! Cacio e pepe pie is made with parmigiano-reggiano cheese, black pepper and bucatini pasta. Baked until cheese and bubbly, it's to die for.

Perhaps the best part about the cacio e pepe pie? Those crispy edges.

Just LOOK at those edges down there.

The crispy, crunchy, almost-burnt cheese and pasta. The edges add so much texture to this and are the BEST part. Like the crunchy chips on top of a potato casserole or a cinnamon streusel on top of a muffin. I definitely either save it for last, or eat it all first. It’s SO GOOD.

Hello lover! Cacio e pepe pie is made with parmigiano-reggiano cheese, black pepper and bucatini pasta. Baked until cheese and bubbly, it's to die for.

Also! This is a meal that can be stretched. It serves about six or eight people (and is SO satisfying) but I like to make it for us too (a family of four) because it lasts and reheats well. And it’s amazing served with different veggies. A salad, roasted broccoli or asparagus, whatever you have in the fridge!

Oh and a big secret?

Eddie actually covered the leftovers with tomato sauce. So that’s a thing.

Even though I told him he RUINED IT.

Hello lover! Cacio e pepe pie is made with parmigiano-reggiano cheese, black pepper and bucatini pasta. Baked until cheese and bubbly, it's to die for.

And let’s be real. If you pair this with a HUGE kale salad, it cancels out all the pasta and cheese.

Hello lover! Cacio e pepe pie is made with parmigiano-reggiano cheese, black pepper and bucatini pasta. Baked until cheese and bubbly, it's to die for.

Cacio e Pepe Pie

Cacio e Pepe Pie

Hello lover! Cacio e pepe pie is made with parmigiano-reggiano cheese, black pepper and bucatini pasta. Baked until cheese and bubbly, it’s to die for.

  • 1 pound bucatini pasta
  • 1 1/2 cups whole milk
  • 1 cup grated Parmigiano-Reggiano cheese, (plus extra for sprinkling)
  • 3 large eggs, (lightly beaten)
  • 2 garlic cloves, (minced)
  • 2 1/2 teaspoons ground black pepper
  • 1 teaspoon kosher salt
  • 8 ounces provolone cheese, (freshly grated)
  • 4 ounces mozzarella cheese, (freshly grated)
  1. Preheat the oven to 425 degrees F. Spray a 9-inch spring form pan with nonstick spray. I also like to wrap the bottom edges in foil, just so nothing leaks out!
  2. Cook the bucatini according to the pasta directions, shaving 1 to 2 minutes off the cook time so the pasta is al dente. Drain the pasta and let it cool slightly. You can give it a quick spritz of olive oil so it doesn’t stick together, if necessary.
  3. In a large bowl, whisk together the milk with the parmigiana, eggs, garlic, pepper, salt, 1 cup of the provolone and half of the mozzarella. Stir until combined. Add the cooked pasta to the bowl and toss well, until all the pieces of pasta are covered with the mixture. Transfer the pasta and cheese mixture to the spring form pan. Sprinkle the remaining provolone and mozzarella on top.
  4. Bake the pie for 35 to 45 minutes, or until the cheese is golden and bubbly and the center is set. Remove the pie and let it cool for 10 to 15 minutes. Gently release the spring form pan (use a sharp knife to cut down through any pieces stuck to the sides). Slice the pie into 6 or 8 wedges and serve immediately with more cheese for sprinkling.

slightly adapted from food and wine

Hello lover! Cacio e pepe pie is made with parmigiano-reggiano cheese, black pepper and bucatini pasta. Baked until cheese and bubbly, it's to die for.

I’d rather eat my pasta in a slice anyway.

The post Cacio e Pepe Pie. appeared first on How Sweet Eats.

30 Apr 20:26

Frozen Peanut Butter and Jelly Oatmilk Bars.

by Jessica

[these frozen peanut butter and jelly oatmilk bars are sponsored by So Delicious Dairy Free! I’m thrilled to be working with them in 2019 to create lots of incredible recipes for you!]

‘Tis the season for frozen treats!

These frozen peanut butter jelly bars are super easy and made with an oatmilk frozen dessert, then covered in a dark chocolate shell. Delish!

Are we starting too early?! I think not. Give me a frozen peanut butter and jelly bar, some sunshine at happy hour and maybe a little rosé and we’re good to go. Now that’s my idea of the HAPPIEST hour.

So Delicious Oatmilk Frozen Dessert

I am SO excited to be working with So Delicious Dairy Free this year on a bunch of new recipes. For years I’ve used their creamers, coconutmilks and almondmilks.

And now? It’s getting even better!

You know I’ve loved the So Delicious Coconutmilk Frozen Dessert forever. Not because I’m dairy-free, but because I’m a coconut freak! And their flavors are so super good. The coconut macaroon? I die over. The mocha almond fudge? I can barely keep it in the house. It’s addictive. Max loves the mint chip. 

peanut butter drizzle chocolate bars

So when I got the chance to try their Oatmilk Frozen Desserts, I was insanely pumped. Ohhhh my gosh this stuff is fantastic. It is so smooth and creamy. Like so much so that I’m shocked they are dairy free. The Caramel Apple Crumble flavor?

It is amazing.  

We have been going absolutely nuts over these and I love having them as a treat for weeknights. It’s such a simple indulgence but after spending so much of the day cooking, prepping and running around like a crazy person, this is the perfect post-dinner snack that I look forward to.

Even if I’m sneaking some spoonfuls straight out of the carton in the afternoon too…

These frozen peanut butter jelly bars are super easy and made with an oatmilk frozen dessert, then covered in a dark chocolate shell. Delish!

I opted for the peanut butter and raspberry flavor to make some frozen dessert oatmilk bars, because even though I don’t love raspberry, I freak over all things PB and J.

(hello, PB and J crumble muffins!)

The peanut butter raspberry is made with creamy peanut butter (a must, I tell you) and black raspberries, which are my favorite variety if I’m going to raspberry town. My biggest pet peeve is an ice cream with a skinny, very minimal swirl, so I’m happy to say that this pint is LOADED!

These frozen peanut butter jelly bars are super easy and made with an oatmilk frozen dessert, then covered in a dark chocolate shell. Delish!

The frozen peanut butter jelly bars are so easy. Embarrassingly easy, as usual. I’ve made another (slightly more complicated) version in the past, but with these, you just scoop out the Oatmilk Frozen Dessert and make a… a frozen brick, if you will. Freeze it, slice it, dip it, devour it.

They are incredible.

The day that we photographed these? No one could keep their hands off of them. They are such a great dessert to get ready for summer.

And the only thing that can make PB and J better is chocolate of course. Of course!

These frozen peanut butter jelly bars are super easy and made with an oatmilk frozen dessert, then covered in a dark chocolate shell. Delish!

One of these reasons I’m loving these is because they are so kid-friendly. My plan is to keep a stash of these in the fridge. Maybe even ones that are bite-sized mini bars for these warmer months to come. Sounds like the perfect idea to me. 

These frozen peanut butter jelly bars are super easy and made with an oatmilk frozen dessert, then covered in a dark chocolate shell. Delish!

Frozen Peanut Butter Jelly Bars

Frozen Peanut Butter and Jelly Oatmilk Bars

  • 2 pints So Delicious Dairy Free Peanut Butter and Raspberry Oatmilk Frozen Dessert, (slightly softened)
  • 3 cups milk chocolate chips
  • 1/4 cup coconut oil
  • ¼ cup creamy peanut butter
  • optional: crushed freeze-dried berries, (for topping)
  1. Line an 8×8 baking dish with parchment paper. Scoop the Oatmilk frozen dessert into the lined baking dish and use a spatula to spread it into an even layer. Place a piece of plastic wrap over top and freeze it for at least 6 hours, or overnight.
  2. The next day, lift the frozen square out of the dish and place it on a cutting board. Quickly cut the square into bars or squares and place them on a parchment lined baking sheet. Freezer for 2 hours, until solid.
  3. Make the chocolate topping: melt the chocolate chips and coconut oil in a microwave-safe bowl. I microwave for 30 seconds at a time, stirring after each time, until the chocolate is melted. Let it sit for 10 to 15 minutes so it cools down slightly. Melt the peanut butter in a separate bowl.
  4. Remove the bars from the freezer and quickly dip them in the chocolate. Drizzle with melted peanut butter. Place each back on the baking sheet. Freeze for another hour before serving.
  5. Before serving, you can crush some freeze dried berries on top if you’d like!

These frozen peanut butter jelly bars are super easy and made with an oatmilk frozen dessert, then covered in a dark chocolate shell. Delish!

Think we can pass these off as lunch too?

The post Frozen Peanut Butter and Jelly Oatmilk Bars. appeared first on How Sweet Eats.

25 Apr 12:38

BLT Pimento Cheese Flatbread.

by Jessica

This pimento cheese flatbread is seriously one of the best things I’ve ever consumed.

A crisped flatbread crust is topped with creamy pimento cheese, crispy bacon, garlic burst tomatoes and shredded lettuce. It's a flavor explosion!

Not being dramatic in the slightest. I swear.

So it’s officially pimento cheese season! This makes me madly excited. Sure, it may be pimento cheese season every season, but with the Kentucky Derby coming up, it’s extra pimento cheese season. I’m calling it.

flatbread with bacon and tomatoes

I’ve done all sorts of things with pimento cheese over the years (burgers! Grilled cheese with spiralized pickle slaw! Crostini! Grits! Quesadillas!) but I’ve allllways wanted to put it on pizza. And if we’re really here in our little circle of trust, I initially planned on this being a 100% plain (pimento) cheese pizza.

But then… it just wasn’t doing anything for me. It had flavor from the cheese of course but not the kind of flavor I expect on my pizzas.

I went back to the drawing board and this time, crisped up some bacon, let the tomatoes burst IN the bacon grease (yes, do it) and sprinkled it with scallions and shredded lettuce.

Holy.flavor.explosion.

A crisped flatbread crust is topped with creamy pimento cheese, crispy bacon, garlic burst tomatoes and shredded lettuce. It's a flavor explosion!

I cannot even begin to explain how delicious this pizza is. The crust is the flatbread crust I use in this recipe – it’s also the crust for the base of the buffalo cauliflower flatbread in The Pretty Dish! It’s an easy dough that can be rolled super thin and almost takes on a cracker-like crunch. We love it.

sliced BLT pimento cheese flatbread

Another thing I love about this crust is that it can be shaped however you’d like, so it is great to make as an appetizer or as dinner for two. You could even use a biscuit cutter to cut circles out of the dough, making them perfectly round, then topping with all the delish toppings. And serve it to friends on a cute little dish.

The tomatoes are sweet, the bacon is salty and crunchy, the cheese is melty and creamy, the crust is crisp. Toss the fresh shredded greens on top and it’s a lovely meal. Or late night snack. Yes to that.

slice of BLT pimento cheese flatbread

This will definitely be in my rotation all spring and summer long. Add a chilled glass of sauvignon blanc and we’re set!

A crisped flatbread crust is topped with creamy pimento cheese, crispy bacon, garlic burst tomatoes and shredded lettuce. It's a flavor explosion!

BLT Pimento Cheese Flatbread

BLT Pimento Cheese Flatbread

A crisped flatbread crust is topped with creamy pimento cheese, crispy bacon, garlic burst tomatoes and shredded lettuce. It’s a flavor explosion!

FLATBREAD

  • 1 3/4  cups  all-purpose flour
  • 1  teaspoon  baking powder
  • 1/2  teaspoon  salt
  • 1/2  cup  water
  • 1/3  cup  olive oil plus more for brushing
  • 4 slices bacon, (chopped)
  • 1 pint grape tomatoes, (cut in halves)
  • pinch of salt and pepper
  • 2 green onions, (thinly sliced)
  • 1 handful freshly grated cheddar or mozzarella
  • 1 to 2 cups chopped green leaf lettuce

PIMENTO CHEESE

  • 12  ounces  sharp white cheddar cheese freshly grated
  • 1  (4-ounce) jar of pimentos, (drained)
  • 4  ounces  1/2 block cream cheese, (softened)
  • 1/2  cup  mayonnaise
  • 1/2  teaspoon  garlic powder
  • 1/2  teaspoon  onion powder
  • 1/4  teaspoon  salt
  • 1/4  teaspoon  pepper

FLATBREAD

  1. Preheat the oven to 450 degrees F.
  2. In a bowl, combine the flour, baking powder and salt, stirring to combine. Add the water and olive oil and mix with a spoon until the dough comes together. Use your hands to finish bringing it together into a ball, then knead it a few times on a floured surface.
  3. Roll the dough into your desired shape – I rolled in into a long oval about 1/4-inch thick – you want it to be thin. Place it on a nonstick (or parchment papered) baking sheet and brush with a bit of olive oil. Bake for 10 minutes, until a few air bubbles form and the dough is golden.
  4. While the crust is baking, heat a skillet over medium heat and add the chopped bacon. Cook until most of the fat is rendered, but the bacon isn’t fully crisped (this is important so it doesn’t burn in the oven!). Remove the bacon with a slotted spoon and place it on a paper towel to drain excess grease. Remove all but 1 tablespoon of bacon grease from the skillet.
  5. Keep the heat under the skillet to medium-low and add the tomatoes and garlic. Add a pinch of salt and pepper. Cook, stirring often, until the tomato halves pop and soften, about 8 to 10 minutes. Turn off the heat.
  6. Remove the crust and spread ½ to ¾ cup pimento cheese on top. Sprinkle on the bacon, tomatoes and scallions. Sprinkle on the extra handful of grated cheese. Bake for 10 to 15 minutes more, until the cheese is golden and bubbly. Remove and cover with the shredded lettuce. Slice and serve!

PIMENTO CHEESE

  1. Add all ingredients together in a large bowl and mix well until combined. You will have some leftovers, so store it in a sealed container in the fridge!

A crisped flatbread crust is topped with creamy pimento cheese, crispy bacon, garlic burst tomatoes and shredded lettuce. It's a flavor explosion!

I mean is that the perfect bite, or what?

The post BLT Pimento Cheese Flatbread. appeared first on How Sweet Eats.

05 Apr 18:13

Dark Chocolate Dragon Fruit Cake.

by Jessica

Hiiii. I made you cake! Chocolate dragon fruit cake, to be exact.

chocolate dragon fruit cake

Chocolate dragon fruit cake that is as delicious as it is pretty. I promise you.

We can make a neon-glazed cake and eat it too!

chocolate bundt cake

I have lots of ideas for serving this cake. If I was into Game of Thrones, I’d probably tell you that you could serve it for the premier, considering it’s chocolate DRAGONfruit cake. Which instantly proves to you that I know nothing about GoT. All of my apologies.

But I did walk near the red carpet press event in NYC the other day which should give me some GoT clout?

pink pitaya powder

SO. This picture above would be pink pitaya powder.

!!!! Cue all the exclamation points.

Otherwise known as, my new favorite ingredient. Are you even surprised?

dragon fruit glaze on chocolate bundt cake

Let’s talk about this GORGEOUS pan. It’s a magnolia bundt pan and the minute I saw it, I had to have it. Order it instantly. I love some of the other fancy bundt pans that I have and this looked like it would be so pretty. Really, I thought it would be great for some sort of Easter cake.

Did not disappoint!

It would be even more stunning in a lighter shade of cake.

chocolate dragon fruit cake

Okay, so the pitaya powder!! I just about died when I found this too. So super excited.

I love to make pitaya bowls (my favorite version is in The Pretty Dish!!) and it’s no secret that it’s probably because of… the color.

Shocking!

But this hot pink makes me want to consume everything. It’s just so pretty!

You also get a peek here at how blue the lighting can be as it comes through my kitchen window. I didn’t want to do a lot of color correcting on these photos because I wanted you to see just how brilliant this color is. Just cannot get enough.

chocolate dragon fruit cake

I mostly use this pitaya powder for smoothies, but it’s also fun to stir into yogurt! And chia pudding… just wait for that recipe. It’s so good for breakfasts and snacks.

But I knew that a glaze or frosting using the powder would be stunning. And I was craving dark chocolate cake. It’s rare that we see dark chocolate cake make an appearance for spring, you know? I figured this was the perfect way.

slice of chocolate dragon fruit cake

The dark chocolate cake itself is not too sweet. It has a very deep chocolate-y flavor and while the pitaya is subtle (especially mixed into a sugary glaze), it makes for a great topping. I crushed a few edible culinary rose petals on top for something extra – a little more seasonal, if you will.

To say that I am so ready for this sunshine… would be an understatement.

chocolate dragon fruit cake

I’d also be lying if I said I didn’t want to cover this cake in a dark chocolate ganache! I bet it would be a show stopper – this glossy, shiny big magnolia cake.

Might just be my weekend project.

Or yours? Please try it and report back!

chocolate dragon fruit cake slice

Dark Chocolate Dragon Fruit Cake


Dark Chocolate Dragonfruit Cake

The prettiest dark chocolate dragonfruit cake! This is a rich dark chocolate bundt cake drizzled with vibrant dragonfruit glaze.

Dark chocolate cake

  • 1  cup  brewed coffee
  • 3/4  cup  Dutch process cocoa powder
  • 2  tablespoons  espresso powder
  • 2 1/4  cups  sugar
  • 1  teaspoon  salt
  • 2 1/2  teaspoons  baking soda
  • 2  large eggs
  • 1  large egg yolk
  • 1 1/4  cups  buttermilk
  • 1  cup  canola oil
  • 2  teaspoons  vanilla extract
  • 2 1/2  cups  all-purpose flour, ( sifted)
  • dried culinary rose petals, (optional)

Dragonfruit Glaze

  • 1 1/2  cups  powdered sugar
  • 1 tablespoon pink pitaya powder
  • 3 to 4 ounces milk

Dark chocolate cake

  1. Preheat the oven to 350 degrees F. Butter and flour and 10-cup bundt cake pan.
  2. Place the coffee, cocoa and espresso powder in a saucepan and heat over medium heat. Bring the mixture to a boil, whisking often, and then set it aside and let it come to room temperature.
  3. In the bowl of your stand mixer, beat the sugar, salt, baking soda and eggs together with the whisk attachment until combined. Add in the buttermilk and oil and beat for another 1 to 2 minutes, scraping the sides or the bottom if needed.
  4. Add the flour and beat on medium speed for 2 minutes. Beat in the cooled coffee cocoa mixture and beat for another 3 minutes. Pour the batter into the bundt pan. Bake for 60 minutes, or until the cake is set and a toothpick inserted into the cake comes out clean. Remove and let cool completely. Once cool, turn the cake out onto a plate or cutting board and drizzle the dragonfruit glaze on top. If desired, you can crush some culinary rose petals on too!

Dragonfruit Glaze

  1. Whisk all the ingredients together until a smooth glaze forms. Pour it over the cake once it has cooled.

chocolate dragon fruit cake

If I had to have a signature cake, this would be it.

The post Dark Chocolate Dragon Fruit Cake. appeared first on How Sweet Eats.

27 Mar 16:58

One Pot Asparagus Mascarpone Pasta.

by Jessica

All I can say to this asparagus one pot pasta: hello lover!

A perfect one pot pasta made with asparagus, shallots, lemon and mascarpone chese. The best weeknight dinner that comes together in a snap! I howsweeteats.com #asparagus #onepotpasta

Now isn’t this just a beautiful sight to see?

All that goodness, right there in that pot! Ready to go. SO FRESH.

A few years ago I shared this one pot mushroom and swiss chard pasta and it remains a huge favorite here on the blog. You guys love it! You often remind me how much I love it too.

That classic tomato basil one pot spaghetti is another dish I really love. I think that Martha did it first? Either way, it was the first one that piqued my interest in these one pot dishes.

I mean sure, I can make a lot of stuff in one pot, but there is something secretly magical about throwing ingredients and dry pasta in a pot with liquid, cooking it for 15 minutes and it making a delicious bowl of dinner! Right?

It makes me feel like I’m Max in the kitchen, so excited with the possibilities of what I can cook and all the newness around me.

Max LOVES to be in the kitchen. He loves to be in our real kitchen and help me make things, but he plays in his toy kitchen every single day. He asks us what we would like and makes us the most perfect plates. Sure, they might include a burger with a pancake and a random bunch of grapes, maybe with a pat of butter on the side, but it’s adorable.

And on his “report card” last month, his teacher wrote that during school, he does “dramatic play in the kitchen.” Yes.

DRAMATIC PLAY IN THE KITCHEN?!

It’s essentially what I do daily and that makes me so, so happy. Warms my heart.

A perfect one pot pasta made with asparagus, shallots, lemon and mascarpone chese. The best weeknight dinner that comes together in a snap! I howsweeteats.com #asparagus #onepotpasta

Needless to say, that is what I think a magic one pot pasta is all about. It’s amazing that we can throw everything in this pot and watch something like the below come to life.

A perfect one pot pasta made with asparagus, shallots, lemon and mascarpone chese. The best weeknight dinner that comes together in a snap! I howsweeteats.com #asparagus #onepotpasta

Here’s the deal on the asparagus one pot pasta:

The asparagus would normally be cooked a little too much for my liking, so I was shocked at how much I love it here. I tend to roast my asparagus to golden, crispy bits. Boiling it with noodles is not my preferred method of consuming the veg. But when it’s combined with the lemon, garlic, mascarpone and pecorino, it tastes like a big bite of spring. It won’t be bright green and it won’t be crisp either, but it’s still delicious!

If you are extra particular about your asparagus, you can throw it in half way through the cook time OR you could even roast it and throw it in at the end.

Side note: If you’re in a pinch and don’t have asparagus – or find yourself making this in another season, you could sub in broccoli!

I stir in the mascarpone as soon as the noodles have absorbed all the liquid. It melts into this flavorful, slightly creamy but not heavy coating on the pasta. Super good. Extra cheese mixed in too. I like to top it with more fresh herbs and if you’d like, you could add more lemon too.

Crushed red pepper on top gives it a bite and freshly cracked black pepper is so good too.

And then you get this! A big bowl of spring magic.

A perfect one pot pasta made with asparagus, shallots, lemon and mascarpone chese. The best weeknight dinner that comes together in a snap! I howsweeteats.com #asparagus #onepotpasta

Asparagus One Pot Pasta

Asparagus One Pot Pasta

A perfect one pot pasta made with asparagus, shallots, lemon and mascarpone chese. The best weeknight dinner that comes together in a snap!

  • 1 1/2 pounds asparagus spears
  • 1 pound whole wheat spaghetti
  • 3 garlic cloves, (minced)
  • 1 shallot, (diced)
  • 1 lemon, (zest grated and juiced)
  • 4 cups water
  • 1 1/2 cups vegetable stock
  • ¼ cup chopped fresh parsley, (plus extra for topping)
  • 2 tablespoons unsalted butter
  • ½ teaspoon salt
  • ½ teaspoon freshly cracked black pepper
  • 1/3 cup mascarpone cheese
  • 1/3 cup freshly grated pecorino romano cheese, (plus extra for topping)
  • crushed red pepper flakes, (for topping)
  1. Remove the woody stems from the asparagus (I do this by seeing where the end snaps off easily!), then chop the asparagus spears into thirds.
  2. Place the asparagus, pasta, garlic, shallot, lemon juice and zest, water, stock, parsley, butter, salt and pepper in a large stock pot. Bring the mixture to a boil and cook for 10 to 12 minutes, stirring occasionally to make sure the pasta doesn’t stick to the bottom of the pot.
  3. Once the noodles have absorbed all of the water, remove the pot from the heat. Stir in the mascarpone cheese and the pecorino, stirring well so all of the noodles get some of the cheese. Stir for a few minutes until it melts and is really incorporated into the pasta. Taste the pasta and add more salt and pepper if you feel like it needs it.
  4. Serve the pasta immediately with a sprinkle of crushed red pepper and more pecorino!

Note: if you are particular about the crispness of your asparagus, you can throw it in halfway or even 3/4 of the way through cook time.

A perfect one pot pasta made with asparagus, shallots, lemon and mascarpone chese. The best weeknight dinner that comes together in a snap! I howsweeteats.com #asparagus #onepotpasta

Look at those twirls!

The post One Pot Asparagus Mascarpone Pasta. appeared first on How Sweet Eats.

25 Mar 14:32

Sticky Sheet Pan Chicken with Pineapple Salsa.

by Jessica

Who else needs a fabulous sticky chicken recipe to add to your weeknight meal repertoire? *raises both hands*

This sticky chicken recipe is made on a sheet pan and roasted until flavorfor and sticky with sauce, then served with pineapple salsa. It's the best! I howsweeteats.com #sticky #chicken

Happy Monday! How are things? How was your weekend?

If you’re anything like me, you may be in desperate need of a good Monday night meal. Too many tacos and too much pizza this weekend if that could be a thing. Probably COULD be a thing, but shouldn’t be. Too much pizza and too many tacos are nevvver a sign of a bad weekend.

Also, I don’t think I’m supposed to include stuff like that in recipe posts anymore because the SEO gods say it’s terrible. But gosh, I am bored AF with all things SEO-related. And so bored with Instagram and I want to share other things and I mean, where is the REAL LIFE FUN?!

We actually had a few real like moments of fun this weekend because it was the first time that everyone was healthy in a few weeks! Whew, this last month has been a doozy. Felt like we hadn’t seen the sun or been outside in a full month. Which is so utterly cliche and ridiculous but it is what it is.

This sticky chicken recipe is made on a sheet pan and roasted until flavorfor and sticky with sauce, then served with pineapple salsa. It's the best! I howsweeteats.com #sticky #chicken

Okay so sticky chicken! I’m always looking for a good sticky chicken recipe and I’m pretty sure I’ve nailed it here. At least until I come up with a few new flavor combinations in another six months.

Story of my life.

But this! It has some honey and brown sugar! It’s required for that stickiness we all desire. Throw the chicken on a sheet pan and roast it with a few glazes of the sauce every now and then.

Once it comes out, top it with some pineapple salsa and you’re good. It’s super flavorful, has a hint of sweet and spice and is one of those recipes that will get you excited for chicken for dinner again. I ALWAYS need those. You know?

P.S. can we take a moment and remember when I had a full blown fruit salsa obsessed? I mean, clearly it is still here. But it was real in 2011.

I have lots of great side dishes to serve with this sticky chicken recipe – my go-tos are probably these sweet and spicy brussels sprouts or this spicy roasted broccoli, along with something simple like this grilled corn tomato salad once the warm season really kids in.

The best part is that it’s very versatile and you can obviously switch up the fruit in the salsa too.

Pineapple salsa for roasted chicken! I howsweeteats.com #sticky #chicken

Even though it’s just the start of spring and still a bit chilly, this is a recipe that makes you FEEL like it’s warm out. It brings summer vibes to your kitchen table but you can totally make it any time of year. It’s great as a stand alone dish or as something to add to a big dinner spread. Win win win.

I keep typing WINE which means it’s time to go get some.

This sticky chicken recipe is made on a sheet pan and roasted until flavorfor and sticky with sauce, then served with pineapple salsa. It's the best! I howsweeteats.com #sticky #chicken

Sheet Pan Sticky Chicken Recipe with Pineapple Salsa


Sticky Sheet Pan Chicken with Pineapple Salsa

This sticky chicken recipe is made on a sheet pan and roasted until flavorfor and sticky with sauce, then served with pineapple salsa. It’s the best!

  • 1 pound boneless,skinless chicken thighs
  • 1 pound chicken drumsticks
  • ½ teaspoon salt
  • ½ teaspoon pepper
  • ½ teaspoon garlic powder
  • ¼ cup honey
  • 2 tablespoons soy sauce
  • 1 tablespoon brown sugar
  • 2 teaspoons apple cider vinegar

pineapple salsa

  • 1 ½ cups pineapple chunks
  • 1 shallot, (diced)
  • ¼ cup chopped cilantro
  • 1 lime, (juiced)
  • pinch of salt and pepper
  1. Preheat the oven to 425 degrees F. Line a sheet pan with foil and spray it with nonstick spray.
  2. Place the chicken thighs and drumsticks on the sheet and sprinkle with salt, pepper, garlic powder on both sides.
  3. In a bowl, whisk together the honey, soy sauce, sugar and vinegar. Brush the mixture on the chicken – you will have some leftover, but just brush one layer on before roasting.
  4. Roast the chicken for 20 minutes. After 20 minutes, brush on more of the sauce and roast for 10 more minutes. Brush or spoon on any remaining sauce and roast for 15 more minutes, or until the inside temperature registers at 165 degrees.
  5. Remove the chicken and serve immediately with the pineapple salsa.

pineapple salsa

  1. Combine all the ingredients together in a bowl and stir. You can make this ahead of time and let it sit in the fridge so the flavors marry. It stores well in the fridge for 1 to 2 days.

This sticky chicken recipe is made on a sheet pan and roasted until flavorfor and sticky with sauce, then served with pineapple salsa. It's the best! I howsweeteats.com #sticky #chicken

The caramely goodness gets me.

The post Sticky Sheet Pan Chicken with Pineapple Salsa. appeared first on How Sweet Eats.

15 Mar 15:07

Loaded Irish Cheddar Mashed Potato Pancakes.

by Jessica

Your weekend now has loaded mashed potato pancakes on the menu!

Loaded mashed potato pancakes are the perfect comfort food or side dish to a hearty meat. Crispy mashed potatoes with aged cheddar. Delicious! I howsweeteats.com #mashedpotato #pancakes

This is such a total throwback recipe for me. My mom made mashed potato pancakes ALL THE TIME!

Wait. Not all the time, but my adult brain remembers them so well that it feels like she made them often. In reality, it wasn’t that often. But I loved them so much (remember how potatoes were my favorite food as a kid?!) and was giddy when she’d make them.

The thing was that she usually made them for dinner… but with breakfast. My mom was the queen of breakfast for dinner. It was the first time I ever learned about the words “comfort food.” I clearly remember her telling me scrambled eggs and bacon were comfort food and I loved having it at night. My dad didn’t love breakfast for dinner, so it wasn’t a frequent meal.

But I always was so excited when that was on the menu. I first shared these plain ones a million years ago!

Loaded mashed potato pancakes are the perfect comfort food or side dish to a hearty meat. Crispy mashed potatoes with aged cheddar. Delicious! I howsweeteats.com #mashedpotato #pancakes

P.S. in case you’re wondering, my go-to breakfast for dinner meal as a kid was a scrambled egg sandwich on toast with yellow mustard.

Yes, my mustard obsession goes waaaay back.

Loaded mashed potato pancakes are the perfect comfort food or side dish to a hearty meat. Crispy mashed potatoes with aged cheddar. Delicious! I howsweeteats.com #mashedpotato #pancakes

Today, I’d totally consider these mashed potato pancakes to be a meal. A comfort food meal, yes. But a meal, nonetheless. I’d be the only one in this house, but who cares!

The good news is that if you also consider them a meal, well – you’re set.

The better news is that if no one else considers them to be a full meal, they can be their side dish. And you can just have them eat cereal for dinner as their main.

Ha. Hahaha.

Loaded mashed potato pancakes are the perfect comfort food or side dish to a hearty meat. Crispy mashed potatoes with aged cheddar. Delicious! I howsweeteats.com #mashedpotato #pancakes

So here’s the deal.

I tend to be a purist (most of the time!) when it comes to mashed potatoes. Any leftovers I have are usually plain, so I like to chop a few delicious things up to go inside. Scallions, chives – you can add whatever you’d like! You could do different herbs, peppers – anything. This recipe below will greatly depend on exactly how you make your mashed potatoes.

Then, stir in some Irish aged cheddar, like this Kerrygold Dubliner (that’s what I used!), which is a game changer. It adds sharp, cheesy flavor and makes the loaded mashed potato pancakes taste incredible.

Loaded mashed potato pancakes are the perfect comfort food or side dish to a hearty meat. Crispy mashed potatoes with aged cheddar. Delicious! I howsweeteats.com #mashedpotato #pancakes

Of course, the best part? Fry some bacon before you make these, so it can be crumbled on top. Use the reserved bacon grease to cook the mashed potato pancakes. Be the happiest ever!

Loaded mashed potato pancakes are the perfect comfort food or side dish to a hearty meat. Crispy mashed potatoes with aged cheddar. Delicious! I howsweeteats.com #mashedpotato #pancakes

How to Make Loaded Mashed Potato Pancakes

Loaded Irish Cheddar Mashed Potato Pancakes

Cheddar mashed potato pancakes are the perfect comfort food or side dish to a hearty meat. Crispy mashed potatoes topped with onions, bacon and sour cream.

  • 3 slices thick cut bacon
  • 3 cups mashed potatoes
  • 5 to 6 tablespoons all-purpose flour
  • 3 ounces irish aged cheddar cheese, (like kerrygold Dubliner)
  • ¼ teaspoon garlic powder
  • salt and pepper, (if needed)
  • 3 green onions, (thinly sliced)
  • ¼ cup chopped chives
  • 2 tablespoons bacon grease, (butter or olive oil)
  • ½ cup plain greek yogurt or sour cream, (for serving)
  1. First up! It’s important to note that the flavor of the mashed potato pancakes depends greatly on how your mashed potatoes were made. If they are seasoned enough for eating (i.e. like you ate them with dinner a night or so ago, so they have salt, pepper, etc in them), then you don’t need to add any additional salt and pepper. If you make mashed potatoes just for these cakes, be sure to season them liberally, as you would when serving mashed potatoes.
  2. Heat a large skillet over medium-low heat and add the bacon. Cook, stirring often, until the fat is rendered and it’s crispy. Turn the heat off under the skillet and transfer the bacon to a paper towel.
  3. Place the mashed potatoes in large bowl and sprinkle on 5 tablespoons of flour along with the garlic powder. Mix the flour into the potatoes and if you can easily form cakes with the potatoes, you’re all set! If you still need something to bind the mixture more, add more flour 1 tablespoon at a time.
  4. Stir in about ¾ of the cheddar cheese, along with ¾ of the green onions and chives. You want to have a bit reserved for topping.
  5. Heat the same skillet over medium high heat. I just use the bacon grease that is already in the skillet, but you can remove it and use butter or oil instead. Add the potato pancakes and let them brown on each side, about 3 to 4 minutes per side. It’s important not to crowd the pan because it will be difficult to get the pancakes out without smashing them. Use a stainless spatula or something firm to lift them up and transfer them to plates.
  6. Once the potatoes are served, top with remaining cheese, green onions and chives. Serve with plain greek yogurt or sour cream!

Loaded-mashed potato pancakes are the perfect comfort food or side dish to a hearty meat. Crispy mashed potatoes with aged cheddar. Delicious! I howsweeteats.com #mashedpotato #pancakes

This is how I’m eating green.

The post Loaded Irish Cheddar Mashed Potato Pancakes. appeared first on How Sweet Eats.

14 Feb 21:59

Chocolate Sheet Cake with Peanut Butter Frosting.

by Jessica

Not much makes me as happy as chocolate peanut butter cake.

Easy chocolate peanut butter cake is the way to my heart. Moist chocolate cake, fluffy peanut butter frosting. It's the perfect dessert, anytime! I howsweeteats.com #chocolatepeanutbutter #cake

Sometimes I seriously wonder… does anyone love chocolate and peanut butter as much as I do? Like is it possible that there is someone else in the world who loves that combination MORE than me?

I doubt it.

It is theeee flavor for me. It is the flavor combination I always crave, the one I would choose every single time if I had to.

Easy chocolate peanut butter cake is the way to my heart. Moist chocolate cake, fluffy peanut butter frosting. It's the perfect dessert, anytime! I howsweeteats.com #chocolatepeanutbutter #cake

Even back to the time of my first real break up when I wanted to eat nothing for days but a chocolate chip covered peanut butter spoon.

Yes that was a real thing.

Easy chocolate peanut butter cake is the way to my heart. Moist chocolate cake, fluffy peanut butter frosting. It's the perfect dessert, anytime! I howsweeteats.com #chocolatepeanutbutter #cake

Just yesterday, Lacy and I were talking about these peanut butter fudge cupcakes I made so long ago for the blog. They were our go-to treat, the cupcakes I took absolutely everywhere, to every gathering, made for every party – everything!

They were tops.

And said chocolate chip covered peanut butter spoon has forever been my mental health snack. When I want something sweet, it’s always a go-to because it’s simple, chances are I have the ingredients, and it’s chocolate plus peanut butter, HELLO.

Comfort food at it’s finest, probably the most craved food I have if I’m in a moment of eating my emotions. I know you get it.

Easy chocolate peanut butter cake is the way to my heart. Moist chocolate cake, fluffy peanut butter frosting. It's the perfect dessert, anytime! I howsweeteats.com #chocolatepeanutbutter #cake

And I think back and wonder just where it was that I first learned about how delicious this pairing could be. I don’t think it was from my mom, because even though she enjoys sweets, she doesn’t seem to lose her mind over peanut butter + chocolate like I do. So I’ve assumed that it was from a stray Reese’s cup on Halloween or something, probably my first taste of one that gave me the choco PB high that I’ve never been able to quit.

That’s so funny now, because my palate is such a snob when it comes to chocolate that Reese’s barely fit the bill these days. Pretty sure I went the entire Halloween season without consuming one because a peanut butter melt away with better quality chocolate could be found.

Easy chocolate peanut butter cake is the way to my heart. Moist chocolate cake, fluffy peanut butter frosting. It's the perfect dessert, anytime! I howsweeteats.com #chocolatepeanutbutter #cake

But seriously.

I could give up all dessert in life if I was allowed to have a few chocolate chips dipped in peanut butter every now and then. It would be worth it.

Okay I’ll stop now. But do you get it? The intense love for the best flavor combo on earth?

Eddie does not get it. He does not love it. He likes both separately, but together? Nope.

Easy chocolate peanut butter cake is the way to my heart. Moist chocolate cake, fluffy peanut butter frosting. It's the perfect dessert, anytime! I howsweeteats.com #chocolatepeanutbutter #cake

That’s why I won’t be making this chocolate peanut butter sheet cake tomorrow for Valentine’s Day.

It’s why I made it a few weeks ago to enjoy then, so I could make something else he loves tomorrow instead.

I’m thinking chocolate dipped strawberries –  for sure. Maybe just chocolate chip cookies. Perhaps even brownies. No PB involved.

Easy chocolate peanut butter cake is the way to my heart. Moist chocolate cake, fluffy peanut butter frosting. It's the perfect dessert, anytime! I howsweeteats.com #chocolatepeanutbutter #cake

As for this lovely cake?

I live for a sheet cake because it seems easier than cupcakes.

Even if you’re making the same batter the same way, it FEELS easier. Do you get that?

In reality, it’s not like it’s that much easier, but at least you can frost one big slab as opposed to 24 single cakes.

Easy chocolate peanut butter cake is the way to my heart. Moist chocolate cake, fluffy peanut butter frosting. It's the perfect dessert, anytime! I howsweeteats.com #chocolatepeanutbutter #cake

This chocolate cake is not overly sweet but it is deeply cocoa-y.

Which is a fantastic contrast for the sweet, rich peanut butter frosting.

That you will definitely want to eat with a spoon.

Wowza.

Easy chocolate peanut butter cake is the way to my heart. Moist chocolate cake, fluffy peanut butter frosting. It's the perfect dessert, anytime! I howsweeteats.com #chocolatepeanutbutter #cake

The peanut butter frosting compliments the cake perfectly. Perfectly, I tell you!

I can state with certainty that I like peanut butter frosting better than peanut butter alone.

Can we just make peanut butter frosting toast a thing?

Easy chocolate peanut butter cake is the way to my heart. Moist chocolate cake, fluffy peanut butter frosting. It's the perfect dessert, anytime! I howsweeteats.com #chocolatepeanutbutter #cake

I share this chocolate peanut butter sheet cake on a Wednesday because it’s my ideal Valentine’s dessert. It’s not shaped like a heart and it may not be mousse or molten or truffled. But it’s one of those desserts that you love intensely because it tastes so good. It’s not some crazy or over the top treat, it’s not layered or ombre-ed.

But it’s chocolate and peanut butter. So therefore, it doesn’t have to be. It’s perfect by itself.

Easy chocolate peanut butter cake is the way to my heart. Moist chocolate cake, fluffy peanut butter frosting. It's the perfect dessert, anytime! I howsweeteats.com #chocolatepeanutbutter #cake

Chocolate Peanut Butter Sheet Cake

Chocolate Peanut Butter Sheet Cake

Easy chocolate sheet cake topped with creamy peanut butter frosting is the way to my heart. It’s the perfect dessert, anytime!

chocolate sheet cake

  • 2 1/4 cups  all-purpose flour
  • 1 1/2 teaspoons baking powder
  • 1/2 teaspoon baking soda
  • 1/2 teaspoon salt
  • 3/4 cup dutch process cocoa powder
  • 1 ½ cups sugar
  • 8 tablespoons unsalted butter, (softened)
  • 1/3 cup vegetable oil
  • 1 cup milk
  • 1/2 cup freshly brewed coffee
  • 2 teaspoons  vanilla extract
  • 4 large eggs

peanut butter frosting

  • 4 tablespoons unsalted butter, (softened)
  • 4 tablespoons cream cheese, (softened)
  • 2/3 cup peanut butter
  • 3 to 4 cups of powdered sugar
  • 2 teaspoons vanilla extract
  • pinch of salt
  • 1 to 2 tablespoons of milk, (if needed)
  1. Preheat your oven to 350 degrees F. Spray a 9×13 inch pan with nonstick baking spray.
  2. In the bowl of your electric mixer bowl, stir together the flour, baking powder, soda, salt, cocoa and sugar. Add in the softened butter and oil and mix on low speed until the mixture combines and begins to look like sand.
  3. With the mixer on low speed, beat in the milk, coffee and vanilla extract until combined. Beat in the eggs one at a time, scraping down the sides of the bowl as needed. Once the batter is smooth and combined, pour it into the baking pan.
  4. Bake the cake for 30 to 35 minutes, or until a tested inserted into the center comes back clean. Remove the cake and let it cool completely.
  5. If desired, you can invert the cake onto a platter or piece of parchment paper before frosting.
  6. To make the frosting, beat the butter, cream cheese and peanut butter in the bowl of your electric mixer until creamy and combined. Beat in the powdered sugar gradually, about 1 cup at a time, until a fluffy frosting begins to form. Beat in the vanilla extrast and salt. If the mixture is too thick, beat in 1 tablespoon of milk.
  7. Frost the cooled cake with the peanut butter frosting. If desired, you can drizzle melted chocolate overtop. I usually just melt about ½ cup of chocolate chips in the microwave and drizzle it over top. Slice and serve!

cake from king arthur flour

Easy chocolate peanut butter cake is the way to my heart. Moist chocolate cake, fluffy peanut butter frosting. It's the perfect dessert, anytime! I howsweeteats.com #chocolatepeanutbutter #cake

Breakfast. Yep.

The post Chocolate Sheet Cake with Peanut Butter Frosting. appeared first on How Sweet Eats.

11 Feb 14:26

Cheesy White Pizza on Garlic Bread Crust.

by Jessica

Pro tip: shape your dough into a heart to make the best white pizza!

Our favorite white pizza recipe has four different kinds of cheese and comes on a garlic bread crust! Topped with crushed pepper and lemon - tons of flavor! I howsweeteats.com #white #pizza

I mentioned last week that I might just make every food into a heart shape this week. And I’m sticking to it.

Remember when I first made the heart pizza with heart pepperoni?! I’ve made a version of that every year around Valentine’s Day for Eddie, and now for Max too because he loves pepperoni pizza.

Currently wondering if I could make heart-shaped sliders. Or tacos. Or smashed potatoes.

Nothing is safe from my heart cookie cutter.

Our favorite white pizza recipe has four different kinds of cheese and comes on a garlic bread crust! Topped with crushed pepper and lemon - tons of flavor! I howsweeteats.com #white #pizza

This year, I decided that I could also make a white pizza for Emilia and myself. I mean, this babe will eat anything and gladly inhales pepperoni pizza, but I need someone on my cheesy white pizza side, right?! Someone to love it as much as I do.

So!

After I made a bunch of pizza on New Year’s Eve, so many of you asked on Instagram stories for my best white pizza recipe.

The thing is that I looooove white pizza. I always have, in fact, growing up it was really the only pizza I’d eat! I didn’t want anything to do with tomato sauce. Not a thing.

Our favorite white pizza recipe has four different kinds of cheese and comes on a garlic bread crust! Topped with crushed pepper and lemon - tons of flavor! I howsweeteats.com #white #pizza

And I have a few recipes here for white pizza versions that we really love. Probably too many recipes. Do I just go start a pizza blog?!

This white pizza with garlic sauce and herbs is SO good. It has a ton of flavor.

This other fancier white pizza with slow roasted cherry tomatoes is incredible, because it’s both savory and sweet. The tomatoes burst and get a little caramely in the oven.

Why I find it appropriate to post an additional white pizza recipe?! Probably because to me, they can be made in so many different ways. I often make a white pizza at home with mushrooms and balsamic or even shredded brussels and bacon.

Super good.

This recipe here is a four cheese pizza that doesn’t require a homemade sauce, meaning it comes together fairly quickly! I like to make sure the crust tastes like garlic bread (um remember this garlic crust pizza?!) and then sprinkle it with crushed pepper flakes and lemon zest. It’s a take on the white pizza from Michigan and Trumbull at Federal Galley.

Our favorite white pizza recipe has four different kinds of cheese and comes on a garlic bread crust! Topped with crushed pepper and lemon - tons of flavor! I howsweeteats.com #white #pizza

The result is to die for. It’s super cheesy with a hint of heat. There’s a little brightness from the lemon zest (don’t skip it!) and if you’re feeling it, you can drizzle some extra garlic oil on top.

As for cheeses, I like to go with freshly grated provolone, fresh mozzarella slices, scoops of fresh ricotta and a heavy handed sprinkle of parmesan. These four come together to create the perfect “pizza cheese” flavor.

And you obviously don’t have to shape your dough into a super cheesy (all puns intended) heart.

But I swear it tastes better than way.

Our favorite white pizza recipe has four different kinds of cheese and comes on a garlic bread crust! Topped with crushed pepper and lemon - tons of flavor! I howsweeteats.com #white #pizza

Our Favorite White Pizza

Our Favorite White Pizza on Garlic Bread Crust

Our favorite white pizza recipe has four different kinds of cheese and comes on a garlic bread crust! Topped with crushed pepper and lemon – tons of flavor!

Dough

  • 1 1/8  cups  warm water
  • 3  teaspoons  active dry yeast
  • 1  tablespoon  honey
  • 1  tablespoon  olive oil
  • 3  cups  all-purpose flour
  • 1 teaspoon garlic powder
  • 1 teaspoon dried basil
  • 1  teaspoon  salt

Pizza

  • 1 tablespoon olive oil
  • 2 garlic cloves, (pressed or very finely minced)
  • 2 cups freshly grated provolone cheese
  • 1 (8 ounce) ball fresh mozzarella, (sliced or torn into pieces)
  • ¾ cup ricotta cheese
  • 1/3 cup freshly grated parmigiano-reggiano cheese
  • 1 lemon, (zest freshly grated or sliced into thin ribbons)
  • ½ teaspoon crushed red pepper flakes, (plus more for sprinkling)

optional:

  • 2 cups baby arugula greens
  • lemon juice from the lemon above
  • pinch of salt and pepper

Dough

  1. In a large bowl, combine water, yeast, honey and olive oil. Mix with a spoon, then let sit until foamy, about 10 minutes. Add in 2 1/2 cups flour, garlic powder, basil and salt, stirring with a spoon until the dough comes together but is still sticky. Using your hands, form the dough into a ball and work in the additional 1/2 cup flour, kneading it on a floured surface for a few minutes. Rub the same bowl with olive oil then place the dough inside, turning to coat. Cover with a towel and place in a warm place to rise for about 1-1 1/2 hours.
  2. After the dough has risen, punch it down and place it back on the floured surface. Using a rolling pin or your hands, form it into your desired shape, like the heart above (sometimes I use baking sheets and do rectangles or free form pizzas – this specific dough will yield one pizza large enough to feed about 3-4 people) and place on a baking sheet or pizza pan. Place the towel back over the dough and let sit in the warm place for 10 minutes.
  3. Heat the oven to 425 degrees F. (If I use my pizza stone, I heat my oven to 475 degrees and bake for 15 minutes. If you’re just using a baking sheet, follow the directions below for baking and set to 425 degrees.)

Pizza

  1. Brush the pizza dough all over with the olive oil, making sure to reach the edges. Add the minced garlic cloves and brush them around to distribute them evenly over the crust. Sprinkle the provolone cheese over the crust. Add on the sliced mozzarella and scoops of ricotta cheese. Sprinkle on the parmesan cheese. Add the lemon zest and red pepper flakes.
  2. Bake for 20 to 25 minutes (or around 15 to 20 minutes if using the pizza stone) until the cheese is golden and bubbly. Remove and sprinkle with extra parmesan and pepper flakes if you wish. If you want some greens on the pizza, toss the arugula with the lemon juice and a pinch of salt and pepper. Top the warm pizza with the greens.
  3. Slice and serve!

Our favorite white pizza recipe has four different kinds of cheese and comes on a garlic bread crust! Topped with crushed pepper and lemon - tons of flavor! I howsweeteats.com #white #pizza

And we get in our greens!

The post Cheesy White Pizza on Garlic Bread Crust. appeared first on How Sweet Eats.

10 Feb 02:35

Mini Berry Nutella Heart Pies for Your Valentine!

by Jessica

No one can resist mini heart pies, am I right?

These adorable mini heart pies are filled with a homemade raspberry compote and creamy, chocolatey nutella. So fun and easy to make! I howsweeteats.com #heart #pie

Ever since having kids, I’ve become full on Valentine’s Day obsessed. I don’t know what it is! It’s not just the day – it’s the little season before each holiday that is so exciting to “celebrate” with them. Max gets ridiculously excited to put up the little décor we have for Valentine’s Day.

He also still calls it ValenTIMES day and I just can’t bear to tell him otherwise because it’s so cute.

It’s one of those words that I secretly hope he always pronounces as he says it now.

These adorable mini heart pies are filled with a homemade raspberry compote and creamy, chocolatey nutella. So fun and easy to make! I howsweeteats.com #heart #pie

Anyhoooo.

I made these mini peach hand pies in the summer and have been dyyyying to make some into hearts all year!

It gets me super excited to have another use for Mother Lovett’s pie crust too. She is probably doing cartwheels in her grave right now because I’ve made more with her pie crust than we ever thought imaginable!

Says the person who grew up not caring about pie.

Crazy!

These adorable mini heart pies are filled with a homemade raspberry compote and creamy, chocolatey nutella. So fun and easy to make! I howsweeteats.com #heart #pie

Full disclosure: raspberries are probably my least favorite fruit and I don’t lose my mind over Nutella like most people do. BUT. The combination of these two together? Ooooh it’s good. It’s decadent and tastes like heaven.

These are also super fun to make with kids! Well, the cutting dough part is. The filling… maybe not so much. But what I love about mini pies is when the gorgeous berry filling peeks out during bake time. It’s so vibrant and pretty and makes the crust on top taste that much better.

These adorable mini heart pies are filled with a homemade raspberry compote and creamy, chocolatey nutella. So fun and easy to make! I howsweeteats.com #heart #pie

I used a mini heart cookie cutter that I found at Target a few years ago. You could make whatever size pies you’d like, so you may get less than the almost-two dozen I got, but that just means more room for ice cream!

These adorable mini heart pies are filled with a homemade raspberry compote and creamy, chocolatey nutella. So fun and easy to make! I howsweeteats.com #heart #pie

Crunchy sugar on top for all of us texture lovers, okay?

These adorable mini heart pies are filled with a homemade raspberry compote and creamy, chocolatey nutella. So fun and easy to make! I howsweeteats.com #heart #pie

I whipped up a quick makeshift raspberry compote (or… something like it?) using frozen raspberries. This way, if you can’t find any great berries at the moment, grab some frozen ones and you’re good to go. You could also use your favorite preserves in a pinch.

These adorable mini heart pies are filled with a homemade raspberry compote and creamy, chocolatey nutella. So fun and easy to make! I howsweeteats.com #heart #pie

A dollop of both bursting, syrupy raspberries and nutella go in the center of a super flakey and buttery crust. These are SO good right from the oven, served with vanilla ice cream, extra raspberries drizzled on top and a nutella spoon, which gets all melty in the bowl.

Best Valentine’s treat ever!

p.s. let’s skip the part about how these mini heart pies may look like a scene from Dexter when covered in extra raspberries.

These adorable mini heart pies are filled with a homemade raspberry compote and creamy, chocolatey nutella. So fun and easy to make! I howsweeteats.com #heart #pie

In case you need a few more ideas, I’ve made Nutella s’mores pop tarts with puff pastry and those are to die for. I also made ones with sour cherry jam and smoked cheddar! Equally as delish. This amaretto brownie heart will make you fall in love (as will the heart baking dish – HELLO!) and who can forget the cabernet latte that I shared last year?!

Making that for sure.

Maybe making it today. It has been a WEEK.

These adorable mini heart pies are filled with a homemade raspberry compote and creamy, chocolatey nutella. So fun and easy to make! I howsweeteats.com #heart #pie

How to Make Mini Heart Pies

Mini Raspberry Nutella Heart Pies

These adorable mini heart pies are filled with a homemade raspberry compote and creamy, chocolatey nutella. So fun and easy to make!

Crust

  • 2  cups  sifted all-purpose flour
  • 1  tablespoon  sugar
  • 1  teaspoon  salt
  • 1  large egg lightly beaten
  • 1/2  teaspoon  white vinegar
  • 1/4  cup  ice cold water
  • 3/4  cups  cold unsalted butter cut into pieces, (12 tablespoons)

Filling

  • 2 ½ cups frozen raspberries
  • ½ cup sugar
  • ½ cup Nutella
  1. Add the flour, sugar and salt to a food processor and pulse just until combined. In a small bowl, whisk mix together the egg, vinegar and water. Add the cold butter pieces into the food processor and pulse until small coarse crumbs remain. Sprinkle the water/egg mixture over the flour and pulse again until the dough comes together.
  2. Remove the dough with your hands and wrap it in plastic wrap. Stick it in the fridge for 30 minutes.
  3. Heat the frozen raspberries and sugar in a saucepan over medium-low heat. Cook until it’s bubbling and the fruit is soft and slightly syrupy, about 10 minutes. Let it cool completely.
  4. Preheat the oven to 375 degrees F. Line a baking sheet with parchment paper. Fill a small bowl with water.
  5. Roll out the dough until it’s about 1/4 inch in thickness. Use a 2-inch heart cookie cutter to cut hearts out of the dough. Make sure to cut an even amount since you will press them together!
  6. Place the hearts on the baking sheet. Fill every other round with a teaspoon of the nutella and top with a teaspoon of the raspberry mixture. Dip a finger in the water and run it along the outside of the dough round that has the filling. Place an empty heart on top of the filled heart. Press the outsides down with a fork to seal the hearts together. Repeat with the remaining hearts.
  7. Beat the egg and water together. Brush it on top of all the pies and sprinkle with coarse sugar. Cut and “x” in the top with a paring knife.
  8. Bake the pies for 20 to 25 minutes, or until golden brown. Remove and let cool slightly. Serve with vanilla ice cream!

These adorable mini heart pies are filled with a homemade raspberry compote and creamy, chocolatey nutella. So fun and easy to make! I howsweeteats.com #heart #pie

Don’t mind me while I go cut every food into a heart shape for the next week.

The post Mini Berry Nutella Heart Pies for Your Valentine! appeared first on How Sweet Eats.