Shared posts

11 Dec 16:19

Golden Beet Ravioli with Pine Nut Cheese

by Gena
Little.pink.hat

I want to try dat

golden beet ravioli with pine nut cheese // choosing raw

When I was first getting into raw foods, raw ravioli, prepared using thinly sliced beets as the pasta portion, was one of the first recipes I sampled and then learned. The dish I tried was served at Pure Food and Wine. It was simple, elegant, incredibly flavorful, and it evoked a traditional dish–ravioli–with a fresh perspective. I loved it.

I’ve made many beet raviolis since I first discovered the dish. There is, as a matter of fact, a beet ravioli in my cookbook.

SI0C9036

 That one is made with cashew cheese. This one is made with pine nut cheese, which is a little bit more complex and nutty tasting (as opposed to cashew, which is pretty neutral), and I used only golden beets, as opposed to a red/golden mixture (or red alone). I love the bright pop of color, especially if you serve it with a little drizzle of pesto or basil oil.

golden beet ravioli with pine nut cheese // choosing raw

The ravioli make an elegant and easy appetizer, especially if you prep them ahead of time! Steven and I had friends over for dinner two weeks ago, and I served these as a first course. I sliced the beets and marinated them in advance, and I prepped the pine nut cheese two days ahead of time. I whipped up a quick fennel and arugula salad at the last minute, using the beet marinade as dressing, and voila: insta-appetizer. Insta, and very tasty. Here’s the recipe.

Golden Beet Ravioli with Pine Nut Cheese

Yield: Up to 16 Ravioli

Ingredients

  • For the ravioli:
  • 1-2 large golden beets, peeled, four edges sliced down to create a square shape
  • 2 tablespoons olive oil
  • 2 tablespoons lemon juice
  • 1/4 teaspoon salt
  • For the pine nut cheese:
  • 1 cup pine nuts, soaked 2-4 hours and drained
  • 2 tablespoons lemon juice
  • 2 tablespoons nutritional yeast
  • 1/2 teaspoon salt
  • 1 small clove garlic, minced (optional)
  • Pepper to taste
  • 1/4 - 1/2 cup water (use judgment)
  • For the basil oil (optional)
  • 1 cup basil leaves
  • 1/2 cup olive oil
  • Pinch salt

Instructions

  1. To prepare the beet ravioli, slice the beet into very thin slices (less than 1/8 of an inch). It's easiest to do this with a mandolin, but a sharp knife will do the trick! Cut as many beet slices as you'll need to serve 2-6 ravioli per person, 2 beet slices per ravioli. The pine nut cheese will yield enough for approximately 16 ravioli, but you can make half of that and then enjoy the cheese on top of salads or as a dip, too.
  2. To prepare the pine nut cheese, add all ingredients except for the water to a food processor or a high speed blender. Start by adding 1/4 cup water and blending the mixture on high speed. Add more water as needed as you go along; the goal is to have a mixture that resembles a thick, creamy hummus in texture. Stop often to scrape the bowl down as you go.
  3. To prepare the basil oil, blend the basil, oil, and salt till the mixture is smooth.
  4. To serve the ravioli, place one beet square on your prep surface and top it with 1 tablespoon of the pine nut cheese. Top the cheese with the other beet square and gently press the edges together. Arrange ravioli on a serving plate and drizzle them with basil oil, if desired.
3.0
http://www.choosingraw.com/golden-beet-ravioli-with-pine-nut-cheese/

golden beet ravioli with pine nut cheese // choosing raw

Delicate and delicious. Perhaps you’ll consider making these for a holiday dinner with friends, or heck, for yourself, as part of an especially pretty dinner! I hope you love them.

Thanks for all of the great responses to my holiday gift guide! Glad you’re enjoying it. I’ll see you back here on Friday, with a lovely seasonal soup recipe.

xo

07 Dec 20:44

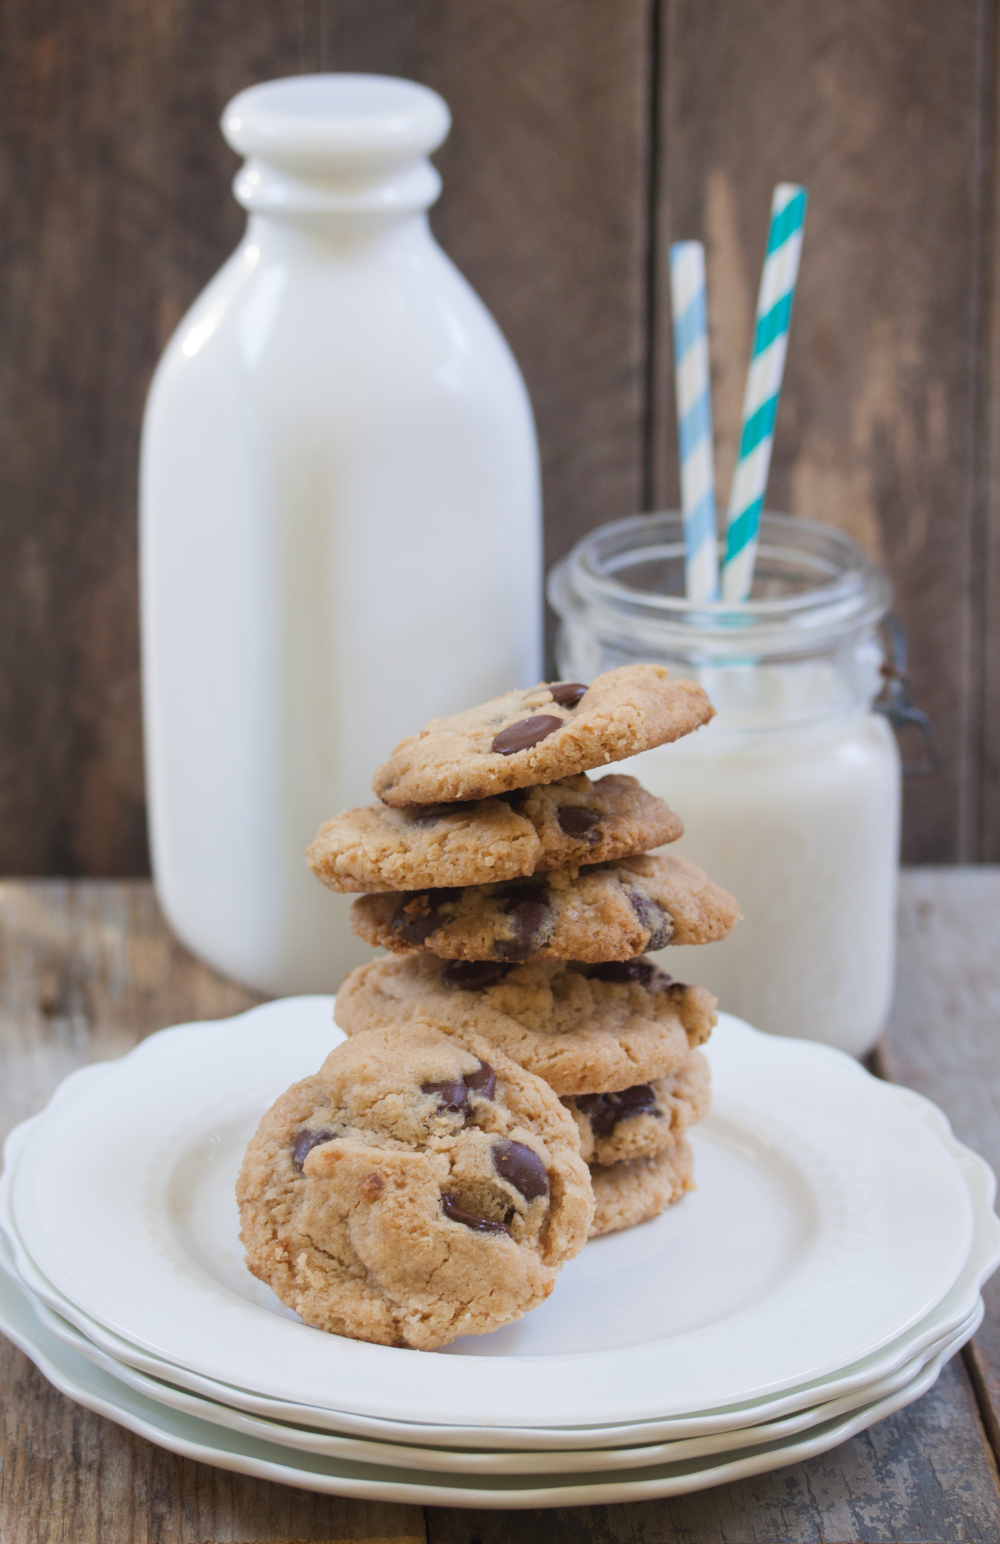
Peanut Butter Chocolate Chip Cookies

by allyson

Peanut Butter Chocolate Chip Cookies

It’s raining here in Philly today, so I decided to brighten things up with some cookies that combine my kids and my two favorite dessert enhancers: chocolate chips and peanut butter.

These are as easy as can be; and, if you’re looking for an even easier recipe, feel free to switch out the listed flours (brown rice, tapioca, potato starch, and xanthan gum) for your favorite all purpose gluten free blend. Or, if you’re not gluten-intolerant, sub in whole wheat flour.

Peanut Butter Chocolate Chip Cookies

gluten-free | dairy-free | egg-free

  • 1/2 cup nondairy margarine or coconut oil *
  • 1/2 cup creamy peanut butter
  • 1 cup sugar (evaporated cane juice) or coconut palm sugar
  • 1 teaspoon vanilla extract
  • 1 tablespoon flaxseed meal mixed with 2 tablespoons water
  • 1/2 teaspoon salt
  • 1/2 teaspoon baking powder
  • 1/2 teaspoon baking soda
  • 1 teaspoon xanthan gum
  • 3/4 cup brown rice flour
  • 1/4 cup tapioca flour
  • 1/2 cup potato starch
  • 1 tablespoon water
  • 1 cup nondairy chocolate chips

Preheat your oven to 375º F.

In a large bowl, cream together the coconut oil, peanut butter, vanilla extract, and sugar. Add the prepared flaxseed meal and stir well to combine. In a separate smaller bowl, whisk together the salt, baking powder, baking soda, xanthan gum, brown rice flour, tapioca flour, and potato starch. Stir together until well mixed, The mixture will be clumpy but crumbly. Add 1 tablespoon (you may need a touch more if your peanut butter is very thick) water and mix well until dough softens. Fold in the chocolate chips.

Scoop into 11/2 inch balls and place 2 inches apart onto an ungreased cookie sheet. Bake for 12 minutes on the middle rack of your oven. Let cool completely before enjoying.

* note: if using coconut oil, cookies will be crispier

Share with friends!

The post Peanut Butter Chocolate Chip Cookies appeared first on Allyson Kramer | Gluten-Free Vegan Recipes | Food Photography.

07 Dec 20:43

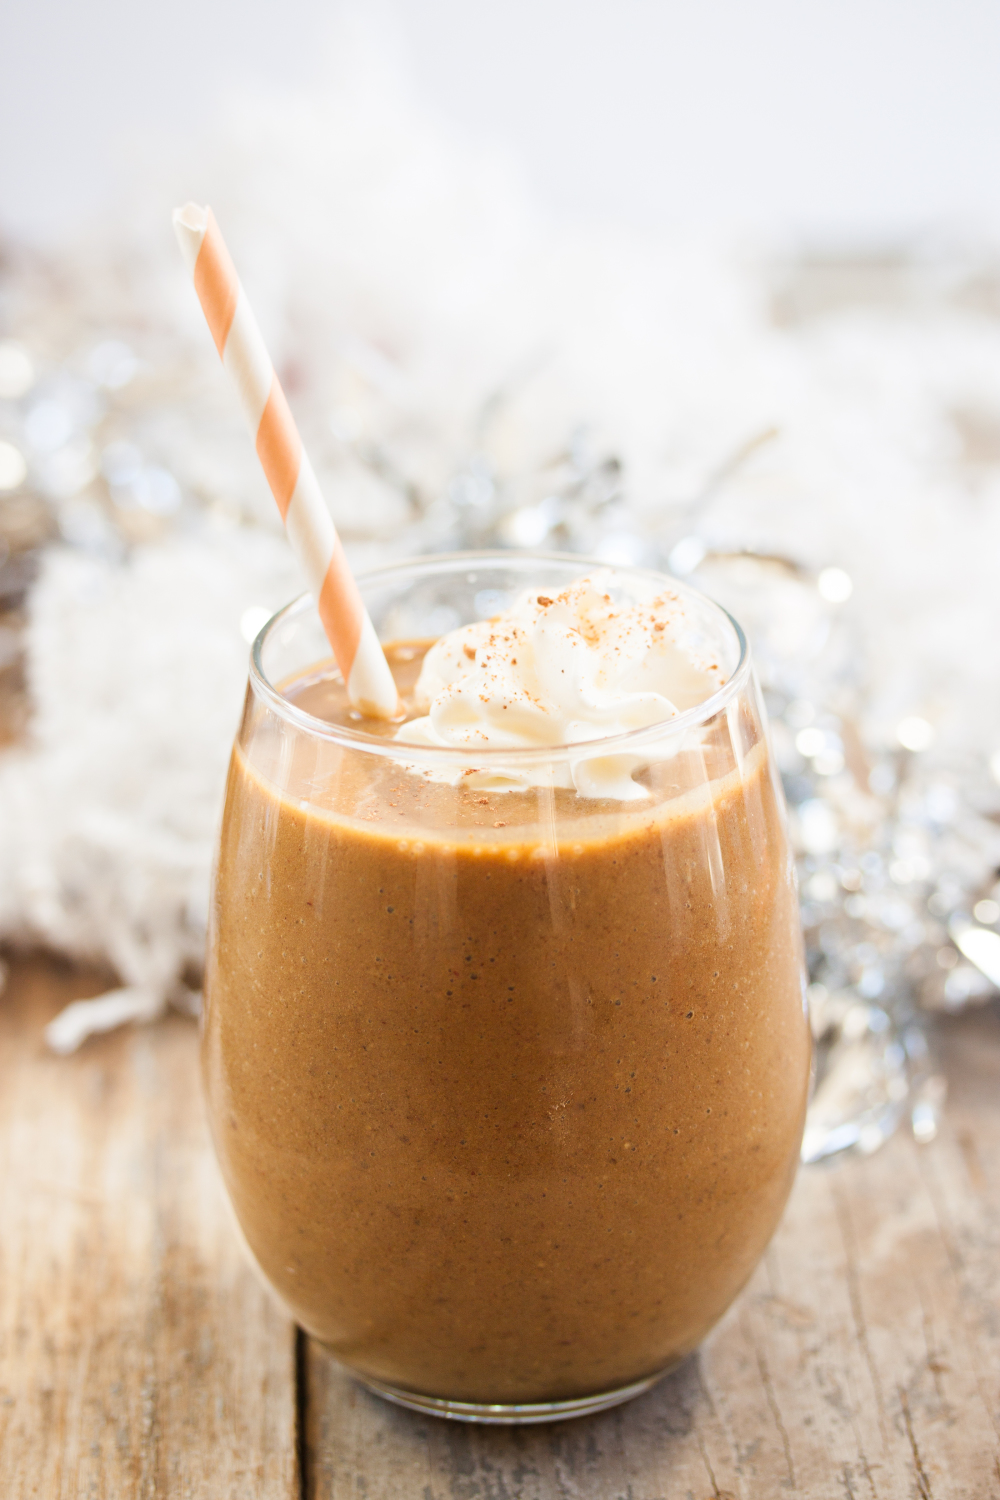
Gingerbread Smoothie

by allyson

Gingerbread Smoothie | Vegan & Gluten-Free  | Allyson Kramer

No need to worry about overdoing it on dessert this holiday season with this insanely delicious smoothie that tastes exactly like dessert. I’m serious. This spicy smoothie tastes so much like you are sipping straight-up gingerbread, you won’t believe it’s actually healthy.

Gingerbread Smoothie | Vegan & Gluten-Free

  • 1 large banana, peeled and frozen
  • 1/4 cup pecans (halves)
  • Small hunk of fresh ginger (about the size of a small grape), peeled
  • 1 tablespoon blackstrap molasses
  • 3  medjool dates
  • 2 dashes nutmeg
  • 1/4 teaspoon cinnamon
  • 1 1/2 cups cold unsweetened almond milk (or your fave nondairy milk)

Blend all ingredients on highest speed of your blender until extremely smooth. Add more almond milk to thin, if desired. Top with whipped coconut cream or enjoy as is.

Makes 1 large smoothie or two small ones to share.


Share with friends!

The post Gingerbread Smoothie appeared first on Allyson Kramer | Gluten-Free Vegan Recipes | Food Photography.

13 Mar 14:55

Eggplant Bacon Wrapped, Avocado Stuffed Dates

by Gena
Little.pink.hat

I want to try making eggplant bacon.

eggplant bacon wrapped dates header

As you may have guessed already, this recipe is a raw, vegan spin on bacon-wrapped, stuffed dates, a popular appetizer/hors d’oeuvre on tapas menus.. We might also call it a creative interpretation of devils on horseback, which is an English pub snack consisting of dates that have been stuffed with chutney or cheese, wrapped in bacon, baked, and sometimes served on toast.

Either way, you get the idea here: eggplant bacon is standing in for the real deal, while creamy avocado takes the place of cheese. Dates are of course the centerpiece of both recipes–the original and this reinvented one–and in both cases, they are predictably divine.

Before I get to the recipe itself, a few short words on how to prepare the dates. First, I recommend using pitted medjool dates; the smaller neglet dates just aren’t the same.

Second, to get started, take a small piece of avocado (maybe an inch long and thin), and stuff it into the center of each pitted date.

dates and avocado

Next, take a long, thin strip of eggplant bacon and wrap it around the date:

wrapping

And finally, secure each date with a toothpick:

wrapping 2 eggplant bacon wrapped dates

So easy. Once you have the eggplant bacon prepared, everything else is just assembly. Here’s the complete recipe.

Eggplant Bacon Wrapped, Avocado Stuffed Dates

Yield: 20 dates

Serving Size: 1 date

Ingredients

  • 1 batch eggplant bacon, cut into thin strips (about 1-inch thick)
  • 20 pitted medjool dates
  • 1 Haas avocado, pitted and cut into about 20 small pieces

Instructions

  1. 1. Prepare the eggplant bacon according to original instructions (here). If you don't have a dehydrator, there's a baking option for the eggplant in the original recipe. Watch it closely; it'll burn quickly!
  2. 2. Place a small piece of avocado in the center of each pitted date.
  3. 3. Wrap a strip of eggplant bacon around each date, and roll it up. Secure ends with a toothpick, and serve.
Schema/Recipe SEO Data Markup by ZipList Recipe Plugin
2.2
http://www.choosingraw.com/eggplant-bacon-wrapped-avocado-stuffed-dates/

Aside from being cute, these appetizers have saltiness, sweetness, and a little bit of fat. All of the essentials. And they’re awfully cute.

eggplant bacon wrapped dates 2

While I can’t claim that this dish can really approximate the original–bacon, after all, is just one of those foods it’s hard to replicate–I can promise you a lot of flavor. Enjoy the recipe, and sleep tight.

xo

25 Feb 22:37

Kickstarter Update: Halfway there!

by Adrienne

Photo by Ted Bigsby
Kickstarter_Logo
Kickstarter goal

We just passed the half way mark on kickstarter! If you’ve been thinking about backing this project or hesitating for any reason, NOW IS YOUR TIME TO SHINE!

With love, light, and faith-
xxxxxxx
adorpheus

09 Feb 15:38

Arisia Photos are up PLUS – Help adorpheus make an album that will change your life, now on Kickstarter!

by Orpheus

support adorpheus on kickstarter!
Those of you who’ve been following my personal blog for a while know that I’ve been working on an album for like 3 years. I’m so FREAKING EXCITED TO ANNOUNCE that the time is finally nigh for me to finish it, and I’d really love it if you helped me do so!

Check it out right here!

Arisia 2014 photos

In cosplay related news – my andorian family and I went to Arisia 2014 for saturday only! You can check out the photos I took here or on facebook!

29 Jan 15:37

Why the Term ‘Psychopath’ is Racist and Ableist

by blackgirldangerous@gmail.com

by Lydia Brown

I have become used to being told that I do not have feelings, that I am innately incapable of relating to other people as human beings or having any empathy at all, that this is a core component of what it means to be autistic. I have become used to hearing this said constantly by so-called professionals, dramatically by television personalities, clinically by journalists and academics, and casually by friends, acquaintances, family. But I have never become used to the feeling of absolute devastation weighing somewhere deep in my chest each time I find myself on the receiving end of this accusation.

Empathy is what makes us human.

It’s no wonder that the idea of psychopathy is terrifying. If psychopathy means the inability to experience empathy, and empathy is what makes us human, then psychopathy is literally the dehumanizing condition. Psychopaths populate crime dramas, horror films, murder mysteries, and thrillers. It’s the casual diagnosis for mass murderers, serial rapists, and child abusers.

But it is also deeply personal, profoundly ableist and sanist, and rooted in a complex, interlocking web of structural racism, ageism, and sexism.

In 1944, the Austrian pediatrician Hans Asperger published a paper describing a condition that he called “autistic psychopathy.”

Theory of mind, in clinical psychology, means the cognitive ability to recognize that other people have different knowledge, experiences, emotions, and beliefs than oneself. Theory of mind is something that autistic people, like me, supposedly lack. Theory of mind is what makes empathy with other people possible.

When I was a sophomore in college, my mom sent me an email that said, “You need to work on your theory of mind.”

Dagger to the gut, I reeled at the words and, with shaky fingers, called home.

“Never say that to me again. Never.”

When I was a sophomore in high school, I was wrongfully accused of planning a school shooting. Another autistic friend who was accused of planting a bomb at her school was detained and interrogated for hours while the entire school went into lockdown. In response to frequent claims in the media and by policymakers that autistic people lack empathy (and are therefore violent psychopaths), many people in the autistic community, including autistic activists, begin the process of disavowal.

“No, autistic people are nothing like psychopaths. We are more likely to be the victims of crime while psychopaths are usually victimizers.”

“No, someone who would shoot dozens of innocent children wasn’t autistic. That’s not autism. That’s mental illness.”

“An autistic person wouldn’t commit such horribly violent crimes. Only a psychopath could do that.”

(continued below)


BGD is a reader-funded, non-profit project. Please GIVE today and help amplify marginalized voices.


If empathy is what makes us human, and autistic people are as human as anyone else, then we must have empathy. It must be some other kind of person who doesn’t experience empathy. It must be someone who is truly psychopathic. This is the logic path that afflicts so many disability communities. Disavowal of one another has become a way of life. Many autistic people routinely decry the use of the slur retarded, yet assert in the same breath that they aren’t crazy or mentally ill. Many physically disabled activists proudly say that their minds work just fine.

When we commit to examining our language and ideas and deconstructing the ableism we find in them, we must make a full, not partial or half-hearted, commitment. When we stop using autistic, crippled, and retarded as insults, when we realize the urgent need to stop scapegoating violence on “mental illness” and “emotional instability or disturbance,” when we learn to stop referring to our political opponents as blind, deaf, or crippled in their ideologies, we must also critically re-examine our use of the psychopathy label.

In radical communities working toward intersectional social justice, the figure of the psychopath is invoked all too often to characterize members of oppressive classes, especially when they are in a position of political power in addition to apolitical structural power.

Empathy is what makes us human. 

In September 2013, a popular blogger responded to a CEO’s appalling statement that criticism of executive bonuses is just as bad as lynching by invoking the specter of psychopathy.

In the alternate reality of wealthy people, criticizing someone’s wealth is just as bad as kidnapping someone, dragging them–by force–to a tree, beating the shit out of them, wrapping a rope around their neck, stringing them up until their neck snaps, setting them on fire, having a barbecue around the charred remains, and taking photographs of the whole thing for postcards and posterity. These are the psychopaths in charge of this corporatocracy we call the United States of America.

The term psychopath is as common in the vocabulary of the average radical social justice organizer as it is in that of the average mainstream political commentator. Yet psychopathy isn’t even a medical or psychiatric diagnosis. It doesn’t exist in the DSM-IV or the DSM-5, and as much as I hate lending any further credence to the medical-industrial complex’s state-sanctioned and socially-approved authority, this is important. Even the medical-industrial complex does not recognize psychopathy as a diagnosis. 

However, most people who point out that psychopathy is not considered a diagnosis typically follow up by explaining that antisocial personality disorder (APD), conduct disorder, and oppositional defiant disorder (ODD) are the closest medically accepted diagnoses to what is meant by psychopathy. These labels are recognized and codified as psychiatric conditions by the medical establishment. And who are the people typically diagnosed with Antisocial Personality Disorder, Conduct Disorder, and Oppositional Defiant Disorder? They are overwhelmingly poor students of color (especially dark-skinned people of color) who frequently have other disabilities.

Antisocial Personality Disorder, the diagnostic category that comes closest to approximating the lay definition of psychopathy, is most often a tool for criminalizing poverty, blackness and brownness, and disability. It is the diagnostic label that legitimizes non-compliance as a mental health problem.

Refusal to take medications? Non-compliant. Failing math class? Non-compliant. Stimming in public? Non-compliant.

If you are non-compliant, you are anti-social. You are mentally ill. You are a psychopath.

In August 2013, Anthony Stokes was denied a life-saving heart transplant because he was Black and labeled non-compliant.

A physician’s form for students in a study abroad program asks the doctor whether the student has a history of emotional disturbance.  It asks whether they have displayed “difficulties in relations with parents, authority figures, peers” with reckless, chilling disregard for whether the student is the victim of parental abuse (financial, physical, emotional, sexual), bullying or other violence by peers, or violence by authority figures (including teachers and police). “Difficulties” in those relations are automatically rendered non-normative, deviant, and thus, suspect and pathological, symptomatic of some supposed larger psychiatric crisis or disturbed personality.

A billboard in Washington DC buses asked parents to volunteer their children for a study on conduct disorder. Symptoms? Failure to conform to social norms (that could mean anyone queer, trans*, mad, autistic, or politically radical), trouble with the law (hell, that could mean anyone who uses weed or attends protests), consistent irresponsibility (that could be anyone for various poverty, disability, or abuse related reasons), impulsivity (as if this is pathological?), manipulative behavior (as a catch-all for anything non-normative or potentially subversive), and lack of empathy.

The language of pathology, mental illness, madness, disease, and disability, has long been used to reinforce other existing structural oppressions like racism, classism, sexism, heterosexism, binarism, cissexism, and ableism. And it is most disheartening when those who purport to work toward dismantling those systems still use ableism as metaphor. Ableist metaphor is all-pervasive in public discourse, academia, grassroots organizing, and left-leaning movements as well as in conservative, neoliberal, and nationalist movements. It draws on the language of disability to characterize, denigrate, attack, rhetoricize, and politicize—and it does so based on the presumption that deviation from typical thought, movement, emotional processing, communication, bodily/mental functioning, learning, remembering, sensing is evidence of defect, deficiency, disorder, and ultimately, moral failure.

To use psychopathy as the lens through which one views either systemic or individual violence is to reinforce the structural power of the medical-industrial complex at the expense of disabled people, poor people, and people of color.

My advice: Be precise in your language and say that oppressive structures are violent and manipulative. Say that those who abuse their structural positions of power act with reckless disregard for other human beings. Say that they are callous and unabashedly wielding the power that comes with their privilege.

But don’t call them psychopaths.

I’ve experienced enough ableism in my life to last me several lifetimes. I don’t need fellow radicals feeding into ableism.

We talk about intersectionality in our identities, in our organizing, and in our writing so often. It is past time to move from talk to accountability.  We must hold ourselves accountable for examining and deconstructing ableism in all its forms in our work, our communities, our personal lives, and our relationships with each other. Because our lives, our dignity, our very ability to be recognized as human, depend on it.

All work published on BGD is the intellectual property of its writers. Please do not republish anything from this site without express written permission from BGD. For more info, go here.

LydiaLydia Brown is a multiply-marginalized disabled activist who focuses on a number of issues related to violence against disabled people. She blogs at Autistic Hoya.


Get BGD creator Mia McKenzie’s debut literary novel, The Summer We Got Free. It’s the winner of the Lambda Literary Award.

Follow us on Twitter: @blackgirldanger

LIKE us on Facebook

The post Why the Term ‘Psychopath’ is Racist and Ableist appeared first on .

29 Jan 15:27

Chaosmos board game keeps you on the edge of cosmic catastrophe

by Ed Grabianowski

Chaosmos board game keeps you on the edge of cosmic catastrophe

In the board game Chaosmos, the Chaos Clock counts down to the complete collapse of the universe. Hidden on some desolate planet protected by traps and trickery is an artifact that can save the cosmos — but you're not the only one after it.

Read more...


29 Jan 15:13

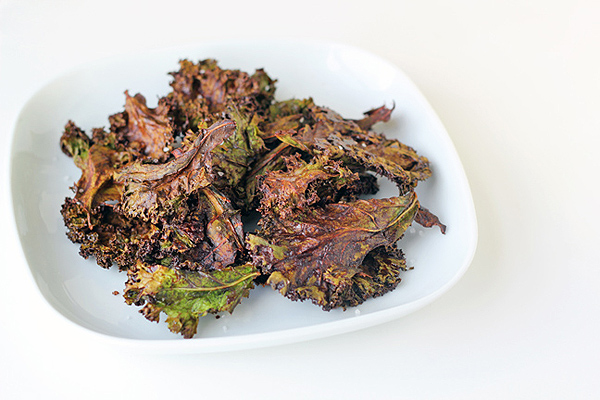
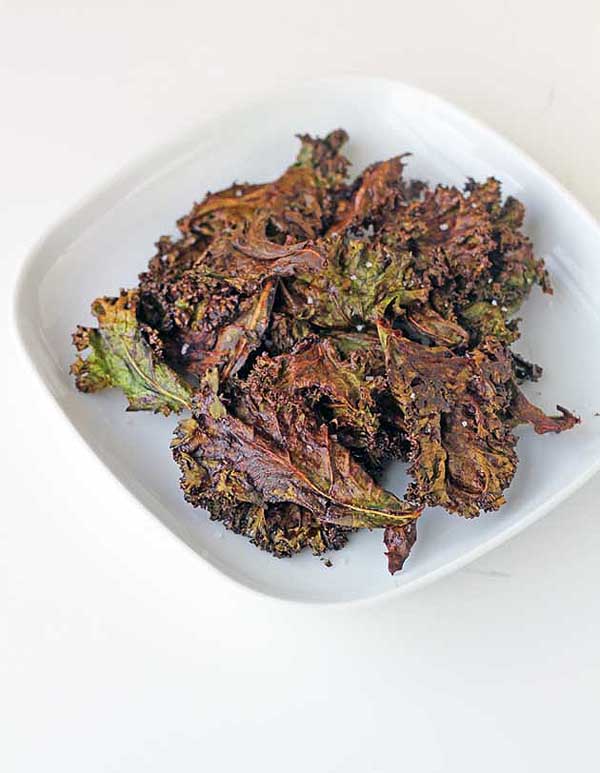
Chocolate Kale Chips from In Sonnet’s Kitchen

by Ricki

Today please welcome Sonnet from In Sonnet’s Kitchen!

sonnetlauberth

The first time I stumbled upon Sonnet’s blog a couple of years ago, I was blown away. Her recipes are always fresh and vibrant, with innovative flavor combinations, and her photos are just spectacular. Sonnet is a Certified Holistic Health coach, which means you’ll find real food ingredients and lots of health-promoting tips and advice on her blog. She is also the author of the Seasonal Comfort Food cookbook and regular contributor to Simply Gluten-Free Magazine. I hope you enjoy this incredible recipe today–two of my all-time favorite foods in one yummy, healthy snack!

chocolate kale chips recipe on rickiheller.com


Hi there! I’m so excited to be guest posting for Ricki while she is working on her new cookbook! My name is Sonnet and I blog over at In Sonnet’s Kitchen, a healthy living blog focused on enjoying real food (including vegan, gluten-free & sugar-free recipes) and living your happiest life.

As a certified holistic health coach, one my goals is to help folks discover delicious recipes that you can easily recreate in your own kitchen.

I am always inspired by Ricki’s creativity around sweets so I’m really excited to share one of my favorite recipes which transforms kale from a savory treat into a salty, coconut-y, chocolate-y indulgence. This one is a must-make.

vegan, grain-free, sugar-free chocolate kale chips recipe on rickiheller.com

I believe that eating dark, leafy greens is essential to our health, but I know that many of us struggle with finding ways to get more greens into our diets. Do you fall into this category?  If so, maybe it’s time we talk.

Dark, leafy greens (think: kale, collard greens, chard, spinach, etc) are excellent sources of vitamins (such as Vitamin A, Vitamin C, and folate), minerals (like iron and calcium), and fiber. There are plenty of ways to enjoy greens as they can be eaten raw in salads, cooked in stir-fries and soups, sautéed for a healthy side dish, or blended into a smoothie!

Some of my favorite greens recipes include:

And, let me just say that if you haven’t tried kale chips before, there is no time like the present. I mean, when kale is covered with chocolate? Well, let’s just say that kale has never tasted so good.

Here’s to your health and I hope you enjoy eating your greens!

vegan, sugar-free, grain-free chocolate kale chips on rickiheller.com

    Print This!    

Chocolate-Covered Kale Chips

1 cup (240 ml) kale leaves, torn into bite-size pieces, tough stems removed
1-1/2  tsp (7.5 ml) coconut oil, preferably organic
1 Tbsp (15 ml) unsweetened cocoa powder
1 Tbsp (15 ml) pure maple syrup [I'd use coconut nectar to for earlier stages of the ACD]
coarse sea salt, to taste

Preheat oven to 350 F (180 C). Line a large sheet pan or cookie sheet with parchment.

Place kale leaves in a large bowl.

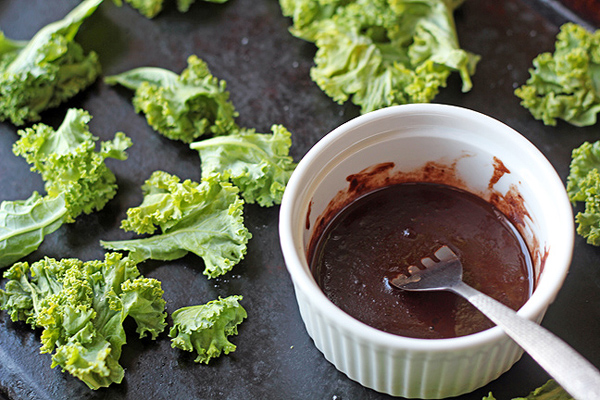
In a small bowl, mix coconut oil, cocoa powder and maple syrup. Toss leaves in chocolate-oil mixture and coat thoroughly.

Lay the leaves flat on sheet pan, making sure kale is spread out and leaves don’t touch each other. Top with sea salt and bake about 15 minutes, turning at least once, until chips are crispy. Makes one serving.

Suitable for: ACD  Stage 3 and beyond [with coconut nectar], sugar-free, gluten-free, grain-free, yeast-free, dairy-free, egg free, corn-free, soy-free, nut free, vegan, low glycemic.

Never miss a recipe–or a comment from The Girls! Click here to subscribe to RickiHeller.com via email. (“We love subscribers, Mum. . . almost as much as we love treats!”)

Sonnet Lauberth is a certified holistic health coach, food blogger, and writer on a mission to help people create fresh food that nourishes their body and tastes good! She is also the author of The Seasonal Comfort Food Cookbook, featuring over 55 healthy grain-free, gluten-free, and dairy-free recipes for fall and winter. Visit her blog In Sonnet’s Kitchen, for seasonal recipes, DIY beauty remedies, and tips on healthy, happy living.
Share

(Visited 962 times, 3 visits today)
24 Jan 14:16

Last minute holiday shopping? FUCK ALL THAT NOISE. Why don’t you...


Last minute holiday shopping? FUCK ALL THAT NOISE. Why don’t you stay home and celebrate in style with some of these spicy sweet bastards? The sugar will keep you awake in case some son of a bitch tries sliding down your chimney in the middle of the night to pilfer your baked goods. NOT THIS YEAR, MOTHERFUCKER. 

FROSTED GINGERBREAD BITES

1 ½ cups flour (unbleached white, whole wheat, or a blend will work)

2 teaspoons ground ginger

1 teaspoon ground cinnamon

¼ teaspoon ground allspice

1 teaspoon baking powder

½ teaspoon baking soda

½ cup brown sugar

½ teaspoon salt

1 cup canned coconut milk

½ cup blackstrap molasses

FROSTING DRIZZLE (optional)

1 tablespoon coconut milk

¾ teaspoon lemon juice

1/3 cup powder sugar, sifted

Warm the oven to 350 degrees. Grease and flour an 8 x 8 baking pan and put a square of parchment paper at the bottom so this motherfucker won’t stick. Grab a medium bowl and dump in the flour, spices, baking powder, baking soda, sugar, and salt. Whisk all that shit around to get out any brown sugar clumps.

In a small saucepan mix together the coconut milk and the molasses. Put it over a medium low heat until the mixture just starts to bubble on the edges. Slowly whisk the coconut milk mixture into the dry ingredients until there aren’t any more dry spots. The batter is going to be thick like a brownie batter but a little spongy. Calm the fuck down before you email me and just trust that shit is correct. Pour the batter into the baking pan and gently move it around so that it is mostly even. Bake for 25-30 minutes. An easy way to check if it’s done is to poke the middle of that motherfucker with a toothpick and if it comes out clean, it’s done.

Once you see that shit is done, pull it out of the oven and let it cool for 10 minutes. Be sure to turn the oven off. Go check that shit right now, since we’re talking about it. Now you should be able to gently slide the cake out of the pan and let it finish cooling on a wire rack or plate or whateverthefuck you got. When it’s cool enough, cut it up into two-inch squares. If you want to frost that shit, I recommend doing it the day you serve the bites.

FROSTING:

Grab a small saucepan and gently warm the coconut milk at a low-medium heat for just about 15-30 seconds. You don’t want that shit boiling, just hot. Turn off the heat and whisk in the powdered sugar and lemon juice. If the frosting looks too thin, add a little more powdered sugar. Before it starts to harden, take a spoon and drizzle it over the cake. Crisscross the drizzle and make it look all fancy or just pour that shit on if you don’t give a fuck.

Makes 16 cake bites


24 Jan 14:13

I made a Supernatural Devil’s Trap Pie! Can be gluten free, sugar free, vegan (recipe)

by Adrienne
Little.pink.hat

this was SO GOOD

Bring me some pie.

So… I may or may not have recently started watching Supernatural (by that I mean I watched all 8.5 seasons over the course of what? A month?). I also may or may not be completely fucking obsessed with it. You probably already know this if you follow me on Tumblr or any other social media site. Blame Ell.

What can I say? I love it so much! I haven’t felt this inspired by a show since Deep Space 9. The characters, the stories, everything! Angels! Demons! ANGELS!

THIS GUY!:

Stolen from cakeisnotpiesammy on Tumblr

This year for Ell’s birthday we had a pie party (we made 4 different kinds of pie!) and I’m not sure if I’ve just been practicing a ton, but I suddenly realized that I’ve got this pie-making thing down. After the pie party, Ell and I BOTH had the idea to make a pie with a Devil’s Trap on it, so that’s exactly what we did on New Year’s Eve.

I chose cherry pie for aesthetic reasons, since cherry pie filling looks scarily like bloody entrails or maybe the pit of hell (I know, I know…), though obviously you can fill it with whatever you want. The devil’s trap is chocolate sauce. A lot of people, including Ell and Vynni, say that they don’t like cherry pie – which is probably cuz y’all are used to eating that stuff that comes from a can. This is totally better than that. This is actually good. Ell and Vynni loved it. I loved it. I think even Dean would love this pie, despite it being sugar-free, gluten free, and vegan.

Thanks to yeahilovebeinpurple on Tumblr

For the crust we used Namaste Foods Biscuits Pie Crust and More Mix. We followed the directions for pie crust, except we substituted the butter with Earth Balance (the stick kind) and the egg with a flax “egg”. You can use a pre-made pie crust if that behooves you.

Demon Proof Cherry Pie - can be gluten free, sugar free, vegan (recipe)

Demon Proof Cherry Pie

(sugar free, gluten free, vegan)

I make it up as I go along for this pie, so the measurements are approximate. Use your own discretion, you culinary genius, you!

For the crust

  • see above note about the crust

For the filling

  • 2 ten ounce bags of frozen pitted cherries, preferably organic (about 4-5 cups). Obviously you can use fresh cherries too, but do YOU wanna remove the seeds from 4 cups of cherries?
  • 1 cup of water
  • 1/2 tsp of sea salt
  • 3 TBSP (or more to taste) of Stevia Baking Blend Powder or other dry sweetener
  • 1 TBSP of organic cornstarch

For the Devil’s Trap
Again, I was winging it here. This also made way more chocolate than we needed (we ate the rest like fondue and dipped banana slices in it).

  • 1/4 cup cocoa powder
  • 2-3 TBSP coconut oil, melted
  • Stevia or other sweetener to taste

(You can also melt some vegan chocolate chips if you don’t want to make your own chocolate sauce from scratch).

Method

Preheat the oven to 350f/176c.

Make the pie crust according to the package directions if you’re not using a pre-made crust. Put the bottom crust into a greased 8-inch pie pan.

To make the filling, combine the first 4 filling ingredients in a saucepan over medium heat. Cook until the stevia or other sweetener is dissolved and the cherries are defrosted, and the water is boiling a little. Add more water if necessary. Once its boiling, add in the cornstarch and whisk until thickened.

Pour the cooked filling into the bottom crust and prepare the top crust while the mixture cools. Add the top crust when ready.

For the devil’s trap, I etched it into the top crust with a knife prior to baking (above). We used this image from Super-Wiki as a reference:

Thanks Super-wiki

Anyways, after that we put it in the oven until it looked done. Probably about a half hour, but I wasn’t really paying attention. You bake it until the crust is browned a little and if you can see any of the filling, it should be bubbling.

Before decorating with chocolate, set the pie aside to cool for at least 45 minutes. Especially if you’re using coconut oil, you don’t want the pie to be warm at all because it’ll melt the chocolate.

After the pie is cooled off, assemble all the chocolate ingredients in a saucepan and heat over low until the coconut oil is melted. Whisk them together to form a chocolate sauce.

I used a knife to carefully (painfully) draw the design by dipping the tip of the knife in chocolate and drawing along the lines I had etched in the crust prior to baking. This was tricky and not that fun. If you have a better method for doing this, go ahead and try that. Let the chocolate cool.

Eat.

Dean eating pie

Wishing you a blessed new year!
- adorpheus

GIF credits: 1 2 3

05 Dec 17:00

Gooey Vegan Chocolate Doughnuts from Baked Doughnuts for Everyone

by Gena

FW5664_035a

When I’m looking for recipes that are vibrant, beautiful, and satisfying, Edible Perspective is always one of the first blogs I look to. Ashley McLaughlin, the recipe developer, writer, and (amazing) photographer behind this online space, has a knack for crowd-pleasing food that feels both simple and celebratory at the same time. Most of the time I’m drawn to Ashley’s savory recipes (she’s a whiz with grains and legumes), but one of her most special talents is gluten-free baking. Especially gluten free doughnut baking. And her new book, Baked Doughnuts for Everyone, features 101 of her outstanding recipes.

The premise behind this book is that anyone can make incredible, baked doughnuts at home (well, with the help of a doughnut pan, that is!). And because Ashley eats a gluten free diet, all of the recipes in this book are gluten free, thus suitable for folks on wheat and gluten free diets. While the book isn’t vegan, it features twelve dedicated vegan recipes, and Ashley has a lot of great tips on how to veganize recipes that aren’t.

baked doughnuts for everyone ash baked doughnuts ashley 2(All images courtesy of Ashley)

As I may have mentioned in the past, I’m a highly imperfect baker. My patience isn’t always what it should be, and I don’t bring the same sort of creative flair to baked goods that I do to raw desserts. That said, there’s nothing like a warm, fragrant baked treat–be it a muffin, a quickbread, or a doughnut–so it has been a true pleasure for me to flip through Ashley’s book and read more about the process of raw doughnut making. Though I confess I have yet to create one of her fabulous recipes at home, I can tell you that the recipes are artful, the photography stunning, and that Ashley’s fun, welcoming demeanor shines through in the book’s pages.

Since many of my readers are gluten free, and nearly all of you seem to enjoy a delightful baked good recipe, I thought you’d be curious to hear about Ashley’s process, and the book itself. Here’s a little Q&A with the doughnut diva herself, Ashley McLaughlin!

 Ashley-1019

1. There are a lot of gluten free baking resources out there, but not too many focused so specifically on one type of baked good. Why doughnuts? What made you want to devote the book to them?

The doughnut book idea actually came from the publisher.  I was lucky enough to be asked if I was interested in writing an entire cookbook on gluten-free baked doughnuts.  Obviously I said, YES!  The doughnut book started as just a proposition, though.  I still had to write a proposal for my vision of the book and have it pass a monthly acquisitions meeting with the publishing team.  Thankfully, it passed—the doughnuts I overnighted them may have helped!—and I was on my way to baking my little heart out.  When I first thought about the book my idea was, go big or go home, which is why you’ll find over 101 recipes inside.  Although the book is all about doughnuts, I tried my best to get creative, including an entire savory doughnut chapter and even a recipe for dog doughnut-biscuits.  It was definitely a fun topic to bake + write about!

2. What are the challenges of baking without gluten? What are the specific challenges of doughnuts without gluten, and how do you address them?

I really think the hardest challenge is hunting down the specific flours.  It’s a shame that so many gluten-free flours are on the pricier side and not always easy to find at your everyday grocery store.  I have a “resources” section in the back of the book which calls out the main ingredients and tools I use and where you can locate them.  I do know that everything can be bought online if you’re having a hard time locating items in your area.

I strive to keep things simple when baking gluten-free and always try my best to use the most nutrient dense flours while not compromising taste and texture.  The combination of gluten-free flours I use really works to the advantage of the baked doughnut texture.  I’m just not sure you could duplicate the doughy-cakey results with white or wheat flour.

A few quick tips when baking gluten-free:

  • Avoid overmixing the batter.  Stop stirring when you no longer see streaks of dry flour to achieve the best texture outcome.
  • Avoid substituting flours in gluten-free baking until you are fully comfortable with the recipes and are okay with the fact that experimenting may result in a few fails.
  • Never pack flour into measuring cups.  Always scoop with a spoon into the cup and then level off with the flat side of a knife, unless noted otherwise.
  • Read the entire list of ingredients and instructions first and then start baking.

3. What are a few of your favorite recipes from the book?

This is the hardest question to answer, but here goes:

  • apple fritter doughnuts
  • vegan gooey chocolate doughnuts
  • red velvet doughnuts—died with beet puree!
  • carrot cake doughnuts
  • the everything doughnuts–savory!

Windows-Live-Writer-baked-doughnuts-for-everyone-QAgiveaway_6C01-

4. There are twelve dedicated vegan doughnuts in the book. Any tips on how readers can customize some of the other recipes to make them vegan? What are your favorite vegan baking tips of the trade?

I think once you bake a few of the vegan doughnuts you’ll get the hang of how they can be changed to include your favorite add-ins.  The flour ratios stay pretty consistent but some of the liquid measurements and sweetener amounts will vary.  Note that the vegan/gf batter is very thick and not pourable.  It will need to be piped or scooped and gently spread into the doughnut mold.  If your doughnuts seem too soft after baking add an extra tablespoon or two of oat flour to your next batch.

One of my favorite tricks when baking vegan and gluten-free is ditching the flax-egg.  Time and time again, I’ve found the flax-egg leads to gummy, half-baked results.  I’ve had people tell me they work and I don’t doubt that in some cases they may, but my preference is to add plain ground flax to the dry ingredient bowl and add more milk (or other liquid called for) to the wet.  After combining the wet and dry together I’ll let the batter sit for 5-8 minutes to thicken before pouring into the pan.  I’ve also found that a very thick batter–not dry but not pourable–results in the best texture.  If the batter is thin and pourable the baked goods just never really seem “done.”

5. As someone who took a long time to master baked goods (and still has a hard time with them on occasion), I’d probably hear the word “doughnut” and feel a little intimidated. Tell us how homemade doughnuts can be easy and accessible?

I think because these doughnuts are baked and not fried it takes most of the pressure off.  The recipes in my book are very similar to making muffins, quick bread, or cake.  You’ll mix the dry ingredients in one bowl, the wet in another, and then combine the two together.  Not having to deal with yeast, waiting for dough to rise, or dealing with a hot pot of oil makes the process so much easier.  Most of the recipes in this book need only 2 mixing bowls, a whisk, spoon, doughnut pan, and the ingredients!  I wanted people to feel like they could tackle gluten-free doughnut baking head on and achieve consistent and delicious results!

Thanks, Ash!

In order to give you a taste of Ashley’s talent, I asked if she’d be so kind as to share a recipe with CR readers. She said she would, and–lucky us–the recipe she chose is for gooey vegan chocolate doughnuts. Talk about delicious! The next thing I do after publishing this post may be to check out doughnut molds on Amazon.

And for the record, I bet you could use this same dough to make cupcakes, and they’d be every bit as great.

FW5664_035a

Vegan Gooey Chocolate Doughnuts

Ingredients

  • ½ cup (60 g) oat flour
  • ½ cup (70 g) sweet rice flour
  • ¼ cup (20 g) unsweetened cocoa powder
  • ¼ cup (50 g) pure cane sugar
  • 2 tablespoons (14 g) coconut flour
  • 1½ tablespoons (11 g) ground flax meal
  • 1 teaspoon baking powder
  • ½ teaspoon baking soda
  • ½ teaspoon salt
  • ¾ cup (175 ml) unsweetened almond milk
  • ¼ cup + 2 tablespoons (129 g) brown rice syrup
  • ¼ cup (60 g) pumpkin puree
  • 2 tablespoon (28 ml) oil
  • 2 teaspoons vanilla extract
  • ½ cup (88 g) vegan dark chocolate chips
  • 2/3 cup (80 g) powdered sugar
  • 5 tablespoons (70 g) unrefined coconut oil, melted
  • 3½ tablespoons (18 g) unsweetened
  • Cocoa powder
  • Vegan ice cream (optional)

Instructions

  1. 1. To make the doughnuts: Preheat your oven to 350°F (180°C, or gas mark 4) and grease your doughnut pan. Combine the oat flour, sweet rice flour, cocoa powder, cane sugar, coconut flour, flax meal, baking powder, baking soda, and salt in a large bowl, mixing well. In another bowl, whisk together the milk, brown rice syrup, pumpkin puree, oil, and vanilla extract until well combined.
  2. 2. Pour the wet mixture into the dry ingredients and stir with a large wooden spoon until just combined, being careful not to over mix (stop when you no longer see dry flour). Gently fold in the chocolate chips. The mixture will be thick.
  3. 3. Spoon the batter into the doughnut molds, filling to just below the top of each mold, 1/8- to ¼-inch (3 to 6 mm) from the top. Bake for 20 to 26 minutes until lightly golden brown around the edges. The cake is supposed to have a gooey center. Let cool in the pan for 5 minutes. Slide a thin spatula around the edges of the doughnuts to help loosen them out. Then place on a cooling rack and allow to cool for 5 to 10 minutes before glazing.
  4. 4. To make the glaze: Mix the powdered sugar and coconut oil together until smooth. Stir in the cocoa powder until combined. Invert the doughnut into the glaze and let the excess drip off. Serve warm, topped with ice cream.
  5. Yields: 8 to 10 standard doughnuts
Schema/Recipe SEO Data Markup by ZipList Recipe Plugin
2.2
http://www.choosingraw.com/gooey-vegan-chocolate-doughnuts-from-baked-doughnuts-for-everyone/

I hope you enjoy these doughnuts! For more information about Ashley’s work, gluten free baking, and the wide world of baked doughnuts, you can explore her blog, Edible Perspective.

And, dear readers, I hope you all had lovely weekends! This week, I’ll be sharing a quick and easy raw snack (that doubles as dessert), a new Green Recovery story (hooray!), a vegan gravy recipe by way of Food52, and more. I look forward to checking back in soon.

xo

01 Oct 13:44

Sews Before Bros - Freaky Friday

by noreply@blogger.com (Kittee Bee Berns)
Little.pink.hat

We made a version of this and it was fantastic!


Hello and welcome to Freaky Friday! I'm Erika from Sews Before Bros and I am thrilled to have a guest spot on Kittee's amazeadorable blog. 

For my little sojourn over to Cake Maker to the Stars, I decided to make nacho lasagna! Not only is this xgfx, it's highly customizeable and easy to make. The basic components you need are corn tortillas, refried beans, and vegan cheeze.

Start Layering!
Preheat your oven to 350 degrees F and start layering your ingredients in a casserole dish, starting with a bottom layer of tortilla. I found that cutting a tortilla in half and placing the straight edge along the edge of the casserole dish helped me fill the corners and leave no spaces uncovered.

In addition to refried beans and Follow Your Heart cheddar, I threw in some sliced olives and some crumbled marinated tofu. Once you've got a good two or three layers going, top with some additional cheese and throw it in the oven. After baking for 15 minutes, remove from the oven and let it cool about 10 minutes before serving. Alternately, refrigerate it overnight so the layers cut and photograph nicely!


There are a lot of delicious things to serve with this: queso, sour cream, salsa, guacamole, cilantro, green onions... I could go on and on. I'll leave it up to your good judgment what you want on your nacho lasagna. 


Nacho lasagna- now it can be YOUR lasagna. And with that, I bid you an apology, and adieu. 
19 Sep 13:44

Raw, Vegan Vanilla Coconut Yogurt (Made with Young Coconut Meat)

by Gena

photo 3

The last time I made coconut yogurt, I fermented it with probiotic powder. The process was easy enough, but it involved leaving the yogurt underneath my radiator for at least 24 hours, then skimming off the “skin” that formed on top.  Hardly a savory procedure! Today, I’m sharing a shortcut version of coconut yogurt. It’s not fermented, so it isn’t bursting with all of those friendly bugs we love , but it’s quick, easy, and incredibly delicious. If you can get past the part where you have to hack open young Thai coconuts, you’ll be delighted at what results. I promise.

Thai coconuts are one of my favorite ingredients, but I don’t use them very often because I kind of dread opening them. Each time I purchase one, however, I realize that the process wasn’t nearly so difficult as I imagined it to be. I have ironically written a whole tutorial on how to easily get these delicious little drupes open, so perhaps I should take my own instruction more often. For details on how to open a young Thai coconut, then scoop out the flesh for yogurt (or pudding, or smoothies, or sauces), check out this post.

And once you do that, it’s time to get moving with this incredible recipe. It’s highly reminiscent of the creamy, thick consistency of Greek yogurt, and it involves only a few ingredients. So, so good.

photo 1

Raw, Vegan Vanilla Coconut Yogurt (Made with Young Coconut Meat)

Ingredients

  • Flesh of 2 young Thai coconuts (about 2 cups)
  • 3/4 cup almond milk or coconut water
  • Pinch sea salt
  • 1 tablespoon maple syrup, coconut nectar, or agave (or to taste)
  • 2 teaspoons freshly squeezed lemon juice

Instructions

  1. Place all ingredients in a high speed blender or food processor and blend till totally smooth and creamy (2-3 minutes in a blender; the food processor may take a little longer). Enjoy with fresh berries or fruit of choice.
  2. Makes 2 servings.
Schema/Recipe SEO Data Markup by ZipList Recipe Plugin
2.2
http://www.choosingraw.com/raw-vegan-vanilla-coconut-yogurt-made-with-young-coconut-meat/

The yogurt will be wonderful with berries or fruit:

photo 2

…or you can dress it up with some of your favorite granola (or raw-nola)! It would be great with some of this raw-nola (my go-to recipe). I served it this week with a new favorite raw-nola recipe, which is infused, appropriately, with coconut. And that will be coming to you soon :-)

photo 4

Young Thai coconuts can be purchased at health food stores and Whole Foods. The best place to shop for them, though, is your local Asian grocery. They will be much, much less expensive, and they’re often sold by the case. The flesh of the coconut can be either thin or thick, and a slightly purple hue is fine. They’re a wonderful source of healthy fat, and they can be used in so many different ways.

Before I go, a big thank you for all of the thoughtful comments and insights shared in Monday’s post. I am so grateful. I also wanted to mention that the issues we were discussing are given an individual voice–and a very articulate, thoughtful voice, at that–in Laura C’s Green Recovery story. This is a great one to revisit or discover, if you are so inclined.

And speaking of Green Recovery, the door is always open for submissions. If you are a little nervous about sharing your story, there are lots of ways that we can work together to make it more comfortable for you. I can give you a pseudonym, keep your name anonymous, or just list your first name. Photos are certainly not mandatory. And if your recovery is still ongoing, you can submit a “recovery-in-progress” story, too, detailing the steps you are taking toward a recovered place. Of course, this isn’t something you should ever rush: these narratives should emerge when the time is right, and only then.

Till tomorrow, friends!

xo

14 Sep 16:13

Kathy’s Vanilla Hazelnut Creamer

by admin


FW5633_007_web

photo by Kate Lewis

I’m excited to share this ingenious recipe from Kathy Hester‘s new book: Vegan Slow Cooking for Two or Just for You. I adore Kathy, and her moxie with cookbookery. Over the past two years, she has put out 3 tasty and devilishly smart cookbooks. She’s what I would consider an alchemist of plant foods: the master of transforming boring beans into droolworthy desserts and teaching folks how to cook practically any dish you can imagine using a slowcooker.

In this new book, she has teamed up with the equally magical Kate Lewis, who has done the book’s food photography, as seen in the shot above, creating a gorgeous and practical guide for slow-cooked meals that won’t leave you wishing for a bigger freezer to store your leftovers.

The time it takes to create this recipe is well worth the end result. Creamy, dreamy, and utterly delightful–it’s a perfectly artisan alternative to the sometimes mysterious non-dairy creamers available on the market today.


Vanilla Hazelnut Creamer — Soy Free, Gluten-Free , Oil-Free

(Reprinted with Permission from Fair Winds Press)

You can make this unsweetened or use any sweetener you prefer. It’s super-thick and rich with minimal ingredients and effort.

  • 1½ cups (355 ml) water
  • 1 cup (135 g) whole hazelnuts
  • ½ vanilla bean, cut lengthwise (or double the vanilla extract below)
  • 1 teaspoon vanilla extract
  • Sweetener of your choice, to taste (I used ¼ teaspoon stevia.)
  • Pinch or two of salt, optional


Add the water, hazelnuts, and vanilla bean to the slow cooker. Cook on low for 7 to 9 hours. Carefully pour the cooked mixture into a blender with the vanilla and blend until smooth and creamy. Add sweetener and blend again. Store in the fridge for up to a week.


YIELD: about 2½ cups (570 ml)

PER 1-TABLESPOON (15 ML) SERVING: 26.6 calories; 2.6 g total fat; 0.2 g

saturated fat; 0.6 g protein; 0.8 g carbohydrate; 0.4 g dietary fiber; 0 mg cholesterol

PREP TIME: 5 minutes

COOKING TIME: 7 to 9 hours


RECIPE VARIATIONS

• Use other types of nuts you have on hand instead of hazelnuts. You can also use different extracts to change up the flavor.

13 Sep 14:06

#veganmofo The World’s Easiest Gluten Free, No Sugar Added Waffles

by Adrienne

These waffles are my favorite thing to make and eat with my loves from the Farthest Star. They are based on this recipe from vegweb, I just tweaked it slightly to remove the sugar.

Easy Blender Waffles

Makes 6 normal size waffles or about 3 belgian waffles
Ingredients:

  • 2 cups rolled oats or quick oats (use Gluten Free ones to keep it GF)
  • 2 cups water
  • 1 packet stevia or a few dashes of uncut stevia to taste
  • 1 tsp cinnamon
  • 1 tsp vanilla
  • 1/2 tsp salt
  • 1 large ripe banana, peeled

Method:
Preheat the waffle iron and grease or spray with non-stick spray if necessary.

Put all of the ingredients in the blender and blend until pureed – there should be no whole oats left and no chunks of banana.

Pour the batter into your waffle iron and cook according to your iron’s settings.

That’s it! Serve with fruit, maple syrup, or whatever else you like. Personally, my favorite thing to put on waffles is Chocolate Peanut Butter, as you might be able to see in the above photo. That stuff is so freaking good I’m probably going to write an entire post dedicated to it.

Love and light-
xxxxxxx
adorpheus

13 Sep 14:03

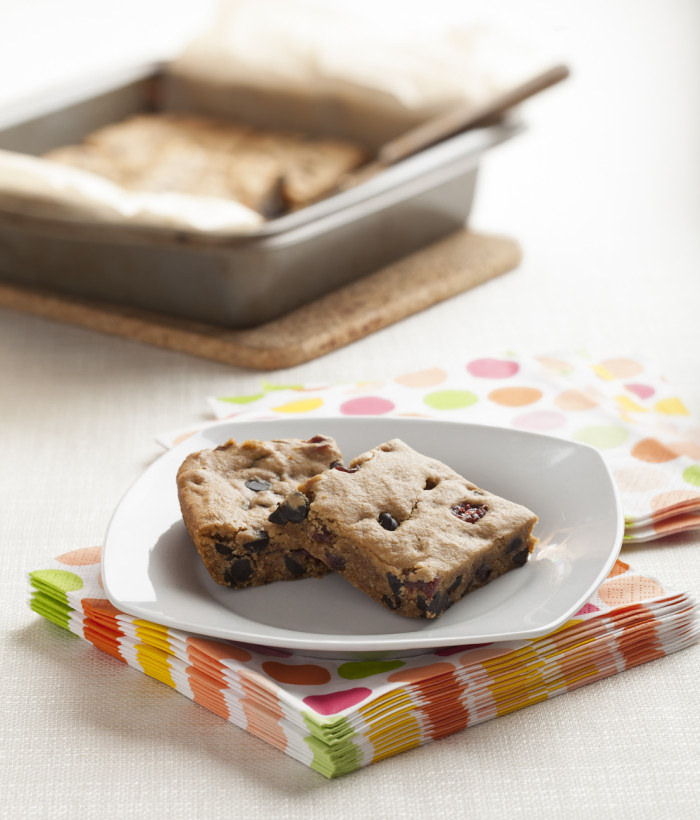
Ricki’s Butterscotch Blondies with Chocolate Chips and Goji Berries

by admin
Ricki's Butterscotch Blondies

photo by Celine Saki

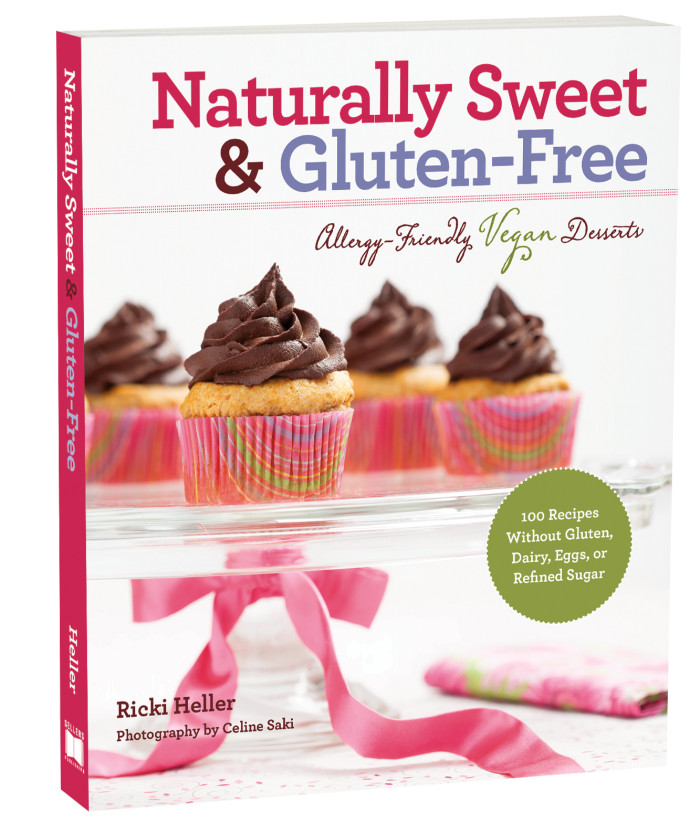
Today is a special day as it marks the release of my dear friend Ricki Heller‘s incredible book Naturally Sweet and Gluten-Free. This fabulous collection 100 recipes will wow your taste buds with unique (and dare I say good for you) ingredients that come together to make some seriously comforting treats. This book wholly intrigues me as it’s an entire book of desserts that calls for no refined sugar--something I appreciate as a connoisseur of the sweet stuff myself.

Ricki’s publisher is kindly offering one copy to a lucky reader. Just leave a comment and you’ll be entered! I’ll randomly choose and announce a winner one week from today on September 19th. Open to US and Canada only.

Naturally Sweet and Gluten Free_3D

Ricki is famous for her allergy-friendly, anti-candida approach to cooking and baking, and I’ve always been a fan of how she approaches desserts–so, this bad boy is right up my alley. The first time I got my hands on this book and flipped through the pages, these delectable looking blondies caught my eye, and I’m excited to share them with you today.

Just in time for Fall, these blondies pair beautifully with a steamy mug of apple cider or hot cocoa.

Butterscotch Blondies with Chocolate Chips and Goji Berries

(reprinted with permission from Sellers Publishing)

SF, CF, NF

(Makes 16)

These are a favorite dessert in our house. They are rich tasting and chewy, and the combination of lucuma with coconut sugar and coconut nectar is, I think, very reminiscent of butterscotch. I love using dried, super-healthy goji berries in these bars, but dried cherries or cranberries work just as well. In fact, feel free to stir in any additions you like, as long as you keep the same proportions. For instance, one alternative I really enjoy is pistachios and chopped dried apricots.

  • 1 cup (135 g) Ricki’s All-Purpose Gluten- Free Flour Mix  
  • 3⁄4 cup (75 g) whole oat flour 
  • 3 Tbsp (45 ml) lucuma powder
  • 1 tsp (5 ml) baking powder

  • 1⁄2 tsp (2.5 ml) baking soda

  • 1⁄4 tsp (1 ml) fine sea salt
  • 1 tsp (5 ml) xanthan gum 
  • 1⁄3 cup (25 g) coconut sugar

  • 1 Tbsp (15 ml) water
  • 
1⁄2 cup (120 ml) coconut nectar

  • 1⁄8 tsp (.5 ml) pure stevia powder or 1⁄4 tsp (1 ml) pure plain or vanilla stevia liquid, or to taste
  • 
1⁄3 cup (90 ml) sunflower or other
  • light-tasting oil, preferably organic

  • 1 Tbsp (30 ml) pure vanilla extract

  • 1⁄4 tsp (1 ml) rum, butterscotch, or brandy flavoring (optional)

  • 1⁄2 cup (100 g) unsweetened carob chips or dairy-free dark chocolate chips
  • 1⁄3 cup (80 ml) dried goji berries, cherries, cranberries, or dried fruit of your choice

Preheat the oven to 325 ̊F (170 ̊C). Line an 8-inch (20-cm) square pan with parchment paper, or spray well with nonstick spray.

In a medium bowl, sift together the flours, lucuma powder, baking powder, baking soda, salt, and xanthan gum.

In a large bowl, mix the coconut sugar and water until the sugar begins to dissolve. Add the coconut nectar, stevia, oil, vanilla, and flavoring, if using, until well blended. Gently stir in the chips and gojis.

Pour the dry mixture over the wet ingredients and stir to blend. You will have a thick and sticky batter. Turn the batter into the prepared pan and smooth the top.

Bake for 20 to 25 minutes, rotating the pan about halfway through baking, until a tester inserted in the center comes out just barely clean (a moist crumb or two is fine). Take care not to overbake, as these will dry out! The top may fall a little as it cools; this is fine. Allow to cool completely in pan before cutting into squares. See page 37, storing your baked goods. May be frozen.


09 Sep 12:30

Friday Favorites #225

by noreply@blogger.com (The Dainty Squid)
Little.pink.hat

moon mat pls

I recently picked up another jean jacket at the thrift store, I just couldn't resist. This means I'm now on the hunt for a back patch for it. My first stop to browse was Stay Home Club. How cute is this Cute Butt Club one?!
My goodness, these are gorgeous boots. I love everything about them - that color, the buckles, the fringe. I guess I'll just have to wear these in my dreams though, they've got quite the price tag.
 Since we're dreaming here's what I'd wear with those snazzy boots...
(all via Modcloth, each photo above is clickable and will take you to it's listing)
 (via: i3Lab)
This cat scarf is adorable!
 (via: Gracie Chai)
Cloud coasters! That's a really snazzy mug too!
 (via: Pygmy Cloud)
These are some of the prettiest iPhone cases I have ever seen. 
This patch is pretty darn awesome too! Kjersti over at New York Kitty is a super talented embroiderer as well, take a peek at this bunny brooch.
This dainty little ring is so pretty.
 (via: Xuanqi)
This isn't the ottoman that is supposed to match my couch but it sure would look real pretty!
How adorable is this fox iPhone case?!
(via: Urban Outfitters)

Happy Friday!
xoxo
05 Sep 14:26

Klaus + Crum

by noreply@blogger.com (The Dainty Squid)
My two all time favorite puppies together! Klaus has met Crum, my parent's Great Dane, a few times but each time he spent most of the time in his crate just to be safe (and because, my goodness, he is a sleepy little pup!) But the last time I went over to my parents Klaus got to really meet Crum. Crum was an absolute angel letting Klaus crawl all over him and nibble on his face. I think it goes without saying Klaus loved meeting someone who would actually put up with his crazy puppy antics since the cats are still trying to show him who runs the house.
 
I think that first photo really shows the crazy size difference between the two of them. I can't wait to see how Klaus compares to Crum in size when he's full grown. I love those puppies!
xoxo
05 Sep 14:24

WHO WANTS SOME GODDAMN DESSERT? Frozen bananas are legit treats...


WHO WANTS SOME GODDAMN DESSERT? Frozen bananas are legit treats that can make you feel like you’re at the boardwalk even if you’re just standing in front of an oscillating fan in your apartment. USE YOUR IMAGINATION MOTHERFUCKER. Make some of these with the kids, they love that shit. Whether you let them read my recipe or not, that’s on you.


FROZEN BANANA POPS

8 popsicle sticks

4 bananas

1 cup of semisweet chocolate chips

1 teaspoon of coconut oil (optional)

½ cup of roasted nuts (I used peanuts but use whateverthefuck you like)

Line a baking sheet or a big ass plate with wax paper or parchment. Peel the bananas and cut them in half widthwise. Stick the popsicle stick up the banana from the flat cut side. Just make sure you don’t poke a fucking hole through the other side of the banana.  Put them all on the baking sheet and let them hang out for a minute. Chop up the nuts all small and put them in a bowl.

So you can melt the chocolate by either slowly heating that shit in the microwave in 25 second increments and stirring in between until it is melted. OR you can do how I do and build a double boiler like a fucking boss. Grab a medium saucepan and fill that bastard with an inch or 2 of water. Throw an all metal bowl on top of that and make sure the whole mouth of the pan is covered and that the water inside isn’t touching the bottom of the bowl. Put this over a medium-low heat and put the chocolate chips in the bowl. The steam will melt those fuckers, just keep stirring the chocolate. When the chocolate looks all smooth turn off the heat. This should whole process should take about 3 minutes.

Grab a banana and gently dip it into the chocolate and spoon the chocolate over to cover any holes. If your having trouble doing it, stir in the oil while the chocolate is still hot and it will loosen that bitch up. Drip off the excess chocolate and sprinkle it with a small handful of the nuts (or coconut flakes, sprinkles, whatthefuckever). Put it down on the baking sheet and repeat with the rest of the bananas. Freeze the pops on the tray for at least 3 hours before serving.

Makes 8 badass banana pops

23 Aug 16:42

Eggplant is abundant as fuck this time of year so you can buy...


Eggplant is abundant as fuck this time of year so you can buy them on the cheap. Not sure what the hell to do with an eggplant? Grab that Grimace-looking son of a bitch and roast the shit out of it so you can whip together this dope dip. Stow those prepackaged sad excuses for a snack and GET FUCKING SERIOUS.

SMOKEY EGGPLANT DIP

1 medium sized eggplant (about 2 ½ pounds)

2 tablespoons lemon juice

2 tablespoons olive oil (you can use tahini* here instead of the oil but depending on where you live that shit might be hard to find so don’t stress)

2-3 cloves of garlic, chopped

1 ¼ teaspoons chili powder

½ teaspoon salt

2 tablespoons chopped parsley

First you need to roast the fucking eggplant. You can do this shit one of two ways. 1. You can grill the whole motherfucker over a medium heat (300 degrees). Rotate it occasionally until all the sides are black and it start collapsing in on it self like a deflated football. This will take about 25-30 minutes. OR 2. Heat your oven up to 375 degrees, put your eggplant on a baking sheet, and roast it whole for 20-30 minutes until you can poke a knife through it like soft butter. Whatever method you choose, just be sure to stab the eggplant with a fork a couple times before you cook it so the steam escapes without that purple fucker falling apart on you.

When the eggplant has cooled down a bit, cut that shit in half. Scoop out all the flesh using a spoon and toss it right in the food processor or blender. Add all the rest of the ingredients except the parsley and run that fucking machine until the eggplant looks nice and smooth. Throw in the parsley and run the machine for a couple extra seconds so that it gets a little chopped up and mixed in. If you don’t mind your dips a little chunky, you could skip the food processor and just mash all of this shit around in a bowl with a fork; just chop the garlic smaller. Taste the dip and add more of whateverthefuck you think it needs so that it taste right to you. More lemon? More garlic? More chili powder? Do whatever. I don’t give a fuck. Serve it warm or cold. It keeps in the fridge for at least 5 days.

Makes enough for 4 people to snack on

*What in the fuck is ‘tahini’? It’s a paste made from sesame seeds and used for tons of badass dishes. Think peanut butter but with sesame seeds.

23 Aug 16:40

The New Veganism: Chilled Cucumber and Avocado Soup with Mango Salsa

by Gena

9565831960_09d1b0b0f1_o

Photos courtesy of James Ransom for Food52.

If you’re not busy blending up dreamy glasses of frozen watermelon and mint today (and who could blame you if you were), then feast your eyes on a bowl of chilled cucumber and avocado soup with fresh, sweet mango salsa. In today’s New Veganism column for Food52, I’m sharing my adoration of blended salads (or green soups, or whatever you’d like to call them). And what better way to share then with a cool, delicate cucumber and avocado soup, topped with bold little pillow of mango salsa?

For the salsa alone, this recipe is worth it. But the soup and garnish together are a really delightful marriage of smooth, cooling, creamy, crispy, and sweet. I hope you enjoy this one while warm weather still lingers (or, if it’s not warm by you, whenever the warm temperatures arrive)!

9563040547_56e83eae3d_o

Head on over to Food52 for the recipe!

xo


22 Aug 14:55

Watermelon, Mint, and Lime Frosty

by Gena

IMG_5863

Having just spent a few days in cool temperatures (summer in San Francisco is always a surprise to this East Coaster!), I’ve returned to find DC as hot and as humid as ever. While I’m glad that September is just around the corner, I can’t say that I mind the excuse to enjoy a few more weeks (or even months) of ice cold, blended drinks. So far this summer, my vegan mango lassi has been my personal favorite, but yesterday a new beverage arrived on the scene: the wonderful watermelon, mint, and lime frosty that you see pictured above. I can’t imagine a beverage that is more summery, or more refreshing.

I happen to have fresh mint from a friend’s herb garden right now, but it’s worth saying that this drink would also be really good with basil, too (the beauty of basil-infused drinks was proven to me last summer when I created my blackberry basil smoothie). If basil is what you have, give it a try. If not, I hope you will find that the mint gives this drink a perfect note of frosty coolness.

IMG_5866

Watermelon, Mint, and Lime Frosty

Ingredients

  • 3 cups of frozen watermelon cubes
  • 1 cup coconut water
  • 1 tablespoon lime juice
  • 1/4 cup mint, loosely packed
  • Coconut syrup, maple syrup, or agave to taste (optional)

Instructions

  1. Blend all ingredients together in a blender till smooth. The texture should be thick and, well, frosty! Not the same as a regular smoothie.
  2. Pour into glasses and garnish with mint, if desired. Makes 2 servings.
Schema/Recipe SEO Data Markup by ZipList Recipe Plugin
2.2
http://www.choosingraw.com/watermelon-mint-and-lime-frosty/

Earlier this summer, when I was giving a little smoothie presentation with my friend Kathy at The Seed, she mentioned that watermelon cubes make a terrific alternative to ice cubes in smoothies: similar texture, but a little creamier and more flavorful. Watermelon is not historically one of my favorite fruits, but it’s growing on me, and that’s in part thanks to Kathy’s influence! (By the way, if you’re looking to put new life in your smoothie routine, Kathy’s book, 365 Vegan Smoothies, is full of wonderful ideas). So, if making a whole beverage with watermelon doesn’t appeal, know that frozen watermelon is still a good trick to have up your smoothie sleeve!

IMG_5862

I love the texture of this drink. As you sip, you’ll get icy pockets and pockets of sweet, pure watermelon and lime juice. Yum!

IMG_5873

IMG_5870

No matter where you are, someplace cool or someplace warm, I hope that this drink will bring sweet refreshment to your day when you need it. Enjoy!

xo

17 Aug 11:42

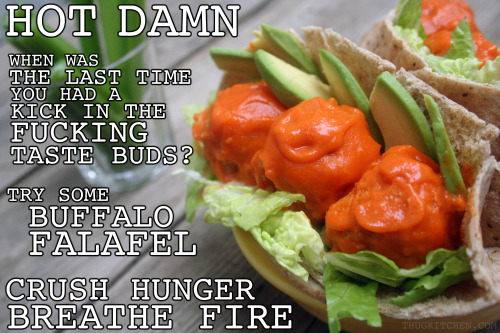
BUFFALO HAVE BALLS NOT WINGS, so you know this meal is legit....


BUFFALO HAVE BALLS NOT WINGS, so you know this meal is legit. These spicy sons of bitches are high in heat but low in fat because they’re baked not fried. So grab a cold drink and a fist full of celery, YOU’RE GOING TO FUCKING NEED ‘EM.


BUFFALO FALAFEL

FALAFEL: 

1 ½ cups cooked chickpeas or 1- 15 ounce can, rinsed

1/3 pound of cauliflower

¼ cup diced onion (yellow, white, red, whatever)

1-2 cloves of garlic

1 teaspoon olive oil

½ teaspoon all-purpose seasoning blend (The no-salt blends are best because you can add that salt shit later in small amounts)

2 tablespoons breadcrumbs

BUFFALO SAUCE:

2 tablespoons olive oil

2 tablespoons flour (Whole-wheat flour works here so does brown rice flour. Use whatever)

1 cup cayenne based hot sauce

¼ cup water

1 tablespoon vinegar (Apple cider vinegar is my favorite here but white vinegar would work too. Use what you got)

For the falafel: Heat the oven to 400 degrees. Lightly spray some oil on a baking sheet. Chopped the cauliflower up into small pieces. Throw it in a food processor and run that shit until the pieces of cauliflower kind of look like rice. If you don’t have a food processor then just chop that shit up as small as you can. Mash the fuck out of the chickpeas in a medium bowl until they form a paste. Chop the garlic up into small pieces. Add the cauliflower, onion, garlic, oil, seasoning blend, and breadcrumbs to the chickpeas and mix that shit up. If your seasoning blend didn’t have salt in it, now you can add a pinch of salt to that motherfucker. The mixture should easily form into balls. If it is too fucking dry, add a little water. No stress. Form the mixture into balls a little bigger than a ping pong ball. Throw the balls on the baking sheet and bake them for 20-25 minutes, flipping them sons of bitches half way through. Remember to set a timer so that you don’t burn the shit out of them. Both sides should be nice and golden. While the falafel bake, make the buffalo sauce.

For the buffalo sauce: In a small saucepan, heat the oil over a medium-low heat. Add the flour and stir constantly until the flour starts to look golden and smell kinda toasted. A few bubbles are cool but this shouldn’t look like it’s boiling. This shit takes about 4 minutes if you got your heat right. Add half the hot sauce and stir until it is all mixed. The flour should make that shit thicken up a bit. Add the rest of the hot sauce, water, and vinegar and stir until it is all mixed up. Turn off the heat.

When the falafel are done cooking, push them gently to the center of the baking sheet and put ¾ of the buffalo sauce on them. Bake that shit for like 5 extra minutes so that the falafel absorbs that sauce. Pour the extra sauce over them when they get out of the oven or whenever you eat them.

You can serve these spicy bastards in pita bread, on top of a salad, or howeverthefuck you want. I recommend some celery sticks to cool your ass down. Or fuck it. Go hard. Breathe fire. Frighten the villagers.

Makes about 12 falafel


10 Jul 14:16

A New Kind of Non-Dairy Cheese: Artisanal Vegan Nut Milk Cheeses from Kite Hill

by Gena

Kite Hill Collage

I’m so glad that the dilly cashew cheese and cucumber rounds look as good as they tasted! Because we’re on the topic of nut cheese, and how great it is, this is a perfect day for me to be sharing an exciting new product review: my experience with Kite Hill cheeses, a new line of tree nut cheeses developed with the expert culinary skills of Tal Ronnen.

I’ve been hearing about Kite Hill cheese for months now, and waiting for its arrival with tremendous excitement. Kite Hill is the first ever plant-based (non-dairy) cheese to be included in Whole Food’s cheese department, rather than the regular dairy section. The brand is headed by Tal Ronnen, whose name you may know from his wonderful, gourmet cookbook, The Conscious Cook, from his new LA eatery, Crossroads, or because he developed the recipes for Oprah Winfrey’s 21 Day Cleanse. Tal has shaped his career around proving that vegan cuisine can be beautiful, flavorful, filling, and enticing.

I remember reading The Conscious Cook when it was released, and noting with a smile Tal’s assertion that cashew cream is a “secret weapon” ingredient. I share his enthusiasm for nut cheeses, and always have. I make them at home often, but I’ve always thought it might be nice if they were commercially available as a special treat; now they are.

IMG_5333

The Kite Hill team consists of Tal, Laura Chenel Chevre alum Jean Prevet, Le Cordon Bleu cheese making instructor Monte Casino, and Stanford Biochemist Pat Brown. This impressive team of professionals have created artisanal, unique cheeses that have just four ingredients:  nut milk, cultures, enzymes, and salt.  They’ve unlocked a technique that makes the proteins in nut milk behave like those in milk, compensating for the lack of casein (milk protein) and lactose so that the nut milk can coagulate and form a curd that is then concentrated and cultured–just like dairy cheese.  After coagulation, Kite Hill follows an artisanal cheesemaking technique–all the way down to the brining and aging.

 IMG_5341

“I’d love to go vegan, but I could never live without cheese.” I hear these words again and again in my own practice, and I remember uttering them myself before I transitioned to a plant based diet. It seems that cheese–more than meat, yogurt, or milk–is the food that keeps many folks from experimenting with veganism. This is partly taste, and partly the fact that cheese is so ubiquitous. It’s in so many foods, especially restaurant dishes, and it’s a part of many of our fondly remembered childhood comfort foods.

With clients who loved cheese but were trying to go dairy-free, I rarely used to recommend most commercially available vegan cheese substitutes. Instead, I offered nut cheese recipes or recommended focusing on other vegan foods for flavor and texture. This isn’t because I’m not tremendously grateful that vegan cheese shreds exist (I am!), or because I think there’s anything wrong with them. It’s because I know that, no matter much better they’ve become, they aren’t quite authentic enough to please a true cheese lover. Kite Hill may be the first commercially available cheese that is a dead ringer for the “real thing.” And the proof of this–for me, anyway–is that my mom, who’s a big cheese lover, tried them and loved them at my apartment over the weekend.

IMG_5314 IMG_5311

The folks at Kite Hill sent me three of their flavors: Cassucio, a soft, spreadable, mild cheese, Cassucio with dill and truffle, and the soft ripened White Alder, which is very similar to brie. I marveled at how similar the latter was to the “real thing”; it even had that characteristic skin and soft, creamy inner texture.

IMG_5326 IMG_5323

Funnily enough, the Alder was so authentic that it evoked my dislike of brie cheese; I suppose that’s as good a testament to it’s authenticity as anything!!

IMG_5336

Even so, I was impressed with the texture, smell, and taste. So very much like the brie I remember from my dairy eating days.

The Cassucio cheeses were both a total delight!! I loved the soft, delicate texture, and the slightly tangy, sweet taste. They reminded me of cashew cheese the way I might make it at home, but with a silkier, more uniform texture.

IMG_5320

I loved eating the cheese with cucumber, zucchini, and homemade almond crackers as a midday snack. The plain version has a touch of nutty taste, but I’d truly never guess that the herb variety is made from non-dairy milk. So authentic.

IMG_5340

IMG_5339

I also loved sprinkling it on zucchini noodles or on a lovely summer salads. Here’s one with farmer’s market greens, red potatoes, and some quinoa and herbs:

photo-11 copy

Kite Hill also makes two vegan ricottas: whipped and firm. I didn’t have a chance to try those, but if they’re as good as the other cheeses, then I’m sure they’re outstanding! I love how fresh and wholesome this product is. You can certainly taste the hard work and craftsmanship that goes into the cheeses.

Right now, Kite Hill cheeses can be found in the cheese section of select west coast Whole Foods. But the Kite Hill website will be offering updates on when the cheeses will start to be available at Whole Foods locations throughout the country. When it is, it’ll be in the cheese section, along with other fine fromage–what a coup for a vegan product!

Keep your eyes peeled for Kite Hill’s arrival at a Whole Foods near you; it shouldn’t be too long from now. I hope you’ll treat yourself to a sampling of this special and unique product, and that you share it with a cheese lover who has expressed his or her doubts about plant-based eating to you. This may just be the vegan “cheese” that plants a seed of curiosity. For more of my thoughts on Kite Hill (and a more thorough description of the flavors) tune into the Our Hen House podcast this coming Saturday!

xo


10 Jul 14:14

Watch me and my BFFs making drinks and talking con food in our latest video!!

by Adrienne

In this video, I and my andorian family from The Farthest Star talk about how to make “andorian ale” ;) and how to prepare food in a hotel room when you’re at a con in our latest installment of in Development for Priority One!!!

I like how in this picture of us enjoying "andorian ale" at Dragon*Con, you can see my Hello Kitty flask on the table. LOL!

I like how in this picture of us enjoying “andorian ale” at Dragon*Con, you can see my Hello Kitty flask on the table. LOL!

Enjoy!

xxxxxxx
adorpheus

10 Jul 14:13

Review + GIVEAWAY: Wise Choice Market natural & traditional foods

by Chef Amber Shea

It’s no secret that over the past year or so, my dietary views have shifted (and relaxed) a bit. Gone are the days of “almost-veganism,” where I tried to summarize my diet in a single cheeky phrase, but in doing so, allowed myself to be pushed into a philosophical box that I neither constructed nor agreed with. Nowadays, I’m not in or near any one type of “diet” box. I eat what I like and I like what I eat! Since letting go of ALL labels (and politics thereof), and instead focusing on eating only for a) health and b) pleasure, my [physical AND mental] health has finally taken strides in the right direction. Plus, as someone who would like to start a family in the next year (there, I said it!) and who has experienced health problems interfering with that goal, I’ve found my nutritional priorities shifting for that reason as well. I couldn’t care less about labels, and I feel no need to name or categorize my diet. And let me tell you, the freedom and relief I feel from that is palpable! I’m not a vegan chef, or a raw chef, or a gluten-free chef—I’m simply Chef Amber Shea, creator (and enjoyer) of health- and happiness-promoting cuisine. And I’m happier than I’ve been in a long time!

For the most part, what I look for nowadays in the foods I eat is simply that they’re mostly natural, unprocessed, and unrefined. Now, I’m no WAPFer, but I do have a natural interest in so-called “traditional foods” and cooking methods. But let’s face it: sometimes we all need pre-made, quick food that we can eat right out of the cabinet or fridge. It can be hard to reconcile that need with a desire to eat organic, traditionally prepared foods. Recently, though, I found an online vendor that fills that very niche! Enter: Wise Choice Market.

Wise Choice Market is an online store full of nutrient-dense traditional foods, both raw and cooked. They have one of the most interesting selections I’ve seen in such a web marketplace—need fermentation starter cultures or water kefir grains? They’ve got it. How about sprouted bread—with or without gluten? Fermented vegetables and veggie juices? All there! And get this—how about potato chips fried in coconut oil?!? Hell yeah! They also sell animal-based traditional foods such as organic bone broth and wild salmon caviar.

Wise Choice Market offered me the chance to try a few items from their store, and though I’m still kicking myself for bypassing those potato chips, I was completely thrilled with what I did get to try. Let’s start with what is perhaps the most exciting of them all…

COCONUT SECRET ICE CREAM! You may know Coconut Secret as the makers of coconut nectar, one of my favorite liquid sweeteners. But holy crap, you guys—apparently they make raw, vegan, organic coconut ice cream too!

This stuff is the real deal. It’s make with coconut CREAM, not milk, so it’s as rich as super-premium dairy ice cream. It’s sweetened with coconut nectar (which you almost never see in packaged products! So cool), so it’s low-glycemic, and it’s not only dairy-free, but gluten-free and soy-free as well. Win! It IS high in fat (saturated fat, specifically), but to me, that’s a beautiful thing, since it’s all derived from coconut (and is therefore rich in metabolism-boosting, antimicrobial medium-chain fatty acids).

Ingredients (for the Madagascar Vanilla flavor): Organic raw coconut, organic raw coconut nectar, purified water, organic vanilla extract, organic raw ground vanilla bean, organic guar gum.

On top of all that, it comes in four different flavors: Madagascar Vanilla (my favorite), Caribbean Chocolate, Piña Colada (Matt’s favorite), and Berry Fusion. You can buy just one flavor at a time, or order a sampler pack to try all four!

For many years now, I’ve been soaking-and-dehyrating my nuts and seeds to rid them of enzyme inhibitors, and I also soak many grains before cooking them (try soaking brown rice in water with a splash of apple cider vinegar overnight before cooking—it makes the rice so fluffy and yum!) to make them more nutritious. Soaking “pre-digests” grains, allowing the nutrients to be more easily assimilated and metabolized. This is an age-old approach practiced in many traditional cultures. Soaking also neutralizes phytic acid, a component of plant fiber found in the bran and hulls of grains, legumes, nuts, and seeds that reduces mineral absorption. Something I’ve come to more or less accept, though, is that anytime I eat nuts, seeds, or grains prepared outside my own home, they won’t be soaked/sprouted/germinated. It’s really not a big deal, since I’m quite flexible with my diet – I regularly eat unsoaked nuts, seeds, and grains without compunction – but when given the easy choice, my preference always leans towards what’s most healthful.

So imagine my delight when I encountered Wise Choice Market‘s organic soaked cereals! They’ve taken the time to do the work for you, by soaking the organic oats in an acidic medium and the organic nuts in salt water for an extended time to transform many of their key properties, making them much easier on your tummy. One less thing to think about when planning out breakfasts for the week!

The cereals come in seven delicious varieties (Original Coconut, Touch O’ Honey, Banana Muffin, Carob Crème, Orange Pecan, Cashew Berry Crunch, and Oatmeal Raisin Cookie) and can be purchased in bags or in single-serving cups. Check out the ingredients in the Original Coconut flavor (below)—I love love LOVE that it contains the very same things I’d use if making my own such bowl of oatmeal at home! Only good-for-you, shelf-stable oil (coconut), unrefined sweeteners (honey and maple syrup), and of course, organic ingredients across the board. These soaked granola cereals can be eaten right out of the bag or from the handy single serving cups, tossed into your yogurt, or covered with milk. For even easier digestion, the cereals can be cooked up quickly on your stove or by pouring boiling water into the single serve cups. Convenient, nutritious, and tasty!

Finally, I knew I had to try one of Wise Choice Market‘s soaked nut butters. Soaking nuts in warm salt water helps to minimize or eliminate the enzyme inhibitors they contain, increases B vitamin levels, and makes the proteins in the nuts more readily available for absorption. When I make nut butter at home, I soak and dehydrate the nuts before grinding them into butter, but needless to say, most nut butter companies don’t go that extra mile. Imagine my excitement to find these nut butters by JoshEWEa’s Garden that are prepared in the exact same way I would prepare them at home! After the soaking stage, the organic nuts for are dried at low temperatures to keep them raw. They are then blended with organic coconut oil, raw honey, and salt to create the delicious, buttery spread we all know and love. I tried (and quickly devoured) this cashew butter, but Wise Choice Market also sells soaked almond butter, pecan butter, walnut butter, and mixed nut butter.

In sum, I was delighted with the fact that all of these products sold by Wise Choice Market are prepared with the exact same care I would use if preparing them myself at home. That’s an extremely rare thing to find in packaged/prepared foods!

Now…want to win some?!


One lucky reader will win a Wise Choice Market prize package containing one each of the coconut ice creams, a sampler pack of the soaked nut butters, and a 6-pack of the soaked cereal cups in Original Coconut flavor. This prize is worth just over $90!

Enter using the widget below. Only residents of the continental United States are eligible (sorry, international friends!).

a Rafflecopter giveaway

BONUS! Wise Choice Market has offered an exclusive coupon code for Chef Amber Shea readers. Use code CHEFAMBER56 for a 5% discount on all items in the store, for orders totaling over $50 (excluding shipping), until August 10, 2013. (FYI: frozen items can only be shipped within the continental U.S.) One use per customer, one coupon code per order. Now get shopping!

Leave a Comment

03 Jul 18:02

Seasonal Appetizer: Cucumber Rounds with Raw Herbed Dill Cashew Cheese

by Gena

IMG_5304

My mom is visiting, which means that I spent Friday morning frantically cleaning my apartment, doing laundry, stocking up on food, and–because cooking for my mom is a favorite past time–coming up with a tasty appetizer for her to nibble on after her train ride. The last time I created a dish for my mom it was my raw, vegan “deviled eggs,” which she loved and praised more than anything I’ve ever served her. Realizing that she has a penchant for nut cheeses and spreads, I though I’d whip her up something light and seasonal. In no time at all, I had a plate of cucumber rounds with herbed dill cashew cheese waiting for her.

I love cashew cheese at any time of year, but I particularly like having a fresh batch handy in the spring and summer, so that I can mix freshly chopped herbs into it. Rosemary, oregano, basil, chives — they all taste fantastic when folded into soft, tangy, salty cashew cheese, and each will give a dish new character.

My mom doesn’t cook a lot of ultra-traditional Greek food, but she does add Greek flavors and accents to nearly everything she prepares. Lemon, dill, oregano, tomato and olive oil are staples in my mom’s cooking, and because I grew up with these flavors, they’re also very common additions to my cooking. Dill is a particular favorite of mine, though I know it’s something of an acquired taste; I love how fresh and springy it tastes in just about everything, from lentil soup or salad to (vegan) ranch dressing to chickpea salads. Mixed into a simple batch of cashew cheese, it’s heaven.

IMG_5298

Cucumber Rounds with Raw Herbed Dill Cashew Cheese

Ingredients

  • 2 cups cashews, soaked 2 hours or overnight in water
  • 1/2 tsp sea salt
  • 2 tbsp lemon juice
  • 3 tbsp nutritional yeast
  • 1/2 cup water
  • 1/4 cup tightly packed dill

Instructions

  1. Drain cashews and rinse them. Add the drained cashews to the food processor along with the salt, lemon, and nutritional yeast. Pulse to combine.
  2. Let the motor run, and drizzle water in, stopping a few times to scrape the bowl down. Keep blending till the cheese has the consistency of a light cream cheese (or whipped ricotta).
  3. Add the dill and pulse to combine. Transfer cashew cheese to an airtight container. Will keep for 4-5 days in the fridge.
  4. Makes 1 3/4 cups
Schema/Recipe SEO Data Markup by ZipList Recipe Plugin
2.2
http://www.choosingraw.com/seasonal-appetizer-cucumber-rounds-with-raw-herbed-dill-cashew-cheese/

I love the way the dill compliments the lemon in the cashew cheese, and the way the cool, hydrating cucumber contrasts them both.

IMG_5300IMG_5306

If you don’t care for dill, you can substitute any fresh herb you like. Feel free to get creative!

My mom was delighted with this little post-travel treat…and I was, too. Hope you’ll enjoy it as much as we did.

xo

03 Jul 18:01

Tofu Paneer Tikka Masala

by Chef Amber Shea

Welcome to July!

My original plan for today was to share a no-bake sweet-treat recipe with you (one from Practically Raw Desserts, in fact!) so that you wouldn’t have to turn on your oven over 4th of July weekend, but one look at my feed reader this morning showed me that zillions of other bloggers are posting sugary stuff right now. In that case, I’ll assume you have your Independence Day dessert needs covered, and instead, I’ll save that recipe for a couple weeks from now, when we’re all dying from the sweltering mid-July heat (or when you Southern-hemisphere folks maybe aren’t so tired of seeing patriotic summer sweets all over the place!).

This fragrant Indian dish is one I’ve made several times in just the last few weeks, on top of all the times I’ve made in the last couple years. It’s based very (very) loosely on my old Tofu Makhani Curry, but I’ve been tweaking it and updating it whenever I make it, and over time, it’s morphed into something quite different and even more delicious. It’s rich and spicy (only as spicy as you want it to be, though!), but somehow just as perfect in warm weather as it is in cold weather. I like to make it with firm, pressed tofu, but you can certainly make it the classic way, with paneer cheese. Either way, the tender cubes soak up the bright, piquant sauce, and you’ve got real crowd-pleaser on your hands. The leftovers keep extremely well for several days, too! Feel free to add frozen peas or green beans if you’d like a punch of green in there.

Tofu Paneer Tikka Masala

Yield: 4 to 6 servings

Vegetarian, dairy-free and vegan if desired, gluten-free.

Ingredients

  • 1 (14-16 oz.) package organic extra-firm tofu, pressed (see instructions below), OR high-quality paneer
  • 2 tablespoons coconut oil or ghee
  • 1 teaspoon mustard seeds
  • 1 teaspoon cumin seeds
  • 1 medium or 2 small onions, peeled and finely chopped
  • 6 cloves garlic, peeled and minced
  • 1-inch chunk fresh ginger, peeled and minced
  • 1 hot chile, stemmed, seeded, and minced (optional)
  • 1 teaspoon ground coriander
  • 1 teaspoon ground cumin
  • 1 teaspoon ground turmeric
  • 1 teaspoon paprika
  • 1 (15 oz.) can full-fat coconut milk
  • 1 (28 oz.) jar or can crushed tomatoes
  • 1 1/4 teaspoons sea salt, or to taste
  • 2 teaspoons apple cider vinegar or lemon juice
  • Cooked basmati rice, for serving
  • Chopped cilantro and/or green onions, for serving (optional)

Instructions

  1. If using tofu, press it in advance to remove as much liquid as possible. Use either the towel method (for 2 to 4 hours) or a device like the TofuXpress (for 8 to 24 hours in the fridge). If using paneer, there's no need to press or prep in advance.
  2. Set your basmati rice to cook, so it's ready when the curry is done.
  3. Heat the coconut oil (or ghee, if desired) in a large pot over medium heat. When it's hot, add the mustard seeds and cumin seeds and cover for about 60 seconds, until it sounds like most of the mustard seeds have popped.
  4. Remove the lid and add the chopped onion. Cook, stirring frequently, for 5 to 7 minutes, until the onions are translucent.
  5. Add the minced garlic, ginger, and chile (if desired). Cook, stirring, for one minute, until fragrant.
  6. Add the coriander, cumin, turmeric, and paprika and stir to combine.
  7. Add the coconut milk, crushed tomatoes, and salt and stir to combine.
  8. Chop the drained tofu into roughly 3/4-inch cubes and add to the pot.
  9. When bubbles begin to appear, lower the heat from medium to low. Simmer uncovered for 25 to 30 minutes, stirring occasionally.
  10. When the curry is thickened to your liking, remove the pot from the heat and add the apple cider vinegar or lemon juice, stirring to combine.
  11. Serve over cooked basmati rice, garnished with chopped cilantro and/or green onions, if desired.
3.1
http://chefambershea.com/2013/07/01/tofu-paneer-tikka-masala/
© 2013 ChefAmberShea.com

Happy Canada Day to my friends up north, and to everyone here in the U.S., have a great 4th of July week and weekend!

Leave a Comment

27 Jun 13:42

Make photographic fabric prints with Inkodye

by noreply@blogger.com (Jessica Jones)
I played around some more with Inkodye, the permanent, water-based dye that develops its color in sunlight. After making easy shadow prints using safety pins and leaves, prints using cardboard cutouts, and a design with a freezer paper stencil, I tried working with a photo negative that I printed at home.

For this experiment, I did a Google image search and set the filters to display large black-and-white photographs. I found an image online that I liked: this desktop wallpaper with a 1962 Ford Thunderbird admired by elegant ladies. "Betty, is that your new car?" "Yes, Shirley. Isn't it mahvelous? Good thing I have a massive driveway so I'll never need to parallel pahk this boat."

I inverted the image in Photoshop to make it a negative and printed it on some old 3M CG3460 inkjet transparency film I found in my closet.

Even if you don't have Photoshop, you can turn any photo of your own into a negative. Bold photos with lots of contrast will work best.

Go to the online image editor Pixlr. Choose "Open image from computer" to upload your photo. From the top menu, choose "Adjustment">"Desaturate" to make the image black and white. Then select "Adjustment">"Invert" to create a negative image. You can also play with brightness, contrast, or levels to get dark blacks and bright whites for good printing. Finally, choose "File">"Save."

Then print the negative onto printable transparency film. Order some from Amazon or the Lumi website. Follow the directions on the package for feeding the sheets through your printer.

If you need larger negatives, try splitting your image in half, printing on two sheets, and taping them together.

Or if printing your own negatives sounds like a pain, you can download the Lumi iPhone app to order custom negatives delivered to your doorstep.

After printing out the negative, I got the fabric ready. A piece of cardboard wrapped with a plastic trash bag makes a great waterproof work surface. I taped my piece of cotton canvas to the board to hold it in place while brushing on dye.

Then I poured a little Inkodye into a cup and brushed it on with a foam brush. Doing this in a room with subdued lighting is important— you don't want the dye to start changing color before you're ready! Try to get an even layer of dye on the fabric. The cloth doesn't need to be soaking wet; just thoroughly coated.

Mix Inkodye with water in a 1:1 ratio to stretch it farther; you'll get the same vibrant color. Or add even more water to get lighter colors. Mix colors to create new hues if you want.

I used a paper towel to blot off all the excess dye I could remove. Too much moisture can cause condensation on the negative, and this can mess up your print.

Then I laid the negative on top of the fabric, printed side up so the ink wouldn't get wet and smear. In case there was a slight breeze outside, I stuck on a piece of tape to secure the negative so it wouldn't blow away. Add more tape if needed, but I wouldn't recommend taping down all the edges or you'll trap more water inside, increasing condensation.

Then I carried the board outside into direct sunshine. See the little animation I made? That's what it looks like as the dye starts to change color from nearly clear to purplish indigo, and eventually to blue. Condensation started to appear which worried me; I've had prints ruined by that before, but this one turned out okay.

After 10 minutes of exposure, I took the board back indoors to a dim room and removed the negative.

Then I immediately washed the fabric with laundry detergent in hot water. The goal is to remove the undeveloped dye from the light areas before it turns color. Scrub really thoroughly or put your print right into the washing machine. The Inkodye company recommends washing it twice. The dye is permanent, so don't worry that you'll wash off the blue areas. They're there to stay, so you can dye clothing and bags and wash them regularly going forward.

Here's the final print.


I decided these ladies needed some friends, so I chose this McCall's pattern fabric for a lining and sewed this print into a zippered pouch.

You could make prints of your kids, your house, your Prius, or your Persian kitty. Print on aprons, t-shirts, hoodies, or pillows. Good times!