Shared posts

17 Apr 04:26

A NEW KIND OF FINGER WAVE

by Kristin Ess
Erika Peterson

Also for keeks

photos/post/design: Kristin Ess

Look out vintage vixens, there’s a new fingerwave in town and we’re hoping to see lots and lots and lots of this wave at Coachella! Many gorgeous gals with fine/straight hair seem to be having trouble getting natural looking waves that will stay.  Here’s my favorite way of making that happen!

You’ll need A) Oribe Superfine Hairspray + B) Leonor Greyl Mousse au Lotus Volumatrice. A less expensive option would be Elnet + Pantene Stylers Mousse. You’ll also need a blowdryer with multiple heat setting. I like this one from Elchim because it has the best hot and cold settings and the ratio of wind to heat is perfect. Okay, here we go:

  1. This is just a visual so you can see how naturally straight her hair dried on the day we shot this.
  2. Start with freshly shampooed, towel dried and brushed out hair. Pour a little mousse into the palms of your hand. For this length a ping pong ball-sized amount is good.
  3. Start by applying a little to the root and then work the rest in on the way down.
  4. I like to comb mousse through using a brush or a comb. An even application of mousse is vital! Otherwise, you can end up with flat spots.
  5. Take a section of hair and zig-zag it through your fingers like you see in photo 5. It’s important that you have the nozzle on your dryer and that you’re using a medium heat setting so you don’t burn your little fingers! Start blowdrying with the nozzle up parallel to your fingers. Your first “wave” will go right above your fingers. Try not to hold the hair too tight.
  6. Now move down to the hair in your fingers. Dry that (still on a medium setting and not getting too close) for about 45 seconds to 1 minute. By the way, it’s okay to let go of the section and then pick it back up again if you loose some pieces from the wind.
  7. Let go every now and again to check your progress and see how it’s drying.
  8. Decide how low you want the wave to go. If you think you want to stop with just one set of waves in the middle, great!
  9. If you want to keep going, that’s great too! Just slide your fingers down and start the next set of waves the same way. If the waves above are fully dry, you won’t mess them up as you move downward.
  10. For sections on top, start by lifting the hair and blowdrying underneath to get a little volume if you want it. Doing this will help the hair have movement.
  11. Then continue making waves the way you did in the previous section. NOTE: Nothing needs to be perfect– in fact, I find that when it’s perfect, it looks less like natural waves and more like you did it with a curling/waving/or flat iron. Sometimes I like to put my fingers on a diagonal angle to get a more natural appearance.
  12. Doing the back isn’t hard and it doesn’t have to be perfect. Turn your head to the side so it makes it easier to reach. See photo 12 if you’re confused.
  13. Once you finish everything, spray the waves with a light mist of hairspray.

Between the mousse and the hairspray, I’ve never had a problem getting fine hair to hold this wave and I don’t think you will either. It’s also nice to have an alternative to irons! xo

17 Apr 04:25

ENCOURAGING YOUR WAVES

by Kristin Ess
Erika Peterson

For KK!

photos/post/design: Kristin Ess

This quick tip is dedicated to all you gorgeous gals with “almost there but not quite” waves.  Tons of TBD readers have mentioned they have hair that’s perfectly wavy on the bottom but gets straight-ish on the top. Some have color damage and some just have 2 textures going on. Today we’re sharing our favorite method for bringing it all together! Sure, you could always use our BRAID METHOD, but sometimes you just want to wear your hair with your OWN natural wave! Plus, it’s fun to be able to work with what you’ve (almost) got so here we go!

You will need: Setting clips, tissue paper (I didn’t want to put tissue paper in the photo because it would have blocked too much of the pattern, but you can put a tiny piece of tissue under each clip to avoid creases!), setting spray (we love  John Frieda Curl Defining Spray ($6) and Ouidad Styling Mist ($16), light serum like Moroccan Oil Light (small $16.60).

  • Air dry your hair as you normally would. Try not to brush your hair after you get out of the shower!
  • Once it’s 85% dry, lightly mist the top layer with your setting spray.
  • Use your tissue paper and clips to set the waves in place. Try to match the pattern of your own natural waves below. It shouldn’t take you more than 5 minutes to get these in place!
  • Let it sit for about 20 minutes while you get dressed/do your makeup. If you need to, use your blowdryer on low and give it a little heat help. Make sure you use a nozzle and that your dryer is pointed down toward the floor to avoid frizz.
  • Once you remove the clips, add a little bit of a light serum to your ends and a quick veil of light hold hairspray.

If your hair is super-straight on top, this might not work for you but it’s worth a shot! You may find that your top layer just needed a little more support!

17 Apr 04:21

Photo


12 Apr 06:36

My Brother My Father S0317

Quick, everyone grab your best over sized sateen button down, it’s Season 3!!  The opening...
11 Apr 20:42

Photo

by sclintonwoods
Erika Peterson

Love you Peter drunklage.


11 Apr 06:50

Letter to Gorbachev - S03E06

Erika Peterson

Sam and I do a golden girls fashion blog, I just wrote one today but it's not loading on the old reader so here's an old one.

Oh my god you guys right to the good stuff. Who cares about plot with a shirt like this: DOROTHY....
07 Apr 05:11

Photo


06 Apr 22:54

Royalty.

by sclintonwoods


Royalty.

03 Apr 15:41

Photo

by sclintonwoods


03 Apr 14:34

POST-BLOWOUT FRIZZ FIGHTER

by Kristin Ess
Erika Peterson

Definitely gonna try this. When I blow out my hair it gets soooooo huge and staticky!!

photos/post/design: Kristin Ess

One of the worst things I can think of is blowing out your entire head of hair only to find it getting puffy + frizzy by the time you’ve put your makeup on and gotten dressed. Obviously the curling iron or flat iron can help but sometimes you just want to wear a smooth, bouncy blowout. We get a lot of emails asking how to eliminate the puff. Here’s what works best.

  1. Blow your hair out as usual. Use a good serum to help you control your frizz.
  2. Once you’re done blowing your hair out split it into two sections. Twist both sections BACK (away from your face) starting up near your temples. Don’t laugh– tuck one side into your bra strap while you do the other side.
  3. Join the two sections together under your chin using a rubber band as you see in photo 3.
  4. Go apply your makeup and get dressed. I know you may look like a little wierdo, but WHO CARES! We’re fighting frizz!
  5. Once you’re dressed and ready to roll, take the rubber band out and put a drop or two of your favorite serum. We love THIS ONE and used it for this tutorial!
  6. Put a little serum where you need it and you’re good to go!

Have you ever tried this??

03 Apr 05:09

WHAT DOES EACH CURLING IRON DO?

by Kristin Ess
Erika Peterson

This is an amazing resource.

There are so many sized curling irons on the shelves, so we’re going to start with the basics. Here are a list of irons, what they do and how you can use them for different looks!

The 2″ barrel iron (AKA “The Bumper”) isn’t intended for curl, but more for a nice rounded bend at the ends of your hair. This curling iron is best for those with long hair who want to make it look like they had a blowout. It’s a good way to fake that round-brushed look.

  • A- Bend the ends of a voluminous updo. Tease and secure first, then hit the ends with this iron to give it some life.
  • B- You can set these curls using a light-hold hairspray + large clips to get an even rounder, bouncier look.
  • C- This iron is amazing for anyone with naturally straight hair (who wants to keep it straight), but gets bored with the pencil-straight look.
  • D- Try curling and setting in different directions to show layers.

The 1 1/2 ” barrel is great for voluminous curls. We recommend setting the hair when using a 1 1/2″ barrel because big curls like this tend to fall quicker if you don’t.

  • A- Spray a light holding hairspray all over your hair. On a medium to high setting, roll the curls from bottom to top. Once the hair heats up, slide the curling iron out and set it with a clip. Wait 10 min after you finish the whole head for the curls to cool + set. Take the clips out, brush and style! This will give you the the biggest, bounciest curl.
  • B- If you have super-long hair, you can wrap curl with this iron. Sorry short to medium length girls, you can’t really get a good curl by wrapping the hair around this iron.
  • C- Definitely a good iron for those of you sporting a heavy side part and wanting to pair it with soft, messy, big curls.
  • D- Dry your hair using a little surf/sea salt spray. Once it’s dry, do one “spin” of the iron in the middle of the hair. Don’t curl the root and don’t curl the ends. Then take your blowdryer and rough it up a little.

This is a very popular iron. I would even say the most popular sized iron. You really can’t go wrong with a 1 1/4″ iron.

  • A- Curl with this, leave out the ends and add a water-based pomade at the root for perfect messy waves.
  • B- Set the hair using a 1 1/4″ barrel and a light setting spray. Clip the hair immediately after it comes out of the hot iron. Let it sit and cool for 20 minutes. Brush it out using a soft bristle brush.
  • C- With NO product, curl the hair with this iron while leaving the ends out. Spray it after with this surf/sea salt spray. Roughly blowdry the whole head using your fingers only. You’ll get a very beachy wave.
  • D- Set the hair the same as in photo B but then smooth your hair over to one side and secure using your favorite floral accessory.

The 1″ iron is a go to for anyone with medium or shorter length hair, or for that soft Veronica Lake-type wave.

  • A- Set the whole head using your 1″ iron. Brush it out using a soft bristled brush. Use large duck bill clips to hold the wave pattern in place and make it even more dramatic.
  • B- A 1″ iron was used here in this Very Veronica tutorial.
  • C- Use a light setting spray to set your curls. Once they cool, smooth them out with a large paddle brush and add a floral headband.
  • D- This was actually done with a 1″ curling iron that I took the clamp off of. You can see how to do that here. I used a light-holding mousse, blowdried the whole head, then wrap curled.

This is the most under-estimated iron on the block. I love this one! The curl from a 3/4″ iron is the BEST, particularly for vintage inspired hair + updos.

  • A- Remove the clamp and wrap curl for this spring-y type of curl.
  • B- Set the whole head using a setting spray. Once it’s cooled, brush it all out and re-coil a few pieces using your fingers. Gorgeous! Love that brushed out look.
  • C- If you set the whole head using a 3/4 iron, let it cool for 20 min, then brush out using a soft bristle brush for 5 minutes, the curl will fall into this vintage-inspired pattern. Seems like the curls will come out much smaller but they actually widen up as you keep brushing. The up-side is that they don’t fall out very fast because they were tighter to begin with.
  • D- Try curling most of your hair with a 3/4 iron the next time you’re doing a messy chignon. You can curl the piece in front with a 1″, but the 3/4″ iron gives great texture to a chignon.

If you have naturally curly hair (like SJP/Beyonce/Shakira curly), a 5/8′ iron is where it’s at. Not every curl on your head stays in place, so when one gets out of line it’s important to have this!

  • A- Wrap curl any crazy stray pieces around a 5/8 iron to reduce the appearance of frizz.
  • B- Sometimes we have curlier hair in one place than another. For example, I have serveral clients who have straight hair on top and curls on bottom. This is a great iron to bring those two textures together because it gives a very “naturally curly” sized curl. Try wrap curling and then pull lightly once you take it off the barrel.
  • C- If you have super straight hair (and a lot of extra time on your hands) you can get this type of fun, springy curl with a 5/8″ iron.
  • D- Oh Bey, what can I say– you probably wake up like that. Add a little heat-protectant serum to you hair before going in with a curling iron.


Every girl with tight curls should have a 3/8″ iron on hand. It’s my favorite iron for the curliest girls!

  • A- No girl in her right kinky-curly mind would ever get this kind of curl from an iron– that’s natural beauty! But it’s good to have this iron on hand if a piece or two need a little taming.
  • B- Again, if you have the time, you can curl your entire head with this iron and get this gorgeous curl. Set it using a heat-protective setting spray, then brush everything out at the end using a soft bristle brush.
  • C- Same as above!
  • D- If you have kinky curls and want to loosen some pieces up a little, this is a great iron for that!
23 Mar 13:03

This is Jewel and her family, spending a weekend reenacting...

Erika Peterson

we all follow suri's burn book, right?


This is Jewel and her family, spending a weekend reenacting scenes from the Oregon Trail. At least that’s what I assume they’re doing in these clothes.

19 Mar 22:51

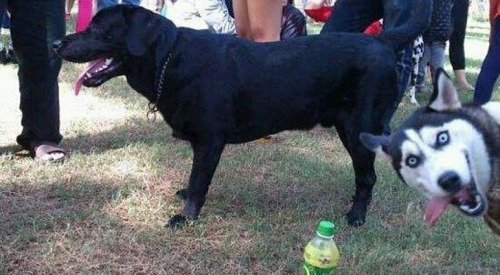
lizardking90: Funny husky photobomb -liveclay

by fairy-wren
Erika Peterson

this is how geordi operates 24/7 HEY GUYS WHATS GOIN ON


lizardking90:

Funny husky photobomb

-liveclay