Shared posts

12 Apr 00:34

Next major macOS version will split up iTunes

by Rui Carmo

It only took Apple what, ten years between realizing this needed to happen and actually getting around to doing it?

On the other hand, given the way macOS apps are being systematically dumbed down to match their iOS counterparts, I suspect this will be a severe pain for anyone who uses iTunes to locally manage iOS devices, and will likely kill iCloud Music Library (which is the only Apple “music” cloud service I actually use).


12 Apr 00:34

Frühlingsangebote: Tag 4

by Volker Weber

SharedScreenshot

Auch heute gibt es wieder einige interessante Tagesangebote:

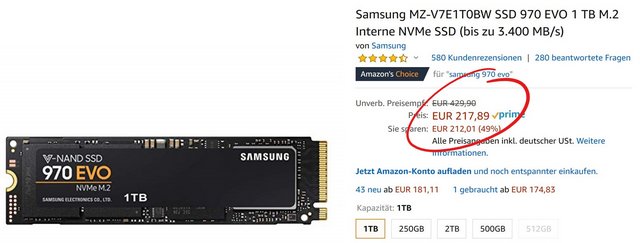
  • Bei Apple und Microsoft hat man verloren, wenn es darum geht, den Notebook-Speicher aufzurüsten. Aber das gilt nicht für alle Hersteller. Mit der Samsung 970 EVO NVMe SSD mit 1 TeraByte kann man den Speicher im Notebook erweitern, ohne gleich Tränen in die Augen zu bekommen.
  • Seit es die Arlo Ultras mit 4k gibt, werden die Arlo Pro 2 (1080p) Starterkits mit 30% Rabatt auf den Listenpreis angeboten. Recommended.
  • Viele User schwören auf auf die exzellenten Samsung microSD Karten statt der häufiger angebotenen SanDisk. Heute mit mit 30% Rabatt auf Listenpreis
12 Apr 00:34

Amazon Music Unlimited für drei Monate kostenlos

by Volker Weber

amazon-music-3-monate

Apple Music, Spotify und hier Amazon Music Unlimited, alle versuchen sich gegenseitig Kunden mit kostenlosen Probemonaten Kunden abzujagen. Natürlich in der Hoffnung, dass einem das Angebot gefällt und man bleibt.

Amazon schreibt jetzt drei Monate gut, und das nicht nur für Neukunden, sondern auch solche, die schon einmal Amazon Music Unlimited hatten. Der Service ist monatlich kündbar. Das ist also keine Abofalle. Ich werde es mal ausprobieren. Das lässt sich nicht nur auf Echos, Smartphones und Tablets, sondern natürlich auch mit Sonos nutzen.

More >

12 Apr 00:34

Bildverarbeitung in iOS Kurzbefehlen fehlerhaft

by Volker Weber

86d4fbcea1872edd2c5f9e119845ad70

Aktuell passiert es mir immer wieder mal, dass ich ein viel zu großes Bild hier einfüge. Das passiert, weil die Bildverarbeitungsbefehle in Shortcuts (deutsch: Kurzbefehle) unzuverlässig sind. So fällt die Umwandlung von PNG in JPEG und die Reduzierung der Auflösung häufig auf die Nase. Ein sehr ärgerlicher Fehler.

Ich hoffe, dass Apple das bald repariert.

12 Apr 00:33

How To Test New Cellular Stuff in the Wild?

by Martin

Having a lab as a network operator is a great thing. You can test new hardware and software there and once you are happy you can deploy things in the wild and make things better for your subscribers. But every now and then something comes along that you don’t only want to test in the lab but you actually want to have a proper shakedown to test stability and functionality before you let your subscribers use the new technology. So how can this actually be done in practice?

3GPP has quite a number of options available to restrict access to some parts of the network. Depending on the circumstances, one or the other, or a combination of them can be used.

Use A Different Mobile Network Code (MNC)

The easiest way to separate new equipment from the operational network is to use a different Mobile Network Code (MNC) in these cells, run them on a channel not used by the live network and to use special SIM cards that can attach to this network. Devices with ‘normal’ SIM cards don’t consider cells with this network code as part of the network and would thus not even try to attach unless they run out of coverage. And when they do, the network simply rejects them, just like other networks in the country would do as well.

Reserve the Cell For Operator Use

In other cases it is undesirable to use a mobile network code that is different from the live network. For this case, 3GPP has specified the ‘cellReservedForOperatorUse’ parameter in the System Information Block 1 (SIB-1) message. When this parameter is set to ‘restricted’, only devices with SIM cards that are subscribed to Access Class 11 and 15 will try to access the cell. SIM cards of ‘normal’ subscribers have a bit set for Access Class 0 to 9 so mobile devices with such SIM cards stay out of those cells.

Use Intelligent Reject Causes

And yet another option to have cells for yourself is to configure them with a  Tracking Area Code (TAC) that is different from that of the ‘normal’ cells in the area. Subscribers trying to access these cells would thus have to make a Tracking Area Update request and can then be rejected with cause #15, ‘no suitable cells in this tracking area’. The devices would then immediately go to the ‘normal’ cells. If you want to make sure that the devices you want to test with only access those cells but not other live network cells, you reject those with reject cause #15 in the ‘normal’ cells. In other words, ‘normal’ subscribers stay in the normal cells while your test mobiles only use the test cells. This of course requires some magic in the core network but the approach has the beauty that no modifications in the radio network or on the SIM card is required.

Another nice thing about this approach is that the test frequency layer does not have to be announced in the live network cells, so no reconfiguration of cell parameters is necessary. If the test device first ends up in the live network after power-up and is rejected in all LTE, UMTS and GSM location and tracking areas, devices will do a full scan and eventually find the test cell that was not announced by the live network. Also, devices remember all location and tracking areas in which they were rejected and don’t try to go there again until they are power cycled. So while it might take half a minute or so to find the test cells after power-up, devices will not try to go to ‘normal’ cells anymore after that and behave in a ‘realistic’ way, i.e. perform cell changes from one test cell to another without delay.

Brute Force: Frequency Lock

And yet another way to restrict test devices to test cells is to reserve a frequency for those cells in an area and then lock them to that frequency. The nice thing about this is that no network side changes are necessary. Unfortunately, locking devices to a frequency is a pretty invasive thing and is typically not straight forward to do in commercial devices. If you want to make sure ‘normal’ subscribers don’t use cells on that frequency layer, you still have to reject them with cause code #15 which again requires some magic in the core network.

Which of the methods should be used in practice highly depends on on the circumstances and there is no ‘one size fits all solution’.

Question: Any other cool approach I have missed here?

12 Apr 00:33

K-pop social media, (Anti-)fan labour, and Networks of (mis)information

by crystalabidin

I am an anthropologist of young people’s internet cultures and have spent the past 13 months learning (from scratch!) about K-pop fan practices on social media through intensive reading of academic literature, thoroughly combing through popular media, and immersing myself in various K-pop communities through digital ethnography. While I am by no means (yet!) an expert, in the past few weeks, I began to catalogue instances of misinformation in some fan network. Specifically, I traced the forms and mechanics of fan labour involved in generating or refuting such content. This interest was generated against the backdrop of a “war on fake news” in South Korea and the trend of “absurd”/”untrue” fan spoofs of idols on “fact accounts“.

At this exploratory stage, I am not yet concerned with verifying the information in these social media posts per se, but rather am focused on how young K-pop fans are innovating with creating attention-generating clickbait, instigating other networks of fans to signal boost their content, and labouring to clear up misconceptions or educate their peers about literacies around misinformation. This follows from my previous work studying how social media influencers are effective disseminators and persuaders of information in saturated internet climate, including their role in generating “subversive frivolity” and their savvy in “visibility labour“.

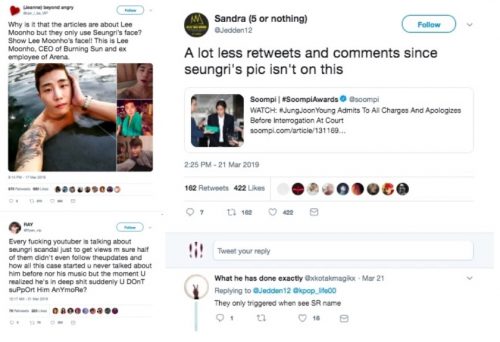
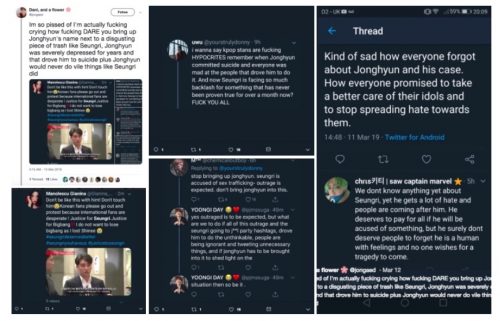
In this post, I present a brief overview of some of my observations focused on the fan-generated folklore, rumour, and potential misinformation pertaining to two incidents: 1) Bigbang member and soloist Seungri’s alleged involvement in a “major sex-video scandal” and “spycams” known as “molka” (parts 1 to 7), and 2) girl group Blackpink’s release of their YouTube record-breaking song Kill This Love, pertaining to platform politics and a Twitter hoax involving Starbucks (parts 8 to 10).

Screengrabs from the Seungri case study were taken from the “#Seungri” hashtag stream on Twitter on 22 March 2019. Screengrabs from the Blackpink case study were taken from the comments section of the Kill This Love YouTube video on 05 April 2019 and 08 April 2019, the “#KillThisLoveStarbucks” hashtag stream on Twitter on 06 April 2019, and the “#Blackpink” hashtag stream on Twitter on 10 April 2019.

*

1) Battle of the fandoms

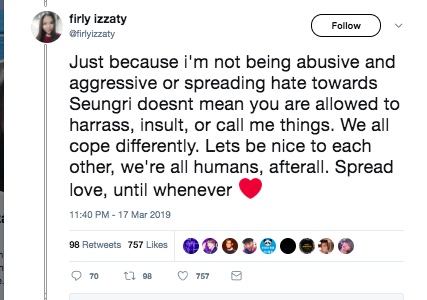
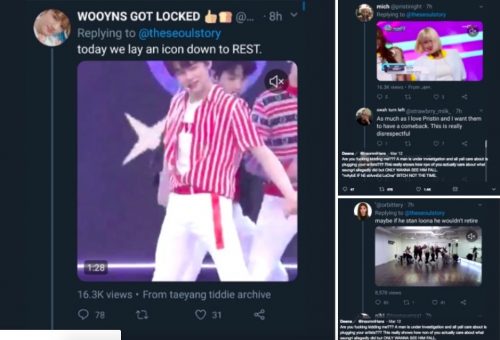
Upon the breaking news of Seungri’s alleged scandal, many fans immediately dissociated themselves from the artiste and expressed their disgust. But fans also emerged to share good testimonials about him and show their support:

Naturally, other (anti-)fans responded with more bad testimonials and went on sprees to block fellow Twitter users who expressed support towards Seungri:

And supportive fans began to speak out about the abuse they were experiencing from anti-fans:

31

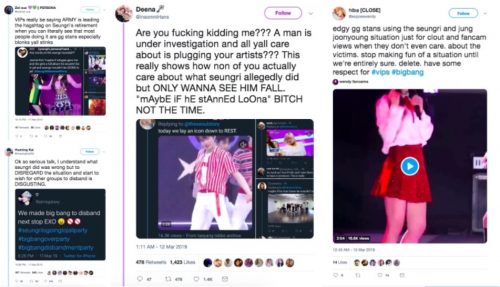
In the midst of this schadenfreude, competing fandoms began to rejoice in Seungri and Bigbang’s downfall by using images and .gifs of their idols as memes:

Other fans criticised each other for capitalising upon other idols’ scandals to plug their own favourites:

*

2) Guilt by association

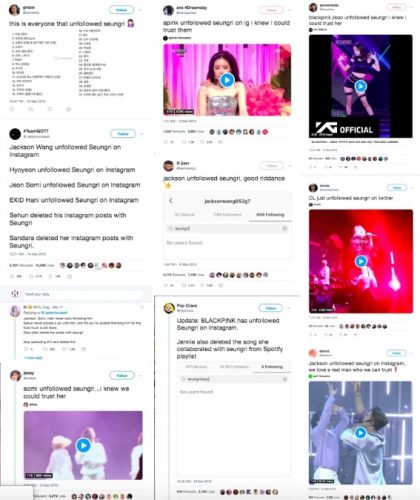
Fans began to celebrate other idols and artistes whom they claimed were unfollowing Seungri on Instagram and Twitter – an action that fans variously interpreted as other artistes verifying Seungri’s guilt, showing support to the victims, or wanting to avoid the drama altogether:

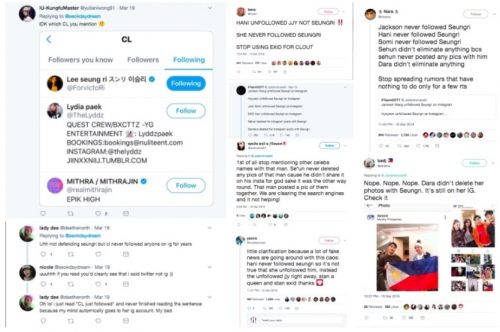
In response, other fans took the initiative to verify these claims by manually filtering through various social media following lists. They also called out the former group for exploiting the image of idols to generate RTs and likes on social media, and for tapping into the affective networks of other fandoms to generate publicity for their favourite idols:

One idol who shared the same name as Seungri was also rumoured to have changed her name to dissociate herself from the incident, although competing reports state otherwise:

And the other members of Seungri’s band Bigbang were also thrust into the spotlight and scrutinised by the media and fans alike:

*

3) Fake news

As news reports kept streaming in from various legacy and popular media outlets, some fans took to pointing out that fake news was being circulated as well:

Some of these malpractices were thought to be acts of mistranslation, and fans with native language skills or local knowledge offered to verify information and sources for other users:

Some news outlets were called out for using the wrong image and wrong name for the idols whom they were reporting on, casting even more doubt on the veracity of the wealth of “news” being circulated despite speedy updates on social media:

*

4) Law vs. Media persecution

In the days following the scandal, the police regularly issued updates that contradicted with the claims circulated by various online media that were already taken to be factual. Fans thus pointed out that media outlets were also capitalising upon the scandal for generate traffic and viewership for their content, and pointed out that Seungri was first persecuted by the media before the law:

*

5) Amplifying and burying information

Fans felt that the overwhelming attention and focus on Seungri was a deliberate attempt to amplifying some information over others, in the hopes that a celebrity scandal will smokescreen or overshadow other more complicated issues involving a complex web of state officials, the police, and highly ranked corporate executives:

Some fans were promoting various attention generating trends:

While others pointed out these mechanisms of amplification and wanted to alter the narrative:

*

6) Spillover consequences

Some fans seemed concerned with the longer term consequences of the scandal, pointing out potential defamation suits, the en masse pre-mature assigning of blame, the larger impact on the K-pop economy, and emergent censorship across platforms and the media:

And others highlighted the potential impact of the scandal on the wellbeing of the artistes as persons, considering the culture of depression (and suicide) in the K-pop industry:

*

7) Para-entertainment

Alongside the severity of the scandal and the serious labour of fans and anti-fans, much of the content also carried a para-entertainment character where fans took the opportunity to insert their own content into streams of virality to generate visibility through memes, spoofs, and slash fiction:

*

8) Platform politics

The remaining part of this post will turn to the Blackpink string of incidents with their recently viral and record-breaking song Kill This Love that debut on 04 April 2019.

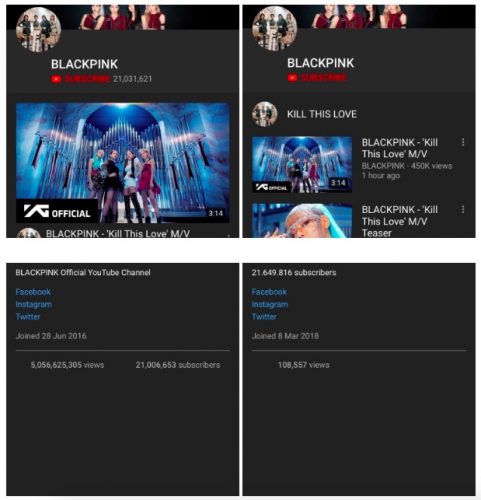
Following the release of the song, a small group of fans cautioned each other about imposter YouTube accounts that were siphoning Blackpink’s streams and views. In the following comparison, Blackpink’s official YouTube account is on the left while one such imposter account is on the left. Both accounts closely resemble each other if not for subtle verifying details: a) The official account’s subscriber count listed right next to the subscriber button (top left), but this is missing on the imposter account (top right). Instead, the imposter account attempts to replicate these verification markers by manually posting a subscriber count into the description box in another tab (bottom right). b) The official accounts About page lists their total number of views and the date the account was started coincides with Blankpink’s debut (bottom left), whereas the imposter account was started a year ago and has accumulated much fewer views (bottom right).

As the video ascended into virality, fans who were closely monitoring the video’s metrics were angered by the inaccuracy of the counters:

Other fans felt that the source of the ‘freeze’ was “sabotage” from anti-fans:

IMG_0658

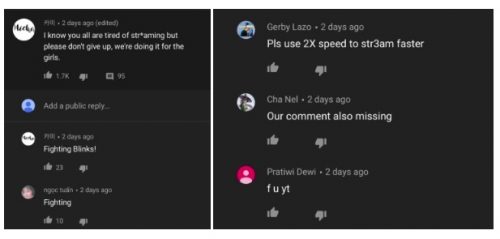
Allegedly, it is widely believed by fans that commenting with the words “view” or “stream” or even using emoji while commenting on a YouTube video would cause the YouTube views and likes meters to freeze:

Thus fans began to ‘spread the word’ by replying to numerous comment threads, pleading with commenters to use l33t speak to evade platform censorship:

Alongside such peer-to-peer networked ‘education’, fans continued to double down on their efforts and strategised over more efficient ways to stream the video:

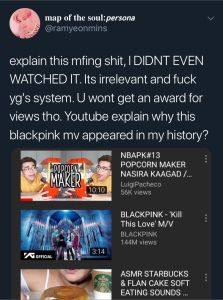
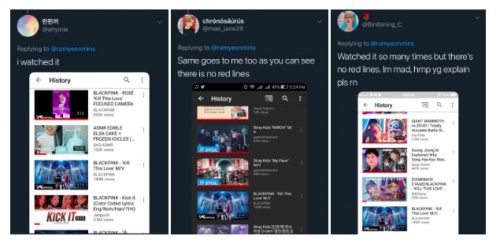
As Blackpink’s video broke music records, other conversation threads began to emerge on Twitter, accusing YouTube of falsifying the viewing history of its users. Some fans reportedly found Blackpink’s video in the ‘History’ tab of their YouTube account despite not having watched the video. Various discussions suspected platform fraud rather than a glitch. Fans who were familiar with YouTube’s various features claimed that the red bars superimposed onto the thumbnail of videos would indicate how much of a video was watched. Various comment threads thus noted the absence of said red bar on the Blackpink video that was showing up in their History:

no01

But still other fans disputed the ‘red bar’ theory, claiming to have watched the video (several times) but not registered that marker in their History:

*

9) Chainmail hoax

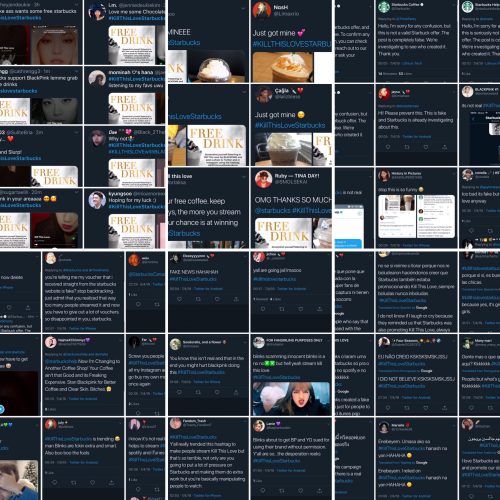
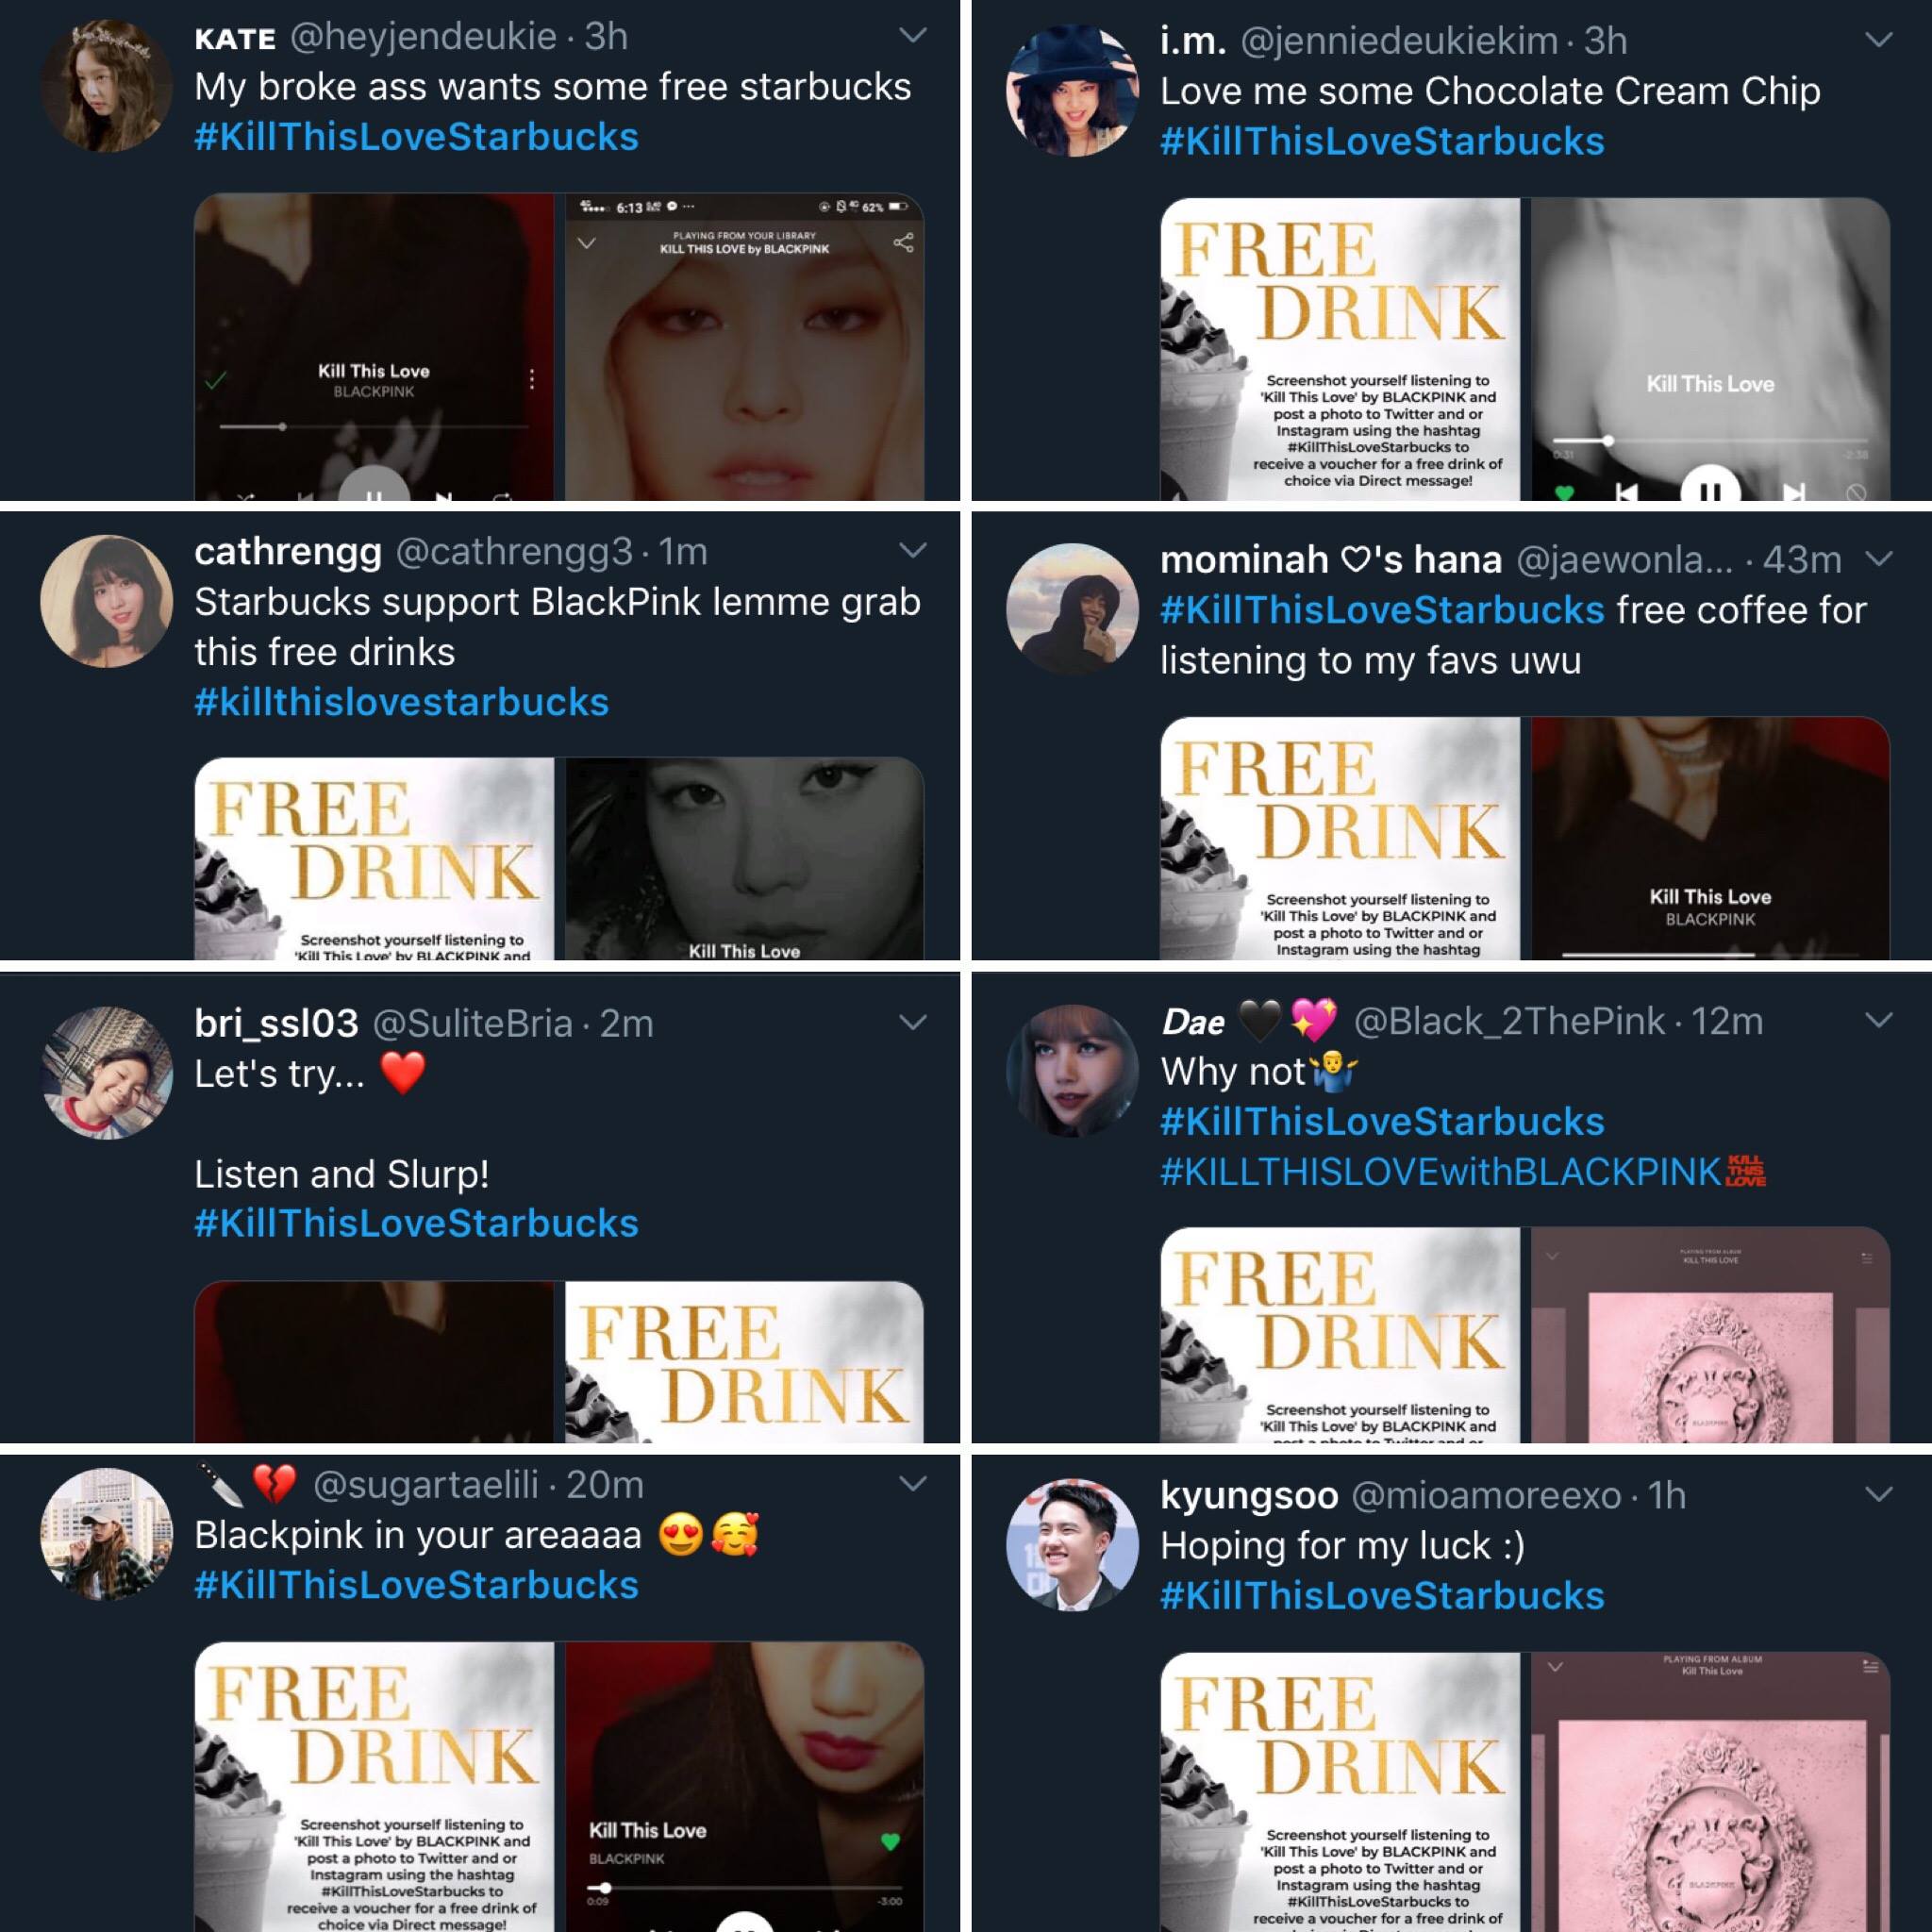
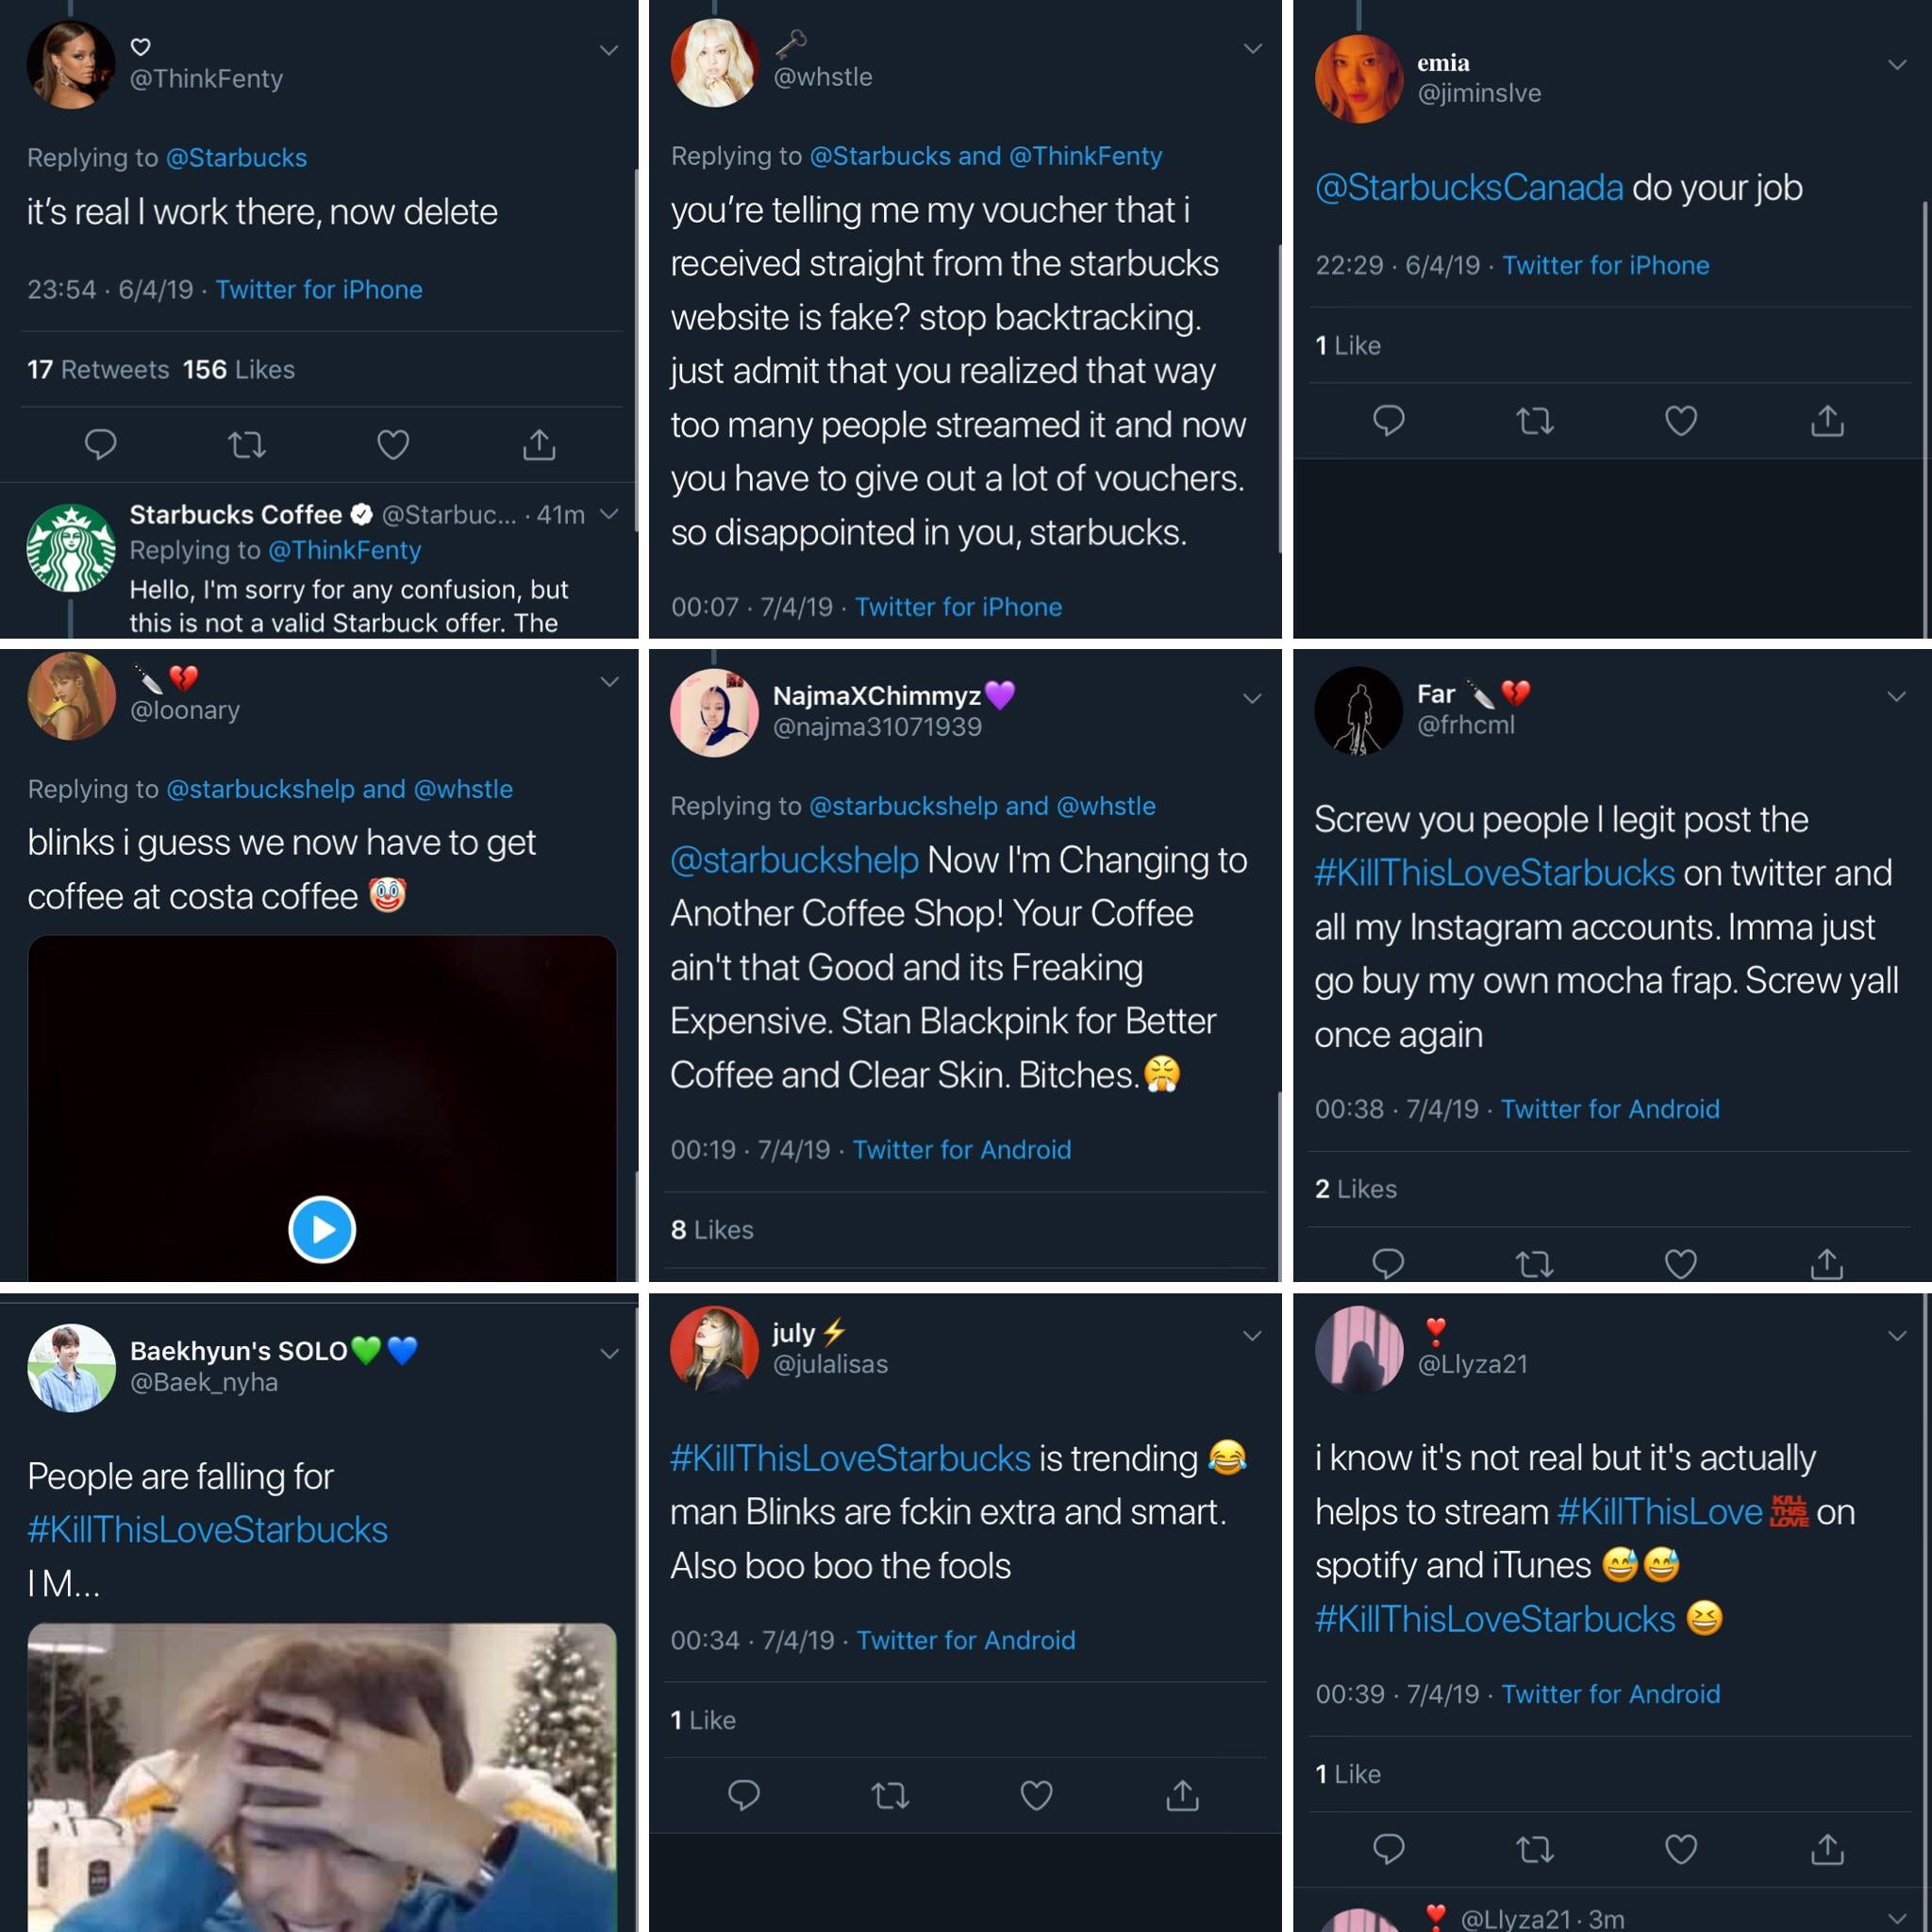
On 06 April 2019, a chainmail hoax broke out on Twitter claiming that streaming a Blackpink song would earn listeners a free drink from Starbucks. Rumour had it that users were to screengrab an image of themselves streaming Blackpink’s Kill This Love, post the screengrab on Twitter with the “#KillThisLoveStarbucks” hashtag, receive a voucher from a Starbucks social media account via direct message, and flash this voucher at any Starbucks outlet to redeem a drink:

grid 1.jpg

Several fans then posted ‘evidence’ of their free drinks:

grid 2.jpg

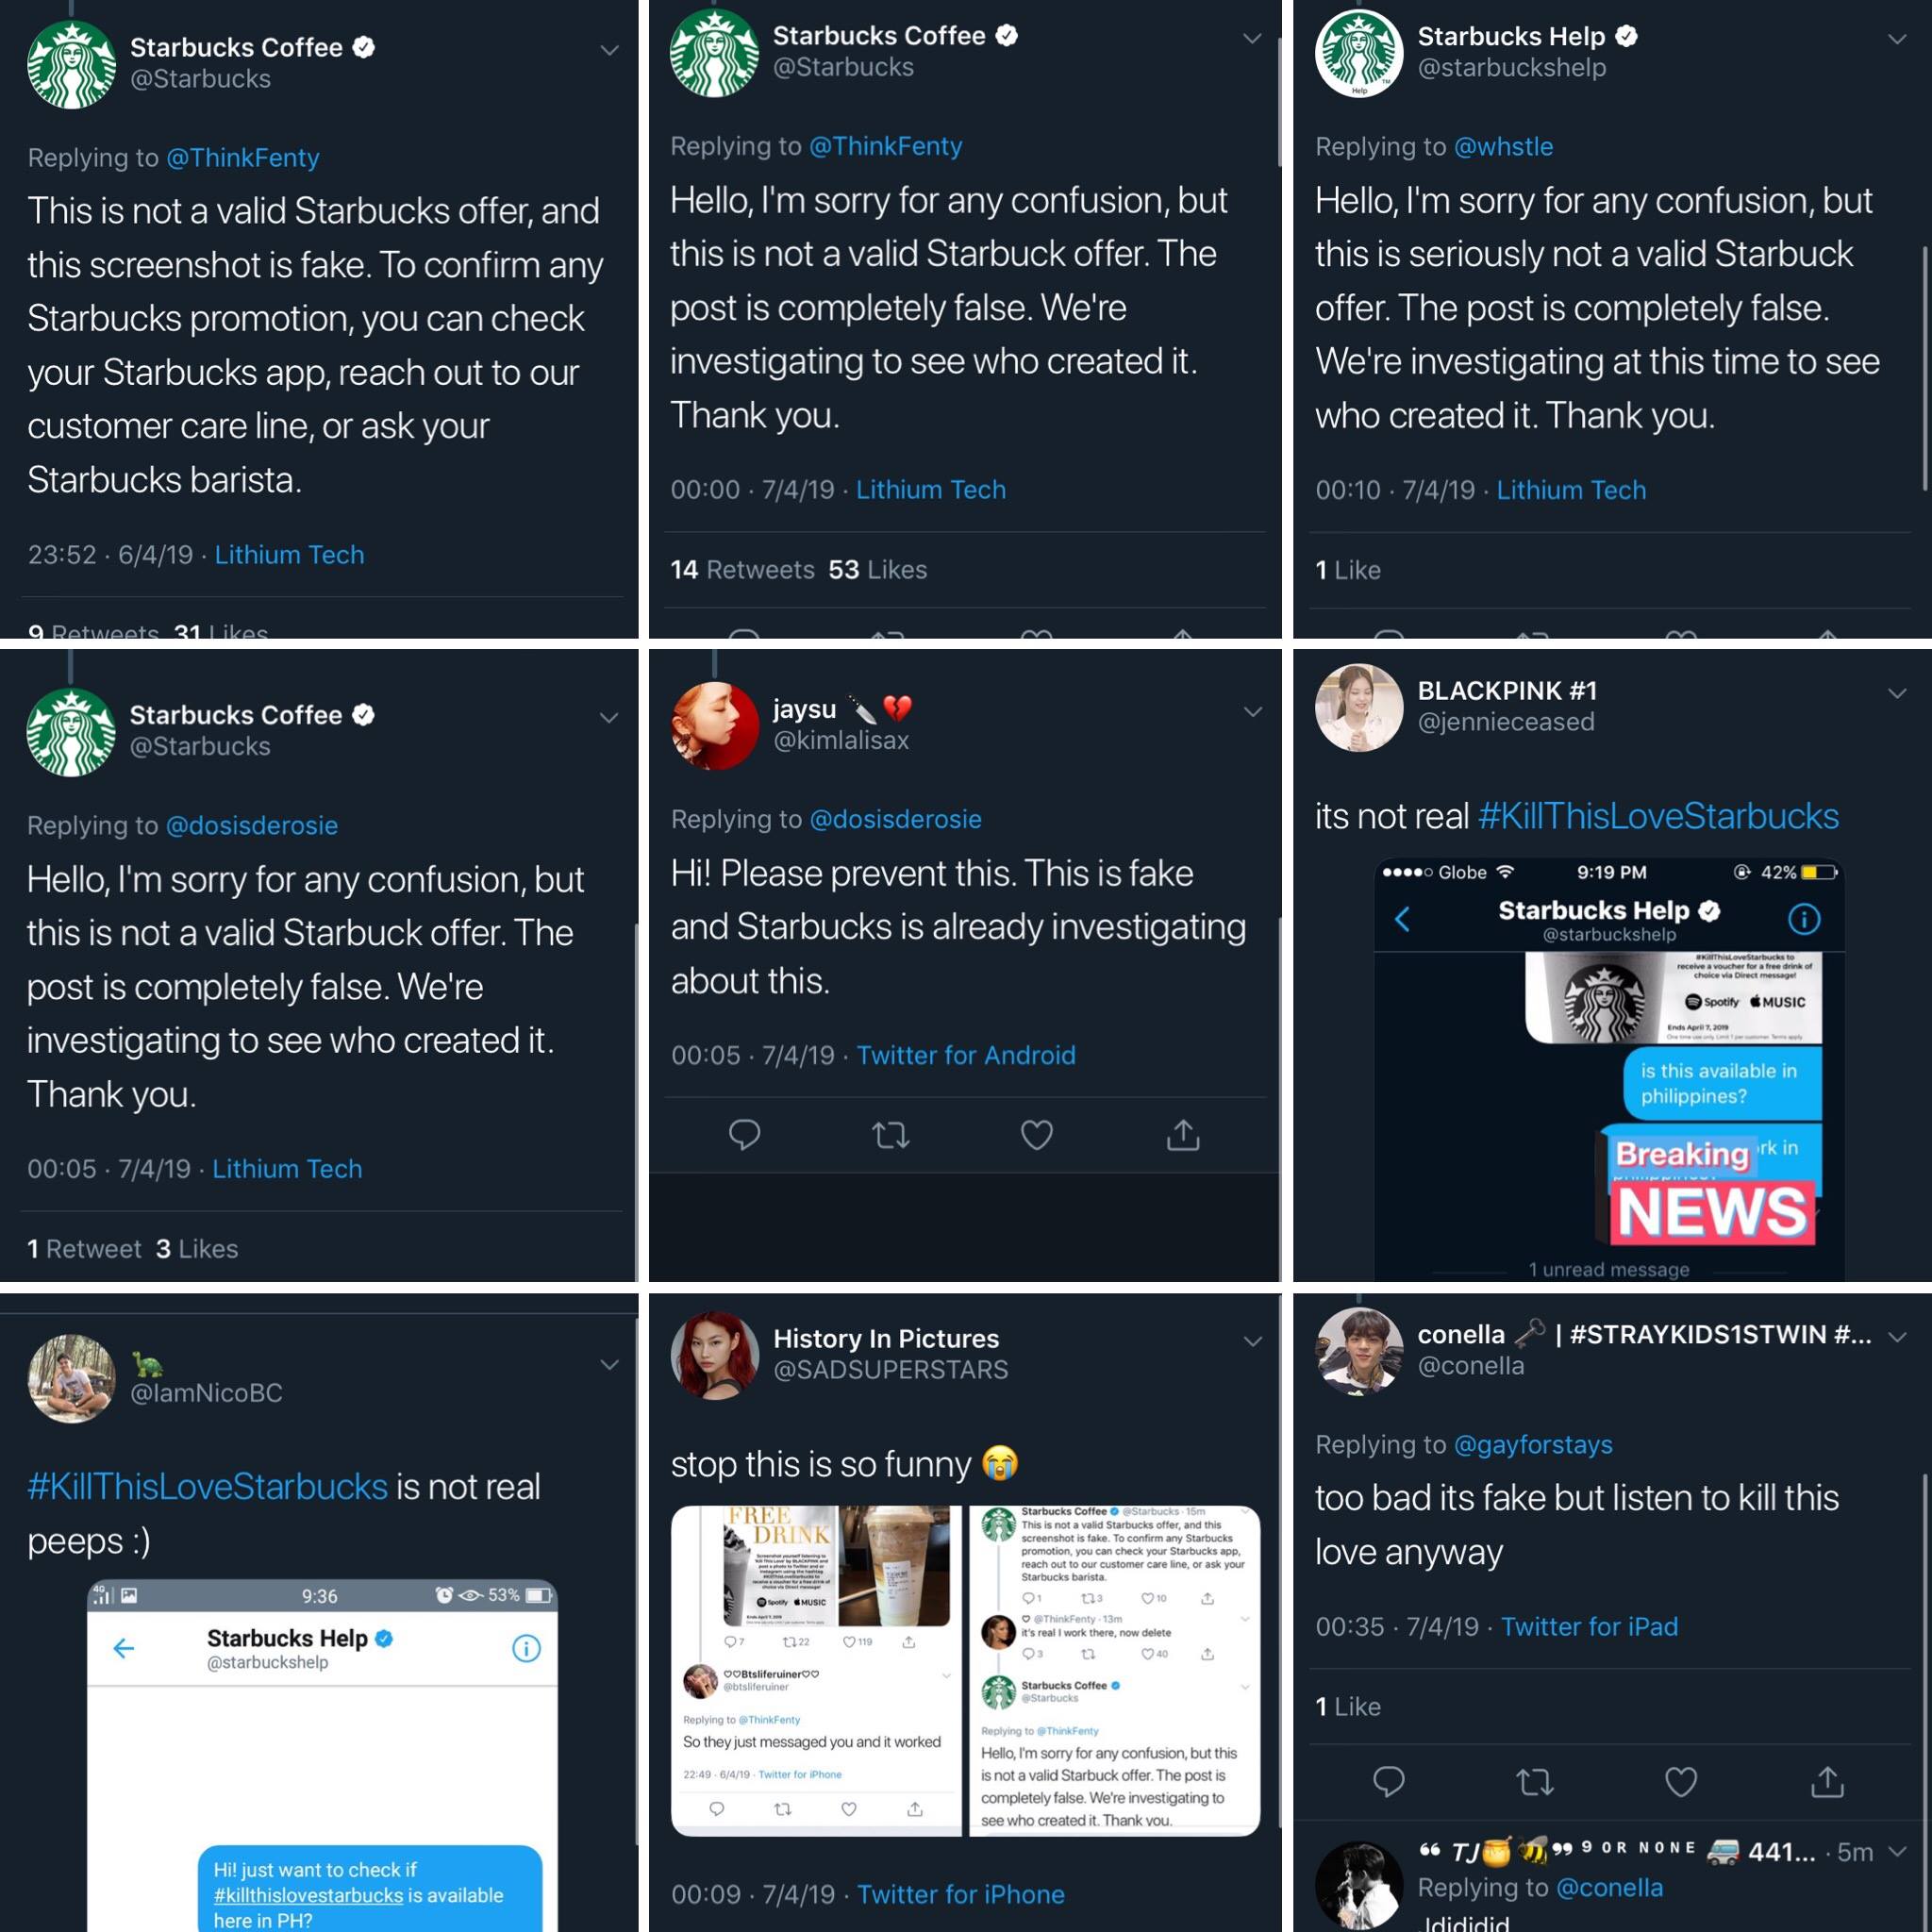
But many more fans who followed the instructions had not succeeded and were @mentioning Starbucks repeatedly, citing poor customer service or requesting for clarifications. Starbucks’ social media thus responded to the throngs of users with a template message that this was not a valid offer, and that they were investigating the incident:

grid 3.jpg

And having personally worked in customer service, I give serious kudos to the various Starbucks social media staff for their labour in politely clearing up the misunderstanding with dozens and dozens of users:

Fans had various responses to Starbucks; while many realised this was a hoax (and acknowledged the genius of this strategy for increasing viewership on Blackpink’s video), still others called out Starbucks for bad customer service and threatened to boycott them:

grid 4.jpg

Eventually, fans came to grips with the fact that the hoax was another strategy for signal boosting Blackpink’s video, as other Twitter users pointed out the spillover effects and stress placed onto Starbucks:

grid 5

On reflection, many fans anti-fans felt that the stunt was “desperate”, “dumb”, and “problematic” (even if it may have succeeded):

*

10) Internationality

Across the various strategies listed above, a final observation I made was the range of international languages that fans were communicating in. I screengrabbed just a very small sample of such instances on Twitter, and continue to be convinced that the impact of K-pop fans, their fan labours, and their vernacular attention generating strategies and potential networks of (mis)information are not confined to South Korea or Asia:

grid 6.jpg

*

A final remark from me:

Some of us may be tempted to brush these phenomena off as mere pop culture or fan practices. However, I find it more useful to frame these vernacular fan practices as strategies demonstrating effective science communication. These fans who are volunteering their time, labour, and expertise are using the vehicles of K-pop to demonstrate the production and circulation of misinformation, white noise, false flags, information amplification and burial, attention shaping, sentiment seeding, and clickbait on social media. They also display: a) the wit to tap across various interest communities whether through social media affordances or fan affects; b) the savvy to cohere across a variety of platforms with good knowledge of how each algorithm ‘works’; and most crucially, c) the rapid ability to spot, learn, replicate, and adapt emergent verification markers on social media, whether instituted by the social media platform or informally but widely acknowledged by fan cultures. In my current and future projects, I will continue to study such weaponising of popular culture as cultures of knowledge.

*

Dr Crystal Abidin is a socio-cultural anthropologist of vernacular internet cultures, particularly young people’s relationships with internet celebrity, self-curation, and vulnerability. She is the author of Internet Celebrity: Understanding Fame Online (Emerald Publishing, 2018) and co-editor of Microcelebrity Around the Globe: Approaches to Cultures of Internet Fame (Emerald Publishing, 2018). Reach her at wishcrys.com or @wishcrys.

12 Apr 00:33

Räumt doch mal hinter Euch auf

by Volker Weber

Große Aufregung heute wegen Alexa. Ich empfehle jedem mal, sein Log anzuschauen und ggfls zu löschen. Ich kann Euch erzählen, was bei mir drin steht:

  • "Guten Morgen": Tagesschau in 100 Sekunden, dann Wetter in Darmstadt, dann HR Info von TuneIn. Jeden Morgen.
  • "Stell den Timer auf 12 Minuten": vowe kocht.
  • "Schalte das Licht im Keller aus": schaltet das Licht im Keller aus.
  • "Was gibt es neues?": Liest meine Nachrichten vor.

Und das am laufenden Band. Trotzdem lösche ich dieses Log einmal die Woche.

Da wir gerade dabei sind, schaut Euch mal Eure Google Activity an. Was Ihr gekauft habt, und wo Ihr so gewesen seid. Auch diese Informationen kann man löschen.

12 Apr 00:33

Contrasting social media Democrats to real life

by Nathan Yau

As many know (I hope), what we see on social media often doesn’t mirror real life. It’s a filtered and algorithmically-driven point of view. This grows problematic when people make decisions based solely on what they see through their feeds. For The Upshot, Nate Cohn and Kevin Quealy look at the contrasts between the filtered view and the real life view and how it factors into voting.

Tags: elections, social media, Upshot

12 Apr 00:30

Samsung’s One UI is one of the best Android user interfaces

by Dean Daley
Samsung Galaxy S10 settings

Back in October, Samsung revealed its latest Android user interface, One UI.

When I initially saw it, I was skeptical as the South Korean company continuously advertised its improved usability and visual comfort. Samsung claimed that One UI made it easier to perform specific actions, with its ‘Viewing’ and ‘Interaction’ sections.

However, with so much wasted space it was difficult to believe. After using the One UI for several months, I have to say that Samsung proved me wrong.

Here are the top reasons why One UI might be the best Android user interface out there.

Natural Interactions

Natural Interactions is a feature that allows the user to navigate Samsung smartphones that feature big displays with just one hand.

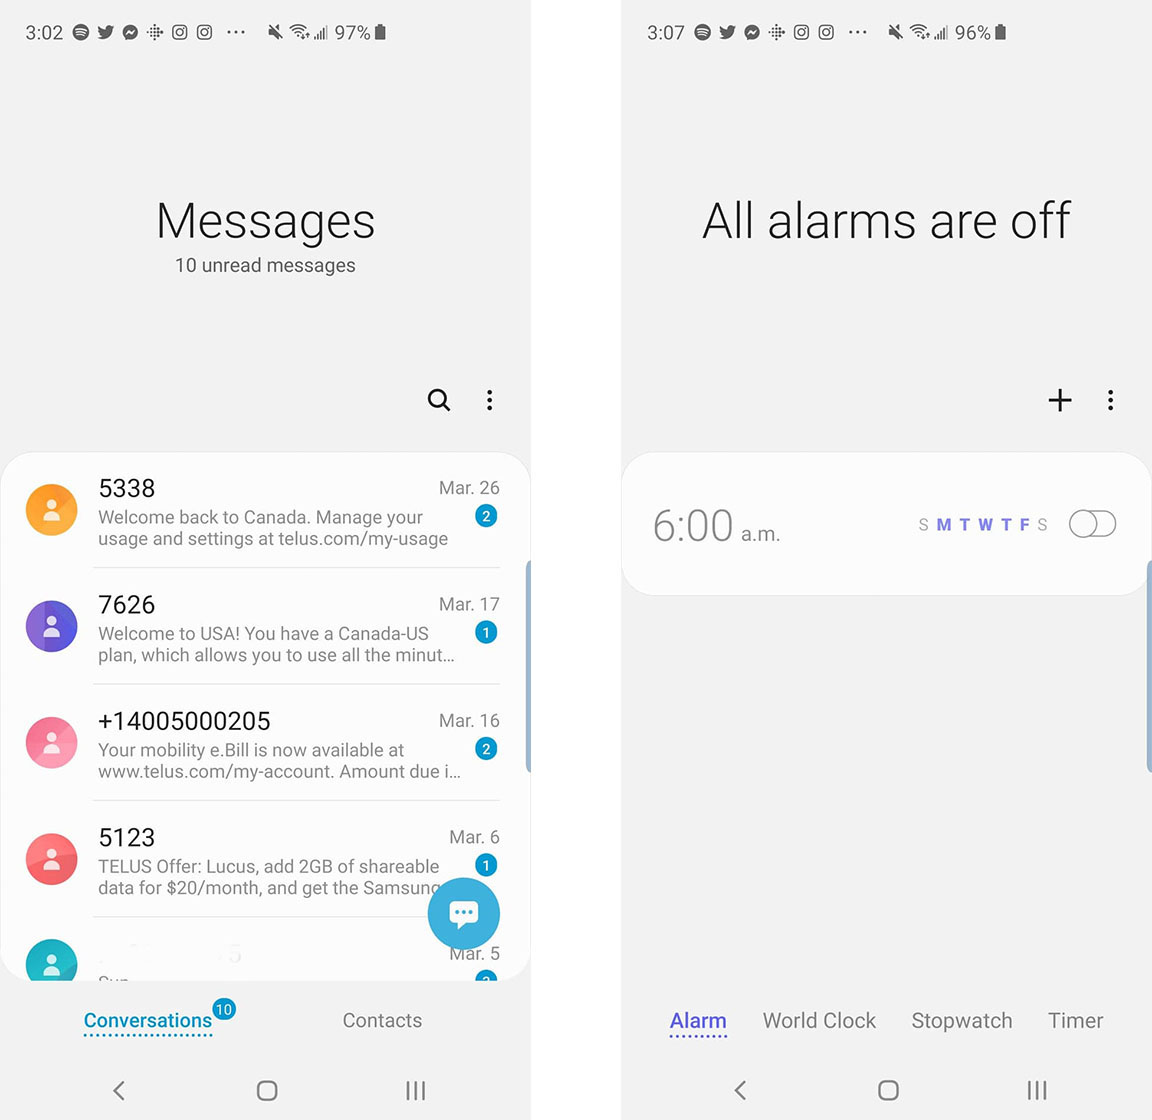
The Samsung Messages app features the title ‘Messages’ at the top with smaller text below. With One UI, the top message in the list is halfway down, making it easier to access. In contrast, the Samsung Experience version of Samsung Messages required the user to reach to the top of the app to open up the top text.

While this is a minor change, I’ve found it makes a significant difference in my day-to-day experience using the One UI, especially when comparing Samsung’s Messages app to Google’s Messages app. I noticed I prefer to use Samsung Messages over Google Messages.

Another example of this type usability is the ‘Clock’ app. The new Clock app features menu buttons in the bottom of the app, which gives users quick access to alarms, world clock, stopwatch and timer. Many clock apps found on other devices place these options at the top of the app, requiring the user to reach up to access them.

Again, it’s a very small shift, but it changed my user experience.

General appearance

Samsung’s One UI skin on top of the stock Android 9 Pie launcher creates an aesthetically pleasing design. The perfect example of this is the Settings app, which hasn’t changed very much from its previous iteration.

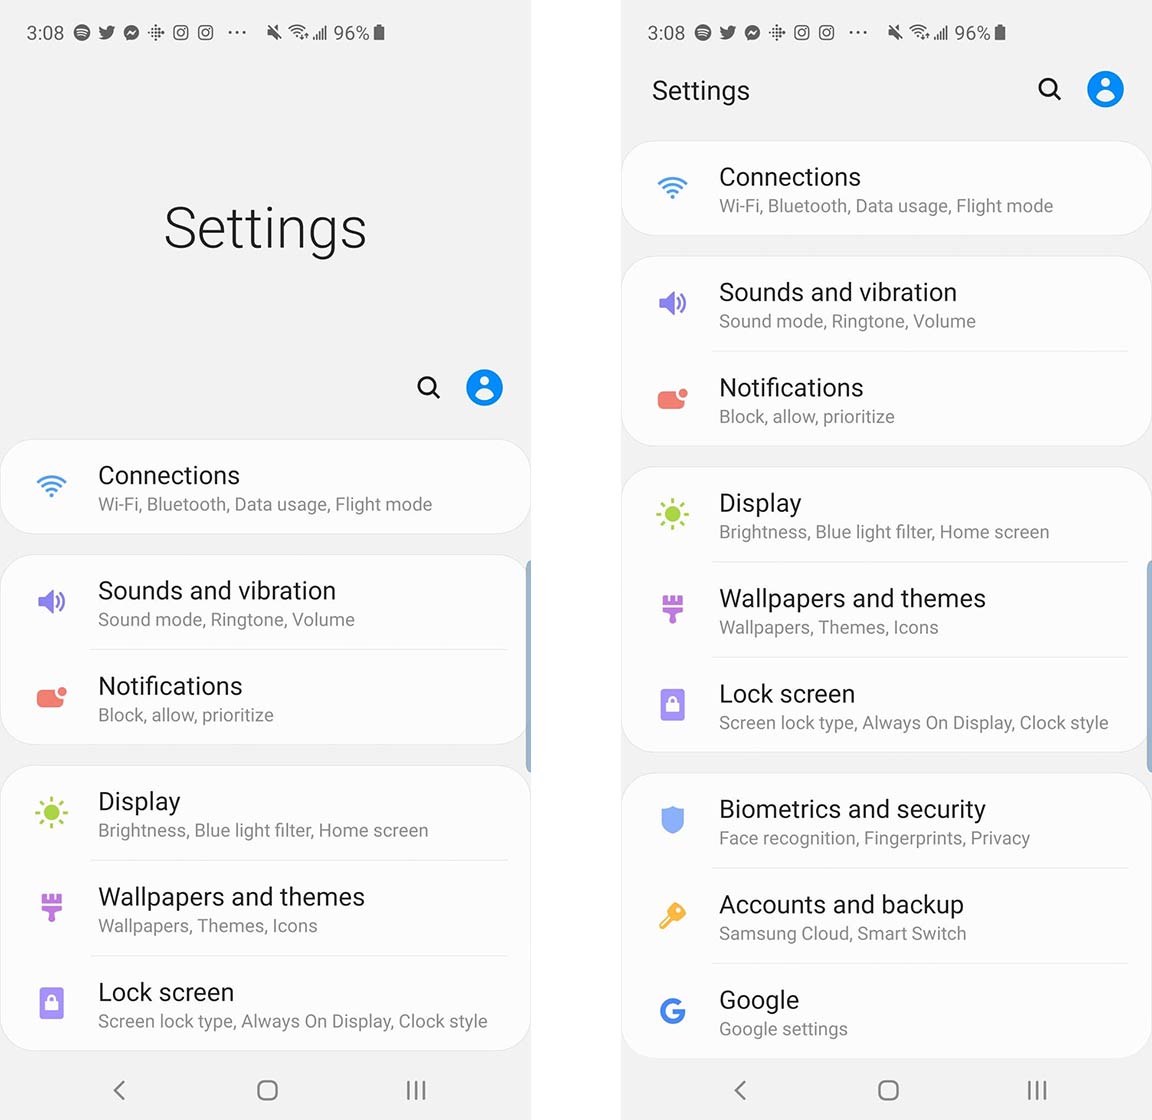
All of the options are the same, but with One UI there are slight differences. Similar to the Messages app, Samsung has added ‘Interaction’ and ‘Viewing’ sections into this app as well. Therefore at the very top, there’s a large space that only reads ‘Settings.’ After scrolling down, you’ll notice slightly different symbols for each of the settings as well as they’re separated into groups.

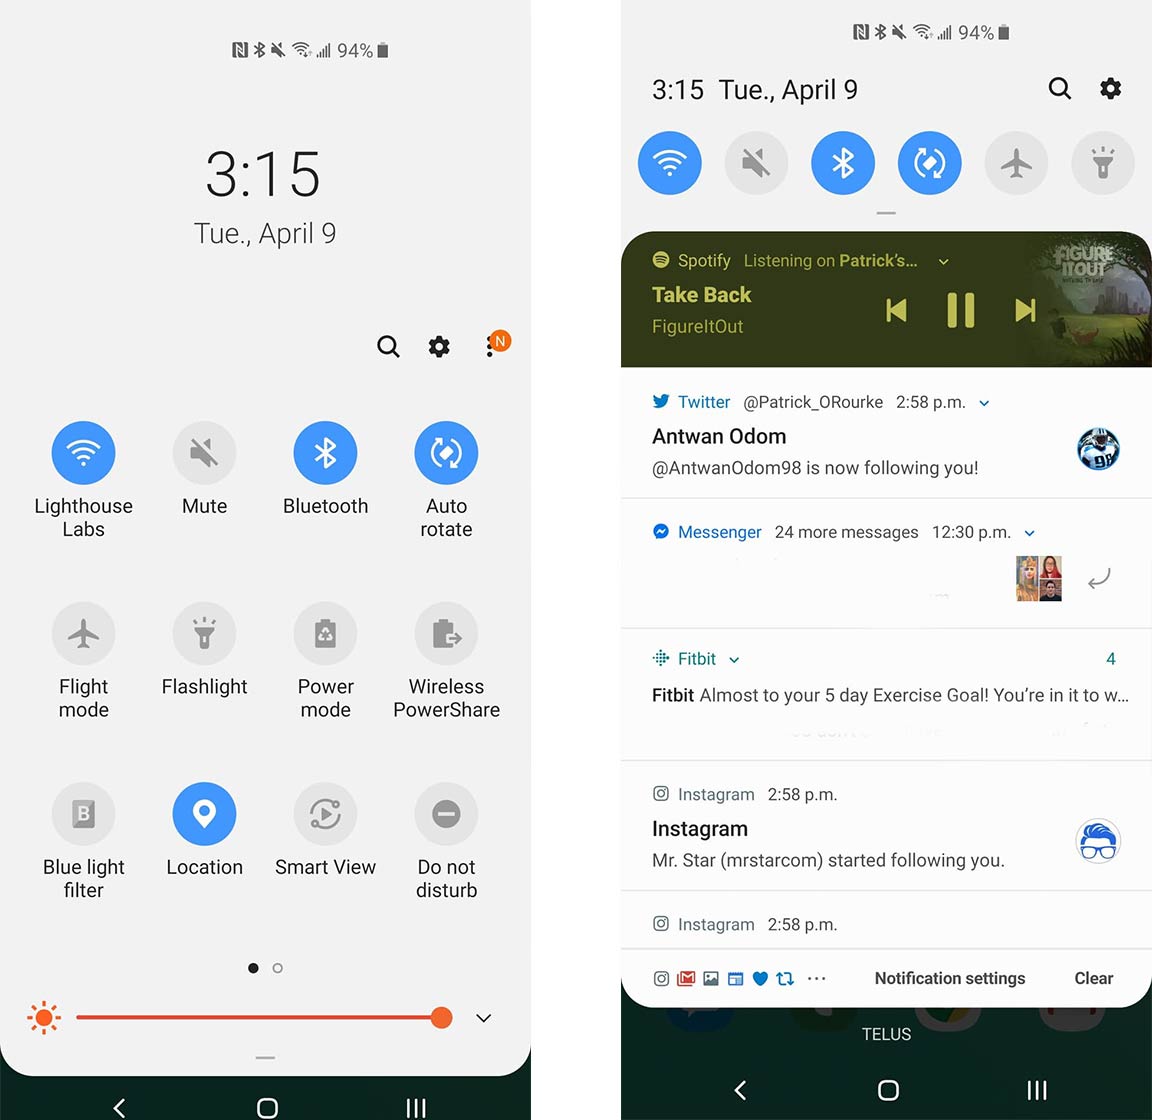
As seen below Samsung has created blocks for ‘Sound and vibration’ and ‘Notifications,’ grouping these two settings together. Continuing further down, you’ll notice other blocks, as well. What Samsung has done here is it has grouped together similar settings group so that alike tasks are easier to find.

For example, if you want to add a new fingerprint to your device, you’ll notice that the ‘Lock Screen’ setting is located in the same block as ‘Display’ and ‘Wallpaper and themes’ which likely means that you need to keep scrolling down, as this block of settings is to customize appearance. Searching slightly further down you’ll see a setting called ‘Biometrics’ which includes, in smaller lettering, ‘Face recognition, Iris and Privacy’ which is the place to add a fingerprint.

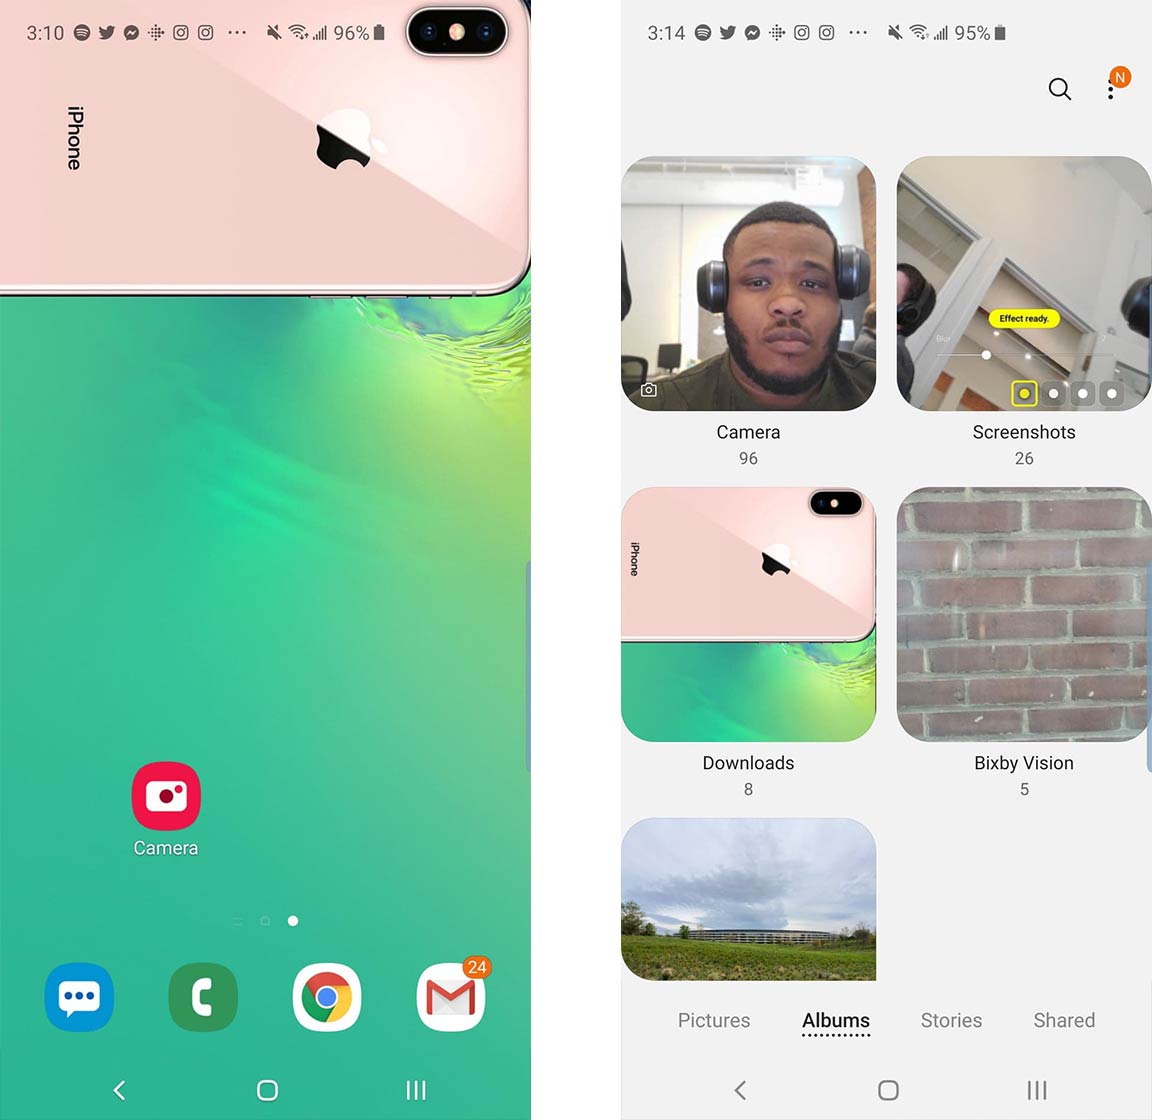
Samsung has even changed the look of its apps so they appear more in-line with Google’s Material Design. This changes the look of app icons like the ‘Camera’ so instead of just showing the outline of a camera, it’s a filled in camera, similar to the Settings’ and the Clock app, and most of Samsung’s first-party apps.

Samsung has also made a point of rounding the corners of literally everything so that it mimics the rounded corners of the device. Which means all apps, all settings, even your albums are rounded.

Settings and Gestures

In a combination of both the aesthetic and the making things more usable, Samsung has the option to make quick settings more accessible as well. Swiping down on the home screen will open up the notifications, and swiping down again opens the quick settings menu. This time, opening up the quick settings menu in its entirety will cause the quick settings to take up all of the phone’s display, with the time at the top, in the ‘Viewing area,’

This quick settings menu is more aesthetically pleasing and hides other notifications.

Within a quick settings menu, all of the titles are rounded and easily accessible because they’re in the ‘Interactions’ area.

I also found the Android Pie-based gestures very usable with One UI. This is partly because of Note 9’s, S9’s and S10’s hardware and software.

Samsung got rid of Google’s Android Pill in favour of completely showcasing the phone’s display. To go home, you swipe up from the middle to go home, swipe up from the right to open recent apps and swipe up from the left to go back.

This process is natural and works somewhat similar to Huawei’s gesture-based controls for the OnePlus 6T, however, with the combination of Samsung’s Hard press Home button on the phones before the S10 there’s never a need actually to swipe up from the middle, users can simply press down where the home button would be and it’ll bring users back to their home page.

In combination with hardware and software, One UI’s gesture-based navigation is one of my favourites, and I’ve used a number of Android handsets over the last few months.

Focus Block

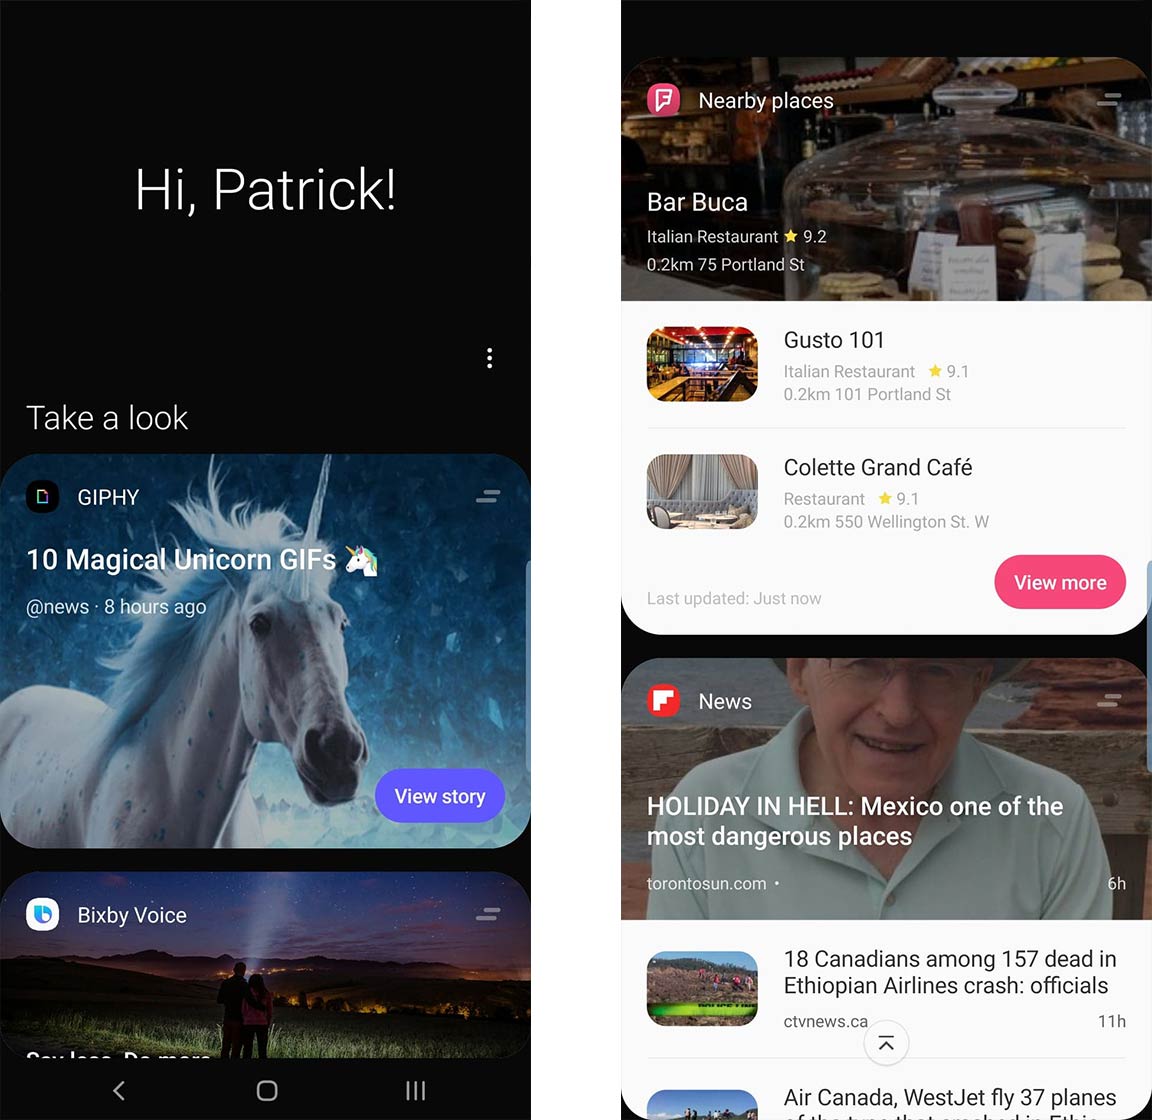
One UI also sports what Samsung calls Focus Blocks. This feature works within the Bixby Home section located on the left of the home page.

Focus Blocks, essentially block the information you’d normally find in the Bixby Home page, such as weather, calendar, Facebook videos and tasks. Samsung says these Focus Blocks will help direct users to their task without distracting them.

Personally, I like the Focus Blocks. Users can always get rid of blocks they don’t want but it’s a quick way to look at your schedule, news, what’s trending on Twitter and more.

You can pin your favourite cards, which I pinned the GIPHY card which features new GIFs with every refresh of the page. The Bixby Home section beforehand featured smaller cards that were difficult to follow. Focus Blocks are bigger and everyone can read them with ease.

One UI in comparison

While it would arguably be blasphemy for me to say that One UI is better than stock Android, the user interface is definitely in the top five of all Android skins. Though I haven’t used all of the devices from different manufacturers, over the last year I have used devices from Sony, HTC, Huawei, Motorola, OnePlus, Samsung, Asus, LG and Nokia.

Even though I’ve missed out on BlackBerry and Alcatel devices, I can confidently say that Samsung’s One UI experience is preferable, especially if you’re looking for an interface that is easy to use with one hand, or that is different from Google’s stock UI, but is still is simple and great to use.

The post Samsung’s One UI is one of the best Android user interfaces appeared first on MobileSyrup.

12 Apr 00:30

Google adds Assistant feature to silence Android phones via Home speakers

by Igor Bonifacic
Google Home

Google has added new cross-device Assistant functionality that allows Assistant users to silence their Android smartphone using Google Home voice commands.

First spotted by Android Police, the new functionality allows Assistant users to ask Google Home to either silence their smartphone or set it to Do Not Disturb. Using the same feature, it’s also possible to disable Do Not Disturb and unsilence a device. Additionally, individuals with multiple phones can ask Google Home to silence a specific device using its exact name.

For example, you can say to Assistant, “Okay Google, set my Pixel 3 to silent.”

It’s not clear when Google added this functionality. Based on research conducted by Android Police, it appears Google the feature enabled within the last month or two. For the moment, it appears this feature is only available to users in the U.S. However, it’s likely we’ll see it make its way to Canada in the near future.

When it does arrive in Canada, I can see it being very handy if you can’t find your phone. If you’re a reasonable human being and have your phone set to silent most of the time, you can ask Assistant to unmute and then proceed to call it to make it easier to find.

Source: Google Via: Android Police

The post Google adds Assistant feature to silence Android phones via Home speakers appeared first on MobileSyrup.

11 Apr 04:23

Google confirms it’s working on a new Pixel tablet or laptop

by Jonathan Lamont
Pixel Slate

Google may be working on a new Pixel tablet or laptop device to serve “productivity on the go.”

According to 9to5Google, Pixelbook Group’s lead project manager, Steve Jacobs, hinted at the new device during a session at Google’s Cloud Next 2019 conference.

The session, titled ‘Introducing Google Hardware for Business,’ started off by running through Google’s existing Pixel hardware options. The Pixelbook, for example, was positioned as a device for leaders, while the Pixel Slate was for “customer-facing teams.”

However, the most exciting section was when Jacobs spoke about what was to come.

“The tools [workers] have aren’t really conducive to the lifestyle and work style that makes them maximally productive and excited about going to work every day. And we think there’s [sic] some unique things we can do differently than the Pixelbook and Pixel Slate that are going to really help give them what they’re looking for when they’re working in this new modern cloud-first era,” Jacobs said.

Regarding when we can expect this new device, Google had no announcements “this week, but down the road.”

As for what this new Pixel device could be, my money is on the ‘Atlas,’ the rumoured Pixelbook successor that turned up in some videos last month. Unfortunately, it seems like it’ll be a little while before we know for sure.

Source: 9to5Google

The post Google confirms it’s working on a new Pixel tablet or laptop appeared first on MobileSyrup.

11 Apr 04:22

Apple Podcasts on the web gets episode playback, refreshed design

by Bradly Shankar
Apple Podcasts SyrupCast

Apple has updated its Podcasts service with a cleaner web interface and the ability to play episodes directly from the website.

Users can still go to iTunes if they so choose, which is required to read reviews and view trending podcast charts. However, the web playback option replaces the need to open iTunes to play a podcast, making playback a more streamlined process all around.

Additionally, show episodes have been given their own landing page to provide individual descriptions and other notes.

It’s worth noting that web podcasts now use the dedicated podcasts.apple.com URL, as opposed to the previous itunes.apple.com URL.

Check out all of the Podcasts on web updates here.

In related news, Apple is also reportedly planning to launch a dedicated Podcasts app on Mac.

Via: 9t05Mac

The post Apple Podcasts on the web gets episode playback, refreshed design appeared first on MobileSyrup.

11 Apr 04:21

Remember all those Brexiters who thought everything would get settled at the last minute as it always does? Well yes, we got the usual horse trading, but the UK was the horse being traded, issue at stake, when to send us to the knacker’s yard.

by ottocrat
mkalus shared this story from ottocrat on Twitter.

Remember all those Brexiters who thought everything would get settled at the last minute as it always does? Well yes, we got the usual horse trading, but the UK was the horse being traded, issue at stake, when to send us to the knacker’s yard.


Posted by ottocrat on Wednesday, April 10th, 2019 10:43pm


67 likes, 26 retweets
11 Apr 04:20

Lost Lagoon

by Michael Kalus
mkalus shared this story from Uploads from Michael Kalus.

Michael Kalus posted a photo:

Lost Lagoon


11 Apr 04:20

What are higher-order functions?

by Eric Normand

Higher-order functions are functions that take a function as an argument and/or return a function. We use them a lot in functional programming. They are a way to define reusable functionality, as we do with map, filter, and reduce.

Transcript

Eric Normand: What are higher-order functions? By the end of this episode, you’ll know what higher-order functions are. You’ll have some examples of higher-order functions that you probably are familiar with. You’ll know why they are used so much in functional programming.

My name is Eric Normand, and I help people thrive with functional programming.

High-order functions are an important way of getting leverage when you’re programming. They’re used, extensively, in functional programming. We were always on the lookout for new higher-order functions to write.

I think that they are the second level of skill. This is how I think of the near-second level of skill in functional programming, the first being seeing actions, calculations, and data.

The second level, you start to think in terms of higher order abstractions like higher order functions.

What are they? Higher order functions, pretty simple definition, but the definition might not really reveal why they’re so important. Here’s the definition. Higher order function is a function that takes a function as an argument and/or returns a function as a return value.

Let’s say a function about a function. It’s a function that acts on a function or it’s a function that creates a function. It’s higher order because you could say, “Well, there’s functions that just operate on values.” Those are low order. We’re talking about addition. We’re talking about string concatenation.

These take two strings, return a string. Addition takes two numbers, return to a number. They’re low order. Once you have a function that operates on a function, boom, you’re getting to a higher order.

Whether they’re better, they’re higher, that’s not really what it’s about. It’s about the fact that it’s about itself. It’s functions about function. That’s what makes it higher order.

Some examples that you’re probably used to already, map, filter and reduce, those are common in a lot of languages now. They are functions, and they take functions as arguments.

Map takes a function and a list, or an array, or something like that, and it applies that function. Map, the function, applies the function that you pass at the argument to all of the elements in that array.

Filter takes a function and a sequence, an array or something, and it applies that function. Any of the elements that don’t return true for that function will not make it into the output function.

Reduce is similar. It takes a function, and an initial value, and an array, and it will call that function on each of the elements in the array.

The common thing, though, is that they take functions as arguments. That’s why they’re higher-order functions.

Why do we do this? You notice you could solve the same problems of map, filter and reduce with for-loops, but for-loops have the advantage of being syntax in your language.

The body of the for-loop, the stuff in the curly braces of the for-loop, is privileged. The compiler is going to look at that code and say, “I’m not going to execute it right away. What I’m going to do is every iteration through this loop, I’m going to execute this code.”

We need a way of deferring the execution of code until later. One way you could do that is you wrap that code in a function, and then you make sure that you have all the arguments you need to make that function work out of context, in some other place. We’re encapsulating this code, wrapping it up in a function.

If your language has first-class functions, then you can take that function and pass it around. We can make another function that says, “I need to know what you want me to do to each of these things in the array,” like a map.

Pass me that as a function and I promise I will call that function for each element in the array and I’ll pass it as the argument.

This is a way that you can pass code around. You can pass functionality around. If I wanted to speak in my own terms, I would say you’re passing calculations around. You’re able to say, you’re not just passing data, you’re passing calculations. These calculations can then be run on different inputs, different arguments.

They let us take something that is basically syntax like a for loop and turn it into something that is not as privileged. That is first class. Usually, you can’t pass a for-loop around but if you wrap it up in a function, you can.

You can also say that at this point you going to start reusing it. Map is much more amenable to re-use. It’s going to give you shorter code, people will talk about that.

I don’t know if those are the really significant things though. I don’t know if it’s so important when you’ve called map it’s shorter. What’s important is that you’re able to operate at a higher level of abstraction. You’re able to make functions that operate on other functions instead of having to write out all the code yourself.

You could write, just as an example, if you wanted to process an array four times with different code, you could write four different for-loops. It does the first one, and then does the second one, does the third one and then does the fourth one.

That’s great. You could replace all of those for-loops with maps. I would argue it’s probably about the same amount of code. You haven’t done any savings yet.

Then because you’re operating on the same array, right the same array, you can say, “Whoa, I don’t need to write out all these maps. I can put the functions that get passed to map into an array.”

“Because the functions are first class, I can put these four functions into an array and then I can map over those. Now I’m really saving some code.” You’re taking it to a higher level. Yes, that’s the leverage that I’m talking about.

Not something that I often see when I see people doing functional programming, taking it to that next level to say, “We don’t need to write out everything we do. We can have the machine do that for us.”

Often this is called metaprogramming. You’re programming about programming because it lets you get away with not having…like you’re making a new syntax. Instead of a for-loop which has a body, you’re doing a map which has a function and so in the function it has a body.

You’re able to do a little syntax. You’re able to program about programming. Functional programmers don’t think that higher-order functions. They don’t really call them metaprogramming. They call them programming. That’s just what you do.

That is what programming is all about. It’s about finding the right level, the right abstractions at the right level for the problem that you’re solving. Sometimes that involves making higher-order functions that operate on other functions.

I do want to emphasize that you need first-class functions to do this or something equivalent. You could have blocks, some places they’re called lambdas. You could do it with anonymous inner classes in Java, but now they have lambdas so you probably don’t need to do it.

Let’s talk about functions that return functions. We talked about maps and filter reduce. Those take them as arguments, but they don’t return them. Let’s talk about two common functions that return functions. One is composition. In the last episode, I talked about function composition as a function.

It takes two functions and it returns a new function that is the composition of the two. You’re actually making a function inside that function and returning it. This is an example of a returning a function.

You could say, “I want a function that adds five to a number.” You could write that function out. It takes X and it returns X plus five. Then you write one. I need one that returns X plus 10, and I need one that returns X plus 100.

You could say, “Wait a second, I see a pattern here. I’m going to make a function. That takes a number N or Y and it returns a function that takes an X and then it will return X plus Y.” You’re taking a function, you’re making a function that returns a new function. Now you’re able to leverage this repetition into common functionality.

Finally, there’s another one that you might be familiar with. Maybe not, but that’s OK. You have something like filter. It’s a function that you pass the filter returns true if you want to keep the element and it returns false if you want to eliminate the elements from the array.

What if you have the function positive? You have a function positive, so it’s a positive number. Returns true if it’s a positive number and false if it’s not positive. You want the opposite of that. You want to keep all of the non-positive numbers and reject all the positive numbers.

You could make a new function that just takes an X and it returns not positive X. You could write that. Then you could also say, “Well, I have a function that tells that me if this is a capitalized string, so is capital.”

I need a function that is the opposite of that. Is not capital. I’m going to make a new function call “is not capital” and it will return not is capital X.

You can write all these functions that are just the opposite of an existing function. Then you see the pattern. “Whoa, I’m writing a new function each time that’s just the not of an existing function.

“Why don’t I make a function that will do that for me?” I’m operating at just a slightly higher level. Instead of writing all these functions myself, I will make the computer write the function for me.

You could call this function opposite or you can call it complement. What it does is it takes a function and it makes a new function that just returns not of calling that functions. Then that’s it.

Now you have a function called the opposite, or complement, or negate. Whatever you want to call it. Now, you can use that and pass it to filter and you’ll get your non-positive numbers out and eliminate the positive numbers.

That’s an example of returning a function. You notice I did these examples so that you could see like, “Oh yes, this is something I would use a lot and I would want to be able to abstract that.”

This is what we’re doing. We’re abstracting these things and you could write yourself. You could write opposite, the opposite of capitalized or the opposite of is capital. You can write the opposite of is positive. You can write the opposite of a bunch of functions all by hand, but this is a way of doing it automatically.

Another thing I want to mention, last thing, is that in JavaScript if you program JavaScript to any amount, you have probably dealt with higher-order functions.

Yes, it has map filter and reduce, but any time you’re calling some Ajax or some asynchronous operation, you’re going to have a callback function, and so it’s a higher-order function. You’re passing in a callback. It’s less common to return a function, I’ve noticed, from JavaScript.

You might have in something like higher-order react components, where you’re taking a component or taking a function and returning a new function, that’s a functional component, is possible. I just want to mention that. Let me recap.

A higher-order function is one that either takes the function as an argument or returns a function as the return value or both. It could do both. Some common examples, map, filter, reduce, function composition, complement or opposite. There’s one that returns an adder that adds a certain number to it. Why do we do it?

Really for the ability to reuse that functionality that you would normally have to write out yourself. You could say that it gives shorter code, but it lets you take a function that represents functionality and use that in some other way. It’s a way to make what you might normally think of as the new syntax.

You can do that with just passing in a function because you don’t need a block. You need first-class functions for this to work. You need to be able to pass them as arguments obviously.

You might think of this as metaprogramming, programming about programming, but that’s kind of limited because this is just what programming is to functional programmers. This is just what we do.

Sometimes, we’re writing a function to convert a string to a different kind of string. It’s just lower order. Just value-to-value. Sometimes, we notice a pattern, and we say, “Oh, I can make this out of higher order functions. If I just pass-in this function, I will be able to eliminate this duplicated code.”

Or, “This is exactly the kind of abstraction that will help my software.” Or whatever it is. We just do that. We just do it naturally. We don’t think of it as a separate activity, like metaprogramming.

You’re probably familiar with callbacks, but the returning of function is also an important thing too.

A little assignment for you that might help you consolidate your learning. Do you have functions that return other functions in your code? You might be able to find them.

Do you have functions that take functions as arguments? Just look at those, find some examples in your code, and ask what they are helping you do. Why are they there? What is it about them that makes them worth having?

Please do me a favor. If you’ve liked this discussion about higher order functions, please subscribe, because then you’ll get more episodes like it as they come out.

That’s all I have to say. If you like to get into a discussion with me, I love getting emails. Please email me at eric@lispcast.com. I try to reply to everything. In fact, I think I pretty much do reply to everything.

You can also find me on Twitter, @ericnormand with a D. You can also find me on LinkedIn.

I’ll see you next time.

The post What are higher-order functions? appeared first on LispCast.

11 Apr 04:19

Music streaming has a far worse carbon footprint than the heyday of records and CDs – new findings

mkalus shared this story .

It is easy to get nostalgic for the era when most music lovers bought LPs. They would save their pennies for a Saturday trip to the local record store, before heading home clutching their glorious new vinyl in a plastic bag to drop the needle on the turntable and listen on repeat. This anachronistic ritual will be resurrected on International Record Store Day on Saturday April 13, as consumers queue to buy exclusive limited edition vinyl releases from their favourite artists. Launched a decade ago, this annual event is an industry drive to boost ailing independent record stores in an age when most people stream music online.

But is it actually true that earlier generations placed a greater value on recorded music than music fans in the present day? We are loath to succumb to the mythology of a “golden age” for music and lend credence to baby boomers moaning of bygone days when music somehow mattered more than it does now. We decided to investigate the numbers to see if they told a different story. As it turns out, they do – and it’s far worse than we expected.

We conducted archival research on recorded music consumption and production in the US, comparing the economic and environmental costs of different formats at different times. We found that the price consumers have been willing to pay for the luxury of owning recorded music has changed dramatically.

The price of a phonograph cylinder in its peak year of production in 1907 would be an estimated US$13.88 (£10.58) in today’s money, compared to US$10.89 for a shellac disc in its peak year of 1947. A vinyl album in its peak year of 1977, when The Sex Pistols’ Never Mind The Bollocks came out, cost US$28.55 in today’s money, against US$16.66 for a cassette tape in 1988, US$21.59 for a CD in 2000, and US$11.11 for a digital album download in 2013.

This fall in the relative value of recorded music becomes more pronounced when you look at the same prices as a proportion of weekly salaries. Consumers were willing to pay roughly 4.83% of their average weekly salary for a vinyl album in 1977. This slips down to roughly 1.22% of the equivalent salary for a digital album during its 2013 peak.

With the advent of streaming, of course, the business model of consuming recorded music changed: what used to be a commodity industry, where people bought copies to own, is now a service industry in which they buy temporary access to a music experience stored in the cloud. For just US$9.99 – barely 1% of the current average weekly salary in the US – consumers now have unlimited ad-free access to almost all recorded music ever released via platforms such as Spotify, Apple Music, YouTube, Pandora and Amazon.

Yet if consumers are paying an ever lower price for their music, the picture looks very different when you start to look at environmental costs. Intuitively you might think that less physical product means far lower carbon emissions. In 1977, for instance, the industry used 58m kilograms of plastic in the US. By 1988, the peak year for cassettes, this had dipped slightly to 56m kg. When CDs peaked in 2000, it was up to 61m kg of plastic. Then came the big digital dividend: as downloading and streaming took over, the amount of plastics used by the US recording industry dropped dramatically, down to just 8m kg by 2016.

But if these figures seem to confirm the notion that music digitalised is music dematerialised – and therefore more environmentally friendly – there’s still the question of the energy used to power online music listening. Storing and processing music in the cloud depends on vast data centres that use a tremendous amount of resources and energy.

It is possible to demonstrate this by translating plastic production and the electricity used to store and transmit digital audio files into greenhouse gas equivalents (GHGs). This shows that GHGs from recorded music were 140m kg in 1977 in the US, 136m kg in 1988, and 157m kg in 2000. By 2016 it is estimated to have been between 200m kg and over 350m kg – and remember that this is only in the US.

Obviously this is not the last word on the matter. To truly compare past and present, if it were even possible, you would have to factor in the emissions involved in making the devices on which we have listened to music in different eras. You would need to look at the fuel burned in distributing LPs or CDs to music stores, plus the costs of distributing music players then and now. There are the emissions from the recording studios and the emissions involved in making the musical instruments used in the recording process. You might even want to compare the emissions in live performances in the past and the present – it starts to look like an almost endless enquiry.

Even if the comparison between different eras ultimately came out looking different, our overriding point would be the same: the price that consumers are willing to pay for listening to recorded music has never been lower than today, yet the hidden environmental impact of that experience is enormous.

The point of this research is not to ruin one of life’s greatest pleasures, but to encourage consumers to become more curious about the choices they make as they consume culture. Are we remunerating the artists who make our favourite music in a way that accurately reflects our appreciation? Are streaming platforms the right business model to facilitate that exchange? Is streaming music remotely from the cloud the most appropriate way to listen to music from the perspective of environmental sustainability? There are no easy solutions, but taking a moment to reflect on the costs of music – and how they have changed over history – is a step in the right direction.


Click here to subscribe to our climate action newsletter. Climate change is inevitable. Our response to it isn’t.

10 Apr 20:37

All of the deaths in Game of Thrones

by Nathan Yau

A few years back, The Washington Post illustrated every death in Game of Thrones. With the new season on the way, the death count is up and the graphics updated.

Tags: deaths, Game of Thrones, Washington Post

10 Apr 20:37

Amazon Echo Link als Konkurrenz zu Sonos Connect

by Volker Weber

amazon-echo-link

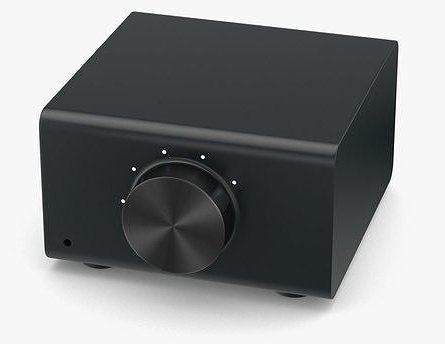
Mit den Echos hat Amazon eine ganze Menge Kunden erreicht. Aber die Lautsprecher sind nichts für Leute mit höheren Klangansprüchen. Die erreicht Sonos mit dem Connect für den Anschluss einer Stereoanlage oder dem Connect:Amp für Kunden, die zwar keinen Verstärker mehr betreiben wollen, aber gute Boxen haben.

Genau diese Kunden will Amazon nun mit dem Echo Link und dem Echo Link für 200 Euro und in zwei Wochen mit dem Echo Link Amp für 300 Euro bedienen. Selbes Prinzip wie bei Sonos, beheimatet im Alexa-Universum, das heißt nicht mit so vielen Musikdiensten. Ein Micro ist nicht drin. Alexa muss also auf einem Echo Dot leben. Den gibt es für 30 Euro mehr im Paket dazu, wenn man noch keinen hat.

10 Apr 20:37

How to Manage Remote Employees for your Small Business

by Guest Author

Work from home, remote work and flexible working hours – these are all oft-repeated buzzwords that you’ll find in any State of Work report published in the last five years. The truth is that these are not just fads any more. As the economy grapples with seismic technological changes, there is a marked shift in the needs and attitudes of employees as well. Remote work is seen as an additional benefit by some workers, but 61% workers have left or have considered leaving a job because of the lack of flexibility. The main reasons that the modern day workforce has come to prioritize flexibility over pay are:

  • Work-life balance
  • Spending time with family
  • Reducing commute times
  • Saving time

It’s evident that the need for flexible work options is not a passing fad. Not taking this into account might mean missing out on promising talent for businesses, even small businesses. So, how should companies approach this issue in order to ensure that they are truly supporting remote workers?

Here are some tips for managing remote employees that your small business should consider:

  1. Attract and Retain the Right Kind of Talent
    It is important to understand what kind of employee is suited to a work from home job. One of the vital tips for managing remote employees is to select the right kind of remote employees first. So your recruiting manager and HR department should make the effort to understand that the kind of candidate needed is one who is intrinsically motivated, can handle the physical barrier between her and her teammates, and has preferably been successful in such an arrangement before. Attracting them might not be a problem, but retaining them and getting the best out of them might be. But if your business keeps the following points in mind, it can be a rewarding experience for all the stakeholders.

  2. Build a Robust Communication Framework
    To manage remote employees well, there needs to be an emphasis on creating a strong communication framework that incorporates the right tools and strategies to build a company culture that sees remote workers as assets who are no less important than in-house teams. Often, virtual workers might feel left out, especially if their in-office counterparts are in a different country across the globe. When employees work from home, they depend on their communication systems to stay in the loop. A simple office phone number might not be enough to accomplish that. An advanced VoIP (Voice over Internet Protocol) telephony service like CallHippo, which provides virtual phone numbers, can be of immense help here. CallHippo’s business phone number is perfect for virtual meetings and conferences. Additionally, the CallHippo business phone number is enhanced with features that make it a great training tool for sales and support teams. A virtual phone number can go a long way in building a robust communication framework with your remote teams.

  3. Encourage Transparency Across All Levels
    This ties in perfectly with the need for a robust communication framework. Employees across departments and locations should know what is happening in the company. So, it is vital to hold company-wide meetings on a regular basis. Even if you have employees who work from home, they should be in the know about company initiatives, its financial position, and department performance. In fact, department meetings with the team leader are also crucial, be it via phone or video call, because it allows them to connect with remote teams and hence, manage remote employees more effectively. As mentioned before, virtual workers might feel left out due to their physical absence from the office, but checking in with them frequently and building a culture of transparency allows companies to bridge that gap. It shows that they actually care about supporting remote workers.

  4. Time Tracking
    This one’s optional, but if you’re worried that employees working remotely for your small business are going to waste time slacking off, you can invest in time tracking tools. While CallHippo may not have dedicated time tracking features yet, the virtual phone number does come with a timezone integration that allows you to see the time in your remote employee’s time zone instantly. Tools like Timely and Hubstaff allow automatic time tracking and deliver detailed reports on your employees’ productivity. But there’s not much to worry about in that area. A Stanford study recently showed that by supporting remote workers, businesses witnessed a huge productivity boost! So, one of the most important tips for managing remote employees might just involve letting them be!

In Conclusion
Building a positive remote work culture is hard work, but it is vital for businesses of all sizes today. As the workforce embraces the remote economy, so should businesses. It doesn’t matter your industry – from real estate, to tech companies – everyone is turning to remote talent. The aforementioned tips for managing remote employees can help your small business to streamline its work from home policies, fine tune intra-team relationships and create a work culture that celebrates remote workers.

Diwakar Chaturvedi – Digital Marketing Manager, CallHippo

Diwakar is a digital marketing expert with over 5 years of experience. He is passionate about digital marketing and this passion has contributed greatly to the success of CallHippo. He enjoys playing cricket and listening to music when he’s not at work.

10 Apr 20:37

Using a Mac from iOS, Part 2 – Luna Display and macOS as an App

by Federico Viticci

iPad Diaries is a regular series about using the iPad as a primary computer. You can find more installments here and subscribe to the dedicated RSS feed.

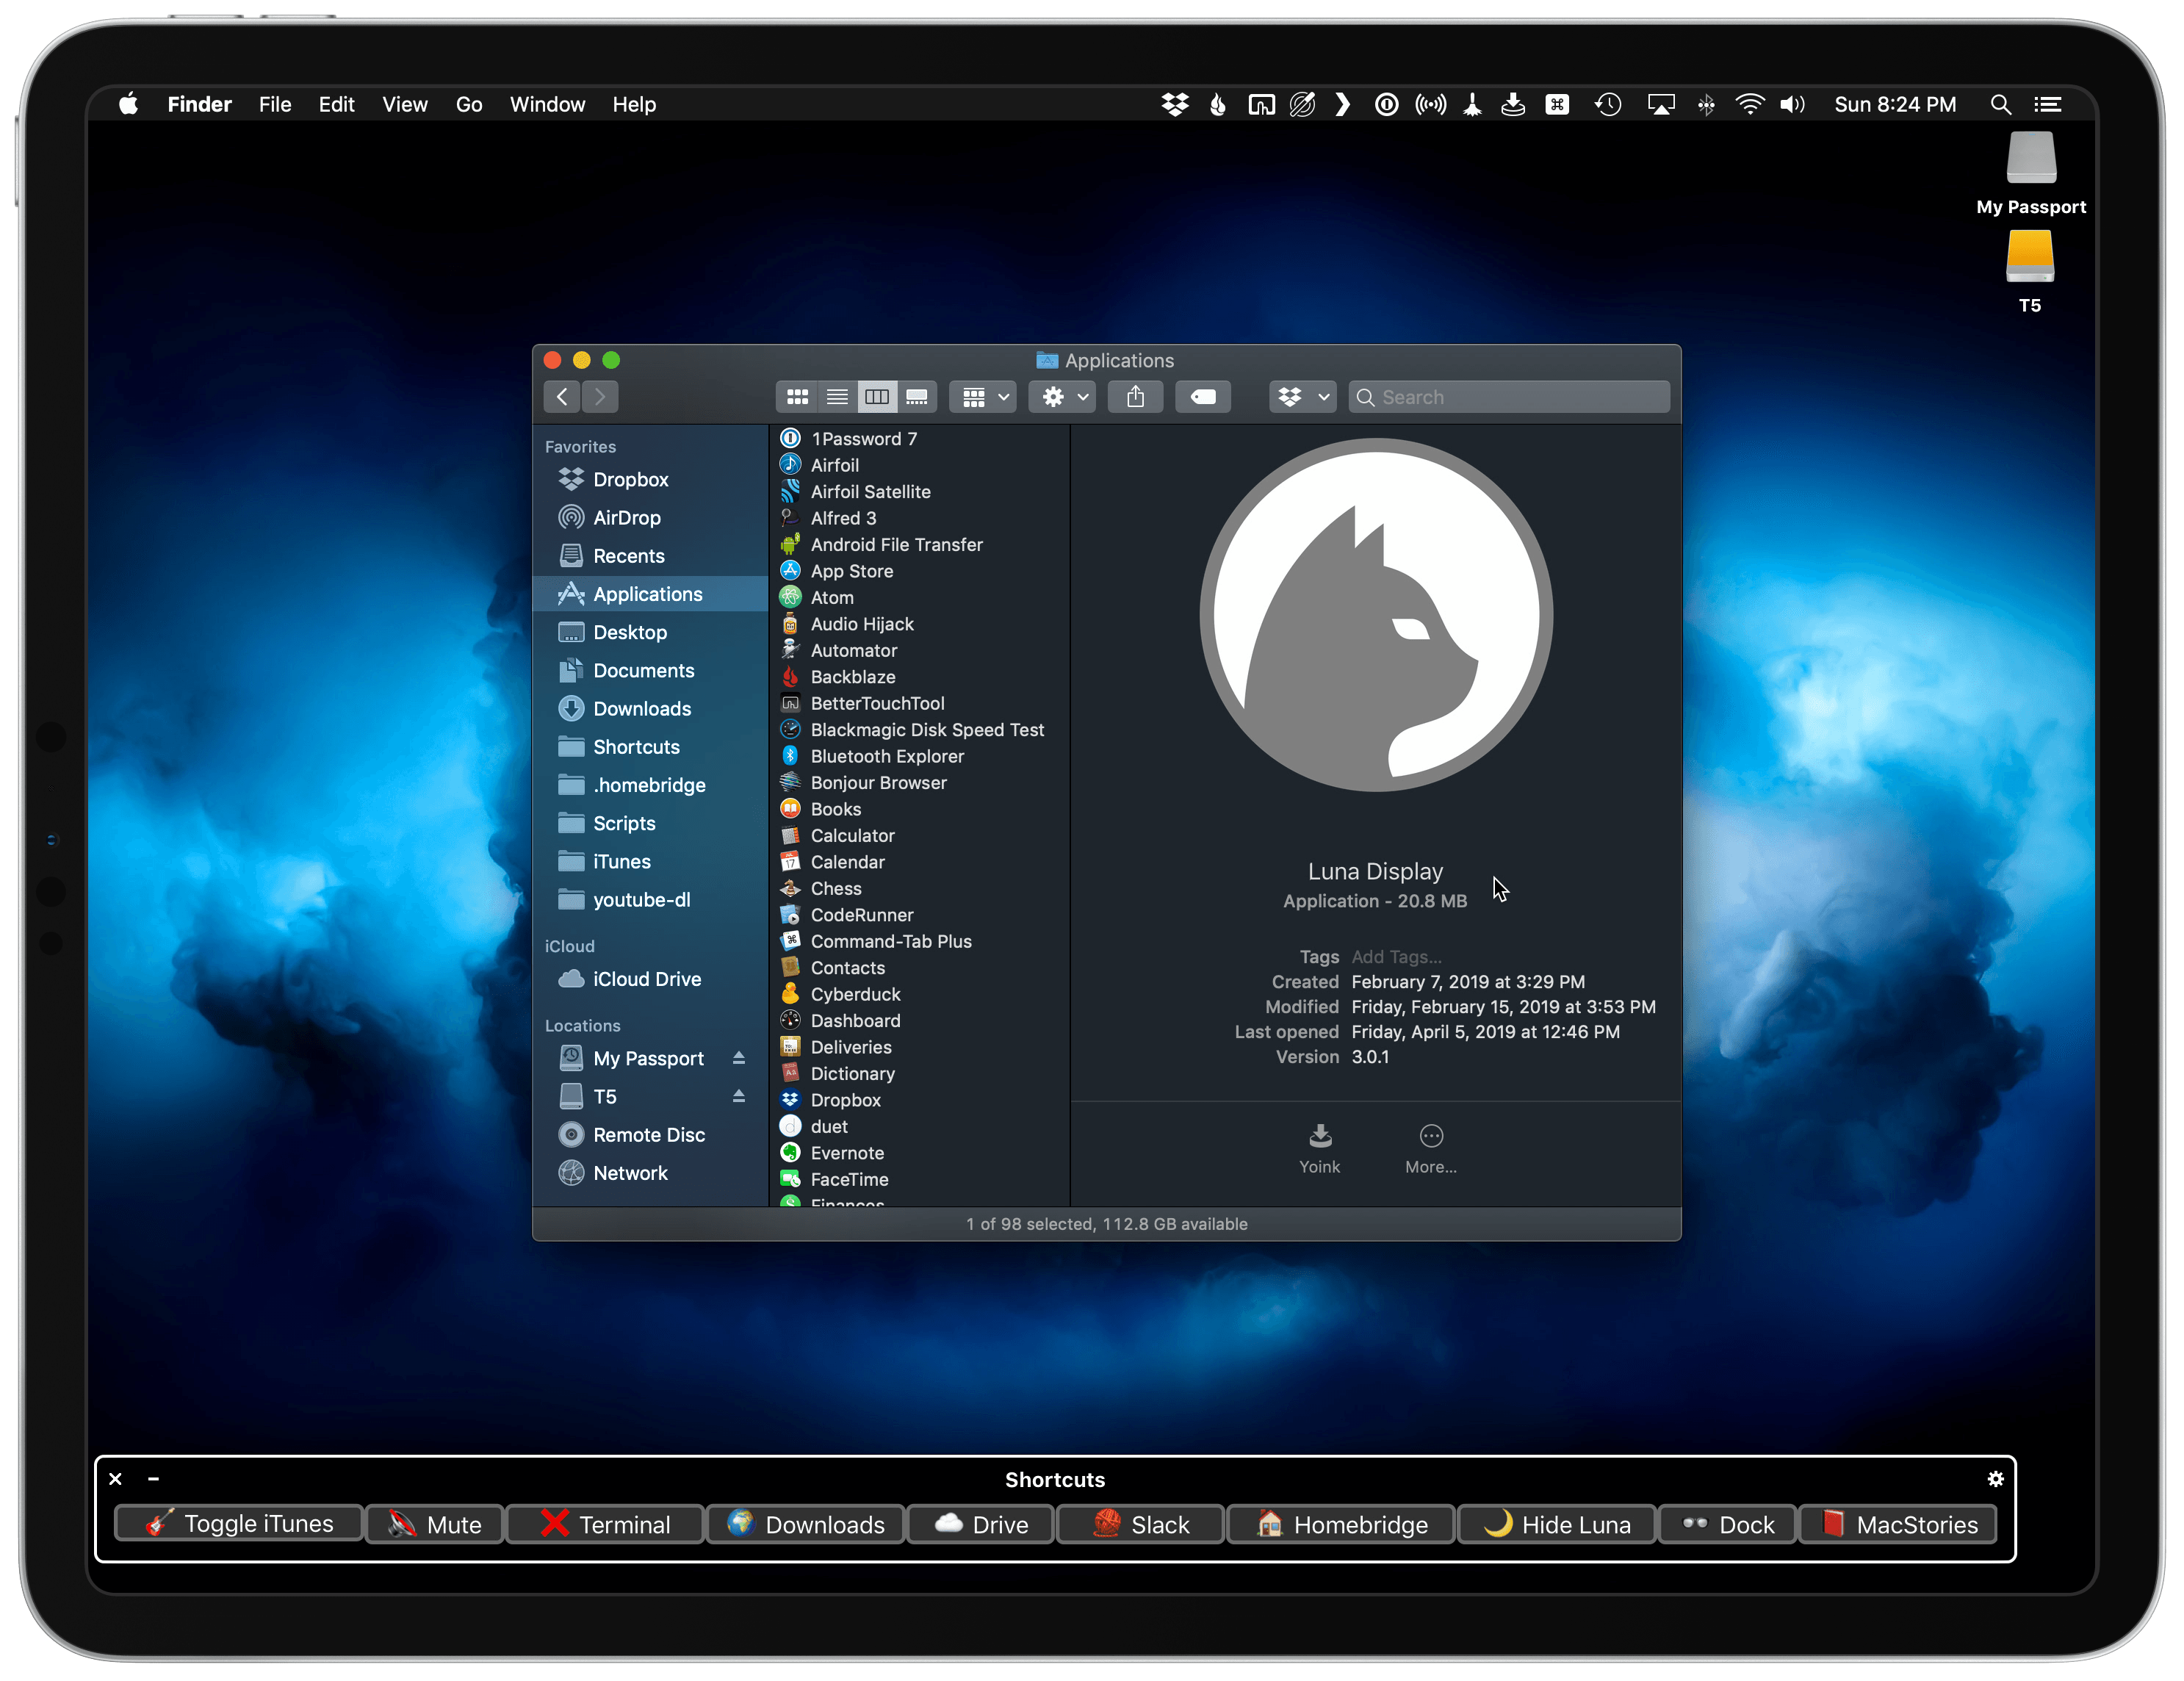
In the first part of my ongoing experiment with controlling and accessing a Mac from the iPad Pro, I covered FileExplorer – the app I use to open Finder locations from iOS' Files app – and shared a collection of shortcuts to control certain macOS features via Siri and the Shortcuts app. I also described my podcasting setup and how I've been taking advantage of Keyboard Maestro to automate window resizing across my two displays connected to the Mac mini. Today, I'm going to cover one of those two external displays – the iPad Pro running the Luna Display app – and how I've been using it to have "macOS as an app" on my iPad Pro. If you find this idea of reducing macOS to an app that runs on the iPad upsetting, the rest of this article likely isn't going to make you happy. If you're intrigued, however, strap in because I have a lot to share.

Allow me to offer some context first. In case it wasn't clear with the first installment of this mini-series, the iPad Pro is still my primary computer and I still use it every day for the majority of my work. The main work-related task that I need to perform on macOS is podcast recording1. My Mac mini is primarily a home server dedicated to tasks that are not supported on iOS such as running Plex Media Server, adding HomeKit compatibility to unsupported accessories via homebridge, and downloading 4K versions of YouTube videos using shell scripts. The fact that I acquired a Mac mini and have been using it more than my old MacBook Pro does not mean I'm abandoning the iPad Pro and "going back to the Mac".

In fact, it's quite the opposite. As I noted in the last installment of iPad Diaries, I like using macOS for certain tasks that are not available on iOS, but I don't like being forced to sit down at my desk to use a different computer. After working on the iPad as my main computer for the past seven years, I guess I take its extreme portability for granted. With the iPad Pro I can work from my desk and the kitchen table and the sofa and the balcony; with the Mac mini, I have to sit in a corner of my bedroom.

And it's not like I only use my Mac for recording podcasts. For all the effort I've put into trying to optimize my iPad setup and get everything done on iOS without macOS, there are still certain tasks that I can only perform on a Mac. For example, downloading multiple files with Safari's download manager on the Mac and having them saved in the Finder is easier than using iCab on iOS if I later need to move those files to an SD card (or, God forbid, a USB drive). Checking the status of my homebridge server (which I leave running in a Terminal window) or tweaking automation settings in Hazel are other examples of app-related tasks that can't be done on iOS because those apps are Mac-only. I could go on: iTunes is the only way to connect to AirPlay 2 speakers and control them with automation thanks to AppleScript (Shortcuts for iOS does not support these kinds of actions); some websites still don't work well enough (or at all) in Safari for iPad, such as Google Docs, which I have to use every day to prepare show notes for my podcasts; speaking of Google Docs, I have found that pasting rich text from Evernote into a Google document is only supported on the Mac; for some reason, the rich text framework on iOS loses formatting when copying and pasting between Evernote and Google Docs.

These are just some examples of tasks that I need to perform for my job and apps I need to use for personal reasons that, despite my unending iOS optimism, cannot be completed in a reasonably efficient way on the iPad alone. Which means that, while I consider the iPad Pro my primary computer, I also have a use for the Mac these days, and I don't begrudge this at all. I like using macOS for what it's good at, and I'm having fun re-learning my way around apps like Hazel and Keyboard Maestro.

I like using macOS for what it's good at.

However, this doesn't change the fact that I'm still not in love with the idea of the Mac mini requiring me to sit down in one specific location of the house to use it. What if I'm in the middle of a writing session on the iPad Pro in another room but need to quickly check something on the Mac? On the other hand, when I am using the Mac mini, what if I could "expand" the setup at my (relatively small) desk by adding another display without actually buying a new, separate external display for the Mac alone? This is where Luna Display comes in.

Disclaimer

This is where I should put the disclaimer that Luna Display has sponsored this website and my podcasts in the past; however, this article is entirely based on my personal opinion of things I like and dislike about my Luna Display unit, which I bought and paid for myself months ago.

Get More iOS Productivity Tips and Shortcuts

With a Club MacStories subscription, you'll gain access to weekly iOS shortcuts, app recommendations, and other exclusive extras.

Starting at $5/month, Club MacStories includes MacStories Weekly – a newsletter delivered every Friday with a focus on iOS productivity and showcasing new and interesting iOS apps. One of MacStories Weekly's regular sections is the Workflow Corner – a weekly assortment of iPad shortcuts, iOS automation tips, and tutorials curated by Federico and the MacStories team.

As a new member, you'll also receive complete access to our back catalogue of over 200 newsletters starting from September 2015.
 
You can find out more about Club MacStories here, or subscribe directly below.


Luna Display

By now you're probably familiar with Luna Display: it's a popular third-party accessory that resembles a tiny USB key and which you plug into your Mac. The Luna device pretends to be a physical display attached to the Mac (hence why the device comes in two versions, Mini DisplayPort and USB-C – standards typically used for connecting displays) while, in practice, it connects wirelessly to a Luna Display app running on your iPad, which is where you'll actually see the macOS interface.

The Luna Display is tiny.

The Luna Display is tiny.

The chief advantage of Luna Display over other apps that promise to turn your iPad into a wireless display for your Mac is the fact that Luna Display is a hardware-based solution that can tap directly into the power of your Mac's GPU to optimize performance. Luna is based on the LIQUID engine, which its developers previously used for their AstroPad creative app and later realized could be applied to a more generalized second-display product such as Luna Display. The benefits of a physical device plugged into your Mac combined with the LIQUID engine can be summarized as follows: Luna Display supports hardware acceleration with Retina quality and up to 60fps; its Velocity Control feature analyzes network traffic dozens of times each second to dynamically optimize image quality depending on your WiFi network; and, LIQUID supports the full range of native iPad features such as Pencil-based UI control and keyboard shortcuts.

Comparing Luna Display to other software-based solutions (such as Duet and Air Display) is beyond the scope of this article, but I'll say this: I tested both alternatives with my 2018 Mac mini and 2018 iPad Pro running on a 5Ghz WiFi network powered by an Orbi mesh system, and none of them came even close to the performance and responsiveness granted by Luna Display (I have a USB-C version). With those apps, I constantly ran into choppy animations, typing latency, or poor image quality.

This is not to say that Luna Display is flawless2 or that it perfectly mimics the experience of connecting a monitor to a Mac via a cable: I still see the occasional slowdown and image artifact when using Luna Display, particularly when lots of things are going on in my network (such as Backblaze or Dropbox) or when I'm working with several windows at once. Those issues, however, are always temporary and resolved in a couple of seconds by the LIQUID engine; the overall performance of Luna Display is excellent, to the point where I sometimes forget there is no cable running from my iPad Pro into the Mac mini. I can work with macOS from my iPad Pro at the kitchen table, and it feels like the Mac mini is right next to me, not in another room with a wall between us. All of this to say: the Luna Display performance hype is most definitely real, and it's vastly superior to any other software-based solution I've tested before.

With Luna Display, I can AirDrop files to the same iPad running a different OS.

With Luna Display, I can AirDrop files to the same iPad running a different OS.

I should also point out a few details about Luna Display as an iPad app that integrates with iOS. Luna Display turns your iPad into a wireless display for the Mac; as such, it lets you touch the screen to control Mac interface elements, or you can use the Pencil if you need more precise control. If you're using the iPad running Luna Display as a secondary monitor for the Mac, you can use the Magic Trackpad you normally use as the Mac's primary pointing device and control what's on the Luna Display. Again, the Luna Display is just an additional monitor for your Mac that you can find under System Preferences ⇾ Displays. If you don't want to use peripherals paired with your Mac to control what's on screen in the Luna Display app on the iPad, besides the aforementioned support for touch controls and the Pencil, you can use whatever keyboard is paired with the iPad; keystrokes and keyboard shortcuts are natively sent to macOS, which means an iPad Pro with a Smart Keyboard and Apple Pencil is a perfectly fine combination to have both keyboard input and cursor control in one integrated package that runs on iOS.

For obvious reasons, Luna Display does not support Split View (it needs to show you the Mac's display in full-screen); even though I sometimes wish that was an option (imagine being able to keep both macOS and an iOS app right next to each other!)3, I can just put other iOS apps in Slide Over on top of Luna Display, and that works well enough.

The good thing is, once Marzipan ships, this hybrid environment will be macOS' new reality and fewer people will probably call me crazy. At least one can hope.

The good thing is, once Marzipan ships, this hybrid environment will be macOS' new reality and fewer people will probably call me crazy. At least one can hope.

At a high level, there are two ways to turn the iPad into a monitor for the Mac using Luna Display: you can either use Luna Display as a second monitor in addition to the primary display of the Mac, which is what you'd do if your Mac was a MacBook Pro, iMac, or any other Mac with a display always attached to it; or, you can use Luna Display as the primary display if you have a "headless" setup (such as a Mac mini) or if you manually change the display arrangement in macOS' System Preferences. In the few months I've spent using the Luna Display with my iPad Pro, I've noticed pros and cons in each approach, and I've come up with a series of workarounds, best practices, and tips I want to share today.

Waking the Mac with a Siri Shortcut

First of all, if you're like me and have a Mac desktop you want to control with the Luna Display on an iPad around the house, chances are you've set macOS to put the computer to sleep after a few minutes of inactivity. And while the Luna Display receiver app for Mac can keep running in the background all the time, it won't be able to wake your computer from sleep if an iPad running the Luna Display app for iOS tries to connect to it. Your computer needs to be awake and running the Luna Display app if you want to control it from the iPad.

As I shared in the last installment of iPad Diaries, I put together two custom shortcuts to obviate this very problem. The shortcuts take advantage of the Shortcuts app's native 'Run SSH Script' action to send a caffeinate command to the Mac's shell; this command, as I explained in the article, wakes a computer from sleep and displays the login screen.

Easy enough.

Easy enough.

If you're close enough to the Mac for Apple Watch proximity-based authentication to work, you won't have to do anything else for the Mac to be unlocked. In fact, most days I can just say "Hey Siri, wake Mac" to my HomePod (or AirPods) before opening Luna Display on the iPad, and my shortcut will wake the Mac mini, which will be instantly unlocked by my Apple Watch. And at that point, the Luna Display app that I always keep running in the macOS dock will be ready to connect to its iOS counterpart. For those rare times when I'm not wearing an Apple Watch though (or if I already know the Apple Watch authentication is going to fail because I'm too distant from the Mac mini), I use a different flavor of the same shortcut that types my password too after waking the Mac from sleep.

Make sure that you enable Remote Login (SSH) for these shortcuts to work.

Make sure that you enable Remote Login (SSH) for these shortcuts to work.

Thanks to these two shortcuts, I can let my Mac mini go to sleep as usual but still quickly connect via Luna Display when I need it. You can download the shortcuts below, or find them in the MacStories Shortcuts Archive.

Wake Mac

Wake the display connected to a Mac on the same local network as your iOS device.

Get the shortcut here.

Wake Mac + Login

Wake the display connected to a Mac on the same local network as your iOS device and paste your password in the login screen by simulating keystrokes.

Get the shortcut here.

Luna Display as a Primary Display

While Luna Display is primarily advertised as a way to extend your Mac setup by adding a secondary display that is actually an iPad, over the past few months we've seen a few examples of folks turning the iPad Pro running Luna Display into a primary display for a headless Mac setup. Of course, some of them were probably inspired by the fact that the Luna Display creators themselves touted the advantages of such an approach when the new Mac mini launched in November.

It is possible to use Luna Display as your Mac's primary monitor, and I've done it myself several times over the last couple of months, but it's not the solution I recommend unless you really have a Mac mini without a display physically connected to it.

It's important to note the distinction macOS makes when dealing with external displays in what Apple labels "extended desktop mode". By default, a Mac has a primary display and optional secondary displays; the primary display is where your desktop icons and app windows first appear. You can move windows between displays, and you can tweak the arrangement of displays in System Preferences, but you're always going to have to keep in mind that macOS can only see one display as primary and that choosing a different primary display has to be done manually by the user.

Here's the problem: unless you set the Luna Display monitor to be the primary one beforehand, or unless you come up with ways to mitigate this issue (more on this in the next section), every time you open an app or trigger a keyboard shortcut on the iPad running Luna Display the associated action will be performed on the primary display by default. In my case, that meant that hitting ⌥Space to trigger Alfred would show the app's search window on the UltraFine 4K, which is my Mac mini's primary display, rather than the Luna Display on the iPad Pro; similarly, I couldn't see the dock and desktop icons on the iPad, and every app window would open on the UltraFine by default. As someone who has a traditional desktop setup with a Mac connected to a display and just wants to use Luna Display as an optional way to control it (as I bet most users do), this is not an ideal situation.

The solution, as I noted above, would be to use the Luna Display as the primary monitor for the Mac. The problem is that there's no intuitive or automatic way to quickly switch primary/secondary displays on Mojave that doesn't involve disabling SIP (at least to my knowledge)4, and I'd rather keep that extra security feature enabled permanently. Which leaves us with the two manual options: physically unplugging the primary display from the Mac so that Luna Display can become the primary one by default (but this only works for Macs where the display can be disconnected, like a Mac mini); or, we have to manually select the primary display in macOS' System Preferences.

If you own a Mac mini and are okay with the first option for those times when you want to use Luna Display for a long work session, then great – just unplug the primary display and use Luna Display instead. I tried this a few times and, personally, I couldn't stand the slight annoyance of having to re-plug the USB-C cable into the back of the UltraFine every time I had to sit down in front of my Mac mini. Workarounds that involve physical actions to be performed and remembered are not for me.

The other approach, which I begrudgingly use on occasion, requires you to select a different primary display by going to System Preferences ⇾ Displays ⇾ Arrangement (while Luna Display is connected) and relocating the white menu bar to the new primary display by dragging it on top of the Luna Display monitor.

Good luck doing this without an Apple Pencil.

Good luck doing this without an Apple Pencil.

Here's my issue with this: the menu bar that acts as an indicator of the primary display is a thin stripe of pixels that I can't manage to select using my finger alone when using Luna Display on the iPad. This interface element was clearly designed for a desktop pointing device; the only way I found to move the menu bar from the iPad is to use the Apple Pencil. Again, possible, but not ideal, and definitely not automated in any way. Even with this approach, however, you'd still run into the problem of System Preferences initially opening on the primary display.

I tried everything I could imagine to make Luna Display work as a primary display for my setup; ultimately, I realized that as long as I keep the UltraFine on my desk, that's going to be treated as the primary display by the Mac mini; there are workarounds, but I'm not in love with any of them.

So I started looking at the problem from a different perspective. If Luna Display was conceived as a way to turn the iPad into a secondary display for the Mac, what could I do to overcome the limitations of secondary displays instead of trying to shoehorn Luna Display into being a primary display on-demand? As it turns out, there's a lot of flexibility involved with optimizing the software experience for secondary displays, and that's when Luna Display finally clicked for me.

Luna Display as a Secondary Display: Keyboard Shortcuts

As a first order of business, I realized I needed to change some of the keyboard shortcuts that were in conflict between macOS and iOS.

Despite the fact that it creates the illusion that you're using macOS on an iPad, it's important to remember that Luna Display is still an iPad app, and as such it responds to default keyboard shortcuts that are shared system-wide across all apps on iOS. Specifically, when I started using Luna Display, the keyboard shortcuts to activate Spotlight search and the app switcher (⌘Space and ⌘Tab, respectively) kept triggering those functionalities on the iPad rather than being passed over to macOS. I had to replace them if I wanted to use the Mac's search feature and app switcher from Luna Display on the iPad.

Disabling Spotlight was easy. To do this, go to System Preferences ⇾ Spotlight ⇾ Keyboard Shortcuts and disable 'Show Spotlight Search'. If you want to keep using Spotlight but simply change its keyboard shortcut, click on it and record a new one from the keyboard. I've always preferred Alfred to Spotlight, so I turned off Spotlight's keyboard shortcuts completely and started using ⌥Space to trigger Alfred's search window, which does not conflict with iOS' ⌘Space shortcut. It took a while to get used to opening search on the Mac with this new hotkey after years of ⌘Space, but the trade-off has been worth it. I can now use both iOS search and Alfred from Luna Display on the iPad – which is nice when I want to put an iOS app on top of Luna Display in Slide Over mode.

Replacing the ⌘Tab app switcher was trickier. As far as I know, there is no way to remap the default keyboard shortcut for the app switcher on macOS that doesn't involve installing system modifications I'm not comfortable with. So I went in a different direction and settled on a third-party app switcher that mimics the default Apple one but extends it with some additional options, including customizations for its appearance and keyboard shortcut. The app is called Command-Tab Plus, and it looks like this after my customizations:

A custom app switcher that does not interfere with iOS' built-in one.

A custom app switcher that does not interfere with iOS' built-in one.

In terms of preferences, as you can see below, there are plenty of options you can configure to filter which apps are going to be shown in the custom switcher and what the palette looks like. I appreciate how I can hit numbers to quickly select specific apps and how I can cycle backwards in the list of apps by holding down the ⇧ key, just like with the Apple switcher.

Effectively, at this point I have two separate app switchers on my Mac mini – the default one and Command-Tab Plus. This way, when I access the Mac from Luna Display on the iPad I'm free to use either the iOS app switcher5 or the Mac one. Once again, it took me a few days to get accustomed to using ⌥Tab after years of muscle memory with a different keyboard shortcut, but I prefer the extra versatility granted by Command-Tab Plus now.

Controlling Windows with BetterTouchTool

To the best of my knowledge, by default macOS does not provide any keyboard shortcuts to cycle an app window through multiple displays, which, as I've noted in this article, is the most annoying limitation of using Luna Display as a secondary display for your Mac. To fix this problem, I've turned to BetterTouchTool.

It's nearly impossible to sum up what BetterTouchTool can do in a single paragraph, but I'll try: with BetterTouchTool, you can associate almost any action on your Mac with a custom keyboard shortcut, gesture, mouse click, or Touch Bar button. Whether you need to launch apps, trigger a specific menu item of an app, control windows, or run AppleScripts, BetterTouchTool can do it. It's like Keyboard Maestro, but with a simplified interface that's designed to let you quickly program your own shortcuts. If you're interested in this kind of utility, take your time to read through the documentation and play around with a few examples; invest enough time into learning BetterTouchTool and what it can accomplish, and you'll end up with a highly personalized macOS environment that can save you several minutes every day.

In my case, all I had to do to make it easier to fling app windows across displays was use BetterTouchTool's 'Move Window to Next Monitor' action. As shown below, all it takes is creating a new shortcut in the 'Keyboard' category of the app, giving it a hotkey, and picking the action from a list of predefined steps:

Now, whenever I want to move a window that has opened on the primary display (the UltraFine) to the Luna Display, I just need to press ⌃⌘L and the window will instantly move. But that's not all: if I'm working with two displays at once (for instance, when I'm recording podcasts), I can hit the same shortcut to shuffle the current window back to the primary display because BetterTouchTool's action is designed to move windows to the "next" monitor, so it's not specific to the Luna Display one.

There are other BetterTouchTool actions I set up to improve the experience of using macOS from the iPad Pro. I was finding it difficult to maximize the size of app windows due to the small size of window resizing controls (because macOS is not optimized for touch interactions), so I assigned the 'Doubleclick Window Titlebar' trigger to 'Maximize Window'.

Thanks to this gesture shortcut, when I'm using Luna Display and want to resize windows to fill the iPad Pro's screen, all I need to do is double-tap their title bar and they'll expand to all four corners of the display.

I also created a BetterTouchTool shortcut to resize windows so they can fill the screen until they reach the edge of the dock on the right side of the screen and the custom Accessibility panel at the bottom. To do this, I assigned a hotkey to 'Custom Move/Resize Window' and configured the action's parameters as follows:

Essentially, this configuration tells BetterTouchTool to start resizing a window from the top-left corner of the display and fill the remaining space on the right by taking into consideration both the dock and menu bar. In terms of height, I set BetterTouchTool to give it an absolute value of 880px, which I manually calculated (with trial and error) to account for the presence of the Accessibility panel. Here's an annotated version of the configuration screen that highlights the options I just mentioned:

I've barely scratched the surface of what BetterTouchTool can do, but I believe its support for multiple displays and window control actions is perfectly suited for Luna Display users who want a better way to deal with windows across multiple displays.

Custom Accessibility Keyboard Panel

Lastly, I want to explain how I've been taking advantage of macOS' built-in Accessibility Keyboard feature and how I've turned it into a custom shortcut panel to trigger various features of macOS more comfortably both from the iPad Pro and when I'm working on my Mac mini.

Among the several Accessibility features supported by macOS, Apple offers a customizable Accessibility Keyboard that lets you use a Mac without a physical keyboard. For users with physical impairments, this is an essential functionality that allows them to type and use apps without having to interact with a physical keyboard. By default, the Accessibility Keyboard looks like a standard QWERTY onscreen keyboard; however, you can fully customize its appearance, as well as create new virtual keyboards from scratch, by using the built-in Panel Editor app available for free on macOS.

The Accessibility Keyboard is based on the idea of panels, and users can create multiple panels with buttons that perform specific actions such as launching apps, triggering system functions, or running AppleScripts. You can create as many panels as you want, and you have complete control over the appearance of buttons and their layout. In addition to the Apple documentation I linked above, I recommend checking out this article from AbilityNet about Panel Editor.

The Accessibility Keyboard and its custom panels are typically employed by visually or physically impaired users who want to have a more comfortable way of interacting with certain macOS features, which is a beautiful idea that confirms how Apple is at the forefront of Accessibility among all tech companies. But I had a different idea: what if I could use custom panels to create a "keyboard" that was actually a shortcut launcher for various apps and AppleScripts that I frequently invoke on my Mac?

I came up with this approach because I realized that, when using macOS via Luna Display on the iPad Pro, I wanted to have something that would allow me to visually launch specific commands in the fastest way possible. I've always been terrible at remembering long lists of keyboard shortcuts; instead, I wondered if I could have a "command palette", sort of like Launch Center Pro but for the Mac, which would let me quickly execute actions with a single tap. Not only did I come up with a system that works well on the iPad because buttons are large enough to be tapped, but in the past few months I've also gotten used to this tool when I'm working at the Mac mini.

The final result looks like this:

And here is what it looks like when it's being configured in Panel Editor:

The Panel Editor.

The Panel Editor.

As you can see, each button (I used emoji to make it more visually pleasant) is associated with an action that I frequently perform on the Mac. To modify the appearance of a button and the action linked to it, there is an inspector on the right side of Panel Editor. Here, in addition to font size and color, you can choose the type of action a button should perform from a list of:

  • Go Back
  • Open Panel
  • Show / Hide Toolbar
  • Dwell
  • AppleScript
  • Enter Text
  • Press Keys
  • Open App
  • System Event
  • Typing Suggestions
Built-in actions that can be assigned to buttons from Panel Editor.

Built-in actions that can be assigned to buttons from Panel Editor.

As I mentioned above, most of my buttons are based on the AppleScript action and scripts I've saved in the /Scripts folder of the Mac's Finder. Of course, when a button triggers an AppleScript, the script runs in the background, so you never see any AppleScript code onscreen.

The 'Toggle iTunes' button, as the name suggests, toggles the playback state of iTunes. This is nice because, as I noted previously, iTunes is the only music app made by Apple that supports AirPlay automation for multiple HomePods. The button is based on the following script:

tell application "iTunes"
    if player state is paused then
        play
    else if player state is playing then
        pause
    else
        play
    end if
end tell

The 'Mute' button is another shortcut to quickly mute/unmute system audio on the Mac mini, and it is a built-in action of Panel Editor:

The 'Downloads' and 'iCloud Drive' buttons open those folders in a new Finder window with one tap6, so I don't have to navigate the file system to get there:

tell application "Finder" to open "Macintosh HD:Users:viticci:Downloads"
set userLibraryFolder to path to library folder from user domain
tell application "Finder"
    reopen
    activate
    set iCloudDriveFolder to folder "iCloud Drive" of folder "Mobile Documents" of userLibraryFolder
    set target of Finder window 1 to iCloudDriveFolder
end tell

The 'Slack' button is based on the 'Open App' action and it, well, launches the Slack app.

With 'Homebridge', I came up with a simple way to restart my homebridge server whenever my Mac mini reboots or if I just want to start up the HomeKit server again. It's also based on an AppleScript:

tell application "Terminal"
    activate
    delay 2
    set shell to do script "homebridge"
end tell

The 'Hide Luna' and 'Dock' buttons toggle the visibility of the Luna Display popup (seriously, it's always in the way), and the macOS dock.

tell application "System Events"
    if visible of process "Luna Display" is false then
        tell application "Luna Display" to activate
    else if visible of process "Luna Display" is true then
        tell application "Finder" to set visible of process "Luna Display" to false
    end if
end tell
tell application "System Events"
    tell dock preferences to set autohide to not autohide
end tell

And finally, the 'MacStories' button launches the MacStories website in a new Safari tab.

tell application "Safari"
    tell window 1
        set current tab to (make new tab with properties {URL:"https://www.macstories.net"})
    end tell
end tell

I was pretty happy with this setup, but I knew I also wanted to come up with a way to enable and disable the Accessibility keyboard by pressing a single hotkey.7 Unfortunately, the macOS AppleScript dictionary does not have native support for activating the Accessibility Keyboard, so I had to turn to the inelegant, unreliable, but sometimes effective world of GUI scripting. This means I had to write AppleScripts that simulate clicking elements in the macOS UI without having to do it myself; effectively, I'm letting a script "interact" with the interface in a programmatic fashion to save a bit of time.

In practice, the final product looks like this:

These two hotkeys are based on AppleScripts that contain a bunch of ugly, flimsy GUI scripting code to open System Preferences, select the Accessibility tab, scroll down to the Keyboard section, and toggle the state of the Accessibility Keyboard setting so I don't have to do all this myself manually every time. Here's the code8 to enable the Accessibility Keyboard:

tell application "System Preferences"
    reveal pane id "com.apple.preference.universalaccess"
    delay 1
    tell application "System Events"
        tell window 1 of application process "System Preferences"
            select table 1 of scroll area 1
            delay 0.1
            select row 16 of table 1 of scroll area 1
            delay 0.1
        end tell
        tell tab group 1 of group 1 of window 1 of application process "System Preferences"
            click radio button 2
            delay 0.1
            click checkbox 1
            delay 0.2
        end tell
    end tell
    quit
end tell

And here's the AppleScript to disable it:

tell application "System Preferences"
    activate
    reveal pane id "com.apple.preference.universalaccess"
    delay 1
    tell application "System Events"
        tell window 1 of application process "System Preferences"
            select table 1 of scroll area 1
            delay 0.1
            select row 16 of table 1 of scroll area 1
            delay 0.1
        end tell
        tell tab group 1 of group 1 of window 1 of application process "System Preferences"
            click radio button 2
            delay 0.1
            click checkbox 1
            delay 1
        end tell
        tell window 1 of application process "System Preferences"
            click button 1 of sheet 1
        end tell
    end tell
    quit
end tell

I'm not happy with the GUI scripting approach, of course: unlike native AppleScript, it's tied to the interface, therefore if Apple changes even a subtle element of a window or menu in a macOS update, these scripts are going to break. However, both scripts get the job done and are reasonably fast. Even better, researching all this led me to discover UI Browser for Mac, an amazing utility that lets you inspect any visual element of the Aqua GUI, browse the hierarchy of windows and menus, and see what their AppleScript representation should be written like.

This is how I navigated the structure of System Preferences for GUI scripting. (Tap for full-size image.)

This is how I navigated the structure of System Preferences for GUI scripting. (Tap for full-size image.)

As you might imagine, I went down the rabbit hole with all of this for a few weeks, but I'm happy with the final result. The scripts to toggle the Accessibility Keyboard panel work great, and I've learned a few things about GUI scripting that might come in handy down the road. If you want to automate a Mac app that doesn't natively support AppleScript, I highly recommend giving UI Browser a try to see what you can come up with.

The "shortcuts bar" that I created using the Accessibility Keyboard for macOS has quickly become one of my favorite enhancements to the everyday Mac experience whether I'm using macOS from the Mac mini or the iPad Pro via Luna Display. It's a testament to Apple's commitment to automation and the Mac's greatest advantage over iOS – the complete freedom to personalize the operating system and truly make it your own.

Finally, here is a short video showing how I can use Luna Display as a secondary display for the Mac mini (which is in another room) while taking advantage of keyboard shortcuts and the Accessibility Keyboard panel:

Luna Display

The idea of using "macOS as an app" seemed ridiculous to me when I first heard of Luna Display years ago, but now that it's become part of my workflow and daily routine, it feels obvious. Even though macOS was not designed for multitouch and using it from an iPad will never be a substitute for the real experience of using a Mac, Luna Display is the closest I was able to get to owning a hybrid Apple device that "runs" both iOS and macOS. Despite the occasional slowdowns or latency issues, the illusion created by Luna Display – this idea that you can have two OSes in one Apple device – is so strong, it feels like a natural complement to the iPad Pro.

Perhaps someday we'll have an Apple laptop running a future operating system that blends the best of both worlds – the sheer ingenuity of iOS and its vibrant app ecosystem, and the wisdom, deep personalization, and technical prowess of macOS. I, for one, cannot wait for that future to become our new reality. But until that happens, Luna Display is the best workaround I've found to date, and it's one of my favorite tech purchases of the past few years.


  1. Although I've been working on fixing this aspect as well, and I should have more to share soon. ↩︎
  2. A major downside of Luna Display is the lack of audio passthrough to the iPad. Any audio or sound effect that would normally play on the Mac will not play on the iPad connected via Luna Display. This isn't a big deal for me because whenever I listen to music on my Mac, I do it with iTunes (which is always streaming audio to one or more HomePods), but it's worth mentioning. ↩︎
  3. Luckily, June isn't that far now. ↩︎
  4. I'm pretty sure SwitchResX could do this, but I don't feel comfortable disabling System Integrity Protection just for this. If you know of any other utility that can do this, please let me know. ↩︎
  5. When you switch between iOS apps with Luna Display running, the connection to the Mac is usually kept alive for a few minutes. I can switch back and forth between, say, Shortcuts and Luna Display without issues. ↩︎
  6. I adapted the iCloud Drive script from this one↩︎
  7. If you're on a Mac, you can also enable an Accessibility Keyboard setting that lets you "dwell" on a hot corner to toggle the visibility of a panel. I use this option when I'm at my Mac mini, but the Luna Display doesn't have a cursor, therefore I can't hover over a corner of the screen to quickly toggle the Accessibility Keyboard. ↩︎
  8. The basic template for these scripts was likely taken from StackOverflow, but I don't remember the original source, and I also ended up modifying them a lot for the latest release of Mojave. ↩︎

Support MacStories Directly

Club MacStories offers exclusive access to extra MacStories content, delivered every week; it's also a way to support us directly.

Club MacStories will help you discover the best apps for your devices and get the most out of your iPhone, iPad, and Mac. Plus, it's made in Italy.

Join Now
10 Apr 20:27

Lost In [SQL] Translation: Charting d[b]plyr Mapped SQL Function Support Across All Backends

by hrbrmstr

Like more posts than I care to admit, this one starts innocently enough with a tweet by @gshotwell:

Since I use at least 4 different d[b]plyr backends every week, this same question surfaces in my own noggin on occasion and I couldn’t resist going all Columbo on this mystery.

I should note that if you only really care about the backends that come with dbplyr @paleolimbot has you covered with this post, which also shows you the translated SQL!

Executing The Plan

There are at least 24 separate backends for dbplyr. Most folks won’t need more than one if their databases all have a decent ODBC or JDBC driver. To be able to use dplyr idioms with databases there needs to be a way to translate R code (e.g. function calls) into SQL. A ton of functions are pre-mapped in dbplyr already and most backend implementations start by relying on these defaults. Furthermore, since SQL is not nearly as “standard” across installations as one might think, some common tasks — such as string manipulation — have a default noop translation.

If you do have to switch across backends with any frequency, knowing which backend provides support for which functions might be nice, but there hasn’t been a reference for this until Dewey & I accepted Gordon’s challenge. What makes this a “challenge” is that you first have to figure out what packages provide a d[b]plyr backend interface then figure out what SQL translations they offer (they don’t necessarily have to inherit from the ones provided by dbplyr and may add other ones to account for SQL clauses that aren’t in functional form). So the first step was just a look through CRAN for which packages import dbplyr and also adding in some I knew were on GitHub:

library(stringi)
library(hrbrthemes)
library(tidyverse)

# All the pkgs from the home CRAN mirror that import 'dbplyr'
c(
  "arkdb", "bigrquery", "childesr", "chunked", "civis", "corrr", "cytominer", "dbplot",
  "dbplyr", "dexter", "dexterMST", "dlookr", "dplyr", "dplyr.teradata", "etl",
  "healthcareai", "hydrolinks", "implyr", "infuser", "ipumsr", "macleish", "mdsr",
  "mlbgameday", "modeldb", "MonetDBLite", "mudata2", "parsemsf", "pivot", "pleiades",
  "pool", "poplite", "RClickhouse", "replyr", "RPresto", "sergeant", "sparklyr",
  "sqlscore", "srvyr", "taxizedb", "valr", "wordbankr", "metis.tidy"
) -> pkgs

I ended up doing install.pkgs(pkgs) which was easy since I have a home CRAN mirror and use macOS (so binary package installs).

The presence of a dbplyr import does not mean a package implements a backend, so we have to load their namespaces and see if they have the core “tell” (i.e. they implement sql_translate()):

(map_df(pkgs, ~{
  tibble(
    pkg = .x,
    trans = loadNamespace(.x) %>%
      names() %>%
      keep(stri_detect_fixed, "sql_translate")
  )
}) -> xdf)
## # A tibble: 28 x 2
##    pkg       trans
##    <chr>     <chr>
##  1 bigrquery sql_translate_env.BigQueryConnection
##  2 civis     sql_translate_env.CivisConnection
##  3 dbplyr    sql_translate_env.ACCESS
##  4 dbplyr    sql_translate_env.Oracle
##  5 dbplyr    sql_translate_env.SQLiteConnection
##  6 dbplyr    sql_translate_env.Impala
##  7 dbplyr    sql_translate_env.OdbcConnection
##  8 dbplyr    sql_translate_env.MySQLConnection
##  9 dbplyr    sql_translate_env.PqConnection
## 10 dbplyr    sql_translate_env.PostgreSQLConnection
## # … with 18 more rows

Now we know the types of connections that package has SQL translation support for. But, we’re looking for the actual functions they provide. To discover that, we’re going to make dummy classed connection objects and get the translations they offer.
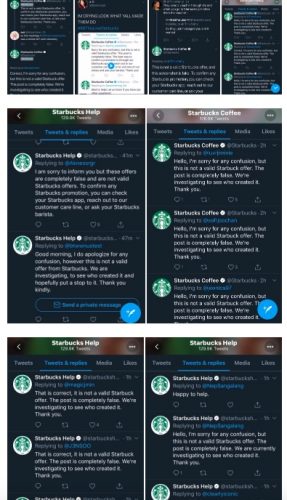
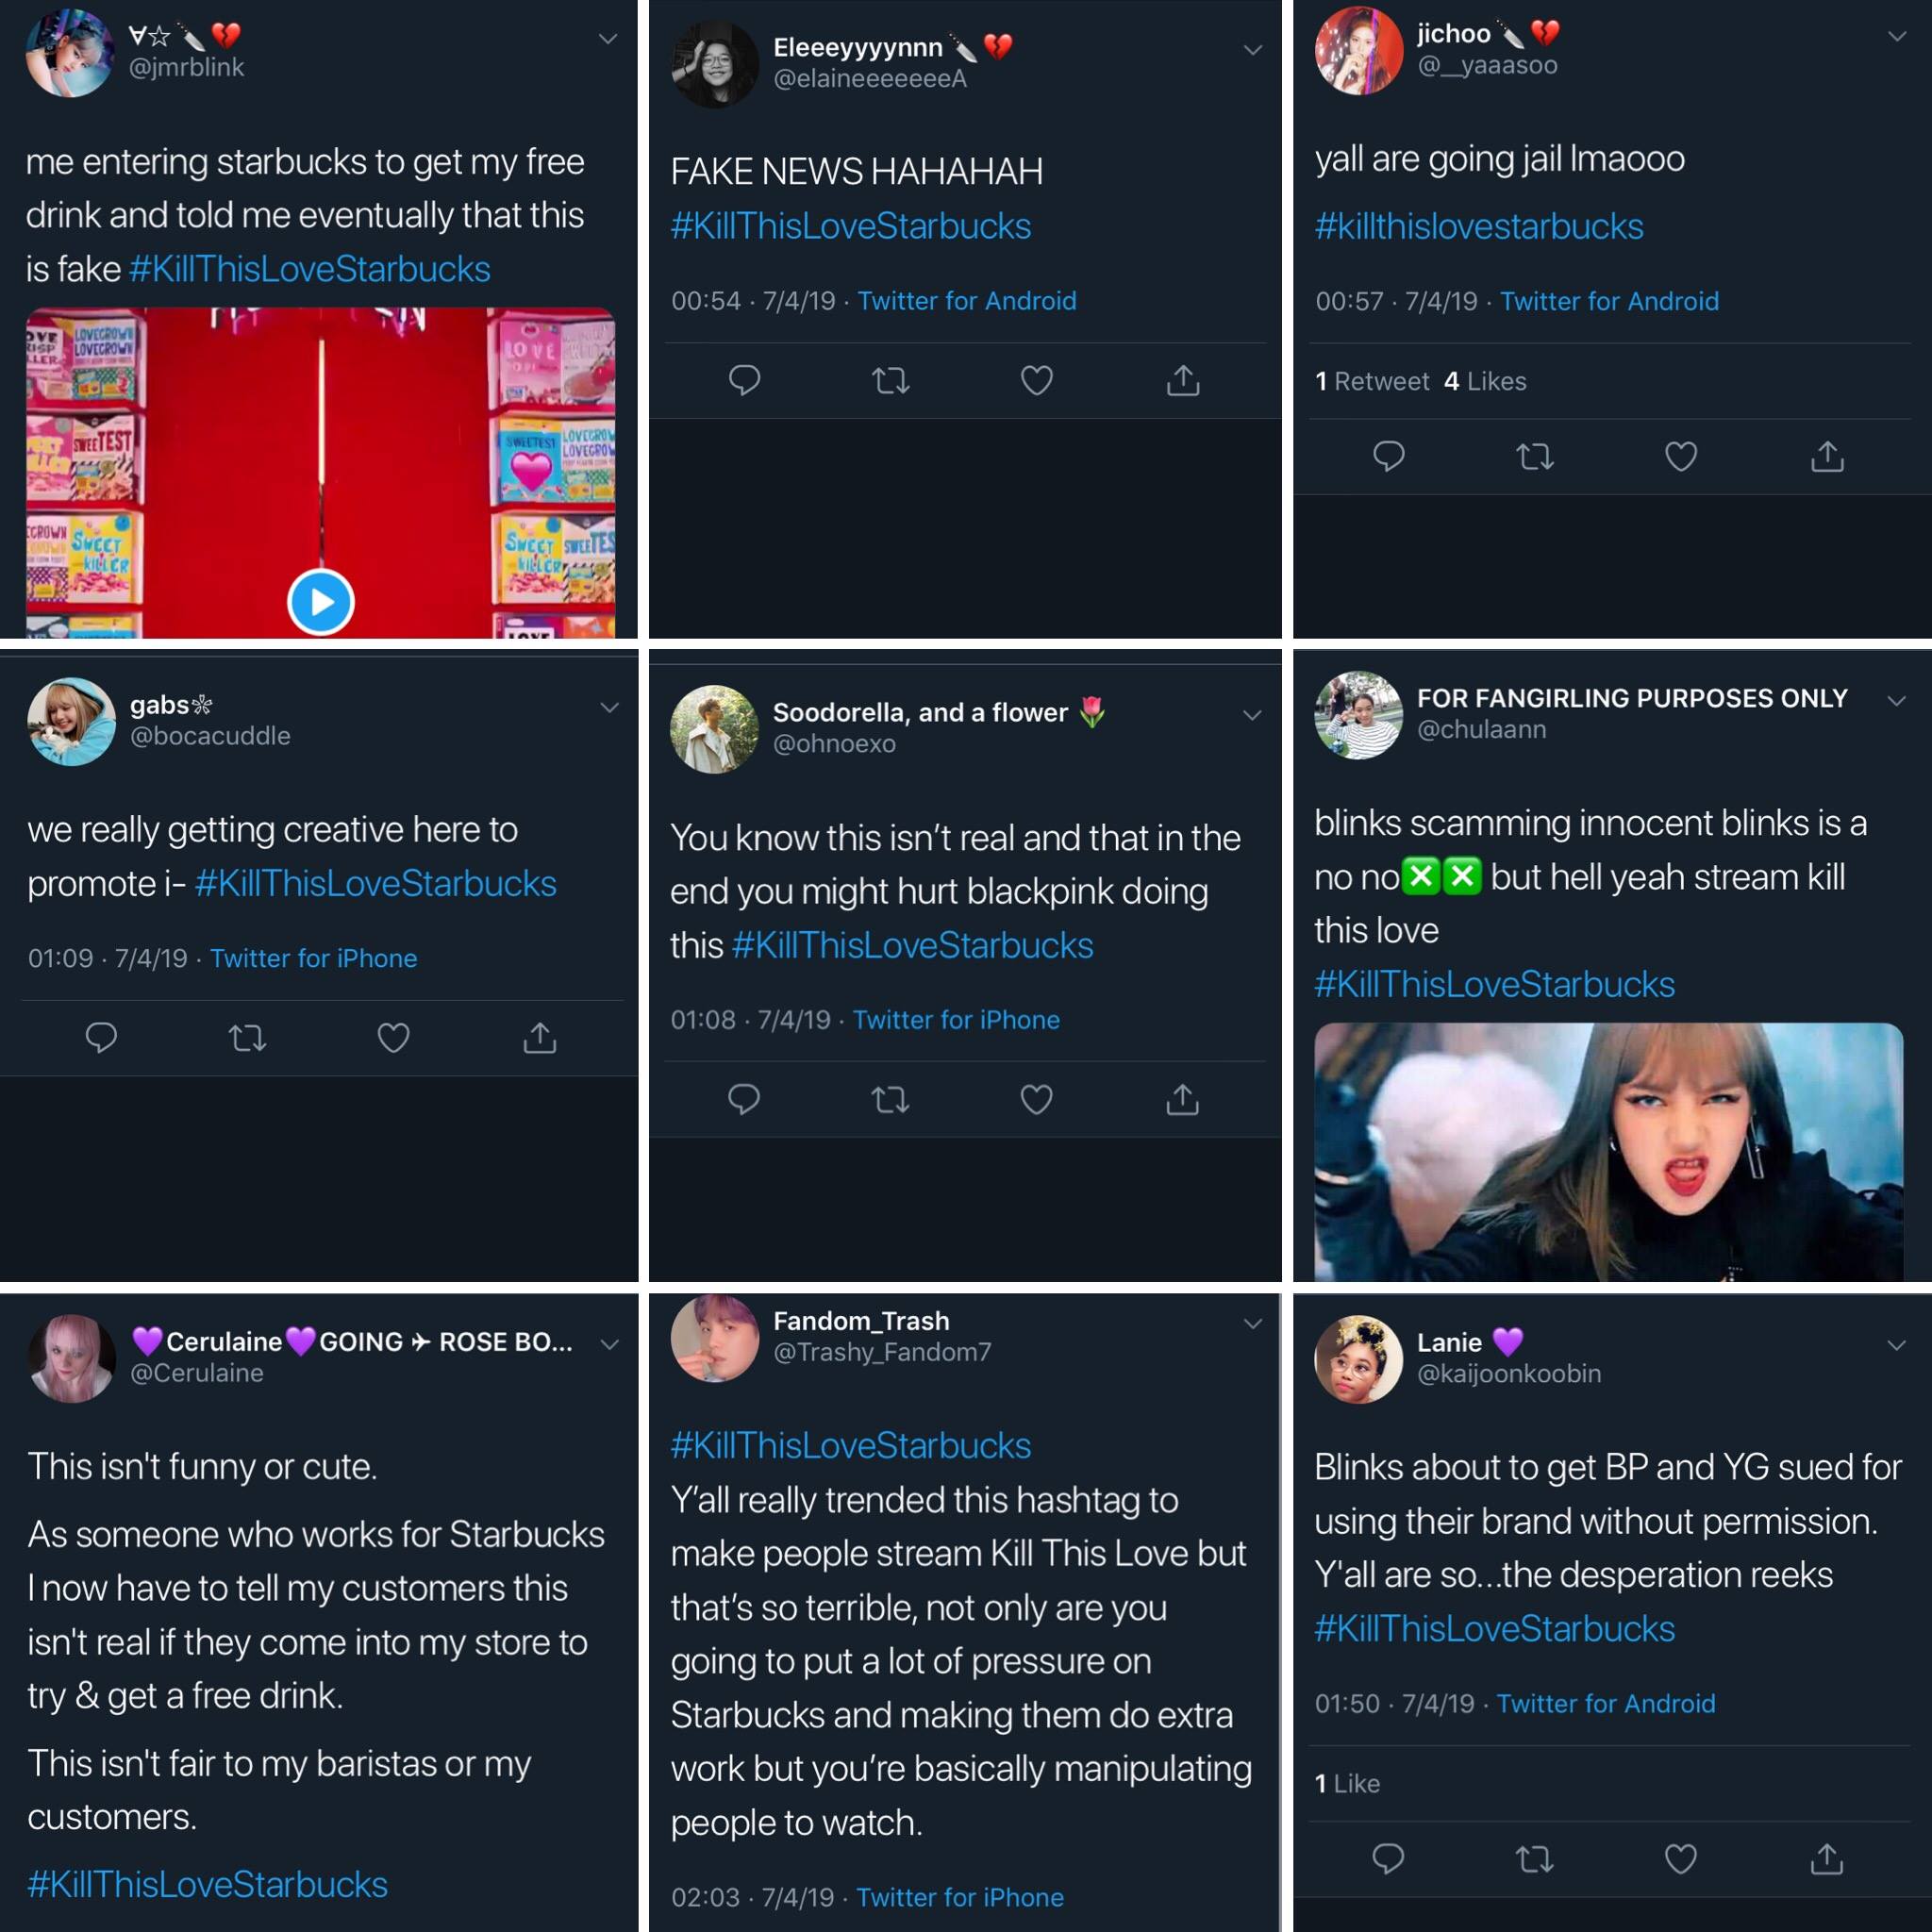
However, some may take the defaults from dbplyr and not override them so we also need to test if they use the sql_not_supported() noop, which we can do by seeing if the function body has a call to stop() in it. We’re also going to ignore maths operators along the way:

(filter(xdf, stri_detect_fixed(trans, ".")) %>%
  filter(trans != "sql_translate_env.NULL") %>% # ignore NULL
  filter(trans != "sql_translate_env.Pool") %>% # ignore db connection pooling 
  filter(trans != "sql_translate_env.PrestoConnection") %>% # this one errored out
  mutate(ƒ = map(trans, ~{

    # get the sql translate functions
    con <- NA
    cls <- stri_replace_first_fixed(.x, "sql_translate_env.", "")
    class(con) <- cls

    env <- sql_translate_env(con)

    # but ^^ rly isn't a nice, tidy object, it's a list of environments
    # with functions in it so we have to iterate through it to extract
    # the function names.

    map_df(env, ~{

      part <- .x
      fs <- names(part)

      # but it's not just good enough to do that b/c a given function name
      # might just implement the "sql_not_supported()" pass through. So we have
      # to actually look to see if the function body has a "stop()" call in it
      # and ignore it if it does.

      map_df(fs, ~{
        tibble(ƒ = .x, src = paste0(as.character(body(part[[.x]])), collapse = "; ")) %>% # this gets the body of the function
          filter(!stri_detect_fixed(src, "stop(")) %>%
          filter(stri_detect_regex(ƒ, "[[:alpha:]]")) %>% # and we rly don't care about maths
          select(-src)
      })
    })
  })) %>%
  unnest(ƒ) %>%
  mutate(trans = stri_replace_first_fixed(trans, "sql_translate_env.", "")) -> xdf)
## # A tibble: 1,318 x 3
##    pkg       trans              ƒ
##    <chr>     <chr>              <chr>
##  1 bigrquery BigQueryConnection median
##  2 bigrquery BigQueryConnection gsub
##  3 bigrquery BigQueryConnection as.logical
##  4 bigrquery BigQueryConnection is.null
##  5 bigrquery BigQueryConnection case_when
##  6 bigrquery BigQueryConnection is.na
##  7 bigrquery BigQueryConnection if_else
##  8 bigrquery BigQueryConnection str_replace_all
##  9 bigrquery BigQueryConnection as.integer
## 10 bigrquery BigQueryConnection as.character
## # … with 1,308 more rows

The rest is all just ggplot2 basics:

 mutate(xdf, db = glue::glue("{pkg}\n{trans}")) %>% # make something useful to display for the DB/conn
  mutate(n = 1) %>% # heatmap block on
  complete(db, ƒ) %>% # complete the heatmap
  arrange(ƒ) %>%
  mutate(ƒ = factor(ƒ, levels=rev(unique(ƒ)))) %>% # arrange the Y axis in the proper order
  ggplot(aes(db, ƒ)) +
  geom_tile(aes(fill = n), color="#2b2b2b", size=0.125, show.legend=FALSE) +
  scale_x_discrete(expand=c(0,0.1), position = "top") +
  scale_fill_continuous(na.value="white") +
  labs(
    x = NULL, y = NULL,
    title = "SQL Function Support In Known d[b]plyr Backends"
  ) +
  theme_ipsum_ps(grid="", axis_text_size = 9) + # you'll need to use the dev version of hrbrthemes for this function; just sub out a diff theme if you already have hrbrthemes loaded
  theme(axis.text.y = element_text(family = "mono", size = 7))

Which makes:

(WP wouldn’t make the featured image linkable so I had to stick it in again to enabled the link so folks can make it full size which is absolutely necessary to see it).

FIN

If you do play with the above, don’t forget to go one more step and incorporate Dewey’s actual SQL mapping to see just how unstandardized the SQL standard is.

Contiguous code for the above is over at SourceHut.

10 Apr 20:25

'Serious breaches' by Vancouver police doom high-profile fentanyl trafficking case

mkalus shared this story .

Two men accused of masterminding an extensive drug trafficking operation have had all charges against them dropped after a judge found Vancouver police had violated their rights on multiple occasions.

Dennis Alexander Halstead and Jason James Heyman were charged after a high-profile seven-month investigation, but the case against them fell apart in February, when a B.C. Supreme Court judge excluded the bulk of the evidence against them.

After a series of hearings that began last fall, Justice James Williams found there were several Charter violations by investigators.

"I do not make this decision without careful thought. As a result of this court's ruling, these criminal charges will not be adjudicated on their merits. That is regrettable; society deserves a better outcome," Williams wrote in a ruling posted online Tuesday.

The judge noted that the charges against the two men concerned a large-scale drug ring involving substantial amounts of fentanyl, heroin, cocaine and guns — items that inflict "horrific damage" on the community.

But, he went on, "where the police commit serious breaches in their investigational activities, considerable harm is done if the courts send the message that such transgressions count for little, or that they can simply be overlooked."

The court registry confirmed that all charges against the two men have been dismissed. A VPD spokesperson declined to comment.

$1.8 million in drugs

Halstead and Heyman were both arrested in 2015 as a result of an investigation nicknamed Project Trooper, and later charged with multiple offences including possession for the purposes of trafficking and illegal firearms possession.

Six people would eventually be charged, but Halstead was the principal target of the investigation, and Heyman was believed to be his business partner, according to court documents. The other four were said to be lower-level dealers.

The men were accused of running a criminal organization that supplied deadly substances to impoverished residents of the Downtown Eastside and distributed drugs throughout B.C. and Alberta.

At a 2015 news conference, investigators said they had seized $1.8 million in drugs, including 20.5 kilograms of cocaine, 1.6 kilograms of heroin, 12.2 kilograms of methamphetamine, 23,000 fentanyl pills and 228 kilograms of the painkiller phenacetin. Twelve guns, a crossbow and eight vehicles — including four with hidden compartments — were also taken during searches.

A photo compilation shows some of the items seized during Project Trooper. (Vancouver Police Department)

Halstead and Heyman were scheduled to go to trial this February, but before that could happen their defence lawyers filed a series of pre-trial applications alleging breaches of their constitutional rights.

The defence successfully challenged some of the key pieces of evidence police used to get search warrants for properties connected to the investigation.

Williams found that police had violated Halstead's privacy by setting up months-long video surveillance of his house without a warrant, that they had conducted an unreasonable search by swabbing vehicles and homes connected to the suspects without a warrant, and that they had improperly obtained passport photos of both Halstead and Heyman.

The end result was that Williams found three searches conducted on March 11, 2015 to have been effectively warrantless. Those searches included Halstead's Coquitlam home, Heyman's Surrrey apartment and an alleged stash house in New Westminster.

Bringing justice into 'disrepute'

Going even further, the judge ruled that when Halstead and Heyman were arrested at the time of those searches, police violated their rights by stalling when they asked to speak to their lawyers. And finally, the officers had failed to file reports in a timely manner after the searches, yet another breach of their obligations.

"These breaches, considered individually and cumulatively, are of such seriousness and impact that, having regard to all the circumstances, admitting that evidence in the trial proceedings would bring the administration of justice into disrepute," Williams wrote.

Vancouver police seized about $1.8 million in drugs in the Project Trooper investigation. (CBC)

The judge said the evidence taken during the searches should be excluded from the trial, effectively killing the prosecution.

In the end, however, Project Trooper was not a complete loss. Two of Halstead and Heyman's co-defendants, Charleen Teresa Flintroy and Cameron Mak, have both pleaded guilty to two counts each of possession for the purposes of trafficking and are awaiting sentencing.

10 Apr 20:25

Saturday Morning Breakfast Cereal - Apple

by tech@thehiveworks.com
mkalus shared this story from Saturday Morning Breakfast Cereal.


Click here to go see the bonus panel!

Hovertext:
Finally I will corner the market for apple breeding humor.


Today's News:
10 Apr 20:25

And the Belgians are calling it the ejector seat. 🤦‍♂️ pic.twitter.com/ka2YyFRDax

by ottocrat
mkalus shared this story from ottocrat on Twitter.

And the Belgians are calling it the ejector seat. 🤦‍♂️ pic.twitter.com/ka2YyFRDax


Posted by ottocrat on Wednesday, April 10th, 2019 5:13pm


12 likes, 7 retweets
10 Apr 20:25

Samsung Galaxy S10: How to Install Modded Google Camera

by Rajesh Pandey
The Samsung Galaxy S10 series comes with an impressive rear camera setup. While the primary 12MP rear shooter remains the same as the one found on the Galaxy S9/Note 9 from last year, Samsung has worked on improving its post-processing for improved dynamic range and sharpness. Despite Samsung’s best efforts though, the Galaxy S10’s camera is simply not as good as the Pixel. But you know what? You can use the Google Camera app to further improve the quality of photos taken from the Galaxy S10. Continue reading →
10 Apr 20:25

Mobile Video Production Spotlighted at the 2019 NAB Show

by John Voorhees

Every year, the National Association of Broadcasters holds a trade show spotlighting advancements in technology in the media and entertainment industries. Jeff Benjamin, who produces much of 9to5Mac’s video content, was on hand for the show this week and reports that mobile video production was one of the highlights of the show:

The first thing that I noticed about this year’s show, is that some of the major players in the mobile video editing space planned their booths to be adjacent to one another. This was a smart move, as it created a stronger presence for mobile video editing than in years before.

I also noticed that there was a significant uptick in foot traffic than in the past. Some of this can be attributed to the way the booths were organized, but I feel like mobile video editing has gained more legitimacy as a whole as people come to grips with how powerful the available apps, tools, and hardware have become.

Benjamin’s story includes details on upcoming updates to LumaFusion and Filmic Pro that are in the works as well as a new app coming later this year from Filmic called Filmic Audio that allows one iOS device to be used as a remote audio recorder that will sync its recordings with video filmed using Filmic Pro on a second iOS device. Benjamin also previews an update coming to the Gnarbox, an outboard storage and backup solution, which is designed to be used by photographers and videographers wired or wirelessly with iOS devices, and the Movi Cinema Robot, an iPhone gimbal that is gaining Filmic Pro integration soon.

Mobile video production is one of the most interesting pro areas for which iOS devices are being used currently as was recently highlighted by Jonathan Morrison who has used apps like LumaFusion to produce YouTube videos. As Benjamin points out, mobile video production is clearly on Apple’s radar based on the company's behind the scenes look at how it shot some of its recent iPad Pro ads. I too hope Apple’s interest foreshadows the arrival of new iOS 13 features that will simplify video and audio production.

→ Source: 9to5mac.com

10 Apr 20:23

Apple reportedly paid $485 million USD for Texture

by Ian Hardy
Texture

When Apple unveiled Apple News+ last month, the company also announced Texture, a magazine distribution platform it purchased in March 2018 would shutter on May 28th.

According to a report from the New York Post, Apple paid a total of $445 million USD for Texture, which Rogers was a partial owner of. The NYPost adds that the $485 million included a $100 million upfront payment to the five organizations — Conde Nast, Meredith, Hearst, Rogers and venture backer KKR — that helped launch the service.

“The sale price of $485 million included a $100 million up-front payment to four publishers who teamed up to launch Texture — Condé Nast, Meredith and Hearst and Rogers in Canada — plus their venture backer, KKR. Going forward, the four publishers got a minimum of $145 million in the first year, followed by a minimum $240 million for the second and third years,” says the report.

In Canada, Apple News+ costs $12.99 CAD per month and has over 300 magazines available, including 30 Canadian magazines.

The news that Texture was shutting down wasn’t so bad for iOS users; they could simply migrate to News+. On Android, however, Apple has yet to provide an alternative.

Source: NYPost

The post Apple reportedly paid $485 million USD for Texture appeared first on MobileSyrup.

10 Apr 20:23

Android Q Beta 2 gets rare patch with unknown ‘bug fixes’

by Jonathan Lamont

Google surprised Android beta testers with a patch for Android Q Beta 2.

The search giant doesn’t typically push patches to beta software, but this time around it did. According to the patch notes, the release contains a “small number of bug fixes for developers and early adopters.”

However, Google didn’t include details about what those bug fixes are.

9to5Google reports that some users claim Beta 2 doesn’t perform as well as the first beta. It’s possible the bug fixes are related to that.

Further, the bug fixes are part of a new build number — QPP2.190228.023 — and the update is available for Pixel, Pixel XL, Pixel 2 and 2 XL, as well as Pixel 3 and 3 XL devices.

At the time of writing, the update hasn’t started rolling out via the Android Beta Program, but the factory images and OTAs are available for manual installation. You can download those here.

Source: 9to5Google

The post Android Q Beta 2 gets rare patch with unknown ‘bug fixes’ appeared first on MobileSyrup.

10 Apr 20:23

CRTC orders Québecor to continue to provide TVA Sports to Bell customers

by Bradly Shankar

The Canadian Radio-television and Telecommunications Commission (CRTC) has issued a legally binding decision that prevents Québecor from withholding its TVA Sports channel from Bell customers.

The CRTC’s ruling comes two days after Bell announced that Québecor began threatening to deny access to TVA Sports through Bell’s services. This is a particularly notable threat given that TVA is the exclusive French-language broadcaster of NHL playoff games, and the only channel in either English or French to carry many of the Montreal Impact Major League Soccer games.

Québecor’s threats come in the wake of accusations that Bell has not been paying enough to use its TVA Sports service. Through a new website called fairvalue.ca, Québecor argued last month that Bell’s specialty channels like RDS get much higher subscription wholesale fees than TVA’s do. Québecor’s ads called for customers to switch over to its Vidéotron subsidiary instead.

In response, Bell has said its RDS channel is “the consistent leader in the French-language sports TV marketplace by far” and had 67 percent more viewers on average than TVA Sports last year. “Bell Media will not devalue the clear fan favourite,” the company said in an April 10th press release.

According to the CRTC’s decision, Québecor is “required to provide” TVA Sports to Bell TV “at the same rates and on the same terms and conditions as they did before the dispute, until the parties resolve their dispute or the Commission issues a decision concerning this unresolved matter.”

“The CRTC has made it quite clear to Québecor that it must comply with the law and continue to provide TVA Sports to Bell customers who’ve paid for it. It’s highly inappropriate for Québecor to make these threats to illegally deny service and in effect take viewers hostage over a business disagreement,” said Martine Turcotte, Bell’s Vice Chair, Québec, in a press statement. “We’ve always negotiated in good faith and invite Quebecor to do the same.”

Source: Bell

The post CRTC orders Québecor to continue to provide TVA Sports to Bell customers appeared first on MobileSyrup.

10 Apr 20:23

Apple AirPods (2019) Review: You’ve heard these before

by Patrick O'Rourke

I’ll get this out of the way first: Apple’s 2nd-generation AirPods are nearly identical to their predecessors.

If you already own a pair of the company’s first-generation wireless earbuds, you should probably skip their successors. That said, if you’ve been on the fence about Apple’s average sounding but convenient earbuds, this is a perfect opportunity to pick them up.

With this in mind, it’s difficult not to be disappointed with the new AirPods, primarily because Apple reportedly planned to release them in 2018, but likely pushed them back so that they could drop at the same time as the now dead AirPower wireless charger.

Often-requested features like noise isolation and IP68 water resistance in both the earbuds and their charging case have not made their way to Apple’s 2nd-generation wireless earbuds. Instead, the refreshed AirPods feature a new H1 chip, hands-free ‘Hey Siri’ functionality, more talk time and faster Bluetooth connection speed.

The most significant update is the addition of an optional wireless Qi charging case, allowing you to charge the headphones on any Qi-compatible wireless charging pad.

The look

AirPods (2019) in charging case

Apple’s AirPods (2019) look identical to their predecessor. This means if you thought AirPods were strange back in 2017 when they first launched, your opinion will not change with this refresh.

I’ve always argued that wireless earbuds, in general, have a strange aesthetic, particularly Samsung’s Galaxy Buds. Given the mainstream success of the AirPods, the earbuds are far more common than they were a few years ago.

When I walk to work I encounter at least 15 to 20 people wearing AirPods on a typical day. In a way, this has helped normalize the wireless earbuds’ stark, white, earring-like aesthetic. Make no mistake though, the AirPods continue to resemble Apple’s standard EarPods with the wires cut off.

AirPods (2019) wirelessly charging

The AirPods’ charging case also remains identical with a few exceptions. First, the magnetic case now features Qi wireless charging that generally works great, but can be a little finicky depending on what charger you’re using. For instance, I needed to carefully place the AirPods charging case directly on the centre of the Mophie Stream Pad+ I tested it with. Of course the same can be said about charging any device capable of being wirelessly charged.

It’s also important to note that charging the AirPods wirelessly is slow, coming in at just 5 watts. Because of this, it can take up to three and a half hours to charge the AirPods wirelessly, with it only taking two hours to charge the earbuds with Lightning. It’s also impossible for me not to get a kick out of charging the AirPods wirelessly on the back of a Galaxy S10 with Samsung’s ‘Wireless PowerShare’ feature. Apple is rumoured to be bringing similar functionality to the iPhone XS series’ successor.

The charging case’s light has also shifted to the case’s exterior and only turns on briefly when you first place it on a charger. Because of this, there were instances where the AirPods were charging, but I assumed they weren’t because the light flipped off. I expect other people to make the same mistake, at least at first.

AirPods (2019) beside an iPhone XS Max

Moreover, I can’t help but wish Apple would release its AirPods in more varied colours like the company does with its Beats headphones brand; a pair of black AirPods would be super sleek. Apple could be saving additional AirPod shades for the inevitable third version of the earbuds.

It’s also worth noting depending on the shape of your ears, Apple’s AirPods still won’t fit snuggly, especially in situations in which you might move around a lot. As a result, those that may have intend to use the wireless earbuds while exercising might be better off waiting for Apple’s $329 wireless Powerbeats Pro to drop in Canada. The Powerbeats Pro feature a wrap-around design rather than a standard earbud like the AirPods.

I’ve never really found the AirPods falling out of my ears to be a major issue because in-ear earbuds have always felt uncomfortable to me. As a result, I appreciate Apple’s insistence on sticking with the more comfortable but less secure classic earbud design.

The beauty of instant connection

AirPods 2019 in ear

The best part of Apple’s AirPods is that they simply just work when it comes to connectivity. After the initial pairing process is complete, all you need to do is pop the headphones out of their charging case and place them in your ears to instantly connect to your paired iOS device.

What has changed over the last few years is other headphone manufacturers are now catching up with the AirPods’ convenience factor, and are also often selling their wireless earbuds at a cheaper price tag.

For instance, if you want the complete second-generation AirPods experience, you’ll need to drop $269 CAD. Samsung’s arguably almost as good Galaxy Buds (which also include noise isolation), on the other hand, cost $199. Of course, if you’re an iOS user, the Galaxy Buds likely aren’t even on your radar since they work best with Samsung smartphones when it comes to their instant Bluetooth connection features.

AirPods 2019 in hand

The same argument can be made about Apple’s AirPods when connecting them to Android devices. The magic of Apple’s wireless earbuds is only apparent with iOS devices. While the AirPods (2019) work with Android devices, the instant connectivity powered by Apple’s new, slightly faster H1 chip is gone.

There are other positively reviewed similar wireless earbud options out there too, with the $219 Jabra Elite 65t and the somewhat pricey $379 Sennheiser Momentum earbuds being the most notable examples. Even Amazon is reportedly looking to get into the wireless earbuds game, according to a recent report.

While Apple’s AirPods are still arguably some of the best wireless earbuds around, the space is quickly becoming increasingly competitive.

So what is actually new?

AirPods 2019 in wireless charging case

Beyond wireless charging, which I’ve already discussed above, little is new about Apple’s second-generation AirPods.

The H1 chip, an upgrade to the W1 featured in the first-gen earbuds, results in the AirPods (2019) connecting slightly faster. The AirPods still can’t connect to multiple devices at once, unfortunately. The connectivity experience in my roughly a week and a half with the new AirPods has been solid. The Bluetooth signal studdered and dropped less than it did with the first-generation AirPods and the instant connection functionality has worked flawlessly.

The 2nd-gen AirPods also feature hands-free Siri interaction. Rather than taping the headphones to launch Siri requests, you can now say “Hey Siri” to activate Apple’s voice-activated assistant.

AirPods (2019) mic

Hey Siri operates great even under noisy conditions. For instance, it worked in the typically loud MobileSyrup office, as well as while walking down a noisy Yonge Street during rush hour in Toronto. I don’t think this is a feature I’ll find myself using very often since I’m not fond of talking to voice-activated assistants in public, but it’s nice it’s there.

Regarding battery life, the new AirPods still last roughly four to four and a half hours on a single charge in my experience. Apple says its H1 chip results in 50 percent more talk time. Though I didn’t test this claim, I did find that using the AirPods as a headset drained the battery at a slower rate when compared to their first-gen version.

As you may have guessed, the charging case also still provides up to 24 hours of charge to the AirPods.

Sound quality remains average

AirPods (2019) on ledge

If you were hoping the AirPods (2019) would feature improved sound quality, that unfortunately isn’t the case. They’re fine with a reasonably impressive sound stage and a level of bass you’d expect from earbuds, but don’t match other wireless earbuds regarding overall sound quality and bass.

I listen to a wide variety of music, ranging borderline out of tune, post-hardcore like ‘Say Anything’s’ recently released ‘Oliver Appropriate,’ to more bass-heavy tunes like ‘Lil Nas X’s’ ‘Old Town Road’ and ‘Logic’s’ ‘Supermarket.’

Generally, the AirPods sound decent regardless of what genre you’re listening to, though it’s worth noting the earbuds tend to feature recessed highs and overall hollow sound. As someone who uses the AirPods on the go for brief periods, typically while I’m walking to and from the train station to work, I’ve never found this to be an issue. If I used them as my only pair of headphones, I might consider this to be more of an issue.

Just like with the first-gen AirPods, I find the convenience of instant connectivity vastly outweighs the AirPods decent but not stellar sound quality.

The post Apple AirPods (2019) Review: You’ve heard these before appeared first on MobileSyrup.