Shared posts

05 Mar 04:01

Cheese Tortellini Minestrone Soup.

by Jessica

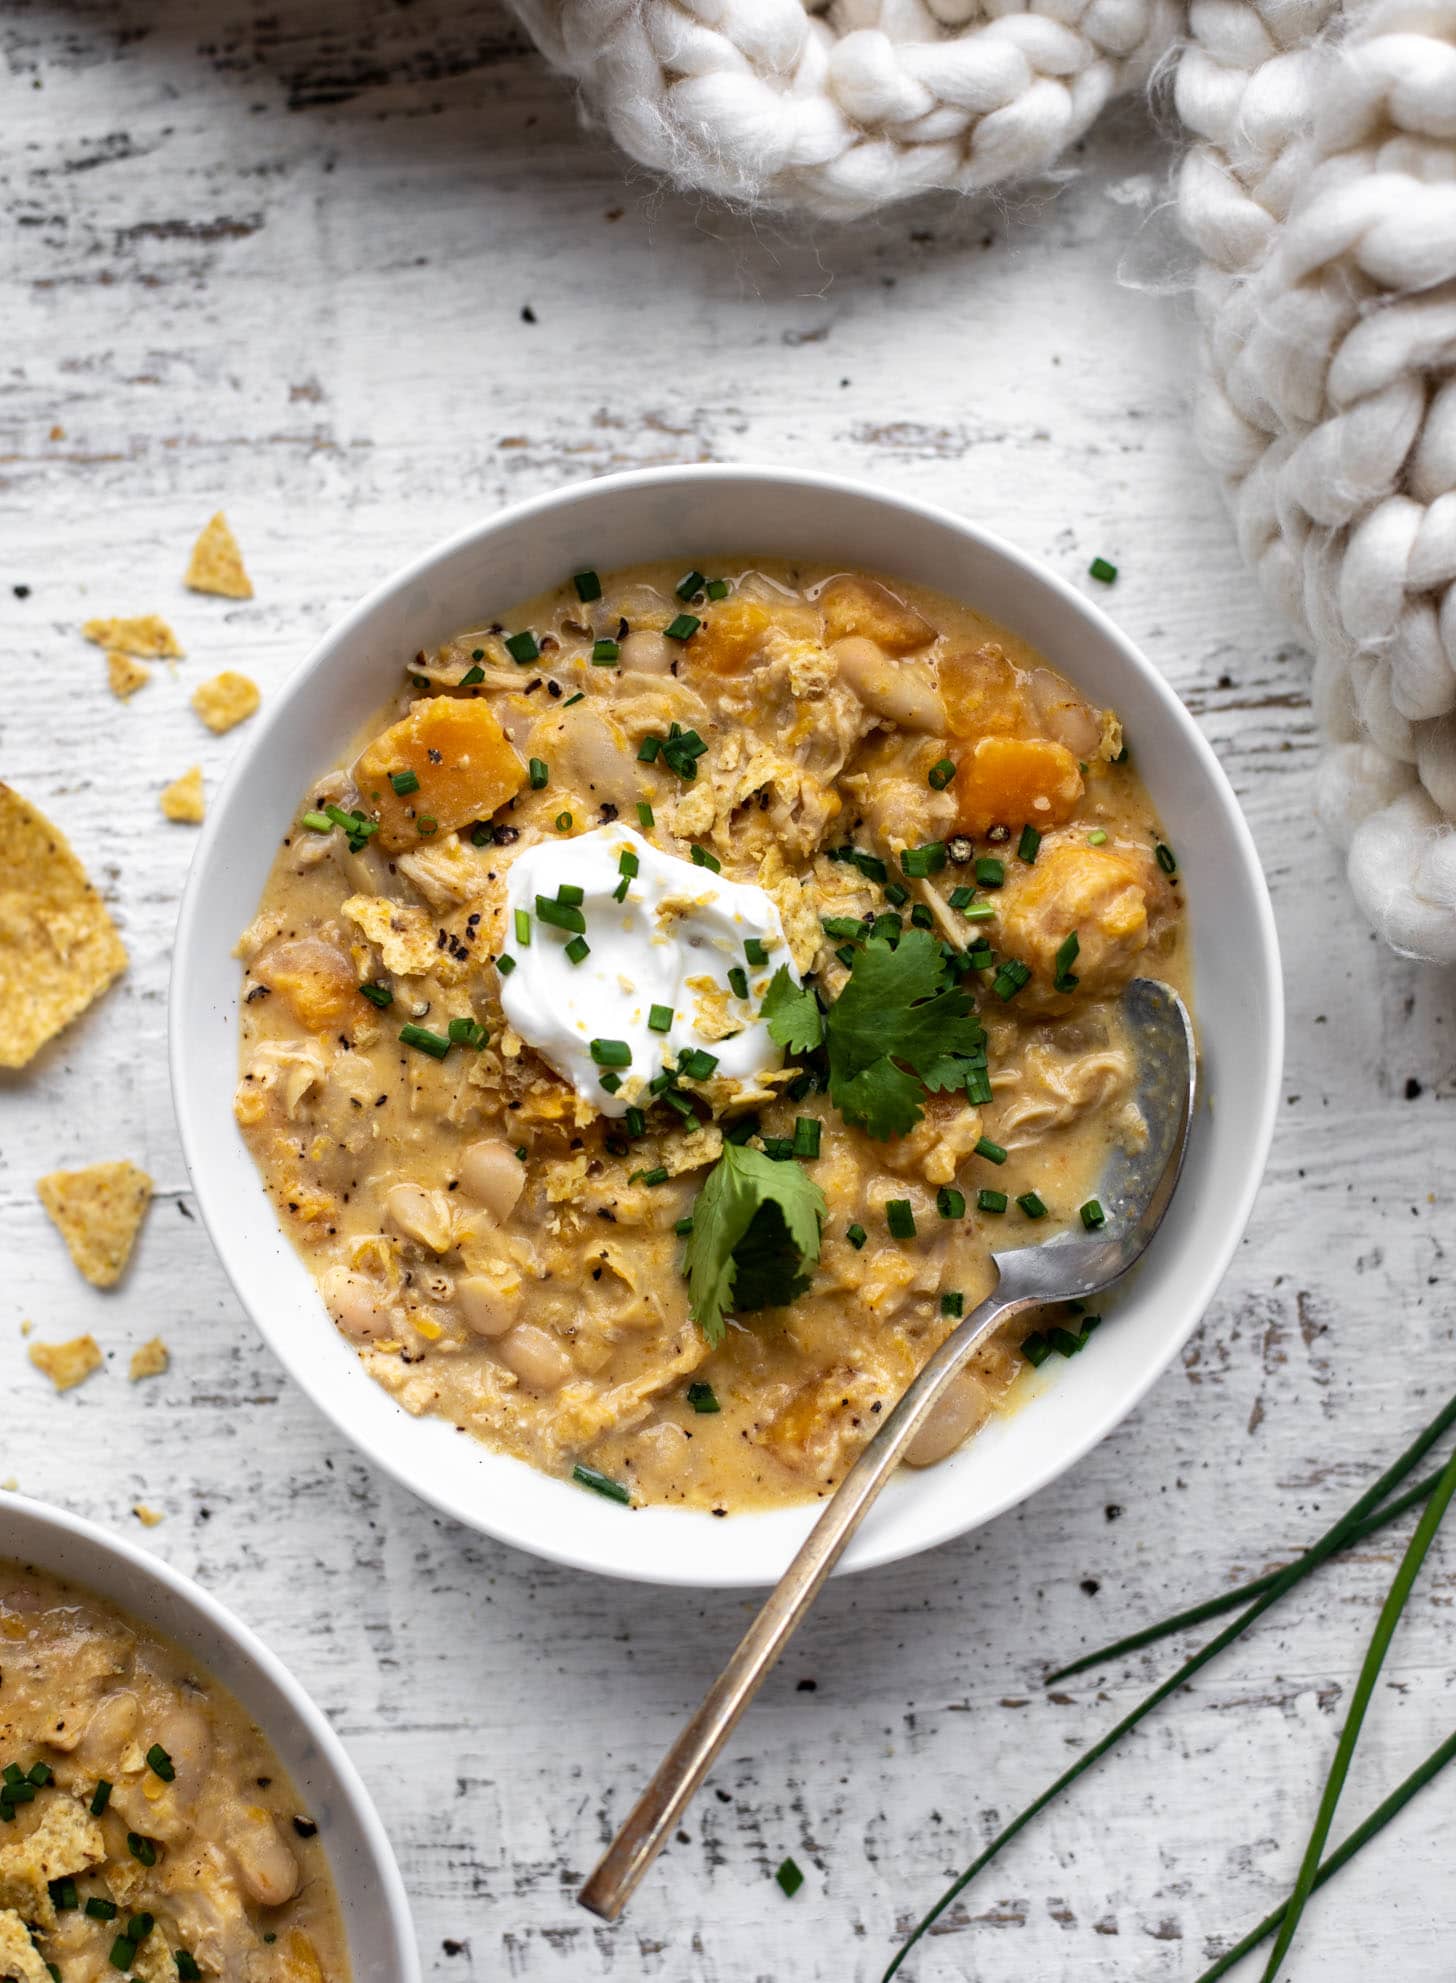
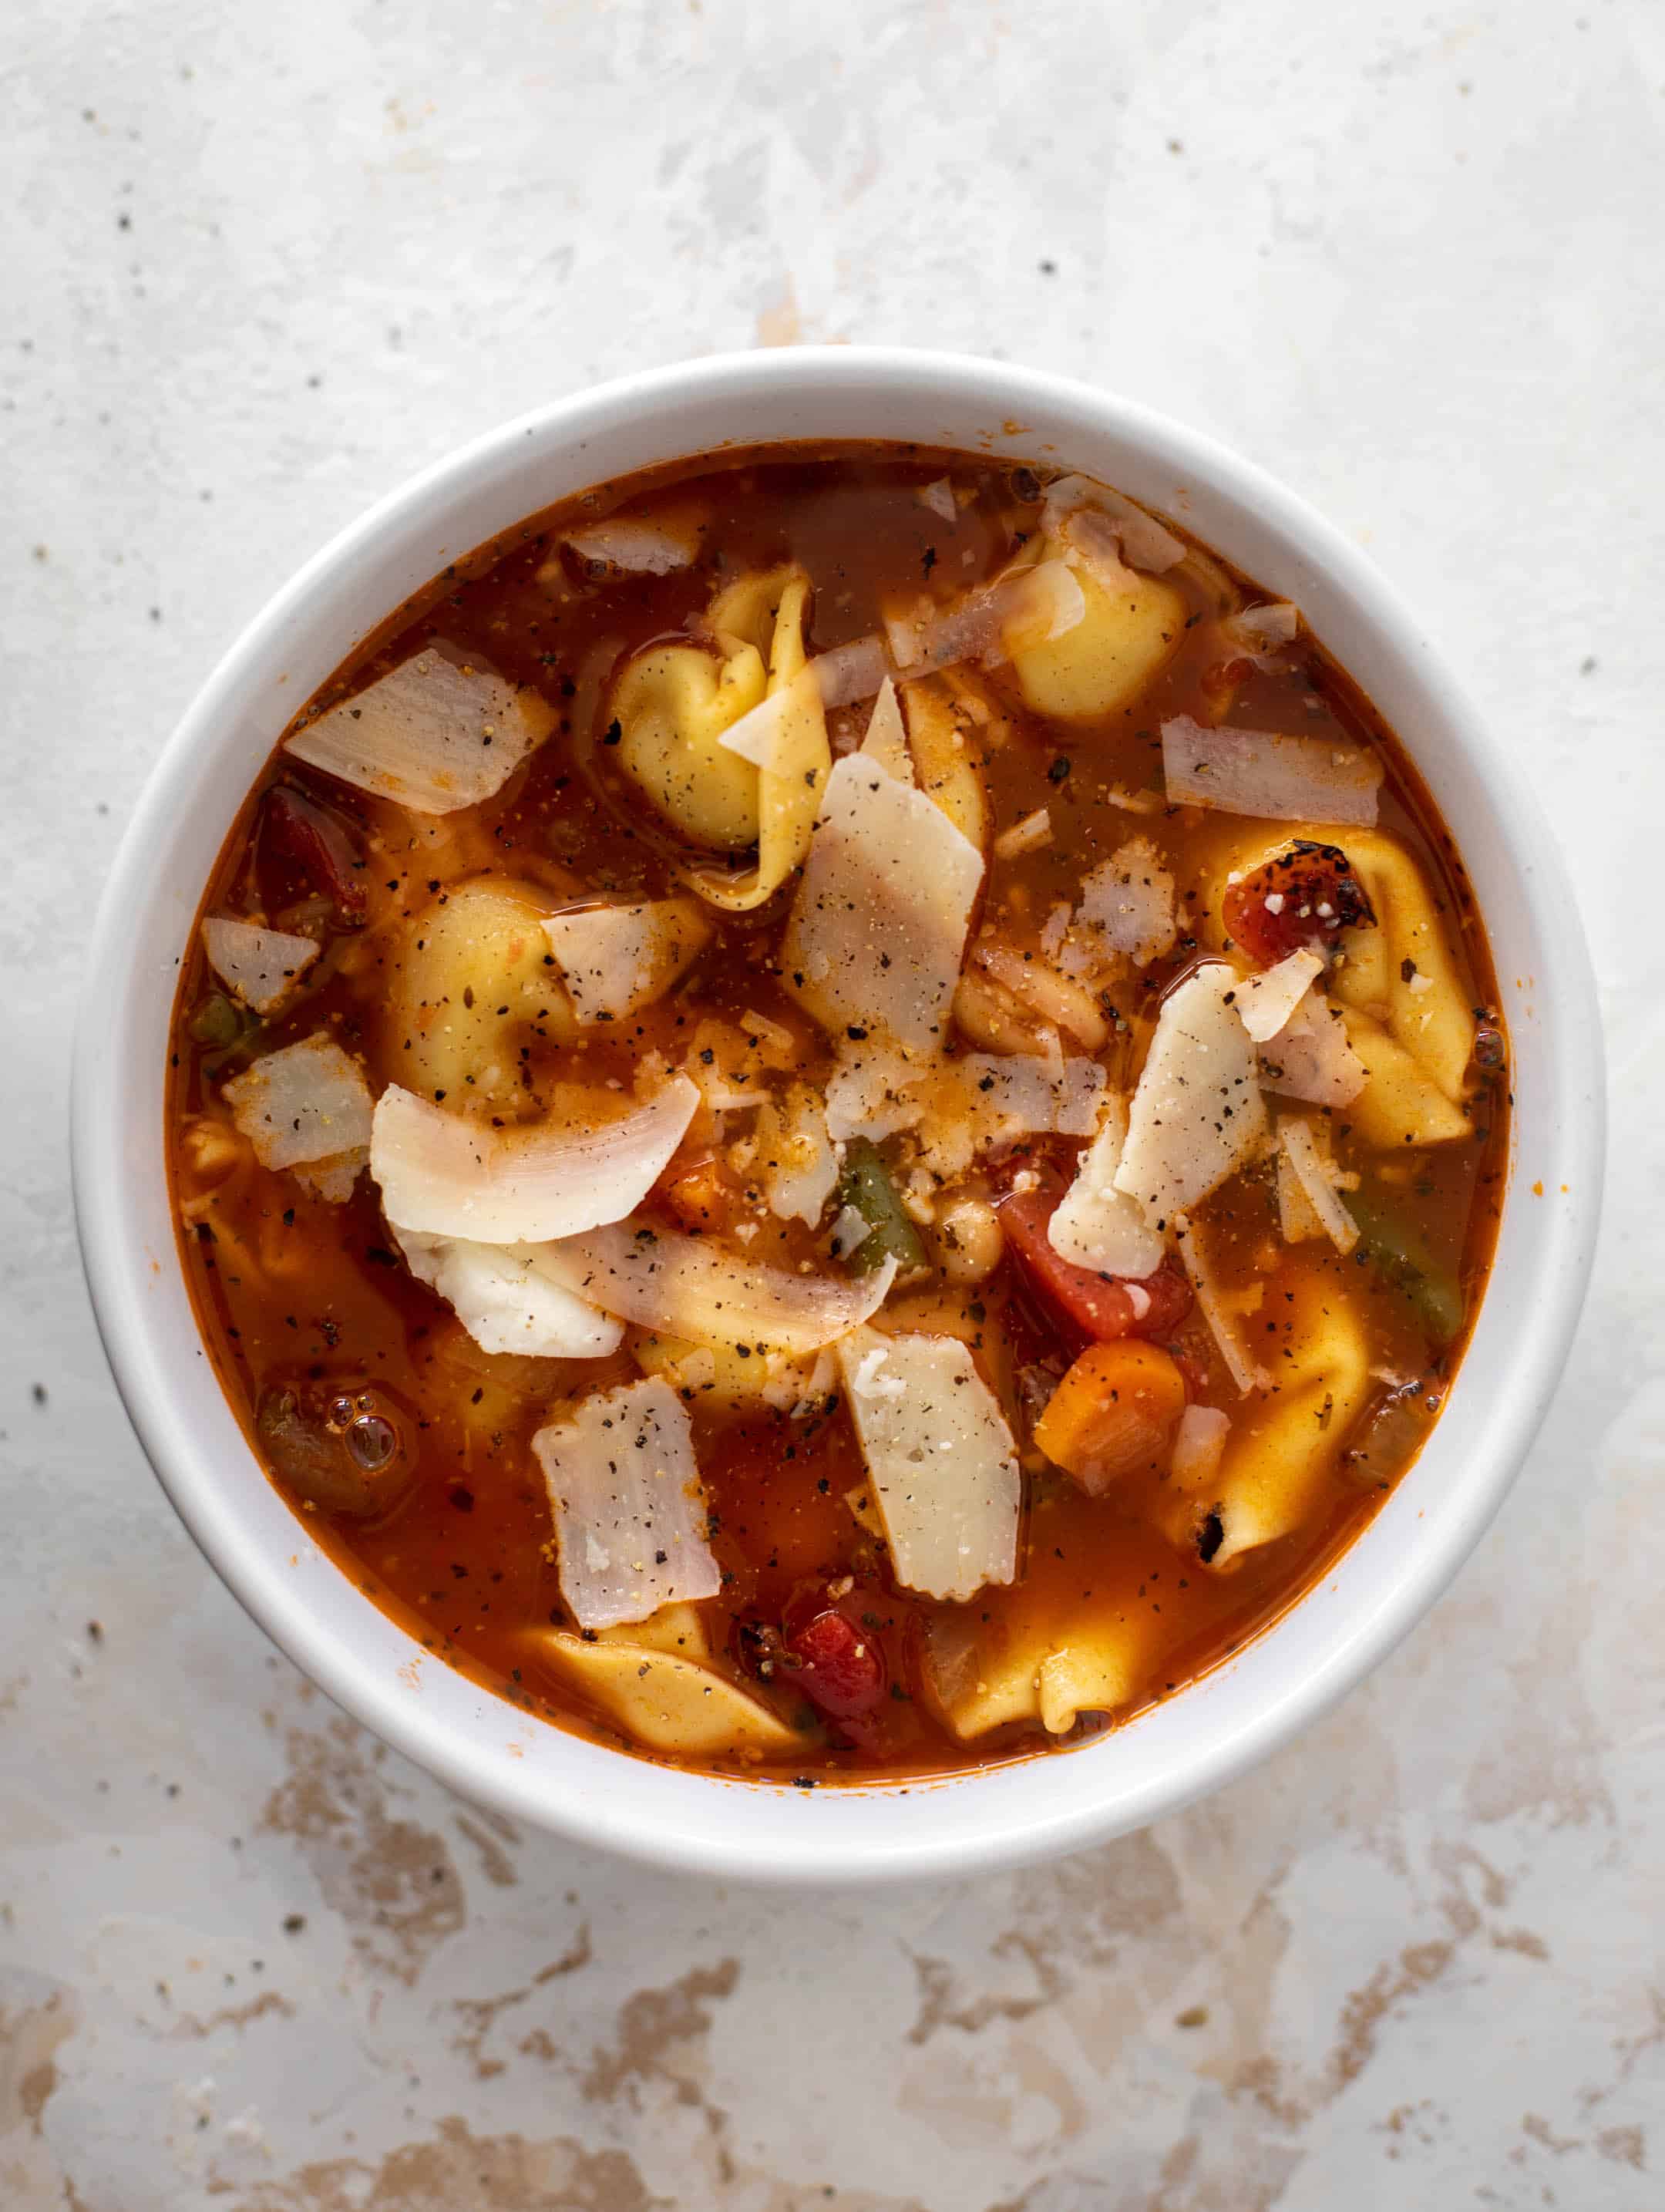
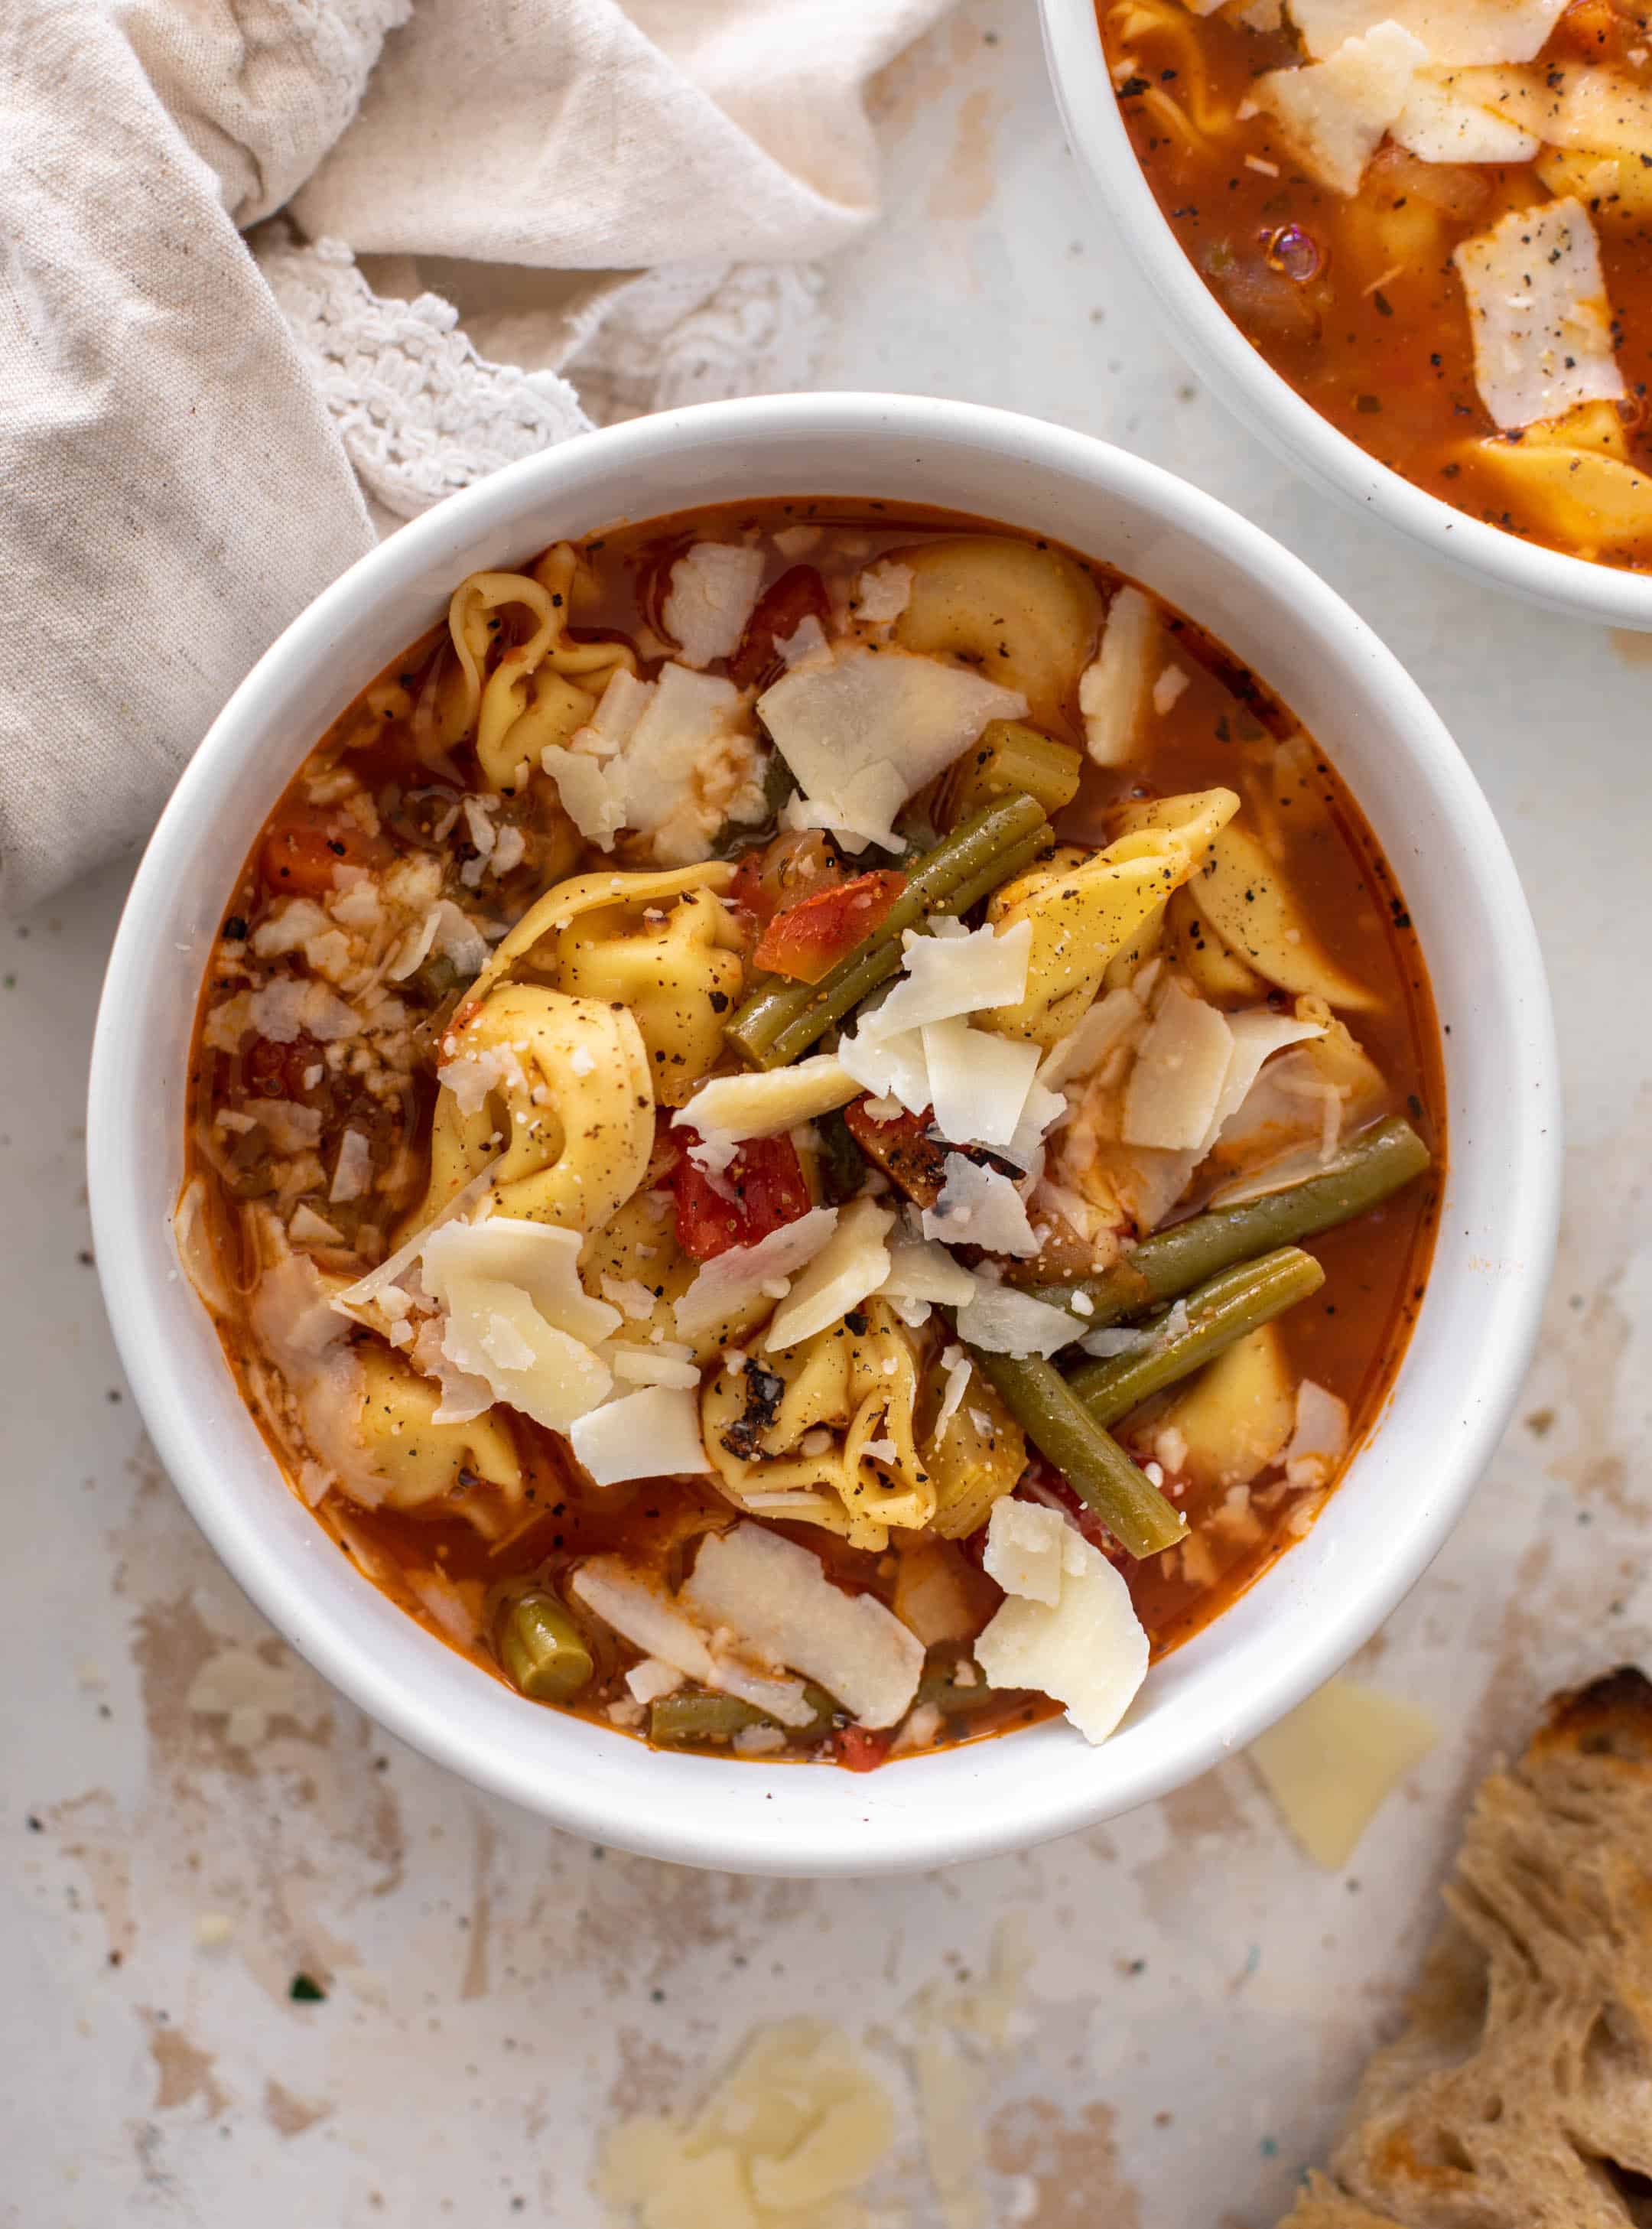
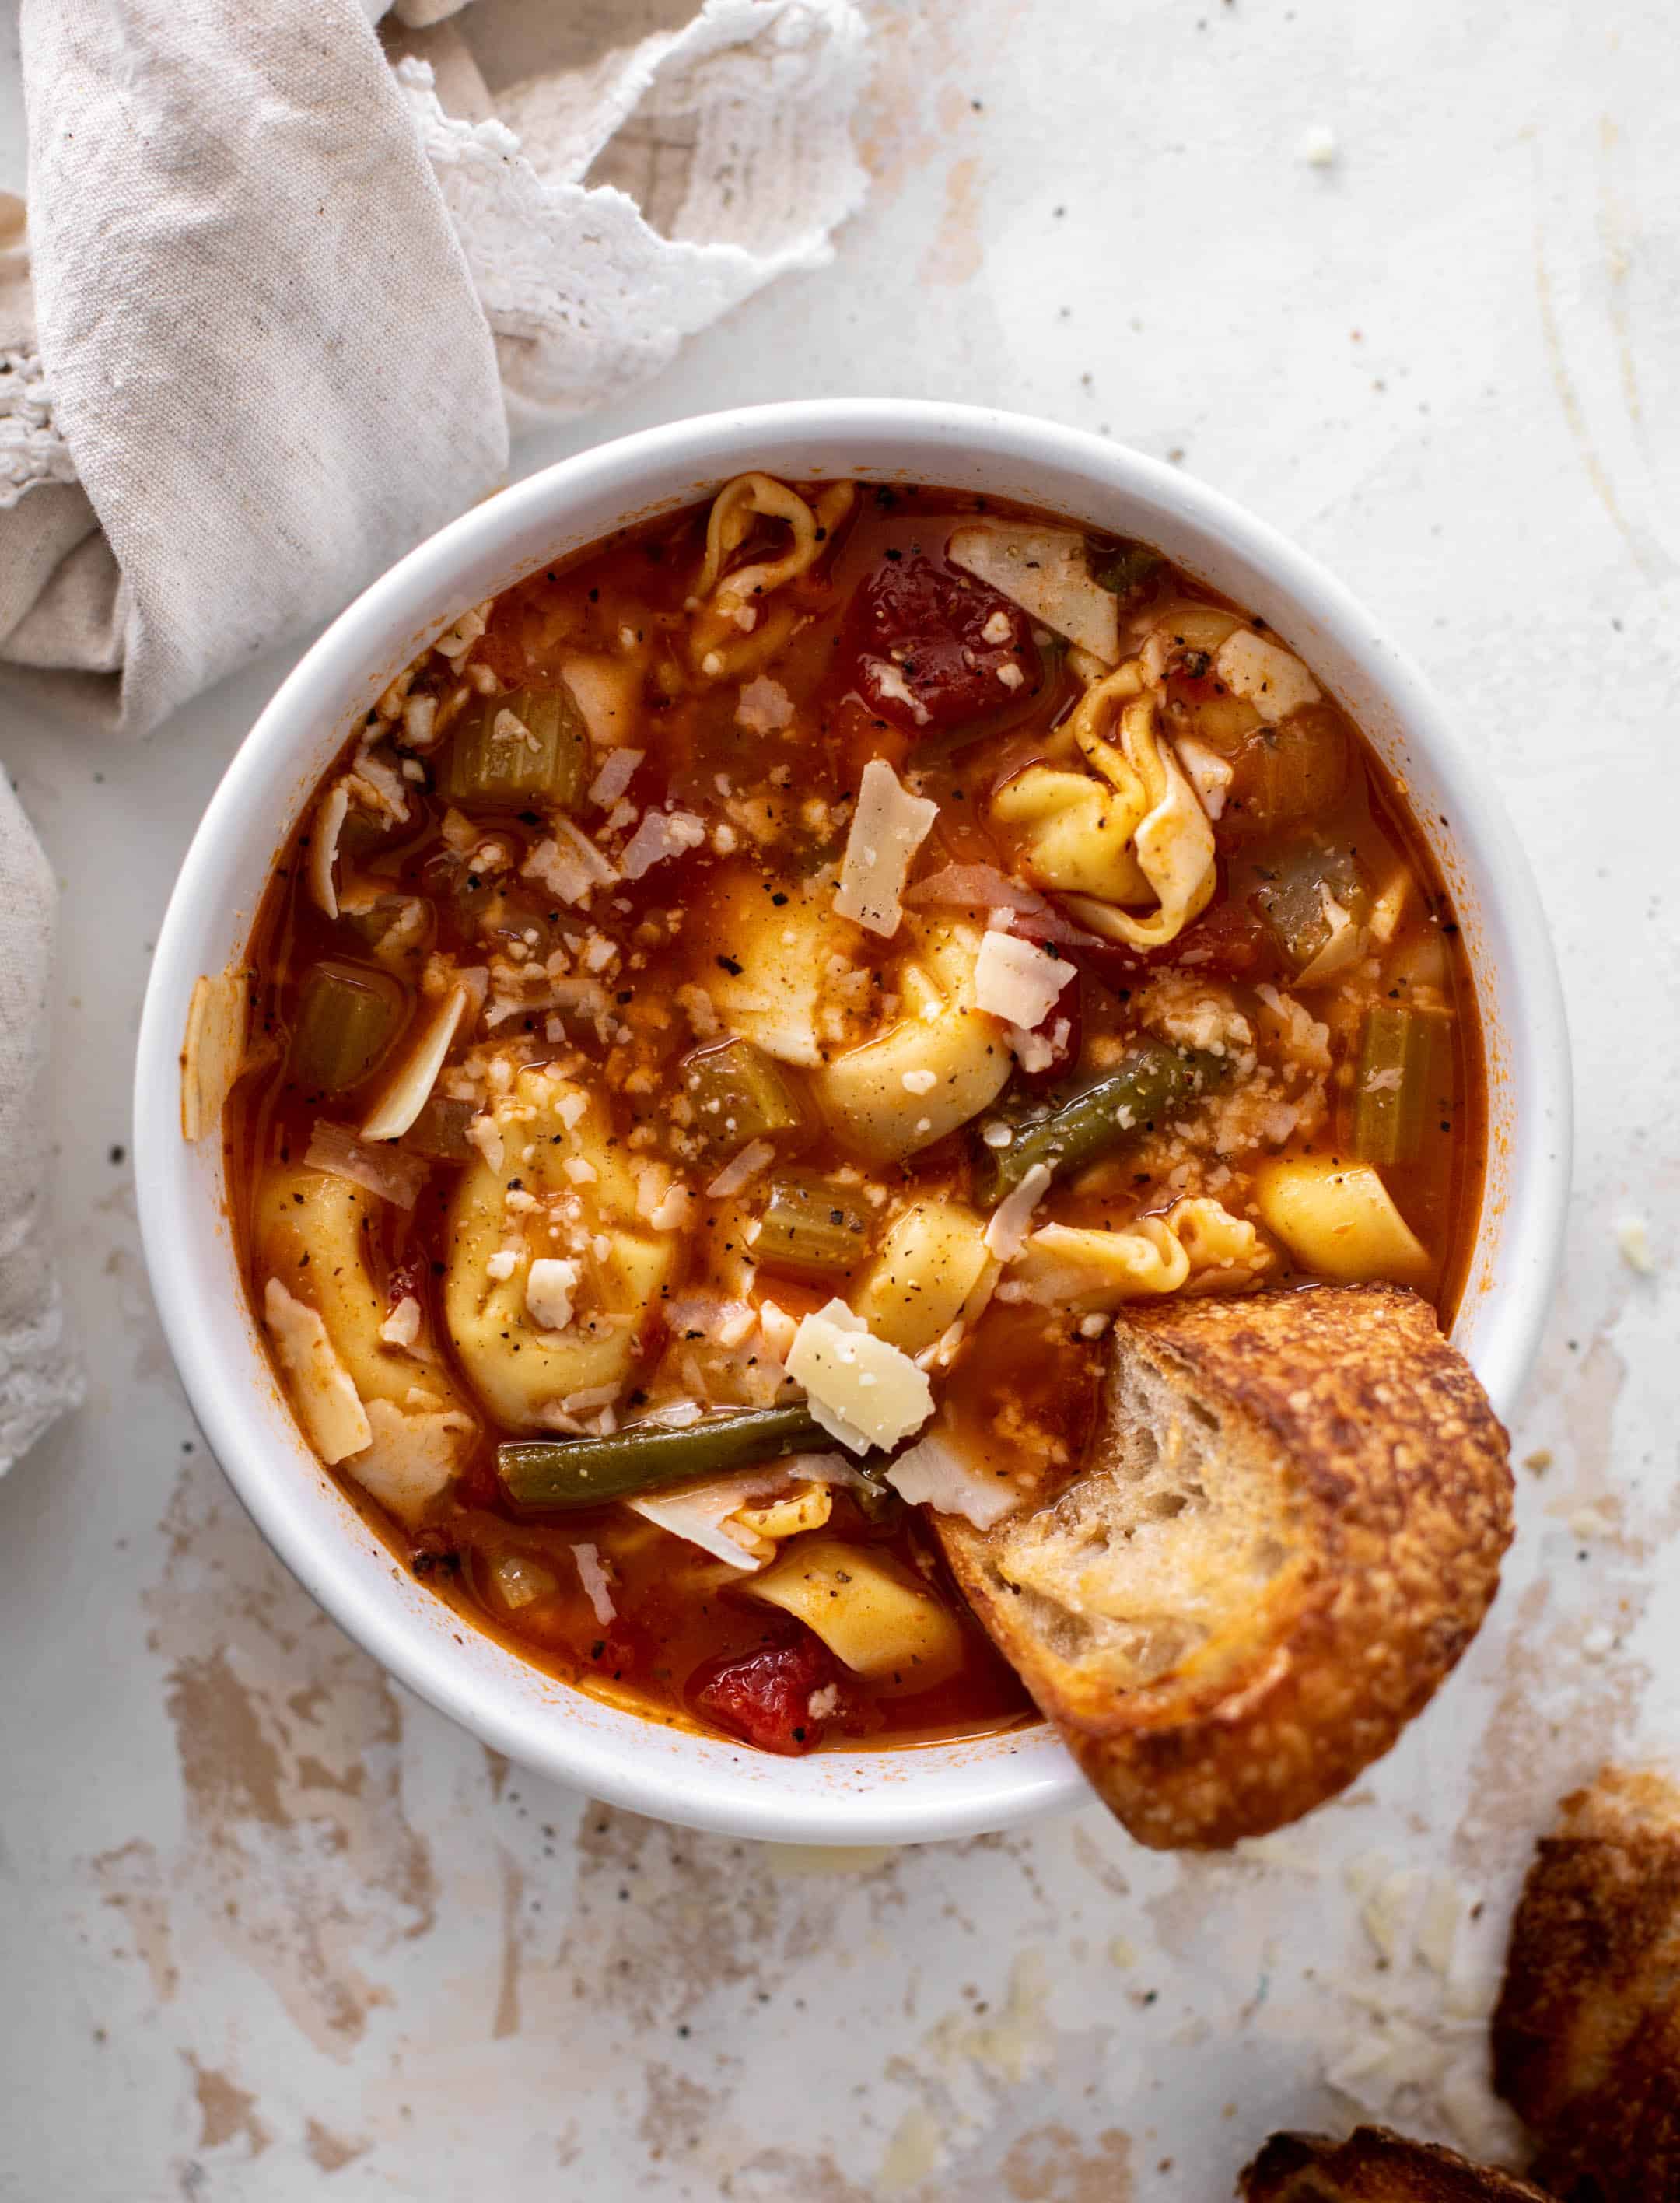
This cheese tortellini minestrone is a fun, satisfying spin on the traditional soup. Lots of vegetables, creamy white beans, fire roasted tomatoes and tortellini come together in a bowl covered in shaved parmesan. It’s comforting and hearty!

It’s still soup season over here!

cheese tortellini minestrone

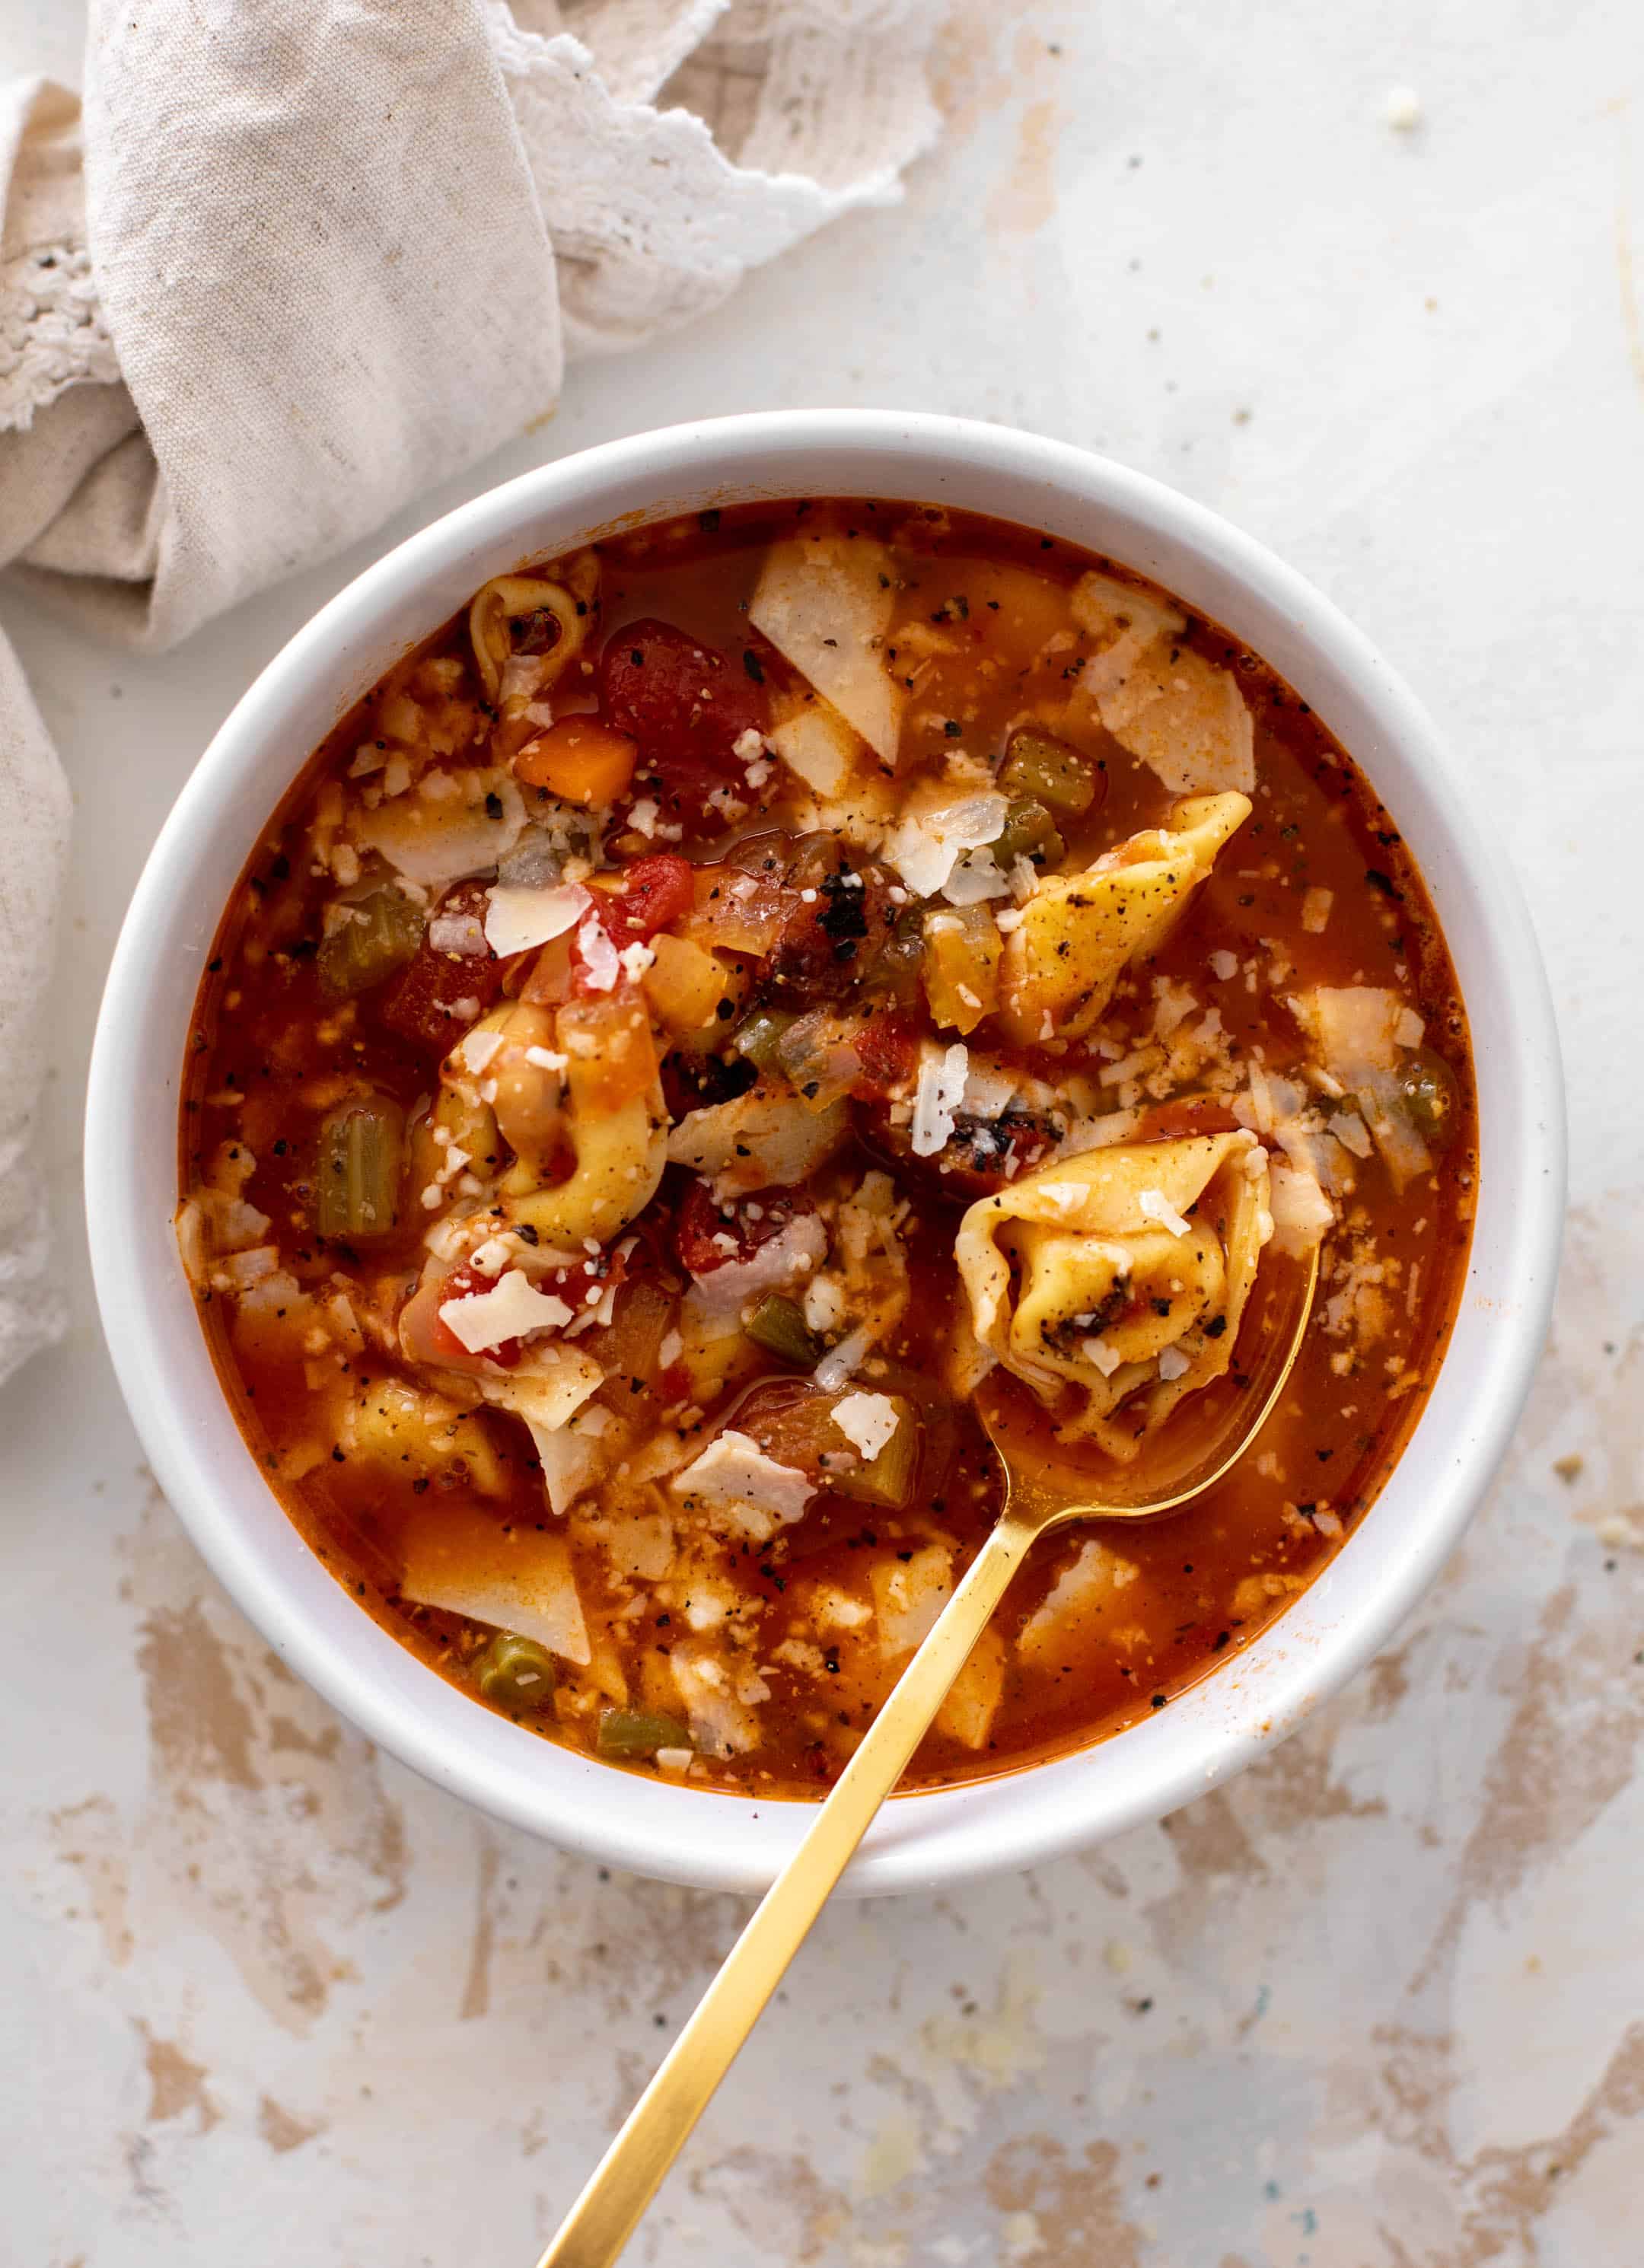
Okay, so we’re having a little weird heat wave in march, but I’m making all the soup I can before it gets super hot. This minestrone soup is made with tons of veggies, beans and cheese tortellini all in a parmesan-flavored fire-roasted tomato brother. 

DELICIOUS.

It’s as rich and decadent as a vegetable soup can be. 

cheese tortellini minestrone

I’m continuing my tortellini journey with this delicious, veggie filled soup. It’s made with a base of fire roasted tomatoes – my absolute favorite!

I don’t even know if it’s possible for me to make a soup without fire roasted tomatoes. So here we are. 

cheese tortellini minestrone

Minestrone has always been one of those soups I’ve made for the kids. The reasons being that you can make a big batch, it freezes great, it’s filled with vegetables and they love it. Especially when my kids first started to eat, this was something I gave them all the time. The tender veggies soaked in a flavorful broth became their favorite thing. 

These days, I’m always looking for ways to make old favorites new and exciting. Hence, the tortellini. We are all loving tortellini so much right now that it makes sense.

cheese tortellini minestrone

And as usual, you can use whatever variety you have and/or love. Chicken tortellini, spinach, sun dried tomato – it doesn’t HAVE to be a version of cheese tortellini. 

Though who doesn’t want extra cheese!!! 

I always want extra cheese. 

cheese tortellini minestrone

One of the main reasons I love minestrone is because of the beans! Gosh, I love beans. They are one of my favorite foods. Creamy, buttery beans that enhance the flavor and satisfaction factor of the soup. I live for it! 

cheese tortellini minestrone

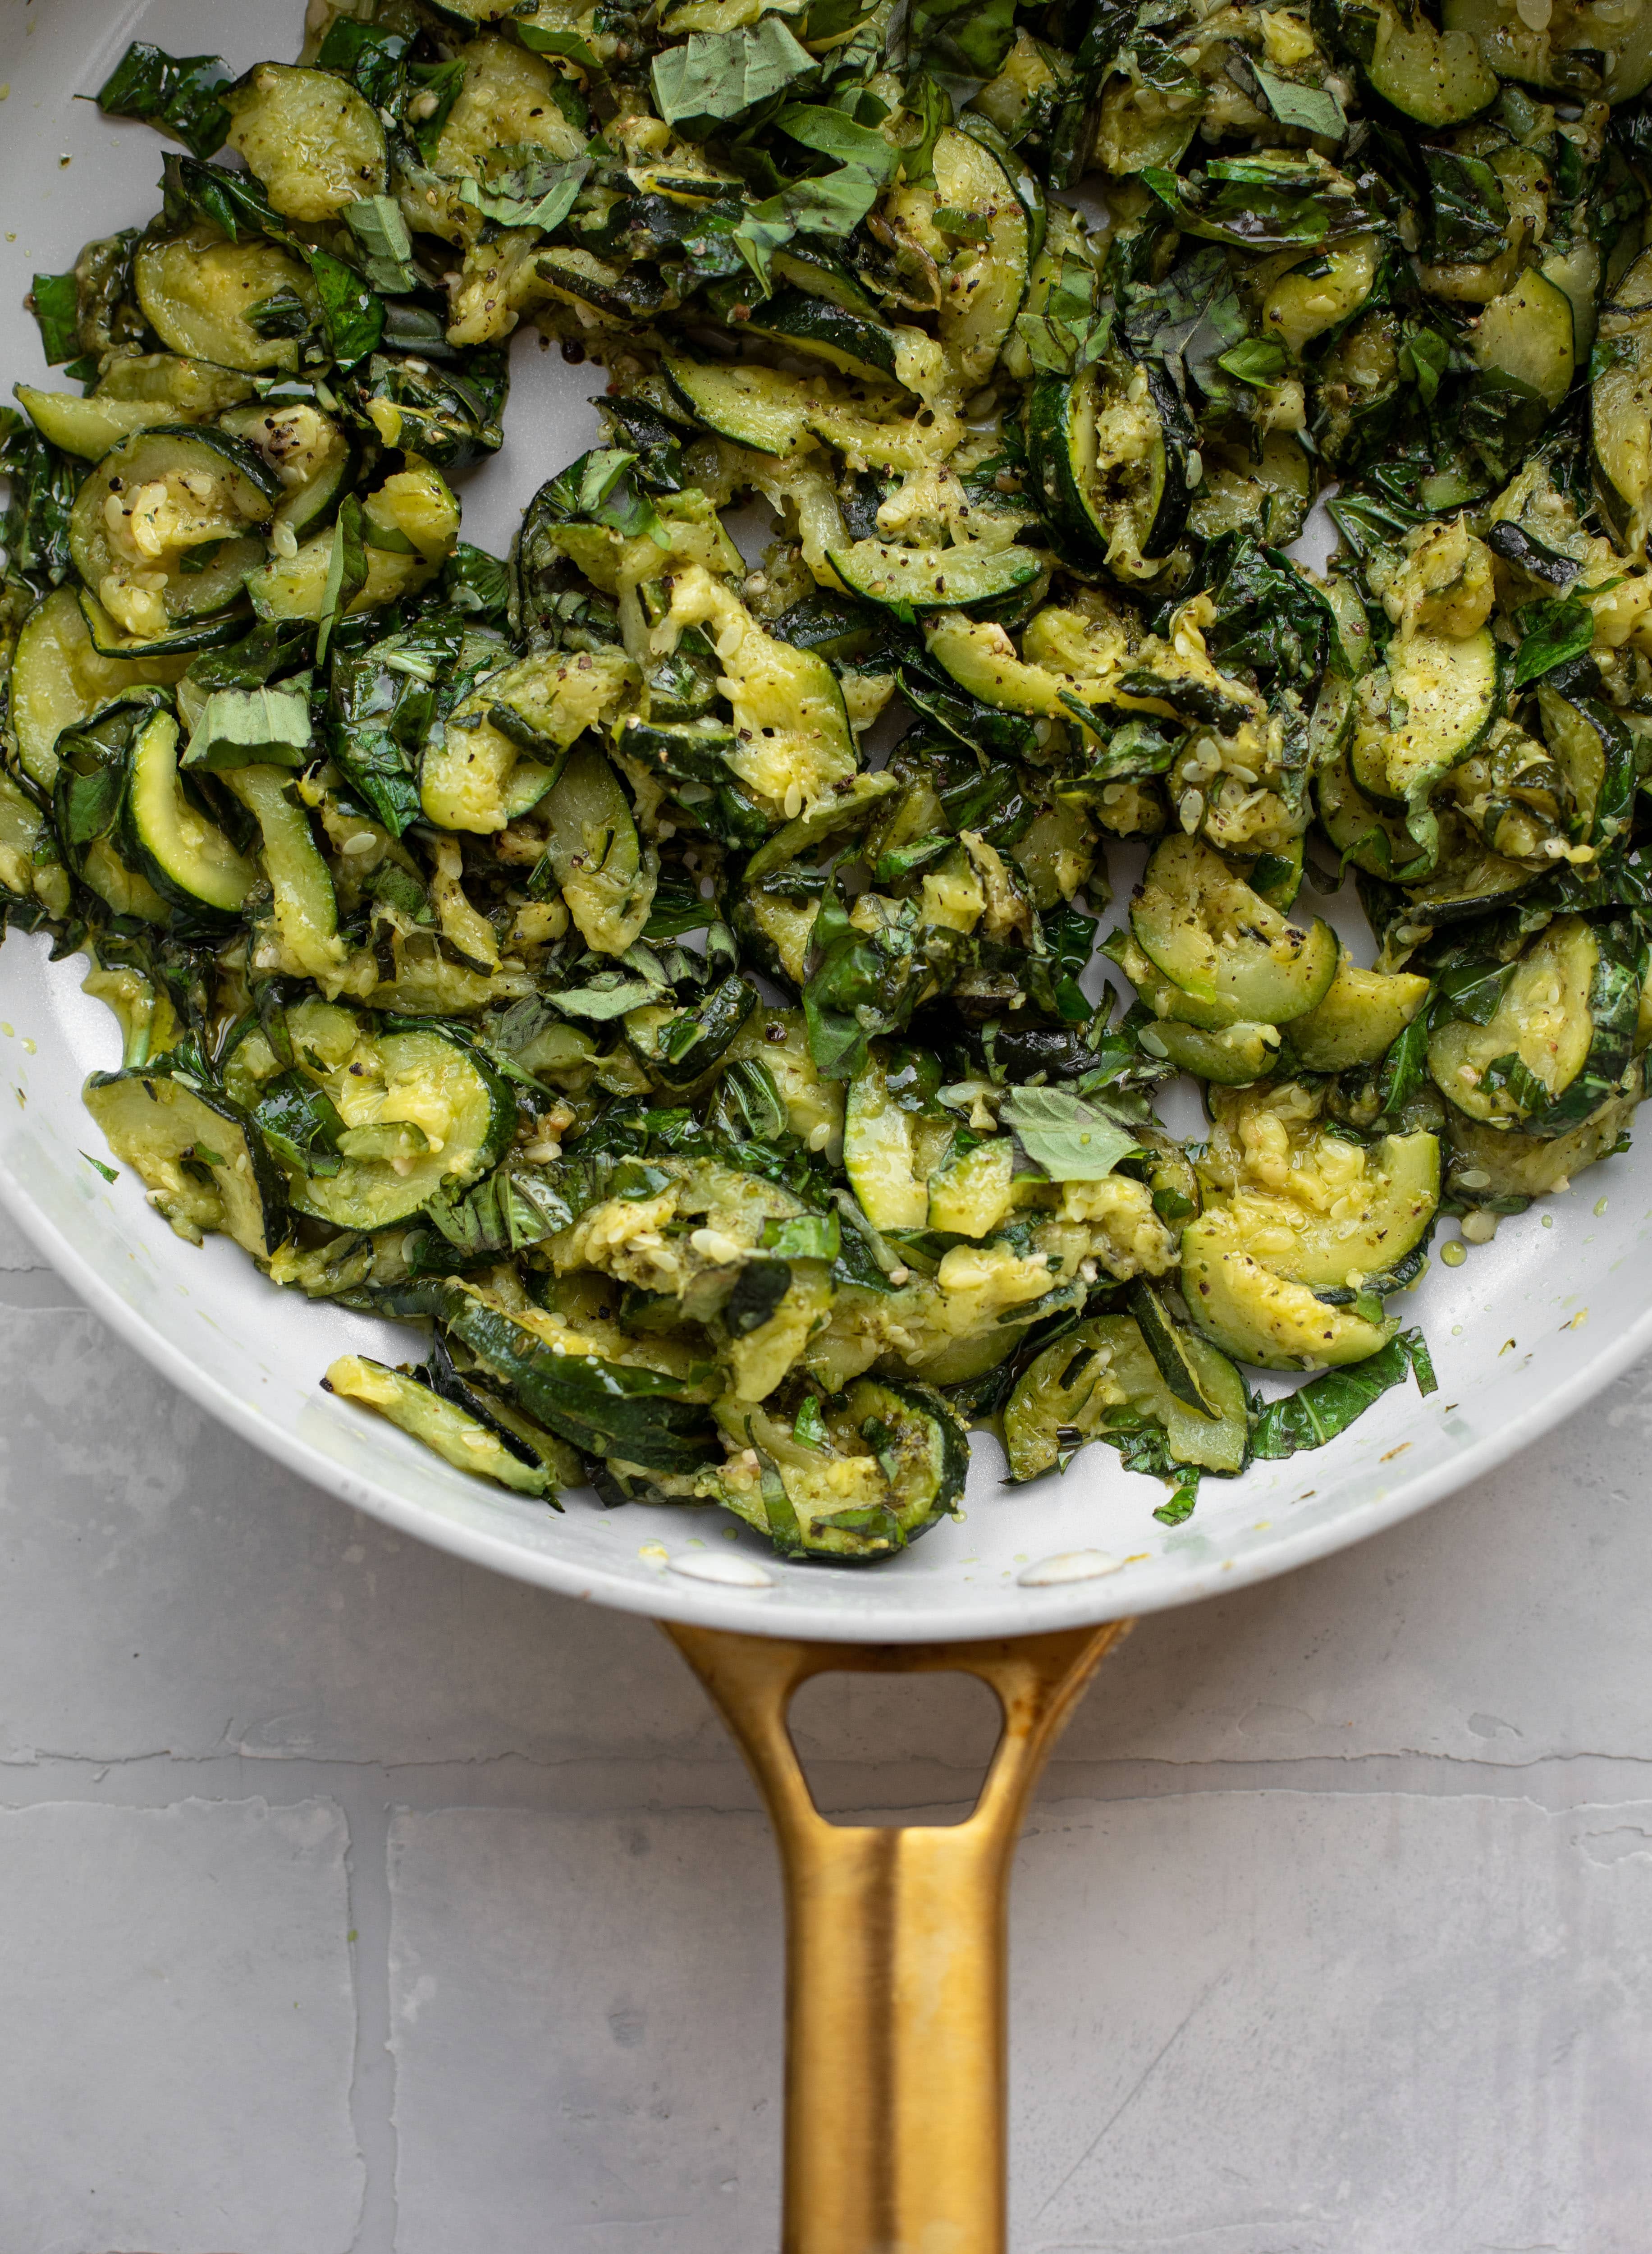
Here’s a run down of what goes into my minestrone. If you’ve made my kale pesto minestrone before, you may be familiar with it! 

  • Onions, carrots and celery, of course. I don’t love celery but make an exception in soup!
  • Lots of garlic. I like a ton in this soup.
  • Fire roasted tomatoes, which I think we’ve covered.
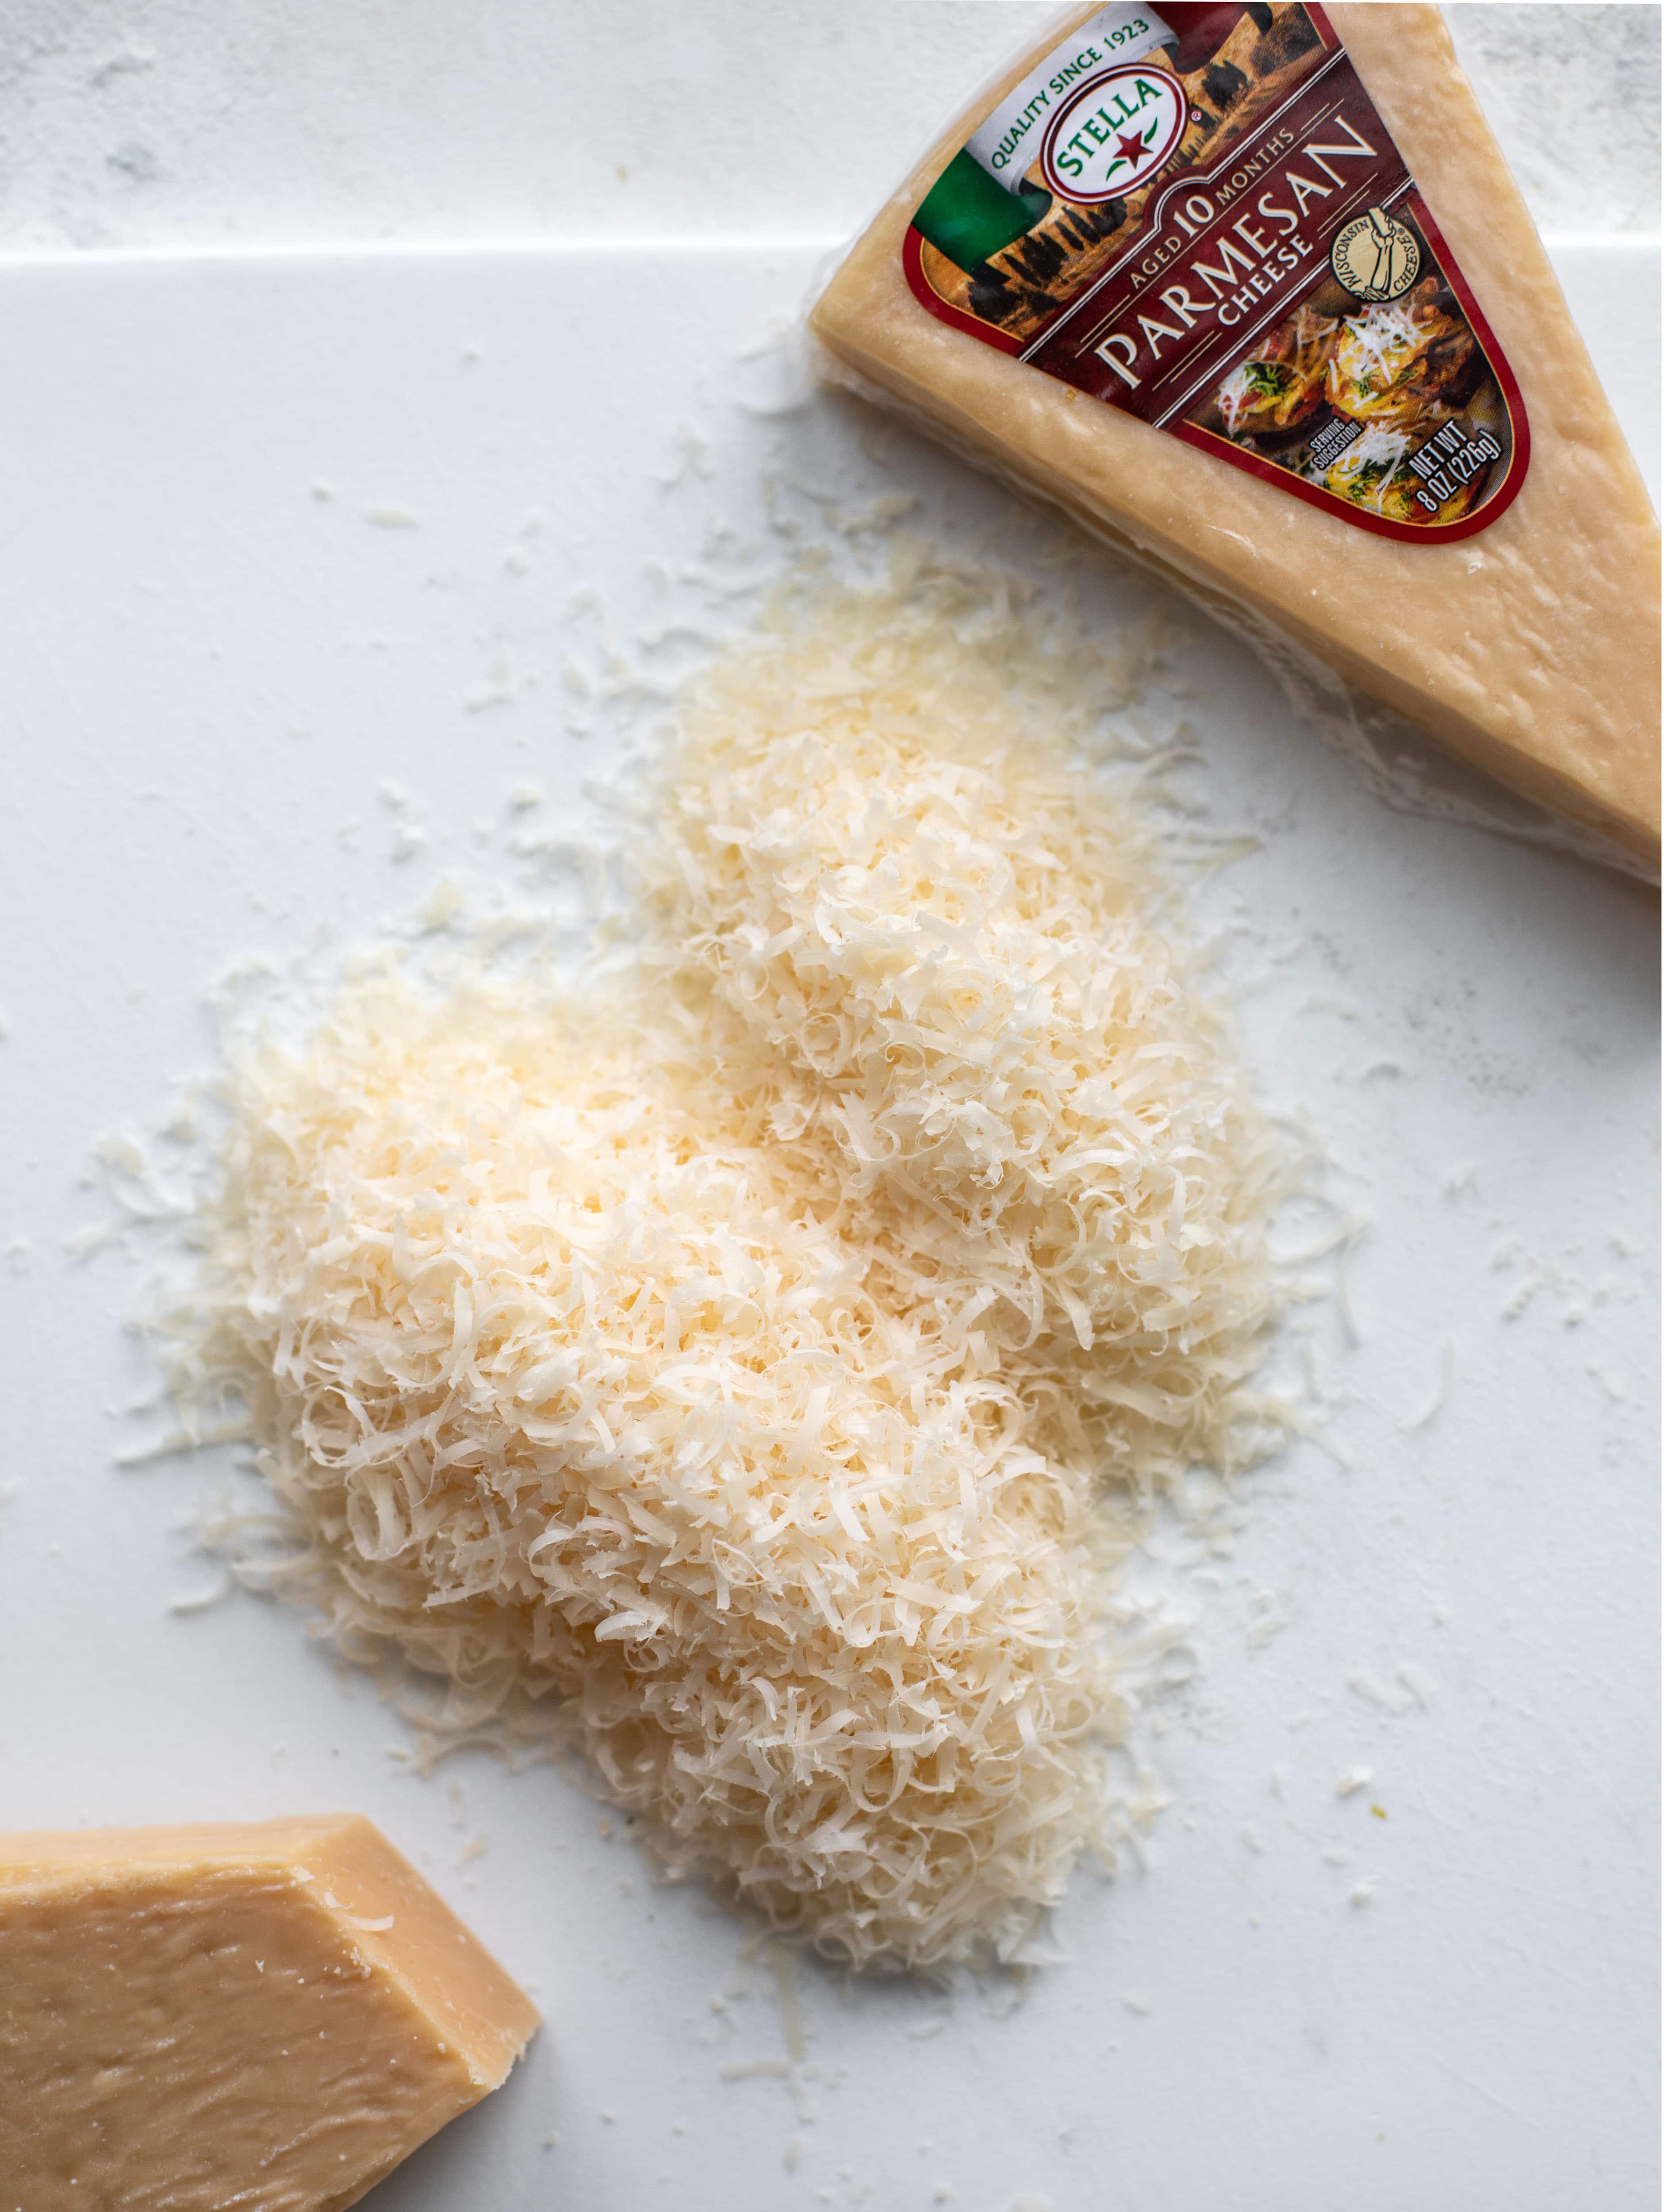
  • A big old parmesan rind. This is key for flavor!
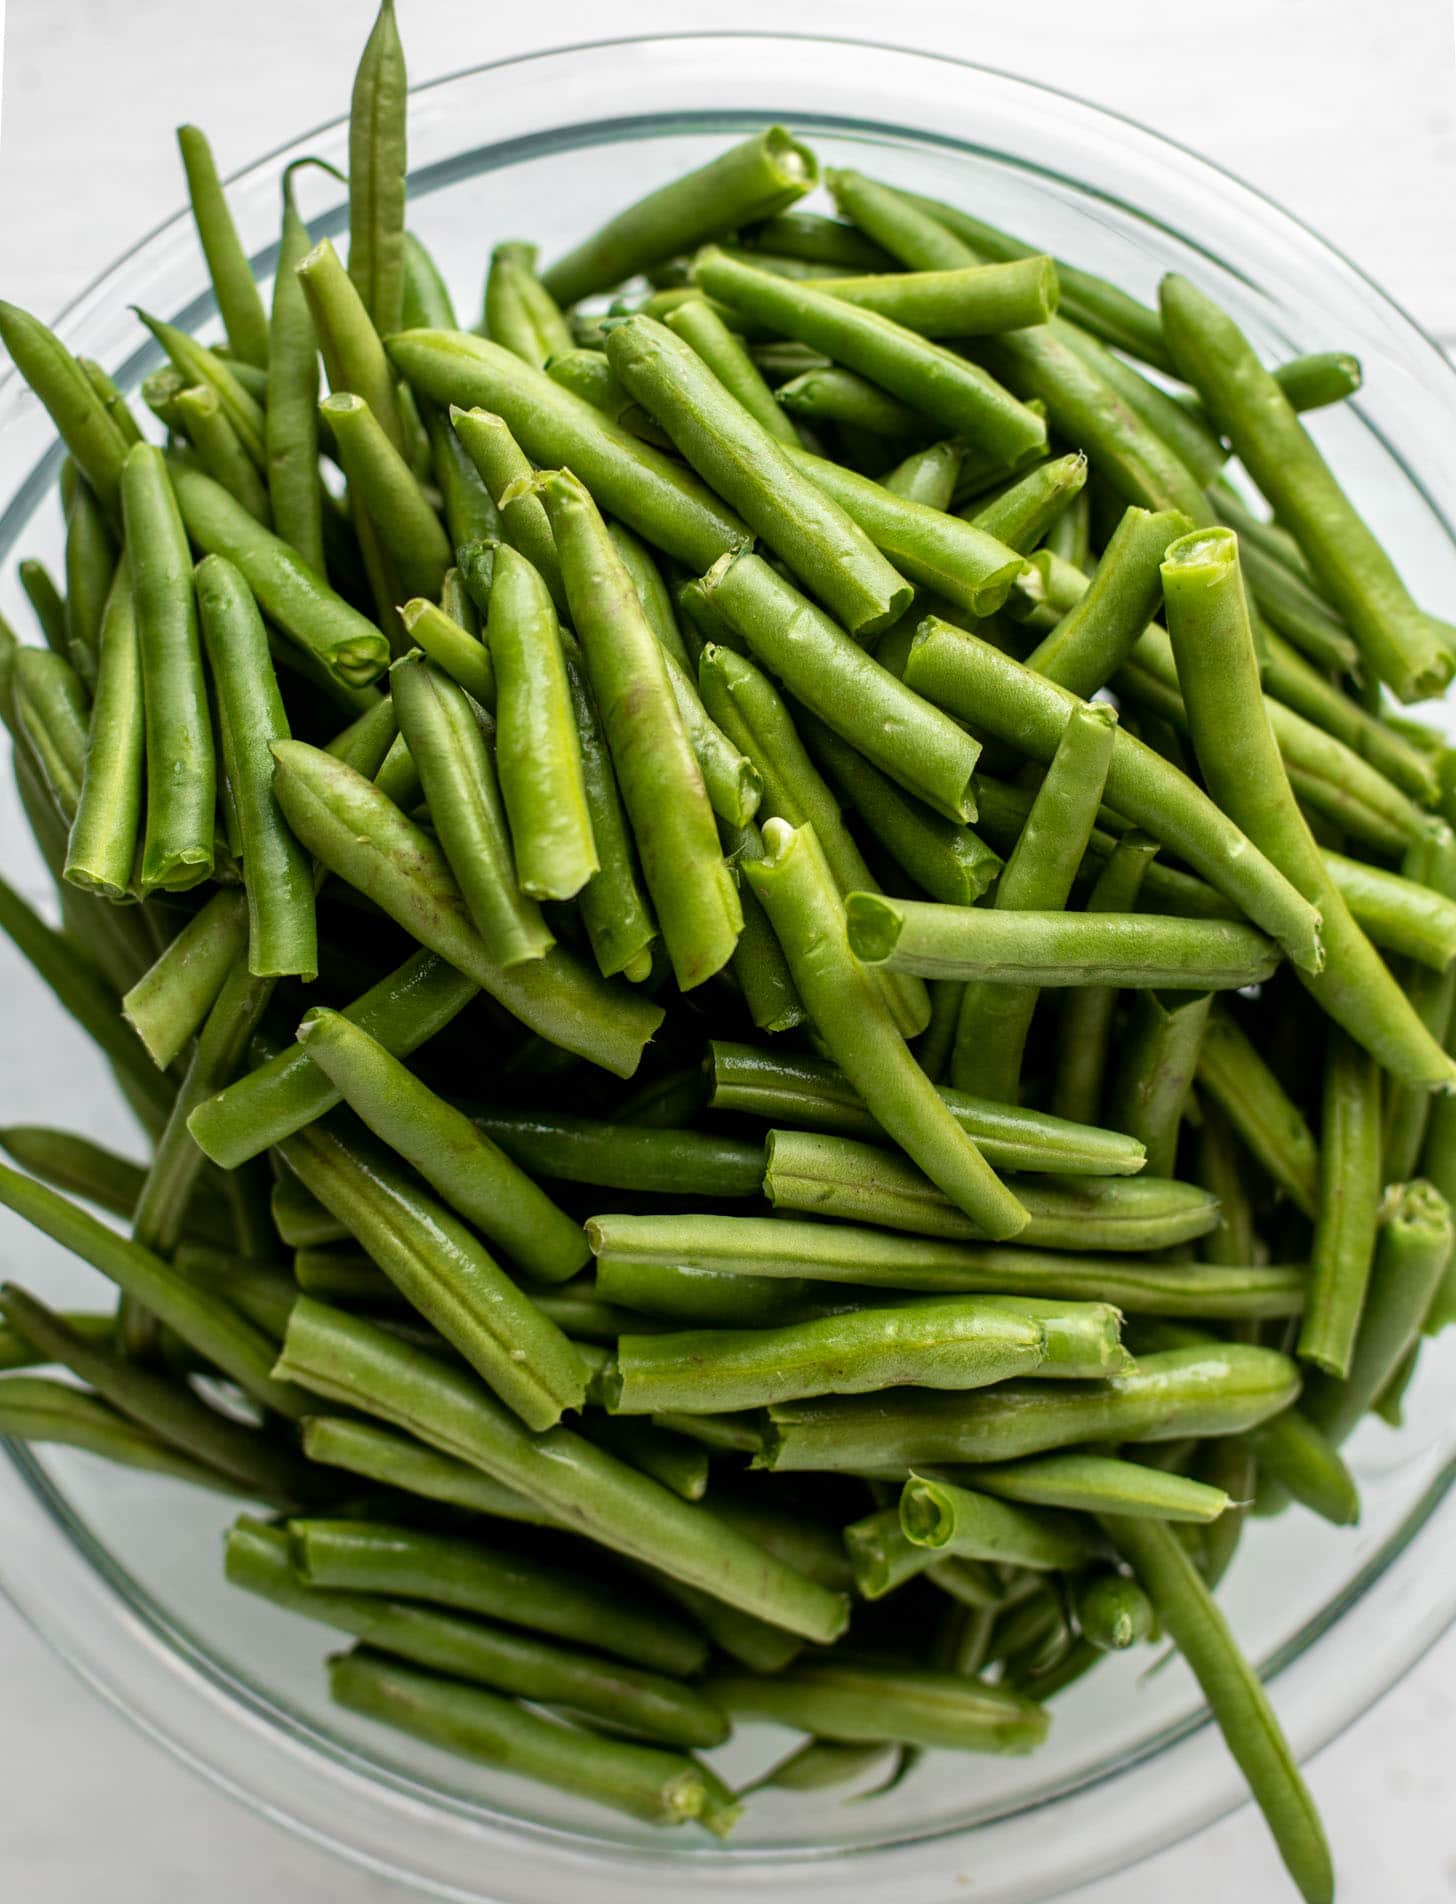
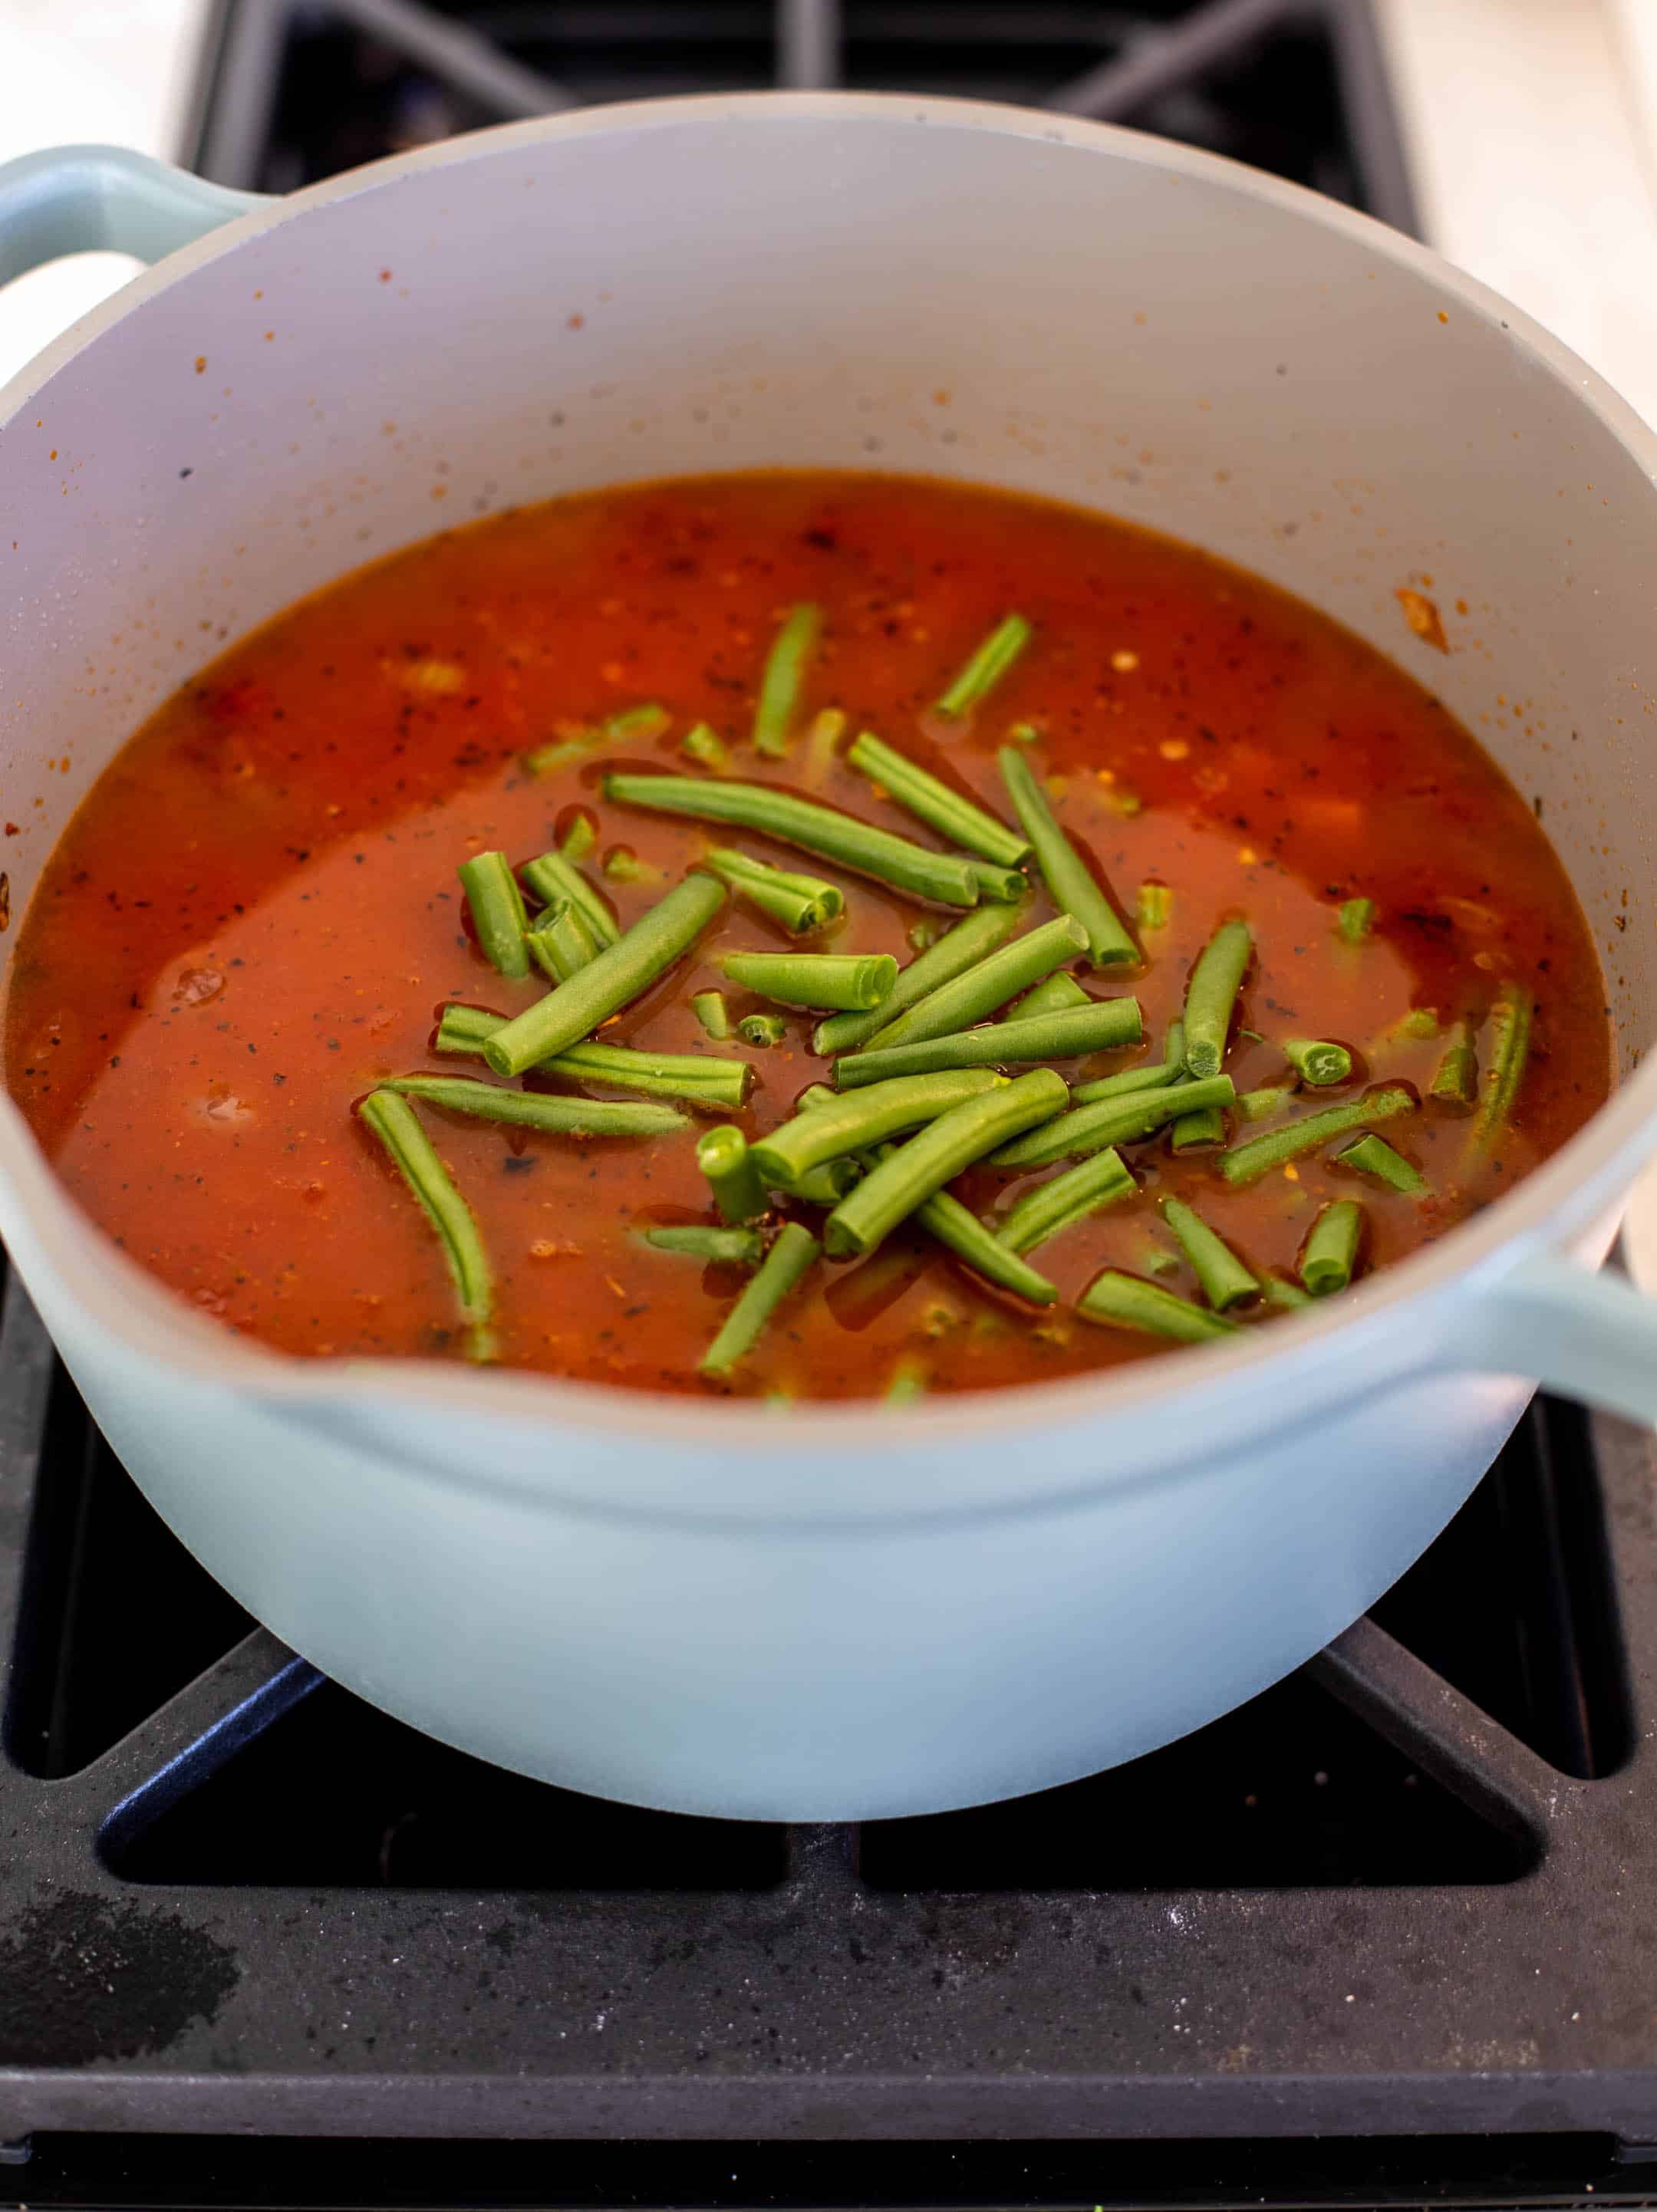
  • Fresh green beans!! I love green beans in minestrone. LOVE. 
  • Creamy cannellini beans. The best.
  • Lots of spices and an extra flavorful stock. 
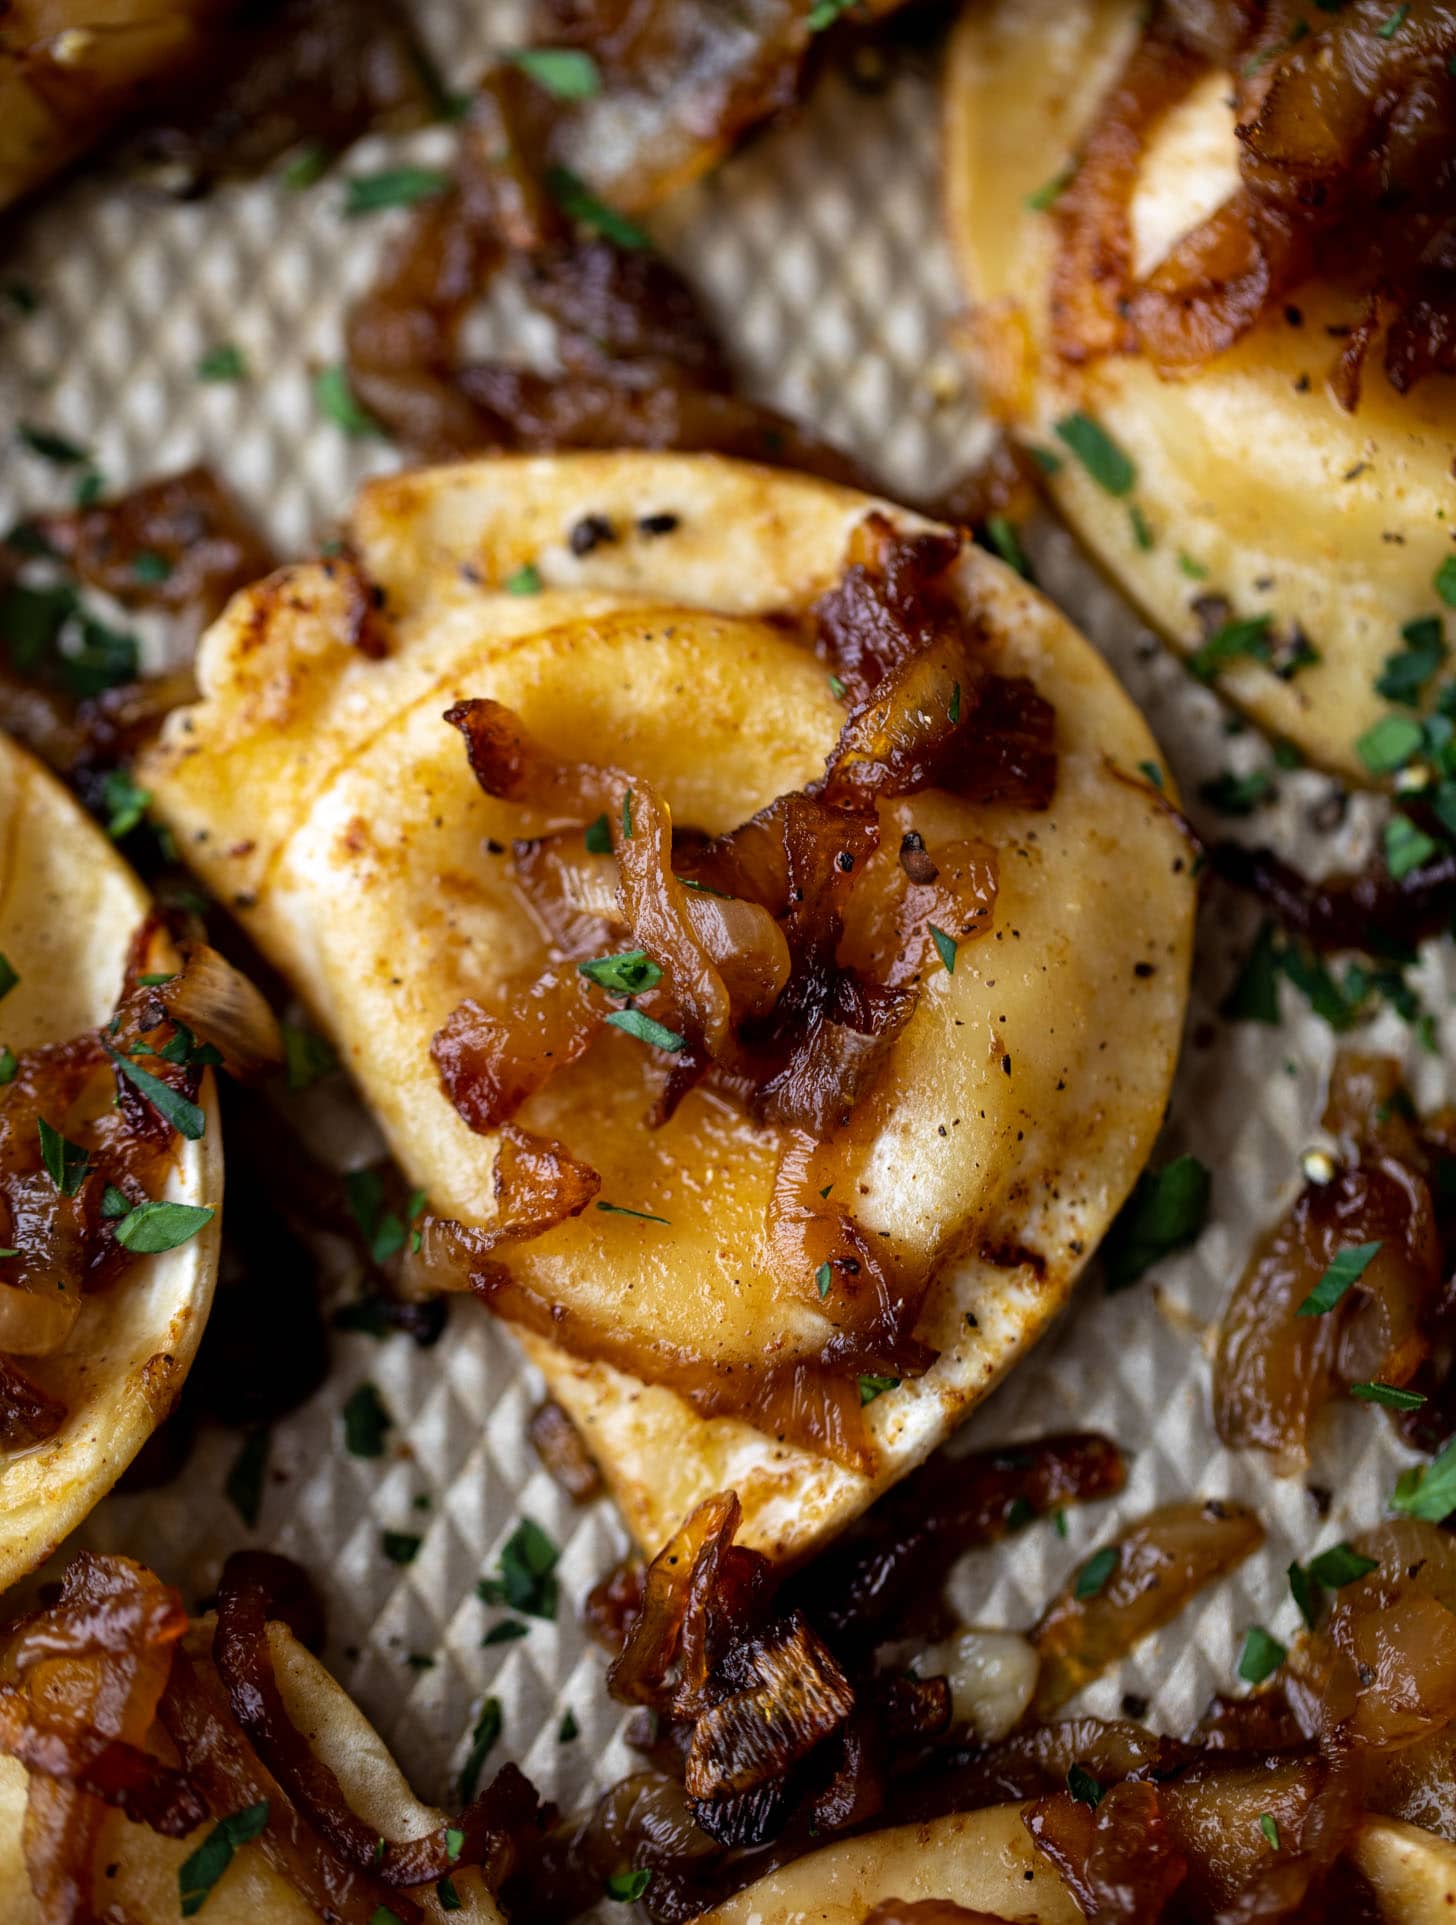
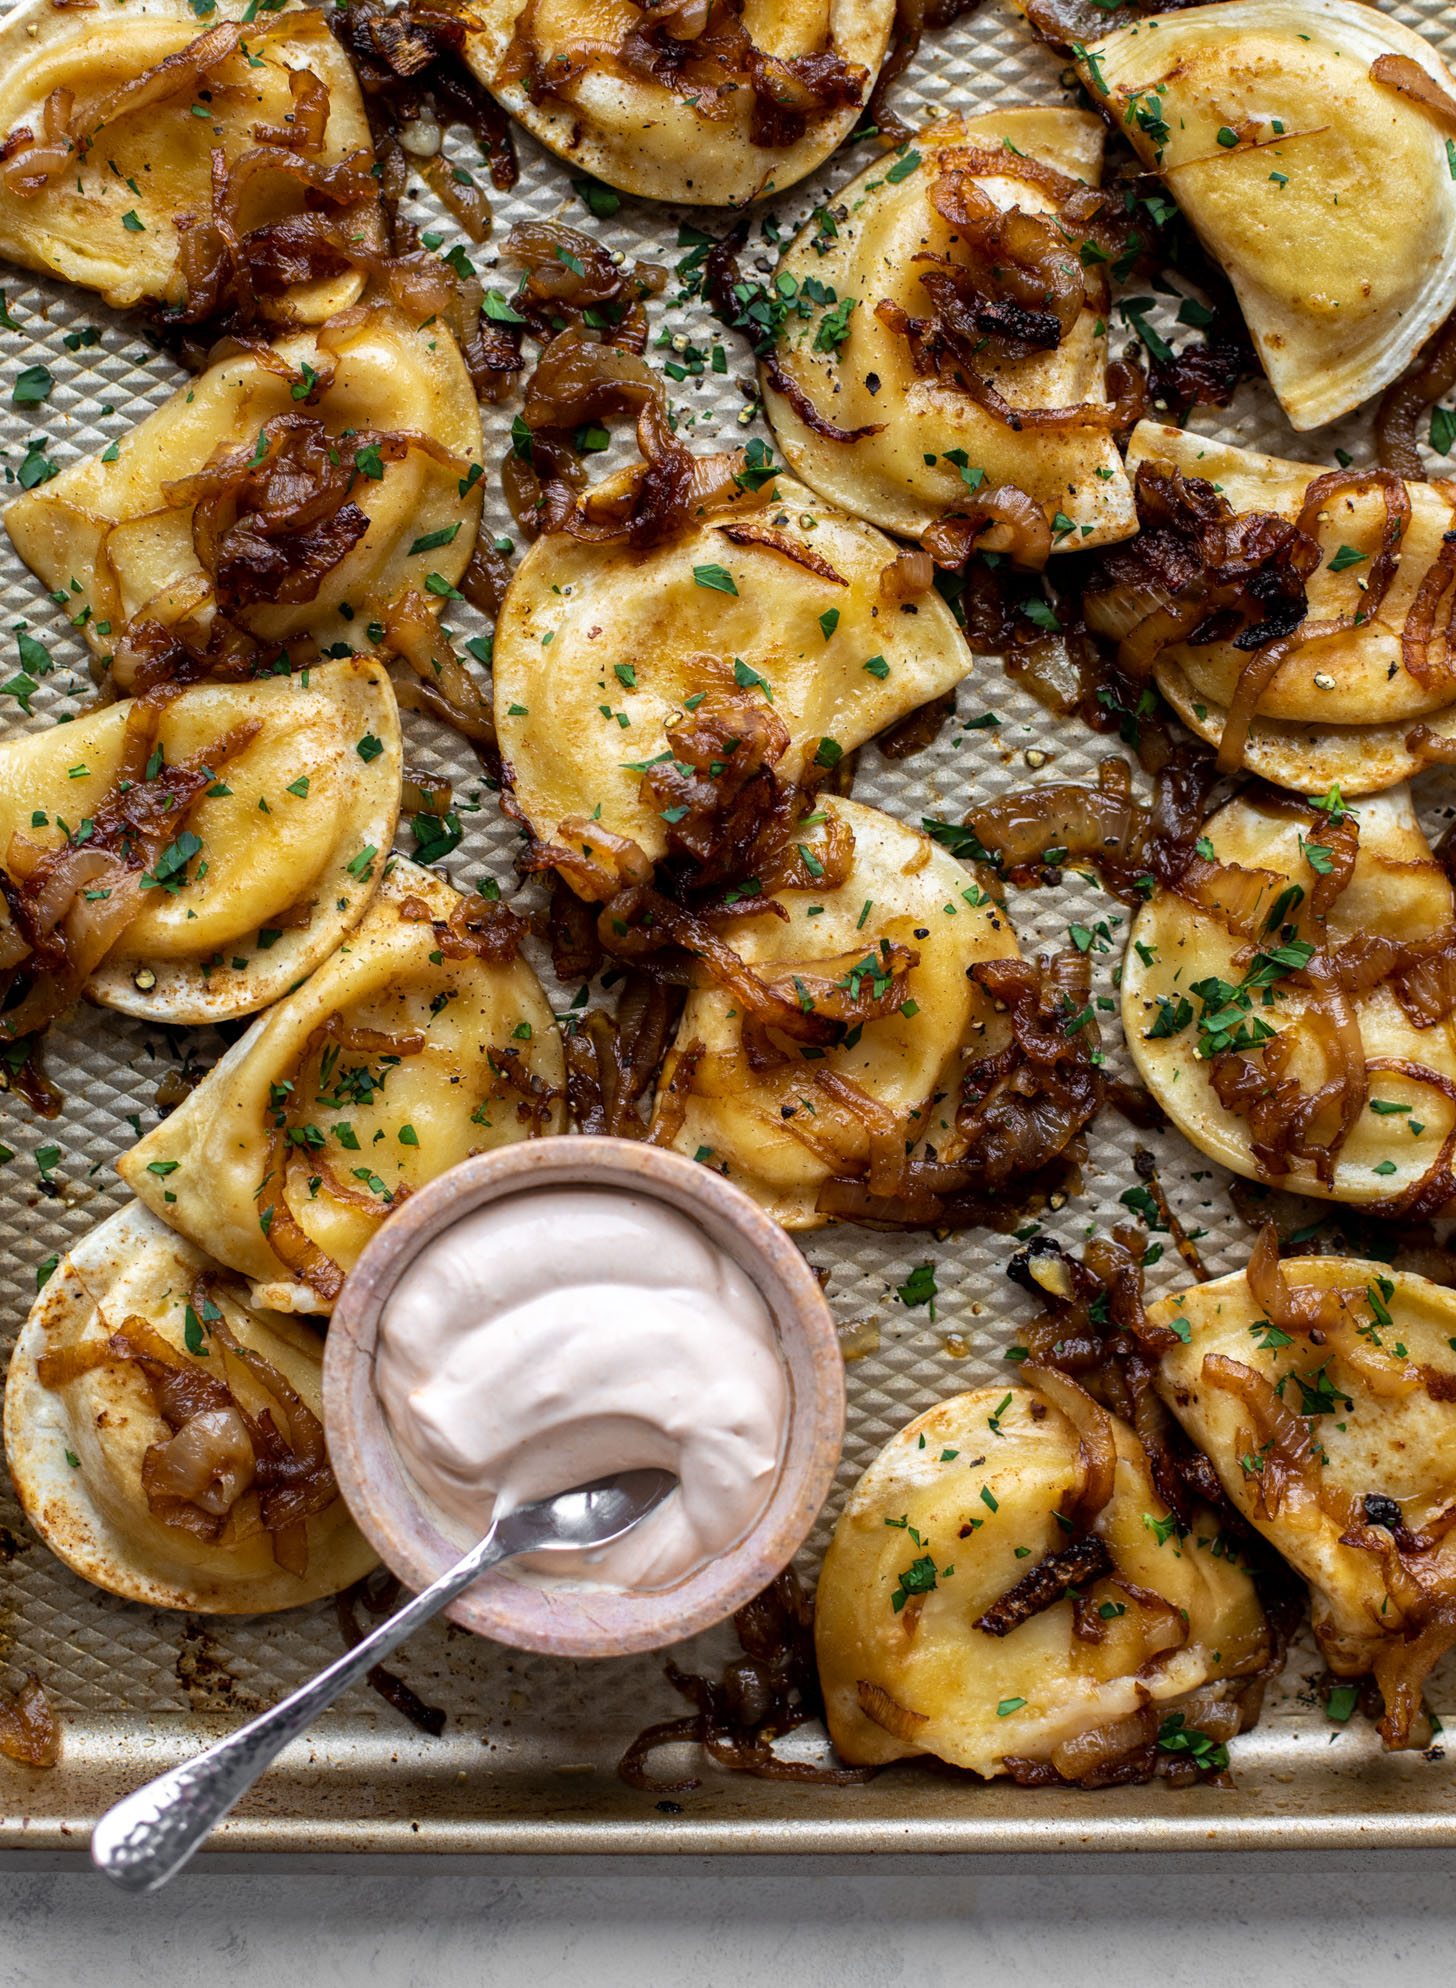
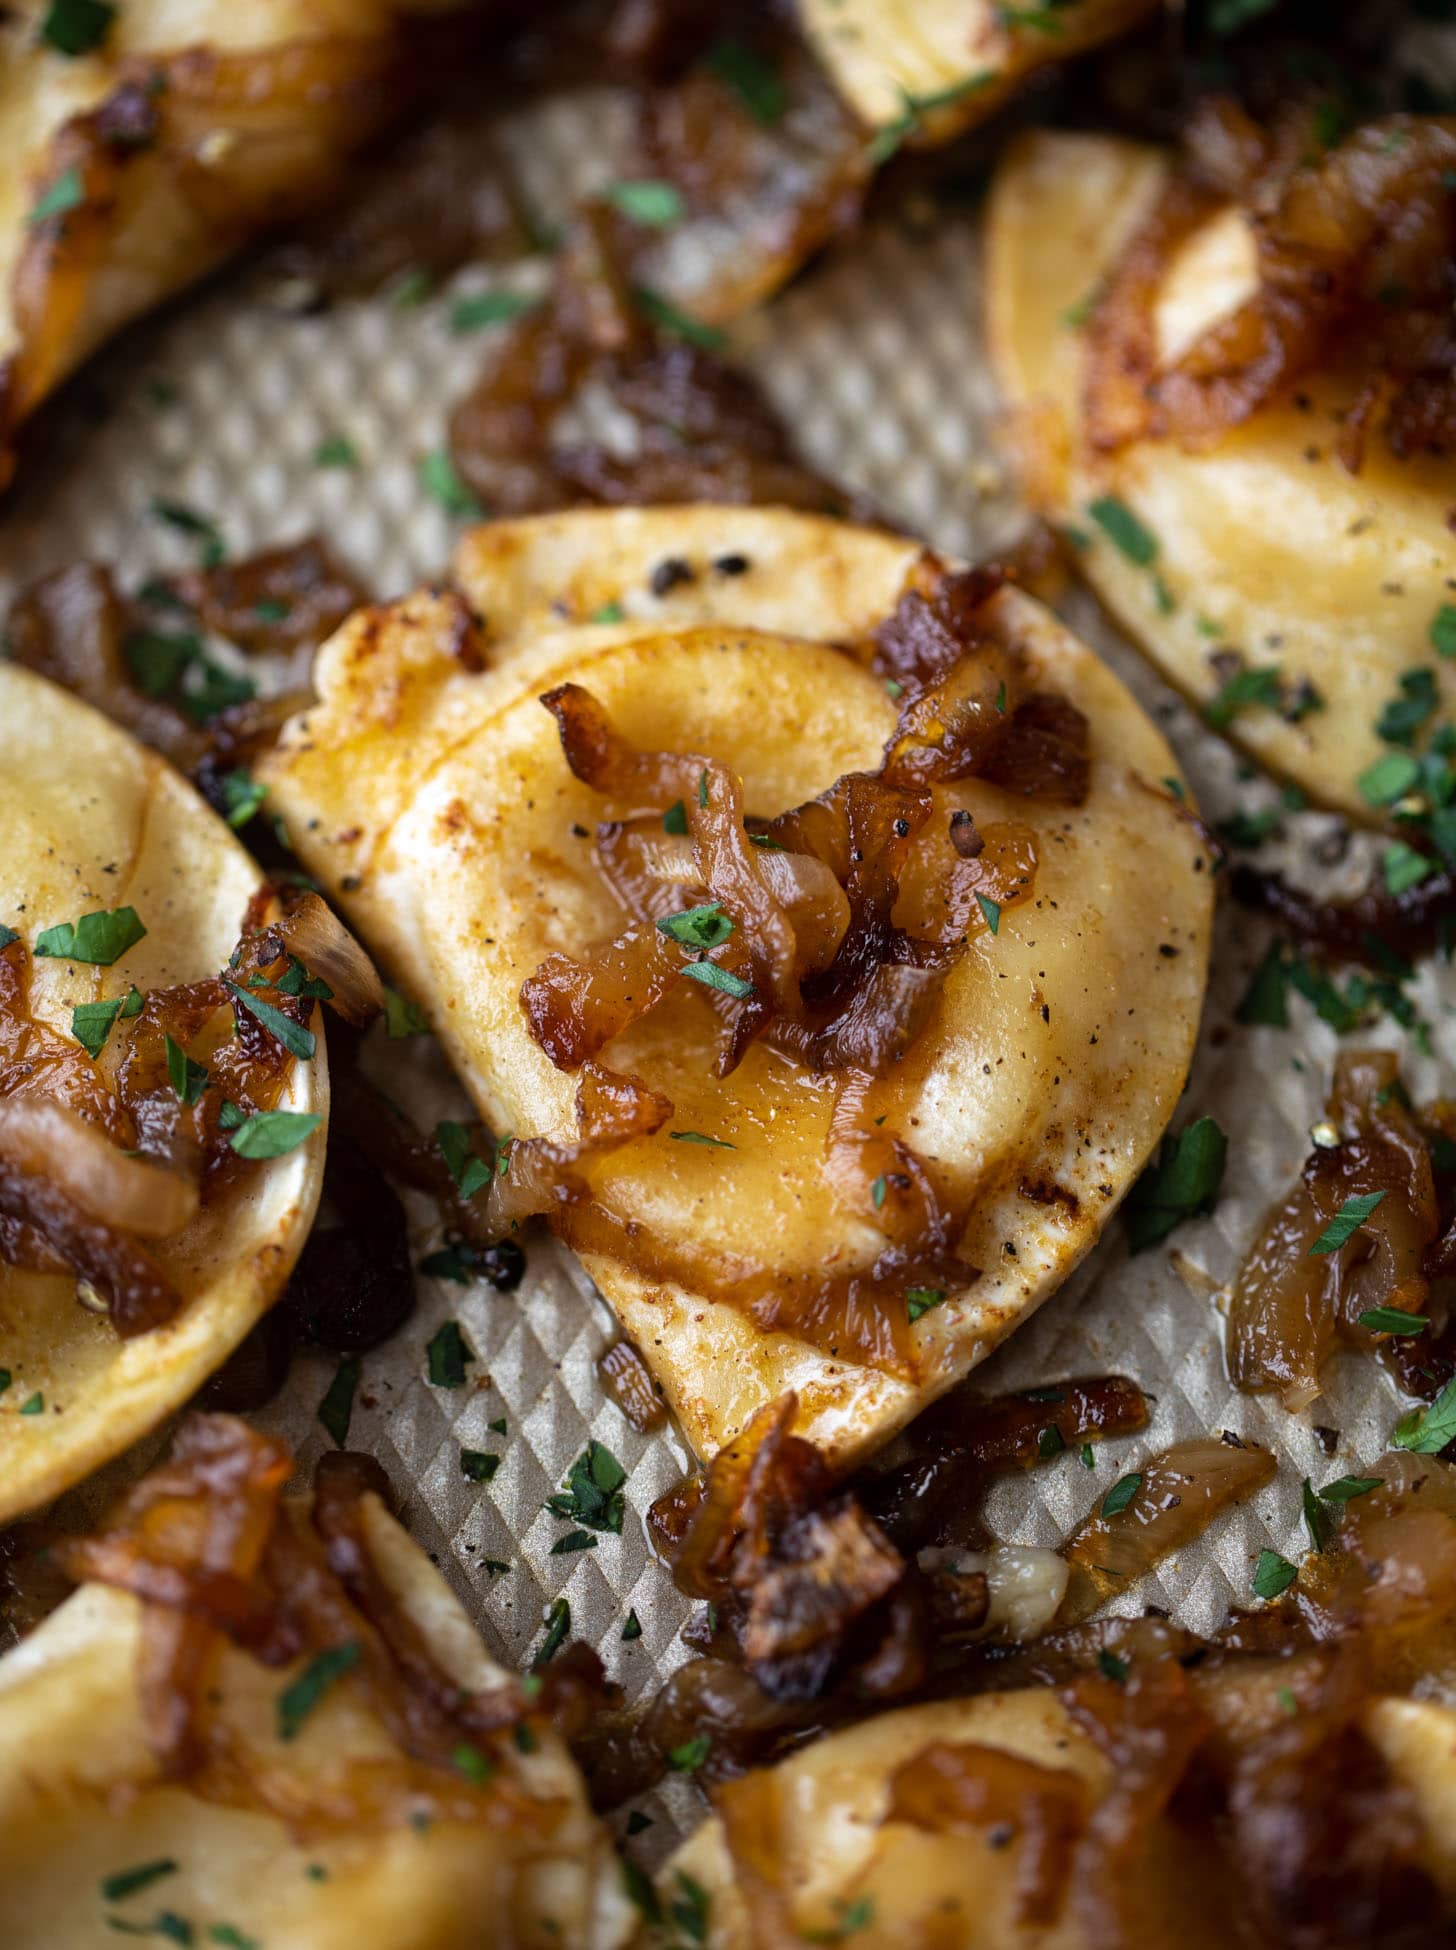
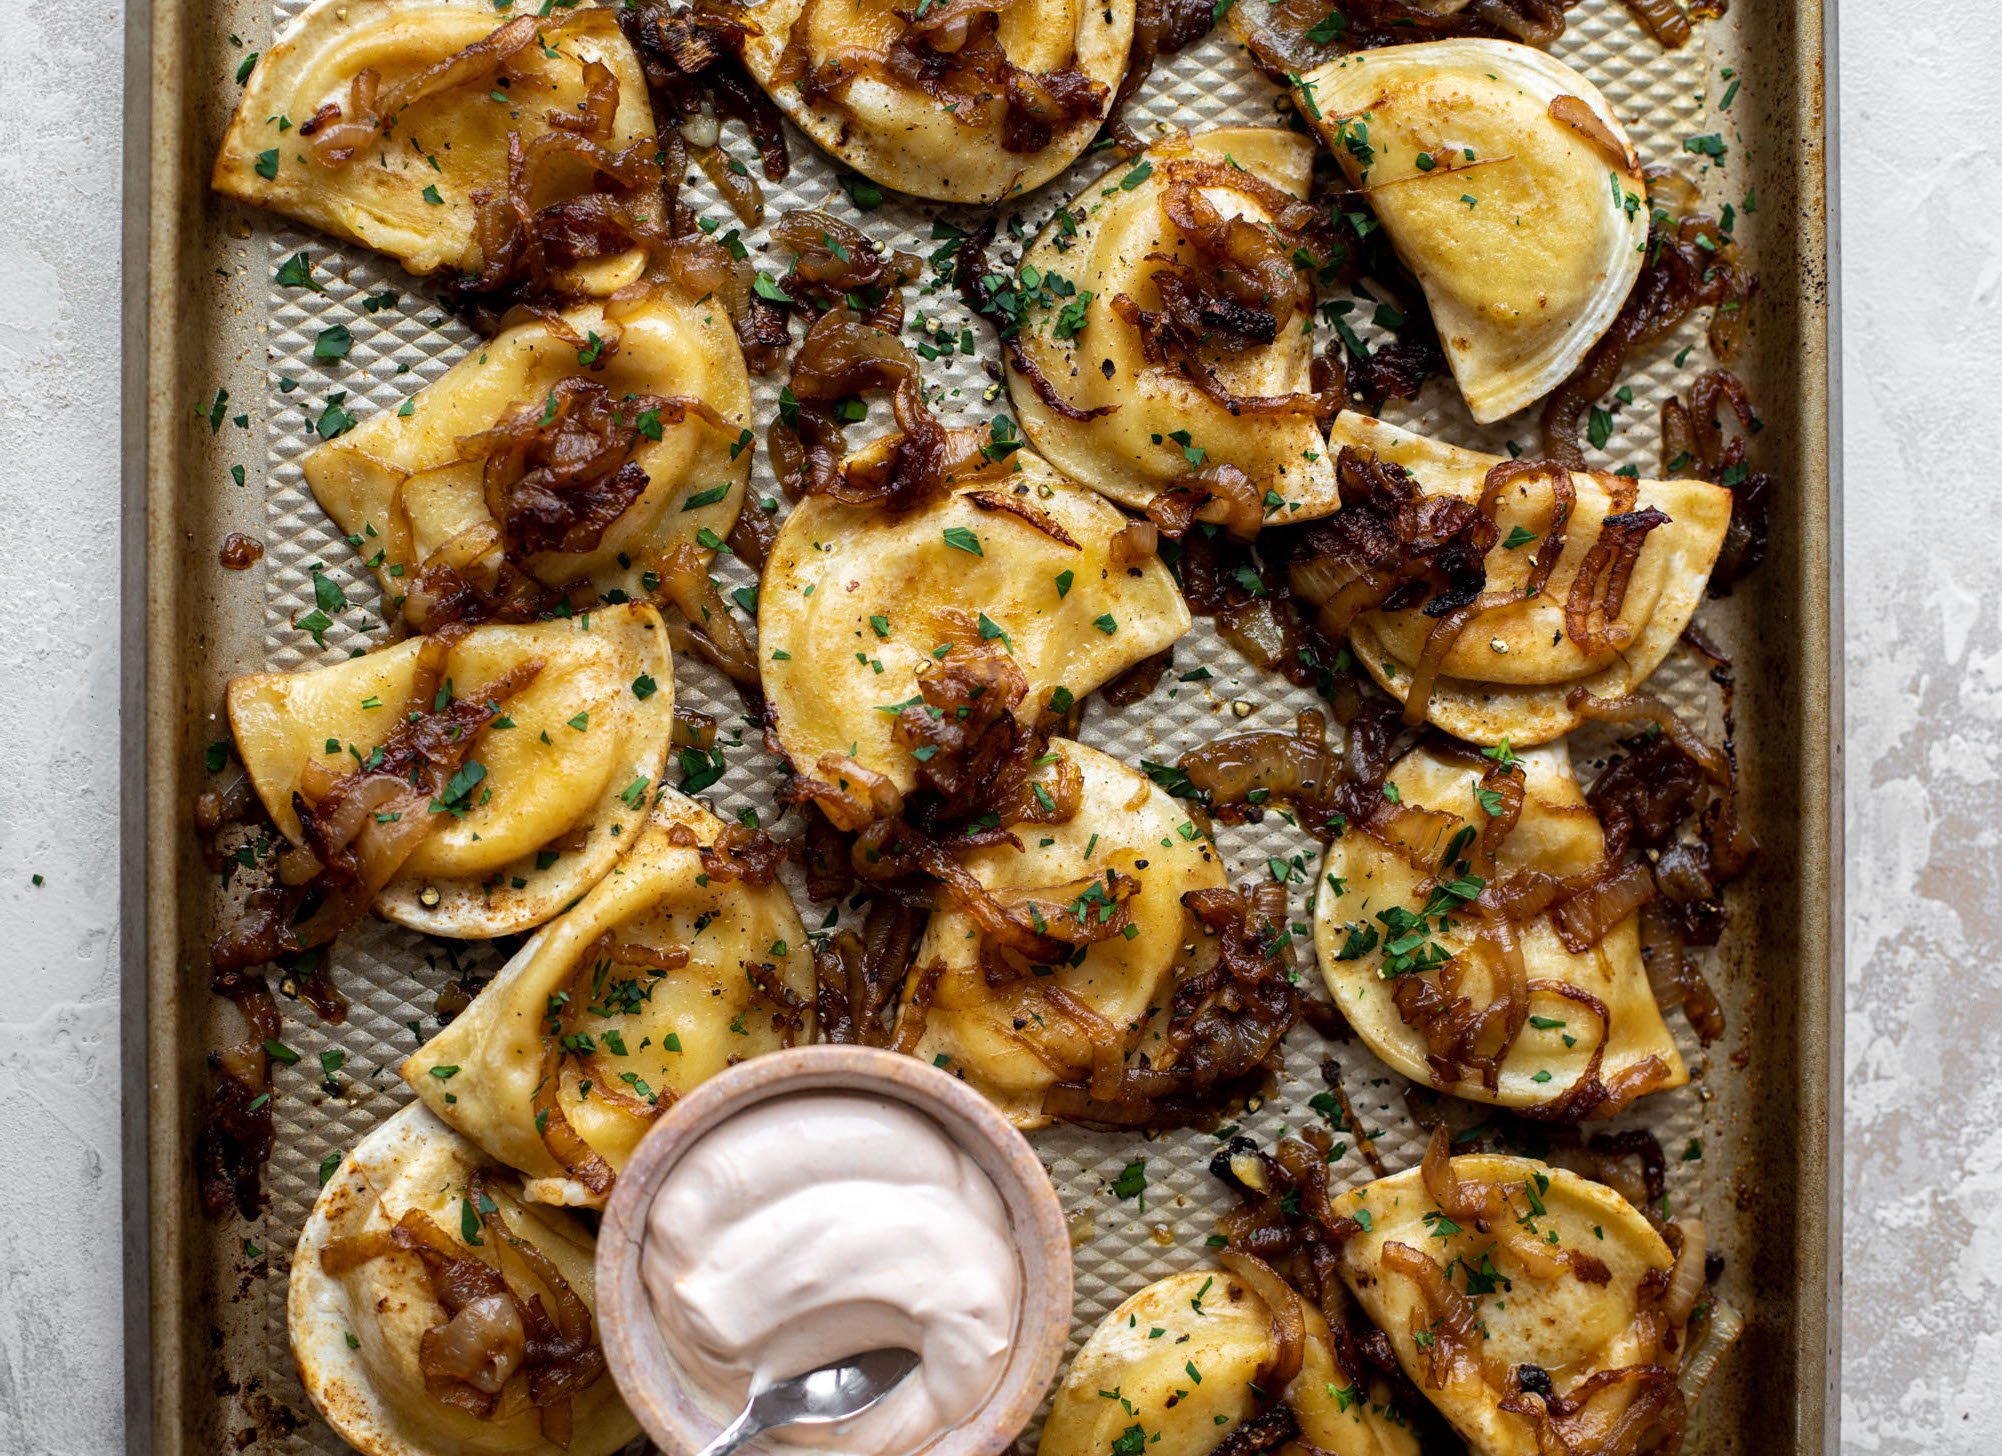
  • Cheese tortellini! Current favorite, obviously. 

cheese tortellini minestrone

The cheese tortellini is such a basic ingredient but adds so much to this soup. It makes it feel different and special and unique, which is really just what I need some weeknights when I’m trying to get dinner on the table. 

cheese tortellini minestrone

There are two options for the tortellini.

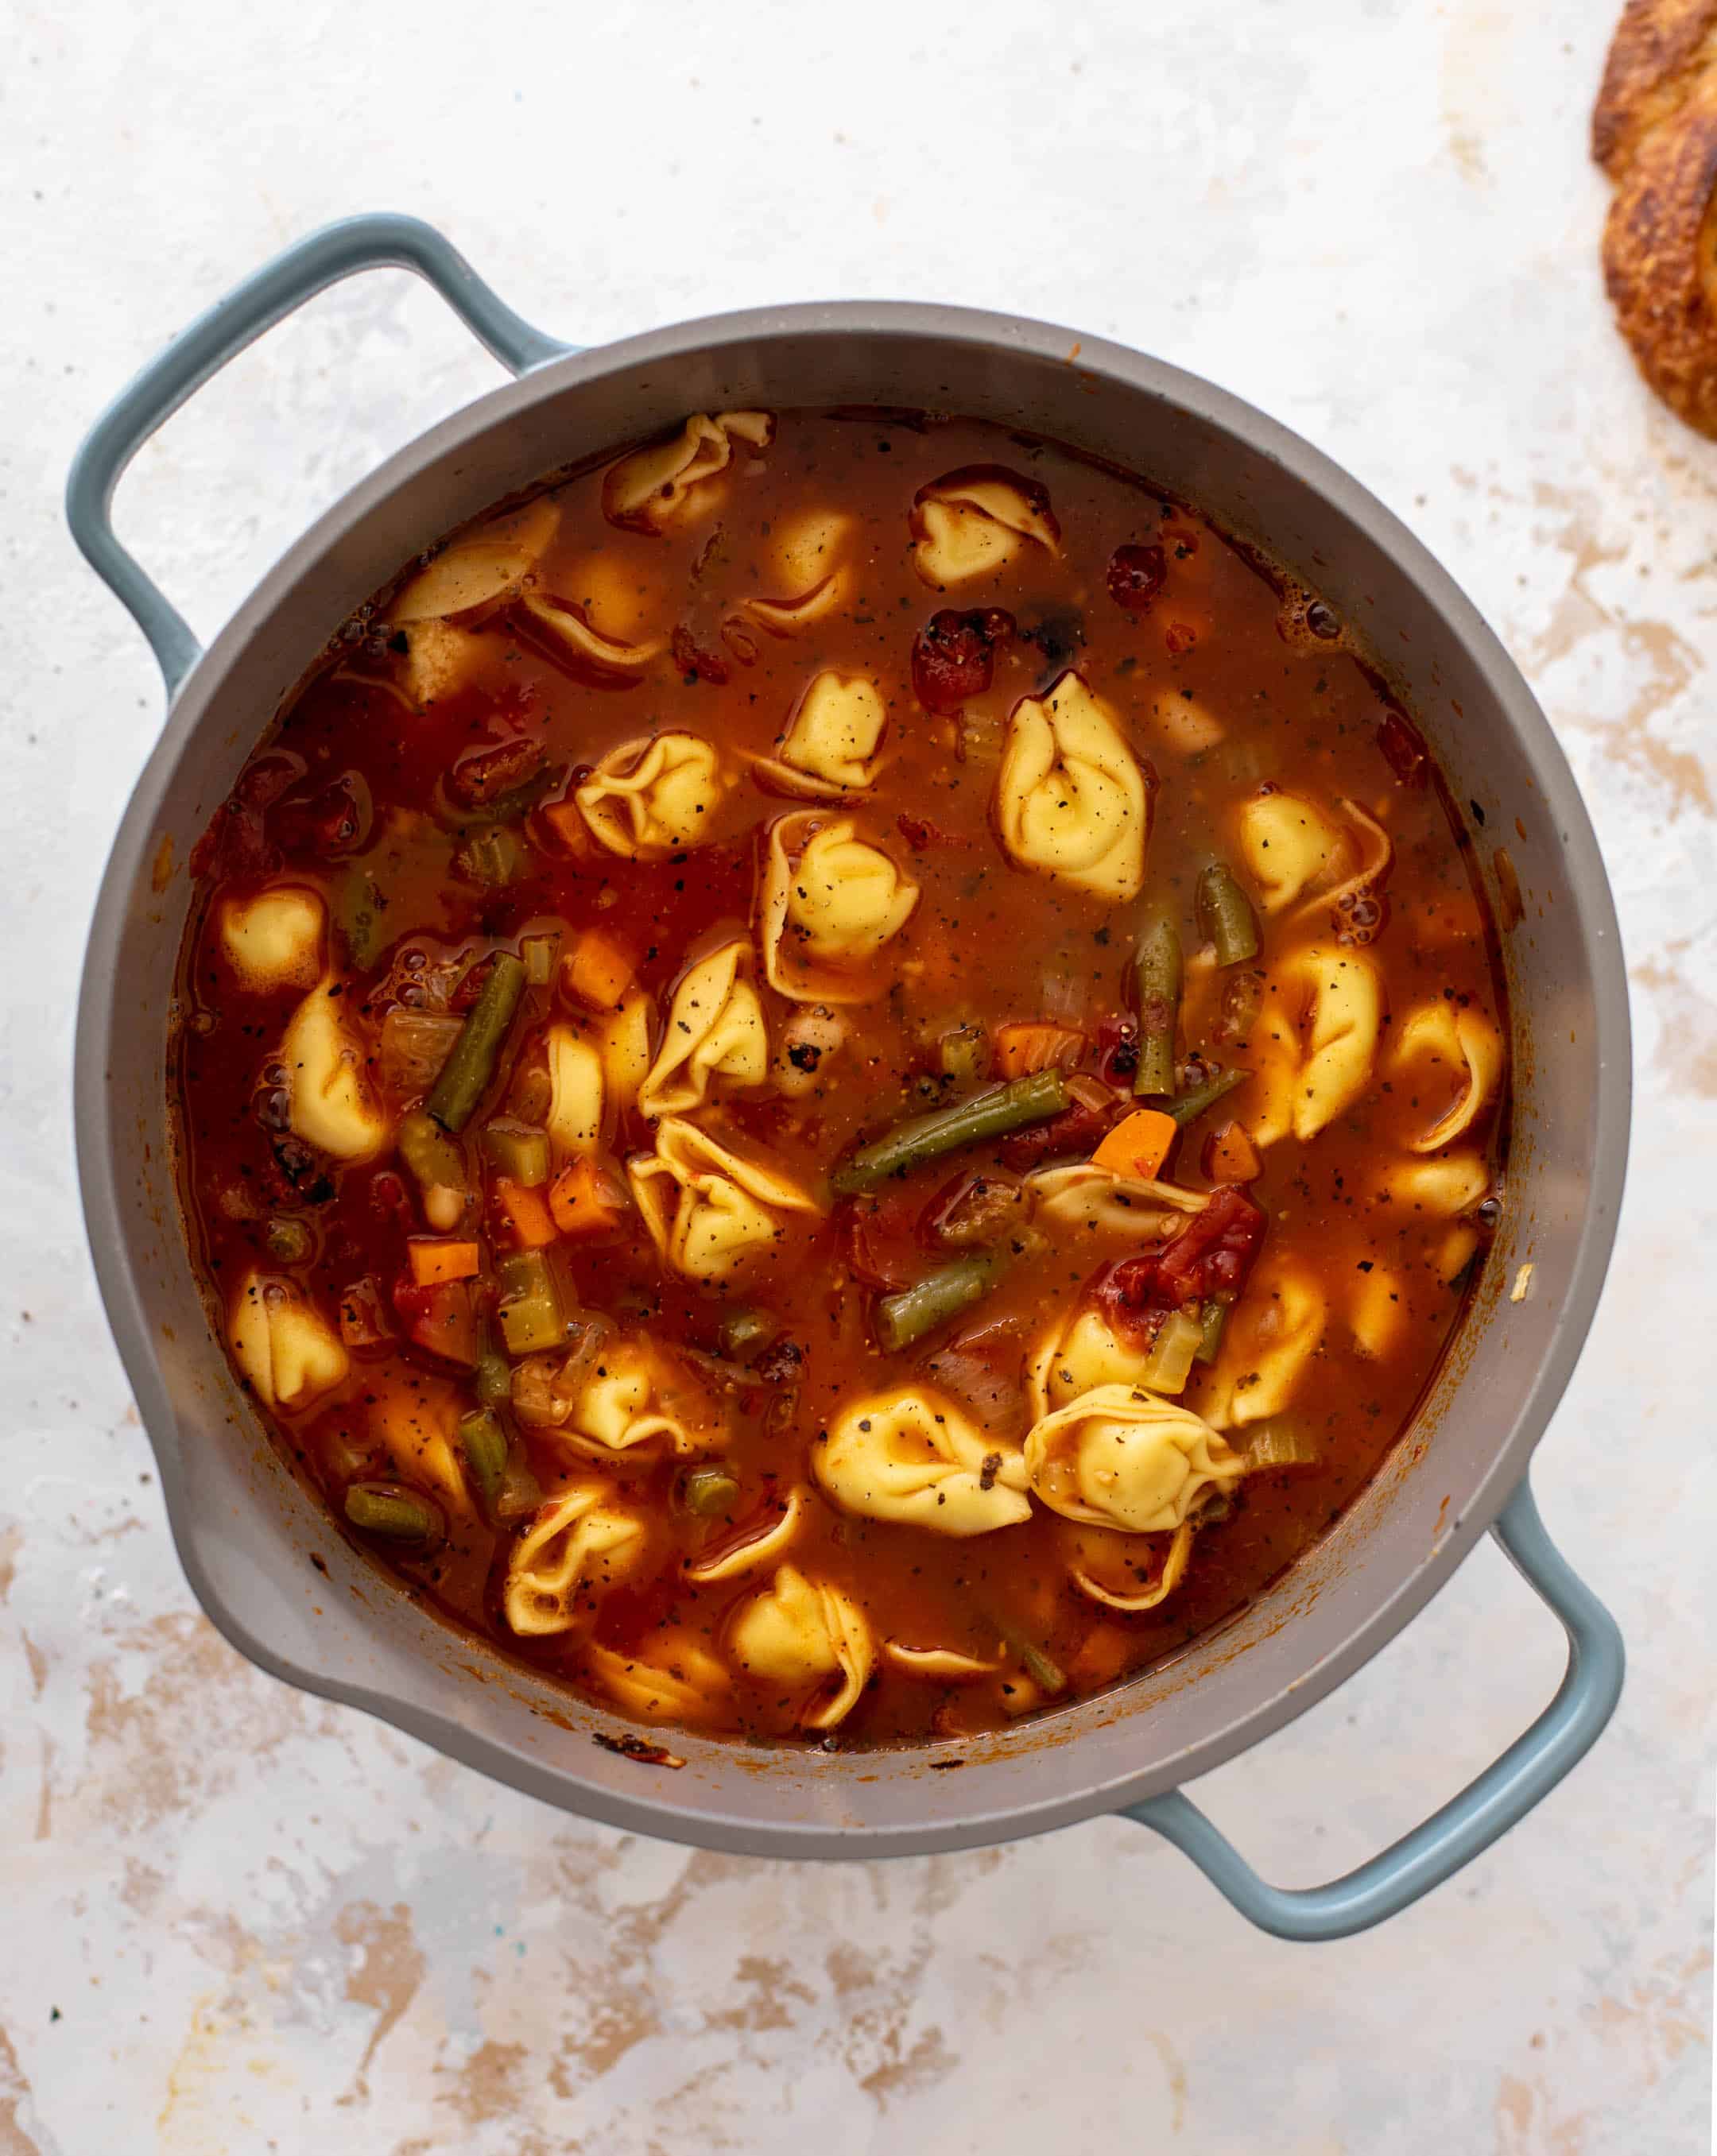
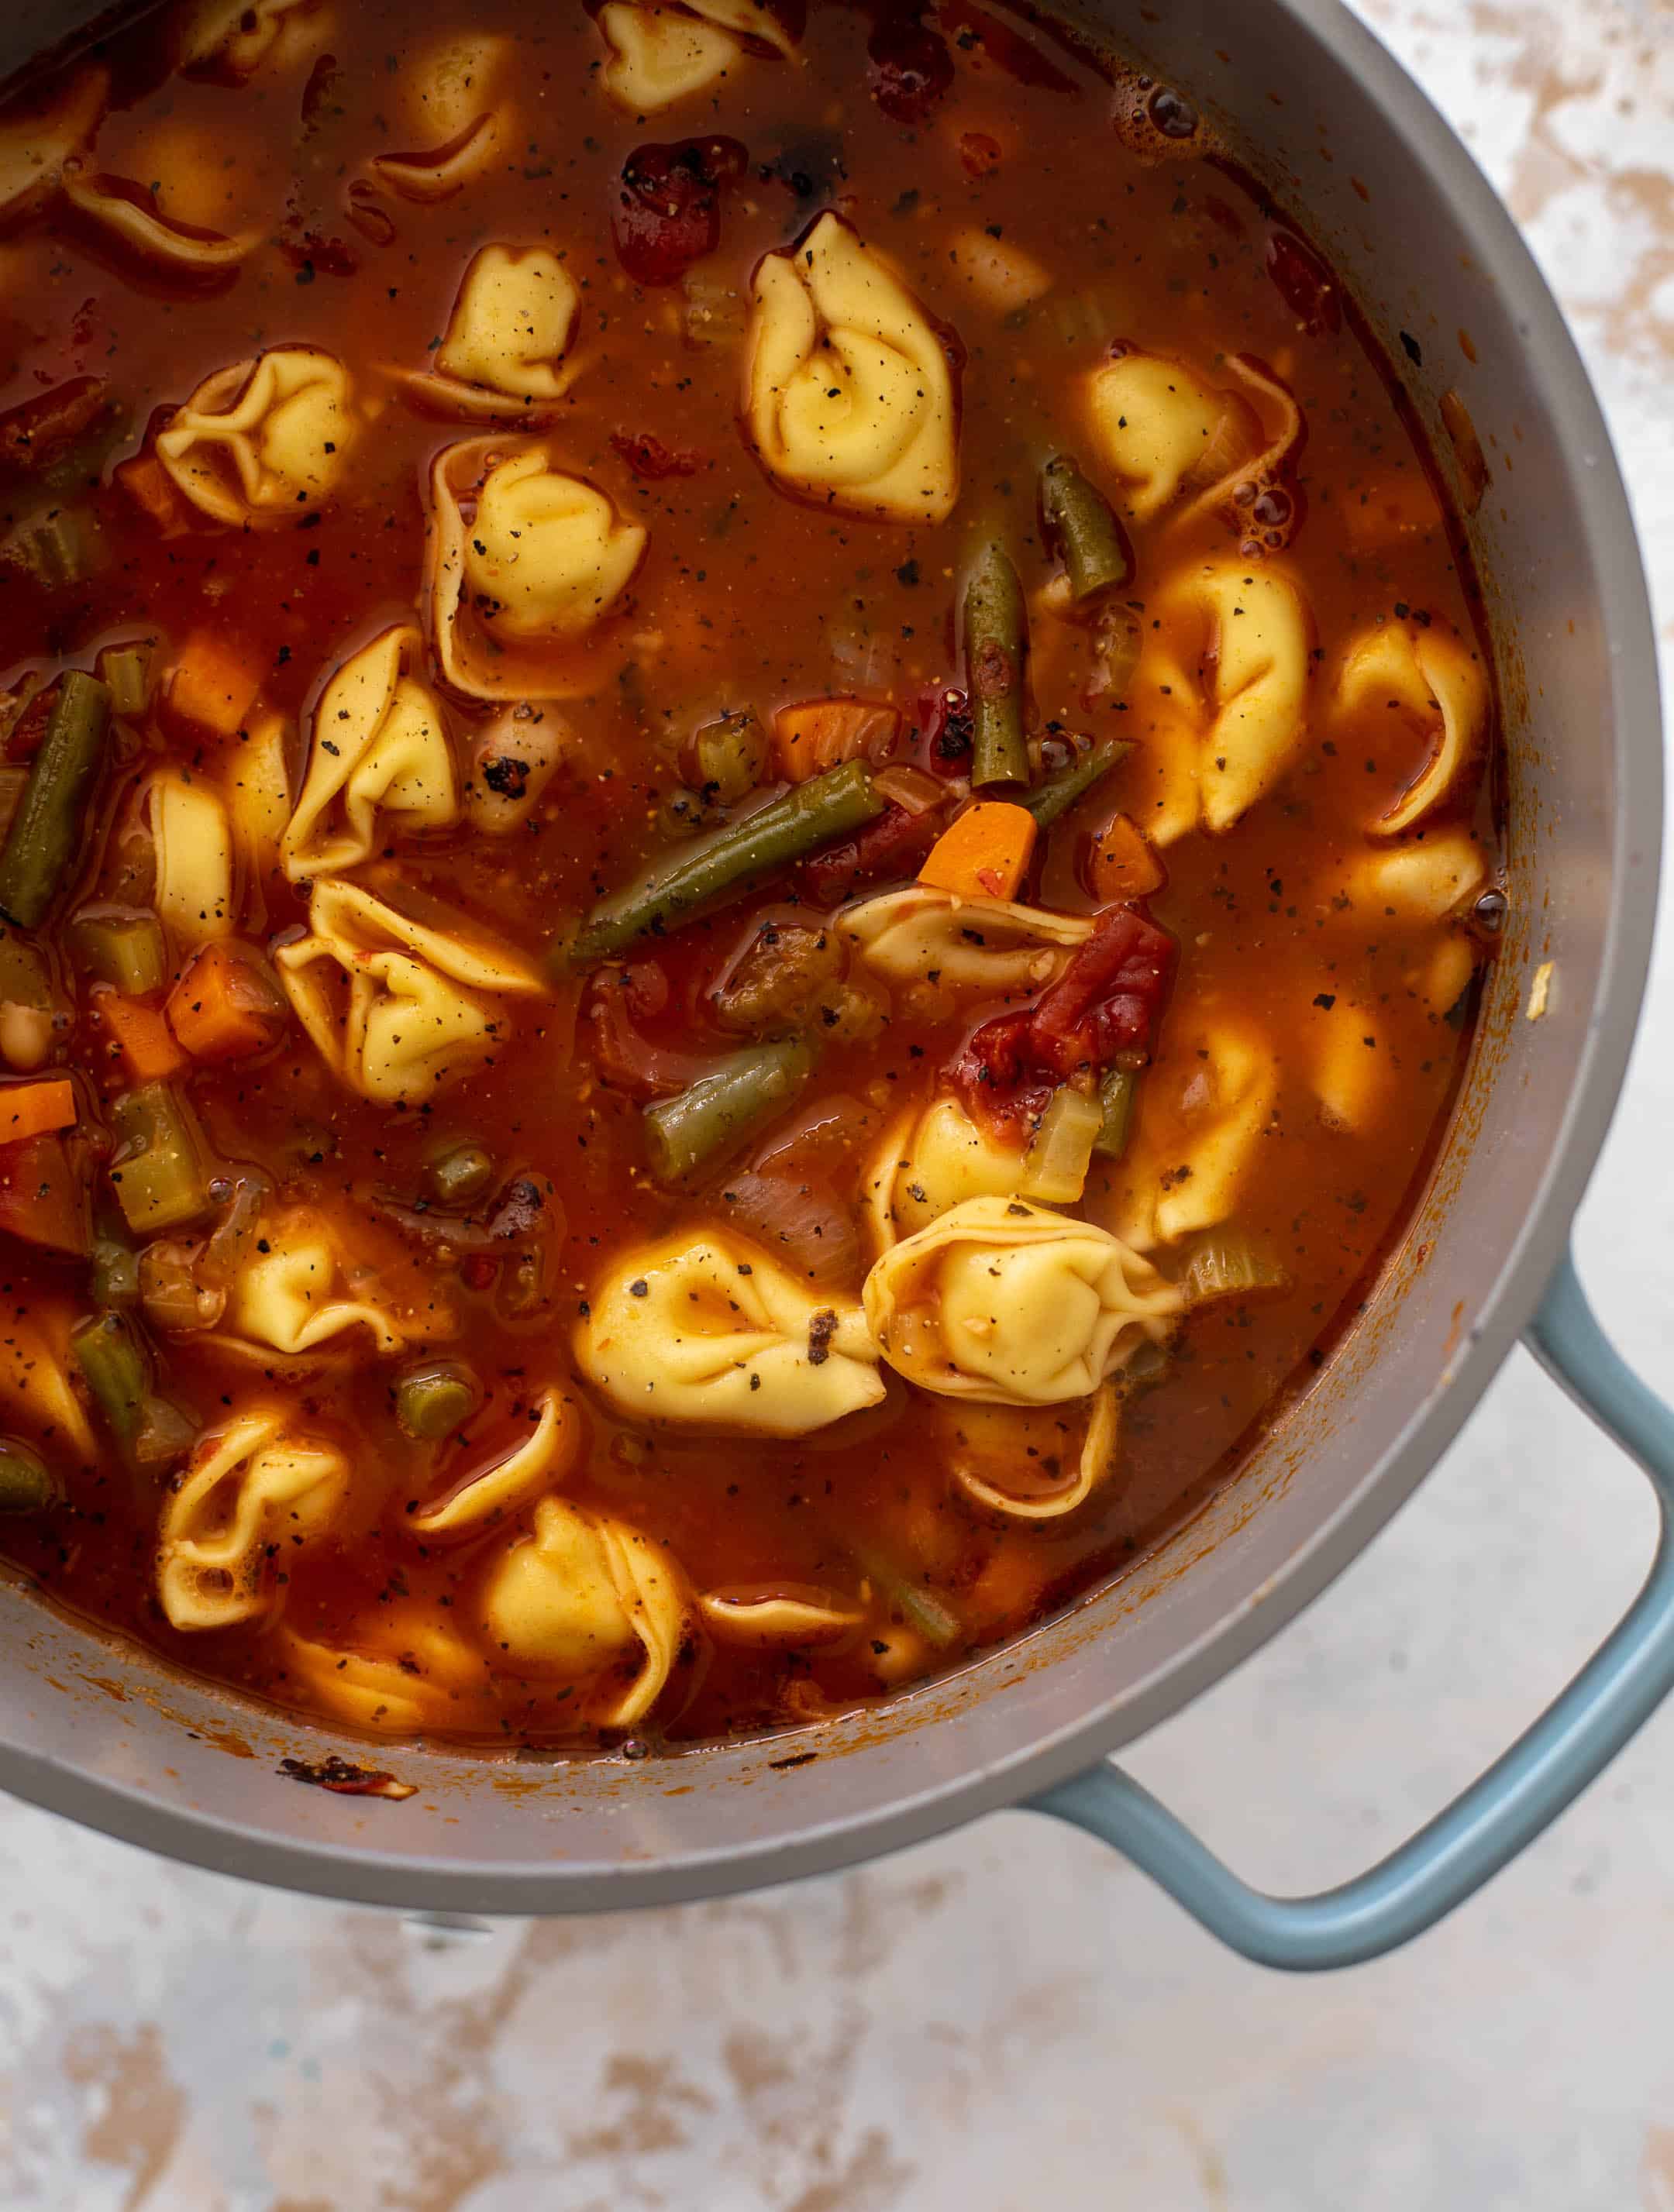
First, you can cook the tortellini right in the soup. If you’re feeding a big crowd, do this. Or if you don’t mind that your tortellini will suck up a lot of brother and make the soup thicker, you can do it. 

Next, you can cook the tortellini separately and store it separately too, only adding a bit of the pasta to the soup when serving. I like this method for leftovers and make-ahead lunches. Minestrone is always a great choice for meal prepping lunches. One we make often!  (more…)

The post Cheese Tortellini Minestrone Soup. appeared first on How Sweet Eats.

18 Jan 04:30

Easy Weeknight White Pizza.

by Jessica

This is the easiest white pizza recipe! Puff pastry gives it a super flaky, delicious crust and it’s so simple. Garlicky, cheesy and topped with sliced tomatoes, this is so delish to throw together after a busy day.

Raise your hand if you love white pizza!

easy weeknight white pizza

I know it’s technically not a weeknight today BUT! I wanted to have this all lined up for you in case you wanted to add it to your meal plan for next week. Or just have something SO easy and delicious to throw together over the weekend.

puff pastry, cheese and tomatoes

I’ve made many white pizzas on the blog before but this one comes close to our all-time favorite. Which is hilarious because it’s embarrassingly easy. It doesn’t even use real pizza dough!

And I clearly have a white pizza obsession, considering that I’ve done white pizza dip and white pizza pull-apart bread and white pizza lasagna. It has been a staple of pizza night in my family since I was a kid, so the flavors are nostalgic and comforting. And delicious! 

easy weeknight white pizza

I based this on my family’s favorite white pizza EVER. We’re talking a white pizza that has been everyone’s favorite for 30 years, maybe? A super long time. 

The crust is very flaky and pastry-like. It’s actually the reason that I first started using puff pastry as a cheaters pizza crust over a decade ago. Puff pastry is really the only way to easily mimic a flaky pizza crust, plus it tastes fantastic. Of course. 

And I think we all know how much I adore it! (Everyday Dinners may have six recipes with puff pastry… oops!)

easy weeknight white pizza

The white pizza that I’m referencing is fairly garlicky. If that kind of thing bothers you, just use less! It’s such a simple pizza too. Everyone LOVES it. 

easy weeknight white pizza

This is what you need for the weeknight white pizza: 

  • Puff pastry! I sound like a broken record since it is so frequently talked about here on the blog, but it’s super versatile. My favorite brand is the Wewalka puff pastry. The Wewalka one has no perforations and is just one large sheet. I absolutely LOVE it. And I find that it works best when you want to use puff pastry as a sheet, as opposed to cut outs, etc. 
  • I do a quick little garlic oil. Just olive oil and garlic, plus a pinch of crushed red pepper if you like it. Just a pinch. We’re not looking for heat here! 
  • Slice tomatoes, which we salt to remove a bit of the moisture. We don’t want them all wet on the puff pastry. And since we do this, they don’t have to be garden fresh or anything. You could get away with some of those less-than-ideal tomatoes from the grocery store in the winter. Because we’re salting and baking them! 
  • Cheese cheese cheese. I like to use a mix. Either freshly grated mozzarella or provolone works. You can use a bag of italian blend cheese. I don’t love bagged shredded cheese because it never melts as nicely as freshly grated, but if you like to use it, I highly suggest Tillamook. They make the best! I also do lots of parmesan too.
  • A sprinkle of dried herbs like basil or italian seasoning is great here too.

easy weeknight white pizza

The downside is that this doesn’t make a ton of pizza for a group. It serves two nicely especially if you have a salad on the side. It serves one if you’ve had A WEEK. It’s best when eaten right after making, but it’s still okay when reheated the next day in the oven. 

easy weeknight white pizza

I know I have a lot of favorites but I have to say that this is probably in my top ten favorite recipes of all time. It’s easy. And flavorful. It’s just simple and classic and lovely to eat. (more…)

The post Easy Weeknight White Pizza. appeared first on How Sweet Eats.

12 Jul 03:45

Bang Bang Grilled Corn.

by Jessica

This bang bang grilled corn is delicious! Drizzled with a creamy, sweet and spicy sauce, topped with cotija cheese. So good!

It’s finally corn on the cob season! WOOHOO! 

bang bang grilled corn

There is nothing we love more than a good ear of corn on a hot summer day. This recipe is so easy but adds a ton of flavor and is a fun way to take things over the top! 

Which of course, I have to do. Always.

At least it’s not as trashed up as hot cheetos grilled corn!

corn on the cob with braided husks

Bang bang corn just sounds like a thing, so let’s make it a thing! I promise you’ll be into it. 

I know I’ve done multiple versions of grilled corn over the last 13 years… grilled corn with bacon butter, grilled corn with sweet and mustard butter! It’s all so darn good, so I figured I had to try it drizzled with bang bang sauce. Like a take on mexican street corn, but with bang bang sauce!

bang bang sauce

First, the bang bang sauce! 

We absolutely love this bang bang sauce on so many things. I’m pretty sure it originated from Bonefish Grill and their bang bang shrimp – it’s a creamy, sweet chili sauce that tends to be blanketed on deliciously fried things. I’ve done bang bang shrimp of course, bang bang cauliflower (tacos AND salad!) and there is a to-die-for bang bang salmon burger in Everyday Dinners too! 

The bang bang sauce is a slightly sweet, spicy creamy drizzle that really plays to your taste buds – it is SO good. It’s not overly spicy (I don’t like a lot of heat, and I love it) and has just the perfect amount of bite. It’s a mix of mayo, sweet chili sauce and chili garlic sauce – so there is a slight bite, but nothing crazy.

grilled corn with braided husks

This time of year, we consume so much corn from our local farms. It’s finally PERFECT and will only be this delicious for six weeks or so… maybe eight if we’re lucky. While, sure, we are corn purists most of the time – even eating the kernels fresh from the cob (so crunchy! so sweet!), sometimes it’s fun to switch things up!

grilled corn drizzled with bang bang sauce

This is a great recipe to make if you want a fancyish side dish or are having a BBQ with friends. I grill the corn as I normally do, then drizzle with the bang bang sauce.

Next comes a sprinkle of cotija cheese. We always have it on hand. It’s crumbly, tangy and so savory. A little bit goes a long way!

Then the corn is finished off with a sprinkling of herbs. I prefer cilantro but if you’re in the camp that think cilantro tastes like soap, you can totally do parsley or any other fresh herb you love! 

The herbs add this refreshing flavor that really takes things over the top. (more…)

The post Bang Bang Grilled Corn. appeared first on How Sweet Eats.

30 Jun 04:45

Health Drink

You'd need to keep track of so many people! Would you use, like, Excel or something? Far too fancy for a simple country nanoenzyme developer like me.
12 Jun 04:13

Roasted Broccoli Pimento Cheddar Melts.

by Jessica

These roasted broccoli pimento cheese melts are a lovely little lunch or snack! Toasted sourdough, melty pimento cheese and charred broccoli come together to make the most perfect cheesy, crunchy toast. We love them!

These pimento cheese melts are the way to my heart! 

roasted broccoli pimento cheese melts

They are embarrassingly easy and incredibly delicious. So simple, yet pack a big punch.

A big lunch punch?!

Okay I’ll stop. They must find their way into your kitchen this week!

broccoli ready to roast

Last week, I promised you something fantastic with that pimento cheese recipe. And here is number one. A toasty sourdough, charred broccoli, melty, cheesy toast that will brighten your day. It can be a toast or even a crostini bite on little baguette slices. 

pimento cheese

If you find yourself with a plethora of pimento cheese… you have got to use it to make these wonderful melts! Sure, I’ve made pimento cheese grilled cheese before. And it’s super good. Very decadent and melty and wonderful. 

But if you want something slightly simpler and if you want to incorporate a little of that classic broccoli cheddar flavor, this melt will be your new BFF.

Make it into a sandwich, keep it open-faced – whatever you desire!

roasted broccoli pimento cheese melts out of the oven

It’s no secret what a fan of roasted broccoli we are in this house. I’ll spare you the ramble of “I just don’t know how it’s possible….” considering I loathed the sight of broccoli a few years ago. But it’s such a staple for us now – and if there is cheddar or any form of cheese involved?

HELLO I am so there.

roasted broccoli pimento cheese melts

First, we have all sorts of delish flavor going on here. Charred, roasted broccoli. Chewy yet toasted sourdough. All the savory, salty cheesy goodness. It’s a combination that cannot be beat.

Next, we have tons of texture too. The toast! The roasted broccoli! And the the gooey melty cheese. 

It’s an actual treat for your tastebuds.

roasted broccoli pimento cheese melts

As simple as it may be, it’s such a satisfying little meal. Pair it with a good greens salad or even an extra side of roasted broccoli. It’s filling, tastes wonderful and so super easy to throw together. (more…)

The post Roasted Broccoli Pimento Cheddar Melts. appeared first on How Sweet Eats.

23 Feb 02:32

Sheet Pan Pierogies with Caramelized Onions and Chipotle Sour Cream.

by Jessica

Sheet pan pierogies are on tap for today!

sheet pan pierogies with caramelized onions and chipotle sour cream

These little cloud-like pasta pillow puffs of love are ridiculously delicious, covered in caramelized onions and served with a chipotle sour cream.

It’s what dreams are made of!

caramelized onions

Living in Pittsburgh, pierogies are already a staple here. During Lent, it’s like we up the ante. I grew up working fish frys each Friday and serving tons of fish sandwiches and pierogi smothered in butter to everyone! With it being Ash Wednesday, I thought today would be the perfect time to introduce you to this little side dish that we are obsessed with.

sheet pan pierogies before the oven

Now I’ve made pierogi from scratch before, but this recipe is not for that! Well, it sort of it, if you have frozen ones. Or some that were freshly made and need to be cooked!

If you want to try your hand at homemade pierogi, I’ve made these sweet potato fontini ones and these pumpkin ones. Both are so, so good! 

And the best part about this recipe? You can use whatever variety of pierogi that you have and/or love. I am partial to the potato and cheddar version, but feel free to use your favorite.

There are no rules here! 

The next best part? We’re cooking these from frozen and making things caramely and flavorful. 

chipotle sour cream

I thought of this idea after making my sheet pan gnocchi for dinner a few weeks ago. It’s a similar pasta type thing, so I figured sheet pan pierogies had to work. And it did! 

Of course, why throw the pierogies in the oven instead of boiling for five minutes on the stovetop? 

It just adds some different flavor. The edges get crispy and roasty and wonderful. You can throw some caramelized onions on top – you can even throw in some peppers! Whatever you like. It also makes a big sheet pan at once that everyone can enjoy. Or you can even have leftovers.

sheet pan pierogies with caramelized onions

I start this out by caramelizing the onions on the stovetop. This isn’t fully necessary, but if you like more deeply caramelized onions, it definitely helps! I also cheat and add a caramelizing agent (did I make that up? maybe.) like balsamic vinegar or apple cider, about 10 minutes into the cooking process. This just helps the onions sweeten up a bit, so we don’t spend 45 minutes caramelizing them only to try and make a sheet pan meal for dinner.

You know?

sheet pan pierogies with caramelized onions and chipotle sour cream

So with that help, the onions are sweet and golden in about 15 (cheating) minutes. This is just to give them a head start, because they certainly do get more caramely in the oven! They will be in the oven for about 30ish minutes, so you don’t want to overdo it.

These are just so good.

P.S. I do give you a tip in the recipe below about skipping the pre-caramelization of the onions! You can do more of a method like my sheet pan gnocchi. The onions just won’t be quite as caramely. 

sheet pan pierogies with caramelized onions

I find that using frozen pierogies works great, but there are a few caveats. If you can manage to find a store-bought or local frozen pierogi brand, it will be better than say, Mrs Ts pierogies. I only say this because the Mrs Ts variety are kind of just thrown into a box, and they are more apt to freezer burn. Freezer burn pierogi pieces will harden and crisp up in the oven, and not in a good way. The classic store bought ones will still work, just be sure to use ones that have no freezer burn and fully brush them with olive oil. 

Using freshly frozen homemade pierogies is perfect too. Or you can even let frozen ones thaw just a little bit. You want to make sure they are fully tossed or brushed with olive oil, covered in some salt, pepper and garlic. Then top them with the onions and roast!

Feel free to add any other veggies you’d like. I have some delish sheet pan gnocchi variations coming in my next book, Everyday Dinners. You can also even add some sort of meat if you wish, maybe smoked sausage or something like that! I decided to keep it pretty basic since this is mostly a side dish for us. Especially during Lent! 

sheet pan pierogies with caramelized onions and chipotle sour cream

The kicker comes with the chipotle sour cream. It’s tangy and wonderful with a little hint of spice. Really adds so much to the pierogies and complements them so super well. 

You can find this in our kitchen constantly over the next few weeks!

sheet pan pierogies with caramelized onions and chipotle sour cream

Sheet Pan Pierogies

Print

Sheet Pan Pierogies

These sheet pan pierogies are the easiest ever! Throw frozen pierogies on a sheet pan with some onions and you're good to go. Yum!
Course Main Course, Side Dish
Cuisine American
Prep Time 15 minutes
Cook Time 25 minutes
Total Time 40 minutes
Servings 4 people
Author How Sweet Eats

Ingredients

  • 4 tablespoons unsalted butter
  • 2 large sweet onions, thinly sliced
  • kosher salt and pepper
  • 1 to 2 tablespoons balsamic vinegar
  • 16 ounces frozen pierogies
  • 2 tablespoons olive oil
  • ½ teaspoon garlic powder
  • ½ teaspoon smoked paprika
  • fresh chives or parsley for topping

chipotle sour cream

  • ⅔ cup sour cream
  • 1 diced chipotle pepper
  • 2 teaspoons adobo sauce from the can of chipotles

Instructions

  • Preheat the oven to 400 degrees F.
  • Heat the butter in a skillet over medium heat. Add the sliced onions with a big pinch of salt and pepper. Cook, stirring often, until the onions slightly soften, about 10 minutes. Reduce the heat to low and stir in the balsamic vinegar. Continue to stir and cook the onions for 5 more minutes. The onions should be soft and slightly caramely looking. Turn off the heat.
  • Spray a sheet pan with olive oil or nonstick spray - make sure the bottom of the pan is covered so the pierogies don’t stick and rip. Place the pierogies on and toss them or brush them well in the olive oil. You want all edges of the pierogies covered! Sprinkles with salt, pepper, garlic powder and smoked paprika. Spoon the caramelized onions from the pan (along with any butter in in the pan) all over the pierogies.
  • Roast for 20 to 30 minutes, flipping the pierogies once in between. Sprinkle with fresh herbs and serve immediately with the chipotle sour cream.
  • Note: alternatively, you can place raw sliced onions (and even peppers) on the baking sheet and toss with olive oil and balsamic. Place the pierogies on top. This eliminates the onion caramelizing step - but they won’t be as caramely.

chipotle sour cream

  • Whisk ingredients together until combined. You can store this in the fridge a day or so ahead of time.

sheet pan pierogies with caramelized onions and chipotle sour cream

Chewy, crispy, flavorful and pillowy!!

The post Sheet Pan Pierogies with Caramelized Onions and Chipotle Sour Cream. appeared first on How Sweet Eats.

22 Jan 03:16

Bolognese Stuffed Peppers.

by Jessica

These bolognese stuffed peppers are cheesy, saucy and a weeknight dinner dream!

bolognese stuffed peppers

Seriously, these will quickly become a new favorite. They are a quick and delish way to make dinner feel special and satisfying. And if you have leftover bolognese, this will come together in MINUTES!!

bolognese stuffed peppers

Bolognese is probably the #1 favorite meal made in this house. My original, AMAZING recipe is in The Pretty Dish. It’s definitely one of the most popular dishes in the book and it is so, so good.

I’ve shared a few quicker weeknight versions of it on the blog, so that’s what you’ll find below! I’m making a ground turkey version today for these peppers and it’s one that you can throw together in 30 minutes. Most bolognese recipes do taste better as they simmer and sit with time. This is no exception, but it’s still REALLY good if you stuff the peppers immediately. 

bolognese stuffed peppers

You can also make the bolognese part ahead of time. My original bolognese recipe in the book makes a large amount and I always freeze (at least!) half. That means I constantly have bolognese on hand, which makes throwing these peppers together a BREEZE. 

Oh and P.S. – I also have a vegetarian version of this bolognese right here! My lentil bolognese is equally as delicious and I have actually served it to Eddie WITHOUT HIM REALIZING there is no meat.

Yes. Let’s just say that may have been one of the greatest successes in my life. It’s true.

bolognese stuffed peppers

Now, this recipe!

Before the holidays, I saw something similar on the kitchn and was like… whoa. I always have bolognese on hand so I gotta make this. So I did!

I made a big batch of my bolognese to make lasagna for Christmas Day, and this is what I did with the leftovers. In less than a month, this alone has become a hugely requested meal in our house. Eddie loves it, wants to take versions of it for lunch – it’s just so good.

bolognese stuffed peppers

Now here’s the secret! I first shared this in my turkey taco stuffed pepper recipe last year. The key to fabulous stuffed peppers? Roast the peppers first.

YES!

Roast them first while you’re preparing the filling. This allows them to get a bit of that roasty, caramely, flavor on their own. It makes the peppers taste SO GOOD! I realize this doesn’t seem like much, but I promise it’s a game changer and many of you have raved about the outcome.

The same goes for this recipe. Roasting the peppers ahead of time is just wonderful and adds a lot to the recipe. Plus, you have the time for it – the bolognese will take about 30 minutes to come together, so you may as well do a quick roast of the peppers while you cook! 

bolognese stuffed peppers

Now I hope I’ve convinced you to try it this week!

bolognese stuffed peppers

Bolognese Stuffed Peppers

Print

Bolognese Stuffed Peppers

These bolognese stuffed peppers are the perfect weeknight meal! Use beef, turkey or even lentils to make the bolognese you love. So delish!
Course Main Course
Cuisine American
Prep Time 20 minutes
Cook Time 40 minutes
Total Time 1 hour
Servings 4 to 6 people
Author How Sweet Eats

Ingredients

  • 4 bell peppers, sliced in half lengthwise, seeds removed
  • 2 tablespoons olive oil
  • kosher salt and pepper
  • 1 sweet onion diced
  • 4 garlic cloves minced
  • 8 ounces cremini mushrooms chopped
  • 1 pound lean ground turkey, I like 94% lean
  • 2 tablespoons tomato paste
  • 1/2 teaspoon dried basil
  • 1/2 teaspoon dried oregano
  • 1/4 teaspoon crushed red pepper flakes
  • 1 tablespoon brown sugar
  • 1/2 cup dry red wine
  • 1 14 ounce can fire roasted tomatoes
  • 1 28 ounce can crushed tomatoes
  • 1/2 cup freshly grated parmesan cheese, plus more for serving
  • 1 cup freshly grated mozzarella or provolone cheese

Instructions

  • NOTE: Remember that you can use my LENTIL BOLOGNESE recipe linked above in the post for this to be vegetarian!
  • Preheat the oven to 400 degrees F. Brush the peppers (inside and outsides) with 1 tablespoon of the olive oil and sprinkle with a big pinch of salt and pepper. Place the peppers on a baking sheet and roast for 15 to 20 minutes.
  • While the peppers are roasting, make the bolognese.
  • Heat a large pot over medium heat and add the remaining tablespoon of olive oil. Add in the onions with a pinch of salt and pepper and cook, stirring occasionally, until softened, about 5 to 6 minutes. Add in the garlic and mushrooms. Stir and cook for another 5 or 6 minutes, until the mushrooms soften. Add in the turkey and break it apart with a wooden spoon. Brown it, stirring and breaking it apart, until it's cooked through, about 6 to 8 minutes. Stir in the tomato paste, dried basil, oregano, pepper flakes and brown sugar. Cook for 2 more minutes.
  • Add in the wine, tomatoes and parmesan. Bring the mixture to a boil then reduce to a simmer and cover, cooking for 15 minutes (or even longer if you wish!). You can make this ahead of time, FYI!
  • Remove the peppers from the oven. Fill the peppers with the bolognese mixture. Top with the grated cheese. Stick them back in the oven for 15 minutes until the cheese is melty. Remove and top with parmesan before serving.

Notes

inspired by the kitchn

bolognese stuffed peppers

That cheese pull though.

The post Bolognese Stuffed Peppers. appeared first on How Sweet Eats.

16 Nov 22:15

Butternut White Chicken Chili.

by Jessica

Oh how I am so in love with this butternut white chicken chili!

butternut white chicken chili

It feels like it’s been forever since I shared an actual weeknight dinner recipe with you! I dedicated the last two weeks to having the most delicious, classic Thanksgiving ever, whether you’re cooking for yourself or a small group or doing the virtual partay, and I’m so glad you guys enjoyed it. But here’s the thing – we still need to eat REGULAR dinner too. 

I find that this time of year is when I struggle most with dinners. It works out best for us when I plan ahead and stick to our plan. That’s the key! 

P.S. head to instagram to watch me make this step-by-step on stories today!

cubed butternut squash

Obsession does not even begin to explain how much I adore this butternut white chicken chili. It’s creamy and hearty and comforting and has a slight hint of sweetness from the squash.

Oh and it comes together pretty quickly too! 

It’s perfect all around.

butternut and chicken in pot

I have a few different white chicken chili recipes in my arsenal. I have one in the Pretty Dish and another quinoa version here (you guys love that!) but this one may take the cake. It’s so satisfying. The flavor is spot on. It’s smoky and delicious. Absolute perfection when topped with a dollop of sour cream and chips! 

butternut white chicken chili

For the beans in this chili, I go with cannellini beans. They are probably my second fave (after pinto!) but here’s the beauty of this recipe – use what beans you have on hand. This is a great pantry recipe because you can use the beans you have and an actual butternut squash lasts forever. Black, pinto, even chickpeas would work. Whatever you love and have, to make this whole cooking dinner process easier.

butternut white chicken chili

I also tend to use a rotisserie chicken for this. It simplifies the process and takes minutes. You can shred or chop the chicken, whichever you prefer. And bonus points if you buy your butternut squash pre-cut. It’s such a great shortcut to take. 

butternut white chicken chili with cilantro and chives

Cumin and just a touch of smoked paprika add flavor to this chili. I like to thicken it with sour cream instead of heavy cream or milk. All you have to do is stir that in right before serving and you’re good to go! 

butternut white chicken chili with sour cream

This is such a super delicious way to make a crave-worthy seasonal chili! A big old hug in a bowl.

butternut white chicken chili

Butternut White Chicken Chili

Print

Butternut White Chicken Chili

This butternut white chicken chili is super comforting and delicious! Creamy, smoky white chicken chili with hearty butternut squash.
Course Soup
Cuisine American
Prep Time 20 minutes
Cook Time 20 minutes
Total Time 40 minutes
Servings 4 people
Author How Sweet Eats

Ingredients

  • 2 tablespoons olive oil
  • 1 sweet onion diced
  • 4 garlic cloves minced
  • kosher salt and pepper
  • 2 cups cubed butternut squash, (in 1/2 to 1 inch cubes)
  • 2 teaspoons ground cumin
  • ¼ teaspoon smoked paprika
  • pinch crushed red pepper flakes
  • 2 cups shredded chicken breasts
  • 2 14 ounce cans cannellini beans, drained and rinsed
  • 3 to 4 cups chicken stock
  • 1 cup sour cream
  • for topping: fresh cilantro chives, tortilla chips, sour cream

Instructions

  • Heat the olive oil in a large pot over medium heat. Stir in the onion and garlic with a big pinch of salt and pepper. Cook until the onion softens, about 5 minutes. Stir in the butternut squash. Add in the cumin, smoked paprika, pepper flakes and stir. Cook for 5 minutes.
  • Stir in the chicken. Add in the beans and 3 cups of the chicken stock. Bring the mixture to a boil, then reduce to a simmer and cover. Simmer for 10 to 15 minutes, or until the butternut squash is fork tender.
  • After 10 to 15 minutes, taste and season with more salt and pepper if needed. If you’d like the soup to have more liquid, stir in the additional cup of stock. Stir in the sour cream, stirring completely until it melts in.
  • Serve the chili immediately, topped with cilantro, chives and tortilla chips. You can add on some cheese if you wish!
  • Leftovers of this are delicious! You might need to add in a drop of stock or water when reheating.

butternut white chicken chili

Give me all the chips for dipping!

The post Butternut White Chicken Chili. appeared first on How Sweet Eats.

13 Nov 14:39

Cranberry Cobbler Bars.

by Jessica

Hellllo cranberry cobbler bars!

cranberry cobbler bars

This is the most perfect holiday dessert that you can make ahead of time. It’s also perfect if you’re not into pumpkin!

And… it’s sort of hot pink and pretty?!

I’m sold.

cranberry filling

We’re continuing our Thanksgiving series today with this not-so-traditional dessert. I know that I promised you classics this week. But the truth is that I already have a really great pumpkin pie on here. I have another pumpkin mousse version coming soon. But today, I wanted to share something that you can prepare a day or two ahead of time to make the entire process easier.

cranberry filling

If you have a copy of The Pretty Dish, then you’ll probably recognize this recipe as a riff on the blueberry peach cobbler bars! 

The bars are RIDICULOUSLY good. They start with a shortbread crust. Then there’s a fruity filling finished with a crumbly topping. 

Oh my heavens. Love.

cranberry cobbler bars before baking

So! I made this filling cranberry sauce-ish. I wanted it to be able to hold up inside the bars. You do need to cook the cranberry mixture here so it’s slightly more high maintenance than the original bars. But it’s worth it. Plus, you can make that ahead of time if you want.

cranberry cobbler bars before baking

The great news is that if you make your own whole berry cranberry sauce, you should be able to use that too! These are a great treat if you’re trying to get rid of cranberry sauce leftovers. 

And I’ll tell you a little secret… if you just want to buy a can of whole berry cranberry sauce (not the jelly!) – it will work too. 

cranberry cobbler bars

Everyone always freaks over these bars!

I have a strawberry version here on the blog and they are just so easy, so delicious and such a hit. You can truly use almost any fruit you love. The cranberry just adds such a wonderful seasonal flavor. Sweet and tart, which is the perfect complement to the buttery shortbread crust and crumble.

cranberry cobbler bars

Make them ahead! Leftovers are delish. And everyone can take a bar home. YUM.

cranberry cobbler bars

Cranberry Cobbler Bars

Print

Cranberry Cobbler Bars

These cranberry cobbler bars are the perfect fall dessert. Shortbread crust and cinnamony, brown sugar cranberry filling make these perfect!
Course Dessert
Cuisine American
Prep Time 25 minutes
Cook Time 45 minutes
Cooling Time 1 hour
Total Time 2 hours 10 minutes
Servings 16 to 20 bars
Author How Sweet Eats

Ingredients

cranberry layer

  • 3 ½ cups fresh cranberries
  • ⅔ cup sugar
  • 2 tablespoons water

crust and topping

  • 3 cups all-purpose flour
  • 1 cups sugar
  • ½ teaspoon salt
  • ¾ cup unsalted butter melted

filling

  • 3 large eggs
  • 1/3 cup half and half
  • 1 cup brown sugar
  • 1 teaspoon vanilla extract
  • 1 tablespoon cornstarch
  • ¼ teaspoon cinnamon
  • pinch of salt

Instructions

  • Preheat the oven to 350 degrees F. Spray a 9x13 inch baking dish with nonstick spray.
  • Make the cranberry filling first. Heat the cranberries, sugar and water together in a saucepan over medium heat. Simmer, stirring often, until the berries begin to burst, the sugar melts and the mixture thickens, about 8 to 10 minutes. Remove the heat and let cool to room temperature.
  • For the crust and topping: Stir the flour, sugar and salt together in a large bowl. Add the melted butter and stir until a shortbread-like dough comes together. I even use my hands to bring it together. Press half of the dough into the bottom of the dish.
  • For the filling: In another bowl, whisk together the eggs, half and half, sugar, vanilla, cinnamon, salt and cornstarch. Gently fold in in the cranberry filling.
  • Pour the mixture over top of the crust. Crumble the rest of the dough over top of the cranberry mixture. Bake for 45 to 50 minutes, until the bars are set and no long jiggly. Cool completely (thi is important! You can even cool overnight.) before slicing into squares!

cranberry cobbler bars

Dream dessert!

The post Cranberry Cobbler Bars. appeared first on How Sweet Eats.

13 Nov 14:05

Cornbread Crumb Muffins.

by Jessica

Hellllllo little cornbread crumb muffins, you beautiful things!

cornbread crumb muffins

I mean, if these aren’t a part of my dinner tonight, I don’t know what I’m thinking. They are soft and fluffy and taste like cornbread perfection. All while being topped with a crumble that is divine!

They are really darn good.

cornbread muffin batter

Okay so cornbread with crumble isn’t that new of an idea to me. Years ago I made this cornmeal crumble cake (with candied tomatoes! wowza) and it is super delish. Just as it sounds – cornbread with a crumbly, streusely topping!

Basically the best part. The part I always steal off the top. You know.

cornbread crumb muffins

It’s a nice twist too because cornbread isn’t necessarily THAT sweet, you know? I know it has a bit of sweetness, but it’s not overly sweet. So the crumble topping brings a little more sweetness to the bite. It’s lovely. 

It’s like we combined cornbread and coffee cake! A little cornbread coffee cake baby. 

cornbread crumb muffins

Are you cornbread people on Thanksgiving? We really aren’t. I love cornbread any other time of year, but it doesn’t seem to fit into our traditional Thanksgiving menu. I know for many of you, it may be a staple.

We usually do some form of roll on the holiday. Usually a parker house roll or buttery cloverleaf one.

But rarely cornbread. 

However, we DO serve corn, so maybe we should just combine the two. Corn and rolls… here we are with best combo. 

Eddie absolutely LOVES cornbread. He could eat it everyday, with either butter or jelly. I love a plain cornbread muffin and if I’m so inclined (and it’s warm), I’ll do a little bit of butter. Otherwise, I adore the flavor on its own and the slightly crumbly texture.

cornbread crumb muffins

The other thing that is great about this recipe? It’s a little more forgiving than a yeasted roll, which means that you can make it a little ahead of time for Thanksgiving. That’s the hardest part for me when it comes to making the bread. I want the bread to be fresh, but don’t have the bandwidth that day (or, let’s be real, the oven space) to make it happen in a way that is worth it. 

This changes that! You can make these a bit of ahead of time – probably the night before, and they will be ready to serve and wonderful. You can also warm them a bit before the meal if you wish!

cornbread crumb muffins with butter

Pretty sure we should all just make these for breakfast!

cornbread crumb muffins with butter

Cornbread Crumb Muffins

Print

Cornbread Crumb Muffins

These cornbread crumb muffins are a mix between fluffy cornbread and coffee cake! Cornbread muffins with a crumble topping. Delicious!
Course Side Dish
Cuisine American
Prep Time 15 minutes
Cook Time 20 minutes
Total Time 35 minutes
Servings 12 muffins
Author How Sweet Eats

Ingredients

  • 1 1/4 cups all-purpose flour
  • ¾ cup finely ground cornmeal
  • ½ cup sugar
  • 3 teaspoons baking powder
  • ½ teaspoon salt
  • 2 large eggs, lightly beaten
  • ¾ cup milk
  • 1/2 cup unsalted butter, melted and slightly cooled

crumb

  • 3 tablespoons brown sugar
  • 3 tablespoons sugar
  • pinch cinnamon
  • pinch salt
  • 1/4 cup unsalted butter, melted
  • 3/4 cup all-purpose flour

Instructions

  • Preheat the oven to 350 degrees F. Line a muffin tin with liners.
  • In a large bowl, whisk together the flour, cornmeal, sugar, baking powder and salt.
  • In a smaller bowl or measuring cup, whisk together the milk and eggs. Add the wet ingredients to the dry, then stir in the melted butter. Stir until just combined.
  • Fill the muffin liners with the batter about ¾ of the way full. Top each with a tablespoon or so of the crumble, gently pressing it into the batter.
  • Bake the muffins for 18 to 20 minutes, or until they are set on top. Let them cool before serving!
  • Note: you can make these a day ahead of time

crumb

  • To make the crumb topping, whisk together the sugar, cinnamon, salt and melted butter until combined. Whisk for a good minute or two until the sugar begins to dissolve, then use a wooden spoon to stir in the flour. The mixture will be crumb-like and dry. Almost like a sludge or sand. This is what you want! Sprinkle the crumb on top of each muffin before baking.

Notes

slightly adapted from this cornmeal crumb cake

cornbread crumb muffins with butter

Perfect swoop of butter too!

The post Cornbread Crumb Muffins. appeared first on How Sweet Eats.

06 Nov 00:53

Green Bean Casserole with French Fried Onions.

by Jessica

Raise your hand if you love green bean casserole! 

green bean casserole with crispy french fried onions

These crunchy green beans are blanketed in a creamy parmesan mushroom sauce and showered with crispy french fried onions. Give me a bowl! 

fresh green beans

On to our next classic in the How Sweet Eats Thanksgiving series… this one is a major fave. We’re going a little untraditional in the next few days, so this is the true last classic until next week. But I promise it’s worth it. 

cream sauce with fresh green beans

Now I know that I’ve shared how traditional my family is when it comes to Thanksgiving. And green bean casserole isn’t something we have served until more recently. Some people absolutely cringe at the dish, while others can’t get enough. A few don’t like mushrooms, a few are freaked out by the serious casserole-ish feel to the dish. 

But I can’t pass it by! 

If you’ve been following along forever, then you may remember my lightened up green bean casserole. It is SO good. I’ve even made that during non-Thanksgiving times! It’s been a staple for almost a decade and I know that many of you make it each year too.

crispy french fried onions

I wanted to make the indulgent, decadent version for you too. Mostly because someone like my mom would never make my lightened up version. Ha! 

In this green bean casserole, we make our own cream of mushroom sauce and use fresh green beans that retain a lot of their crisp. I love that, because the only thing I don’t really care for in regular green bean casserole (read: the one that uses canned or frozen green beans) is that the green beans can get mushy. 

No mushy beans here!

These green beans stay crisp. The parmesan mushroom cream is absolutely delicious. It’s not too heavy and the beans are not drowning it in. It’s just the right amount!

green bean casserole

Then of course… we have the onions. How can we forget about the onions?

I’ll be the first to tell you that I occasionally use the crispy fried onions in a can this time of year. They are actually pretty good and require a lot less work. Since I am showing you how to make this from scratch, I wanted it to be the real deal. If you’d like, you can make these buttermilk french fried onions below that are absolutely addictive. You won’t be able to stop snacking on them while making this casserole. 

green bean casserole with crispy french fried onions

My best tips for if you have leftover green bean casserole…

Reheat it and use it as leftovers. Or freeze it! 

There aren’t a ton of options here, but I do have to say that leftovers of this are fantastic and taste just as good, minus the onions losing a little crisp.

Yum.

green bean casserole with crispy french fried onions

Green Bean Casserole

Print

Green Bean Casserole with French Fried Onions

This green bean casserole from scratch is super delicious and topped with french fried onions! It's comforting and wildly flavorful.
Course Main Course
Cuisine American
Prep Time 1 hour
Cook Time 20 minutes
Total Time 1 hour 20 minutes
Servings 6 to 8 people
Author How Sweet Eats

Ingredients

buttermilk french fried onions

  • 2 sweet onions, thinly sliced
  • 2 cups buttermilk
  • salt and pepper
  • 3 cups all-purpose flour
  • vegetable or canola oil for frying

green bean casserole

  • 2 pounds fresh green beans, trimmed and snapped in half
  • 1 tablespoons olive oil
  • 2 tablespoons unsalted butter
  • 1 large sweet onion, diced
  • kosher salt and pepper
  • 16 ounces cremini mushrooms chopped
  • 4 garlic cloves, minced or pressed
  • 2 tablespoons flour
  • 1 1/2 cups chicken or vegetable stock
  • 1 1/2 cups heavy cream
  • 1/4 teaspoon freshly grated nutmeg
  • ½ cup freshly grated parmigiano reggiano cheese, plus more for topping

Instructions

buttermilk french fried onions

  • I find that it’s easiest to make the fried onions first, this way they are ready to go for the topping. If you don’t want to make these from scratch, you can use store bought!
  • Place the sliced onions in a large bowl and cover them with the buttermilk. Let them soak while the oil heats.
  • Heat the oil in a large stockpot or saucepan. You want it to be about 375 degrees F. Place the flour on a plate with a big pinch of salt and pepper. Stir well.
  • Once the oil is up to temperature, take a few onion slices from the buttermilk and dredge them in the flour, coating them completely. Add them to the oil and fry until golden brown, tossing a few times, about 2 to 3 minutes total. Remove the onions and place them on a paper towel to drain excess grease.

green bean casserole

  • Preheat the oven to 400 degrees F.
  • Bring a pot of salted water to a boil. Once boiling, add in the green beans. Blanch for 5 minutes, then remove the green beans and place them in a bowl of ice water to stop the cooking.
  • Heat the olive oil and butter large skillet over medium-low heat. Add in the diced onion with a big pinch of salt and pepper. Cook until softened, about 5 minutes.
  • Stir in the mushrooms. Cook until they soften too, about another 5 minutes. Stir in the garlic and cook for 1 minute.
  • Stir in the flour to create a roux. Cook for 2 to 3 minutes, until it smells fragrant and a bit nutty. Slowly stream in the stock, stirring the entire time. Cook for about 5 minutes, until the mixture is thickened and simmering.
  • Stir in the cream until combined. Stir in the grated nutmeg and the parmesan cheese. Turn off the heat. Add the green beans to the cream mixture and toss to coat. Pour the mixture in a 9x13 baking dish. Sprinkle on extra parmesan cheese. Top with the french fried onions.
  • Bake the green beans for 20 to 25 minutes, until the sauce is bubbly and warm. Serve immediately!
  • To serve 4: Cut this recipe in half exactly. I suggest keeping the same amount of fried onions because they are delicious!
  • To serve 10 to 12: Double this recipe exactly. The same amount of onions works too - but you can also make more if you’d like.

green bean casserole with crispy french fried onions

I.am.in.love.

The post Green Bean Casserole with French Fried Onions. appeared first on How Sweet Eats.

31 Oct 03:21

Chipotle Tomato Soup with Smoked Cheddar Pull Apart Bread.

by Jessica

This chipotle tomato soup is an absolute GAME CHANGER.

chipotle tomato soup with smoked cheddar pull apart bread

Mostly because it is served with super easy and quick smoked cheddar pull apart bread. You will struggle to stay away from this entire loaf. Oh boy is this incredible.

chipotle tomato soup with smoked cheddar pull apart bread

I’ve told you before about how I love the tradition of tomato soup and grilled cheese on Halloween! I think one of you readers even tipped me off to the tradition. This would have been an awesome tradition when I was growing up because we always ate dinner quickly before trick-or-treating! 

sourdough bread stuffed with smoked cheddar

These days, we usually have our parents and family over on Halloween – the result of having the first born grandchild/nephew, etc. SO I make a chili bar for everyone, which is also very fun. It’s also much easier than cooking 12 separate grilled cheeses, you know? 

But if you’re looking for traditions for Halloween night, this tomato soup and grilled cheese one needs to happen!

saucepan of chipotle tomato soup

This twist is PERFECTION. I realize that 2020 is the year that we’re not supposed to be sharing food, but here we are and I think if you make this pull-apart bread for just your family in your home to share, you’re golden.

baked smoked cheddar pull apart bread

First, the soup!

This soup is basically my go-to favorite, nordstrom copycat (but better, I swear) tomato soup. I added a little bit of chipotle chili powder to the base, cooking it over heat with the shallots and garlic. 

The end result is INCREDIBLE. There is this slight bite of heat but it is not spicy, if that makes sense. There is the perfect amount of heat and I am not someone who loves spicy food. If you dip your bread in the soup, it’s even milder. A spoonful will give you a little lasting heat flavor, but otherwise it is a dream! 

P.S. if you don’t want anything spicy at all, just skip the chipotle. It’s as easy as that.

chipotle tomato soup

Now, for the bread!

YEARS ago, I made this white pizza pull apart bread. It’s definitely a cheaters recipe but really oh-so delish. You simply cut a grid pattern into a loaf of bread (I prefer sourdough) and stuff it full of cheese.

Yes. Stuff it full of cheese. OMG my dream. 

Then bake it!

smoked cheddar pull apart bread

The end result are these perfect cheese-covered bread slices that are incredible for dipping. Or just eating on their own. Basically… inhaling. 

chipotle tomato soup with smoked cheddar pull apart bread

This flavor combo cannot be beat! Chipotle tomato soup with a hint of smoky heat, and then smoked cheddar cheese melted all over the rustic sourdough. 

chipotle tomato soup with smoked cheddar pull apart bread

DREAM MEAL. 

chipotle tomato soup with smoked cheddar pull apart bread

Chipotle Tomato Soup with Smoked Cheddar Pull Apart Bread

Print

Chipotle Tomato Soup with Smoked Cheddar Pull Apart Bread

This chipotle tomato soup is creamy and delish with a hint of heat. Serve with smoked cheddar pull apart bread for a slice of heaven!
Course Main Course
Cuisine American
Total Time 1 hour
Servings 4 people
Author How Sweet Eats

Ingredients

chipotle tomato soup

  • 2 tablespoons unsalted butter
  • 2 shallots, sliced
  • 2 garlic cloves, minced
  • 1 1/2 tablespoons tomato paste
  • ¼ teaspoon chipotle chili powder
  • 28 oz diced fire-roasted tomatoes
  • 2/3 cup cooking sherry
  • 1/3 cup chicken stock
  • 3 tablespoons brown sugar
  • 1/2 teaspoon dried basil
  • 1/4 teaspoon salt
  • 1/4 teaspoon pepper
  • 3/4 cup heavy cream
  • freshly snipped chives for garnish

smoked cheddar pull apart bread

  • 1 loaf sourdough bread
  • 4 tablespoons butter, melted
  • 8 ounces smoked cheddar cheese, freshly grated
  • fresh chives, for sprinkling

Instructions

  • Heat the butter in a saucepan over medium-low heat. Add in the shallots and garlic, cooking until soft and slightly golden and stirring occasionally, about 8 to 10 minutes. Stir in the tomato paste and chipotle powder and cook for another 5 minutes. Add in the tomatoes, sherry, chicken stock, brown sugar, basil, salt and pepper, then bring the mixture to a boil. Reduce to a simmer and cook for 20 minutes.
  • Transfer the soup to a high-powered blender and carefully blend until pureed. Transfer back to the pot over low heat. Right before serving, stir in the heavy cream. Taste and season additionally with salt and pepper if needed – it might, depending on your tomatoes. To serve, drizzle the soup with the extra cream and garnish with chives.

smoked cheddar pull apart bread

  • Preheat oven for 400 degrees F. Line a baking sheet with parchment paper. Slice a grid pattern into the loaf of bread, leaving about an inch uncut at the bottom of the loaf. I find it easiest to slice longways and then go back and slice the rest of the grid.
  • Loosely tent the bread with foil and place in the oven for 10 minutes.
  • Remove the bread and gently pry apart the bread squares. Drizzle the butter into the crevices of the bread. Gently pull apart the bread again and stuff the grated cheese into the crevices and pile it on top. Bake the bread for 15 to 20 minutes, uncovered, or until the cheese is golden and bubbly. Sprinkle with chives and serve immediately.

chipotle tomato soup with smoked cheddar pull apart bread

I mean look at that meltiness.

The post Chipotle Tomato Soup with Smoked Cheddar Pull Apart Bread. appeared first on How Sweet Eats.

28 Oct 18:50

Creamy Balsamic Chicken and Mushrooms.

by Jessica

This balsamic chicken and mushrooms is sponsored by Fustinis

Oh my my, this creamy balsamic chicken and mushrooms HITS THE SPOT.

creamy balsamic chicken and mushrooms

This skillet chicken is versatile and delicious. Perfect for a weeknight. Serve it with potatoes or roasted vegetables or my personal favorite – toasted sourdough bread.  (more…)

The post Creamy Balsamic Chicken and Mushrooms. appeared first on How Sweet Eats.

22 Oct 13:38

Pumpkin Pierogies with Brown Butter and Crispy Sage.

by Jessica

These pumpkin pierogies are the perfect bite of fall.

pumpkin pierogies with brown butter and crispy sage

If there ever was a flavor of pierogi that I desired? Pumpkin is it. I mean, I live in Pittsburgh so pierogies are totally a THING here. This may scare pierogi purists away but we’re going on a little fall flavor adventure today! (more…)

The post Pumpkin Pierogies with Brown Butter and Crispy Sage. appeared first on How Sweet Eats.

20 Oct 13:42

Harvest Tortellini Skillet.

by Jessica

This harvest tortellini skillet is sponsored by Stella Cheese!

This tortellini skillet is a pan full of fall heaven!

harvest tortellini skillet with butternut squash and sage

Cheesy, satisfying and filled with autumn flavors of squash, sage and bacon – there is nothing better!

harvest tortellini skillet with butternut squash and sage

I look forward to these flavors all year long. Nothing tastes quite as comforting as a caramelly brown butter, sweet squash cubes, fried sage, bacon and cheesy pasta. This will be a go-to weeknight meal for you this season. And let me just say that the leftovers are incredible.

stella mozzarella cheese

Today I’m partnering with Stella Cheese again, featuring their Fresh Mozzarella Cheese. Their mozzarella is absolutely incredible. It’s soft and silky – perfect for caprese salads in the summer, but it also melts beautifully, perfect for topping pizzas and pastas in these cooler months. Because of its versatility, fresh mozzarella is a staple in our fridge. We love it so much!

harvest tortellini skillet with butternut squash and sage

The Stella Fresh Mozzarella Cheese has a delicate flavor that enhances dishes so well. We’re layering it on top of a cheesy tortellini pasta dish today and the indulgence level is over the top.

Let’s get to it!

harvest tortellini skillet with butternut squash and sage

First, we’re cooking some bacon and once it’s crispy, we’re cooking a bunch of butternut squash in the bacon fat. Oh my YUM.

While the butternut squash is cooking, we’re going to brown a little butter and fry some sage. These are my ultimate favorite fall flavors and just typing them out has me excited.

harvest tortellini skillet with butternut squash and sage

Oh! We’re also cooking a bit of cheese tortellini here too. You have a little bit of leeway – you can make a spinach tortellini or another version you love. As long as it’s mild enough to go with these incredible flavors.

harvest tortellini skillet with butternut squash and sage

Then, it’s time to combine everything in one skillet – throw the tortellini and sage brown butter into with the squash. Add a touch of Stella Parmesan and a blanket of sliced Stella Fresh Mozzarella Cheese.

Throw the whole skillet under the broiler and let that Stella Fresh Mozzarella Cheese get all bubbly and melty. It is DREAMY!

Serve it up with an extra Stella Parmesan sprinkle for good measure. It’s hard to not eat it right out of the skillet!

harvest tortellini skillet with butternut squash and sage

This a major flavor bomb. The squash is sweet and a bit savory, the bacon is smoky and crunchy, the sage is earthy and slightly fresh. The Stella Fresh Mozzarella Cheese is melty and mild and brings the entire dish together.

I can’t get enough!

harvest tortellini skillet with butternut squash and sage

And!

Like I mentioned above, the harvest tortellini skillet leftovers are deeeelish. I love a dinner where I find myself craving the leftovers the next day. This reheats well and is perfect to grab for lunch. It’s such a treat.

harvest tortellini skillet with butternut squash and sage

Harvest Tortellini Skillet

Print

Harvest Tortellini Skillet

This harvest tortellini skillet is loaded with butternut squash, bacon, sage, parmesan, mozzarella and cheese tortellini. Yum!
Course Main Course
Cuisine American
Prep Time 10 minutes
Cook Time 30 minutes
Total Time 40 minutes
Servings 2 to 4 people
Author How Sweet Eats

Ingredients

Instructions

  • Heat the bacon in a large oven-safe skillet over medium-low heat. Cook until it’s crisp and most of the fat has rendered. Throw in the sage leaves and let them crisp up in the bacon fat, about 1 to 2 minutes. Remove the bacon and sage with a slotted spoon and place it on a paper-towel lined plate to remove excess grease.
  • Add the squash to the same skillet with the remaining bacon fat. Season it with a pinch of salt, pepper and nutmeg. Cook, stirring often, until the squash is fork tender, about 12 to 15 minutes.
  • While the squash is cooking, bring a pot of salted water to a boil. Add the tortellini and cook according to package directions, usually 3 to 5 minutes.
  • Once the tortellini is finished, add it to the skillet with the squash. Toss well. Stir in the Stella Parmesan cheese. Stir the bacon and sage back into the pot. Cover with the Stella Fresh Mozzarella Cheese.
  • Preheat the broiler in your oven to high. Stick the skillet under the broiler for 2 to 3 minutes, just until the mozzarella is bubbly and melted. Remove the skillet and top with more parmesan. Serve immediately!

harvest tortellini skillet

Those cheese pulls!

The post Harvest Tortellini Skillet. appeared first on How Sweet Eats.

20 Oct 13:42

Pumpkin Focaccia.

by Jessica

This pumpkin focaccia is making all my bread dreams come true.

pumpkin focaccia bread

It’s fluffy and cloud-like, but crisp on the edges. It’s studded with salty pepitas and covered in parmesan. I can’t get enough!  (more…)

The post Pumpkin Focaccia. appeared first on How Sweet Eats.

20 Oct 13:39

Salted Peanut Butter Cup Bars.

by Jessica

Chocolate peanut butter bars are basically my dream dessert. 

salted chocolate peanut butter bars

Seriously. Is there ANY better combo?! I think not. (more…)

The post Salted Peanut Butter Cup Bars. appeared first on How Sweet Eats.

06 Oct 02:54

Pretzel Crusted Chicken Salad with Mustard Vinaigrette.

by Jessica

Here’s how to make dinner better: pretzel crusted chicken salad.

pretzel crusted chicken salad with mustard vinaigrette

Oh oh yes. !!!! This pretzel crusted chicken salad is going to make an appearance in our house at least once a week for the foreseeable future.

pretzel crusted chicken

One of my favorite chicken recipes EVER is my pretzel crusted chicken with hot honey and house sauce. Oh my word. They chicken fingers are absolutely to die for – we love them!

I make the chicken fingers often for dinner and Eddie and I throw them on a salad. It’s seriously one of the best salads I’ve ever eaten. The chicken is so flavorful because the pretzels are so crunchy and salty, obviously! And it just adds so much more than you’d even expect.

sliced pretzel crusted chicken on cutting board

So! Here we are with an ACTUAL pretzel crusted chicken salad.

Can I make this one of my faux oktoberfest recipes?! 

It’s no secret I’m already a fan of this combo. Remember a few years ago when I made a hot pretzel panzanella with mustard dressing? Yes, actually chunks of soft pretzel in the salad, drizzled with mustardy vinaigrette.

I die just thinking about it. It’s SO GOOD.

This is like that, just different. Crunchy pretzel bites, hearty chicken, still the same briney and tangy dressing that I could practically drink! 

pretzel crusted chicken on spring greens

I’m using full chicken breasts here instead of the tenders. I like to pound them out a bit so they are even all over in size, then coat them in the pretzels and bake for 25 to 30 minutes. The result is the most flavorful, tender, crunchy chicken you’ve ever had. 

You won’t be able to stop eating it!!

P.S. you can find me on instagram today showing you how to make this step-by-step.

pretzel crusted chicken salad with onions, cheese, cucumbers and apples

In celebration of all things fall, I added some extra goods to this salad. Apples, because hello! ‘Tis the season. You can chop, slice or grate them. White cheddar, because it’s delicious with the pretzel flavor. Pickled onions for tanginess, cucumbers for a refreshing crunch. 

And it’s all drizzled with a mustard vinaigrette. I make many mustard-y vinaigrettes, sometimes even multiple times per week! But this one is extra good because it complements the pretzels so well.

pouring dressing on pretzel crusted chicken salad

I used to live for a soft pretzel with yellow mustard when I was a kid. It has been about a million years since I’ve had one, so this combo is allowing me to relive all of that over again. 

pretzel crusted chicken salad with mustard vinaigrette

Crunchy pretzel chicken, creamy cheddar, crisp apples and tangy dressing. Literally makes the best pretzel crusted chicken salad ever.

pretzel crusted chicken salad with mustard vinaigrette

I am so there!

pretzel crusted chicken salad with mustard vinaigrette

Print

Pretzel Crusted Chicken Salad

This pretzel crusted chicken salad is packed with spring greens, cheddar, apples, and crunchy crispy pretzel coated chicken. It's a dream!
Course Salad
Cuisine American
Prep Time 15 minutes
Cook Time 30 minutes
Total Time 45 minutes
Servings 4 people
Author How Sweet Eats

Ingredients

  • 3 cups mini pretzel twists, (traditional salted ones)
  • 1 teaspoon garlic powder
  • 1 pound boneless, skinless chicken breasts
  • salt and pepper
  • 2 large eggs, lightly beaten
  • 8 to 10 cups spring greens or your favorite lettuce
  • 1 honeycrisp apple, chopped
  • 4 ounces cheddar cheese, chopped or grated
  • 4 baby cucumbers, sliced
  • ¼ cup pickled onions

mustard vinaigrette

  • 3 tablespoons apple cider vinegar
  • 2 tablespoons honey
  • 1 tablespoon dijon mustard
  • 2 garlic cloves, finely minced or pressed
  • 1/4 teaspoon salt
  • 1/4 teaspoon pepper
  • 1/2 cup extra virgin olive oil

Instructions

  • Note: if you haven't made the pickled onions yet, make those to start. They can sit for 45 mins at room temp while you make the rest of the salad. I highly suggest making them ahead and storing in the fridge for weekly use!
  • Preheat the oven to 425 degrees. Line a baking sheet with foil and place a wire rack on top. Spray the rack with nonstick spray.
  • Pound the chicken breasts so they are evenly thick all over. Season the chicken breasts with the salt and pepper. Place the pretzels in a food processor and blend until mostly fine crumbs remain. Place the pretzels in a bowl. Stir in the garlic powder.
  • In another bowl, lightly beat the eggs.
  • Take each chicken breast and coat it in the beaten egg. Dredge it through the pretzel crumbs, pressing gently so the crumbs adhere. Place the chicken on the rack and repeat with remaining chicken. Once all the chicken is finished, spray it with avocado or olive oil spray. This is important and really helps things get crispy and golden!
  • Bake the chicken for 12 to 15 minutes. Flip it gently and spray the other side with the oil spray. Bake for another 12 to 15 minutes.
  • While the chicken is baking, assemble the salad. Place the greens in a large bowl with a pinch of salt and pepper. Add in the chopped apples, cheddar, cucumbers and pickled onions.
  • Remove the chicken from the oven and slice it. Add it to the salad and drizzle on the dressing. Enjoy!

mustard vinaigrette

  • In a bowl, whisk together the vinegar, honey, mustard, garlic, salt and pepper. Continue to whisk while streaming in the olive oil. This dressing stays great in the fridge in a sealed container for about a week.

pretzel crusted chicken salad with mustard vinaigrette

Happiest sight on earth.

The post Pretzel Crusted Chicken Salad with Mustard Vinaigrette. appeared first on How Sweet Eats.

01 Oct 20:35

Pumpkin Lasagna Roll Ups with Crispy Sage.

by Jessica

Pumpkin lasagna rollups are about to be on repeat all season long.

pumpkin lasagna roll ups with crispy sage

I’ve been dreaming of this combo every since I made my french onion chicken lasagna roll ups earlier this year. I mean, DREAMING of it! Waiting to share it with you. In all its cheesy, squashy, savory goodness. 

pumpkin lasagna filling

Because I live for savory pumpkin. All squash, really. And yes, I know it is so tricky to find pumpkin right now, so if you can’t find it, this works perfectly with butternut squash too!

If you want to make you own pumpkin puree, I have a how-to on that right here. I’d do the same with butternut squash, but honestly if I was making it for this? I probably just quickly roast and give it a coarse mash. No big deal because we’re rolling it up with cheese.

inside of pumpkin lasagna roll ups

And covering it in sauce.

And sprinkling it with crispy sage.

I can’t even handle that.

These flavors are my fall dream.

EVERYTHING is in here. 

pumpkin lasagna roll ups ready for the oven

Lasagna roll ups are so much better than regular lasagna. I don’t know what it is! They are definitely cuter. They are more pre-portioned out, which I love. Like it’s easy to have one or two of these with a house salad. The filling options are endless. And of course, it’s probably just the cheese?

pumpkin lasagna roll ups right out of the oven

I’m happy to report that these are a lot easier than my french onion chicken roll ups. There are still a few steps – you have to boil the noodles, make the filling and the sauce, but it’s not hours of prep time. 

You know?

The pumpkin filling is loaded with ricotta and parmesan and sage. The béchamel sauce is creamy and classic with hints of nutmeg. Everything gets topped with cheese which takes it over the top, then crisp delicate sage leaves add that wonderful savoriness. I adore this.

pumpkin lasagna roll ups with crispy sage

Years ago I made this butternut squash lasagna recipe and man, I adore that too. Up until these, it might have been my favorite savory fall recipe that I’ve ever made. These taste so, so similar to that in such a wonderful way. 

pumpkin lasagna roll ups with crispy sage

It’s the coziest meat, plus it’s satisfying and pretty much everyone loves it. The kids go crazy over them.

And I totally lied to Eddie and told him I used butternut squash so he would eat them (he says he doesn’t like pumpkin….), so eat them, he did. Inhaled them. I eventually told him that they were pumpkin and not butternut, so now I’m pretty sure he is on board with savory pumpkin dinners and that is thrilling. 

pumpkin lasagna roll ups with crispy sage head on shot

Look at how perfect these little roll up babes are!

pumpkin lasagna roll ups with crispy sage

These reheat well too. You can absolutely make them ahead of time – you can even assemble everything, sauce and all, and keep it in the fridge before baking, though I suggest keep the roll ups and sauce separate for best results. Like regular lasagna, it’s a great meal to double and then stick in the freezer too! I mean, who doesn’t want to eat these flavors all year long?

P.S. you could also add some sautéed spinach to the rolls, like I do in my french onion version. Or even onions and mushrooms!

pumpkin lasagna roll ups with crispy sage

Run and make it tonight!

pumpkin lasagna roll ups with crispy sage

Pumpkin Lasagna RollUps

Print

Pumpkin Lasagna Roll Ups with Crispy Sage

Pumpkin lasagna rollups are a super cozy fall dinner! Cheesy, melty pasta rollups with a fried sage and parmesan.
Course Main Course
Cuisine American
Prep Time 30 minutes
Cook Time 30 minutes
Total Time 1 hour
Servings 4 to 6 people
Author How Sweet Eats

Ingredients

  • 12 to 15 lasagna noodles boiled
  • 12 ounces ricotta cheese
  • 1 (15 ounce) can pumpkin puree
  • 1 cup finely grated parmesan cheese, plus more for sprinkling
  • 1 large egg
  • ¼ teaspoon dried sage
  • kosher salt and pepper
  • 2 cups freshly grated mozzarella or provolone cheese
  • 2 tablespoons butter
  • 2 tablespoons all-purpose flour
  • 2 cups milk
  • ¼ teaspoon freshly grated nutmeg

fried sage

  • 1 tablespoon butter
  • 1 handful 15 or so fresh sage leaves

Instructions

  • Preheat the oven to 350 degrees F.
  • Bring a pot of salted water to a boil and cook the lasagna noodles according to the directions, around 8 or 9 minutes. You will need 12 lasagna noodles for this recipe. I suggest make the entire box, in case some break or rip while cooking. With any leftover lasagna noodles, you can tear them apart and use like regular pasta with sauce later in the week.
  • Once the lasagna noodles are cooked, immediately lay them out in a single layer on a kitchen towel or parchment sprayed with nonstick spray.
  • In a large bowl, whisk together the ricotta, pumpkin, parmesan, egg, a big pinch of salt and pepper (½ teaspoon or so, each) and the dried sage. Whisk until combined. Place 3 tablespoons of the mixture on each lasagna noodle. I like to place the 3 tablespoons on all the noodles before spreading it out. If any look sparse, I use any leftovers in the bowl to plump up the filling on those ones.
  • Spread the ricotta filling out all over the noodles. Take 1 ½ cups of the grated mozzarella and sprinkle it evenly over the filling on each lasagna noodle. Keep the remaining cheese for the top.
  • Roll up each lasagna noodle tightly from the end.
  • Heat the butter in a large skillet over medium heat. Once sizzling, whisk in the flour and let it cook for 2 to 3 minutes, until fragrant and golden. Slowly whisk in the milk, stirring the entire time to avoid lumps. Whisk constantly until the mixture thickens, about 3 to 4 minutes. Reduce the heat to low and stir in a pinch of salt and pepper along with the fresh nutmeg. Taste the sauce and if needed, add more salt and pepper.
  • Ladle ½ cup or so of sauce in the bottom of a 9x13 inch baking dish. Alternately, you could use a 12-inch oven safe skillet too.
  • Place the lasagna roll ups seam-side down in the dish. Pour the remaining sauce over top of the rollups. Sprinkle the remaining mozzarella on top along with a sprinkle of parmesan cheese. Bake for 25 to 30 minutes, until golden and bubbly.
  • While the roll ups bake, heat the butter in a skillet over medium heat. Add in the sage leaves and cook for 1 to 2 minutes, just until crispy.
  • Remove the lasagna roll ups from the skillet and top with the sage leaves. Serve with extra parmesan cheese for sprinkling.

Basically want to nuzzle inside the lasagna nooks.

The post Pumpkin Lasagna Roll Ups with Crispy Sage. appeared first on How Sweet Eats.

01 Oct 20:35

Cinnamon Toasted Pumpkin Pie Oatmeal.

by Jessica

I want to eat pumpkin pie oatmeal for breakfast, lunch and dinner.

pumpkin pie oatmeal with coconut cream and almonds

I mean, look at this bowl! Don’t you?!

Pretty sure that is going to be the year of cozy breakfasts for me.

toasted steel cut oats with cinnamon

I know I just shared a pumpkin recipe yesterday. But I HAD to share this one with you too because I wanted to make sure you have every day of fall left to make this. 

Every.single.day.

It is that good! This oatmeal is perfect for breakfast or lunch and if you’re really needing some comfort, dinner. 

pumpkin butter

Also, don’t freak about the pumpkin shortage! 

This oatmeal doesn’t use pumpkin puree, it uses pumpkin butter! Which is great news if you can’t find pumpkin puree. I also use pumpkin butter in my gooey pumpkin bars, so don’t worry about buying a jar and not using it up.

P.S. If you DO have pumpkin puree and want to use it, you totally can. You may need to add some sweetness to your oats in that case! 

pumpkin butter in pumpkin pie oatmeal

I’ve been obsessed with pumpkin butter for as long as I can remember. It’s always been a staple that we bought at american spoon

And about a billion years ago I made these pumpkin chocolate chip cookies with pumpkin butter instead of puree. I was adamant to make a chewy pumpkin cookie and not a cakey one. I still love those cookies, but how hilarious is that now a decade later, I do want a cakey pumpkin cookie?!

swirling pumpkin butter in pumpkin pie oatmeal

When it comes to oatmeal, steel cut will always be my pick. Well, after overnight oats, that is. But steel cut just have SO much texture. They are so wonderfully chewy and when cooked, become incredibly creamy. They make such a classic bowl of oatmeal that I feel like I could eat it every morning.

Especially when it looks like this.

I mean… YES. 

Now – I have made a version of pumpkin pie oatmeal before. This bruléed oatmeal served in a pumpkin is amazing – it’s just made with different oats! It’s a little fancier while this one is more… everyday oatmeal.

pumpkin pie oatmeal with coconut cream and almonds

Now one of the reasons these ones are so delish is because we’re toasting them. We’re toasting the oats with a big pinch of cinnamon. Toasting them in BUTTER! You can also use coconut oil or your fat of choice, of course. 

I liken this to toasting rice for risotto. It adds depth of flavor while at the same time, browning the butter a bit. Which obviously makes for the the perfect base of breakfast! 

pumpkin pie oatmeal with pumpkin butter

From there, the oats take about 15 minutes. Add in some water and milk, simmer and stir, and watch them become creamy and dreamy. Stir in the pumpkin butter and vanilla. Scoop them into a bowl and be the happiest!

pumpkin pie oatmeal with coconut cream and almonds

I love to top these with whipped coconut cream. You can make your own from a can of refrigerated coconut milk or you can get a can of coconut cream and scoop it from there. The coconut cream is what really makes these taste like pumpkin pie. I am obsessed.

See, with the addition of pumpkin butter here, I don’t find that these oats need any sweetener. That will depend on the kind of pumpkin butter you use, of course. But the coconut cream also adds a hint of creamy sweetness. It’s perfect!

Then I also like to sprinkle with some toasty sliced almonds. 

Oh my gosh.

pumpkin pie oatmeal with coconut cream and almonds

Seriously the best fall breakfast ever!

pumpkin pie oatmeal with coconut cream and almonds

Pumpkin Pie Oatmeal

Print

Pumpkin Pie Oatmeal

This pumpkin pie oatmeal is made with steel cut oats and pumpkin butter. It tastes like a slice of pumpkin pie, topped with coconut cream!
Course Breakfast
Cuisine American
Prep Time 10 minutes
Cook Time 15 minutes
Total Time 25 minutes
Servings 4 servings
Author How Sweet Eats

Ingredients

  • 2 tablespoons butter
  • 1 cup steel cut oats
  • ¼ teaspoon cinnamon, plus extra for sprinkling
  • 2 cups water
  • 1 ½ cups milk
  • ¼ teaspoon salt
  • ⅓ cup pumpkin butter, plus more for topping
  • 2 teaspoons vanilla extract
  • pinch of finely grated nutmeg
  • maple syrup, if needed
  • whipped coconut cream, for topping
  • sliced almonds, for topping

Instructions

  • Note: the sweetness level of this recipe will differ depending on the brand of pumpkin butter you use. I suggest tasting the oats near the end of cook time and if needed, stirring in maple syrup or honey for more sweetness.
  • Heat the butter in a pot or large skillet over medium-low heat. Once melted, stir in the oats and cinnamon. Cook, stirring often, until the oats are toasty, about 3 to 4 minutes.
  • Pour in the water, milk and salt. Bring the mixture to a boil then reduce it to a simmer. Cook, stirring often, for 15 minutes. Stir in the pumpkin butter, vanilla extract and grated nutmeg. Taste and if needed, add in a bit of honey or maple syrup.
  • Serve the oats topped with coconut cream, sliced almonds and a dollop of pumpkin butter. Add a sprinkle of cinnamon and eat!

pumpkin pie oatmeal with coconut cream and almonds

Happy breakfast to us.

The post Cinnamon Toasted Pumpkin Pie Oatmeal. appeared first on How Sweet Eats.

01 Oct 20:33

Broccoli Cheddar Stuffed Spaghetti Squash.

by Jessica

Dinner tonight is broccoli cheddar spaghetti squash! Oh my.

broccoli cheddar stuffed spaghetti squash

I mean, I could get my veggies in like this every day.

cheesy broccoli cheddar spaghetti squash

I crave anything broccoli cheddar and this melty, cheesy broccoli sauce stuffed into tender spaghetti squash noodles does not disappoint. It’s satisfying and comforting and tasted like heaven!

It seriously blows my mind that I didn’t enjoy anything broccoli cheddar when I was kid. Actually, I’m pretty sure that I would order broccoli cheddar stuffed potatoes and just eat the cheddar and the potato. Riddle me that.

fresh roasted spaghetti squash

These days, broccoli competes for my number one favorite vegetable. It absolutely blows my mind. If you would have told me when I started this blog that I’d actually learn to love almost every vegetable, I would have laughed in your face. Hysterically.

Super glad things have changed around here! If I can become a veggie lover, anyone can. Trust me.

So!

Much like my spaghetti squash parmesan, this is a staple for us when it comes to cozy fall weeknight dinners. The kids love that they can have a “bowl” made of squash and it helps that the mixture is fully of golden brown bubbly cheese. 

cheesy melty broccoli cheddar

It also comes together so easily! The worst part is probably having to actually CUT the squash. But you gotta cut it in half! (P.S. here’s a little trick to make it easier.)

First, you roast the squash so you can scrape the noodles a bit. The edges get golden and caramely and smell incredible. While the squash is in the oven, you sauté some broccoli and shallot and garlic and stir in milk and cheese, making a quick cheesy sauce. 

stuffed the spaghetti squash with broccoli cheddar

Then you stuff the broccoli cheddar mixture into the squash boats, sprinkle with a little more cheese and breadcrumbs and bake until bubbly.

Yessss.

Bake until bubbly.

broccoli cheddar stuffed spaghetti squash

Oh my word.

This is so, so delicious. So hearty, but kind of light at the same time if that makes sense? It’s weeknight perfection.

It will become a new favorite dinner!

broccoli cheddar stuffed spaghetti squash

Broccoli Cheddar Spaghetti Squash

Print

Broccoli Cheddar Spaghetti Squash

This broccoli cheddar spaghetti squash is so comforting and satisfying. Tender squash noodles stuffed with melty, cheesy broccoli. Delish!
Course Main Course
Cuisine American
Prep Time 30 minutes
Cook Time 15 minutes
Total Time 45 minutes
Author How Sweet Eats

Ingredients

  • 2 spaghetti squash, cut in half with seeds scraped out
  • salt and pepper
  • 1 tablespoon olive oil
  • 1 shallot, diced
  • 2 garlic cloves, minced
  • 3 cups broccoli florets
  • 1 cup milk
  • 2 cups grated white cheddar cheese
  • ¼ cup seasoned panko breadcrumbs

Instructions

  • Preheat the oven to 400 degrees F. Line a baking sheet with foil and spray with nonstick spray.
  • Slice the spaghetti squash in half lengthwise and scrape out the seeds. Brush the cut sides with olive oil. Place the squash cut-side down on a baking sheet. Roast for 25 minutes.
  • While the squash is roasting, heat the olive oil in a skillet over medium-low heat. Add the shallots and garlic and cook for 2 minutes. Stir in the broccoli florets and cook, stirring often, for 6 to 8 minutes, until they are slightly softened. Stir in the milk and cook for 1 to 2 minutes, until it is warmed through. Stir in 1 cup of the cheddar and turn off the heat. Stir until the cheddar melts.
  • Remove squash from the oven and flip them over. Use a fork to scrape some of the squash. Season the squash with salt and pepper. Evenly distribute the broccoli cheddar mix in each squash bowl. Sprinkle the remaining cheddar on top. Sprinkle on the breadcrumbs.
  • Return the sheet to the oven and bake 10 to 15 minutes, until the cheese is golden and bubbly.

broccoli cheddar stuffed spaghetti squash

Those golden cheese bits. OMG.

The post Broccoli Cheddar Stuffed Spaghetti Squash. appeared first on How Sweet Eats.

20 Sep 03:59

Caramelized Onion and Burst Tomato Pasta Skillet.

by Jessica

No better way to close out summer than with caramelized onion tomato pasta!

caramelized onion tomato pasta with basil

Super caramely onions, bursting tomato gems, lots of fresh basil ribbons and of course – parmesan. Because life is nothing without cheese! 

This is late summer in a skillet. 

caramelized onions and cherry tomatoes

In case you haven’t noticed, this has basically been the year of caramelized onions for me. I mean, sure, I’ve used them in many recipes over the last decade, but this year I’ve really gone over the top.

And I can only assume that’s because we have so much time at home, that right now I’m like “oh, I have to caramelize onions for 30 minutes? Sweet! Something to do!”

You know?

caramelized onions and burst cherry tomatoes

Anyway, that’s why I don’t feel terribly awful about sharing so many recipes recently that require you to caramelize onions for a half hour before you really make the meal.

Promise promise it’s worth it. 

caramelized onions and burst cherry tomatoes in a skillet

So I know I just gave you a whole spiel about the onions taking quite a while, but other than that, this is such a quick and easy pasta. It’s one that comes together in a matter of minutes once the onions are caramelized and the tomatoes have popped. Throw the ingredients in the skillet and check them every so often. That’s all it takes! 

caramelized onion burst tomato pasta up close

There are a few major flavor players here in this skillet:

The caramelized onions, of course. They have so much sweet and savory flavor that I can’t help but use them in everything.

Burst cherry tomatoes! The best of summer, adding a little acid and a bit more sweet to the skillet.

Fresh basil, for an herby, refreshing pop.

And parmesan. Nutty and buttery and savory all in the one. It brings everything together and tastes so lovely. 

caramelized onion tomato pasta with basil in a skillet

Any pasta you love works here. Any shape, any kind. This is my idea of a perfect meatless meal, but it can also be a great side dish too. Or a pot luck dish, you know, when we can do that again in ten years. It’s even tastes good when it’s cold.

The leftovers are TOPS. The flavors just marry together even more in the fridge and taste incredible.

caramelized onion tomato pasta with basil

This is everything I want for dinner.

caramelized onion tomato pasta with basil

Caramelized Onion Tomato Pasta

Print

Caramelized Onion and Burst Cherry Tomato Pasta

This caramelized onion tomato pasta is super simple and flavorful. Perfect for the end of summer! Delicious as a main dish or side.
Course Main Course
Cuisine American
Prep Time 10 minutes
Cook Time 50 minutes
Total Time 1 hour
Servings 2 to 4 people
Author How Sweet Eats

Ingredients

  • 2 sweet onions, thinly sliced
  • 2 tablespoons butter
  • salt and pepper
  • 8 ounces pasta
  • 3 garlic cloves, minced
  • 2 cups whole cherry tomatoes
  • ⅓ cup fresh chopped basil ribbons, plus extra for topping
  • ¼ cup finely grated parmesan cheese
  • shaved parmesan for topping

Instructions

  • Heat the butter in a large skillet over medium-low heat. Stir in the onions with a big pinch of salt and pepper. Cook, stirring often, for 25 to 35 minutes, until the onions are golden and caramely.
  • Towards the end of the onions caramelizing, bring a pot of salted water to a boil and cook the pasta according to the package directions.
  • Add the garlic and cherry tomatoes into the skillet with the onions. Cook, stirring often, until the tomatoes begin to burst, about 10 minutes.
  • Stir the pasta into the skillet. Stir in the basil ribbons and the parmesan cheese. Taste and season with a pinch of salt and pepper if you feel it needs it.
  • Serve immediately with extra basil and parmesan for topping.

caramelized onion tomato pasta with basil and parmesan

Cute little springs!

The post Caramelized Onion and Burst Tomato Pasta Skillet. appeared first on How Sweet Eats.

04 Sep 19:08

Baked Bubbly and Cheesy Cauliflower Parmesan.

by Jessica

This cauliflower parmesan is the perfect cheesy treat.

baked cauliflower parmesan

Why yes, I’ll call anything with a cheese a treat. Cheese is my treat of choice. Always!

sliced cauliflower

To say I love this meal (side? snack?) would be an understatement. It is so darn good.

See, Eddie LOVES chicken parmesan. I make it for him every few weeks (sometimes in meatball form!). And I’m not sure when the idea of cauliflower covered in sauce and cheese became more appealing to me than chicken covered in sauce and cheese, but it did. There I said it! 

cauliflower steaks with olive oil

It’s true. This is more desirable to me than crispy chicken, which is just crazy! I never thought the day would come.

Now I don’t exactly consider this a meal alone, though it could be one – maybe with a side of pasta or vegetables or beans or something? Something with a little more substance. 

OR you could make this as a side dish. Or heck, a nice little lunch with a greens salad. Sounds perfect with a glass of chilled pinot grigio!

cauliflower parmesan about to be baked

Okay so the cauliflower parm!

It’s no secret that roasted cauliflower is one of the first vegetables I really got into. I’ve said for years that when it’s roasted, it almost takes on a popcorn-like flavor. It’s kind of nutty, if you will. In a really good way.

fresh mozzarella, sauce on cauliflower

I still can’t bear to call cauliflower steaks. But I mean, these do look steak-like, if I do say so myself! The key is to slice the head of cauliflower into thick pieces so it can hold a ton of sauce and cheese.

Since we cut the slices thick, I like to roast them first. This allows them to get a little browned and charred, maybe with a few crispy edges. 

Then we go back in and top with marinara. Then top with fresh mozzarella!

baked cauliflower parmesan

Roast a bit more until that cheese is golden and bubbly. It’s a dream! Top with the garlic butter breadcrumbs for a little texture. And fresh basil too. 

baked cauliflower parmesan

This is definitely a knife and fork kind of dish. The cauliflower will be tender enough to cut with a fork, but it may be a little messy with the sauce. Throw in some garlic bread too? 

baked cauliflower parmesan

It’s warm and comforting and totally delish.

baked cauliflower parmesan

I’m all about the easy weeknight comfort meals right now and this hits the spot!

baked cauliflower parmesan

Cauliflower Parmesan

Print

Cauliflower Parmesan

This baked cauliflower parmesan is seasoned and covered in saucy marinara, topped with bubbly cheese and garlic butter breadcrumbs.
Course Main Course
Cuisine American
Prep Time 10 minutes
Cook Time 30 minutes
Total Time 40 minutes
Author How Sweet Eats

Ingredients

  • 1 large head cauliflower, sliced into 1-inch thick slices
  • 2 tablespoons olive oil
  • 1 teaspoon italian seasoning
  • salt and pepper
  • 1 cup marinara sauce
  • 8 ounces fresh mozzarella cheese, sliced
  • 3 tablespoons parmesan cheese, for topping
  • fresh basil, for topping

garlic butter breadcrumbs

  • 1 tablespoon unsalted butter
  • 1 garlic clove, minced or pressed
  • 1/3 cup seasoned panko bread crumbs

Instructions

  • Preheat the oven to 425 degrees F.
  • Slice the cauliflower from the top down, into 1-inch thick slices. Place the cauliflower on a baking sheet. Drizzle or brush with the olive oil so it covers the slices. Sprinkle with the italian seasoning and a pinch of salt and pepper all over. Roast the cauliflower for 15 minutes.
  • After 15 minutes, spoon the marinara over the cauliflower. Place a slice of the fresh mozzarella on top. Bake for 15 more minutes, or until the cheese is bubbly and melted.
  • Remove the cauliflower and top with the breadcrumbs, fresh basil and a sprinkle of parmesan.

garlic butter breadcrumbs

  • Heat the butter in a skillet over medium-low heat. Stir in the garlic, cook for a few seconds, then stir in the bread crumbs. Cook, stirring often, for 2 to 3 minutes until golden.

baked cauliflower parmesan

Looks like a nice cheesy pillow

The post Baked Bubbly and Cheesy Cauliflower Parmesan. appeared first on How Sweet Eats.

12 Aug 22:09

Grilled Peach Pizza with Corn and Chili Garlic Sauce.

by Jessica

This pretty little corn peach pizza should be your dinner tonight!

grilled peach pizza with corn and chili garlic oil

It 100% screams HELLO SUMMER as loud as it can.

sliced peaches

Corn and peaches are one of my favorite combos ever. They basically represent summer on a dish. And I love that with both being sweet and crunchy, they can work in a dessert or a savory meal. Just so good, right?

chili garlic oil

Peach pizza isn’t a new thing for us here. Years ago I made this peach ricotta pizza that has been a huge fave. And, well, corn on pizza? It’s a must have and another one of my favorite ingredients to throw on top of dough.

The combo also really shines in salads or salsas – if you’ve ever made the corn peach salsa from The Pretty Dish, then you know what I’m talking about! 

corn peach pizza on the grill

I threw this pizza on the grill, much like last year’s steakhouse pizza. I love doing pizza on the grill and we also have an ooni oven which is incredible. 

The only issue with grilling this is that the cheese may not get super bubbly and brown on top, in which case you can throw it under the broiler for a minute or two. If you head over to instagram today, I’ll show you exactly how I make this, step by step, in instagram stories. You’ll want to eat your screen! 

corn peach pizza off the grill

So the toppings! 

It allllll starts with some chili garlic oil. Sort of like this garlic sauce pasta, or the chili oil that I make for my white clam pizza – but combined! I’m warning you – this is addictive and you will want to dip and entire loaf of sourdough directly in it. It’s fab. Super garlicky with a hint of heat.

grilled peach pizza with corn and chili garlic oil

The oil sizzles with six cloves of garlic and a bunch of red pepper flakes. Then it’s the base for our pizza. On top we have thinly sliced peach, corn straight from the cob and a bunch of fresh mozzarella. I happened to use marinated fresh mozzarella and that is amazing too. Adds a little extra flavor, but it’s not totally necessary. Regular fresh mozzarella works too! 

grilled peach pizza with corn and chili garlic oil

After the pizza is cooked and super bubbly and cheese, I like to top it with a few handfuls of microgreens and then lots of fresh basil. Or whatever herbs you have on hand. I also like to do one more extra drizzle of chili garlic oil on top. 

And of course, feel free to throw on some parmesan! 

It’s heavenly.

grilled peach pizza with corn and chili garlic oil

Corn Peach Pizza

Print

Corn and Peach Pizza with Chili Garlic Sauce

This corn peach pizza is summer on a dish! Made with fresh mozzarella, basil and herbs and chili garlic sauce, it's incredible!
Course Main Course
Cuisine American
Prep Time 2 hours
Cook Time 2 days 25 minutes
Total Time 2 days 2 hours 25 minutes
Servings 4 people
Author How Sweet Eats

Ingredients

dough

  • 1 cup warm water
  • 3 teaspoons active dry yeast
  • 1 tablespoon honey
  • 1 tablespoon olive oil
  • 2 1/2 cups all-purpose flour
  • 1 teaspoon salt
  • flour and coarse cornmeal for dusting

toppings

  • ½ cup olive oil
  • 6 garlic cloves, finely minced
  • ½ teaspoon crushed red pepper flakes
  • 2 peaches, thinly sliced
  • 2 ears of corn, kernels cut from the cob
  • 8 ounces provolone cheese, freshly grated
  • 8 ounces fresh mozzarella cheese, sliced or in balls

Instructions

  • In a large bowl, combine water, yeast, honey and olive oil. Mix with a spoon, then let sit until foamy, about 10 minutes. Add the flour and salt, stirring with a spoon until the dough comes together but is still sticky. Using your hands, form the dough into a ball and work in the additional 1/2 cup flour, kneading it on a floured surface for a few minutes. Rub the same bowl with olive oil then place the dough inside, turning to coat. Cover with a towel and place in a warm place to rise for about 1 to 1.5 hours.
  • Make the garlic oil. In a small saucepan, combine the oil, garlic and pepper flakes. Cook over low heat, stirring often, just until the garlic is slightly golden and sizzling.
  • After the dough has risen, punch it down and place it back on the floured surface. Using a rolling pin or your hands, form it loosely into your desired shape Place the towel back over the dough to rest.
  • Preheat the grill to high heat for 10 to 15 minutes - you want the temperature to be around 450 to 500 degrees F. If needed, lower the temperature a little bit.
  • Now comes the time when you need to be prepared! Have your corn and peaches sliced. Have your cheese out and ready to go. Generously cover a pizza peel with flour and coarse grind cornmeal. This will help prevent the dough from sticking.
  • Moving quickly, transfer your pizza dough to the pizza peel, quickly rolling it a bit more if needed but making sure the entire bottom is floured/cornmeal very well. Spoon the garlic oil all over top of the top, brushing it around the edges. Top with the cheeses, then the corn and peaches.
  • Quickly and gently use a spatula or additional pizza peel to slice your pizza directly on to the grill grates. Close the lid and cook until the pizza dough is bubbly and golden, anywhere from 5 to 8 minutes – but this will depend on the thickness of your crust. Just be sure to continue to check it. It will be finished when the edges are golden and puffed up! You can rotate the pizza a few times if you feel it needs it.
  • Once the pizza is finished, slide the peel under it and transfer it to a cutting board. Cover it with the micro greens and basil and slice it to serve. Enjoy!

grilled peach pizza with corn and chili garlic oil

Always craving this.

The post Grilled Peach Pizza with Corn and Chili Garlic Sauce. appeared first on How Sweet Eats.

02 Aug 17:42

Blueberry Peach Galette with Cinnamon Sugar Crust.

by Jessica

Making summer dessert dreams come true with this blueberry peach galette.

blueberry peach galette with cinnamon sugar galette

I live for a good galette!

Seriously. When I first discovered galettes, my world changed. Feeling that pie dough is high maintenance in itself – let alone trying to work the dough into the pie dish and making the edges all pretty. I have patience for many food related things but that was never one of them. I’ve got better at it over the years, but the galette is the answer to a quick and delish pie-like treat!

blueberries and peaches

The “rustic” feel of the galette is just another word to say that you don’t have to be as precise in making pretty crust. As long as your filling works and your pie crust recipe is legit? The galette wins! 

I’ve made quiiiiiite a few here on the blog. The first I ever made was a ginger peach galette. I’ve done sour cherry, apple cheddar and savory versions like summer chicken pot pie and butternut squash. They are all so darn good. Something about bites of that crust. Yum. 

blueberries and peaches in galette dough

This version is a spin on my blueberry peach cobbler bars in The Pretty Dish. Those bars are incredible and if you don’t have the book yet, go grab a copy

Blueberry peach is such a perfect summer combo and one that I find myself craving.

Right?

So I took a note from this stone fruit tart I made last year and used a cinnamon sugar crust too, which is crunchy and crispy and a texture lovers dream. Oh my gosh.

sprinkling cinnamon sugar on dough

HEAVEN!

This crust is so wildly good! I like to use a mix of turbinado sugar and cinnamon because the coarse granules make the crust even better. It’s just SO extra crunchy. Please please try it.

blueberry peach galette with cinnamon sugar galette

And the filling is a bubbly blueberry peach bomb. I swear the inside of this just straight up tastes like SUMMER. Then it mixes with the ice cream and you just don’t even know what to do with yourself.

blueberry peach galette with cinnamon sugar galette topped with ice cream

Oh oh! And you can easily make the galette dough ahead of time of course – store it in the fridge and use when ready. Other fruits work in the filling, though I am most partial to berries and stone fruit, of course.

Especially when mixed together!

blueberry peach galette with cinnamon sugar galette topped with ice cream and fresh mint

P.S. I am probably the person that steals all of the crunchy crust right there.

blueberry peach galette with cinnamon sugar galette topped with ice cream and fresh mint

Don’t forget a big scoop of vanilla bean ice cream! 

Can’t be beat.

sliced blueberry peach galette with cinnamon sugar galette topped with ice cream and fresh mint

Blueberry Peach Galette

Print

Blueberry Peach Galette with Cinnamon Sugar Crust

This blueberry peach galette is a summer dessert dream. Juicy blueberries and peaches in a cinnamon sugar crust. Delish!
Course Dessert
Cuisine American
Prep Time 45 minutes
Cook Time 45 minutes
Chilling Time 30 minutes
Total Time 2 hours
Servings 4 people
Author How Sweet Eats

Ingredients

dough

  • 4 cups sifted all-purpose flour
  • 3 tablespoons sugar
  • 1 teaspoon salt
  • 1 teaspoon cinnamon
  • 1 large egg lightly beaten
  • 1 teaspoon white vinegar
  • 1/2 cup ice cold water
  • 1 1/2 cups cold unsalted butter cut into pieces, 3 sticks or 24 tablespoons
  • 1 egg + a few drops of water beaten together, for brushing
  • ¼ cup raw turbinado sugar + ½ teaspoon cinnamon, for sprinkling

filling

  • 1 ½ cups blueberries
  • 2 peaches, thinly sliced
  • 2 tablespoons cornstarch
  • 2 tablespoons sugar
  • 1 tablespoon lemon juice
  • 1/4 teaspoon salt
  • fresh mint, for garnish
  • vanilla ice cream. for serving

Instructions

dough

  • NOTE: this makes TWO galette crusts! I highly suggest following this recipe and making two - stick one in the freezer so you have it when needed. You can freeze it for 3 months!
  • Add the flour, sugar, cinnamon and salt to a food processor and pulse just until combined. In a small bowl, whisk mix together the egg, vinegar and water. Add the cold butter pieces into the food processor and pulse until small coarse crumbs remain. Sprinkle the water/egg mixture over the flour and pulse again until the dough comes together.
  • Remove the dough with your hands and wrap it in plastic wrap. This dough makes enough for 2 galette crusts, so separate it into 2 sections now, – or separate it after it’s refrigerated.
  • Refrigerate the dough for 30 minutes. Freeze one of the other balls of dough!
  • After 30 minutes, preheat the oven to 400 degrees F.

filling

  • Combine the blueberries and peaches in a large bowl. Stir together the sugar, cornstarch , lemon juice and salt. Pour it over the fruit and toss well.
  • Remove one of the crusts from the fridge. (The other is good for another week or so, or it can be frozen.)
  • Roll one of the pie crusts into a… “rustic”shape – like a big circle with ragged edges, until it is about 1/4 inch thick. Place the dough on a parchment-lined baking sheet.
  • Layer the fruit in the center leaving a 2-inch+ border of crust. Once the fruit is layered, fold the crust over top of it. Brush the crust with the beaten egg wash.
  • Sprinkle on the cinnamon sugar mixture and press it into the crust. Sprinkle any of the exposed crust with the sugar.
  • Bake the galette until the crust is golden and the fruit is syrupy, about 40 to 45 minutes. Let it cool slightly before serving with ice cream and a fresh mint leaf.

blueberry peach galette with cinnamon sugar galette topped with ice cream and fresh mint

How is this so heavenly?! 

The post Blueberry Peach Galette with Cinnamon Sugar Crust. appeared first on How Sweet Eats.

22 Jun 13:29

Baked Popcorn Chicken with Raspberry Hot Honey.

by Jessica

Who wants to make baked popcorn chicken with me today!

baked popcorn chicken with raspberry hot honey

And I’m back with more hot honey too.

Hope you’re not sick of it yet. Because this version has a BIG twist.

Say hello to raspberry hot honey, which might just be your new favorite thing. You can put it on this chicken, you can put it on watermelon wedges. This is a dream.

I mean, is there anything more versatile than that? So good.

raspberry puree and jalapeno in honey

Okay but before that, let’s talk chicken. I basically use my own darn blog so I don’t have to eat boring chicken recipes. And since I started 11 years ago, I have posted a ton, and I do mean a TON, of baked crispy chicken recipes.

They are easily my favorite thing to make. Everyone loves them. They are simple. They can be used in so many different ways. Wowza.

One of the ones that you always go crazy for are these pretzel crusted chicken fingers with hot honey. So yes, this is sort of like that, but… not. 

Not exactly, of course.

panko flour coated chicken pieces

Here, we’re soaking our chicken nugget pieces in buttermilk (remember I used to do this alllll the time, back in the day?) and then dredging them in a mixture of flour and panko. But we’re still baking them! Using my wire rack trick, getting them extra crispy crunchy.

If you go watch on instagram later today, you can see me make these step by step! 

raspberry hot honey

Once the chicken is done, you can drizzle it with the hot honey or dip it in the hot honey.

And this might be my favorite variety of hot honey yet.

drizzling raspberry hot honey on popcorn chicken

The raspberries add a little more sweetness that really balances out the hot peppers. They also turn the hot honey the most gorgeous shade of pink, so of course I’m here for that. OF COURSE. 

baked popcorn chicken with raspberry hot honey

This is a recipe you can make for lunch or dinner, or even as an app for a crowd. While I don’t love next-day leftovers of this chicken (Eddie does, so that’s saying something), at room temp, they do hold up well. Meaning you could make them about an hour or so before a get together and keep them warm. They will stay flavorful and crunchy! Yes!

Oh and let’s also talk about how we can make strawberry hot honey too. Or blueberry?! And blackberry, of course. I’m obsessed. Keep this stored in your fridge, drizzle it on EVERYTHING – seriously. Fish, shrimp, chicken, fruit, dessert – the options are absolutely endless.

And I’m in love.

raspberry hot honey

Baked Popcorn Chicken with Raspberry Hot Honey

Print

Popcorn Chicken with Raspberry Hot Honey

Baked popcorn chicken is super crispy and crunchy and baked! Serve with a drizzle or dip of fresh raspberry hot honey for extra zing.
Course Main Course
Cuisine American
Prep Time 1 hour
Cook Time 30 minutes
Total Time 1 hour 30 minutes
Servings 4 people
Author How Sweet Eats

Ingredients

raspberry hot honey

  • 4 ounces fresh raspberries
  • 2 tablespoons water
  • ¾ cup honey
  • 1 jalapeño pepper, thinly sliced

popcorn chicken

  • 1 pound boneless, skinless chicken breasts, cut into pieces
  • 2 cups buttermilk
  • 3/4 cup flour
  • 1 1/2 cups panko bread crumbs
  • 2 teaspoons garlic powder
  • 2 teaspoons smoked paprika
  • salt and pepper

Instructions

raspberry hot honey

  • Place the raspberries and water in a blender and blend until pureed. Pour the mixture through a fine mesh strainer set over a bowl, pressing with a back of the spoon to capture the seedless berry puree. You only need 2 to 3 tablespoons of puree!
  • To make the honey, combine 2 tablespoons of the puree with the honey and sliced jalapeno in a saucepan. Bring the mixture to a simmer, stirring to combine. Let it cool to room temperature then use as desired - as a dip or drizzle. You can store this in the fridge for a few days!

popcorn chicken

  • Place the chicken pieces in a baking dish and cover with the buttermilk. Cover the baking dish and place it in the fridge for at least 1 hour (or longer).
  • Preheat the oven to 450 degrees F. Line a baking sheet with a wire rack. Spray the wire rack with nonstick spray.
  • Remove the chicken in buttermilk from the fridge about 15 minutes before making. Combine the flour, panko and spices on a plate with a generous pinch of salt and pepper. Take each piece of chicken out of the buttermilk and place it directly into the flour panko mix, tossing to coat. Place it on the wire rack and repeat with remaining chicken. Spritz or brush the chicken with olive oil spray. This is important because it helps the chicken crisp up!!
  • Bake the chicken pieces for 15 minutes, then rotate the pan and bake for 10 to 15 minutes more, until golden and crunchy.
  • Remove the chicken and serve with the raspberry hot honey. You can drizzle it on or use it for dipping!

baked popcorn chicken with raspberry hot honey

More crispy crunchy bites please.

The post Baked Popcorn Chicken with Raspberry Hot Honey. appeared first on How Sweet Eats.

14 Jun 02:40

Strawberry Basil Focaccia Bread.

by Jessica

Hello new favorite summer bread! It’s strawberry focaccia and I am all about it.

strawberry basil focaccia

And the first strawberry recipe of the season is out of the gate!

sliced strawberries

Okay so I might have, like, ten strawberry recipes for you this year. I CAN’T HELP IT.

They’ve been my favorite fruit for as long as I’ve been eating fruit. 

Strawberry has also always been my go-to flavor. We’re talking artificial flavors, of course. While both of my brothers worshipped at the altar of anything cherry, I was strawberry all the way. Cherry tasted like cough syrup and I just couldn’t do it.

Sure, that’s changed and now I do like cherry. BUT I LOVE STRAWBERRY. Forever and ever. Amen.

sliced strawberries close up

And I 100% am the person who leaves behind all of the grape popsicles. Never could get into grape.

focaccia with caramelized onions and strawberries

This year, I have been living for savory strawberry recipes. Yes, I have two sweet ones to share with you too (one is actually from last year… it’s a long story, haha), but I’ve been craving savory recipes where strawberries are just part of the bunch. Where they add a hint of sweetness.

Sort of like this strawberry pizza that may have freaked you out.

And like this focaccia!

strawberry basil focaccia

Okay – they might add more than a hint of sweetness. But it’s in a really good way. The focaccia bread is still chewy and salty – oh and especially those crispy, crunchy edges?! Live for them.

I threw a ton of basil on top. I was already hooked on the idea of strawberry basil focaccia. Then I googled strawberry focaccia to make sure it wasn’t completely over done. And I saw saveur had added caramelized onions to a strawberry focaccia, knew I’d love it since I did it on pizza, so I had to add caramelized onions to my strawberry focaccia!

strawberry basil focaccia

Yes, the obsession with this bread is still going. Last year I made a grilled focaccia and I still dream about that. Honestly might make it this weekend because it’s incredible. And of course – pretzel focaccia! I don’t even want to think about it because it’s unreal. 

I’m excited to add this one to the bunch. It’s chewy, salty, sweet and has the most refreshing bite from the herbs. Serve it as an appetizer, a snack, a side dish at dinner… whatever you like!

strawberry basil focaccia

Strawberry Focaccia

Print

Strawberry Basil Focaccia

This strawberry focaccia bread is the perfect sweet and savory combo. Caramelized onions, strawberries, basil and flaky salt!
Course Side Dish
Cuisine American
Prep Time 2 hours 40 minutes
Cook Time 20 minutes
Total Time 3 hours
Servings 8 to 10 people
Author How Sweet Eats

Ingredients

  • 1 3/4 cups warm water
  • 2 1/4 teaspoons active dry yeast
  • 1 tablespoon honey
  • 5 cups all-purpose flour plus more for your workspace
  • 1 tablespoon kosher salt plus more for sprinkling
  • 1 cup extra virgin olive oil
  • 2 tablespoons unsalted butter
  • 1 large sweet onion, thinly sliced
  • salt and black pepper
  • 2 tablespoons balsamic vinegar
  • 1 ½ cups sliced strawberries
  • flaked salt, for sprinkling
  • 1 big handful of basil leaves, thinly sliced or torn

Instructions

  • In a bowl, stir together the water, yeast and honey. Let it sit for 10 to 15 minutes until foamy.
  • In the bowl of your stand mixer, add the flour, 1 tablespoon of salt, 1/2 cup of olive oil and the yeast mixture. Stir, using the dough hook, until the mixture comes together. Knead it on medium-low speed for 5 to 6 minutes. If it's super sticky, sprinkle in a bit of extra flour. You want it to be silky!
  • Put the dough in an oiled bowl and cover it. Place it in a warm spot and let it rise for 1 hour, or until it's doubled in size.
  • After it's doubled, place the remaining oil in a 15 1/2 x 10 inch jelly roll sheet pan. Place the dough in the sheet pan and turn it over to cover it in the oil once, then press and spread it until it fits in the pan (or almost fits in the pan. it's going to rise again!). While doing this, press to make finger marks in the dough so it looks like traditional focaccia. Cover the sheet pan and place the dough back in a warm place to rise for another hour.
  • While it’s doing the second rise, heat a large skillet over medium-low heat and add the butter. Stir in the onions with a pinch of salt. Cook for 10 minutes, stirring often, until softened. Stir in the balsamic vinegar. Cook for another 10 to 15 minutes, until caramely.
  • Preheat the oven to 425 degrees F. Uncover the pan and cover the bread with the caramelized onions and thinly sliced strawberries. Sprinkle with a pinch of flaked salt. Drizzle with olive oil. Bake the bread for 15 to 20 minutes, until it's golden and toasty. Remove from the oven and let it cool. Top with fresh sliced basil and cut into pieces. Serve!
  • You can make this ahead of time and slice right before serving. You can reheat in a low temp oven (like 250) for a few minutes before eating.

Notes

caramelized onion idea from saveur

strawberry basil focaccia

It’s like savory dessert focaccia!

The post Strawberry Basil Focaccia Bread. appeared first on How Sweet Eats.

14 Jun 02:39

Dynamic Entropy

Despite years of effort by my physics professors to normalize it, deep down I remain convinced that 'dynamical' is not really a word.
14 Jun 02:38

Sun Dried Tomato and Sweet Corn Skillet Lasagna.

by Jessica

This summer skillet lasagna is sponsored by Stella Cheese! I’ll be creating a few fun recipes for them throughout 2020.

Today we’re eating the epitome of summer in a skillet lasagna.

summer skillet lasagna

It’s no secret that skillet lasagna is one of my absolute favorites! It’s an easy way to enjoy lasagna and a great throw-together weeknight meal. I love it so much. You can use what you have on hand, a variety of pasta shapes and of course… CHEESE.

Give me all the cheese please.

freshly grated parmesan cheese

Today I’m partnering with Stella Cheese and I could not be more excited! Dream come true level.

Um, hello, my name is Jessica and I am the biggest cheese lover on the planet. Stella has a huge selection of artisan cheeses with a rich Italian heritage. It is super high quality and tastes fantastic, which really allows you to elevate your everyday meals. Today, I’m using their Stella Parmesan Cheese which has been aged for 10 months. It’s nutty and buttery and absolutely delish.

ingredients for sun dried tomato pesto

The Stella Parmesan Cheese is working double duty for us today: I’m using it in the pesto and in the skillet lasagna. It’s one of those cheeses that adds so much depth of flavor.

I’m also throwing some of the Stella Fresh Mozzarella on top for an extra cheesy melt. This is perfect on pizza too.

pureed sun dried tomato pesto

So skillet lasagna, let’s get to it.

To start, we have a sun-dried tomato pesto. Oh my GOSH. Okay guys this might be my pesto of the summer. It is so ridiculously flavorful. Sun dried tomatoes, tons of fresh basil, the buttery, nutty Stella Parmesan Cheese, lots of garlic and toasted pine nuts.

Yes yes yes! Blend that up and you’re in pesto heaven.

Now, making this pesto babe from scratch does give you an extra step. But it’s one you can do ahead of time and something that can be stored in the fridge. And if you are unable to grab all the ingredients right now, feel free to use your favorite jarred pesto!

summer skillet lasagna

The rest of the lasagna is really quite simple, especially if you use some ingredients you have in your kitchen. We do some lightly caramelized shallots and sweet corn cut straight from the cob since we’re hitting the summer season. Of course, you can use another variety of corn at the moment if fresh corn isn’t accessible right now.

We’re throwing in a touch of ricotta for the lasagna touch and the fresh mozzarella cheese because WHY NOT MORE CHEESE?! Another sprinkle of the Stella Parmesan Cheese on top too.

Fresh herbs. Lots of basil.

It’s easy but wildly flavorful!

summer skillet lasagna

And of course, use whatever pasta you have on hand. I like to break the lasagna noodles into third and use those, but bowties work too! You can layer your noodles or throw them all together if you’re in the dinner rush. However these ingredients end up together in the skillet will be wonderful.

sun dried tomato and sweet corn skillet lasagna

Isn’t it so gorgeous too?! It’s also a great dish that you can transport – throw it in a baking dish instead of the skillet to take to a cookout or dinner party with friends.

Comforting, cheesy and tastes like summer!

Sun Dried Tomato and Corn Skillet Lasagna

Print

Sun Dried Tomato and Sweet Corn Skillet Lasagna

This skillet lasagna is loaded with a sun dried tomato pesto, sweet corn right off the cob, tons of ricotta, mozzarella and parmesan. Delicious.
Course Main Course
Cuisine American
Prep Time 25 minutes
Cook Time 20 minutes
Total Time 45 minutes
Servings 4
Author How Sweet Eats

Ingredients

sun dried tomato pesto

  • 1 cup packed basil leaves
  • 1 7 oz jar sun dried tomatoes in olive oil
  • 3 garlic cloves, minced
  • ½ cup freshly grated Stella Parmesan Cheese
  • ¼ cup toasted pine nuts
  • ½ teaspoon salt
  • ½ teaspoon pepper
  • ⅓ to ½ cup extra virgin olive oil

lasagna

Instructions

sun dried tomato pesto

  • Combine the basil, sun dried tomatoes (and the oil from the jar), garlic, parmesan, pine nuts, salt and pepper in a food processor. Pulse until combined. With the processor on, stream in the olive oil, starting with ⅓ cup. You may need a bit more depending on how much olive oil is in your jar of tomatoes. You can make this ahead of time!

lasagna

  • Preheat the oven to 350 degrees F. Bring a pot of salted water to a boil so you can cook the lasagna noodles. Cook them according to the package directions, but shave 1 minute off the cook time so the noodles are al dente. Drain the noodles once they are finished boiling.
  • Heat an oven-safe 8 or 10-inch skillet over medium-low heat and add the olive oil. Add the shallots with a pinch of salt and pepper and stir. Cook until softened, about 3 minutes. Stir in the corn kernels. Stir in the pesto.
  • Take the noodles and fold them into the corn and pesto mixture in the skillet. Add on some spoonfuls of ricotta cheese and a few slices of the Stella Fresh Mozzarella, along with grated Stella Parmesan Cheese (save some for topping!). I like to make sure all the noodles are coated! Top with remaining sliced mozzarella and parmesan.
  • Bake the lasagna for 25 to 30 minutes. Remove it from the oven and garnish with extra fresh basil. Serve!

sun dried tomato and corn skillet lasagna

My middle name should be cheese.

The post Sun Dried Tomato and Sweet Corn Skillet Lasagna. appeared first on How Sweet Eats.

01 Jun 18:09

Melted Zucchini Baked Ziti.

by Jessica

Oh guys. I am super super into melted zucchini baked ziti right now.

melted zucchini baked ziti

Pretty sure this is my summer love language.

It’s been my little secret in the kitchen for the last few weeks. It’s a dish we’ve eaten constantly. Eddie is thisssss close to being sick of it because I’ve made it so much. Oh well! More for me. 

melted zucchini and garlic in skillet

Plus look at all that green! And garlic! Totally an excellent way to eat veggies.

zucchini and fresh basil in skillet

I absolutely love this method of cooking zucchini. It melts into an almost-sauce. You sauté it with some olive oil, salt and garlic and is melts into zucchini strands that are soft and flavorful and kind of caramelized!

It’s SO good.

noodles

I’ve made a zucchini sauce recipe before from bon appetit, but a few weeks ago my friend Flavia started making a version of the zucchini pasta on her instagram. It got me SO excited for summer and all the uses for zucchini. Other than this summer squash brown butter pasta, another huge fave. 

And this one is great because you can use up a LOT of zucchini squash. For instance, I like to make this sauce with four or five whole zucchini. They melt down so much (almost like when you cook onions) that you will be shocked!

pasta tossed with melted zucchini

Also! This baked ziti is for all my friends who are usually very underwhelmed by baked ziti. Hi. It’s me! Right?!

There are a few variations of baked ziti that are incredible, and actually I have another one coming in my book next year. But on the regular, it’s just not like there is much going on and if you don’t love tomato sauce, it can be even more underwhelming! Hi. Me again.

This is the solution. 

fresh mozzarella covering zucchini ziti

A summery baked pasta. It’s perfect as a side dish for a party or amazing for dinner with a big greens salad. I’ve probably made this dish ten times in the last month, giving it away to friends and family with abandon. Pretty sure come the end of the summer with zucchini is everywhere, I’ll have a bunch at my doorstep! 

melted zucchini baked ziti

Here’s the scoop:

It’s still simple and flavorful, almost like a naked pasta. Noodles, zucchini, garlic and olive oil. Some pesto stirred in towards the end. Any variety you like! Loaded up with parmesan, ricotta and fresh mozzarella. Tons of chopped fresh basil too! 

Make it in a skillet for weeknight dinner, or make it in a baking dish to take to a cookout as the side dish.

Oh and I actually have another skillet lasagna coming next week that is similar and oh so good – with other flavors that just scream summer.

melted zucchini baked ziti

Anywayyyy… you bake it for just a bit to bring everything together. Then eat the cheesy goodness. 

Simple, flavorful and so insanely good! 

melted zucchini baked ziti

Melted Zucchini Baked Ziti

Print

Melted Zucchini Baked Ziti

This melted zucchini ziti is made with an olive oil zucchini sauce, lots of garlic, fresh basil, ricotta and mozzarella. It's summer perfect!
Course Main Course
Cuisine American
Prep Time 40 minutes
Cook Time 20 minutes
Total Time 1 hour
Servings 4 as a meal, 6 as a side dish
Author How Sweet Eats

Ingredients

  • 1 pound ziti pasta, or similar cut noodle
  • ½ cup reserved pasta water
  • ⅓ cup olive oil
  • 4 medium zucchini squash, sliced into rounds or chopped
  • 4 garlic cloves minced
  • ½ teaspoon salt
  • ½ teaspoon freshly cracked black pepper
  • 1/4 teaspoon crushed red pepper flakes
  • 3 tablespoons pesto
  • 1 cup packed fresh basil, plus extra for topping
  • 12 ounces ricotta cheese
  • 12 ounces fresh mozzarella cheese, sliced
  • grated parmesan cheese, for serving

Instructions

  • Preheat the oven to 350 degrees F. Bring a pot of salted water to a boil and cook the pasta according to the package directions. Be sure to reserve the ½ cup of the pasta water after cooking!
  • Heat a large skillet (you can do an oven safe one if you don’t want to transfer) over medium-low heat and add the olive oil. Add the zucchini, garlic, salt and pepper. Stir to combine. Cook, stirring often, until the zucchini cook down and sort of melt into the pan. Stir in the red pepper flakes.
  • Stir in the reserved pasta water and the pesto. Stir in the fresh basil. By this time the pasta should be finished. You can either add everything to a baking dish or add it all to the skillet if it’s large enough. Toss the pasta with the zucchini pesto mixture - whether it’s in the dish or skillet.
  • Add the ricotta cheese in scoops throughout the pasta. Toss it together until the ricotta coats most of the pasta. Add the fresh mozzarella - a few slices in the noodles and a few on top too.
  • Bake for 20 to 25 minutes, just until the cheese melts everything comes together. Remove and serve immediately with a sprinkle of fresh parmesan and fresh basil for garnish.

melted zucchini baked ziti

Plus, veggies!

The post Melted Zucchini Baked Ziti. appeared first on How Sweet Eats.