Shared posts

20 Jan 22:48

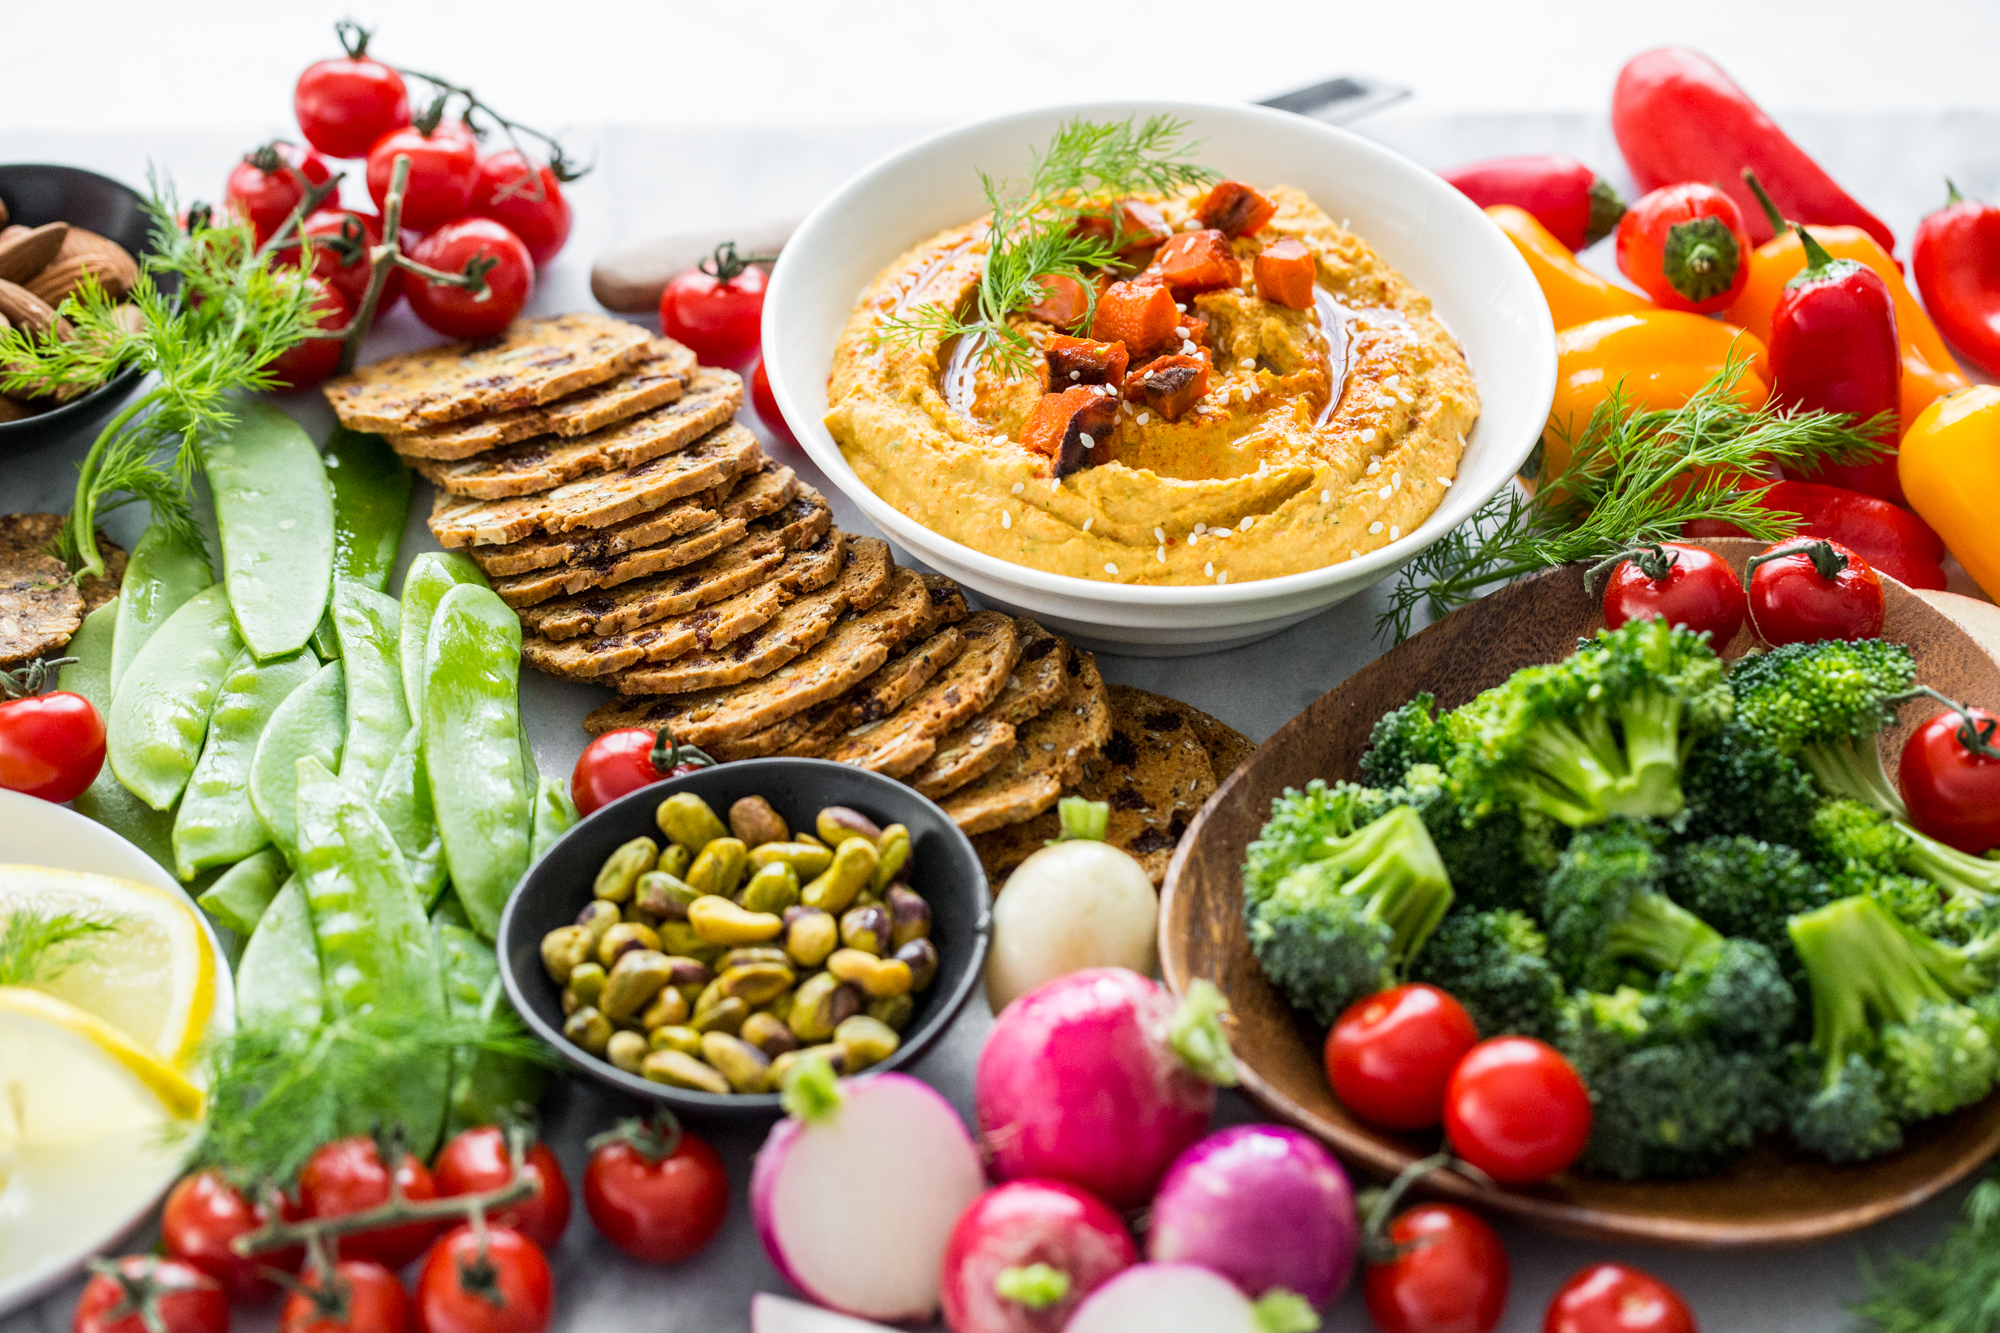
Roasted Carrot and Dill Hummus

by Angela (Oh She Glows)
Shh.listen

Dang I love me some roasted carrots

I just checked the version history of my Roasted Carrot and Dill Hummus Google Doc and realized that I first tested this hummus recipe on January 10, 2015. What the heck? THREE years ago?! #hellotimewarp Better late than never, I say…although I know a few people who are likely baffled by its turtle-paced cross to the finish line! 

My kiddos are hummus fiends (they’ll actually eat it by the spoonful…I have no idea who they got that habit from…), and they gobbled up this roasted carrot version in no time. I like knowing that it’s packing a couple extra veggies—what’s not to love about a sneaky vitamin boost? 

I know what you’re thinking: Ange, is this hummus really worth roasting carrots for? I agree, it’s sort of a big ask for a hummus recipe, but every time I make this version I’m reminded how much I LOVE the flavour combo. The smoky charred carrots just give it that little something-something…not to mention a bit of sweet creamy-dreamy-ness (technical term) alongside a hint of dill—so bright and fresh!

A couple fun tricks: Since I’m already roasting carrots for the recipe, I like to add a few extras along with some other veggies, like broccoli, for dipping into the hummus or layering in a wrap. So throw whatever veggies you have onto the roasting pan and go wild. Or you might even toss on a handful of chickpeas to get in on the roasting party—they’re also great in a wrap, served on salad, or sprinkled as a garnish on the hummus itself. Another trick I use now and then is to roast the carrots before bed and pop them into a container in the fridge overnight. The next day, the carrots are ready to be thrown into the food processor with the other hummus ingredients so it all comes together super fast. 

Before I get to the recipe, I’d also like to mention that The Oh She Glows Recipe App is still on sale for 99 cents in the iTunes Store! (The Google Play Store operates separately from iTunes, and we weren’t able to extend the Oh She Glows app sale any longer with them, unfortunately—we’ll have to do another sale in the near future!) A huge thank you to everyone who has supported our app and left such great feedback! It means the world to us as this has been such a passion project. 

5 from 8 reviews
Print
Email

Roasted Carrot and Dill Hummus

Vegan, gluten-free, grain-free, nut-free, refined sugar-free, soy-free

Roasted carrots and fresh dill lend this creamy hummus a lightly sweet and tangy flavour that’s downright irresistible! This recipe was love at first bite and has since claimed the number 1 spot in my homemade hummus repertoire. Because this version calls for roasted carrots, I sometimes like to make the most of that oven time by roasting a few extra veggies alongside for dipping. This hummus is lovely layered in wraps or sandwiches, paired with crackers and veggies, spread on toast, or served on top of warm veggie bowls or salads—or just eaten with a spoon (you know I do). I encourage you to play around with the amount of dill, lemon, oil, and/or garlic to find your perfect version. I purposely kept the lemon and dill pretty light so that you can tweak to taste. Thank you to She Likes Food for inspiring this delicious hummus flavour!

Yield
2 1/4 cups (560 mL)
Prep time
10 Minutes
Cook time
35 Minutes
Total time
45 Minutes

Ingredients:

For the hummus:
  • 1 1/2 cups (200 g) peeled and diced carrots (2 to 3 medium chopped into 1/2-inch pieces)
  • 1 teaspoon (5 mL) untoasted sesame or olive oil
  • Pinch fine sea salt
  • 1 small garlic clove
  • 3 packed tablespoons (6 g) chopped fresh dill, or more to taste
  • 1 (14-ounce/398 mL) can chickpeas*
  • 1/4 cup (60 mL) tahini
  • 2 tablespoons (30 mL) fresh lemon juice, or more to taste
  • 4 tablespoons (60 mL) chickpea brine or filtered water, or more if needed**
  • 1 to 2 teaspoons (5 to 10 mL) untoasted sesame oil or light olive oil, to taste
  • 3/4 to 1 1/4 teaspoons fine sea salt, to taste
For garnish:
  • Ground cumin, ground coriander, and/or fresh minced dill (optional)

Directions:

  1. Preheat oven to 400°F (200°C) and line a roasting pan with parchment paper.
  2. Spread the diced carrots on the roasting pan. Toss them in the teaspoon of oil and sprinkle with a pinch of salt. Roast for 32 to 37 minutes, until carrots are fork-tender and blackened on the bottom.
  3. About 5 to 10 minutes before your carrots are done roasting, place the garlic and fresh dill into a large food processor. Process until minced.
  4. Drain the chickpeas over a small bowl, reserving the chickpea brine, if using.
  5. Next add the drained chickpeas, tahini, lemon juice, chickpea brine (or filtered water, if using), oil, and salt. Process until smooth, stopping to scrape down the side of the processor as necessary.
  6. When the carrots are ready, carefully transport them to the processor using the parchment paper as a handle to carry. Process the mixture again until smooth. I like to let the machine run for a couple minutes so it gets as smooth as possible. Taste and adjust ingredients as desired. Feel free to add more dill, lemon, salt, oil or water depending on your preferences.
  7. Serve the hummus with a sprinkle of ground cumin, coriander, and fresh minced dill, plus a drizzle of sesame or olive oil, if desired. Leftover hummus will keep in an airtight container in the fridge for about 5 to 7 days.

Tips:

* If using freshly cooked chickpeas, please use only 1 cup. For some reason when using freshly cooked chickpeas, this hummus turns out on the thicker side. To keep from throwing off the other flavours, I recommend using just 1 cup of freshly cooked chickpeas in place of the 1 1/2 cups found in a 14-ounce can. This version will also produce a slightly smaller yield.


** Chickpea brine (or aquafaba) is simply the liquid found in a can of chickpeas. I find using aquafaba yields a creamier hummus, but the difference is slight. Feel free to use regular ol’ water if you wish!

Here’s a little behind-the-scenes action for ya! My photography studio is slowly being taken over by toys!! Send help. 

© copyright 2018 Oh She Glows. All Rights Reserved.
09 Jan 17:43

At Home with Amber Ulmer in Mt. Juliet, Tennessee

by Jacki Moseley
Shh.listen

Home decor inspiration all arooound

Art Print/Schoolhouse.

Hey, friends! We’re so excited to share Amber Ulmer’s gorgeous Nashville home with you. Amber photographs many of the room tours you’ve seen on ABM, including Elsie’s kitchen, master bathroom, Nova’s playroom (and more!), so we’re thrilled to get a tour of her space today.Light Fixture/Lucent Lightshop.“We live in a sweet 1960’s spilt-level home in a quiet neighborhood in Mt. Juliet, Tennessee, just outside of Nashville. We happen to live across the street from my in-laws, and it’s actually a magical experience. The kids walk across to pick fruit and veggies in Mimi and Papa’s garden and we have babysitters right across the street.

Sofa/Joybird, Rug/Overstock, Pillows/The Guyots, Mirror/Joss & Main, Plant Hanger/Wolffords Wonders on Etsy, Coffee Table and Pouf/Wayfair.“My favorite room in our home is probably our main family room. We have a wonderfully large sectional that fits us all and our dogs for movie nights and all the cuddles. I love the big windows that let all the beautiful light flood into our space. Our record player is in there as well and the kids love thumbing through all the vintage story records we’ve collected. They will put on Robin Hood or Cinderella and act out the scenes and dance around. It’s the greatest to watch! And obviously all my precious plants make me so happy in this room.

Kitchen Chairs and Console/Overstock.

Sofa and Coffee Table/Article, Chairs/Joybird, Rug/Rugs USA/ Wooden Blinds/Blindster

“A few of my favorite items in our home are our green velvet couch from Article, my collection of brass trinkets, my Goodwill score of a wicker chair, and all my plants. The Article green velvet couch is the most comfy couch in all the land! It’s my napping couch. It’s luxurious, but oh so cozy too—the perfect combo for a sofa, if you ask me. Everyone that comes over wants to come and get cozy on it. It’s so inviting. My mother used to collect brass items like candlestick holders, bookends, and the like. I started a few years ago. I am still on the hunt for the same little brass partridge family my mother used to have.

Record Player/Amazon.

“The vintage wicker chair was the best score! $19 at Goodwill! Talk about a steal! So that sits next to our record player and I love it. And all my plants. Gosh, they just bring so much life in each room! It’s probably the biggest collection of anything I have. I will forever be that crazy plant lady.

Wall Hanging/Wolffords Wonders on Etsy, Sconces/Schoolhouse, Bedding/Parachute Home.Rug/Joss & Main, Side Table/Wayfair (similar), Bedding/Beddys.Canvas Print/Joss & Main.

Rug and Curtains/Joss & Main, Cacti Paintings/Laurel and Pearl on Etsy, Quilt/Schoolhouse.

Banner/Matriarch Handmade on Etsy.

“We have lived in our home for nine years now. It’s been wonderful being so close to family and we live on an acre, so there is so much room for the kids to play and our dogs to run. It’s definitely matured with us through the years as far as its styling goes. I feel that the styling now fits the era of the home and don’t see it changing much more at all, except for some updates that we hope to make in the coming years to the kitchen and bathroom.”

Thanks so much for sharing, Amber! You can find more of Amber via By The Ulmers and on Instagram.

Credits//Author and Photography: Amber Ulmer.
19 Dec 21:23

Make a Fold-Away Dollhouse

by Mandi Johnson

When I was a 7-year-old, all I wanted was a Barbie Dream House for Christmas. After what seemed like years of wishing, my dreams finally came true. But then I had this monstrous toy that was basically a piece of furniture in my bedroom. Fun, yes. But practical? Ehhh … not so much.

This year, my daughter requested all kinds of dolls and doll accessories for Christmas, and I began having flashbacks to the ol’ Barbie Dream House. Was this our future? Say it ain’t so! I didn’t think it was justifiable to add another dollhouse for every scale doll that my kids play with, so I came up with an alternative space-saving solution. A fold-away dollhouse!

Make a Fold-Away DollhouseMake a Fold-Away DollhouseThe OG American Girl doll fans amongst you may remember the “Scenes and Settings” you could buy to play with the 18″ historic character dolls. I had the Samantha one and would spend hours setting up lifestyle scenes with my cousins before one of our parents would take photos as we directed the shots! I still remember the excitement of getting those photos developed, and cringing at the reflection of the camera flash on the glossy background pages.

Perhaps my background in American Girl doll lifestyle shoot art directing (ha) prepared me for this very moment in time? I borrowed from the Scenes and Settings idea to create a simple plywood backdrop for my children’s dolls, so when they’re not playing, the dollhouse can be folded up, the furniture and dolls stored in a basket, and everything neatly put away until another day.

Make a Fold-Away DollhouseThere are a lot of options with this project. You can make it in any scale to suit your specific needs, and you can add as much or as little decoration as you’d like! Some of the supplies shown above ended up unused in my project, but adding shingles or painting bricks may be something I’ll add if I make another one of these fold-away dollhouses one day.

Materials:
-1/2″ plywood (You only need about 1/4 of a full sheet.)
-hinges for the walls and the front door (The size depends on your scale, but you may need to get shorter screws so they don’t poke through your plywood.)
-basswood trim pieces
-sandpaper (I used 80 grit, 120 grit, and 400 grit.)
-wood glue
-primer + paint
-pencil
-(optional) painter’s masking tape

Tools:
miter shears or sharp scissors
-power drill
-jigsaw
-square
-(optional) paint brushes or sponges

Make a Fold-Away DollhouseStep One: Have your plywood cut to the size you want each wall of the dollhouse to be. For a 6″ doll, I made my walls 22″x16″. Then use a square or t-square to draw where you want your windows, doors, and roof lines to be.

Make a Fold-Away DollhouseStep Two: Use a jigsaw to cut out the the shapes you drew in step one. If you need tips for cutting out a hole using a jigsaw, this post by Laura is helpful!

You’ll also need to cut a new piece of wood for your front door. Make it smaller than the opening, because hinges and swinging will make it fit tighter than you expect.

Make a Fold-Away DollhouseStep Three: Sand down all of your rough edges with a block wrapped with 80 grit sandpaper. I like using sticky-back sandpaper for this reason! After you’ve leveled out any rough edges from the jigsaw, go over everything with 120 grit to make it nice and smooth.

Step Four: Cut pieces of your basswood strips to act as trim around the windows, doors, and “floors.” Glue each piece onto your walls and door using wood glue, then “clamp” the pieces in place with masking tape until the glue has dried.

You could paint your trim separately and glue it on after painting the walls, but I’ve done it both ways and found it easier to just spray paint the whole thing, trim and all, then cut in with paint. If you are stenciling on any kind of pattern, adding trim after painting the walls would be smart.Make a Fold-Away DollhouseAt this point, you may choose to leave your wood natural and unpainted. If that’s the look you’d like, I’d caution you to keep that in mind when selecting your plywood, because as you can see, my basswood strips are a different hue than the plywood I used, which provides a nice contrast … but not everyone would want that kind of contrast in their finished product.

Also, if you plan to leave your walls and door unpainted, I would definitely seal everything with a few coats of polyurethane. Lightly sand with 400 grit sandpaper after your first coat to ensure the final coats are silky smooth.

Make a Fold-Away DollhouseStep Five: Prime and paint the walls and door. After one coat of primer, use 400 grit sandpaper to make the surface silky smooth. Then move on to your final paint colors.

I had considered wallpapering the walls with a tiny floral wallpaper, but in the end I decided that the wallpaper would probably end up peeling up with wear and tear, so I kept things as indestructible as possible and just used paint. (That was my same reasoning behind not using shingles on the exterior as I had initially planned.) I did use a textured “stone” spray paint on the exterior walls to give the finish a miniaturized stucco feel. It isn’t so noticeable in pictures, but I think it adds a significant touch in person.

Step Six: Add hinges to connect the walls. Make sure to stagger your hinges up or down on either side of the middle wall, or else your screws from each side’s hinges will hit each other and give you lots of grief.

Make a Fold-Away DollhouseStep Seven: Add hinges to your door. I was worried about being able to maneuver my screwdriver into the tiny door opening in order to screw the hinge into place, but it worked fine to come at the screw at a slight angle. Whew!

Lastly, add some sort of knob to your front door. You can glue on beads, fashion a knob out of polymer clay, or do as I did and simply use a metal push pin on each side of the door.

Make a Fold-Away DollhouseThis simple little dollhouse still feels plenty charming, but it doesn’t have the destructible elements of the fancier dollhouse I made two years ago. Plus it has the added benefit of being space-conscious and portable!

Make a Fold-Away DollhouseMake a Fold-Away DollhouseBefore I built this fold-away dollhouse, I had selected my dolls and the furnishings. The doll shown is a mini American Girl doll (Samantha) in casual clothing I got from Hole in My Bucket on Etsy. Mini American Girl dolls are easily found for sale online, and they’re the same size as the 6″ Lori dolls.

Make a Fold-Away DollhouseIt’s difficult to find furniture for 6″ dolls, though the Lori brand does have some furnishings available, just not in a style I prefer. I found this well-made vintage Strombecker* furniture on eBay, and other furniture in this scale by searching for “Ginny doll furniture.” (Ginny is a vintage 7 1/2″ doll from the ’50s.) After I found the furniture, it helped me decide what size to make the rooms in the fold-away dollhouse. This project could easily be adaptable to 1:12 scale—the traditional size for miniatures—which means doll furniture in this scale is available everywhere. Or you could even size it for Barbies or 18″ dolls.

*Not all Strombecker doll furniture is in this scale, so please check measurements before you buy any doll furniture!

Make a Fold-Away DollhouseI can’t wait for my girls to wake up and find their new dollhouse under the Christmas tree! I won’t have to sneak around after they’re in bed to paint and build it, but that doesn’t mean I won’t still be sneaking to play a little and set up scenes for them to discover in the morning! – Mandi

Credits // Author and Photography: Mandi Johnson. Photos edited with A Color Story Desktop.
13 Dec 19:47

make-believe: holiday hosting.

by ERIN BOYLE
Shh.listen

I love this blog, but without reading anything, the photo of a hand holding a block of wood is so ridiculous

make-believe: holiday hosting | reading my tea leaves

My need to be cozy intensifies by about a million times in December. On my walk to work this morning, as I barreled through wind tunnels and along Christmas-tree lined streets, I was already fantasizing about returning to our apartment at the end of the night. We won’t be hosting anyone tonight, but the impulse to make a cozy sanctuary out of our tiny apartment is still strong. I’ll be turning on the Christmas tree lights, pulling on slippers, setting a pot of soup to simmer on the stove, and lighting candles for dinner. In anticipation of upcoming gatherings, here’s a collection of things for imagined (or real) dinners in. Guests not required.

A seasonless-dress for elegance and comfort.

A casserole (I’m officially in love) for serving something warming.

A cutting board fit for a festive cheese spread.

Candlesticks (and candles) for extra light.

A mug that gives back, because the host needs mulled wine, too.

Oxfords for staying comfy.

Long rule earrings for a touch of fancy.

A perfect lipstick for a winter evening.

dab of perfume, just because.

In an effort to ground all of this make-believing in something a bit more down to earth, here are a few things we might do to help foster safe spaces for folks in need:

To provide shelter: Open your home. Airbnb Open Homes can help you set up your home to serve as a temporary shelter for evacuees and refugees in need of a place to stay. 

To support girls at risk: Donate to Girls Mentoring and Educational Services (GEMS). GEMS is an organization with a mission to “empower girls and young women who have experienced commercial sexual exploitation and domestic trafficking to exit the commercial sex industry and develop to their full potential.”

To help get people back into their homes: Send money. More than donations of clothes or food, organizations trying to serve folks seeking disaster relief need cash money. Here’s a list of places helping folks suffering from forest fires in California. 

12 Dec 18:24

Gnocchi and Vegetable Soup

by Emma Chapman

True story: When I first encountered the word ‘gnocchi,’ I assumed it was pronounced GA-no-chee. Why? Probably because I am a genius when it comes to pronouncing new words. Really, ask any of my close friends, they will tell you. I’m a pronunciation wizard.

My special X-Men power aside, are you guys in love with gnocchi as much as I am?! If not, what’s wrong with you? I mean no disrespect, but seriously gnocchi has to be one of my favorite foods on the planet. It’s right up there with pizza and brownies. (Hmm … all my favorite foods are carbs. That’s probably not ideal …) If you’ve never had the pleasure of gnocchi-ing yourself before, here’s the deal. They are little pillowy dumplings, usually sold in the pasta aisle—the best aisle at the grocery store, right? They are usually made of potatoes, flour, cheese, or a combination of all three, etc. Sometimes they are made with other ingredients too, like pumpkin or other squash, pesto, sweet potato, carrots, and so on. Not only are they delicious and super versatile, they also cook super quick. And the only thing I like more than carbs is probably super-quick-to-make carbs.

🙂

This soup is filling, comforting, and can be made in well under an hour from start to finish. It’s also pretty easy to change up, based on what you have on hand. See notes for some thoughts.

Gnocchi and Vegetable Soup, serves 3-4

1 package gnocchi, approx. 18 oz.
1 tablespoon olive oil
3 tablespoons finely chopped onion
3 carrots, about 8 oz.
1 zucchini, about 5 oz.
4 cloves of garlic, minced
1 can tomato puree, 10 oz.
2 cups vegetable stock
1 big handful of spinach, torn
1 tablespoon parsley, chopped
salt and pepper
Parmesan to serve, optional

First, prep all the vegetables. Keep in mind that this soup will not be getting pureed, so you want to chop your vegetables into bite-sized pieces.

In a large pot, add the olive oil and onions and cook over medium heat for 2-3 minutes until the onion begins to soften. Then add the carrots and cook for another 2-3 minutes. Next, add the zucchini and garlic, and season everything generously with salt and pepper. Cook another few minutes, until you begin to really smell the garlic. Add the tomato puree and vegetable stock, reduce the heat to low/simmer, and place a lid over the pot. Allow that to cook for 30-40 minutes.

Here’s what gnocchi I used, it’s a pumpkin kind that I got from ALDI. I loved this and it made my final soup feel even more like fall/winter. But, any kind of gnocchi will work here, so feel free to pick something that you like or that is readily available where you shop.

You could also make your own gnocchi. Homemade is SOOO good, but it will add quite a bit of time. Trade-offs.

After the soup has been cooking for about 20 minutes, get the gnocchi ready. Follow the directions on the package to boil water and cook the gnocchi in the boiling water until they float. Once they are done cooking, reserve a cup of the pasta water before straining.

Add the gnocchi and 1 cup of pasta water to the pot (this is after the initial 30-40 minutes of cooking, as the carrots should be very tender and soft). Give everything a stir and then taste the soup. Add more salt and pepper as needed, or if you’d like to add some heat, try a little cayenne. Then add the torn spinach and chopped parsley before serving.

You can top with a little Parmesan cheese if you like, but this soup is also really good on its own, so feel free to keep it dairy-free if you prefer. If you have any leftovers, you can save them in an airtight container for at least 2-3 days after this was made (probably more) and just rewarm before enjoying again. Hooray for soup! xo. Emma

Note: If you can, swap out the vegetable stock here to change up the flavor a little as well as the protein content. I recently discovered a creamy, bean-based (high protein) soup stock that I’ve tried in a few soups and really like. If you don’t care about keeping this plant-based, you could also use bone broth for additional protein. If you choose to consume meat, we encourage you to choose organic and buy from sources you know are ethically produced for both your health and the health of our planet.

If you are enjoying this as part of the Weekday Weekend challenge, then note a few things. First, choose a gnocchi that is made of all vegetables/plants (all potatoes) or whole wheat. I actually think this is fairly hard to do, so if you don’t have any luck finding one you could swap out the gnocchi for a whole grain pasta instead. Second, make sure to either skip the Parmesan or use a non-dairy Parmesan (another great source of plant-based protein, see our recipe in our cookbook).

Credits // Author and Photography: Emma Chapman. Photos edited with ACS for Desktop.

Gnocchi and Vegetable Soup

  • 1 package gnocchi (approx. 18 oz.)
  • 1 tablespoon olive oil
  • 3 tablespoons finely chopped onion
  • 3 carrots (about 8 oz.)
  • 1 zucchini (about 5 oz.)
  • 4 cloves of garlic (minced)
  • 1 can tomato puree (10 oz.)
  • 2 cups vegetable stock
  • 1 big handful of spinach (torn)
  • 1 tablespoon parsley (chopped)
  • salt and pepper
  • Parmesan to serve (optional)
  1. First, prep all the vegetables. Keep in mind that this soup will not be getting pureed, so you want to chop your vegetables into bite-sized pieces.

  2. In a large pot, add the olive oil and onions and cook over medium heat for 2-3 minutes until the onion begins to soften. Then add the carrots and cook for another 2-3 minutes. Next, add the zucchini and garlic, and season everything generously with salt and pepper. Cook another few minutes, until you begin to really smell the garlic. Add the tomato puree and vegetable stock, reduce the heat to low/simmer, and place a lid over the pot. Allow that to cook for 30-40 minutes.

  3. After the soup has been cooking for about 20 minutes, get the gnocchi ready. Follow the directions on the package to boil water and cook the gnocchi in the boiling water until they float. Once they are done cooking, reserve a cup of the pasta water before straining.

  4. Add the gnocchi and 1 cup of pasta water to the pot (this is after the initial 30-40 minutes of cooking, as the carrots should be very tender and soft). Give everything a stir and then taste the soup. Add more salt and pepper as needed, or if you’d like to add some heat, try a little cayenne. Then add the torn spinach and chopped parsley before serving.

If you can, swap out the vegetable stock here to change up the flavor a little as well as the protein content. I recently discovered a creamy, bean-based (high protein) soup stock that I’ve tried in a few soups and really like. If you don’t care about keeping this plant-based, you could also use bone broth for additional protein.

05 Dec 15:52

An Essay About a Teenager, Annotated by The Teenager

by swissmiss

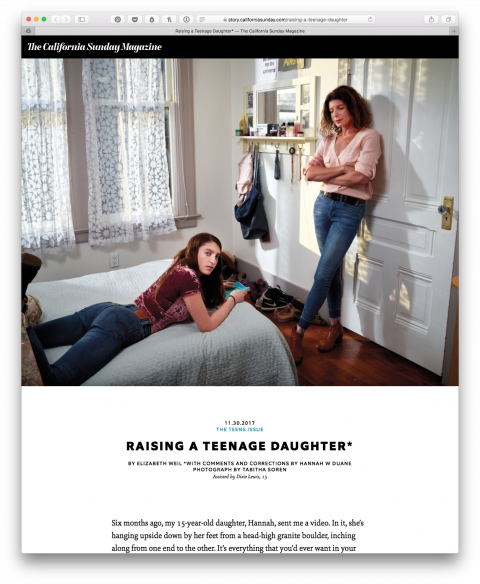
An essay about raising a teen that was then also annotated by the teen who the essay is about: Raising a Teenage Daughter.

I love the idea of this format and would love to see more of this, about other topics.

01 Dec 15:49

a book advent calendar.

by ERIN BOYLE
Shh.listen

I loooooove this idea!

christmas book advent calendar | reading my tea leavesWe’ll be stringing up our clutter-free advent calendar (and filling it with festive (and activist) activities for the holiday season) again this year, but with so many whisperings from folks we know planning picture book advent calendars, we couldn’t help but to get in on that fun, too. 

We’ve made room on our bookshelves this year by swapping books in and out with the seasons, and so advent calendar, or no, December 1 seemed like the perfect date for pulling our wintry and Christmastime books out from the back of the closet.

The concept of the calendar is simple: Wrapping up 24 (or 25, depending on preference) books to open on each day leading up to Christmas. For our calendar, we gathered all of our wintry and Christmas books and supplemented our own collection with books from the library (and books on loan from Grammy). In an effort to save on space, put our small stash of recycled paper to repeated use, and wait patiently on library returns, we’re wrapping up just a week’s worth of books at a time, but you wouldn’t be wrong to wrap all 24 or 25 books in one go if you’d rather.christmas book advent calendar | reading my tea leaves

In case there’s anyone else hoping to start the tradition in their own home—or just looking for a festive list of seasonal reading—below is a list of some of the books that we’ll be reading at our house this holiday season. We celebrate Christmas and so the list includes both religious and secular options, but of course you can cater the list to your own traditions or interests.

If the idea feels festive, but the holiday not quite right, there’s a great list of Hanukkah books this way, a Conscious Kid list of 26 books to support conversations on race, racism, and resistance right here, a Vamos a Leer list of books celebrating Latino winter celebrations here, and InCulture’s list of African-American Christmas and Kwanzaa books this way.christmas book advent calendar | reading my tea leaves

Here’s some of what we’ll be reading:

SNOW words and pictures by Uri Shulevitz (Amazon/Indiebound)

WINTER DANCE words by Marion Dane Bauer, pictures by Richard Jones (Amazon/Indiebound)

THE CHRISTMAS BOOT words by Lisa Wheeler, pictures by Jerry Pinkney (Amazon/Indiebound)

THE SNOWY DAY words and pictures by Ezra Jack Keats (Amazon/Indiebound)

A CHILD IS BORN words by Margaret Wise Brown, pictures by Floyd Cooper (Amazon/Indiebound Out of Print. Check the library!)

FOX’S GARDEN pictures by Princesse CamCam (Amazon/Indiebound)

THE POLAR BEAR words and pictures by Jenni Desmond (Amazon/Indiebound)

BRAVE IRENE words and pictures by William Steig (Amazon/Indiebound)

THE TOMTEN words and pictures by Astrid Lindgren (Amazon/Indiebound)

THE NIGHT BEFORE CHRISTMAS words and pictures by Rachel Isadora (Amazon/Indiebound)

THE TREES OF THE DANCING GOATS words and pictures by Patricia Polacco (Amazon/Indiebound)

GOODBYE AUTUMN, HELLO WINTER words and pictures by Kenard Pak (Amazon/Indiebound)

OVER AND UNDER THE SNOW words by Kate Messner, illustrations by Christopher Silas Neal (Amazon/Indiebound)

KATY AND THE BIG SNOW words and pictures by Virginia Lee Burton (Amazon/Indiebound)

THE FOX WENT OUT ON A CHILLY NIGHT words and pictures by Peter Spier (Amazon/Indiebound)

MIRACLE ON 133RD STREET, words by Sonia Manzano, illustrations by Marjorie Priceman (Amazon/Indiebound)

THE ANIMALS’ SANTA by Jan Brett (Amazon/Indiebound)

COBWEB CHRISTMAS by Shirley Climo (Amazon/Indiebound)

WHO IS COMING TO OUR HOUSE? by Joseph Slate and Ashley Wolff (Amazon/Indiebound)

UNDER THE CHRISTMAS TREE, words by Nikki Grimes and pictures by Kadir Nelson (Amazon/Out of Print. Check the library!)

WHO BUILT THE STABLE?: A NATIVITY POEM, words and pictures by Ashley Bryan (Amazon/Indiebound)

TOO MANY TAMALES, words by Gary Soto and pictures by Ed Martinez (Amazon/Indiebound)

THE NUTCRACKER IN HARLEM by T.E. McMorrow, illustrations by James Ransome (Amazon/Indiebound)

BABOUSHKA AND THE THREE KINGS words by Ruth Robbins, illustrations by Nicolas Sidjakov (Amazon/Indiebound)

BEFORE MORNING, words by Joyce Sidman, illustrations by Beth Krommes (Amazon/Indiebound)christmas book advent calendar | reading my tea leaves

What about you guys? No such thing as too many recommendations!

Lots of the books on this list are ones we’ve found at our local library, but when we buy books, we love to support our local bookstores—Stories BookshopBooks Are MagicGreenlight Bookstore, and Community Bookstore, to name a few. I’ve provided links below to where you can find these titles online or in your own neighborhood bookstores.

30 Nov 17:56

25 simple gifts under $25, for anyone.

by ERIN BOYLE

25 gifts under $25, for anyone | reading my tea leaves In the same spirit as the kid’s guide from earlier this week, here’s a list of ideas for gifts to give grownups. The specifics here aren’t as important as the general notion that gifts don’t have to carry a certain monetary value to be special. Rather than a purely aspirational guide, I’ve pulled together this list culled from examples of presents I’ve given to, or received from, my own family in years past. I’m hopeful it might serve as a jumping off point for some of you.

Lots of these are things you might be able to make yourself. Others are treasures you might find secondhand. Nearly all of them are things you can find from independent shops and makers. As always, if you have additions of your own that you’d like to share, I’d love to hear them.25 gifts under $25, for anyone | reading my tea leaves

+ Beeswax candles (Homemade or otherwise). 

+ A plate full of homemade cookies (presented in a bandana for easy transport).

+ A hot/cold pack.

+ Upgraded pantry staples. (Like hand-harvested rice! Or fancy beans!)

+ A vintage record.

+ A keyring.

+ Fire starters

Special soap.

25 gifts under $25, for anyone | reading my tea leaves

+ Replacement kitchen essentials. (Like fresh potholders or dish towels!)

+ Colorful tea

+ A board game.

+ Cord clasps.

+ Bath salts.

+ A calendar.

+ A set of vintage pillowcases

+ A pair of socks.

+ A set of coasters.25 gifts under $25, for anyone | reading my tea leaves

+ A winter bulb.

+ A festive spice cabinet addition or two.

+ An insulated water bottle.

+ An issue of a new magazine.

+ A secret potion.

+ A notebook.

+ An extra tiny bowl.

+ Sugar scrub. (Mixed in your home, or somewhere else.)

For the curious:

The amaryllis bulb pictured is one I found at my favorite local garden shop. The candle I found at our local grocery store. The bandana is a well-worn old favorite. And the soap is from Little Seed Farm.

30 Nov 17:33

We’re All Pros Already

by swissmiss

We’re all pros already.
1) We show up every day
2) We show up no matter what
3) We stay on the job all day
4) We are committed over the long haul
5) The stakes for us are high and real
6) We accept remuneration for our labor
7) We do not overidentify with our jobs
8) We master the technique of our jobs
9) We have a sense of humor about our jobs
10) We receive praise or blame in the real world
― Steven Pressfield

From the book: The War of Art

30 Nov 17:31

Boozy Apple Cider A La Mode

by Natalie Jacob

The best part about fall and winter is a warm drink. Boozy mulled apple cider comes in at the top of my list for most perfect chilly weather cocktail. The aroma of apple and spice is so delightful and mulling cider is one of my favorite domestic activities this time of year. The scent fills the house and makes all my worries melt away! I guess the bourbon helps with that too. I’ve recreated a classic mulled cider and made this Boozy Apple Cider A La Mode by adding bourbon, vanilla liqueur, and fresh whipped cream. It’s like a warm piece of apple pie in a glass!

Boozy Apple Cider A La Mode, serves one

1 1/2 oz. bourbon
1/2 oz. Licor 43
mulled apple cider
sweet whipped heavy cream
freshly grated nutmeg

Mulled Cider

2 quarts apple cider
2 cinnamon sticks
2 whole allspice berries
2 whole cloves
2 whole star anise
1 orange thinly sliced

To mull your cider, place all ingredients in a large saucepan and bring to a simmer. I let it simmer for 10 minutes to really bring out all the spices. If you have allspice liqueur on hand, you can add a 1/2 oz. of that as well, but it’s optional. I like adding it to take the spice element up a notch! Spoon or strain out the spices.

Now it’s time to get your whipped cream ready! Add your heavy cream to a bowl and add some sugar to taste. I like to whip the cream by hand because it gets too fluffy when I use a stand or hand mixer. You want it to be stiff enough to float on top of the drink but still pourable. I whipped mine with a whisk for a few minutes. How I test to make sure it’s the right consistency is I drop a dab of it on the back of my hand. If it doesn’t roll off, it’s ready. I like to sweeten my cream with some amaretto or faretti liqueur too. It gives the cream some flavor and who doesn’t want some booze in their cream? It adds some nuttiness to the drink and complements the rest of the ingredients.

The best part about this drink is the assembly. It’s so easy! Add your Licor 43 and bourbon to your serving vessel and then pour the hot mulled apple cider on top. Stir to incorporate and then float your whipped cream on top slowly. Garnish with freshly grated nutmeg. Sip and enjoy!

This is a very simple recipe that can be thrown together in a matter of minutes. It’s perfect for hosting a fall-themed party, serving by the fire, accompanying dessert at Thanksgiving, or if you’re just looking for something seasonal to unwind with. Licor 43 is made from 43 different ingredients, including vanilla, citrus, and other fruits, as well as aromatic herbs and spices. I love using it for fall and winter cocktails because of the vanilla flavor it adds. It pairs perfectly with bourbon and the freshly mulled cider and made the drink really taste like apple pie. This Boozy Apple Cider A La Mode is soothing, sweet and has just the right amount of spice to it. What’s your favorite way to stay warm? I’m looking forward to having a few of these on the cold days ahead. Cheers and happy mulling! xo Natalie

Credits // Author and Photography: Natalie Jacob. Photos edited with A Color Story Desktop.
21 Nov 16:01

Setting Up the Perfect Guest Bathroom

by Kara Whitten
Shh.listen

i like the shelf arrangements

Setting up the perfect guest bathroomI love having friends and family stay over at my house. One of the biggest items on our list of new house must haves was a space for guests. So I am so excited to have partnered with Parachute to help set up the perfect guest bathroom in my home. Now, everyone that comes to stay will feel like they are in a fancy hotel, only better. Although it may seem trivial, having a fresh and well stocked bathroom for your guests can really make a difference in how comfortable they are in your home. And it’s easier to accomplish than you might think. I will walk you through a few of my favorite ways to elevate my bathroom and have guests feeling pampered.

Of course the number one thing on the list is to make sure you have clean towels for them to use. And I’m not talking about those 4-year-old ones that you subject yourself to. I am talking about crisp white towels like you would get at the spa. My favorite are these white waffle towels from Parachute. They are lightweight but absorbent and dry quickly. I always make sure to keep several on hand and easy to find in the bathroom so that my guests don’t have to rifle around or feel like they are bothering me by asking for more towels. A few wood and wicker baskets do wonders to corral the folded towels.

After the towels are stocked, I try to add a few little essentials like an extra toothbrush, toothpaste, tampons, lotion, shampoo, conditioner, makeup removing wipes, and plenty of extra toilet paper. Basically anything that they could possibly forget and may need. For these essentials I like to have them easily accessible either on the counter, nearby shelves or in the vanity. So that in case the need arises, they can easily find what they need. It’s little extras like this that will make your guests feel at home in your home.

Setting-up-the-Perfect-Guest-Bathroom-7 Setting-up-the-Perfect-Guest-Bathroom-7The last step in making sure my guest bathroom is ready for visitors is the luxurious extras. Parachute carries so many of these additions that raise the comfort level and really elevate your guests’ stay. A few of my favorite extras include a plush robe for them to use, slippers to keep their feet warm, and a gently scented candle that they can light to relax (or cover up odors!). All it takes is adding a few luxe items like these to make your guests feel pampered.

Setting-up-the-Perfect-Guest-Bathroom-7

Setting-up-the-Perfect-Guest-Bathroom-7

Setting-up-the-Perfect-Guest-Bathroom-7One final touch is a bit of greenery. My guest bathroom doesn’t get any natural light, so I have to go with faux plants in here, but that pop of green contrasts so nicely with the crisp black and white. With just these few details, my guest bathroom now feels like a relaxing spa retreat every time I step inside. And I know if I enjoy it that much, my guests will too.

Setting-up-the-Perfect-Guest-Bathroom-7

So just remember to start with the staples, layer in the essentials, and top it off with the luxurious extras. xo. –Kara

Credits//Author and Photography: Kara Whitten. Photos edited with A Color Story Desktop.
17 Nov 15:43

Elsie’s Nashville BNB Kitchen Tour (Before + After)

by Elsie Larson
Shh.listen

I feel like we should just do a microwave vent over the stove when we do new cabinets. The kitchen is so small and it'll sell well that way.

Hello friends!! Today is FINALLY the day I get to share our completed bnb kitchen renovation with you!!!! I have been working on this since last spring and it’s been a prettyyyyy dramatic renovation (aren’t they all?). So needless to say, I am SO HAPPY that it’s complete! Today, I’m here to share all the details of our kitchen renovation with you.

But first … you know what time it is! Time for a walk down memory lane …

The before kitchen had good bones. I knew right away that we could repurpose the builder grade cabinets with a fresh coat of paint and I was excited to try a new, more contrasty, color scheme since I am usually drawn to all-white-everything. You can see all the before photos right here.

OK, there’s a LOT to cover in this renovation. I’ll start with the sink and faucet! This tour is sponsored by Delta Faucet and The Home Depot. Delta faucets are my favorite for kitchen and bath hardware. I have many in my own home (in Champagne Bronze), so I was excited to get the same faucet I love in Matte Black for this home! It ties together perfectly with the hardware we used in the BnB Bathroom, which you can see here. Delta sent the most amazing Trinsic Faucet with Touch2O Technology—when it is running you can touch anywhere on the spout or handle to stop and start the flow of water. This is amazing for washing dishes (which I have already done quite a bit of getting this house ready for our first guests!). I’ll be sure to share videos on Instagram stories of how it works—it’s pretty rad!

The counters are quartz, which has become my absolute go-to for kitchens. The color is Pearl Jasmine by Cosentino, available at The Home Depot. They have a pretty strong marble pattern, which I love! We worked with The Home Depot’s Home Services for our countertop installation; they had a certified fabricator come to the home to create the exact outline before construction of the custom countertop began, and made the entire installation process so easy! I lost my mind a bit the first time I saw them installed … they are SO pretty!

The stripe ceramic vase is from 31 Bits.

The light is from my go-to Lucent Lightshop. I have their brass lights all over my own home, so when I found out they could make any light in matte black I was SO happy! I love how it blends into the kitchen and makes a statement at the same time.

The appliances are from Kitchenaid and they are truly stunning. I love that we were able to continue the matte black theme with the black stainless appliances. Here are the product links: Refrigerator, Dishwasher, Microwave and Range. These appliances are so sleek and beautiful. I will be sure to share more details on Instagram stories as well (hope you are following @abeautifulmess because I’ll be sharing a tour today on our stories).

Let me just say, for someone who has almost nothing black or high contrast in my own home, designing this space truly changed me! I am obsessed!

This Barista Express espresso machine is kind of bananas. It is one of my favorite birthday gifts of all time, so I am excited to have one in our bnb. I am planning to make a video tutorial of how to use it because THE FUTURE IS NOW.

Details!

I’m so happy to share the totally finished breakfast nook now that the floors are in (when we first shared this project there was still stick on tile on the floor). The wallpaper is from WallsNeedLove and the pendant is from Schoolhouse Electric. I have to say, out of all the things I was nervous about, the patterned tile was probably the thing I was more scared of. I worried it would be too busy. But it isn’t. And it turned out incredible!!!!

Speaking of the tile, I haven’t shared a link yet.

This tile is from The Home Depot and I’ve already gotten so many comments (both online and in person) that are shocked and excited that such an affordable tile can look so expensive. I’m honestly blown away by it. It’s even prettier in person!

On the nook tabletop I currently have a few server pieces and some cloth napkins. In the future, I would love to to put some board games here … how sweet would that be for guests?

Thank you so much for following our renovation! It has truly been a labor of love. I am so proud of this space and I cannot wait to host our first guests (which will be friends and family during the holidays).

One more floor shot—A. because I love this tile and B. because I forgot to tell you that underneath the stick on tile was rotten subfloor and mold that took a LOT of extra time and money to repair. This is just a part of renovating. It’s still worth it! But I have learned over the past three years that when Jeremy’s dad told us, “count on it costing twice as much and taking twice as long” that he was right SO much of the time. Renovations are frustrating and longer than you think and sometimes really expensive. But when you get to the end of it all, there is so much joy in your finished project! So thank you for sharing my joy today.
xx. Elsie

Other Sources: Paint/Thunderbolt by Valspar and and Marshmallow by Sherwin Williams, Hanging Planter/WayfairKitchen Towels,Cutting Boards, Soap Dispensers, Marble Tray, and Wooden Tray/Target, Utensil Holder and Honey PotWorld Market, White Pot/HomeGoods, Rattan Tray/Amazon.

P.S. Let me know in the comments if you have any questions!

Credits//Author: Elsie Larson. Project Assistant: Collin DuPree. Photography: Amber Ulmer. Photos edited with A Color Story Desktop Presets.


SaveSaveSaveSaveSaveSaveSaveSaveSaveSaveSaveSaveSaveSave

16 Nov 16:27

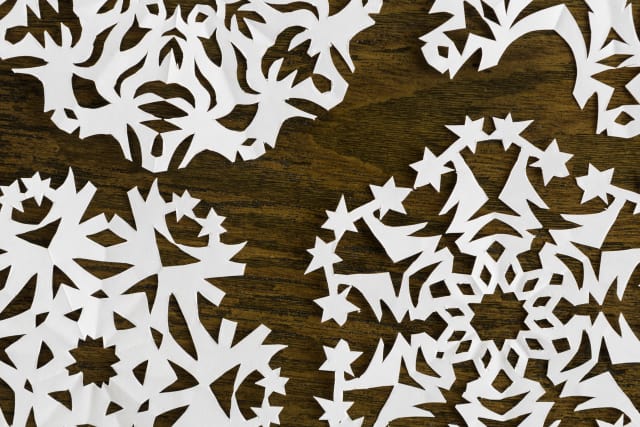
Nine Ways To Take Paper Snowflakes To The Next Level

by Katie Holdefehr

The thought of making paper snowflakes may remind you of childhood memories of cutting out wonky, misshapen snowflakes only a mother could love. While the concept remains the same, this time around, the look is much more sophisticated— and your improved motor skills will come in handy. Armed with a quick tutorial, some project inspiration and a pair of scissors, you're ready to snip your way to a winter wonderland.

READ MORE »

15 Nov 16:21

Pfeffernüsse Spice Cookies

by Irvin Lin
Shh.listen

Add these to the christmas cookie plate

Pfeffernüsse Spice Cookies

Years ago, I used to host an annual holiday cookie swap at a local nonprofit community center in San Francisco. Friends and members of the community would gather together, bearing large batches of homemade cookies. Everyone would walk around, sampling cookies and taking a few of the ones we loved.

Each person left with a tin of assorted cookies, along with a slight sugar buzz.

It was a marvelous way to meet new people in the neighborhood, as well as learn about new cookies that I wasn’t familiar with. And that’s exactly how I was introduced to the magical Pfeffernusse.

Continue reading "Pfeffernüsse Spice Cookies" »

14 Nov 15:18

Meal Plan for November Week 3

by Marta Rivera
Meal Plan for November Wk 3
Notice: Undefined variable: readmore in /web/sites/simplyrecipes.com/wp-content/themes/simply/lib/tweaks.php on line 92

My family’s favorite holiday is fast approaching! We’re a bunch of foodies and Thanksgiving is considered a high-holiday around here.

It’s easy to get off track with homemade meals given all the excitement in the air, but I won’t be thwarted! I rely on my menu plans more than ever in the latter part of the year.

This week, I’m all about menus whose ingredients can serve double-duty in next week’s holiday meal as well – like chopped onions and even mashed potatoes. They can be prepped for this week, but also used in recipes for Turkey Day.

Continue reading "Meal Plan for November Week 3" »

03 Nov 17:32

10 Easy Appetizers for Your Holiday Party

by Summer Miller
Shh.listen

Wrapping perfectly good prosciutto around melon

Holiday Appetizers

The holidays are upon us! Drinks, parties, ugly sweaters, and best of all, FOOD! So much glorious food!

It’s time to don your gay apparel and show up to that party in style. And don’t forget your appetizer!

Continue reading "10 Easy Appetizers for Your Holiday Party" »

02 Nov 16:34

Oliver Jeffers

by swissmiss

My friend Bas did it again. His personal mini documentaries called Like Knows Like is how we meet in the first place and made me fall in love with his craft. Today he launched his latest masterpiece, with fellow studiomate and friend Oliver Jeffers as the subject. 15 mins well spent.

02 Nov 00:04

Meal Plan for November Week 1

by Marta Rivera
November Meal Plan Week 1

This month, you can look forward to meal plans from Marta Rivera. Marta is a trained chef, mom of twins, and Army wife – and she is also one of our Simply Recipes recipe testers!

November is in full effect! Also in full effect are the numerous commitments that literally drive us away from our kitchens and the comfort of great home-cooked meals.

Setting the stage for creating wholesome dinners for my family is very important to me. The ability to plan out my meals, prep the ingredients, and cook them quickly means I don’t have to feel guilty when outside activities fill up our schedules.

Continue reading "Meal Plan for November Week 1" »

02 Nov 00:01

Chocolate Florentine Cookies

by Irvin Lin
Chocolate Florentine Cookies

There are a number of cookies that I try not to make too often. This is not because they are difficult or time-consuming, but because they get consumed way too fast in our household!

Florentines fall into this category. These nutty, toffee-like cookies sandwiched with a layer of dark chocolate are basically everything my partner and I look for in a cookie. Thus, they disappear like magic once made. A total danger for our waistline.

Continue reading "Chocolate Florentine Cookies" »

30 Oct 21:45

Four-Cheese Lasagna with Fresh Pasta

by Sally Vargas
Four Cheese Lasagna

This is not your Aunt Mary’s lasagna—or one you’ve likely encountered from any family member! There’s no tomato sauce and no meat. Just fresh pasta sheets layered with four different kinds of delicious cheese.

This lasagna is golden with crispy-chewy edges on top and creamy insides in the middle. This makes a heavenly and decadent addition to a holiday table or midwinter feast.

Continue reading "Four-Cheese Lasagna with Fresh Pasta" »

28 Oct 15:36

Whole Wheat Applesauce Waffles 

by Emma Chapman

Are you on team waffles or pancakes? Personally, I tend to oscillate between the two, so I guess I’m on both teams. But I must say, lately waffles have been winning for two reasons. First, I love the ease of them. You just pour batter into a waffle iron and it does everything for you, like magic. No flipping required. And second, I sort of love the little square pockets that make a waffle a waffle. Not only are they cute, they are the obvious perfect place to hold maple syrup. But we all knew that already, as this isn’t our first waffle rodeo. 🙂

These are extra awesome because they are favored for the season (hello, apples and cinnamon!), naturally sweetened, and super soft and fluffy. Oh yes, whole wheat breads can still be super soft and fluffy, friends! I know sometimes whole grain foods can conjure up images of hard and chewy cardboard, but I promise these waffles are pretty much the exact opposite. They are soft, flavorful, and still packed full of good-for-you ingredients. I think you’re gonna love them. Bonus points if you use an apple that you got from an apple picking day. Ha!

Whole Wheat Applesauce Waffles, makes 4

3/4 cup whole wheat pastry flour
1/4 cup arrow root powder (or corn starch is OK too, if you can’t find arrow root)
1/2 teaspoon cinnamon
1/4 teaspoon baking soda
1/2 teaspoon baking powder
1/2 teaspoon salt
1 apple, shredded with a box grater (do not include seeds or stem)
1 cup (unsweetened) applesauce
1/3 cup milk (I used unsweetened almond milk)
1 egg
1/2 teaspoon vanilla extract

Heat up your waffle iron while you prepare the batter. Add all the dry ingredients (first six listed) to a medium size mixing bowl and whisk to combine. Then add the wet ingredients (all remaining ingredients) and stir until well combined. Then stir in the shredded apple.

Some waffle irons require a little non-stick cooking spray before you begin making your waffles and others don’t. I trust you know what yours needs, so either use that or don’t. Pour about 1/2 to 2/3 cup batter into the waffle iron, cook until done (most irons have a light that goes off when the waffle is done). Repeat until you’ve cooked all the waffles.

These are great with a little butter, or drizzled in nut butter, and then topped with 100% pure maple syrup. Yum! Happy breakfast making to you. xo. Emma

Credits // Author and Photography: Emma Chapman. Photos edited with the A Color Story Desktop actions.
26 Oct 16:34

Speculoos Brownie Cake + First Look at Baker’s Royale Cookbook

by Cindy Rahe
Shh.listen

CHAPIN I NEED CAKE.

Speculoos Brownie Cake

I have been a long-time follower of Naomi Robinson’s blog, Baker’s Royale. It was her lush and textured photography style that initially drew me in, but it’s been her delicious, homemade desserts that keep me coming back.

Her new book, also titled Baker’s Royale, is full of beautifully shot, approachable recipes – 75 of them!

Continue reading "Speculoos Brownie Cake + First Look at Baker’s Royale Cookbook" »

20 Oct 14:29

Ultimate flourless brownies for two + Cookbook news!

by Angela (Oh She Glows)
Shh.listen

omg. o.m.g.

ultimateflourlessbrownies-10

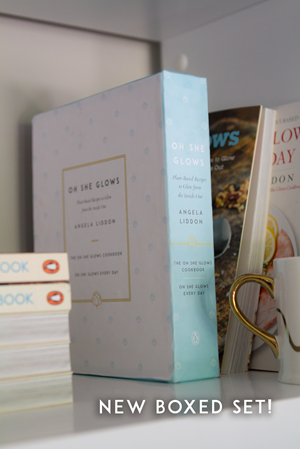
Several months ago, my publishing team let me know about an exciting idea that Indigo had proposed for my two cookbooks. They’ve been so thrilled with your response to the books (as have I!) that they’ve created a special-edition OSG boxed set, available just before the holiday season kicks off. When they asked me I was like, hmm…let me think about it….YES!! Lol.

Shortly after, the mock-up arrived on my doorstep. It was like Christmas morning!

IMG_1853

This one above is just the mock-up version…the pages are literally glued to the box by hand. The real thing will look even better, but I wanted to give you an idea. It makes such a gorgeous gift!

To celebrate, Indigo is having a pre-order SALE on the boxed set this week! It’s 40% off (until Oct. 22nd), and also qualifies for free shipping within Canada.

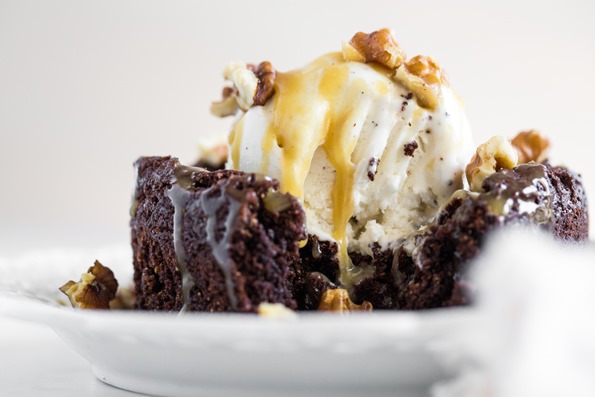
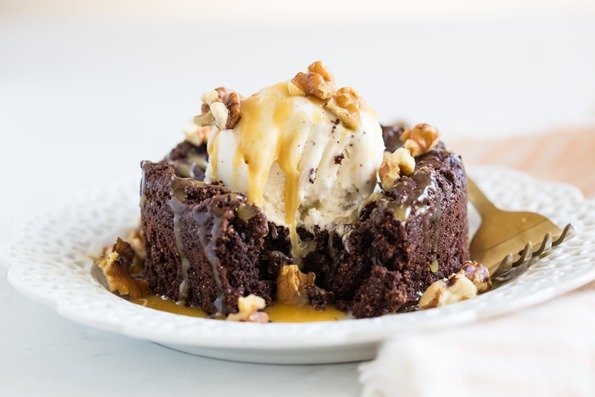
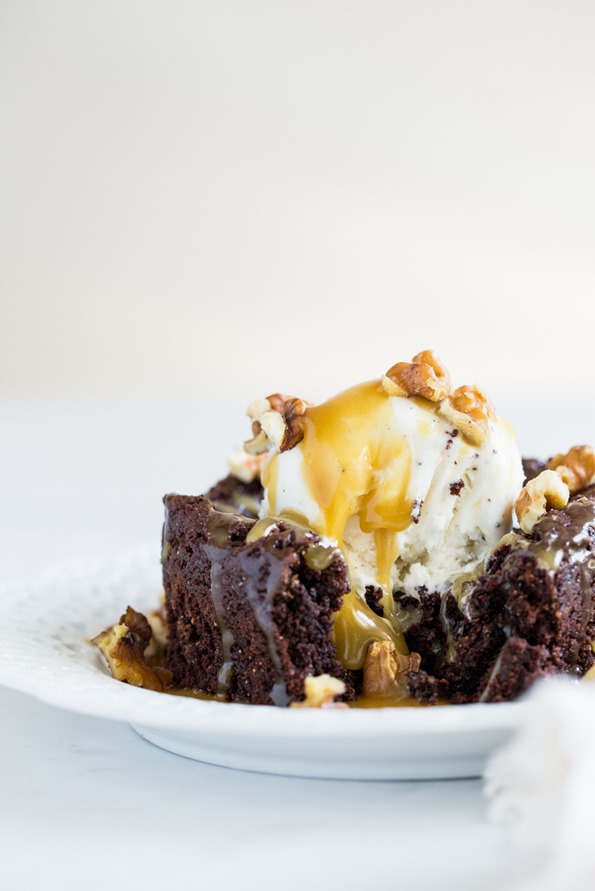
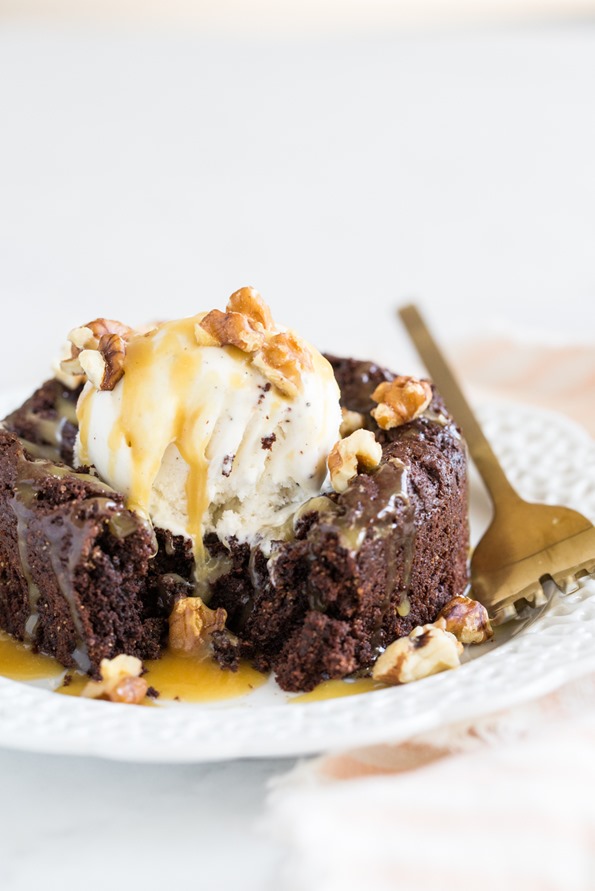
To keep this celebration going with FOOD (cuz you know that’s what we do), I’m happy to share today’s recipe— a rendition of my Ultimate Flourless Brownies with Magic No-Cook Caramel from Oh She Glows Every Day. I’ve had a lot of requests for one- or two-serving desserts, and many of you have told me that you love these brownies. Soooooo…it seemed like a no-brainer to start with this dessert. The brownies are vegan, grain-free, and oil-free, and they turn out wonderfully chewy, dense, and chocolaty. You can also make them soy-free simply by using a soy-free chocolate, such as Enjoy Life brand.

If you’re planning a quiet Halloween in with a pal, it would be a wonderful option. Heck, if you’re planning a wild night out, just make this earlier in the day. Actually, make them now….yes, make them right this second.

ultimateflourlessbrownies-9

ultimateflourlessbrownies-19

ultimateflourlessbrownies-18

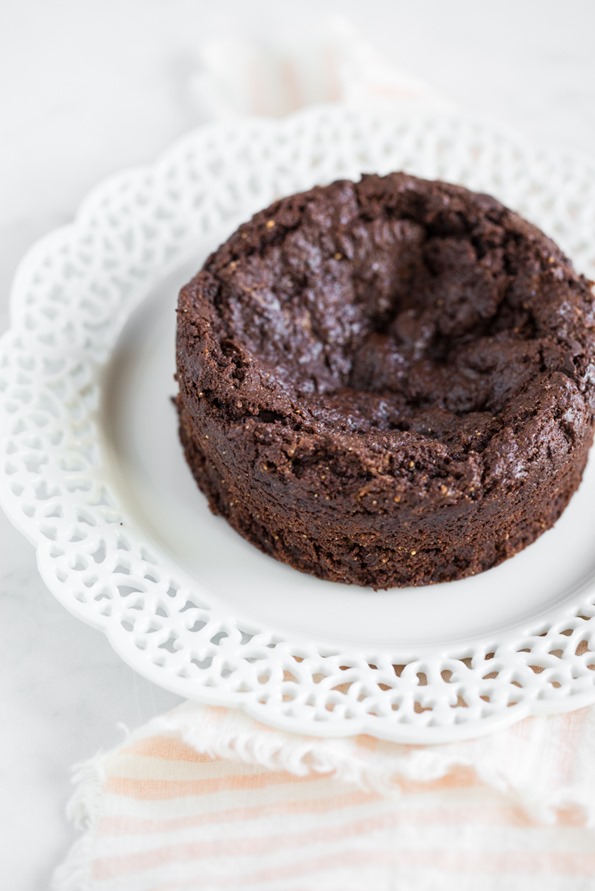
You can make one big brownie as I’ve done here using a 4-inch ramekin, or you can use two smaller 3-inch ramekins. A cupcake tin (with liners) also works! If you’re going to make smaller portions, I recommend baking them for less time as they’ll bake much faster.

ultimateflourlessbrownies-13

ultimateflourlessbrownies-2 

ultimateflourlessbrownies-7

ultimateflourlessbrownies-8

5 from 12 reviews
Print
Email

Ultimate Flourless Brownies for Two

Vegan, gluten-free, grain-free

This two-serving brownie is fudgy and dense with a firm edge, and thanks to the almond butter base, there isn’t a stitch of flour! The nuttiness of the almonds and chopped dark chocolate enhance its rich chocolate flavour. This is a fantastic dessert when you want a decadent treat without being taunted by a pan of leftover brownies in the kitchen. (But if you do, see the full-sized brownie and caramel recipes in my second cookbook, Oh She Glows Every Day.)

Yield
2 servings
Prep time
15 Minutes
Cook time
23 Minutes
Total time
38 Minutes

Ingredients:

For the brownies:
  • 1 1/2 teaspoons (4 g) ground flax
  • 1 tablespoon (15 mL) water
  • 1/4 teaspoon (1 mL) fine sea salt
  • Scant 1/8 teaspoon (0.5 mL) baking soda
  • 1 tablespoon plus 1 teaspoon (20 mL) pure maple syrup
  • 1/2 teaspoon (2.5 mL) pure vanilla extract
  • 2 teaspoons (5 g) arrowroot starch
  • 2 tablespoons plus 2 teaspoons (17 g) unsweetened cocoa powder
  • 2 tablespoons (28 g) natural cane sugar
  • 1/4 cup (60 mL) natural smooth almond butter
  • 2 tablespoons (20 g) chopped dark chocolate or choc. chips
For the Magic No-Cook Caramel:
  • 1 tablespoon plus 1 teaspoon (20 mL) coconut oil, melted
  • 2 tablespoons (30 mL) pure maple syrup
  • 1 tablespoon (15 mL) raw cashew butter
  • 1 teaspoon (5 mL) coconut nectar or pure maple syrup*
  • A good pinch of fine sea salt

Directions:

  1. Preheat the oven to 350°F (180°C) and place the oven rack in the middle position. Lightly grease a 4-inch ramekin (or two small, 3-inch ramekins) with oil.
  2. In a medium mixing bowl, whisk together the ground flax and water. Let it sit for a couple of minutes.
  3. To the flax mixture, add the salt, baking soda, maple syrup, vanilla, and arrowroot starch; whisk vigorously until smooth.
  4. Add the cocoa powder and sugar; stir with a spoon until combined. The batter will be very thick.
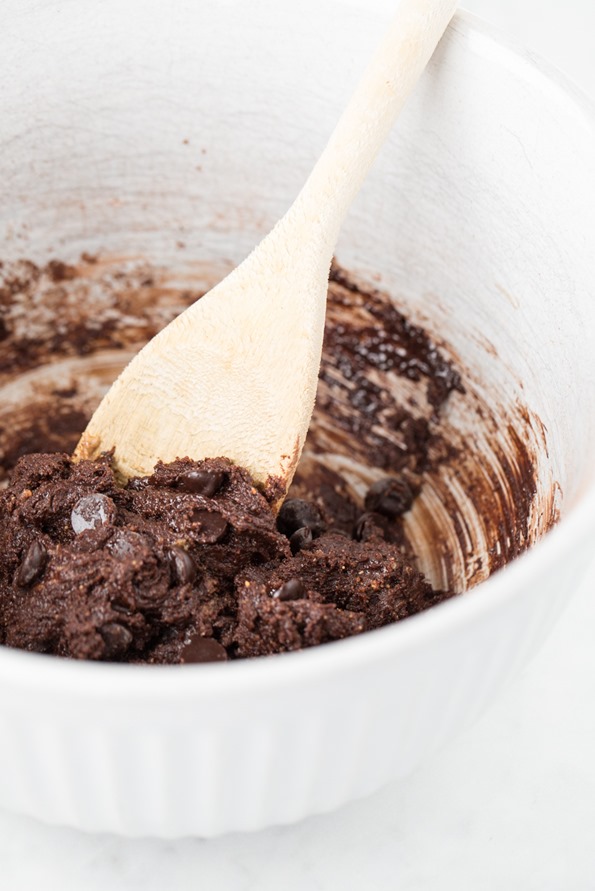
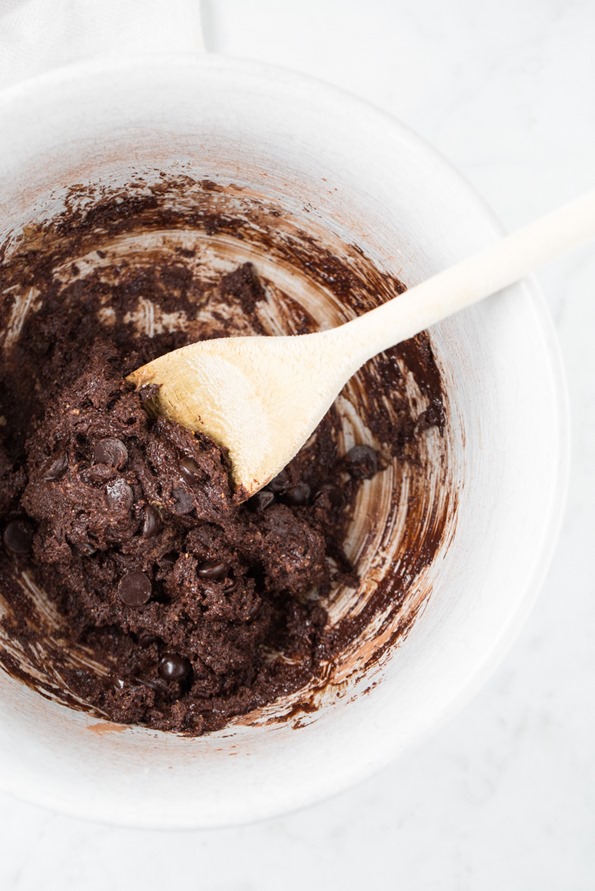
  5. Stir in the almond butter and chopped chocolate until thoroughly combined. Mix the dough for 30 to 60 seconds, until you can’t see any “ribbons” of almond butter in the dough.
  6. Scoop the dough into the prepared ramekin(s). Press down on the dough with your fingers until even and smooth.
  7. Place the ramekin(s) directly onto the rack, and bake for about 22 to 25 minutes, until the brownie has risen nicely, but is still soft to the touch. When it’s ready, the middle will still look a bit underdone. A toothpick inserted into the middle won’t come out clean. Shortly after removing from the oven, the middle will sink, but this is all normal. Pinky swear!
  8. Place the ramekin(s) on a cooling rack for about 25 to 30 minutes.
  9. Meanwhile, prepare the Magic No-Cook Caramel Sauce. Add all of the caramel sauce ingredients into a mini food processor, and process until smooth. Or you can simply add it to a small bowl and beat it with an electric mixer. Transfer to a small jar.
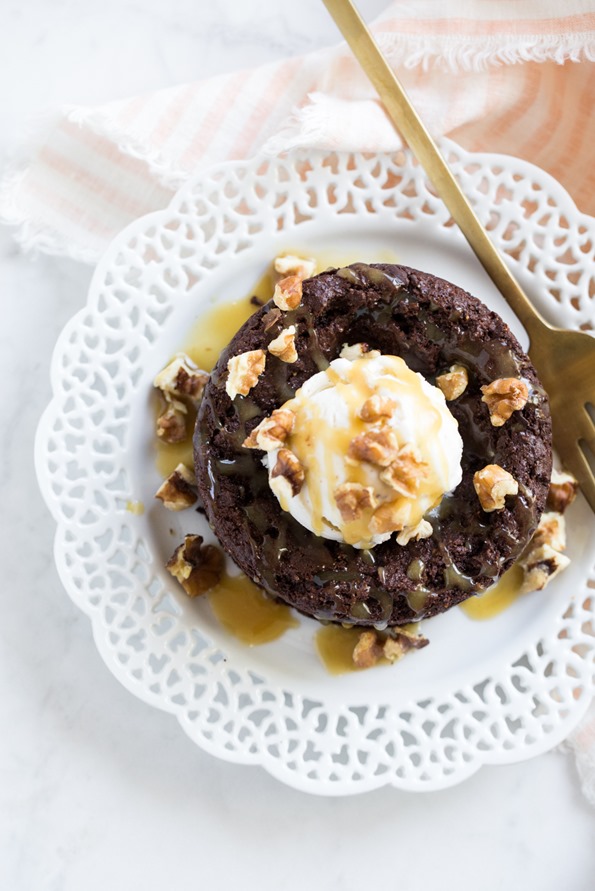
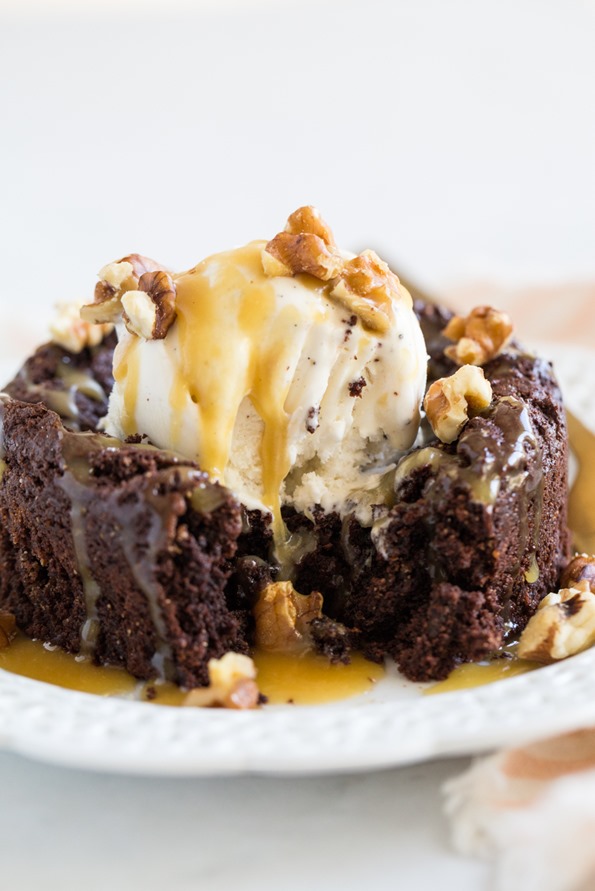
  10. You can serve the brownie in the ramekin, or you can slide a knife around the edge and carefully pop it onto a plate. Serve it with a scoop of ice cream (totally optional), a drizzle of caramel sauce, and a small pinch of coarse sea salt. I like to scatter on some toasted walnuts for a little crunch, too.
  11. Any leftover brownie (I doubt you’ll have any, though!) can be stored in an airtight container in the fridge for a few days. You can also wrap the cooled brownie individually in tin foil and place it into an airtight container or bag in the freezer for 3 to 4 weeks. If you have leftover caramel sauce, it’ll keep in an airtight container in the fridge for a week or so.

Tips:

* The coconut nectar has a slightly tangy flavour which is why it works well in this caramel sauce, but if you don’t have any on hand feel free to use maple syrup in its place. It’ll work just fine!

The caramel sauce makes 1/4 cup (60 mL). If you don't want that much, you can cut the recipe in half and whisk everything by hand in a small bowl.

ultimateflourlessbrownies-16

As always, you can find this recipe in The Oh She Glows Recipe App (on iOS and Android). Happy baking!

ultimateflourlessbrownies-15

© copyright 2018 Oh She Glows. All Rights Reserved.
12 Oct 18:57

Pumpkin Gingerbread

by Elise Bauer
Pumpkin Gingerbread

This pumpkin gingerbread is one of our favorite treats for fall!

We almost always have extra pumpkin sitting around this time of year, either puréed and in cans, or fresh. Two of my favorite sweet quick breads are pumpkin bread and gingerbread.

This recipe started as an experiment to combine the two. The result? A tender, richly flavored loaf—spicy, molasses-y, and pumpkin-y. 

Continue reading "Pumpkin Gingerbread" »

12 Oct 10:00

Caramel Apple Monkey Bread

by Cindy Rahe
Caramel Apple Monkey Bread

In the category of “Not Terribly Beautiful Baked Goods That Taste Amazing,” this Caramel Apple Monkey Bread is a clear winner!

No, this may not the prettiest dessert in the galaxy, but what it lacks in presentation, it more than makes up for in sticky, gooey, pull-apart deliciousness.

Continue reading "Caramel Apple Monkey Bread" »

10 Oct 15:46

German Untranslatable Words

by swissmiss

As a native German speaker living in the USA this Untranslatable German Words Box of Cards delights me to no end. I hope it includes FINGERSPITZENGEFUEHL and ESELSBRUECKE.

09 Oct 14:48

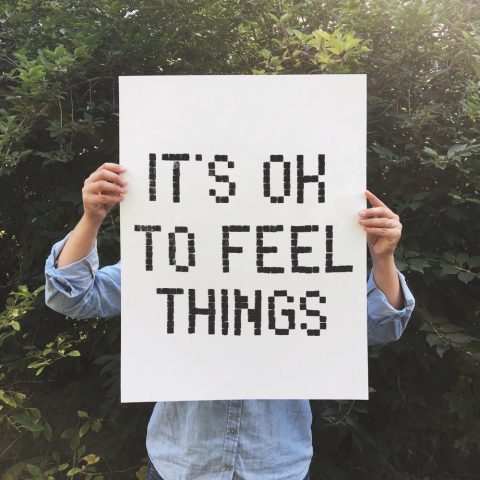
It’s Ok To Feel Things

by swissmiss

I agree with this message.

06 Oct 20:07

Wooden Ball Plant Stand DIY

by Laura Gummerman

I’m certainly no stranger to plants in the house and I’m always on the lookout for cute pots and large plant stands. While it’s great to have those bigger plant stands to elevate plants, having some smaller tabletop stands also help to add more personality to your plant and offset a more plain planter as well. I saw some wooden craft balls in my DIY supplies and thought they would be perfect for creating a simple but textural low level plant stand. Ready to make your own?Supplies:
8″ wooden circle
2″ wooden knobs (8 of them)
-acrylic paint and brush
-wood glue
wooden skewers (optional)
Paint your wooden circle and wooden knobs the color of your choice. It can be a little awkward to paint round balls so it really helps to put them on skewers first and hold the skewer while you turn the ball to paint it. I stuck them into a cardboard box while they dried in between coats.Place your painted knobs on the underside of your painted circle, evenly spaced, with the knobs hanging over the outside edge just a bit. Use your glue to attach your knobs in place. That’s it! Now you’re ready to display your plants!Isn’t it sooo fun?! It’s really such a simple process to make, but it has such a whimsical look to it. You could also use smaller knobs (and more of them) to create more of a “string of pearls” look around the edge, but I think this larger size is fun too. That gold planter is perfect to sit on top of this stand but I think the pastel lavender would be so pretty with either this gold and white or textured dot planter as well. Lord knows that I have enough plants around the house, but I think whoever gets to sit on this one will feel pretty special! xo. Laura

Credits // Author and Photography: Laura Gummerman. Photos edited with A Color Story Desktop.
06 Oct 16:54

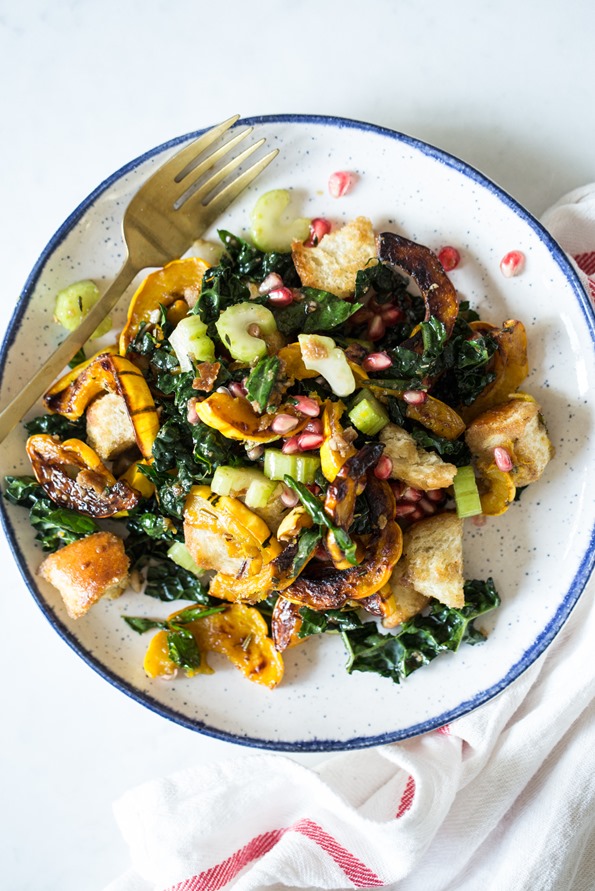
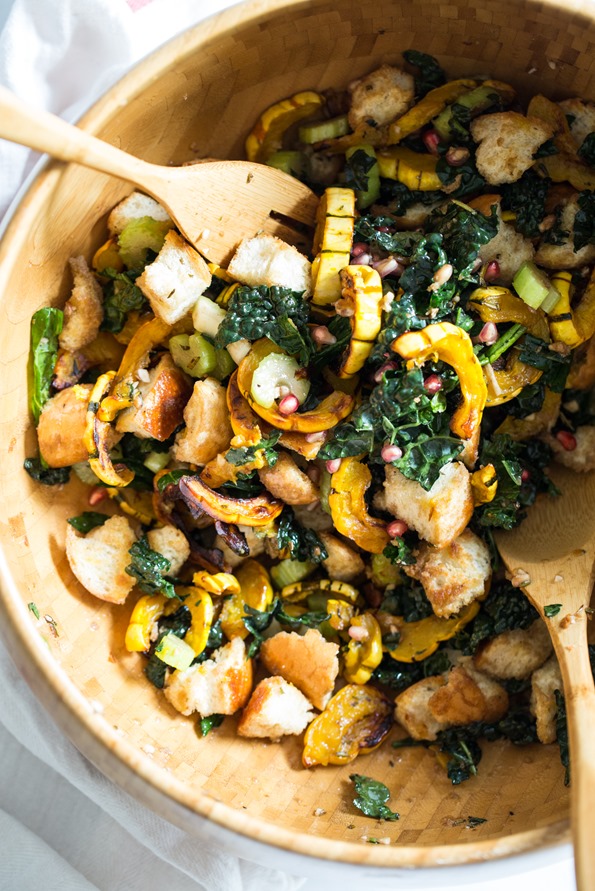
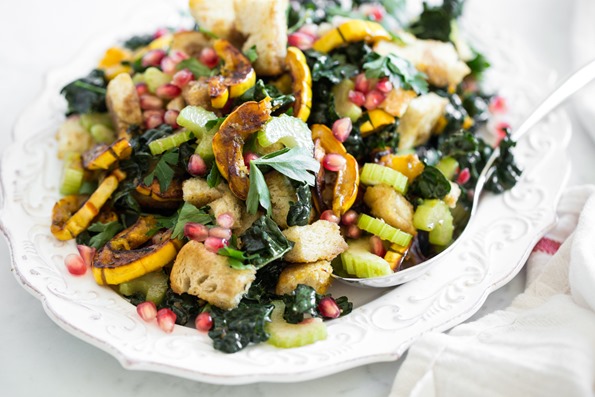
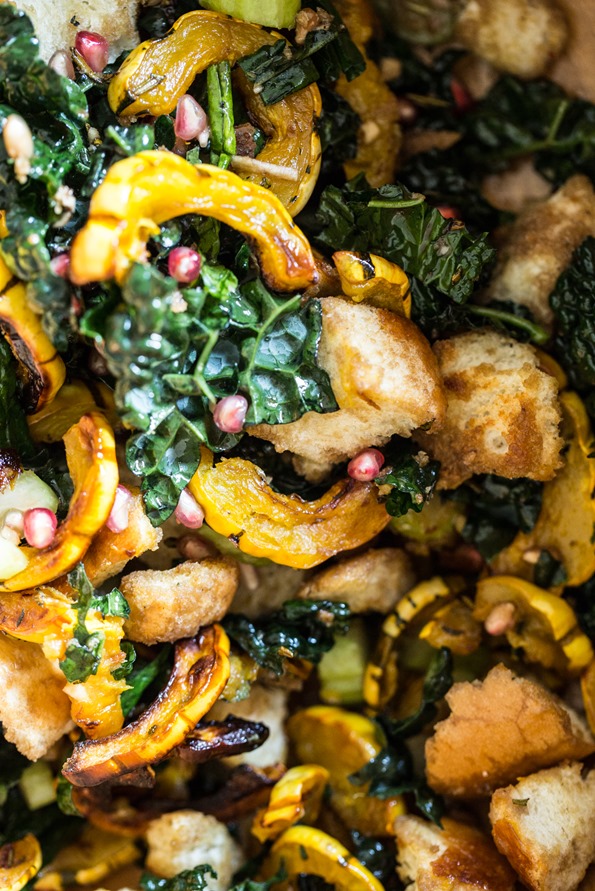
Make-Ahead Thanksgiving Panzanella

by Angela (Oh She Glows)
Shh.listen

I really like this recipe, and that plant-based cookbook looks yummy, but i mostly enjoyed the initial writeup about cutting corners and making do and things still being delish.

065A8272

065A8250

065A8193

065A8264

065A8176

We now have a three- and a one-year-old in the house as of a week ago. Two toddlers…OMG, save me. It’s loud, and crazy, and some nights cereal or smoothies for dinner feels like a major culinary accomplishment.

But, oh, do I adore my little monsters and this crazy family.

Lately, these are some of the questions I ask when I attempt to cook:

Can I cut out an ingredient (or four) while still enjoying the dish? Is this step absolutely necessary to the overall dish? Why is there so much screaming going on? If I do something the night before, will it save time the next day? Adriana, can you please stop tackling your brother like a football!? Lol. 

And probably one of the questions I ask the most: Why is there no OSG delivery service yet, damnit!?

Goals ;)

I’m learning more often than not that the answer to my “can I save time” question is a resounding YES. I’m learning tricks along the way. I’m cutting corners. And you know what? Almost always, the food still tastes great. (And if it doesn’t, Arlo will eat anything.)

065A8219

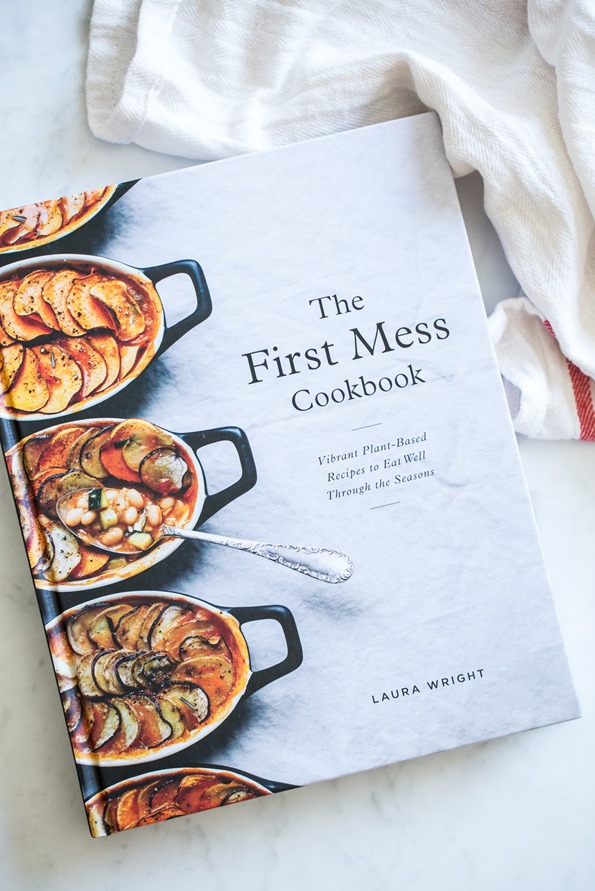
If you follow me on Insta Stories, you may have seen how excited I was to dig into Laura’s beautiful plant-based cookbook, The First Mess Cookbook, this past spring. I’ve been following Laura for years (#TFMfangurrrrrl); she’s a seriously talented writer, photographer, and cook. I’m constantly amazed by the beauty she captures in her food, and the warmth and passion with which she shares it. Laura is one of those cooks who seems to truly adore the process of cooking. I personally don’t always enjoy the process (real talk: sometimes I loathe cooking), and often don’t slow down enough to find it uber-relaxing, but Laura has a way of inspiring a certain intention and gratitude for the process. I love that. Her plant-based recipes and photographs are truly works of art, and I’m so glad she shares them with us all. Her cookbook would be a delicious addition to your collection if you don’t have it already!

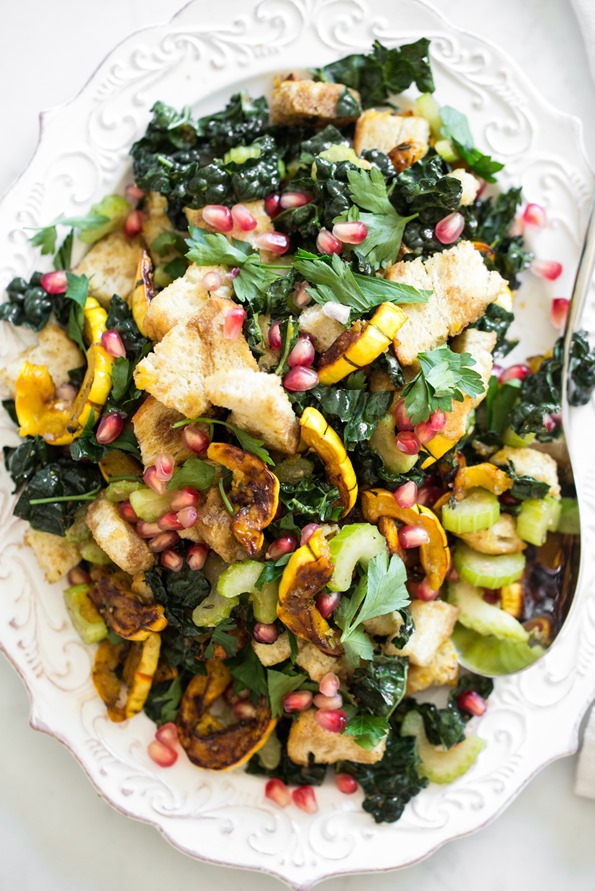
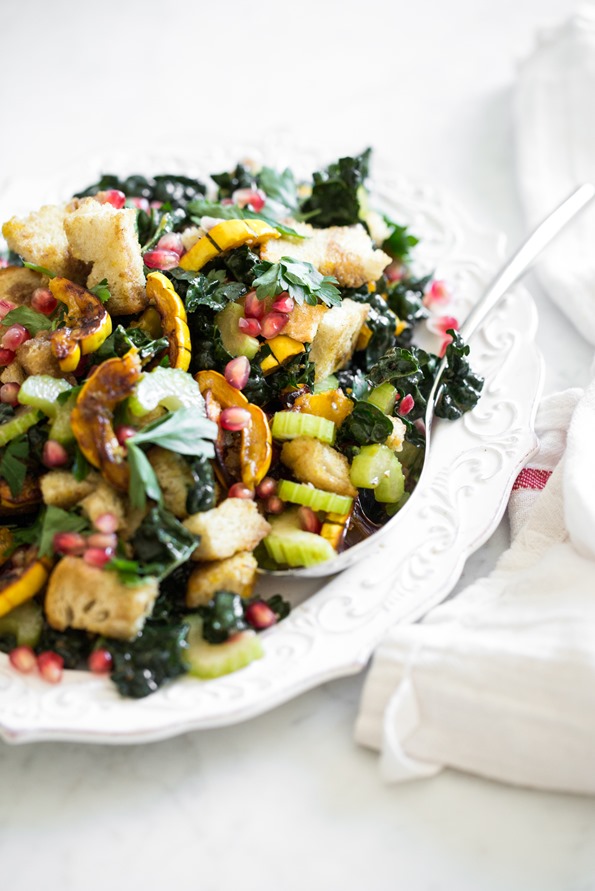
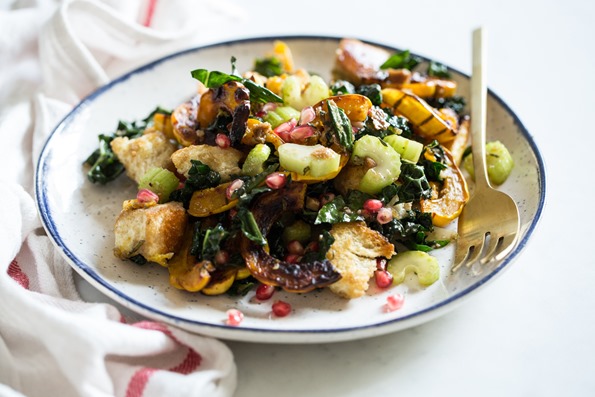
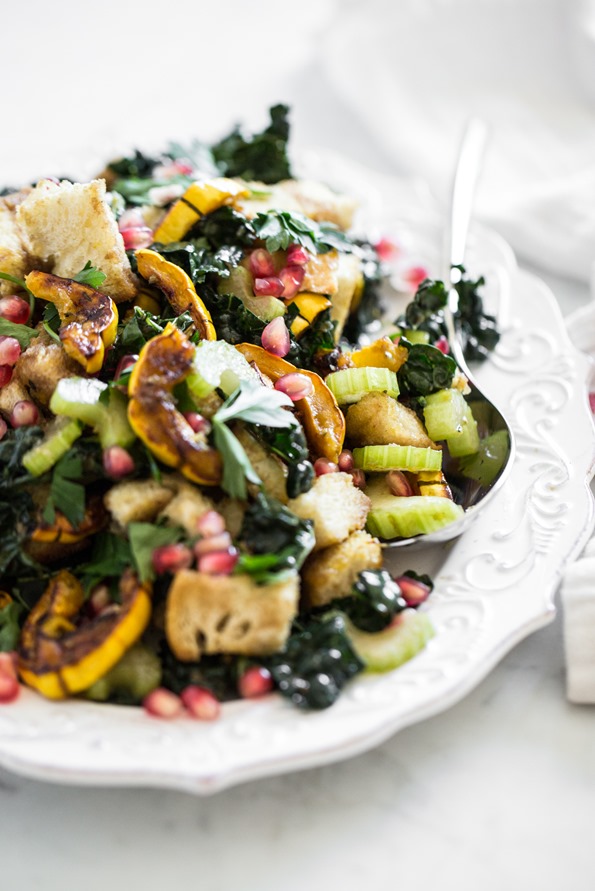
Months ago, I made a mental note to make the Thanksgiving Panzanella, and I couldn’t wait to make it once the cooler temperatures had set in. Because the recipe has quite a few steps, I started it the day before, and ended up creating a fun, make-ahead version. As you can tell, I’m all about make-ahead situations these days! By doing most of the prep work in advance, it became a practical option for our Thanksgiving meal. The prep work the day before is a half hour (and it’s a bit kitchen-destroying, tbh), but the next day, the effortless prep will only set you back a mere 10 minutes. Pretty sweet, huh?!

Oh, and it’s a looker. And tasty…duh. As my hilarious recipe tester, Nicole, wrote, “Yield: 6 side servings or one big serving for me ha ha ha!” LOL! Love her.

065A8198

5 from 9 reviews
Print
Email

Make-Ahead Thanksgiving Panzanella

Vegan, nut-free, refined sugar-free, soy-free

Since this is quite an involved recipe, I like to prepare a few aspects of this panzanella the day before to save time and mess on the day of a special event, such as Thanksgiving. By doing a bit of advance prep (about 30 minutes the day before), all you have to do on the day is bake the squash and bread, then toss it all together just before serving. I like to serve this recipe warm, so I time the cooking so that the squash and bread come out of the oven just before our planned mealtime. This recipe is adapted from The First Mess Cookbook (2017) by Laura Wright. Reprinted by permission of Penguin Canada, a division of Penguin Random House Canada Limited.

Yield
6 side servings
Prep time
40 Minutes
Cook time
35 Minutes
Total time
1 Hour, 15 Minutes

Ingredients:

For the dressing:
  • 2 tablespoons (30 mL) balsamic vinegar
  • 1 small garlic clove, minced
  • 2 teaspoons (10 mL) pure maple syrup
  • 1 teaspoon (5 mL) Dijon mustard
  • 1/4 cup (60 mL) extra-virgin olive oil
  • Generous pinch of fine sea salt
  • Freshly ground black pepper, to taste
For the salad:
  • 4 cups (175 grams) cubed sourdough bread (about 1/2 a loaf)
  • 2 medium (800 g) delicata squash
  • 1 tablespoon (15 mL) minced fresh rosemary
  • 2 teaspoons (10 mL) minced fresh thyme leaves
  • 2 cups (40 g) stemmed and sliced lacinato kale
  • 2 medium/large celery stalks (210 g), thinly sliced (1 1/4 cups)
  • 1/3 cup (80 mL) pomegranate seeds
  • 1 tablespoon plus 2 teaspoons (25 mL) extra-virgin olive oil, divided
  • Handful of celery leaves or fresh parsley leaves, for garnish

Directions:

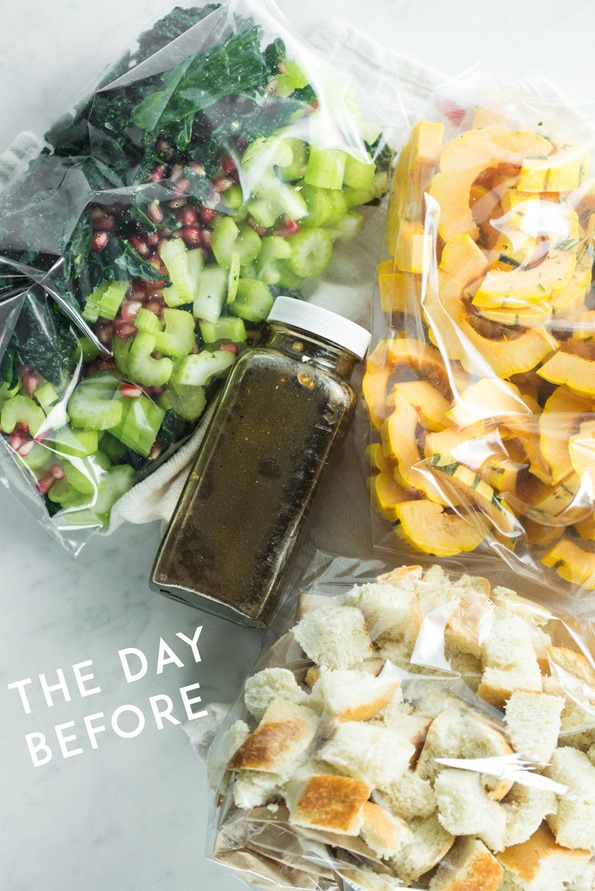
  1. The day before (steps 1-4): Make the dressing: In a small jar, place the balsamic vinegar, minced garlic, maple syrup, Dijon mustard, olive oil, salt, and pepper. Screw on the lid and shake to combine. Chill in the fridge.
  2. Slice the sourdough bread into 1-inch cubes until you have 4 cups. Place into a large bag or container and leave it on the counter.
  3. Slice each squash down the middle, lengthwise. With a spoon, scrape out all of the seeds and discard them. Slice the squash into 1/4-inch “half-moon” slices, and place them into a large zip bag, bowl, or container. Mince the rosemary and thyme and add it to the squash. Chill the squash and herbs in the fridge (covering, if necessary).
  4. In a separate zip bag or container, place the sliced kale, chopped celery, and pomegranate seeds. Chill in the fridge (covering, if necessary).
  5. The next day (steps 5-8): About 15 minutes before you begin, remove the dressing and squash from the fridge and place them on the counter so that they can come to room temperature. Position two racks near the centre of the oven. Preheat the oven to 400°F (200°C), and line two extra-large baking sheets with parchment paper.
  6. Spoon the squash and herbs onto one of the baking sheets. Add a tablespoon of oil and toss until the squash is thoroughly coated. Sprinkle generously with salt and pepper. Roast the squash for about 30 to 38 minutes, until nicely brown on the bottoms. (There’s no need to flip halfway through baking unless you want them evenly browned.)
  7. While the squash is roasting, spread the cubed sourdough onto the remaining baking sheet and toss it in a couple teaspoons of oil. When you have 10 to 15 minutes left of the squash’s roasting time, place the sourdough in the oven with the squash and continue roasting for 10 to 15 minutes. The bread should feel lightly toasted when it’s ready, but it shouldn’t look brown.
  8. While the squash and sourdough are roasting, place the kale, celery, pomegranate seeds, and dressing into a large serving bowl. When the squash and bread are finished cooking, add them into the bowl, and toss well, until combined. Season the panzanella with more salt, to taste, if desired. Serve warm with a garnish of celery or parsley leaves scattered on top. This recipe is best enjoyed immediately, or within a couple of hours of preparing.

065A8212

065A8269

Below is a photo of what the prep looks like the day before! On day 2, all you do is roast the squash and bread, and then mix it all together. *slow clap*

065A8237

On the cusp of our Canadian Thanksgiving weekend, THANK YOU for your amazing love and support, even when this blog is a virtual ghost town. I’ve been chipping away at some big behind-the-scenes blog changes and can’t wait to share more. Also, Eric recently started a new career venture, which has been wild. I’m thrilled for him, and grateful to be able to return the support and encouragement that he’s given me all these years. But, holy hell have we been struggling to stay afloat. The juggle of parenthood and “careerhood” is no easy feat. I’ve been trying to make it work with a lot more on my plate. Some days I feel like I’m doing a crappy job at everything, and other days, I feel like I’m killing it. We’ll get into a groove…it just takes some trial and error. Just know that I love and appreciate your support more than you know.

I hope my fellow Canadians have a relaxing and delicious Thanksgiving weekend with loved ones, and if you try out this recipe, I hope you enjoy it—and my make-ahead tricks—as much as we do. I’ve also added this recipe to The Oh She Glows Recipe App, so keep your eyes peeled for it on there.

arlonurseryfinal-4

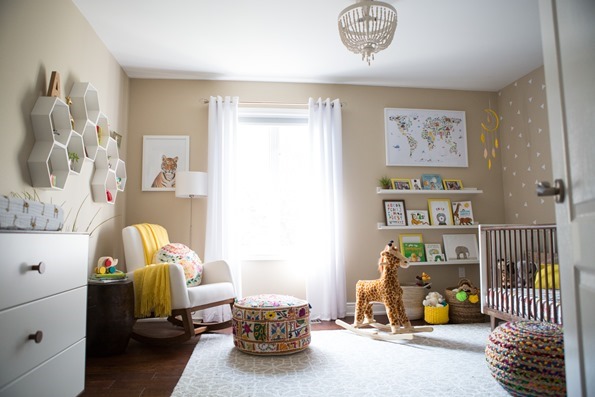
Last but not least, I’d like to pass along Arlo’s nursery tour over on HGTV! It was so much fun (and such an honour) to be featured. (Just know that the nursery never looks this put together in real life….it actually looks like a tornado blew through it most days.) A special thanks to the lovely Brittany Devenyi for the feature!

© copyright 2018 Oh She Glows. All Rights Reserved.
06 Oct 15:03

10 Minute Pizza Dough (No Yeast, No Rise Time!)

by Emma Chapman

10 Minute Pizza Crust (via abeautifulmess.com) Is there anything better than pizza night? Not really! The only issue I come up against now and again is I sometimes don’t quite feel like I have enough time to make one of my favorite yeasted doughs. I just don’t have an hour for it to rise. I need pizza NOW, you know the feeling? That’s where this recipe comes in—it’s quick, it’s delicious, it makes pizza night at home a breeze.

We’ve teamed up with ALDI on this recipe. All the ingredients can be found in their stores as well as some other little “cheats” I’m gonna share for quick and easy pizza nights. 🙂 One super exciting thing I learned about ALDI recently is that they are now accepting Apple Pay at all their stores nationwide. What?! I know, right? ALDI stores are already known for being fast and efficient, so being able to just hold your phone up to the reader works really well and makes getting in and out with everything you need even easier and faster.

10 Minute Pizza Crust 10 Minute Pizza Crust (via abeautifulmess.com)I also love that you can change up pizza toppings and sauces to fit the season or different tastes at your house. I spiced a bunch of mine up with some fall flavors which I’ll share too.

No yeast pizza dough recipe10 Minute Pizza Crust, makes one 12-inch diameter pizza

1 cup + 2 tablespoons Baker’s Corner All-Purpose Flour
1 teaspoon Baker’s Corner Baking Powder
1/2 teaspoon salt
1 SimplyNature Organic Cage-Free Brown Egg
2 tablespoons Simply Nature Organic Extra Virgin Olive Oil
1/4 cup water

Mix all the ingredients together until a soft dough ball forms. Allow to rest while you prep your toppings and preheat your oven to 400°F. If you have a pizza stone, don’t forget to go ahead and have that in the oven so it can preheat as well.

Autumn flavorsI used three different toppings on the pizzas pictured here. First I added a (delicious) store-bought marinara sauce (Priano from ALDI), with sliced red bell pepper, red pepper flakes, and mozzarella. I also found this really tasty Specially Selected Pumpkin and Chipotle pasta sauce. Using store-bought sauces makes pizza night too easy, and I love the fall flavor of this one. (You can find your closest ALDI store here to find one of these flavors.) I added that to a few pizzas with mozzarella and then topped with a few sage leaves once out of the oven. And last I spread a little Priano Pesto on and added chopped apple and mozzarella, which I then drizzled with a balsamic vinegar reduction once out of the oven. If I had to pick a favorite, I would probably pick the apple one, although they were all delicious (oh yes, I ate some of all three). But I love the sweet crunch of apple with the strong and delicious flavor of balsamic. However, you could totally top these all sorts of ways just depending on what you like!

Once your oven is preheated (and pizza stone, if using), roll the dough out, no need to knead. Then bake for 5 minutes. Remove from the oven and add your sauce and toppings, then bake another 10-12 minutes.

This crust is thin but soft, almost like a biscuit in a way. If you prefer a thin, cracker crust, try this recipe.

10 minute pizza doughSo that’s my easy 10-minute crust, but if you want an even easier, “cheater” version, check out the options in the bread aisle next time you’re at the grocery store. I love to use pita or naan bread as a pizza crust when I don’t feel like making my own dough. There’s lots of great, easy options available for fast and delicious pizza nights, so don’t be afraid to experiment. Thanks for letting me share! xo. Emma
Credits // Author and Photography: Emma Chapman. Photos edited with A Color Story Desktop.