Shared posts

23 Apr 15:17

How to Coordinate Your Shoes With Your Suit

by Brett and Kate McKay

Once you have your shirt and tie put together, you need to match your shoes to your suit. To do this, know that there are three main colors of dress shoe — black, brown, burgundy/oxblood — to go with five main colors of suit — light gray, dark gray/charcoal, navy blue, brown, black. You can’t wear any shoe with any suit, so use the above illustration to help you make the appropriate selection. The only suits that go with every color shoe, and therefore are the most versatile, are navy blue and light gray. The least versatile suit — black — should really only be paired with black shoes. 

When you have multiple options of shoe color, how do you know what to go with? Keep the following in mind to determine what color shoe to wear to any given event (and use the dress shoe hierarchy to then determine the right style): 

  • Burgundy/oxblood — more casual, stylish, creative, less formal 
  • Brown — versatile, not casual but not formal, middle of the road and safe 
  • Black — formal, getting down to business 

Ultimately, matching your shoes to your suit is not that complicated. And remember, your belt should always be the same color as your shoes. 

Like this illustrated guide? Then you’re going to love our book The Illustrated Art of Manliness! Pick up a copy on Amazon.

The post How to Coordinate Your Shoes With Your Suit appeared first on The Art of Manliness.

21 Jul 21:21

Highlights of the Castine House and Garden Tour!

by Loi Thai, Tone on Tone
It's July and that means summer in Maine! Summer in Maine means lobsters, blueberries, sailing as well as house and garden tours.

I'm thrilled to say that the 2016 Castine House & Garden Tour, sponsored by the Castine Historical Society, was a huge hit with record attendance! From the 18 featured properties including historic homes, cabins, cottages, gardens plus the lighthouse to the perfect Maine summer day, the event was fun, festive and flawless.

A big thank you to the local volunteers who greeted every visitor with a friendly smile. The docents, shuttle drivers, and many others all deserve credit for their enthusiastic teamwork in making this event such a success. There would not have been a tour without Ruth and Lynne, the Co-Chairs, who started organizing, coordinating and managing every detail beginning last summer. And, thanks to those who generously shared their homes and gardens.

Thanks of course to the many visitors who kept coming all day! I'm especially grateful to my blog, Instagram and Pinterest friends for attending - appreciate your support! Though we're social media pals, it was awesome to finally meet in person :)

Without further delay, I'll share a quick highlight of what I was able to see. Because I volunteered as a docent, I didn't get a chance to catch and photograph every property. Click on photo to enlarge.
The beautiful tour poster designed by the talented Meredithe and her team at Meri Meri.
A few photos of our home on tour day.

Look, no more power lines! Our town recently buried all the power lines on Main Street. The sidewalks, granite curbs, lamp posts and asphalt are all new. Everything was finished just in time for the big event.
Inside, a few of my myrtle topiaries in the dining room were ready to greet visitors.
A stunning summer arrangement of wild grass, garlic scapes and dogwood branches created by Nancy for our antique iron urn. I asked her to go BIG and gutsy, but keep it informal.  Everyone, Tom and I included, couldn't stop admiring it. Merci, Nancy!!

Nancy (who lives in Castine) along with her team of volunteers arranged many of the stylish floral pieces for the tour.
The tour started at 10:00 AM but people started lining up early - there was such a buzz around town!
This historic home's edited palette of white, gray and black mixed with brown antiques and a pop of gold looked so striking.
ABOVE and BELOW: This cool, contemporary style beach house originally designed by acclaimed architect Neil Middleton in the 1980s was recently renovated. It is situated among fields of wildflowers with a panoramic view of the sea. Check out that industrial dolly as a coffee table. I want it!
ABOVE: A timeless cape with clean lines, simple color scheme and classic furnishings. Several little rooms were gutted to create this large, airy living space.   
There was such a diverse collection of homes and gardens featured. Each had its own unique point of view. Here we have a 1930s log cabin that oozed charm, character and personality with custom built furnishings, Maine finds plus vintage items including the collection of fabulous lobster dishes. Don't you love that massive stone fireplace? Talk about showstopper!
Many houses in Castine are white inside and out, including ours, so it was exciting to see color used beautifully here. Also, the homeowners created these artistic arrangements with fresh flowers from their own gardens.
Speaking of gardens, this one perched high on the cliff overlooking the Penobscot Bay simply took my breath away. It was designed by Maine landscape architect Bruce Riddell. Native blueberries and lush ferns along with favorite perennials and specimen trees are tucked amongst bold granite resulting in a tapestry of plantings and stonework.
From Nashville to New York, thanks to my social media friends that came to the tour - such fun meeting everyone :) Hugs to Linda and her lovely family, Catherine and her gorgeous children, Elizabeth, Billie, Wayne and Glenda. I apologize if I missed anyone. Nearly 700 people came through our home!
Lastly, Tom and I are grateful to the 11 docents, including Ellie, Sylvia and Jane (visiting from England), who volunteered at our place. You all are the best!
Cheers,
Loi
PS - For more photos, check out my INSTAGRAM.
04 Apr 20:24

My First Brand New Sewing Machine or "Hello, Kitty!"

by noreply@blogger.com (Peter Lappin)


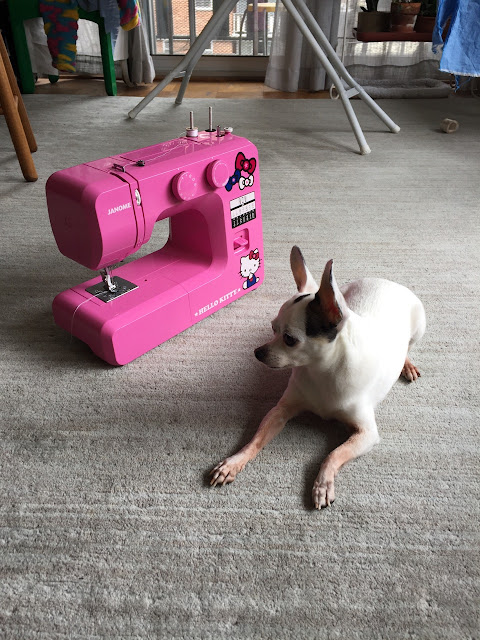
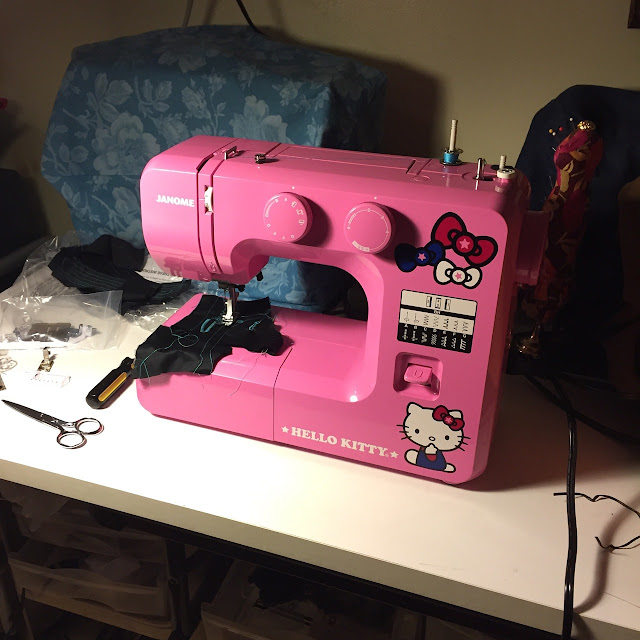
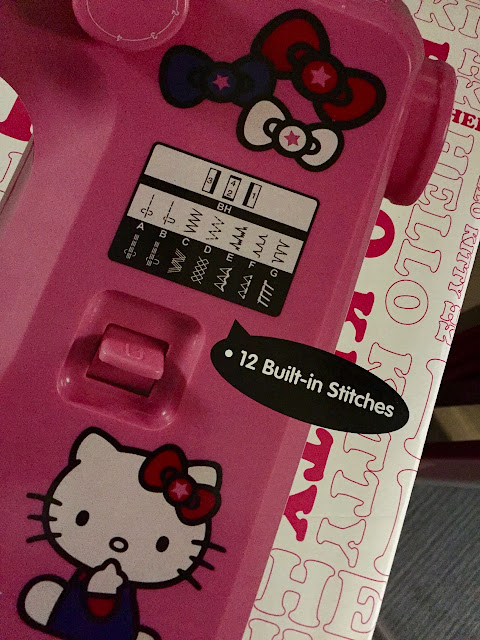
Readers, say hello to the first brand new sewing machine I've ever purchased!

It's a Janome, model 14412, a lipstick pink Hello Kitty.

You may recall from 
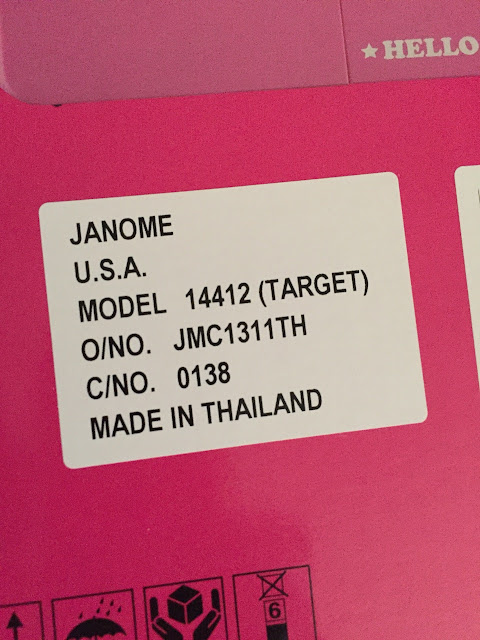
an earlier post that I was curious about what kind of new sewing machine I could get for approximately $100 or less.  I chose the Janome 14412 because she is virtually identical to the Janome 2212, a somewhat more expensive model that has gotten excellent reviews around the internet.

I don't know if the Janome 14412 is exclusively a Target model, but the name Target does appear on the box.  I purchased my machine through Ken's Sewing Center in Alabama, via eBay, for just $99.99, with no additional tax or shipping costs.

I have no relationship with Janome and this isn't a sponsored post.  (It's also not an April Fools joke.)  I wanted to perform an experiment.  I interact with many different kinds of sewers, and I've come to realize that many are not open to vintage machines -- especially not at the beginning.  I want to be able to recommend, from first-hand experience, a model you can find at a Target or Bed, Bath & Beyond (in the USA).    It takes time to hunt for an old machine and not everybody has the time or the inclination.  New machines have their allure. They don't need rewiring or constant oiling and they don't smell like burning dust.


Like any machine, the Janome 14412 has its pros and cons.  Let's start with the pros.

PROS

The Janome is a relatively quiet, relatively smooth, fully mechanical zigzagger.  The 14412 has a somewhat hollow mechanical sound compared to my Bernina 930, but it weighs half as much -- about 13 lbs -- and it's not engineered and manufactured in Switzerland.  It starts and stops smoothly and I find its pedal responsive.  It has a .6 amp motor.  You won't mistake it for a Singer 201, but it provides a pleasant sewing experience.

The 14412 has metal casting, which I understand to mean that the inner frame is metal.  It does not bounce or shake at all.  It feels solid despite being mostly plastic.  Pink plastic.

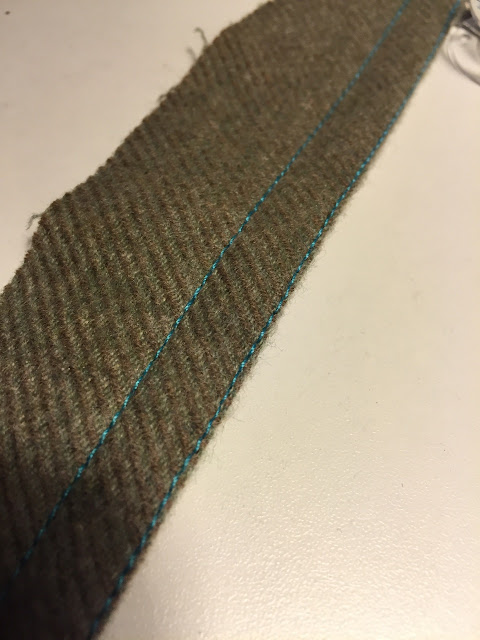
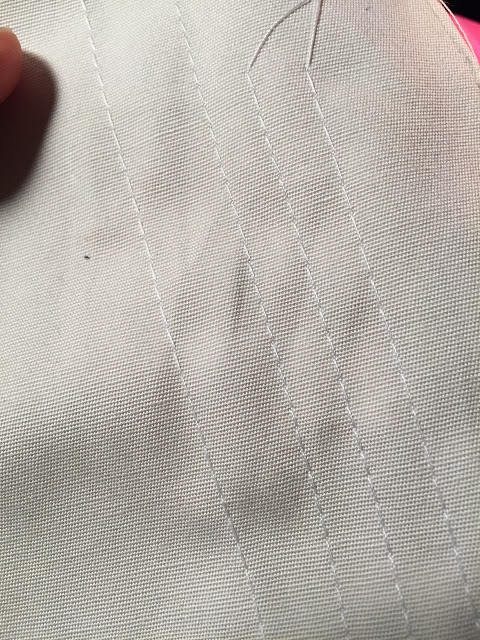
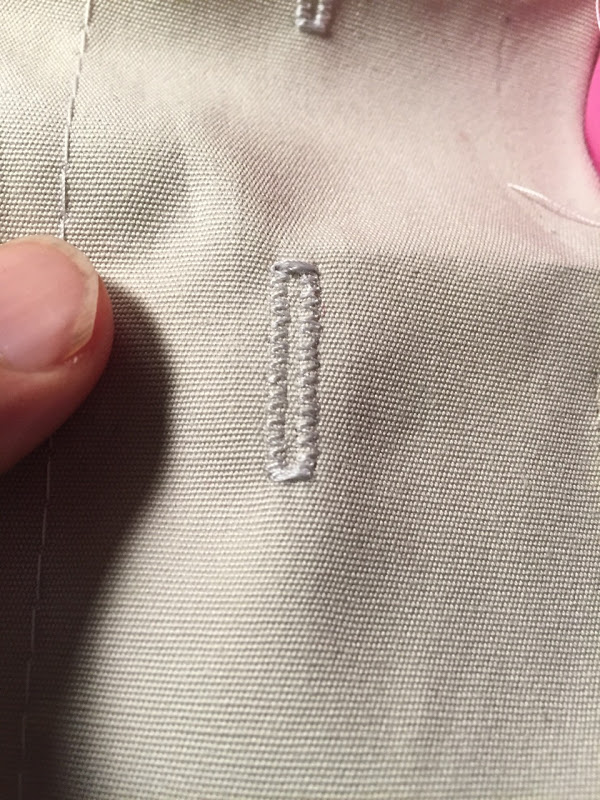
It stitches beautifully.  I did side-by-side comparisons with my Bernina 930 and there was virtually no difference in stitch quality.  The stitches are extremely straight (as opposed to somewhat angled).  It performs straight stitch, zig zag, as well as a few utility and stretch stitches -- all the basics.


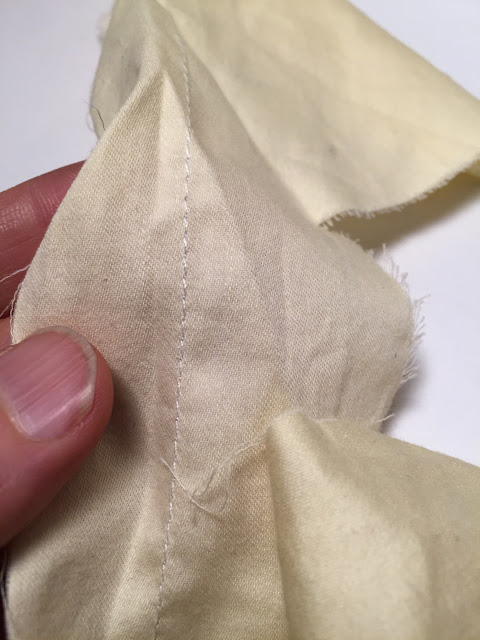
I am extremely fussy when it comes to thread tension.  I usually calibrate tension by stitching the longest stitch length down a single layer of my most fragile fabric.  There should be no gathering and stitches should look balanced (I generally use different colored thread above and below to help test this).  Even after adjusting the top tension, I found the bobbin tension to be slightly tight, so I loosened the screw on the bobbin case.  That was the only adjustment I needed.   Naturally, if I'm sewing through something very thick, I might raise the top tension to pull the bobbin threads up through many layers.  But the bobbin thread should not have to be adjusted.

In the pic below, the three lines of stitches on the right are the Janome; the line on the left is my Bernina 930.


You can see me sew on it here.

I didn't buy this machine because it is cute but, let's face it, it is cute.  (Though honestly, Hello Kitty means nothing to me.)   It's also lightweight and easy to carry (it has a handle).  Since my machines are always out, I didn't need a hard case and it doesn't come with one.

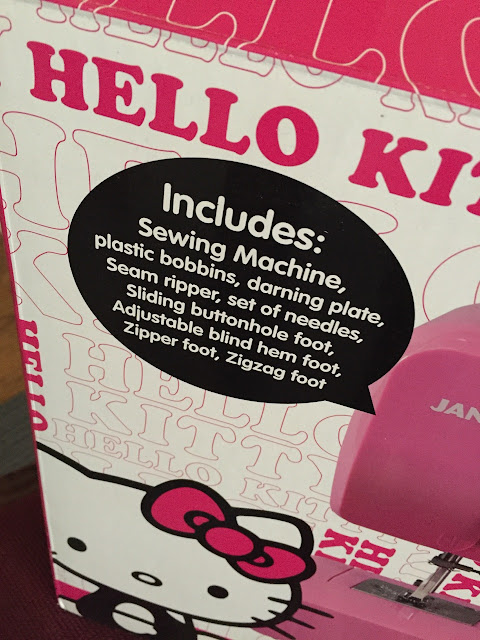
The Janome comes with a handful of snap-on presser feet.  If you're getting this machine, I recommend treating yourself to a larger selection of snap-on feet, as well as an all-metal short shank adapter (the Janome's is partially plastic).  You can find a set on eBay here.

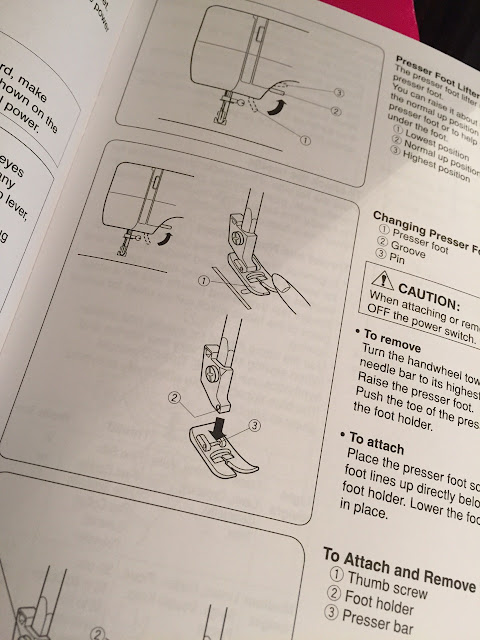
The manual is clear.  Mine was English-only.


If you're a devoted straight-stitcher like me, you'll be happy to learn that on the Janome you can also use the vintage Singer straight-stitch presser foot -- my favorite due to its narrow toes and open design.  Just make sure you take it off if you switch to zigzag or you'll break a needle.


Overall, the pedal works well.  It starts the machine easily (without having to turn the handwheel, which I tend to do out of habit anyway) and relatively smoothly, and slows the machine when necessary.

The Janome winds bobbins beautifully -- balanced and very full.    It's also a cinch to thread.

Apparently this machine doesn't require oiling; we'll see. (Oiling isn't mentioned in the manual.)

CONS

Having owned this only one day but tested it thoroughly, I cannot identify any cons.  That's right: NO cons.  The feed dogs don't drop, but it comes with a nifty, easy-to-use feed-dog cover.

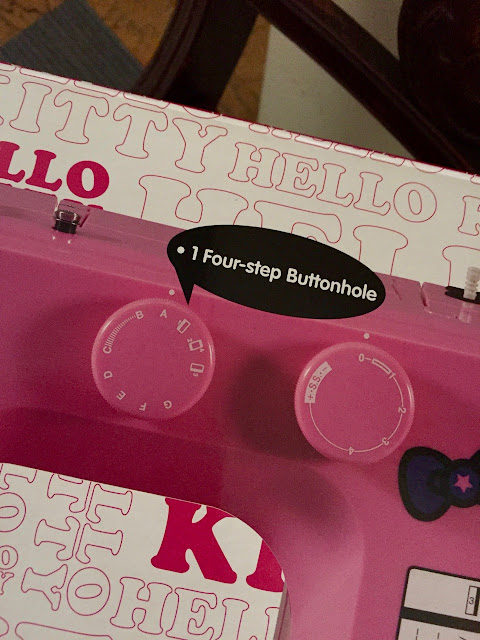
Remember, this is a $100 machine though it's mechanically identical to a machine that sells for a bit more (the 2212).  Despite its Kitty cuteness, it's not a toy.  It's ideal for the casual sewer, a beginner-level sewer, and especially, a (supervised) child.   But it has everything I need too.  Even a decent buttonhole, though I prefer the ones I make with my Singer buttonholer.


It hasn't struggled with anything I've put under the presser foot so far -- including 8 layers of wool flannel.  That said, I wouldn't use it for automobile upholstery.

If you demand the Mercedes-of-sewing-machines, this may not meet your expectations.   But if you're fine with a Ford, you'll be quite contented.

Finally, would a boy feel comfortable sewing on a pink Hello Kitty sewing machine?  This boy did.

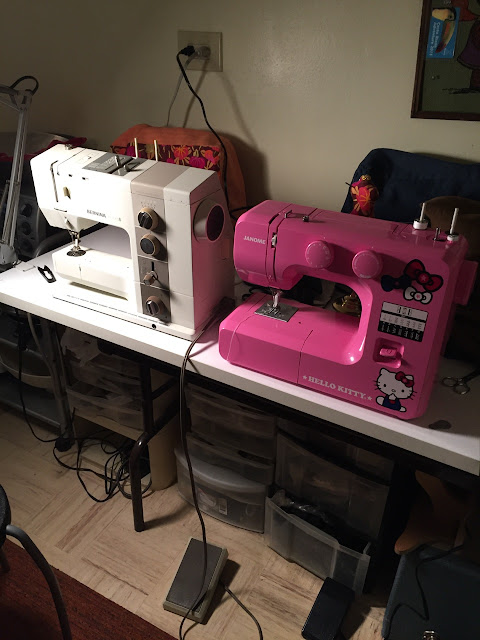
Here it is next to my Bernina 930.  The Janome is a full-sized machine.


I'm keeping my Janome 14412 for now.   I want to see how it handles shirtmaking.  My hunch is that it will do just fine.

In closing, I know many (most) of my readers think $100 is better spent on an all-metal vintage machine and maybe they're right.  But for a first-time sewer who just wants to plug it in and sew (after reading the manual first, of course), I think this Janome  model is an excellent choice.  I'll keep you posted if anything happens to change my mind.

More about the 14412 on the Janome website (PS - nobody sells this model for the MSRP of $249).

Have a great day, everybody!


12 Jan 17:53

Save Time and Money With Make-Ahead Breakfast Sandwiches

by Brett & Kate McKay

make ahead homemade frozen breakfast sandwiches

A few months ago I shared a tutorial on how to make easy, make-ahead breakfast burritos. It was surprisingly popular and many folks have proudly sent me pictures on Instagram of the breakfast bounty they created by following the instructions in that article.

But, you know, not everyone is a burrito person. Some folks like to have their meat and cheese wedged between layers of bread. And even burrito die-hards sometimes get the urge to stray and add some variety in their life. So today we’re back with a tutorial on how to save time and money with another morning mealtime favorite: the breakfast sandwich.

These babies are even easier to make than the burritos, and you really can’t beat a breakfast sandwich. Sausage, egg, and cheese all held together by a warm biscuit or English muffin. It’s great to eat on the go or even while you’re relaxing on a Saturday morning in your sweatpants while you join your kids in watching Paw Patrol (Adventure Bay: A city that relies on puppies and a ten-year-old boy for their emergency services).

You could swing by McDonald’s or a convenience store and pick up a breakfast sandwich, but that won’t save you much time (there’s the drive there and back, and then you have to wait in line) and as we’ll see, it’ll cost almost 3X as much as the homemade variety.

You could opt for frozen store-bought sandwiches, but then you run into the same problems I had with the manufactured breakfast burritos: 1) they’re dinky and not very filling, and 2) they’re filled with artificial preservatives and flavors.

ingredients list for Bob Evans breakfast sandwiches

The ingredients list for Bob Evans breakfast sandwiches. These were actually fairly tasty, but too small for my man-sized appetite.

A few months ago I spent 45 minutes (including clean-up) one Saturday morning making a dozen hearty breakfast sandwiches. When I was done, I put them in the freezer and pulled one out when I or one of the kids wanted one. The sandwiches were tasty and filling. Gus had a week where he ate one every single day for breakfast. Wheaties got nothing on these babies.

Below I share the steps I took in preparing my make-ahead breakfast sandwiches.

Ingredients & Prep Time

ingredients for homemade breakfast sandwiches sausage muffins cheese

My breakfast sandwich is inspired by the McDonald’s Sausage Egg McMuffin. The ingredient list is much simpler than the make-ahead breakfast burritos, and they take half the time to make. Here’s what I used in mine:

  • 18 eggs
  • 2 packages of English muffins (you can also use biscuits but you’ll have to bake them ahead of time)
  • 2 16 oz. packages of breakfast sausage (you can buy sausage in premade patties to save time, but they’re more expensive)
  • 2 packages of sliced cheddar cheese (you’ll only use 12 slices)
  • 1 cup of whole milk

The above netted me 12 hefty-sized breakfast sandwiches with plenty of egg and sausage.

Total cost of ingredients: $12.84

Cost per sandwich: $1.07

Compare that to the store-bought Bob Evans breakfast sandwiches: $.99

Then compare that to the cost of a McDonald’s Sausage Egg McMuffin: $2.99

My make-ahead breakfast sandwich beats the cost of the McDonald’s version by nearly $2. What a bargain. What’s more, you don’t have to wait in line to get your food like you would at McDonald’s. Just pull your sandwich out of the freezer, warm it up for a minute in the microwave, and you’re good to go. The store-bought Bob Evans breakfast sandwiches beat mine in price by $.08. But the big advantage of the homemade sandwich is that they’re bigger and much more filling. I made my sausage patties at least 1.5X the size of those on the Bob Evans sandwich, so you actually do save money when you’re comparing price per ounce. And as with most things you make yourself, there’s less artificial flavors and preservatives in my breakfast sandwiches than either the fast food or store-bought variety.

How to Make the Breakfast Sandwiches

Step 1: Prepare & Cook Eggs

We’re going to bake our eggs. This provides several advantages: 1) it’s easy, 2) it creates the perfect egg round for a sandwich, and 3) while the eggs are cooking in the oven, it gives you time to prep the other parts of the sandwich, thus saving time in the long-run.

preheating oven baking eggs homemade breakfast sandwiches

Pre-heat oven to 375 degrees.

eggs in bowl for mixing homemade breakfast sandwiches

Crack 18 eggs into a giant bowl. Look at all those thwarted chicken embryos.

adding milk to eggs homemade breakfast sandwiches

Add 1 cup of whole milk. This will make your egg rounds nice and fluffy. You can add some salt and pepper if you’d like. I didn’t.

whisking whipping eggs homemade breakfast sandwiches

Scramble.

spraying 9x13 pan baking eggs homemade breakfast sandwiches

Spray a 9×13 pan with cooking spray. Don’t forget to get the sides.

pouring eggs into baking pan homemade breakfast sandwiches

Pour egg mixture into pan.

baking eggs in oven homemade breakfast sandwiches

Place in oven for 25 to 30 minutes. While the eggs are baking, you can start cooking the sausage and prepping the muffins. Bake until the eggs are puffed around the edges.

checking eggs for doneness homemade breakfast sandwiches

One way to test for doneness is to stick a knife into the eggs. If the knife comes out clean, you’re good to go. Remove and let the eggs cool completely.

cutting egg rounds pint glass homemade breakfast sandwiches

After the eggs have cooled, take a standard drinking glass (I used a pint glass) and use it as a cookie cutter to cut the egg rounds. I was able to get 12. You’ll have some scraps left over. Just save them for breakfast tomorrow.

finished cut egg rounds for homemade breakfast sandwiches

Finished egg rounds.

Step 2: Cook Sausage Patties

raw sausage patties homemade breakfast sandwiches

Form your sausage into patties. Because I like sausage, I made my patties a little on the bigger and thicker side. The thinner you make them, the more patties you can get out of a package. I got 9 out of a single tube.

cooking sausage patties cast iron skillet breakfast sandwiches

Cook patties on high heat…

cooked sausage patties in skillet homemade breakfast sandwiches

…until they’re nice and brown. This shouldn’t take more than 20 minutes. While one side of the patties are cooking, you can start warming up the English muffins.

Step 3: Toast English Muffins

toasting english muffins for homemade breakfast sandwiches

Pretty easy. Just toast the English muffins to desired toastiness. I prefer a medium toast.

Step 4: Assemble!

If you don’t know how to assemble a breakfast sandwich, Zeus help you.

assembling muffin egg sausage homemade breakfast sandwiches

assembling homemade breakfast sandwich muffin sausage egg

homemade bacon breakfast sandwich egg cheese muffin

Instead of sausage, you can also use bacon in your breakfast sandwich. In my batch, I made a few with bacon.

homemade sausage egg breakfast sandwich in hand

Boy howdy, this was a mighty fine and filling breakfast sandwich.

Step 5: Wrap in Foil and Freeze

homemade breakfast sandwiches wrapped in foil for freezing

Let your prepared sandwiches cool completely before wrapping them in foil. You want to let them cool so you don’t build up condensation inside the foil and consequently create ice crystals on your sandwich after they freeze. Write the date you cooked your sandwiches on the foil with marker. For best results, eat within a month; however, I’ve eaten sandwiches that were in the freezer for over four months and they still tasted great.

Step 6: Heat Up & Enjoy Your Sandwich

frozen homemade breakfast sandwich on paper towel

Loosely wrap your breakfast sandwich in a paper towel and place in a microwave on high heat for 1 minute to 1 minute and 30 seconds.

warmed microwaved homemade breakfast sandwich sausage egg cheese

You want the cheese to be a bit melted and the egg warmed completely through. Enjoy!

23 Sep 18:17

How to Clean Your Gutters

by Jeremy Anderberg

gutter fulls of leaves how to clean gutters

Cleaning your gutters is one of the un-sexiest home maintenance chores you can do. It’s usually dirty, you’re moving the ladder a lot, you’ll likely get wet from flushing the gutters, and it’s not exactly something you can show off once you’re done (like you can with a clean and organized garage). Not doing it regularly, though, can spell trouble for your home. If the gutters are too full, water can actually damage the roofing and the fascia (the boards behind the gutters, rather than the tough tissue in the human body). Overfull gutters can spell trouble below deck as well, as water pouring over the gutters versus going cleanly down the spouts can mean water getting to your foundation, and possibly into your basement and crawlspace. The torrents can also do a number on your garden beds if they’re right under the gutters.

While it’s a simple task, below I offer a few reminders and perhaps a couple new ideas on how to keep your gutters clean as a whistle, and thus protect your home for years to come.

When to Clean Your Gutters

Twice a year — once each in the spring and fall — is the recommended amount and timing for cleaning your gutters. In my neighborhood though, we have plenty of trees, meaning I’m doing it much more than that. After a big storm, or even just a couple months of wind and rain, I’m up there cleaning them out, even if it’s just to remove a downspout clog. And in the fall alone I do it a couple times as well with the bevy of leaves we get.

It’s far more pleasant to wait until your gutters are dry to clean them out. Otherwise they’re quite mucky, which makes them harder to de-gunk. It’s also not a bad idea to check your gutters before you’re forecasted to get a big storm. I’ve sat in my dining room and watched the rainwater pour over the gutters and into the garden and foundation, which I probably could have prevented by doing a quick 10-minute sweep of even just the spots near the downspouts. Better to do this chore too much and keep your foundation safe than not enough.

Safety First

Don’t attempt to clean your gutters from the roof. You’d be turning this chore into a needlessly dangerous proposition. A ladder is going to be your best bet. Make sure you’re following best practices for ladder safety; cleaning out gutters is a simple task but it can quickly go awry if you aren’t paying attention. Perhaps most pertinent for this particular chore: don’t reach out further than is safe to do. It’s easy to think you can lean out as far as your body will take you, since it means moving the ladder less, but remember, keep your waist between the rails. Don’t contort yourself trying to get an extra few inches; the risk isn’t worth it. Since you’re moving the ladder a lot, on potentially unsteady lawns and gardens, also be sure you have stable and even footing; get a spotter if needed.

ladder standoff stabilizers for cleaning gutters

Standoff stabilizers — so you can clean your gutters without wrecking them.

If you’re using an extension ladder, it’s a good idea to get what’s called standoff stabilizers. These will prevent the ladder from lying on the gutters themselves, which can cause damage.

For collecting the debris (rather than leaving it scattered about your property), you can lay out a tarp underneath your gutters, and just move it along with you when you move the ladder. If using an a-frame ladder, it’s also easy to use a bucket with a handle, which can be attached to one of the built-in hooks on the top of most ladders.

Get That Gunk Out!

cleaning gutters by hand how to clean gutters

Using a small garden trowel, or just your hands with a pair good gloves, scoop out the leaves and sediment, starting at the downspout. In my experience, your hands are a better tool for this job. They’re just all around more maneuverable; getting downspout clogs loosened is far easier with hands than a trowel.

When you’ve cleaned as much as you safely can in one spot, move the ladder on down and repeat the process with all your gutters. Once you’ve got all that you can with your hands, use a hose to flush the finer debris, starting at the end opposite the downspout. Let it run for a minute, and ensure that water is coming cleanly through the spout. If it’s just trickling, you know you still have a clog. In that case, run the hose at high pressure right into the downspout to clear it.

If you’re not the home handyman kind of guy, there are several options for alleviating this chore altogether. Gutter whiskers and other insert-type products simply lie in the gutters themselves and prevent leaves and other gunk from building up; they’re rather expensive though. Mesh guards are far cheaper, and act as just a netting over the gutters. Yet another DIY option are snap-in plastic covers, but you have to ensure that your gutters are compatible before committing to buying them for your entire home. Exploring these options is on my own home maintenance list for this fall; if you have recommendations, please let me know!